
❌

Normal view

There are new articles available, click to refresh the page.
Before yesterdayMain stream

3D Imaging Without a Lens

10 September 2026 at 14:30

There are plenty of ways to capture 3D images or simulations of such if you know what you’re doing with camera hardware and fancy mathematics. However, a little more unusual is the idea of capturing a 3D image while using no lens at all β€” and yet, [okooptics] has achieved just that!

The basic concept builds on an older project from [okooptics], wherein images were captured from a Raspberry Pi camera with no regular lens element installed. In its place was a thin layer of Scotch tape over the sensor, acting as a diffuser. With the right deconvolution math, it’s possible to actually recover a real image out of the blurry mess this setup initially captures. [okooptics] was then able to push this into three dimensions by weighting the point spread function used to deconvolute the image.

Adding directional bias to the process creates a similar effect to slightly shifting the cameras position, actually revealing a view from a slightly different angle of objects in front of the camera. [okooptics] does a great job of explaining the science behind how this is possible and the practical limitations of the technique, also referencing research papers that have explored these ideas in great depth.

It’s math heavy to extract 3D data from what otherwise looks like blurry nothingness, but it’s possible if you know what you’re doing. For a fuller understanding, it’s worth diving into [okooptics] earlier work in this realm, taking photos with Scotch tape in place of a lens.
Digital β€œFilm” For Your Pi Camera

31 August 2026 at 07:00

The formula of a Raspberry Pi camera is such that it’s almost a self-assembly kit of parts. Over the years we’ve seen a lot of attempts to make one that’s more impressive, usually due to a different take on a case design. It’s not often we see something genuinely out of the ordinary, and perhaps [Strange Inventions] has made one. He’s produced an instant camera where the β€œfilm” is a removable cartridge containing a color e-paper display.

It’s a straightforward enough idea: the camera writes the image to the display, and since these displays are persistent, there it stays. The displays connect via headers, and the cartridge slips in in a similar manner to a console game cartridge. They’re not cheap, but at least unlike a Polaroid or Instax cartridge, they are reusable.

You’ll have to pay up if you want to download the files, but it’s not outrageously expensive if you really want to build one. But perhaps the key here is that it’s not something beyond the abilities of the average Hackaday reader to make their own. We’re sure this idea will be expanded upon by others in due course.

Meanwhile, if it’s simpler instant photography you crave, you can always print the real thing.

Panoramic Photography with a Linear Scanner

28 August 2026 at 04:00

Although digital photography took a big bite of the film industry’s lunch, it wasn’t able to completely eliminate the need β€” or desire β€” for photographers to use film in some situations. But digital information from a camera sensor can be manipulated to augment the natural physical capabilities of a camera in ways not really feasible for film. High dynamic range images, focus and exposure stacking, and automatic panoramic stitching. This camera takes the latter example to the extreme.

[Philo]’s proof of concept was a smartphone camera set on a chair and rotated around a room. Some software grabbed a single column of pixels as it moved and stitched them all together to form an image. This came out well enough that the idea was refined a few times, but it wasn’t until a single-line digital camera meant for imaging assembly lines was found that this really took off. Using the camera and some custom software, [Philo] was eventually able to take some of the longest panoramic images we’ve seen, using things like railways and boats as the track the camera rides on, with accelerometer data to help stabilize the image.

The results speak for themselves. There’s a bit of wobble from the movement of the various vehicles despite the accelerometer data, but given that the image is coming from a sensor meant for examining conveyor belts, it’s hard to complain. Of course, if you want to stick to film, there are panoramic film cameras available too even if they don’t quite have the reach of this digital one.

Combining Photogrammetry Utilities into a Simple GUI Tool

24 August 2026 at 11:30

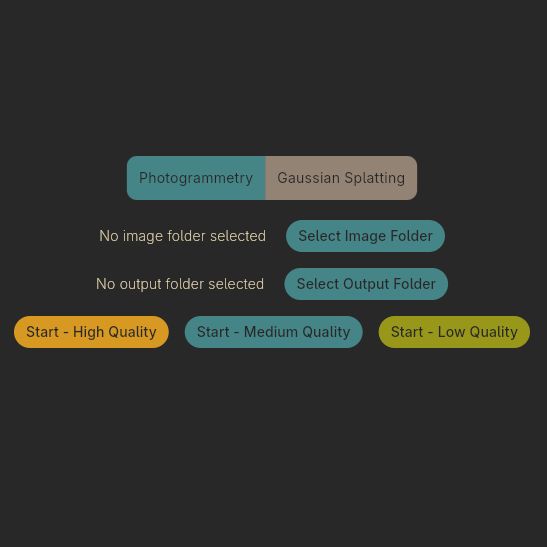
One of the fun aspects of open source software is that you can often find so many libraries and tools that implement the functionality you need, but ease of use for e.g. artists is often not a priority. This is where [Edin Spiegel] β€˜s annoyances with photogrammetry tools led him down to the path of creating the Simple Photogrammetry GUI project, which is basically what it says on the tin.

In an associated video its development and use is demonstrated, combining tools like Colmap, OpenMVS, mvs-texturing, pymeshlab, brush and PoissonRecon to implement both photogrammetry and gaussian splatting to turn those photos into a not too shabby mesh along with realistic textures.

The GUI uses the Flutter GUI kit, so Linux support is still somewhat sketchy, but should work in this new release of this GUI wrapper. The author is asking for people to test this GUI and report any issues found so that they can be addressed.

From a quick glance at the project and the comments to the video it seems quite useful for anyone who wants to get started quickly with photogrammetry. One niggle is perhaps that it relies on processing using CUDA, with a much slower fallback to CPU processing if you do not happen to have an Nvidia-blessed GPU installed. Of course this is one of those universal issues in a world where theoretically everyone should be using OpenCL already.

In addition to the build instructions you can also download an AppImage for Linux and compiled binaries for Windows to theoretically get started as fast as your internet connection allows. Interestingly, the AppImage is well over a GB in size, whereas the Windows ZIP file is just 207 MB for the v1.1.5 release, so take that into account.

PolyShot Camera Focuses On Nostalgia

18 August 2026 at 14:30
An open-source, DIY, point-and-shoot digital camera.

Although we personally have yet to see anyone brandishing an old digital point-and-shoot camera, we hear they’re back in vogue. Why, though? People are nostalgic for that image quality. While he certainly could have simply picked up a vintage model somewhere for a likely inflated price, [Arnov Sharma] decided to build his own version and call it the PolyShot.

The core of this project is the Unihiker K10 dev board, which uses an ESP32-S3, a whopping 2 megapixel camera, and a micro SD card to capture photos and display them back on the screen. The tricky part, if you can call it that, is the custom PCB. It’s a simple board with just three buttons: shutter, gallery, and next image. We do like that the position of the battery compartment creates a nice grip.

The biggest difference here is that there is a few-second delay between pressing the shutter button and actually capturing the image, which you can see in the short videos below. So if you’re trying to get a shot of a skink or something equally speedy, we wish you good luck.

In a future iteration, [Arnov] wants to address the issue of image quality, because this project ended up evolving into a more traditional digital camera. He would also improve the battery life, for which the current expectancy is around three hours on a charge. Ultimately, [Arnov] wants to ditch the Unihiker and design everything from the ground up, using an ESP32-S3 module.

Β 

❌
❌