❌

Normal view

There are new articles available, click to refresh the page.
Before yesterdayMain stream

Easy Chili Recipe

19 October 2026 at 14:19

malcom’s easy chili recipe

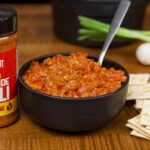
When chili season rolls around, you can’t beat a big pot of homemade chili. This is my quick and easy chili recipe, and it’s about as simple as it gets.

I like to use ground beef and breakfast sausage together because the sausage adds a little extra seasoning and gives the chili a richer flavor.

Once the meat is browned, everything goes in the pot to simmer until all those flavors come together. You don’t have to spend all day in the kitchen to make a good pot of chili, and I think the leftovers taste even better the next day.

WHAT MALCOM USED IN THIS RECIPE:
Print
chili recipe

Easy Chili Recipe


5 Stars 4 Stars 3 Stars 2 Stars 1 Star

No reviews

Description

This easy homemade chili recipe is thick, hearty, and full of rich, savory flavor with just the right amount of spice. It’s simple to make and perfect for those nights when you’re craving a big bowl of delicious chili.


Ingredients

  • 1lbs Ground Beef
  • 1lb Ground Breakfast Sausage
  • 2 –10oz Bags Frozen Chopped Onions
  • 2 teaspoon Killer Hogs AP Seasoning
  • 2 –15oz Cans Tomato Sauce
  • 2 –14.5oz Cans Petite Diced Tomatoes
  • 1 –10oz can Rotel (diced tomatoes & chilis)
  • 2 Heaping Tablespoons Malcom’s Bonafide Chili Seasoning
  • 1 Tablespoon Sugar
  • 1 Tablespoon Worcestershire Sauce
  • 1 –16oz can Mixed Chili Beans

Instructions

  1. Brown beef and sausage in a skillet with onions. Season with AP Seasoning.
  2. Once meat is browned, drain fat and return meat and onions to skillet.
  3. Add tomatoes, Malcom’s Chili Seasoning, sugar and Worcestershire sauce.
  4. Mix and allow to simmer on low for at least 30 minutes.
  5. Add chili beans 20-30 minutes before serving and allow them to heat through (adding them too early will make them mushy).


Malcom Reed
Connect on Facebook
Follow me on TikTok
Subscribe to my YouTube Channel
Follow me on Instagram

Buy Killer Hogs Products Here

The post Easy Chili Recipe appeared first on HowToBBBQRight.

Smoked Pork Chili: A Winning Tailgating Feast (Budget-Friendly, Too!)

Weary of the usual tailgating fare? Whether you party on the asphalt or in your backyard, we have the perfect antidote for “wing fatigue”: Smoked Pork Chili Verde.

Forget the usual hot dogs and hamburgers. This smoky, slightly spicy pork chili brings something different to the party, and it won’t cost a fortune.

This recipe—one of our favorites—was developed when we were blessed with an abundance of fire-roasted green chile peppers at a session of Steven’s Barbecue University. Meaty country-style pork ribs (not ribs at all, but a well-marbled cut from the shoulder) were smoked and helped turn these peppers into a dish that could feed more than 50 attendees. The recipe has since been adjusted to feed 12.

Happily, the chili benefits from an overnight rest in the refrigerator. Make it at home the day before the party, then reheat before your guests arrive. We like to serve the chili from a Dutch oven, like this one from Lodge.

What makes this pork chili verde special is its combination of roasted green chiles, tangy tomatillos, tender pork, and a touch of wood smoke.

Hatch green chiles roasting over an open fire on a grill

The green chiles and vegetables develop a rich, roasted flavor when charred over high heat. Meanwhile, the pork gets its own dose of smoke before everything comes together for a slow, gentle braise.

It’s the kind of meal that makes people stop talking about the game long enough to ask, “Who made this chili?”

And that’s saying something when the score is tied in the fourth quarter.

Recipe

Barbecue University Chili Verde

Recipe by Steven Raichlen

Country-style pork ribs are smoked over wood, then gently braised with fire-roasted green chiles, tomatillos, onions, and spices. This crowd-sized chili serves 12 and tastes even better the next day.

Yield: 12 servings

Equipment: Grill or smoker; grill-safe Dutch oven or heatproof casserole; food processor; 2 cups wood chips or chunks, preferably mesquite, soaked for 1 hour and drained

Ingredients

  • 20 to 24 fresh chiles, preferably a mix of poblanos, Anaheim, Hatch, or New Mexican chiles
  • 2 to 3 jalapeño chiles
  • 1-1/2 to 2 pounds fresh tomatillos, husked, washed, and halved
  • 2 large Spanish onions, peeled and quartered through the stem ends
  • 4 to 5 pounds country-style pork ribs, bone-in or boneless, each 3/4 to 1 inch thick
  • Coarse salt and freshly ground black pepper
  • 1 12-ounce bottle or can of beer, in a spray bottle
  • 1 bunch fresh cilantro, coarse stems removed, with a few sprigs reserved for serving
  • 4 cloves garlic, coarsely chopped
  • 6 cups chicken broth, plus more as needed
  • 1 tablespoon ground cumin, or more to taste
  • 2 teaspoons dried oregano, preferably Mexican
  • Sour cream or Mexican crema, for serving (optional)

Instructions

  1. Set up your grill for direct grilling and preheat to high. Grill the chiles, jalapeños, tomatillos, and onions, turning as needed, until the chile skins blister and blacken and the onions develop a good char.
  2. Transfer the grilled vegetables to a large bowl and allow them to cool. Peel, stem, and seed the chiles, reserving their juices. Remove any excessively charred layers from the onions and tomatillos. Coarsely chop the vegetables and garlic.
  3. Working in two batches, process the roasted vegetables, cilantro, garlic, chicken broth, cumin, and oregano in a food processor. Pour the mixture into one or two grill-safe Dutch ovens or heatproof casseroles.
  4. Prepare the grill for indirect grilling at 225 to 250 degrees F, placing a drip pan between the coal piles. Add 1/2 cup of wood chips or chunks to each pile, replenishing halfway through smoking. Alternatively, use a smoker according to its instructions. On a gas grill, use a smoker box or foil smoking pouch, starting on high until smoke appears, then reducing the heat to medium-low.
  5. Season the pork generously with salt and black pepper. Place the ribs over the drip pan and smoke for 1 hour, turning once and periodically spraying with beer. Transfer the smoked pork into the chile mixture, submerging the pieces.
  6. Cover the Dutch oven or casserole and place it on the grill. Cover the grill and braise for 1-1/2 hours, maintaining a temperature of approximately 300 degrees F by adding coals as needed.
  7. Move the Dutch oven to a heatproof surface. Remove the pork, discard any bones, and cut the meat into bite-size pieces. Stir it back into the chili. Adjust the seasoning with additional broth, cumin, or salt if necessary. Serve in bowls, topped with sour cream or crema if desired, and garnish with cilantro.

See the original Barbecue University Chili Verde recipe.

Looking for more recipes like this? Browse our Recipe Index for grilled, smoked, and live-fire favorites.

Get Steven’s weekly grilling tips, seasonal recipes, and live-fire ideas in your inbox. Join our Up in Smoke newsletter. Sign up and get a FREE PDF of Steven Raichlen's Best Ribs Recipes Ebook.

Preorder Man On Fire — A Steven Raichlen Memoir. And get some really cool rewards!

Looking to upgrade your tailgating setup? Check out our Tailgating Essentials.

The post Smoked Pork Chili: A Winning Tailgating Feast (Budget-Friendly, Too!) appeared first on Barbecuebible.com.

Samosa Dip with Spiced Potatoes, Crispy Chickpeas, Chutneys and Yogurt

By: Richa
7 October 2026 at 11:19

This loaded Samosa Dip brings all the flavor of samosa chaat to a shareable party platter! Samosa-spiced potatoes, crispy chickpeas, tangy chutneys, creamy yogurt and crunchy veggies make every scoop a delicious mix of textures. No pastry or folding needed! Nut-free, gluten-free and soy-free, with 13g protein (52g total) and 10g fiber per serving!)

samosa platter with yogurt bed and cucumber on a white plate

This samosa chaat platter is going to be the first thing that disappears at every dinner party. It has an incredible mix of flavors and textures! It looks festive, it’s easy, and perfect for the upcoming festive season. This samosa platter is also high in protein and fiber. with 13 grams protein(52g total without sides) and 10 grams fiber per serving. If you use multigrain or whole grain crackers or pita as a side, the numbers bump up by 3-5g.
It also has this word that is going to get you to run to the kitchen to make it right now, which is SAMOSAS!

What are Samosas?
Samosa are crispy, savory pastries stuffed with deliciously spiced potatoes. They’re a super popular Indian side and the star of this platter.

What is Chaat?

Chaat is a family of Indian street food snacks. Chaat dishes usually have tons of different textures and sauces and flavors built up. Chaat actually means to lick, basically, because the flavor and texture combination is so amazing that you really want to lick every last bit off of your plate.

For samosa chaat, ideally you use some pre-made samosas, break them apart, top them with yogurt, chutneys (like my cilantro-mint chutney or tamarind chutney), some other crispy bits, and fresh onion and tomato. But for an easier and healthier version, we’re just making the samosa potatoes and then layering it all up.

samosa platter components in bowls before assembling

Traditionally, chaat comes with the crispy bits, such as the crispy crackers or the crispy samosas, right in it. And if you’re making it ahead, all of those crispy bits kind of get soggy. So to avoid that, we’re going to make this layered dip kind of situation and serve the crackers on the side, so that people can just scoop it directly from the platter. You get those same flavors and textures, but you never lose that crunch!

If you don’t want to make the whole platter, you can also just make these individual components and serve them all as a chaat spread, so that people can take whichever toppings they want and whichever chutneys and sauces they want. If they want just the chickpeas, they can use just the chickpeas with some sauces, or just the potatoes, or all of the above. Make all of these components, and then serve them however you like. They are absolutely delicious and amazing.

samosa platter with crackers and pita triangles

You can use store-bought tamarind chutney, but there is a recipe for a homemade tamarind chutney in the recipe notes, which comes from my first cookbook. If you don’t like tamarind or don’t have access to tamarind, you can also make the maple lime sauce that I’ll also put in the recipe notes. Or use Mango chutney (store bought or homemade)

You can serve this with crackers, crisp pita bread, papadum, cucumber, carrots, or tortilla chips as the crunchy element. Use what you have, and try this incredible samosa chaat platter!

samosa platter with yogurt bed on a Black plate

Why You’ll Love This Samosa Platter

  • flavors and textures of samosa chaat, simplified
  • crunchy chickpeas, spiced potatoes, and flavorful chutneys
  • make for now or make ahead!
  • naturally gluten-free, soy-free, and nut-free

Continue reading: Samosa Dip with Spiced Potatoes, Crispy Chickpeas, Chutneys and Yogurt

The post Samosa Dip with Spiced Potatoes, Crispy Chickpeas, Chutneys and Yogurt appeared first on Vegan Richa.

Jeera Dal (Indian Cumin-Scented Lentil Dahl)

By: Richa
27 August 2026 at 09:04

This easy jeera dal converts simple ingredients into incredible flavor! Red lentils cooked to creamy and scented with sizzling cumin, garlic, chili oil tadka. (gluten-free, soy-free, nut-free) 19 g fiber, 19 g protein!

hand holding a pan of jeera dal

Jeera means cumin, and dal means lentils. Together, they create a simple meal that doesn’t sacrifice flavor. This is a simple cumin-scented lentil soup that’s cozy and satisfying.

This is a simple recipe with everyday ingredients, but it makes such a delicious dal. It’s one of the simple, home-style dals that my mom used to make often.

plate of jeera dal with a side of cauliflower and potatoes

I changed it up a little to make it slightly spicier and creamier with some non-dairy yogurt. If you cook the dal long enough, it becomes creamy on its own, so if you don’t want to add non-dairy yogurt, that works just as well.

We make this simple dal with red lentils (masoor dal), along with tomato and dried fenugreek leaves. While the lentils cook, we make an amazing tadka, which is a spiced oil with cumin seeds, green chili, and garlic. That tadka takes the dal to the next level!

This jeera dal is delicious served with your favorite Indian sides or sabzi! In the photo above, I’m serving it with my simple gobi aloo matar.

spoon serving jeera dal from the pan

Why You’ll Love Jeera Dal

  • easy to make with simple ingredients
  • 30-minute recipe with tons of flavor
  • while the lentils simmer, make the quick cumin spiced oil
  • naturally gluten-free, soy-free, and nut-free
jeera dal in the pan after cooking and adding the spiced oil

Continue reading: Jeera Dal (Indian Cumin-Scented Lentil Dahl)

The post Jeera Dal (Indian Cumin-Scented Lentil Dahl) appeared first on Vegan Richa.

Chili Ginger Garlic Beans (Majestic Beans) with Whipped Cumin Tofu and Onion Salad

By: Richa
5 August 2026 at 09:49

High protein, bold chili ginger garlic beans with cumin tofu and spicy onion salad. 30 minutes recipe, serve on toast, fries, baked potatoes, in smashed tacos, wraps or bowl. nut-free and gluten-free, 22 grams protein and 10 grams of fiber)

chili garlic beans, onion salad, and whipped tofu in bowls on a black table

When weeknight dinners feel a little same-old, these chili ginger garlic beans are about to wake things up. They’re saucy, punchy, and layered with heat, balanced by creamy cumin-lime whipped tofu and a quick spicy onion salad. It’s bold, high-protein, and done in about 30 minutes.

Pile them on toast, tuck it into a baked potato, a dip platter, over roasted veg, in a wrap or go full comfort mode over crispy fries. One recipe, many moods. I prepped these and my garlic vinegar chickpeas and serve them in so many ways – watch on my YouTube channel !

dip platter made with the chili garlic beans


We are reimagining Indian food today with beans majestic, a plant-based spin on chicken majestic. If you want a more traditional vegan version of Indian chicken majestic, check out my tofu majestic recipe. It’s super easy and full of flavor!

When people think of Indian food, they tend to think of Indian curries. But Indian cuisine that goes so far beyond curries and other saucy dishes served with flatbread and rice. There are so many creative ways that you can serve classic Indian dishes!

These saucy, chili garlic curry leaf beans are basically taking the sauce inspired from my tofu majestic, simplifying it, and adding beans to it. And it works so beautifully! It’s saucy, spicy, delicious, and pairs really well with lots of different components.

beans on toast made with the chili garlic beans

We make the beans along with a creamy, whipped tofu and pair these with a quick onion ring salad. Then, we’re going to pair these components in lots of different ways: on toast, as a dip, over baked potatoes or crispy potatoes(chili cheese fries style), or as crispy tacos!

chili fries made with the chili garlic beans

Why You’ll Love Chili Garlic Beans

  • 1-pan white beans packed with amazing Indian flavors
  • creamy, curry-inspired, blender tofu whip takes only minutes to make
  • quick pickled onion salad adds tang and crunch
  • versatile! 1 dish can be served 4 or more ways
  • naturally nut-free with easy gluten-free option
baked potatoes topped with the chili garlic beans
crispy tacos made with the chili garlic beans

Continue reading: Chili Ginger Garlic Beans (Majestic Beans) with Whipped Cumin Tofu and Onion Salad

The post Chili Ginger Garlic Beans (Majestic Beans) with Whipped Cumin Tofu and Onion Salad appeared first on Vegan Richa.

Garlic Vinegar Chickpeas with Crispy Potato Strips

By: Richa
29 July 2026 at 16:46

Chili Garlic Vinegar Chickpeas, 15 minute, bold ginger garlic heat and a vinegar snap. Use them on crispy potatoes, stuff pitas, smash tacos, toss salads, or top papadam nachos. Make once, meals and snacks all week. (gluten-free, soy-free, nut-free) 18g protein 15g fiber

salad made with chili garlic chickpeas and crispy potatoes

These tangy spicy 15 minute chickpeas are wildly flavorful and so versatile. Ginger for warmth, garlic for depth, chilies for spark, vinegar for snap. Cook these once, and you’ve got a building block for the week. Put them on crispy potatoes, stuff a pita, smash a taco, toss a salad, or make fusion pappadum nachos!
These chili garlic vinegar chickpeas are inspired from my Nepali potatoes. I took that flavor profile and put it with the chickpeas, because it’s just so incredibly delicious. 

pita made with chili garlic chickpeas and crispy potatoes

For the chickpeas, we’re making this dry sauce of garlic, ginger, and green chilies and also adding some whole spices, like mustard seeds and cumin seeds. We are adding vinegar in the end, so the chickpeas pick up that tanginess and aromatic flavors from the sauce and get so flavorful and tender.

Pappadum nachos below

papadum nachos made with chili garlic chickpeas and crispy potatoes

They are just so addictive, especially served with the easy baked or air fried crispy potatoes strips.

You can serve these chickpeas and potatoes together in various ways: as a bowl with salad greens, to make papadum nachos, in smashed tacos, or stuffed into warm pita bread. No matter how you serve them, you are going to love them!

smash tacos made with chili garlic chickpeas and crispy potatoes

Why You’ll Love Chili Garlic Chickpeas

  • easy, 1-pan chickpeas cook while the potato strips crisp up in the air fryer
  • full of rich, deep Indian flavors
  • versatile! Serve as a salad, nachos, tacos, or stuffed into a pita
  • naturally gluten-free, soy-free, and nut-free
chili garlic chickpeas and crispy potatoes after cooking
spoon taking a bite of chili garlic chickpeas

Continue reading: Garlic Vinegar Chickpeas with Crispy Potato Strips

The post Garlic Vinegar Chickpeas with Crispy Potato Strips appeared first on Vegan Richa.

❌
❌