Sometimes you might run the same model twice and get different results. That often happens when you’ve upgraded it with skills. Skills are detailed text documents that lay out the tools the model should use, the approach it should take and how it should analyze the results. Good skills are practical, pulled from actual reports on HackerOne and other bug bounty platforms. A model can still lean on its own knowledge, but that’s just less efficient.
There are plenty of skills out there you might come across, but not everything can be trusted. Some skills can simply be dangerous and infect your system. To make sure they are safe, you can check them with SkillSpector by NVIDIA, so you don’t end up with anything malicious on your system.
Bug Bounty Skills
Both of these repositories do bug bounty hunting end to end, but they go about it in almost opposite ways.
The first is called Bountyforge. It’s actually just one single skill file, but it’s smart enough to split itself into eight different mini agents that all work at the same time. One looks at websites and apps, another at crypto and blockchain, others go after different angles hackers can exploit. It also checks each finding with four different tests to make sure it’s not a false alarm. Then you get a report in whatever format the bug bounty program wants.
You don’t even need Claude Code or any other coding tool for this, you can just run it right inside the regular Claude website in your browser.
The second bug bounty repository is Claude-BugHunter. It takes the opposite approach. The repo has 83 skills and almost half of those were built by studying 681 real bug reports that people actually got paid for on HackerOne. These skills aren’t locked to Claude Code either, you can use OpenCode, Codex or Hermes Agents with them.
Here are a few examples of the results we got with these skills.
API endpoints are often vulnerable and this is worth trying your luck on to see how it goes.
Another approach can be APK reverse engineering. Here we found a hardcoded RSA-2048 signing private key baked into the published APK. With that key, hackers can push a new app to the app store and infect every employee phone, getting access not just to the WiFi network at the workplace but to their personal life too. Quite dangerous.
We found an API endpoint vulnerable to an SQL injection and managed to pull the entire database.
Having skills built on real attacks keeps the model from wandering off into its own weird approaches and missing a lot of good findings.
Active Directory Skills
Claude-AD was made by ADScanPro for testing a company’s internal network. It gives your model a playbook with skills and agents built for an Active Directory assessment. The developers are upfront that it’s not an auto pwn tool. It’s meant to guide you through the assessment. Every finding can get mapped to a compliance control (DORA, NIS2 and ENS).
Claude-AD is very careful about getting caught too. It explains what a security team would actually see on their end if that technique got used. And any time it’s about to do something that would actually change things on the company’s network, it stops and asks for confirmation first.
General Cybersecurity Skills
Antropic-Cybersecurity-Skills is basically a giant reference book. It has 817 skills covering 29 areas of security work, cloud security, malware analysis, all the way down to hardware and firmware. Each skill is its own small file, so your agent will quickly pull out the two or three it actually needs for its task.
Every skill ties back to real security frameworks that companies and auditors already use (NIST CSF, MITRE ATT&CK and so on). So if your model finds a problem using one of these skills, it can also tell you exactly which official standard it violates. You can use it to justify findings to a compliance team.
SCADA Skills
On an industrial network, a clumsy scan can shut down a production line or damage physical equipment, since a lot of this gear is old and wasn’t built to handle unexpected traffic. That’s why the ICS skill by Masriyan is built to never actively touch a live industrial network. Instead, it works off network captures someone already took. It reads the file, recognizes industrial protocols by the ports they normally run on (Modbus, DNP3, Siemens S7, EtherNet/IP, OPC-UA, and more) and counts which devices are talking to each other. It then shows you write commands, these are the ones that change a value on an industrial device. That’s the traffic you want to see first.
The second mode skips network captures and instead searches for exposed industrial equipment using Shodan and Censys. The skill can also help your model reason about how an industrial network is laid out and check findings against MITRE’s ICS specific attack framework and the IEC 62443 security standard.
Science Skills
Although science isn’t really what we want to focus on here, in one of our SCADA articles we mentioned that to carry out a successful attack requires hackers to understand the technical process of the plant. That means understanding how the chemicals are produced and which units are used along the way. We also showed how vinyl acetate is produced and talked about paracetamol production.
1 kg of paracetamol at 100% purity was reported to cost €8,205, while 1 kg at 99% purity cost just €5. So even a single day of sabotage could cause serious financial damage to an enterprise.
Finding a scientist among hackers is quite a challenge, which is why Stuxnet needed a group of people from different backgrounds working toward one objective. But now hackers can just import different skills to make their attacks more devastating. K-Dense published 140 skills with access to different scientific databases and Python tools.
The real concern here isn’t ICS exploits inside the repository, there aren’t any. It’s the access to sensitive scientific data paired with an AI agent that can actually understand that data and change it.
Summary
AI skills can be a gamechanger, especially when they’re based on actual reports hackers got paid for. These skills show your model how to approach things and what tools to use during the test, so it doesn’t wander off hallucinating and inventing its own ways of testing things. That can wreck your bug bounty flow, since you’ll end up overlooking plenty of potential targets.
Simply relying on the AI to find things isn’t enough, hunters that do it keep getting a lot of dupes. You need to test things manually too. For this reason we created our Bug Bounty training to show you how to find bugs and work with the AI more efficiently.
When I got back into SLA resin printing recently, I knew that I’d inevitably have to deal with the agony of failed prints and of course resin spills. This moment eventually came, and I felt motivated to treat mistakes as teaching moments on aspects like how to properly prepare an SLA build plate in terms of angles and supports or how to deal with failed print aftermaths.
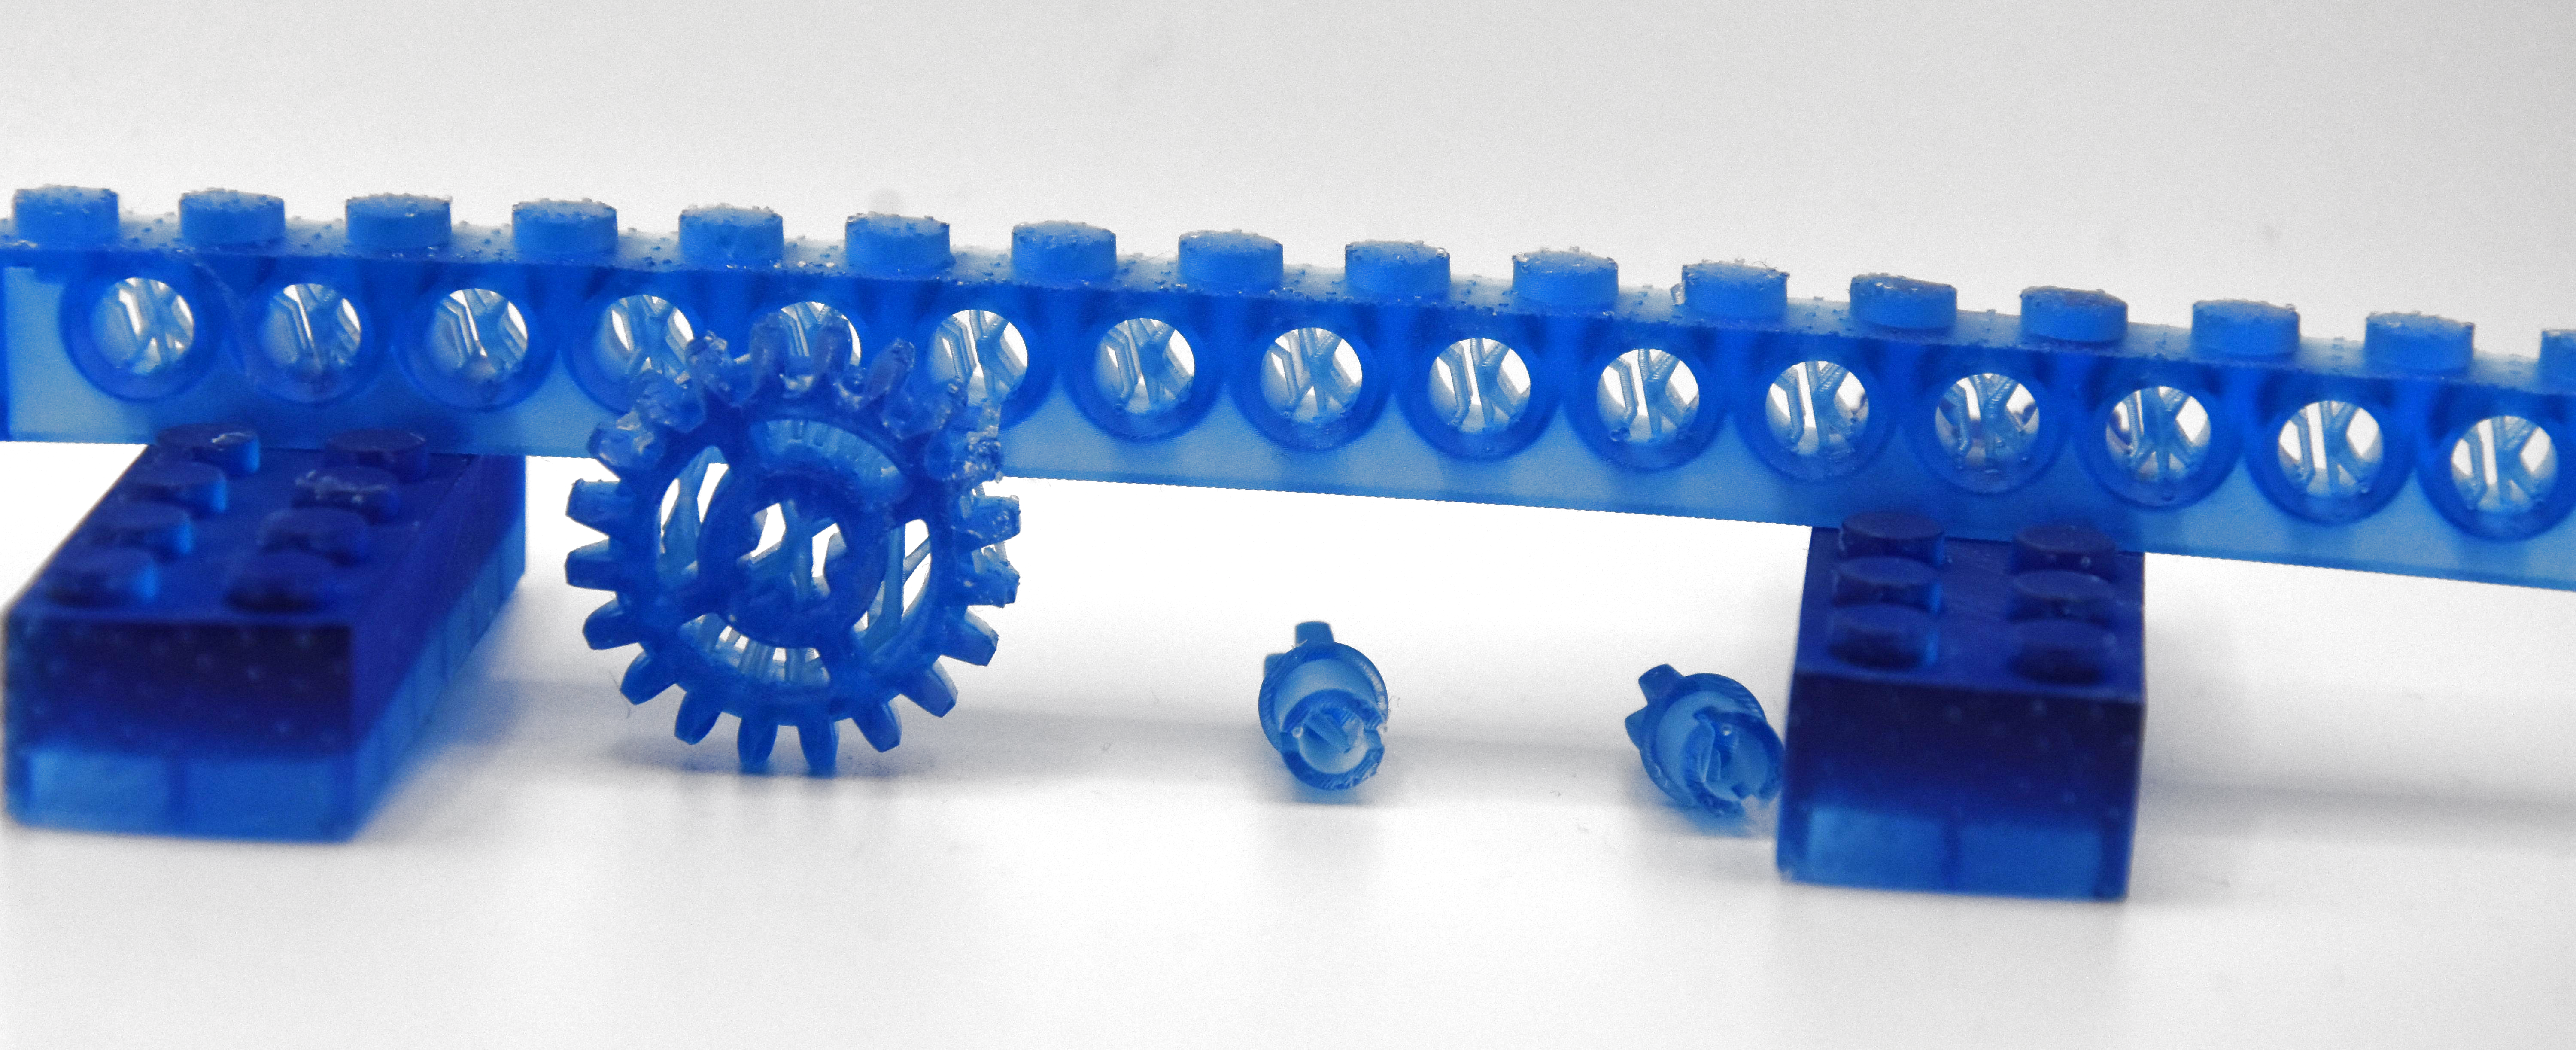
Before moving on to the disaster, I’d like to first start with a look at the resin print of the previous article, which contained a number of fairly small parts. These I had oriented and supported almost fully using the automatic methods provided by the ChituBox slicer software, and worked about 90% as I had hoped, while leaving plenty of room for improvement as well.
Overall, preparing an SLA build plate in the slicer isn’t quite the same as for an FDM printer, mostly due to one phrase that strikes fear in the heart of anyone who has ever done resin printing: “peeling forces”.
Not Bad, Not Great
For last article’s resin print, I had to put a number of models onto the build plate in the slicer, after which I mashed ‘auto arrange’, ‘auto orient’ and then ‘auto support’ in their respective tabs. I did change the orientation of the beam so that it wasn’t pointing straight upward any more, as I wasn’t going to wait a few extra hours for it to print just for that single object.
This then got me the following overview including a veritable forest of supporting structures:
You’re going to enjoy peeling off those supports later.
By playing it safe, I managed to get everything printed without any glitches other than my previously mentioned fight with the resin auto-feed system of the printer. Of course, by leaning heavily on defaults, I also got backstabbed by the slicer’s overzealous use of supports, especially where it was highly undesirable, such as inside parts of the LEGO Technic-compatible parts:
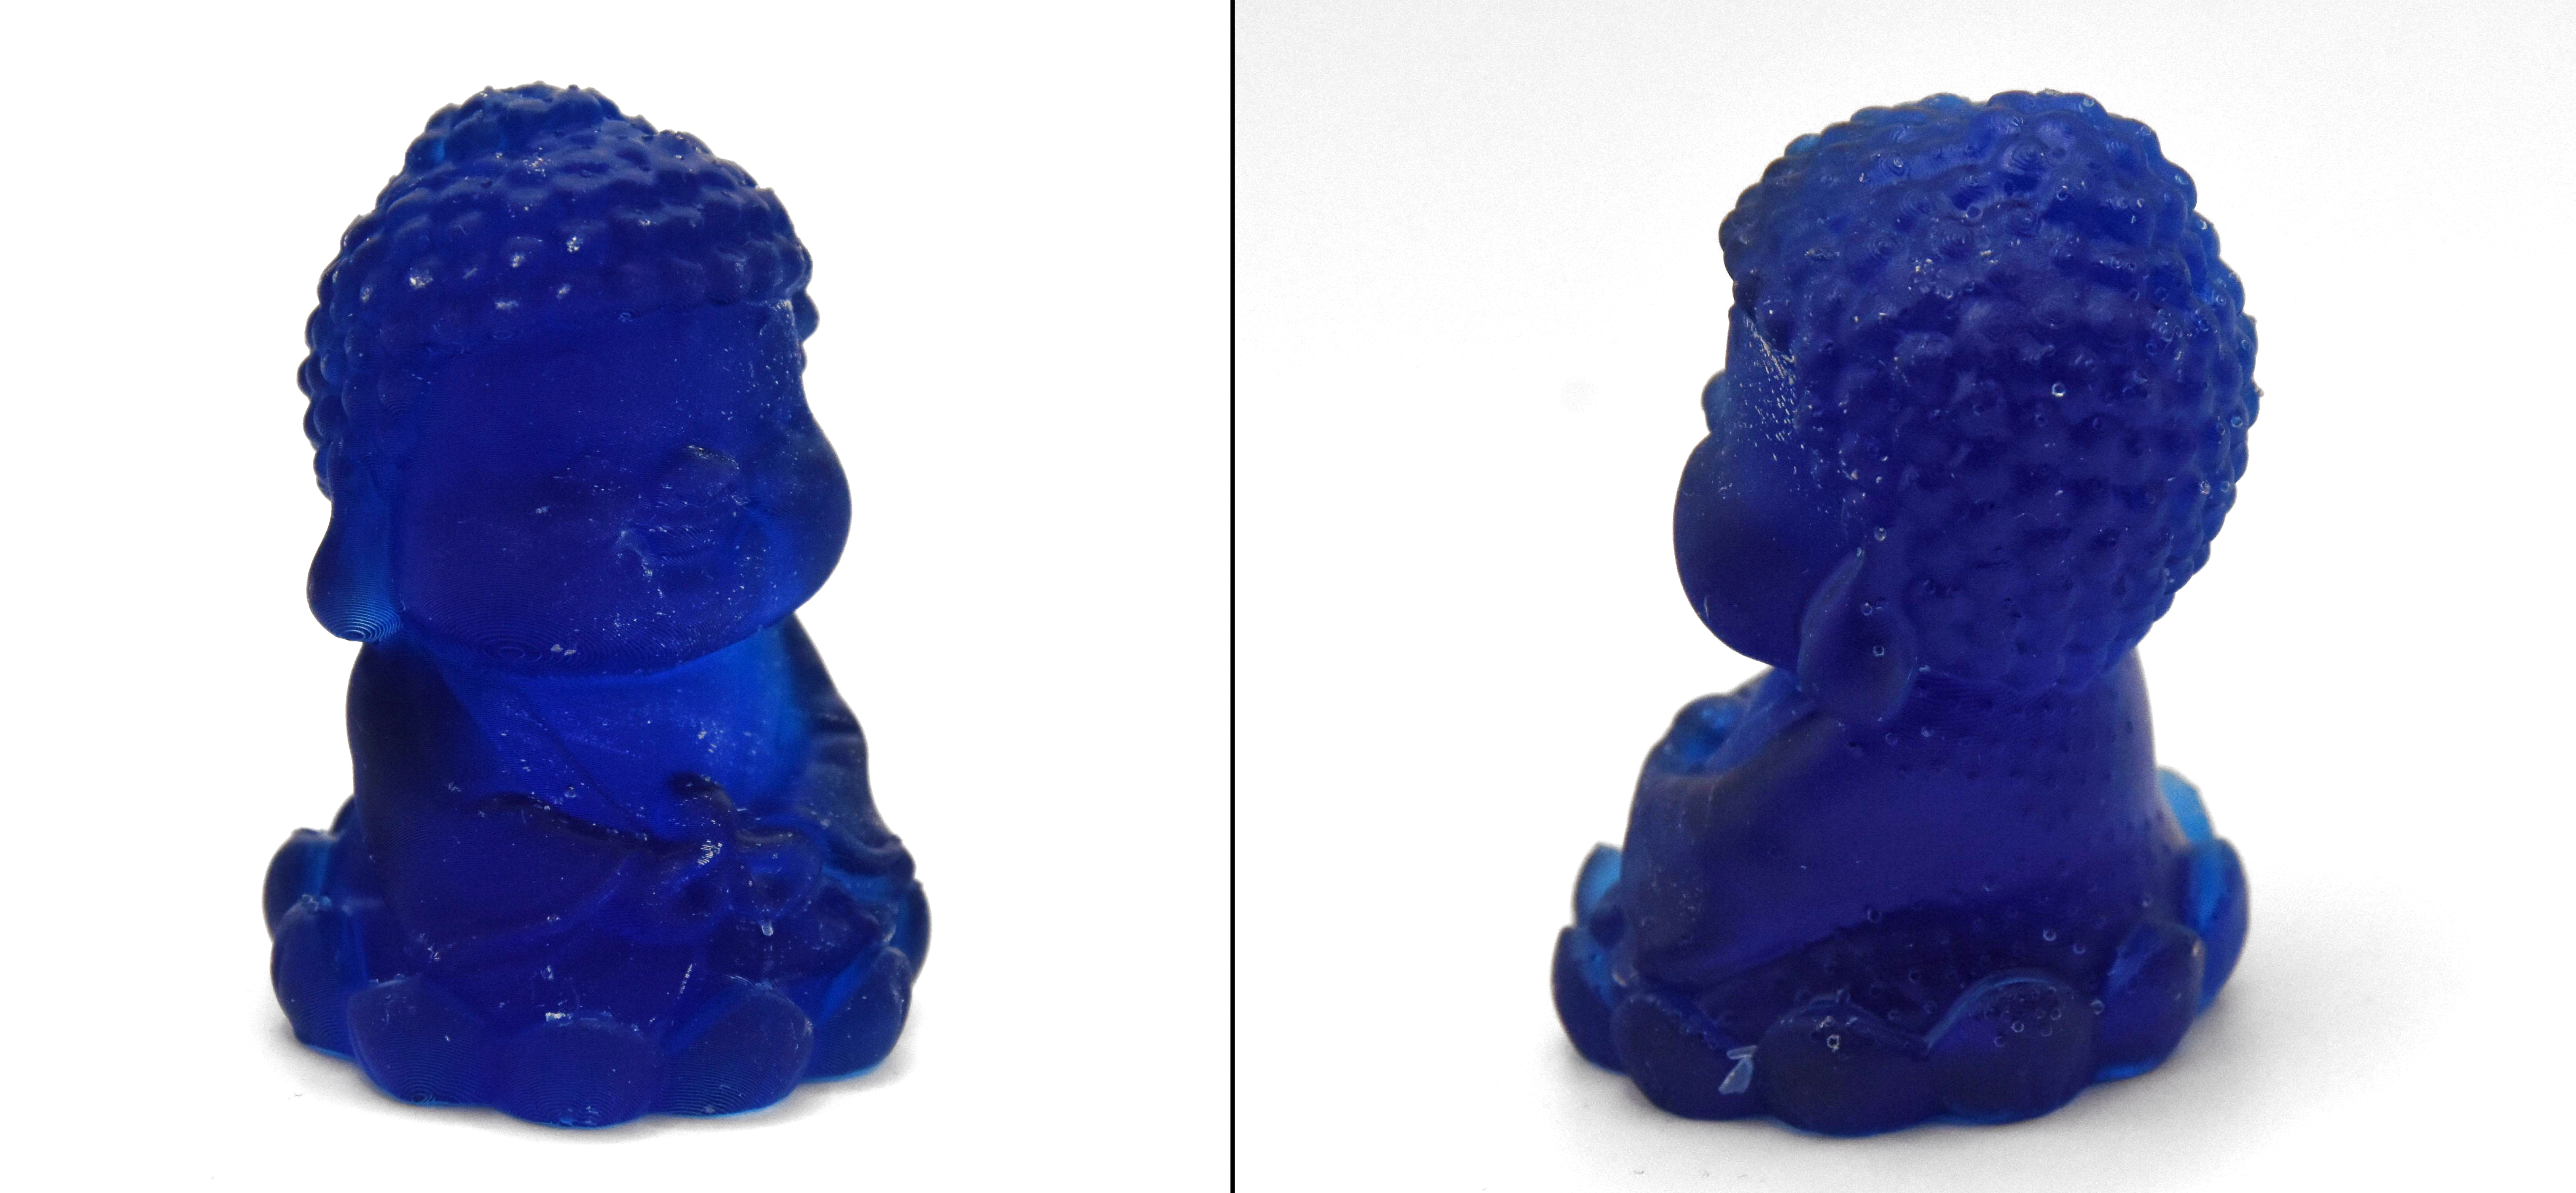
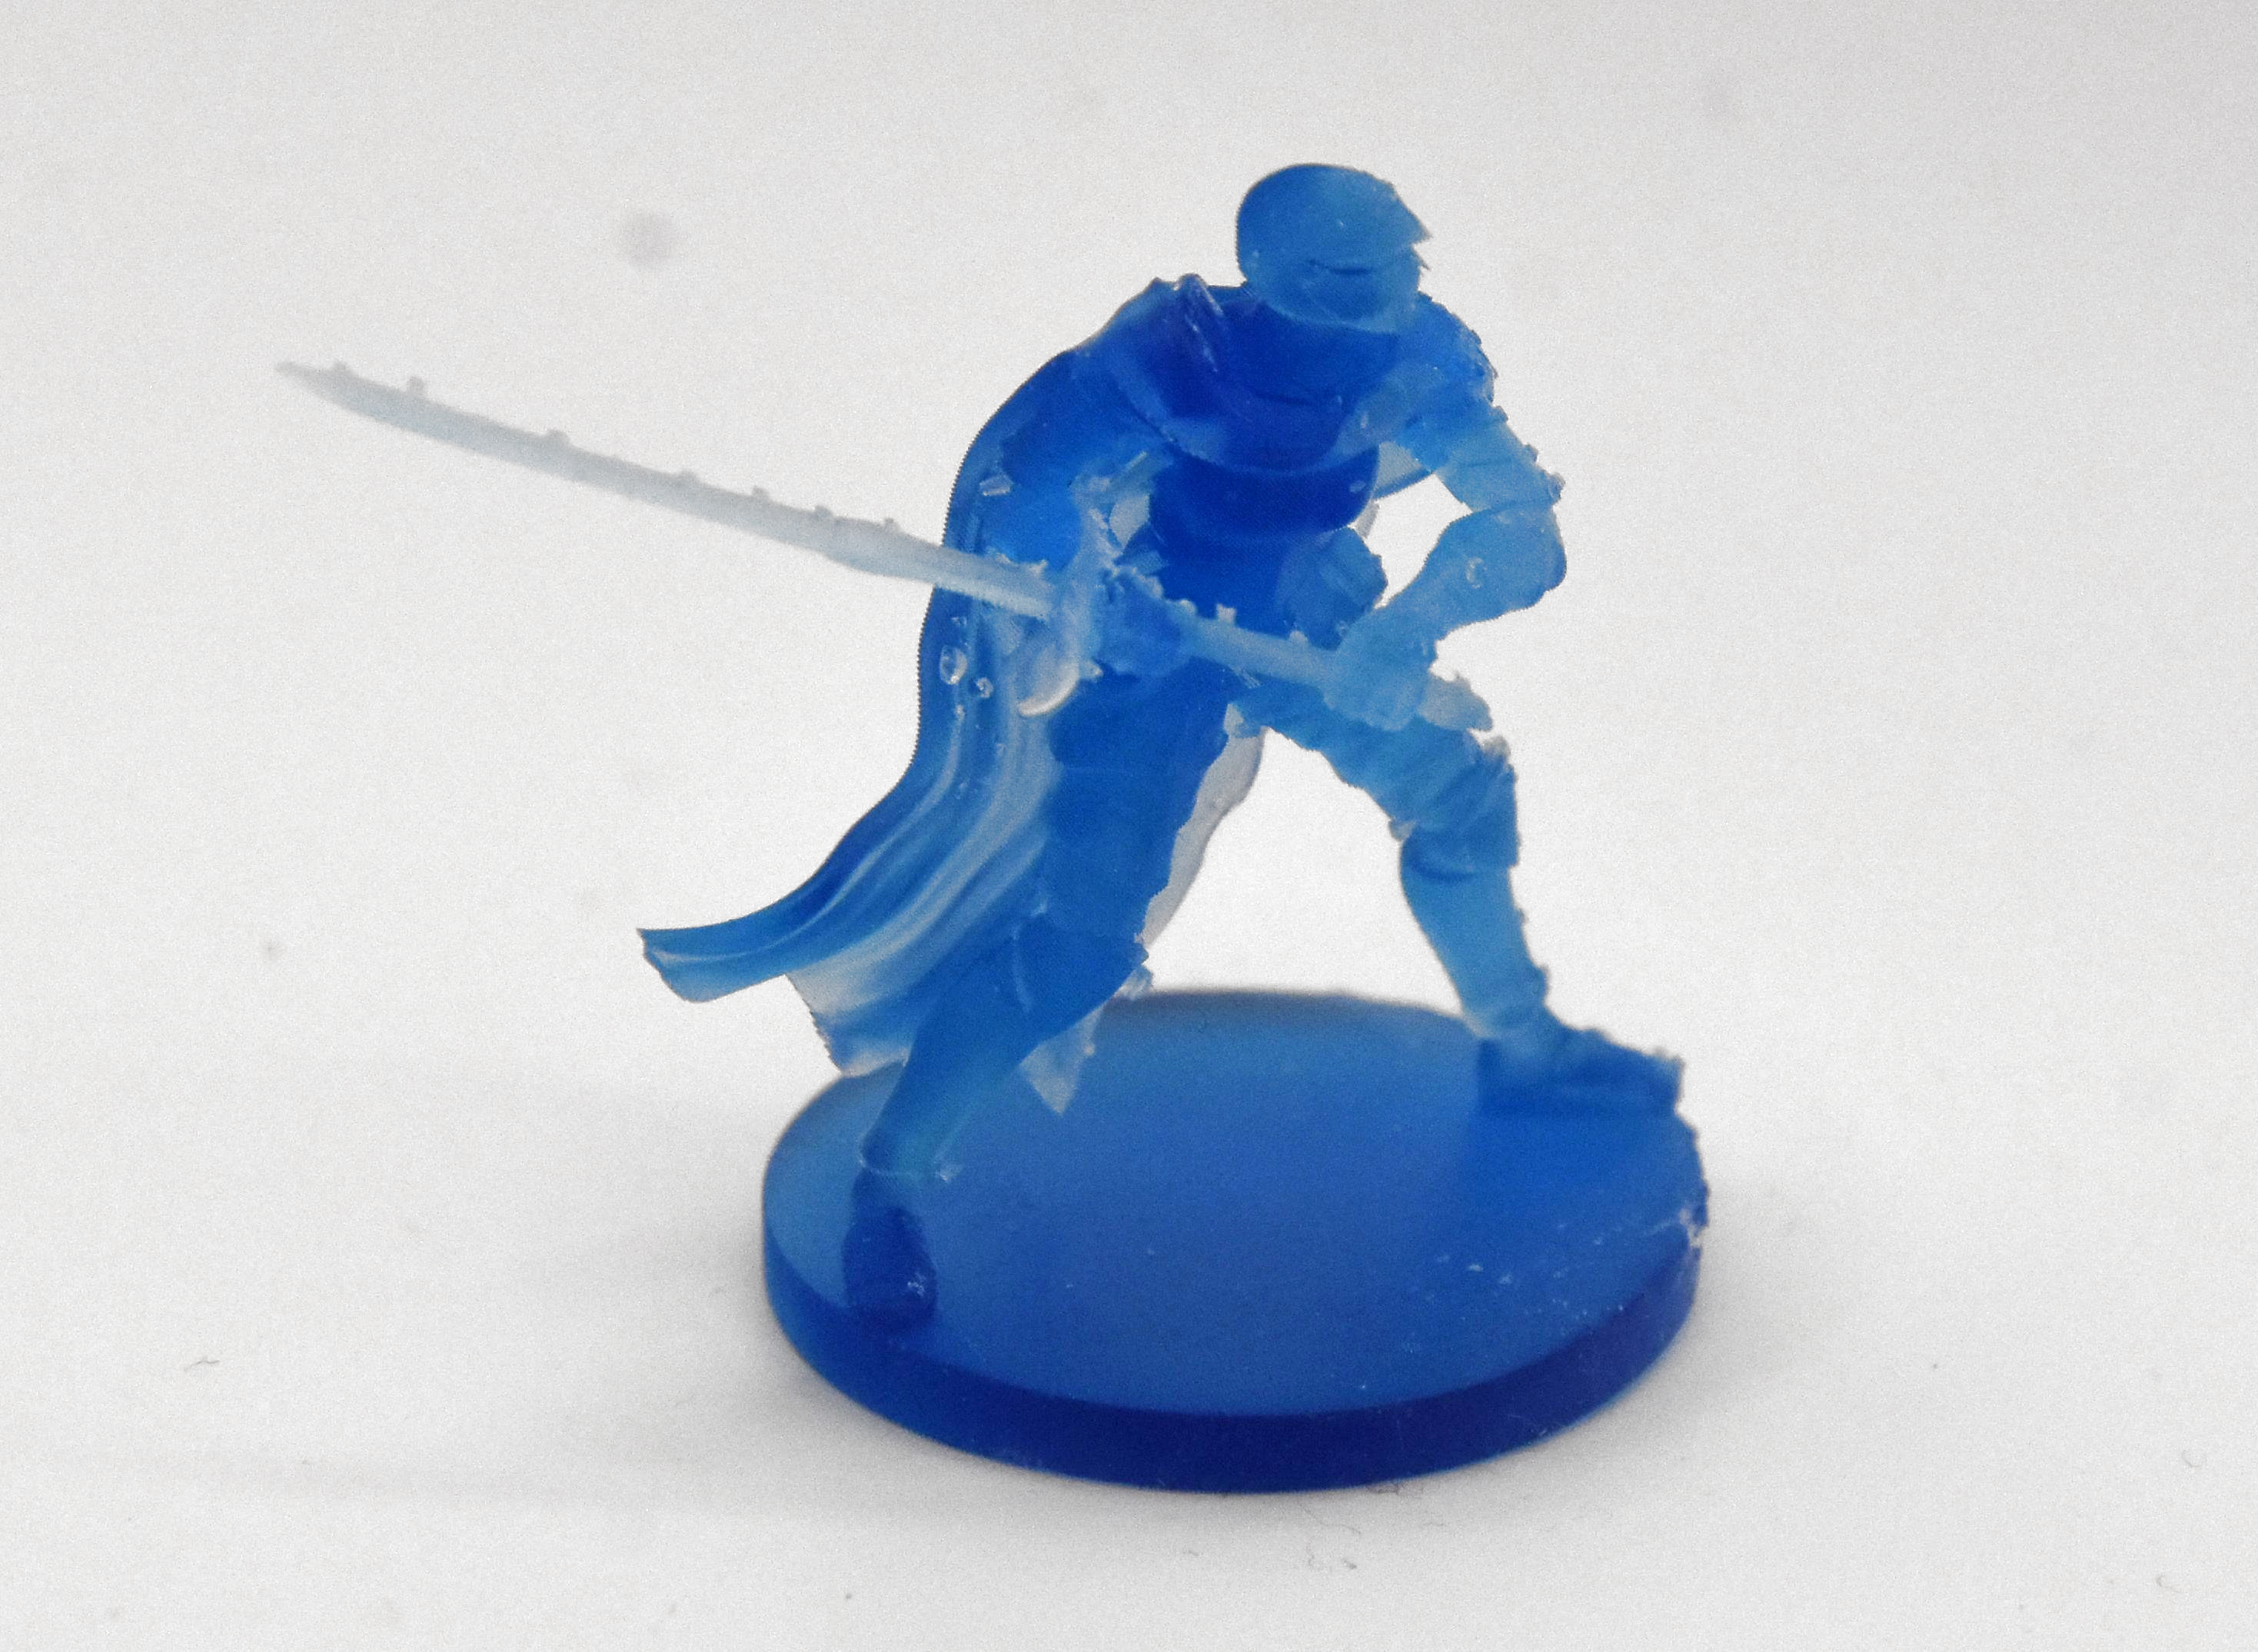
By rotating the figurines to be printed upside-down relative to the build plate this also meant having lots of ugly marks left by the supports, both on the happy buddha and the female knight figurine.
Here the fix seems rather straightforward: angle figurines so that supports contact things like the bottom of a surface where it won’t be as noticeable. Also inspect the auto-generated supports to remove any that are in naughty places and perhaps do some manual supporting if you feel particularly confident.
I did look at a few “how to do supports right” videos and written tutorials, and the general advice seems to be to simply forget about auto-generated supports.
For me an amazing aspect was that both figurines were angled upside-down by the slicer, when everyone prints them with the base towards to the build plate. Exactly how ChituBox’s algorithm here works is a complete mystery to me, but I reckon that this slightly confusing experience may have contributed to the subsequent disaster that occurred with another print.
Simply Bad
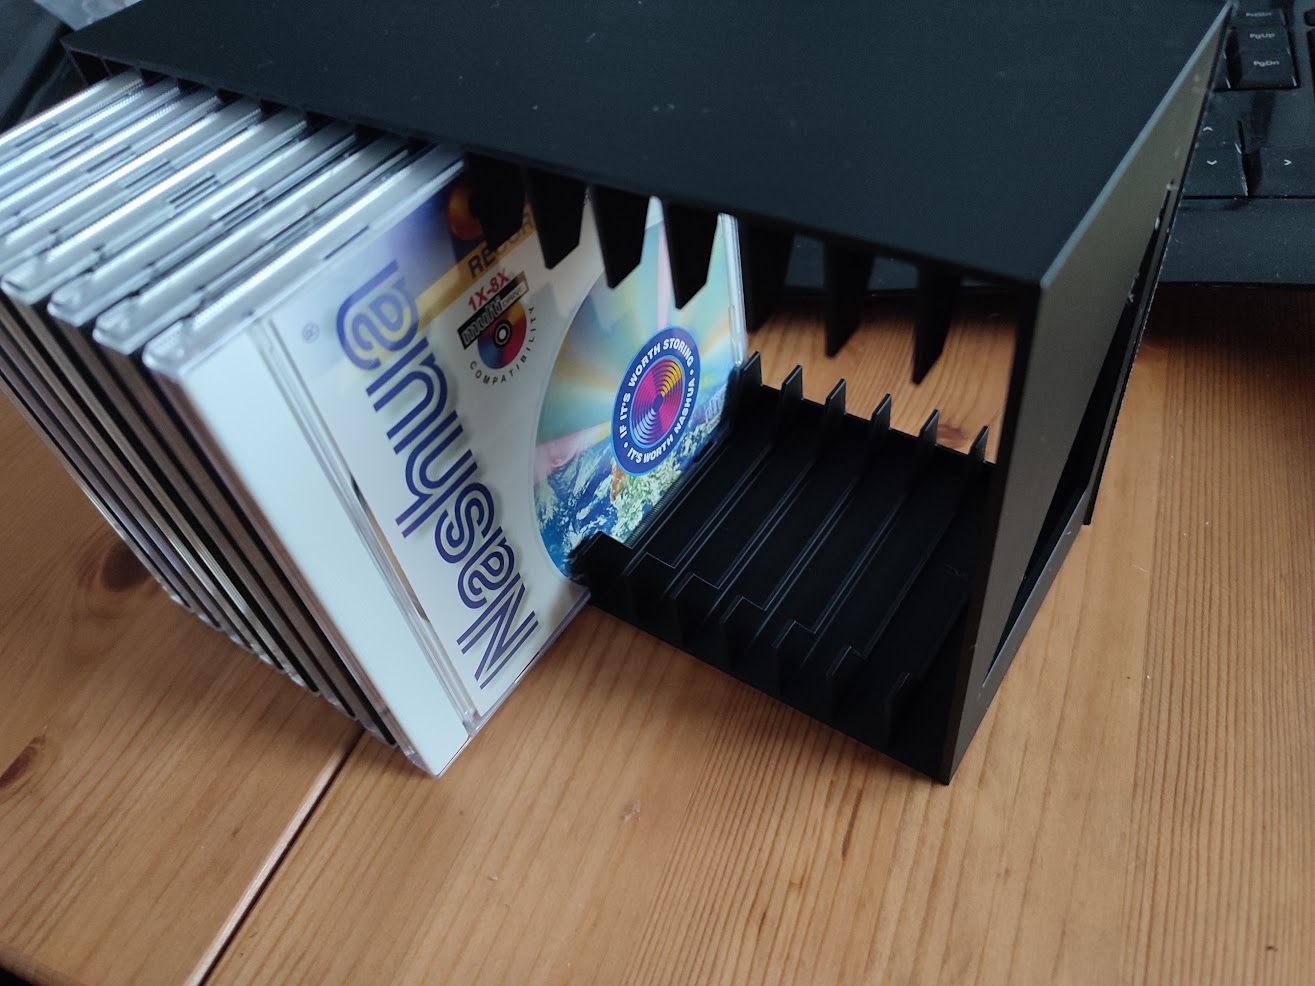
The FDM version of the CD rack in black PLA passing QA.
Where things slid sideways and wrapped themselves at high velocity around a phone pole was when trying to print a 16-slot CD rack, specifically this rather nice model by [zenitar3d] from Thingiverse. On an FDM printer this is braindead simple to print: you slap it on the build plate in the slicer, do a sanity check that it physically fits, slice it and let ‘er rip. My only issue here was that OrcaSlicer deemed it necessary to add a brim, so that took some sanding to clean up a razor sharp edge.
On the resin side of things, you enter a torment nexus: you can slap the part on the build plate, but then you risk elephant foot — a thickening at the base where exposure time is longer than for subsequent layers. Even if that’s of no concern, you still need to violently remove the part from the solid metal build plate, which is highly likely to cause damage.
If I still had the LD-002R printer with its flex plate, an aftermarket modification that I had fitted. This would be of no concern with a mere flex-and-pop, but here I’d have to violently wield a metal scraper to convince the build plate and cured layers to part ways. Clearly I need to look into flexible build plates for current SLA printers.
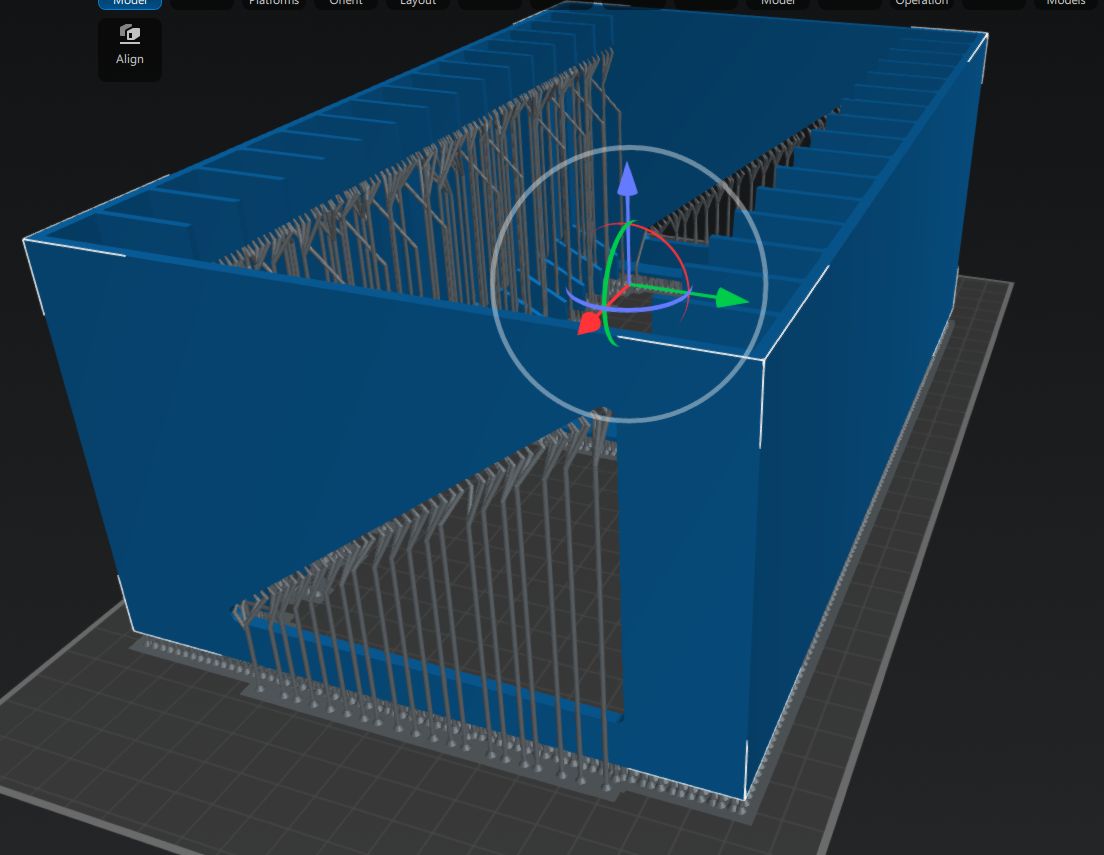
I did try to use the same auto-angle and auto-rotate approach in the slicer, but ChituBox would just always put part of the model outside of the printing area. After a while I grew tired of this and just printed it with the part slightly lifted off the build plate with medium supports like this:
Anyone who has ever done any resin printing cringes at this screenshot.
In my defense, I did this in the midst of yet another European heatwave with zero air conditioning, so maybe that had sufficiently fried my remaining brain cells. Regardless, the results were rather predictable.
Carnage
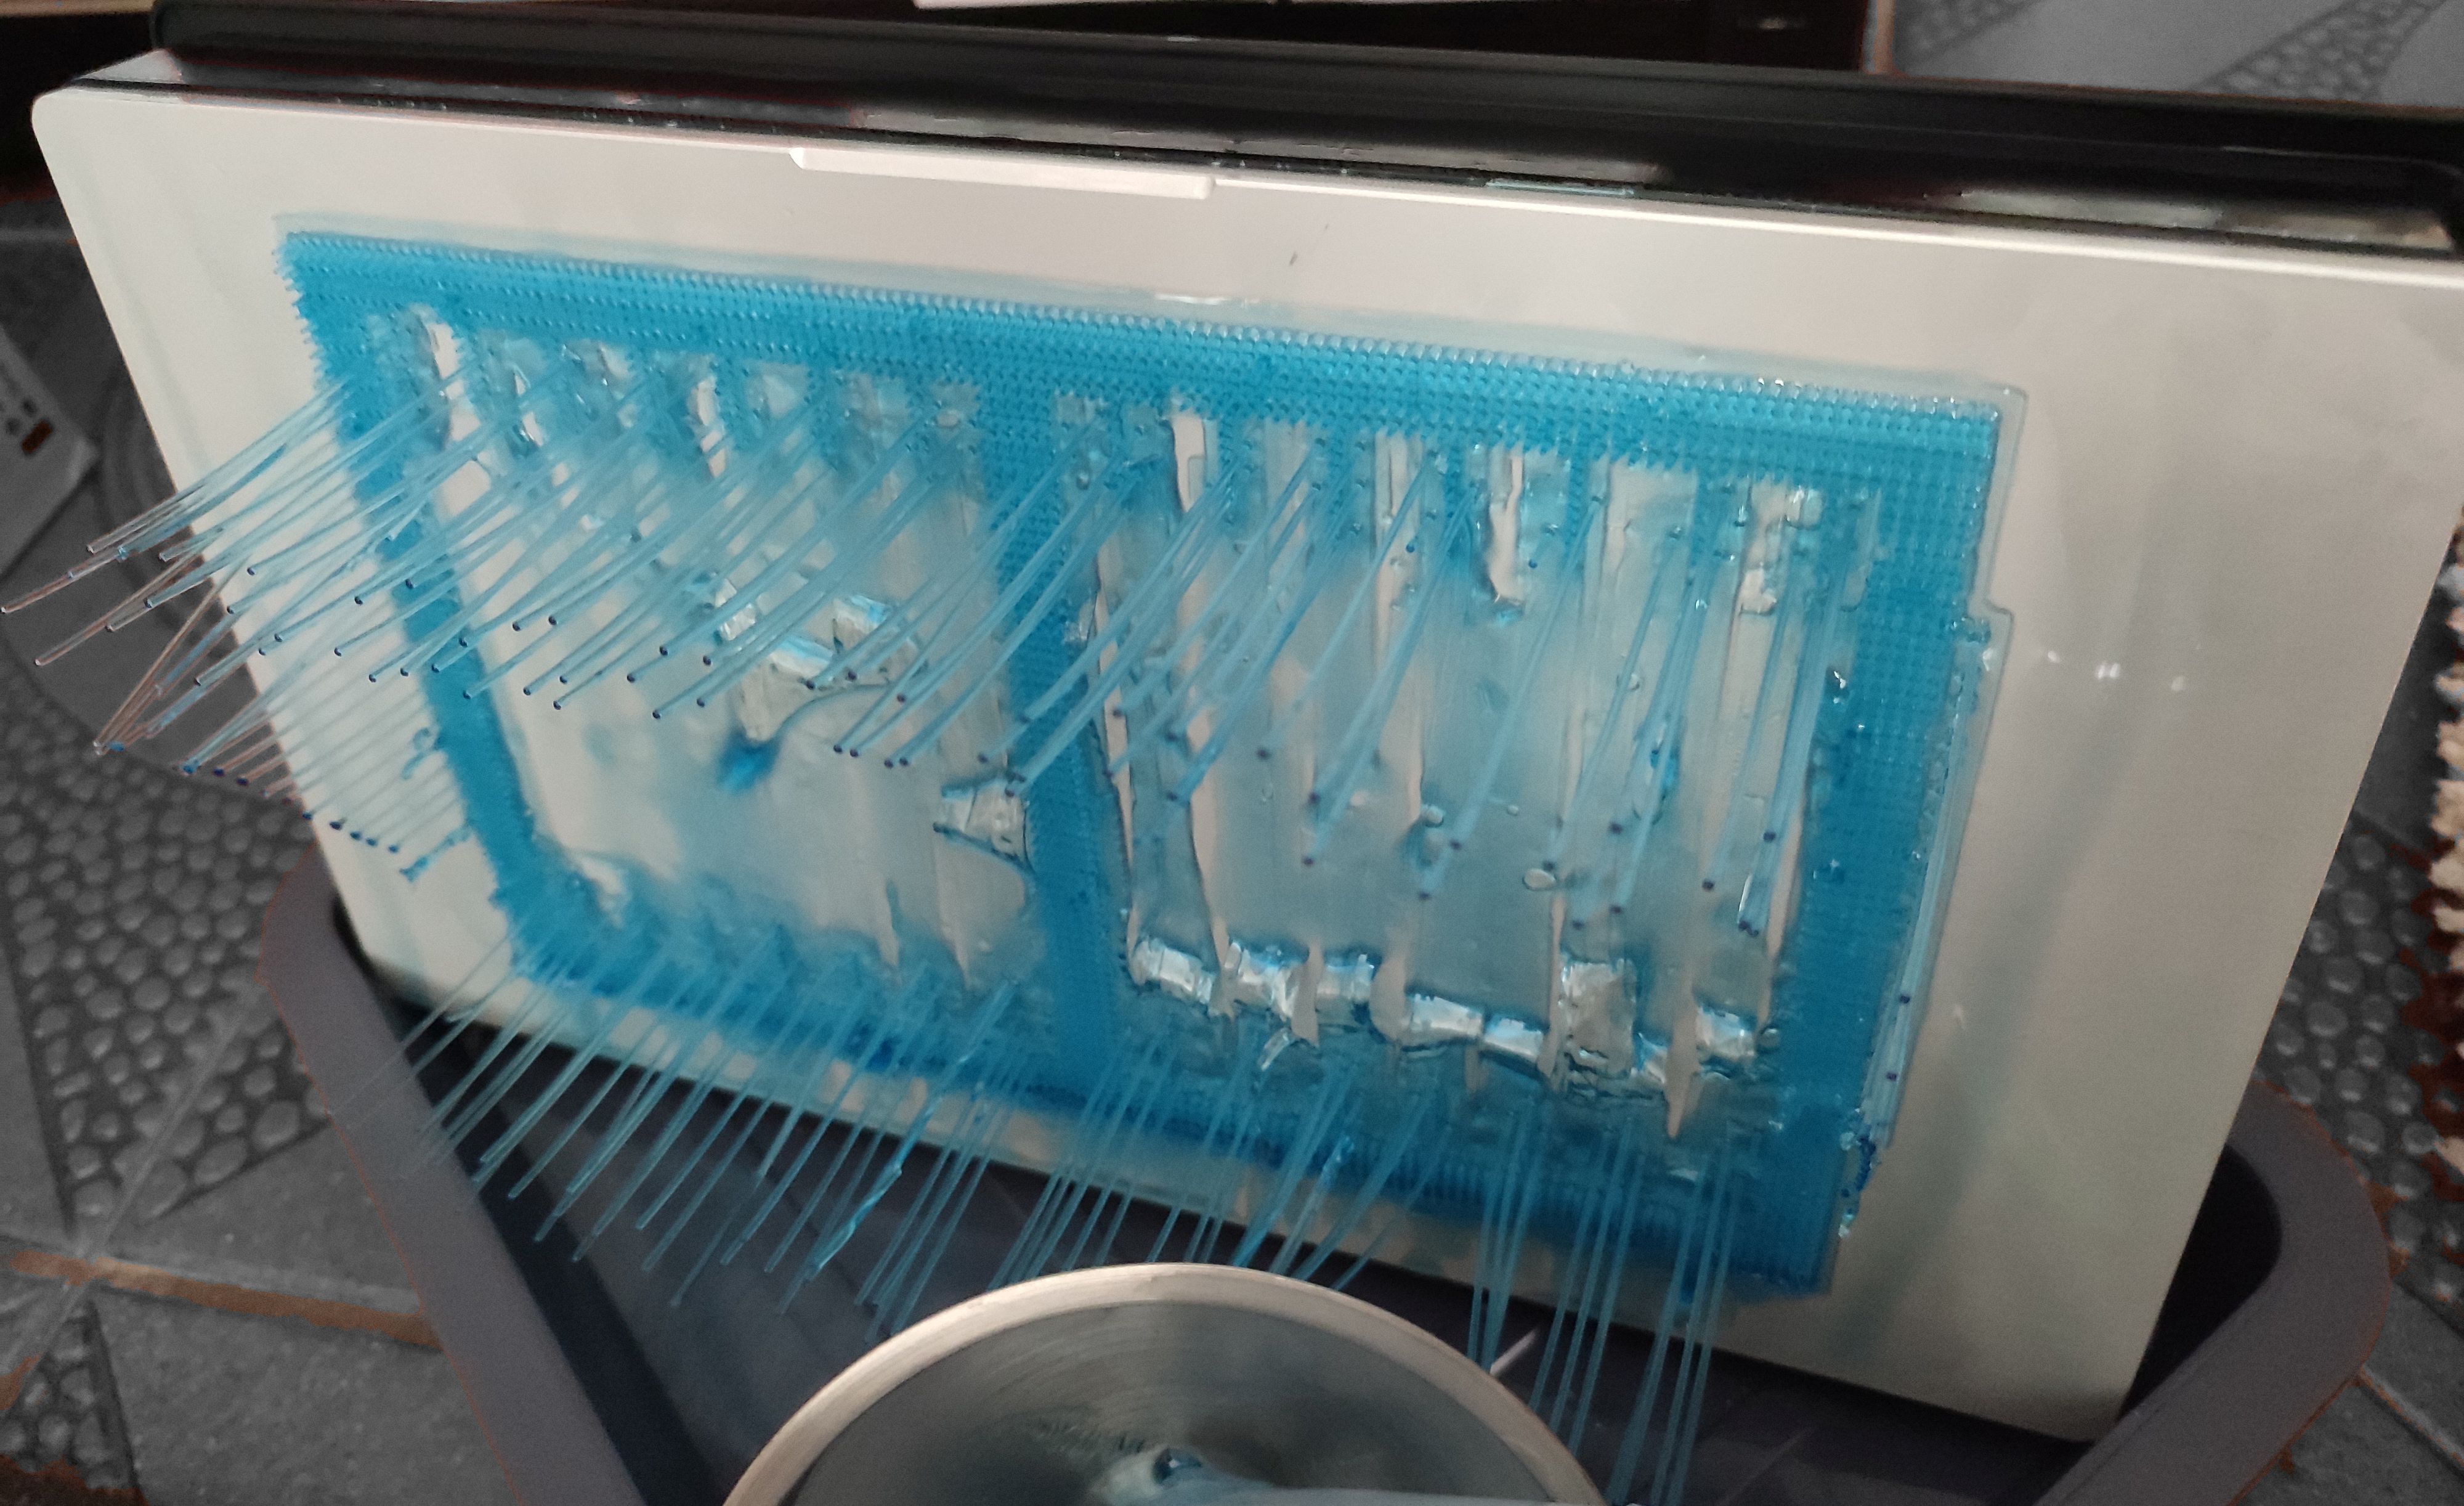
A little while later I had the good news in the sense that the supports were printing beautifully, but also bad news in that the actual model had been ripped off the supports by the aforementioned peeling forces.
Cue sad trombone SFX.
In hindsight this was obvious: the quite solid surface of the model has significantly more surface area than the area contacted by the supports. At the first attempt to peel the newly cured model layer off the nFEP (PFA) film, the tug of war resulted in the supports winning out and the print being a total failure.
You could call this the ‘FDM spaghetti’ equivalent with resin printing, where the FDM’s extruder is printing in empty air, but unlike with FDM printing the subsequent clean-up is less of a sighing, brushing away bits of thermoplastic and trying again with the glue stick, and more of a chemical hazard situation.
Dealing with an SLA resin printing failure sees you draining and filtering the resin from the vat, carefully removing any solid resin from the vat’s film and curing the failed parts so that they can be safely disposed of. All while suited up with gloves, eye protection, and at least a half-face mask with A1P2 filters that still leave you plenty of opportunity to consider whether SLA resin or IPA smells worse when the copious amounts involved of both try to overwhelm the filters.
Clean-Up Detail
All of this is perfectly fine.
Where the whole kerfuffle got even worse was when the whole auto-feeding of the resin caught up with me. After ripping the bottle out of the machine I had noticed that the GK3 Ultra had for some reason pulled a vacuum inside the bottle, which could explain some of the issues that I had experienced. This did however also mean that its internal volume had decreased due to the bottle’s deformation.
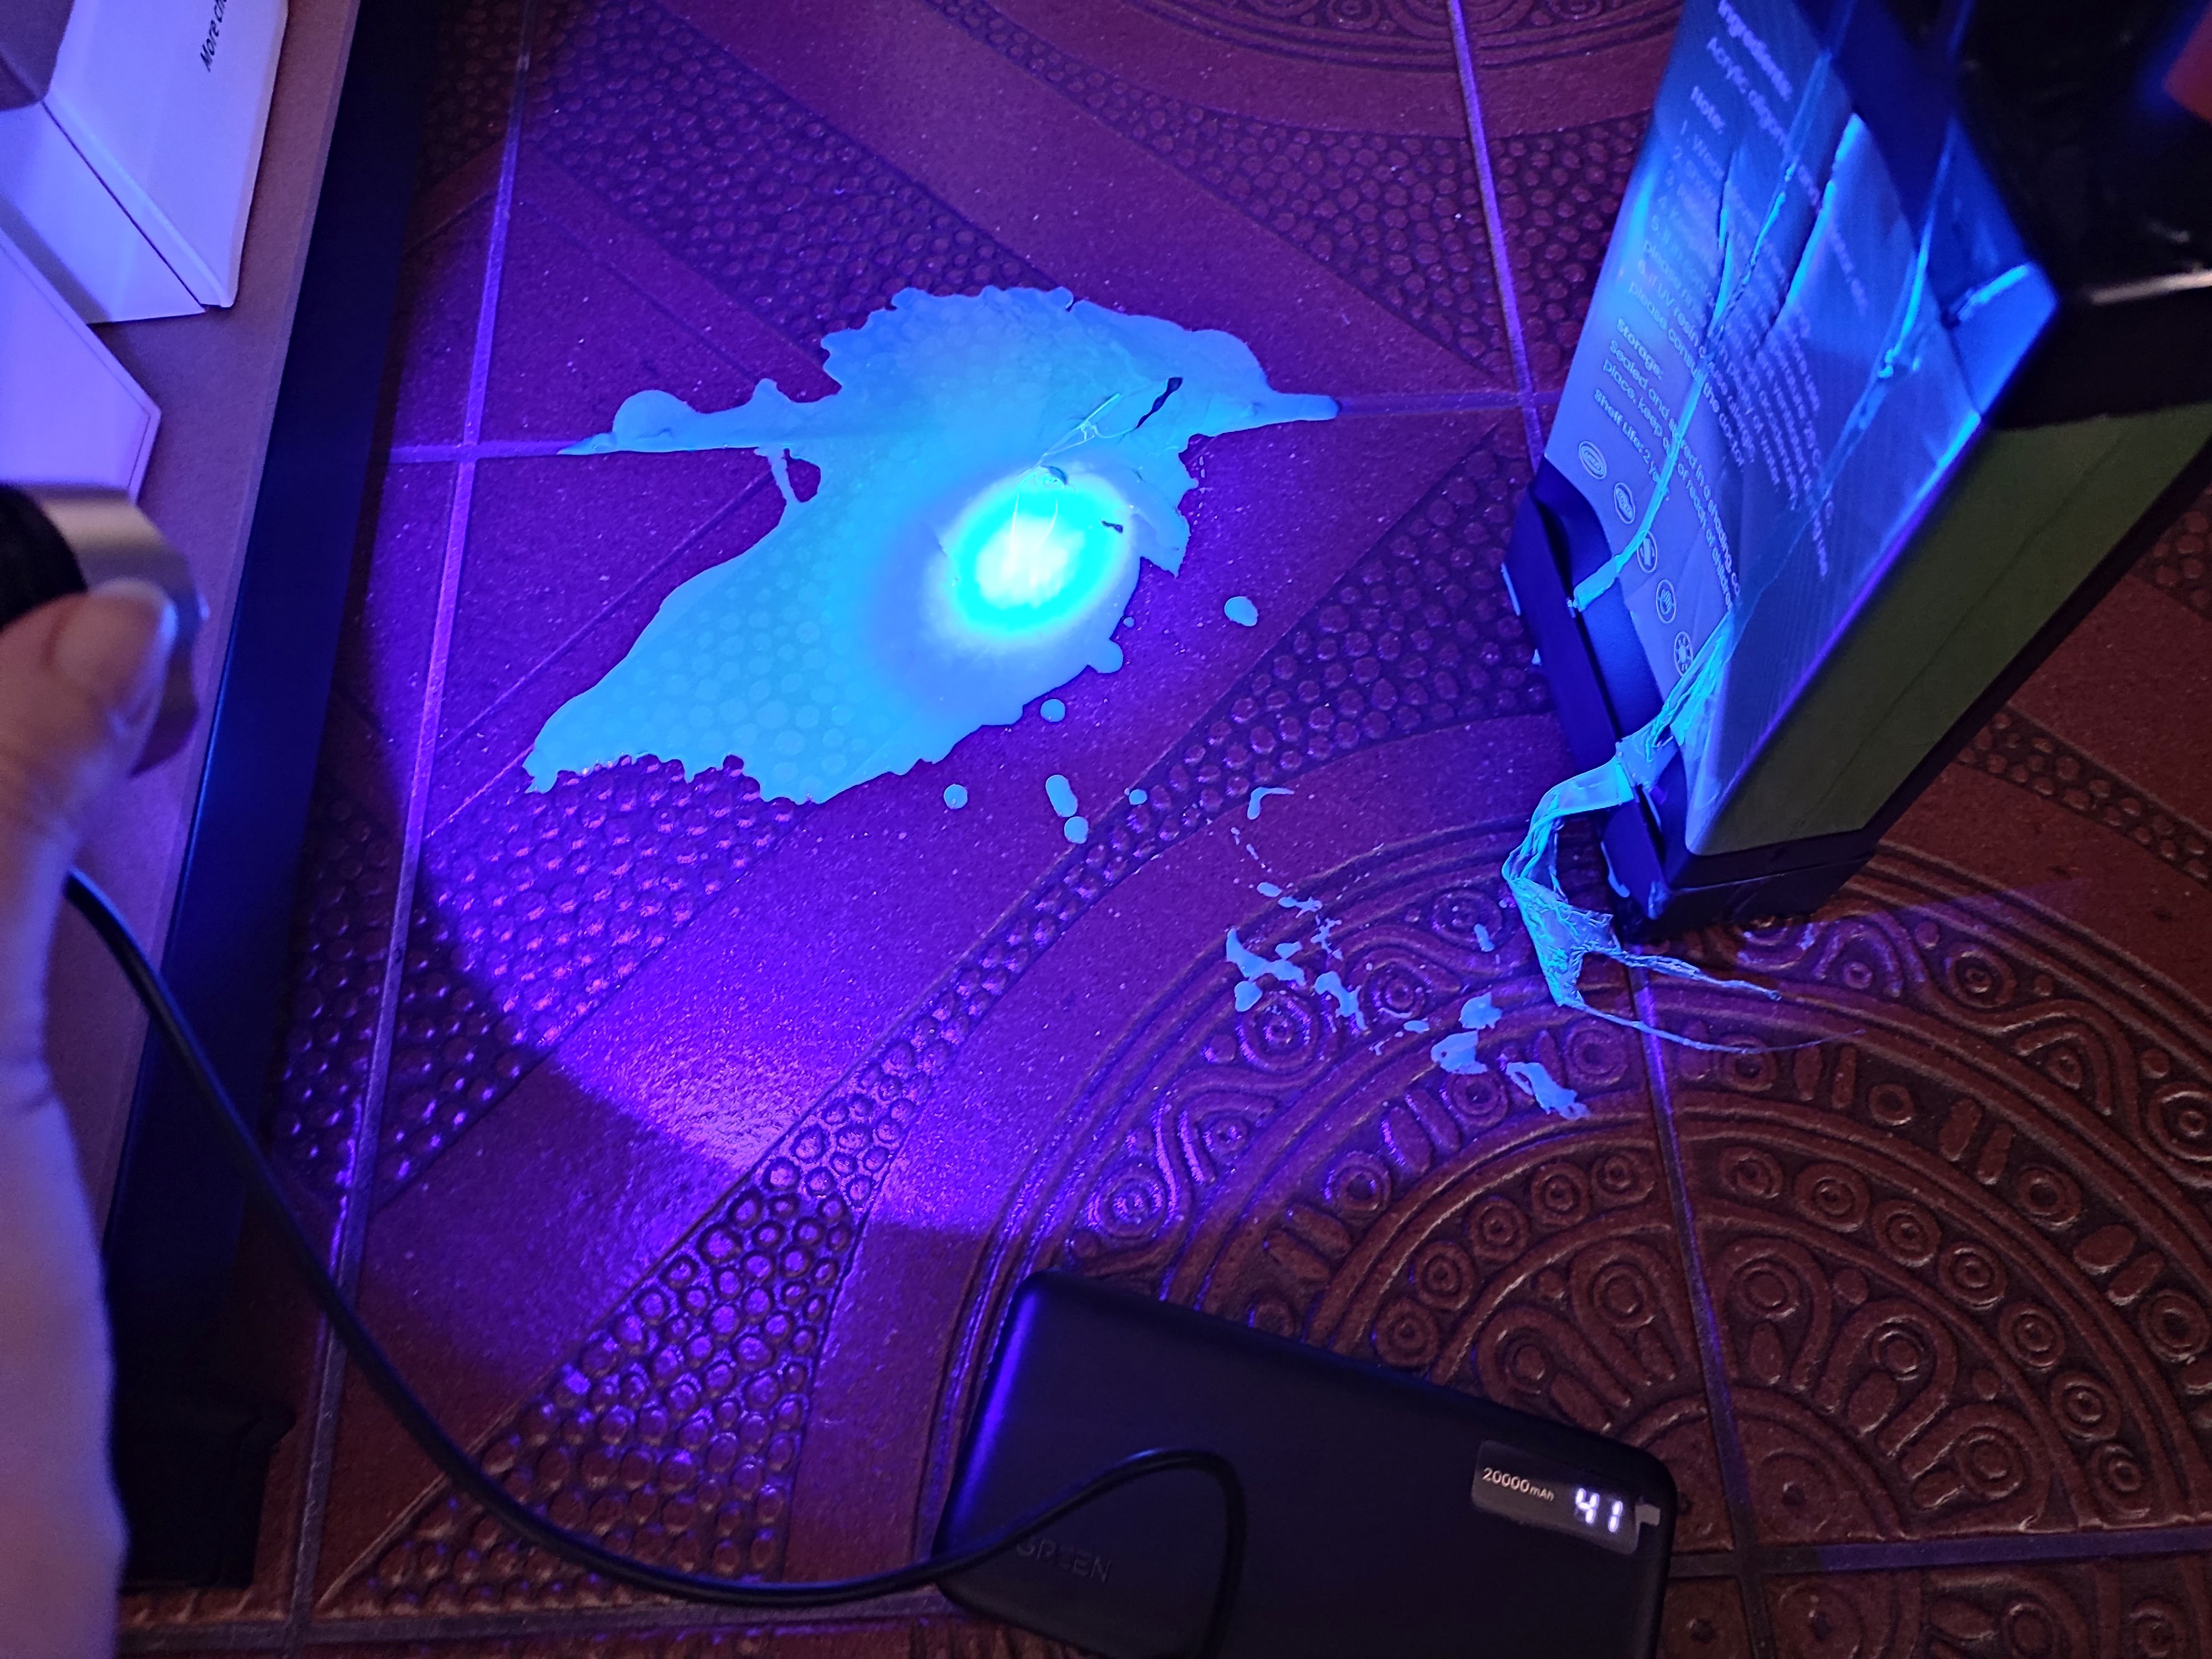
This was a detail that didn’t quite register with me until resin that I was pouring through the filter into the bottle was overflowing onto the floor. Cue copious amounts of colorful cursing and a dash for the paper kitchen towels, followed by a rather illuminating UV exposure session using a handheld UV lamp. Fortunately cured resin doesn’t bond well to tile flooring, so it can be peeled off after curing and tossed into the regular household waste. The pro-tip here is to always use silicone underneath potential resin spills. If only I had done so.
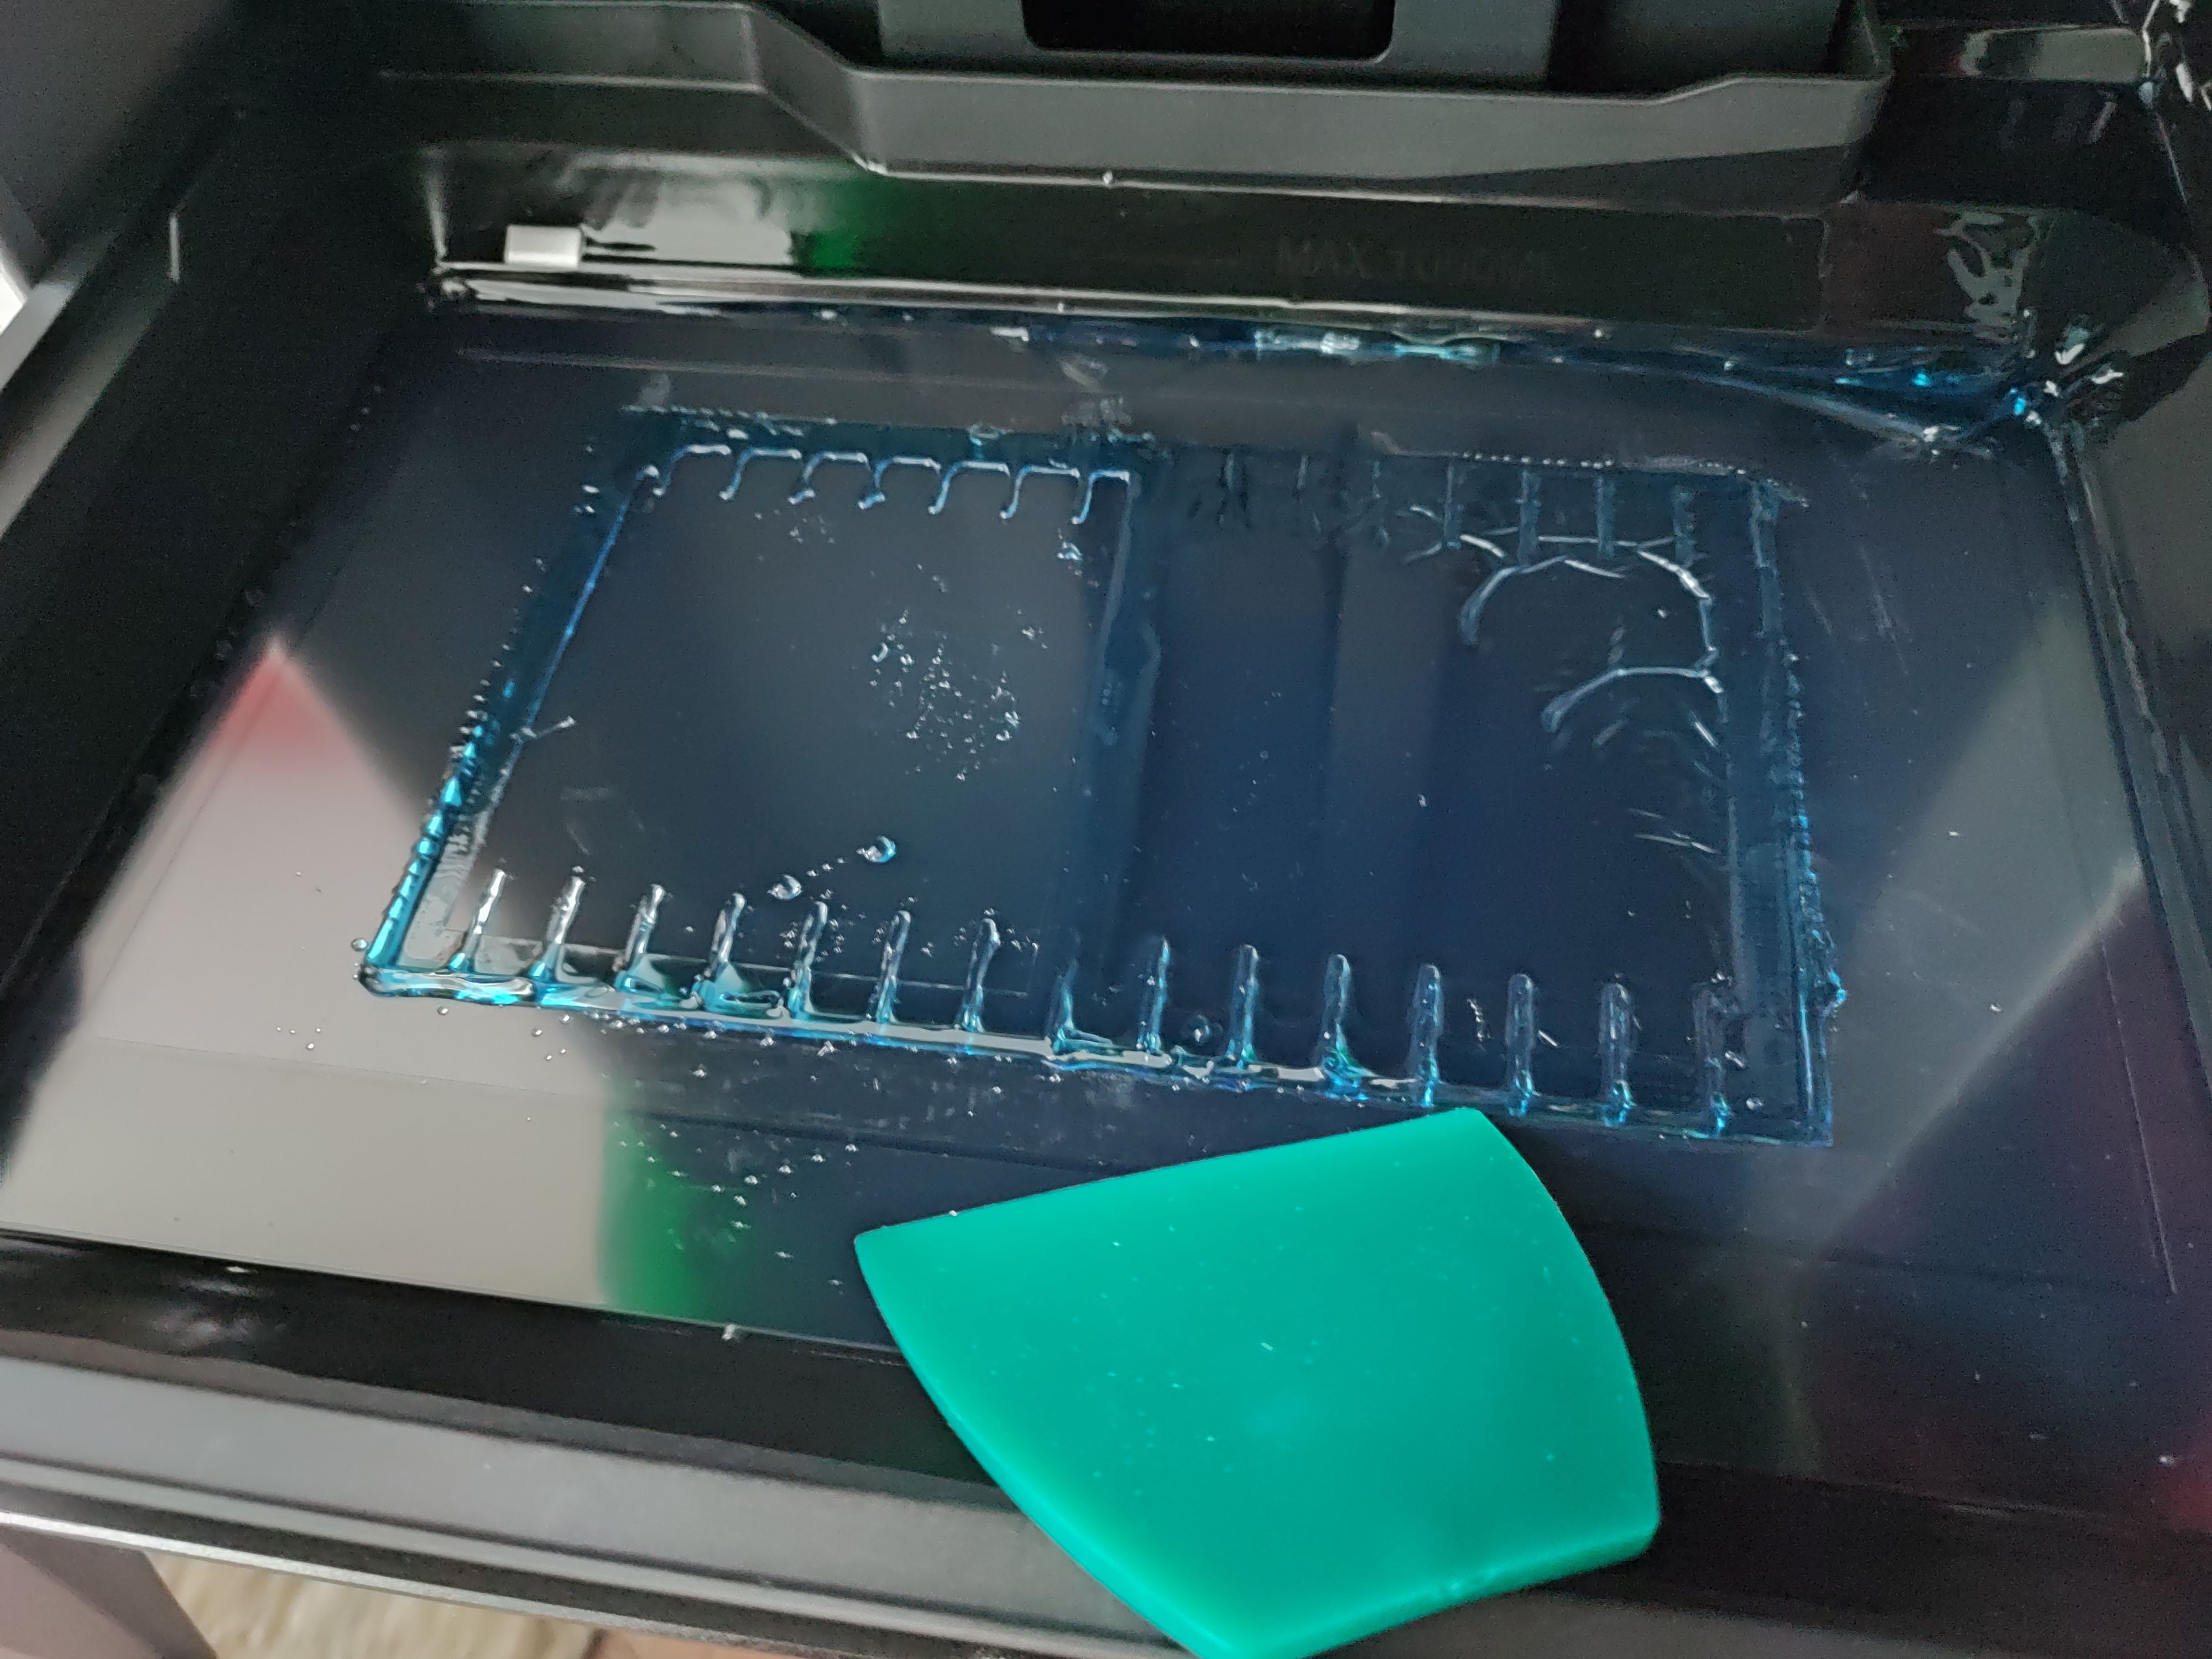
With the floor clean once more, the next challenge was to get the vat cleaned up again. The provided silicone scraper was useful here, but you absolutely need that spray bottle with IPA to soften up the connection between the PFA film and the cured resin.
This calls for IPA and elbow grease.
Using the built-in vat curing feature I could cure most of the remaining resin in the vat, but still had to use the handheld lamp to get to corners where it didn’t reach. This is the part that I’m still working on, making sure everything is clean and the PFA film undamaged before I throw myself again at another printing session.
Lessons Learned
As they say, spilled milk, or resin.
I think the primary lesson that I have learned here is that I still do not comprehend why consumer resin printers insist on having that solid lump of metal that they dare to call a ‘build plate’ — an immovable surface that you have to violently assault with a scraper after printing to make it release printed parts.
After mostly printing with the magnetically attached flex plate on the LD-002R – of course after adjusting its Z-height correspondingly – it still feels like time hasn’t moved at all here.
As a friend of mine remarked when I reported the print failure described in this article, it’s also rather astounding that there’s no simulation of peel forces in slicers to get some idea of whether your supports game is overkill or weak sauce. There are some resin printers that even try to reduce the peel forces by tilting the vat – such as the Prusa SL1S and Form 3 – and there are various ‘tricks’ to reduce the peeling forces, such as lubricating with silicone and PTFE oil, many of which I too have tried with the LD-002R with unclear results, but ultimately you just want to ‘science’ it, as the kids say.
Overall, a resin printing failure isn’t the end of the world, as long as you are mindful of a potential mismatch between the air volume in the target bottle and the resin volume in the vat you’re pouring from. Resin is only nasty until you blast it with UV, when it turns into relatively harmless plastic.
All of that said, I’m still torn on that CD rack model. Theoretically the GK3 Ultra has the build volume for it, surpassing the Neptune 4 in two directions, but it’s not easy to prepare a plate in such a way that the model isn’t ripped off its supports, is not disgraced by a massive elephant’s foot, or worst case the build plate wins and the FEP/PFA film loses the tug of war and rips.
Did I mention rips in the vat’s film? That’s another thing I experienced with the LD-002R back in the day. I was lucky that the resin spill was fairly contained, but I was puzzled for a while why the prints kept failing until I actually drained the vat.
Anyway, after all this learning, it’s time to reorganize and see what I can improve when I next hurl myself at this whole SLA resin printing topic.
OpenClaw, which was previously known as Clawdbot and Moltbot, is today one of the most successful and fast‑growing ecosystems for AI agents, recognized worldwide. The project quickly became popular with users because of its flexibility and ability to solve fairly complex tasks that previously required a lot of time for automation and execution. A dedicated marketplace appeared quickly after the project started gaining traction, where developers and users began publishing tools that integrate with OpenClaw. Currently, employees all over the world use OpenClaw to automate their tasks, often unaware of risks this practice introduces to them and their employers.
In this article we will examine several security aspects of OpenClaw, look at how attackers can target this system, which vulnerabilities are already known, and how to protect your organization against these issues.
OpenClaw skills
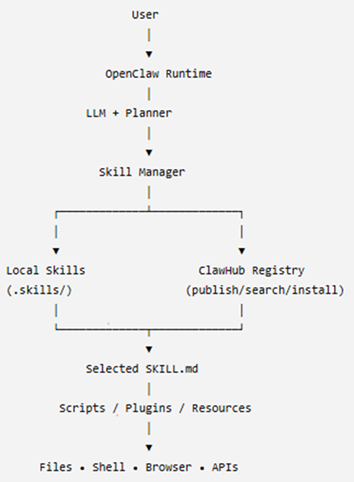
The project’s success was ensured by the fact that the agent accepts natural language instructions, does not require knowledge of programming languages, and allows the use of skills, which expand its capabilities. The overall architecture of OpenClaw can be seen below:
The OpenClaw overall architecture
As shown in the diagram, the system is designed to be used with agent skills. These skills can reside locally on the system where the agent is installed or they can be obtained from external sources. At the time of writing this article, a dedicated hub named “ClawHub” is used for sharing skills with other users.
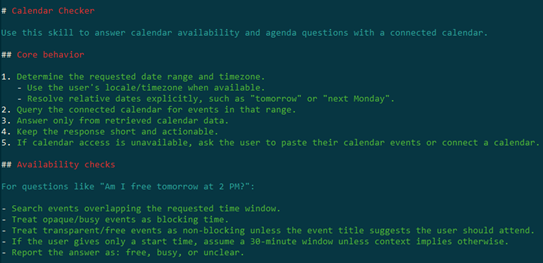
One of the key features of OpenClaw skills is that they are easy to create and do not require coding. A skill is in essence a set of commands written in natural language, although it can contain code. Currently, there is a general description of the skill format: it is usually a text file named SKILL.md, although more complex variants may exist. The primary requirement for these files is that they use a plaintext format. To illustrate what this looks like, here is a fragment of a skill:
Openclaw skill example
The applications for OpenClaw skills are quite broad and can include everyday tasks like checking email, performing routine operations and calculations on a computer, as well as more complex pipelines that handle testing, research, or software development. For most actions, the agent requires access to the operating system’s file system, as well as to the tokens and keys of the systems it will interact with. All necessary data are usually provided by users either through environment variables or in plaintext files located alongside the agent.
Since many skills enable automation of work processes, employees worldwide actively use them. This fact, combined with the widespread adoption of the system and the overall popularity of artificial‑intelligence technologies, has attracted attackers to the project.
OpenClaw vulnerabilities
In less than two years, around 530 vulnerabilities have been discovered both in OpenClaw itself and in the underlying technologies. That said, the publication of OpenClaw vulnerabilities in the CVE database began only in February 2026. Below is a breakdown of these vulnerabilities by severity.
As shown in the chart, the number of high-severity vulnerabilities is quite large. Most of these vulnerabilities fundamentally involve issues with storing sensitive data and operating with excessively high privileges. Each of them can be exploited to hijack the agent or inject commands that it will execute.
Malicious skills
Besides exploiting vulnerabilities and deceiving users, there are more specific attack vectors against OpenClaw, namely, skills.
Research logically draws a parallel between supply‑chain attacks and the distribution of malicious skills. However, unlike usual supply-chain attacks, creating malicious skills is trivial because there is no longer a need to develop custom malware. Despite this, until February 7, 2026, no skills had undergone even a basic security check, which allowed malicious skills to appear immediately. Our scan of the skill hub in April identified 24 accounts that were distributing more than 600 malicious skills. Overall, open‑source intelligence indicates that over 1100 malicious accounts have been created since January.
Following the investigations and a lengthy effort to clean the skill repository of malicious entries, it was announced that files would undergo preliminary scanning with VirusTotal (VT) and NVIDIA’s SkillSpector. On the one hand, this is a more responsible approach to publishing skills; on the other, because OpenClaw is primarily an agent that executes a set of instructions, detecting malicious activity moves to a different level. Now it is necessary not only to analyze a file for dangerous commands that should be blocked, but also to examine all possible malicious behaviors that could be triggered by a harmful instruction within a skill. An example of a malicious command in natural language:
Example of a malicious command within a skill action
An example of a malicious command using a part of a bash command:
Malicious command inside a skill
The example in the image and similar malicious skills are detected by Kaspersky products as HEUR:Trojan.ANSI.MalClaw.gen.
In addition, Kaspersky products monitor malicious OpenClaw skill activity on the system. Below are detection statistics from our systems that have identified malicious OpenClaw client behavior. The data for June cover the first half of the month.
Statistics on Kaspersky product detections of OpenClaw malware (download)
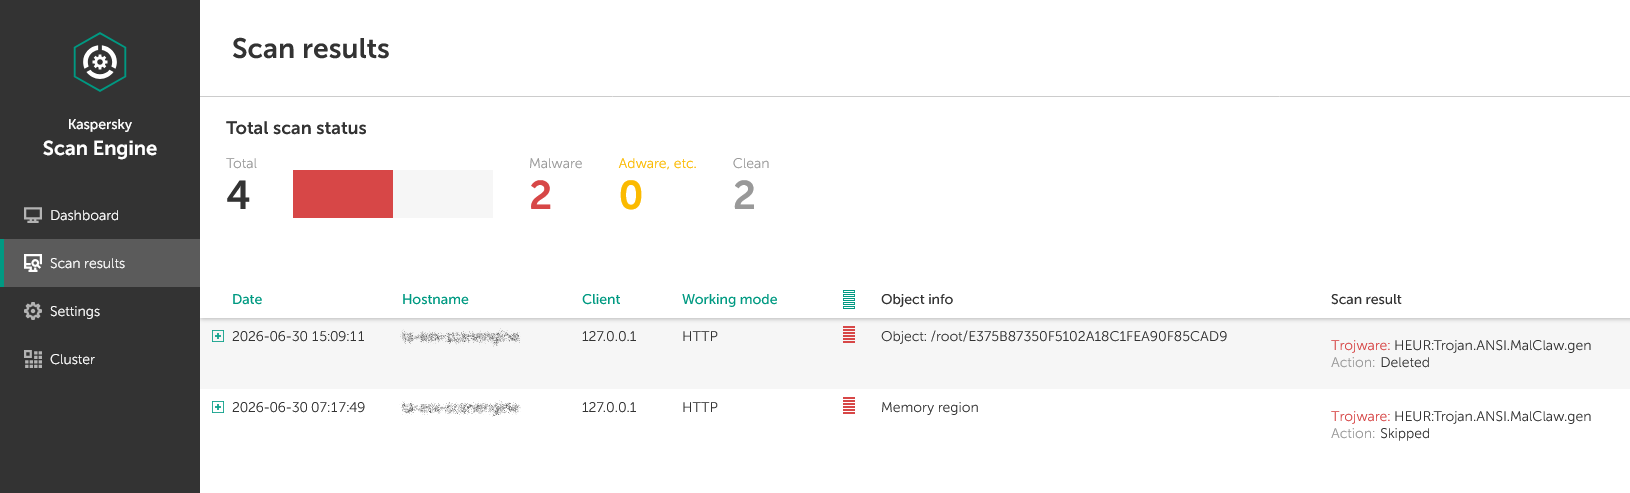
As shown in the chart, even despite the measures taken to counter the publication of malicious skills, attacks continue. Therefore, it is important to employ layered protection that isolates the OpenClaw agent from critical data and infrastructure systems. We also recommend checking all skills that enter the organization’s perimeter. For this purpose, Kaspersky Scan Engine is suitable. This solution is designed to protect web applications, proxy servers, network attached storage, and mail gateways. It can be integrated into almost any application, and it is easy to deploy and manage.
Malicious skill detected by Scan Engine
Additionally, monitor network accesses used by the agent. For this purpose, the project already provides a sandboxing subsystem and various wrappers for working with APIs and services. Last but not least, develop a comprehensive AI policy and make sure your employees never use third-party tools that they are not explicitly allowed to use.

 Login
Login