As technologies change and adapt, we’re often left with seemingly useless junk that has nowhere to go. Certainly anyone still sitting on a pile of floppy disks feels this way sometimes, but odds are anyone who owns a mining ASIC or an NFT can attest to that as well. The trillions of dollars flowing into GPU-based data centers will likely become the next victim of this trend, so if you want to capitalize on the losses of some venture capitalist you’ll want to figure out a way to get GPUs meant for a server into your desktop doing useful work.
Of course, calling these devices GPUs is a bit of a stretch compared to the Radeon and GeForce cards many of us are used to using for gaming. These don’t even have a PCIe slot or video output, after all. But, as [Oscar] notes, the VRAM and GPU cores are very real and can still do useful work. An adapter board is able to mate a Tesla V100 SXM2 16 GB GPU to a standard PCIe slot, which solves the first problem, but the major downside from there is that the cooling fan for this unit was literally deafeningly loud. At 82 dB it was about as loud as a lawnmower, which is fine in a server rack but not great in a bedroom. [Oscar] found a way to tamp down the fan speed, making it usable in a home.
Without video output, the utility of these cards mainly comes from adding VRAM and compute for tasks that benefit from parallel computing. Using tensor splitting, [Oscar] is running a local LLM with this card alongside his RTX 4080, providing 32 GB of VRAM on his NixOS system. With his benchmarking tests, the LLM sports impressive stats for a self-hosted model, ranking somewhere around Claude Sonnet 4.6. What’s even more impressive is that this is all done for around £200, and with the rate the various LLM companies are ratcheting up pricing could pay itself back very quickly. If trading off performance for cost is acceptable, though, it’s possible to run local models on much less powerful hardware as well.
This week Jonathan chats with Nariman Jelveh about Puter! It’s the project that takes the idea of the Browser-as-the-OS seriously. Why did a simulated desktop on the web take off, what the story of making it Open Source, and what’s coming next? Watch to find out!
Did you know you can watch the live recording of the show right on our YouTube Channel? Have someone you’d like us to interview? Let us know, or have the guest contact us! Take a look at the schedule here.
Between the speed and reliability of modern desktop 3D printers and the abundance of powerful single-board computers, there’s never been a better time to build a personal computing device that bucks traditional forms for something more bespoke. Whether you want to go all in on Gibsonian cyberdeck aesthetic or a distraction-free writing device to take notes on, there’s no shortage of examples out there that you can turn to for inspiration.
A recent entry into the field, the Don’t Panic Cyberdeck from [Paul Rickards], is a particularly approachable specimen for those looking to experiment with alternative computing experiences. While the final product certainly stands out among the throngs of nearly identical laptops, it doesn’t take a huge investment in time or money to put one of your own together.
Which is not to say the project is simplistic, exactly. Rather, as [Paul] released the design under the Creative Commons license and was kind enough to provide not only a detailed Bill of Materials but assembly instructions, the community is able to benefit from the sleepless nights he no doubt put into it.
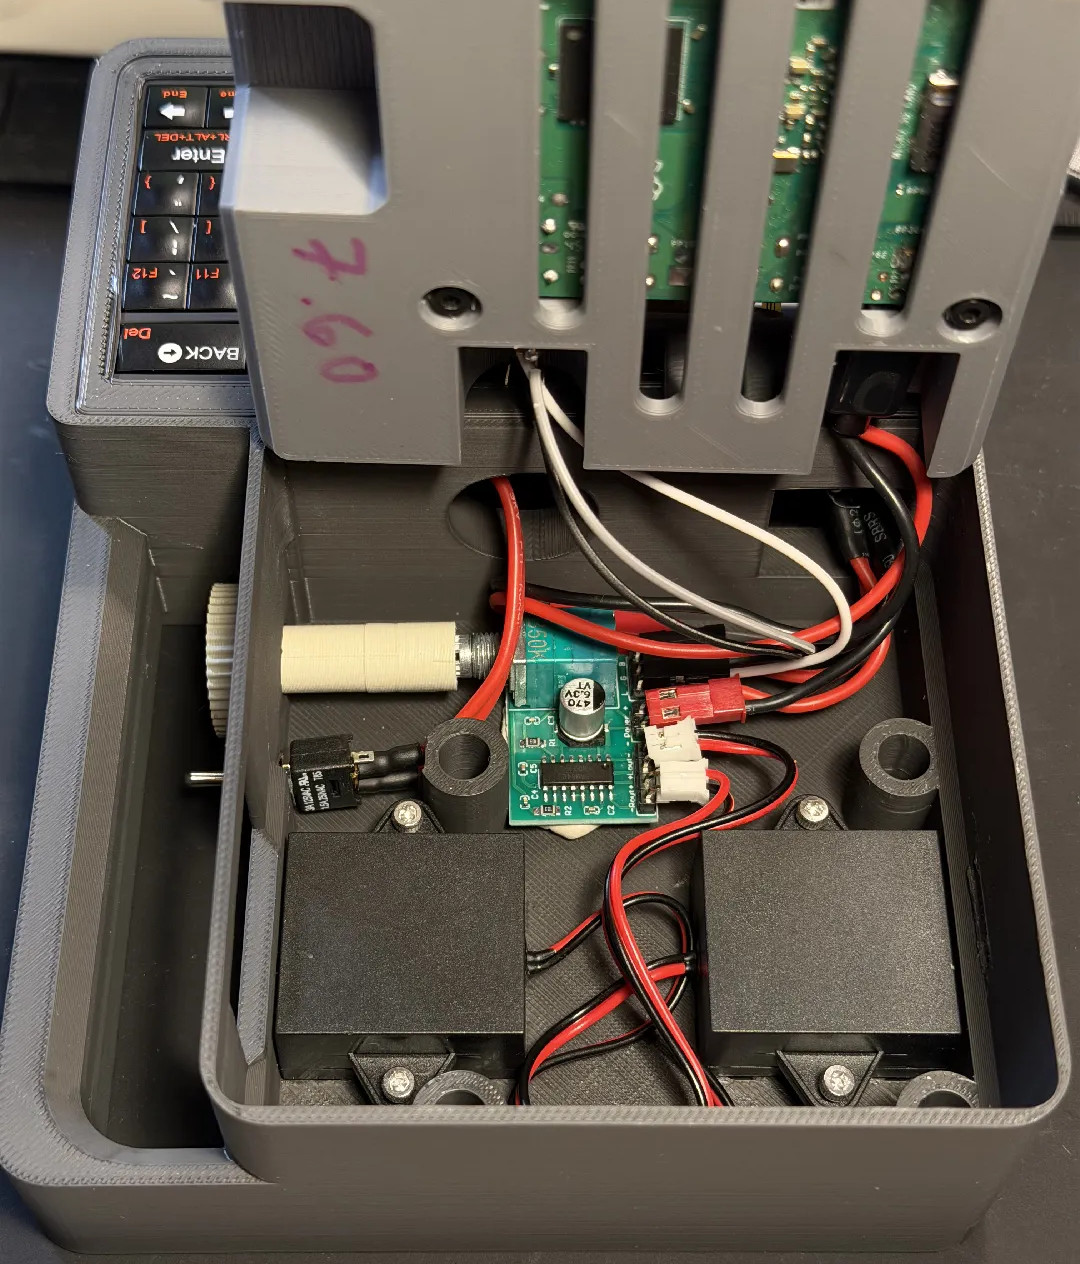
In it’s baseline configuration, the Don’t Panic uses a Raspberry Pi 3A+, a Pimoroni HyperPixel 4.0 Square LCD (touch optional), and a Rii 518BT keyboard. Those core components would be enough to get you up and running, but if you want battery power you’ll also need to add a LX-2BUPS UPS board and a pair of 18650 cells. Audio might be nice as well, and for that [Paul] recommends a PAM8403 breakout board. He’s even got a printable volume knob that slips over the board’s potentiometer and peeks outside the case.
On the one hand, the original Apple II has been copied over and over again since at least the early 80s, so maybe this hack is old hat to the greybeards around here. On the other hand, this is the year 2026. When Apple released it back in 1977, who could have predicted people would still be building these things nearly five decades later?
In that sense, a homebrew Apple II in the current year is pretty remarkable. It’s a really well done project by [simonboak], nicely open sourced with a case to match, so is worth looking at on its own merits.
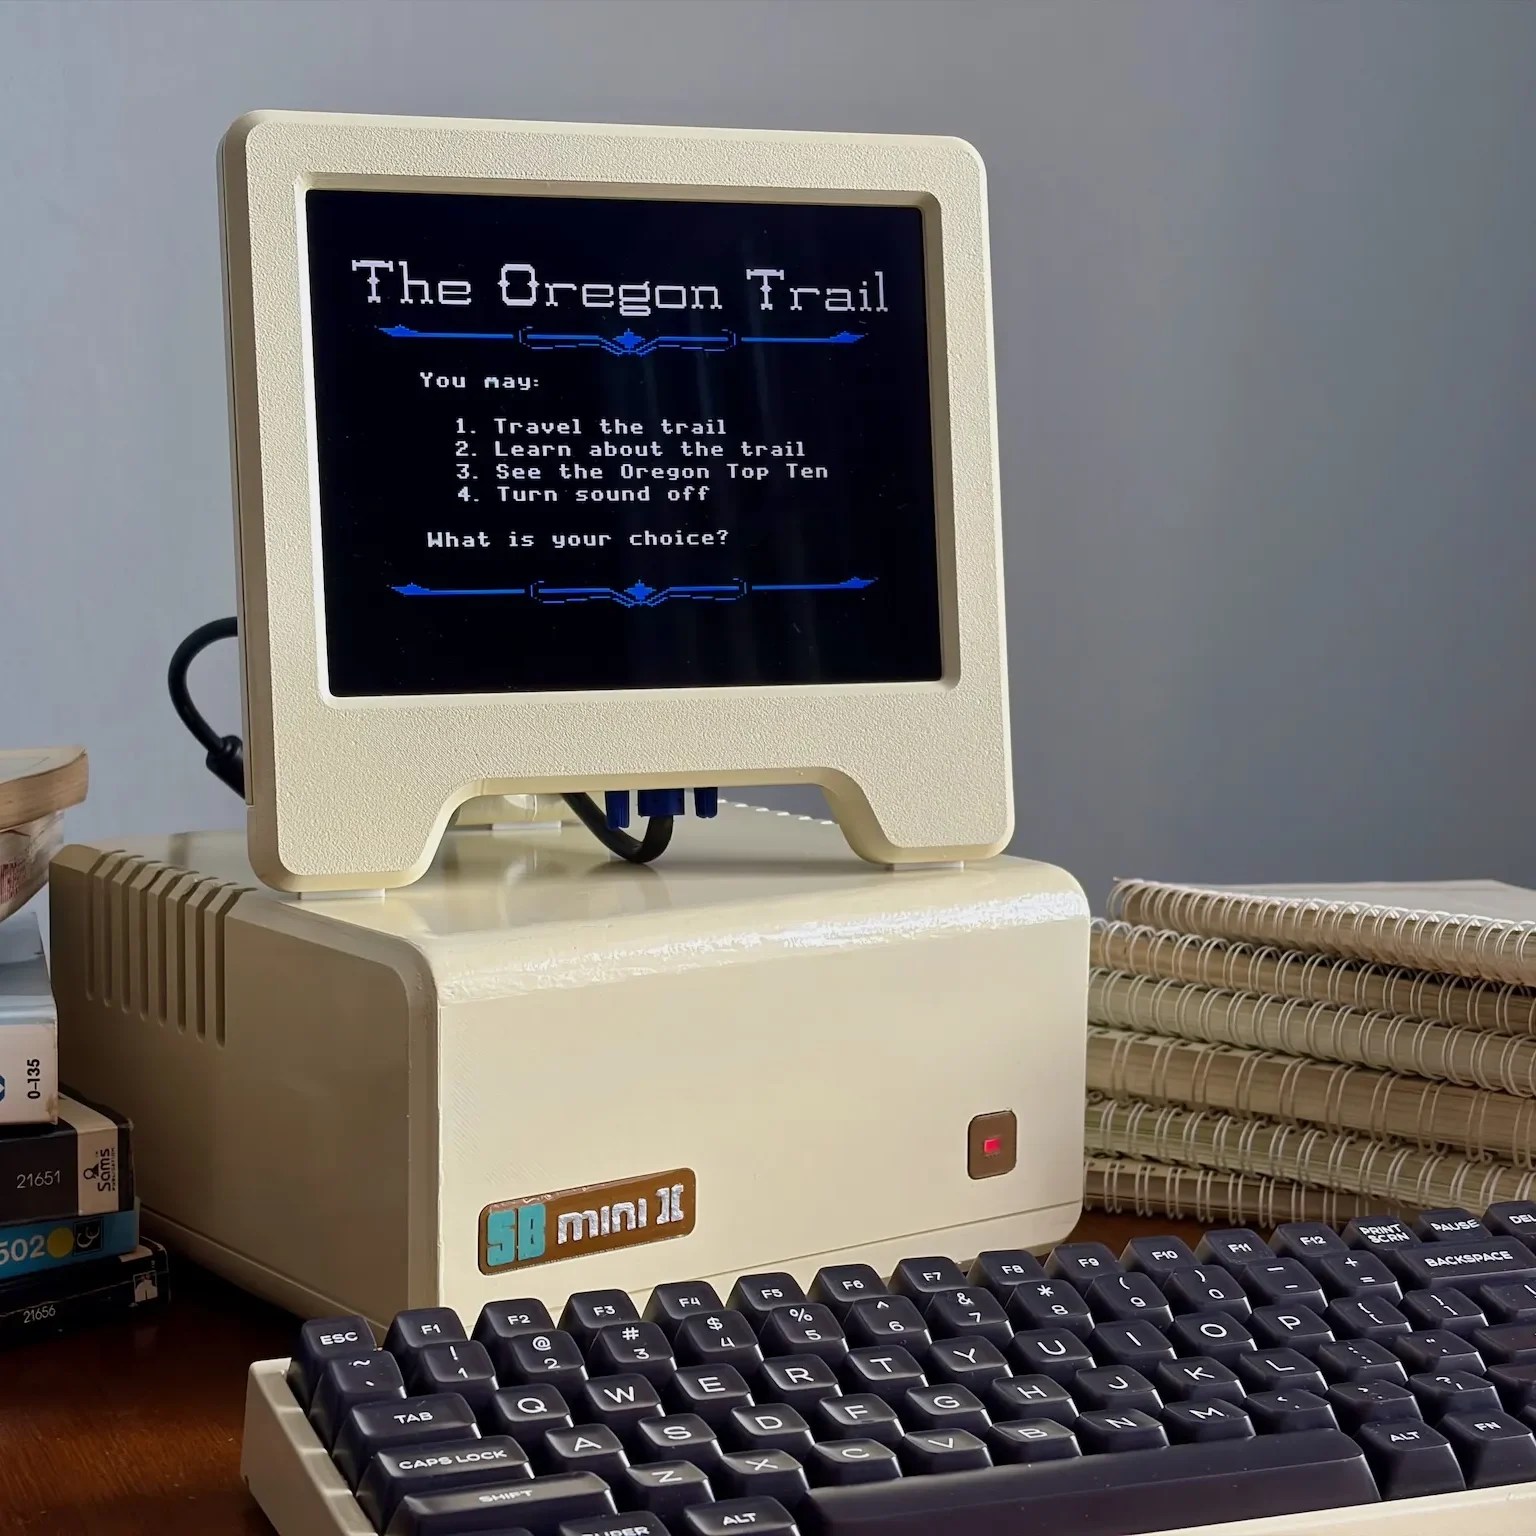
It doesn’t run DOOM, but neither did the original. Oregon Trail is more this unit’s speed.
Unlike the later models, the original Apple II only used commercially available ICs, making it an easy target for recreation. No FPGAs required, just good old-fashioned DIPs. OK, these are modern CMOS versions of the chips, but other than that, the biggest concession to modernity is space on the board for a Raspberry Pi Pico to allow for connecting a USB keyboard.
The accompanying blog post lists some other differences from 1977’s favorite home computer: SRAM vs DRAM — because you know the Woz would have used it if he could — and omitting the composite video circuitry in favor a late-model VGA card. There’s no need for the composite output since he’s eschewing the period-appropriate CRT for a retro-styled LCD monitor, which is also 3D printed and available on Printables. It’s crazy to think that the Apple II family lived long enough not only to see the dawn of VGA but also well into its sunset.
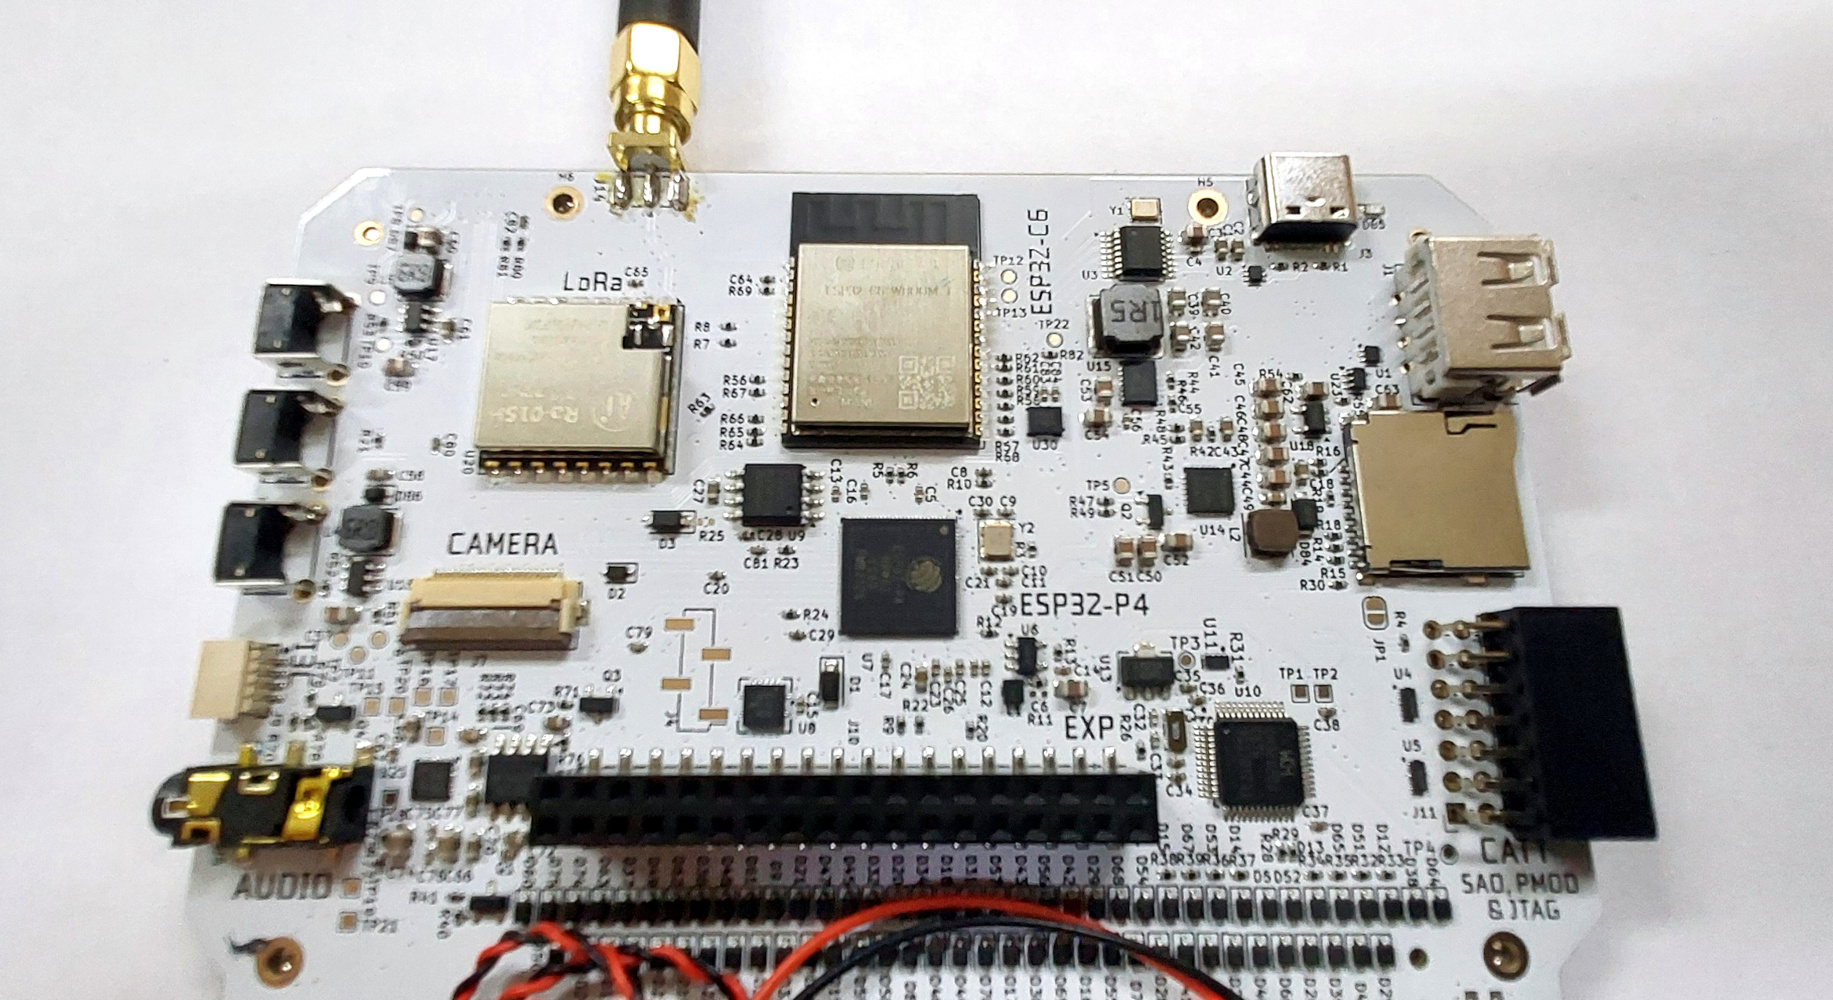
The bare PCB, with the expansion connector bottom centre.
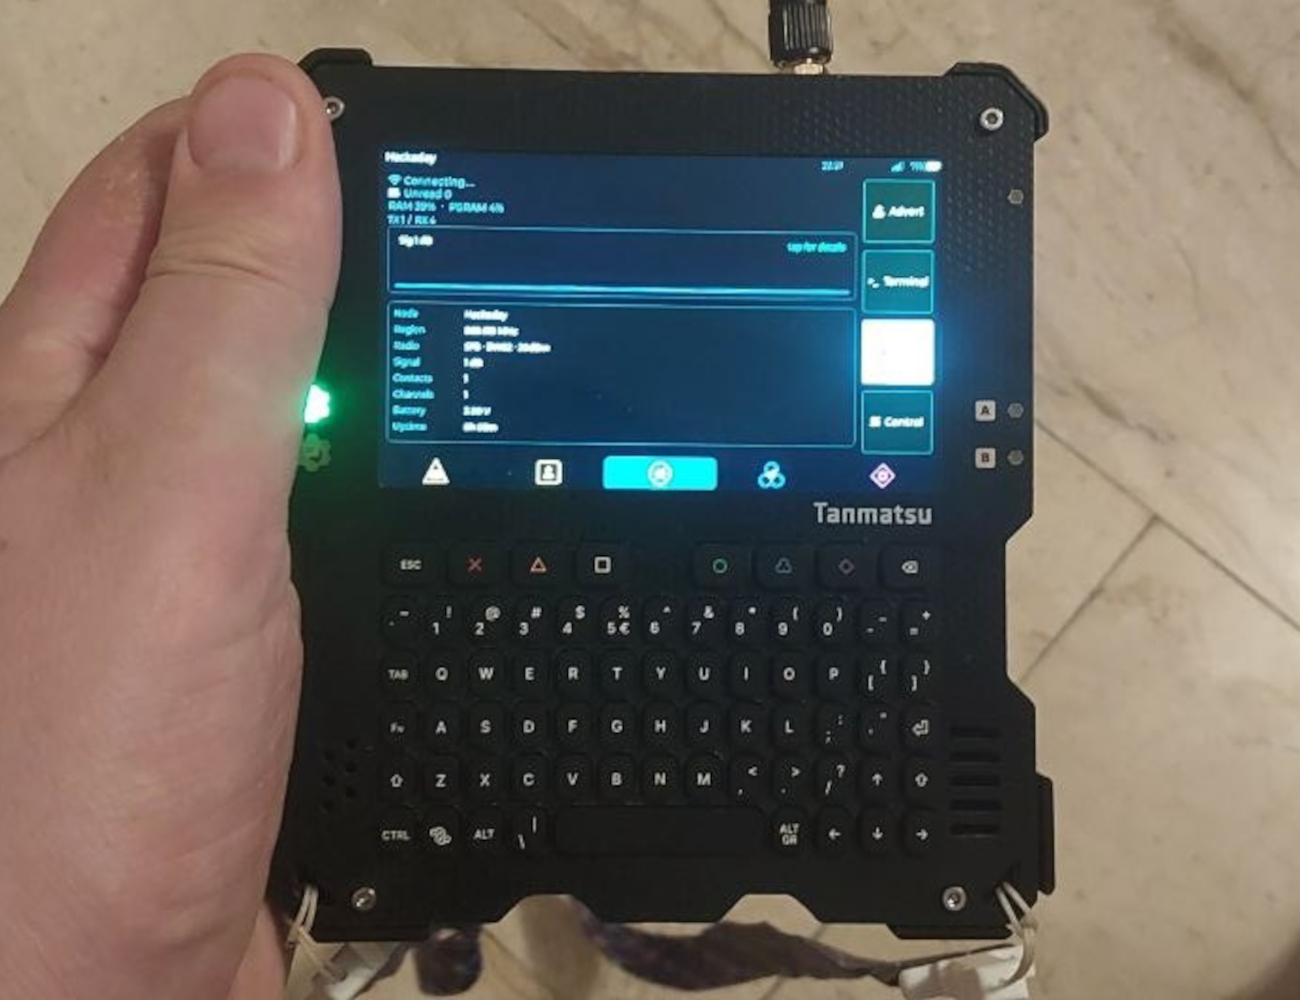
The Tanmatsu (Japanese for “Terminal”), is a general putpose palmtop computer based around an ESP32-P4 application processor from Espressif. It takes the form of a PCB and PETG 3D printed sandwich, with the front face PCB sporting a silicone QWERTY keyboard and an 800×480 MIPI DSI display. The keyboard should be familiar to many readers, being the same moulding as the Solder Party KeebDeck which has appeared on other devices.
Under the hood that P4 has two 400MHz RISC-V cores and 32MB of PSRAM with 16MB of Flash, and there’s an ESP32-C6 for WiFi, BLE and IEEE 802.15.4 mesh networking. There’s an Ebyte LoRa module with an SMA antenna too, which can be had in 868, or 915MHz versions depending on where in the world you live.
For interfacing there are USB A and C ports, and SD card socket, a 3.5 mm jack for audio, and three expansion ports. On the right side a Qwiic compatible socket, on the left a socket with PMOD and SAO capabilities, and on the rear under the cover, a CSI camera connector the same as the Raspberry Pi, and a much larger expansion socket with all the various signals, planned for add-ons. It’s all powered by a chunky 2500 mAh LiPo which can be charged through the USB-C port.
Because I know the folks behind it I’ve watched it grow from its origins in a souped-up version of the MCH2022 badge into its current form, indeed I bought my Tanmatsu just over a year ago. Due to those origins in the Dutch badge team, this device is open-source. The Tanmatsu is a commercial version produced and sold by Renze Nicolai, its designer, while the Konsool is its community cousin. You can find its mechanical hardware here, its electronics here, and its firmware here.
An App Repository For Your Creations
Turning the Tanmatsu on, after a synthwave-inspired splash screen you find yourself in a graphical menu. The user interface is pretty intuitive to anyone used to a desktop GUI or a modern smartphone, along the top are status icons for SD card, Wi-Fi, and battery, the main body of the screen has a grid of icons, and along the bottom is a list of the various keyboard shortcuts. Navigation is via a set of arrow keys with the return key selecting an option, and a set of coloured function keys handle special functions.
Meshcore is only a download from the repository away.
On first start-up the Tanmatsu has no apps installed, so the first order of business is to connect to a Wi-Fi network and update the firmware through the Settings. It takes a while to do this as it can update the firmware on the P4, the C6, and the microcontroller it uses for housekeeping. A feature I like is that this is the first device from the world of badges I’ve seen that can hold more than one set of Wi-Fi network details rather than requiring me to change the settings at each location.
With a freshly updated Tanmatsu you can open the repository, this device’s app store, and download some apps to get started. This is a long-standing badge.team feature, in that badges going back to their SHA 2017 offering have had downloadable apps. The apps are sorted into categories for easy navigation, and in my case there are immediately two apps I have installed, the Tamatype camera app for my Pi camera add-on, and from the choice of two different Meshcore apps, Wadamesh.
The apps themselves come in two forms, either ones written in an interpreted scripting language such as MicroPython, or those compiled directly for the P4. It doesn’t ship with a script engine installed, however MicroPython is downloadable as an app from the repository. This is not a multitasking device so the front-end is a launcher, and after running an app the screen will flash blue for a moment as it loads. Each app has a metadata file which instructs the Tanmatsu what to do with it, an icon file, and a folder containing its executable components. There’s a comprehensive online guide, should you wish to try developing your own apps.
In use the Tanmatsu is convenient to hold and type with using two hands. The display is clear and bright, and the keyboard while a little on the small side has a positive click action. Using the apps depends on the individual choices of the app developer, but the interface conventions are straightforward. I’ve been using it for Meshcore for a while now, and it makes a very handy terminal indeed.
In A Niche Of Its Own
The price of a fully assembled Tanmatsu is 99 Euros, plus Dutch sales tax if you live in the EU, and shipping. The good news for Americans in an age of uncertain tariffs is that I’m told they will be shipping from a US warehouse in the next few months. It’s worth considering for a moment where this places the device in the ecosystem of similar computers.
It’s relatively simple to make a handheld Linux cyberdeck using a Raspberry Pi board, however once the price of new peripherals and parts is taken into account it’s not necessarily a cheap project. There are quite a few similar-sized Linux devices on the market whose prices reflect this at about twice as much. Thus I think that the Tanmatsu fits in a middle zone between development boards that come without the screen, battery, and keyboard, and those Linux handhelds that are all-singing all-dancing.
In its favour it’s as far as I know the only P4 device on the market with a mature operating system and particuarly an app repository, but if only Linux will do, it’s unable to deliver. Where I think its niche lies is in being simple and low power enough to be a reliable and powerful hacker’s communicator and general purpose toolkit, but cheap enough to remain a reasonable purchase. For now it stands alone in that niche, and only time will tell whether it can successfully define it.

 Login
Login