With VHDL being arguably more deterministic and bullet-proof than Verilog, it’s good to see another open source VHDL simulator joining the fray that is not a variation of ghdl. Written by [Óscar Grimal] in C++ with an MIT license, the Pulse project is a still in progress package that provides the entire toolchain, from the compiler to the requisite waveform output.
This waveform output is provided in the form of a text-based user interface (TUI), which at the very least helps a lot with making it cross-platform compatible. As dependencies only a C++20 capable compiler and CMake are indicated.
Of course, with VHDL being a rather hefty language especially once you start piling up the associated standard library, the currently supported language and library features are somewhat limited still so that you’re limited to basic IEEE packages and types, with default values are not supported yet.
Per the roadmap on the GitHub project’s Readme more VHDL language features including generics and additional types will be added, along with an enhanced simulation engine. It’s also said that mixed-language support with Verilog will be added, though SystemVerilog looks to be getting the short end of the stick as usual.
It will definitely be interesting to compare this package to ghdl.
When you see a listing for an Ethernet switch whose specification list is in effect ‘yes’, with a four-digit price tag when new, and with the seller asking for less than 10% of said $3,000 asking price in an ‘untested’ condition, the only rational thing to do is of course to mash that ‘buy’ button. This is what [This Does Not Compute] did, and created a video about to show what a great investment decision this was.
Naturally this Juniper EX4100-F-12P switch came without power supply brick for its 48VDC input. Figuring out its pin-out and probing said input showed that the voltage rails had been shorted, giving a first clue as to why this switch had been on sale for so very cheap. Bravely hoping that it would be a straightforward fix, the unit was disassembled.
With a 280 Watt power brick, it’s little wonder that the top of the unit is a one massive aluminium heatsink, including a large heatpipe. Also visible on the lid near the power input was a very-bad-news black skid mark.
From that first discovery the news just got worse and worse, with clear signs of water ingression, rust and corrosion, along with the aftermath of a powered circuit meeting such bad corrosion. After some clean-up it’s clear that some components had violently exploded, ripping apart layers of the PCB and likely parts of traces in those inner sections too.
With no schematics available and no other good repair options via Juniper or anywhere else, it seems that unfortunately this gamble turned out to be merely a pile of e-waste and a few bucks worth of scrap metal. Caveat emptor, once more.
For a little while vacuum tubes and semiconductors were fighting a heated battle for dominance, with bipolar junction transistors and 1959’s RCA Nuvistor both allowing you to build a compact circuit with relatively low power usage and no high voltages. Although we now know that semiconductor technology won out overwhelmingly, that doesn’t mean that you cannot build a brand new Nuvistor board in 2026, as [Eric Schlaepfer] AKA [TubeTimeUS] recently did.
Nuvistors saw their most use in small-signal radio frequency applications, like VHF and UHF, with excellent low-noise characteristics that saw them used until the early 1970s in television sets, radios and oscilloscopes, as well as in space probes like the 1960s US Ranger Moon missions, so by that metric they had a good run.
Nothing so exciting is built in this video, sadly, but alongside a breakdown on how nuvistors work, we do see a discrete 555-style timer built using a gaggle of tetrode nuvistors, giving a pretty good idea of what using them in a project is like. Being a vacuum tube at its core, nuvistors still have the heater element, which is what gives vacuum tubes their reputation for being slow to start working and large current draw.
Despite their drawbacks, nuvistors still have a range of benefits compared to modern-day transistors, including being practically immune to electrostatic discharge (ESD) and electromagnetic interference (EMI) all the way up an EMP that will destroy most semiconductor electronics.
That said, the somewhat limited 8-nuvistor implementation of the 555 had to get a few extra pins for the heater supply, which burns up about 7.5 Watt just to allow the circuit to function. Terming it the ‘hollow-state 555 timer’, it works effectively just like any semiconductor 555, just with that extra power cost and of course no significant prospect of making it smaller, barring a semiconductor evolution as with the pixels-sized CRTs in the SED and FED type displays.
We covered the nuvistor before, including a great reference on this device, and its history that was much longer than people often assume today, as well as the vacuum tubes we use every day in for example our microwaves.
The revival in film photography has brought a range of specialist films to tempt the experimenter, as well as increased the popularity of loading your own cartridges. But perforating the film from blank stock has always been beyond the reach of home gamers. Now [Jon Schiereck] has done it, but not quite with film. He’s made a perforator for photographic paper, producing a strip which can be shot in a camera. It’s film, but it’s not exactly film.
The machine takes the form of a 3D printed mechanism which feeds a strip of photographic paper through a pair of punches to make the sprocket holes. In this case those holes are circular, being made by a pair of drill bits ground for the purpose, and they’re moved up and down by a crank driven by a set of gears from a hand crank or even a cordless drill. A rubber roller pulls the film forward.
It seems to be a well-thought-out machine, and you can try it yourself for free via a slightly unusual distribution medium, his Ko-Fi page. In case you’re worried about finding a slitter to make those 35mm paper strips, it seems he’s also working on a 3D printable one of those. So you can shoot on paper, and develop it just as you would a print.
If you’re further into extending what you can film through the use of a 3D printer, how about 8 mm movie film?
Expressif might not have intended the ESP32-S3 to become an emulation powerhouse, but that’s certainly what has happened. The little microcontroller seems perfect for recreating the Game Boys or Game Gears of years past, and there are a lot of software options to that end. Having grabbed firmware off a github repo, you still need a physical build to hold, and that’s where this one by [HVT Lab and Huy Vector] stands out.
As you can see, they’re letting everything hang out — not even in a 90s-inspired clear case, but with an open frame of soldered brass, with just a small strip of 2 mm clear acrylic to help stabilize the buttons. That appears to be held with cyanoacrylate glue, but it’s brass and solder doing the majority of the structural work here. We might be a little more confident tossing this lovely device in a bag or pocket if the whole device was boxed in with that acrylic — shorting the exposed power bus on your keys sounds like a bummer — but we can’t argue with the aesthetic vision here. It’s a lovely build on the physical end.
From the video it looks like the software is based on Retro-Go, which we’ve seen in use before. In any case, there are plenty of open source projects you could load onto the ESP32-S3 powering this circuit sculpture, though, from NES to IBM PC.
The Philips PM5139 is not famous. It won no great victories on the battlefield, nor was instrumental in changing the political landscape. It was just a useful function generator that you might find on a workbench somewhere, doing its job quietly and relatively accurately. [doctormord] has been doing the work to reverse engineer this humble piece of hardware.
The PM5139 is poorly documented; the only existing service manual out there is for the PM5138A, a less-capable sister model. Hence, there was some value in reverse engineering the device to understand it better. Work started with two EPROM dumps capturing what Philips put in the box all the way back in the early 1990s. From there, the code was examined and tinkered with until [doctormord] felt confident to modify it and improve upon what was already there. This was achieved with the aid of an 8051 emulator that could run the code to make it obvious what was going on. The result was a custom “V2.0” firmware that adds six arbitrary waveforms to the function generator and the ability to play simple music, amongst other tweaks.
Resin 3D printing has opened up a whole new scale of resolution for hackers, but the technology can go still finer; commercial micro-SLA and two-photon polymerization printers can print items with sub-micron feature sizes, but the machines are well out of reach for hackers. There’s more than one way to get such high resolution, though, as [Diffraction Limited] demonstrated with his micron-scale resin printer.
The printer builds on [Diffraction Limited]’s previous micro-manipulator and fiber-coupled laser. The micro-manipulator holds the end of the optical fiber just in front of the build plate, which is coated with resin. A 405-nm laser shines through the fiber, curing the resin in a narrow cone in front of the fiber’s core, which the micro-manipulator can trace in a pattern to build up objects, much like an FDM printer. Since the fiber’s inner core is only three microns across, the cured resin shears cleanly away from it when the fiber moves. Since the principle is so similar to an FDM printer, a standard slicer could be used to generate the tool paths.
Early testing proved that the principle worked, but the resin wasn’t absorbent enough for very high resolutions; UV light passed through previously cured resin too easily, limiting the minimum layer height. A UV-absorbent dye dissolved in the resin solves this by limiting the light’s penetration depth. [Diffraction Limited] found that curcumin, the natural dye responsible for turmeric’s bright yellow colour, worked well for this; as an added bonus, alcohol easily extracts it from turmeric powder. This solved the resolution issues well enough for [Diffraction Limited] to print a series of Benchies 150 µm long, a Stanford bunny dwarfed by a human hair, and a few other microscopic pieces. Conveniently, the curcumin dye leaves the printed objects slightly fluorescent under UV light, making them easier to pick up under a microscope.
While the Citroën logo they project onto the pavement looks great, [OrangeTungsten] wasn’t thrilled with how their door-mounted projectors actually functioned. The mechanism for detecting when they should kick on was a bit too clever for its own good, and needed to be simplified a bit. Luckily for us, the process was meticulously documented for anyone else who might find themselves in a similar situation.
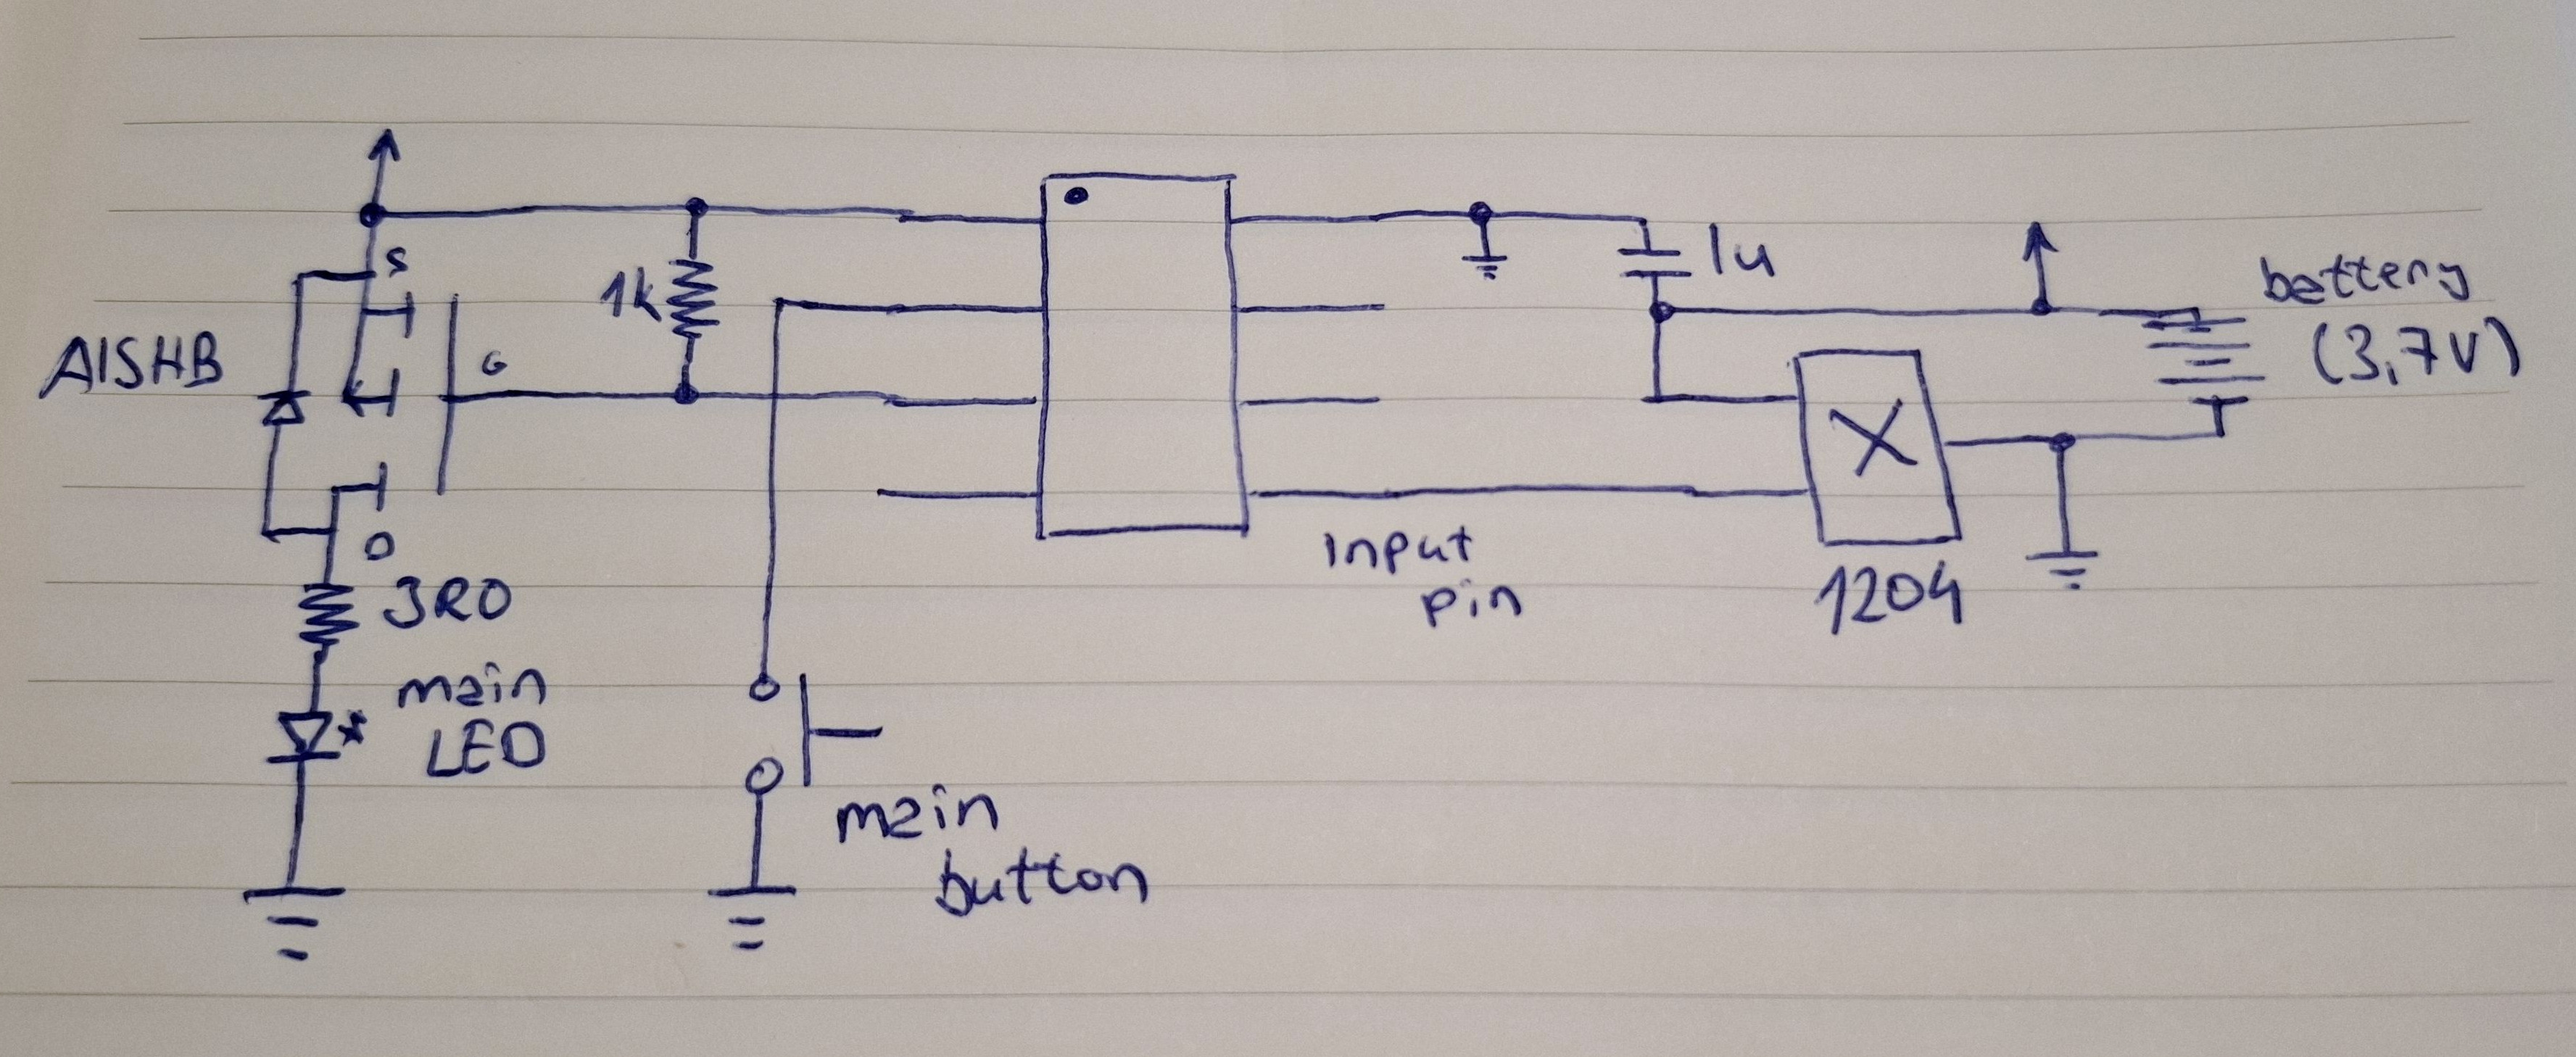
Originally, the projector detected when it should turn on by sensing the presence of a tiny magnet using a Hall effect sensor. There are certainly some advantages to this approach, but in practice, [OrangeTungsten] says the retrofitted magnet would keep falling off and leaving the projector inoperative. The fix was simple enough: figure out how the circuit worked, pull out the Hall effect sensor, and replace it with a simple button that would physically make contact with the door frame.
It’s not a terribly complex fix, but it’s a clever solution and well documented, and that goes pretty far around these parts. We were also interested in this one because an examination of the electronics inside the projector uncovered a 8-pin microcontroller — the sole purpose of which would appear to be polling the Hall effect sensor and using its status to throw a transistor which in turn powers the LED.
It’s hard to believe that whoever designed this gadget couldn’t figure out how to turn an LED on and off without a MCU, but we’re living in strange times. We assume there’s some kind of justification for this, such as some flashing or fading effects, but [OrangeTungsten] never mentions the things doing anything more complex than simply turning on and off.
Whatever the rationale was behind the original design of these projectors, the important thing is that the application of some hardware from the parts bin got them up and working again, which is something we never get tired of seeing.
If you used a scientific calculator in the 1970s or 1980s, there was a fair chance that it worked differently from almost every calculator you see today. Instead of typing:
2 + 3 =
you entered:
2 ENTER 3 +
There wasn’t even an equals key. Hewlett-Packard made this system — Reverse Polish Notation, or RPN — practically synonymous with serious scientific calculators until other players like TI and Casio got serious. Once you got used to it, ordinary algebraic calculators could feel annoyingly clumsy.
Today, RPN calculators look like a nearly extinct species. HP left the calculator market, licensing the HP calculator line to Moravia Consulting. Old HP-15Cs, 16Cs, 32Ss, 42Ss, and 48s have become collectibles. But RPN isn’t dead. You can still buy new hardware, build your own, or turn almost any computer or phone into a very capable RPN machine. There are reasons some of us still want to.
But Why Polish?
The name goes back to Polish logician [Jan Łukasiewicz], who devised a notation in which operators precede their operands. Instead of writing:
A + B
you can write:
+ A B
The big advantage is that parentheses aren’t required. The structure of the expression tells you exactly what operates on what. Reverse Polish notation simply puts the operator at the other end:
A B +
[Łukasiewicz] wasn’t designing calculators, of course, but the same idea turned out to be extremely convenient for computers and calculators. Your software doesn’t have to remember what operation is in progress. Each operator is ready to go and can simply work on the operands that you’ve already read.
RPN isn’t exactly the way people calculate with pencil and paper, and it certainly wasn’t derived from the slide rule, but there is a similarity in the way you work. With a slide rule, you generally establish some value, operate on it, and continue from the result. When doing a long-hand calculation, you often calculate a subexpression, write down the answer, and use that answer in the next step. You will probably start with the inner parenthesis and work outward, just like someone with an RPN calculator does. RPN formalizes that process with a stack.
Suppose you want:
(3 + 4) × (5 + 6)
On a conventional calculator, you either need parentheses, or you have to calculate one result and remember it. On an RPN calculator:
3 ENTER

4 +

5 ENTER

6 +

×
The first + leaves 7 on the stack. The second leaves 11 above it. The multiply consumes both and leaves 77.
Notice what’s missing: parentheses, an equals key, and any need to tell the calculator about precedence. This isn’t much of a win for a five-key calculation. It becomes more apparent with something like computing the value of a bunch of parallel resistors:
R=1/(1/R1+1/R2+1/R3…)
An RPN user can calculate each reciprocal, add it to the running result on the stack, and finally take the reciprocal. Intermediate answers stay in the calculator naturally instead of being stuffed into memory registers or enclosed in increasingly impressive collections of parentheses.
Is RPN better? Calculator users have been arguing about that for half a century. But once RPN gets wired into your fingers, it can be surprisingly hard to give up.
RPN Before HP
Although RPN and HP are nearly inseparable in popular memory, HP didn’t invent the RPN calculator. That distinction generally goes to the Friden EC-130, introduced in 1964. It was a 44-pound transistorized desktop calculator costing $2,150, and its CRT actually displayed all four levels of its RPN stack at once. More than 18,000 were eventually made. You can even simulate it in Verilog, if you like.
HP entered the business in 1968 with the HP 9100A, a programmable desktop scientific calculator. It weighed about 40 pounds and sold for $4,900, but it provided logarithms, trigonometry, hyperbolic functions, coordinate conversion, programming, and RPN operation. HP famously called it a calculator rather than a computer partly because customers could often buy calculators without getting corporate computer departments involved.
Then came the machine that changed everything: 1972’s HP-35, the first HP pocket scientific calculator. From there, RPN became a defining characteristic of HP calculators for decades.
There were financial calculators, programmer’s calculators, scientific calculators, graphing calculators, and eventually the RPL machines such as the HP-28 and HP-48, which generalized the stack idea into an entire programming environment.
Eventually, though, algebraic entry won the mass market. Even HP began producing machines with algebraic modes, and some later calculators let you choose either system.
So did RPN die out? Are there any RPN machines left in 2026? Quite a few, as it turns out. The real question is do you want a calculator that pretends, in some way, to be your favorite old-fashioned RPN calculator, or do you want a more modern device that happens to use (or, at least, is able to use) RPN?
RPN You Can Still Hold In Your Hand
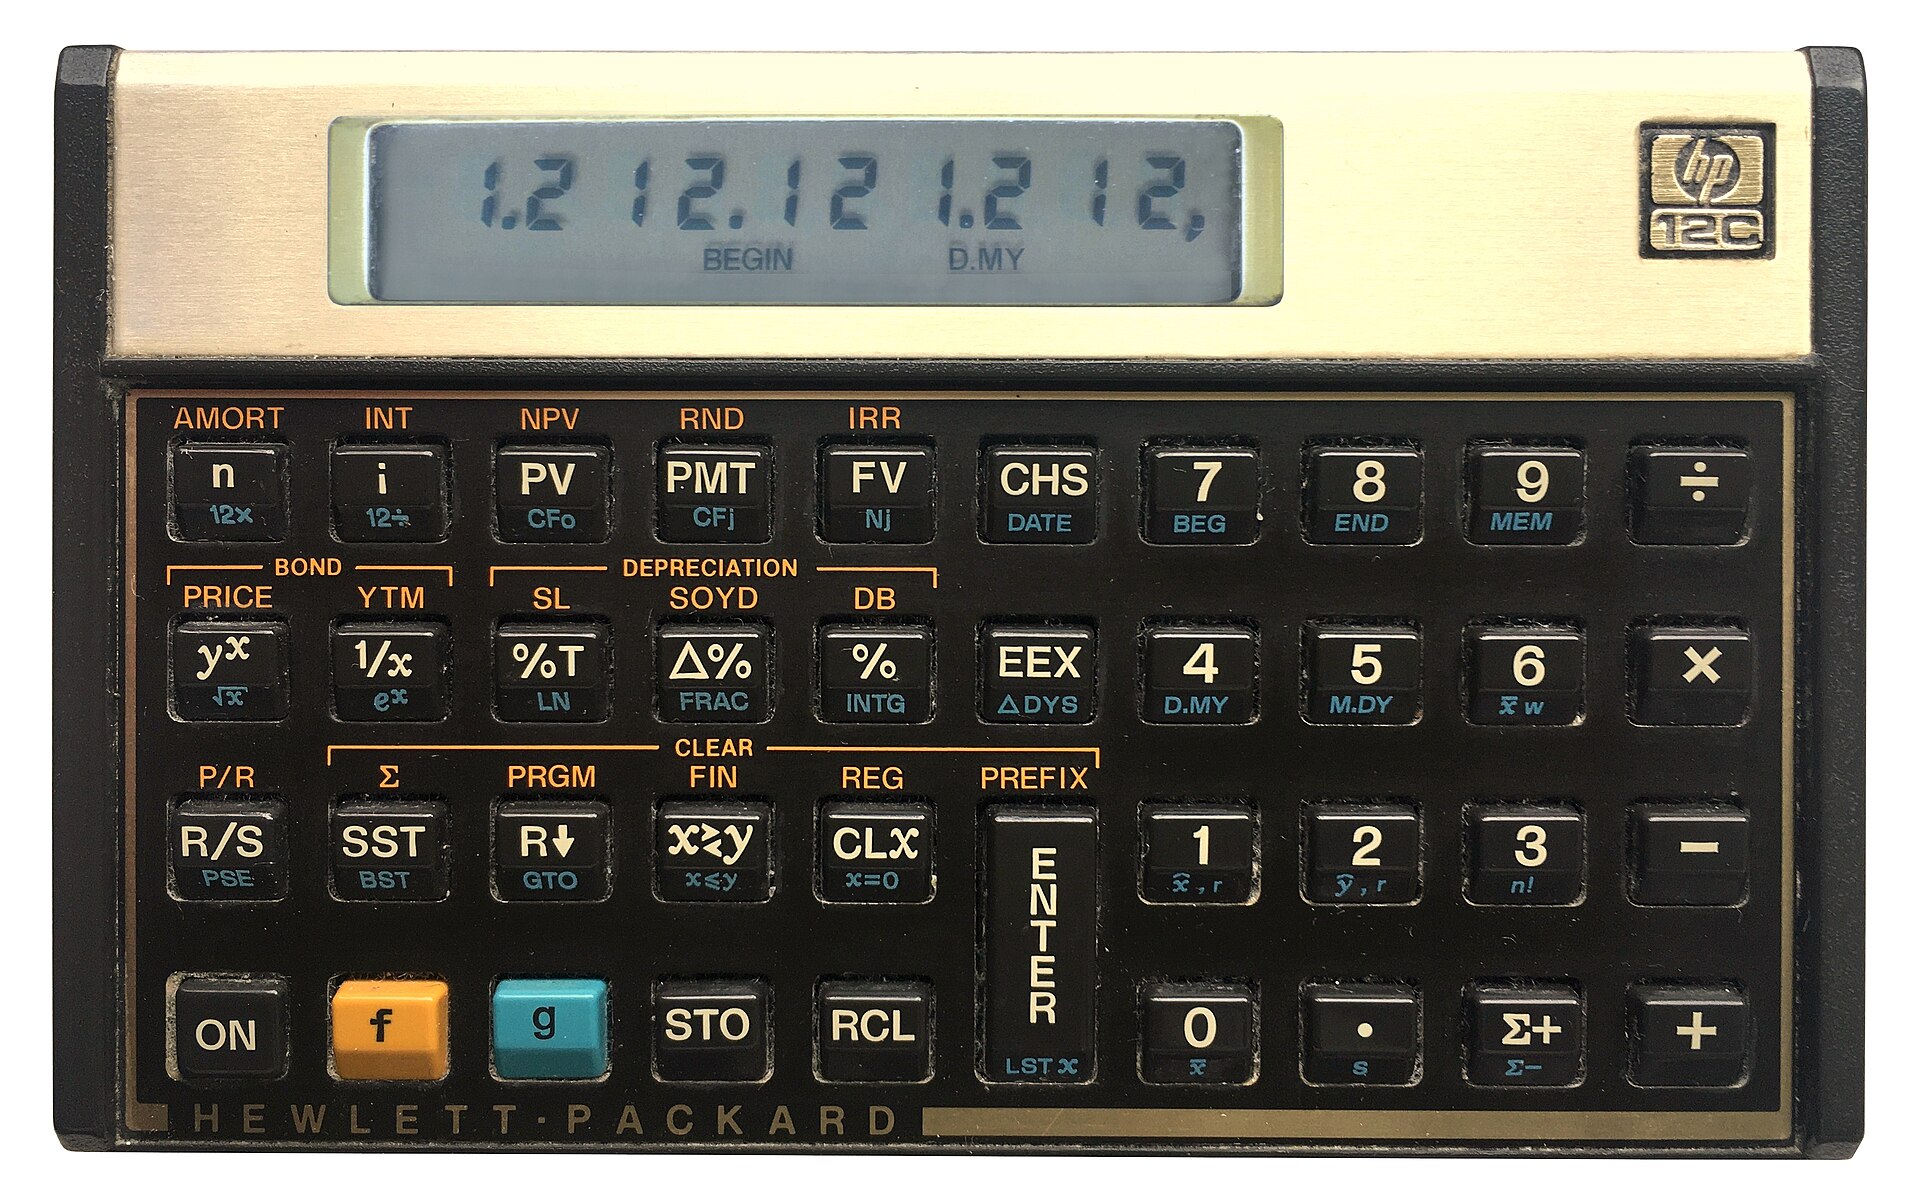
You can still get an HP12C (public domain).
The strange survivor is the HP-12C. Introduced in 1981 as a financial calculator, it remains available new more than four decades later. Depending on the retailer, expect something around $50 to $70. The 12C Platinum, which can operate in either RPN or algebraic mode, is also still available for roughly $80 to $110.
Then there is the HP Prime G2, generally around $150 to $170. The Prime is a graphing calculator with CAS, programming, symbolic mathematics, touch screen, and textbook-style input — but buried among all of that is an RPN entry mode. It isn’t an old-fashioned HP RPN calculator, but it certainly qualifies.
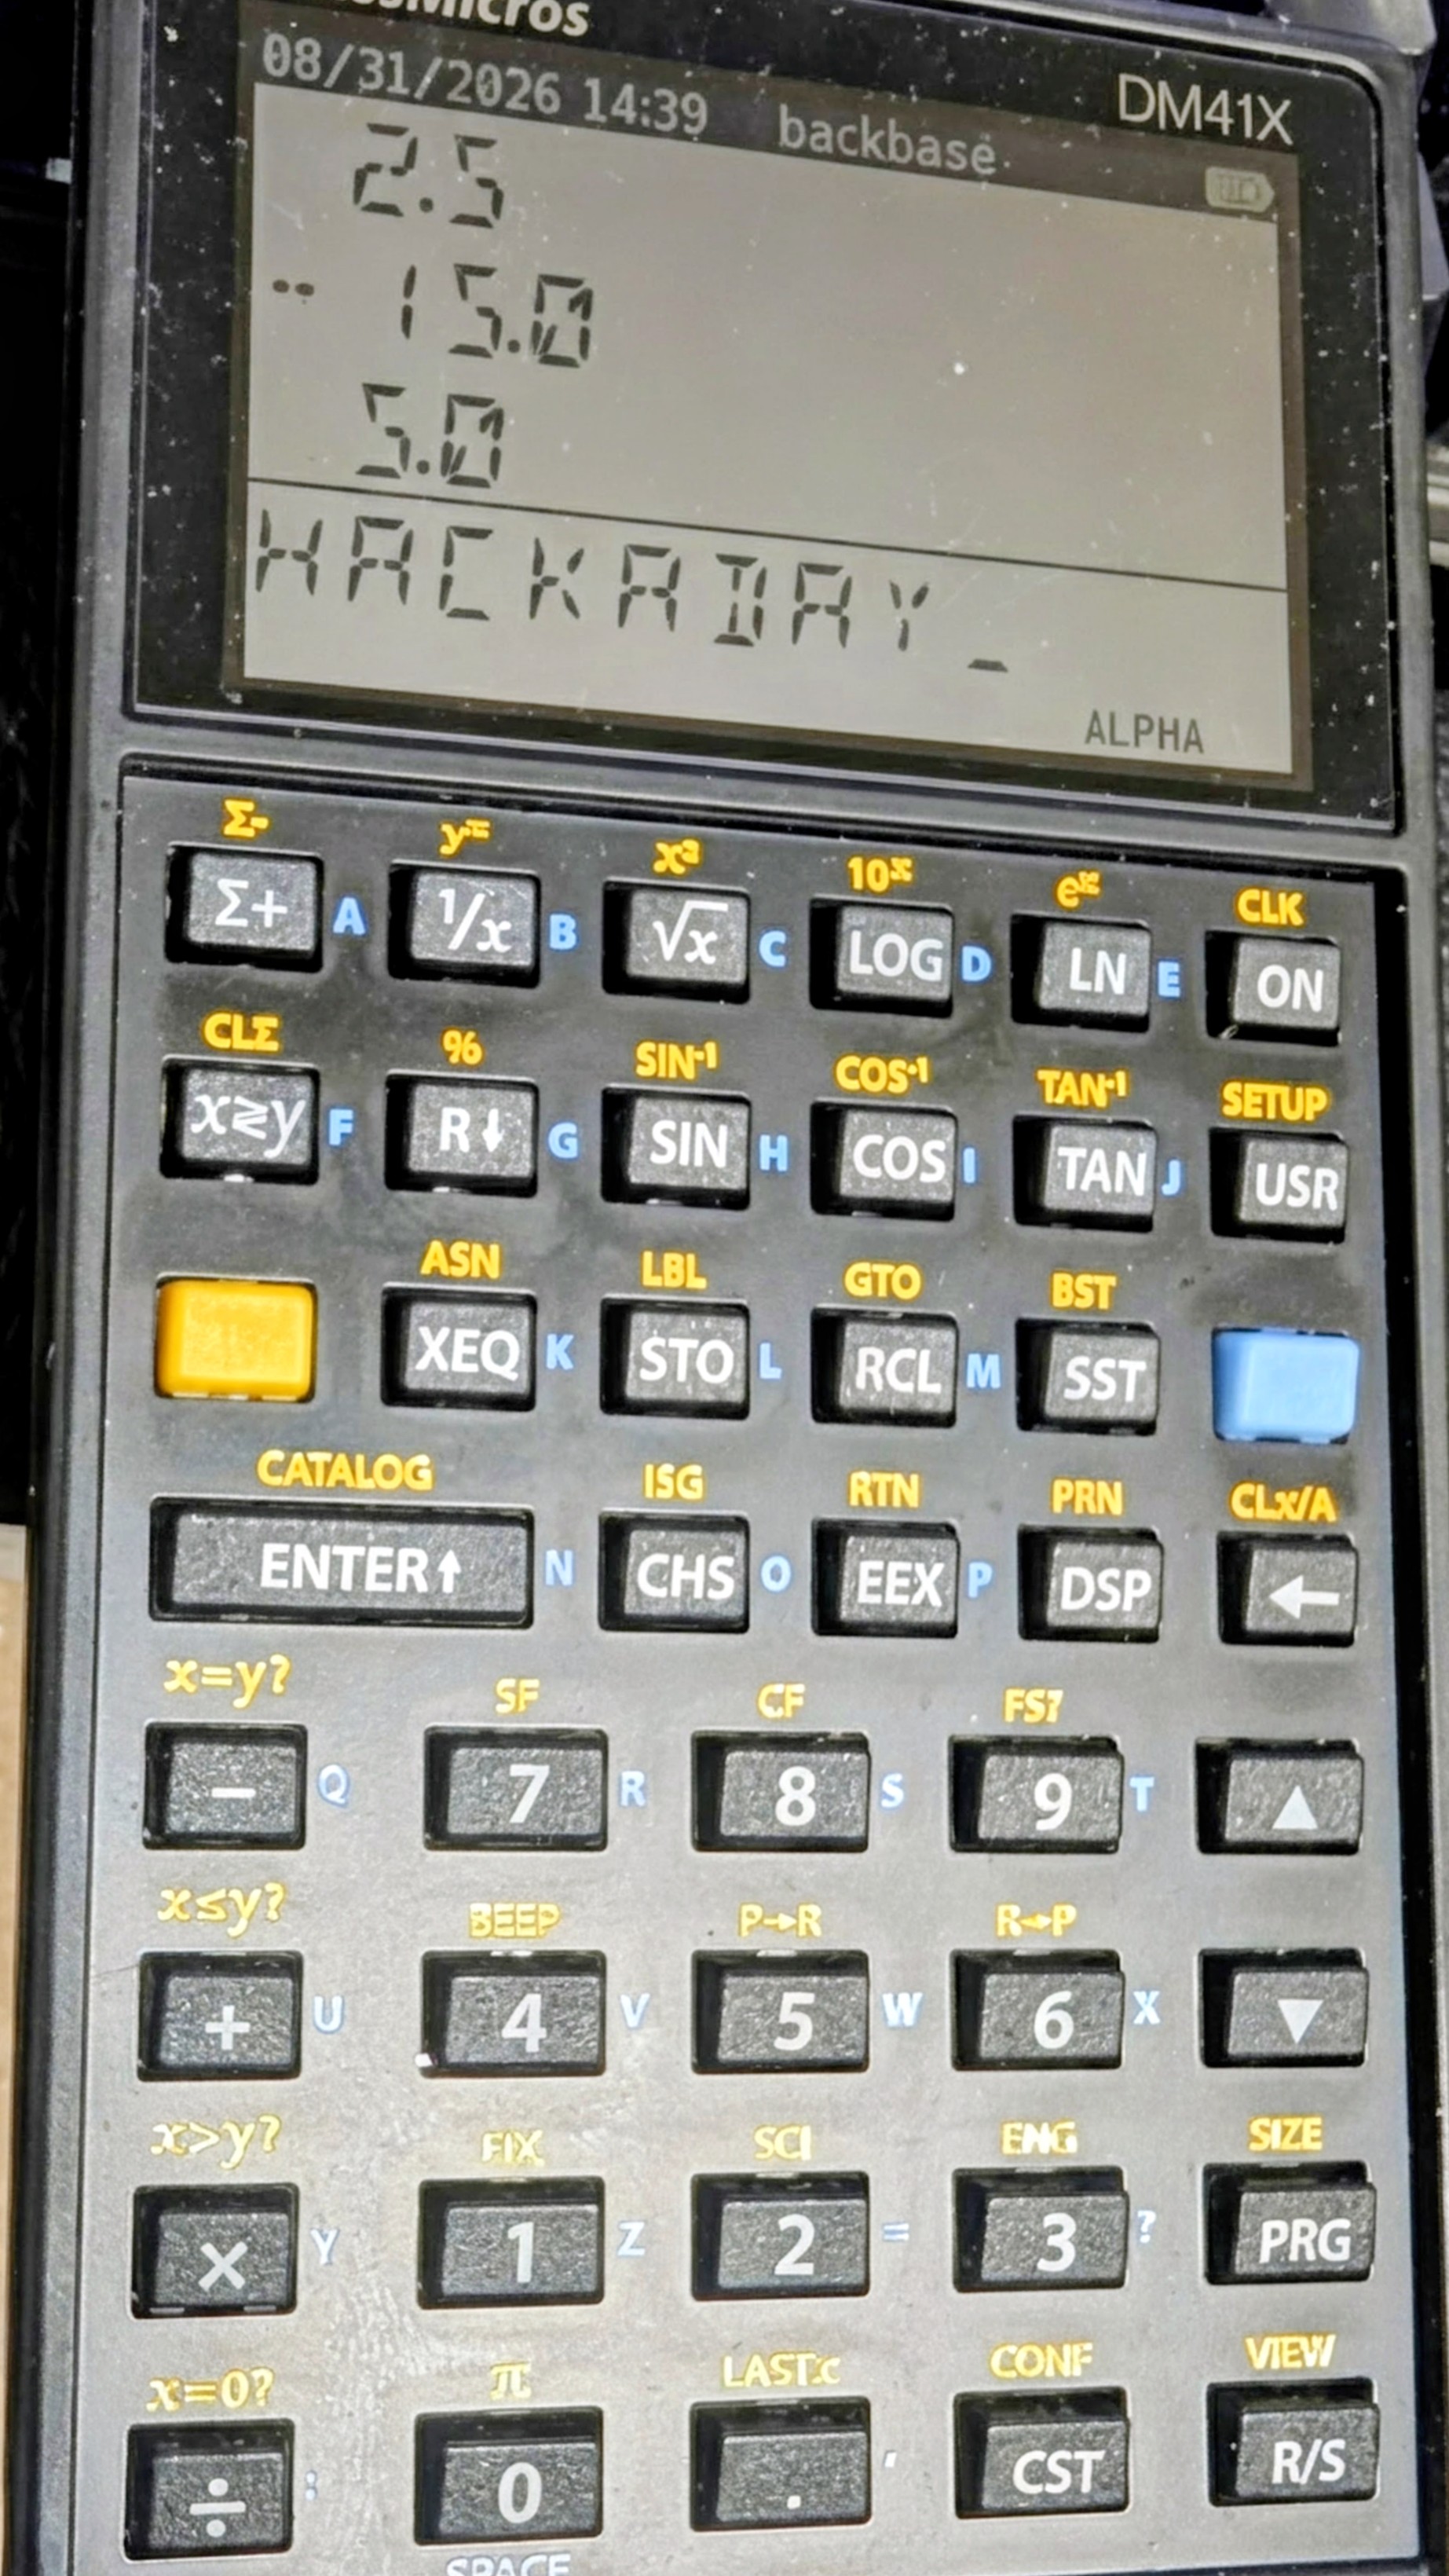
The real center of new RPN hardware today, however, is SwissMicros. SwissMicros started by producing modern implementations of classic HP designs and has since moved well beyond simple reproduction. Its current machines include the DM15L, modeled after the HP-15C; the DM16L programmer’s calculator; DM41L, DM41C, and DM41X machines inspired by the HP-41 family; and the DM32, which occupies roughly the territory once covered by the HP-32SII.
The SwissMicros answer to the HP41C (thanks [Julian]).At the high end is the DM42n, a modern descendant of the HP-42S idea. It has a 400×240 display, USB-C, programmable operation, matrices, complex numbers, equation solving, numerical integration, and 34-digit decimal arithmetic. It currently sells for a bit more than $300.
Perhaps more interesting is the R47, at about the same price. Instead of recreating a particular HP calculator, it grew out of the WP34S/WP43 community projects and attempts to be a modern enthusiast’s RPN calculator. It has an eight-level stack, matrices and vectors, complex arithmetic, base-N and bit operations, statistics, units, financial calculations, equation solving, integration, programming, and even built-in electrical engineering functions. Its firmware is still officially considered beta. This is probably the closest thing today to somebody asking, “What calculator would an obsessive HP engineer build if we started over?”
SwissMicros calculators aren’t cheap. Depending on the model, you’re generally looking at roughly $180 to more than $300 after currency conversion. But they are real, currently manufactured calculators rather than 40-year-old collectibles.
Heat Up The Soldering Iron
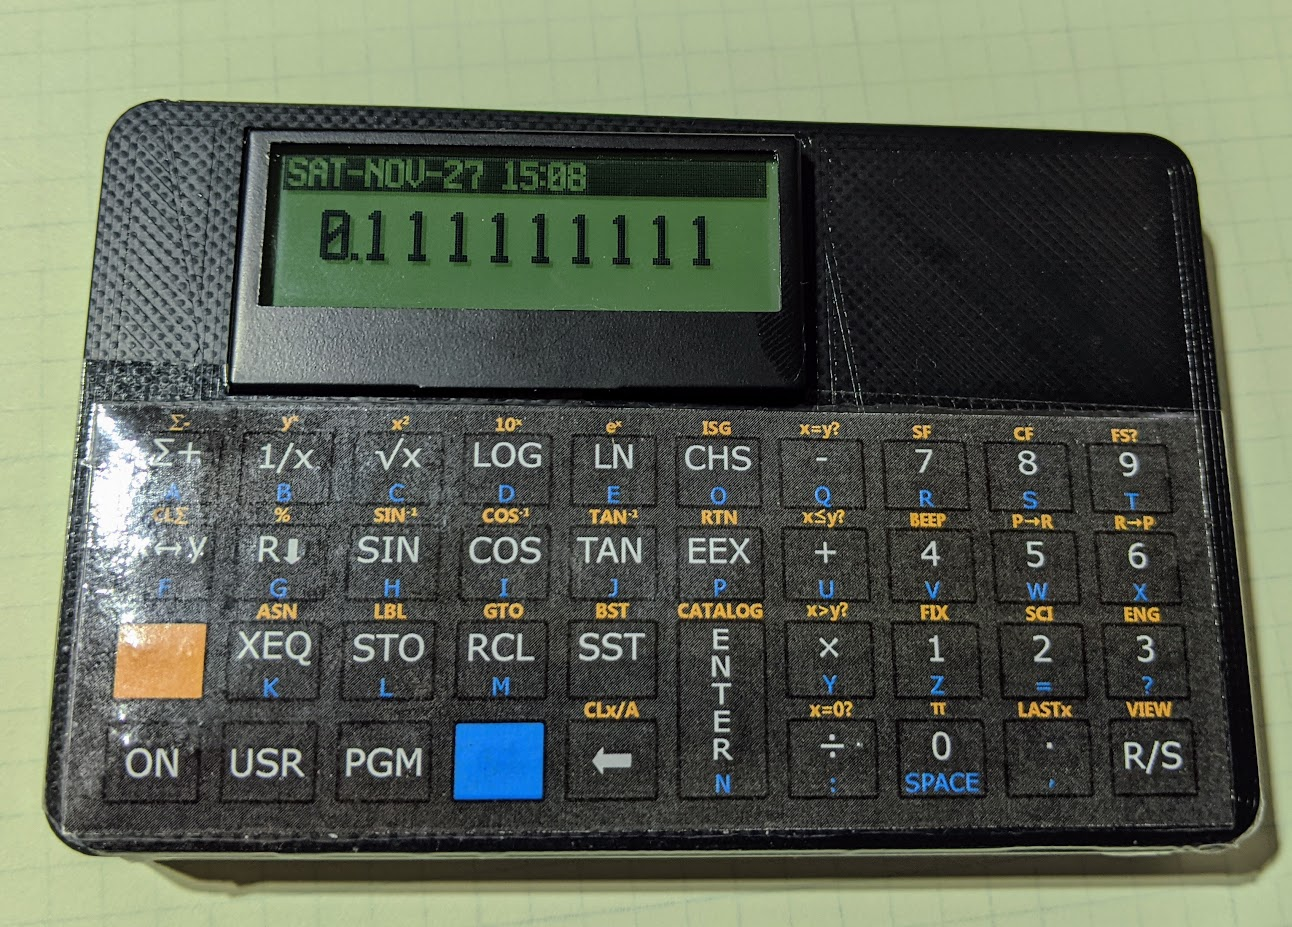
Sure, a real HP41C is in portrait mode, but otherwise, [Garza’s] is a pretty good clone.There is also a suitably hacker-friendly route. [Alex Garza’s] PAXER calculator projects reproduce machines such as the HP-15C, HP-16C, and HP-41C using an ATmega328. They’re available in kit form, use through-hole components, and aren’t just empty cases containing old calculator electronics.
The ATmega scans the keyboard, drives the display, and emulates the original machine. The design adds such modern amenities as continuous memory, an LCD backlight, real-time clock, and considerably higher execution speed than the originals. Kits and assembled versions are typically under $100.
There is also the 10LC (and related models), which approaches the problem from the other direction: take inexpensive ESP32-based M5Stack Cardputer hardware, add calculator firmware and key labels, and turn the whole thing into a pocket RPN calculator. Figure roughly $50-$60.
It isn’t going to make a calculator collector forget an HP-42S keyboard, but it does show how little hardware is actually required to build an extraordinarily capable calculator today.
There’s An App For That
CalcTastic is a modern RPN phone app.If physical keys aren’t mandatory, RPN is actually thriving. You can get a host of RPN calculators on your Android or iPhone. There are many options for desktop computers, too. You can generally find these on your platform’s program repositories.
One of the best places to start is Free42, [Thomas Okken’s] free, clean-room implementation of the HP-42S. It runs on Android, iOS, Windows, macOS, and Linux. Plus42, from the same author, takes that foundation and expands it with equations, units, directories, plotting, financial functions, and other capabilities that the original HP-42S never had.
Android users also have CalcTastic, which can switch between algebraic and RPN modes and provides scientific calculation, complex numbers, fractions, statistics, conversions, and — in the paid version — programmer functions. The basic version is free, and the Plus version is only a few dollars.
For the HP-48 crowd, there is Droid48 on Android and several HP-48 implementations on iOS. If your idea of a calculator includes directories, symbolic objects, programs, lists, and an RPL command line, the phone in your pocket can impersonate a 48 far faster than the original hardware ever could. If you prefer the HP41C, go41C is the one I like.
Apple users have an especially large selection. i41CX recreates and extends the HP-41 environment. PCalc isn’t primarily an RPN calculator, but has long offered a very good RPN mode. There are also modern RPN calculators including MathU, RPN Calc, RPN Calculator 48, and a growing number of simulations of individual classic HP machines.
Real HP
Even HP’s current flagship environment is available in software. HP Prime Pro runs on Android and iOS and supports optional RPN input.
Desktop users aren’t left out either. HP provides a free HP Prime Virtual Calculator for Windows, and there has also been a macOS version. Most unusually, HP once produced an actual native Linux version. The Linux release was packaged as an AppImage and survives as a 2019 technical preview — build 2.1.14288 in the copy sitting on my Linux machine. It isn’t the Windows version hidden inside Wine; it’s a native HP build, and it still works remarkably well. Unfortunately, it predates one particularly interesting addition to the Prime: Python programming.
The HP Prime needs a setting to change to RPN mode.
There is a way to get that on Linux, although HP doesn’t make it easy. I found that the December 2024 Windows release of the Virtual Calculator, version 2.2.15212, runs under Wine using the Soda 9 runner in Bottles. That version includes the Prime’s Python app and reports MicroPython 1.9.4. The catch is that you don’t want to accept its offer to upgrade. Updating to the current Windows version causes the simulator to stop working under the same setup, and Soda 11 doesn’t appear to fare any better. So there is a slightly absurd sweet spot where an older Windows Prime under an older Wine runner provides a more up-to-date Prime on Linux than HP’s own native Linux build.
Between Free42, Plus42, Prime, HP-48 emulators and innumerable smaller projects, software may actually be the easiest way to use RPN today.
The Used Option
Of course, another source is available: millions of old calculators are already out there. If you’ve always wanted an HP-11C, 15C, 16C, 28S, 32SII, 41CX, 42S, or 48GX, auction sites and used-equipment dealers will happily provide one. Sometimes you can still find a bargain, especially if you’re willing to buy a cosmetically ugly machine or something outside the most desirable models. The problem is that the best old calculators aren’t merely used calculators anymore. They’re collectibles.
A calculator that originally lived in an engineer’s shirt pocket may now be a pristine example with its case, manuals, and box — and priced accordingly. Even fairly ordinary examples of desirable models can sell for enough money that carrying one around every day starts to feel irresponsible. My treasured HP41C, for example, works fine, but is already scuffed up enough that I rarely risk using it at my desk these days.
That creates a slightly absurd situation. A perfectly functional 35- or 40-year-old calculator may cost considerably more than an astonishingly capable modern computer because one is being priced as a collectible and the other as a tool.
On the other hand, battered calculators exist. If you don’t care about scratches, engraved names, missing battery doors, or someone’s old asset-control sticker, those are often exactly the machines to buy. You’re going to use it, after all.
ENTER Isn’t Dead
RPN plainly lost the calculator wars. Walk into an office supply store, and almost every calculator on the shelf expects conventional algebraic input. But it didn’t disappear.
You can still buy an HP-12C. You can buy sophisticated new RPN machines from SwissMicros. You can solder together your own HP-inspired calculator around an 8-bit AVR. You can turn an ESP32 gadget into one. Or you can install an app and have an HP-42S, HP-48, or modern RPN calculator in your pocket for anywhere from nothing to a few dollars.
That’s a surprising amount of life for an input system the mainstream calculator industry decided we didn’t want decades ago. Then again, people who like RPN tend to really like RPN.
If 2 ENTER 3 + looks more natural to you than 2 + 3 =, apparently somebody is still willing to sell you a calculator. If you want to see how easy it can be to parse RPN in a program, we’ve done that.
If you’ve heard the high-pitched whine or buzz from an electronic device when a current-carrying inductor is vibrating, you’ll know how unpleasant it can be. It’s common in all kinds of equipment, but it’s become a particular annoyance of late in hardware like PC power supplies, GPUs, and cooling pumps. There is plenty of hearsay on the web about which parts whine and which don’t, and [Lowell Wood] wants to get to the bottom of it.
To track the issue, [Lowell] has put together the Coil Whine Database. It accepts user reports on hardware, regarding the level at which coil whine is present. A score of 0 is given to a part that is inaudible in a quiet room, with higher scores representing higher sound levels. A part scored at 2 is audible working at a desk with the computer under load; a part scored at 4 is audible even when the machine or device is at idle.
For now, the database is largely empty—[Lowell] has just opened submissions, adding a report on their own ROG Astral RTX 5080 card for good measure. If you want to submit a report on a unit, either silent or noisy, that’s simple enough—just fill in the coil whine report form. Over time, submissions will hopefully grow, and it will be easier to get a good idea of what equipment whines and what is likely to operate silently out of the box.
The database aims to present a guide to what parts whine, and how much, noting that any given population of devices tends to vary. To that end, any given device won’t be reported on publicly until it receives at least 5 reports. To counter bias, reports of silent parts will be weighted higher, since it’s unlikely that people happy with their quiet hardware will be rushing to research this issue or report it to a database. Relevant files to the project are available on GitHub for the curious.
When it comes to building real-world flying vehicles, testing can be arduous and expensive. You have to find somewhere to fly, then you have to contend with environmental conditions and the possibility of damaging your craft if things go wrong. Simulation is a great solution to this, allowing testing without so much risk. To that end, [AlexanderRex] whipped up a platform for testing UAVs from the comfort of your computer desk.
PteroSim is intended as a comprehensive test bench for simulating autonomous aerial vehicles. It can run PX4, ArduPilot, and Betaflight binaries right in the simulator. The autopilot code is given simulated sensor data, and in turn responds with actuator commands, just as it would in a real craft. The simulator runs the flight dynamics using JSBSim, and the resulting scene is rendered in Unreal Engine 5.
If you’ve ever wanted to quickly road test different autopilot settings without heading out to the field or risking hardware, this is a great way to do so. It’s hard to beat the speed of iteration that is possible when testing on the computer on your desk. We’ve featured similar work before, too.
Humanoid robots, even scaled-down ones, tend to be expensive. The Berkeley Humanoid Lite offers a more accessible and economical option by centering the design around 3D printed actuators that make up the bulk of the robot’s frame.
The actuators are made by combining motors with printed cycloidal gearboxes and an embedded magnetic encoder. They’re modular, so even if one has no desire to recreate the whole robot it might be worth checking out the actuator design details to see if they might be useful in some other way.
The Berkeley Humanoid Lite isn’t a finished product so much as an open-source, easily customized reference design. The GitHub repository contains everything one might need, and you can watch some basic demonstrations, including VR-driven teleoperation, in the video embedded below.
At a total hardware cost of under $5,000 USD it’s still expensive, but much more economical than other humanoid robots, open-source or not. As mentioned, even if one doesn’t plan to build one, the modular actuator design is worth keeping in mind for other purposes.
Over the centuries there have been an incredible number of purported medical devices released onto the market, with some having more outrageous claims than others. Released in the 1910s and produced into the 1920s, the Farador electrotherapeutic device claimed to be a thermoelectric device that would cure all disease conditions. In a recent video over at the [Our Own Devices] channel we get an in-depth look at this device and its usage instructions.
It’s a thermoelectric generator. Sort of. (Credit: Our Own Devices, YouTube)
On the Smithsonian’s website you can see the version they’ve got. It’s not identical, but the working principle remains the same — after bypassing the whole ‘is this the right treatment’ questionnaire because it’s a cure-all device, you take the main metal device and its connected electrodes out of the box.
Unlike similar devices of the era that applied an actual electrical current using batteries or similar, this Farador purportedly uses thermoelectric power generation, but there’s no clear hot or cold side to what would be the generator. Despite this, about 20-30 mV can be measured across the electrodes, so surely it’s working?
As it turns out, the Farador is just one of many fake medical devices that cloned the original Electropoise. Naturally such devices have been disassembled by many over the past decades, and as it turns out they are all empty inside, or at least devoid of any mechanisms. Much like many of such fake medical devices today, they mostly bank on the placebo effect. This placebo effect can be so strong that it’s even a confounding factor in real medical trials and medicine.
The more involved and complex the purported medical treatment seems, the stronger the effect tends to be. For the Farador the complex instructions, apparently high-tech thermoelectric generator and such all help to create the illusion and could thus be construed to be the main feature of this product.
This week Jonathan chats with Nathan Freitas of the Guardian Project! What is going on at the forefront of Open Source and privacy advocacy? Where are we on a true Tor browser on iOS? And what’s the ideal solution to the Android Lockdown issue? Watch to find out!
Did you know you can watch the live recording of the show right on our YouTube Channel? Have someone you’d like us to interview? Let us know, or have the guest contact us! Take a look at the schedule here.
As children, many of us looked wistfully into the cockpits of heavy machinery, wondering just how the series of knobs and levers would do something like operate a bulldozer, crane, or excavator. The nature of these myriad of hydraulic and electronic controls for equipment like this is often inscrutable to adults as well; it takes a considerable amount of training to be able to competently operate most of these machines. But this new controller from MIT may help shorten that training time.
The controller is specifically meant for excavators. In a standard excavator, a pair of joysticks is typically used, with one controlling the swing and the boom and the other controlling the stick and the bucket. Getting used to this combination can take practice, so instead the group of researchers replaced them with a model excavator arm that the operator controls directly with their own arm. The new controller is more intuitive to use as it translates the movements of the model to that of either a real excavator or a training simulation.
The researchers plan to include haptic feedback in future versions, which will hopefully further increase the ease of which new operators can get a feel for using these machines. For those not working towards a new career or an ambitious weekend with rental equipment, there are some other ways of learning how to operate excavators and other pieces of heavy machinery.
A pyrotechnic charge is set off by passing a high voltage through a filament within it, melting the filament and igniting the charge. We could think of a variety of circuits that could do this, but perhaps we wouldn’t have come up with [Michał Słomkowski]’s solution. He’s used the ringer crank generator from an old military field telephone. It’s an old project he’s shared with us due to its recent republishing on his website.
The basic principle is simple enough, winding the generator charges a capacitor bank through a bridge rectifier. Then a thyristor is used as the trigger device, dumping the contents of the capacitor into the filament. But the full circuit has a couple of refinements. There’s a charge indicator circuit using a couple of Zener diodes and an LED, and a filament tester which passes a non-triggering current through the filament from a 9 volt battery. We like the use of an over-the-top high-current thyristor, no doubt what he had in his junk box.
Perhaps it’s a symbol of how far technology has moved, that today it’s surprisingly rare to find a bridge rectifier or a thyristor, and building this device today would involve a microcontroller and probably an AliExpress inverter module as a matter of course.
Impressive as it most certainly is when an amateur fabricates a semiconductor, most of the projects we’ve seen are more demonstrations than workable chips. [Dr. Semiconductor], however, is going much further with his fabrication process, and is already working on a method to bond chips to printed circuit boards. It’s difficult to align a PCB with the pads on the underside of an opaque silicon wafer, however, so as a trial run he’s made and bonded some transparent LED chips.
The starting material for these chips is a gallium nitride (GaN) LED epiwafer, a stacked structure of n-doped GaN, an indium gallium nitride quantum well layer, and p-doped GaN grown on a sapphire substrate. When current passes through the structure, electrons from the n-doped layer and holes from the p-type layer recombine in the quantum well layer, emitting blue light. To make a functional LED from this, [Dr. Semiconductor] needed to make electrical contacts to both the n-type and p-type layers. Making the n-type contact required cutting through the p-type and quantum well layers.
This would normally be done with reactive ion etching in chlorine, but [Dr. Semiconductor] came up with a new process: a 355-nm ultraviolet etching laser causes GaN to break down into gallium and nitrogen, with the resulting cut being cleaned up by a potassium hydroxide etch. To deposit the contacts themselves, [Dr. Semiconductor] formed a photoresist mask, deposited metal (nickel, silver, and titanium) in a sputtering chamber, and used a developer solution to dissolve the mask and lift off the unwanted metal regions.
The LED after bonding and phosphor application.
When [Dr. Semiconductor] applied current between the two contacts, the LED glowed bright blue. The next step was to mount it to a PCB; to do so, he first sliced the wafer into individual LED chips with the ultraviolet laser. He then electroplated indium bumps onto a printed circuit board, positioned the chip above these bumps, added some rosin flux, and melted the indium bumps. This soldered the chip to the board and let the board power the LED.
Like most commercial LEDs, these were blue; most LED assemblies additionally include a phosphor layer which absorbs blue light and emits another color. To create a white LED, for example, [Dr. Semiconductor] mixed cerium-doped yttrium aluminium garnet phosphor powder with clear silicone and spread it over the LED. This absorbs some of the blue light and emits yellow light, and the resulting mixture of blue and yellow light looks white to human eyes.
If you’ve got a cheap ham rig, it might not be very practical for you to receive certain transmissions out of the box. However, if you were to hack in a convenient little beat frequency oscillator (BFO) to your rig, then you’d be up and running. Here’s a simple way to do just that with a venerable old part everybody knows and loves.
The build in question concerns the use of a 555 timer IC. It’s seasoned with the right smattering of resistors and capacitors to taste, producing a 455 kHz beat frequency oscillator. This can be injected into the intermediate frequency chain of a receiver, making up for the lack of a steady carrier wave when receiving continuous-wave and single side-band suppressed carrier transmissions. Thanks to a potentiometer in the circuit, it’s tunable, too, from 455 kHz, plus or minus twenty percent or so. Thanks to the versatility of the 555, it’s possible to run the chip on a wide voltage range, anywhere from 4.5 volts to 16 volts, which makes it easy to install in just about any old radio set without requiring adding a specialized power supply. There’s also an alternative design that EDN covered in greater detail some time ago.
If you’re eager to dive into a wider range of transmissions than your radio can currently receive, this old-school ham hack could be just what the shack ordered. We feature plenty of good ham hacks around these parts, and don’t forget—we always want to hear about the freshest ones on the tipsline.
These days, modems are pretty fancy bits of kit, what with to keep up with the speeds of cable, VDSL, and fiber connections. At lower speeds, though, it’s entirely possible to build a modem out of simple discrete components. [sv3ora] did just that, building a simple modem for the CB2 Micro.
It’s a remarkably simple build.
The project takes advantage of the fact that the V1.54 firmware for the CB2 Micro enabled 75 baud serial communication. Thus, it made sense for [sv3ora] to build a 75 baud modem to suit. As was the way in the days of dial-up internet, the modem modulates data into audio, demodulates audio back into data, allowing the CB2 Micro to send and receive data over telephone lines, ham radio links, or to store and retrieve data via mediums like cassette tape.
The device is built out of good old BC547 transistors. along with a smattering of diodes, resistors, and capacitors as supporting hardware. That’s all you need to turn slow serial into audio and back again. [sv3ora] does a great job of demoing the hardware, using it to store a program on tape and retrieve it again later.
There are quite a few rather unconventional methods of propulsion, but perhaps one of the more curious approaches involved Helmholtz resonance, as demonstrated by [Junsun Hwang] et al. with a paper in Science Advances and associated summary article by EPFL’s School of Engineering.
Although probably better known from something like musical instruments, Helmholtz resonance can be used for more than creating or deadening noise. If stimulated with an external acoustic source that matches the chamber’s resonance frequency the result is a jet of air at the neck of the chamber. This acoustic actuation can thus be used for a number of applications.
In the paper a number of such applications are demonstrated, including a boat with three of these chambers for propulsion and steering, as well as a microflier (see above image) that when placed above an ultrasonic phased area will hover due to the production of this jet of air.
This microflier concept was then adapted with angled resonator chambers so that they could drive a propeller. Naturally, the produced thrust is only a fraction of a Newton so it’s essential to make these structures as light as possible, in the order of micrograms. These microfliers were created using high-resolution 3D printing, with a few iterations attempted to determine the optimal configuration.
In the case of the boat the ultrasonic transducers were directly placed on the bottom of the resonance chamber, but in the case of the microfliers the weight limitations necessitate these transducers to be external. Even if not the most practical kind of flying robot, as a demonstrator of this application of Helmholtz resonance for acoustic propulsion it’s pretty cool.

 Login
Login