Normal view

There are new articles available, click to refresh the page.
Before yesterdayHowToBBBQRight

Coppa Cut Pork Chops

21 May 2026 at 13:12

Coppa Cut Pork Chops

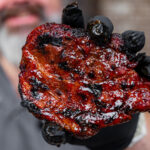
Coppa pork chops are cut from the “money muscle” end of the pork butt, giving them extra marbling and a richer, juicier bite than your average pork chop. They’re cooked over a two-zone fire, finished hot to build a little char, then coated in a sweet peach chipotle glaze that turns sticky on the outside while locking in that fire-grilled flavor.

WHAT MALCOM USED IN THIS RECIPE:
Print
coppa pork chop

Coppa Cut Pork Chops


5 Stars 4 Stars 3 Stars 2 Stars 1 Star

No reviews

Description

These Coppa Pork Chops are grilled over a two-zone fire until perfectly juicy, then finished with a sweet and smoky peach chipotle glaze. The combination of rich, marbled pork, light char from the grill, and sticky sweet heat sauce makes these chops packed with bold backyard barbecue flavor.


Ingredients

  • Coppa cut pork chops (about 1.5 inches thick)
  • Killer Hogs Hot Rub
  • 1/2 cup Heath Riles BBQ Hot Peach Glaze
  • 12 Tablespoons chipotle sauce (based on your heat level – you can even add more for more heat)

Instructions

  1. SEASON THE CHOPS
    – Coat each coppa chop evenly with Killer Hogs Hot Rub on all sides.
    – Let them sit at room temp and sweat while the grill comes up to temperature.
  2. FIRE UP THE GRILL
    – Set up your charcoal grill or drum smoker for a two-zone fire:
    – Indirect side running around 275°F Direct side for searing (you’ll bring this up later)
  3. COOK INDIRECT
    – Place the chops on the indirect side of the grill.
    – Close the lid and cook at 275°F until they reach about 130°F internal. This usually takes around 30-45 minutes, depending on your fire.
  4. MAKE THE GLAZE
    – In a small bowl, mix:
    – 1/2 cup Hot Peach Glaze
    – 1 tablespoon chipotle sauce
    – Set aside for finishing.
  5. REST THE CHOPS AND STOKE THE FIRE
    – When the chops hit around 130°F internal, pull them off the indirect side and set them aside to rest for a few minutes while you open up the grill and get the fire or direct side up to 500-500 degrees.
  6. SEAR AND GLAZE
    – Place the chops back over the hottest part of the grill.
    – Brush on a light coat of glaze. Flip after about a minute. Glaze again. Keep flipping and glazing every minute or so.
    – Repeat until the glaze caramelizes and sets on the outside.
    – Cook until the internal temperature reaches 140°F, then pull the chops off.
    – Rest for 5 to 10 minutes before serving.

Notes

This is all about controlling the internal temp so you can render the fat without drying them out, then finishing hot to build color and set the glaze.


Malcom Reed
Connect on Facebook
Follow me on TikTok
Subscribe to my YouTube Channel
Follow me on Instagram
Buy Killer Hogs Products Here

The post Coppa Cut Pork Chops appeared first on HowToBBBQRight.
Smoked Meatloaf with Beef & Pork

13 April 2026 at 13:27

Classic Meatloaf with Beef and Pork

This is a classic meatloaf, just done right. The mix of beef and pork keeps it tender and juicy, and the smoke adds a layer of flavor you don’t get from the oven. It’s a straightforward recipe that delivers every time.
WHAT MALCOM USED IN THIS RECIPE:

Print
meatloaf

Smoked Meatloaf with Beef & Pork


5 Stars 4 Stars 3 Stars 2 Stars 1 Star

No reviews

Description

This meatloaf stays tender, juicy, and full of flavor thanks to a beef and pork blend and a steady cook. Finished with a rich glaze, it’s a dependable recipe that delivers every time.


Ingredients

  • 1lb ground beef 90/10
  • 1lb ground pork
  • 2 eggs – lightly beaten
  • 1 1/2 cup bread crumbs
  • 1 medium onion finely diced
  • 4 cloves minced garlic
  • 1/4 cup chopped flat leaf parsley
  • 1/4 cup ketchup
  • 1 Tablespoon Worcestershire sauce
  • 2 Tablespoons Killer Hogs AP Seasoning
  • 1 Tablespoon Malcom’s Italian Stallion Seasoning

Classic Meatloaf Glaze:

  • 1/2 cup ketchup
  • 1/4 cup brown sugar
  • 1 Tablespoon Worcestershire sauce
  • pinch white pepper
  • pinch cayenne pepper
  • pinch paprika

Instructions

  1. Combine the ground beef, ground pork, eggs, bread crumbs, onion, garlic, and parsley by hand. Add the ketchup, worcestershire and seasonings and mix thoroughly.
  2. Line a baking sheet with parchment paper and form the meat mixture into a loaf shape.
  3. Cook the meatloaf at 350°F using pecan pellets for 35 minutes – you can cook it in the oven if you prefer.
  4. Combine the glaze ingredients in a small bowl and brush over the top of the meatloaf. Continue to cook for an additional 25 minutes or until the internal temperature reaches 165°F.
  5. Remove the meatloaf from the grill and allow it to rest for 10 minutes before serving.

Notes

  • Don’t overmix – Mix just until combined. Overmixing makes the meatloaf dense instead of tender.
  • Pan vs free-form – Pan = softer, classic texture. Free-form = more surface area and better glaze.
  • Cook to temp – Cook to 160°F internal, not by time, for a juicy, properly set loaf.
  • Rest before slicing – Rest 10–15 minutes so it holds together and slices clean.

This is one of those recipes that proves simple still works best. The beef and pork keep it tender, the glaze finishes it right, and it’s the kind of meal people come back for. Run it once and it’ll earn a spot in your rotation.

Malcom Reed
Connect on Facebook
Follow me on TikTok
Subscribe to my YouTube Channel
Follow me on Instagram

Buy Killer Hogs Products Here

The post Smoked Meatloaf with Beef & Pork appeared first on HowToBBBQRight.

Smoked Picanha

13 April 2026 at 13:11

Smoked Picanha

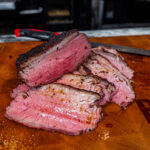
There’s a lot of ways to cook picanha, but this one is hard to beat. The reverse sear gives you control over the doneness and lets you finish with a real crust. You end up with a juicy, even cook and a crust that gives you everything you want out of a steak.

WHAT MALCOM USED IN THIS RECIPE:


Print
Reverse-Seared Picanha

Smoked Picanha


5 Stars 4 Stars 3 Stars 2 Stars 1 Star

No reviews

Description

Reverse-seared picanha cooked low for even doneness, then finished hot for a perfect crust. Simple method that delivers steakhouse-level results.


Ingredients

  • 1 whole picanha (top sirloin cap)
  • Swine Life Prime Beef Rub
  • Killer Hogs Steak Rub

Instructions

  1. SEASON
    1. Light coat of Swine Life Prime Beef.
    2. Follow with a layer of Killer Hogs Steak Rub.
    3. Let sit at room temp 30–45 minutes while the grill comes up to temp.
  2. SET UP THE GRILL
    1. Indirect cooking setup (drum cooker or any grill works).
    2. Stabilize temperature at 275°F.
  3. COOK (INDIRECT PHASE)
    1. Place picanha on the pit.
    2. Cook until internal temp hits 128–130°F
    3. Usually about 1.5 hours, but go by internal temp, not time.
  4. REST + CONTROL CARRYOVER (CRITICAL STEP)
    1. Pull around 128–130°F and leave the probe in.
    2. Let the internal temp rise during the rest. Once it peaks and starts coming back down, go in for the sear.
    3. Open the vents on your pit, open the lid and let the fire get hot.
  5. SEAR (HOT & FAST)
    1. Place picanha back onto pit – directly over high heat.
    2. Flip every minute.
    3. Sear for 3–5 minutes total until a crust forms.
  6. REST, SLICE, SERVE
    1. Let it rest briefly and slice against the grain.

Notes

This method is all about controlling the internal temperature so you don’t overcook the picanha during the sear.

By bringing it up slowly over indirect heat, you get even doneness all the way through. When you pull it and let it rest, the internal temp will continue to rise, then eventually peak and start to fall. That’s your window.

Once it starts coming back down, the meat has stopped actively cooking, so you can hit it with high heat to build a crust without pushing it past medium-rare.

Once you run a Picanha this way, it’s hard to go back to anything else. You get full control over the doneness and a finish that eats the way it should. It’s a simple method, but it delivers every time.

Malcom Reed
Connect on Facebook
Follow me on TikTok
Subscribe to my YouTube Channel
Follow me on Instagram

Buy Killer Hogs Products Here

The post Smoked Picanha appeared first on HowToBBBQRight.

WHITE SAUCE CHICKEN THIGHS

13 April 2026 at 12:00

WHITE SAUCE CHICKEN THIGHS

These White Sauce Chicken Thighs are one of those cooks that just works every time. Crispy, well-seasoned chicken thighs get dunked in a tangy White Sauce that gives you a flavor you don’t get from traditional BBQ sauce. It’s simple to cook, but the flavor is anything but.

WHAT MALCOM USED IN THIS RECIPE:


Print

White Sauce Chicken Thighs


5 Stars 4 Stars 3 Stars 2 Stars 1 Star

No reviews

Description

Hot and fast chicken thighs finished in a tangy white sauce. The skin cooks up bite-through while the sauce adds a bold, creamy kick. Simple method, big flavor.


Ingredients

  • 1214 bone-in, skin-on chicken thighs
  • Killer Hogs AP Seasoning
  • Killer Hogs The BBQ Rub
  • Killer Hogs Mississippi White Sauce

Instructions

  1. Trim the chicken
    1. Remove any large pockets of fat, especially along the sides
    2. Square the thighs up so they cook evenly
    3. Don’t over-trim, you still need that fat to render
  2. Season
    1. Light coat of Killer Hogs AP Seasoning on both sides
    2. Follow with Killer Hogs The BBQ Rub for color and flavor
    3. Let them sit at room temp while the pit comes up
  3. Cook
    1. Set the pellet grill at 400°F
    2. Place thighs skin-side up and cook 45 minutes to 1 hour
    3. Internal temp needs to be at least 175, but I like to take mine to the 195 range.
  4. Sauce + Finish
    1. Pull the chicken straight off the pit
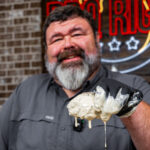
    2. Dunk each thigh fully in Killer Hogs Mississippi White Sauce and let the excess drip off briefly. Serve immediately

Notes

The skin stays bite-through with just enough crisp and the inside is rich and fully rendered, not greasy. The white sauce hits with tangy, creamy contrast against the BBQ rub… and yeah, it’s messy, a little unconventional but it always gets attention.

Not the prettiest plate you’ll ever put out, but once you taste it, that won’t matter. That tangy white sauce over well-cooked chicken just works. It’s different than your usual BBQ, and that’s exactly why it’s worth cooking.

Malcom Reed
Connect on Facebook
Follow me on TikTok
Subscribe to my YouTube Channel
Follow me on Instagram

Buy Killer Hogs Products Here

The post WHITE SAUCE CHICKEN THIGHS appeared first on HowToBBBQRight.

Smoked Turkey

3 November 2025 at 14:40

Smoked Turkey

Juicy Meat & Crispy Skin Every Time

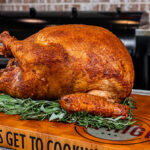
This smoked turkey is all about big flavor and perfect texture — juicy meat with crispy, bite-through skin. The secret isn’t complicated: a simple brine, a good dry, and steady heat on the pit.

Once the bird soaks up that flavor, I let the skin dry out, season it from top to bottom, and smoke it low and slow over pecan wood. The result is golden skin that crackles when you slice and meat so tender it practically drips juice.

Serve it hot off the board for Thanksgiving dinner and show off what a real smoked turkey should taste like.

WHAT MALCOM USED IN THIS RECIPE:

Print
smoked turkey

Smoked Turkey


5 Stars 4 Stars 3 Stars 2 Stars 1 Star

No reviews

Description

Juicy, smoky, and crisped to perfection — this smoked turkey is everything a holiday bird should be. Tender, flavorful, and kissed with just the right amount of smoke — it’s turkey done right.


Ingredients

  • 1 whole turkey (1218 lbs), thawed
  • HowToBBQRight Ultimate Brine Kit
    • OR
      • 1 bottle Malcom’s Bird Brine
      • 1 bottle Killer Hogs AP Seasoning
      • 1 bottle Malcom’s King Craw Cajun Seasoning
      • Meat Bag
  • Water (enough to completely submerge turkey)
  • 1 stalk celery, cut into chunks
  • 1 medium onion, quartered
  • 1 apple, quartered
  • 3 cloves garlic, smashed
  • Cooking spray or oil (for coating the skin)
  • Chicken Rack (optional)

Instructions

  1. Brine the Turkey
    1. Mix one bottle of Bird Brine with 1 gallon of water until dissolved. Place the turkey in a large brining bag or container and pour the brine mixture over the bird. Add enough cold water to completely submerge.
    2. Seal the bag (or cover the container) and refrigerate for 24 hours. For larger turkeys (over 16 lbs), brine up to 48 hours.
  2. Dry and Prep
    1. Remove the turkey from the brine and discard the liquid. Pat the skin completely dry with paper towels—this is key to getting crispy skin.
  3. Stuff the Cavity
    1. Place the celery, onion, apple and garlic (use whatever aromatics you like) inside the cavity.
    2. Tie the legs together and tuck the wing tips underneath so the turkey cooks evenly.
  4. Oil and Season
    1. Lightly coat the entire surface of the turkey with cooking spray or oil.
    2. Season the backside first with a medium coat of Killer Hogs AP Seasoning, followed by a medium coat of Malcom’s King Craw Cajun Seasoning.
    3. Flip the turkey onto a rack and repeat on the top side with the same layers of seasoning.
  5. Smoke the Turkey
    1. Preheat your smoker or grill to 275°F using pecan pellets (or your preferred wood).
    2. Place the turkey on the pit, centered for even airflow, and cook until the internal temperature in the deepest part of the breast reaches 160°F.
  6. Rest and Serve
    1. Remove the turkey from the smoker and rest for 20 minutes. The internal temperature will carry over to about 165°F in the breast and 175°F in the dark meat.


That’s how you smoke a turkey that comes out juicy every single time — with golden, crispy skin and that rich, smoky flavor you can only get from cooking it low and slow. Keep it simple, trust the process, and you’ll carve into the best turkey you’ve ever put on the table.

Malcom Reed
Connect on Facebook
Follow me on TikTok
Subscribe to my YouTube Channel
Follow me on Instagram

Buy Killer Hogs Products Here

The post Smoked Turkey appeared first on HowToBBBQRight.

Smoked Tomahawk Ribeye on the Pellet Grill

3 November 2025 at 14:07

Smoked Tomahawk Ribeye on the Pellet Grill

This 3-pound tomahawk ribeye went straight on the pellet grill—no reverse sear, no cast iron finish. Just steady smoke and low heat all the way through. I figured it might miss that crust, but the right layer of seasoning and patience built up the perfect color. The result? Juicy, tender, medium-rare perfection with a buttery jus from the rest. Proof you can cook a tomahawk start to finish on a pellet grill and still pull off a true steakhouse-quality ribeye.

WHAT MALCOM USED IN THIS RECIPE:

Smoked Tomahawk Ribeye On The Pellet Grill Recipe

Print
Smoked Tomahawk

Smoked Tomahawk Ribeye on the Pellet Grill


5 Stars 4 Stars 3 Stars 2 Stars 1 Star

No reviews

Description

Smoked tomahawk ribeye cooked start-to-finish on the pellet grill. No sear, just low heat, rich smoke, and juicy medium-rare steakhouse flavor every time.


Ingredients

  • 1 Tomahawk Ribeye Steak (about 3 lbs)
  • 2 Tbsp Worcestershire sauce
  • 2 Tbsp Willingham’s W’ham Original Mild Seasoning
  • 12 Tbsp Killer Hogs AP Seasoning (salt, pepper, garlic)
  • 12 Tbsp Killer Hogs Steak Rub (for texture & color)
  • ½ stick (4 Tbsp) unsalted butter, cut into pats

Instructions

  1. Trim the Steak
    Lightly trim any big pockets of fat around the edges and clean up the bone for presentation.
  2. Season Generously
    Rub the steak all over with Worcestershire sauce as a binder.
    Apply a medium coat of W’ham Original Mild Seasoning for color and base flavor.
    Add a layer of Killer Hogs AP Seasoning to build that salt, pepper, garlic profile.
    Finish with a layer of Killer Hogs Steak Rub for texture and crust.
  3. Rest & Fire Up the Grill
    Let the steak sit out while you fire up your pellet grill to 250°F. This gives the seasonings time to melt in and lets the steak come up to room temperature before cooking.
  4. Smoke the Tomahawk
    Place the steak on the pellet grill and insert a probe thermometer into the thickest part.
    Set your first target internal temp to 120°F.
    Once it hits 120, reset your probe to 128°F and monitor closely.
  5. Rest with Butter
    Place pats of butter and a light sprinkle of Steak Rub on a platter.
    Remove the steak from the grill at 128°F and place it directly on butter.
    Tent loosely with foil and rest for 10 minutes.
  6. Slice & Serve
    Remove the steak from the bone, then slice across the grain. The melted butter and drippings combine to make a rich, flavorful sauce—spoon that over the slices before serving.

That’s how you nail a tomahawk on the pellet grill—low heat, good smoke, and plenty of patience. Slice it up, drizzle that buttery rest over the top, and you’ve got steakhouse flavor right in your backyard.

Malcom Reed
Connect on Facebook
Follow me on TikTok
Subscribe to my YouTube Channel
Follow me on Instagram

Buy Killer Hogs Products Here

The post Smoked Tomahawk Ribeye on the Pellet Grill appeared first on HowToBBBQRight.

Honey Balsamic Salmon on the Pellet Grill

27 August 2025 at 11:56

Honey Balsamic Salmon

Grill salmon hot to lock in moisture, then brush on a honey-balsamic glaze that caramelizes into a tangy-sweet crust—restaurant flavor in just 15 minutes.

WHAT MALCOM USED IN THIS RECIPE

Print
Honey Balsamic Salmon

Honey Balsamic Salmon on the Pellet Grill


5 Stars 4 Stars 3 Stars 2 Stars 1 Star

No reviews

Description

This honey-balsamic salmon gets seared on a blazing hot grill for a perfect crust, then finished with a tangy-sweet glaze that caramelizes beautifully in just minutes.


Ingredients

  • 4 salmon fillets (6-8oz fillets)
  • Olive oil
  • King Craw Seasoning (or your favorite Cajun-style blend)

For the Honey Balsamic Glaze:

  • 2 green onions (separate the whites and the greens), thinly sliced
  • 2 cloves garlic, minced
  • 1/4 cup balsamic vinegar
  • 2 tablespoons honey
  • Salt & black pepper to taste (I used TX Brisket Rub)

Instructions

  1. Preheat your pellet grill to 400°F.
    You want those high temps to help build a crust and lock in the moisture.
  2. Prep the salmon:
    Lightly oil each fillet and season generously with King Craw seasoning on tops and sides. Let it sit while the grill heats up.
  3. Make the glaze:
    In a small saucepan, sauté the green onion whites and garlic in a little oil until softened (1–2 minutes). Add the balsamic, honey, salt, and pepper. Let it simmer until slightly reduced and syrupy — about 5–7 minutes. Set aside.
  4. Grill the salmon:
    Place the fillets directly on the grates. Cook for about 13 minutes, or until the internal temp hits 125°F. The outside should have a nice crust at this point.
  5. Glaze it:
    Brush the salmon with the honey balsamic glaze and let it cook another 1–2 minutes until the glaze sets and your salmon reaches 135°F internal.
  6. Serve it up:
    Pull it off the grill and let it rest for a few minutes before serving. Pairs great with roasted veggies, rice, or even a fresh salad.

Oil up salmon fillets, season them heavy with King Craw—or your favorite Cajun rub—then throw them on a 400°F pellet or hot grill to build that craveable crust. While the salmon’s cooking, whisk together green onion, garlic, balsamic vinegar, honey, salt & pepper until it reduces into a syrupy glaze. Brush it on during the last couple of minutes so it caramelizes and locks in that sweet-tangy shine. Juicy, quick, and restaurant-worthy in just 15 minutes.

Malcom Reed
Connect on Facebook
Follow me on TikTok
Subscribe to my YouTube Channel
Follow me on Instagram

Buy Killer Hogs Products Here

The post Honey Balsamic Salmon on the Pellet Grill appeared first on HowToBBBQRight.

Boudin & Crawfish King Cake

2 February 2023 at 11:43
Boudin & Crawfish King Cake

Boudin King Cake topped with a Crawfish Cheese Dip


Quick, Easy and Delicious! This is a different take on a King Cake. Your traditional King Cakes are a sweet pastry with an sweet icing.

But I’m switching it up and doing a spicy, savory King Cake Recipe using Boudin Sausage and a Crawfish Cheese Dip. Then to really take it to the next level (and make it look awesome) I top it with green onions and crushed Pork Rinds!

WHAT MALCOM USED IN THIS RECIPE:

Print

Boudin & Crawfish King Cake


Description

Quick, Easy and Delicious! King Cake Recipe using Boudin Sausage and a Spicy Crawfish Cheese Dip, topped with green onions and crush Pork Rinds.


Ingredients

  • 3 cans Pillsbury Buttery Crescent Rolls
  • 4 links Boudin Sausage
  • 1# crawfish tails
  • 1 block cream cheese – softened
  • ½ small onion – diced
  • ½ red bell pepper – diced
  • 3 cloves garlic – minced
  • 16oz white queso (cheese dip)
  • 1 package pork cracklin’ or pork rinds – crushed
  • 45 green onions – thinly sliced
  • 1/4 cup Malcom’s King Craw Cajun Seasoning
  • 2 teaspoons Killer Hogs Hot Sauce

Instructions

  1. Preheat smoker to 350°F; Remove boudin links from casing and smoke for 10-15 minutes to warm through.
  2. Combine room temp cream cheese with half the crawfish tails and season with 2 Tablespoons King Craw Cajun Seasoning and 1 teaspoon Killer Hogs Hot Sauce.
  3. Arrange crescent rolls in an oval shape on a baking sheet covered with butcher paper or aluminum foil to prevent sticking.
  4. Spread cream cheese mixture on center of crescent roll dough and place boudin link over the top. Fold the crescent roll dough around the sausage and cream cheese mixture, forming into the shape of a King Cake.
  5. Place on smoker and cook for 45 – 55 min or until it browns on the outside.
  6. In a pan, sauté red bell pepper and onion until soft. Add garlic and sauce for 1 minute more. Add other half of the crawfish tails and season with remaining King Craw Cajun Seasoning and 1 teaspoon Killer Hogs Hot Sauce. Add white cheese dip and turn off heat. Remove King Cake from smoker. Drizzle the crawfish cheese dip. Top with pork rind crumbs and garnish with thinly sliced green onion.
  7. Serve and enjoy!

Keywords: Boudin king cake, boudin and crawfish king cake, spicy king cake, savory king cake, crawfish cheese dip

Malcom Reed Connect on Facebook Follow me on TikTok Subscribe to my YouTube Channel Follow me on Instagram

Have a Question About This Recipe?

Connect with us in our HowToBBQRight Facebook group for recipe help, to share your pictures, giveaways, and more!

The post Boudin & Crawfish King Cake appeared first on HowToBBBQRight.

WalMart Prime Rib

13 December 2022 at 11:33
WalMart Prime Rib

WalMart Prime Rib

For this recipe I picked up a nice, boneless, 5lb Prime Rib Roast from WalMart for about $66… and I turned it into something that is worthy of that Holiday Table. I seasoned it with beefy flavors, garlic and onions and then smoked it on a pellet smoker with Hickory pellets until it was medium rare (120 internal).

WHAT MALCOM USED IN THIS RECIPE: Print

WalMart Prime Rib


Description

Smoked Prime Rib cooked with an herb-crust on the Pellet Smoker using Hickory Pellets.


Ingredients


Instructions

  1. Prepare pellet grill for indirect smoking at 250°F using hickory pellets.
  2. Trim excess fat from prime rib roast and use butcher twine to secure the shape of the roast.
  3. Mix together Killer Hogs TX Brisket Rub, Chimi Churri, Garlic and Onion in a small bowl. 
  4. Drizzle the outside with olive oil for a binder. Season with a layer of Swine Life Prime Beef Rub. Then generously rub the outside of the prime rib roast with the TX Brisket seasoning mixture. 
  5. Place the prime rib on the smoker – use an internal meat probe to monitor internal temps. When temperature in the center of the roast reaches 120°F, remove from smoker and allow prime rib to rest for at least 20-30 minutes before slicing.

Keywords: prime rib, prime rib roast, walmart meat, walmart prime rib, smoked prime rib, prime rib on the grill, how to smoke a prime rib

Have a Question About This Recipe?

Connect with us in our HowToBBQRight Facebook group for recipe help, to share your pictures, giveaways, and more!

The post WalMart Prime Rib appeared first on HowToBBBQRight.

Smoked & Fried Turkey Recipe

3 November 2022 at 16:03
Smoked & Fried Turkey Recipe

Smoked Fried Turkey

I brined this 12lb bird, then smoked it on a pellet grill until it hit around 150° internal, then I dropped it in 350° peanut oil until the breast was 165° in the breast. And as soon as it came out of the hot oil, I gave it a good shake of my cajun seasoning….

This turkey can our with a super crunchy, crispy skin on the outside and some seriously juicy and lightly smoked meat on the inside!

Print

Smoked & Fried Turkey Recipe


Description

Smoked Fried Turkey – whole turkey brined and smoked with pecan wood,  then deep fried it in peanut oil for a juicy, smoked turkey with a crispy turkey skin.  


Ingredients


Instructions

  1. Remove thawed turkey from packaging be sure to check the cavity and neck area for giblets.
  2. Place the turkey in Meat Bag or large container and pour in the bottle of Bird Brine. Add 2 gallons of water (enough to completely submerge the bird) and place in the refrigerator or in a cooler on ice for 24-48 hours.
  3. Remove turkey from brine and allow to drain. Place on a wire rack over a sheet pan and place in the refrigerator for 2 hours to dry the skin. (It helps to pat the excess moisture off the skin with paper towel)
  4. Prepare pellet grill for indirect smoking at 275°F using pecan pellets.
  5. Spray the skin with the cooking spray – or another oil – and season with AP seasoning on all sides.
  6. Place the turkey in the smoker breast side up until an internal meat probe hits about 150° F.
  7. Set up a turkey fryer for deep frying at 350°F using peanut oil for best flavor. Any clear frying oil will work.
  8. Remove the turkey from the smoker and insert the turkey frying rod/hanger through the cavity.
  9. Leave the meat probe inserted in the thickest part of the breast to monitor internal temperature while frying.
  10. Carefully lower the turkey breast side down into the hot oil. Use extreme caution and follow the turkey fryer directions carefully.
  11. When the internal temperature reaches 165°F in the breast, carefully remove the turkey from the hot oil allowing it to drain. Place the turkey immediately on a cutting board breast side up and remove the turkey frying rod/hanger.
  12. Season the outer skin with King Craw Cajun Seasoning and let the bird rest for 5-10 minutes before carving.

Malcom Reed
Connect on Facebook
Follow me on TikTok
Subscribe to my YouTube Channel
Follow me on Instagram

Have a Question About This Recipe?

Connect with us in our HowToBBQRight Facebook group for recipe help, to share your pictures, giveaways, and more!

The post Smoked & Fried Turkey Recipe appeared first on HowToBBBQRight.

Cajun Pork Loin Sandwich

28 October 2022 at 13:19
Cajun Pork Loin Sandwich

Cajun Pork Loin Sandwich

How I Turned a $10 Pork Loin into a $20 Cajun Pork Loin Sandwich Print

Cajun Pork Loin Sandwich


Description

Pork Loin injected with a Cajun Butter, Seasoned with King Craw Seasoning and smoked on the pellet grill. Turned into a monster, big-boy pork loin sandwich with spicy garlic pickles and a creamy creole slaw.


Ingredients


Instructions

  1. Prepare pellet smoker for indirect cooking at 275°F using pecan pellets for smoke flavor. Any grill can be used just maintain the same temperature throughout the cook.
  2. Use a sharp knife to score the fat on the pork loin. Make slits at an angle spaced about 1/2” apart in one direction, rotate the pork loin and make additional cuts in the opposite direction.
  3. Apply a light coat of creole mustard to the outside of the loin and season with King Craw cajun seasoning. Inject the pork loin to add moisture and flavor inside the meat
  4. Place the pork loin on the pellet smoker fat side up and cook until internal temperature reaches 135°F. Remove from the pit and allow it to rest for 10-15 minutes covered loosely with aluminum foil. The internal temperature will carry over producing a perfectly cooked, juicy pork loin.
  5. Slice the loin thin and pile high on a toasted jumbo burger bun slathered with Blue Plate mayonnaise, spicy garlic pickles, and topped with creamy creole slaw.

Cajun Butter Injection Recipe:

Creamy Creole Slaw Recipe:

  • 1/2 cup Blue Plate Mayo
  • 1/4 cup creole mustard
  • 3 Tablespoons sugar
  • 1 Tablespoon red wine vinegar
  • 1 teaspoon salt
  • 1 teaspoon cracked black pepper
  • 1 bag of pre-shredded cabbage and carrots
  • 1/2 sweet onion finely sliced

Directions:

  1. Combine the mayo, creole mustard, sugar, red wine vinegar, salt, and black pepper in a mixing bowl.
  2. Add the shredded cabbage and carrots along with the finely sliced onion to a large bowl.
  3. Pour the creole dressing mixture over the vegetables and stir well.
  4. Cover the bowl with plastic wrap and refrigerator for 1-2 hours before serving.

Keywords: pork loin sandwich, pork recipes, pork loin, smoked pork, smoked pork loin, cajun pork, cajun pork loin sandwich

Malcom Reed Connect on Facebook Follow me on TikTok Subscribe to my YouTube Channel Follow me on Instagram

Have a Question About This Recipe?

Connect with us in our HowToBBQRight Facebook group for recipe help, to share your pictures, giveaways, and more!

The post Cajun Pork Loin Sandwich appeared first on HowToBBBQRight.

BBQ Chicken Pizza

10 September 2022 at 11:01
bbq chicken pizza

BBQ Chicken Pizza

Chicken thighs grilled and charred over charcoal grill. Then sliced and used for a quick and easy Pellet Grill BBQ-style Chicken Pizza using White BBQ Sauce, Jalapeños and lots of cheese! This recipe is a perfect Football Food! WHAT MALCOM USED IN THIS RECIPE: Print
bbq chicken pizza

BBQ Chicken Pizza


Description

Grilled chicken thighs used to make a simple – quick and easy – BBQ Chicken Pizza… using White BBQ Sauce, Jalapeños and lots of cheese! This recipe is a perfect Football Food!


Ingredients


Instructions

  1. Prepare a charcoal grill for 2 zone grilling. Hot coals on one side and a cool zone on the other.
  2. Season boneless, skinless chicken thighs with Killer Hogs Hot Rub.
  3. Place the chicken thighs on direct side of the grill. Flip sides for even cooking every 3-5 minutes. Continue cooking chicken thighs until internal temp hits 165 minimum. You can always move chicken to cool side to allow to finish cooking if needed.
  4. Rest the chicken thighs for 5 minutes and slice into thin strips.
  5. Preheat pellet grill – or any other grill – set up for indirect cooking at 425 degrees F. You can also cook pizza in the oven.
  6. Open pizza crust and spread it on a greased baking sheet.
  7. Spread Killer Hogs White Sauce over crust. Sprinkle half the mozzarella over sauce.
  8. Top with grilled chicken thigh strips. Add sliced jalapeños and diced onion followed by triple blend cheddar and remaining mozzarella.
  9. Place pizza on grill and cook until cheese has melted and edges are golden brown – about 25-30 minutes but keep an eye on it.
  10. Remove pizza from grill and drizzle too with Killer Hogs The BBQ Sauce before cutting to serve.

Keywords: bbq chicken pizza, grilled pizza, pizza, football food, bbq pizza, grilled chicken

Malcom Reed Connect on Facebook Follow me on TikTok Subscribe to my YouTube Channel Follow me on Instagram

Have a Question About This Recipe?

Connect with us in our HowToBBQRight Facebook group for recipe help, to share your pictures, giveaways, and more!

The post BBQ Chicken Pizza appeared first on HowToBBBQRight.

Firecracker Pork Belly Bites

14 July 2022 at 13:09
Pork Belly Bites

Firecracker Pork Belly Bites

Pork belly cut into bites, smoked with a psicy seasoning and glazed with a sweet and spicy firecracker sauce.

Print
Pork Belly Bites

Firecracker Pork Belly Bites


Description

Pork Belly Burnt Ends smoked with a sweet and spicy Firecracker Sauce


Ingredients

Firecracker Glaze:

  • 1/2 cup brown sugar
  • 1/2 cup Killer Hogs Hot Sauce
  • 1 Tablespoon apple cider vinegar
  • 1 teaspoon kosher salt
  • 1 teaspoon crushed red pepper flakes

Combine ingredients in a small bowl and microwave for 1-2 minutes stirring often to melt the sugar.


Instructions

  1. Prepare pellet grill for indirect cooking at 275 degrees using hickory pellets.
  2. Cut pork belly into cube size portions, coat with mustard, and season on all sides with Killer Hogs Hot Rub.
  3. Spray a raised cooking rack with vegetable oil and place pork belly pieces on the rack. Cook on the pellet grill for 2 hours.
  4. Place each piece of pork belly in a half-size aluminum pan and add brown sugar, honey, hot sauce, and Frank’s Red Hot seasoning.
  5. Cover the pan with aluminum foil and place back on the pit for 1 hour.
  6. Remove the pan from the grill, carefully remove each pork belly burnt end from the hot liquid in the pan and transfer to a small baking pan.
  7. Glaze each piece with the Firecracker Glaze and place back on the pit for 2-3 minutes or until the glaze sets.
  8. Remove the pan from the grill and serve with extra glaze for dipping.

Keywords: Firecracker Pork Belly Bites, Spicy pork belly, spicy pork belly burnt ends, pork belly, pork belly burnt ends, burnt ends, pork belly bites

Malcom Reed
Connect on Facebook
Follow me on TikTok
Subscribe to my YouTube Channel
Follow me on Instagram

Have a Question About This Recipe?

Connect with us in our HowToBBQRight Facebook group for recipe help, to share your pictures, giveaways, and more!

The post Firecracker Pork Belly Bites appeared first on HowToBBBQRight.
Smoked Beef Tenderloin

18 June 2022 at 11:26
Smoked Beef Tenderloin

Smoked Beef Tenderloin on Pellet Grill

Smoking a beef tenderloin this way gives new meaning to “steak dinner”. When I was thinking about what meal I’d want for Father’s Day this year… I just wasn’t feeling ribeye… But I was feeling a perfectly smoked Beef Tenderloin, cut into filet-sized pieces, and served with some Beefy Smoked Mushrooms. WHAT MALCOM USED IN THIS RECIPE: Print

Smoked Beef Tenderloin


Description

Beef Tenderloin slow smoked on the pellet grill alongside some beefy, smoked mushrooms. Perfect for a different, delicious take on steak night.


Ingredients

  • 1 whole beef tenderloin
  • 2 Tablespoons Worcestershire Sauce
  • 1 Tablespoon Killer Hogs AP seasoning
  • 2 Tablespoons Traeger Saskatchewan Seasoning (or your fave blackened rub)

Beefy Smoked Mushrooms

  • 3 pints sliced mushrooms
  • 1 shallot finely chopped
  • 56 cloves garlic minced
  • 1 cup red wine
  • 1 cup beef broth
  • 1 Tablespoon Kitchen Accomplice Beef Broth Concentrate
  • 1/2 stick butter
  • 2 teaspoons Killer Hogs AP Seasoning
  • Place all ingredients into a smoker-safe dish or a half size aluminum pan. Smoke on pit for 1.5 – 2 hours until mushrooms and garlic are tender.

Instructions

  1. Trim the whole beef tenderloin into center cut portion be sure to remove any sinew or silver skin.
  2. Prepare pellet grill or any other smoker for indirect smoking at 250 degrees.
  3. Drizzle the outside of the tenderloin with Worcestershire for a binder and season with a layer of AP seasoning followed by the Saskatchewan seasoning.
  4. Place the tenderloin on the smoker, insert a probe thermometer into the center of the roast and smoke until internal temperature reaches 120 degrees.
  5. Remove the tenderloin from the pit and cover loosely in foil and rest for 20-30 minutes.
  6. Slice the tenderloin into desired thickness and serve.

Keywords: smoked beef tenderloin, beef tenderloin, beef tenderloin recipe, pellet grill, Beef tenderloin on a pellet grill, pellet smoker, smoked beef tenderloin steaks, steak recipes, beef tenderloin steak, tenderloin steak

Malcom Reed Connect on Facebook Follow me on TikTok Subscribe to my YouTube Channel Follow me on Instagram

Have a Question About This Recipe?

Connect with us in our HowToBBQRight Facebook group for recipe help, to share your pictures, giveaways, and more!

The post Smoked Beef Tenderloin appeared first on HowToBBBQRight.
Smoked Porterhouse Steak with Bacon Tallow Butter

17 May 2022 at 21:28
Smoked Porterhouse Steak with Bacon Tallow Butter

Smoked Porterhouse Steak with Bacon Tallow Butter

Porterhouse Steak smoked on a Drum Smoker and topped with Bacon Tallow Butter – A steak like this can make anyone happy… WHAT MALCOM USED IN THIS RECIPE: Print
Smoked Porterhouse Steak

Smoked Porterhouse Steak with Bacon Tallow Butter


Description

Porterhouse Steak smoked and topped with Bacon Tallow Butter


Ingredients


Instructions

  1. Prepare drum smoker for indirect cooking at 275°F using lump charcoal for fuel.
  2. Drizzle each side of the porter house steaks with olive oil to lightly coat and season with a layer of Prime Beef rub followed by the Steak Rub. Allow the steaks to rest at room temperature for 20 minutes.
  3. Place the steaks on the smoker and insert a probe thermometer into the center of one steak to monitor internal temp.
  4. Smoke the steaks until the internal temperature reaches about 118° flipping half way through for even cooking.
  5. Take half of the bacon tallow/drippings and mix with 1/2 stick of melted butter. Season with a dash or two of Prime Beef and Steak Rub. Rest in the refrigerate until ready to use.
  6. Remove the lid from the drum and baste each steak with the bacon drippings. Flip the steaks and continue cooking (with the lid off to sear the steaks) until the internal temperature reaches about 125-128°F.
  7. Remove the steaks from the grill, top each with a big dollop of the bacon tallow butter and rest for 7-10 minutes before serving.

Malcom Reed
Connect on Facebook
Follow me on TikTok
Subscribe to my YouTube Channel
Follow me on Instagram

Have a Question About This Recipe?

Connect with us in our HowToBBQRight Facebook group for recipe help, to share your pictures, giveaways, and more!

The post Smoked Porterhouse Steak with Bacon Tallow Butter appeared first on HowToBBBQRight.

Honey Jalapeño Ribs

31 March 2022 at 12:37
Honey Jalapeno Ribs

Honey Jalapeño Ribs

Smoked Ribs with a Honey Jalapeño Glaze WHAT MALCOM USED IN THIS RECIPE: Print
Honey Jalapeño Ribs

Honey Jalapeño Ribs


Description

Ribs with a Honey Jalapeño Glaze smoked on the new Traeger Timberline XL


Ingredients

Honey Jalapeno Rib Glaze Recipe:


Instructions

  1. Prepare Traeger grill for indirect smoking at 225°F using signature blend pellets.
  2. Season ribs on both sides with garlic jalapeño rub and Killer Hogs The BBQ Rub.
  3. Smoke ribs for 2 1/2 hours on pellet grill, remove from grill and place on a sheet of aluminum foil.
  4. Wrap the ribs with: pats of butter, Mike’s Hot Honey and sweet fire pickle juice.
  5. Place the wrapped ribs back on the Traeger and increase the grill temperature to 275 degrees. Continue to cook the ribs until internal temperature reaches 200 degrees between the rib bones.
  6. Carefully unwrap the ribs and glaze on both sides with honey jalapeño rib glaze recipe below. Return the ribs to the grill for 10-15 minutes to set the glaze.
  7. Cut into individual portions and serve.
  8. For The Honey Jalapeno Rib Glaze Recipe: In a small pot over medium heat, sauté the slices of fresh jalapeño in butter until soft. Add in the brown sugar, honey, and vinegar sauce. Stir to combine. Once sauce hits a light boil, reduce heat to simmer and continue to cook for 10-15 minutes until sauce has thickened. Transfer to glass jar and cool to room temperature. Can be stored in the refrigerator for 1 week.

Keywords: Honey Jalapeno Ribs, honey jalapeno bbq ribs recipe, smoked bbq ribs, jalapeno bbq ribs, jalapeno ribs, jalapeno honey ribs, jalapeno honey bbq sauce

Malcom Reed
Connect on Facebook
Follow me on TikTok
Subscribe to my YouTube Channel
Follow me on Instagram

Have a Question About This Recipe?

Connect with us in our HowToBBQRight Facebook group for recipe help, to share your pictures, giveaways, and more!

The post Honey Jalapeño Ribs appeared first on HowToBBBQRight.

❌
❌