Normal view

There are new articles available, click to refresh the page.
Before yesterdaySweet Spicy Tasty

Classic Nei Appam

 Nei Appam is one of the most important Neivedhiyams / Prasadams made during Janmashtami,  Ganesh Chaturthi,  Karthigai,  Avani Avittam and lot more poojas or rituals like Ganapathi Homam, Bhagavathi Sevai etc .

Instant version can be made using rice flour,but this is a classic version by soaking and grinding rice along with cardamom, ripe bananas and jaggery.  Adding grated coconut or slivered coconut bits gives a nice taste and texture to the appam. 

I add a teaspoon of udad dhall while soaking the rice, this gives a nice texture and softness to the Neiappams . By adding the udad dhall , we can avoid the use of cooking soda . Udad dhall automatically gives the appam the softness and fluffy texture. 

We can using melted jaggery syrup while grinding the appam batter or if we are using good quality powdered jaggery without dust, then we can add it to the rice while grinding. 

Grinding jaggery with rice is an easier way to seamlessly blend the rice and jaggery without lumps .

For Krishna Jayanthi, it is said that if we are unable to make  elaborate prasadams for Krishnar , we can offer 

Navaneetham (Butter + sugar candy)

Nei appam

Aval Payasam (Poha Kheer)

Thayir Aval / Gopalkaala (Dahi Poha)

Paal / Milk.


Preparation Time : 10min
Soaking Time : 4 hrs
Cooking Time : 30min
Complexity : medium

Ingredients 

1 cup rice (no basmati/fragrant rice)
1 tsp udad dhall
3/4 cup jaggery (use 1 cup if you like it very sweet)
1 ripe banana
2 to  3 cardamoms

Procedure

  • Wash and soak the rice and udad dhall for 3 to 4 hrs
  • Drain the water and add the soaked rice to the blender along with roughly chopped banana and cardamom seeds .
  • Grind it to a fine paste adding water in batches. 
  • If using organic jaggery powder ,add the jaggery powder to the blender and grind it to a smooth paste resembling Dosa batter .
  • If you are doubtful about the jaggery,melt it using half cup water and strain it .
  • Use this strained jaggery water for grinding the appam batter.
  • Transfer the batter to a mixing bowl ,add a tsp of grated coconut or slivered coconut bits if you like .
  • Beat it well with a whisk or spoon to incorporate air . The batter will feel light . Rest it for 30 to 40 mins
  • Heat the appam pan , pour ghee into the cavities .
  • Once the ghee has heated up,pour the appam batter into the cavities and cook on medium flame until the underside cooks well.
  • Flip it over gently and let the other side cook until crisp and brown.
  • Take it off from the appam pan and repeat the same steps for the entire batch of batter. 
  • Tasty and delicious Nei appam is ready. 
  • If you like you could also make Jackfruit Nei appam and Watermelon Nei appam  also .

Pinterest Link - https://pin.it/4r11xefoZ


Pidikarunai Masiyal | பிடிகருணை‌ மசியல் (small elephant foot yam)

 Pidikarunai Kizhangu belongs to the Yam/Jimmikand family and is native to southern India especially Tamil Nadu . 

Also known as Pidi Karanai or karunai kizhangu it is often mistaken with arbi /taro root ,but both are entirely different . 

 Elephant foot yam is known as Senai kizhangu or simply Senai /Chenai.

Pidi karunai is used in a variety of recipes like masiyal (gravy type) , stir fry , sambar, kootu etc

Pidi karunai is small in size as compared to the regular yam /suran that is commonly used. 

Kai Pidi in Tamil is a measure to denote "a fistful" and as this vegetable fits within the size of one's fist it is called as Pidi karunai .

The flesh inside is starchy, and has a slightly slimy texture when cooked. It has a mild earthy flavor . Pidi Karunai has a tendency to cause mild itchiness to some, hence we always need to cook it in tamarind water to reduce the itchy property .

Health benefits of Pidi karunai

  • Rich in dietary fibre 
  • Low glycemic index.
  • Rich in potassium ,Vit B and C 

Pidikaranai masiyal is a very traditional Tambrahm recipe ,so obviously it is devoid onions, garlic and other strong spices .

Every home will have their own slight variations in preparing this masiyal .Some use tamarind pulp to cook the masiyal while some recipes just use a dash of lime juice while serving. 

I was introduced to Pidikarunai masiyal only after my marriage and that was when I first saw this vegetable.  In Bangalore, this vegetable is still a rarity but with the growing Quick commerce and Dark storage concept, we do get to relish Pidi karunai 3 to 4 times a year .

If you are in Tamil Nadu or happen to visit, you can definitely buy these from the local vegetable vendors .In Mumbai , Matunga market stores this vegetable around Sankrant for a few weeks .


Preparation Time - 30 mins
Cooking Time - 45 mins
Complexity - medium
Serves - 3 to 4

Ingredients 

500gm pidikarunai 
2 green chillies 
Finely chopped ginger 
1/2 cup tamarind extract 
1/2 tsp sambar powder
1 tsp oil 
1/2 tsp mustard seeds 
1 tsp udad dhall
2 dry red  chillies 
Few curry leaves
Pinch of asafoetida 

Method


  • Soak the pidikarunai in water for 10-15 mins and scrub it clean to clear the mud off it .
  • Add the cleaned Pidikarunai in a pressure cooker with sufficient water ,turmeric and a small piece of tamarind. 
  • Pressure cook for 3 whistles and open it after the pressure releases .
  • You may immerse the pressure cooked pidikarunai in a bowl of water .This step makes the peeling of pidikarunai easy.
  • Peel the skin of the pidikarunai and mash it well with a masher or using back of a ladle .
  • To the mashed pidikarunai, add salt, sambar powder , turmeric and the tamarind extract. Mix it well and keep aside .
  • In a kadai,add oil and once heated,temper it with mustard ,udad dhall,curry leaves, ginger,green chillies and red chillies.  
  • Add the pidikarunai mixture to the tempering, 1/2 cup of water and cook until the raw flavor of tamarind is lost.
  • You can adjust the consistency by adding water if you feel it is too thick.  Also,adjust the spice and salt level based on your liking .
  • Delicious pidikarunai masiyal is ready to be served .
  • You can mix it with rice and hot ghee and eat it with some roasted papads and curry.


Aadi Amavasai (Amavasya) Special post

Thai Amavasai , Aadi Amavasai and Mahalaya Amavasai  are very significant for Tamil people . The ancestors ,our pithrus are worshipped on Amavasai and the family seeks the blessings of our forefathers for the family's wellbeing. 

Aadi Amavasai is observed in the Tamil month of Aadi / Aashada / Karka (cancer) between July 15th and August 17th. 
Aadi Amavasai is the first amavasai that falls after the start of Dakshinayanam . Dakshinayanam is when the sun moves to the south of Equator .  In western India,  it is known as Ghatari Amavasya .

Like every other Amavasai,  the pithrus are worshipped and the whole family seeks their blessing . It is believed that those who observe Aadi Amavasai their families are blessed with good luck,peace and prosperity by their ancestors.  Tamil Brahmins offer tharpanam around mid morning and offer Dakshina to the Vadhyar / priest . Tharpanam is offered only by the sons who have no father . 

According to Garuda Puranam, offering black til (sesame seeds) and water to forefathers on this day will please them and they shall bless  you with longevity, success, progeny and relief from debts.


My prasadam platter above  was prepared for last year's (2023) Aadi Amavasai .In 2024 ,Aadi Amavsai is on Aug 4th 2024 . 

As like every other special occasion, even Aadi Amavasai is celebrated with an elaborate meal spread offered to our pithrus . Each family has their own tradition of preparing the food . In a typical Tamil brahmin home ,we make Vadai and Payasam along with Raw Banana (vazhakkai) curry , pepper based kuzhambu , jeera pepper rasam ,cucumber pachadi ,boiled moong dhall .
Along with this you can also prepare Arbi fry (seppankizhangu fry) ,Suyyam / Sugiyan ,Inji Thogayal etc etc .

In Maharashtra and  Gujarat ,people feast and rejoice on Ghatari amavasya as Shravan Mahina commences on the day after Amavasya and people observe Vrat/fasting and refrain from eating non veg during Chatur Maas . 

This year in 2024 it is celebration galore continously . 

Aug 2 - Aadi Vellikizhamai - auspicious Friday in the month of Aashada. How to offer maav vilakku on Aadi Vellikizhamai

Aug 3 - Aadi Pathinettam Perukku - Thanks giving and gratitude to River Kaveri . You may read my post on Significance of Aadi Perukku on my blog.

Aug 4 - Aadi Amavasai. 

Aug 7 - Thiru Aadi Pooram ( birth of Sri Aandal) 


Click on the recipe Names below for a complete recipe 


Incase you don't have time to prepare such an elaborate menu for Amavasai,  you can look up my post on Basic Amavasai Thaligai and cook up and simple, yet authentic  offering for Amavasai.

To know about the Significance of Mahalaya Amavasai look up my post on the same .


Vendakka Kichadi (Pachadi) | Fried ladies finger (okra) in coconut yogurt sauce - Sadhya special

 Kichadi (Pachadi) is an integral part of a festive meal (Sadhya) in Kerala. Kerala style kichadi must not be confused with the North Indian Khichdi which is a rice based main course recipe. 

 Onam and Vishu Sadhya is incomplete without serving a kichadi . Kichadi also known as Pachadi in few regions of Kerala,is a yogurt based side dish often made from various vegetables like Okra/ladies finger ,ginger ,tomato, Cucumbers, ash gourd etc .

Kichadi pairs well with Sambar Rice and a coconut based vegetable stir fry . One can even make it as a part of day to day meal as well. Why wait for a special occasion to savor such a healthy delicacy ? 

Vendakkai Thayir Kichadi/Pachadi   is made from okra/ladies finger . Ladies finger is known as Vendakka or Vendakkai in Malayalam/ Tamil.

Chopped ladies finger is shallow fried in coconut oil and then added to the coconut chilli paste mixed in yogurt. The yogurt must not be spur, else it will ruin the taste of the kichadi /pachadi.

Some recipes call for cooking the coconut chilli paste + yogurt ,but in this recipe I am not cooking the yogurt mixture . I am going to just add the fried Okra to the yogurt mix along with the tempering. 

Some popular kichadi /pachadi served as part of Sadhya 

Inji (Ginger) Thayir  Kichadi 

Thakali (Tomato) Kichadi 

Vellarikai Inji (Cucumber Ginger )Thayir 

Vellarikai (Cucumber) kichadi


This month in our SHHH Secretly Cooking Challenge food group,we are celebrating Sadhya special hosted by me . My fellow bloggers have come up with amazing and authentic Kerala Sadhya recipes . My partner for this month ,Radha Rajagopalan has dished out the traditional Ada Pradhaman ,which is a classic dessert from Kerala. Do check out her recipe for Ada Pradhaman without fail .  

To know more about the dishes served in a typical Sadhya for Onam / Vishu, check out the list soon after the recipe of Vendakkai Kichadi. I am giving you a complete list of authentic recipes.


Preparation Time - 10mins
Cooking Time- 5 mins
Complexity - simple
Serves - 2 to 3 

Ingredients

1/4 cup fresh grated coconut 
2 green chillies
1/2 tsp jeera/cumin
8 to 10 tender ladies finger/okra/vendakkai
200ml  thick yogurt/dahi/thayir
Salt as needed
2 tsp coconut oil
1/2 tsp mustard seeds
1 dry red chilli
Few curry leaves 

Method

  • Wash and dry the ladies finger. Cut into medium sized roundels. 
  • Whisk the yogurt well and make it lump free and smooth. 
  • Grind the green chillies, coconut,jeera with 1tbsp yogurt and some water  into a smooth paste.
  • Add this paste to the yogurt and mix it well with adequate salt.
  • In a frying pan,heat 1tsp of coconut oil and roast the ladies finger until it crispy  ,add a little salt to the roasted ladies finger in the end .
  • Prepare a tempering of mustard seeds,red chilli and curry leaves in the remaining coconut oil .
  • Add the roasted ladies finger ,tempering to the yogurt mixture and mix it well .Delicious and tasty vendakkai kichadi is ready to be served .

Sadhya recipes on the blog. Click on the individual items below to get detailed recipe


Pin me up


Nei Payasam | Aravana Payasam

 Nei Payasam also known as Aravana Payasam is very popular as prasadam in Kerala Temples especially Bhagavathy (Devi) Temple and Ayyappa Temple . Sharkara Payasam ,Kadu Madhuram or just Aravanai are some other names for Nei Payasam.

Nei means ghee and payasam means kheer. This payasam gets it flavor and taste from just 3 ingredients; rice,ghee and jaggery. The payasam is either garnished with fried coconut bits or ghee fried cashews . A pinch of ginger powder at the end elevates the flavor profile manifold. 

Though we call this as Nei Payasam, the consistency of nei payasam isn't like the usual paysam (kheer). Consistency of nei payasam is gooey and thick similar to sakkarai pongal . 

Originally, Kerala Matta raw rice or red rice is used in the preparation of Nei Payasam,but if that us not available we can use any short grained rice, but a strict No to Basmati rice as it will alter the taste of Nei Payasam, because of the natural flavor that Basmati rice possesses


 In temples, nei payasam is made in huge bronze urulis and slow cooking method is followed. Ghee is poured at intervals until the ghee is completely absorbed into the rice and jaggery mixture.  Normally, dark colored jaggery is used for preparing nei payasam, hence the color will be dark and deep brown. 

Aravana / Nei Paysam shouldn't be confused with sakkarai pongal though they may sound similar. The quantity of ghee used in Nei payasam in more also there is no use of milk or lentils. Because the quantity of ghee is more ,we cannot eat this nei paysam like any other paysam for dessert . Just a small quantity can be savored and that itself will be very satiating and satisfying. 

Even to this day, Bhagavati Seva Pooja always has the offering of nei paysam and the same is distributed to all those partaking in the Pooja . 

I have very fond memories of enjoying piping hot Nei Payasam and crispy fried Medhu Vadai served as prasadam in leaf cups after Bhagavathy Seva Pooja.  The taste still lingers on my tongue and nothing can beat the taste and flavor of prasadam that is blessed with divine vibrations.

Holy month of Aashada or Aadi or Karikatam(July 15 to Aug 15 as per English calender) is known for Bhagavathy Seva ,many Brahmin families hailing from Kerala / Palakkad have the tradition of performing thus pooja at home on either Tuesdays or Fridays in this holy month .

So,whether or not you perform Bhagavthy Seva at home,you can always prepare Nei Payasam and offer as prasadam during auspicious pooja days or even on Tuesdays and Fridays during Aadi Maasam .


Preparation Time - 15 to 20 mins
Cooking Time - 45 mins
Complexity- medium 
Serves - 2 to 3

Ingredients 

3/4 cup raw rice (I have used Sona Masuri )
3/4 cup powdered organic jaggery 
1/2 cup ghee 
Few cashews 
Pinch of dry ginger powder 
Pinch of cardamom powder 

Method 

  • Wash the rice well and pressure cook it with 3 cups of water and let the pressure release naturally. 
  • The rice must be cooked well and soft but not mushy . With the back of ladle ,lightly mash the rice but don't make it mushy . 
  • In a thick bottomed vessel , melt the jaggery with 1/2 cup water . We don't need any string consistency  just the jaggery needs to melt . Incase ,you see any impurities in the jaggery syrup,then filter it out and bring the syrup to a quick rolling boil.
  • Slowly add the mashed and cooked rice and mix it well without any lumps .Gradually add the ghee in parts and keep stirring until all the ghee is well absorbed into the nei payasam and the paysam looks glossy and well done .
  • If you are using coconut bits ,fry them in ghee until it turns golden brown and crisp ,likewise the same with cashewnuts as well.
  • Add this to the nei payasam along with cardamom powder and ginger powder and mix it well .
  • Offer it to the lord and distribute it among family and friends. 

Pin me up


Karpooravalli (Omavalli) neer mor / Indian Borage Buttermilk (Doddapathre neer majjige)

 Karpooravalli / Omavalli / Ajwain patha /Indian Borage - are you hearing these names for the first time ? 

Well, this is a very traditional and medicinal herb used in Indian Cooking especially in the South.  This herb belongs to the mint family, but has a pungent and strong flavor resembling that off Thyme /Ajwain/ Omam.

A perennial plant and can be grown easily at home without any effort . The leaves are used in herbal drinks to treat indigestion, cold ,cough and also to boost overall immunity. 

Due to the pungent taste and the anti microbial properties possessed by Karpooravalli it is very effective to treat sore throat and sinusitis .

Also a mild diuretic , it helps in flushing out the toxins from the body and maintains good kidney health ,there by managing the body metabolism. 


As a kid ,I remember my mom would make me chew a small leaf especially in monsoon to keep me away from seasonal flu and stomach issues due to weather change . It is always good to incorporate such healthy and natural food in our day to diet to keep us safe and healthy.

When I found some fresh karpooravalli, I was intrigued to try Preethi's recipe of making karpooravalli Buttermilk/Neer Mor using this magical herb.

Preethi has used dried powder form of karpooravalli while I have used fresh leaves since I had an access to these . My friend's mom has it growing on her home garden and aunty was kind enough to get me some fresh and tender leaves .

Summer ,winter or monsoon buttermilk is a part of daily diet in our home and I keep experimenting with different flavors . If you also like buttermilk in various taste then you must try some of it 

Pudina Chaas 

Neer Mor  - Ramanavmi Special 

Vazhaithandu Mor (banana stem) 

Masala Chaas 


Preparation Time - 5 mins
Cooking Time  - Nil
Complexity - Nil
Serves - 2 to 3

Ingredients 

2 to 3 fresh karpooravalli leaves
200ml thick yogurt
400ml water 
1/4 tsp finely chopped ginger
Salt to taste 
Pinch of kala namak (black salt)
Pinch of roasted jeera powder 

Method 

  • In a small blender ,blend the ginger ,karpooravalli leaves with little salt into a coarse paste.
  • Whisk the curd using an electric beater or manual whisk till it appears creamy.  
  • Add the ground paste, salt , black salt ,jeera powder and chilled water and whisk it again until it appears nice and frothy. Adjust salt based on your need.
  • Pour into glasses and enjoy with your meal or keep it refrigerated until your lunch time.

Pin me up 


Rose Gulkand Shrikhand | Gulkand Shrikand | Gulab Shrikhand

 Rose Shrikand or Gulab shrikand is made using Gulkand and mild rose essence or rose syrup .

Gulkand is a delicious jam made from rose petals and sugar . Gulkand is an important ingredient while preparing masala paan (flavored betel leaf) or beeda as it is called in the South .

Shrikand is often served alongside the main course meal as an accompaniment to puris and hot parathas. Rose Shrikand is my next favorite after the classic flavors of Badam Elaichi Shrikand and Kesar Pista Shrikand .

Rose shrikand, gulab Shrikhand, Shrikhand, Shrikand, gulkandh Shrikhand, rose Gulkand Shrikand, kulkandh , gulqand srikand ,srikand

This gooey and sweet Gulkand along with mild rose essence is blend into the silky smooth hung curd to make the lipsmacking Gulkand Shrikand . Serve it along with some hot puris or parathas and you will relish the taste forever . 

The trick to making a silky smooth yogurt is getting hold of a perfect hung curd. 

If you get thick and creamy Greek yogurt,you can also use that to make Shrikand . I have editted my recipe (June 2025) below to include how to make the perfect hung curd using home set Dahi /yogurt . 

Rose shrikand, gulab Shrikhand, Shrikhand, Shrikand, gulkandh Shrikhand, rose Gulkand Shrikand, kulkandh , gulqand srikand ,srikand

If you love this flavor of rose / gulkand ,then you must definitely check these recipes out 

Gulkand Milkshake

Rose Kulfi

Rose Thandai

Rose Milk

Rose shrikand, gulab Shrikhand, Shrikhand, Shrikand, gulkandh Shrikhand, rose Gulkand Shrikand, kulkandh , gulqand srikand ,srikand

Pre Preparation time - 2 to 5 hrs 
Cooking Time - Nil 
Actual Preparation - 5 mins 
Serves - 2 to 3

Ingredients 

400ml thick yogurt or full fat dahi or curd

2 tsp rose syrup 

2 to 3 tablespoons gulkand 

2 to 3 tsp  powdered  sugar (optional)

Preparation of Hung curd

Take a wide mixing bowl and place a strainer over it lined with a muslin cloth/ cotton cloth and pour the curd into the cloth . 

I have used home made thick curd for an even consistency. You can also use the store bought dahi if you please . The yogurt should not be sour . So it is best to use freshly set curd made in last 24hrs .

I set the yogurt /dahi in full fat milk .Once the dahi was set ,I let it sit in the fridge for 24hrs to set properly . 

Bring the ends of the cloth together, squeeze it once and tie it very tightly . Place a heavy object over the tied cloth and leave the colander over the mixing bowl so that all the whey water will get collected in it . Keep squeezing the cloth occasionally to drain the excess water . 

Keep this set up inside the refrigerator so that the hung curd doesn't turn sour especially in summer .

After about 2 to 3 hrs , you can see all the whey collected in the bowl below and when you open the cloth all that is left is thick creamy mass which is hung curd . Squeeze it once again before removing it from the cloth to ensure there is no water content left.  When you touch the hung curd , it should appear thick and creamy without any excess water.  If you find it watery, leave it for somemore time in  the cloth with the weight on . 

Donot waste the collected whey, you can use it while kneading the dough for rotis or even to prepare buttermilk or Chaas

Preparation of Shrikhand

Rose shrikand, gulab Shrikhand, Shrikhand, Shrikand, gulkandh Shrikhand, rose Gulkand Shrikand, kulkandh , gulqand srikand ,srikand

  • Transfer the hung curd to a wide mixing bowl .Add in the gulkand , rose syrup. Powdered sugar may be added though it isn't necessary.    Gulkand as well as rose syrup will have sugar already added in them which is enough to give sweetness to the Shrikhand.
  • Mix well with a spoon until all the ingredients blend well . Keep it in the refrigerator for it to set well . 
  • Take it off the refrigerator just before serving and garnish with some chopped pistachios and some tutti fruity. 

Pin it up 


NeerAagaram | Pazhaya Saadham | Probiotic rice porridge

 Neer is water and Aagaram is food ,so basically NeerAagaram boils down to Watery Food or put it simply,  a liquid diet . Neeragaram is very popular in the Southern part of India and also in Orissa, Bengal, Bihar ,chattisgarh as well . Partaking Neeragaram on a daily  basis prevents malnutrition and also improves our immune system .

Now,if you are wondering what is this  Neeragaram ? The answer is very very simple and will leave you amazed .

Neeragaram is just left over cooked rice soaked in water overnight and the next morning it is mashed well and mixed with buttermilk ,rock salt and consumed with shallots and some green chillies .

Neeragaram is also known as Pazhaya Saadham , Saadhertham , pazhaya sor Kanji in South and in the North it is called as Pakhala, Paani Bhaat,Panta Bhaat etc

Neeragaram is also known as Pazhaya Saadham , Saadhertham , pazhaya sor Kanji in South and in the North it is called as Pakhala, Paani Bhaat,Panta Bhaat etc . Orissa celebrates this health rich food as Pakhala Dibasa in the month of March every year .

Neeragaram is a powerhouse of nutrients for the benefit of good gut health . It's a natural probiotic just like home set curd .

The overnight soaking of cooked rice helps in the activation of good bacteria which is very beneficial on consumption for good gut /intestinal health.  You may need not take probiotic supplements if you have this pazhaya saadham regularly.

Neeragaram is also known as Pazhaya Saadham , Saadhertham , pazhaya sor Kanji in South and in the North it is called as Pakhala, Paani Bhaat,Panta Bhaat etc

Consuming Neeragaram early in the morning is an age old practice followed by ancestors especially during the hot summer months when the sun is blazing. The soaked rice acts as a natural coolant and also keeps us full for long hours due to the absorption of starch content in the rice and most importantly prevent us from dehydration. 

Neeragaram can be had with some pickle , fried curd chillies (mor milagai) or with chopped shallots /onions . If you are pairing pazhaya saadham with onions you must definitely try it out with Srilankan Seeni Sambol - get the recipe from my fellow blogger Priya's blog.

You may adjust the quantity of buttermilk as per your preference. I like my neeragaram watery,so I add more buttermilk, if you like it thick like a porridge, you can adjust accordingly. 

Preparation Time - 8 to 10 hours /overnight 
Cooking Time - Nil
Complexity - easy 
Serves - 2 to 3 

Ingredients 

1.5 cups cooked rice (I use the sona masoori variant)
2 cups water 
3 cups buttermilk
Rocksalt as needed 

Method 

  • Soak the rice in 2 cups water overnight . Use an earthen vessel if you can else regular steel bowls will work.
  • The next morning, mash the rice well with your hands or use a masher . The rice when mashed should resemble porridge /gruel like consistency.  Mashing the rice with your hands is always a good choice .
  • To this now add the buttermilk ,rock salt and mix well . Pour it into glasses and serve with the accompaniments of your choice .
  • You may also add 1/4 tsp fenugreek seeds while soaking the rice previous night. 

Pin it up 

Neeragaram is also known as Pazhaya Saadham , Saadhertham , pazhaya sor Kanji in South and in the North it is called as Pakhala, Paani Bhaat,Panta Bhaat etc


Vellarikaai Inji Thayir Pachadi | Cucumber Ginger flavored yogurt - No cook recipe

 Cucumbers are my best friend in summer . I love to munch on some juicy Cucumbers as is or use them in salads or raitas .

Raitas or pachadis are a must have in summer as they cool down the body heat and are comforting on our stomach aiding digestion. 

Across the length and breadth of India ,Cucumbers are an integral part of summer meal be it the Khamang Kakdi of Maharashtra ,Southekaai kosambri from Karnataka ,Vellarikai Kichadi of Kerala or Pahadi Raita from Himachal Region . 

Vellarikaai inji thayir pachdi, cucumber ginger raita , kakdi adraki raita,kheera aur adrak ka raita, vellari inji pachadi,cucumber pachadi

Today , I shall be sharing another favorite recipe using cucumber.  Thayir Pachadi is the South Indian version of raita . We can make thayir pachadi with many vegetables like tomatoes,  sweet potatoes,  ladies finger,ginger etc .

Inji Vellarikaai thayir pachadi ,is very easy to make and is a No cook recipe.  We will need fresh and tender cucumbers to make this raita . Donot use an over ripe cucumbers as the cucumber won't be juicy and also the seeds will be too mature and rough.

Spice level can be adjusted by increasing or decreasing the number of chillies used .I prefer to keep the pachadi mild so that the flavor of ginger is lifted up. 

Vellarikaai inji thayir pachdi, cucumber ginger raita , kakdi adraki raita,kheera aur adrak ka raita, vellari inji pachadi,cucumber pachadi

Preparation Time - 10 mins
Cooking Time - Nil 
Complexity- easy 
Serves - 3 to 4

Ingredients 

2 small Cucumbers or 1 medium Cucumber
150ml thick yogurt /dahi/curd 
Salt as needed 
Small piece of ginger 
1 small green chilli
Few curry leaves 
2 tsp finely chopped fresh corriander 
1 tsp oil
1/4 tsp mustard seeds
1/4 tsp udad dhall 
Pinch of asafoetida 

Method 


  • Peel the skin of the cucumber.  Finely chop half the quantity of the cucumbers and add it to a mixing bowl.
  • Roughly chop the other half of the cucumber and blend it with ginger , chilli, corriander, curryleaves and little salt to a very fine paste.
  • Whisk the curd with adequate salt and make it lump free. 
  • Mix the cucumber paste , chopped cucumber and the whisked yogurt.  Adjust salt if needed. 
  • Prepare a tempering of mustard seeds and udad dhall in hot oil with asafoetida.  Cool it and then add it to the raita . Donot pour hot tempering over the pachadi as the curd may turn sour in the hot weather .
  • Delicious thayir pachadi is ready to serve .

Pin me up 


Badam Kheer | Badam Payasam | बादाम खीर

 Badam Kheer / Payasam is an exotic festive dish which is loaded with lots of richness and flavor .

It is very easy to make and has no fancy ingredients except almonds ,cardamom, milk and saffron strands.  Sugar is used as a sweetener.   Soaked almonds are ground to a fine paste with saffron and cardamom and simmered in boiling milk .

Badam kheer , how to make badam payasam , baadam payasam , badam payasa , badam kheer at home , almond pudding , badam geer , badam gheer

Mom used to stock up home made badam powder and I used to drink Badam milk during my school days as I was not a fan of malt based drinks . Badam payasam is an extension of Badam Doodh or Badam milk and a perfect dessert for all festive occasions or even get togethers .

Even beginners can easily make  badam Kheer due to the ease involved in the making of this payasam. I prepared this yummy and aromatic badam Kheer for our Tamil New Year's festival today .

To know more about ,how we celebrate Tamil New Year (Puthaandu) and the delicious spread we prepare ,check this post here .


Badam kheer , how to make badam payasam , baadam payasam , badam payasa , badam kheer at home , almond pudding , badam geer , badam gheer


Preparation Time - 1 hr
Cooking Time - 30 mins
Complexity- easy 
Serves - 3 to 4 

Ingredients 

1/2 cup badams /almonds soaked in hot boiling water 
1/2 litre milk (preferably use 2% fat or full fat milk) 
1/4 cup sugar 
3 to 4 cardamoms
Few strands of saffron

Method

  • Soak the almonds in hot boiling water for mini1 hr . You can soak for 2 to 3 hours also. Deskin the badams and discard the skin.
  • In a blender add the badams, cardamoms,  saffron ,1/2 cup milk and grind to a fine paste .
  • Boil the 1/2 litre milk in a thick bottomed vessel . As the milk reaches its boiling point ,slowly add this badam paste and keep stirring on low flame and continue cooking until the raw flavor of almonds is lost .
  • Lastly, add the sugar and continue to simmer till the kheer thickens .  You can add some saffron strands while the kheer is simmering. Turn off the stove and let it come to room temperature. 
  • Serve this badam Kheer warm or chilled . 

Pin me up !!

Badam kheer , how to make badam payasam , baadam payasam , badam payasa , badam kheer at home , almond pudding , badam geer , badam gheer


Strawberry Lemon Soda (Mocktail)

 Strawberry lemon soda is a very refreshing mocktail drink that can be served at any party.

Made from fresh strawberries ,flavored with fresh lemon juice and spiked up with either club soda or sprite ,this drink gives a nice zing with every sip. If using plain club soda we will need to add some sugar or sugar syrup to give the sweetness while we don't need extra sweetener if using sprite or 7Up. 

Preparing Strawberry Lemon Soda is actually a child's play as there is not much complexity involved.  Though at home we are a huge fan of Strawberry Milk shake , this refreshing mocktail was a welcome change and we all simply loved it . I have used sprite in my recipe, hence no extra sweetener added .

If serving for a large party ,you can mix the Strawberry syrup ,lemon juice along with some ice cubes and lemon slices in  a jar and keep it ready ..pour the Strawberry mix onto serving glasses and add in the soda /sprite just before serving along with some crushed ice .

If you love to spread some Strawberry Jam on  a warm slice of toasted bread,then Priya's Strawberry Chilli Jam is a must try .


Preparation Time  - 10 mins
Cooking Time - Nil
Complexity - easy 
Serves - 2 glasses 

Ingredients 

8 to 12 strawberries 
2 tsp sugar 
1 tbsp lemon juice 
Few lemon slices 
250 ml soda /sprite 

Method 


  • Trim off the top part of the Strawberries and roughly chop them.
  • Add them to a blender with 2 tsp sugar and blend it to a smooth puree .
  • Divide the puree equally into 2 serving glasses , add 1/2 tsp lemon juice and a slice of lemon to each . Add some crushed ice before adding sprite/ soda .
  • Slowly pour in the chilled sprite in both the glasses and serve immediately. 

Refreshing and classic welcome drinks on my blog 


Pin me up 


Set Dosa | Set Dose (variation 2)

 Set dosa is one of the most loved breakfast in Karnataka.  Though the basic ingredients remain the same,there are some mild variations used by various restaurants that make them a speciality .

My mom had learnt a recipe from one restaurant cook and I have been following that primarily all these years to make Set Dosas at home . To check out my Mom's variant click here

Recently, my cousin Kalyani who blogs at Sizzling Tastebuds posted a Millet Set Dosa which prompted me to look up her recipe of The Regular Set Dosa and I found that it was slightly different from my recipe and  I went ahead and made Set Dosas with her proportion and needless to say everyone at home liked it. They were just spongy and so soft that it was a melt in mouth experience. I have followed her recipe to the 'T' and no changes at all . 

I served these cotton soft set dosas with Aloo Sagoo and Coconut Chutney the way it is served in most restaurants here in Bangalore . Chutney Pudi is of course our family favorite and we cannot imagine having our Dosas without Molagapudi.  Click on the recipe names above for detailed method of preparation. 

Ingredients 

2 cups idli rice 
1 cup whole udad dhall (udad dal gota)
1/4 cup beaten rice /Poha 
1/4 sabudana /jawwarsi 
 2 tsp channa dal
1 tsp methi seeds 
salt to taste 

Method 

  • Wash the idli rice and udad dal 3 or 4 times until the water is clear .
  • Sift the beaten rice once and wash it thoroughly under the colander .
  • Soak the idli rice , udad dhall, beaten rice, Sabudana ,methi seeds in sufficient water for 3 to 4 hours .
  • After the soaking Time,  grind the ingredients in a wet grinder or blender until you get a smooth batter . Batter must have the consistency of Dosa batter, neither too thick nor too runny . I prefer the wet grinder as the yield is more compared to  the blender method .
  • Add salt, beat it well once with your hands . The warmth from our hands induces good aeration and helps the batter to ferment well.
  • Allow the batter to ferment in a warm place for 8 to 10 hrs .

  • To prepare the dosas ,heat the tawa , drop a ladle of the batter and donot spread too much. The set  Dosa has to be slightly thick .
  • The moment you pour the batter on the hot tawa ,you can see lot of pores /holes developing on it.This means your batter is perfect. Just drizzle a few drops of oil and cook covered for 1min.
  • Slowly flip over and cook on the other side for just 10 sec . 
  • If the batter is well fermented, then absolutely no oil is required to cook the dosa.
  • Serve hot with accompaniment of your choice.

Pin me up


Paruppu Urundai Mor Kuzhambu/ Lentil balls in spicy yogurt gravy

Paruppu Urundai Mor Kuzhambu is an authentic and traditional recipe made in most Tamil homes . It is a festive dish and relished by all .  

The lentil dumplings are made by soaking and grinding thoor dhall along with red chillies ,curry leaves and some salt . This ground mixture is then shaped as balls and steamed to be further simmered along with the yogurt gravy until the flavors are absorbed into the urundais.

 Some use a combination of lentils /paruppu to make the urundais while some use just thoor dhall . This time I have used just thoor dhall and a handful of udad dhall to get the softness.  Pair this delicious paruppu urundai more kulambu with a simple vegetable stir fry with coconut gratings and mix along with piping hot rice to have a wholesome and delicious lunch . 

You may also want to try Paruppu Urundai Kuzhambu which is a tamarind based gravy for another gastronomic feast .

Onset of January brings about a lot of festivals in India and the best way to enjoy them is by cooking and eating a delicious feast.This month on our food bloggers' group Shhh Cooking Secretly Challenge , we are celebrating a festive theme suggested by me . I was partnered with the versatile and fantastic food blogger ,Mayuri ji who has prepared a Holi special Thandai Flavored Rava cake 

Some more lipsmacking and tasty Mor Kuzhambu variations on my blog

Pooshnikaai (ash gourd) Mor Kuzhambu 

Kumbalkkai (ash gourd )Majjige Huli 

Pooshnikaai (ash gourd) Mor Kootu 

Vendakkai (ladies finger)Mor Kuzhambu 

Bonda Mor Kuzhambu 


Ingredients 

For the Paruppu Urundais

1/2 cup thoor dhall /split pigeon peas
2 tbsp udad dhall
2 to 3 green chillies 
Few curry leaves 
Salt as needed
Generous pinch of asafoetida

For the Mor Kuzhambu 

250ml thick yogurt 
100 ml water 
2 tsp oil
1 tsp mustard 
2 to 3 dry red chillies 
fresh curry leaves 
pinch of turmeric 
Pinch of asafoetida 
salt
To grind
 6 to 7 tbsp  fresh grated coconut 
1/2 tsp jeera/cumin 
3 to 4 green chillies 
1 tsp channa dhall /bengal gram
2 tsp dhaniya /corriander seeds
Small piece ginger 


Method 

To make the Paruppu Urundais 

  • Wash and soak the lentils in sufficient water for 2 to 3 hrs .
  • Drain the water and grind the lentils along with  chillies ,curry leaves, salt and asafoetida to a fine paste .
  • Make small lemon sized balls out of these and steam it until it is half done . Don't steam until the lentils become hard ,else they won't absorb the flavor of gravy into them . Keeping them half cooked helps it remain soft and easy to eat .

To make the Mor Kuzhambu 

  • Soak all the ingredients under the "to grind" section in water for 10 to 15 mins and grind into a fine paste.
  • Whisk the yogurt until is creamy and smooth. 
  • Add in the ground spice paste to the whisked yogurt along with salt and turmeric powder and mix well with water mentioned . Donot add too much water , else the mor kuzhambu will be runny and will split on boiling.
  • Add the steamed lentil dumplings to the mor kuzhmabu as soon as it starts frothing up.Simmer for a few mins and turn it off. 
  • Prepare a tempering of mustard seeds, dry red chillies and fresh curry leaves in oil and pour it over the mor kuzhambu. 

Khimchi - Asian Cuisine

 If you are a Chinese food lover, then Khimchi is not a new item.  I was introduced to khimchi when I first dined at Mainland China years ago. Mainland China is one of the most popular Asian Fine Dine restaurant in India that serves many authentic Asian dishes .

For the uninformed, Khimchi is a way of preserving veggies like a pickle and is served alongside the main course meal . Mostly when fresh veggies aren't available either due to weather or any other factor, then this Khimchi comes to the rescue. 

 I had Googled many recipes on how-to make Khimchi at home and had been wanting to try from a long time.  Finally I narrowed down on a recipe from a popular food channel and prepared using that recipe . I was quite happy with the outcome as it was just like the one I have tasted. I made it using cabbage but there are many variants where you can add carrots, daikons etc as well.

This month in our food bloggers' group Shhh cooking secretly Preethi Tandon suggested we explore jams,chutneys ,jellies or preserves from non Indian Cuisine and viola it was the best time to make and enjoy this yummy Khimchi which was a long over due to present itself on the blog.

My partner for this month is the enthusiastic blogger Seema who gave me the versatile ingredients soy sauce and sugar while I gave her  Cumin and lemon as the secret ingredients. with Seema has made a lipsmacking Quince Chutney.. If only I could lay my hands on that chutney now,I would be in the 7th heaven relishing it :-) 


Preparation Time - 3 to 4 hrs
Cooking Time - Nil
Complexity - simple

Ingredients 

3 cups finely chopped Cabbage
1/4 cup Dark soy sauce 
1/4 cup Vinegar 
2tbsp Chili flakes
Salt as needed 
1 tbsp Sugar 
2 tsp Little garlic powder 
1 tbsp Finely  grated ginger
Sesame oil while serving 

Method


  • In a wide mixing bowl , take the cabbage and mix it with salt and some chilli flakes . Let this rest for 3 to 4 hrs 
  • After 3 to 4 hrs the cabbage will appear wilted and soggy.Squeeze out  as much juice you can from the cabbage and transfer it to another bowl.
  • In this bowl,now add in all the ingredients except the oil and mix it well.
  • Store it in sterilized glass jar,cover it properly and let it ferment for 24hrs .this step is very important to get the perfect taste and texture. 
  • Refrigerate after 24hrs and always use a dry spoon while scooping out from the jar.
  • Drizzle some sesame  oil over the khimchi just before you serve.

Pin it up


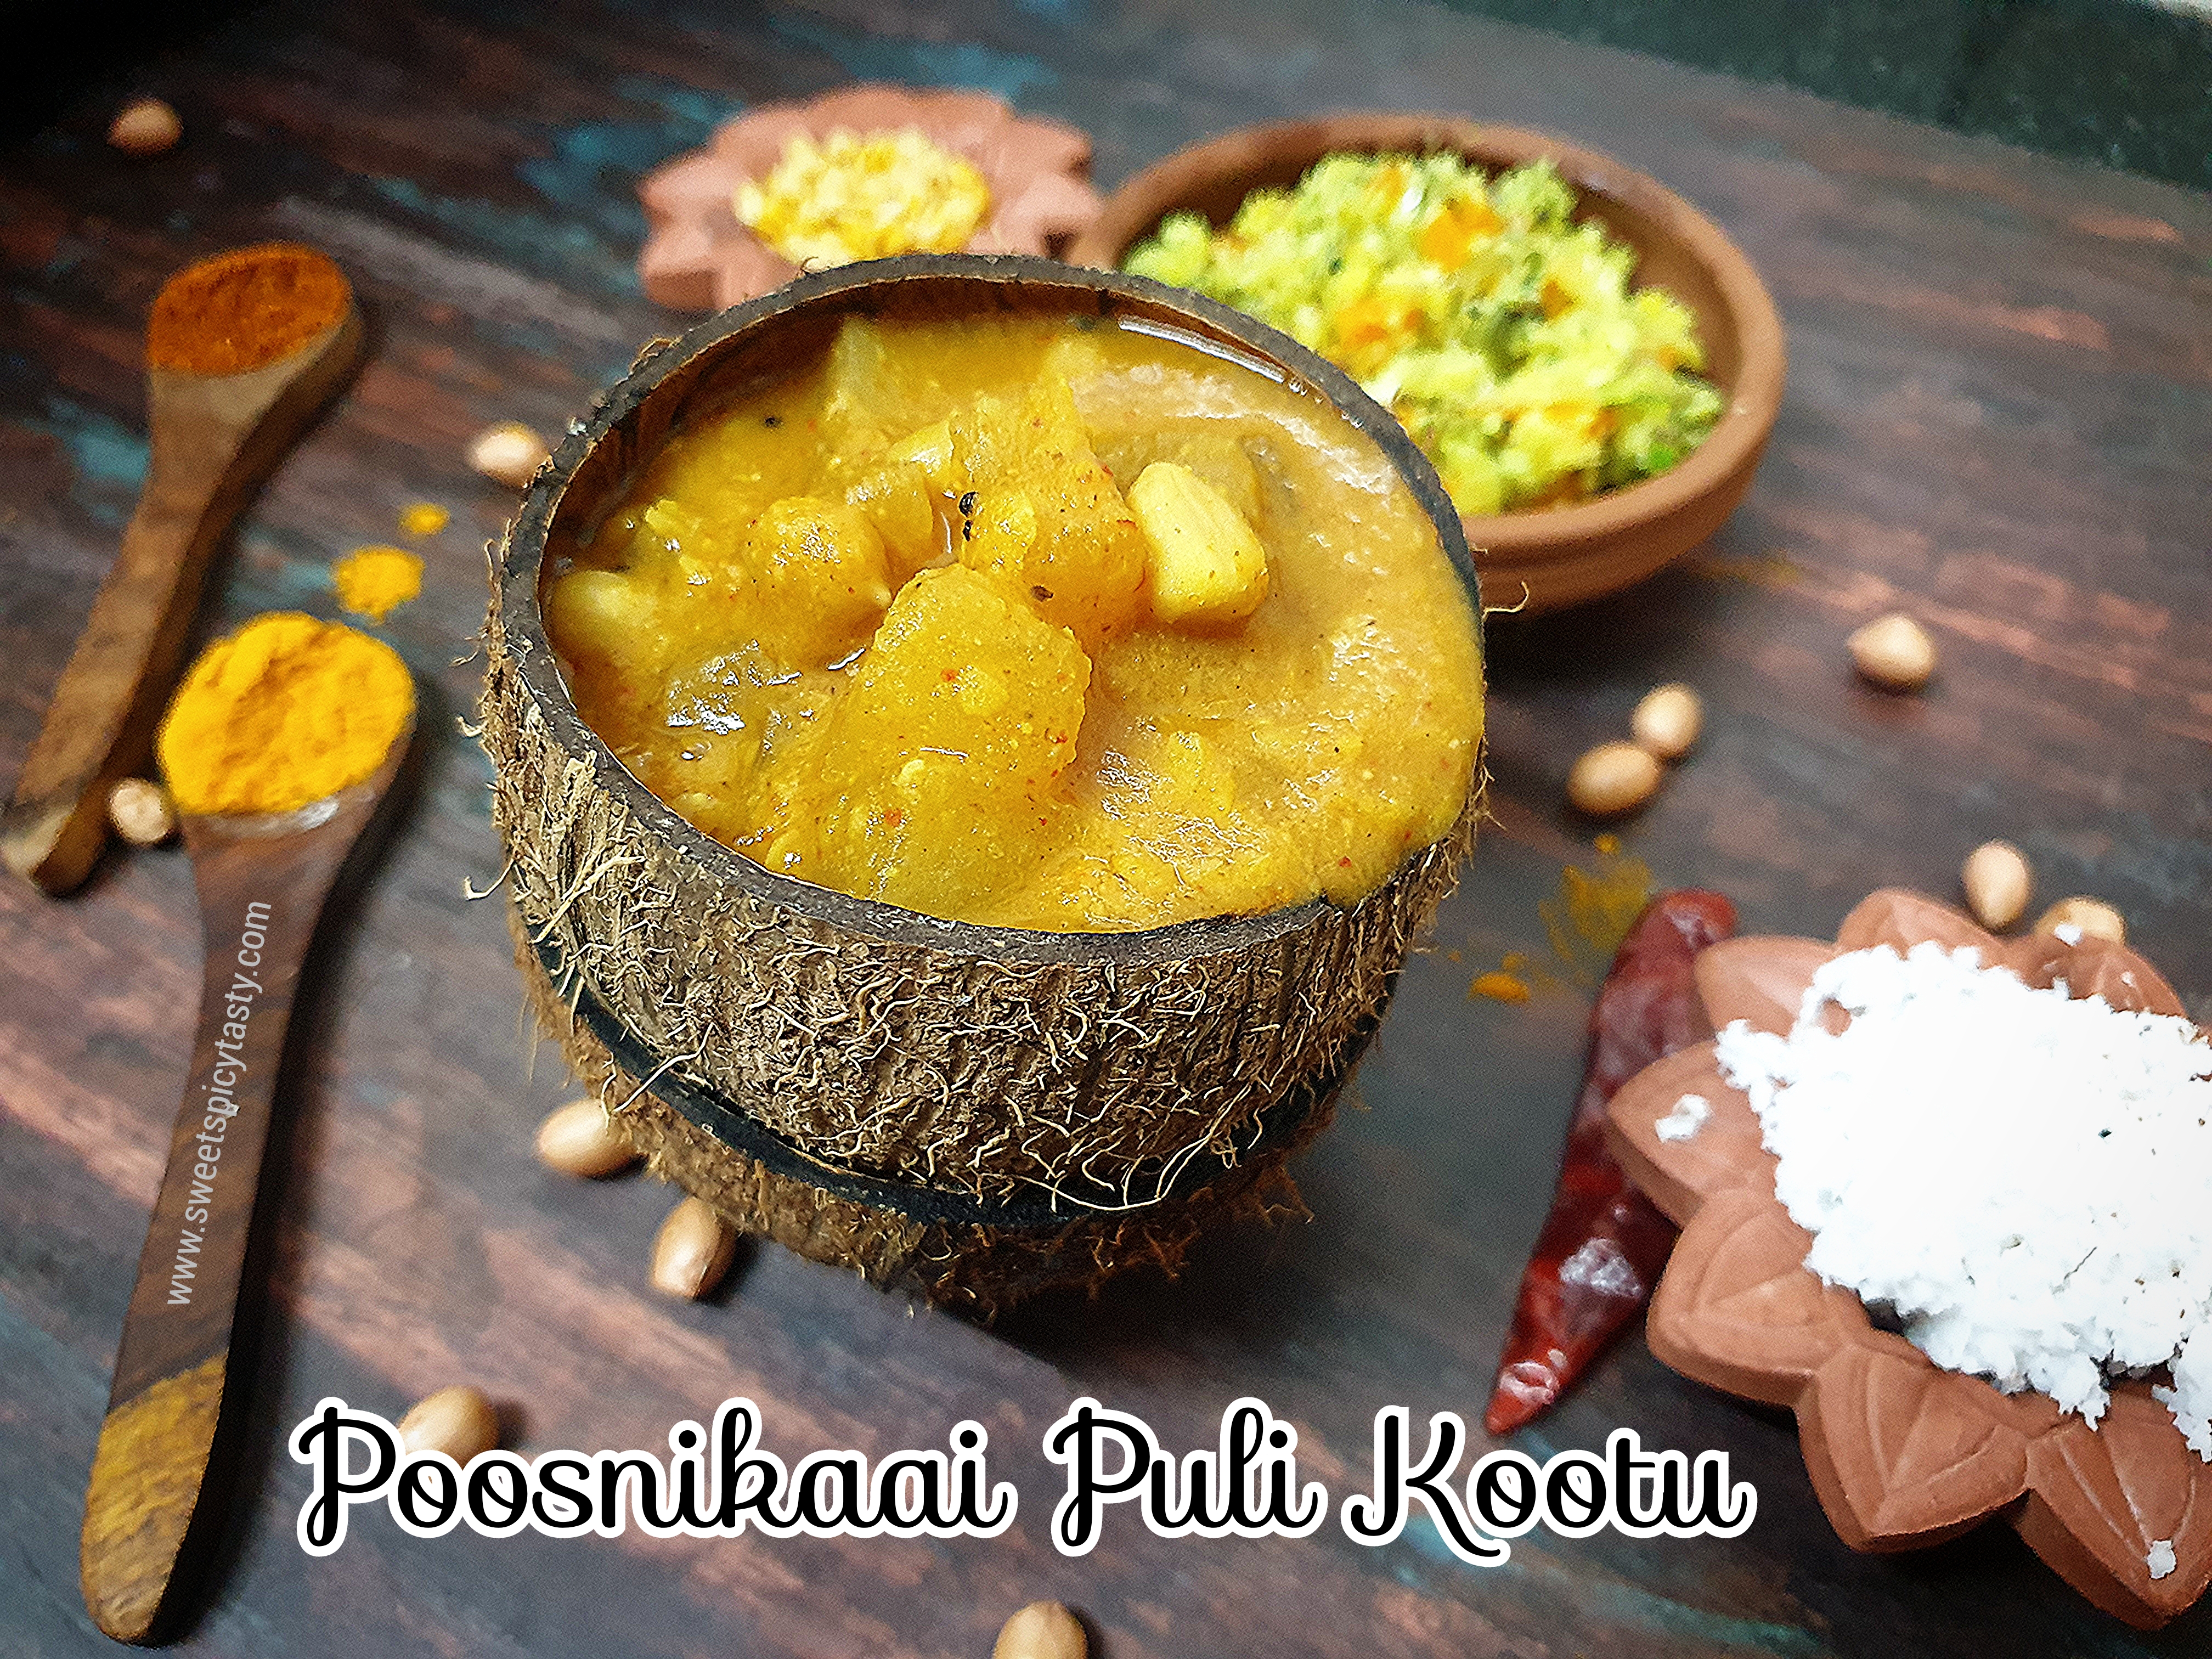
Poosanikaai Puli Kootu - Kalyana Kootu

27 September 2022 at 10:20

 Puli Kootu or Pulippu Kootu is an authentic Tamil brahmin recipe and is made quite frequently in most homes .It is a must have on the wedding feast menu and hence also known as Kalyana Kootu . 

Puli kootu is very tasty as it has a balance of all flavors and the tanginess from the tamarind extract gives it an altogether different flavor profile.

Pulippu kootu fits perfectly for those following a Vegan Diet and also being a No onion No garlic recipe  it is Saatvik and Jain Friendly as well.

Pulippu kootu can be made with brinjals,  ash gourd /white pumpkin or chayote/chou chou . In traditional tambrahm weddings puli kootu is made from ash gourd/poosanikaai and has either boiled chick peas or groundnuts added to the kootu .

In my recipe today ,I am going to use boiled peanuts but I also make it using boiled chickpeas many a times and both of them taste really delicious. 

Puli kootu with hot rice and some coconut based vegetable stir fry is an amazing combination for lunch.  In my home most often the left over puli kootu is paired with chapati for night and it pairs well .


Preparation Time - 15 mins
Cooking Time - 30 mins
Complexity- simple 
Serves - 2 to 3

Ingredients 

2 cups chopped ash gourd /poosanikaai 
1/4 cup thoor dal /pigeon peas/thuvaram paruppu
1/4 cup peanuts 
Small lemon sized tamarind ball
Few curry leaves 
Pinch of turmeric
Salt as needed 
2 tsp oil 
1/2 tsp mustard seeds
Pinch of asafoetida 

To roast and grind
1 tbsp channa dal 
1 tbsp dhaniya/corriander seeds
2 tbsp coconut grated 
3 to 4 dry red chillies 

Method


  • In a pan heat 1/4 tsp oil and roast the channa dhall until crisp and golden brown followed by the dhaniya and red chillies.Allow it to cool and the  grind into a fine paste with coconut and set aside. 
  • Soak the tamarind in hot water for 10  mins and then extract the pulp . Strain the impurities and keep ready .
  • Boil the chopped ash gourd in sufficient water until it is cooked well..it has to be firm but well cooked .
  • Pressure cook the thoor dhall and peanuts in 2 separate containers in the same cooker .Mash the thoor dhall well and set aside.  This saves a lot of time and effort as well.
  • In a thick bottomed vessel,add the boiled ashgoured ,peanuts and the tamarind extract with 1/4 cup water and boil it until the raw smell of the tamarind is lost. 
  • Next add the coconut paste , cooked thoor dhall and another 1/2 cup water and bring to a rolling boil.Adjust salt at this stage . Donot boil too much as the dhall will begin to start sticking to the bottom of the pan and it may get burnt..we don't want a burnt kootu .
  • Prepare a tempering of mustard seeds, curry leaves and asafoetida and pour it on the pulippu kootu.

Pin it up for future 


Chakka Pradhaman using Chakkavaratti - Sadhya Special

8 September 2022 at 10:14

 Onam is the harvest festival of Kerala and also the day to comomerate and celebrate Vamana and King Mahabali .Whole of Kerala and Malayalees world over celebrate the day with a lot of joy and happiness. Onam is a ten day festival and as per gregorian Calender falls anyday between August - September which coincides with the  Chingam Month as per Malayalam Alamanac on the star of Thiruvonam or Sravanam which is the 22nd star or Nakshatra.


Mahabali was a very generous and powerful king who ruled Kerala and there was abundant prosperity and happiness during his reign. It is believed that on this day King Mahabali or Maaveli visits the land of Kerala and rejoices with the people of the land . To welcome the King ,an elaborate rangoli or kolam using flowers is decorated at every home , a lavish spread known as Sadhya is prepared and the annual boat race is held by the State .

ONAM is the annual state festival of Kerala.

I have already posted almost all recipes prepared for a Sadhya on my blog .I will post the link below which can be used as a ready recokner. 

Today we shall see a very traditional and authentic sweet chakka Pradhaman made using Jackfruit Jam known as Chakka Varatti . I have already posted how to make chakka varatti during jackfruit season .

This paysam is really easy to make if we have the chakka varatti ready on hand . The other  version to make Chakka Pradhaman from scratch can be found here. 

Without further delay,let me get to the recipe quickly .


Preparation Time - 10 mins
Cooking Time - 15 mins
Complexity - simple
Serves - 2 to 3

Ingredients 

1/2 cup chakka varatti / jackfruit jam
3/4 cup grated coconut 
3 tbsp jaggery 
1/2 cup thick coconut milk 
2 tbsp finely chopped coconut bits 
2 tsp ghee 

Method


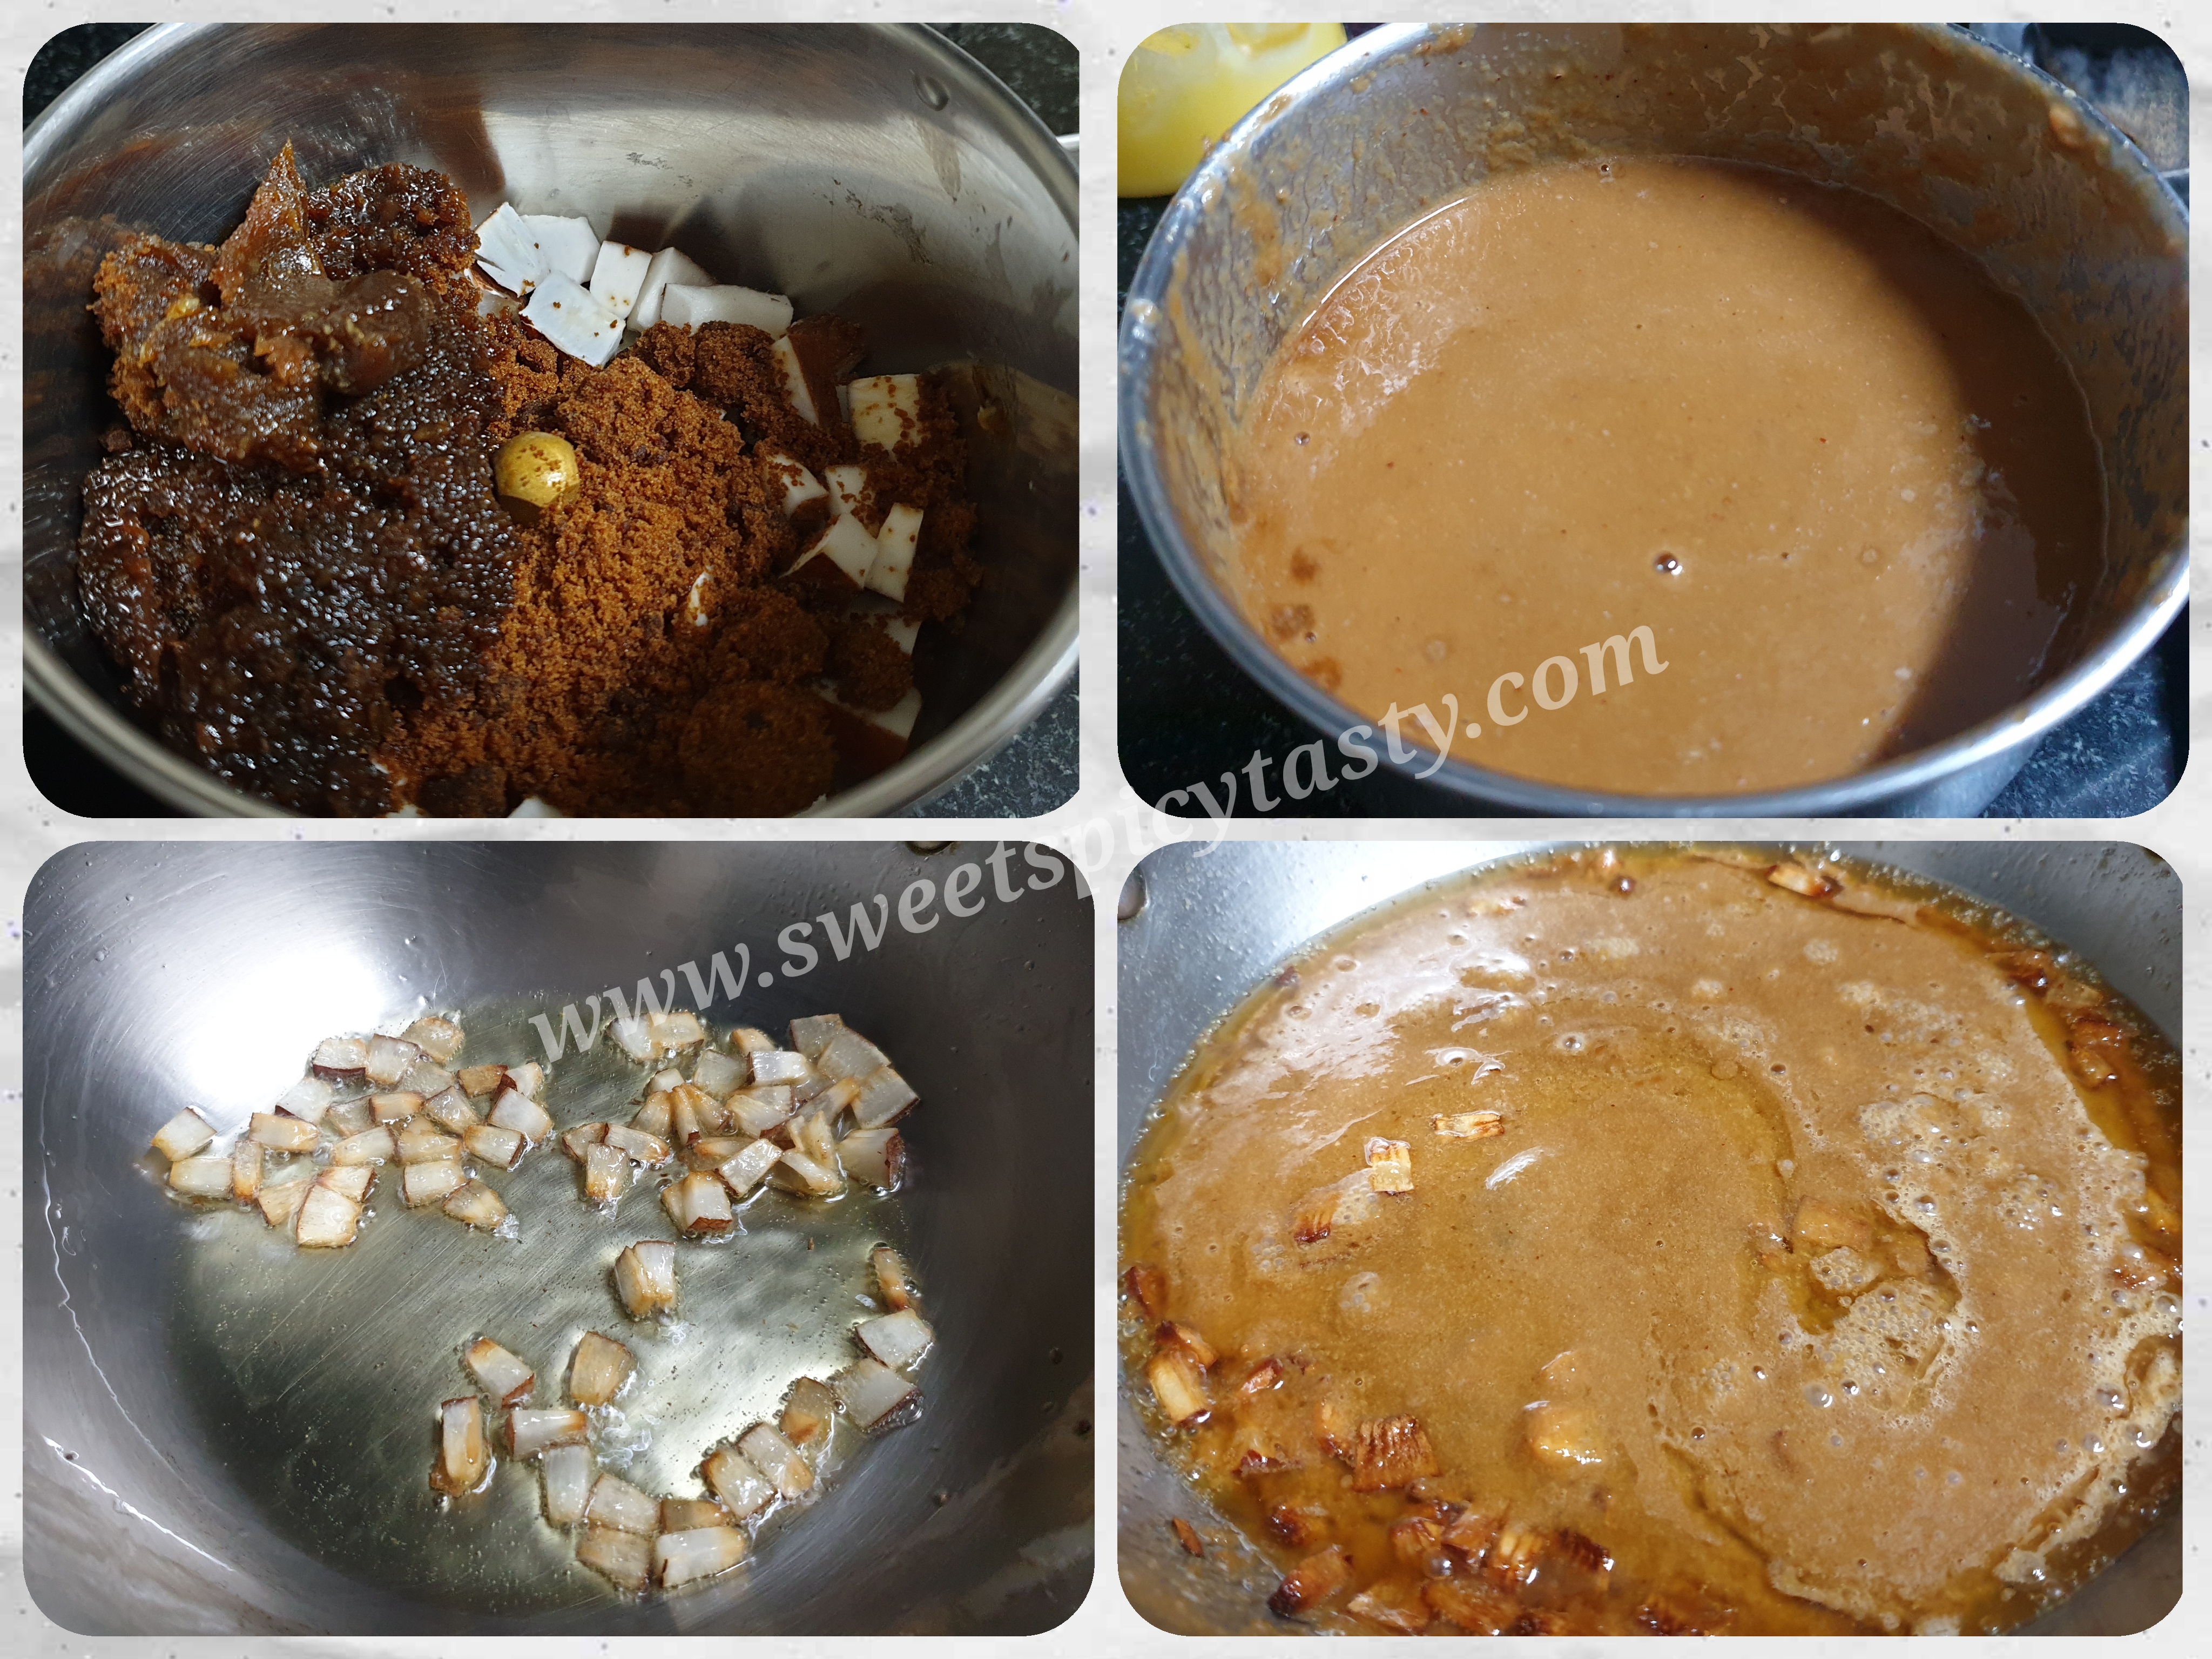
  • Blend the chakka varatti, grated coconut and jaggery with 1/4 cup water to a very fine paste .
  • In a heavy pan ,heat the ghee and fry the coconut bits until they turn crisp and brown.
  • Pour the blended paste to this fried coconut and bring it to a quick boil .
  • Add the thick coconut milk in the end ,mix well and turn off the stove .Donot try to over cook or boil the Pradhaman after adding the coconut milk ..the Pradhaman will curdle .the heat is enough to cook the coconut milk and take away the raw smell.
  • Delicious chakka Pradhaman is ready. 

Pin it up 


Sadhya recipes on the blog. Click on the individual items below to get detailed recipe


Vella Seedai /Innipu Cheedai - Janmashtami Special

 Vella Seedai or sweet jaggery fritter balls are an essential prasad /offering made for Gokulashtami/ Krishna jayanthi to celebrate the birth of Lord Krishna .

We make two types of seedai; Uppu seedai (savory)  and Vella seedai (sweet) along with various other favorites of Lord Krishna to be offered on the special day when we all rejoice and celebrate lord Krishna's birth .

To know how we celebrate Krishna Jayanthy in a typical Tambrahm (Tamil Brahmin) house hold head over to my post, Krishna Jayanthy Celebrations where you can also find link to all the special recipes we make for the big festival .


Making seedai is an art and requires a little expertise and caution while making it . With practice we can easily master this and become a pro .

I am giving all tips and tricks to make a fail proof seedai so that even beginners and newbies can make it with an ease . These tips are applicable for flours which are either home made or store bought. 

Traditionally rice flour and udad dhall flour at prepared at home for purpose of maintaining hygiene and quality but now a days we get good quality ready made flours so we can use that even. 

In this recipe, I have used store brought rice flour and  udad dhall flour to make the recipe, thus making it easy for working women and those who are pressed for time.   

Points to keep in mind 

  • Roast the rice flour in a dry pan until it feels warm. The flour should be roasted just until you can feel the warmth no need for the flour to change color . Sieve the flour well through a sieve once it cools down.
  • Roast the udad dhall flour the same way and sieve it. If you are unable to find ready made udad dhall flour,  take 1 cup of udad dhall and dry roast in a pan until it turn crisp ,cool it and then blend into a fine powder using the blender . Sieve it to get a really fine powder without any grits . 
  • Melt the jaggery in hot water and strain it to remove any impurities .
  • Sieving the flours and jaggery syrup is very important as even a small particle or grit can cause the seedais to burst in the oil .

To know how to make Uppu Seedai and also on how to roast the flours check the video link below 


Ingredients 

1 cup rice flour 
1tbsp udad dhall flour /Ulutham maav
1/2  cup grated jaggery + 3/4 cup water to melt it
1/2 tsp white sesame seeds / yellu 
2 tsp grated coconut  (optional)
Pinch of cardamom powder
Oil to deep fry 
1 tbsp unsalted butter/ ghee at room temperature 

Method

  • Take a wide mixing bowl and add the sieved rice flour and udad dhall flour along with the sesame seeds and grated coconut. 
  • Meanwhile, heat the melted jaggery in a pan and let it come to a rolling bowl.we donot need ant string consistency.  When the jaggery is boiling add in the cardamom powder to this.
  • Pour this hot jaggery syrup over the flours and mix it gently with a spoon so that the syrup gets incorporated well with the flours.
  • Now add the melted butter and gently with your hands knead a soft and pliable dough.most of the times the jaggery syrup is enough to knead the dough but incase if you feel the dough is dry , sprinkle some warm water and knead until its firm but soft.  Cover with a damp cloth and let it rest for 30 mins.
  • Heat oil in a kadai and start rolling small balls from the dough . The balls must be crack free and the same time not rolled very tight. 
  • If you roll it tight there is a chance of the seedais bursting in oil . Grease your palms with ghee while you begin to roll the balls .
  • When the oil is heated, reduce flame to medium and first drop one ball into the oil . It must not disintegrate in the oil. Incase it disintegrates means the moisture content is more . To fix this ,sprinkle some rice flour and knead the dough again until the dough feels dry and firm . Donot panic. 
  • Once the dough is of righr consistency, drop the balls into the oil carefully and fry on medium flame by occasionally splashing oil over the seedais,this will prevent the seedais from bursting. 
  • Fry until the oil stops hissing and the seedais have turn nice and brown. You can see cracks on the seedais once they are fried. This indicates that the seedais are perfectly done both from the inside and outside.
  • Carefully take it off from the hot oil and let them cool completely before you can store in a dry container. 

Pin it up


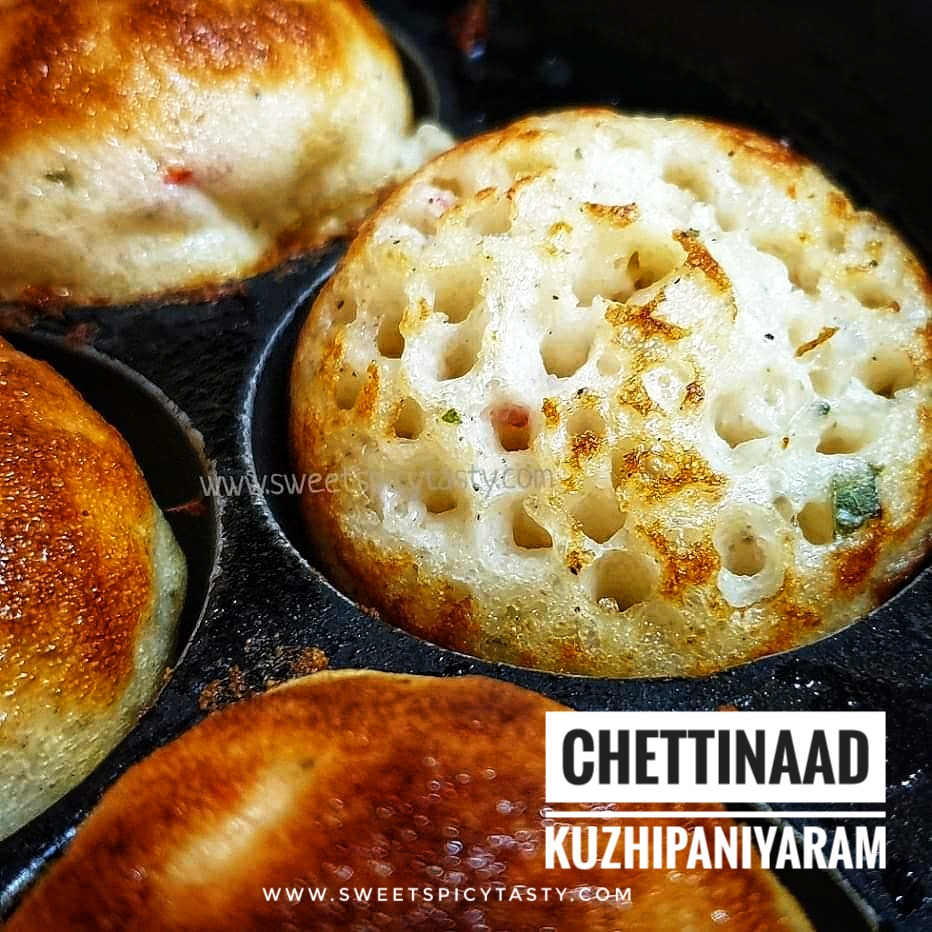
Chettinaad Kuzhipaniyaram - savory snack

 Kuzhipaniyaram is a very tasty and delightful savory snack which takes a very important place either for breakfast or evening snacks  in Tamil Nadu.

Kuzhi in Tamil means cavity/depression and paniyaram means snack in general . So Kuzhi paniyaram means a snack with a depression..sounds funny right ? Basically kuzhi refers to the cavity in the mould of the pan which is used to prepare this snack. 

Kuzhipaniyaram is made in a special vessel called as paniyarakal . It is the same pan which is used to make Sweet Appams ,paddu or gunthaponganalu .

I have already shared the other variant of Paniyaram made from regular Idli batter ,but this chettinaad Kuzhipaniyaram is a special recipe where the batter is ground solely for the purpose of making paniyarams.

Some classic recipes using the Paniyaram Kal / Aebelskeiwer Pan 

Jackfruit Nei Appam

Watermelon Nei Appam

Paddu/Gunthaponganalu

Kunukku Paniyaram

Chettinaad is a region in the Sivagangai district in Tamil Nadu (Southern India) . Chettinaad is known for amazing cotton sarees,Athangudi tiles and lipsmacking food with bold flavor profile especially non veg .

Chettinaad cuisine is known for its pungent and spicy flavor and variety of food ranging from main course , snacks to sweets and savories . As much as they are famous for non veg ,there are a lot of vegetarian options as well .

 Kuzhi paniyaram is served with coconut chutney and /or thakali(Tomato) chutney and some piping hot filter coffee. 

Kuzhipaniyaram also known as uppu appam should not be confused with the other chettinaad special known as Vellayappam .

Vellayappam is a totally different recipe and it has been very well explained by my co blogger Radha on her blog who is my partner this month for the Shh secretly cooking challenge ..we are celebrating Chettinaad cuisine suggested by Kalyani of Sizzling Tastebuds. Kalyani has shared a classic recipe Kaigari Mandi which is very delicious and a perfect accompaniment for main course or idli/dosas .


Soaking Time - 6 to 7 hrs
Fermentation Time - 8 hrs
Preparation Time - 30 mins
Cooking Time - 20 mins
Serves - 5 to 6

Ingredients 

1 cup raw rice (strictly no basmati rice)
1 cup idli rice 
1/4 cup whole udad dal (udad gota)
1 tsp fenugreek seeds 
Salt as needed 

For tempering 
1 tsp mustard seeds
2 to 3 green chillies finely  chopped 
Handful of curry leaves
2 tbsp grated coconut
1/4 cup oil
Fresh chopped corriander 
1/2 onion finely chopped (optional - I haven't used )

Method

  • Wash multiple times until the water is clear. Soak the rice and lentils with fenugreek in water for 5 to 6 hrs.
  • Grind the soaked rice and lentils in a blender or grinder to a fine smooth paste .Batter should be of idli batter consistency not a very runny batter . Let the batter ferment overnight or for 8 hrs . 
  • Before making the kuzhi paniyarams , we need to prepare a tempering that will be added to the batter. 
  • To prepare the tempering, heat about 2 tbsp oil in a pan and splutter the mustard seeds, followed by the green chillies,  curry leaves and fry the onions if using until they turn pink and soft . Lastly add in the coconut and give a quick stir .Add this tempering along with finely chopped corriander to the batter and mix well . 
  • Heat the paniyaram pan and add a few drops of oil in each cavity . 


  • Once the pan is well heated ,add the batter to each cavity and remember to fill only 3/4th of the cavity . The batter on cooking will raise and it needs space to swell . So if you fill it to the brim,the batter will overflow making it a mess .
  • The paniyarams will develop lot of pores as they are cooking, these pores are perfect indicator of a well fermented batter . Once the batter appears cooked on top ,carefully flip it over and cook the underside until it turns brown and crisp .Cooking has to be on medium flame throughout. 
  • Remove the appams /paniyarams from the pan and serve hot with chutney of your choice. 

Pin me up


Chakkavaratti | Chakkavaratiyadhu - Jackfruit Preserve

 Jackfruits are still available in plenty in most places in India and will surely be available for a few weeks more . If you are done with your quota of eating fresh , ripe and juicy jackfruits then I suggest you must make this delicious jackfruit jam /preserve a delicacy from Kerala known as Chakka Varatti or Chakka Varatiyadhu. 

Chakkai in Malayalam means Jackfruit and Varatiyadhu means reduction /simmering process .So basically we make a tasty relish or jam like preserve from jackfruit pulp and jaggery to relish all year long when fresh jackfruits aren't available. 

You can also use fresh ripe jackfruit to make delicious Chakka Pradhaman (Jackfruit Payasam) and Chakka Unniappams . (Fritters) 

I learnt this recipe from Chandra Muthukrishnan aunty, who is an expert in making traditional and complex dishes in a breeze .She guided me  over whatasapp while I was making this and gave a final approval when I shared the video of the finished product . 

Traditionally in olden times, making chakka varatti was a long drawn process and the ladies of the house had to toil a lot to prepare since modern day gadgets like gas stoves, food processors or pressure cookers were not available. 

The jackfruit pods had to be boiled over wooden or charcoal stoves and then using grinding stone the pulp had to me made and then further cooked in huge bronze vessel called Uruli with jaggery and  ghee for hours together to get the perfect taste and texture . Now making chakka varatti is a lot easier and we can prepare it effortlessly at the comfort of our homes .


Preparation Time -20 mins
Cooking Time - 35 to 45 mins
Complexity - complex 

Ingredients 

14 to 16 ripe jackfruit pods 
jaggery powder  (same measure as jackfruit pulp) 
2tsp of cardamom powder 
ghee as needed 

Method 


  • Deseed the jackfruit pods and pressure cook it with 1/4 cup water for 2 whistles on medium flame .
  • Let the pressure release naturally, strain the excess water and let the jackfruit cool down .
  • Blend the cooked jackfruit into a smooth pulpy puree in your blender.
  • Measure the pureed jackfruit and take the same quantity of  jaggery powder ..eg if you get 1 cup of puree, using the same cup measure 1 cup of powdered jaggery and 1/2 cup ghee .


  • Melt the jaggery in 1/4 cup water and strain it for impurities. 
  • In a heavy bottomed pan ,heat the strained jaggery syrup and let it come to a nice bubbling boil .
  • At this stage add the jackfruit pulp and mix it nicely till the jaggery and pulp blend in well.
  • Keep stirring on low flame and you can see the mixture begins to cook and starts giving out a good aroma . 
  • The key is in stirring without a break as there is a chance of the mixture getting burnt easily . 
  • The mixture begins to thicken and reduces in quantity after 10 mins,at this stage add some 3 to 4 tbsp of ghee and mix well . The entire ghee gets absorbed by the mixture and you can see a nice glossy look.
  • After some time you can see that the entire jam looks glossy and begins to leave the sides of the pan easily and resembles the texture of a jam .
  • Now add the balance ghee ,cardamom powder and continue to cook for sometime. When you drop a blob of the chakka varatti using the ladle, it should slide off and fall down easily . This is the correct texture .turn off the stove at this stage and let it cool . The  jam will slightly thicken more after cooling. Donot worry about that. Once cooled, transfer the chakka varatti to a dry container using a dry spoon and refrigerate it. (Check the video below for the consistency)


Note

To have a prolonged shelf life ,never thaw the entire preserve for a long time.  Take out the desired quantity and put it back into the refrigerator.  This way the chakka varatti stays for almost 1 year .


Patal Poha Chivda / पातळ पोहा चिवडा - vegan snack (low fat)

 Chiwda is a traditional Maharashtrian snack made during Diwali alongwith the various other snacks. 

Patal Poha chivda is prepared using thin paper variety rice flakes and very easy to make. Hardly uses a few spoons of oil ,making it a healthy choice to indulge.  A perfect snack to compliment a hot glass of coffee or tea . You can make this anytime during the year and store it in an airtight container.  Stays good for almost 10 days. 

Patal poha chivda is made by dry roasting the poha and is seasoned with mild spices and garnished with lots of roasted groundnuts, roasted gram and even cashew nuts .

Having grown up with a lot of Maharashtrian friends around this snack was a regular feature at home and even now I make it frequently but somehow it never made it to the blog .

This time when Poonam suggested Maharashtrian cuisine for our Shhh cooking secretly group,  I planned to make this chiwda with the secret ingredients Green chilli and roasted gram given to me by Aruna and she prepared Khamang kakdi - healthy cucumber salad using the secret ingredients peanut and mustard that I gave her . Poonam's Shakkarpaare is my next in list for 4pm snack. 

Some traditional Maharashtrian snacks from my blog for you all to enjoy 

Cornflakes Chiwda 

Poha Chiwda

Sabudana Chiwda

Thikhat Shankarpaali

Kothimbir Wadi 

Sabudana Wada


Preparation Time - 10 mins
Cooking Time - 10 mins
Complexity - easy 
Serves - 3 to 4

Ingredients 

3 cups thin rice flakes /patla poha
1/2 cup groundnuts 
1/4 roasted gram (chutney dal)
2 to 3 green chillies finely chopped
1/2 tsp turmeric
2 tsp powdered sugar 
Handful fresh curry leaves 
2 tbsp oil 
Pinch of asafoetida
Salt as needed 

Method

  • Firstly sieve the poha through a sieve.This step is optional ,you may do this if you find many small powdery  rice flakes in your packet.
  • Heat a thick bottomed pan and dry roast the poha/rice flakes until they turn crispy . If you crush it with your fingers the poha must crumble easily . At this stage ,transfer the roasted poha to a plate .set aside 
  • In the same pan,heat the oil and fry the ground nuts followed by roasted gram,green chillies and curry leaves one after another until they turn crisp. 
  • Add the asafoetida, turmeric powder ,salt and the roasted poha . Toss it gently with a wooden ladle and mix all the ingredients well . Do this on low flame. Turn off the flame and add the powdered sugar in the end and  mix it all gently .
  • Let the chivda cool down for a while ,then transfer it to an airtight container and store away from moisture .


❌
❌