❌

Reading view

There are new articles available, click to refresh the page.

Beetroot Poriyal Recipe (Beetroot Stir Fry)

Beetroot Poriyal is a mildly spiced simple South Indian stir fry. Beetroot Poriyal is a tasty and healthy side dish which can be mixed with rice and enjoyed. This is a great side dish with rice and curry or even with roti. This is one of the excellent way to include beetroot in your menu.

beetroot poriyal served

Beetroot stir fry or beetroot poriyal is one of my favorite ways to eat beetroots. Not all at home are fond of beetroot but I just love beetroot in any form especially this poriyal. This is a simple poriyal with basic tadka but tastes so delicious with rice and sambar which is my favourite combo.

[feast_advanced_jump_to]

About Beetroot Poriyal

Beetroot Poriyal is made using beetroot, onion, coconut, spices and herbs as main ingredients. It is a simple stir fry made with beetroots cooked with onion and tempering spices with the addition of coconut. This beetroot stir fry is one of the healthy ways to consume beetroot.

Beetroot is a nutritious vegetable so do make it a practice to include it in your weekly menu to enjoy the benefits. The term 'poriyal' in tamil means sauteed or fried whereas in malayam it is called thoran, in kanada it is called 'palya' and in telugu it is called 'vepudu'.

Beetroot proiyal comes together quickly and can be made with just few ingredients that is available in your kitchen. Serve it with rice and sambar it is such a comforting meal. You can enjoy this poriyal for lunch or even pack it for kids lunchbox.

As a kid I had trouble eating most vegetables and even during that time beetroot was my favorite vegetable. Mixing it with curd rice to see the pink colour was so exciting yes good old memories.

beetroot poriyal served

Beetroot Poriyal Video

Similar Recipes

Beetroot Poriyal Ingredients

  • Beetroot - Choose fresh beetroot that is firm outside. Cut into small cubes and use it. You can even grate and use.
  • Onion - Onion is sauteed with other spices after tempering. It adds crunch and flavor to the poriyal.
  • Coconut - Poriyal is not complete with the addition of grated coconut at the final stage. I usually have coconut cubes in freezer so when there is no fresh coconut I pulse the cubes in mixer to get grated coconut and use it.
  • Oil - You can use any cooking oil. I used ground nut oil for this stir fry.
  • Green chillies - Green chillies adds spice to this stir fry. You can even use red chilli powder instead.
  • Mustard seeds, Urad dal - Mustard seeds is first added and spluttered, then urad dal is added and sauteed until golden.
  • Curry leaves - adds freshness and flavour to the stir fry.
  • Turmeric powder - Turmeric powder adds flavour and retains the bright pink colour of beetroot.
ingredients needed to make beetroot poriyal

How to make Beetroot Poriyal Step by Step

1.Heat 1 tablespoon oil in a kadai - add 1 teaspoon mustard seeds let it splutter.

temper mustard seeds

2.Then add Β½ teaspoon split urad dal.

add urad dal

3.Add few curry leaves and 1 long green chili slit.

add curry leaves

4.Add 1 medium sized onion chopped finely around Β½ cup.

saute onion

5.Add 1 and Β½ cups chopped beetroot along with ΒΌ teaspoon turmeric powder and salt to taste. I used 1 medium sized beetroot.

add beetroot

6.Saute for 3 minutes.

saute well

7.Add ΒΎ cup water to it.

add water

8.Give a quick mix.

let it boil

9.When it starts to boil cook covered for 10-12 minutes or until beetroot turns soft.

cook covered

10.In between stir then cook covered to avoid burning at the bottom. Check by pressing if it is soft then it is cooked else cook for few more minutes.

beetroot is cooked

11.Add ΒΌ cup grated coconut(tightly packed).

add coconut

12.Give a quick saute and switch off.

mix well

Tasty beetroot poriyal ready!

beetroot poriyal served with rice

Expert Tips

  • Cutting - You can cut into small cubes or even grate using big holed grater and use it.
  • Cooking beetroot - You can even steam cook beetroot separately and add it but I prefer cooking in kadai itself along with spices. It adds more flavour to the stir fry.
  • Pressure cooker - If pressure cooking - pressure cook for 1 whistle in medium flame.
  • Instant Pot - If using instant pot - set timer in pressure cook mode for 2 minutes and cook it.
  • Variation - You can add Β½ teaspoon sambar powder if you like. Add a pinch of hing while tempering if you prefer.
  • Adding coconut - After adding coconut no need to cook for a long time, just switch off and mix it.
  • Packing for lunchbox - If you are packing for lunchbox then coconut needs to be sauteed well to extend shelf life.
  • Oil - You can replace cooking oil with coconut oil for a different flavour.

Serving & Storage

Serve beetroot poriyal with rice, sambar and rasam. You can serve beetroot poriyal with plain steamed rice, mix and eat too. Beetroot poriyal keeps well in fridge for 2 days.

FAQS

1.Can I grate and add beetroot?

Yes you can grate and add beetroot for beetroot poriyal. Grated beetroot takes less time to cook so check accordingly. Use big holed grater for grating.

2.Is adding coconut mandatory?

You can skip coconut if you don't want to add. But I recommend adding coconut as it adds a nice flavour and crunch to the poriyal.

3.Can I add chilli powder?

Yes you can add 1 teaspoon chilli powder replacing green chilli.

beetroot stir fry served

If you have any more questions about this Beetroot Poriyal Recipe do mail me at sharmispassions@gmail.com. In addition, follow me on Instagram,Β Facebook,Β PinterestΒ ,YoutubeΒ andΒ TwitterΒ .

Tried this Beetroot Poriyal Recipe? Do let me know how you liked it. Also tag us on Instagram @sharmispassions and hash tag it on #sharmispassions.

πŸ“– Recipe Card

Print

Beetroot Poriyal Recipe

Beetroot Poriyal is a mildly spiced simple South Indian stir fry. Beetroot Poriyal is a tasty and healthy side dish which can be mixed with rice & enjoyed. Learn to make Beetroot Poriyal with step by step pictures and video.
Course Side Dish
Cuisine Indian
Keyword curry, curry recipes, Kerala Meal Sidedish, lunch box recipes, lunch recipes, lunchbox recipes, poriyal, poriyal recipes, Side Dish, stir fry recipes, veg recipes, vegetable
Prep Time 15 minutes
Cook Time 15 minutes
Total Time 30 minutes
Servings 2 people
Calories 107kcal
Author Sharmilee J

Ingredients

  • 1 medium sized beetroot (1 and Β½ cups chopped finely)
  • 1 medium sized big onion (Β½ cup chopped finely)
  • ΒΌ cup grated coconut (tightly packed)
  • ΒΌ teaspoon turmeric powder
  • salt to taste

To Temper:

  • 1 tablespoon oil
  • 1 teaspoon mustard seeds
  • Β½ teaspoon urad dal
  • 1 long green chili
  • few curry leaves

Instructions

  • Heat 1 tablespoon oil in a kadai - add 1 teaspoon mustard seeds let it splutter.
  • Then add Β½ teaspoon split urad dal.
  • Add few curry leaves and 1 long green chili slit.
  • Add 1 medium sized onion chopped finely around Β½ cup.
  • Add 1 and Β½ cups chopped beetroot along with ΒΌ teaspoon turmeric powder and salt to taste. I used 1 medium sized beetroot.
  • Saute for 3 minutes.
  • Add ΒΎ cup water to it.
  • Give a quick mix.
  • When it starts to boil cook covered for 10-12 minutes or until beetroot turns soft.
  • In between stir then cook covered to avoid burning at the bottom. Check by pressing if it is soft then it is cooked else cook for few more minutes.
  • Add ΒΌ cup grated coconut(tightly packed).
  • Give a quick saute and switch off.
  • Tasty beetroot poriyal ready!

Video

Notes

  • Cutting - You can cut into small cubes or even grate using big holed grater and use it.
  • Cooking beetroot - You can even steam cook beetroot separately and add it but I prefer cooking in kadai itself along with spices. It adds more flavour to the stir fry.
  • Pressure cooker - If pressure cooking - pressure cook for 1 whistle in medium flame.
  • Instant Pot - If using instant pot - set timer in pressure cook mode for 2 minutes and cook it.
  • Variation - You can add Β½ teaspoon sambar powder if you like. Add a pinch of hing while tempering if you prefer.
  • Adding coconut - After adding coconut no need to cook for a long time, just switch off and mix it.
  • Packing for lunchbox - If you are packing for lunchbox then coconut needs to be sauteed well to extend shelf life.
  • Oil - You can replace cooking oil with coconut oil for a different flavour.

Nutrition

Serving: 75g | Calories: 107kcal | Carbohydrates: 13g | Protein: 3g | Fat: 6g | Saturated Fat: 3g | Polyunsaturated Fat: 1g | Monounsaturated Fat: 2g | Trans Fat: 0.01g | Sodium: 978mg | Potassium: 279mg | Fiber: 3g | Sugar: 5g | Vitamin A: 809IU | Vitamin C: 269mg | Calcium: 70mg | Iron: 1mg

The post Beetroot Poriyal Recipe (Beetroot Stir Fry) appeared first on Sharmis Passions.

Milk Halwa Recipe | Paal Halwa Recipe

Milk halwa is a soft rich sweet with a slight grainy texture that makes it feel so nice to eat. The gentle sweetness of milk with the light flavor of cardamom and the richness from ghee makes it special. It kind of melts in the mouth but still has that small grain feel which makes it different from other milk sweets. Milk Halwa is commonly made for festivals and worth the effort & time for its taste.

paal halwa served in a bronze bowl

This halwa takes a little time as milk has to cook down slowly, but the end result is worth the wait. Adding curd while cooking gives that grainy touch, and ghee adds the smooth finish. You can make it for festivals, small family treats or even when you want something traditional and comforting.

[feast_advanced_jump_to]

About Milk Halwa

Milk halwa is made by simmering milk until it becomes thick, then adding sugar, rava, curd, and ghee to get a rich taste and texture. The curd makes the milk split slightly giving it a grainy look, while ghee blends in and later starts oozing at the sides when it is ready. This slow process is what builds the flavor and perfect texture.

This sweet is liked in many parts of India, but each place makes it in their own way. Some add khoya for a quicker version but slow cooking milk gives more flavor. The texture is smooth with small grains and the taste is sweet but not heavy. The regional variations also add interesting twists in spices or nuts.

You can adjust the richness by adding more or less ghee, or use white sugar instead of cane sugar if you like a more white color halwa. For sweeter version, you can also add more sugar. This dessert is something I always like to make because it feels warm and traditional.

I usually make this milk halwa recipe for festivals or when guests come. It's one of those dishes that bring people together and makes celebrations happy. Milk Halwa can be prepared in very less time. I love thirattipal so when I was telling about this to my friend, she suggested me to try this Milk HalwaΒ as this tastes just like thirattipaal or paalkova.

As gokulashtami is nearing thought to post this Milk Halwa. This is not as tedious as stirring for hours together like for palkova, do try it for krishna jayanthi this year and enjoy.

paal halwa served in a bronze bowl

Paal Halwa Video

Milk Halwa Ingredients

  • Full cream milk - I made this using full cream milk for a rich and creamy texture. You can use regular milk if you want but it won't come out as thick or rich. This is the main base of the halwa.
  • Sugar - I have used white sugar for sweetness. You can use cane sugar or brown sugar too for a more healthy version.
  • Sooji (semolina) - I have added sooji to help thicken the halwa. You can't skip this as it absorbs moisture and adds a bit of grainy texture which is nice.
  • Curd - I used fresh curd to split the milk and get that grainy texture. This makes the halwa different from smooth milk sweets. If you don't have fresh curd, store-bought works fine too.
  • Ghee - I made this with little ghee comparatively, add ghee little by little while cooking to make the halwa soft and glossy. It adds richness and good aroma.
  • Cardamom powder - I have just added a small pinch for flavor and fragrance.

Similar Recipes

How to make Milk Halwa Step by Step

1.Boil 2 cups full cream milk.

boil milk

2.Simmer for 5 minutes.

stir well

3.Add 2 tablespoon rava(sooji).

add sooji

4.Keep stirring to avoid lumps.

stir well

5.Cook until rava turns soft.

cook rava till soft

6.Now add Β½ cup sugar.

add sugar

7.Add 2 tablespoon thick curd.

add curd

8.Cook until it starts to thicken.

cook till it thickens

9.It will start to thicken so keep stirring. Cook in low medium flame.

keep cooking

10.Now start adding ghee 1 to 2 tablespoon at a time. We need β…“ cup ghee in total.

add ghee little by little

11.Keep cooking, adding ghee in interval.

keep cooking, add ghee

12.And at one stage it will leave the sides of the kadai. Add remaining ghee fully and cook for few more minutes.

thicken and rolls

13.Leaves sides of the kadai.

leaves sides

14.Ghee oozes out at the edges now add β…› teaspoon cardamom powder.

add cardamom powder

15.Give a quick mix and switch off. After cooling down the texture will become more grainy.

paal halwa is ready

Paal halwa is ready!

Expert Tips

  • Simmer - I always cook the milk in low flame so it gets thick evenly without burning. You can stir once in few minutes at first, but when it starts getting thick, stir often so it doesn't stick at bottom.
  • Adding curd - Adding curd makes the milk split and give that grainy texture. If you add too early, milk will separate too much.
  • Ghee stage - I add ghee little by little when I see halwa sticking to pan. This way the ghee soaks in well and gives a nice glossy look. You can even smell the change when ghee blends in, also the texture changes.
  • Right time to stop - Switch off when halwa leaves the sides of pan and you see ghee oozing at the edges. It will get little more thick after cooling, so don't cook too much.
  • Sweetness level - You can add more sugar if you want more sweet, but it will make halwa little softer. I taste once before switching off and adjust.

Serving and Storage

You can serve milk halwa warm or in room temperature. It taste nice as a dessert after lunch or dinner, and also as a sweet snack with tea or coffee. If you have any leftover halwa, keep it in a clean box and store in fridge for 3-4 days. You can warm it little before eating, or even eat it cold also.

FAQS

1.Can I skip curd?

No, curd is what gives the nice grainy texture. Without it, halwa will turn smooth.

2.Can I make this with khoya?

Yes, you can, but the cooking time will be less and taste will be little different.

3.Why my halwa is chewy?

This happens when it cooks too long after it already leaves the sides of the pan. So keep an eye and stop at the correct stage.

4.Can I use low-fat milk??

Yes, but it will make the halwa less rich and little dry.

5.Can I reduce ghee?

Yes, but adding enough ghee makes it more soft and tasty. Ghee adds richness and the texture will change if you reduce ghee.

paal halwa served in a bronze bowl

If you have any more questions about this Milk Halwa RecipeΒ do mail me at sharmispassions@gmail.com. In addition, follow me on Instagram,Β Facebook,Β PinterestΒ ,YoutubeΒ andΒ TwitterΒ .

Tried this Milk Halwa Recipe? Do let me know how you liked it. Also tag us on Instagram @sharmispassions and hash tag it on #sharmispassions.

πŸ“– Recipe Card

Print

Milk Halwa Recipe | Paal Halwa Recipe

Milk halwa is a soft rich sweet with a slight grainy texture that makes it feel so nice to eat. The gentle sweetness of milk with the light flavor of cardamom and the richness from ghee makes it special. It kind of melts in the mouth but still has that small grain feel which makes it different from other milk sweets. Milk Halwa is commonly made for festivals and worth the effort & time for its taste.
Course Dessert
Cuisine Indian
Keyword cardamom powder recipe, curd recipes, diwali dishes, diwali mithai, diwali recipes, diwali sweets, diwali sweets recipes, easy diwali recipes, ghee recipes, halwa, milk recipes, sweet recipes
Prep Time 5 minutes
Cook Time 25 minutes
Total Time 30 minutes
Servings 2 people
Calories 494kcal
Author Sharmilee J

Ingredients

  • 2 cups full fat milk
  • Β½ cup sugar
  • β…“ cup ghee
  • 2 tablespoon sooji
  • 2 tablespoon curd
  • 3 tablespoon ghee
  • β…› teaspoon cardamom powder

Instructions

  • Boil 2 cups full cream milk.
  • Simmer for 5 minutes.
  • Add 2 tablespoon rava(sooji).
  • Keep stirring to avoid lumps.
  • Cook until rava turns soft.
  • Now add Β½ cup sugar.
  • Add 2 tablespoon thick curd.
  • Cook until it starts to thicken.
  • It will start to thicken so keep stirring. Cook in low medium flame.
  • Now start adding ghee 1 to 2 tablespoon at a time. We need β…“ cup ghee in total.
  • Keep cooking, adding ghee in interval.
  • And at one stage it will leave the sides of the kadai. Add remaining ghee fully and cook for few more minutes.
  • Leaves sides of the kadai.
  • Ghee oozes out at the edges now add β…› teaspoon cardamom powder.
  • Give a quick mix and switch off. After cooling down the texture will become more grainy.
  • Paal halwa is ready!

Video

Notes

  • Simmer slow - I always cook the milk in low flame so it gets thick evenly without burning. You can stir once in few minutes at first, but when it starts getting thick, stir often so it doesn't stick at bottom.
  • Adding curd - Adding curd makes the milk split and give that grainy texture. If you add too early, milk will separate too much.
  • Ghee stage - I add ghee little by little when I see halwa sticking to pan. This way the ghee soaks in well and gives a nice glossy look. You can even smell the change when ghee blends in, also the texture changes.
  • Right time to stop - Switch off when halwa leaves the sides of pan and you see ghee oozing at the edges. It will get little more thick after cooling, so don't cook too much.
  • Sweetness level - You can add more sugar if you want more sweet, but it will make halwa little softer. I taste once before switching off and adjust.

Nutrition

Serving: 100g | Calories: 494kcal | Carbohydrates: 50g | Protein: 10g | Fat: 31g | Saturated Fat: 19g | Polyunsaturated Fat: 1g | Monounsaturated Fat: 8g | Cholesterol: 88mg | Sodium: 98mg | Potassium: 471mg | Fiber: 3g | Sugar: 45g | Vitamin A: 406IU | Vitamin C: 0.1mg | Calcium: 318mg | Iron: 1mg

The post Milk Halwa Recipe | Paal Halwa Recipe appeared first on Sharmis Passions.
Aloo Tikka Recipe

Aloo Tikka is a smoky potato appetizer made with kitchen available ingredients. You can make it in minutes, and it always looks impressive when you serve it for guests. The potatoes get marinated in spiced yogurt, then grilled until they're golden and charred on the outside.

aloo tikka served with green chutney

This recipe comes together quickly and doesn't need much work. You just need some marinating time, so it's perfect when you want something that looks fancy but is actually simple. Every bite has that spiced yogurt flavour, and the vegetables keep it fresh and tasty.

[feast_advanced_jump_to]

About Aloo Tikka

Aloo Tikka is a potato appetizer made by marinating potatoes in spiced yogurt and then grilling them on the tawa. The potatoes stay soft and creamy inside while the outside gets a nice charred layer. It has a soft texture inside and that spiced yogurt flavour from the marinade.

This is really popular when you're hosting guests or want something more interesting than regular snacks. You eat it hot and crispy, and it tastes best when it's served right away. The nice thing is you can prepare it ahead and just grill it when guests arrive.

It's also easy to make it according to your taste preference. You can add paneer or cottage cheese to make it richer and you can mix in boiled corn or extra vegetables. Each time you try a variation it tastes a little different, so you can experiment and see what you like best.

I usually make Aloo Tikka when I'm expecting guests or when I want something that looks impressive but is actually quite easy to make.

aloo tikka served with green chutney

Similar Recipes

Aloo Tikka Ingredients

  • Baby Potatoes - I use baby potatoes because they cook evenly. You can use regular potatoes too, just cut them into smaller pieces.
  • Thick Yogurt - The yogurt is the base of the marinade and makes the potatoes tender and flavourful. It's really important for the taste.
  • Onion and Capsicum -Β  Onion and Capsicum add sweetness, crunch, and nice colour to the dish. They pair well with the spiced potatoes.
  • Besan Flour - Besan Flour helps create a thicker coating on the potatoes. It also helps the spices stick better while you're grilling.
  • Ginger Garlic Paste - It adds warm flavour to the marinade and gives it depth.
  • Spice Powders - I use garam masala powder, red chili powder, tandoori masala powder, turmeric powder, cumin powder, and pepper powder. Each one adds its own flavor and color to the marinade.
  • Ajwain - This adds aroma and interesting flavour. It also helps with digestion.
  • Kasoori Methi - The dried herb flavour lifts all the other flavours and makes it taste authentic.
  • Chat Masala Powder - I sprinkle this on top just before serving. It adds a tangy finish to every bite.
  • Lemon Juice - This adds brightness and tang. It balances the richness of the yogurt and keeps everything fresh.
  • Oil - Just enough so the outside turns crispy without getting greasy. You need oil for the spices to cook properly.
  • Salt - It brings out all the flavours. I use regular table salt, but you can use black salt if you like.

How to make Aloo Tikka Step by Step

1.Take curd in a thin cloth and hang it for at least 2 hrs for the water to drain completely. The curd should be thick with no excess water.

how to make aloo step1

2.Pressure cook baby potatoes for 3 whistles it should be cooked soft but not mushy. Peel the skin and prick holes with a fork or toothpick.

how to make aloo step1

3.My potatoes were big so I cut them into half.You need not do this if its small.Get ready with all your ingredients. To a mixing bowl add hung curd.

how to make aloo step1

4.Now add the spice mix listed under 'spice mix' in ingredients list. Add oil. Mix well

how to make aloo step1

5.Add required salt. Add cubed onion, capsicum and potatoes. Check the marinate and add more salt if required.

how to make aloo step1

6.Mix well, finally add lemon juice.Marinate for 30 minutes. Take your skewers. I used my metal skewer which came with my oven.

how to make aloo step1

7.Insert the veggies alternatively. Toast on tawa until golden brown. Turn over in between and slowly cook so that it is evenly cooked on both sides.

how to make aloo step1

Serve hot with green chutney, lemon wedges and onions.

aloo tikka served with green chutney

Expert Tips

  • Pressure Cooking - I cook baby potatoes for three whistles so they're tender all the way through. If you cook them too long, they get mushy and fall apart when grilling.
  • Marinating Time - I marinate for at least 30 minutes. If you have time, marinating overnight makes a big difference to the flavour.
  • Grilling - I wait until the tawa is quite hot before adding the potatoes. I let each side sit for a few minutes so you get that golden brown colour.
  • Using Skewers - I use metal skewers because wooden ones can sometimes split the potato. Push gently when you insert them.
  • Testing - I use a knife to check if it's done, the outside should be crispy and dark, but the inside should still be creamy.

Serving and Storage

Serve this hot and crispy with green chutney, fresh lemon wedges, and onions on side. You can just store any leftovers in an airtight container in the refrigerator for up to a day.Β 

FAQS

1. Can I use regular potatoes?

Yes. Pressure cook them longer and cut them into smaller cubes so they cook through properly.

2. Can I skip the black salt?

Yes, you can use regular salt instead. It will still taste good.

3. Can I make this ahead?

Yes, you can prepare and marinate the potatoes ahead, just grill them when needed.

4. Can I add paneer?

Sure, you can add paneer to make it more filling. Use cubed paneer pieces.

5. Can I make it without skewers?

Yes, you can arrange the marinated potatoes directly on the tawa. It will taste good though the presentation will be different.

aloo tikka served with green chutney

If you have any more questions about this Aloo Tikka Recipe do mail me at sharmispassions@gmail.com. In addition, follow me on Instagram, Facebook,Β  Pinterest, Youtube andΒ TwitterΒ .

Tried this Aloo Tikka Recipe? Do let me know how you liked it. Also tag us on Instagram @sharmispassions and hash tag it on #sharmispassions.

πŸ“– Recipe Card

PotatoTikka1
Print

Aloo Tikka Recipe

Aloo Tikka is a smoky potato appetizer made with kitchen available ingredients. You can make it in minutes, and it always looks impressive when you serve it for guests. The potatoes get marinated in spiced yogurt, then grilled until they're golden and charred on the outside.
Course Appetizer, Snack
Cuisine Indian, Indo Chinese
Keyword aloo fry, aloo fry recipe, Aloo Recipes, curd recipes, easy potato fry, how to make potato fry, masala recipes, Potato, potato fry, potato fry recipe, Potato Recipes, snack recipes, starter, tikka recipes, veg recipes, vegetable, yogurt recipes
Prep Time 30 minutes
Cook Time 15 minutes
Total Time 45 minutes
Servings 2 people
Calories 223kcal
Author Sharmilee J

Ingredients

  • 1 cup thick curd
  • 15 nos baby potatoes
  • ΒΎ cup big onion cut into cubes
  • ΒΎ cup capsicum cut into cubes
  • 1 tablespoon oil
  • 2 teaspoon lemon juice
  • salt to taste
  • oil to fry

Spice mix:

Instructions

  • Pressure cook baby potatoes for 3 whistles it should be cooked soft but not mushy. Peel the skin and prick holes with a fork or toothpick.
  • My potatoes were big so I cut them into half. You need not do this if its small. Get ready with all your ingredients. ToΒ a mixing bowl add hung curd.
  • Now add the spice mix listed under 'spice mix' in ingredients list. Add oil. Mix well. Marinate for 30 mins.
  • Add required salt. Add cubed onion, capsicum and potatoes.
  • Mix well, finally add lemon juice. Take your skewers. I used my metal skewer which came with my oven.
  • Insert the veggies alternatively. Toast on tawa until golden brown.
  • Drizzle oil, turn over in between and slowly cook so that it is evenly cooked on both sides.
  • Serve Aloo Tikka hot with green chutney, lemon wedges and onions.

Notes

  • Pressure Cooking - I cook baby potatoes for three whistles so they're tender all the way through. If you cook them too long, they get mushy and fall apart when grilling.
  • Marinating Time - I marinate for at least 30 minutes. If you have time, marinating overnight makes a big difference to the flavour.
  • Grilling - I wait until the tawa is quite hot before adding the potatoes. I let each side sit for a few minutes so you get that golden brown colour.
  • Using Skewers - I use metal skewers because wooden ones can sometimes split the potato. Push gently when you insert them.
  • Testing - I use a knife to check if it's done, the outside should be crispy and dark, but the inside should still be creamy.

Nutrition

Serving: 125g | Calories: 223kcal | Carbohydrates: 21g | Protein: 7g | Fat: 13g | Saturated Fat: 4g | Polyunsaturated Fat: 2g | Monounsaturated Fat: 6g | Trans Fat: 0.03g | Cholesterol: 16mg | Sodium: 83mg | Potassium: 513mg | Fiber: 5g | Sugar: 11g | Vitamin A: 2517IU | Vitamin C: 81mg | Calcium: 192mg | Iron: 2mg

The post Aloo Tikka Recipe appeared first on Sharmis Passions.
Banana Peanut Butter Popsicle Recipe

Banana Peanut Butter Popsicle is a delicious ice treat made by freezing a blend of sliced banana, milk flavoured with peanut butter. Banana Peanut Butter Popsicle is a treat for the family in the summer holidays with the goodness of banana and peanut butter.

banana peanut butter popsicles served

This is simple and easy to make in a few minutes, it doesn't need any cooking at all. Each bite has banana and peanut butter flavour and the curd makes it creamy, the frozen texture is smooth and together it feels satisfying. This comes together quickly without requiring much effort.Β 

[feast_advanced_jump_to]

About Banana Peanut Butter Popsicle

Banana Peanut Butter Popsicle is a quick and easy to make and you can enjoy bananas in a different form and this recipe is also easy to make and does not need much effort. It can be made ahead and kept in the freezer until serving time, the flavours blend together well and gives creamy taste.

The texture is smooth and frozen throughout the popsicle. The popsicle has natural sweetness from banana and rich flavour from peanut butter. This is perfect for hot days when you want something cool and filling at the same time.

The recipe is flexible and depends on how sweet your banana and peanut butter are. Sugar can be adjusted based on your taste. Some people like chunky peanut butter for texture while others prefer creamy.

You can also add cocoa powder if you like chocolate flavour mixed with peanut butter.I usually make this during summer and my family likes the creamy texture and peanut butter flavour making it a favourite at home.Β 

banana peanut butter popsicles served

Similar Recipes

Banana Peanut Butter Popsicle Ingredients

  • Banana - I have used ripe, soft bananas for the popsicle base. Ripe ones give sweet taste and blend well with peanut butter.
  • Curd - I use curd for make this rich and creamy. It gives smooth texture and helps bind all ingredients together.
  • Milk - I added boiled and cooled milk for creamy consistency. You can use regular milk if that is what you have.
  • Peanut Butter - I used for flavour and nutrition in the popsicle. You can use chunky or creamy based on what you prefer.
  • Brown Sugar - I added brown sugar for sweetness and depth of flavour. You can adjust based on how sweet your banana is.

How to make Banana Peanut Butter Popsicle Step by Step

1.To a mixer jar - take curd, milk and banana. Add brown sugar to it.

43102552242 f78e223fde o

2.Add peanut butter and blend until smooth and creamy. Take your popsicle mould.

how to make banana peanut butter popsicles step1

3.Pour into popsicle mould leaving 1 cm on top. Close with lid.

how to make banana peanut butter popsicles step2

4.Freeze for at least 6-8 hours. Then show the bottom part in running tap water and then remove the popsicles carefully. Serve!

how to make banana peanut butter popsicles step3

Serve immediately!

banana peanut butter popsicles served

Expert Tips

  • Picking Banana - I usually choose ones that are ripe and soft because they blend well and tastes sweet. Overripe ones with brown spots work really well too.
  • Blending Smooth - I blend all ingredients until completely smooth and creamy before pouring into moulds.Β 
  • Freezing Time - I always freeze for at least 8 hours or overnight for best result. This helps popsicles set properly and unmould easy.
  • Demoulding - I usually show mould under running water for few seconds. This helps release popsicle easily without breaking them.
  • Nuts - You can also add in some extra nuts for crunchiness.

Serving and Storage

Serve Banana Peanut Butter Popsicle immediately after remove from freezer. It taste good as summer treat or afternoon snack. You can store in freezer for about one week, consume within for best flavour and taste.

FAQS

1.Can I use smooth peanut butter?

Yes you can use smooth peanut butter if you prefer. Both smooth and chunky work well, it just depend on your preference for texture.

2.Can I add chocolate?

Yes, add cocoa powder to the mixture for best taste and it blend well with other ingredients.

3.How long should I freeze this?

You should freeze for at least 8 hours or overnight for the popsicles to set properly and unmould easily without breaking.

4.Can I use any banana?

You can use ripe banana for sweet taste. Overripe ones with brown spots also work really well for this recipe.

5.How long can I store it?

You can store this in freezer for about one week only. It taste best when fresh and frozen solid.

banana peanut butter popsicles served

If you have any more questions about this Banana Peanut Butter Popsicle Recipe do mail me at sharmispassions@gmail.com. In addition, follow me on Instagram, Facebook,Β  Pinterest, Youtube andΒ TwitterΒ .

Tried this Β Banana Peanut Butter Popsicle Recipe ? Do let me know how you liked it. Also tag us on Instagram @sharmispassions and hash tag it on #sharmispassions.

πŸ“– Recipe Card

PeanutButterPopsicles4
Print

Banana Peanut Butter Popsicle Recipe

Banana Peanut Butter Popsicle is a delicious ice treat made by freezing a blend of sliced banana, milk flavoured with peanut butter. Banana Peanut Butter Popsicle is a treat for the family in the summer holidays with the goodness of banana and peanut butter.
Course Dessert
Cuisine Indian
Keyword fruit recipes, ice cream recipes, icecreams, milk recipes, peanut butter recipes, popsicles
Prep Time 10 minutes
Freezing Time 8 hours
Total Time 10 minutes
Servings 4 popsicles
Calories 227kcal
Author Sharmilee J

Ingredients

  • 1 cup curd
  • Β½ cup milk
  • ΒΌ cup brown sugar
  • 1 small banana
  • ΒΌ cup peanut butter

Instructions

  • To a mixer jar - take curd, milk and banana. Add brown sugar to it.
  • Add peanut butter and blend until smooth and creamy. Take your favorite popsicle mould.
  • Pour into popsicle mould leaving 1 cm on top. Close with lid.
  • Freeze for at least 6-8 hrs. Then show the bottom part in running tap water and then remove the popsicles carefully.
  • Serve Banana Peanut Butter Popsicle immediately!

Notes

  • Picking Banana - I usually choose ones that are ripe and soft because they blend well and tastes sweet. Overripe ones with brown spots work really well too.
  • Blending Smooth - I blend all ingredients until completely smooth and creamy before pouring into moulds.Β 
  • Freezing Time - I always freeze for at least 8 hours or overnight for best result. This helps popsicles set properly and unmould easy.
  • Demoulding - I usually show mould under running water for few seconds. This helps release popsicle easily without breaking them.
  • Nuts - You can also add in some extra nuts for crunchiness.

Nutrition

Serving: 75g | Calories: 227kcal | Carbohydrates: 27g | Protein: 7g | Fat: 11g | Saturated Fat: 4g | Polyunsaturated Fat: 2g | Monounsaturated Fat: 5g | Cholesterol: 12mg | Sodium: 113mg | Potassium: 340mg | Fiber: 1g | Sugar: 22g | Vitamin A: 126IU | Vitamin C: 3mg | Calcium: 132mg | Iron: 0.5mg

The post Banana Peanut Butter Popsicle Recipe appeared first on Sharmis Passions.
Jamun Kofta Curry Recipe

Jamun Kofta Curry is a creamy delicious curry made with soft jamun koftas in a onion tomato based gravy. This is a great side dish for rice meal, naan, roti and other Indian breads. The koftas are soft inside with a light crisp outside and the smooth gravy makes it satisfying.Β 

jamun kofta gravy served with chapathi

This makes lunch really special and is perfect for weekends and special occasions. It comes together in about less than an hour and doesn't need much effort. The texture is soft and creamy with little crispy kofta pieces throughout, together it makes a satisfying meal.

[feast_advanced_jump_to]

About Jamun Kofta Curry

Jamun Kofta Curry is a quick and easy recipe, has soft jamun koftas and creamy tomato gravy together. You can make it ahead and keep in the fridge until serving time. The flavours blend together well and gives nice taste.The soft koftas in the creamy gravy makes it our family favourite.

The texture is soft and creamy with little crispy kofta pieces throughout. Each spoon has soft kofta with the creamy tomato gravy. The gravy is smooth with mild tomato flavour and hints of ginger garlic. Cashews and fresh cream make it rich and delicious.

The recipe is flexible and depends on the things you add according to your taste, some people prefer thicker gravy while others like it slightly thin. You can also adjust how much cream you use based on what you like and prefer extra rich or lighter curry.

I usually make this on weekends or when we have guests coming for lunch or to make the weekend special for my family. My family likes it best when served with chapathi or naan.Β 

Once when I was searching for ideas to use up the jamun mix this popped up in my mind and immediately tried it out. I was so content to see all the happy faces at home after tasting this, the koftas are breadish texture with a great taste to go with the makhani gravy, yum!

jamun kofta gravy served with chapathi

Jamun Kofta Curry Ingredients

  • Jamun Mix - I have used jamun mix as the base for koftas. It tastes great when mixed with other ingredients and vegetables.
  • Carrot - I added grated carrot for sweetness and texture to the kofta.
  • Onion - I use chopped onion in the kofta dough for flavour and binding.
  • Coriander Leaves - I added fresh coriander leaves for fresh taste and aroma.Β 
  • Tomatoes - I use medium sized tomatoes for making the gravy. Fresh ripe tomatoes gives better flavour than canned ones.
  • Onion for Gravy - I use roughly chopped onion for making the gravy base. It gives a creamy base for the gravy.
  • Cashews - I added some cashews for richness and creaminess to the gravy. It gives richness and creaminess to the gravy.
  • Oil - I use oil for frying koftas and for tempering spices. You can use any cooking oil you have at home.
  • Shahi Jeera - I use for tempering and it gives nice flavour to the gravy.
  • Ginger Garlic Paste - I added for flavour and aroma to the gravy.
  • Red Chilli Powder - I added for colour and mild heat. Adjust quantity based on how spicy you like the curry.
  • Garam Masala Powder - I used it for flavour and taste.
  • Fresh Cream - I added fresh cream for richness and smoothness. It make the gravy creamy and rich.
  • Milk - I added milk to make the gravy smooth and balance the spices. It also adds creaminess without making it too heavy.
  • Salt - I added to taste. Always adjust salt at the end as per your preference.

Similar Recipes

How to make Jamun Kofta Curry Step by Step

1.To a pressure cooker - add onion, tomatoes and cashews. Add Β½ cup water and pressure cook for 2 whistles. Cool down completely.

how to make jamun kofta gravy step1

2.Transfer to mixer jar and make a fine puree, Set aside. Heat a pan with oil - add jeera let it crackle.

how to make jamun kofta gravy step2

3.Add ginger garlic paste fry for a minute. Add onion tomato puree and let it boil in low flame

how to make jamun kofta gravy step3

4.Now add required salt along with red chilli powder and garam masala powder.Simmer for 5 minutes in low flame.

how to make jamun kofta gravy step4

5.Add fresh cream mix well then add milk.

how to make jamun kofta gravy step5

6.Mix it and bring to a boil, garnish with coriander leaves and switch off.

how to make jamun kofta gravy step6

7.In a mixing bowl - add jamun mix along with carrot, onion and coriander leaves. Mix well first.

how to make jamun kofta gravy step7

8.Then sprinkle little water to a form a dough. Roll small lemon sized balls.

how to make jamun kofta gravy step8

9.Arrange in a plate.Heat oil in a kadai - fry the balls, roll and cook for even browning and cooking. Fry 3-4 balls at a time. Do in batches.

how to make jamun kofta gravy step9

8.Fry until golden brown. Drain in tissue paper. At the time of serving add the balls to the gravy and serve.

how to make jamun kofta gravy step8

Add the koftas to the gravy while serving time. Drizzle fresh cream, garnish with coriander leaves.Serve hot with roti or chapathi.

jamun kofta gravy served with chapathi

Expert Tips

  • Jamun Mix Consistency - I keep the jamun mix slightly thick before making koftas. If it is too thin, add little rice flour or cornstarch to help bind the dough properly.
  • Forming Koftas - I make lemon sized balls and they cook evenly this way. If you make them too big, inside stay raw and outside get burnt.
  • Frying Koftas - I fry 3-4 koftas at a time in batches so they cook evenly. Don't overcrowd as they might not cook evenly.
  • Cooking Gravy - I let the gravy simmer in low flame after adding spices to make the gravy thick and creamy.
  • Adding Koftas - I add koftas to the gravy just before serving so they stay crisp. If added to the gravy they might turn soggy and soft.
  • Cream and Milk - I always add fresh cream first then milk and mix well. This prevent curdling and make the gravy smooth and silky.

Serving and Storage

Serve this hot with roti, chapathi or steamed rice and it tastes perfect. You can also serve with naan for a special meal. Store the gravy in fridge for up to one day and add the koftas just before serving for best texture.

FAQS

1.Can I make the koftas ahead?

Yes you can just make the base ahead and fry the jamuns later and add. Add them just before serving so they stay crispy and don't get soft.

2.Can I add in other vegetables?

Yes you can add peas, beans or boiled potato. It gives different flavour and texture to experiment.

3.Why are my koftas breaking?

The mixture may be too wet so add little rice flour or cornflour to bind. Make them slightly thicker.

4.Can I make the gravy thinner?

Yes you can add little milk or water. Add slowly and check until you get the thickness you like.

5.Can I skip the fresh cream?

Yes you can skip it, the gravy will still taste good but will be less creamy and rich.

jamun kofta gravy served with chapathi

If you have any more questions about this Jamun Kofta Curry RecipeΒ do mail me at sharmispassions@gmail.com. In addition, follow me on Instagram,Β Facebook,Β PinterestΒ ,YoutubeΒ andΒ TwitterΒ .

Tried this Jamun Kofta Curry Recipe? Do let me know how you liked it. Also tag us on Instagram @sharmispassions and hash tag it on #sharmispassions.

πŸ“– Recipe Card

JamunKoftaGravy1
Print

Jamun Kofta Curry Recipe

Jamun Kofta Curry is a creamy delicious curry made with soft jamun koftas in a onion tomato based gravy. This is a great side dish for rice meal, naan, roti and other Indian breads. The koftas are soft inside with a light crisp outside and the smooth gravy makes it satisfying.Β 
Course Lunch, Main Course, Side Dish
Cuisine Indian
Keyword curry, curry recipes, Dinner recipe, fresh cream recipe, Gravy, gravy recipes, lunch recipes, meals, milk recipes, roti sidedish, Side Dish, veg recipes, vegetable
Prep Time 15 minutes
Cook Time 30 minutes
Total Time 45 minutes
Servings 2 people
Calories 670kcal
Author Sharmilee J

Ingredients

For the kofta:

  • 1 Β½ cups jamun mix
  • ΒΌ cup carrot grated
  • ΒΌ cup chopped onions
  • 1 tablespoon coriander leaves
  • water as needed

For the gravy:

  • 1 medium sized big onion roughly chopped
  • 2 medium sized tomatoes roughly chopped
  • 5 nos cashews
  • 1 tablespoon oil
  • ΒΎ teaspoon shahi jeera
  • 1 teaspoon ginger garlic paste
  • 1 teaspoon red chilli powder
  • ΒΎ teaspoon garam masala powder
  • 1 tablespoon fresh cream
  • β…“ cup milk
  • 1 teaspoon coriander leaves finely chopped - just for garnish
  • salt to taste
  • water as needed

Instructions

  • To a pressure cooker - add onion, tomatoes and cashews. Add Β½ cup water and pressure cook for 2 whistles. Cool down completely.
  • Transfer to mixer jar and make a fine puree, set aside.
  • Heat a pan with oil - add jeera let it crackle. Add ginger garlic paste fry for a minute.
  • Add onion tomato puree and let it boil in low flame.
  • Now add required salt along with red chilli powder and garam masala powder. Simmer for 5mins in low flame.
  • Add fresh cream mix well then add milk. Mix it and bring to a boil, garnish with coriander leaves and switch off.
  • In a mixing bowl - add jamun mix along with carrot,onion and coriander leaves. Mix well first.
  • Then sprinkle little water to a form a dough. Roll small lemon sized balls. Arrange in a plate.
  • Heat oil in a kadai - fry the balls, roll and cook for even browning and cooking.
  • Fry 3-4 balls at a time. Fry in batches. Fry until golden brown.
  • Drain in tissue paper. At the time of serving add the balls to the gravy and serve.
  • Serve Jamun Kofta Curry hot with roti or chapathi.

Video

Notes

  • Jamun Mix Consistency - I keep the jamun mix slightly thick before making koftas. If it is too thin, add little rice flour or cornstarch to help bind the dough properly.
  • Forming Koftas - I make lemon sized balls and they cook evenly this way. If you make them too big, inside stay raw and outside get burnt.
  • Frying Koftas - I fry 3-4 koftas at a time in batches so they cook evenly. Don't overcrowd as they might not cook evenly.
  • Cooking Gravy - I let the gravy simmer in low flame after adding spices to make the gravy thick and creamy.
  • Adding Koftas - I add koftas to the gravy just before serving so they stay crisp. If added to the gravy they might turn soggy and soft.
  • Cream and Milk - I always add fresh cream first then milk and mix well. This prevent curdling and make the gravy smooth and silky.

Nutrition

Serving: 100g | Calories: 670kcal | Carbohydrates: 54g | Protein: 30g | Fat: 38g | Saturated Fat: 19g | Polyunsaturated Fat: 3g | Monounsaturated Fat: 14g | Trans Fat: 0.03g | Cholesterol: 106mg | Sodium: 412mg | Potassium: 1844mg | Fiber: 4g | Sugar: 46g | Vitamin A: 5089IU | Vitamin C: 32mg | Calcium: 973mg | Iron: 1mg

The post Jamun Kofta Curry Recipe appeared first on Sharmis Passions.
Strawberry Fool Recipe

Strawberry Fool is a creamy delicious dessert that is made by layering fresh strawberries and whisked fresh cream. It is a special dessert and is a must try at home during strawberry season for its taste, also the dessert feels soft and creamy and is best served cold.

strawberry fool served in a glass

This is simple and doesn't need any cooking, each spoon has strawberry flavour and the soft cream gives it smooth texture, also the strawberry pieces add a bite and everything together feels fresh and satisfying. This comes together quickly without requiring much effort.

[feast_advanced_jump_to]

About Strawberry Fool

Strawberry Fool is a quick and easy to make dessert. You can enjoy fresh strawberries in a different form and this recipe is also easy to make and does not need much effort. It can be made ahead and kept in the fridge until serving time, the flavours blend together well and give a refreshing taste.

The texture is soft and creamy with little strawberry pieces throughout. Each spoon has a strawberry flavor and soft cream makes it smooth. Lemon juice if added gives a tangy taste that balances the sweetness. When you serve it cold everything comes together and tastes really good.

The recipe is flexible and depends on how sweet your strawberries are. Sugar can be adjusted based on your strawberries. Some people like more strawberries for stronger flavor while others prefer more cream. You can also skip lemon juice if you don't like the tangy taste.

I usually make this during strawberry season when berries are fresh and sweet. My family likes it really chilled. The creamy texture and fresh strawberry taste make it a favourite at home.

strawberry fool served in a glass

Strawberry Fool Ingredients

  • Strawberries - I have used fresh, ripe strawberries for the pudding and the garnish. Medium sized ones give you better flavour and soft texture.
  • Fresh Cream - I use fresh cream or whipped cream for making this rich and creamy. You can also use whipping cream if that is what you have.
  • Sugar - I added sugar for sweetness, you can just adjust as per taste depending on how sweet your strawberries are.
  • Lemon Juice - I used for tangy taste and it helps bring out fresh flavour. Adjust quantity based on how much tangy taste you like and it balances the sweetness.

Similar Recipes

How to make Strawberry Fool Step by Step

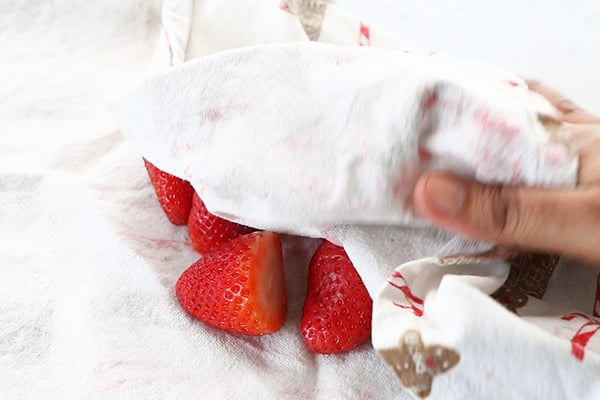
1.Rinse it well, remove the leaf. Chop them roughly.

how to make strawberry fool step1

2.Take it in bowl, add sugar to it.

how to make strawberry fool step2

3.Mix well add lemon juice. Set aside for 10 minutes so that it becomes juicy.

how to make strawberry fool step3

4.To a mixing bowl add fresh cream, Whisk well until thick and peaks are soft. I used my hand mixer. I always take fresh cream from fridge just before whisking.

how to make strawberry fool step4

5.Add juicy strawberries reserving a tablespoon of it for topping.

how to make strawberry fool step5

6.Just give a quick mix, do not over mix. Take your serving glass. Spoon the mixture into it.

how to make strawberry fool step6

7.Fill the serving cup, spoon the juicy strawberries and add as topping. Chill until serving time.

how to make strawberry fool step7

Serve chilled!

Expert Tips

  • Picking Strawberries - I usually choose ones that are completely ripe and naturally sweet, makes the dessert taste better.Β 
  • Whisking Cream - I whisk until soft peaks form and then stop. If you over whisk it, the texture becomes heavy and does not work as well.Β 
  • Strawberry Mix - I prefer keeping strawberry mixture slightly pourable so it spreads easily when layering. You get a smoother finish this way and flavours blend well together.
  • Chilling Time - I always refrigerate the dessert before serving. It sets properly and tastes much better when cold. You can make it ahead and keep in fridge for few hours.
  • Toppings - You an also add few nuts on the top for garnish, it also add crunch texture.

Serving and Storage

Serve Strawberry Fool as after meal dessert or on afternoon to beat the summer heat. You can store this in fridge for upto one day, consume within for best flavour and taste.

FAQS

1.Can I make this ahead?

Yes you can make it before some time and serve. The flavours blend well and taste even better when it sit for some time.

2.Which strawberries are best?

I use ripe, sweet and fresh ones for best flavour and the right texture overall. Medium sized ones work well too.

3.Can I add vanilla essence?

Yes you can use it and it mix well into the cream giving extra flavour. Add only small quantity for best taste.

4.Can I skip lemon juice?

Yes skip if you don't like tangy taste. Lemon juice gives a bit of freshness and balance the sweetness but it is optional.

5.How long can I store it?

You can store this in the fridge for about one day only. It taste best when fresh and cold.

strawberry fool served in a glass

If you have any more questions about thisΒ How to season Iron TawaΒ do mail me at sharmispassions@gmail.com. In addition, follow me onΒ Instagram,Β Facebook,Β Β Pinterest,Β YoutubeΒ andΒ TwitterΒ .

Tried thisΒ How to season Iron Tawa? Do let me know how you liked it. Also tag us on Instagram @sharmispassions and hash tag it on #sharmispassions.

πŸ“– Recipe Card

StrawberryFool2
Print

Strawberry Fool Recipe

Strawberry Fool is a creamy delicious dessert that is made by layering fresh strawberries and whisked fresh cream. It is a special dessert and is a must try at home during strawberry season for its taste, also the dessert feels soft and creamy and is best served cold.
Course Dessert
Cuisine Indian
Keyword 30 mins recipes, dessert recipes, fresh cream recipe, fruit recipes, lemon recipes, strawberry recipes
Prep Time 10 minutes
Cook Time 10 minutes
Chilling Time 15 minutes
Total Time 35 minutes
Servings 2 glass
Calories 440kcal
Author Sharmilee J

Ingredients

  • 1 cup fresh cream / whipped cream
  • 6 medium sized strawberries
  • ΒΎ teaspoon lemon juice (optional)
  • 1 tablespoon sugar

Instructions

  • Rinse Strawberries well, remove the leaf. Chop them roughly.
  • Take it in bowl, add sugar to it. Mix well add lemon juice. Set aside for 10 mins so that it becomes juicy.
  • To a mixing bowl add fresh cream, Whisk well until thick and peaks are soft. I used my hand mixer. I always take fresh cream from fridge just before whisking.
  • Add juicy strawberries reserving a tablespoon of it for topping.
  • Just give a quick mix, do not over mix. Take your serving glass. Spoon the mixture into it.
  • Fill the serving cup, spoon the juicy strawberries and add as topping. Chill Strawberry Fool until serving time.
  • Enjoy Strawberry Fool chilled!

Notes

  • Picking Strawberries - I usually choose ones that are completely ripe and naturally sweet, makes the dessert taste better.Β 
  • Whisking Cream - I whisk until soft peaks form and then stop. If you over whisk it, the texture becomes heavy and does not work as well.Β 
  • Strawberry Mix - I prefer keeping strawberry mixture slightly pourable so it spreads easily when layering. You get a smoother finish this way and flavours blend well together.
  • Chilling Time - I always refrigerate the dessert before serving. It sets properly and tastes much better when cold. You can make it ahead and keep in fridge for few hours.
  • Toppings - You an also add few nuts on the top for garnish, it also add crunch texture.

Nutrition

Serving: 100g | Calories: 440kcal | Carbohydrates: 12g | Protein: 4g | Fat: 43g | Saturated Fat: 27g | Polyunsaturated Fat: 2g | Monounsaturated Fat: 11g | Cholesterol: 134mg | Sodium: 33mg | Potassium: 170mg | Fiber: 1g | Sugar: 11g | Vitamin A: 1754IU | Vitamin C: 23mg | Calcium: 84mg | Iron: 0.3mg

The post Strawberry Fool Recipe appeared first on Sharmis Passions.
Podi Idli Recipe

Podi Idli is a great South Indian breakfast that cab be made quickly with leftover idlis or mini idlis. It is made by tossing steamed idlis over a basic tempering along with a spicy ground lentil condiment called podi. These serve as a great snack too, kids will love it.

mini podi idli served

Podi idli is so tasty and a comforting food made with leftover idlis or mini idlis.Β I have always wondered how our elders turn even the leftovers to such tasty snack and avoid food wastage. So I have also stuck to this rule of no food wastageΒ  as far as I can.

[feast_advanced_jump_to]

About Podi Idli

Podi is a spicy condiment made using lentils. Idli is steamed rice cakes. So idlis tossed in podi is popularly known as Podi Idli. It is a quick South Indian breakfast made using left over idlis. Later hotels started to fancy it using mini idlis.

I started making podi ever since mittu started eating idli podi. I usually make a simple version in dosa tawa itself. But later when I tasted in restaurants and seeing kids enjoy it now this is the version I am making and everyone at home is a fan of it.

The key to a perfect tasting podi idli is idlis should be firm and podi should be slightly coarse. You can refrigerate the idlis for a while to make it a bit firm so that they don't crumble while tossing.

I always use homemade idli podi as it tastes great and is less spicy. I always have a batch of homemade idli podi as we aren't big fans of store bought ones. Once I see the bottle nearing to finish I make a fresh batch and store.

Over the years I have made so many versions of idli podi but the one posted here is our staple. For a change I try different varieties but finally come to our family staple recipe.

mini podi idli served

Podi Idli Video

Podi Idli Ingredients

  • Idli - You can use mini idli or big idlis cut into cubes. Make sure to refrigerate them for minimum 15 minutes before making podi idli.
  • Onion - Sliced onion adds a crunch and taste to this dish so do not miss it.
  • Oil - I always use gingelly oil for podi idli. But you can use any cooking oil too.
  • Ghee - Ghee is added for flavour. You can skip it if you do not prefer.
  • Mustard seeds - Mustard seeds is added to oil for tempering.
  • Curry leaves - is added for flavour.
  • Idli Podi - I always use homemade idli podi. But you can use store bought idli podi too make sure it is crunchy and slightly coarse.
  • Salt - to taste and balance the flavours.
ingredients needed to make mini podi idli

Similar Recipes

How to make Podi Idli Step by Step

1.To a pan add 1 tablespoon gingelly oil. Add Β½ teaspoon mustard seeds, let it splutter.

temper mustard seeds

2.Add 1 small sprig curry leaves, let it splutter.

temper curry leaves

3.Add 1 medium sized onion sliced along with little salt. Idli podi already has salt so keep an eye while adding salt.

add onion, salt

4.Saute until it turns transparent. Do not let it soften it should be slightly crunchy.

saute until transparent

5.Add around 30 mini idlis along with 3 tablespoon idli podi. My homemade idli posi is not spicy so I added more. You can adjust according to the spice level of your idli podi.

add idli, podi

6.Add 1 Β½ tablespoon ghee.

add ghee

7.Give a quick mix.Toss in high flame and switch off.

mix well

Serve podi idli hot!

mini podi idli served

Expert Tips

  • Adding idli podi - Our recipe of idli podi is less spicy so I usually add more. But if you are using store bought then use little less as it may be spicy, adjust accordingly.
  • Add ons - You can add vegetables like carrot, capsicum to make it whole some. You can even add corn, peas or any other veggie of your choice. You can even add peanuts or almonds replacing cashews.
  • Oil - Gingelly oil is good for health so be generous in adding. You can replace it with coconut oil.
  • Idlis - Make sure your idlis are slightly porous so that it absorbs the podi well. So use the first batch of idli batter for best results. If you don't have mini idli mould, you can even make regular idlis, cube them and use it.
  • Avoid crumbling - Refrigerate steamed idlis for a while to make it firm and avoid crumbling.

Serving and Storage

Serve podi idli hot or warm for the best taste. Enjoy it as a breakfast, snack, or light dinner. It also tastes delicious with a cup of filter coffee or masala chai. Garnish with fresh coriander leaves and a drizzle of ghee for extra flavour.

FAQS

1. Can I use leftover idlis?

Yes. Leftover or a day-old idlis works very well because they hold their shape and absorb the podi without becoming mushy.

2. Can I make podi idli for lunch boxes?

Yes. Podi idli is a great lunch box recipe because it stays great and flavorful even after cooling.

3. Why is my podi idli dry?

It means there wasn't enough oil or ghee, or too much podi was used. Add a little more sesame oil or ghee and toss again for a better coating and to avoid drying.

mini podi idli served

If you have any more questions about thisΒ How to season Iron TawaΒ do mail me at sharmispassions@gmail.com. In addition, follow me onΒ Instagram,Β Facebook,Β Β Pinterest,Β YoutubeΒ andΒ TwitterΒ .

Tried thisΒ How to season Iron Tawa? Do let me know how you liked it. Also tag us on Instagram @sharmispassions and hash tag it on #sharmispassions.

πŸ“– Recipe Card

Print

Podi Idli Recipe (Podi Mini Idli)

Podi Idli is a great South Indian breakfast that cab be made quickly with leftover idlis or mini idlis. It is made by tossing steamed idlis over a basic tempering along with a spicy ground lentil condiment called podi. These serve as a great snack too, kids will love it.
Course Breakfast, Snack
Cuisine Indian
Keyword chilli idli, chilli idly, easy idli for beginners, healthy idli, how to make chilli idli, how to make idli chaat, how to make idli fingers, how to make masala idli, how to make podi idli, idli milagai podi, idli podi recipe, Idli recipes, snack recipes
Prep Time 5 minutes
Cook Time 10 minutes
Total Time 15 minutes
Servings 2
Calories 206kcal
Author Sharmilee J

Ingredients

  • 30 mini idli
  • 1 medium sized onion
  • 1 tablespoon oil
  • 1 Β½ tablespoon ghee
  • Β½ teaspoon mustard seeds
  • 1 small sprig curry leaves
  • 2 tablespoon idli podi
  • salt to taste

Instructions

  • To a pan add 1 tablespoon gingelly oil. Add Β½ teaspoon mustard seeds, let it splutter.
  • Add 1 small sprig curry leaves, let it splutter.
  • Add 1 medium sized onion sliced along with little salt. Idli podi already has salt so keep an eye while adding salt.
  • Saute until it turns transparent. Do not let it soften it should be slightly crunchy.
  • Add around 30 mini idlis along with 3 tablespoon idli podi. My homemade idli posi is not spicy so I added more. You can adjust according to the spice level of your idli podi.
  • Add 1 Β½ tablespoon ghee.
  • Give a quick mix.Toss in high flame and switch off.
  • Serve podi idli hot!

Video

Notes

  • Adding idli podi - Our recipe of idli podi is less spicy so I usually add more. But if you are using store bought then use little less as it may be spicy, adjust accordingly.
  • Add ons - You can add vegetables like carrot, capsicum to make it whole some. You can even add corn, peas or any other veggie of your choice. You can even add peanuts or almonds replacing cashews.
  • Oil - Gingelly oil is good for health so be generous in adding. You can replace it with coconut oil.
  • Idlis - Make sure your idlis are slightly porous so that it absorbs the podi well. So use the first batch of idli batter for best results. If you don't have mini idli mould, you can even make regular idlis, cube them and use it.
  • Avoid crumbling - Refrigerate steamed idlis for a while to make it firm and avoid crumbling.

Nutrition

Serving: 150g | Calories: 206kcal | Carbohydrates: 8g | Protein: 2g | Fat: 19g | Saturated Fat: 8g | Polyunsaturated Fat: 2g | Monounsaturated Fat: 8g | Trans Fat: 0.03g | Cholesterol: 29mg | Sodium: 45mg | Potassium: 86mg | Fiber: 2g | Sugar: 2g | Vitamin A: 39IU | Vitamin C: 24mg | Calcium: 19mg | Iron: 0.2mg

The post Podi Idli Recipe appeared first on Sharmis Passions.
Moru Curry Recipe

Moru Curry is a Kerala style yogurt based curry tempered with spices. Moru Curry is a popular buttermilk curry that can be made quickly to pair up with rice. It is one of the staple side dishes in Kerala, it is quick and easy to make. It is light, mildly spiced and served as a part of Sadya meal.

moru curry served

Moru Curry is a tasty side dish made by tempering spices in thick buttermilk. It is a popular Kerala style buttermilk curry that is served with rice. This buttermilk curry can be made with or without coconut. I have shared the simple and basic version of Moru Curry here.

[feast_advanced_jump_to]

About Moru Curry

'Moru' means buttermilk and 'Curry' is gravy based liquid side dish. Moru Curry is a very simple traditional Kerala style seasoned buttermilk which is an integral part of Onam Sadya. It is light and cooling for the stomach perfect balance for spicy and heavy meals served in Sadya.

Morru Curry has butter milk which helps in cooling the stomach making it ideal to be part of a heavy sadya meal. This Kerala style moru curry is popularly known as Moru Kachiyathu. This is one of Kerala's most refreshing side dishes and I love it so much.

Moru Curry is also called Nadan Moru Curry or Moru Kachiyathu or Kachiya Moru. I have shared the basic version of moru curry, there are a lot of variations to this simple curry, check out expert tips section.

Moru Curry can be prepared with just few ingredients that is easily available in your kitchen. If you are pressed for time then this moru curry is perfect to make in just few minutes of time.

moru curry served

Moru Curry Video

Moru Curry tastes great even with just rice and papadam. This Moru Curry can be made with coconut or without it but this version I am sharing is without coconut which is the basic version. Tempering in coconut oil gives a great flavor to the curry.

This is a very simple dish that you can make when you don't have vegetables in stock still can enjoy a good meal with papadam and a simple vegetable stir fry. Hubby appreciated this moru curry, so I am making it often.

Even though this moru curry is very simple to make there are still certain tricks to make this curry perfectly. Always switch off and add the prepared buttermilk else it will may curdle.

Similar Recipes

Moru Curry Ingredients

  • Curd - Use thick curd that is slightly sour which is best for this curry. Whisk it well and then add it.
  • Tempering - A simple tempering is made using coconut oil, mustard seeds, fenugreek seeds, curry leaves, red chili and hing. Adding hing is optional.
  • Turmeric powder - Turmeric powder is added for flavor and color.
  • Coconut oil - Coconut oil adds great flavor to the pachadi. However you can use regular cooking oil too.
  • Small onion - Small adds flavor to the curry and also crunch while eating.

How to make Moru Curry Step by Step

1.Take 1 cup thick curd in a bowl, add 1 cup water to it.

add water to curd

2.Whisk it well until smooth. You can even use a wired whisk to whisk well. Now buttermilk is ready. Set aside.

whisk it well

3.To a pan add 1Β tablespoonΒ coconut oil heat it. Now add

  • Β½Β teaspoonΒ mustard seeds
  • ΒΌΒ teaspoonΒ fenugreek seeds
  • 1Β smallΒ green chiliΒ slit into 2
  • 2Β nosΒ red chilies
  • fewΒ nosΒ curry leaves

Let it splutter, give a quick mix using a ladle.

prepare the tempering

4.Add 5 small onion(sliced) along with required salt to taste and ΒΌ teaspoon turmeric powder.

add onion, turmeric powder, salt

5.Give a quick saute until it turns golden. Switch off.

saute until golden

6.Add prepared thick buttermilk to it.

add whisked curd

7.Make sure to add buttermilk only when the flame is off or low. I usually switch off and then add it to avoid curd from curdling.

butter is added

8.Mix well.

mix it well

Moru Curry is ready!

Expert Tips

  • Use thick and slightly sour curd for best taste.
  • Always switch off while adding buttermilk or keep in low flame and add it.
  • Do not cook after buttermilk is added as it might curdle.
  • Adjust water according to the thickness of curd. If curd itself is runny then add less water
  • This moru curry can be made with or without coconut.
  • Grind ΒΌ cup coconut, 1 green chili, Β½ teaspoon cumin seeds to a paste and add it to the tempered items saute until raw smell leaves then add buttermilk.
  • You can add vegetables like vellarika(cucumber), kumbalanga(ash gourd), kaya(green raw plantain) etc.

Serving & Storage

Serve Moru Curry with rice and any vegetable stir fry or any spicy fry and papadam. This Moru Curry keeps well for 2 days in fridge.

FAQS

1.What vegetables can I add to moru curry?

You can cook and add ash gourd, yam, plantain, ladies finger, drumstick, cucumber etc.

2.Why did my moru curry curdle?

  • If buttermilk is not whisked well then it will curdle.
  • If the buttermilk is added to hot tempered items then it will curdle. So always turn off heat and add buttermilk or curd.

3.Is moru curry and moru kachiyathu the same?

Yes they are the same just the name differs.

4. Can I make moru curry with coconut?

Yes you can make moru curry with coconut also. But the traditional Kerala recipe is a simple buttermilk gravy with tempered spices.

5.Can I add vegetables to moru curry?

Yes you can add vegetables like cucumber, ash gourd, raw banana, yam etc.

moru curry served

If you have any more questions about this Moru Curry Recipe do mail me at sharmispassions@gmail.com. In addition, follow me on Instagram, Facebook,Β  Pinterest, Youtube andΒ TwitterΒ .

Tried this Β Moru Curry Recipe? Do let me know how you liked it. Also tag us on Instagram @sharmispassions and hash tag it on #sharmispassions.

πŸ“– Recipe Card

Print

Moru Curry Recipe | Kerala Moru Kachiyathu

Moru Curry is a Kerala style yogurt based curry tempered with spices. Moru Curry is a popular buttermilk curry that can be made quickly to pair up with rice. Learn to make Moru Curry with step by step pictures and video.
Course Side Dish
Cuisine Indian
Keyword curd recipes, curry, curry recipes, Kerala Meal Sidedish, lunch recipes, meals, Side Dish, veg recipes
Prep Time 10 minutes
Cook Time 10 minutes
Total Time 20 minutes
Servings 2
Calories 147kcal
Author Sharmilee J

Ingredients

  • 1 cup curd thick & sour
  • 1 cup water
  • 5 nos small onion sliced thin
  • salt to taste

To temper:

  • 1 tablespoon coconut oil
  • Β½ teaspoon mustard seeds
  • ΒΌ teaspoon fenugreek seeds
  • a pinch hing (optional)
  • 1 small green chili split into 2
  • 2 nos red chilies
  • few nos curry leaves
  • ΒΌ teaspoon turmeric powder

Instructions

  • Take 1 cup thick curd in a bowl, add 1 cup water to it.
  • Whisk it well until smooth. You can even use a wired whisk to whisk well. Now buttermilk is ready. Set aside.
  • To a pan add 1Β tablespoonΒ coconut oil heat it. Now add Β½Β teaspoonΒ mustard seeds, ΒΌΒ teaspoonΒ fenugreek seeds, 1Β smallΒ green chiliΒ slit into 2, 2Β nosΒ red chilies, fewΒ nosΒ curry leaves
  • Let it splutter, give a quick mix using a ladle.
  • Add 5 small onion(sliced) along with required salt to taste and ΒΌ teaspoon turmeric powder.
  • Give a quick saute until it turns golden. Switch off.
  • Add prepared thick buttermilk to it.
  • Make sure to add buttermilk only when the flame is off or low. I usually switch off and then add it to avoid curd from curdling.
  • Mix well.
  • Moru Curry is ready!

Video

Notes

  • Use thick and slightly sour curd for best taste.
  • Always switch off while adding buttermilk or keep in low flame and add it.
  • Do not cook after buttermilk is added as it might curdle.
  • Adjust water according to the thickness of curd. If curd itself is runny then add less water
  • This moru curry can be made with or without coconut.
  • Grind ΒΌ cup coconut, 1 green chili, Β½ teaspoon cumin seeds to a paste and add it to the tempered items saute until raw smell leaves then add buttermilk.
  • You can add vegetables like vellarika(cucumber), kumbalanga(ashgourd), kaya(green raw plaintain) etc.

Nutrition

Serving: 75g | Calories: 147kcal | Carbohydrates: 8g | Protein: 5g | Fat: 11g | Saturated Fat: 8g | Polyunsaturated Fat: 0.3g | Monounsaturated Fat: 2g | Cholesterol: 16mg | Sodium: 138mg | Potassium: 212mg | Fiber: 1g | Sugar: 7g | Vitamin A: 131IU | Vitamin C: 5mg | Calcium: 156mg | Iron: 0.4mg

The post Moru Curry Recipe appeared first on Sharmis Passions.
How to season claypot for first use | How to maintain claypots

How to season clay pot is a simple guide that helps you use new clay pots the right way. A properly seasoned clay pot cooks food evenly and brings out amazing aroma while cooking. And the food tastes different and the aroma fills your kitchen.Β 

season claypots

The seasoning process takes a few days but it just makes the clay pot last much longer and cook better. Clay pots have been used in Indian homes for years and they continue to be favourite for making curries and everyday dishes.Β 

[feast_advanced_jump_to]

About Clay Pot

Clay pot or manchatty is a traditional cookware that is used for making curries, rice dishes and many everyday Indian foods. There are two types of clay pots, brown ones which are regular clay pots and black ones which are brown pots that are burnt for a few days. Both types work well but black clay pots are stronger and last longer because they are burnt and become more durable.

Cooking in clay pot is a bit different from metal cookware. The pot takes longer to heat up but once heated it cooks food evenly and keeps heat for long time. Even after switching off the stove the food continues to cook which is a specialty of clay pots. The food gets cooked slowly and evenly which brings out flavour and taste beautifully.

Clay pots have small pores in them which is why they need proper seasoning before first use. When you season the clay pot with starch water and oil it fills these pores and makes the cooking surface smooth. The seasoning process takes around five days but it is worth doing properly because it makes the pot last longer and cook better.

I usually buy clay pots from local shops and I ask shopkeeper for tips before bringing them home. I use clay pots for making fish curries, vegetable curries and rice dishes regularly.

season claypots

How to Season Clay Pot - Things needed

  • Water - Plain water is used for first soaking. Water helps pores in clay pot to open up gently before seasoning begins.
  • Starch Water - Rice cooked water or rice washed water is used for soaking clay pot for three days. It helps seal pores and prepare the surface for oil seasoning.
  • Ghee or Coconut Oil - I have used ghee or coconut oil for seasoning and spreading on both sides of pot. It fills pores and creates protective layer on cooking surface.
  • Grated Coconut - Used during final seasoning step with oil. Coconut helps spread oil evenly inside pot and season cooking surface well.
  • Turmeric Powder - Added to boiling water during last step of seasoning. Turmeric has natural properties that help complete seasoning process.
  • Coconut Scrubber - Used for scrubbing pot during washing and initial preparation. It removes any loose particles without damaging clay surface.
season claypots

Similar Recipes

How to season claypots Step by Step

1.These 2 are the new claypots I am going to season for first use. First rinse and wash it well. Use a coconut scrubber.

how to season claypots step1

2.Scrub it well, rinse and wash the claypots well.

how to season claypots step2

3.After washing soak the claypots in plain water forΒ 1 day. After you soak you can hear a slight sizzle sound if you note it keenly there are small pores in the claypots so when waters enters first time you can hear that mild sound.

how to season claypots step3

4.Next day again scrub and wash it, soak in starch water(rice cooked water) or rice washed water forΒ 3 days. Daily make it a point to change the starch water.

how to season claypots step4

5.Wash it again sun dry it. Now add ghee or coconut oil.

how to season claypots step5

6.Spread it well on both the sides back and top. Sun dry it for 2 -3 hrs until the oil is completely absorbed and is dry. Now add ghee or coconut oil, switch on the stove.

how to season claypots step6

7.Add 1-2 tablespoon grated coconut and saute it well so that the coconut and oil spreads all over the inside of the pan. Saute until golden.

how to season claypots step7

8.Do it for both the pans. Now remove the coconut add water along with turmeric powder let it come to a boil. Switch off and dry under the sun. Now your claypots are ready to use.

how to season claypots step8

How to maintain claypots

1.After use let the pots come to room temperature then soak in water for a while. Then using coconut scrapper scrap the extras. The black one I used for makingΒ paneer fried rice todayΒ morning for packing mittus lunchbox and the brown one for making ragi koozh.

how to maintain claypots step1

2.Scrub well and wash it in running water. Never use detergents or any soapy liquids. As there are small pores in the claypot there are chances for the soap to enter through the pores which in turn can mix in the food while getting cooked.So useΒ rice flourΒ orΒ besan flourΒ orΒ chapathi flourΒ to wash it. After washing in plain water then sprinkle rice flour.

how to maintain claypots step2

3.Scrub it well andΒ  wash it

how to maintain claypots step3

4.Sun dry it then store.

how to maintain claypots step4

This is the way I seasoned my claypots and maintain it.Hope you find this post useful.

Expert Tips

  • Buying Clay Pots - Always pick pot that feels heavy and thick. Knock on back and listen for sharp loud sound, louder sound means good quality pot.
  • First Cooking - You should make curries first time not dry dishes. This is safer because clay pot stays moist and there is less chance of burning smell.
  • Heat Level - Always use low to medium flame while cooking in clay pot. High heat can cause cracks because clay gets too hot and expands.
  • Cooling Down - Never pour water into hot pot immediately after cooking. Wait for it to cool naturally for while then soak in water slowly.
  • Empty Pot Warning - Never heat clay pot when it is empty, this can damage it. Always have something cooking or liquid inside when heating.
  • Washing Method - Use only rice flour or besan flour for washing, never use soap. Soap can enter small pores and mix with food during cooking.
season claypots

Storage

After using a clay pot, let it cool down to room temperature before washing. Soak it in water for a while and then gently scrub it with coconut scrubber to remove stuck food. Wash it in running water using rice flour or besan flour, never use any soap or detergent as it can damage seasoning. Sun dry it completely before storing it in a dry place on your kitchen shelf.

FAQS

1.Can I use soap for washing?

No you should never use soap because it enters small pores in clay and can mix with food. Use rice flour or besan flour instead for washing.

2.When should I discard the clay pot?

If you see mild cracks forming at back of pot then stop using it for cooking. You can use it for soaking ragi or for gardening instead.

3.Which type is better, brown or black clay pot?

Black clay pots are stronger and last longer because they are burnt for few days. Brown ones are good too but black ones are more durable for regular cooking.

4.Can I use clay pot on induction?

No clay pots work only on gas stove, they will not work on induction cooktops. You need gas flame for clay pot to heat properly.

5.How long does seasoning process take?

Initial seasoning takes around five days with soaking and oil application. Real seasoning happens with regular cooking over first few weeks as you use it more.

season claypots

If you have any more questions about thisΒ How to season claypotsΒ do mail me at sharmispassions@gmail.com. In addition, follow me onΒ Instagram,Β Facebook,Β Β Pinterest,Β YoutubeΒ andΒ TwitterΒ .

Tried thisΒ How to season claypots? Do let me know how you liked it. Also tag us on Instagram @sharmispassions and hash tag it on #sharmispassions.

πŸ“– Recipe Card

Claypots3
Print

How to season claypot for first use | How to maintain claypots

How to season clay pot is a simple guide that helps you use new clay pots the right way. A properly seasoned clay pot cooks food evenly and brings out amazing aroma while cooking. And the food tastes different and the aroma fills your kitchen.Β 
Calories
Author Sharmilee J

Ingredients

  • Water
  • Starch Water
  • Ghee or Coconut Oil
  • Grated Coconut
  • Turmeric Powder
  • Coconut Scrubber

Instructions

How to season claypots for first use

  • These 2 are the new claypots I am going to season for first use.First rinse and wash it well.Use a coconut scrubber.
  • Scrub it well , rinse and wash the claypots well.
  • After washing soak the claypots in plain water forΒ 1 day.After you soak you can hear a slight sizzle sound if you note it keenly there are small pores in the claypots so when waters enters first time you can hear that mild sound.
  • Next day again scrub and wash it, soak in starch water(rice cooked water) or rice washed water forΒ 3 days.Daily make it a point to change the starch water.
  • Wash it again sun dry it.Now add ghee or coconut oil.
  • Spread it well on both the sides back and top.Sun dry it for 2 -3 hrs until the oil is completely absorbed and is dry.Now add ghee or coconut oil, Switch on the stove.
  • Add 1-2 tablespoon grated coconut and saute it well so that the coconut and oil spreads all over the inside of the pan. Saute until golden.
  • Do it for both the pans.Now remove the coconut add water along with turmeric powder let it come to a boil.Switch off and dry under the sun.Now your claypots are ready to use.

How to maintain claypots

  • After use let the pots come to room temperature then soak in water for a while.Then using coconut scrapper scrap the extras.The black one I used for makingΒ paneer fried rice todayΒ morning for packing mittus lunchbox and the brown one for making ragi koozh.
  • Scrub well and wash it in running water.Never use detergents or any soapy liquids.As there are small pores in the claypot there are chances for the soap to enter through the pores which in turn can mix in the food while getting cooked.So useΒ rice flourΒ orΒ besan flourΒ orΒ chapathi flourΒ to wash it.After washing in plain water then sprinkle rice flour.
  • Scrub it well andΒ  wash it
  • Sun dry it then store.
  • This is the way I seasoned my claypots and maintain it.Hope you find this post useful.

Notes

  • Buying Clay Pots - Always pick pot that feels heavy and thick. Knock on back and listen for sharp loud sound, louder sound means good quality pot.
  • First Cooking - You should make curries first time not dry dishes. This is safer because clay pot stays moist and there is less chance of burning smell.
  • Heat Level - Always use low to medium flame while cooking in clay pot. High heat can cause cracks because clay gets too hot and expands.
  • Cooling Down - Never pour water into hot pot immediately after cooking. Wait for it to cool naturally for while then soak in water slowly.
  • Empty Pot Warning - Never heat clay pot when it is empty, this can damage it. Always have something cooking or liquid inside when heating.
  • Washing Method - Use only rice flour or besan flour for washing, never use soap. Soap can enter small pores and mix with food during cooking.

The post How to season claypot for first use | How to maintain claypots appeared first on Sharmis Passions.
How to season new iron dosa tawa, Tips to maintain iron tawa

How to Season Iron Dosa Tawa is a simple guide that helps to use new iron tawa the first time. A properly seasoned tawa gives crisp dosas, prevents the batter from sticking and also protects the surface from rusting. With regular cooking the surface slowly becomes naturally nonstick, and the dosas get better in taste and texture.

iron dosa tawa with ladle

Iron dosa tawas have been used in many homes for years because they last long and cook evenly. Both cast iron and regular iron tawas work well when seasoned properly. A well maintained tawa can be used for many years without any problem.

[feast_advanced_jump_to]

About Iron Dosa Tawa

Iron dosa tawa is one of the most commonly used traditional cookware for making dosa, chapathi and many other everyday dishes. Cast iron and regular iron both work well, but they need proper seasoning before first use. This helps the surface become smooth and makes cooking much easier after few uses.

Seasoning is simply building a thin layer of oil over the iron surface. This layer protects the tawa from rust and also helps the batter spread easily without sticking. Many people even find that an old iron tawa works better than a new one.Β Β 

There are many ways to season an iron tawa, but this method is simple and works well for both new and old tawas. The same process can also be used for iron kadai, frying pan or any other unseasoned iron cookware. Once the seasoning is done well, maintaining the tawa becomes much easier with a little regular care.

I use my tawa for making dosas, chapatis, roasting vegetables, making dosa pizza. My family can taste the difference when something is made on iron versus other cookware.Β 

Cast iron dosa tawa which is 5 yrs old and I use it on a daily basis.I bought it from a local whole sale shop and it costed 300 Rs.

cast iron dosa tawa

How to Season Iron Dosa Tawa - Things needed

  • Oil - Used for seasoning the tawa and forming a protective layer on the surface. You can use coconut oil or any cooking oil you have at home.
  • Salt - Salt helps remove any dirt from the surface and works well along with oil while seasoning. Regular table salt is enough for this.
  • Starch Water - Starch water from cooked rice helps during the seasoning process. You can also use rice washed water if starch water is not available.
  • Mustard Seeds - Used during the final seasoning step. It gives a light tempering and helps spread the oil across the tawa.
  • Urad Dal - Urad dal is added along with mustard seeds for the tempering. It also helps while seasoning the cooking surface.
  • Onion - Onion is used for the final seasoning step. It helps condition the tawa and also improves the cooking surface after frying.
  • Dish Soap - Used only for the first wash to remove factory coating and dust from the new tawa. It should not be used for regular cleaning after seasoning.
  • Metal Scrubber - Used for scrubbing the new tawa well before seasoning. It helps remove dirt and loose particles from the surface.
  • Clean Cloth - A clean cloth is used for wiping the tawa dry after washing. It is also useful for applying a thin layer of oil before storing.

Similar Recipes

Chapathi Tawa I use regularly which is also almost 4 yrs old.I bought it from a local whole sale shop and it costed 100 Rs. I find online and even shops expensive so look out for local whole sale shops where it is damn cheap and no compromise in quality also.

chapathi tawa

From the days I started cooking I had no craze in buying nonstick pans even before I knew about its health hazardsΒ  as I didn't like the taste and texture of dosas / chapathis cooked in nonstick. The few ones I had were gifts / free items that came with my induction. But I am crazy about collecting traditional cookwares these days so more seasoning posts coming up soon.

Trust me, a well seasoned iron tawa works better than nonstick and the crispy texture it gives is worth all the effort we put in. I was searching for a flat dosa tawa and happy to find it in a local shop here in Coimbatore years back.

There are many different ways to season iron tawa. The tips and tricks I have given here can be used for any unseasoned iron utensils either kadai or pan or tawa.You can use these steps to re-season an old iron tawa too.

I have given both how to season iron dosa tawa for first time use and how to maintain it regularly.

dosa pizza

You might have seen these pics of my dosa and chapathi tawa in my earlier posts too.

dosa, chapathi, pizza made in iron tawa

How to season Iron Tawa Step by Step

1.First rinse the new dosa tawa with dishwasher soap or liquid and a metal scrubber. Scrub it well and wash it. Dry it completely.

how to season iron dosa tawa step1

2.Now add 2 teaspoon of oil and 2 teaspoon salt to the tawa. Adjust the quantity of oil and salt according to the size of the tawa.

how to season iron dosa tawa step2

3.Spread it with well so that the oil salt mixture is evenly spread over the entire dosa tawa completely. Leave it aside forΒ 1 day.

how to season iron dosa tawa step3

4.Next day scrub again to remove any rust or dirt. Now we need starch water(rice cooked water) or you can used rice washed water too.

how to season iron dosa tawa step4

5.Soak in starch water or rice washed water.If you don't have enough mix starch water with water and add.Soak it forΒ 2 days.Change the starch water the next day and then leave aside.Wash it again.Now heat it up. Add 2 teaspoon of oil.

how to season iron dosa tawa step5

6.Add Β½ teaspoon of mustard seeds, ΒΌ teaspoon of urad dal and let it splutter.

how to season iron dosa tawa step6

7.Using a spatula spread the tempering all over the dosa tawa. Now add 1 -2 tablespoon chopped onion and fry until golden. Spread and saute to cover the entire dosa tawa.

how to season iron dosa tawa step7

8.Remove it and wipe off with a clean tissue or a cloth.Now your dosa tawa is ready to use. The first 2 dosas may slightly stick at the edges but after making 3-4 dosas it will work perfectly. These steps are needed only for new dosa tawa and can be used for re-seasoning tawas which you haven't used for a long time too.

how to season iron dosa tawa step8

How to maintain Iron Dosa Tawa

1.Sometimes we might overheat the dosa tawa which makes dosas stick or any other reasons which may cause the dosas to stick.In that case either do thisΒ step 1 or step 2Β to avoid dosa sticking.Heat the dosa tawa keep in low flame, add oil and salt spread using a ladle, keep spreading and cooking for 2 minutes. Switch off, wipe it with a cloth then start using.

how to maintain iron dosa tawa step1

2.This is the recent method amma read in a book and it works like a charm.Heat dosa tawa in low flame, roughly tear 2 small red chillies and put it on the tawa, spread to cover the entire dosa tawa and saute for 2 minutes. Switch off, wipe it with a cloth then start using. Alternatively you can use half onion prick with a fork and use it on the pan to wipe it off.

how to maintain iron dosa tawa step2

See my paratha puffing up!

puffing paratha

Expert Tips

  • Heat Level - Always cook dosas on low medium flame. If the tawa gets too hot, sprinkle little water, wipe it and then start making dosas.
  • Before Making Dosa - Rinse the tawa once with water if oil was applied before storing. Wipe it dry well before heating.
  • Avoid Moisture - After washing, never leave the tawa wet for a long time. Dry it well before storing to avoid rust.
  • Cooking Eggs - If the tawa is used for eggs or non vegetarian dishes, wash it with soap before using it again for dosas.
  • Re-seasoning - If the tawa has not been used for many weeks, season it again before making dosas. It helps bring back the smooth cooking surface.
  • Storage - Keep the tawa in a dry place without stacking wet vessels on top. This helps the seasoning stay good for longer.
items made using iron tawa

FAQS

1.Can I use my new tawa immediately?

Yes you can but seasoning gets stronger with use. First few dosas might stick but this is normal.Β 

2.How long does seasoning take?

Initial process takes about three days with soaking. Real seasoning happens with regular use over first few weeks. More you use it, better it gets.

3.Do cast iron and regular iron season differently?

Seasoning process is the same for both. Cast iron is heavier so takes slightly longer to heat but steps are identical.

4.My dosas are sticking, what do I do?

The tawa should not be too hot. If not, use red chilli refresh method or onion method. These work quickly and tawa is back to normal.

5.Can I wash with soap everyday?

If used for non-veg sometimes, you can use soap occasionally but for regular dosa making, just water is enough. Just rinse with water and wipe dry.Β 

If you have any more questions about thisΒ How to season Iron TawaΒ do mail me at sharmispassions@gmail.com. In addition, follow me onΒ Instagram,Β Facebook,Β Β Pinterest,Β YoutubeΒ andΒ TwitterΒ .

Tried thisΒ How to season Iron Tawa? Do let me know how you liked it. Also tag us on Instagram @sharmispassions and hash tag it on #sharmispassions.

πŸ“– Recipe Card

IronDosaTawa1
Print

How to season new iron dosa tawa, Tips to maintain iron tawa

How to Season Iron Dosa Tawa is a simple guide that helps to use new iron tawa the first time. A properly seasoned tawa gives crisp dosas, prevents the batter from sticking and also protects the surface from rusting. With regular cooking the surface slowly becomes naturally nonstick, and the dosas get better in taste and texture.
Calories
Author Sharmilee J

Ingredients

  • Oil
  • Salt
  • Starch Water
  • Mustard Seeds
  • Urad dal
  • Onion
  • Dish Soap
  • Metal Scrubber
  • Clean Cloth

Instructions

How to season Iron Tawa Step by Step

  • First rinse the new dosa tawa with dishwasher soap or liquid and a metal scrubber. Scrub it well and wash it. Dry it completely.
  • Now add 2 teaspoon of oil and 2 teaspoon salt to the tawa. Adjust the quantity of oil and salt according to the size of the tawa.
  • Spread it with well so that the oil salt mixture is evenly spread over the entire dosa tawa completely. Leave it aside forΒ 1 day.
  • Next day scrub again to remove any rust or dirt. Now we need starch water(rice cooked water) or you can used rice washed water too.
  • Soak in starch water or rice washed water.If you don't have enough mix starch water with water and add.Soak it forΒ 2 days.Change the starch water the next day and then leave aside.Wash it again.Now heat it up. Add 2 teaspoon of oil.
  • Add Β½ teaspoon of mustard seeds, ΒΌ teaspoon of urad dal and let it splutter.
  • Using a spatula spread the tempering all over the dosa tawa. Now add 1 -2 tablespoon chopped onion and fry until golden. Spread and saute to cover the entire dosa tawa.
  • Remove it and wipe off with a clean tissue or a cloth.Now your dosa tawa is ready to use. The first 2 dosas may slightly stick at the edges but after making 3-4 dosas it will work perfectly. These steps are needed only for new dosa tawa and can be used for re-seasoning tawas which you haven't used for a long time too.

How to maintain Iron Dosa Tawa

  • Sometimes we might overheat the dosa tawa which makes dosas stick or any other reasons which may cause the dosas to stick.In that case either do thisΒ step 1 or step 2Β to avoid dosa sticking.Heat the dosa tawa keep in low flame, add oil and salt spread using a ladle, keep spreading and cooking for 2 minutes. Switch off, wipe it with a cloth then start using.
  • This is the recent method amma read in a book and it works like a charm.Heat dosa tawa in low flame, roughly tear 2 small red chillies and put it on the tawa, spread to cover the entire dosa tawa and saute for 2 minutes. Switch off, wipe it with a cloth then start using. Alternatively you can use half onion prick with a fork and use it on the pan to wipe it off.

Notes

Heat Level - Always cook dosas on low medium flame. If the tawa gets too hot, sprinkle little water, wipe it and then start making dosas.
Before Making Dosa - Rinse the tawa once with water if oil was applied before storing. Wipe it dry well before heating.
Avoid Moisture - After washing, never leave the tawa wet for a long time. Dry it well before storing to avoid rust.
Cooking Eggs - If the tawa is used for eggs or non vegetarian dishes, wash it with soap before using it again for dosas.
Re-seasoning - If the tawa has not been used for many weeks, season it again before making dosas. It helps bring back the smooth cooking surface.
Storage - Keep the tawa in a dry place without stacking wet vessels on top. This helps the seasoning stay good for longer.

The post How to season new iron dosa tawa, Tips to maintain iron tawa appeared first on Sharmis Passions.
Creamy Macaroni Pasta Recipe

Creamy Macaroni Pasta is a creamy and rich pasta made using easily available ingredients in your kitchen. Cheese is minimum in this recipe still it comes out so rich that I can say this is no lesser than mac and cheese. This is mild and not so heavy so it is my goto recipe for busy weekend dinner.

creamy macaroni pasta served

If you are looking for a creamy and tasty pasta which is not loaded with cream or cheese then this pasta is just for you. It has an Indian flavour twist to the usual pasta that you will fall for instantly. Bored of mac and cheese or white sauce pasta then this one is for you, do try and let me know how you liked it.

[feast_advanced_jump_to]

About Creamy Macaroni Pasta

Creamy Macaroni Pasta is an Indian twist to the regular white sauce pasta, mac and cheese. No heavy ingredients, this sauce is mild yet creamy and delicious. With macaroni pasta it nicely coats the sauce and this recipe is a winner.

Macaroni pasta tossed in a delicious creamy and thick sauce, this is a must try recipe to make your dinner special. Kids will love it for sure as it is creamy. You can use any small pasta variety, I used mini macaroni which I had in hand.

This pasta is easy to make and comes together in just 20 minutes from start to finish. A small amount of cheese is used here and the creaminess comes from milk. A zing of Indian masalas makes this pasta so unique and delicious.

I created this pasta recipe just for many who stay away from Alfredo, mac and cheese because of the heavy use of cream and cheese. This pasta comes out so creamy yet light because it uses a combination of milk with little cheese.

creamy macaroni pasta served

Creamy Macaroni Pasta Video

Creamy Macaroni Pasta Ingredients

  • Macaroni PastaΒ - Macaroni Pasta variety is preferred for this recipe and I would suggest to stick with it. However you can use any small variety pasta.
  • MilkΒ - Use full cream milk for a creamy rich sauce.
  • CheeseΒ - I have used processed cube cheese. You can parmesan cheese too.
  • FlourΒ - Usually maida is used but you can replace it with wheat flour too.
  • Spice powdersΒ - I have used red chilli powder and garam masala powder.
  • Seasoning - Mixed herbs and pepper powder are used.
  • ButterΒ - is added for sauteing garlic, onion.
  • Cumin seeds - is added to melted butter and sautΓ©ed. It gives nice flavour to the sauce. Instead of cumin seeds you can add cumin powder too.
ingredients needed to make macaroni pasta

Similar Recipes

How to make Creamy Macaroni Pasta Step by Step

Cooking pasta

1.Boil 4 cups water, add salt to it. Add 1 cup macaroni pasta to it.

cook pasta

2.Cook until it becomes soft but not mushy.

cook until soft

3.Once cooked drain water, rinse with cold water to avoid further cooking.

drain water

Preparing sauce

4.Heat 2 tablespoon butter, add Β½ teaspoon cumin seeds, let it splutter.

temper cumin seeds

5.Add 1 tablespoon garlic finely chopped, 2 tablespoon onion finely chopped.

saute onion, garlic

6.Add 1 tablespoon flour.

add flour

7.Give a quick saute then add salt, 1 teaspoon chilli powder, Β½ teaspoon garam masala powder.

add spice powders

8.Give a quick saute.

quick saute

9.Add 1 Β½ cups milk.

add milk

10.Give a quick mix so that it does not form lumps.

quick mix

11.When it starts to thicken add 2 tablespoon cheese. Cook until the sauce thickens and becomes creamy.

add cheese

12.Give a quick mix. The sauce should be thick and creamy like this.

mix well

13.Add ΒΌ teaspoon pepper powder and ΒΌ teaspoon mixed herbs.

add pepper powder, mixed herbs

Mixing pasta

14.Add cooked macaroni pasta.

add cooked pasta

15.Mix well and switch off.

mix well

Creamy Macaroni Pasta is ready!

creamy macaroni pasta just made

Expert Tips

  • Pasta to choose - You can choose any small pasta variety which will suit best. Macaroni is recommended for this recipe.
  • Cheese to use - You can use parmesan cheese or processed cheese cubes. I used processed cheese cut into small cubes.
  • Seasoning - I have used dried mixed herbs and pepper powder, you can use fresh herbs like rosemary, basil leaves etc.
  • Spices - I have used red chilli powder, garam masala powder and pepper powder. You can add chilli flakes too.
  • Flour - I have white flour but wheat flour works fine too. Do not add more as it may give a after taste.

Serving and Storage

Serve it hot with toasted bread or it tastes great as such too. I wouldn't recommend to store as it tastes great when hot also the consistency changes when cooled or stored. In case if you want to store, you can store in fridge then add little milk heat it up before serving. Always serve hot!

creamy macaroni pasta served

If you have any more questions about thisΒ Creamy Macaroni Pasta RecipeΒ do mail me at sharmispassions@gmail.com. In addition, follow me onΒ Instagram,Β Facebook,Β Β Pinterest,Β YoutubeΒ andΒ TwitterΒ .

Tried thisΒ Creamy Macaroni Pasta Recipe? Do let me know how you liked it. Also tag us on Instagram @sharmispassions and hash tag it on #sharmispassions.

πŸ“– Recipe Card

Print

Creamy Macaroni Pasta Recipe

Creamy Macaroni Pasta is a creamy and rich pasta made using easily available ingredients in your kitchen. Cheese is minimum in this recipe still it comes out so rich that I can say this is no lesser than mac and cheese. This is mild and not so heavy so it is my goto recipe for busy weekend dinner.
Course Breakfast, dinner
Cuisine Indian, Italian
Prep Time 5 minutes
Cook Time 15 minutes
Total Time 20 minutes
Servings 3
Calories
Author Sharmilee J

Ingredients

  • 1 cup macaroni pasta
  • salt to taste
  • 4 cups water
  • 2 tablespoon butter
  • Β½ teaspoon cumin seeds
  • 1 tablespoon garlic finely chopped
  • 2 tablespoon onion finely chopped
  • 1 tablespoon flour
  • 1 teaspoon chilli powder
  • Β½ teaspoon garam masala powder
  • 1 Β½ cups milk
  • 2 tablespoon cheese
  • ΒΌ teaspoon pepper powder
  • ΒΌ teaspoon mixed herbs

Instructions

  • Boil 4 cups water, add salt to it. Add 1 cup macaroni pasta to it.
  • Cook until it becomes soft but not mushy.
  • Once cooked drain water, rinse with cold water to avoid further cooking.
  • Heat 2 tablespoon butter, add Β½ teaspoon cumin seeds, let it splutter.
  • Add 1 tablespoon garlic finely chopped, 2 tablespoon onion finely chopped.
  • Add 1 tablespoon flour.
  • Give a quick saute then add salt, 1 teaspoon chilli powder, Β½ teaspoon garam masala powder.
  • Give a quick saute.
  • Add 1 Β½ cups milk.
  • Give a quick mix so that it does not form lumps.
  • When it starts to thicken add 2 tablespoon cheese. Cook until the sauce thickens and becomes creamy.
  • Give a quick mix. The sauce should be thick and creamy like this.
  • Add ΒΌ teaspoon pepper powder and ΒΌ teaspoon mixed herbs.
  • Add cooked macaroni pasta.
  • Mix well and switch off.
  • Creamy Macaroni Pasta is ready!

Video

Notes

  • Pasta to choose - You can choose any small pasta variety which will suit best. Macaroni is recommended for this recipe.
  • Cheese to use - You can use parmesan cheese or processed cheese cubes. I used processed cheese cut into small cubes.
  • Seasoning - I have used dried mixed herbs and pepper powder, you can use fresh herbs like rosemary, basil leaves etc.
  • Spices - I have used red chilli powder, garam masala powder and pepper powder. You can add chilli flakes too.
  • Flour - I have white flour but wheat flour works fine too. Do not add more as it may give a after taste.

The post Creamy Macaroni Pasta Recipe appeared first on Sharmis Passions.
Easy Paneer Bhurji Gravy

Paneer Bhurji Gravy is a quick and easy side dish made using crumbled paneer, onion, tomato, spices and herbs. This is a flavorful side dish perfect to pair up with roti, nan, chapati or with rice dishes like pulao, jeera rice etc. Learn to make Paneer Bhurji Gravy with the help of step by step pictures and video.

paneer bhurji gravy served with roti, rice

Paneer Bhurji Gravy comes together in just 20 minutes yes it is so easy and quick to make. This can be made for breakfast, lunch or even dinner to pair up with any flatbread of your choice. Do try this easy gravy and enjoy!

[feast_advanced_jump_to]

About Paneer Bhurji Gravy

'Paneer' is Indian cottage cheese and 'Bhurji' means scrambled so this dish is basically paneer scrambled and cooked along with onion, tomato, ginger garlic paste and spices in gravy consistency. This is a perfect side dish for chapati, roti, pulao, jeera rice etc.

I love both the gravy and dry version of paneer bhurji. Paneer Bhurji Gravy is a tasty and zesty gravy made by crumbling paneer and cooking it with onion, tomato, herbs and spices. Paneer Bhurji Gravy is a side dish for roti, naan and rice meal too. Paneer Bhurji Gravy making is simple and could be made in minutes.

Paneer Bhurji Gravy isΒ an easy and quick side dish to make. It is one of the quickest side dish you can make in a jiffy. I tried this after getting the recipe from my cousin sister and I was like how did I miss to make this often as it gets done in few minutes when you have paneer in hand. So after that this has become a staple side dish.

paneer bhurji gravy served

Paneer Bhurji Gravy Video

Paneer Bhurji Gravy Ingredients

  • Paneer -Β Paneer is the star ingredient for this recipe. So use fresh soft paneer either homemade or store bought. That is the key to get moist juicy tasty paneer bhurji.
  • Spices -Β Indian spice powders like turmeric, red chili powder and garam masala powder. Mostly I use homemade spice powders to get fresh flavors.
  • Ginger garlic paste -Β I used homemade ginger garlic paste. If you do not have, crush ginger and garlic roughly using mortar and pestle and add it.
  • Onion, tomato -Β Freshly chopped onion and tomatoes are sauteed until mushy and used.
  • Garnish -Β Add coriander leaves and kasoori methi as garnish which enhances the flavor a lot.
  • Cumin seeds -Β Cumin seeds is used for tempering.
  • Gram flour - Gram flour is used as a thickening agent here. It makes the gravy thick and creamy.
  • Butter, Oil -Β Both butter and oil is used for tempering. Butter adds flavor and richness to the gravy.

Similar Recipes

How to make Paneer Bhurji Gravy Step by Step

1.Take 200 grams paneer, if store bought rinse it well and set aside. If using frozen thaw and use it. If refrigerated, keep it outside for a while then use it.

add crumbled paneer

2.Heat 1 and Β½ tablespoon butter, 1 teaspoon oil. Add 1 teaspoon gram flour.

add butter, oil, gram flour

3.Cook for a minute until color slightly changes.

cook for a minute

4.Add 1 teaspoon ginger garlic paste, 1 green chili finely chopped.

add ginger garlic paste, green chili

5.Add 2 medium sized onion, 2 medium sized tomatoes - finely chopped.

add onion, tomato

6.SautΓ© until tomatoes turn mushy and raw smell leaves - it takes at least 7-10 minutes. Add salt to taste, Β½ teaspoon turmeric powder, 1 teaspoon red chili powder and 1 teaspoon garam masala powder.

add spice powders

7.Give a quick sautΓ©. Add around Β½ cup water.

add water

8.Give a quick mix. Boil for few minutes until slightly thick.

boil for few mins

9.Add crumbled paneer.

add crumbled paneer

10.Give a quick mix. Boil for 2 minutes. Then add 2 tablespoon fresh cream, 1 teaspoon crushed kasoori methi and 1 tablespoon coriander leaves.

add fresh cream, crushed kasoori methi

11.Mix it well. Switch off.

paneer bhurji gravy is ready

Delicious paneer bhurji gravy ready!

Expert Tips

  • For best results use fresh paneer. You can use homemade or store bought too.
  • You can replace butter with ghee too.
  • For vegan option replace paneer with tofu.
  • You can add Β½ teaspoon coriander powder if you like.
  • If you don't have fresh cream add milk instead.

Serving and Storage

Paneer Bhurji Gravy can be enjoyed with bread or pav bun. It goes well with roti and rice too. Keeps well in fridge for 2 days.

paneer bhurji gravy served with roti, rice

If you have any more questions about this Paneer Bhurji Gravy Recipe do mail me at sharmispassions@gmail.com. In addition, follow me on Instagram, Facebook,Β  Pinterest, Youtube andΒ TwitterΒ .

Tried this Paneer Bhurji Gravy Recipe? Do let me know how you liked it. Also tag us on Instagram @sharmispassions and hash tag it on #sharmispassions.

πŸ“– Recipe Card

Print

Easy Paneer Bhurji Gravy Recipe

Paneer Bhurji Gravy is a quick and easy side dish made using crumbled paneer, onion, tomato, spices and herbs. This is a flavorful side dish perfect to pair up with roti, nan, chapati or with rice dishes like pulao, jeera rice etc. Learn to make Paneer Bhurji gravy with the help of step by step pictures and video.
Course dinner, Lunch, Side Dish
Cuisine Indian, Indo Chinese
Keyword 30 mins recipes, butter recipes, capsicum recipes, curry, curry recipes, easy paneer recipes, Gravy, gravy recipes, indian paneer recipes, lunch box recipes, lunch recipes, lunchbox recipes, masala recipes, paneer dishes, paneer recipes, veg recipes, vegetable
Prep Time 10 minutes
Cook Time 20 minutes
Total Time 30 minutes
Servings 2 people
Calories 444kcal
Author Sharmilee J

Ingredients

Instructions

  • Take 200 grams paneer, if store bought rinse it well and set aside. If using frozen thaw and use it. If refrigerated, keep it outside for a while then use it.
  • Heat 1 and Β½ tablespoon butter, 1 teaspoon oil. Add 1 teaspoon gram flour.
  • Cook for a minute until color slightly changes.
  • Add 1 teaspoon ginger garlic paste, 1 green chili finely chopped.
  • Add 2 medium sized onion, 2 medium sized tomatoes - finely chopped.
  • SautΓ© until tomatoes turn mushy and raw smell leaves - it takes at least 7-10 minutes. Add salt to taste, Β½ teaspoon turmeric powder, 1 teaspoon red chili powder and 1 teaspoon garam masala powder.
  • Give a quick sautΓ©. Add around Β½ cup water.
  • Give a quick mix. Boil for few minutes until slightly thick.
  • Add crumbled paneer.
  • Give a quick mix. Boil for 2 minutes. Then add 2 tablespoon fresh cream, 1 teaspoon crushed kasoori methi and 1 tablespoon coriander leaves.
  • Mix it well. Switch off.
  • Delicious paneer bhurji gravy ready!

Video

Notes

  • For best results use fresh paneer. You can use homemade or store bought too.
  • You can replace butter with ghee too.
  • For vegan option replace paneer with tofu.
  • You can add Β½ teaspoon coriander powder if you like.
  • If you don't have fresh cream add milk instead.

Nutrition

Serving: 100g | Calories: 444kcal | Carbohydrates: 16g | Protein: 18g | Fat: 35g | Saturated Fat: 21g | Polyunsaturated Fat: 1g | Monounsaturated Fat: 2g | Trans Fat: 0.2g | Cholesterol: 89mg | Sodium: 106mg | Potassium: 469mg | Fiber: 4g | Sugar: 6g | Vitamin A: 1578IU | Vitamin C: 22mg | Calcium: 612mg | Iron: 3mg

The post Easy Paneer Bhurji Gravy appeared first on Sharmis Passions.
Chocolate China Grass Pudding Recipe

Chocolate China Grass Pudding is a smooth and creamy dessert made with cocoa powder, milk and china grass. It has soft texture that melts in your mouth with a rich chocolate flavour. This recipe is very simple and quick to make with ingredients you have at home.

chocolate china grass pudding served

You can serve this pudding when you want something sweet and easy to prepare. It comes together in less than one hour including setting time. Many people like this pudding because it tastes good without needing too much effort or fancy ingredients.

[feast_advanced_jump_to]

About Chocolate China Grass Pudding

Chocolate China Grass Pudding is made by mixing cocoa powder and milk with sugar and then setting it to a pudding using china grass. China grass comes from seaweed and it helps pudding to set without any gelatin. The pudding turns out smooth and creamy with soft bite and rich chocolate taste.

This pudding is popular at home because it needs only simple ingredients. Some people like to add extra chocolate chips on top for more chocolate while others keep it basic. You can make it less sweet or more sweet depending on what your family likes.

You can also change how firm or soft the pudding is by adjusting china grass measure. Also add condensed milk for extra richness while others just use milk and cocoa powder. This recipe has their own version and all of them tastes delicious.

I usually make this pudding when I want something quick for dessert. My family likes it best when it served cold from fridge with chocolate sprinkle on top.Β 

chocolate china grass pudding served

Chocolate China Grass Pudding Ingredients

  • Milk - I use regular milk for the base because it gives smooth texture.
  • Cocoa Powder - I use good quality brown cocoa powder because it gives rich chocolate taste. Dark cocoa works better than light one.
  • Brown Sugar - I use brown sugar because it adds sweetness with little caramel flavour. You can use regular white sugar also but brown sugar tastes better.
  • Dark Chocolate Chips - I add these for extra chocolate flavor and little texture. It makes pudding taste more special.
  • China Grass - I use china grass which is agar agar from seaweed to set the pudding firm. It comes in sheet form and works without any gelatin.
  • Water - I add water to dissolve china grass. This helps it break down and mixes well into pudding.
chocolate china grass pudding served

Similar Recipes

How to make Chocolate China Grass Pudding Step by Step

1.Take Β½ cup milk add sugar to it I used brown sugar you can replace with regular sugar too. Add cocoa powder, mix well without lumps.

how to make chocolate china grass pudding step1

2.Add this mixture to boiled milk mix well.

how to make chocolate china grass pudding step2

3.Add chocolate chips and let it boil for 5 minutes.

how to make chocolate china grass pudding step3

4.See now this is a bit thick and creamy. Now strain and set it aside.

how to make chocolate china grass pudding step4

5.Cut agar agar into small strips in case if its a big sheet like. Measure and take agar agar in a sauce pan, add water to it. Heat it up. Keep stirring and cook in low flame. Cook until it is completely dissolved and the water is clear without any strips.Switch off.

how to make chocolate china grass pudding step5

6.Strain china grass into the chocolate mixture, mix well. Pour into moulds and set for at least 30 minutes. Agar agar puddings set well in room temperature itself. If you want to serve chilled then refrigerate for a while before serving.

how to make chocolate china grass pudding step6

Serve chilled with chocolate shavings or chocolate semiya.

chocolate china grass pudding served

Expert Tips

  • Dissolving China Grass - I always dissolve china grass in water on low heat until it becomes clear without any pieces. Once it dissolves do not wait long before adding to chocolate mix or it will set and become too thick.
  • No Lumps - I usually mix cocoa powder with milk first to get smooth texture. This gives pudding smooth feel without any grainy bits.
  • More Chocolate - I sometimes add extra chocolate chips if I want more chocolate taste. Good quality chips make it taste really good.
  • Setting Time - I find that pudding set nice in room temperature in about thirty minutes. You can also keep in fridge if you want it more cold.
  • Adjust Sweetness - I prefer adding sugar little by little and taste it. This way you can make it sweet exactly how you like.

Serving and Storage

Serve Chocolate China Grass Pudding cold with chocolate sprinkle or choco chips on top. Serve it with cold milk or add little ice cream if you want. Store leftover pudding in airtight container in fridge and it stay fresh for two to three days.Β 

FAQS

1. Can I use regular sugar?Β 

Yes you can use white sugar but brown sugar gives caramel flavor and taste better in chocolate.

2. What if pudding not set properly?Β 

This happens if china grass does not dissolve well or you not use enough so next time dissolve it completely until water becomes clear.

3. Can I add more chocolate?Β 

Yes you can add more chocolate chips or increase cocoa powder for extra taste just make sure pudding is still set with right amount of china grass.

4. How long pudding stay fresh?Β 

Pudding stays fresh in fridge for two to three days in airtight container after that texture change and it taste little dry.

5. Can I make ahead for party?Β 

Yes you can make pudding one day before and keep in fridge just add sprinkle on top when you serve so it look fresh.

chocolate china grass pudding served

If you have any more questions about this Chocolate China Grass Pudding Recipe do mail me at sharmispassions@gmail.com. In addition, follow me on Instagram, Facebook,Β  Pinterest, Youtube andΒ TwitterΒ .

Tried this Chocolate China Grass Pudding Recipe? Do let me know how you liked it. Also tag us on Instagram @sharmispassions and hash tag it on #sharmispassions.

πŸ“– Recipe Card

ChocolateAgarAgarPudding1
Print

Chocolate China Grass Pudding Recipe

Chocolate China Grass Pudding is a smooth and creamy dessert made with cocoa powder, milk and china grass. It has soft texture that melts in your mouth with a rich chocolate flavour. This recipe is very simple and quick to make with ingredients you have at home.
Course Dessert
Cuisine American, French, Indian, Italian, Mediterranean, Mexican
Keyword agar agar recipes, chinagrass jelly custard, chocolate recipes, dessert recipes, milk recipes, pudding recipes
Prep Time 10 minutes
Cook Time 20 minutes
Resting Time 30 minutes
Total Time 1 hour
Servings 3 cups
Calories 184kcal
Author Sharmilee J

Ingredients

  • 1 cup milk
  • 2 tablespoon dark choco chips

Chocolate mix:

  • Β½ cup milk
  • 3 tablespoon brown sugar
  • 1 Β½ tablespoon coco powder

For china grass mix:

  • 5 gms china grass
  • β…“ cup water

Instructions

  • Take Β½ cup milk add sugar to it I used brown sugar you can replace with regular sugar too.
  • Add coco powder, mix well without lumps.
  • Add this mixture to boiled milk mix well.
  • Add choco chips and let it boil for 5 mins till it is thick & creamy.
  • Now strain and set it aside.
  • Cut agar agar into small strips in case if its a big sheet like. Measure and take agar agar in a sauce pan, add water to it. Heat it up.
  • Keep stirring and cook in low flame. Cook until it is completely dissolved and the water is clear without any strips. Switch off.
  • Strain china grass into the chocolate mixture, then mix well.
  • Pour into moulds and set for atleast 30mins. Agar agar puddings set well in room temperature itself. If you want to serve chilled then refrigerate for a while before serving.
  • Serve Chocolate China Grass Pudding chilled with chocolate shavings or chocolate sprinkles!

Notes

  • Dissolving China Grass - I always dissolve china grass in water on low heat until it becomes clear without any pieces. Once it dissolves do not wait long before adding to chocolate mix or it will set and become too thick.
  • No Lumps - I usually mix cocoa powder with milk first to get smooth texture. This gives pudding smooth feel without any grainy bits.
  • More Chocolate - I sometimes add extra chocolate chips if I want more chocolate taste. Good quality chips make it taste really good.
  • Setting Time - I find that pudding set nice in room temperature in about thirty minutes. You can also keep in fridge if you want it more cold.
  • Adjust Sweetness - I prefer adding sugar little by little and taste it. This way you can make it sweet exactly how you like.

Nutrition

Serving: 75g | Calories: 184kcal | Carbohydrates: 26g | Protein: 5g | Fat: 7g | Saturated Fat: 5g | Polyunsaturated Fat: 0.2g | Monounsaturated Fat: 1g | Cholesterol: 15mg | Sodium: 64mg | Potassium: 319mg | Fiber: 1g | Sugar: 21g | Vitamin A: 199IU | Vitamin C: 0.05mg | Calcium: 205mg | Iron: 1mg

The post Chocolate China Grass Pudding Recipe appeared first on Sharmis Passions.
Aadi Koozh Recipe

Aadi Koozh or Aadi Kool is a healthy porridge made in the auspicious time of the Tamil month called Aadi. Aadi Koozh is made using finger millet flour, raw rice, curd, herbs etc. Learn to make Aadi Koozh Recipe with step by step pictures and video.

aadi koozh served with small onion, puli kuzhambu

Aadi KoozhΒ  is served with pickle or puli kuzhambu or dry fish curry or even fish kuzhambu. Aadi Koozh is known for its cooling properties and often served to beat the heat. Aadi Paal or Aadi Thengai Paal is also made for Aadi Pirappu.

[feast_advanced_jump_to]

About Aadi Koozh

'Aadi' is the auspicious month in the Tamil calendar and 'Koozh' is porridge so 'Aadi Koozh' translates to a special porridge made during the month of Aadi. Aadi Koozh is prepared in this auspicious month of Aadi and served in temples.

Aadi Koozh is basically ragi porridge cooked along with broken raw rice. Aadi Koozh is made using finger millet flour, raw rice, curd, salt garnished with curry leaves, small onion and green chilies.

Aadi is one of the most auspicious month celebrated in Tamil Nadu. Traditionally Aadi Koozh is prepared by fermenting ragi slurry overnight then mixed with cooked rice and garnishings. Fermenting gives a sour taste to the porridge. The easy and quick alternate is the instant ragi koozh.

The first of the month is marked with a special puja, followed by a feast with 'payasam' prepared with coconut milk, 'puran poli' and vadai. Traditionally, the family of a 'pudhu maappillai' (new son-in-law) is invited to the girl's house, where the couple is gifted new clothes and other presents.

aadi koozh served with small onion, puli kuzhambu

Aadi Koozh Video

The 18th day of Aadi, is observed as 'Aadi Perukku', a day of offerings and prayers to these rivers, which mean so much to the lives and prosperity of the people. The day is an occasion for rejoicing particularly for those living on the banks of the all the main rivers, its branches and tributaries. [Source : Wiki Pedia]

According to the Tamil calendar, Aadi is the fourth month of the year. The first day of this month, is celebrated as Aadi Pandigai or Aadi Pirappu, which is an important festival to most Tamils, especially newly-weds.

The most visible manifestation of the month of Aadi is the huge 'kolams' that are patterned early each morning in front of houses. They are usually bordered with red 'kaavi' and across the front doorway at the top are strung mango leaves.

aadi koozh served with small onion, puli kuzhambu

Similar Recipes

Aadi Koozh Ingredients

  • Finger millet flour - Finger millet flour is the base ingredient for Aadi Koozh. RagiΒ is also known asΒ Finger milletΒ orΒ KelvaraguΒ orΒ KeppaiΒ in short.
  • Raw Rice - Raw rice is added and cooked along with ragi flour to give the koozh a texture and taste.
  • Curd - Curd is mixed with water to make buttermilk. Buttermilk is added to cooked mixture to make it a porridge.
  • Accompaniments - Aadi Koozh is served with raw small onion, pickle, or any non veg kuzhambu varieties like fish kuzhambu or karuvadu kuzhambu etc.
ingredients needed to make aadi koozh

How to make Aadi Koozh Step by Step

1.Measure and take ΒΌ cup raw rice.

take raw rice in a mixer

2.Grind it to a slightly coarse mixture like this.

coarse grind it

3.Boil 2 cups water in a sauce pan add broken raw rice to it. Cook until rice turns soft more like porridge in consistency. Let it simmer.

cook like a porridge

4.Meanwhile to a mixing bowl take 1 cup ragi flour, add 4 cups water to it.

mix ragi flour with water

5.Whisk it well without any lumps. This is done off the stove. This mixture can be left overnight to ferment and then proceeded too.

whisk it well

6.Add the ragi mixture to the cooking rice. Add required salt.

add ragi mixture to rice porridge

7.In low flame, keep mixing to avoid lumps and cook it till it becomes thick and raw taste of ragi flour leaves.It takes at least 5 minutes.

cook until thick

8.It will become shiny and thick.

thick and shiny

9.The cooked rice will be seen in between as shown here. At this stage switch off.

cooked well

10.Add 1 cup thick curd to a bowl, 1 and Β½ cups water. Whisk it well, Set aside.

whisk curd with water

11.Transfer the cooked ragi porridge to a mixing bowl along with 2 tablespoon small onion(chopped finely), 2 teaspoon curry leaves(chopped finely),1 green chili(crushed).

add small onion, curry leaves

12.Add whisked curd to it.

add whisked curd

13.Add water if it is to too thick. Adjust with little water if needed may be around Β½ cup.

add water

14,Mix it well using a whisk.

mix well

15.Aadi koozh is ready!

aadi koozh is ready

Serve Aadi Koozh warm or chilled!

aadi koozh served with small onion, puli kuzhambu

Expert Tips

  • Water ratio - Water quantity for cooking ragi and raw rice may differ, so adjust accordingly.
  • Traditional method - Usually they soak ragi flour overnight and then add cooked rice to it. This is done to get a slightly sour taste. I have shared the instant version.
  • Cookware to use - Always use a heavy bottomed vessel to cook the koozh else it will stick to the bottom. I used a claypot.
  • Flame - While cooking keep in low flame and cook else lumps may form easily. Keep mixing with a ladle / whisk.
  • Consistency - The koozh thickens with time so adjust water / buttermilk accordingly. I used thick curd so had to add more water. Make sure you cool down the koozh completely before adding buttermilk.

Serving & Storage

Serve Aadi Koozh with raw small onion and curry leaves sprinkled. You can enjoy it warm or chilled. Aadi Koozh keeps well in fridge for 2 days.

FAQS

1.Is adding raw rice mandatory?

Yes as traditionally the making of aadi koozh involves adding raw rice along with ragi flour. Even in temples this tradition is followed.

2.What other items can I serve it with?

You can serve Aadi Koozh with raw small onion chopped finely, curry leaves chopped finely, vathal, puli kulambu, fish curry, chopped raw mango etc.

aadi koozh served with small onion, puli kuzhambu

If you have any more questions about this Aadi Koozh Recipe do mail me at sharmispassions@gmail.com. In addition, follow me on Instagram,Β Facebook,Β PinterestΒ ,YoutubeΒ andΒ TwitterΒ .

Tried this Aadi Koozh Recipe? Do let me know how you liked it. Also tag us on Instagram @sharmispassions and hash tag it on #sharmispassions.

πŸ“– Recipe Card

Print

Aadi Koozh Recipe | Aadi Kool Recipe

Aadi Koozh or Aadi Kool is a healthy porridge made in the auspicious time of the Tamil month called Aadi. Aadi Koozh is made using finger millet flour, raw rice, curd, herbs etc. Learn to make Aadi Koozh Recipe with step by step pictures and video.
Course Breakfast
Cuisine Indian
Keyword drink recipes, Festival, Healthy tea time drink, millet recipes, Nutritional Beverage, Nutritional Drink, porridge recipes
Prep Time 15 minutes
Cook Time 25 minutes
Total Time 40 minutes
Servings 3 people
Calories 372kcal
Author Sharmilee J

Ingredients

  • 1 cup ragi flour
  • ΒΌ cup raw rice
  • 2 cups water + as required
  • 1 cup curd
  • 2 tablespoon small onion
  • 2 teaspoon curry leaves
  • 1 green chili
  • salt to taste

Instructions

  • Measure and take ΒΌ cup raw rice.
  • Grind it to a slightly coarse mixture like this.
  • Boil 2 cups water in a sauce pan add broken raw rice to it. Cook until rice turns soft more like porridge in consistency. Let it simmer.
  • To a mixing bowl take 1 cup ragi flour, add 4 cups water to it.
  • Whisk it well without any lumps. This is done off the stove. This mixture can be left overnight to ferment and then proceeded.
  • Add the ragi mixture to the cooking rice. Add required salt.
  • In low flame, keep mixing to avoid lumps and cook it till it becomes thick and raw taste of ragi flour leaves.
  • It will become shiny and thick.
  • The cooked rice will be seen in between as shown here. At this stage switch off.
  • Add 1 cup thick curd to a bowl, 1 and Β½ cups water. Whisk it well, Set aside.
  • Transfer the cooked ragi porridge to a mixing bowl along with 2 tablespoon small onion(chopped finely), 2 teaspoon curry leaves(chopped finely),1 green chili(crushed).
  • Add whisked curd to it.
  • Add water if it is to too thick. Adjust with little water if needed may be around Β½ cup.
  • Mix it well using a whisk.
  • Aadi koozh is ready!
  • Serve Aadi Koozh warm or chilled!

Video

Notes

  • Water ratio - Water quantity for cooking ragi and raw rice may differ, so adjust accordingly.
  • Traditional method - Usually they soak ragi flour overnight and then add cooked rice to it. This is done to get a slightly sour taste. I have shared the instant version.
  • Cookware to use - Always use a heavy bottomed vessel to cook the koozh else it will stick to the bottom. I used a claypot.
  • Flame - While cooking keep in low flame and cook else lumps may form easily. Keep mixing with a ladle / whisk.
  • Consistency - The koozh thickens with time so adjust water / buttermilk accordingly. I used thick curd so had to add more water. Make sure you cool down the koozh completely before adding buttermilk.

Nutrition

Serving: 250ml | Calories: 372kcal | Carbohydrates: 74g | Protein: 10g | Fat: 4g | Saturated Fat: 2g | Polyunsaturated Fat: 0.4g | Monounsaturated Fat: 1g | Cholesterol: 11mg | Sodium: 56mg | Potassium: 480mg | Fiber: 1g | Sugar: 4g | Vitamin A: 329IU | Vitamin C: 133mg | Calcium: 409mg | Iron: 3mg

The post Aadi Koozh Recipe appeared first on Sharmis Passions.
Blueberry Smoothie Recipe

Blueberry Smoothie is a refreshing and healthy breakfast drink that can made in just few minutes when you have frozen fruits in hand. It is a powerful antioxidant rich smoothie made using frozen blueberries, banana, milk, yogurt and honey. It makes your breakfast ready in no time and it is nutritious and filling too.

blueberry smoothie served

This smoothie is a burst of flavours with banana to give creaminess and thickness while blueberries adds a vibrant purple colour to the smoothie. Make a cup of this smoothie to start your day as it is refreshingly delicious. Do try and enjoy!

[feast_advanced_jump_to]

About Blueberry Smoothie

Blueberry Smoothie is a healthy and nutritious breakfast drink made using frozen blueberry, banana, yogurt, milk, vanilla extract and honey. There are a lot of variation that you can make to this smoothie. You can include other fruits of your choice like orange, pineapple etc.

This blueberry smoothie has become our family favourite especially with kids. To break their daily routine of dosa or idli for breakfast I make this smoothie and they just love it. I always have a stock of frozen blueberries and banana for this smoothie sake.

The extra tip of making any smoothie creamy and thick is to use frozen fruits. Banana gives extra creaminess to the smoothie so do not miss adding them. Yogurt and milk balances the consistency to a perfect drink.

Some add wheat grass to smoothies, if you can source them then use it. You can even add a teaspoon of chia seeds. I have used honey for sweetener you can even use maple syrup or dates. Use any natural sweetener to make the smoothie more healthy.

blueberry smoothie served

Blueberry Smoothie Video

Blueberry Smoothie Ingredients

  • BlueberryΒ - Wash and freeze blueberries and use them for your smoothies. Frozen berries makes the drink creamy.
  • BananaΒ - Any ripe frozen banana is perfect for smoothies. Adding frozen banana makes the smoothie thick and creamy.
  • Yogurt - I have regular yogurt, you can add greek yogurt to add protein to your smoothie.
  • Milk Β - Milk adds volume also adjusts the consistency to the smoothie.
  • HoneyΒ - I have used honey for sweetener, you can use maple syrup too. If your banana is sweet then you can even skip sweetener.
  • Vanilla extract Β - I have used a dash of homemade vanilla extract for a mild flavour. You can add other flavouring of your choice.
  • Ice cubesΒ - Do not add more ice cubes as it may make the smoothie runny. Add just 3-4 ice cubes.
ingredients needed to make blueberry smoothie

Similar Recipes

How to make Blueberry Smoothie Step by Step

1.To a mixer jar add Β½ cup frozen blueberries, Β½ of a medium sized banana along with ΒΎ cup milk, ΒΌ cup yogurt, Β½ teaspoon vanilla extract and 2 tablespoon honey. My banana was sweet so added just 2 tablespoon honey, adjust sweetness according to your fruits sweetness.

add ingredients to a blender

2. Blend until smooth and creamy.

blend well

3.Pour into serving glass and serve.

pour into serving glass

4.Serve immediately.

serve

Enjoy chilled!

Expert Tips

  • Fruits - I have used frozen blueberry and banana. You can add in a mix of fruits like pineapple, strawberries, oranges too. Choose fruits that are naturally sweet to reduce the quantity of sweetener we use. Using frozen fruits makes the smoothie chill, thick and creamy.
  • Blending - Blend until you can see the vibrant purple shade. If there is speckles of blueberries in the drink it is perfect as it tastes so good while drinking.
  • Consistency - Smoothies are usually thick and creamy. But you can adjust the consistency according to your liking by adding or reducing milk.
  • Milk - I have used regular milk, for vegan option you can use oat milk or almond milk or any nut based milk.
  • Variations - You can include wheat grass, chia seeds etc.

Serving and Storage

Serve the smoothie immediately for best taste. I would not recommend storing in fridge as the colour and taste changes a bit. Blueberry Smoothies tastes best when served fresh.

FAQS

1.How to make this smoothie vegan?

You can use oats milk or cashew milk or almond milk or soy milk for vegan alternate.

2.Can I use fresh fruits?

Yes you can use fresh fruits but frozen fruits makes smoothie thick and creamy, also chilled.

3.What other fruits can I use?

You can choose to use strawberries, pineapples, mangoes, avocado, raspberry etc.

4.Can I make this smoothie ahead and store?

The colour completely changes when stored also the taste changes a bit so I would recommend to serve this smoothie fresh.

5.Can I skip banana?

Yes you can skip banana and make smoothie with just blueberries, milk, yogurt and honey. Adding banana to smoothie makes the drink thick and creamy.

blueberry smoothie served

If you have any more questions about thisΒ Blueberry Smoothie RecipeΒ do mail me at sharmispassions@gmail.com. In addition, follow me onΒ Instagram,Β Facebook,Β PinterestΒ ,YoutubeΒ andΒ TwitterΒ .

Tried thisΒ Blueberry Smoothie Recipe? Do let me know how you liked it. Also tag us on Instagram @sharmispassions and hash tag it on #sharmispassions.

πŸ“– Recipe Card

Print

Blueberry Smoothie Recipe

Blueberry Smoothie is a refreshing and healthy breakfast drink that can made in just few minutes when you have frozen fruits in hand. It is a powerful antioxidant rich smoothie made using frozen blueberries, banana, milk, yogurt and honey. It makes your breakfast ready in no time and it is nutritious and filling too.
Course beverage, Drinks
Cuisine American, Indian
Prep Time 5 minutes
Blending time 5 minutes
Total Time 10 minutes
Calories
Author Sharmilee J

Ingredients

  • Β½ cup frozen blueberries
  • Β½ medium sized banana
  • ΒΎ cup milk
  • ΒΌ cup yogurt
  • Β½ teaspoon vanilla extract
  • 2 tablespoon honey

Instructions

  • 1.To a mixer jar add Β½ cup frozen blueberries, Β½ of a medium sized banana along with ΒΎ cup milk, ΒΌ cup yogurt, Β½ teaspoon vanilla extract and 2 tablespoon honey. My banana was sweet so added just 2 tablespoon honey, adjust sweetness according to your fruits sweetness.
  • Blend until smooth and creamy.
  • Pour into serving glass and serve.
  • Serve immediately.
  • Enjoy chilled!

Video

Notes

  • Fruits - I have used frozen blueberry and banana. You can add in a mix of fruits like pineapple, strawberries, oranges too. Choose fruits that are naturally sweet to reduce the quantity of sweetener we use. Using frozen fruits makes the smoothie chill, thick and creamy.
  • Blending - Blend until you can see the vibrant purple shade. If there is speckles of blueberries in the drink it is perfect as it tastes so good while drinking.
  • Consistency - Smoothies are usually thick and creamy. But you can adjust the consistency according to your liking by adding or reducing milk.
  • Milk - I have used regular milk, for vegan option you can use oat milk or almond milk or any nut based milk.
  • Variations - You can include wheat grass, chia seeds etc.

The post Blueberry Smoothie Recipe appeared first on Sharmis Passions.
Ragi Roti Recipe

Ragi Roti is a healthy breakfast dish made using ragi flour, onion, curry leaves, green chillies and salt. It is soft but little chewy and has a mild nutty taste, these are healthy, gluten fren and tastes so good. This roti recipe is really good for breakfast or even as light snack when you feel hungry and want something wholesome and filling.

ragi roti served with onion thokku

These rotis are little different from normal wheat roti because ragi gives unique taste and makes it more healthy and nutritious. The onion and green chillies add small spice and curry leaves gives nice flavour while cooking. You can have it with chutney or even plain, it tastes so good. If you want something gluten free and healthy, ragi roti is a great choice.

[feast_advanced_jump_to]

About Ragi Roti

Ragi Roti is a traditional Indian flatbread made from ragi flour. Making dishes using ragi flour or finger millet flour is very common in South India. The texture is soft if cooked right. It has small nutty taste which is different from wheat roti. Ragi roti can be made quickly and can make for a healthy breakfast or snack.

Taste is earthy and nutty from ragi while onions and green chillies add mild sweetness and spice. Curry leaves gives fresh aroma which makes it more tasty. It is different from normal roti and feels wholesome. You can eat it plain or with any chutney. I served it with onion thokku and it was so good.

You can make small changes if you want. You can add grated carrot or beetroot to make it little more healthy and look colourful. You can add pinch of turmeric powder or cumin powder for extra flavour. You can also sprinkle few sesame seeds on top while cooking for crunch.

I usually make ragi roti on weekends when want quick breakfast for family. It is fast to make and feels comforting. It is simple but feels satisfying. I like both sweet version and salt versions of ragi roti very much. As a kid I liked the sweet more but now like both.

ragi roti served with onion thokku

Ragi Roti Video

Ragi Roti Ingredients

  • Ragi flour - I have used ragi flour for base. It gives nutty taste and make roti healthy. You can use other millet flour also. I used homemade sprouted ragi flour which I had in hand.
  • Onion - I have added chopped onion for sweetness and small crunch. It balances ragi taste.Β 
  • Green chillies - I just used finely chopped for mild spice. You can skip if you want mild roti.
  • Curry leaves - I added for fresh aroma and flavour. You can skip if not available, roti still tastes good.
  • Oil - I added for toasting the roti and greasing butter paper, you can use any oil of your choice.
  • Salt - to balance the taste.
  • Water - Hot water is added to ragi flour to make the dough.
ingredients needed to make ragi roti

Similar Recipes

How to make Ragi Roti Step by Step

1.To a mixing bowl - add 1 cup ragi flour, add 1 medium sized onion chopped finely, 1 big green chilli, 1 tablespoon curry leaves and required salt to taste.

add ingredients to ragi flour

2.Mix this well first.

mix it

3.Add hot water little by little.

add hot water

4.Mix with spatula well first until no dry flour is seen.

mix well

5.By now it will be warm enough to handle with hand.

comes together

6.Gather together to form a dough.

form a dough

7.Divide into 4 equal portions.Make big lemon sized balls.

divide into balls

8.Grease the butter paper with few drops of oil. Place the ball and flatten it. Start patting it with your fingers.

pat using fingers

9.It should be slightly thick like this. You can make 2 rotis at a time so that you can alternate them while one is getting cooked in the tawa.

slightly thick roti

10.Heat dosa tawa and drizzle few drops oil.

drizzle oil

11.Carefully transfer the butter paper with roti side down. Gently peel the paper.

transfer to tawa

12.Drizzle oil at the sides and on top.

drizzle oil

13.Cook covered for 2 minutes.

cook covered

14.Flip over and cook. Toast the rotis on both the sides till golden spots appear here and there, drizzle oil.

flip over and cook

15.Ragi roti is ready!

ragi roti is ready

Expert Tips

  • Flour - Any ragi flour is good to use make sure it is not fine. You can use regular ragi flour or sprouted ragi flour.
  • Dough - I keep the dough moist and sticky. You can adjust water accordingly and mix. If dough is too tight then it will have more cracked edges while pressing.
  • Flattening - I grease my fingers with little oil / water while flattening so it does not stick.
  • Cooking on tawa - I drizzle oil on tawa and cook in medium flame. Flip only when one side is cooked.
  • Making rotis - You can make two at same time and alternate while cooking. I usually make it around 3-4 inches in diameter. But it is purely your preference, you can make it big too.
  • Storing leftover- I keep the leftover in fridge for 1-2 days. Reheat on tawa before serving.

Serving and Storage

Serve it as breakfast with coconut chutney, tomato chutney or spicy dip. It also goes good with yogurt or sambar. Store leftover in airtight box in fridge for 1-2 days. Reheat on tawa to make soft and warm.

FAQS

1.Can I skip green chillies?

Yes, you can skip it if you want mild roti. Still taste good with onion and curry leaves. You can even add Β½ teaspoon red chilli powder replacing chillies.

2.Can I make dough ahead?

Yes, you can keep dough in fridge few hours. Bring to room temperature, sprinkle little water mix well then proceed. Storing the dough for long hours in fridge is not recommended as it may dry up.

3.Can I add vegetables?

Yes, carrot, cabbage, beetroot or zucchini grated works. Just make sure dough is not too wet.

4.Can I use wheat flour?

You can, but taste will be different. Adding wheat flour is a different recipe. THis ragi roti is traditionally made using only ragi flour.

5.Can I freeze cooked roti?

Yes, but if you want to freeze then half cook the rotis and stack them between butter paper and store in freezer. When you want to serve, thaw it then cook and serve.

ragi roti served with onion thokku

If you have any more questions about this Ragi RotiΒ  Recipe do mail me at sharmispassions@gmail.com. In addition, follow me on Instagram,Β Facebook,Β PinterestΒ ,YoutubeΒ andΒ TwitterΒ .

Tried this Ragi Roti Recipe? Do let me know how you liked it. Also tag us on Instagram @sharmispassions and hash tag it on #sharmispassions.

πŸ“– Recipe Card

Print

Ragi Roti Recipe

Ragi Roti is a healthy breakfast dish made using ragi flour, onion, curry leaves, green chillies and salt. It is soft but little chewy and has a mild nutty taste, these are healthy, gluten fren and tastes so good. This roti recipe is really good for breakfast or even as light snack when you feel hungry and want something wholesome and filling.
Course Main Course, Snack
Cuisine Indian
Keyword 30 mins recipes, Dinner recipe, flat bread recipes, flatbread recipes, millet recipes, ragi recipes, roti, roti recipes, tiffin recipes
Prep Time 10 minutes
Cook Time 10 minutes
Total Time 20 minutes
Servings 4 rotis
Calories 256kcal
Author Sharmilee J

Ingredients

  • 1 cup ragi flour (finger millet flour)
  • 1 medium sized onion finely chopped
  • 1 green chilli finely chopped
  • 1 tablespoon curry leaves finely chopped
  • salt to taste
  • hot water as needed
  • oil to toast

Instructions

  • To a mixing bowl - add 1 cup ragi flour, add 1 medium sized onion chopped finely, 1 big green chilli, 1 tablespoon curry leaves and required salt to taste.
  • Mix this well first.
  • Add hot water little by little.
  • Mix with spatula well first until no dry flour is seen.
  • By now it will be warm enough to handle with hand.
  • Gather together to form a dough.
  • Divide into 4 equal portions.Make big lemon sized balls.
  • Grease the butter paper with few drops of oil. Place the ball and flatten it. Start patting it with your fingers.
  • It should be slightly thick like this. You can make 2 rotis at a time so that you can alternate them while one is getting cooked in the tawa.
  • Heat dosa tawa and drizzle few drops oil.
  • Carefully transfer the butter paper with roti side down. Gently peel the paper.
  • Drizzle oil at the sides and on top.
  • Cook covered for 2 minutes.
  • Flip over and cook. Toast the rotis on both the sides till golden spots appear here and there, drizzle oil.
  • Ragi roti is ready!

Video

Notes

  • Flour - Any ragi flour is good to use make sure it is not fine. You can use regular ragi flour or sprouted ragi flour.
  • Dough - I keep the dough moist and sticky. You can adjust water accordingly and mix. If dough is too tight then it will have more cracked edges while pressing.
  • Flattening - I grease my fingers with little oil / water while flattening so it does not stick.
  • Cooking on tawa - I drizzle oil on tawa and cook in medium flame. Flip only when one side is cooked.
  • Making multiple rotis - You can make two at same time and alternate while cooking.
  • Storing leftover- I keep the leftover in fridge for 1-2 days. Reheat on tawa before serving.

Nutrition

Serving: 50g | Calories: 256kcal | Carbohydrates: 47g | Protein: 5g | Fat: 6g | Saturated Fat: 1g | Polyunsaturated Fat: 2g | Monounsaturated Fat: 4g | Trans Fat: 0.02g | Sodium: 64mg | Potassium: 281mg | Fiber: 1g | Sugar: 2g | Vitamin A: 280IU | Vitamin C: 151mg | Calcium: 240mg | Iron: 2mg

The post Ragi Roti Recipe appeared first on Sharmis Passions.
Strawberry Muffins Recipe

Strawberry Muffins are a flavourful treat made using flour, baking powder, curd, strawberry. It has a natural fruity flavour and sweet not too heavy. These muffins are perfect for weekend baking when you want something healthy and special, they come out soft and fresh.

strawberry muffins served in a white plate

Strawberry muffins are easy to make at home and everyone at home enjoys them, baking can be finished in less than an hour from start. They stay fresh for a couple of days when stored in container and tastes good for breakfast or snack with tea. Strawberry gives that fruit flavour and fresh piece on top.

[feast_advanced_jump_to]

About Strawberry Muffins

Strawberry Muffins are eggless baked goodies that has become popular at home kitchen for quick snack and breakfast. Fresh strawberry and strawberry essence both are used for strong fruity flavour, flour and baking powder makes them rise and come out fluffy.

Texture is soft and spongy inside because curd and oil makes the batter moist, baking powder helps them rise while baking. Top comes out golden and crusty while inside stays tender and not dense, fresh strawberry pieces on top add little texture and looks nice.

You can adjust how much strawberry essence you use depends on preference, some people like stronger fruit taste and some prefer subtle hint. Some add more fresh strawberries if available. You can also use frozen strawberry but fresh strawberry gives better texture and colour to the muffins.

I usually make this in strawberry season on weekends for my family, they love the strawberry taste and flavour.Β 

strawberry muffins served in a white plate

Strawberry Muffins Ingredients

  • Flour - Used flour for making base of muffin and it gives structure and texture. I usually sift it with baking powder and soda.
  • Baking powder and baking soda - These help muffin rise and become fluffy and light, just small amount needed.Β 
  • Sugar - Added sugar for sweetness and it dissolves into oil and curd mixture.Β 
  • Curd - Used thick curd instead of eggs and it gives moisture and binding to batter. Curd also keeps muffins soft and tender.
  • Olive oil - Used olive oil for richness and it makes muffins moist inside. Oil gives tender texture compared to butter.
  • Strawberry essence - I added strawberry essence for flavour, it gives fruity taste throughout the muffin.Β 
  • Fresh strawberries - I have used fresh strawberry pieces throughout batter and on top for texture and real fruit flavour.Β 
strawberry muffins served in a white plate

Similar Recipes

How to make Strawberry Muffins Step by Step

1.Preheat oven at 180 deg C. Measure flour and add it to sieve. Add baking powder and baking soda to it.

how to make strawberry muffins step1

2.Sieve it in a mixing bowl. In another mixing bowl add oil and sugar.

how to make strawberry muffins step2

3.Mix well with a whisk. Add curd.

how to make strawberry muffins step3

4.Mix well until sugar completely dissolves. Now add flour mixture.

how to make strawberry muffins step4

5.Mix it. Add strawberry essence. Add chopped strawberries reserving a tablespoon for topping.

how to make strawberry muffins step5

6.Give a quick mix. Arrange muffin liners. My liners were too big for my mould so I lined them up in paper cups and ramekins.

how to make strawberry muffins step6

7.Using a ice cream scooper scoop the batter and fill the liners till ΒΎth.

how to make strawberry muffins step7

8.Top with reserved cut strawberries. Bake in preheated oven for 25-30 minutes or until the top turns golden.

how to make strawberry muffins step8

You can use a toothpick to check if its done. You can store these muffins for 2 - 3 days in room temperature.

strawberry muffins served in a white plate

Expert Tips

  • Mixing - I mix oil and sugar first until combined, then add curd and mix until smooth. Use spatula to avoid over mixing which makes muffin tough.
  • Curd consistency - I use thick curd and or let it drain in cloth for a while if runny. Thick curd is important because it give better texture and muffin not come out dense.
  • Strawberry - I chop strawberries small and add them just before baking, some I keep aside for topping.Β 
  • Oven temperature - I make sure the oven is preheated well before baking as it is important for even baking. Muffin needs consistent heat so top gets golden while inside stay soft and moist.
  • Filling muffin - I fill the liner till three quarter full and leave space for muffin to rise. Dont overfill.
  • Testing doneness - I poke the toothpick in centre and if it comes out clean, then muffin is ready. If still wet batter on toothpick then give a few more minutes to bake.

Serving and Storage

Serve this muffins as snack, after meal dessert or for parties and these taste delicious and stays good for up to three days in room temperature in an airtight container.

FAQS

1.Can I add nuts?

Yes, you can any nuts of your choice like almonds, cashew, walnut for crunch texture.

2.Can I skip strawberry essence?

Yes, use fresh strawberry without essence, flavour will be bit less strong but still tastes good.

3.Why my muffins come out dense and not fluffy?

Over mixing the batter makes muffin dense, mix gently with spatula, also check oven preheat properly before baking.

4.Can I add more strawberry?

Yes you can add more strawberries but adjust flour or curd slightly to keep batter consistency right.

5.How long they stay fresh?

Muffin stay good in container for two three day at room temperature, you can freeze for one month also.

strawberry muffins served in a white plate

If you have any more questions about thisΒ Strawberry Muffins RecipeΒ do mail me at sharmispassions@gmail.com. In addition, follow me onΒ Instagram,Β Facebook,Β PinterestΒ ,YoutubeΒ andΒ TwitterΒ .

Tried thisΒ Strawberry Muffins Recipe? Do let me know how you liked it. Also tag us on Instagram @sharmispassions and hash tag it on #sharmispassions.

πŸ“– Recipe Card

Strawberrymuffins3
Print

Strawberry Muffins Recipe

Strawberry Muffins are a flavourful treat made using flour, baking powder, curd, strawberry. It has a natural fruity flavour and sweet not too heavy. These muffins are perfect for weekend baking when you want something healthy and special, they come out soft and fresh.
Course Snack
Cuisine American, Chinese, French, Indian, Italian, Mediterranean, Mexican
Keyword all purpose flour recipes, Baking, baking recipes, curd recipes, eggless, maida recipes, Muffins, strawberry recipes, yogurt recipes
Prep Time 15 minutes
Cook Time 30 minutes
Total Time 45 minutes
Servings 6 big muffins
Calories 216kcal
Author Sharmilee J

Ingredients

  • 1 cup flour / maida
  • Β½ teaspoon baking powder
  • ΒΌ teaspoon baking soda
  • β…“ cup sugar
  • Β½ cup thick curd
  • ΒΌ cup olive oil
  • Β½ teaspoon strawberry essence
  • Β½ cup cut fresh strawberries

Instructions

  • Preheat oven at 180 deg C.
  • Measure flour and add it to sieve. Add baking powder and baking soda to it. Sieve it in a mixing bowl.
  • InΒ another mixing bowl add oil and sugar. Mix well with a whisk.
  • Add curd. Mix well until sugar completely dissolves.
  • Now add flour mixture. Mix it.
  • Add strawberry essence. Add chopped strawberries reserving a tablespoon for topping. Give a quick mix.
  • Arrange muffin liners. MyΒ liners were too big for my mould so I lined them up in paper cups and ramekins.
  • Using a ice cream scooper, scoop the batter and fill the liners till ΒΎth.
  • Top with reserved cut strawberries. Bake in preheated oven for 25-30 mins or until the top turns golden.
  • You can use a toothpick to check if its done. Enjoy Eggless Strawberry Muffins!

Notes

  • Mixing - I mix oil and sugar first until combined, then add curd and mix until smooth. Use spatula to avoid over mixing which makes muffin tough.
  • Curd consistency - I use thick curd and or let it drain in cloth for a while if runny. Thick curd is important because it give better texture and muffin not come out dense.
  • Strawberry - I chop strawberries small and add them just before baking, some I keep aside for topping.Β 
  • Oven temperature - I make sure the oven is preheated well before baking as it is important for even baking. Muffin needs consistent heat so top gets golden while inside stay soft and moist.
  • Filling muffin - I fill the liner till three quarter full and leave space for muffin to rise. Dont overfill.
  • Testing doneness - I poke the toothpick in centre and if it comes out clean, then muffin is ready. If still wet batter on toothpick then give a few more minutes to bake.

Nutrition

Serving: 40g | Calories: 216kcal | Carbohydrates: 29g | Protein: 3g | Fat: 10g | Saturated Fat: 2g | Polyunsaturated Fat: 1g | Monounsaturated Fat: 7g | Cholesterol: 3mg | Sodium: 91mg | Potassium: 73mg | Fiber: 1g | Sugar: 13g | Vitamin A: 22IU | Vitamin C: 7mg | Calcium: 50mg | Iron: 1mg

The post Strawberry Muffins Recipe appeared first on Sharmis Passions.
Ajwain Potli for Babies and Kids

Ajwain Potli is a simple home remedy made from roasted ajwain seeds wrapped in a muslin cloth. This remedy is safe and natural without any chemicals, many family use it during winter when cold and congestion are common in babies. You can try this for babies as it is a natural inhaler and absolutely safe.

ajwain potli for babies

Making potli takes just takes few minutes and ingredients needed is only ajwain seed, no other thing is required. Potli can be hold near baby nose so that they breathe in aroma, or keep close while they sleep so they get benefit passively. This remedy is very affordable it works well for preventing cold.

[feast_advanced_jump_to]

About Ajwain Potli for Babies and Kids

Ajwain Potli is a traditional remedy used in many Indian homes to treat cold, congestion and breathing difficulty in babies and toddlers. It is made by roasting ajwain seeds until nice aroma release, then tying them in small muslin cloth to create potli that can be use as an natural inhaler.Β 

The strong smell from roasted ajwain helps clear nasal passage and makes breathing easy for little ones who struggle with stuffiness. This remedy works best when potli is fresh and aroma is still strong, it can be used for two days then make new potli.

You can make potli in different sizes depending on baby age and comfort, small potli is easier for older kids to hold while larger ones are good for keeping near crib. Some people keep potli in pillow case or hang it near baby cot so that the aroma spreads in the air.Β 

I usually make potli when my baby starts getting stuffy nose and cold sign comes, it helps so much and baby breathing become easier and they can sleep better. I feel fresh roasted potli is more effective than old ones.

Similar Recipes

ajwain potli for babies

Ajwain Potli for Babies and Kids Ingredients

  • Ajwain seeds - Used ajwain seed for making potli and it strong aroma help with congestion and breathing.Β 

How to make Ajwain Potli Step by Step

1.Measure a tablespoon of ajwain seeds, dry roast until nice aroma comes. Let it cool down completely.

how to make ajwain potli for babies step1

2.Take a muslin cloth, add the roasted ajwain to it

how to make ajwain potli for babies step2

3.Bring the edges to the center and putΒ  a knot. Your ajwain potli is ready.

how to make ajwain potli for babies step3

Just inhale every now and then which helps in easy breathing and gives a soothing effect.

ajwain potli for babies

Expert Tips

  • Roasting - I always dry roast ajwain in pan on medium heat until aroma comes out strong. I don't roast too much or it will burn and smell becomes bad, just roast until golden brown.
  • Cooling - I let roasted ajwain cool complete before tying in cloth, if it is too hot it makes cloth uncomfortable to hold.Β 
  • Cloth selection - I use muslin cloth because it is soft and does not irritate baby skin, any thin breathable cloth also works.Β 
  • Potli size - I make small potli so that babies and kids can easily hold and play with it without dropping.Β 
  • Storage - I keep potli in container after two days aroma fade and make fresh one. Don't keep same potli for too long as aroma become weak and it not work good anymore.
  • Safety - I always make sure knot is tight so that ajwain don't spill out, keep it away from baby mouth so that they don't put it in mouth. When baby is sleeping I keep potli near but not direct on face.

Serving and Storage

Serve Ajwain Potli to baby by keeping it near nose so that they breathe in aroma, or hold it gently during day when baby awake and playing. Serve at night by keeping potli near crib or pillow so that baby gets benefit while sleeping and congestion relief comes. Store potli in airtight container for two days only, after that aroma fades and it does not work, make fresh potli for continued benefit.

FAQS

1. At what age can baby use Ajwain Potli?

Ajwain Potli is safe from three months onwards as there is no direct contact with skin, just aroma inhale.

2. Can I use the same potli multiple times?

You can use for two days but aroma becomes weak after that, make fresh potli for better results and effectiveness.

3. Is Ajwain Potli safe for newborn baby?

Yes it safe as long as it far from baby face and no direct contact happens, aroma inhale is enough.

4. Can I use Ajwain Potli along with other medicine?

Yes Ajwain Potli can be used along with medicines, it is natural remedy and does not interfere with medicine given by doctor.

5. What if baby tries to put potli in mouth?

Make sure potli knot is tight and kept away from baby reach, if baby gets it in mouth just take out and wash hand and mouth.

ajwain potli for babies

If you have any more questions about this Ajwain Potli for Babies and KidsΒ do mail me at sharmispassions@gmail.com. In addition, follow me on Instagram, Facebook,Β  Pinterest, Youtube andΒ TwitterΒ .

Tried this Ajwain Potli for Babies and Kids? Do let me know how you liked it. Also tag us on Instagram @sharmispassions and hash tag it on #sharmispassions.

πŸ“– Recipe Card

AjwainPotli2
Print

Ajwain Potli for Babies and Kids

Ajwain Potli is a simple home remedy made from roasted ajwain seeds wrapped in a muslin cloth. This remedy is safe and natural without any chemicals, many family use it during winter when cold and congestion are common in babies. You can try this for babies as it is a natural inhaler and absolutely safe.
Course howtos
Cuisine Indian
Keyword 30 mins recipes, Baby Food
Prep Time 5 minutes
Cook Time 5 minutes
Total Time 10 minutes
Servings 1 cup
Calories
Author Sharmilee J

Ingredients

  • 1 tablespoon ajwain / omam / carom seeds

Instructions

  • Measure a tablespoon of ajwain seeds, dry roast until nice aroma comes. Let it cool down completely.
  • Take a muslin cloth, add the roasted ajwain to it.
  • Bring the edges to the center and putΒ  a knot. Your ajwain potli is ready. Just inhale every now and then which helps in easy breathing and gives a soothing effect.

Notes

  • Roasting - I always dry roast ajwain in pan on medium heat until aroma comes out strong. I don't roast too much or it will burn and smell becomes bad, just roast until golden brown.
  • Cooling - I let roasted ajwain cool complete before tying in cloth, if it is too hot it makes cloth uncomfortable to hold.Β 
  • Cloth selection - I use muslin cloth because it is soft and does not irritate baby skin, any thin breathable cloth also works.Β 
  • Potli size - I make small potli so that babies and kids can easily hold and play with it without dropping.Β 
  • Storage - I keep potli in container after two days aroma fade and make fresh one. Don't keep same potli for too long as aroma become weak and it not work good anymore.
  • Safety - I always make sure knot is tight so that ajwain don't spill out, keep it away from baby mouth so that they don't put it in mouth. When baby is sleeping I keep potli near but not direct on face.

Nutrition

Serving: 0g | Carbohydrates: 0g | Protein: 0g | Fat: 0g | Saturated Fat: 0g | Polyunsaturated Fat: 0g | Monounsaturated Fat: 0g | Trans Fat: 0g | Cholesterol: 0mg | Sodium: 0mg | Potassium: 0mg | Fiber: 0g | Sugar: 0g | Vitamin A: 0IU | Vitamin C: 0mg | Calcium: 0mg | Iron: 0mg

The post Ajwain Potli for Babies and Kids appeared first on Sharmis Passions.
Aadi Paal Recipe

Aadi Paal is a simple and delicious dessert prepared on the first day of Aadi month. Aadi Paal is made using jaggery and coconut milk as main ingredients. Aadi Paal is also called as Aadi Thengai Paal. Learn to make Aadi Paal with step by step pictures and video.

aadi paal served with fried cashews

I love all jaggery based kheer or payasam and this is my favorite too. This Aadi Paal is more like a payasam but not too thick. Aadi Paal or Aadi Thengai Paal is very simple and easy to make with just minimal ingredients that is available in your kitchen.

[feast_advanced_jump_to]

About Aadi Paal

Aadi Paal is made using jaggery, coconut, cardamom powder, ghee and nuts. Aadi Paal also called as Aadi Thengai Paal is a must for Aadi pandigai which is the first day of the tamil month Aadi. Aadi Paal has minimal ingredients yet tastes so delicious.

Aadi Paal is prepared to mark 1st day of Aadi month. However you can make it on other days and enjoy too as it is so tasty. Newly married son in law is invited to the in laws house and gifted with new clothes, gifts which marks the significance of Aadi. Aadi month is majorly dedicated to Goddess Amman.

Traditionally Aadi Paal is made using coconut milk and jaggery as main ingredients but to add flavor and taste cardamom powder, ghee fried cashews are added. Rice flour slurry can also be added to make it more thick and creamy.

With the goodness of jaggery and homemade coconut milk this Aadi Paal is simple yet tastes so good. We can make this for Aadi Velli too. Aadi Koozh, Aadi Kummayam and Aadi Paal are made for Aadi festival.

aadi paal served with fried cashews

We usually do not have this practice of making recipes for Aadi but have tasted Aadi Koozh served in temples. Kummayam is my native special so amma makes it as an evening snack and I have learnt the recipe from her and my aunt who is an expert in making it.

This is the first time I am making and tasting Aadi Paal. This is more like coconut milk jaggery we serve it along with aapam but the method and taste varies. Jaggery coconut milk served with aapam is a no cook version but Aadi Paal is made more like a thin kheer or payasam.

Aadi Paal is very good and soothing for your tummy. Coconut milk has a lot of health benefits and also helps in digestion problems. Do try this Aadi Paal once at least if you haven't and I am sure you will thank me later.

Similar Recipes

Aadi Paal Ingredients

  • Coconut - Use fresh coconut to make coconut milk. Fresh coconut gives more volume of coconut milk also gives great flavor to this drink.
  • Jaggery - Use good quality organic jaggery. You can use block or powdered jaggery.
  • Flavoring - Cardamom powder is the main flavoring used here. Adding edible camphor is optional but gives a divine taste.
  • Ghee - Ghee is used for frying cashews.
  • Cashews - Few broken cashews are fried in ghee and added. Though this is optional it tastes great when added.
ingredients needed to make aadi paal

How to make Aadi Paal Step by Step

1.Add 1 and Β½ cups coconut along with 1 cup water to a mixer jar.

add water to coconut

2.Blend well for a minute.

blend well

3.Now transfer this coconut mixture to a fine holed strainer placed over a bowl and press it with a spoon / spatula till all the milk is drained.You can use muslin cloth to drain too.

press well

4.Now the extracted milk is the first coconut milk or thick coconut milk. Press and squeeze until all the milk is extracted and the mixture becomes dry. You will see at one point while pressing the milk will stop coming so this indicates you can stop here.

squeeze and extract coconut milk

7.Thick coconut milk is ready.

thick coconut milk is ready

8.Now take the remains in the strainer and add it back to the mixer. Add 1 and Β½ cups of water to it.

add water

9.Blend well again for few seconds.

blend well

10.Transfer the mixture to the same strainer. Press well to extract coconut milk.

press well

11.Measure ΒΎ cup thick coconut milk and ΒΌ cup thin coconut milk and set aside.

thick and thin coconut milk is ready

12.To a pan add β…“ cup jaggery.

add jaggery

13.Add ΒΌ cup water to it.

add water to it

14.Simmer until jaggery completely dissolves.

let jaggery dissolve

15.Switch off and transfer it to a strainer to remove impurities in jaggery if any. Discard the remains.

16.Jaggery syrup is ready. Set it aside.

jaggery syrup is ready

17.Add it to a pan and let it boil for 2 minutes or until slightly thick.

boil jaggery syrup

18.Now add ΒΌ cup thin coconut milk.

add think coconut milk

19.Mix it well.

mix it well

20.Simmer for 2 minutes.

simmer for 2 minutes

21.Switch off and add ΒΎ cup thick coconut milk.

add thick coconut milk

22.Add ΒΌ teaspoon cardamom powder and a pinch edible camphor(optional).

add cardamom powder

23.Mix well.

mix it well

24.You can serve aadi paal as such too or add ghee fried cashews and serve it. Heat 2 teaspoon ghee - add 5 cashews broken and fry until golden and switch off. Add it and mix well. Serve and enjoy!

fry cashews

Aadi Paal is ready!

Expert Tips

  • Flame - Simmer flame while adding thin coconut milk and switch off while adding thick coconut milk.
  • Adding coconut milk - After thick coconut milk is added, don't let it boil then it will start splitting.
  • Variations - You can even add raisins and saffron for extra flavor.
  • Colour - The colour depends on the jaggery color.
  • Adding rice flour - You can mix 1 teaspoon rice flour with 2 tablespoon water make a slurry and add it along with thin coconut milk. This is done to make it more thick and creamy.

Serving & Storage

Aadi Paal is served with ghee fried cashews or as such too. It should be consumed within 3-4 hours of making as it keeps well in room temperature only for few hours. If stored in fridge it keeps well for 2 days but the fresh taste will not be there.

FAQS

1.Can I use store bought ready made coconut milk?

Yes you can use store bought coconut milk however the taste differs. Fresh coconut milk gives the best taste for aadi paal. You can even use frozen coconut to extract coconut milk.

2.Can I use sugar replacing jaggery?

You can replace jaggery with sugar but traditionally jaggery is used for making Aadi Paal.

aadi paal served with fried cashews

If you have any more questions about this Aadi Paal Recipe do mail me at sharmispassions@gmail.com. In addition, follow me on Instagram, Facebook,Β  Pinterest, Youtube andΒ TwitterΒ .

Tried this Aadi Paal Recipe? Do let me know how you liked it. Also tag us on Instagram @sharmispassions and hash tag it on #sharmispassions.

πŸ“– Recipe Card

Print

Aadi Paal Recipe | Aadi Thengai Paal

Aadi Paal is a simple and delicious dessert prepared on the first day of Aadi month. Aadi Paal is made using jaggery and coconut milk as main ingredients. Aadi Paal is also called as Aadi Thengai Paal. Learn to make Aadi Paal with step by step pictures and video.
Course Dessert
Cuisine Indian
Keyword cardamom powder recipe, coconut recipes, dessert recipes, Festival, jaggery recipes, milk recipes, sweet recipes
Prep Time 20 minutes
Cook Time 20 minutes
Total Time 40 minutes
Servings 2
Calories 400kcal
Author Sharmilee J

Ingredients

To make coconut milk:

  • 1 and Β½ cups coconut
  • water as required to make coconut milk

To make jaggery syrup:

  • β…“ cup jaggery
  • ΒΌ cup water for making jaggery syrup

Instructions

  • Add 1 and Β½ cups coconut along with 1 cup water to a mixer jar.
  • Blend well for a minute.
  • Now transfer this coconut mixture to a fine holed strainer placed over a bowl and press it with a spoon / spatula till all the milk is drained.You can use muslin cloth to drain too.
  • Now the extracted milk is the first coconut milk or thick coconut milk. Press and squeeze until all the milk is extracted and the mixture becomes dry. You will see at one point while pressing the milk will stop coming so this indicates you can stop here.
  • Thick coconut milk is ready.
  • Now take the remains in the strainer and add it back to the mixer. Add 1 and Β½ cups of water to it.
  • Blend well again for few seconds.
  • Transfer the mixture to the same strainer. Press well to extract coconut milk.
  • Measure ΒΎ cup thick coconut milk and ΒΌ cup thin coconut milk and set aside.
  • To a pan add β…“ cup jaggery.
  • Add ΒΌ cup water to it.
  • Simmer until jaggery completely dissolves.
  • Switch off and transfer it to a strainer to remove impurities in jaggery if any. Discard the remains.
  • Jaggery syrup is ready. Set it aside.
  • Add it to a pan and let it boil for 2 minutes or until slightly thick.
  • Now add ΒΌ cup thin coconut milk.
  • Mix it well.
  • Simmer for 2 minutes.
  • Switch off and add ΒΎ cup thick coconut milk.
  • Add ΒΌ teaspoon cardamom powder and a pinch edible camphor(optional).
  • Mix well.
  • You can serve aadi paal as such too or add ghee fried cashews and serve it. Heat 2 teaspoon ghee - add 4 cashews broken and fry until golden and switch off.
  • Add it and mix well. Serve and enjoy!
  • Aadi Paal is ready!

Video

Notes

  • Flame - Simmer flame while adding thin coconut milk and switch off while adding thick coconut milk.
  • Adding coconut milk - After thick coconut milk is added, don't let it boil then it will start splitting.
  • Variations - You can even add raisins and saffron for extra flavor.
  • Colour - The colour depends on the jaggery color.
  • Adding rice flour - You can mix 1 teaspoon rice flour with 2 tablespoon water make a slurry and add it along with thin coconut milk. This is done to make it more thick and creamy.

Nutrition

Serving: 150ml | Calories: 400kcal | Carbohydrates: 38g | Protein: 3g | Fat: 28g | Saturated Fat: 23g | Polyunsaturated Fat: 1g | Monounsaturated Fat: 2g | Cholesterol: 6mg | Sodium: 17mg | Potassium: 268mg | Fiber: 0.2g | Sugar: 34g | Vitamin C: 1mg | Calcium: 34mg | Iron: 4mg

The post Aadi Paal Recipe appeared first on Sharmis Passions.
Lemon Poppy Seed Muffins Recipe

Lemon Poppy Seed Muffins is a soft spongy muffins which has a citrus flavour. You get a crunch from poppy seeds in every bite.These muffins come together quickly for weekend baking when you want homemade treat for special breakfast or snack. It gives the feeling of baking without too much effort.

lemon poppy seed muffins served

Muffins are easy to make at home with ingredients most kitchen will already have, baking can be finished in thirty minutes from start. They stay soft and fresh for two three days when store dwell in container, tastes good with tea or as a simple dessert. Lemon makes them feel a bit fancy for guests but they are simple enough for everyday baking too.

[feast_advanced_jump_to]

About Lemon Poppy Seed Muffins

Lemon Poppy Seed Muffins is a popular homemade muffin in many kitchen now. It is a simple Western style muffin that comes out well every time.The texture is soft and fluffy inside because yogurt and egg make batter moist and light, sugar sprinkle on top before baking helps create crusty edge while inside stay tender.Β 

Lemon flavour is fresh and tangy, it balances well with the sweetness of sugar. You can adjust how much lemon you like by using more or less zest, some people prefer strong lemon taste and some prefer just hint of it. Some bakers add lemon extract but it not necessary, plain muffin taste really good on their own.Β 

Poppy seeds can be increased or reduced base on preference, you can add more if you like texture. Some people make glaze on top but I find sugar sprinkle is enough and lookd nice too. Fresh lemon juice make big difference from bottled one, and yogurt keepd muffin moist for longer.

I usually make these when I want quick something for family or when guests are coming, my kids really love lemon taste and eat them while still warm. At home we always make extra because they finish too fast, it comes out consistent every time.

lemon poppy seed muffins served

Lemon Poppy Seed Muffins Ingredients

  • Wheat flour - Used wheat flour for making base of muffin and it give nice structure. I usually sift it first to avoid lumps in the batter.
  • Sugar - Added regular white sugar for sweetness in muffin batter. It dissolves while mixing and makes batter sweet.
  • Poppy seeds - Used black poppy seeds for texture and little crunch in every bite. I just sprinkle it in batter and it give nice look and texture.
  • Baking powder and baking soda - These help muffins rise and become fluffy and light. I make sure to measure them carefully and not add too much or muffin gets bitter taste after baking.
  • Egg - Used one egg to bind all ingredients and give structure. Egg also helps muffin rise and come out fluffy, I whisk it well before adding to other ingredient.
  • Yogurt - Added yogurt for making batter soft and moist, it helps muffin stay tender for longer.Β 
  • Melted butter - Used melted butter for richness in batter. I always let it cool a bit before mixing with egg and yogurt, butter gives muffin soft texture.
  • Lemon juice and zest - Used fresh lemon juice and zest for bright flavour. I use both juice and zest together for strong lemon taste in muffin.
  • Salt - Added small amount of salt, it helps balance sweetness and make lemon flavour come out better.
lemon poppy seed muffins served

Similar Recipes

How to make Lemon Poppy Seed Muffins

1.Preheat oven at 190 deg C for 10 minutes. To a mixing bowl - add wheat flour, baking powder, baking soda and salt. Add sugar to it.

how to make lemon poppy seed muffins step1

2.Add black poppy seeds, mix well and set aside.

how to make lemon poppy seed muffins step2

3.In another mixing bowl - add an egg whisk until pale. Add curd.

how to make lemon poppy seed muffins step3

4.Add lemon juice. Whisk once.

how to make lemon poppy seed muffins step4

5.Add melted butter, mix it. Add flour mixture.

how to make lemon poppy seed muffins step5

6.Add lemon zest. Mix with a spatula.Using an ice cream scooper scoop out the batter.

how to make lemon poppy seed muffins step6

7.Arrange muffin liners in muffin mould. Drop the scooped batter into the liners, sprinkle sugar on top.Bake in preheated oven at 190 deg C for 25-30 minutes or until the top turns golden and crusty.

how to make lemon poppy seed muffins step7

Serve warm!

Expert Tips

  • Mixing - I always mix dry and wet separate, then combine gently with spatula. Over mixing makes muffin tough and dense, mixing gentle help it stay fluffy.
  • Oven temperature - I preheat oven well before starting to bake, make sure it is hot enough. This helps muffin bake even and top get golden.
  • Sugar on top - I sprinkle good amount of sugar, this creates crusty sweet topping that makes it taste better.
  • Lemon flavour - I use fresh lemon juice and zest together, it gives best taste without bitterness.Β 
  • Filling even - I use ice cream scooper to scoop batter so all muffins fill even and gets baked at the same time. This way they all come out with same golden colour and texture.
  • Check if done - I poke toothpick in centre of muffin and if it comes out clean, it is ready. Top should look golden and crusty when done baking, inside still soft and warm.
lemon poppy seed muffins served

Serving and Storage

Serve this while still warm from oven. This can be served as breakfast or snack with tea, they taste good as a light dessert too. Store any leftovers in an airtight container for two to three days at room temperature.

FAQS

1. Can I use all purpose flour?

Yes all purpose flour can be uses and it works fine, texture comes out bit different but muffins still taste good.

2. Can I make lemon flavour stronger?

Yes you can add more zest or lemon extract if you prefer stronger lemon taste in muffins.

3. Why my muffins come out dense?

Over mixing makes muffin dense and heavy, mix gently with spatula. Also check oven is properly preheated before start.

4. Can I prepare batter ahead?

You can make batter and refrigerate for few hour but bake same day for best fluffy muffins.

5. How long they stay fresh?

Muffins stay good in container for two three days at room temperature, you can freeze them for one month also.

lemon poppy seed muffins served

If you have any more questions about this Lemon Poppy Seed Muffins Recipe do mail me at sharmispassions@gmail.com. In addition, follow me on Instagram, Facebook,Β  Pinterest, Youtube andΒ TwitterΒ .

Tried this Lemon Poppy Seed Muffins Recipe ? Do let me know how you liked it. Also tag us on Instagram @sharmispassions and hash tag it on #sharmispassions.

πŸ“– Recipe Card

LemonPoppySeedMuffins2
Print

Lemon Poppy Seed Muffins Recipe

Lemon Poppy Seed Muffins is a soft spongy muffins which has a citrus flavour. You get a crunch from poppy seeds in every bite.These muffins come together quickly for weekend baking when you want homemade treat for special breakfast or snack. It gives the feeling of baking without too much effort.
Course Baking, Breakfast, Snack
Cuisine American, Chinese, French, Indian, Indo Chinese, Italian, Japanese, Mediterranean, Mexican
Keyword 30 mins recipes, Baking, baking recipes, butter recipes, cake, Cake Recipes, lemon recipes, Muffins, wheat flour recipes, yogurt recipes
Prep Time 10 minutes
Cook Time 20 minutes
Total Time 30 minutes
Servings 9 muffins
Calories 182kcal
Author Sharmilee J

Ingredients

Dry mix:

  • 1 Β½ cups wheat flour
  • Β½ cup sugar
  • 1 tablespoon black poppy seeds
  • Β½ tablespoon baking powder
  • ΒΌ teaspoon baking soda

Wet mix:

  • 4 tablespoon melted butter
  • 1 no egg
  • ΒΌ teaspoon salt
  • ΒΎ cup yogurt
  • 1 tablespoon lemon juice
  • 1 teaspoon lemon zest

Instructions

  • Preheat oven at 190 deg C for 10 minutes.
  • Take a mixing bowl - add wheat flour, baking powder, baking soda and salt. Add sugar to it.
  • Add black poppy seeds, mix well and set aside.
  • In another mixing bowl - add an egg whisk until pale. Add curd.
  • Add lemon juice. Whisk once.
  • Add melted butter, mix it. Add flour mixture.
  • Add lemon zest. Mix with a spatula.
  • Using an ice cream scooper scoop out the batter.
  • Arrange muffin liners in muffin mould. Drop the scooped batter into the liners, sprinkle sugar on top.
  • Bake in preheated oven at 190 deg C for 25-30 minutes or until the top turns golden and crusty.
  • Serve Lemon Poppy Seed Muffins warm!

Notes

  • Mixing - I always mix dry and wet separate, then combine gently with spatula. Over mixing makes muffin tough and dense, mixing gentle help it stay fluffy.
  • Oven temperature - I preheat oven well before starting to bake, make sure it is hot enough. This helps muffin bake even and top get golden.
  • Sugar on top - I sprinkle good amount of sugar, this creates crusty sweet topping that makes it taste better.
  • Lemon flavour - I use fresh lemon juice and zest together, it gives best taste without bitterness.Β 
  • Filling even - I use ice cream scooper to scoop batter so all muffins fill even and gets baked at the same time. This way they all come out with same golden colour and texture.
  • Check if done - I poke toothpick in centre of muffin and if it comes out clean, it is ready. Top should look golden and crusty when done baking, inside still soft and warm.

Nutrition

Serving: 25g | Calories: 182kcal | Carbohydrates: 29g | Protein: 3g | Fat: 6g | Saturated Fat: 4g | Polyunsaturated Fat: 1g | Monounsaturated Fat: 2g | Trans Fat: 0.2g | Cholesterol: 16mg | Sodium: 216mg | Potassium: 65mg | Fiber: 1g | Sugar: 12g | Vitamin A: 177IU | Vitamin C: 1mg | Calcium: 83mg | Iron: 1mg

The post Lemon Poppy Seed Muffins Recipe appeared first on Sharmis Passions.
❌