Reading view

There are new articles available, click to refresh the page.

V Formation Flying of Birds is Explained by a Minimal Wake–Vortex Model

Although it’s commonly suspected that migratory birds fly in a ‘V’ formation due to this saving energy for the birds in the slipstream, understanding the exact aerodynamics behind this and how it affects the way that the birds use their wings to maintain this optimal pattern. After all, unlike airplanes and cars, our feathered avian dinosaur friends need to flap their wings if they want to have any chance of staving off plummeting back to Earth. Recent research by Brown University researchers now have provided a simulated model that answers many questions.

The major question was how this would work in the up- and down-wash zones created in this type of formation, with every bird following the lead bird dealing with the vortices created by the flapping of the wings of the bird before them. These wake vortices are quite complex, and thus required careful modelling to make sense of them.

As described in the paper by [Olivia Pomerenk] et al., the model is based on northern bald ibises, taking into account live-bird measurements for validation of the model. The main effect that can be observed is a reduced flapping amplitude, leading to an 11% energy savings for the birds in the leader’s wake.

The main advantage of having such a model is of course that it provides insight into the kinematic and aerodynamic mechanisms, meaning the ability to model virtual flocks of birds, predict the efficiency of specific in-flight configurations, and apply the lessons to swarms of drones, or whatever else we want to put in the air.

Counterfeit Retro Mainboards with Fake AGP Slots Are a Thing

Sometimes that retro gaming itch strikes, and you just have to source components for a Pentium 4 build, like [Computer Retro Bus] did recently. Unfortunately, along the way he learned that you can actually get counterfeit mainboards. Case in point the purported ‘Asrock P4i45GV’ that was purchased as the core of this Pentium 4 build, which turned out to have many issues that included a fake AGP slot.

The mainboard was bought off Facebook Marketplace, with the first sign of trouble being spotty GPU support for the AGP slot, and an inability to install a driver for a card that seemed to work. Following this, issues with the installed Soundblaster soundcard popped up, with the use of Windows ME as OS being of course a factor, but even ME is generally not this sketchy.

Warning on fake AGP slot on genuine Asrock mainboard. (Credit: The Retro Web)

At some point he decided to actually dig into this Socket 478 mainboard that he had purchased, only to find out that there was a reason why there were no real markings on it. After an image search it turned out to be a clone of the aforementioned Asrock mainboard, including the original’s ‘feature’ of connecting the ‘AGP’ slot to the PCI bus. This explained why only the AGP GPUs that are compatible with PCI worked with this mainboard, as it’s actually Asrock’s ‘AGI’ slot.

Effectively just a way to scam buyers into believing that they bought a mainboard with an AGP slot when it was just a regular PCI slot cosplaying as an AGP slot. This doesn’t just mean lower speeds and spotty support with AGP cards, but also also potentially dead GPUs, as this mainboard inherited the same 3.3V-only card support.

Unlike PCI slots that are keyed for 3.3/5V voltage support, AGP slots are keyed for either 3.3V or 1.5V, or no key for universal support. These ‘AGI’ slots are sadly keyed for 1.5V AGP cards and thus will expose 1.5V-only AGP cards to potentially fatal voltages.

On the bright side, these are at least genuinely old mainboards, using the same AGP-less Intel chipsets, made back in the day to sell to unsuspecting buyers. Clearly the pain that these fake boards as well as genuine Asrock boards that these ripped off caused back in the day continues in 2026. Caveat Emptor, as they say.

Giving Resin 3D Printers Another Shot After Six Years

Art of 3D printer in the middle of printing a Hackaday Jolly Wrencher logo

My initial experience with a 3D printer came in 2020, when I got access to a buddy’s Creality LD-002R SLA printer. This was one of those awkward transition phases for SLA printers, where inefficient RGB LCDs finally got replaced by monochrome LCD panels, thus massively reducing the required exposure time and increasing the LCD panel’s lifespan.

The closely related Creality LD-002H is a monochrome SLA printer, but as this wasn’t the one that this friend opted for we had to learn the ropes on this more old-school printer. In terms of specifications this meant a build volume of 119 mm x 65 mm x 160 mm to play with and a claimed 26.1 µm resolution. Despite some struggles along the way, this machine churned out impressively high levels of detail with whatever cheap resin we threw at it, and even the post-printing processing became easy once we added a flex plate to the build plate and tweaked the cleaning and curing steps.

Despite all these positives, we both drifted away from resin printing, mostly due to the still messy and smelly printing process. FDM printers seemed like a better deal, especially after said buddy got his mittens on a used IDEX FDM printer. I would eventually go through a rather loathsome Creality Ender V2 experience before ending up with my current-day Elegoo Neptune 4, and resin printing seemed to be a thing of the past for me. Until recently, that is.

Things Have Changed

The Creality LD-002R MSLA 3D printer from 2020. (Credit: Creality)

Despite not having access to a resin printer any more, I still kept up to date on newly released hobbyist-level 3D printers of any type, as well as progress in technologies. Here I rather liked the digital light processing (DLP) types of resin printers, as they ditched the LCD and UV light source for a MEMS micro-mirror and laser setup for big power and weight savings. Unfortunately DLP resin printers appear to have fallen by the wayside again due to a variety of reasons, one of them apparently being scaling limitations with available DLP light engines and the manufacturers for the latter seemingly uninterested in this market.

Thus consumer SLA printing is still generally done with mono LCDs, which do not quite have the same efficiency and crisp edges for individual pixels as DLP, but which otherwise have come a long way, with better optics and light sources. A big push has also been towards larger build volumes, so despite new SLA printers tacking on more ‘K’s to their display resolution, the effective resolution isn’t that much better than a 2020 budget model. The real question is probably whether that’s even needed based on my own experiences printing fine details.

Perhaps the most exciting change is that with overall user-friendliness,  such as easier bed levelling, the preventing of resin smells wafting out of the printer into the room, heated resin vats for reliable print results and UV-blocking lids that you can flip open instead of having to gently lift off the printer with dirty gloves while you desperately try not to drop it whilst scrambling to find a free spot to put it safely down.

Although the Creality LD-002R lists air filtration with a carbon filter, this was more filtration of the homeopathic variety. Instead of filtering anything, the tiny, noisy fan effectively blasted unfiltered, resin-rich air into the room. Thus one of the first thing we did was disabling this ‘feature’ by turning off the fan and sealing the air hole. This immensely improved the printing experience even with less optimal airflow in the room.

Picking A Resin Printer

The Anycubic Photon D2, the largest Anycubic DLP printer. (Credit: Anycubic)

The selection of resin printers to pick from these past years has been nothing short of overwhelming, even if you ignore the veritable flood of slightly different variations from certain manufacturers. Here DLP printers seemed different enough even with their small build space, to the point that I almost got one. Of course the long-awaited successor DLP printers never appeared, and the small build space was somewhat rough and put me off from an impulse buy.

Thus getting an SLA printer as a friend for my FDM printer seemed like the only option, but lacking real project motivation that idea got put on the backburner. It’s really hard to justify a purchase if you cannot justify such a financial expense, after all.

That’s when I suddenly got motivation shoved into my face, in the form of Uniformation contacting me about giving their GK3 Ultra SLA printer a shot. This would be a no-strings-attached chance to have a poke at what looked to be a rather nice and capable printer, even if its price tag of around $1,300 makes it something for people who really know that this is the resin printer they want.

I had heard of this Uniformation company before, as a smaller company that scored a pretty big hit with the somewhat-troubled-but-very-interesting GKtwo SLA printer, which had also featured on my shortlist at one point. The GK3 successor to the GKtwo had been baking in the resin printing community for more than a year by the time I got contacted, with gradual improvements over that time based on community and reviewer feedback.

This is quite different from most 3D printer companies who generally push out a new model in a take-it-or-leave-it sense, so I took them up on their offer for this printer to either play with or use as a very fancy coffee table, whatever I wanted. Based on the sheer verbal abuse I have read aimed at Uniformation during the GK3 development phase on especially sub-reddits, it makes me fairly confident that all major issues were fixed, and that at the very least it’ll be a massive upgrade over the LD-002R that’s pretty much my reference point.

Setting Up

In the world of 3D printers, it would seem that the idea of a flatpack parcel with your new 3D printer – as with my Ender 3 v2 and Neptune 4 bed slingers – has come to an end. A modern CoreXY kinematics FDM printer arrives fully assembled with only few exceptions – like Prusa 3D’s DIY kit offerings – so you’re looking at a very big box that weighs a lot. The similarly priced Prusa CORE One+ for example comes in at a cool 22.5 kg without packaging.

Super easy to move, barely an inconvenience. (Credit: Maya Posch)

The GK3 Ultra ups that to 35 kg, so I had a rather unhappy delivery bloke lug the ~40 kg box up a few steps from his van to where I could use furniture rollers to walk it over to its new home, next to the FDM printer in a sturdy rack. Lifting the printer into the rack was consequently also a bit of a chore, though less due to the weight and more due to the lack of any good places to grip it. I had to put on some good gloves for extra grip and to prevent the aluminium case from cutting into my flesh.

With that chore done, I could finally admire the fine mess that I had gotten myself into. First of all, the build volume is pretty massive, at 300 x 160 x 300 mm, almost fully beating the Neptune 4’s 225 x 225 by 265 mm. The GK3 Ultra is notably quite deep, at about 40 cm before adding space for the power and Ethernet cables, not to mention the provided Wi-Fi dongle if that’s more your thing.

Much of this extra space is taken up by the resin dispenser system, which I’ll cover more later. Within the rack you’ll need at least 85 cm between the two shelves if you want to put a resin bottle into the slot that’s conveniently placed on the top. Fortunately you can also pour resin directly into the vat and even make the flippy lid removable, but it’s a pretty hefty unit either way.

After liberating a lot of foam and goodies from the inside of the printer, I was finally able to start commissioning it. This involved removing a lot of protective film, running the exposure test to verify that the LCD and UV light source are working, and best of all a quick confirmation that the pre-levelled build plate was still level. Compared to the faffing about with four bolts on the LD-002R’s build plate assembly and sheets of A4 paper that I was used to, this was a massive improvement.

Time To Print

The resin that got sent along with the printer uses a special bottle style, which fits in the GK3’s resin feeding system. You slot the entire bottle into the hole on the top of the printer, from where it should automatically slot into all the tubing and widgets that are supposed to handle the resin flow. My only misgivings with this design is that each of these special cartridge-like bottles are only rated for ten insertion/removal cycles, after which you have to buy a new one.

Bottom of the Uniformation resin bottle, with the ports visible. (Credit: Maya Posch)

If you use non-Uniformation resin and are pouring resin into a special bottle, then this can be a bit of a pain, if only to keep track of just how many times you have inserted said bottle before you suddenly have it start draining fully into the vat, or whatever the failure mode here is. Fortunately you can also disable this feature if you’d rather pour the resin directly into the vat, which is probably what I’ll end up doing with typical resin bottles rather than use the provided empty special bottle.

Since the only bottles of non-expired resin that I have lying around use this automatic resin feeding system, I’ll be be giving it a shot. A total of two resin types are available to me, one is the water-washable type that’s supposedly not as smelly as the standard resin that I have always used, and which can be cleaned with plain water instead of IPA.

The other type of resin is ABS-like, which as the name suggests is a ‘tough’ kind of resin, targeting similar use cases as ABS, ASA and kin. For the test I’ll print everything with both WW and ABS, as well as in PLA on the FDM printer, to test both overall workflow, printing of fine detail, water-tight parts, heat-resistance and durability.

Test Setup

For a first printing round, I have so far printed a range of parts on the Neptune 4 in white PLA, and for the GK3 Ultra I will initially just use the ABS-like (AL) clear-blue resin, to not have to switch resins just yet, which is another fun topic to cover. These prints include a range of items like bottles, a miniature figurine and a bunch of LEGO Technic-compatible parts. The latter two serve to give dimensional accuracy a good workout, along with basic durability testing.

The print results and my initial findings will be in the next article, as this one is getting on in words. I’m also more than happy to consider any requests for aspects to test and questions to answer here. Although I have so far printed FDM parts in PLA, I’ll probably also be printing some parts in PETG and conceivably also TPU. Since I only have an open style FDM printer, engineering-grade materials such as ABS, ASA, etc. are naturally not available to me, for both practical and health-related reasons.


Java Ring Restored After Nearly 30 Years

Back in the late 90s when absolutely everybody knew that Java was going to become the one programming language to rule them all, the Java Ring was handed out to folks at Java developer conferences as an example of how it was going to revolutionize smart wearable devices. Recently [Daisuke Yamazaki] got his mittens on one of these collector’s items to see about reviving it.

We talked about these rings and associated iButton devices before, with their intended use being primarily to act as authentication keys. For the Java Ring, this use was mostly just used as a kind of gag, whereby visitors to these conferences could specify their coffee preferences at a terminal, having this programmed into the ring so that they could get their desired cup of literal java at various bean juice dispensers around the conference site.

Talking to one of these iButton devices requires a so-called Blue Dot adapter, which [Yamazaki-san] purchased along with the ring. Although the device happily responded on the 1-wire bus, figuring out how to interact with the original Java-based firmware and answering the question of how much of the original information of someone’s coffee preferences in ’98 were retained would require more sleuthing.

Welcome to the Java wearables future of 1998. (Credit: Internet Watch, Impress)

After recovering an installer for the Dallas Semiconductor’s IB-DE IDE from the Wayback Machine, this posed the next problem. As it was a 32-bit Java binary, which didn’t play nice with the modern Java 25 runtime and belying the ‘write once, run anywhere’ marketing phrase of back then. Downgrading to 32-bit Java 1.8 with since removed communication APIs helped here.

With the IDE in place, the traffic between the Java Ring and the PC-based software could be analyzed to figure out what was going on. This revealed CRC errors that pointed to the built-in lithium backup battery having expired. Unfortunately the stainless steel case is meant to be sealed and thus turn into e-waste the moment said battery calls it quits. Here fortunately a Japanese TV program picked up on these efforts and featured his efforts on national TV.

This led to the happy ending, with some help with others in replacing this battery. This also answered the question of which parts of the firmware and data were in the battery-backed RAM and which in ROM. Although full details of the findings here are a bit scarce, it seems that the original data was lost along with the dead back-up battery, but the ROM retained the JVM and allowed for a new program to be eventually written to the device and retained across reader sessions.

Although these days the various NFC standards have made bulky devices like iButtons rather obsolete, they’re still a fun look at an era when it was thought that lugging a tiny computer as a (key) ring around for authentication was the future. Of course these days we mostly lug an entire 6″ smartphone for that purpose, so maybe the joke is on us after all.

Thanks to [Wood] for the tip.

Detection of a Four-Carbon Sugar in Interstellar Space

Although life tends to find a way, something first has to kickstart said lifeforms. Exactly how the first biological cells formed on Earth – and potentially on other worlds – remains an enduring mystery. Some theories point to the early Earth’s surface conditions as a viable laboratory for the self-assembly of the first viable membranes, RNA, DNA and associated molecular machinery, while seeding of the Earth’s primitive atmosphere by sugars and other precursors from asteroids and kin is required in other theories.

Recently [Izaskun Jiménez-Serra] et al. added to this debate with the reported detection of four-carbon sugars in the form of erythrulose in the interstellar medium. Using the 40 meter radio telescope at Yebes and the 30 meter radio telescope at Granada the signatures of this sugar was detected in a molecular cloud near the center of the Milky Way.

These sugars likely form on these interstellar dust grains from more basic two-carbon aldehydes and alcohols, with them providing conceivably a source of energy for early metabolic processes of developing lifeforms. This specific type of sugar is highly prevalent in Earth’s fruits, and thus its prevalence in interstellar space is at the very least an interesting coincidence, if not another puzzle piece in the overarching question of abiogenesis.

Earth-like LHS 1140b May Feature the First Atmosphere Found on Exoplanet

Finding another planet outside of our solar system that can comfortably be called ‘Earth-like’ is one of those discoveries that — if confirmed — would be a major event. The complication here is that with every exoplanet that we discover through observations, determining the type of planet is hard enough, never mind figuring out whether it has an atmosphere, much less what’s in that atmosphere. This makes a recent report on LHS 1140 b rather exciting, as it strongly suggests that this super-Earth may have something close to an Earth-like atmosphere.

In the paper by [Collin Cherubim] and others in Science, the findings of helium occasionally escaping from its atmosphere have led to considerable excitement, as this time-variable atmospheric escape of helium suggests a helium-rich upper atmosphere that’s further depleted in hydrogen.

It should be noted, of course, that these assumptions are based on observations from roughly 49 light-years away, so there’s always some room for later adjustments. Even if confirmed, the star that LHS 1140b orbits is a red dwarf, with a nearly 25-day orbital period and light levels less than half of what Earth receives from the Sun. This would make the surface of LHS 1140b with its proposed oceans rather dim, even if it’s conceivably at temperatures well within the comfort range of us Earth-based mammals.

At 49 light-years distance, it’s also not close enough that — barring an FTL drive — we could do direct observations or visitations, but if these results hold, it’d be on the short list along with a number of other plausibly habitable exoplanets to check out once we build that first warp drive-powered starship.

Seven Ways to Install Magnets Into Your 3D Prints

Magnets are awesome, so it’s no wonder we love to add them to our 3D prints. Doing so in a way that will actually last is harder, with thermal creep being one reason a simple friction fit will loosen over time, and using super glue to hold a magnet in place can be messy. In a recent video, [Slant 3D] covers seven ways to install magnets in 3D prints without resorting to glue, along with the advantages and disadvantages of each.

With friction, the argument is that you can still use them, but you’d want to use something like cylindrical magnets rather than flat magnets to increase the friction with the thermoplastic. Using an arbor press rather than human primate hand power is also beneficial.

Rather than installing magnets halfway through a print with all the logistics that entails, you can use side slots to install said magnet into, which is much easier, but as with all embedded magnets, you get that plastic barrier between the magnet and its target.

Other methods involve using a bit of extra material that you need to push the magnet past, using something like an arbor press, so the magnets should never just fall out. A wildcard here: spherical magnets, which can be locked in using a similar method, while automatically orienting themselves to an opposing magnet.

The final tip is to never use two magnets in a magnetic lock. Instead, use a cheaper ball bearing or a similar plain metal part on one side instead. Magnets tend to be much more brittle than whatever stainless steel ball bearing or washer you can use on the other side.

Of course, people will always try to install magnets during an FDM print, but before they try to do that anyway, they really should learn about the fascinating ways in which magnets can ruin print beds, destroy nozzles, and otherwise make a total mess of a print. Magnets seem magical. Maybe they are.

Automated Pressure Advance Using a Bed-Leveling Sensor

One of the most crucial aspects of FDM 3D printing is ensuring sufficient material is extruded. Determining the right flow rate can be done manually, but some printers these days automatically perform this adjustment, which is very convenient. [Stefan] of CNC Kitchen investigates how to add similar functionality using existing bed-leveling sensors.

A major complication with extrusion in FDM printers is that the flow rate has to fit the printing speed. However, you can’t just immediately speed up or reduce the flow rate, as the melting filament is flexible and thus acts like a spring, especially as the extruder is exerting significant force on the filament, which adds compression.

The moment you reduce or increase the speed of the nozzle, you can get over- or under-extrusion, but the delayed response by the extruded filament means that you have to adjust for this change in advance. Ergo, the name ‘pressure advance’, also known as the K-value. Obviously, this is a parameter that differs with each material, printer, and other factors, so a direct measurement is always the best.

In the Bambu Lab X1 FDM printer, a Lidar scanner was used to scan various test patterns to automatically determine the optimal setting. This was later moved to the purge section of the extruder in newer Bambu Lab printers. On other FDM printers, the only available sensor in that area is typically the pressure sensor for bed leveling. Could this sensor make a similar measurement?

This wasn’t just an idle thought, but was inspired by the Snapmaker U1, which runs open-source Klipper, with tantalizing glimpses of how it does pressure-advance sensing in its extruder. This extruder also only contains a load cell, as do some Prusa printers. These much more open printers thus provided a test bed for some experimentation.

With load cell data available, [Stefan] measured how various extrusion rates affect the load cell, which can then theoretically be correlated with the appropriate K-values for specific transitions. He created a calibration tool for a range of Prusa printers that works with stock firmware, though this is definitely still a work in progress. There are also a couple of similar open-source projects, such as this Auto PA Calibration project by [Mark].

Overall, K-value presets tend to work pretty well, but adding a pressure-advance calibration feature to existing FDM printers is definitely an interesting idea. There’s also the prospect of lateral sensing using this same bed-leveling sensor, which could allow the printer to sense much more than just the bed.

Remembering the Zilog Z80 as it Turns Fifty Years Old

Perhaps the saddest thing about the Zilog Z80 is that this humble 8-bit microprocessor wasn’t allowed to live until its 50th birthday. This, fortunately, doesn’t prevent people like [David Oberhollenzer] from reminiscing on this influential processor and what it means to them personally.

First released in July of 1976, this humble 8-bit miracle would go on to power not just a range of home computers, but also be found in everything from industrial controllers to arcade systems. Despite this success, the new owner of Zilog — Littelfuse — decided to put an end to this winning streak in 2024 for the stand-alone processor and its peripherals.

Although the original Z80 ecosystem ceased production, this didn’t prevent hobbyists from creating new operating systems for it, let alone entire new development toolchains, or demonstrate multitasking on the Z80.

Meanwhile, the Z80 architecture is still very much alive and kicking, such as in the form of the eZ80 SoC in the TI 84+ CE calculator that [grubbycoder] ported Sonic 2 from the Z80-based Sega Master System.

Among all of this modern-day Z80 goodness, we also have a few gems from the past to admire, such as the OS that Zilog made for this architecture in the form of Z80-RIO, which was sadly not as successful as the hardware.

Write 2D and 3D Games in Modern MoonBASIC

One of the major strengths of the BASIC programming languages has always been their no-fuss setup and rich set of commands for operations that would take considerably more work in a bare-bones language like C. MoonBASIC continues this legacy with a BASIC variant optimized for both 2D and 3D game development.

Included in the package are Raylib, Box2D, and Jolt, whose functionality is exposed via over 4,200 commands in their respective namespaces. You can also download a whole IDE package based around VS Code, use it on the command line, or add it to an existing VS Code installation.

A quick glance at the ‘getting started‘ guide gives a pretty good idea of what to expect of MoonBASIC, including a range of custom language additions and support for PBR materials, dynamic lighting, and other modern game engine features.

Whether writing a game in BASIC was on your bingo card for this year or not, it might be worth taking a look to see whether it’s your jam. After all, if BASIC was good enough for both AI and game development in the 1980s, surely it can be used for complex games in 2026.

How Octopuses Hacked their Ribosome to Become Smart

A fascinating aspect in evolutionary biology is that of convergent evolution — whereby similar structures and functions evolve independently from each other. The highly advanced nervous system of octopuses is a good example here, displaying levels of intelligence and capabilities far beyond those of other cephalopods and matching that of primates, despite no evolutionary link here. Exactly how octopuses developed this rather unique capability remained a mystery, though recent research by [Rishav Mitra] points at the rather unique ribosomes in these animals.

Ribosomes are the molecular machinery at the core of each cell that enable the synthesis of proteins. Due to their highly crucial role, they tend to remain evolutionary unchanged, which makes the big change observed in the octopus (i.e. order Octopoda) in the form of this H88 rRNA break quite remarkable.

Common octopus (<i>Octopus vulgaris</i>). (Credit: Albert Kok, Wikimedia)
Common octopus (Octopus vulgaris). (Credit: Albert Kok, Wikimedia)

This H88 break increases the accuracy of translated proteins, something that is essential for complex nervous systems as it reduces cases of misfolded proteins (proteinopathy). Because of how well-preserved ribosomes are across species, the researchers were able to run a number of experiments including a similar rRNA break in E. coli that confirmed many of the assumptions about how these octopus ribosomes performed.

Since proteinopathy results in misfolded proteins that are either useless or harmful to the organism – as seen in various human diseases – this can especially harm long-lived cells like neurons. Unsurprisingly, we can see a similar change to ribosomes in other animal groups, including that of us primates. Although the reasons for octopuses to develop more complex nervous systems wasn’t due to social pressures but rather to cope with highly complex and dynamic environments, it would seem that both types of environmental pressures led to the same convergent path, with a little ribosomal help.

EU Adds Exemptions to User-Serviceable Batteries Rules

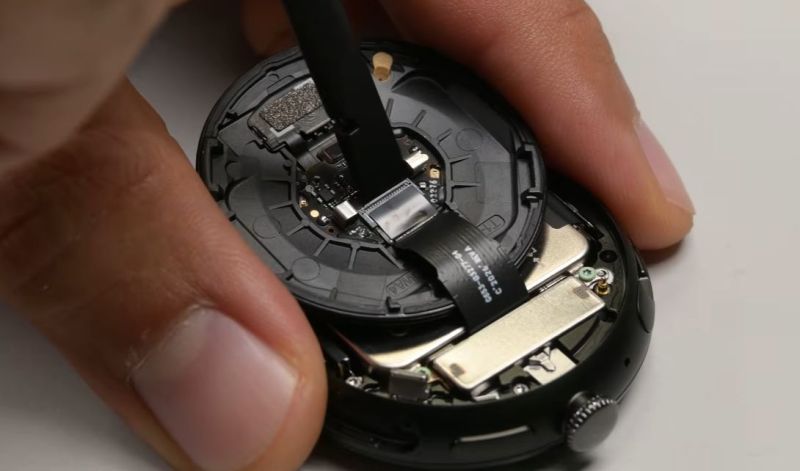
Built-in batteries put a timebomb inside devices, with especially the calendar aging feature of Li-ion chemistries setting a hard limit on when you’ll have to toss the device or figure out a way to replace the battery somehow. Here the EU’s Battery Regulation policy with the 2027 implementation of the user-serviceable battery requirement provided a lot of hope. Now six new categories of exemptions are diminishing what could have been a bonanza of easy repairability.

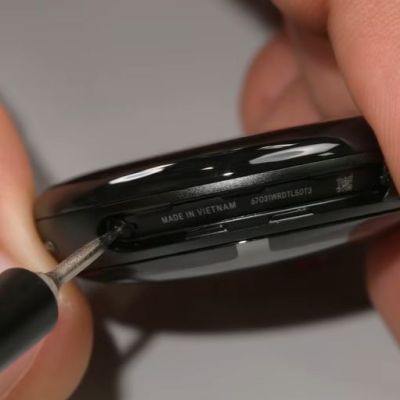
Most notable here are smartwatches, fitness trackers, wireless earbuds and other so-called ‘wet devices’, which as GSMArena also notes is an area where having a user-replaceable battery might affect features like being water-resistant. Something which is also relevant for e.g. outdoor wireless speakers. There’s also a new exemption for smartphones, where if its battery retains at least 83% of its original capacity after 500 charge cycles, battery replacement has to be only replaceable by professionals. Which is probably code for ‘glue, hotplates and prying tools’.

Considering just how daft of an idea built-in batteries are, this is somewhat disappointing to see. While it’s understandable that ‘wet devices’ get such broad exemptions, it should be noted here that advanced technologies like gaskets are neither complicated nor expensive. You can even hand the average user a tube of RTV silicone and let them go to town on a part in the happy knowledge that there’s never such a thing as ‘too much’ RTV silicone.

It is likely that there was some pressure from the industry on the EU to not change too much, but at the very least us happy few in the EU will be getting a new Nintendo Switch 2 with easily replaced battery in both the main unit and its controllers. For the average rechargeable device you keep kicking around the house this should also still apply as long as its manufacturer cannot squeeze it into one of these exemption categories.

The Right to Repair battles shall continue.

Wireless LCD Streaming for the ANENG AN870 Multimeter

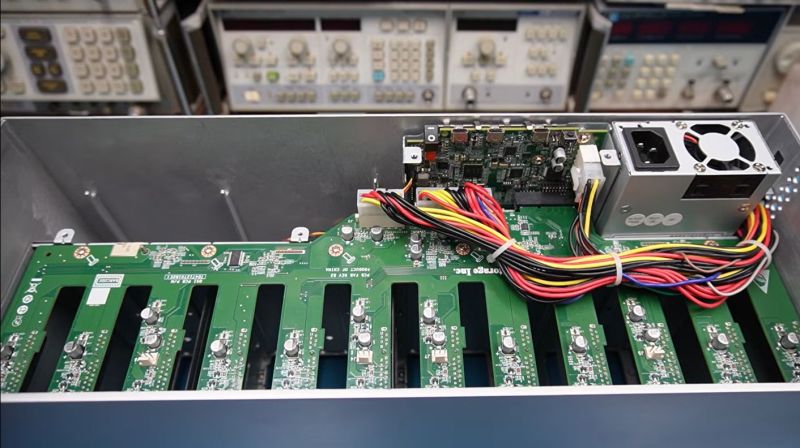
Having the information shown on the display of a digital multimeter also recorded off-screen can be incredibly useful, but unless the device exposes something like SCPI on a network interface, you will have to get creative. In the case of the budget ANENG AN870 digital multimeter (DMM), [Bits und Bolts] really wanted to show its display clearly as an overlay in OBS instead of just the camera view, but with said DMM not offering an easy way he had to resort to just copying the data sent to its multiplexed LCD.

The GitHub project page contains the background information, as well as the instructions if you too have this DMM. It might of course also be useful as the jumping off point for your own DMM modification. In total the project requires three modules: an RP2040 Zero and HC-12 433 MHz transceiver on the DMM side, and another HC-12 plus ESP32-C3 module on the receiving side. A boost module is also added to generate 3.3 V out of the 2.4 V – 3 V provided by the meter’s two AA cells.

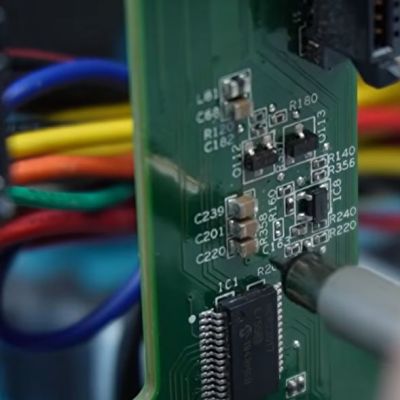
To be able to read the LCD signal lines, a custom PCB was created that is installed inside the DMM. With the LCD’s segments mapped, this meant being able to send a perfect copy of the display’s state to the ESP32-C3 and from there making it available via WiFi.

Even Chemical Bonds Obey Einstein’s Relativity

Although Einstein’s Theory of Relativity is typically associated with really large and really heavy things like planets in solar systems and big things in universes in general, it turns out that even at an atomic scale its effects can be measured. These are the findings of Brown University scientists, whose measurements on very heavy elements indicate the presence of relativistic bonds.

Unfortunately the paper by [Kirk A. Peterson] et al. in Science is paywalled without a convenient ArXiv version to ogle details beyond the supplemental, but the Brown press release gives quite a few details by itself, including the use of photoelectron spectroscopy to measure the strength of the bonds between the examined nuclei.

The essential summary is that our concept of how triple bonds work may be flawed, with the assumption that there are distinct sigma and pi bonds, the latter being the awkward, weaker ‘side bonds’ where the overlapping atomic orbitals do not directly line up as with a sigma bond. As it turns out, if there’s enough mass involved, relativistic effects smudge both types of bonds together into a hybrid type of bond.

Although the sigma-pi triple bond theory still seems to hold up for lighter atomic nuclei, in the case of the examined bismuth-carbon triple bond, the typical, slightly radioactive bismuth-209 nucleus with atomic number 83 is heavy enough to affect the orbital mechanics and with it the chemical bonds that these produce.

This is an important finding, as it affects our basic understanding of how strong the bonds between certain elements are. Pi bonds are after all significantly weaker than sigma bonds, so a hybrid form would effectively make triple bonds involving a heavier element stronger than one between lighter elements.

Hayabusa2’s Next Target is a Tiny 11 Meter Asteroid

Launched in 2014, Japan’s Hayabusa2 spacecraft completed its primary asteroid sample return mission all the way back in 2020. But with the main spacecraft still healthy, the intrepid little probe was assigned new missions — such as its future investigation of asteroid 1998 KY26, a rather unassuming 11 meter diameter rock.

Artist impression of Hayabusa2 firing its ion thrusters. (Credit: DLR, Wikimedia)

Earlier this month Hayabusa2 flew by the 450 meter 98943 Torifune at a distance of 800 meters, close enough to get an up-close look of its surface of mostly silicate minerals. With the spacecraft flying past at around 5 km/s, this posed some challenges with tracking, especially since its systems and instruments were not designed for high-speed tracking.

With that mission now complete, 1998 KY26 – first discovered in 1998 – is next on the menu, though this will have to wait a while. Currently it’s estimated that the two will not meet until July 2031.

Once they do meet up, after Hayabusa2 zips twice more past Earth, it’ll be another major challenge for the by now rather degraded spacecraft. Its sensors have suffered radiation and other types of damage, while its ion engines are quite depleted. The goal at this target asteroid is to enter orbit, deploy its last target marker and projectile, before attempting a landing, probably at one of its poles.

As likely the final mission for this spacecraft it’ll be very educational in many ways, not the least of which is that of planetary defense, but also that of deepening our understanding of these asteroids and the many varieties that we share space with.

Hacking Around the Financial Pain of New 3DS XL Top Screens

With Nintendo’s 3DS experiencing a bit of a renaissance lately, prices for functioning systems have shot through the roof. Getting a busted one with a broken screen is a lot cheaper, but then you run into the eye-watering price difference between a replacement top screen for the regular version and the larger XL variant. The latter costs about the same as a whole new used 3DS, while the former goes for peanuts. Here the solution is obvious, with [Skawo] demonstrating how they hacked the cheaper, smaller top screen into a New 3DS XL.

The price difference on AliExpress as shown in the video is on the order of $120, with the smaller screen going for less than $10. Since they both use the same connector pin-out and display technology, you can plug either display into the New 3DS XL mainboard.

Where you’ll run into issues, other than the replacement display being obviously not XL, is the physically shorter flat flex cable for the controls that forces the display to be installed in an offset manner. You need jailbroken firmware like Luma3DS here to adjust for the screen offset. Filling in the missing screen real-estate is the other issue you have to patch over somehow, which was done here in barbaric fashion with some cardboard.

Beyond that it does work, and as a fix to at least get a broken New 3DS XL back into the game it’s worth considering. Do note that there’s a difference between regular 3DS and New 3DS (second generation) screens with neither being compatible, so be careful before you try such a fix.

Benchmarking Repairability Scores with an Asus Tablet

A few years ago, France introduced a mandatory repairability score for consumer goods like laptops and tablets. It involves five criteria that range from documentation and availability of spare parts to ease of disassembly, with the manufacturer using a government-provided checklist to determine their score.

Recently Asus determined that their Asus ROG Flow Z13 – model GZ302EA – scored a 10 out of 10 using this system. This led [iFixit] to run the same tablet/laptop hybrid through their own rating system.

You can find the filled-out spreadsheet for this device here, with this Asus-provided site showing a list of devices that all score a 10/10 or a measly 9.9/10 according to this system. As a self-reported score it is hard to take it as the objective truth, as there is every incentive for the manufacturer to tweak the truth to their own benefit and gloss over inconveniences. This is where it’s interesting to compare it with [iFixit]’s 7/10 score.

On documentation, Asus gives itself a perfect score but [iFixit] finds it to be incomplete. Removal of one fan requires the disassembly of the cooler with its liquid metal thermal interface on the CPU. The wireless card, and most ports, are soldered to the mainboard. On the bright side, after you get the screen off, the insides are quite modular, which is a plus.

[iFixit] dings three points: for documentation, soldered-down components, and a fan accessibility glitch. Parts accessibility outside of France is also significantly harder, but one can hardly blame the French system for that. Overall the French self-reported rating would seem to be a fair start, but depending on which criteria you define as required you may find yourself disagreeing with the score.

In the case of LPDDR5 RAM one could argue for example that with LPCAMM2 modules soldering RAM onto the mainboard ought to be a thing of the past, and Wi-Fi modules should always be removable as well. You can take that up with the French regulators.

The Neo Geo Does Run DOOM After All

Demonstration of the DoomGeo port of Doom to the Neo Geo. (Credit: Sabino, GitHub)

Perhaps the most ridiculous statement that anyone can make is that a computer system with clearly enough processing power ‘cannot run DOOM‘. This is why we accept the premise that a PDP-11 cannot run this game, but something on the order of a Neo Geo gaming console with its 68000 processor and for the time impressive GPU definitely ought to be able to.

The stated problem here is a lack of RAM for a framebuffer, with the CPU only having 64 kB to play with. This limitation now has seen two different approaches to try and circumvent it, as covered by [Modern Vintage Gamer].

The first project here is Doom64kB, which as the name suggests tries to somehow work with this system RAM limitation. It uses the Doom8088 port for the original IBM PC and similar Intel 8088-based systems. This had to massively reduce the feature list, including the lack of texture mapping for floors and ceiling, no saving or loading, and no music.

The other project is DoomGeo, which doesn’t try to bend the Neo Geo hardware to its will, but accepts the Neo Geo way of doing things: involving sprite strips, pre-baked graphics, fix-layer UI, and a minimum of runtime data. This of course drastically changes how the Doom game engine normally works, with its framebuffer-based rendering.

From this we can thus conclude that it’s not so much the processing power that limits where DOOM can run, but more of how framebuffer-friendly the system architecture is, yet with some ingenuity and a complete rewrite of the game engine even that is no major obstacle.

(Top image: Neo Geo AES console. Credit: Evan-Amos, Wikimedia)

UDP Broadcasting and the Joys of IPv4 Subnetting

In the previous installment on UDP broadcasting and service discovery, the basics of both were explored, including an implementation in the form of NyanSD and its protocol. Contained in the comment section was a very good demonstration of why one of the most exciting aspects of software development is the opportunity to share your latest creations with other people. This being the ability to get solid feedback on all the points – including any potential boneheaded omissions – that you really should address, whether intentional or accidental.

The most pertinent point raised was definitely that of broadcast addresses and IPv4 subnets, with the latter topic especially being something that the sysadmins at the office would talk about all the time, but which us software developers were always happy to ignore as something that didn’t concern us. Turns out the joke was on me and everyone else – like our esteemed readers – who thought that they could escape the fascinating world of subnets, as today we’ll take an in-depth look at what subnets are and how they are relevant to the world of UDP network discovery.

I somewhat alluded in the first article to the topic of ‘which broadcast address to use’ as being somewhat of a rough topic to figure out, which is clearly why I just stuck to a blatantly ‘works for me’ /24 subnet that usually will work on networks, until it does not.

Subnet And Conquer

Basic subnetting concept. (Credit: Michel Bakni, Wikimedia)

The short version of ‘what is a subnet’ is to point at the subnet mask that we have been mostly mindlessly mashing into networking configuration dialogs along with the IPv4 address for many decades now. Usually this takes the form of 255.255.255.0, which is just the human-readable version of the actual bitmask. Here the loopback interface already tends to use 255.0.0.0 as its netmask, which is a detail that tends to be easy to gloss over as this is just one of those local OS things.

Putting netmasks in the crudest and simplest terms, they are a bitmask that is used to identify how an IPv4 pool of addresses is split up by defining which bits of the 32-bit IPv4 address identify a subnet. Normally we call the trailing part of an IPv4 address (the .123) the host identifier, with the preceding section the network identifier.

By masking part of this host ID and using it to create a subnet identifier, we can then use this for additional routing, just at the cost of a reduced number of possible host IDs within that subnet.

As an example, the common 255.255.255.0 mask identifies the first 24 bits (3 bytes) of the 32-bit (4-byte) IPv4 address, hence the mask being referred to as /24. With this mask, the remaining host ID bits allow for 256 hosts, of which two are not used for hosts: the first (e.g. 192.168.0.0) and last (e.g. 192.168.0.255) in the range. The last host ID in the range forms the broadcast address for that subnet.

This is why, for a /24 subnet, you can generally get away with just slapping a .255 on the end of an interface’s address, but also why for other subnet configurations it’s likely to explode violently.

To get briefly back to the loopback’s /8 style netmask, this means a single subnet with a maximum of 16,777,214 hosts, which ought to be sufficient for local system networking shenanigans. Its opposite extreme would be the /31 style netmask, which with just two potential host IDs is practically useless.

IPv6 subnetting is similar, but due to the much larger address pool and differences in the protocol this is a whole other kettle of fish that is as likely to send a network administrator’s heart racing in excitement as it is to make the average software developer run away screaming. This can be a fun topic for another day, perhaps.

This overview of IPv4 subnetting also skips over details like the different classes of IPv4 subnets beyond the Class A type here, but those are happily left to sysadmins and kin for now.

Sub-casting

In order to thus obtain the broadcast address for a given network interface you need to know two things: the IPv4 address and its associated netmask. From this you can then tell three things: the subnet ID, the broadcast address in that subnet, and the current host ID. Of these we only really care about the the second item.

Although you can obtain the broadcast address yourself by applying the netmask to the address, the OS’s APIs tend to happily give you the precomputed broadcast address. If that’s not your style or not an option, a manual procedure is to:

  1. Determine the number of host ID bits using the netmask.
  2. Set all bits to 1 in these bits to get the highest possible host ID.
  3. Use this value along with the original masked (i.e. network ID) bits to obtain the broadcast address.

If we thus start with a 192.168.0.0/24 network, we end up with 192.168.0.255, while for a 192.168.0.0/26 network with just six bits available the maximum value is 64, ergo we get 192.168.0.63, since we start counting at 0.

With this we can now broadcast UDP packets on any interface without any (major) worries.

Local Broadcast Address

A small glitch in the whole above story is that there’s actually another broadcast address, one which is always the same for each interface and can be considered to make the whole preceding explanation completely irrelevant. This being the local, or limited, broadcast address, which is either the best thing since sliced bread or the worst sin ever committed in the history of IP networking, depending on whom you ask.

This cheat code takes the form of the address 255.255.255.255 and if you send a packet on a UDP socket to it, you’ll get happy UDP responses from any service that is listening on the specified port. This raises the point of why you’d not just use this broadcast address on all interface, rather than bother with all the earlier described nonsense.

The only major difference between this local broadcast address and the earlier described directed broadcast address is that the latter can also be used to target a foreign network, instead of just the local network. This makes it a very attractive option if you just want to query the local network with UDP broadcast packets.

As for why you’d not want to use a local broadcast address, I couldn’t really find any references or citations on why this would be the case. Both would appear to be perfectly valid approaches to broadcasting, each with its own pros and cons.

Bugs

One final topic was my mistaken hardcoding of a /24 style broadcast address in NyanSD. Here reader ziew helpfully pointed me towards the Poco::Net::NetworkInterface::broadcastAddress() function, which seemed perfect. Unfortunately Poco’s implementation at least on Windows 10 appears to be rather broken.

After getting only 0.0.0.0 as broadcast address from this function, I had a bit of a look at what was happening, including checking what I got as subnet mask both for the default index parameter and for the next index. Across two different Windows 10 installations and both GCC in MSYS2 as well as MSVC 2017/2022 with various versions of Poco the returned values were… interesting enough to file a bug report on the Poco issue tracker.

Clearly this isn’t going to be fixed just yet, but on the bright side the horrific atrocity that I committed by hardcoding a /24 broadcast address will still work on basically every home LAN out there that NymphCast is likely to be used on.

Maybe I could just switch to a local broadcast address and that’d be even better. Feel free to torch down this idea in the comments, just be sure to provide solid reasoning and cite your sources.

A Complex Topic

Writing out the above pretty much clarifies I think why past me got a bit overwhelmed when trying to ‘just do a UDP broadcast thing’. Even just scratching the surface of IPv4 subnets and not even venturing into IPv6 territory makes one already feel a bit antsy.

Certainly, one could totally argue that anything other than a /24 network is unlikely to be encountered outside of certain government and business networks with either very specific needs, very enthusiastic sysadmins, or both, but it’s always better to design software with such real-life scenarios in mind.

Using Your Own RBMK Reactor Control Center At Home

To give people the most intimate RBMK experience, the [Chornobyl Family] has been working tirelessly at not only replicating the original RBMK reactor control room and its SKALA industrial control system’s controls, but also to create a version that you could tinker with at home if you ever fancied getting your own RBMK operator license. This starts with the operator console, with its use demonstrated in a recent video including a range of common commands.

In this video the entering of codes on the console to interact with the system is detailed, including the logic behind it. In the absence of large displays to display many parameters and such, this way the operator could ‘talk’ with the control system, including obtaining current sensors readings and the setting and changing of setpoints. From the same console you can also select and run programs, which is useful for automating tasks, like monitoring coolant flows.

In the second video not only the construction of the control panel is covered, but also a visual representation of the simulated reactor core which is displayed on a connected monitor. Although not a part of the original SKALA system as such, a much larger version existed as a wall-sized physical version inside the control room, so it’s definitely more home-simulator friendly.

We previously covered this SKALA system that controls RBMK reactors, as well as the 1990s modernization of the Chornobyl Nuclear Power Plant.

❌