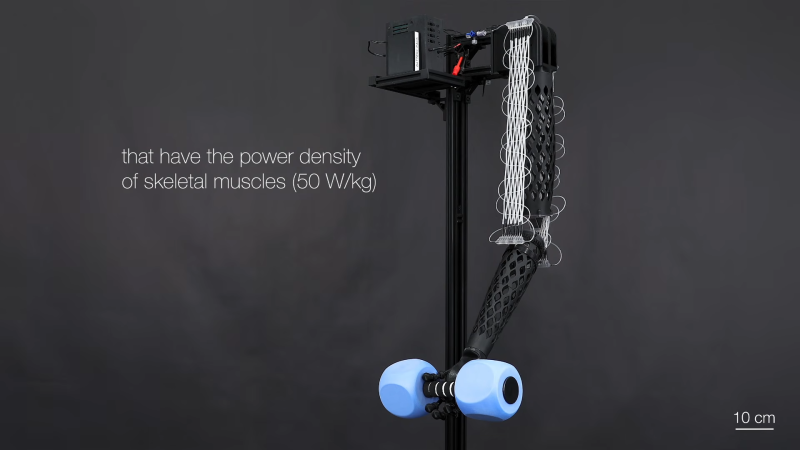
At the current rate of robotics development, you might assume that we’re close to Skynet taking over. However, while we likely wouldn’t do well in a physical fight against a robot, we can at least keep the bragging rights of having the cooler actuators. Or at least, that was the case before a new actuator came into town — introducing “Electrofluidic Fiber Muscles”.
Traditional robotic actuators use motors of some kind with a variety of gearboxes or linkages to turn rotational movement into usable movement. This isn’t always the most effective way to run some robotics movements, especially when modeling humans. This is why many have turned to pressurized modes of actuation. Though most don’t show quite the promise of the new player.
Electrofluidic Fiber Muscles use pressure to shorten muscle strands, similar to past actuators. However, these are a tad different, taking advantage of electrofluidic pressure. A small current under high voltage is able to drive a pressure gradient in a long tube. This tube can then be connected to both an extensor and flexor portion of an actuating circuit, similar to a biological mechanical system. Better yet, this driving pressure pump can be spun around the fibers themselves, making a tight package.
Unfortunately, it will probably be a bit till we see this inside a hobbyist robot. Until then, make sure to check out some other actuator feats!
Computer-generated imagery (CGI) has largely replaced physical models in major film productions these days, but the transition didn’t exactly happen overnight. For a time there was an effort to blend the physical and digital, which allowed animators on productions such as Jurassic Park to work with newer technology in a way they were familiar with. [Corridor Crew] took this concept a step further by manipulating digital models with nothing but a webcam.
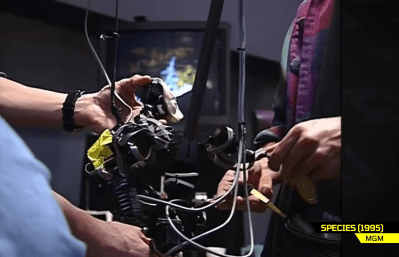
Early in the production of CGI, animators found a purely digital workflow to be less intuitive than the use of physical elements such as puppets. Feeling the weight and touch of a miniature with joints and limbs made for a more natural animation, so they created the dinosaur input device to map movements of a physical model into a digital recreation.
Puppeteered humanoid input device for the film Species
Unfortunately for the future of dinosaurs made of motion sensors, none of these devices really caught on and the technology is essentially non-existent today. [Corridor Crew] decided to give the concept another chance with the application of newer motion capture research. Using just a camera and a small human miniature allowed for full animations to be made using one’s own hands. The motion capture plugin can be found here if you want to try it for yourself!
At the end of the day, the need for a stop motion intermediate was found to be unnecessary. That being said, there is some really cool tech discovered throughout its history. If you want to discover even more film tech, maybe try out an adventure making your own film camera!
Of all innovations adopted by the maker community within the past couple of decades, one stands among the rest on top for anything regarding manufacturing. It goes without saying here at Hackaday how many projects have been reliant on using the technology to turn their ideas into reality. 3D printing has been a maker community invention and, in return, has expanded this hacky community into something that anyone with an imagination can get into. It also goes without saying that the layer-based tech imposes limits on what we can actually create: think overhangs and layer adhesion. However, there’s a possibility that a recent offshoot of this scrappy community has the power to eliminate some of these faults.
Volumetric additive manufacturing (VAM) is a young technology that has a similar start to many new tech toys, including the original SLA of the first 3D printers. That is expensive and completely stuck in the laboratory… Fortunately, that’s not where 3D printing as a whole stayed, as the RepRap project managed to bring the obscure technology to the hobbyists’ main stage. An entire group of people formed and spent countless hours until the useless pieces of poorly extruded plastic could form parts impossible to make with anything else. A cool quirk of history is that it likes to repeat: examples spur recreation, and this appears to be happening with the technology found within VAM printing.
History
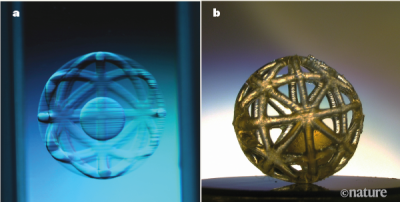
Hold up for a second. While we have covered VAM here before at Hackaday, it’s not exactly the most well-known tech or the easiest to understand. So what is it? Starting from the beginning and simplest forms, VAM is similar to the more common SLA printing. Using a light source and light sensitive resin, both of these methods can create entire physical objects by solidifying or curing specific areas of a vat or vial of resin. SLA will often use something like a laser and layer by layer “draw” the model until the entire geometry is finished. A quirk of most of many photosensitive resins is that they need to overcome a threshold before they can start curing. This allows VAM to do something a bit different. The earliest methods of VAM used intercepting lasers which allowed selective curing only where these beams were intercepted. One singular spot at a time would be able to overcome the threshold required for printing, allowing you to build up most geometries.
Xolography Print
This works, but for more complicated models there’s more effective methods. One type has been covered here before called Xolography, still using intercepting beams, however with differing wavelengths which allows for more finite control. This is effective, but the resin is complex, requiring two-wavelength-photon-sensitive photoinitiators. Introduce the current standard in VAM printing, computed axial lithography (CAL). This method finds itself using existing methods found in traditional tomography, such as CT scanners. CAL methods are basically reverse tomography, where a model is used to create projections to be projected in printing. These projections allow dose control in each “voxel” of resin from changing the projection as the volume of resin is rotated. When ideal, this means that the entire model is printed at once. No layers needed for printing, and printing in minutes rather than hours.
Open-Sourced
Cool, but why should you care about this tech? Because you could start using it now! Just like the RepRap project before it, VAM has OpenCAL. OpenCAL was started by the same lab that originally created the axial version of the technology. UC Berkeley released the first OpenCAL around 2019 which was… well a start.
Functionally practical for only big budget research, it was far too expensive and complicated for any hobbyist with a 9-5 to realistically touch. Last year saw a new model presented at Open Sauce which used a consumer projector and common hobbyist electronics. While this was an improvement, there are three barriers to VAM printing; the hardware, software, and chemical resins make it a challenge for any individual alone. A newer version of the hardware was quickly put together for this summer. This helps with the hardware element, but there’s two new aspects being released alongside OpenCAL V2 for other unsolved problems.
Software: Tomo
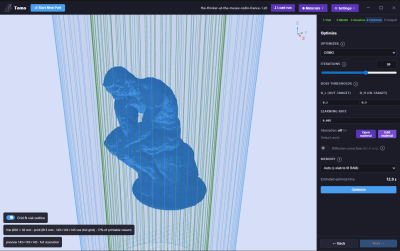
Tomo with the Thinker model being prepped
For a little while now there have been various software packages available for allowing easier use of whatever VAM printer you might have, however these had various problems. From being undocumented to being complicated for anyone without comfort in command line , something different would be needed. A standalone application would certainly work, and low and behold that’s exactly what’s being tried here, called Tomo. Tomo allows you to use an OpenCAL printer with little thought or expertise, or ideally any other type of VAM printer.
Chemistry: Formlabs Resin
Large form factor VAM print
Material science is always a particular challenge for the open source community. Unlike software, you can’t distribute unlimited copies of your perfect mix of photosensitive resin without special chemical clearances and certainly not for free. Some of the first 3D printers from RepRap would use a nylon weed wacker line in place of the standard PLA of today. Unfortunately there’s less flexibility in the fine tuned resin found in VAM. This resin has to have a nonlinear photo-reaction for selective curing, be fairly transparent to the reactive wavelength, and be very viscous to prevent resin movement during printing. Formlabs, which makes resin printers and resins, has gotten into the act. Through talks between the OpenCAL team and Formlabs, an agreement for production of this special resin is being worked out, allowing for far cheaper material.
Hardware: OpenCAL
OpenCAL V2 printer
Of course this leaves the printer itself. OpenCAL is designed for a variety of different sized printing volumes, projectors, or anything else you might have in mind. Expect printing anything from this printer to finish in the span of minutes. While it can do the same small prints found in the older model of OpenCAL, experiments involving larger form factors have been attempted. But if you want more details make sure to check out the documentation here or join their Discord channel!
Future of VAM Printing
So how far can this technology really go? Could it pass traditional methods of 3D printing? Well, it’s certainly faster than traditional printing, however, there’s still plenty of trouble when trying it out. How do you remove partially cured resin off your print? How do you actually tell when the print is done? These are problems that are being fixed right now by the community, and maybe you can be the one to fix something holding it back. It’s fair to say that the community that has propped this technology up to where it currently stands is who is going to decide where it goes.
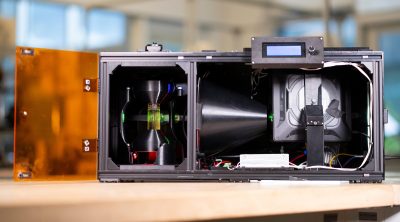
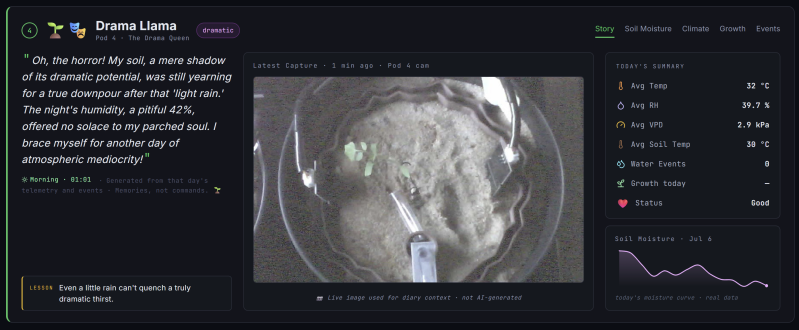
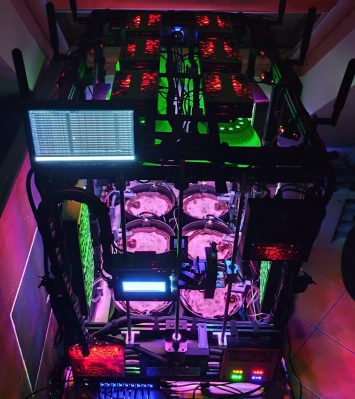
Oh, the farming lifestyle…living off the land, fending for yourself. But who’s got time for all that? For the modern hacker, the best option in the garden space may be this over-engineered automated AI tomato farm created by [Gerd Nicolay]. You can even interact with it right now through the magic of the Internet.
[Gerd] started off with your run-of-the-mill pot and plant, choosing the humble tomato to keep the system simple. Then things started to escalate, with the addition of automatic lighting, watering, and data logging environmental parameters like humidity. Now we’re getting somewhere, but there’s more that can be added. How about an entire AI council to monitor and decide the fate of each individual tomato while recording an entire storyline to go alongside the growing cycle?
That’s right, four different models collaborate to ensure only the utmost quality of care for these tomatoes based on camera feeds, humidity, and various other environmental factors being recorded constantly. Is this a little overkill? Maybe for those who have even a modest sense of gardening knowledge — but who can bash the mountain of documentation and data collection on these wonderful little plants?
Perhaps the best part: you can recommend actions for the AI counsel to take from the comfort of your own web browser. While the TomatoFarm might be slightly unnecessary for the average farmer, if you want to try a more reasonable monitoring system, we have you covered too!
Flight sims are wonderful to play around with to get immersed in the position of a pilot. Racing sims can give you a thrill that can only be beaten by the real thing. However, most of this tech is on the more expensive side, so it would be great if you could use some of the hardware already found in your house. Many Sony headphones already have rotation and movement data built in for spatial audio, so why not start there?
[Nicholas Slattery] had this very idea and has produced an open-source application to connect your headphones straight to your sim. There’s a surprising amount of support built into many headsets that use a known protocol called the Android Head Tracker HID protocol. This allowed [Nicholas] to connect a family of Sony headphones straight into OpenTrack, which is often used with flight sims. The best part is you can still use the headphones as normal with a Bluetooth connection.
If you want to give this a try with your own rig, check out [Nicholas]’s GitHub here. While flight and driving sims might be expensive to put together, it’s never too hard to hack together something to lower that barrier! Whether it’s a flight sim force-feedback joystick or driving sim hand-breaks we got you!

 Login
Login