Reading view

There are new articles available, click to refresh the page.

Italian Baked Eggs Recipe

Some egg recipes are so simple, but still manage to feel a little special. These Italian baked eggs are one such recipe. Eggs are baked in a flavourful tomato sauce (marinara), topped with parmesan cheese and finished with some fresh herbs. It is simple, comforting and so delicious with some toasted bread. Baked Eggs Recipe...

Read More

The post Italian Baked Eggs Recipe appeared first on Yummy Tummy.

Crispy Corn Recipe

Crispy Corn Recipe

Crispy Corn is a popular Indian restaurant-style snack made by coating boiled sweet corn kernels with cornflour and rice flour, then deep-frying them. The fried kernels are tossed with chilli powder, chaat masala and other seasonings. The coating is crisp, while the corn remains tender and mildly sweet inside. Crispy corn is served hot as...

READ: Crispy Corn Recipe

Creamy Chicken Kali Mirch (Black Pepper Chicken Gravy)

Chicken Kali Mirch in a rich white gravy is a stellar chicken recipe that’s comforting, satisfying and so tasty. This chicken curry is ready in under 45 minutes and can easily make a weeknight dinner feel special.

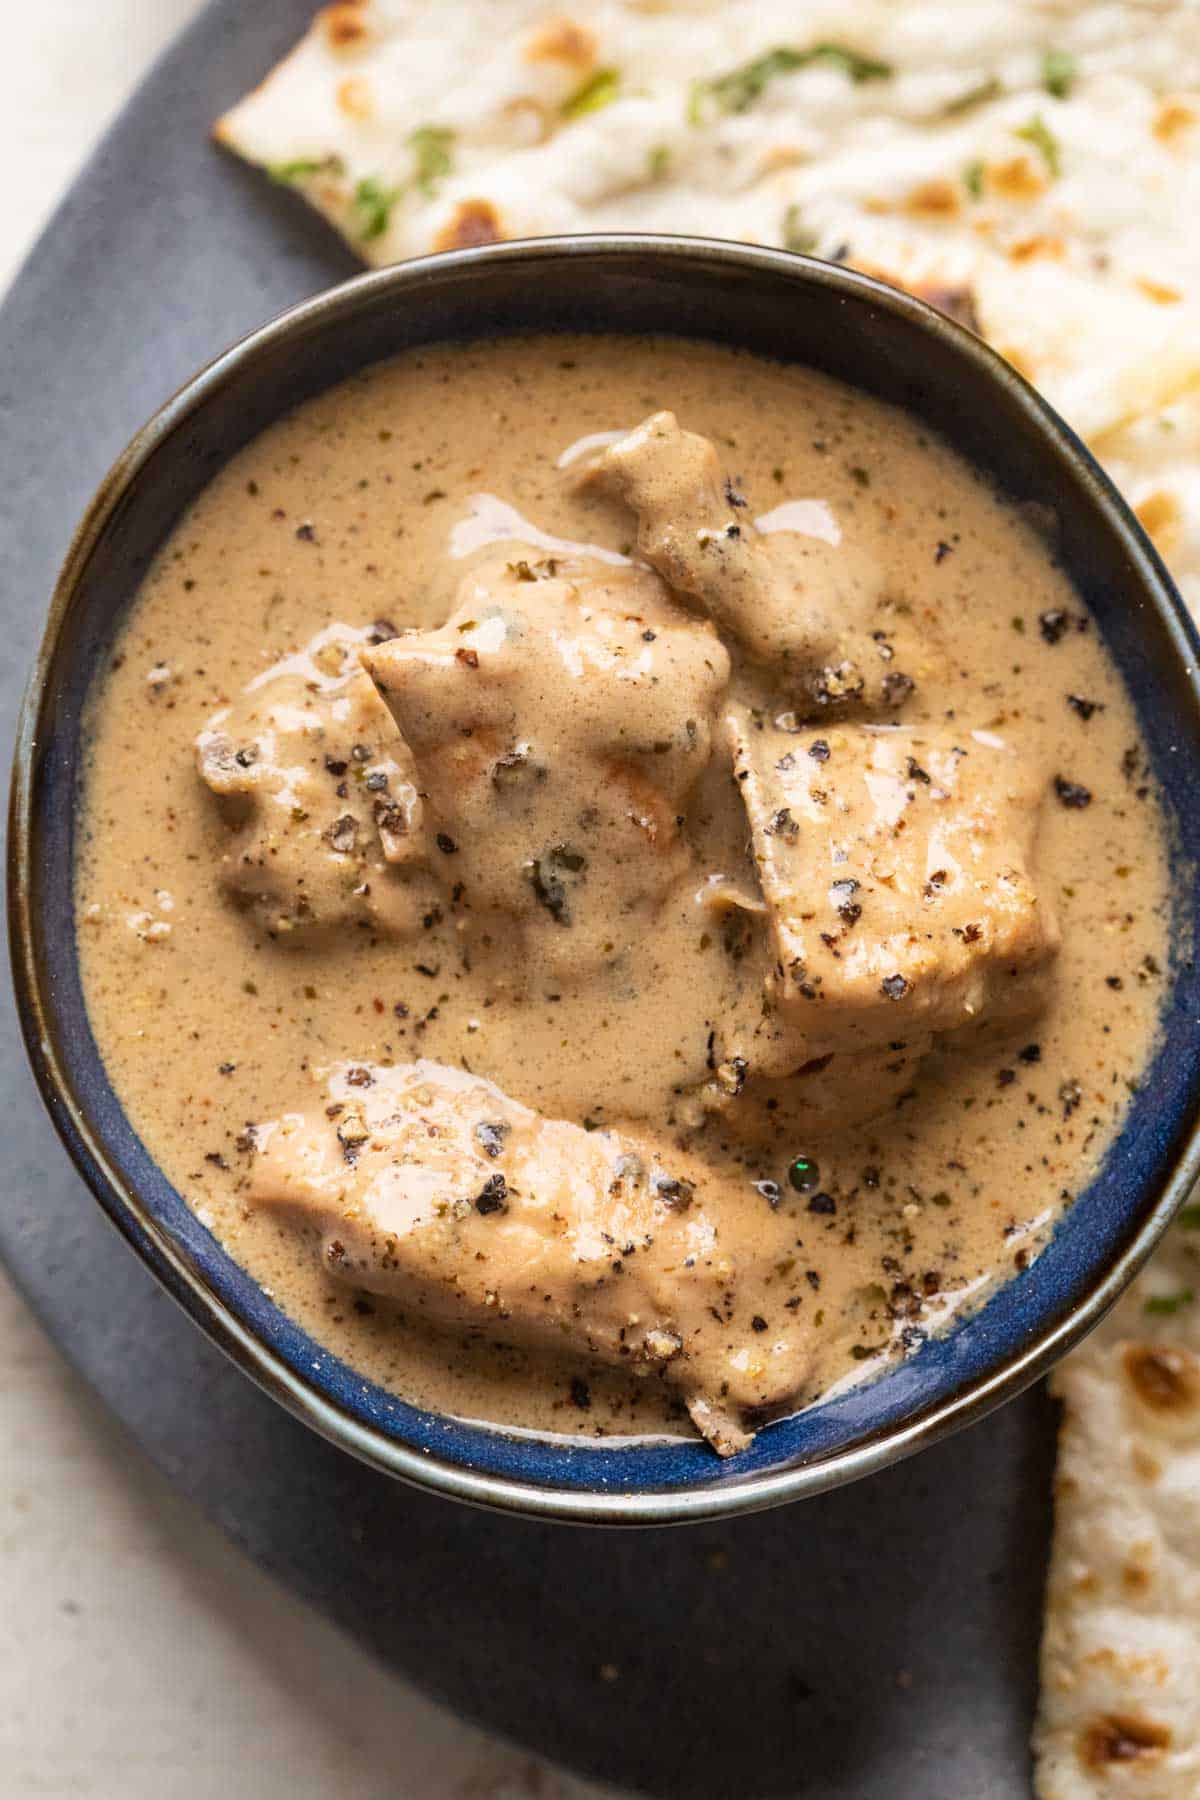
Chicken kali mirch gravy served in a blue bowl with naan on the side

This chicken kali mirch has turned out to be one of my favourite chicken gravy recipes ever. This recipe ticks all the right boxes when it comes to comfort food. The gravy is smooth and luscious but not heavy; it’s warm, fragrant, gently spiced. The chicken pieces remain juicy and soak up all the black pepper flavour. The recipe is really simple and you don’t need fancy any

This chicken curry is also known as murgh kali mirch or black pepper chicken gravy/curry. Ans while it’s not a very popular restaurant dish, I guarantee is you it’s a hundred percent worth trying! And you’ll be titled the curry master every time you try it.

Ingredients for Chicken Kali Mirch

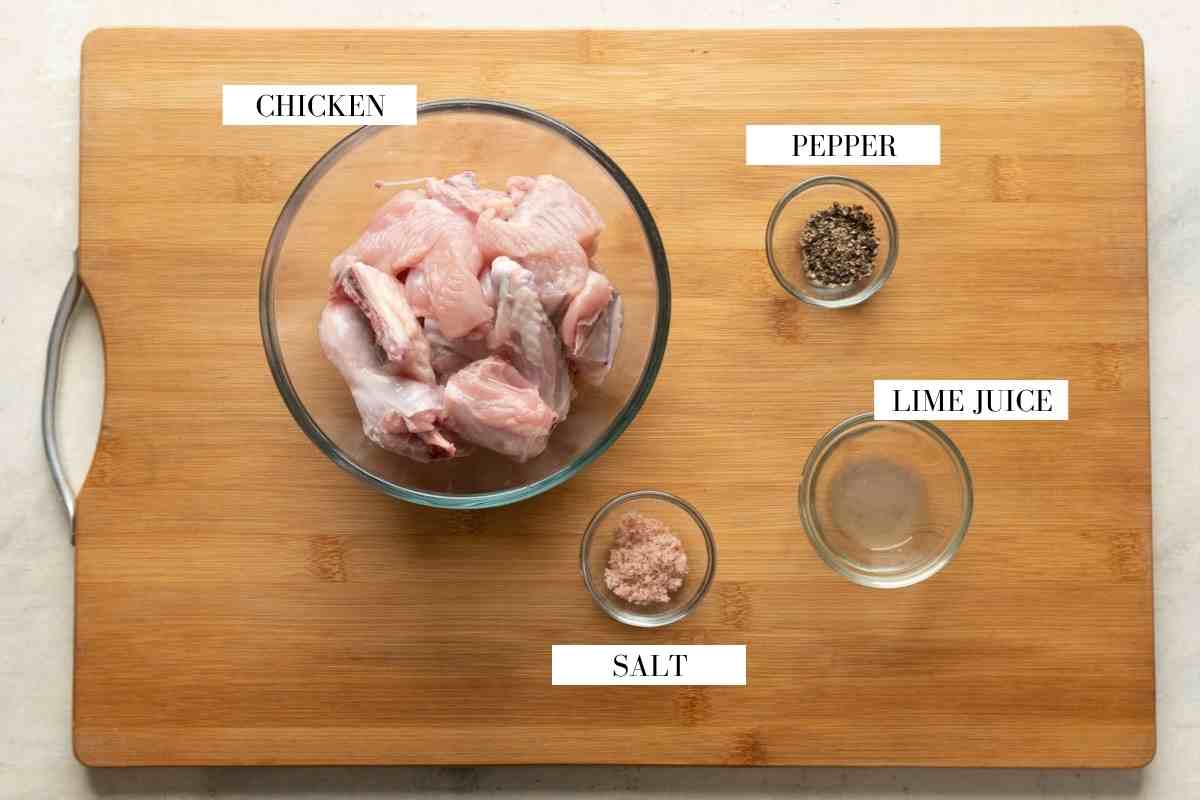
Here’s what you need for marinating the chicken, which is the first step in this recipe

Ingredients for marinating chicken kali mirch on a brown board with text to identify them

Chicken: I recommend bone in, skinless chicken pieces for this recipe, commonly known as ‘curry cut’ in India. If you don’t have this cut available where you are, use thighs and drumsticks instead.

The rest is a simple marinade of, pepper, lime juice and salt.

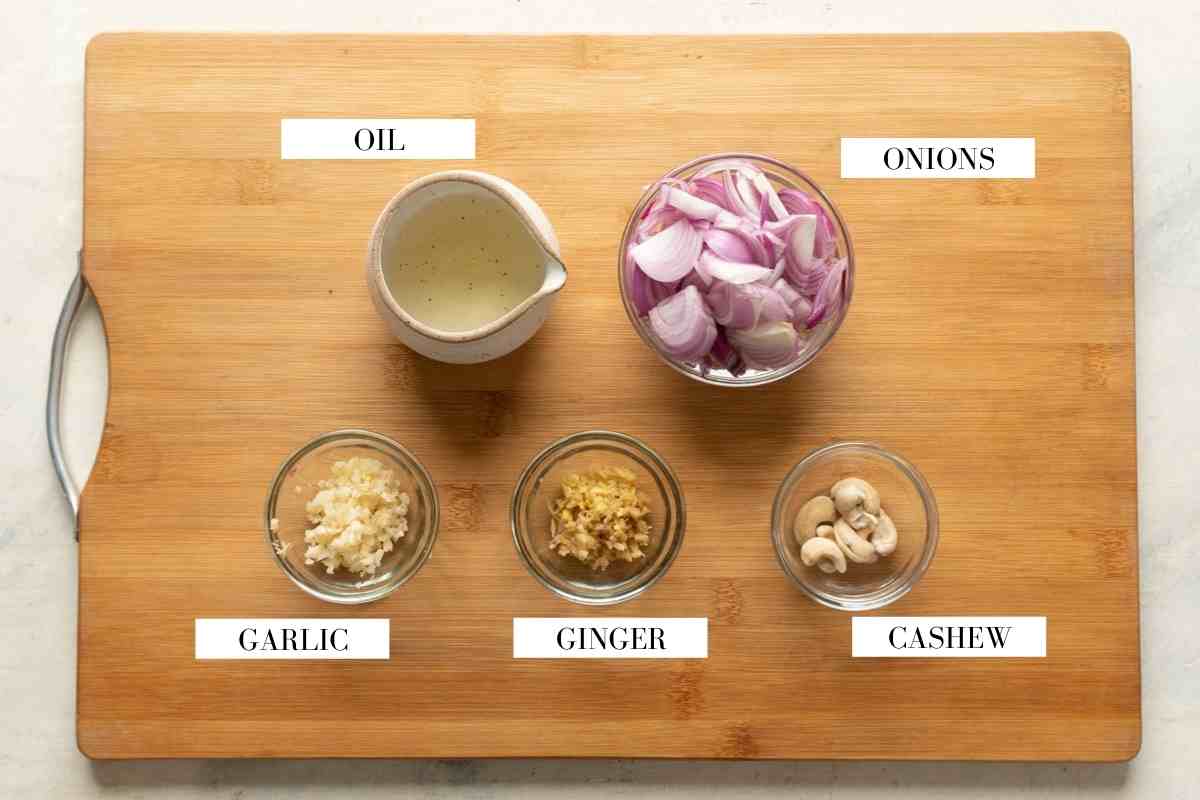
Ingredients for making the onion paste for chicken kali mirch on a brown board with text to identify them
  • Onions: Preferably red or white for that sharp, pungent taste. You can roughly chop them as they will be blended later
  • Ginger and Garlic: For flavour, these are powerful aromats that form the base of the gravy
  • Cashews: For creaminess and richness. This recipe uses no cream, so cashews is what adds richness to the gravy
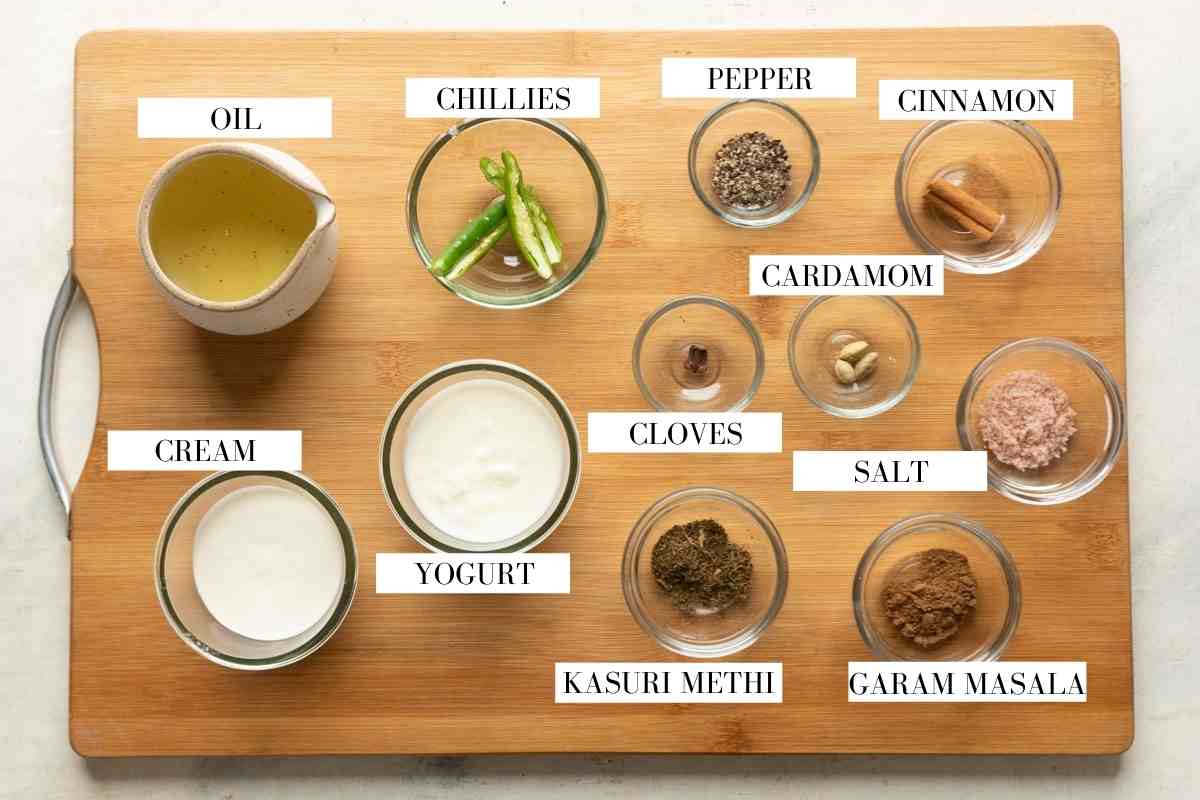
Ingredients for making the gravy for chicken kali mirch on a brown board with text to identify them
  • Whole Spices: Cinnamon, cardamom and cloves make this curry really fragrant
  • Black Pepper: Ground black pepper is used while marinating the chicken as well as in the gravy. It adds a nice spice and a gentle heat and flavour to the entire dish. Its the star ingredient of this recipe!
  • Kasuri Methi: This is a key ingredient that’s added towards the end to pull the whole dish together. I highly recommend trying to source it. Its an ingredient that I use frequently in Indian recipes so in my book, it’s a must have
  • Garam Masala: A little goes a long way with this powerful spice blend. Highly recommend making your own garam masala if you can
  • Yogurt: To add volume, tanginess and acidity
  • Cream: To add richness and make the overall curry really nice and creamy

Chicken Kali Mirch – Step by Step Recipe

Super simple – I’m breaking this down into 4 parts

1. Marinate

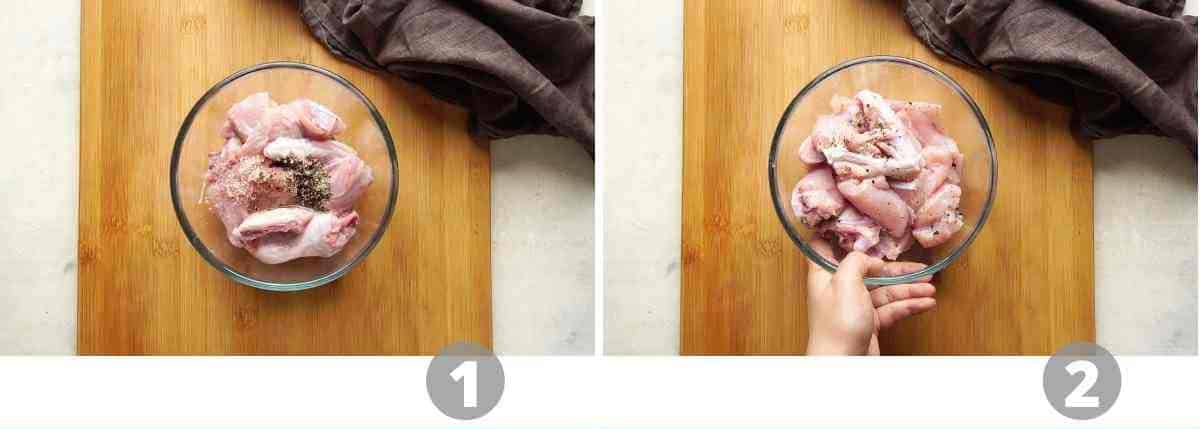
Step by step picture collage showing how to marinate chicken

1-2 Marinate the chicken pieces in lime juice, salt and pepper till the chicken is nicely coated. Set aside for 20 minutes while you make the onion paste

2. Onion Paste

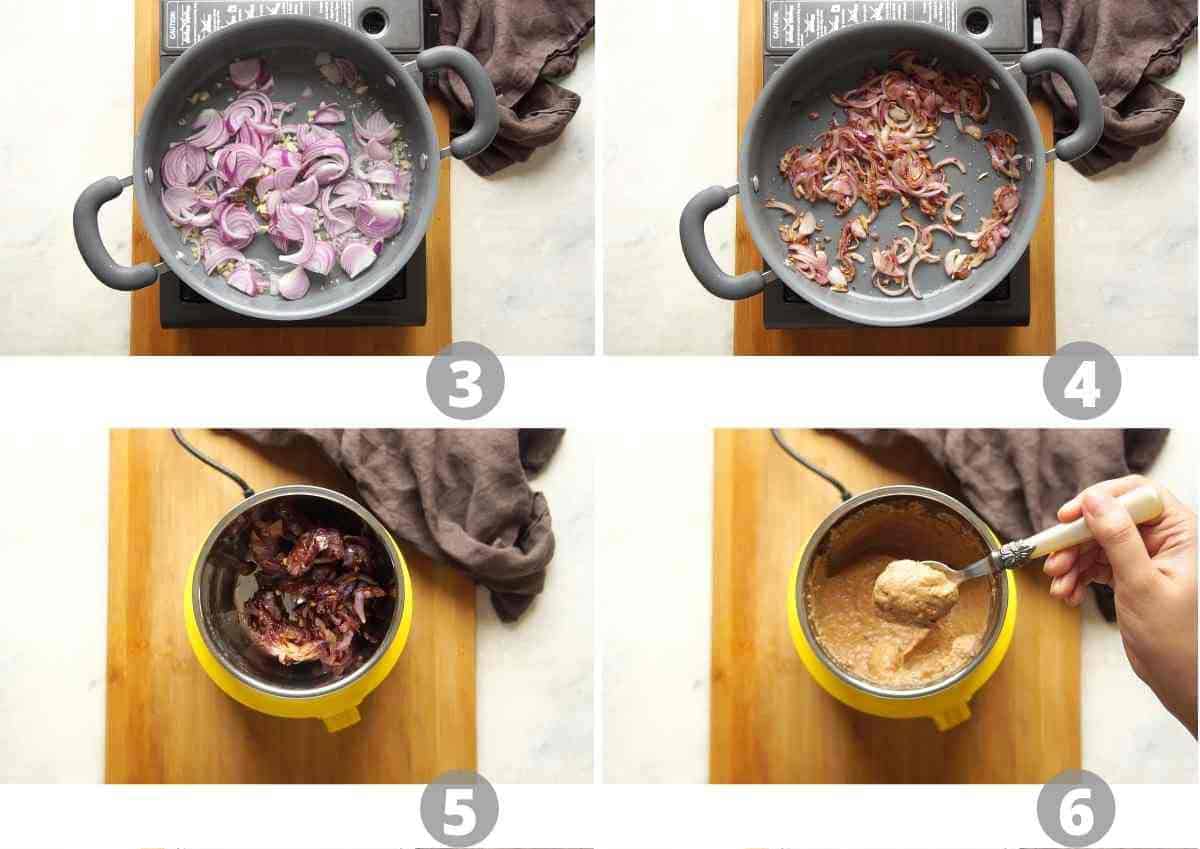
Step by step picture collage showing how to make onion paste for the chicken kali mirch gravy

3. Saute the onions, ginger and garlic in oil to soften and cook them

4. Look for a light golden brown colour. We don’t want to caramelise the onions too much or the colour of the gravy will change

5. Cool the onion mixture completely and then grind it in the smallest jar of the mixer grinder along with cashews and a dash of water

6. Blend to a smooth, creamy paste

3. Sear Chicken

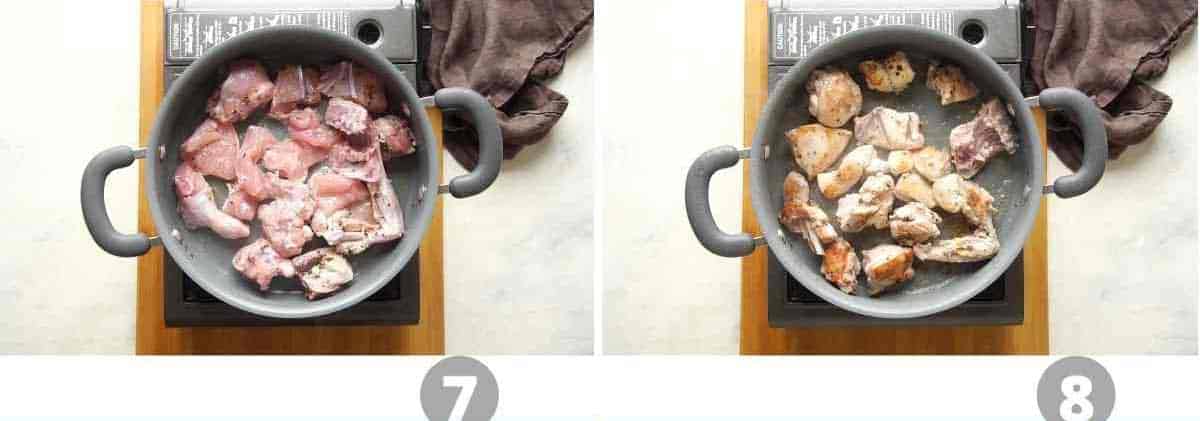
Step by step picture collage showing how to brown chicken pieces

7. While the onion paste is cooling down, heat oil in a pan and add all the chicken pieces. Sear on high heat for 2-3 minutes on each side

8. Flip the chicken pieces and cook on the other side – we are looking for a nice golden sear to lock in the flavours

4. Kali Mirch Gravy

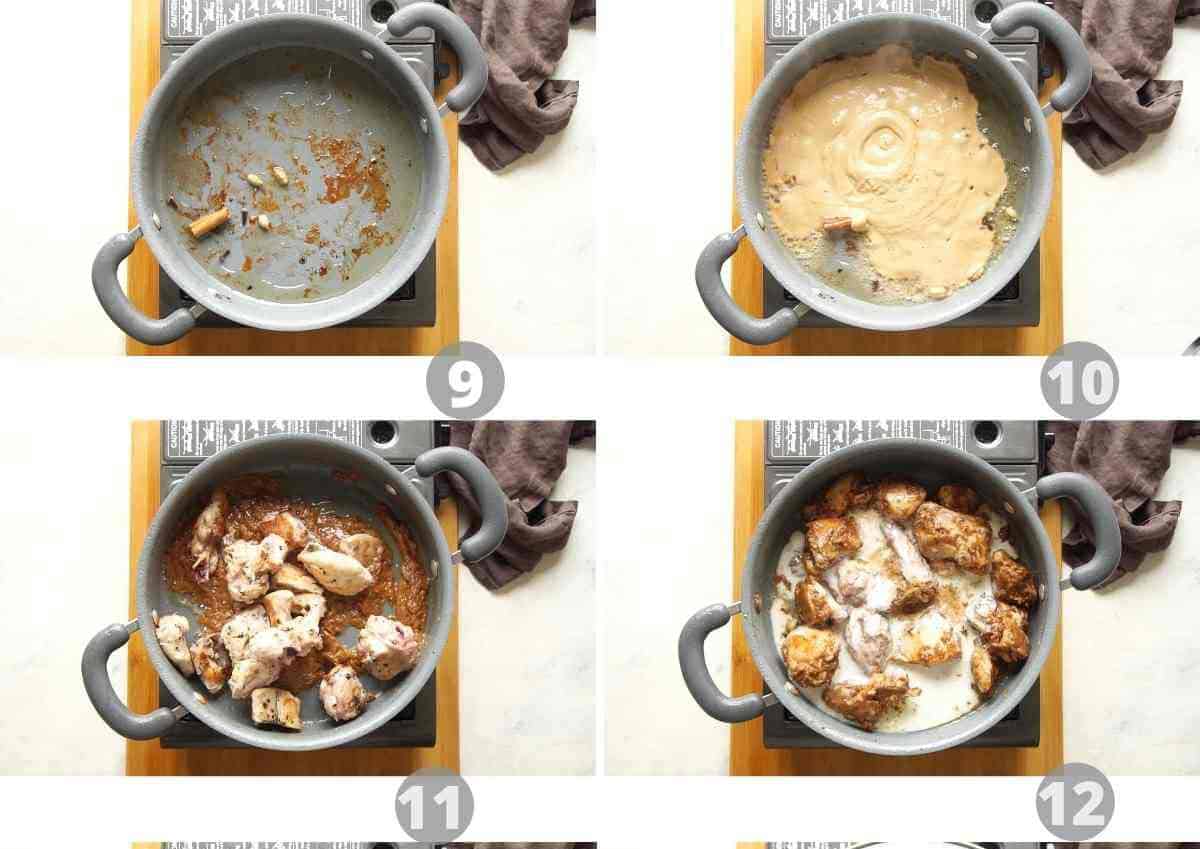
Step by step collage showing how to make chicken kali mirch

9. Remove the chicken pieces and in the same pan, heat more oil and add the whole spices. Saute for a minute

10 Add the onion paste and cook it for a few minutes till it reduces to half

11. Add the chicken pieces and coat them well with the onion mixture

12. Reduce the heat, whisk the yogurt and add it to the pan along with garam masala. Quickly toss this around till the yogurt cooks a bit and you can see oil separating from the sides. If you don’t keep tossing it, the yogurt will split and can give the curry a grainy texture.

Step by step collage showing how to make chicken kali mirch

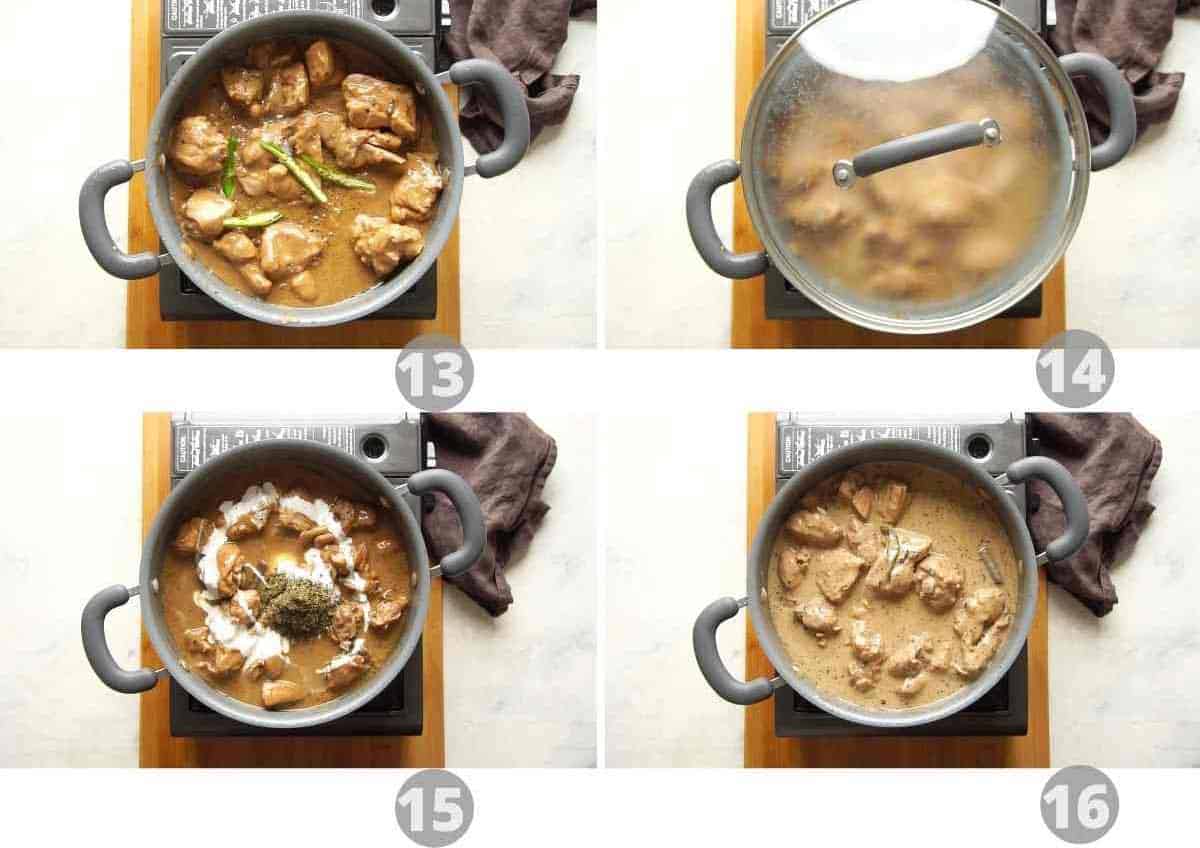
13. Add green chillies and water and mix well

14. Cover and cook the chicken for 15-20 minutes till its tender and cooked through

15. Add kasuri methi, ground black pepper and the cream

16. Give it another mix and turn off the flame. Chicken kali mirch is ready!

Richa’ Top Tips

  • Marinate the chicken for at least 15 minutes. This helps the pepper and lime juice work their magic and flavour the chicken from inside out. Longer is better!
  • Use the right cut of chicken: Bone-in, skinless chicken pieces are best for this recipe. The chicken pieces are cut into 1.5-2 inch in size. You can use boneless thigh pieces, but if you wish to use chicken breast, cook them in the gravy for only 7-8 minutes
  • Take your time browning onions. Brown the onions to a light golden. The more you brown them, the deeper the colour of the gravy will be. Which is not a bad thing, just different
  • Make sure to whisk the yogurt before adding it to the gravy. Add the yogurt on a low flame or turn off the flame. Once you add the yogurt, mix immediately and keep tossing it over low heat till the yogurt cooks
  • Don’t skimp on the pepper. If you want to reduce the heat, reduce the green chillies or skip them
  • Highly recommend using kasuri methi. Kasuri Methi really brings this dish together and helps add the finishing touch. A small amount goes a long way.
  • Make it vegetarian. Try my paneer kali mirch recipe for an easy vegetarian version. Believe me, it’s just as good!

Serving Suggestions

Storage Tips

  • Fridge: Let the chicken kali mirch cool completely before storing. Then Transfer to an airtight container and refrigerate for up to 2–3 days. The flavours deepen over time, so it often tastes even better the next day.
  • Reheating: When reheating, add a splash of water to loosen the gravy and heat gently. Alternatively, you can reheat on the stovetop or in the microwave until warmed through
  • Freezer: For longer storage, freeze for up to 1 month Note: the sauce texture may change slightly after thawing
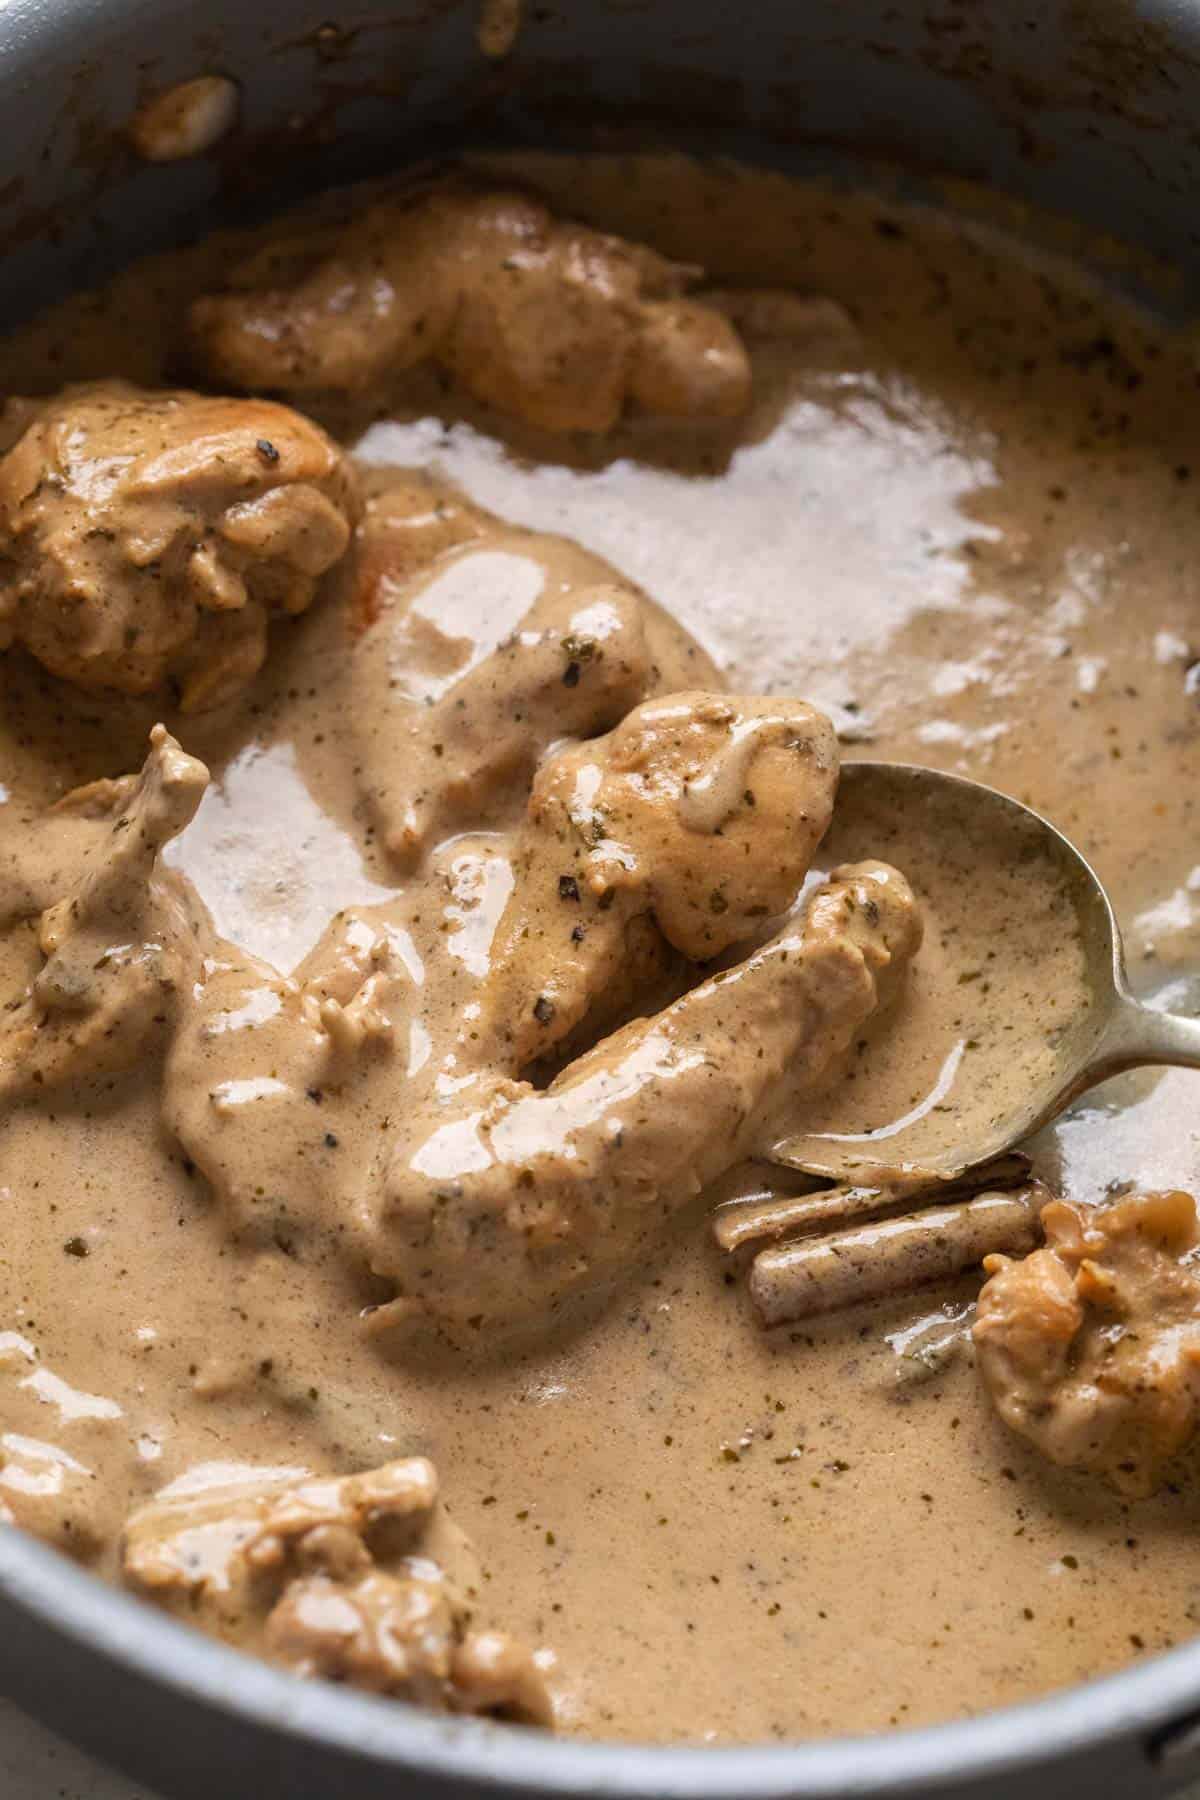
Chicken kali mirch pictured in the pan that it was cooked in with a spoon pooling up the gravy

If you are looking for a mildly spiced, but super tasty gravy (I always hear a lot of our international readers saying its too spicy etc), then this is it! The combination of onions, black pepper, yogurt and cream make this gravy so lickable, you’ll be eating it off the stove. I know I do!

Watch Paneer Kali Mirch Recipe Video

LOVE THIS RECIPE? Subscribe to my newsletter and be the first to receive all new recipes!

Chicken kali mirch gravy served in a blue bowl with naan on the side
Print

Chicken Kali Mirch

Who would've imagined that flavours of black pepper could work so well in a chicken curry! This dish is warm, comforting and fragrant and is the best cozy, weeknight dinner. The chicken pieces remain juicy, the gravy is creamy and light and everything is mildly spiced but still very very tasty. This Chicken Kali Mirch is a fantastic weeknight dinner option!
Course Main Course
Cuisine North Indian
Diet Gluten Free, Halal
Prep Time 10 minutes
Cook Time 30 minutes
Total Time 40 minutes
Servings 4 people
Calories 382kcal
Author Richa

Ingredients

Marination

  • 500 grams Chicken bone-in, skinless, cut into 1.5-2 inch pieces
  • 1/2 Teaspoon Salt
  • 1 Teaspoon Black Pepper freshly ground
  • 1 Teaspoon Lemon Juice

Onion Cashew Paste

  • 1 Tablespoon Oil
  • 2 medium Onions sliced
  • 1 inch piece Ginger chopped
  • 7-8 Garlic cloves chopped
  • 8 Cashew nuts soaked in hot water for 20 minutes

Gravy

  • 4 Tablespoons Oil divided
  • 3 Green Cardamoms
  • 3 Cloves
  • 1 inch piece Cinnamon
  • ¼ cup Yogurt whisked
  • ½ Teaspoon Garam Masala
  • 1-2 Teaspoons Black Pepper freshly ground
  • 2 Green Chillies slit lengthwise
  • ½ Teaspoons Kasuri Methi Fenugreek Leaves, roasted and crushed
  • 2 Tablespoons Cream heavy or light cream
  • 1/4 Teaspoon Salt

Instructions

Marination

  • Add chicken, salt, pepper and lemon juice to a bowl and mix well. Set aside for 20-30 minutes and allow to marinate.

Onion Cashew Paste

  • Heat a tablespoon of oil in a pan and add the sliced onions. Fry on medium heat for 4 minutes till the onions are soft and translucent.
  • Add the chopped ginger and garlic and keep frying on medium heat for 1 minute.
  • Cook the onion mixture and then add it to a mixer grinder with cashew nuts. Grind to a smooth paste, use 2-3 tablespoons of water if required. Set aside.

Gravy

  • Heat 2 tablespoons of oil in a pan and place the marinated chicken pieces side by side. Cook on high heat for 2-3 minutes on each side. Remove from the pan and set aside.
  • In the same pan, add the remaining 2 tablespoons of oil and allow it to heat up on a medium flame. Add the whole spices and saute for 30 seconds to a minute.
  • Add the onion cashew paste that was ground earlier and cook for 5-6 minutes on medium heat till you see oil separating from the sides.
  • Add the fried chicken pieces and fry on medium heat for 2-3 minutes
  • Reduce the heat to low and add the whisked yogurt, garam masala and salt. Cook for 2-3 minutes, stirring continuously till oil separates.
  • Now add green chillies and ¾ cup of water. Mix well, cover & simmer on low heat for 15 minutes till chicken pieces are tender and cooked through.
  • Add pepper and kasuri methi, mix and simmer on low heat for 2-3 minutes. Serve hot.

Video

Nutrition

Calories: 382kcal | Carbohydrates: 13g | Protein: 14g | Fat: 31g | Saturated Fat: 6g | Polyunsaturated Fat: 7g | Monounsaturated Fat: 16g | Trans Fat: 0.1g | Cholesterol: 55mg | Sodium: 567mg | Potassium: 304mg | Fiber: 3g | Sugar: 4g | Vitamin A: 219IU | Vitamin C: 10mg | Calcium: 71mg | Iron: 1mg

This article was researched and written by Urvi Dalal.

The post Creamy Chicken Kali Mirch (Black Pepper Chicken Gravy) appeared first on My Food Story.

Baconpalooza: 9 Ways to Grill With Bacon

“…bacon is in its terminal stage, clinging to relevance, grasping at any opportunity to cash in on its dwindling cachet as its 15 minutes come to an end.”

So wrote Seattle journalist Erica C. Barnett in May 2009, in the alternative newspaper The Stranger.

Well, Ms. Barnett, you got it wrong. Time to eat crow, preferably wrapped in a bacon weave.

Yes, cured and smoked pork belly is still one of America’s favorite flavors, an exceedingly popular meat at supermarkets and butcher shops from coast to coast. At breakfast it sits beside eggs, toast, pancakes, or potatoes. On a hamburger it contributes smoke and crunch. Wrapped around vegetables, chicken, fruit, or scallops, its rendering fat bastes whatever lies beneath it. Crumbled over salads or soups, a small amount can flavor an entire dish. Even bacon fat itself becomes an ingredient, carrying its smoky character into eggs, beans, cornbread, vegetables, gravies, stews, and sauces.

“Fry” it on your outdoor grill or griddle and avoid messy spatters and lingering odors.

Here are our favorite ways to enjoy this versatile meat.

Make a Bacon Weave

Have you yet to try the impressive bacon weave, a savory cloak that elevates meatloaf, pork loin, and the Thanksgiving turkey?

Bacon sausage fattie

If not, find concise directions and tips for success here. It’s easy and is guaranteed to impress friends and family.

Make Bacon Jam

We read that 69 percent of U.S. restaurants feature bacon on their menus, some in the form of bacon jam.

It’s a bougie condiment you can make yourself. Find the recipe for Bacon Jam here.

BBQ Sauce

Make Bacon Bourbon

Bacon isn’t limited to the plate. You can even put it in your glass.

Our Bacon Bourbon uses rendered bacon fat to infuse bourbon with smoke. Sip it straight or use it for Manhattans and Old Fashioneds. Better still, garnish the cocktail with a strip of bacon.

Bacon Bourbon

Bacon-Wrapped Onion Rings

Wrap thick slices of sweet onions with thin-cut bacon for a porky twist on onion rings.

Bacon on a Stick

Thread bacon on bamboo skewers and grill at 375 degrees for 8 to 10 minutes per side, or until done to your liking.

Serve with burgers or other grilled sandwiches. These also make good stir sticks for Bloody Marys.

Bacon-Wrapped Corn

Spiral bacon slices around ears of sweet corn.

Bacon-Wrapped Fruit

Wrap wedges of fruit—peaches, cantaloupe, or pears—with bacon and grill to your liking.

Make Onion Bombs

Follow our directions for Onion Bombs—a blessed marriage between onions, bacon, and ground meat.

Onion Bombs

Make Your Own Bacon

Make your own bacon! It’s easier than you think and can be on your table in as little as two days.

Homemade Bacon

Photo: Steve Nestor

Our 48-hour homemade bacon method shows you how.

Explore more at BarbecueBible.com in our Recipe Index.

For new posts and recipes, join the Up in Smoke newsletter. Sign up and get a FREE PDF of Steven Raichlen's Best Ribs Recipes Ebook.

Preorder Man On Fire — A Steven Raichlen Memoir. And get some really cool rewards!

Looking for some fall grilling inspiration? Check out our Fall Grilling Guide.

The post Baconpalooza: 9 Ways to Grill With Bacon appeared first on Barbecuebible.com.

Peerkangai Curry Recipe (Ridge Gourd Curry)

Peerkangai curry also known as ridge gourd curry, beerakaya kura or turai is a simple and comforting South Indian side dish made with fresh ridge gourd, onion, chillies, spices and a simple tempering. It is one of those easy vegetable recipes that can be made quickly for lunch or dinner. Serve it with hot steamed...

Read More

The post Peerkangai Curry Recipe (Ridge Gourd Curry) appeared first on Yummy Tummy.

Yogurt with Vanilla Balsamic Strawberries

If you love strawberries, you must try this simple vanilla balsamic strawberry with yogurt. Fresh strawberries are tossed with vanilla, balsamic vinegar to bring out their natural sweetness. It is quick to make, refreshing and makes a lovely light dessert.  Yogurt with Strawberries If you haven't tried strawberries with yogurt, you are missing out. This...

Read More

The post Yogurt with Vanilla Balsamic Strawberries appeared first on Yummy Tummy.

Sambaram Recipe | Spiced Buttermilk | Kerala Pacha Moru

Sambaram is a Kerala style spiced buttermilk. Sambaram is a refreshing drink made by blending curd with water, green chili, ginger and salt. Sambaram is served as a part of Onam Sadhya as it helps in digestion of the huge spread of Sadhya. Learn to make Sambaram with step by step pictures and video.

sambaram served with onion, green chillies

I have tasted sambaram only few times, now I can easily make at home itself. Sambaram is served in Onam Sadya meal as it helps in digestion. Not only for Sadya you can even make this spiced buttermilk to beat the scorching heat.

[feast_advanced_jump_to]

About Sambaram

Sambaram is a Kerala style spiced buttermilk made using thick curd, small onion, green chilies, curry leaves and salt. Sambaram is a popular drink served in Onam Sadya meal. It takes just 5 minutes to prepare Sambaram.

Sambaram is a refreshing summer drink, a slightly different take to the South Indian Neer Mor. Sambaram or Spiced buttermilk is the Kerala version of Moru / Chass / Majjiga / Majjige / Taak. This Kerala version of spiced buttermilk is also called as Sambharam or Moru or Pacha moru or Morum vellam.

Sambaram is sold commercially as a street food and in juice & petti (local) shops in Kerala. It is a very good replacement for tea, coffee or juices in summer between breakfast and lunch. It is a very refreshing drink to beat the heat.

My memory of Sambaram dates back to childhood days during my train journey to Goa where it was offered in packets - I could not stop with one - well most of us could not! You feel the stomach is really filled after having Moru during the diet / fasting days.

Sambaram is best in summer and gives a refreshing feel. It also aids in digestion and hence can be served as one of the dish whenever we have huge spread. Since Sambaram is a body cooler, it is better to avoid in rainy days and after evening or else one may catch cold!

sambaram served with onion, green chillies

Sambaram Video

Related Recipes

Sambaram Ingredients

  • Curd - Thick curd / Yogurt is recommended for this recipe. Fresh curd or the buttermilk churned after separating butter while making homemade butter gives a perfect blend. Add water based on your taste of having it like a lassi or buttermilk. Curd available at stores will also be good for this recipe.
  • Ginger - Ginger gives good flavor to this buttermilk also aids in digestion.
  • Green Chili - You can use regular green chilies or the long variety ones as per the availability.
  • Small Onion - Small onion adds aroma and flavor to the buttermilk.
ingredients needed to make sambaram

Why this recipe works?

  • Easy and quick to make.
  • Customizable according to our preference.
  • Healthy and nutritious.
  • Perfect to serve as a part of Sadya meal.
  • Can be made under 15 minutes.

Similar Recipes

How to make Sambaram Step by Step

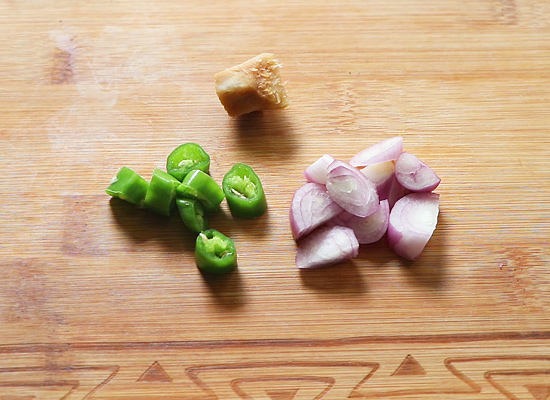
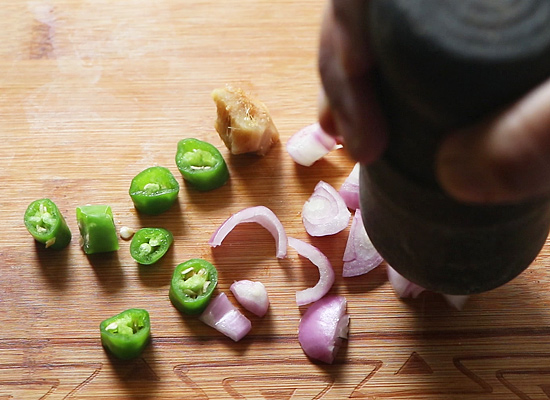
1.First get ready with ½ inch ginger, 2 small onion and 1 long green chili. Chop them roughly.

get ready with ginger,onion and green chilli

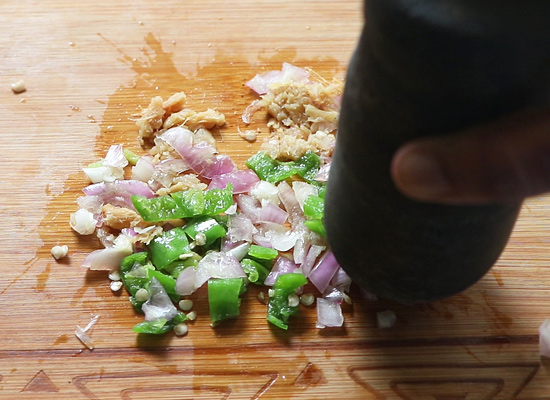
2.Take a hand mortar and pestle and crush using it. You can use mixer to crush it roughly too.

crush roughly

3.Crush roughly but do not make it a fine paste if using a mixer just crush it coarsely.

crush with mortar and pestle

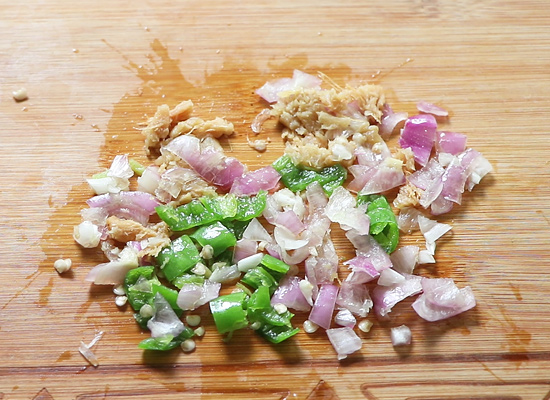
4.Crush like shown below. Set aside.

crushed and ready

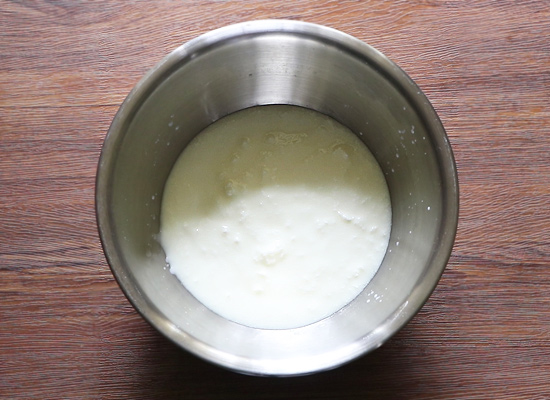
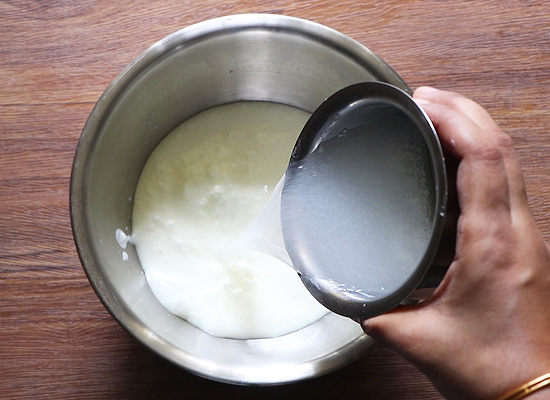
5.To a mixing bowl : add 1 cup thick curd.

add curd

6.Add 1 and ½ cups water to it.

add water

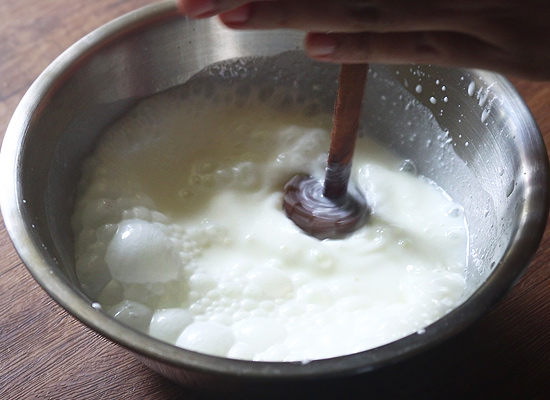
7.Whisk well. I used my hand churner to do this.

whisk well

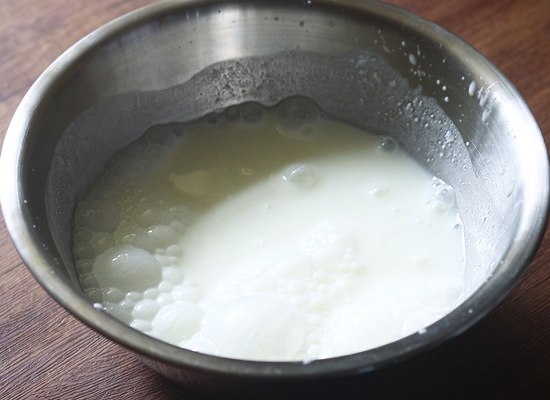
8.Whisk until smooth and creamy.

whisked buttermilk

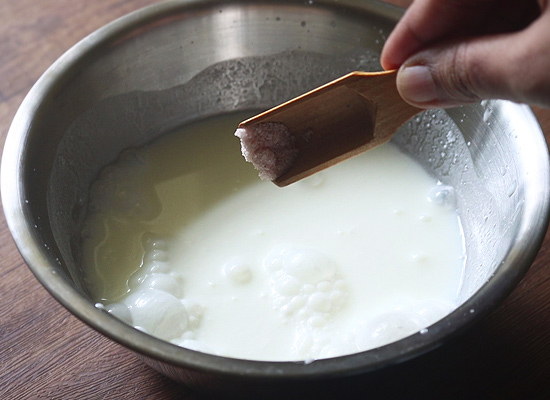
9.Add required salt to it.

add salt to taste

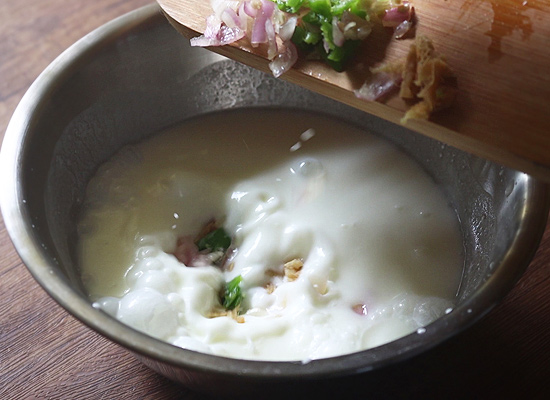
10.Add crushed ginger,onion and green chili.

add crushed items

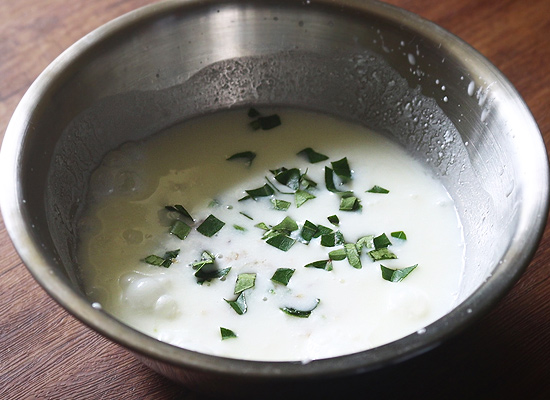
11.Add finely chopped curry leaves.

add curry leaves

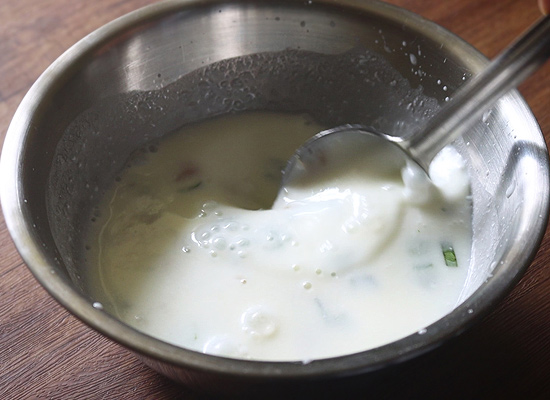
12.Mix it well.

mix well

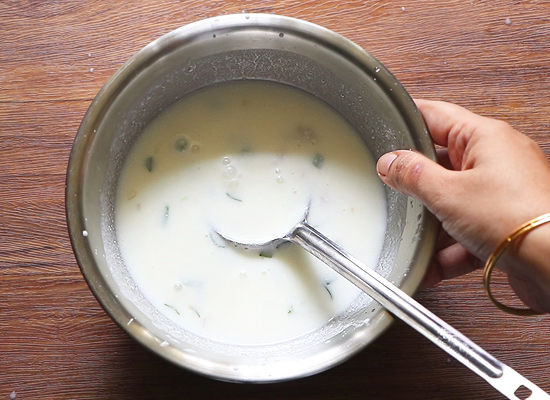
13. Sambaram is ready to serve!

serve

Serve chilled!

sambaram served with onion, green chillies

Expert Tips

  • Curd - Use thick fresh curd. Thin it down by adding water. Use thick chilled curd for best results.
  • Whisking - You can use the traditional mathu(wooden ladle) or wired whisk to whisk the curd.
  • Flavorings - Small onion, ginger and green chilies are crushed and added which gives the drink a great flavor.
  • Consistency - The consistency can be adjusted to your liking, add more water if you like it a bit runny.
  • Spice level - Adjust spice level according to your preference. You can add more green chilies if you want it more spicy.
  • Resting time - You can give resting time of 30 minutes, keep it covered. Then if you want you can strain it and drink, the flavors will still be there.

Serving & Storage

Serve Sambaram chilled. Sambaram can be served as a part of meals or as a mid day drink. Garnish with coriander leaves or mint leaves to make Sambaram more appealing and refreshing.

Add ice cubes to make Sambaram exciting for kids and those who likes to have it with ice. Since buttermilk becomes sour after few hours, consume it fresh.

FAQS

1.What is Sambaram?

Sambaram  (Sambharam / Moru) is a refreshing drink made by blending curd (yogurt) with water, chili, ginger and salt. Sambaram is the Kerala version of Moru (Tamil) / Chass (Hindi) / Majjiga (Kannada) / Majjige (Telugu) / Taak (Marathi).

2.Is Sambaram and buttermilk the same ?

No. While the buttermilk is raw, Sambaram is flavored with chilli,, ginger and salt. However Sambaram, Moru, Chass, Majjiga, Majjige, Taak are all similar but prepared with slight variations in the ingredients.

sambaram served with onion, green chillies

If you have any more questions about this Sambaram Recipe do mail me at sharmispassions@gmail.com. In addition, follow me on InstagramFacebookPinterest ,Youtube and Twitter .

Tried this Sambaram Recipe? Do let me know how you liked it. Also tag us on Instagram @sharmispassions and hash tag it on #sharmispassions.

📖 Recipe Card

Print

Sambaram Recipe

Sambaram is a Kerala style spiced buttermilk. Sambaram is a refreshing drink made by blending curd with water, green chili, ginger and salt. Sambaram is served as a part of Onam Sadhya as it helps in digestion of the huge spread of Sadhya. Learn to make Sambaram with step by step pictures and video.
Course Drinks
Cuisine Indian
Keyword curd recipes, drink recipes, Healthy tea time drink, Nutritional Beverage, Nutritional Drink, yogurt recipes
Prep Time 10 minutes
Total Time 10 minutes
Servings 2
Calories 79kcal
Author Sharmilee J

Ingredients

  • 1 cup curd
  • 1 and ½ cups water
  • ½ inch ginger
  • 2 small onion
  • 1 long green chilli
  • salt to taste
  • few curry leaves

Instructions

  • First get ready with ½ inch ginger, 2 small onion and 1 long green chili. Chop them roughly.
  • Take a hand mortar and pestle and crush using it. You can use mixer to crush it roughly too.
  • Crush roughly but do not make it a fine paste if using a mixer just crush it coarsely.
  • Crush like shown below. Set aside.
  • To a mixing bowl : add 1 cup thick curd.
  • Add 1 and ½ cups water to it.
  • Whisk well. I used my hand churner to do this.
  • Whisk until smooth and creamy.
  • Add required salt to it.
  • Add crushed ginger,onion and green chilli.
  • Add finely chopped curry leaves.
  • Mix it well.
  • Sambaram is ready to serve!
  • Serve chilled!

Video

Notes

  • Curd - Use thick fresh curd. Thin it down by adding water. Use thick chilled curd for best results.
  • Whisking - You can use the traditional mathu(wooden ladle) or wired whisk to whisk the curd.
  • Flavorings - Small onion, ginger and green chilies are crushed and added which gives the drink a great flavor.
  • Consistency - The consistency can be adjusted to your liking, add more water if you like it a bit runny.
  • Spice level - Adjust spice level according to your preference. You can add more green chilies if you want it more spicy.
  • Resting time - You can give resting time of 30 minutes, keep it covered. Then if you want you can strain it and drink, the flavors will still be there.

Nutrition

Serving: 200ml | Calories: 79kcal | Carbohydrates: 7g | Protein: 4g | Fat: 4g | Saturated Fat: 3g | Polyunsaturated Fat: 0.1g | Monounsaturated Fat: 1g | Cholesterol: 16mg | Sodium: 67mg | Potassium: 199mg | Fiber: 0.2g | Sugar: 6g | Vitamin A: 310IU | Vitamin C: 101mg | Calcium: 175mg | Iron: 0.1mg

The post Sambaram Recipe | Spiced Buttermilk | Kerala Pacha Moru appeared first on Sharmis Passions.

Cheese Paratha Recipe

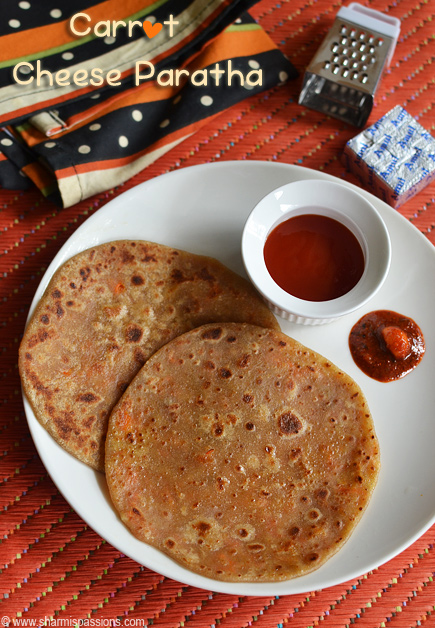
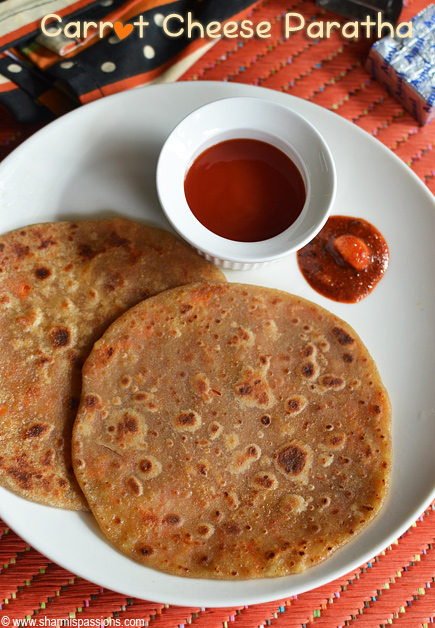
Cheese Paratha is a warm and comforting dish that brings together the softness of homemade paratha with the gooey richness of melted cheese. It's an easy-to-make paratha that feels both tasty and filling. It's ideal for days when you want something quick but satisfying. The combination of melted cheese with carrots and warm spices creates a deliciously hearty bite. Learn to make Cheese Paratha with step by step pictures.

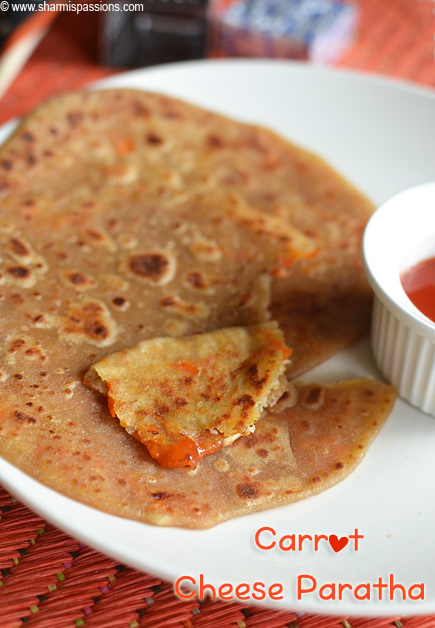
cheese paratha served with tomato sauce

This recipe is perfect for busy mornings or quick dinners. It's satisfying and full of flavor. The cheesy filling makes it a go-to option for kids and cheese lovers. This recipe can be enjoyed plain or with a simple side of curd. It's a cozy, filling meal that works for any time of the day. It's the kind of dish you'll want to make again and again for its taste and ease.

[feast_advanced_jump_to]

About Cheese Paratha

Cheese Paratha is a flavorful Indian flatbread made with a stuffing of grated cheese and mild spices. It's one of the most loved parathas by children and is often served as a special breakfast or packed into lunchboxes. The paratha is roasted until crisp outside while the cheese melts beautifully inside.

This is a quick and easy-to-make recipe with simple ingredients. This recipe also includes grated carrots, which enhance the nutrition and add a slight crunch to the filling. You can easily make it even on a busy morning or after a long day. The parathas are soft yet crisp on the edges and stay good for a few hours when packed.

Carrot Cheese Paratha is one of the regular stuffed paratha that I pack for mittu's lunchbox. The idea of stuffing was given by a dear friend during our casual talk and I loved the idea. First I was stuffing just cheese then started to combine carrots along with it to make it even more healthy and filling.

This cheese paratha is a versatile recipe. You can easily customize the filling and adjust your spice level to your taste. You can switch the cheese, add more veggies, or even mix in herbs to create your own version. It's a must-try if you're looking for a fun, filling, and satisfying meal.

cheese paratha served with tomato sauce

Cheese Paratha Ingredients

  • Wheat flour - Used for making the dough, gives a wholesome base to the paratha. It's a healthier alternative for maida.
  • Water, oil - Used to knead the dough to the right consistency - soft and non-sticky. 
  • Carrots - Adds a slight crunch and sweetness to the stuffing. Also adds nutrition to the dish.
  • Cheese - This is the key ingredient. It gives a creamy, melty, gooey texture. Adds a rich flavor and taste.
  • Roasted jeera powder - Adds an earthy flavor and warmth to the filling. 
  • Chaat masala powder - Adding a slight amount gives a light tangy twist and lifts the flavor of the cheese. 
  • Ghee - For roasting the paratha - helps achieve golden brown color and adds aromatic flavor to the dish. Alternatively you can use oil to toast the parathas.

Similar Recipes

Why This Recipe Works

  • This recipe uses simple ingredients and is quick to prepare.
  • The paratha is soft, yet slightly crisp on the outside.
  • The carrots add a healthy touch without affecting the cheesy taste.
  • The cheese melts inside, giving a rich, gooey texture in every bite.
  • It's perfect for kids, lunchboxes, or even evening snacks.
  • You can easily customize the filling with other veggies or herbs.
  • It's wholesome and can be eaten on its own or paired with sides.

How to make Cheese Paratha Step by Step

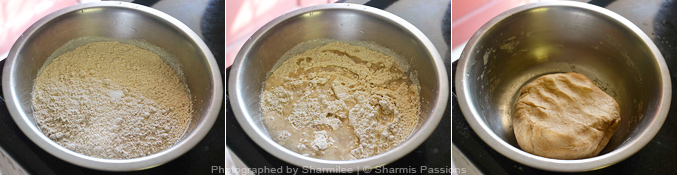
1.In a wide mixing bowl add wheat flour, salt and first give a quick mix for salt to be even. Then add water little by little, gather to form a soft pliable dough. Once it is gathered to a mass add ½ teaspoon oil and knead it once. The dough should not be too tight or too loose, it should be non sticky at this stage. Allow it to rest for a while until we prepare the stuffing.

how to make cheese paratha step1

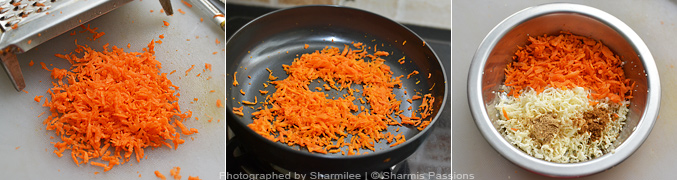
2.Trim the edges, scrap off the outer skin and grate the carrots. Dry roast grated carrot in a pan for 3-5 minutes. Then in a mixing bowl add carrot, grated cheese, roasted jeera powder and chat masala powder.

how to make cheese paratha step2

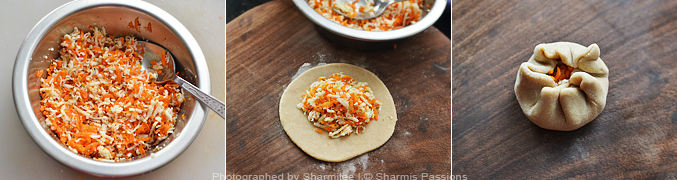
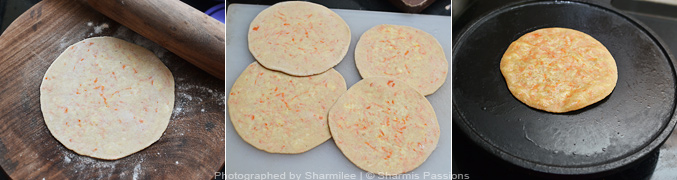
3.Give a quick mix. Make equal sized balls with the chapati dough and make it ready. Roll each ball into a thick circle, keep the stuffing in the middle seal it by pulling all the edges to the center as shown below.

how to make cheese paratha step3

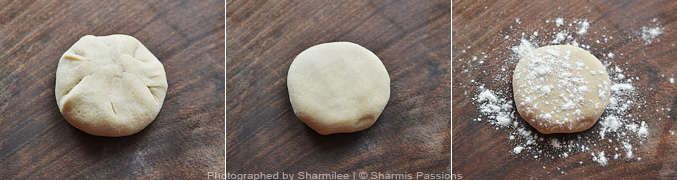
4.Seal it completely, flip over and sprinkle flour.

how to make cheese paratha step4

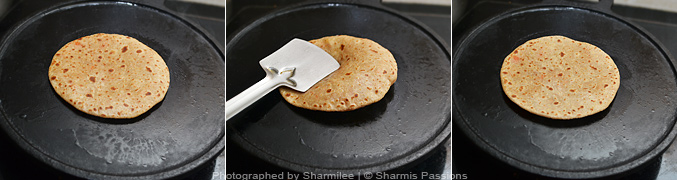
5.Then roll it into a thin / thick parathas as per your preference, dust flour then and there to avoid sticking. Heat a dosa pan and carefully transfer the paratha, drizzle oil / ghee. Once it starts to bubble on one side.

how to make cheese paratha step5

6.Flip over to other side and cook till brown spots appear here and there. It nicely puffs up like poori, just press it.

how to make cheese paratha step6

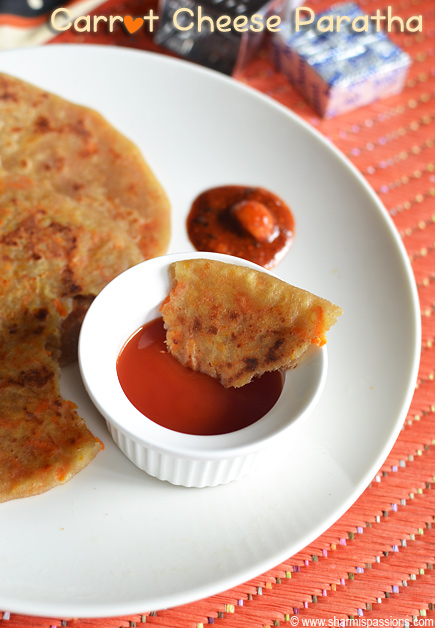
Serve it hot with plain curd or tomato sauce and garlic pickle. What else do you need?! Yum combo!!

cheese paratha served with tomato sauce

Expert Tips

  • Kneading the Dough - Make sure the dough is soft but not sticky. A well-kneaded dough gives soft, easy-to-roll parathas. Rest it for 15 minutes then start rolling.
  • Carrots - Use the fine side of the grater to make the grating fine. I did not sauté the carrots, added it raw as it gets cooked while toasting the parathas.
  • Stuffing - Keep the filling dry. Squeeze out any excess moisture from carrots if needed before mixing with cheese.
  • Sealing - Don't overfill. Seal well the sides after placing the stuffing and gently flatten before rolling.
  • Rolling - Dust with flour and roll gently to prevent the stuffing from coming out. Use even pressure across the paratha.
  • Cooking - Cook on medium heat and flip a couple of times. Press gently at the edges to ensure even roasting.
  • Cheese - You can use mozzarella or processed cheese. You can also try a mix of cheese and paneer for variation.

Serving and Storage

Serve Cheese Paratha hot with tomato ketchup, curd, or your favorite pickle. It's also delicious with green chutney or just plain butter.

You can store the dough and stuffing separately in the fridge for a day. Prepare fresh parathas when needed. Leftover parathas can be reheated in a tawa and served hot.

FAQS

1.Can I skip the carrots in the filling?

Yes, you can make a plain cheese filling or try other veggies like onion, capsicum etc.

2.What kind of cheese works best?

Processed cheese or mozzarella melts well and gives a creamy texture.

3.How do I stop the cheese from leaking while rolling?

Make sure to seal the dough ball tightly before rolling. Roll gently and evenly.

4.Can I make the paratha ahead of time?

It's best served fresh and hot, but you can roll them out and refrigerate. It gets a bit dry so may be store in fridge for an hour or so not more than that. Cook just before serving.

5.Is this suitable for lunchboxes?

Yes, it stays soft and tasty for a few hours, making it a great lunchbox option.

6.Can I use whole wheat and maida mix for the dough?

Yes, a mix of wheat flour and all-purpose flour gives a slightly softer texture.

cheese paratha served with tomato sauce

If you have any more questions about this Cheese Paratha Recipe do mail me at sharmispassions@gmail.com. In addition, follow me on InstagramFacebookPinterest ,Youtube and Twitter .

Tried this Cheese Paratha Recipe? Do let me know how you liked it. Also tag us on Instagram @sharmispassions and hash tag it on #sharmispassions.

📖 Recipe Card

15175587542 98991b1c2b o
Print

Cheese Paratha Recipe

Cheese Paratha is a warm and comforting dish that brings together the softness of homemade paratha with the gooey richness of melted cheese. It's an easy-to-make paratha that feels both tasty and filling. It's ideal for days when you want something quick but satisfying. The combination of melted cheese with carrots and warm spices creates a deliciously hearty bite. Learn to make Cheese Paratha with step by step pictures.
Course Breakfast, dinner, Lunch
Cuisine Indian
Keyword carrot recipes, chapati, chapati recipes, cheese recipes, flat bread recipes, flatbread recipes, healthy recipes, paratha recipes, Paratha', recipes, roti, roti recipes, veg recipes, vegetable
Prep Time 20 minutes
Cook Time 20 minutes
Total Time 40 minutes
Servings 4 parathas
Calories 168kcal
Author Sharmilee J

Ingredients

  • 1 cup wheat flour
  • 2 carrots
  • cup cheese
  • 1 teaspoon roasted jeera powder
  • ½ teaspoon chat masala powder
  • salt to taste
  • oil / ghee to toast
  • water as required to form the dough

Instructions

  • In a wide mixing bowl add wheat flour, salt and first give a quick mix for salt to be even.
  • Then add water little by little, gather to form a soft pliable dough.
  • Once it is gathered to a mass add ½ teaspoon oil and knead it once. The dough should not be too tight or too loose, it should be non sticky at this stage.
  • Allow it to rest for a while until we prepare the stuffing.
  • Trim the edges, scrap off the outer skin and grate the carrots.
  • Dry roast grated carrot in a pan for 3-5 minutes.
  • Then in a mixing bowl add carrot, grated cheese, roasted jeera powder and chat masala powder.
  • Give a quick mix. Make equal sized balls with the chapati dough and make it ready.
  • Roll each ball into a thick circle, keep the stuffing in the middle seal it by pulling all the edges to the center as shown below.
  • Seal it completely, flip over and sprinkle flour.
  • Then roll it into a thin / thick parathas as per your preference, dust flour then and there to avoid sticking.
  • Heat a dosa pan and carefully transfer the paratha, drizzle oil / ghee. Once it starts to bubble on one side.
  • Flip over to other side and cook till brown spots appear here and there. It nicely puffs up like poori, just press it.
  • Serve it hot with plain curd or tomato sauce and garlic pickle!

Notes

  • Kneading the Dough - Make sure the dough is soft but not sticky. A well-kneaded dough gives soft, easy-to-roll parathas. Rest it for 15 minutes then start rolling.
  • Carrots - Use the fine side of the grater to make the grating fine. I did not sauté the carrots, added it raw as it gets cooked while toasting the parathas.
  • Stuffing - Keep the filling dry. Squeeze out any excess moisture from carrots if needed before mixing with cheese.
  • Sealing - Don't overfill. Seal well the sides after placing the stuffing and gently flatten before rolling.
  • Rolling - Dust with flour and roll gently to prevent the stuffing from coming out. Use even pressure across the paratha.
  • Cooking - Cook on medium heat and flip a couple of times. Press gently at the edges to ensure even roasting.
  • Cheese - You can use mozzarella or processed cheese. You can also try a mix of cheese and paneer for variation.

Nutrition

Serving: 200g | Calories: 168kcal | Carbohydrates: 27g | Protein: 6g | Fat: 4g | Saturated Fat: 2g | Polyunsaturated Fat: 0.3g | Monounsaturated Fat: 1g | Cholesterol: 9mg | Sodium: 84mg | Potassium: 147mg | Fiber: 2g | Sugar: 2g | Vitamin A: 5196IU | Vitamin C: 2mg | Calcium: 86mg | Iron: 2mg

The post Cheese Paratha Recipe appeared first on Sharmis Passions.

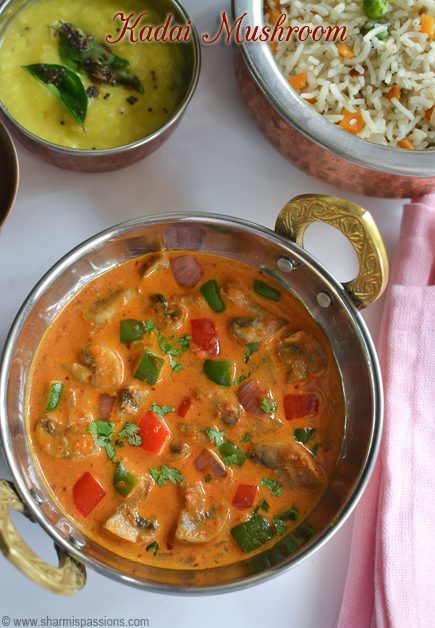
Kadai Mushroom Recipe

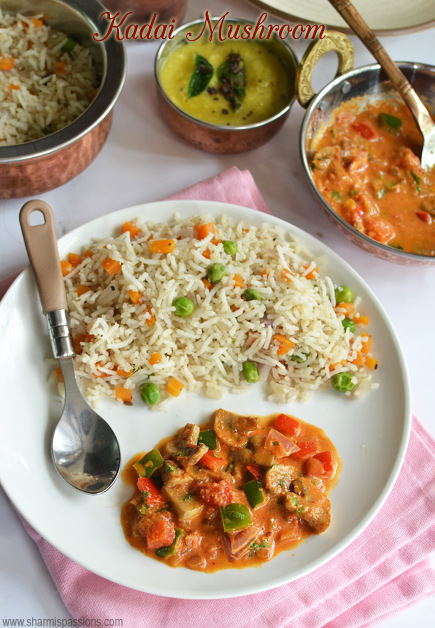
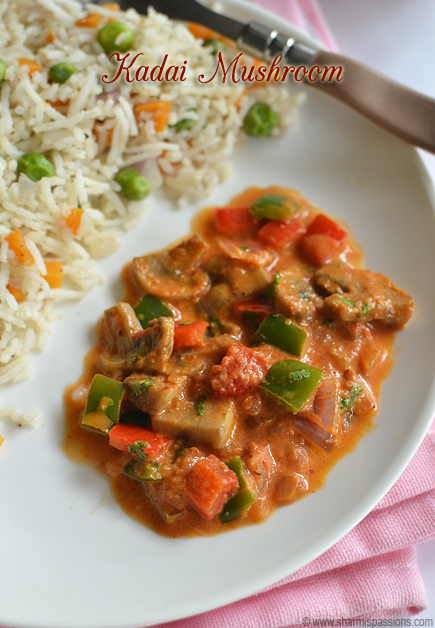
Kadai Mushroom is a tasty North Indian side dish made by cooking mushrooms in a tangy tomato and onion-based sauce. This dish goes perfectly with flatbreads like roti, naan, or chapati, and it also works wonderfully with rice dishes like pulao or fried rice. It's a quick and easy-to-make recipe, offers a rich, comforting flavor in every bite. Follow the step by step instructions to make Kadai Mushroom.

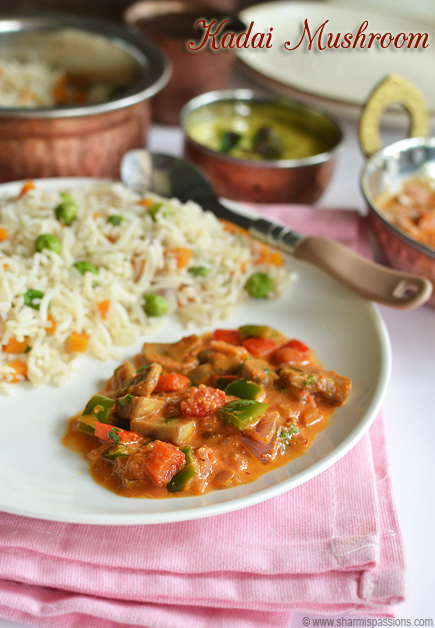
kadai mushroom served with pulao

Kadai mushroom is a flavorful side dish as mushrooms absorb all the flavors from the creamy gravy, making each bite flavorful and satisfying. The recipe uses simple ingredients, making it a perfect option for a delicious meal. Whether you're preparing a family dinner, a quick meal, or something for a special occasion, Kadai Mushroom is an excellent choice.

[feast_advanced_jump_to]

About Kadai Mushroom

Kadai Mushroom is a popular vegetarian dish loved in many households. The dish has bold, rich flavors, with creamy gravy that pairs perfectly with tender mushrooms. It's a favorite for people of all ages and gets its name from the "kadai," the traditional wok-like pan used for cooking it.

This recipe is flexible and can be easily customized to suit your taste preferences. You can adjust the spice level to suit your taste. You can make it mild or add green chilies or chili powder for an extra kick. It's also a great choice for vegetarians and vegans, as it doesn't contain any animal products.

Kadai Mushroom is my favorite or I should say anything tagged as 'kadai', I just love it. The spice mix is the main reason I guess, the flavor of freshly ground spices is so good and that's the reason I love kadai paneer too.

I often make either Mushroom Biryani or Pepper Mushroom so this kadai mushroom is my last option as its only me who loves kadai mushroom so its given the last priority but given a chance I never leave it. Looking for a simple mushroom curry then mushroom do pyaza will be the best choice.

This recipe can be paired with a variety of sides, making it a complete meal. It is a tasty dish with a mix of flavors. The tomatoes add tang, the onions bring a bit of sweetness, and the spices give it the right amount of heat. It's made with simple pantry ingredients, but tastes as delicious as restaurant ones.

kadai mushroom served with pulao

Kadai Mushroom Ingredients

  • Oil - Used for sautéing the onions, spices, and vegetables, bringing out their full flavors.
  • Coriander seeds, red chilies - Roasted to release their natural oils and Adds heat, earthy flavor. They enhance the depth of the dish.
  • Onions, ginger garlic paste, tomatoes - Adds a aromatic base to the dish Sautéed to a golden brown, these provide a savory, slightly sweet flavor and taste.
  • Garam Masala Powder - It's a blend of aromatic spices that adds warmth, depth, and richness to the curry.
  • Kasoori Methi - Adds a distinctive flavor, enhancing the overall flavor of the dish.
  • Capsicum - Adds a crunchy texture and mild sweetness, making the dish more vibrant and flavorful.
  • Mushrooms - This is the key ingredient, It soaks up the rich sauce, gives a tender, earthy flavor that elevates the dish.
  • Fresh Cream - Provides a rich, creamy texture that smooths out the gravy and adds a luxurious feel to the dish.
  • Coriander Leaves - Used as a garnish, coriander leaves add a fresh, aromatic note and brighten up the dish with their green color.

Similar Recipes

Why This Recipe Works

  • It's a quick and easy beginner-friendly recipe.
  • The recipe is made with simple pantry ingredients.
  • This recipe has a deeper, more aromatic flavor.
  • It's a satisfying dish that's full of flavor yet light on the stomach.
  • This dish is easily customizable based on your taste preferences.
  • You can pair it with a variety of side dishes, like roti, naan, or rice.
  • Fresh cream adds a smooth texture to the gravy, making it luxurious and rich.

How to make Kadai Mushroom Step by Step

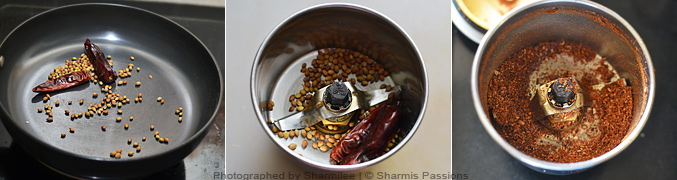
1.Clean mushroom as shown in the link, slice it and keep aside. Dry roast coriander seeds and red chilies for few minutes until nice aroma comes. Cool down, transfer to mixer and grind it to a slightly coarse powder, Set aside.

how to make kadai mushroom step1

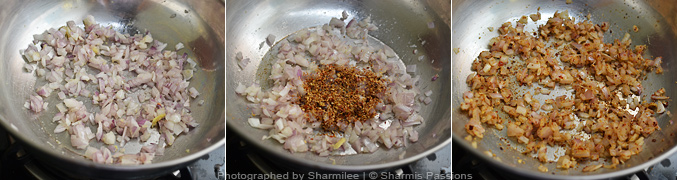
2.Heat oil, add onions, ginger garlic paste and sauté till onions turn slightly browned. Next add the spice powder and sauté for a minute.

how to make kadai mushroom step2

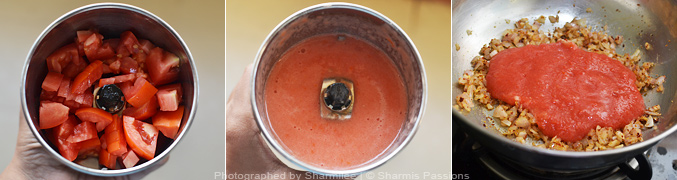
3.In a mixer add tomatoes and grind to a fine paste and add it along with onions.

how to make kadai mushroom step3

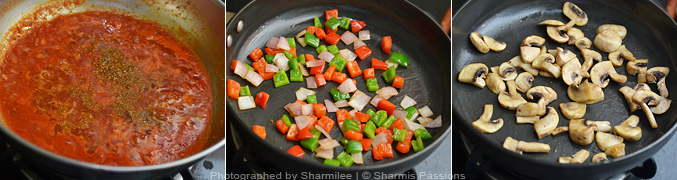
4.Saute till raw smell leaves, then add little water and let it boil. Add garam masala powder. While it boils in another pan add little oil, toast capsicum and onion for 2 minutes, Set aside. Then add mushroom and sauté for 2 minutes.

how to make kadai mushroom step4

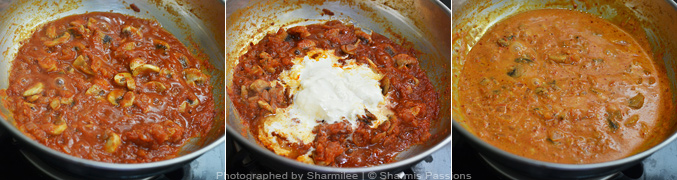
5.Then add mushrooms and cook till it turns soft. Then add fresh cream and let the gravy boil.

how to make kadai mushroom step5

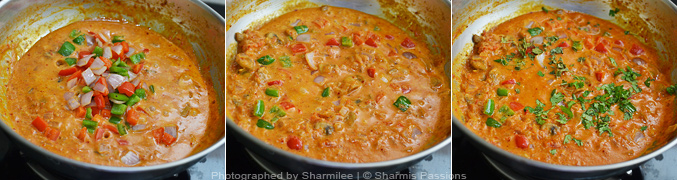
6.When the gravy starts giving a nice aroma, and the consistency is semi thick add toasted onion capsicum and give a quick stir. Finally garnish with coriander leaves, kasoori methi and switch off.

how to make kadai mushroom step6

Serve hot with pulao or roti!

kadai mushroom served with pulao

Expert Tips

  • Roasting - Roast the red chilies and coriander seeds to release their flavors, creating a aromatic flavor in the gravy. This is called kadai masala.
  • Cream - If you prefer a lighter dish, you can reduce the amount of fresh cream or replace it with yogurt or cashew cream for a healthier option.
  • Sauteing the vegetables - Toast the capsicum and onions separately for 2 minutes to bring out their natural sweetness and retain its crunch. This adds extra flavor and texture to the dish.
  • Mushroom - Mushrooms cook quickly, so make sure not to overcook them. Sauté them for just a few minutes until they are tender and have absorbed the flavors of the spices.
  • Spice Level - For a spicier dish, you can add extra green chilies or chili powder according to your heat preference. You can also add a pinch of red chili flakes for extra kick.

Serving and Storage

Serve Kadai Mushroom hot with roti, naan, chapati, or steamed basmati rice. You can also pair it with fried rice or pulao for a complete meal.

If you have leftovers, store them in an airtight container and refrigerate for up to 2 days. Reheat before serving to restore the consistency of the gravy.

FAQS

1.Can I use other vegetables in place of mushrooms?

Yes, you can substitute mushrooms with paneer, peas, or cauliflower for a different version of the dish.

2.Can I make this recipe without fresh cream?

Yes, you can use coconut milk or cashew or almond cream for a dairy-free option.

3.How do I adjust the spice level?

You can increase the number of green chilies or add chili powder to make it spicier.
Adjust according to your preference.

4.Can I prepare this dish in advance?

Yes, Kadai Mushroom can be made ahead and stored in the refrigerator for up to 2 days. Add little milk or water if it is too thick while reheating.

5.How can I make the gravy thicker?

If you prefer a thicker gravy, cook it for a few extra minutes to reduce the liquid, or add a tablespoon of cornstarch mixed with water to thicken it.

kadai mushroom served with pulao

If you have any more questions about this Kadai Mushroom Recipe do mail me at sharmispassions@gmail.com. In addition, follow me on InstagramFacebookPinterest ,Youtube and Twitter .

Tried this Kadai Mushroom Recipe? Do let me know how you liked it. Also tag us on Instagram @sharmispassions and hash tag it on #sharmispassions.

📖 Recipe Card

15009006089 010a40f844 o
Print

Kadai Mushroom Recipe

Kadai Mushroom is a tasty North Indian side dish made by cooking mushrooms in a tangy tomato and onion-based sauce. This dish goes perfectly with flatbreads like roti, naan, or chapati, and it also works wonderfully with rice dishes like pulao or fried rice. It's a quick and easy-to-make recipe, offers a rich, comforting flavor in every bite. Follow the step by step instructions to make Kadai Mushroom.
Course Side Dish
Cuisine Indian
Keyword curry, curry recipes, Kerala Meal Sidedish, kids lunchbox menu, lunch box menu, lunch box recipes, lunch recipes, lunchbox recipes, meals, mushroom recipes, North Indian, roti sidedish, Side Dish
Prep Time 15 minutes
Cook Time 30 minutes
Total Time 45 minutes
Servings 2
Calories 193kcal
Author Sharmilee J

Ingredients

  • 1 cup mushroom cleaned
  • ½ medium sized capsicum cubed
  • ½ medium sized big onion cubed
  • 2 medium sized tomatoes
  • 3 tablespoon fresh cream
  • 1 teaspoon ginger garlic paste
  • ½ teaspoon garam masala powder
  • ½ teaspoon kasoori methi
  • 1 tablespoon coriander leaves
  • 3 teaspoon oil
  • salt to taste

To roast and grind:

  • 2 medium sized red chillies
  • 2 teaspoon coriander seeds

Instructions

  • Clean mushroom as shown in the link, slice it and keep aside.
  • Dry roast coriander seeds and red chilies for few mins until nice aroma comes. Cool down, transfer to mixer and grind it to a slightly coarse powder, set aside.
  • Heat oil, add onions, ginger garlic paste and sauté till onions turn slightly browned.
  • Next add the spice powder and sauté for a minute.
  • In a mixer add tomatoes and grind to a fine paste and add it along with onions.
  • Sauté till raw smell leaves, then add little water and let it boil.
  • Add garam masala powder. While it boils in another pan add little oil, toast capsicum and onion for 2minutes, Set aside.
  • Then add mushroom and sauté for 2 minutes.
  • Then add mushrooms and cook till it turns soft. Then add fresh cream and let the gravy boil.
  • When the gravy starts giving a nice aroma, and the consistency is semi thick add toasted onion capsicum and give a quick stir.
  • Finally garnish with coriander leaves, kasoori methi and switch off.
  • Serve Kadai Mushroom with veg pulao or plain steamed basmati rice.

Notes

  • Roasting - Roast the red chilies and coriander seeds to release their flavors, creating a aromatic flavor in the gravy. This is called kadai masala.
  • Cream - If you prefer a lighter dish, you can reduce the amount of fresh cream or replace it with yogurt or cashew cream for a healthier option.
  • Sauteing the vegetables - Toast the capsicum and onions separately for 2 minutes to bring out their natural sweetness and retain its crunch. This adds extra flavor and texture to the dish.
  • Mushroom - Mushrooms cook quickly, so make sure not to overcook them. Sauté them for just a few minutes until they are tender and have absorbed the flavors of the spices.
  • Spice Level - For a spicier dish, you can add extra green chilies or chili powder according to your heat preference. You can also add a pinch of red chili flakes for extra kick.

Nutrition

Serving: 100g | Calories: 193kcal | Carbohydrates: 13g | Protein: 4g | Fat: 15g | Saturated Fat: 6g | Polyunsaturated Fat: 2g | Monounsaturated Fat: 6g | Trans Fat: 0.03g | Cholesterol: 25mg | Sodium: 19mg | Potassium: 600mg | Fiber: 4g | Sugar: 7g | Vitamin A: 2320IU | Vitamin C: 60mg | Calcium: 56mg | Iron: 1mg


The post Kadai Mushroom Recipe appeared first on Sharmis Passions.

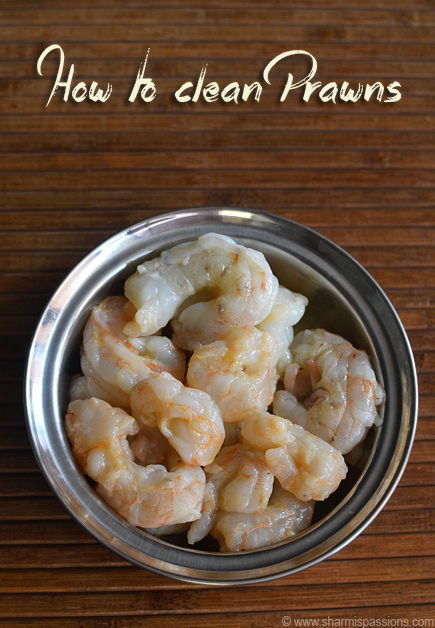
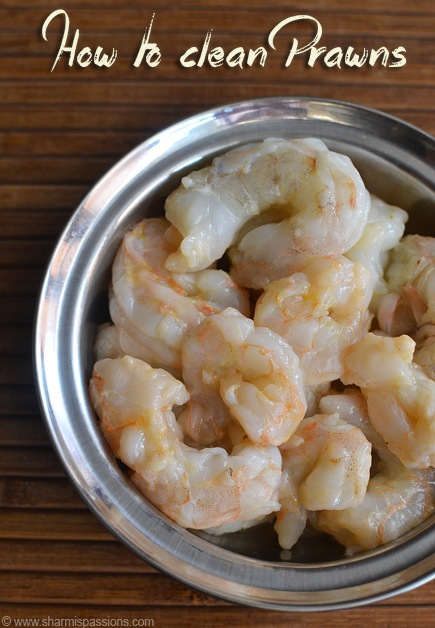
How to clean prawns / How to devein prawn
Prawns are a tasty and quick-to-cook seafood. They have a mild sweet flavor and a tender texture that makes them great in many dishes. Cleaning and deveining prawns might seem like a bit of work, but it's necessary to make sure that they're safe to eat. By cleaning the prawns properly, you can have a cleaner and healthier meal. 

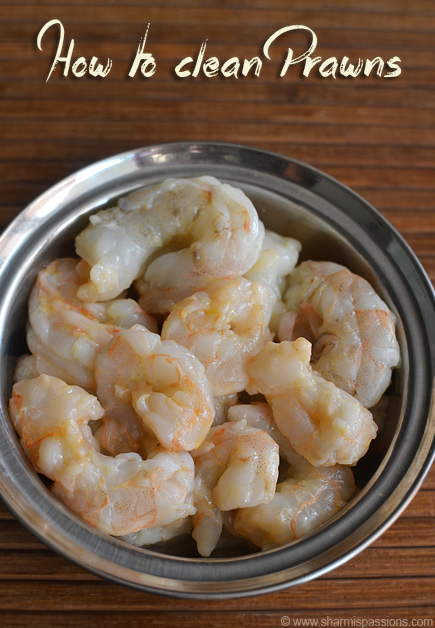
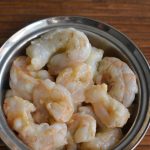
cleaned and deveined prawns in a bowl

Deveining prawns is a simple process. With a few easy steps, you can clean them quickly. This will help you to know about how to clean prawns and remove the vein, making them perfect for any dish you want to prepare. Though this may take some time, it's worth the effort for a delicious and safe seafood experience.

[feast_advanced_jump_to]

About Cleaning and Deveining Prawns

Cleaning prawns is important for both flavor and health. The black vein that runs along the back of prawns is their digestive tract and can contain waste. Removing it not only makes the prawns cleaner, but also improves their taste and makes them easier to digest.

You can buy prawns with or without the shells. If you buy prawns with shells, you'll need to peel them first before cleaning. The color of the vein can vary, from black to gray or even white, but it should always be removed. Once cleaned, prawns can be used in many dishes, from curries to pasta, without worrying about impurities.

Cleaning prawns is a simple task. Once you know how to devein them, the process becomes quick and easy. You can easily clean the prawns and add them to your dishes.

I had been wanting to post this since long but me and nonveg dishes always don't share a great bond as you all know and hence the delay. So when amma was cleaning I shot the pictures to post it here.

cleaned and deveined prawns in a bowl

Clean and Devein Prawns Ingredients

  • Prawns - Use Fresh prawns. If they have shells, peel them before cleaning.

Similar Recipes

Why This Works

  • The process is simple and beginner-friendly.
  • It helps avoid digestive problems, making prawns healthier to eat.
  • Removing the vein improves the taste and texture of the prawn.
  • You don't need special tools-just a sharp knife or kitchen scissors to remove the vein.
  • It improves hygiene by removing harmful bacteria and toxins.
  • Clean prawns look better, especially in dishes like salads and curries.
  • Properly cleaned prawns last longer and stay fresher.
  • Clean prawns absorb marinades and flavors better.

How to clean Prawns Step by Step

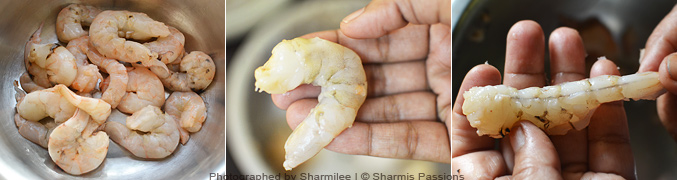
1.Take prawns in a bowl .I got it shell removed if you have shells then first take it out and then proceed. Take a prawn turn to the back side, you can see a vein black in color sometimes it looks grey or even greyish white.

how to clean prawns step1

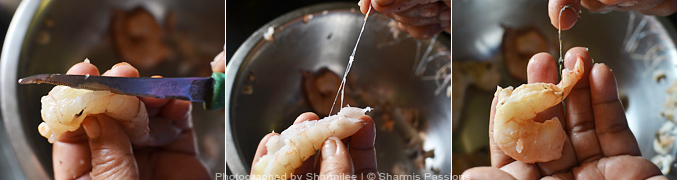
2.Use a small sharp knife to make a slit along the middle of the back. Pull out the vein and discard it.

how to clean prawns step2

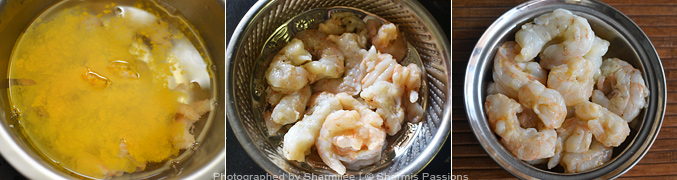
3.You can see all the veins here. Now the prawn is deveined and is ready. Rinse it with water 2-3 times.

how to clean prawns step3

4.Add little turmeric powder and wash it once. Now cleaned prawns is ready to cook.

how to clean prawns step4

Expert Tips

  • Peel the Shells First - If the prawns have shells, start by peeling them off, starting from the head to the tail. Then proceed with the next.
  • Use a Sharp Knife - A sharp knife or kitchen scissors will help you make a clean slit along the back of the prawn, allowing you to easily remove the vein without damaging the flesh of the prawn.
  • Vein Color - The vein color may appear black, gray, or white, but it's important to remove it no matter what color it is. This helps avoid digestive issues and improves the flavor of the prawn in the dish.
  • Rinsing - After deveining, rinse the prawns with water a few times to remove any leftover dirt. This step ensures they are completely clean.
  • Turmeric - Adding a pinch of turmeric while washing the prawns helps remove any lingering smells and gives them an extra layer of cleanliness.

Serving and Storage

Once cleaned and deveined, prawns can be used in any recipe you like. 

If you're not using them immediately, store them in an airtight container in the fridge for up to two days. For longer storage, freeze them in a zip-lock bag. When freezing, make sure to remove any excess air from the bag to prevent freezer burn.

FAQS

1.Is it necessary to remove the vein from prawns?

Yes, the vein contains waste and can cause digestive issues if eaten. It's best to remove it before cooking.

2.How can I confirm that I've removed the entire vein?

After making a slit along the back, gently pull out the vein. Ensure there are no black thread-like pieces left.

3.What if the vein is hard to remove?

If the vein is tough, you can use a toothpick or fork to gently loosen it before pulling it out.

4.Can I skip the turmeric while washing the prawns?

While optional, turmeric helps remove odor and adds an extra layer of cleanliness to the prawns.

5.How long can I store cleaned prawns?

Cleaned prawns can be stored in the fridge for up to two days or frozen for up to a month.

cleaned and deveined prawns in a bowl

If you have any more questions about this How to clean prawn do mail me at sharmispassions@gmail.com. In addition, follow me on InstagramFacebookPinterest ,Youtube and Twitter .

Tried this How to devein prawn ? Do let me know how you liked it. Also tag us on Instagram @sharmispassions and hash tag it on #sharmispassions.

📖 Recipe Card

15175265566 94b466a352 o
Print

How to Clean Prawns | How to Devein Prawns

Prawns are a tasty and quick-to-cook seafood. They have a mild sweet flavor and a tender texture that makes them great in many dishes. Cleaning and deveining prawns might seem like a bit of work, but it's necessary to make sure that they're safe to eat. By cleaning the prawns properly, you can have a cleaner and healthier meal. 
Course howtos
Cuisine Indian
Keyword How to, non veg recipes, prawn recipes
Cleaning time 20 minutes
Total Time 20 minutes
Servings 1 cup
Calories 170kcal
Author Sharmilee J

Ingredients

  • 200 grams prawns

Instructions

  • Take prawns in a bowl. I got it shell removed if you have shells then first take it out and then proceed.
  • Take a prawn turn to the back side, you can see a vein black in color sometimes it looks grey or even greyish white.
  • Use a small sharp knife to make a slit along the middle of the back. Pull out the vein and discard it.
  • You can see all the veins here. Now the prawn is deveined and is ready.
  • Rinse it with water 2-3 times.
  • Add little turmeric powder and wash it once.
  • Now cleaned prawns is ready to cook.

Notes

  • Peel the Shells First - If the prawns have shells, start by peeling them off, starting from the head to the tail. Then proceed with the next.
  • Use a Sharp Knife - A sharp knife or kitchen scissors will help you make a clean slit along the back of the prawn, allowing you to easily remove the vein without damaging the flesh of the prawn.
  • Vein Color - The vein color may appear black, gray, or white, but it's important to remove it no matter what color it is. This helps avoid digestive issues and improves the flavor of the prawn in the dish.
  • Rinsing - After deveining, rinse the prawns with water a few times to remove any leftover dirt. This step ensures they are completely clean.
  • Turmeric - Adding a pinch of turmeric while washing the prawns helps remove any lingering smells and gives them an extra layer of cleanliness.

Nutrition

Serving: 100g | Calories: 170kcal | Protein: 40g | Fat: 1g | Saturated Fat: 0.2g | Polyunsaturated Fat: 0.3g | Monounsaturated Fat: 0.2g | Trans Fat: 0.01g | Cholesterol: 322mg | Sodium: 238mg | Potassium: 528mg | Calcium: 128mg | Iron: 1mg

The post How to clean prawns / How to devein prawn appeared first on Sharmis Passions.

Varagu Pongal | Kodo Millet Pongal

Varagu Pongal is a traditional South Indian dish made with Kodo Millet, also called varagu in Tamil. It's a wholesome and nourishing dish seasoned with aromatic spices. This can be enjoyed for breakfast or during festive occasions. It's a healthy alternative to rice-based dishes, making it a great option for people looking to reduce carbs intake. Follow the step by step instructions to make best tasting Varagu Pongal.

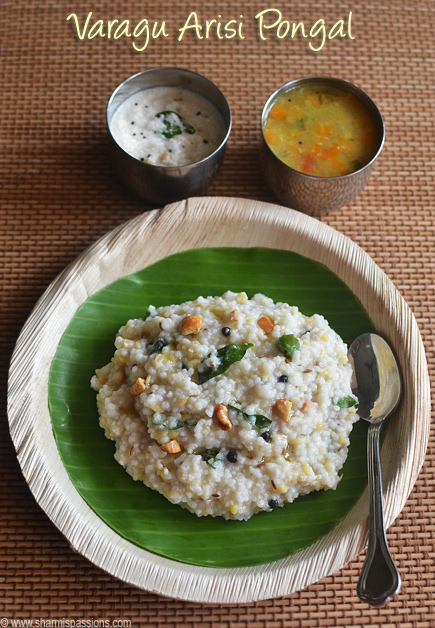
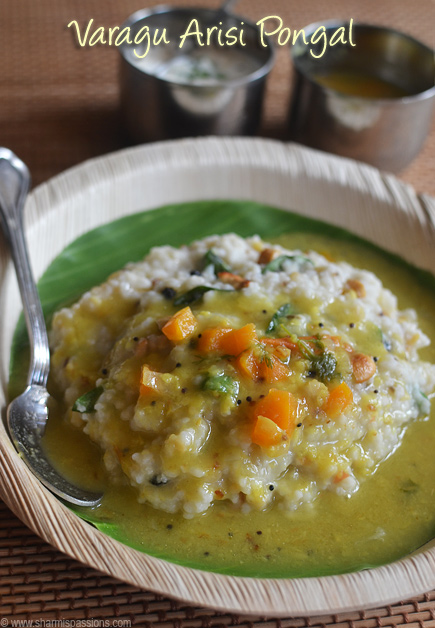
varagu pongal served with chutney and sambar

Millets like varagu are rich in magnesium, iron, and fiber, which helps regulate blood sugar levels. This dish combines health benefits with a savory and satisfying flavor. It's a great choice for a healthier meal. It's quick to prepare and perfect for both busy mornings and special occasions, offering a balanced meal.

[feast_advanced_jump_to]

About Varagu Pongal

Varagu Pongal is a simple and comforting dish, popular in South Indian homes and loved for its gentle, soothing taste. This dish has a mild, savory flavor. The dish is enhanced with ghee, cashews, and spices like cumin, pepper, and ginger. It's a light yet filling meal, making it easy to digest and perfect for starting the day or as a satisfying snack.

This recipe is made with simple ingredients. It's usually prepared in a pressure cooker, but it can also be made in instant pot for ease. The tempering adds a rich flavor, with roasted spices creating a beautiful aroma in the dish. The recipe is simple enough for beginners to try.

This recipe is versatile, it pairs wonderfully with coconut chutney, sambar, or even a simple pickle. It's an excellent choice for anyone looking for a delicious and nutritious meal. You can easily customize the consistency to suit your preference-either soft and creamy or slightly grainy. The mild taste also makes it ideal for both kids and elders.

I often make varagu pongal with coconut chutney and tiffin sambar and the combo is so good. This is easy and quick to make for breakfast that you can just make it in a jiffy and serve it. You can use the same recipe and use other millets like kuthiraivali, samai, thinai etc.

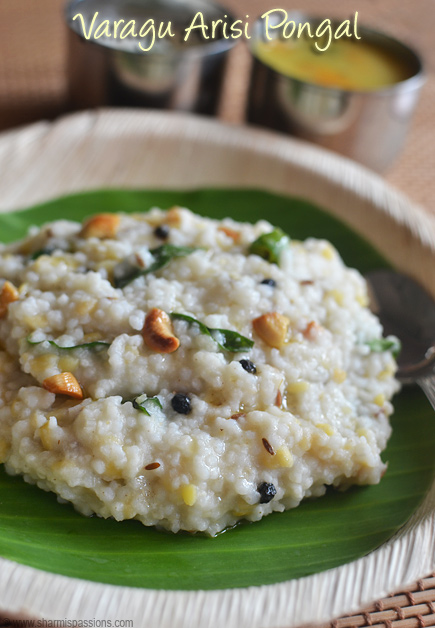
varagu pongal served with chutney and sambar

Varagu Pongal Ingredients

  • Moong dal - Moong dal is a good source of protein and fiber. It adds a creamy texture to the pongal and helps in digestion, making this dish both filling and light on the stomach.
  • Varagu rice - This is the key ingredient. It's a nutritious alternative to rice, is rich in fiber, protein, and essential minerals like iron and magnesium. It has a low glycemic index, making it a great choice for regulating blood sugar levels.
  • Water - Used to cook the rice and dal mixture. The amount of water can be adjusted based on your taste preference.
  • Oil - Used to temper the spices and brings their full flavor into the dish.
  • Whole or crushed pepper, cumin - Adds spice that pairs well with the other spices, cumin aids in digestion and adds a warm, aromatic earthy flavor to the pongal.
  • Curry leaves - Adds a distinctive aroma, curry leaves add freshness and depth to the dish.
  • Green chilies - Adds a mild heat that can be adjusted based on your spice preference.
  • Ginger - Adds a zesty kick and aids in digestion, complements the flavors of the spices.
  • Hing - A pinch of hing adds a pungent aroma and enhances the savory taste of the dish. Also aids in digestion.
  • Cashews, ghee - Add a rich, crunchy texture and enhance the flavor of the dish. They also provide healthy fats and essential nutrients to the pongal.

Similar Recipes

Why This Recipe Works

  • Varagu rice is a nutritious, gluten-free alternative to regular rice.
  • It's a quick and easy dish to prepare, making it perfect for busy mornings or a light meal.
  • Moong dal and millet provide a rich source of protein and fiber.
  • The dish has a wonderful, aromatic flavor.
  • The dish is low on the glycemic index, helping to maintain steady blood sugar levels.
  • The flavors are customizable based on your spice preferences.
  • It's a versatile recipe and can be paired with chutney, sambar, or eaten on its own.
  • It's a great option for a healthy, filling meal.

How to make Varagu Pongal Step by Step

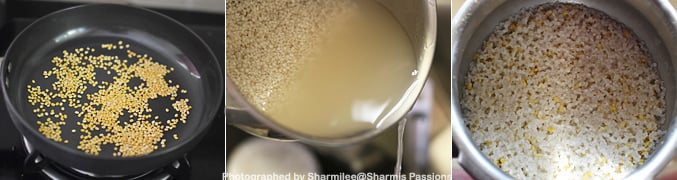
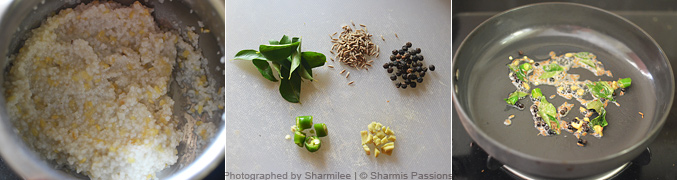
1.Dry roast moong dal till golden brown. Transfer to pressure cooker, then Rinse the millet well, drain water and add it to cooker. Add water and pressure cook for 3-4 whistles in medium flame. Switch off.

how to make varagu pongal step1

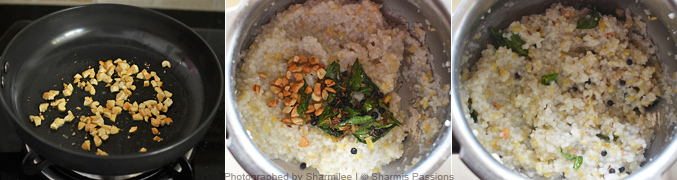
2.Once pressure releases, mash up rice and dal well with a ladle. Now get ready with the tempering items. Heat oil in a pan - add the items listed under ' temper' let it splutter.

how to make varagu pongal step2

3.Then fry cashews in ghee and transfer both tempering and fried cashews to the pongal. Give a quick stir.

how to make varagu pongal step3

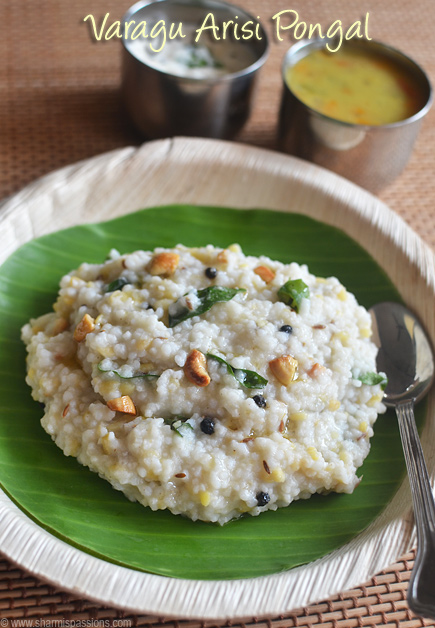
Serve hot with a drizzle of ghee on top along with chutney and sambar.

varagu pongal served with chutney and sambar

Expert Tips

  • Roasting moong dal - Slightly roast the moong dal before cooking it to enhance its flavor and give the pongal a deeper, nuttier taste.
  • Adjusting water - You can add a little more water if you want your pongal to be more runny. It will start to thicken with time so adjust accordingly.
  • Pressure cooking - Make sure to cook pongal in medium flame to avoid overcooking the millet and dal. 3-4 whistles are usually enough.
  • Tempering - Allow the oil to heat up before adding the spices for tempering. This will help release their essential oils and enhance the dish's flavor.
  • Ghee - Drizzling a spoonful of ghee over the pongal just before serving adds a rich flavor. You can also garnish it with extra cashews for a more appealing look.

Serving and Storage

Serve Varagu Pongal hot with a side of chutney or sambar. It's perfect for breakfast, lunch, or dinner. 

You can store it in an airtight container, but let the pongal cool completely before transferring it. It can be stored in the refrigerator for up to 1-2 days. Heat before serving, sprinkle little hot water to make the consistency perfect.

FAQS

1.Can I use other millets for this recipe?

Yes, you can use other millets like foxtail or barnyard millet in place of varagu. The cooking time may vary slightly.

2.Can I make Varagu Pongal without ghee?

Yes, you can use oil as a substitute for ghee if you prefer a vegan option.

3.Can I add vegetables to Varagu Pongal?

Yes, you can add vegetables like carrot, peas to make the dish more nutritious, whole some and colorful.

4.Can I prepare Varagu Pongal ahead of time?

It's best served fresh and hot, but you can make it ahead of time and reheat it with a little water or ghee to restore its moisture.

5.Is Varagu Pongal gluten-free?

Yes, varagu rice is naturally gluten-free, making this recipe suitable for those with gluten sensitivities.

varagu pongal served with chutney and sambar

If you have any more questions about this Varagu Pongal Recipe do mail me at sharmispassions@gmail.com. In addition, follow me on InstagramFacebookPinterest ,Youtube and Twitter .

Tried this Varagu Pongal Recipe? Do let me know how you liked it. Also tag us on Instagram @sharmispassions and hash tag it on #sharmispassions.

📖 Recipe Card

15019148190 b40cef930f o
Print

Varagu Pongal Recipe | Kodo Millet Pongal Recipe

Varagu Pongal is a traditional South Indian dish made with Kodo Millet, also called varagu in Tamil. It's a wholesome and nourishing dish seasoned with aromatic spices. This can be enjoyed for breakfast or during festive occasions. It's a healthy alternative to rice-based dishes, making it a great option for people looking to reduce carbs intake. Follow the step by step instructions to make best tasting Varagu Pongal.
Course Breakfast, Lunch
Cuisine Indian
Keyword 30 mins recipes, millet recipes, pongal, pongal recipes, recipes
Prep Time 5 minutes
Cook Time 15 minutes
Total Time 20 minutes
Servings 2
Calories 338kcal
Author Sharmilee J

Ingredients

  • ½ cup varagu rice
  • 3 tablespoon moong dal
  • 1 and ¼ cups water
  • 5 cashews broken
  • 1 teaspoon ghee
  • salt to taste

To temper :

  • 1 teaspoon oil
  • ½ teaspoon pepper whole or crushed roughly
  • ½ teaspoon jeera whole or crushed roughly
  • few curry leaves
  • 1 green chillies
  • ½ teaspoon ginger chopped finely
  • teaspoon hing

Instructions

  • Dry roast moong dal till golden brown.
  • Transfer to pressure cooker, then Rinse the millet well, drain water and add it to cooker.
  • Add water and pressure cook for 3-4 whistles in medium flame. Switch off.
  • Once pressure releases, mash up rice and dal well with a ladle.
  • Now get ready with the tempering items. Heat oil in a pan - add the items listed under ' temper' let it splutter.
  • Then fry cashews in ghee and transfer both tempering and fried cashews to the pongal.
  • Give a quick stir.
  • Serve hot with a drizzle of ghee on top along with chutney and sambar.

Notes

  • Roasting moong dal - Slightly roast the moong dal before cooking it to enhance its flavor and give the pongal a deeper, nuttier taste.
  • Adjusting water - You can add a little more water if you want your pongal to be more runny. It will start to thicken with time so adjust accordingly.
  • Pressure cooking - Make sure to cook pongal in medium flame to avoid overcooking the millet and dal. 3-4 whistles are usually enough.
  • Tempering - Allow the oil to heat up before adding the spices for tempering. This will help release their essential oils and enhance the dish's flavor.
  • Ghee - Drizzling a spoonful of ghee over the pongal just before serving adds a rich flavor. You can also garnish it with extra cashews for a more appealing look.

Nutrition

Serving: 150g | Calories: 338kcal | Carbohydrates: 53g | Protein: 12g | Fat: 9g | Saturated Fat: 2g | Polyunsaturated Fat: 2g | Monounsaturated Fat: 3g | Trans Fat: 0.01g | Cholesterol: 6mg | Sodium: 93mg | Potassium: 141mg | Fiber: 7g | Sugar: 1g | Vitamin A: 53IU | Vitamin C: 3mg | Calcium: 26mg | Iron: 3mg

The post Varagu Pongal | Kodo Millet Pongal appeared first on Sharmis Passions.

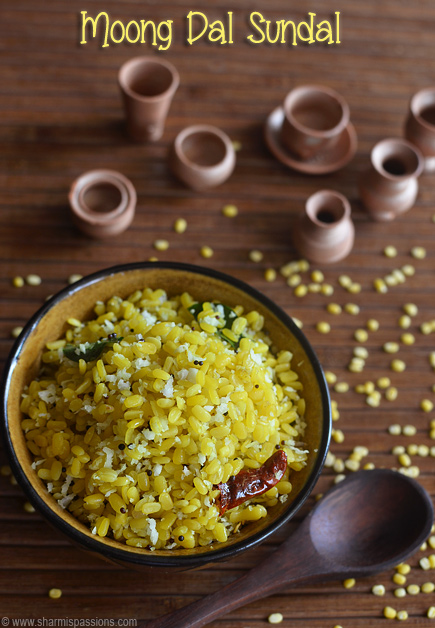
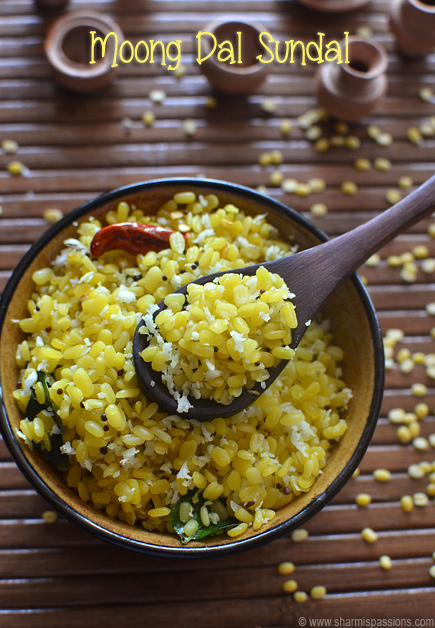
Moong Dal Sundal | Pasi Paruppu Sundal

Moong Dal Sundal, also called Pasi Paruppu Sundal, is a light and healthy South Indian snack made with yellow moong dal. It's an easy-to-make recipe and doesn't need any soaking, making it a quick option. This recipe is a comforting snack that is full of flavor and has a soft, crumbly texture. It's mildly spiced and topped with coconut, making each bite simple yet satisfying.

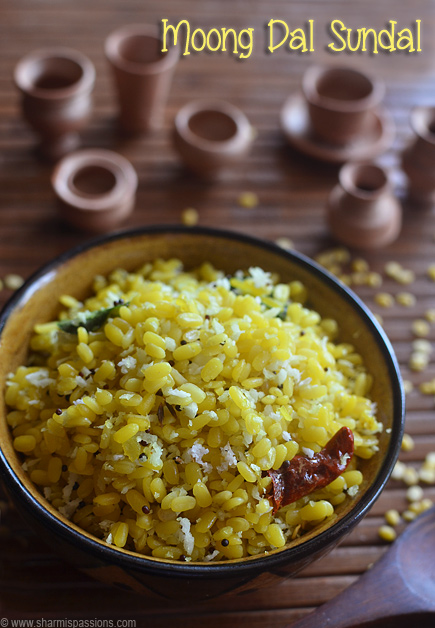
moong dal sundal served

This snack recipe is a healthier alternative to fried snacks. It's often prepared during festivals and special occasions. It is also packed with nutritional benefits. It's rich in protein and fiber, helps with digestion and keeps you full for longer. Whether as a snack between meals or a light side dish, it's an excellent way to enjoy something tasty and nutritious.

[feast_advanced_jump_to]

About Moong Dal Sundal

Moong Dal Sundal is a traditional dish made with simple pantry ingredients. It's commonly made in South India. The texture is soft and slightly crumbly, which makes it easy to eat and enjoy. It has a mild flavor, and the tempering adds the dish a warmth flavor. It's a light dish that's quick to make, making it perfect for any time of the day.

This dish is made with simple and healthy ingredients, making it both nutritious and easy to prepare. It's naturally gluten-free. This delightful snack recipe requires no fancy ingredients. This dish is great when you want something light, quick, and full of flavor. It works well as a snack or a side dish with your meals.

We don't have the custom of keeping kolu so I am here with the sundal recipes for navaratri. Paasi Paruppu Sundal is very easy and simple to make but the trick part here is to cook moong dal perfectly.

This is a versatile recipe that can be easily customized to your taste preferences. You can adjust the spice level to your liking or even add other ingredients like roasted peanuts or vegetables for variation. If you're looking for a simple snack this Moong Dal Sundal surely satisfies your soul with its soothing taste.

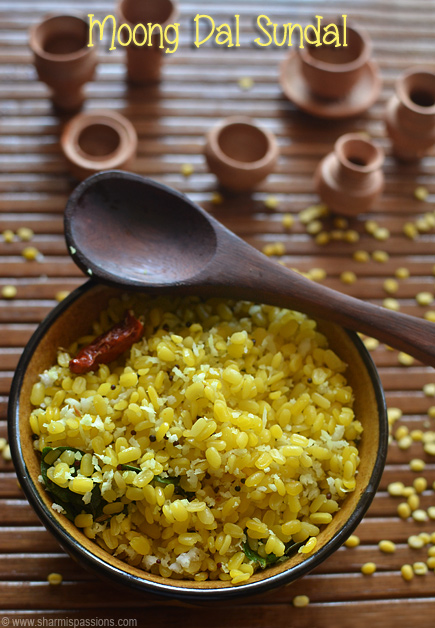
moong dal sundal served

Moong Dal Sundal Ingredients

  • Moong dal - This is the key ingredient of the dish. It's high in protein and fiber, perfect for a soft, tender texture. 
  • Grated coconut - Adds sweetness and a texture to the dish. It gives healthy fats and enhances the overall flavor and helps balance the spices.
  • Oil - Used for tempering, it helps release the essential oils from the spices, adding richness and aroma to the dish.
  • Mustard seeds, urad dal - Add a slight pungent, crunchy texture and nutty flavor to the dish.
  • Red chili - Provides a mild heat, adding flavor and color. You can adjust it according to your spice preference.
  • Curry leaves - Adds a distinct fragrance, it enhances the flavor and offer health benefits like improving digestion.
  • Hing - Adds a subtle pungency, enhances the savory flavors and aids digestion.

Similar Recipes

Why This Recipe Works

  • This is a quick and easy-to-make recipe with just a few ingredients.
  • It's a nutritious dish, rich in protein, fiber, and healthy fats.
  • It has an aromatic flavor and a soft texture.
  • A healthier snack compared to fried foods.
  • You can adjust the spice level to your taste.
  • The dish is light, making it ideal for any time of day.
  • Perfect for all ages.

How to make Moong Dal Sundal Step by Step

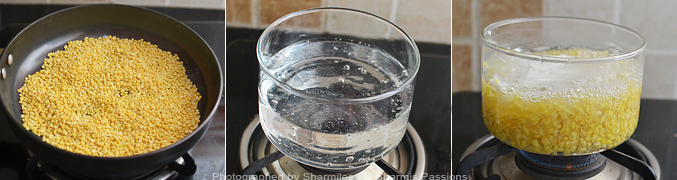
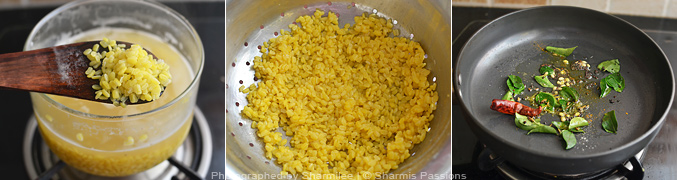
1.Dry roast moong dal till slightly golden browned. Set aside. Boil water, once it starts to boil vigorously add roasted moong dal, little salt and let it cook in low flame.

how to make moong dal sundal step1

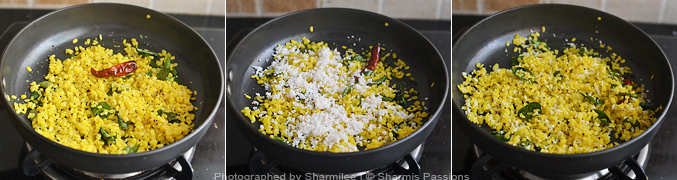
2.The grains should be separate but when you press each dal, it should be soft that is the correct way to cook moong dal for sundal. This may take just 3-5 minutes. Switch off, strain water and set aside. In a pan heat oil - add the items listed under 'to temper' let it splutter. Add a pinch of turmeric powder.

how to make moong dal sundal step2

3.Now add cooked dal and just toss it. Add coconut and give a quick stir. Switch off.

how to make moong dal sundal step3

Serve hot / warm as a evening snack!

moong dal sundal served

Expert Tips

  • Roasting moong dal - Roasting the dal before cooking adds a deep, roasted flavor and a crunchy texture to the dish.
  • Cooking time - The dal should be soft but not mushy. It should retain its shape while being tender to the bite.
  • Water - After cooking, strain the excess water and rinse with cold water to stop the cooking process.
  • Lemon juice - A squeeze of fresh lime or lemon juice just before serving can add a tangy flavor that enhances the overall taste.
  • Roasted peanuts - Adds extra crunch and protein to the dish.
  • Spice level - You can add a pinch of red chili powder or chopped green chilies to the tempering for a spicier taste.
  • Freshness - A little bit of fresh cilantro or mint can add a refreshing flavor to the sundal.

Serving and Storage

You can serve this Moong Dal Sundal warm as an evening snack or side dish for meals.

You can store it in an airtight container. It can be kept in the fridge for up to 1-2 days but is best enjoyed fresh for optimal texture.

FAQS

1.Can I make Moong Dal Sundal ahead of time?

It's best enjoyed fresh, but you can prepare it ahead of time, heat it and serve hot.

2.Can I use other types of lentils for this recipe?

While moong dal is ideal, you can try with chana dal, black chana, white chana for a different taste.

3.What can I serve with Moong Dal Sundal?

It pairs well with tea, coffee, or as a light snack with meals.

4.Can I add vegetables to Moong Dal Sundal?

Yes, you can add finely chopped vegetables like grated carrots or onion for extra taste and texture.

5.How can I make it vegan?

This recipe is already vegan. Use plant-based oil for tempering.

moong dal sundal served

If you have any more questions about this moong dal sundal do mail me at sharmispassions@gmail.com. In addition, follow me on InstagramFacebookPinterest ,Youtube and Twitter .

Tried this moong dal sundal recipe? Do let me know how you liked it. Also tag us on Instagram @sharmispassions and hash tag it on #sharmispassions.

📖 Recipe Card

15120508079 9e826c15f5 o
Print

Moong Dal Sundal Recipe | Pasi Paruppu Sundal Recipe

Moong Dal Sundal, also called Pasi Paruppu Sundal, is a light and healthy South Indian snack made with yellow moong dal. It's an easy-to-make recipe and doesn't need any soaking, making it a quick option. This recipe is a comforting snack that is full of flavor and has a soft, crumbly texture. It's mildly spiced and topped with coconut, making each bite simple yet satisfying.
Course Snack
Cuisine Indian
Keyword dal recipes, Festival, navaratri sundal recipes, snack recipes, sundal recipes
Prep Time 20 minutes
Cook Time 20 minutes
Total Time 40 minutes
Servings 2 people
Calories 254kcal
Author Sharmilee J

Ingredients

  • ½ cup moong dal
  • 3 tablespoon coconut grated
  • salt to taste

To temper:

  • 2 teaspoon oil
  • 1 teaspoon mustard seeds
  • ½ teaspoon split urad dal
  • 1 small small red chilli
  • 1 sprig curry leaves
  • 1 tiny pinch hing

Instructions

  • Dry roast moong dal till slightly golden browned. Set aside.
  • Boil water, once it starts to boil vigorously add roasted moong dal, little salt and let it cook in low flame.
  • The grains should be separate but when you press each dal, it should be soft that is the correct way to cook moong dal for sundal. This may take just 3-5 minutes.
  • Switch off, strain water and set aside.
  • In a pan heat oil - add the items listed under 'to temper' let it splutter. Add a pinch of turmeric powder.
  • Now add cooked dal and just toss it. Add coconut and give a quick stir. Switch off.
  • Serve Moong Dal Sundal hot / warm as a evening snack!

Notes

  • Roasting moong dal - Roasting the dal before cooking adds a deep, roasted flavor and a crunchy texture to the dish.
  • Cooking time - The dal should be soft but not mushy. It should retain its shape while being tender to the bite.
  • Water - After cooking, strain the excess water and rinse with cold water to stop the cooking process.
  • Lemon juice - A squeeze of fresh lime or lemon juice just before serving can add a tangy flavor that enhances the overall taste.
  • Roasted peanuts - Adds extra crunch and protein to the dish.
  • Spice level - You can add a pinch of red chili powder or chopped green chilies to the tempering for a spicier taste.
  • Freshness - A little bit of fresh cilantro or mint can add a refreshing flavor to the sundal.

Nutrition

Serving: 100g | Calories: 254kcal | Carbohydrates: 33g | Protein: 14g | Fat: 8g | Saturated Fat: 3g | Polyunsaturated Fat: 1g | Monounsaturated Fat: 3g | Trans Fat: 0.01g | Sodium: 1955mg | Potassium: 40mg | Fiber: 6g | Sugar: 2g | Vitamin A: 105IU | Vitamin C: 1mg | Calcium: 27mg | Iron: 2mg

The post Moong Dal Sundal | Pasi Paruppu Sundal appeared first on Sharmis Passions.

Vella Puttu Recipe

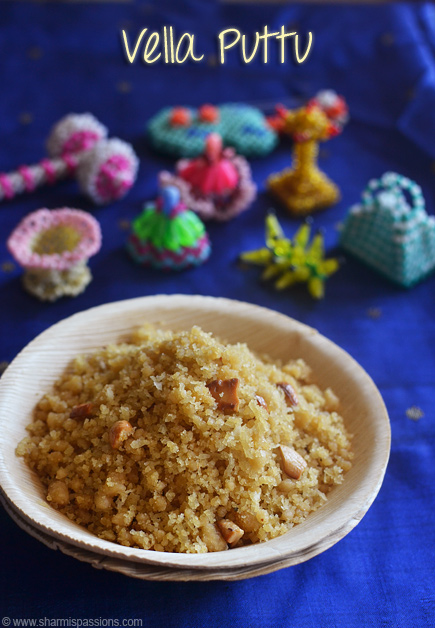
Vella Puttu is a traditional South Indian sweet made using jaggery and rice flour. It is usually prepared during festivals like Gokulashtami and Navratri. This recipe has a soft, crumbly texture and a mild sweetness that makes it comforting. It's one of those dishes that brings a rich taste and beautiful aroma.

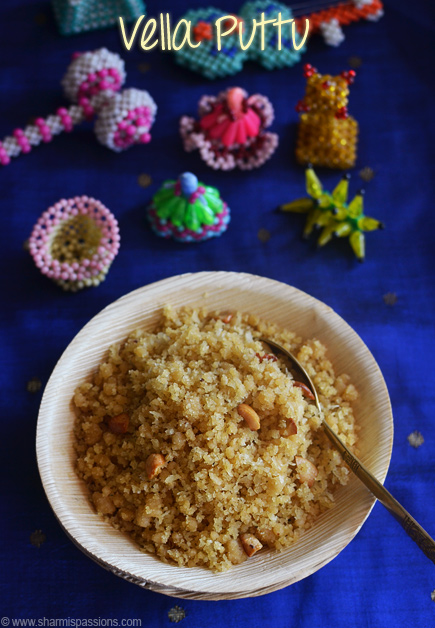
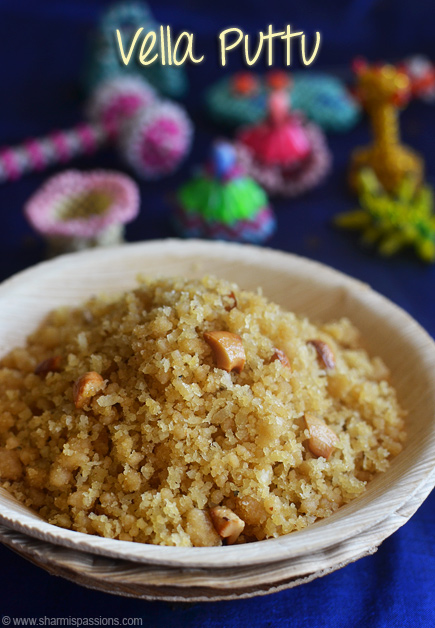
vella puttu served

Vella Puttu Recipe is perfect for people who prefer sweets that are not too sugary or heavy. It is made with simple ingredients and it doesn't require much effort to prepare. Even though it's a festive sweet, this recipe can be made on regular days when you feel like having a quick and tasty homemade snack or dessert.

[feast_advanced_jump_to]

About Vella Puttu

Vella Puttu is a much-loved sweet dish with a soft, crumbly texture and a homemade taste. It is made with just a few ingredients - mainly jaggery, rice flour, cardamom, and coconut. These ingredients come together beautifully to create a sweet that feels light yet full of flavor.

Vella Puttu is a beloved treat in many households, especially during festive times. It's not just about the taste-it's about the memories, traditions, and the joy of sharing something homemade with others. The aroma of melted jaggery mixed with cardamom and coconut often fills the kitchen, making it a warm and inviting delight.

This recipe is also perfect for beginners. Since it doesn't require fancy tools, anyone can try it at home. It's a lovely way to enjoy a traditional sweet without spending too much time in the kitchen. This sweet carries the essence of tradition and comfort in every spoon.

Similar Recipes

vella puttu served

Vella Puttu Ingredients

  • Rice flour - This is the key ingredient. Adds the base texture of the dish, which is soft and crumbly once steamed. Rice flour absorbs the jaggery syrup well, making it perfect for this recipe.
  • Jaggery, water - Used to prepare the jaggery syrup. It adds sweetness and richness to the dish. It's also a healthier alternative to refined sugar.
  • Ghee - Used for frying cashews and adds richness and a delicious, aromatic flavor to the dish.
  • Cashews, coconut - Add a rich, nutty flavor and a crunchy texture with a mild sweetness that complements the other ingredients.
  • Cardamom powder - Adds a warm, aromatic flavor to the dish. It pairs perfectly with the jaggery and coconut.
  • Edible camphor - Adds a unique flavor and fragrance, often used in traditional sweets for its distinctive aroma. It's optional, but it enhances the authenticity of the dish.

Why This Recipe Works

  • This recipe is made with just a few simple ingredients.
  • It's a simple and quick recipe to prepare.
  • This recipe has a soft, crumbly texture making it tasty.
  • Jaggery adds natural sweetness, a healthier alternative for white sugar.
  • It has a mild sweetness and a rich, aromatic flavor.
  • It's a healthy snack recipe that can be made in advance.
  • Perfect for festivals and special occasions.

How to make Vella Puttu Step by Step

1.Dry roast rice flour till it changes color to light brown. Cool down, then sprinkle water little by little and make the entire flour wet, keep mixing.

how to make vella puttu step1

2.The mixture should hold together when you press with it with your palms and should crumble and fall when you leave it (pidicha pidikkanam vitta uthuranum). Now collect the mixture in a clean muslin cloth and tie the ends to make a bag like. Steam the mixture for at least 8-10 minutes.

15131810409 ebe5d1065b o

3.Cool down and then crumble it with your hands to break the lumps formed. Set aside. Now start preparing the jaggery syrup, add water to crushed jaggery just till immersing level.

15295512086 691962edc6 o

4.Strain to remove impurities. Then heat up the syrup in a pan. Keep water in a plate to check the consistency. Keep boiling until you reach a consistency when you pour a drop of the jaggery syrup in water it should not get dissolved.

15318550865 51ef75a3c9 o

5. It should form a soft ball. This is the correct consistency. In a teaspoon of ghee fry the cashews and keep it ready.

15132003917 ec175c7751 o

6.Keep the flame in sim and immediately add the cooked rice mixture. Now add ghee, cardamom powder and edible camphor. Keep mixing till it becomes dry and all the jaggery syrup is absorbed. Add coconut, ghee fried cashews, mix well and switch off.

15295511726 fdabc6f9f8 o

Enjoy it hot or warm!

navaratri toys

Expert Tips

  • Rice flour - If you don't have time to grind rice flour at home, you can use store-bought rice flour or idiyappam flour.
  • Jaggery syrup - It's important to cook the jaggery syrup until it forms a soft ball in water for best results.
  • Steaming - Steaming the rice flour mixture is essential for the perfect texture. Make sure to steam it thoroughly to avoid lumps.
  • Frying - Frying the cashews in ghee adds a rich, nutty flavor that enhances the overall taste of the Vella Puttu.
  • Sweetness - If you prefer a sweeter dish, you can add extra jaggery or extra sugar. Adjust it according to your taste preference.
  • Coconut - Use freshly grated coconut for rich taste and flavor.

Serving and Storage

Vella Puttu is best served warm, allowing the flavors to blend together. You can serve it as a dessert or a sweet snack with tea or coffee.

As it has coconut, it does not keep well in room temperature for more than a day. You can store it in an airtight container for up to a week in the refrigerator. Simply warm it up before serving.

FAQS

1.Can I use regular rice flour instead of store-bought flour?

Yes, you can use regular rice flour, but store-bought flour gives a smoother texture.

2.Can I substitute jaggery with sugar?

Yes, you can use sugar but jaggery gives a richer flavor and is a healthier alternative.

3.What can I use instead of edible camphor?

Edible camphor adds a unique flavor, but you can skip it.

4.Can I add other nuts?

Yes, you can add other nuts like almonds or pistachios, but cashews are the most commonly used.

5.How do I know if the jaggery syrup has reached the right consistency?

The syrup should form a soft ball when dropped into water. If it dissolves, you need to boil it further. If it is hard then the stage has passed and it has over cooked which will make the puttu hard.

6.Is this recipe kid-friendly?

Yes, it is a kid-friendly recipe.  You can skip edible camphor and add more nuts.

vella puttu served

If you have any more questions about this Vella Puttu Recipe do mail me at sharmispassions@gmail.com. In addition, follow me on InstagramFacebookPinterest ,Youtube and Twitter .

Tried this Vella Puttu Recipe? Do let me know how you liked it. Also tag us on Instagram @sharmispassions and hash tag it on #sharmispassions.

📖 Recipe Card

15319321082 748ebae14f o
Print

Vella Puttu Recipe

Vella Puttu is a traditional South Indian sweet made using jaggery and rice flour. It is usually prepared during festivals like Gokulashtami and Navratri. This recipe has a soft, crumbly texture and a mild sweetness that makes it comforting. It's one of those dishes that brings a rich taste and beautiful aroma.
Course Breakfast, dinner, sweet
Cuisine Indian
Keyword 30 mins recipes, 30 mins rice recipes, gokulashtami recipes, puttu recipes
Prep Time 10 minutes
Cook Time 20 minutes
Total Time 30 minutes
Servings 2
Calories 370kcal
Author Sharmilee J

Ingredients

  • ½ cup rice flour (You can use store bought rice flour / idiyappam flour too)
  • cup jaggery
  • 2 tablespoon coconut
  • 5 cashews broken
  • ¼ teaspoon cardamom powder
  • 1 tiny pinch edible camphor
  • 2 teaspoon ghee
  • ¼ cup water for jaggery syrup + as required for rice flour mixture

Instructions

  • Dry roast rice flour till it changes color to light brown. Cool down, then sprinkle water little by little and make the entire flour wet, Keep mixing.
  • The mixture should hold together when you press with it with your palms and should crumble and fall when you leave it(pidicha pidikkanam vitta uthuranum).
  • Now collect the mixture in a clean muslin cloth and tie the ends to make a bag like…
  • steam the mixture for at least 8-10 minutes.
  • Cool down and then crumble it with your hands to break the lumps formed. Set aside.
  • Now start preparing the jaggery syrup, add water to crushed jaggery just till immersing level.
  • Strain to remove impurities. Then heat up the syrup in a pan. Keep water in a plate to check the consistency.
  • Keep boiling until you reach a consistency when you pour a drop of the jaggery syrup in water it should not get dissolved.
  • It should form a soft ball.This is the correct consistency.
  • In a teaspoon of ghee fry the cashews and keep it ready.
  • Keep the flame in sim and immediately add the cooked rice mixture. Now add ghee, cardamom powder and edible camphor.
  • Keep mixing till it becomes dry and all the jaggery syrup is absorbed.Add coconut, ghee fried cashews, mix well and switch off.
  • Serve Vella Puttu hot / warm.

Notes

  • Rice flour - If you don't have time to grind rice flour at home, you can use store-bought rice flour or idiyappam flour.
  • Jaggery syrup - It's important to cook the jaggery syrup until it forms a soft ball in water for best results.
  • Steaming - Steaming the rice flour mixture is essential for the perfect texture. Make sure to steam it thoroughly to avoid lumps.
  • Frying - Frying the cashews in ghee adds a rich, nutty flavor that enhances the overall taste of the Vella Puttu.
  • Sweetness - If you prefer a sweeter dish, you can add extra jaggery or extra sugar. Adjust it according to your taste preference.
  • Coconut - Use freshly grated coconut for rich taste and flavor.

Nutrition

Serving: 150g | Calories: 370kcal | Carbohydrates: 68g | Protein: 3g | Fat: 9g | Saturated Fat: 5g | Polyunsaturated Fat: 1g | Monounsaturated Fat: 3g | Cholesterol: 13mg | Sodium: 3mg | Potassium: 76mg | Fiber: 2g | Sugar: 34g | Vitamin C: 0.2mg | Calcium: 19mg | Iron: 1mg

The post Vella Puttu Recipe appeared first on Sharmis Passions.

Mocha Cupcake Recipe (Chocolate Coffee Cupcake)

Chocolate cupcakes are always a favorite, but have you tried adding coffee to them ? The combination of chocolate and coffee gives these eggless cupcakes a delicious mocha flavour. These Eggless mocha cupcakes are soft, moist and fluffy cupcakes made with a simple chocolate and coffee flavoured batter. Mocha Cupcake Recipe I could stand here...

Read More

The post Mocha Cupcake Recipe (Chocolate Coffee Cupcake) appeared first on Yummy Tummy.

Andhra Fish Fry Recipe (Chepa Vepudu Recipe)

Andhra fish fry als known as Chepa Vepudu is a popular Andhra fish recipe which is loved by everyone. Fish pieces is marinated with ginger garlic paste, spice powders, lemon and pan fried till golden brown. Enjoy hot fried fish with rice, curry of choice. Andhra Fish Fry Recipe Andhra fish fry, also known as...

Read More

The post Andhra Fish Fry Recipe (Chepa Vepudu Recipe) appeared first on Yummy Tummy.

❌