❌

Reading view

There are new articles available, click to refresh the page.

Regain Some Trust in Unknown USB Drives
For how useful USB thumb drives are for quickly toting around and copying files from one computer to another, they can be a bit of a security headache. Programs can be loaded on them with all kinds of malware; they can be obscured in some ways that are difficult to detect, and they can be set up to execute certain programs when they’re plugged in. The general wisdom is to simply avoid untrusted USB devices completely, but that sort of abstinence-only policy rarely works in the real world. If, for some reason, an untrusted USB device absolutely needs to be used, many of these security issues can be mitigated with this tool.

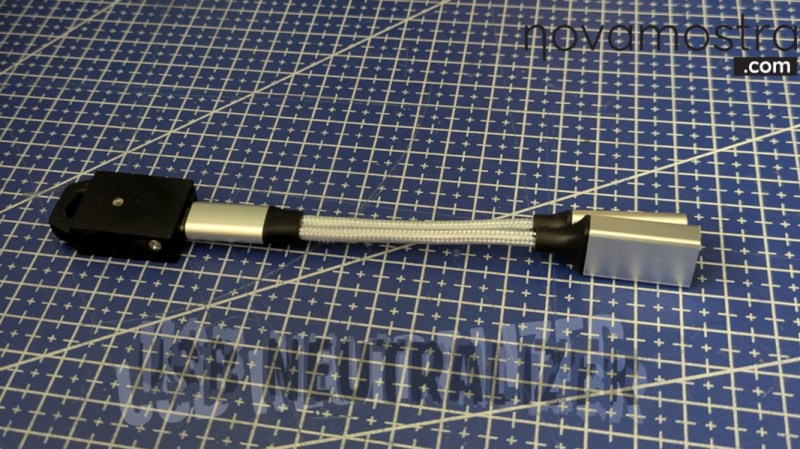
Built by [Novamostra], the device is simple on the surface: it’s a Raspberry Pi Pico mated to a 2-in-1 USB splitter cable. But with the USB Neutralizer software they have written loaded onto the Pico, it automatically destroys the ability of any connected USB thumb drive to load files. The program works by deleting the first and last 34 Logical Block Addressing (LBA) sectors on the drive immediately when it’s plugged in, without doing anything else. This effectively corrupts the drive bad enough to prevent malicious software in the partitions from doing anything, allowing the user to (relatively) safely put the USB drive into their computer and format it for re-use. The code for this tool is also open-source and reviewable on the project’s GitHub page.

Of course, this isn’t a perfect security solution for all USB attacks. It doesn’t erase or replace the firmware on the drive itself, and although firmware-level attacks are rare they’re not out of the question for all users, all the time. It also won’t prevent a malicious physical attack like this high-voltage one, and it may also not stop hidden or obscured partitions or devices programmed for storage and some other nefarious purpose simultaneously, like a USB HID. But still, this solves a great many of the problems associated with getting new drives from semi-untrustworthy sources, like retailers or friends whose computer skills we don’t fully trust.
Scanwheel: A Pocket-Sized POV TV

Scanwheel

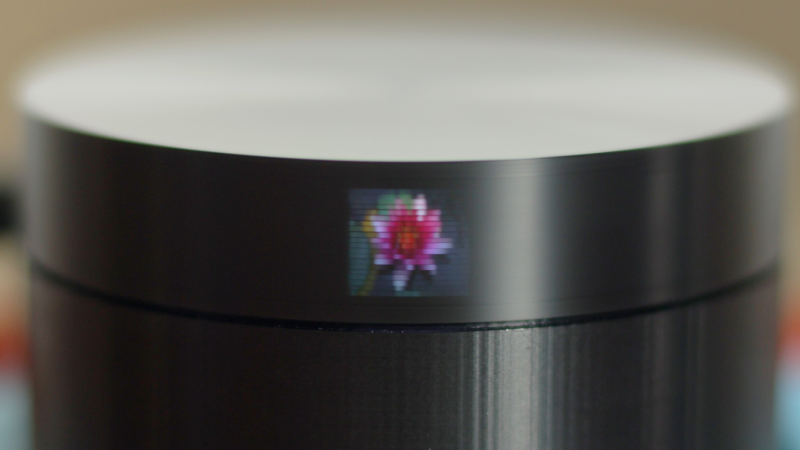
When you hear the word TV, you probably think of a big LED screen, maybe even the old CRT TVs, but in either case it’s something large and fairly complicated. However, thanks to the persistence of vision, it doesn’t have to be. In this handheld-sized project from [Ancient], the Scanwheel is born, a miniature mechanical TV that uses a spinning disk and some LEDs to produce an image.

The electronics of the Scanwheel are pretty straightforward. The smarts come from a Raspberry Pi Pico, an A4988 motor driver, a couple of LEDs, and a small 21-02485 stepper motor. The Raspberry Pi Pico is used to command the motor speed as well as coordinate the LEDs to turn on at the right time. The case is 3D printed; the base includes space for the various support electronics as well as some small light baffles to ensure the LEDs don’t bleed over outside their intended area. The top of the case is a disk that includes 20 small holes spaced evenly around the perimeter at varying heights, allowing light to only leave the disk when one of these holes is in front of the LEDs.

When you put all these pieces together, spin the motor up to roughly 900 RPM, and turn the LEDs on in a precise order, you end up with a really cool result: a miniature TV. And due to the five different LEDs in this build, you actually have a color 20Γ—20 pixel display in the center and, on either side of that, two more 20Γ—20 black-and-white displays capable of showing different images. Thanks [Ancient] for sharing this awesome build that takes advantage of the persistence of vision effect to create a unique display. Be sure to check out the video below as well as the instructions on how to build your own. And if you enjoy this sort of thing, check out some of our other persistence-of-vision projects as well.

SB Mini II is a Homebrew Apple II Clone

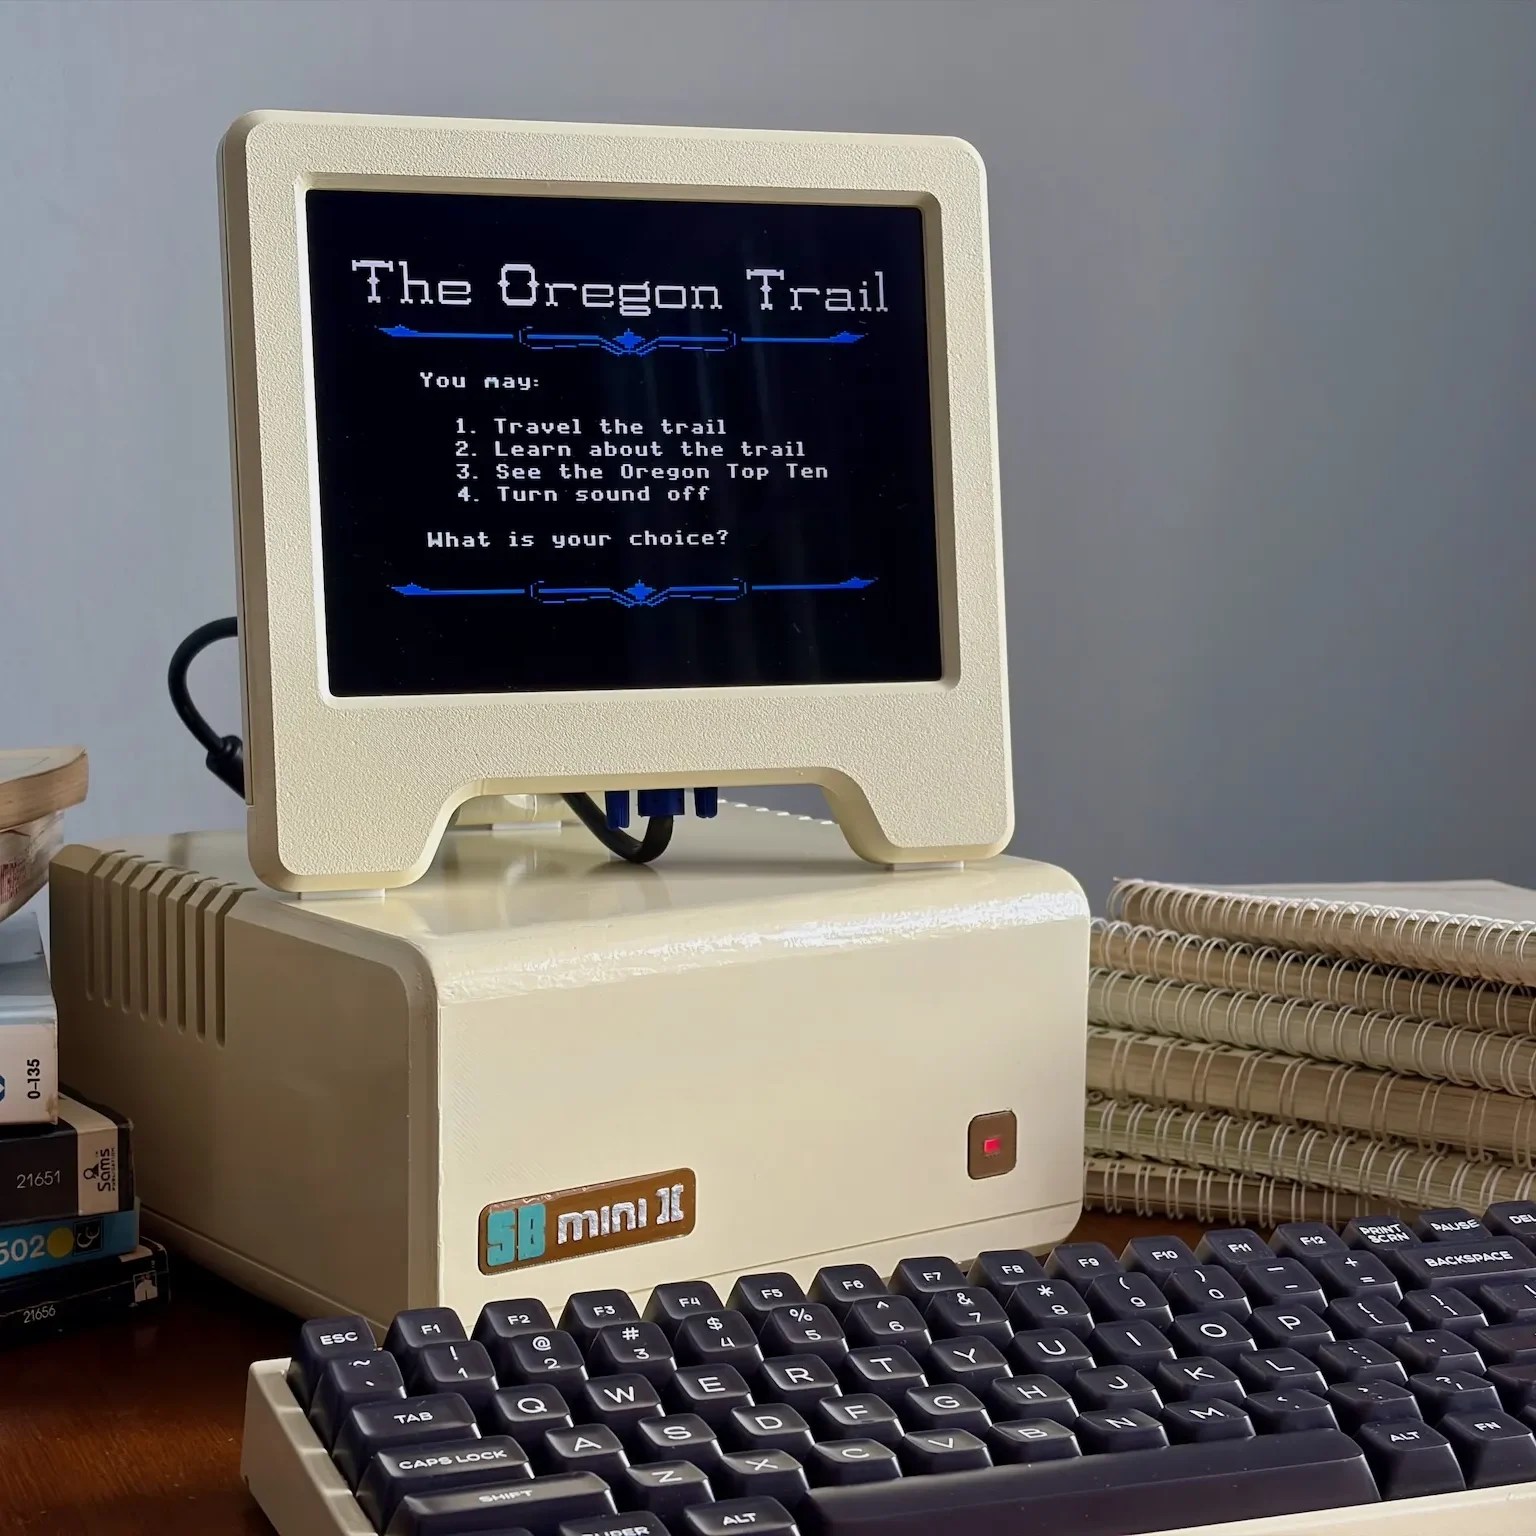
On the one hand, the original Apple II has been copied over and over again since at least the early 80s, so maybe this hack is old hat to the greybeards around here. On the other hand, this is the year 2026. When Apple released it back in 1977, who could have predicted people would still be building these things nearly five decades later?

In that sense, a homebrew Apple II in the current year is pretty remarkable. It’s a really well done project by [simonboak], nicely open sourced with a case to match, so is worth looking at on its own merits.

It doesn’t run DOOM, but neither did the original. Oregon Trail is more this unit’s speed.

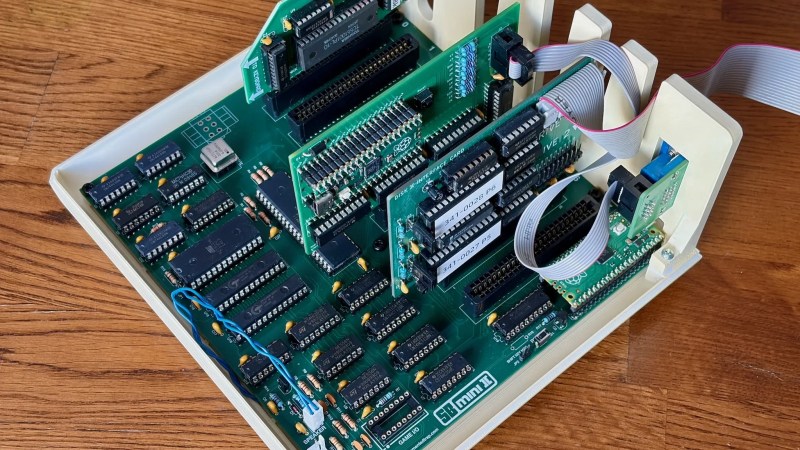
Unlike the later models, the original Apple II only used commercially available ICs, making it an easy target for recreation. No FPGAs required, just good old-fashioned DIPs. OK, these are modern CMOS versions of the chips, but other than that, the biggest concession to modernity is space on the board for a Raspberry Pi Pico to allow for connecting a USB keyboard.

The accompanying blog post lists some other differences from 1977’s favorite home computer: SRAM vs DRAM β€” because you know the Woz would have used it if he could β€” and omitting the composite video circuitry in favor a late-model VGA card. There’s no need for the composite output since he’s eschewing the period-appropriate CRT for a retro-styled LCD monitor, which is also 3D printed and available on Printables. It’s crazy to think that the Apple II family lived long enough not only to see the dawn of VGA but also well into its sunset.

If a homebuilt Apple ][ doesn’t impress, what about a PC-compatible circa 1995?

❌