❌

Reading view

There are new articles available, click to refresh the page.

Spicy and Saucy Tangra Chilli Chicken | Kolkata Style

This Tangra chilli chicken brings the flavours of Kolkata’s famous Chinatown into your kitchen. It’s spicier and saucier than regular chilli chicken, and the air fryer gets the chicken perfectly crispy without deep-frying.
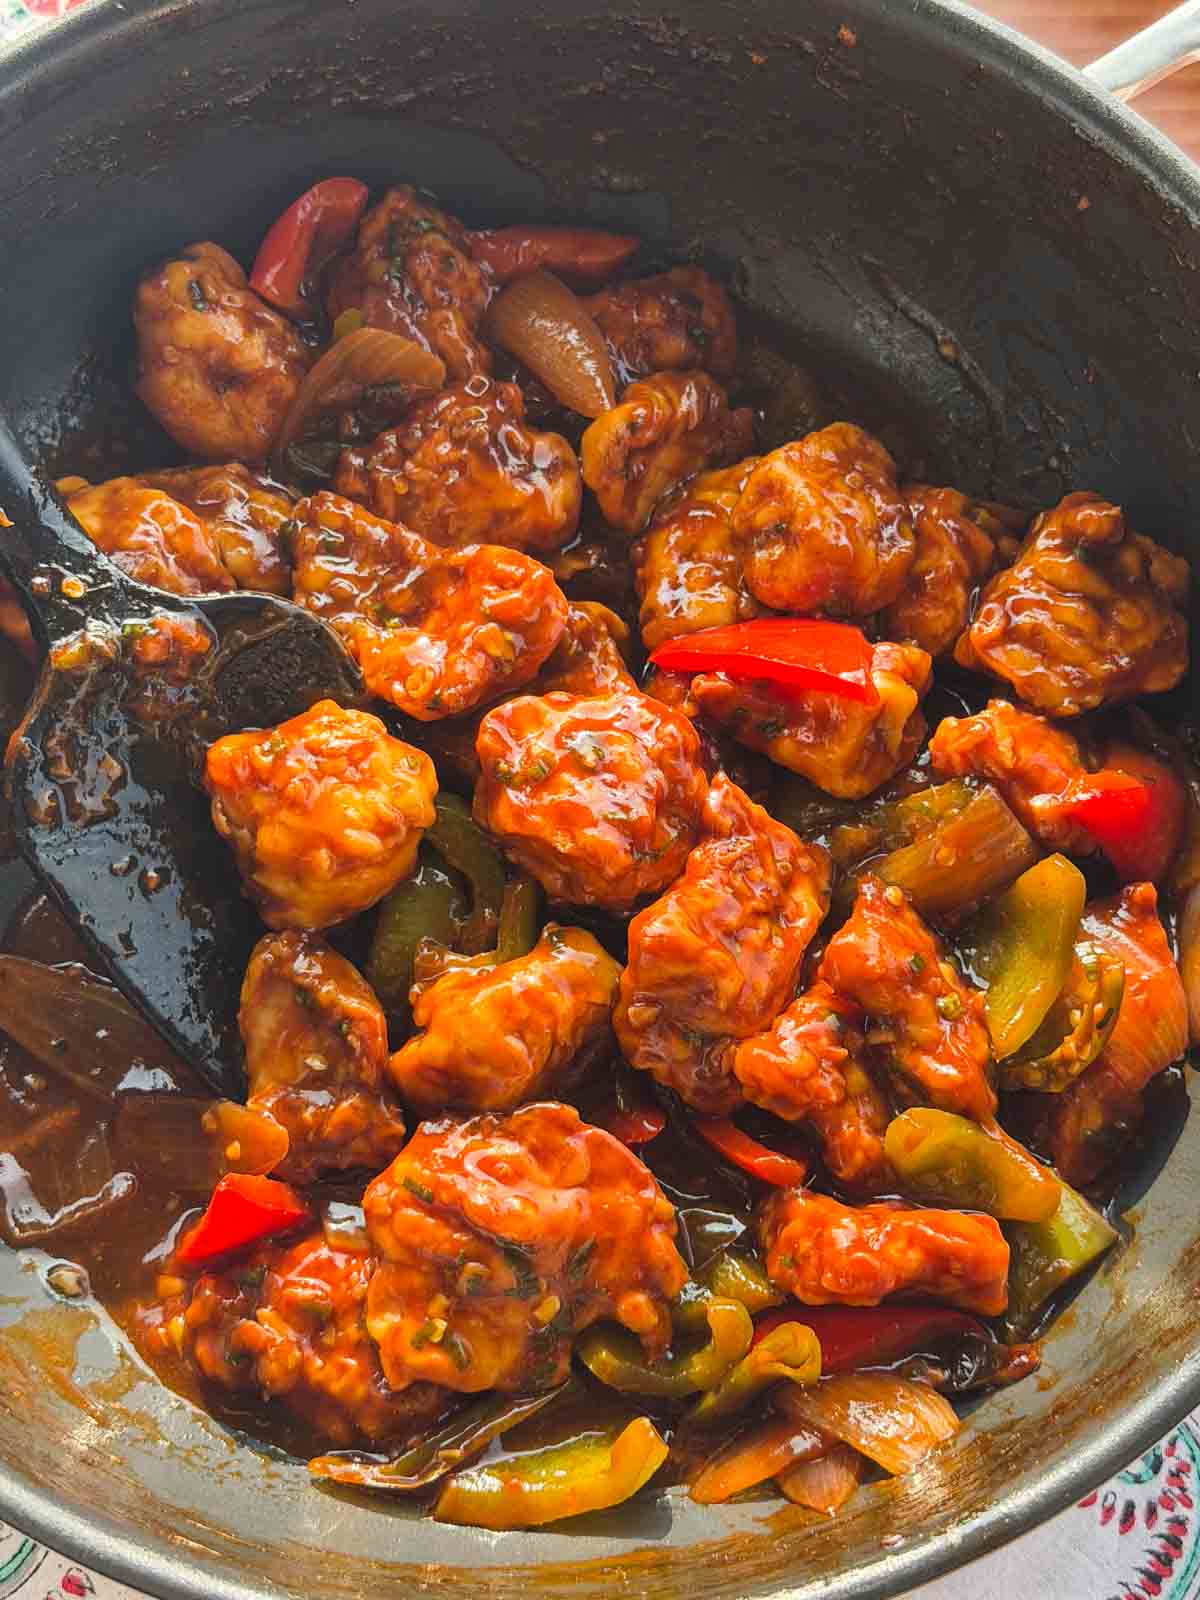
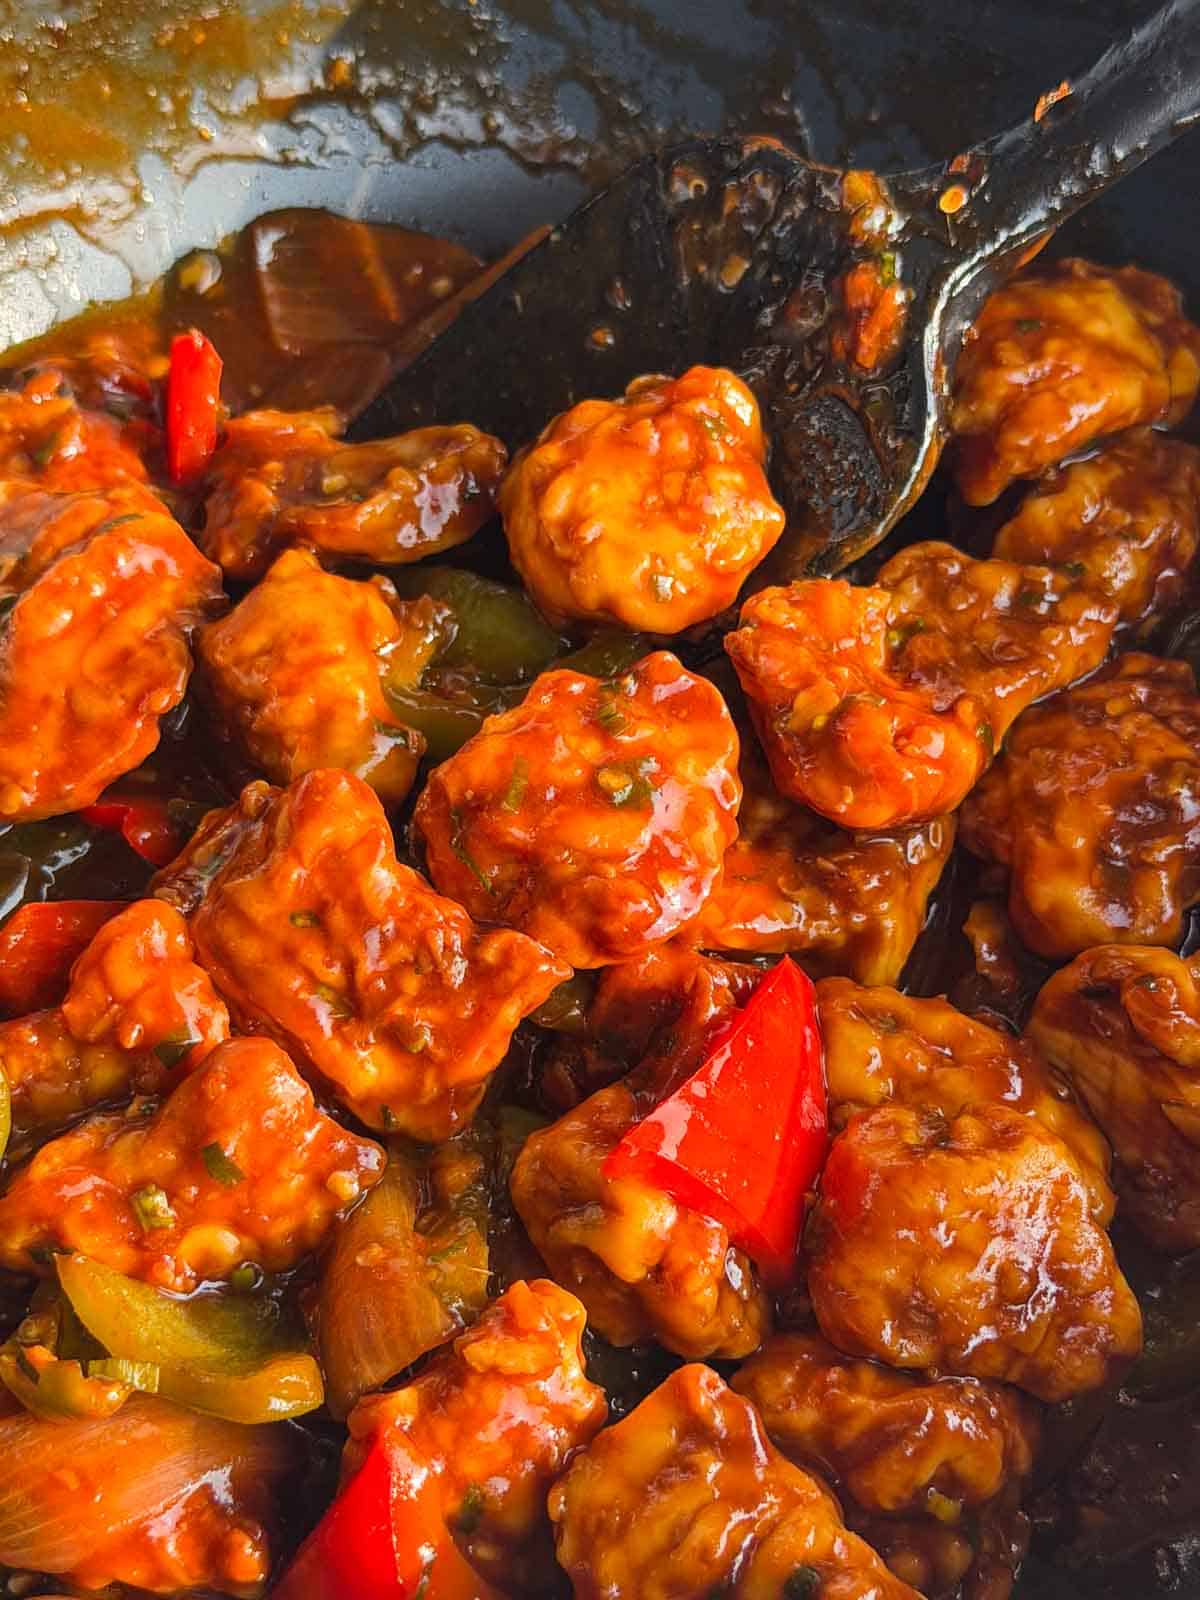
chilli chicken in the wok ready to be served

This Tangra chilli chicken has been making our Indo-Chinese nights at home so much better. If you’ve had regular chilli chicken a hundred times by now and it’s started to feel a bit dull, the Tangra version from Kolkata’s Chinatown is going to bring that excitement back again. It’s spicier, saucier, and the flavour of the sauce is so much deeper than what you get from a standard chilli chicken recipe.

We already have our Chinese chilli chicken dry on the blog, which my family loves, but ever since I made this Kolkata chilli chicken recipe version, it’s been a tough competition between the two. Try both and see which one your family picks.

Tangra Chilli Chicken Ingredients

  • Chicken Thighs: Boneless, cut into ΒΎ inch cubes. Thighs stay juicier than breast after air frying.
  • Marinade: Maida, cornflour, grated garlic, vinegar, egg, and salt. This coating is what gives the chicken its crispy exterior and flavor that holds up in the sauce.
  • Sauce Mix: Dark soy sauce, tomato ketchup, red chilli sauce, oyster sauce, chicken broth paste, cornflour, and water. The combination of all these sauces is what gives Tangra chilli chicken its signature flavour that regular chilli chicken doesn’t have.
  • Stir-fry aromatics: Garlic, ginger, and green chillies sliced diagonally.
  • Vegetables: Onion petals, green and red capsicum. They get a quick stir-fry on high heat so they stay crunchy.
  • Spring Onion Greens: For garnish.
  • Oil: For brushing the air fryer basket and stir-frying.

Richa’s Top Tips

  • Marinate the chicken for at least 30 minutes. The maida and cornflour coating needs time to set so it crisps up properly in the air fryer. A rushed marinade means the coating slides off, and you lose that crunch.
  • Air fry in stages, finishing at 200Β°C. The initial fry at 180Β°C cooks the chicken through, and the final 2-3 minutes at 200Β°C gives it that deep golden, crispy finish that survives being tossed in the sauce.
  • Keep the stir-fry on high heat and move fast. Everything in the wok happens quickly. The garlic, ginger, and chillies need just 30 seconds, and the onions and capsicum need a minute or two at most. If you lower the heat or cook too long, the vegetables go soft and lose their crunch.
  • Mix the sauce ingredients ahead of time in a bowl. Once the stir-fry starts, things move fast, and you don’t want to be measuring sauces while the wok is smoking. Having the sauce mix ready to pour in saves time and stress.
  • Don’t let the chicken sit in the sauce too long. Toss it in, cook for about 2 minutes, and serve immediately. The longer the chicken sits in the sauce, the softer the coating gets. You want that contrast between crispy chicken and saucy gravy.

Frequently Asked Questions

What makes Tangra chilli chicken different from regular chilli chicken?

Tangra chilli chicken comes from Kolkata’s Chinatown, an area called Tangra, where Chinese-Indian families have been cooking Indo-Chinese food for decades. The sauce uses a more complex mix of dark soy, oyster sauce, ketchup, and chilli sauce along with generous amounts of green chillies, which gives it a deeper, bolder flavour than the standard chilli chicken you get at most restaurants.

Can I make Tangra chilli chicken without an air fryer?

Yes. Deep fry the marinated chicken pieces in hot oil until golden and crispy, about 3-4 minutes. Drain on paper towels and then toss in the sauce as usual. The air fryer is a healthier alternative that uses much less oil, but deep frying gives you an equally crispy result.

Can I make this vegetarian?

Paneer cubes, firm tofu, or cauliflower florets all work well with this same sauce and method. For paneer and tofu, coat them in the same marinade and air fry until golden. For cauliflower, our bang bang cauliflower uses a similar approach, and the Tangra sauce would work beautifully with it.

Storage Tips

  • In the fridge: Store the air-fried chicken and the sauce separately in airtight containers for up to 2 days. Keeping them apart prevents the coating from going soggy. When ready to eat, reheat the sauce, crisp the chicken in the air fryer for 2-3 minutes, and toss together fresh.
  • Freezing: The air-fried chicken freezes well on its own for up to two weeks. Thaw overnight in the fridge and crisp up in the air fryer before tossing in freshly made sauce. The sauce is best made fresh as the flavour dulls after freezing.
  • The stir-fry vegetables: Best made fresh every time. Reheated onions and capsicum lose their crunch and turn limp, which takes away from the whole dish.

Serving Ideas

This chilli chicken Bengali recipe pairs best with rice or noodles. Here are our favourites from the blog:

  • With Egg Fried Rice: The most classic pairing. A plate of egg fried rice with saucy Tangra chicken on top is a proper Indo-Chinese meal.
  • With Chilli Garlic Noodles: If you want noodles instead, these spicy, garlicky noodles with the Tangra chicken on the side are an incredible combination.
  • With Hakka Noodles: For something milder alongside the spicy chicken, regular hakka noodles let the Tangra sauce take centre stage.
  • As part of an Indo-Chinese spread: Serve this with honey chilli potatoes and veg spring rolls for a proper Chinese dinner at home.

Customisation Ideas

  • Make it drier: Reduce the water in the sauce mix to about ΒΌ cup instead of ΒΎ cup for a drier, stickier version that works great as a party starter.
  • Make it with paneer or tofu: Cube them to the same size, coat in the same marinade, and air fry until golden. The Tangra sauce works just as well with both.
  • Add cashews: A handful of roasted cashews tossed in at the end adds a crunch that pairs really well with the saucy chicken. Common in a lot of Kolkata-style Indo-Chinese restaurants.
  • Use different vegetables: Baby corn, spring onions, and mushrooms all work well in the stir-fry alongside or instead of the capsicum and onions.

Did You Know?

Kolkata’s Tangra is the only Chinatown in India, and one of the oldest in the world. Chinese immigrants, mostly Hakka people from Guangdong province, settled in Kolkata in the late 18th century. They originally worked in leather tanneries and shoe-making, and the food they cooked at home gradually blended Chinese techniques with Indian spices and ingredients. That fusion is what we now call Indo-Chinese food, and Tangra is where it was born. The chilli chicken, manchurian, and fried rice that every Indian restaurant serves today can all be traced back to the kitchens of this small neighbourhood in East Kolkata.Β 

a close up image of chilli chicken in the wok

Once you make Tangra style chilli chicken, there’s really no going back to the regular version. Fair warning. Tag me on Instagram @my_foodstory when you make it, I’d love to see how yours turns out.

Watch Tangra Chilli Chicken Recipe Video

chilli chicken in the wok ready to be served
Print

Tangra Chilli Chicken

This Tangra chilli chicken is spicier and saucier than regular chilli chicken. Serve it fried rice or noodles for a street-style meal at home.
Course Main Course
Cuisine Indian Chinese
Diet Halal
Prep Time 10 minutes
Cook Time 25 minutes
Total Time 35 minutes
Servings 4 servings
Calories 421kcal
Author Richa

Equipment

Ingredients

  • 500 grams boneless chicken thighs cut into ΒΎ inch cubes

For marination

  • Β½ teaspoon salt
  • ΒΌ cup all purpose flour / maida
  • ΒΌ + β…› cups cornflour
  • 2 teaspoons grated garlic
  • 1 teaspoon vinegar
  • 1 large egg

For sauce mix

  • 1 Β½ tablespoons dark soy sauce
  • 3 ΒΎ tablespoons tomato ketchup
  • 3 tablespoons red chilli sauce
  • 1 Β½ tablespoons oyster sauce
  • 1 Β½ teaspoons chicken broth powder
  • ΒΎ teaspoon cornflour
  • ΒΎ cup water

For stir fry

  • 1 Β½ tablespoons finely chopped garlic
  • 1 tablespoon finely chopped ginger
  • 8-9 green chillies sliced diagonally
  • 1 medium onion cut into petals
  • Β½ green capsicum cut into ΒΎinch cubes
  • Β½ red capsicum cut into ΒΎinch cubes
  • 2 tablespoons finely chopped spring onion greens

Instructions

Marinating chicken

  • Add chicken to a bowl, add all the marination ingredients, give a good mix and set aside to marinate at least for 30 minutes

Sauce mix

  • Add all ingredients for sauce mix to a bowl, whisk well and set aside.

Air frying chicken

  • Preheat the air fryer to 180C and brush the basket with oil. Arrange the marinated chicken with some gap between each other. Brush with oil. Air Fry at 180C for 7 minutes, flip once, air fry at 180C for 5 minutes and for 2-3 minutes at 200C, till they turn golden from outside.

Making tangra chicken

  • Heat oil in a wok or pan, add ginger, garlic and green chillies and saute on high for 30 seconds. Add onions, capsicums and saute on high for a minute or 2 till they get roasted. add air fried chicken and saute for a minute on high. Add sauce mix and cook on medium for 2 minutes while stirring constantly. Garnish with spring onion greens and serve.

Video

Nutrition

Calories: 421kcal | Carbohydrates: 30g | Protein: 25g | Fat: 22g | Saturated Fat: 6g | Polyunsaturated Fat: 5g | Monounsaturated Fat: 9g | Trans Fat: 0.1g | Cholesterol: 164mg | Sodium: 1704mg | Potassium: 471mg | Fiber: 5g | Sugar: 15g | Vitamin A: 781IU | Vitamin C: 46mg | Calcium: 45mg | Iron: 2mg

This article was researched and written by Harita Odedra.

The post Spicy and Saucy Tangra Chilli Chicken | Kolkata Style appeared first on My Food Story.
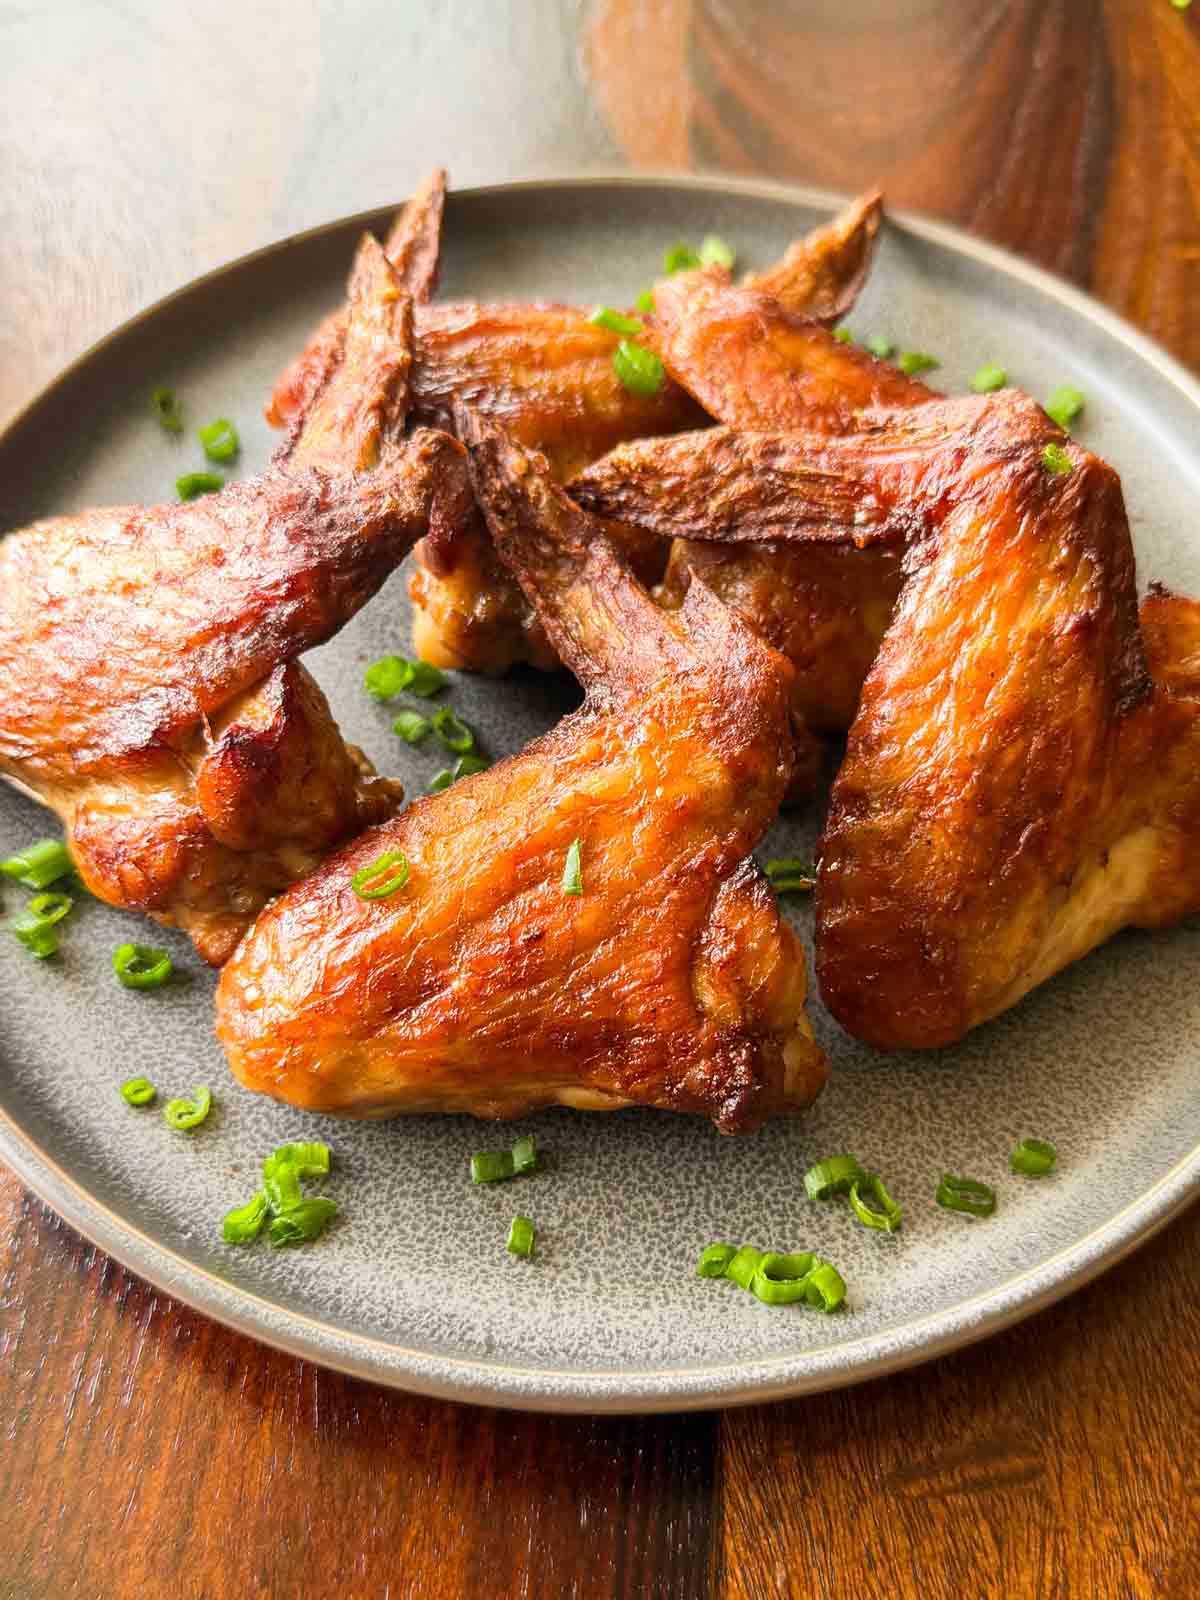
Soy Sauce Chicken Wings In Air Fryer

Making these soy sauce chicken wings in the air fryer is a game changer! It’s quick, easy, and mess-free. All you need to do is marinate, air fryer, and serve, and an entire batch is ready in 20 minutes!Β 

soy chicken wings served on a plate

These soy sauce chicken wings in air fryer is one of those recipes we make on repeat at home. They’re perfect for weeknight dinners when I want something that feels more fun than the usual stuff, but they also work so well when we’re having friends over. The marinade takes just a few minutes to throw together, and after that, the air fryer does pretty much all the work.

I especially love that there’s very little mess involved. The wings go straight from the marinade into the air fryer, so there’s no deep frying, splattering oil or a pile of dishes to deal with afterwards. They come out juicy on the inside, nicely browned and slightly crisp on the outside, with all that savoury soy and sesame flavour. Honestly, these disappear pretty quickly every time I make them!

Ingredients for Soy Sauce Chicken Wings

Chicken: Skin-on chicken wing pieces. I like using skin-on pieces as they get really crispy on the outside, but skinless pieces work tooΒ Β 

Soy sauce: I have light soy sauce for that savory umami flavor, but dark soy sauce will work in a pinchΒ 

Vinegar: Adds a dash of tangy freshness to the dish

White pepper powder: Adds a subtle earthy flavor and a kick of heatΒ 

Salt and sugar: For balance and seasoning

Oil: I have used toasted sesame oil for its authentic Indo-Chinese and nutty flavors, but you can use a neutral-flavored oil if that’s what you have availableΒ 

Baking powder: Helps make the chicken skin light and crispyΒ Β 

Stock powder: Adds a savory, umami flavor boost. A little goes a long wayΒ 

Frequently Asked QuestionsΒ 

Can I use boneless chicken for this recipe?Β 

Yes, but the cooking time will be different. Boneless chicken cooks faster than bone-in wings, so start checking earlier to prevent it from drying out.Β 

Can I make these chicken wings without an air fryer?

Yes absolutely! You can bake them in a preheated oven at 220Β°C until the wings are cooked through and nicely browned, flipping them halfway through. Cooking time may vary depending on your oven and the size of the wings.

How do I know when the chicken wings are cooked?

The wings should be deeply browned on the outside and cooked through near the bone. For the most reliable check, use a thermometer. The thickest part of the chicken should reach 74Β°C/165Β°F.

Richa’s Top Tips

  • Marinate for at least 4 hours. But if you have more time, I highly recommend marinating for 8 hours or overnight to give these chicken wings much more flavor.Β 
  • Air fry the wings in a single layer. Overcrowding the air fryer basket restricts hot air flow and can lead to steamed chicken wings and not roasted. It can also cause uneven browning.Β 
  • Start skin-side down: This gives the underside time to cook before flipping and helps the skin get evenly browned.
  • Flip halfway through: This is important for even browning and roasting on both sides.
  • Watch the salt: Light soy sauce and stock powder both contain salt, so start with the smaller amount of salt in the marinade if you’re unsure. You can always adjust the seasoning next time.
  • Let them rest for a couple of minutes: Once cooked, let the wings sit for 2-3 minutes before serving. They’ll be juicy and easier to handle.

Storage Tips

  • Fridge: I would recommend eating these straight out of the air fryer. However, you can store leftovers in an airtight container in the refrigerator for up to 3 days.
  • Reheat: To reheat, place the wings in the air fryer at 180Β°C for 4–6 minutes, turning once, until hot and crisp again. Avoid microwaving if possible as it can make the skin soft and chewy.
  • Freeze: You can also freeze the cooked wings for up to 2 months. Cool them completely before transferring them to a freezer-safe container or bag. Reheat directly from frozen in the air fryer, adding a few extra minutes to the cooking time.

Serving IdeasΒ 

These soy chicken wings work really well as an easy appetiser or part of an Indo-Chinese-style meal. Serve them alongside:

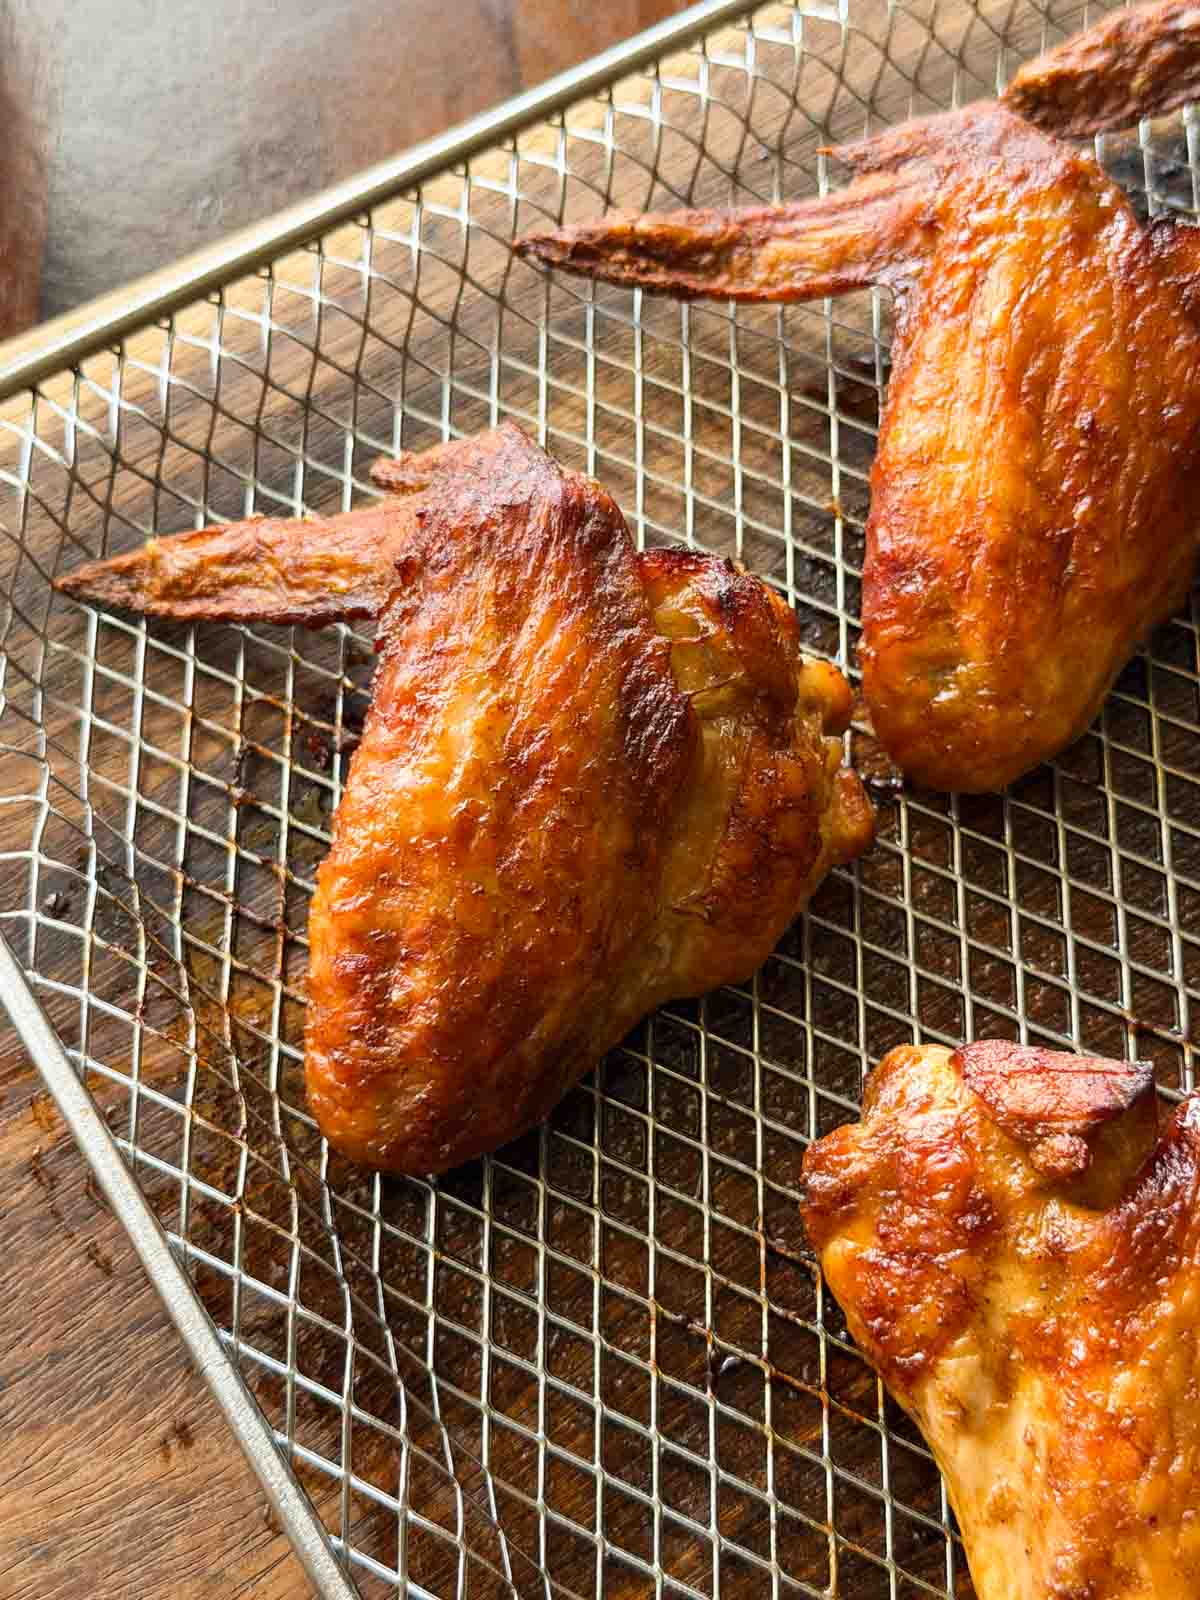
soy chicken wings in the air fryer tray ready to be served

These soy chicken wings are a breeze to put together thanks to the air fryer. They turn out crispy, juicy, and so delicious. I am convinced you won’t be able to stop at one because they’re so so addictive! Β 

If you make this air fryer chicken wings, don’t forget to DM the pictures @my_foodstory. Until then, happy cooking!

Watch Soy Sauce Chicken Wings Recipe Video

soy chicken wings in the air fryer tray ready to be served
Print

Soy Chicken Wings in Air Fryer

Making chicken in the air fryer is a game changer! It’s quick, easy, and mess-free; all you need to do is marinate, air fryer, and serve, and an entire batch is ready in 20 minutes!
Course Snacks & Appetisers
Cuisine Indian Chinese
Diet Halal
Prep Time 5 minutes
Cook Time 15 minutes
Total Time 20 minutes
Servings 8 wings
Calories 121kcal
Author Richa

Equipment

Ingredients

  • 8 chicken wings with skin approx. 450 grams

For marination

  • 3 tablespoons light soy sauce
  • 2 teaspoon vinegar
  • ΒΌ-Β½ teaspoon salt
  • ΒΌ teaspoon sugar
  • 1 teaspoon white pepper powder
  • 2 teaspoon toasted sesame oil
  • Β½ teaspoon baking powder
  • Β½ teaspoon stock powder

Instructions

  • Add chicken wings with all the ingredients listed under marination in a bowl, mix well and set aside to marinate for 8 hours or overnight.
  • Pre-heat airfryer at 200 C and brush the airfryer basket with a few drops of oil
  • Add the marinated chicken wings to the basket skin side down, air fry at 200 C for 10 minutes. Flip once and air fry for another 8 minutes at 200 C till the wings are roasted well. Serve.

Video

Nutrition

Calories: 121kcal | Carbohydrates: 1g | Protein: 10g | Fat: 9g | Saturated Fat: 2g | Polyunsaturated Fat: 2g | Monounsaturated Fat: 3g | Trans Fat: 0.1g | Cholesterol: 37mg | Sodium: 544mg | Potassium: 90mg | Fiber: 0.1g | Sugar: 0.3g | Vitamin A: 71IU | Vitamin C: 0.4mg | Calcium: 23mg | Iron: 1mg

This article was researched and written by Urvi Dalal.

The post Soy Sauce Chicken Wings In Air Fryer appeared first on My Food Story.

High-Protein Edamame Garlic Rice

This edamame garlic rice turns leftover rice into a garlicky, protein-rich meal that takes about 20 minutes from start to finish. That’s because leftover rice deserves better than being microwaved and eaten plain.Β 

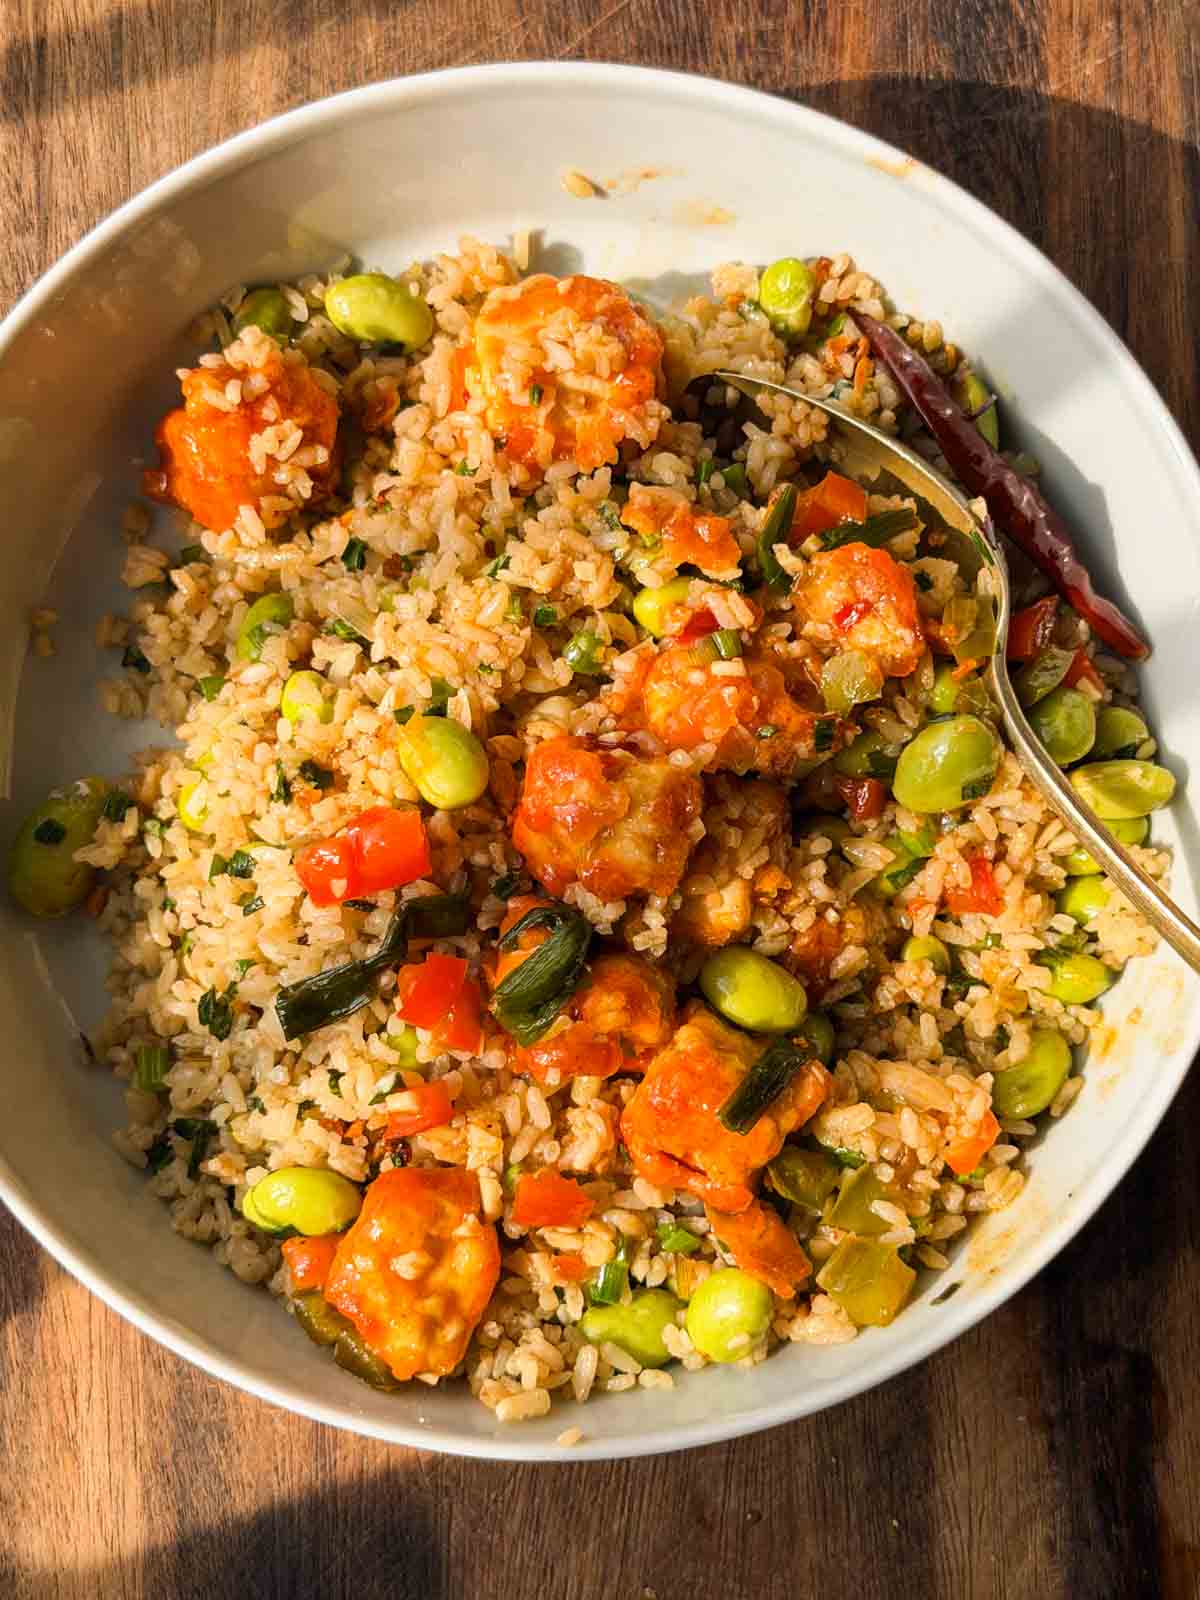
edamame garlic rice topped with teriyaki chicken and served in a white bowl

This edamame garlic rice has become our favourite way to use up leftover rice at home. There’s almost always some sitting in the fridge from the night before, and this recipe makes sure it never goes to waste. I often add it to my kids’ lunch boxes and it comes back clean every single time. If you’re a parent, you know that’s a feat!Β 

The garlic and sesame oil give it so much flavour, and the edamame adds a really good amount of plant-based protein that makes every bowl feel like a proper, filling meal.It comes together in about 20 minutes with barely any prep, and everything goes into one wok. You can have it on it’s own, but throw in some aloo or chicken curry and you’ve got yourself a delicious, homemade meal in no time!Β Β 

Ingredients for Edamame Garlic Rice

Edamame Pods: Fresh or frozen both work well. They need to be steamed, cooled in ice water, and then shelled before going into the rice.

Leftover Rice: Day-old or cold rice works best. Fresh hot rice tends to turn mushy when tossed in the wok.

Aromatics: Finely chopped garlic and spring onion whites, sautΓ©ed quickly on high heat.

Toasted Sesame Oil: I’ve used sesame oil for its nutty aroma, but any neutral oil works if you don’t have it.

Seasoning: Salt, white pepper, sugar, and light soy sauce.

Chilli Oil (Optional): Drizzled on top before serving for some extra heat.

Spring Onion Greens: For garnish.

Frequently Asked Questions

What is edamame?

Edamame are young soybeans that are harvested before they fully mature. They come in green pods and are commonly found in the frozen section of most supermarkets. They’re naturally high in protein, fibre, and iron, which is why they’re so popular in plant-based cooking. In this recipe, the pods are steamed and then shelled to get the beans inside.

Can I add a non-veg protein to this recipe?

Yes. Shredded chicken, prawns, or even a fried egg on top all work really well. If adding chicken or prawns, cook them separately first and toss them in with the rice at the end so they don’t overcook.

Can I add veggies to this edamame garlic rice?

Absolutely. Broccoli, corn, bell peppers, and mushrooms are all great additions. Just make sure to chop them small and sautΓ© them before the rice goes in so they cook through properly.

Can I use frozen shelled edamame instead of pods?

Yes, and it saves you the shelling step entirely. Just steam them for about 8-10 minutes instead of 15 since they’re already out of the pod. Cool in ice water the same way.

Richa’s Top Tips

  • Use cold or day-old rice. Freshly cooked rice has too much moisture and will turn mushy and sticky the moment it hits the wok. Cold, lLeftover rice that’s been in the fridge overnight has driesd out just enough to stay separate and hold its shape when tossed.
  • Steam the edamame properly before shelling. Edamame requires about 15 minutes in the steamer to help them cook fully and become soft. Under-steamed edamame will be tough and chewy in the final dish.
  • Plunge the steamed pods in ice water immediately. This stops the cooking and keeps the beans bright green. If you skip this, they’ll continue cooking from the residual heat and lose their colour and bite.
  • Toss gently after adding the rice. The grains break easily if you stir too aggressively. Use a light tossing motion so the rice stays intact and doesn’t turn into a sticky mess.
  • Keep the heat high when sautΓ©ing the garlic and spring onions. You want them fragrant and slightly golden in a matter of seconds. Low heat will make them sweat instead of sizzle, and you’ll lose that punchy garlic flavour.

Storage Tips

  • In the fridge: Store in an airtight container for up to 2 days. The flavours hold up well and it actually tastes great cold the next day as a rice salad.
  • Freezing: Not recommended. The rice changes texture once frozen and the edamame can turn mushy after thawing.
  • Reheating tip: Toss it back into a hot wok with a few drops of sesame oil and soy sauce. A minute or two on high heat brings it back to life much better than the microwave.

Serving Ideas

This edamame garlic rice works as a quick meal on its own, but it also makes a great side. Here are a few pairings from the blog:

  • With Teriyaki Chicken Stir Fry: The garlicky rice with sweet, sticky teriyaki chicken on top makes for a really satisfying dinner bowl.
  • With Teriyaki Shrimp Broccoli Stir Fry: If you want a seafood option, the teriyaki shrimp alongside this rice is a combination we come back to often.
  • With Crispy Tofu Broccoli Stir Fry: For a fully plant-based meal, crispy tofu over the edamame rice gives you protein from two sources and tastes incredible together.
  • With Asian Veg Stir Fry: A big pile of crunchy stir fried vegetables on top of this rice keeps things light and balanced.

Customisation Ideas

  • Add an egg: Crack an egg into the wok before the rice goes in, scramble it quickly, and then toss the rice through it. Adds protein and gives it an egg fried rice feel.
  • Add chicken or prawns: Cook them separately in the same wok first, set aside, and then toss them back in with the rice at the end.
  • Swap the edamame for peas: If you can’t find edamame, green peas work as a substitute. They won’t have the same bite but will still add colour and freshness.
  • Make it more Asian: Add a teaspoon of oyster sauce and a splash of rice vinegar along with the soy sauce for a deeper, more complex flavour.

Did You Know?

Edamame and mature soybeans are the exact same plant, just harvested at different stages. Edamame are picked when the beans are still young, green, and soft, usually about 80% of the way to full maturity. If left on the plant for a few more weeks, those same beans would dry out, turn yellow, and become the hard soybeans used to make tofu, soy milk, and soy sauce. So in a way, eating edamame is eating tofu before it becomes tofu.Β 

edamame garlic rice topped with teriyaki chicken and served in a white bowl

This edamame rice recipe proves the best meals don’t always need a lot of ingredients or time. Just some leftover rice, a handful of edamame, and a hot wok. If you make it, share your bowls with me on Instagram @my_foodstory, I’d love to see how yours turns out.

Watch Edamame Garlic Rice Recipe Video

edamame garlic rice in the frying pan ready to be served
Print

Edamame Garlic Rice

This edamame garlic rice turns leftover rice into a garlicky, protein-rich meal that takes about 20 minutes from start to finish.
Course Main Course
Cuisine Indian Chinese
Diet Vegetarian
Prep Time 10 minutes
Cook Time 10 minutes
Total Time 20 minutes
Servings 3 servings
Calories 612kcal
Author Richa

Ingredients

  • 210 grams edamame pods
  • 3 cups water
  • 10-15 ice cubes
  • 1 tablespoon toasted sesame oil or any neutral flavoured oil
  • 1 tablespoon finely chopped garlic
  • 1 tablespoon finely chopped spring onion whites
  • 2 cups cooked and cooled or leftover rice
  • Β½ teaspoon salt
  • ΒΌ teaspoon white pepper powder
  • Β½ teaspoon sugar
  • 2 teaspoons light soy sauce
  • 3 tablespoons finely chopped spring onion greens
  • 2-3 teaspoons chilli oil optional

Instructions

  • Heat a steamer with water and when it starts boiling, add edamame pods to the steamer plate and place it inside the steamer. Cover the lid and steam on high for 15 minutes till they are soft and cooked well.
  • Take a bowl with 3 cups of water and 10-15 ice cubes. Plunge the steamed edamame pods and refresh in cold water for 2-3 minutes, so the beans do not overcook and stay green in color. Drain the pods and discard the water.
  • De-shell the pods to take out edamame beans. This should yield about 105 grams / approx. ΒΎ cup of beans.
  • Heat oil in a wok or kadai, add garlic, spring onion whites and saute on high for a few seconds until fragrant. Add edamame beans and saute for a few seconds. Add rice, salt, pepper, sugar, soy sauce and toss gently till all the ingredients are mixed well.
  • Garnish with spring onion greens and serve. Optionally, you may also top with chilli oil.

Video

Notes

  1. Fresh or frozen edamame pods may be used in the recipe. I have used frozen ones.
  2. Leftover rice or one day old rice works best in the recipe.
  3. Toss gently after adding rice so the rice does not break and turn mushy.

Nutrition

Calories: 612kcal | Carbohydrates: 108g | Protein: 17g | Fat: 12g | Saturated Fat: 2g | Polyunsaturated Fat: 4g | Monounsaturated Fat: 5g | Trans Fat: 0.01g | Sodium: 637mg | Potassium: 489mg | Fiber: 6g | Sugar: 3g | Vitamin A: 80IU | Vitamin C: 7mg | Calcium: 99mg | Iron: 3mg

This article was researched and written by Harita Odedra.

The post High-Protein Edamame Garlic Rice appeared first on My Food Story.
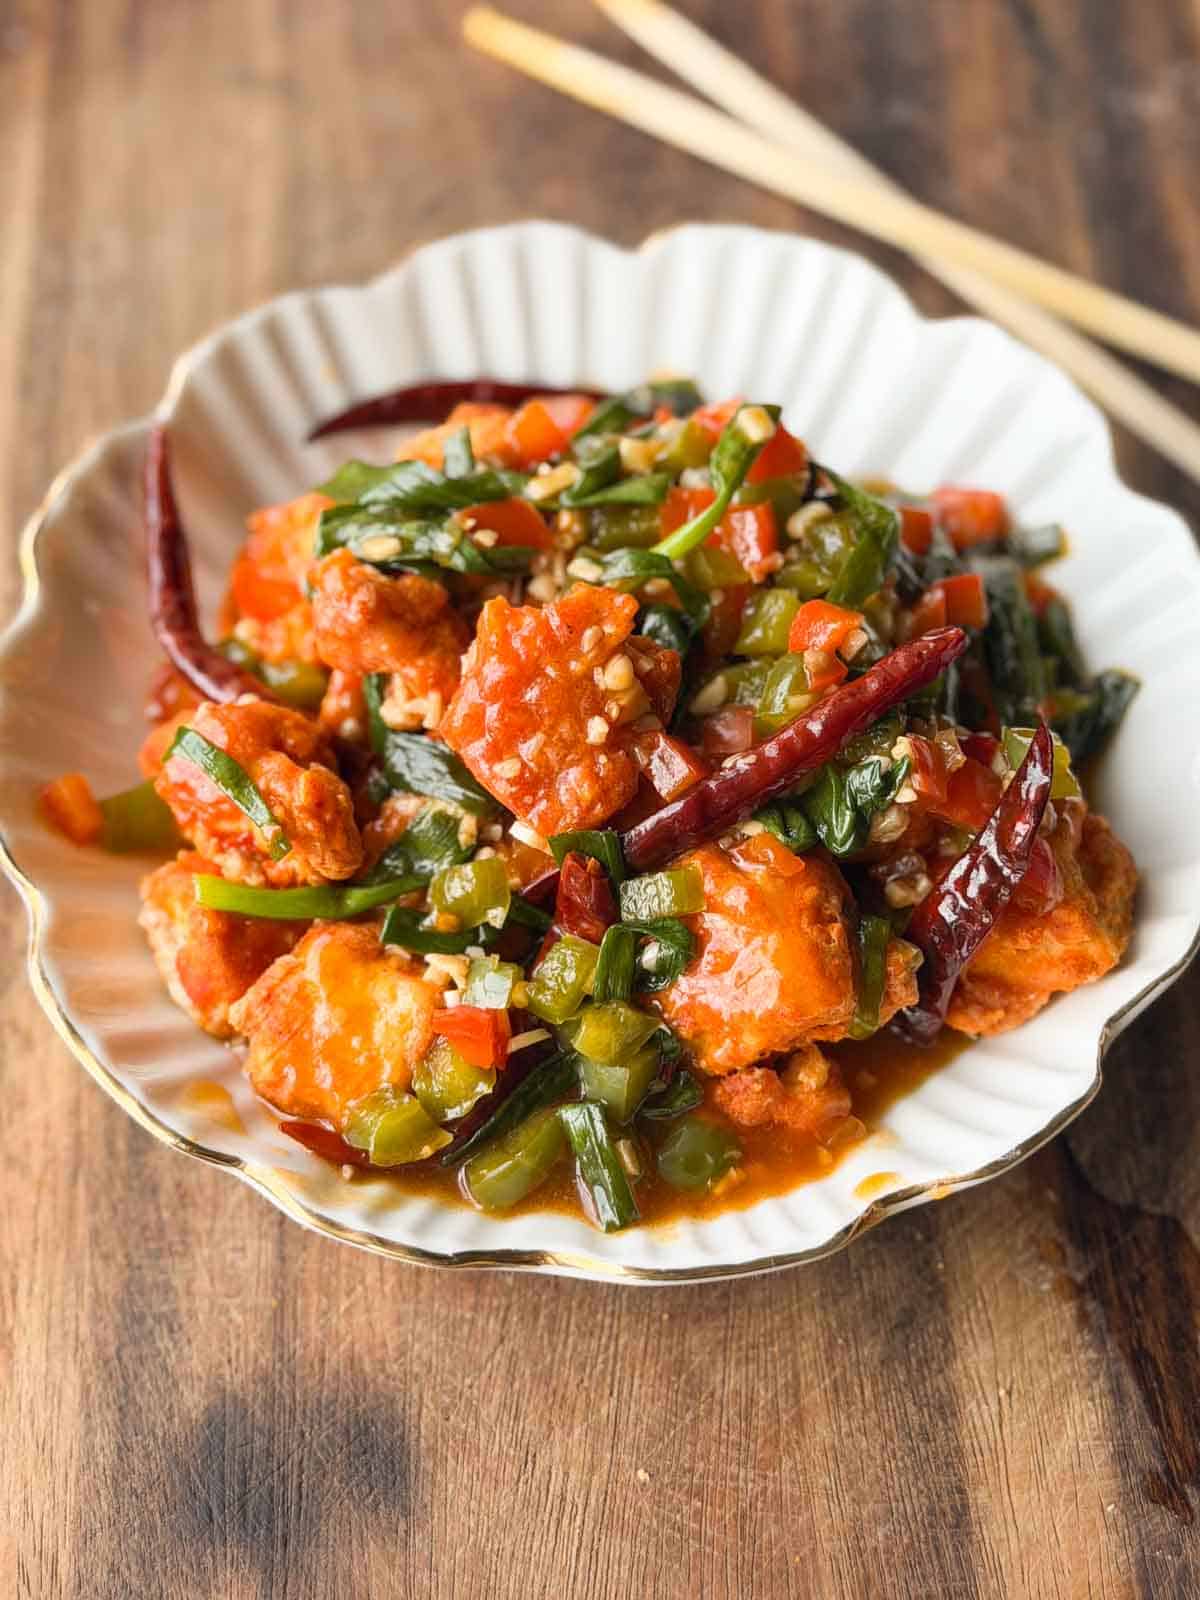
Crispy Chili Tofu in air fryer

If you need a tofu recipe that’s easy and delicious, then this Crispy Chili Tofu is just what you need! It’s crispy, saucy, and has that addictive street-style Indo-Chinese flavor we all love so much!

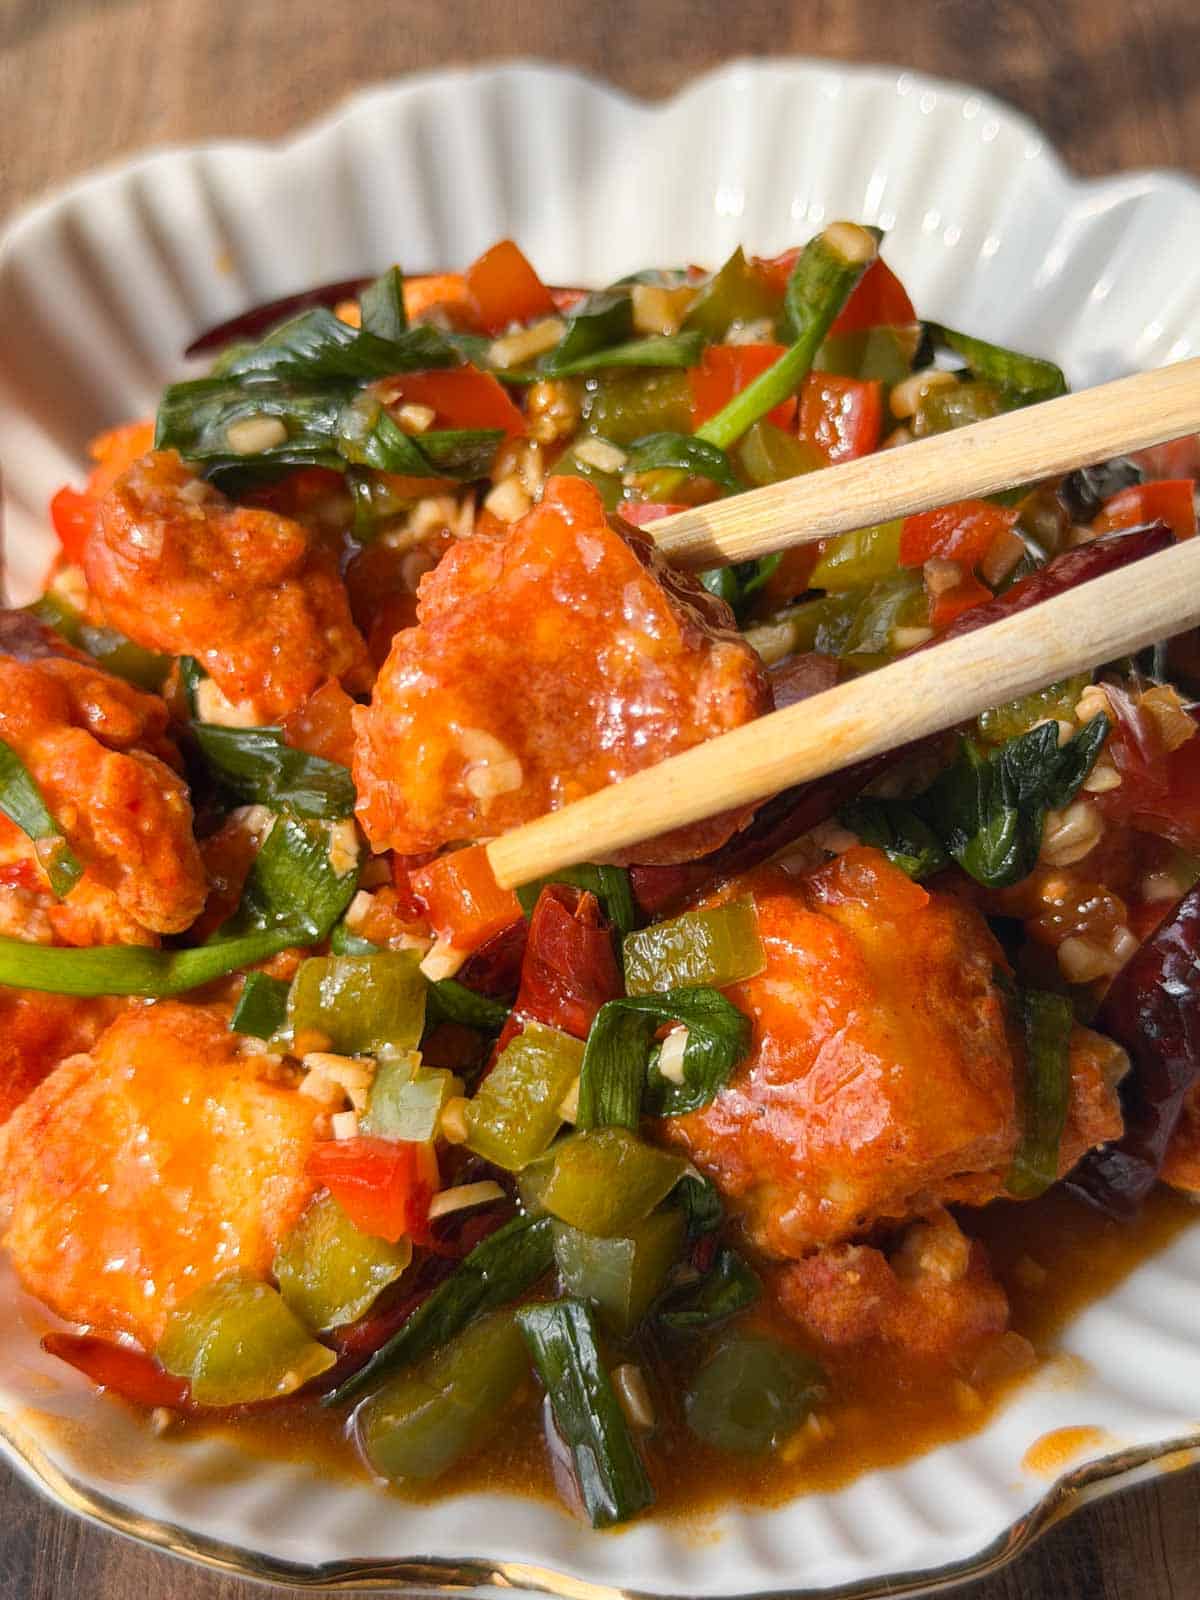
crispy chili tofu served in a white bowl with chopsticks

If you haven’t yet found a tofu recipe you feel like eating on repeat or one you can add to your list of favorites, then I think Crispy Chili Tofu might just be the one. It’s got crispy pieces of tofu that we cook in the air fryer until they turn crisp and golden brown, and a glistening sauce that’s bursting with flavor that coats everything. The result is a dish that’s got the same savory flavor and texture of street-style Indo-Chinese, but made cleaner and healthier in your kitchen.Β 

I made this chili tofu recipe as a replacement for my paneer chilli recipe for dinner one night, and my family just couldn’t have enough of it. We love eating this with veg fried rice for a classic easy weeknight dinner. But you can serve it with hakka noodles, plain rice, or even use it as a filling to make rice paper rolls; the possibilities are endless!Β 

Ingredients for Crispy Chili Tofu Recipe

Tofu: I have used extra firm tofu as it retains its shape and doesn’t break apart during the cooking process. Extra firm tofu also gives the recipe a nice biteΒ 

Spices: White pepper powder, Kashmiri red chilli powder lend a spicy kickΒ 

Corn flour: Used as a coating for the tofu to make it light and crispy. We also mix it in water to make a slurry which helps to thicken the sauce

Oil: Sunflower or neutral-flavored oil with a high smoke point

Sauces: A mix of schezwan sauce, light soy sauce, and oyster sauce for color, heat, and that authentic Indo-Chinese flavors

Veggies: Cubed bell peppers. (I have used red and green, but you can use whatever you have)Β 

Garlic: Finely chopped for flavor and aromaΒ 

Chicken stock: To adjust the consistency of the sauce as well as add flavor. Feel free to swap with veggie stock or simply water for a vegan or veg version

Spring onion greens: Used as garnish for freshness and crunch

Salt and sugar: For seasoning and balance

Frequently Asked Questions

Can I use paneer instead of tofu?

Yes, absolutely! Paneer tastes great in this recipe. In fact, I have an awesome paneer chilli recipe on the blog for you to check out!Β 

Can I make this recipe with a non-veg protein?Β 

Definitely! Chilli chicken is a popular street-style Indo-Chinese dish and is the non-veg version of this crispy chili tofu recipe.Β 

Can I make this chili tofu recipe without an air fryer?Β 

Yes! You can shallow fry the coated tofu in a little oil over medium-high heat until golden and crispy on all sides. Drain on a wire rack or paper towel before adding it to the stir-fry.

Can I make this crispy chili tofu vegetarian?

Yes, simply swap the oyster sauce for vegetarian oyster sauce or mushroom stir-fry sauce and chicken stock or veggie stock or water. This keeps the same savoury, slightly sweet flavour while making the recipe vegetarian.

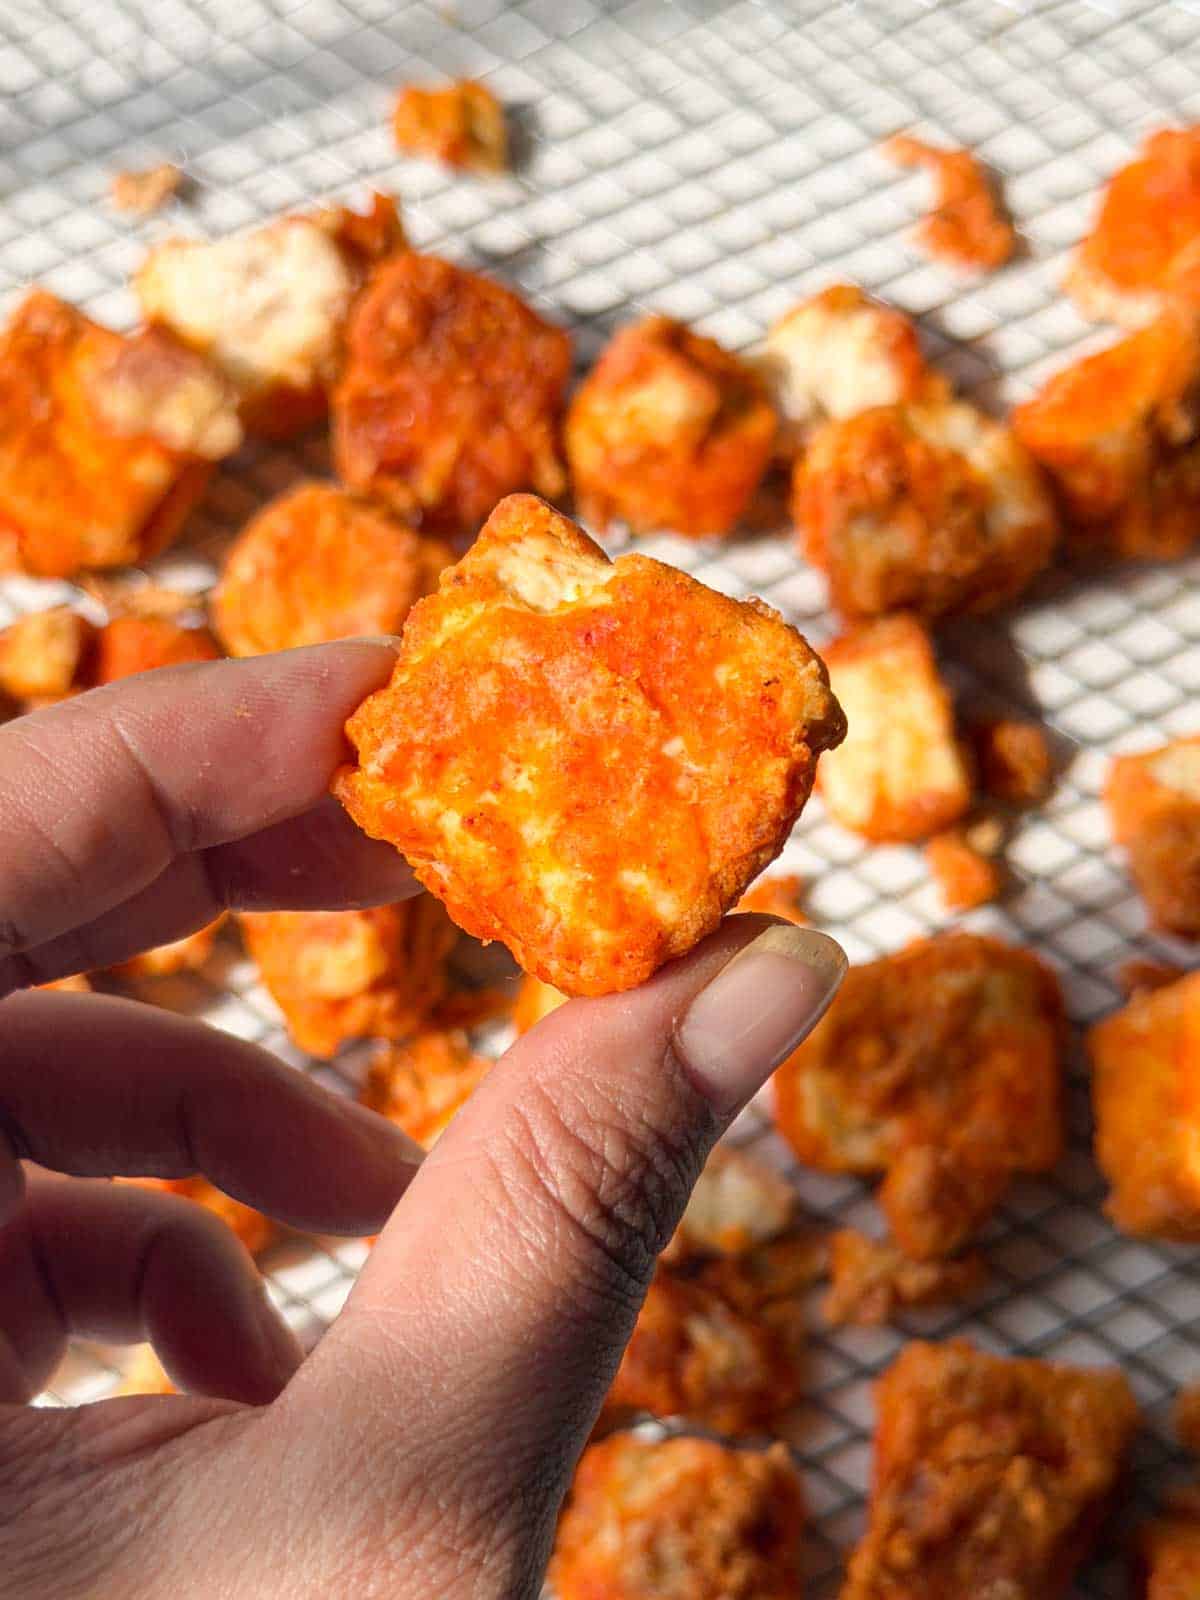
a person holding an air fried tofu to showcase it's color and crispy texture

Richa’s Top Tips

  • Use firm tofu for this recipe. Firm or extra firm tofu works perfectly in this recipe as it retains the shape, doesn’t break apart, and has the perfect amount of texture and chew required for this Indo-Chinese dish.
  • Handle the tofu gently. The coating can peel off if you toss or flip the tofu too aggressively. Use a pair of tongs or a spatula to carefully turn the pieces.
  • Add the crispy tofu at the very end. Once the sauce has thickened, toss in the air-fried tofu and spring onion greens and mix just until coated. This keeps the tofu crisp instead of letting it sit in the sauce and turn soggy.
  • Have everything ready before you start the stir-fry. The sauce comes together quickly, so chop your vegetables and measure out the sauces beforehand.

Storage Tips

  • Fridge: Crispy chili tofu is best eaten immediately while the tofu is still crisp. However, leftovers can be stored in an airtight container in the refrigerator for up to 2 days.
  • For the best texture, store the crispy tofu and stir-fry sauce separately if you know you’ll have leftovers.Β 
  • Reheat the tofu in an air fryer at 180Β°C for 3–5 minutes until hot and crisp, then warm the sauce separately and toss everything together just before serving.
  • If the tofu has already been mixed with the sauce, reheat it in the air fryer or oven rather than the microwave. The microwave will heat it through, but the tofu will lose most of its crispiness.
  • I wouldn’t recommend freezing this recipe because the texture of the tofu can become spongy after thawing.Β 

Serving IdeasΒ 

  • Along with fried rice: Serve it alongside veg, chicken, or egg fried rice or for an easy restaurant-style meal at home. The crispy tofu and savoury rice make a really satisfying combination.
  • Pair with noodles: Pair it with Chilli Garlic Noodles or Hakka Noodles for a spicy, saucy Indo-Chinese dinner. I especially love noodles with this because you get a mix of crispy tofu, vegetables and chewy noodles in every bite.
  • Make it a rice bowl: Spoon the tofu over steamed basmati rice and stir fried veggies and add some extra spring onions on top. It’s a simple option when you want something filling without making several dishes.Β 
a close up image of crispy chili tofu served in a white bowl with chopsticks

This crispy chili tofu recipe is the easiest way to make authentic, street-style Indo-Chinese dishes at home. It’s clean, healthier, and so, so delicious. Making this chili tofu recipe in the air fryer also means we don’t need any extra oil and the whole process is mess free!

If you make this air fryer tofu recipe, don’t forget to DM the pictures @my_foodstory. Until then, happy cooking!

Watch Crispy Chili Tofu Recipe Video

crispy chili tofu served in a white bowl
Print

Crispy Chili Tofu in Air Fryer

If you need a tofu recipe that’s easy and delicious, then this Crispy Chili Tofu is just what you need! It’s crispy, saucy, and has that addictive street-style Indo-Chinese flavor we all love so much.
Course Main Course
Cuisine Indian Chinese
Diet Vegetarian
Prep Time 10 minutes
Cook Time 10 minutes
Total Time 20 minutes
Servings 4 servings
Calories 256kcal
Author Richa

Equipment

Ingredients

For tofu marination

  • 400 grams tofu cut into 1 inch cubes
  • Β½ teaspoon salt
  • Β½ teaspoon white pepper powder
  • 1 teaspoon kashmiri chilli powder
  • 2 teaspoons groundnut or any neutral flavoured oil
  • Β½ cup corn flour

For stir fry

  • 2 tablespoons sunflower oil or any neutral cooking oil
  • 1 tablespoon finely chopped garlic
  • 5 red chillies whole
  • ΒΌ cup cubed red bell peppers
  • ΒΌ cup cubed green bell peppers
  • 1 tablespoon schezwan sauce
  • 1 tablespoon light soy sauce
  • 2 teaspoons oyster sauce
  • Β½ teaspoon sugar
  • ΒΎ cup chicken stock
  • 1 teaspoon cornflour
  • 1 Β½ teaspoons water
  • Β½ cup spring onion greens cut into 2 inch long pieces

Instructions

  • Take tofu in a bowl, add all the ingredients for marination, toss gently so the tofu does not break. Set aside for 5-10 minutes to marinate.
  • Pre-heat airfryer at 200C.
  • Add the marinated tofu to the air fryer basket, brush with a teaspoon of oil and air fry for 10 minutes at 200C. Flip them gently and air fry at 200C for 2-3 minutes. Remove the fried tofu from the basket gently so that the coating does not peel off and transfer to a plate.
  • Heat 1 tablespoon sesame oil in a wok or pan, add garlic, red chillies and saute on medium for 1-2 minutes till fragrant, add red & green bell peppers and saute for high for a few seconds. Add schezwan sauce, soy sauce, sugar, stock and mix well.
  • Mix cornflour in 1 Β½ teaspoons of water to make a slurry and add to the pan while stirring continuously so there are no lumps formed. Cook for 2-3 minutes while stirring till the gravy thickens.
  • Add fried tofu & toss gently for 1-2 minutes till they are coated with the gravy, garnish with spring onion greens and serve.

Video

Nutrition

Calories: 256kcal | Carbohydrates: 29g | Protein: 8g | Fat: 13g | Saturated Fat: 2g | Polyunsaturated Fat: 3g | Monounsaturated Fat: 8g | Cholesterol: 1mg | Sodium: 797mg | Potassium: 513mg | Fiber: 2g | Sugar: 7g | Vitamin A: 1141IU | Vitamin C: 106mg | Calcium: 59mg | Iron: 2mg

The post Crispy Chili Tofu in air fryer appeared first on My Food Story.
Chilli Egg Stir Fry (Spicy and Saucy)

This Chilli Egg Stir Fry is the latest Indo-Chinese dish in town! Spicy, saucy, tangy, and full of umami, it’s a dish you absolutely need to make ASAP!Β 

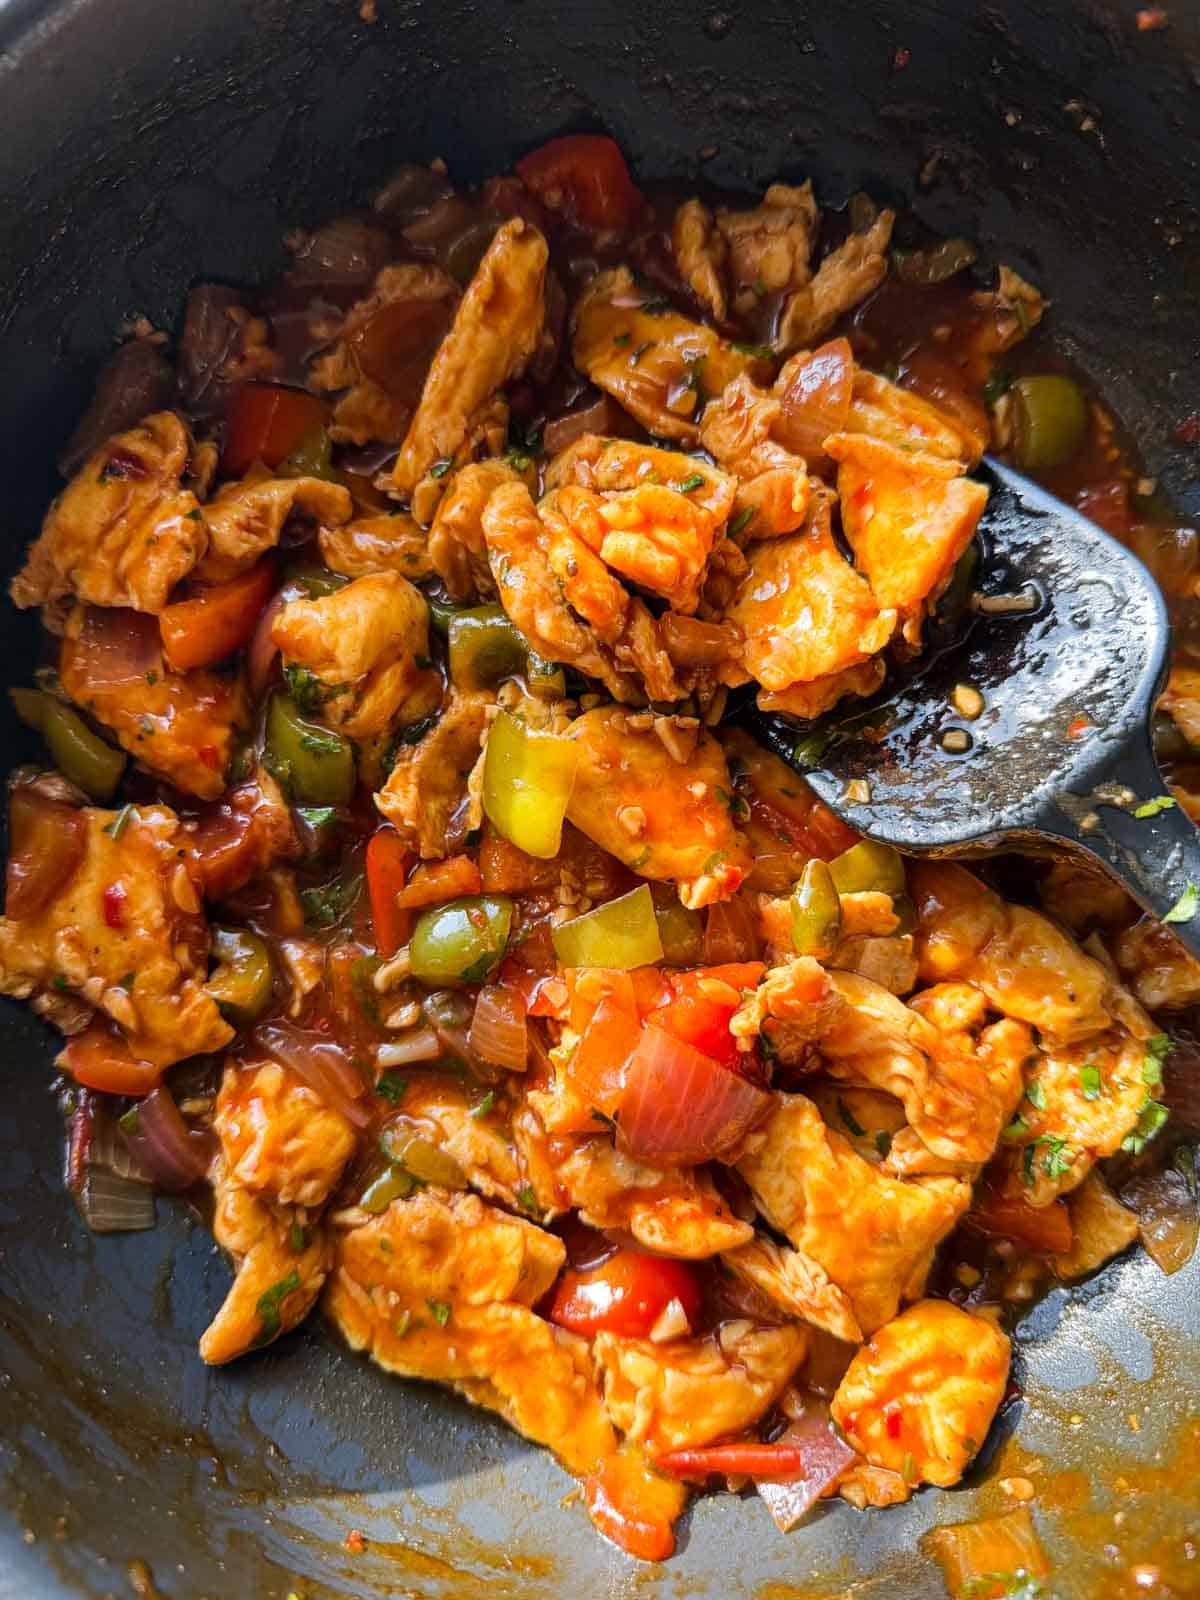
chilli egg stir fry in its cooking pan with ladle

This Chilli Eggs Stir Fry is my latest Indo-Chinese favorite dish. It’s spicy, tangy, addictive, and like most Indo-Chinese dishes, super quick and easy to make. All you need is eggs, some basic Indo-Chinese sauces, a few veggies, and only 20 minutes to make this dish that will climb right up on your favorites list. This is an egg chilli dry style recipe, but you can easily turn it into a gravy if you want to serve it for dinner.Β 

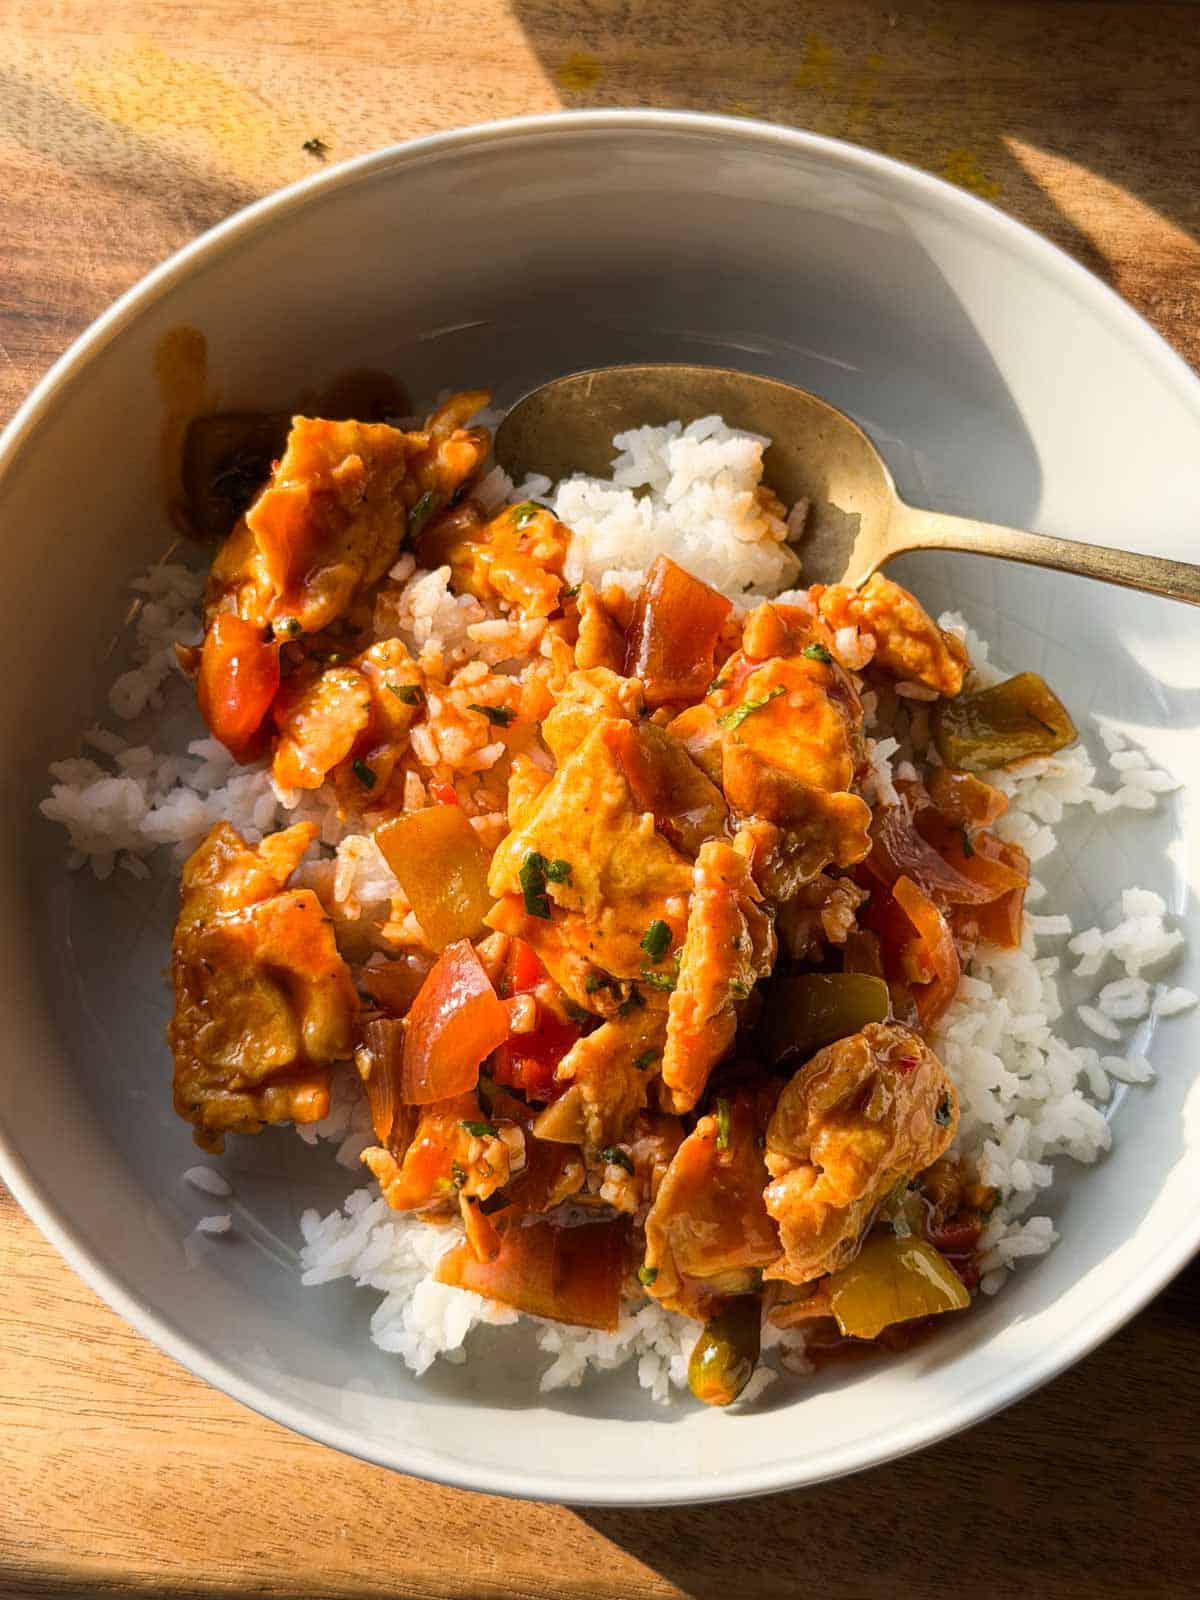
You can serve these chilli eggs as a starter as well as a quick and filling 5-pm snack. But I recently served as a side for dinner with some fried rice and noodles and believe me, the bowls were licked clean! Let’s find out how to make this delicious chilli egg recipe.Β 

Chilli Eggs Stir Fry IngredientsΒ 

Eggs: Whole eggs, whisked to make an omeletteΒ 

Spices: Crushed pepper, green chilli, and red chilli flakes for a slight kick of heat

Veggies: Tomatoes and capsicum for flavor and texture

Aromatics: Onions, spring onion greens, and minced garlic for flavor and aroma

Sauces: Light and dark soy sauce, ketchup, sriracha or red chilli sauce, and vinegar mixed together to make the sauceΒ 

Sugar: For balance and a hint of sweetness

Salt: To seasonΒ 

Corn flour: Mixed in water to form a slurry. Helps the sauce thicken

Oil: I have used groundnut oil but any neutral-flavored oil with a high smoke point like sunflower, vegetable, canola, etc. will work here

Frequently Asked QuestionsΒ 

How do I prevent the omelette from breaking apart during stir fry?

The key here is to be gentle. Make sure to cut the omelette into large pieces and put them into the pan only after the vegetables have been stir-fried. Toss gently once the sauce is added.

Can I make this chilli egg stir fry spicy?

Absolutely. Increase the green chilli, sriracha or red chilli flakes according to your preference. For a milder version, reduce the green chilli and sriracha.

Why is my sauce not thickening?

Make sure the corn flour is evenly mixed into the sauce before adding it to the pan. The sauce also needs to simmer for 1-2 minutes for the corn flour to activate and thicken it.

Richa’s Top Tips

  • Whisk the eggs well: This helps incorporate air into the eggs and gives you a fluffy omelette. It’s an important step to ensure the omelette holds up well when tossed with the sauce.
  • Keep the vegetables crunchy: You want the veggies to be slightly charred but still crispy, rather than soft and mushy. To achieve that, make sure to cook the onion, tomato and capsicum briefly over high heat.Β 
  • Cut the omelette into large pieces: Larger pieces are easier to toss with the sauce without breaking apart. Smaller pieces tend to make the dish soggy.
  • Mix the sauce before adding it to the pan: The corn flour settles quickly, so give the sauce a good stir just before pouring it in.
  • Don’t overcook after adding the sauce: The sauce only needs 1-2 minutes to thicken and coat the eggs. Cooking it for too long can make the omelette rubbery.

Storage Tips

  • Fridge: Store leftover chilli egg stir fry in an airtight container in the refrigerator for up to 2 days.
  • Reheat: Reheat it gently in a pan over medium-low heat until warmed through. Add a splash of water if the sauce has thickened too much. You can also microwave it in short intervals, stirring between each interval.
  • Freezing not recommended: The texture of the omelette and vegetables can become rubbery and watery after thawing.

Serving Ideas

  • Along with a rice dish: This chilli egg stir fry is great as a quick side dish with steamed rice, jeera rice or fried rice.Β 
  • With noodles: You can also serve it with hakka noodles or even these chilli garlic noodles for a quick weeknight meal.
  • For a lighter meal: Serve it alongside some steamed vegetables or a simple cucumber salad.Β 
  • In a roll: You can also spoon the saucy eggs into a roti or wrap with some fresh spring onions and veggies for an easy egg roll.

Customisation Ideas

  • Add more vegetables: Sliced mushrooms, carrots, cabbage, broccoli or baby corn would all work well. Cut them into small pieces so they cook quickly.
  • Make it extra spicy: Add more green chilli, sriracha or red chilli flakes. You can also add a little chilli oil before serving.
  • Add protein: Toss in cooked chicken, prawns or tofu along with the omelette for a more substantial stir fry.
  • Make it more saucy: Increase the sauce quantities slightly and add a splash more water if you want something that works particularly well with rice or noodles.
  • Add ginger: Finely minced or julienned ginger can be sautΓ©ed along with the garlic for extra flavour.
  • Use different greens: Finish with chopped spring onion greens, coriander or even a handful of finely sliced spring onion whites for extra freshness.
chilli egg stir fry in a white bowl with spoon

This egg chilli stir fry isn’t your usual starter, but once you try it, there is no going back. It’s spicy, tangy, and full of delicious flavors and textures. It’s a total must-try! If you make this recipe, DM me your pictures or tag me in stories over on my IG @my_foodstory ❀️ Β 

Watch Chilli Egg Recipe Video

Spicy chilli egg stir fry served over white rice in a bowl.
Print

Chilli Egg Stir Fry

Spicy and saucy, this chilli egg stir fry is best served on it's on as a snack, or along with fried rice or noodles for a satisfying weeknight dinner.
Course Snacks & Appetisers
Cuisine Indian Chinese
Diet Halal
Prep Time 10 minutes
Cook Time 10 minutes
Total Time 20 minutes
Servings 2 servings
Calories 185kcal
Author Richa

Ingredients

  • 2 eggs
  • A pinch salt
  • β…› teaspoon crushed pepper
  • 2 Β½ teaspoons groundnut or any neutral cooking oil divided
  • 2 teaspoons minced garlic
  • 1 green chilli sliced diagonally
  • 1 onion cut into petals
  • 1 tomato deseeded and cut into petals
  • Β½ capsicum cut into Β½ inch triangles or squares
  • 3 tablespoons finely chopped spring onion greens

Sauce mix

  • 1 teaspoon light soy sauce
  • Β½ teaspoon dark soy sauce
  • 1 tablespoon ketchup
  • Β½ tablespoon sriracha or red chilli sauce
  • 1 teaspoon vinegar
  • Β½ teaspoon sugar
  • β…› teaspoon salt
  • ΒΌ teaspoon crushed pepper
  • Β½ teaspoon red chilli flakes
  • Β½ teaspoon corn flour
  • ΒΌ cup water

Instructions

  • Break 2 eggs into a bowl, add a pinch of salt, β…› teaspoon of crushed pepper, whisk well and set aside.
  • Take all the ingredients for sauce mix in another bowl, stir to combine well and set aside.
  • Heat a flat bottomed pan, brush with Β½ teaspoon of oil, pour the whisked eggs and make a fluffy omelette. Cut into 5-6 large pieces and transfer to a plate.
  • Heat the same pan with 2 teaspoons of oil, add garlic and green chillies and saute for a few seconds till fragrant. Add onions, tomatoes & capsicum and saute for a minute on high till they get lightly roasted and crunchy.
  • Add omelette pieces and saute for a few seconds.
  • Mix the sauce mix, add to the pan and cook on medium for 1-2 minutes till the sauce coats the eggs well. Take off the heat and serve.

Video

Notes

  1. Sauce mix has to be mixed and kept handy before making the stir fry as its a quick recipe.
  2. Do not overcook the eggs and veggies as they turn soggy & do not taste good in the stir fry.Β 

Nutrition

Calories: 185kcal | Carbohydrates: 17g | Protein: 8g | Fat: 10g | Saturated Fat: 3g | Polyunsaturated Fat: 3g | Monounsaturated Fat: 4g | Trans Fat: 0.01g | Cholesterol: 164mg | Sodium: 823mg | Potassium: 432mg | Fiber: 4g | Sugar: 10g | Vitamin A: 1964IU | Vitamin C: 59mg | Calcium: 64mg | Iron: 2mg

This article was researched and written by Urvi Dalal.

The post Chilli Egg Stir Fry (Spicy and Saucy) appeared first on My Food Story.
Air Fryer Gobi 65 (Spicy Crispy Cauliflower)

Gobi 65 is an Indo-Chinese classic dish with battered, deep-fried cauliflower. But in this recipe, we make gobi 65 in the air fryer for a lighter, healthier, and guilt-free version.Β 

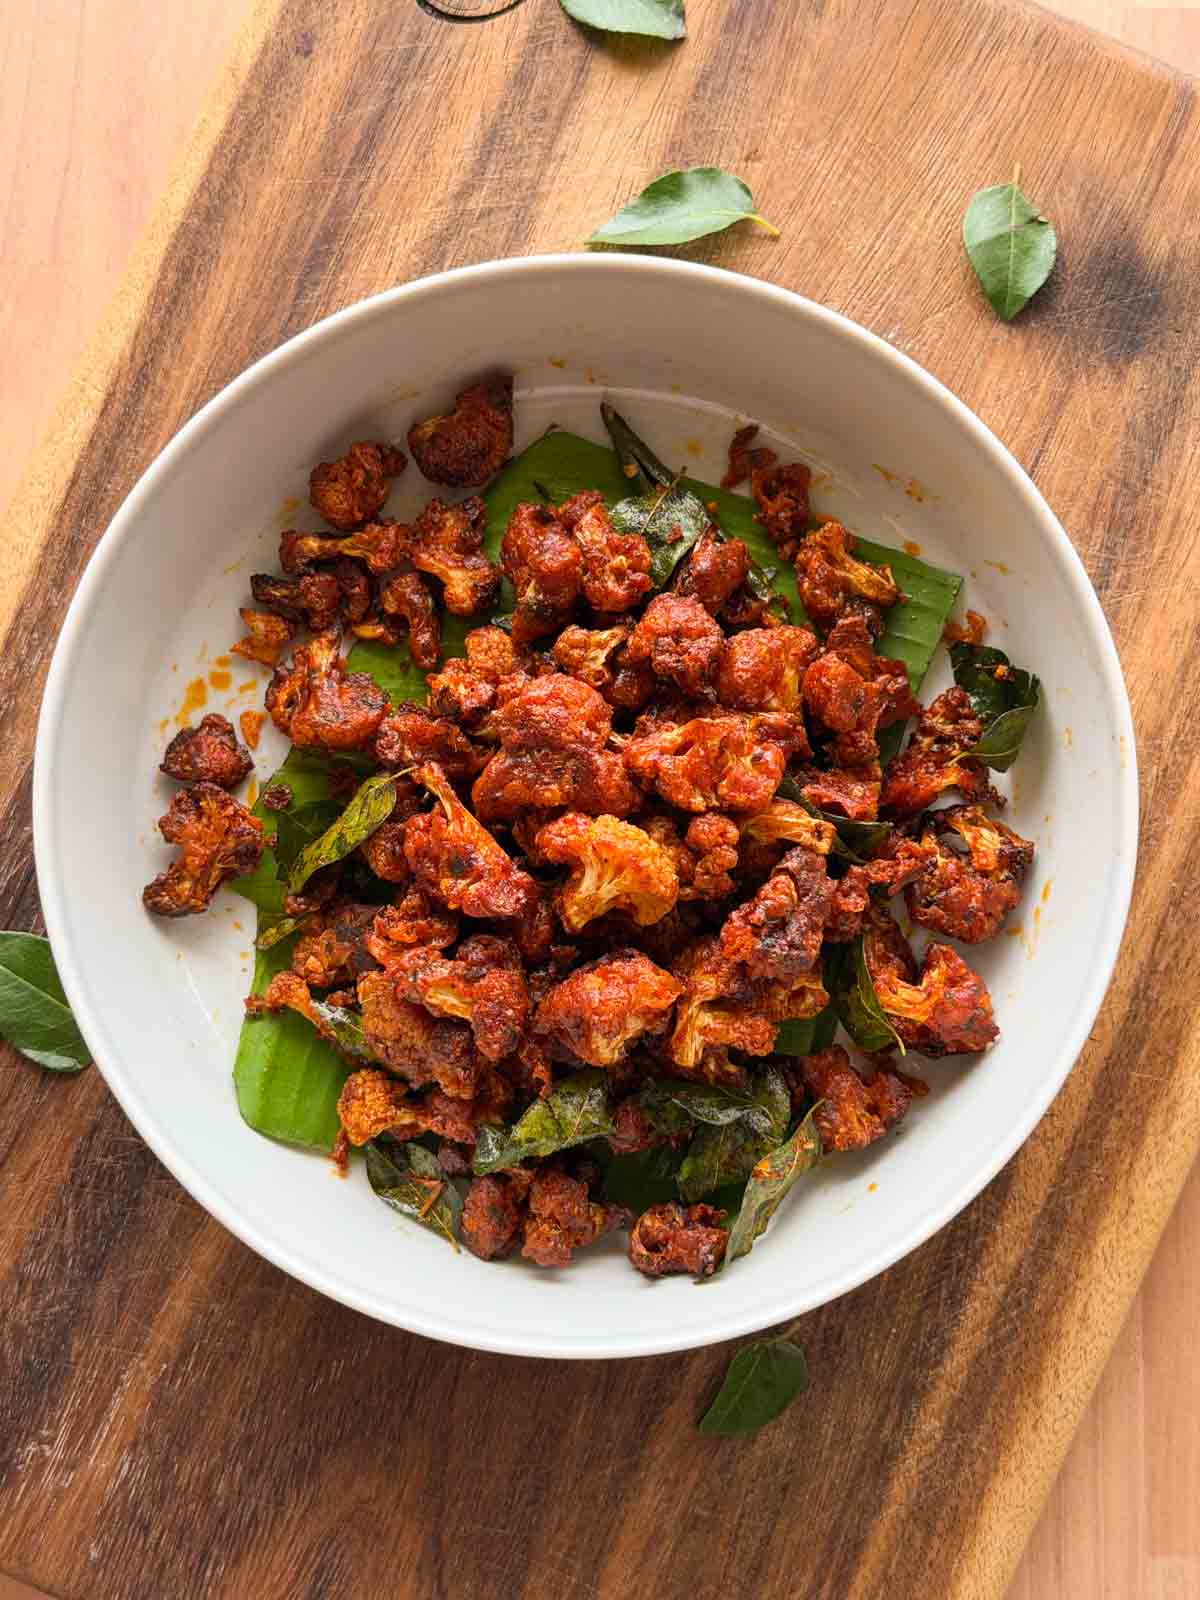
air fryer gobi 65 served in a white bowl

Most of our Indo-Chinese orders call for either gobi 65 or chicken 65, because how can they not! What is not to love about crispy spicy cauliflower florets in the most delicious tempering. Originally Gobi 65 is made by deep frying cauliflower florets, but this recipe is my attempt at making it healthier by air frying gobi. The result is the same crispy, crunchy cauliflower, but minus the excess oil and guilt. And once tossed in that quick tempering, it creates pure magic!Β 

It’s a quick recipe that calls for some basic ingredients but delivers max flavor. Once you find out how easy it is to make gobi 65 at home, believe me you’re never calling for takeout again!Β 

Gobi 65 IngredientsΒ 

Cauliflower: Cut into florets and blanched for before use.Β 

Spices: turmeric powder, Kashmiri red chilli powder, cumin powder, fennel powder, and coriander powder for warmth, color, and flavor.

Ginger and garlic: Used in two ways – the paste is used in the marinated and finely chopped ginger and garlic is used in the tempering for flavor and aroma.Β 

Sugar: for balance and to add a slight sweetness.Β 

Curry leaves: Used in the marinade and tempering for an earthy flavor and aroma.Β 

Curd: To tenderise the cauliflower, help the marinade stick, and add a slight tanginess to the dish. Can be subbed with unflavored Greek yogurt.

All purpose flour: Or maida. To make the gobi really crispy and airy.Β 

Oil: Any neutral-flavored oil like peanut, sunflower, vegetable, etc.Β 

Green chilli: For spice and heat authentic to Indo-Chinese cooking. You can adjust the amount to suit your spice tolerance.Β 

Frequently Asked QuestionsΒ 

Why isn’t my cauliflower crispy?

Too much moisture is usually the culprit. Make sure the cauliflower is well drained after blanching, use a thick batter and don’t overcrowd the air fryer basket.

Can I use frozen cauliflower?

Yes, but thaw it completely and pat it dry before marinating to prevent the batter from becoming watery.

How do I know when the cauliflower is done?

The coating should be cooked through and golden, while the cauliflower should be tender with crisp edges. The final 200Β°C air fry gives it its signature crunch.

Richa’s Top Tips

  • Don’t skip blanching. A quick 30-second blanch helps clean the cauliflower, softens it slightly, and ensures a more even cook. Be sure to rinse it with cold water immediately so it doesn’t continue cooking.
  • Drain the cauliflower well. Any excess moisture will thin out the batter and prevent it from sticking properly. Pat the florets dry with a paper towel or a clean kitchen towel if needed.
  • Add water gradually. The batter should lightly coat each floret instead of being runny. You may not need the full tablespoon depending on how much moisture is left on the cauliflower.
  • Leave space in the air fryer basket. Arrange the florets in a single layer with a little gap between each one so the hot air can circulate and crisp them evenly.
  • Brush with oil between batches. A light brushing of oil during air frying helps the coating cook evenly and gives the cauliflower a beautifully crisp exterior.
  • Stir fry on high heat. This high temperature is what helps retain that crispiness and prevents soggy, steamed cauliflower.

Storage Tips

  • Refrigerate: Store leftover Gobi 65 in an airtight container in the refrigerator for up to 2 days.
  • Reheat: Reheat in the air fryer at 180Β°C for 4-5 minutes until hot and crispy again. You can also reheat it in a hot pan for a few minutes.
  • Avoid microwaving: The coating tends to soften and lose its crisp texture.
  • Not freezer-friendly: I recommend enjoying this recipe fresh as the coating can become soft after freezing and thawing.

Serving Ideas

  • Serve hot with sliced onions and lemon wedges for a classic restaurant-style feel.
  • Pair with green chutney or spicy mayo as a snack or appetizer.
  • Serve alongside fried rice, hakka noodles or schezwan noodles for an Indo-Chinese meal.
  • Add it to wraps or rolls with onions and mint chutney for a quick lunch.
  • Enjoy with a chilled soft drink or masala soda for the perfect party snack.

Customisation Ideas

  • Make it spicier: Increase the green chillies or add a pinch of hot chilli powder while stir frying.
  • Add vegetables: Toss in sliced onions, bell peppers or spring onions during the final stir fry for added texture.
  • Make it extra crispy: Sprinkle a little extra cornflour into the batter if it feels too loose.
  • Skip the final stir fry: The air-fried or fried cauliflower tastes delicious on its own with a dipping sauce if you’re short on time.
  • Experiment with flavours: Finish with crushed black pepper, toasted sesame seeds or chopped coriander for a slightly different twist.
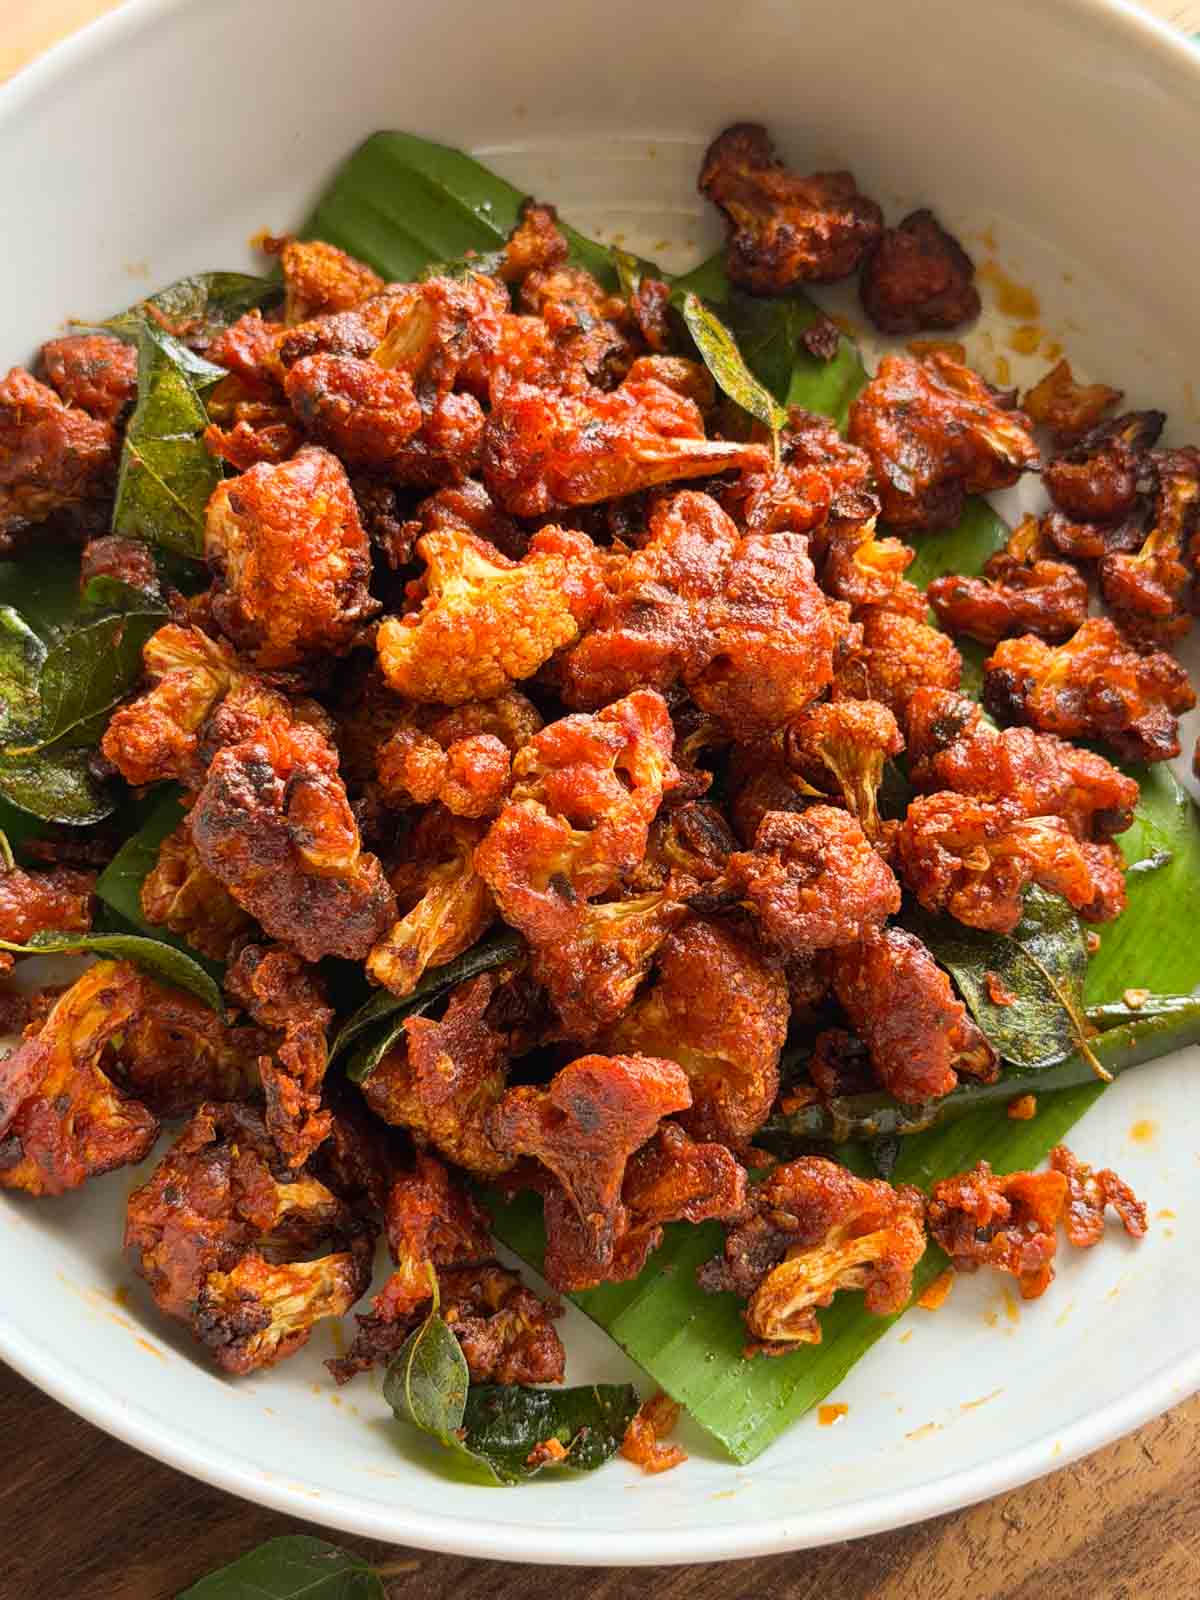
a close up image air fryer gobi 65 to showcase it's color and texture

Whether you’re looking for an easy party starter, a teatime snack or just a fun new way to enjoy cauliflower, this Air Fryer Gobi 65 is always a good idea. It’s spicy, crispy, packed with flavour and much lighter than the traditional deep-fried version. Once you try it, I bet it will become your new favorite way to make gobi!

If you make this recipe, DM me your pictures or tag me in stories over on my IG @my_foodstory ❀️

Watch Gobi 65 Recipe Video

air fryer gobi 65 served in a white bowl
Print

Gobi 65

This Indo-Chinese classic Gobi 65 features crispy, spicy cauliflower. Since this version is made in the air fryer, it's lighter but just as delicious and crispy.
Course Snacks & Appetizers
Cuisine Indian Chinese
Diet Vegetarian
Prep Time 10 minutes
Cook Time 15 minutes
Total Time 25 minutes
Servings 4 servings
Calories 154kcal
Author Richa

Equipment

Ingredients

For marination

  • 300 grams cauliflower florets approx. 3 cups, cut into 1 inch size florets
  • 1 Β½ teaspoons ginger garlic paste
  • β…› teaspoon turmeric powder
  • 1 tablespoon + ΒΎ teaspoon kashmiri chilli powder
  • ΒΎ teaspoon coriander powder
  • ΒΌ teaspoon cumin powder
  • ΒΎ teaspoon salt
  • ΒΎ teaspoon sugar
  • 2 sprigs curry leaves finely chopped
  • 2 ΒΌ tablespoons curds / yoghurt whisked
  • 3 tablespoons maida
  • 1 Β½ tablespoons corn flour
  • 1 Β½ teaspoons groundnut oil or any neutral cooking oil
  • 1 tablespoon water

Other

  • 2 tablespoons groundnut oil or any neutral cooking oil divided
  • 1 teaspoon finely chopped garlic
  • 1 teaspoon finely chopped ginger
  • 2 green chillies halved
  • Β½ teaspoon kashmiri chilli powder
  • ΒΌ teaspoon fennel powder
  • 2 sprigs curry leaves

Instructions

Blanching cauliflower

  • Add cauliflower florets & salt to boiling water, mix for 30 seconds and drain them immediately. Do not keep longer. Rinse them with cold water & drain again. Set aside. See note 1

Marinating cauliflower

  • Take blanched cauliflower florets in a wide bowl or deep plate. Add all ingredients given for marination except water and combine well with your hands. Add water, 1 teaspoon at a time and combine well. Mix with your hands to make sure the batter coats the cauliflower well.

Air frying cauliflower

  • Pre-heat airfryer at 180C and brush the basket with oil. Place the marinated cauliflower florets with some gap between each other, brush some oil and air fry at 180C for 10 minutes. Brush oil and air fry at 180C for 8-10 minutes till the masala is cooked well. Brush with a few drops of oil and air fry at 200C for 2-3 minutes till they turn golden and crisp. Transfer to a plate once they cool a bit.
  • OR

Deep frying cauliflower

  • Heat ΒΌ cup of oil in a deep pan or kadai and once it’s medium hot, drop the marinated florets into the oil & fry on medium heat for 4-5 minutes or until they turn golden and crisp. Do not over crowd the pan as it does not fry uniformly. Fry the cauliflower in batches.

Gobhi 65 fry

  • Heat oil in a kadai or pan, add garlic, ginger and green chillies and fry lightly over medium flame. Once fragrant, add curry leaves and saute for a minute. Add kashmiri chilli powder, saunf powder and saute. Add fried cauliflower and stir fry on high heat for a minute. Serve.

Video

Notes

  1. Cauliflower is blanched exactly for 30 seconds to make it slightly tender but do not cook or leave in the boiling water for longer than 30 seconds. Over blanched cauliflower does not work for the recipe.

Nutrition

Calories: 154kcal | Carbohydrates: 15g | Protein: 3g | Fat: 10g | Saturated Fat: 2g | Polyunsaturated Fat: 3g | Monounsaturated Fat: 4g | Cholesterol: 1mg | Sodium: 577mg | Potassium: 308mg | Fiber: 3g | Sugar: 4g | Vitamin A: 718IU | Vitamin C: 59mg | Calcium: 50mg | Iron: 1mg

The post Air Fryer Gobi 65 (Spicy Crispy Cauliflower) appeared first on My Food Story.

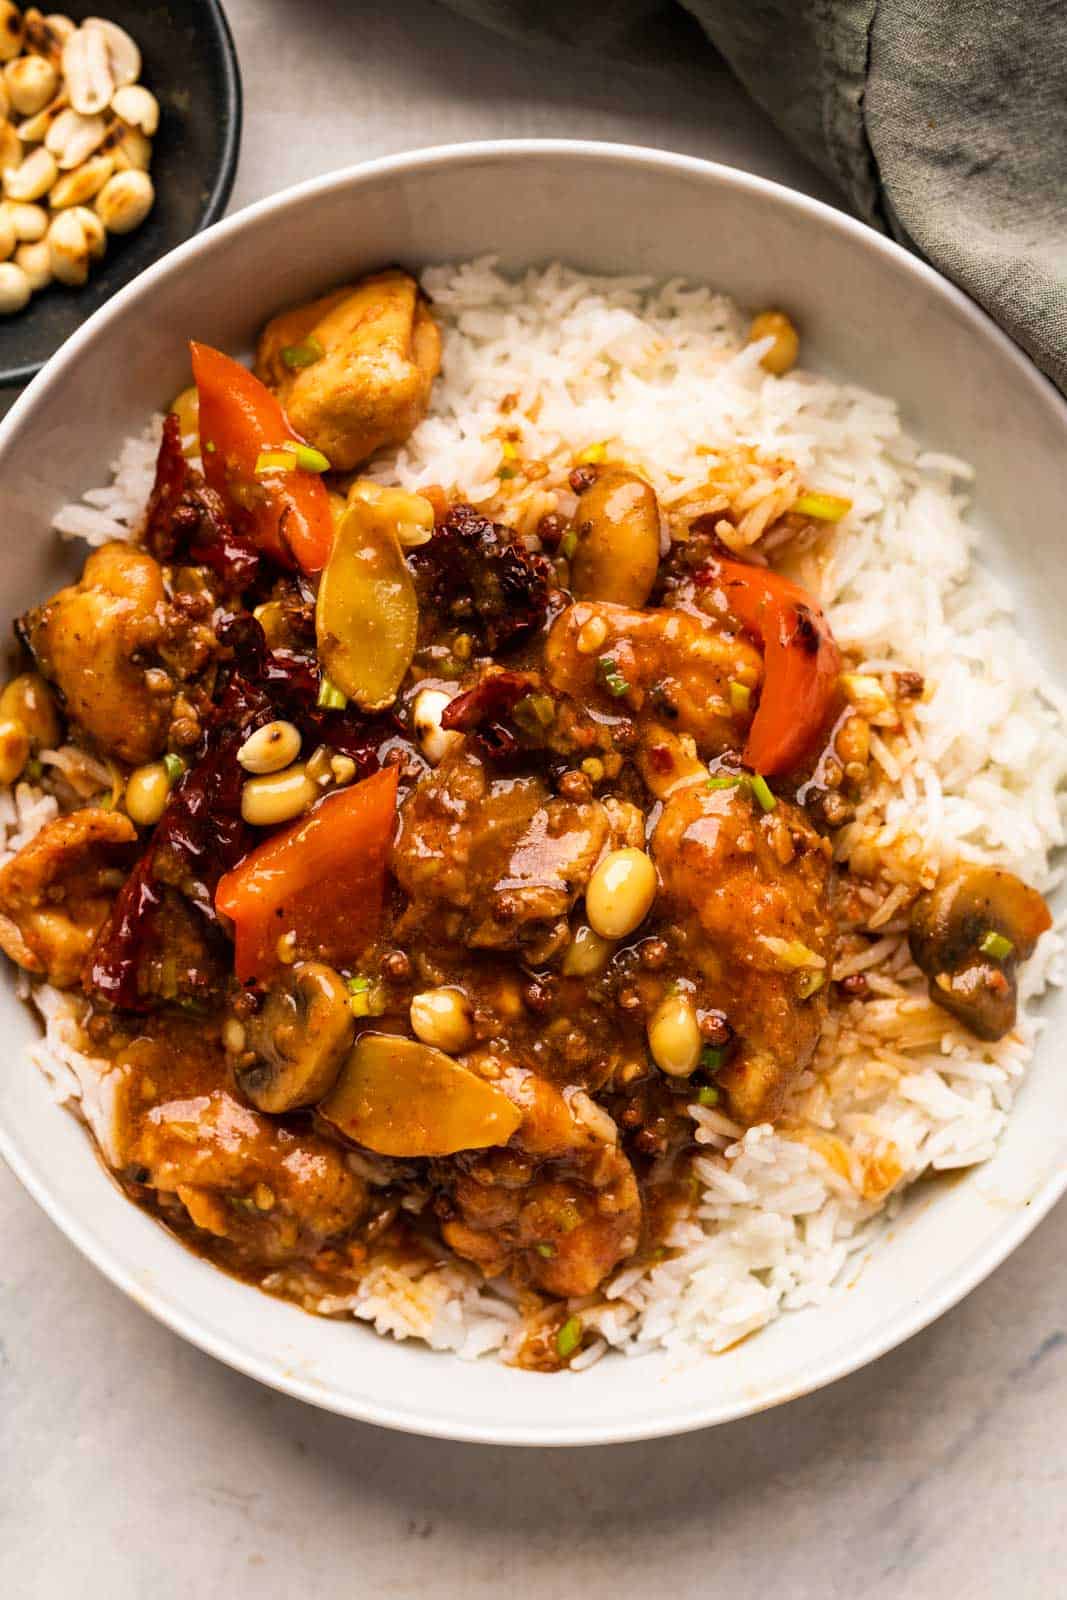
Easy Kung Pao Chicken Recipe

This Kung Pao Chicken is spicy, sour, sweet and salty and everything we love about Indo-Chinese food! It’s easy, comes together quickly, has the same takeout style flavor, and makes for the best weeknight meal.

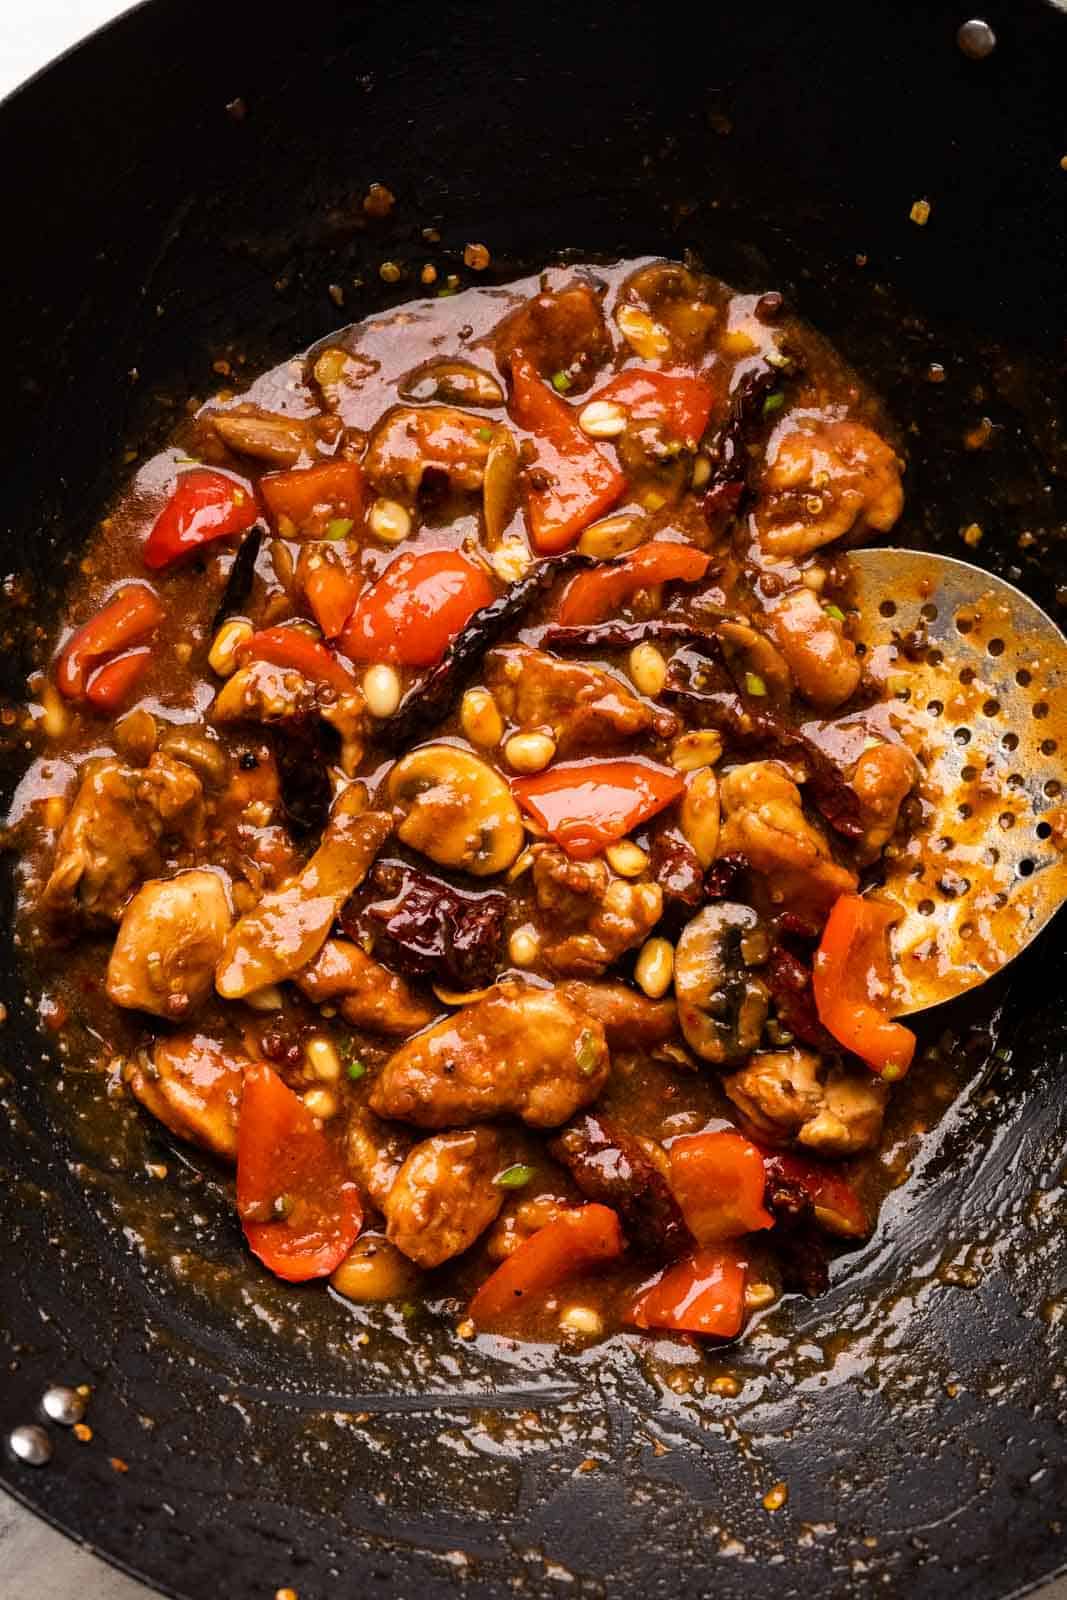
Kung Pao chicken pictures in the wok that it was cooked in with a skimmer

If there’s one takeaway dish I never get tired of, it’s Kung Pao Chicken. I love how it comes together in under an hour with simple pantry ingredients, yet tastes like something you’d order from your favourite Chinese restaurant. It’s saucy, packed with flavour, and one of those recipes that disappears from the dinner table every single time. We are talking BIG flavours here!

In the authentic Chinese version, Kung Pao or Kung Bo is usually a dry stir fry served as an appetiser or accompaniment.Β  But we made an Indianised version, so it’s got more sauce, mushrooms and peanuts. I promise, it’s just as good!

Kung Pao Chicken Ingredients

  • Red Chilli Paste: Dry red chilli paste is just what this kung pao stir fry needs for a hit of spice. It’s a simple blend of soaked dry red chillies and water. I’ve used the seeds of the chillies in the sauce for extra heat. If you want to reduce the heat level, just remove the seeds of the chillies before blending.
  • Kung Pao Sauce: This Chinese spicy chicken has a spicy sweet salty gravy which is dangerously addictive. The sauce is a perfect balance of soy sauce, vinegar, hot sauce, ketchup, sesame oil and lemon juice.
  • Dried Red Chillies – For an extra spicy, smoky hit.
  • Sichuan Peppercorns: These keep you coming back for more!
  • Chicken: Boneless thigh pieces stay juicy and tender through the high cooking temperatures of Indo-Chinese cooking.
  • Corn flour: Used in the marinade as well as the sauce. It helps to make crisp up the chicken pieces as well thicken the sauce and lend a glossy sheen.
  • Veggies: Mushrooms and onions for texture and flavor
  • Aromatics: Finely chopped ginger and garlic
  • Peanuts: Roasted for extra texture and a lovely nutty flavor. You can replace peanuts with cashews for a slightly different flavor.
  • Spring onion greens: Used as garnish for freshness

Frequently Asked Questions

What does kung pao chicken taste like?

Kung pao chicken is mildly sweet, sour, savory, and has a signature spicy kick from Sichuan peppercorns. Basically, it’s like a party in your mouth and totally addictive!

Can I use chicken breast instead of chicken thighs?

Yes. Chicken breast works well, but it cooks faster and can dry out more easily. Keep an eye on the cooking time and avoid overcooking.

Why is baking soda added to the marinade?

A small amount of baking soda helps tenderise the chicken, giving it the soft, velvety texture that’s common in restaurant-style stir-fries.

Can I add other vegetables?

Yes. Bell peppers, broccoli, baby corn, zucchini and snap peas all work well. Stir-fry them on high heat so they stay crisp.

Richa’s Top Tips

  • Adjust the spice to suit your tolerance. I’ve made this kung pow chicken extra spicy coz that’s how I roll, but you can adjust spice levels according to your preference!
  • Don’t skip the marinade. Even 30 minutes makes a noticeable difference. The baking soda helps tenderise the chicken, while the cornflour creates a light coating that gives the sauce something to cling to.
  • Cut the chicken into evenly sized pieces. This ensures everything cooks at the same rate, which is very important for the quick cook times of Indo-Chinese cuisine.
  • Fry the chicken in batches. If you’re making a large batch, then it’s best to cook the chicken in smaller batches. Overcrowding the wok lowers the oil temperature, causing the chicken to steam instead of turning golden.
  • Keep the heat high while stir-frying. High heat cooks the vegetables quickly so they stay crisp and helps the sauce reduce into a glossy coating instead of becoming watery.
  • Have everything prepped before you start. Everything moves really quickly once you start cooking. So keeping everything ready before you start ensures a smoother cooking process.
  • Make it vegetarian or vegan by swapping chicken with paneer or tofu respectively. You can check out my kung pao tofu recipe here.

Storage Tips

  • Refrigerate: Store leftovers in an airtight container in the refrigerator for up to 3 days.
  • Reheat: Warm in a hot pan for a few minutes until heated through. Add a splash of water if the sauce has thickened too much. You can also microwave it in short bursts, stirring halfway through.
  • Freeze: Freeze for up to 2 months. Thaw overnight in the refrigerator before reheating. The mushrooms will soften slightly after freezing, but the flavour will still be great.
  • Make ahead: You can marinate the chicken and prepare the sauce a day in advance. Store both separately in the refrigerator and stir-fry just before serving.

Serving Ideas for Kung Pao Chicken

  • Steamed jasmine rice: The classic pairing. The fluffy rice soaks up all the delicious sauce and balances the bold flavours of the stir-fry. You can also serve with plain steamed rice for an equally delicious meal.
  • Fried rice or noodles: Egg fried rice, hakka noodles, chilli garlic noodles, basil fried rice are some classic Indo-Chinese sides that really complement the sweet, savory spicy notes of kung pao chicken.
  • Stir-fried greens: Serve alongside bok choy, Chinese greens, broccoli or green beans for an easy way to add more vegetables to the meal.
  • Asian-inspired sides: Pair it with spring rolls, momos, bao, or a light cucumber salad for a complete takeout-style spread.
  • Lettuce wraps: Spoon the chicken into crisp iceberg or butter lettuce leaves for a lighter meal or appetiser.

Garnish Kung Pao Chicken with chopped spring onions and serve with steamed rice or noodles!

Kung Pao Chicken served over rice in a bowl with peanuts on the side

This kung pao chicken recipe is so easy, delicious, and addictive that I’ll be you won’t be able to stop making it. We make it nearly every other week, and we’re still not bored. It’s quick, flavour-packed, and one of the BEST Indo-Chinese dishes you can make at home.

If you try this recipe, DM me pictures over on my IG or tag me in your stories at @my_foodstory.

Watch Kung Pao Chicken Recipe Video

Kung Pao Chicken served over rice in a bowl with peanuts on the side
Print

Saucy Kung Pao Chicken

This Kung Pao Chicken recipe has big, bold flavours from chillies added three ways. There's lots of sauce so that the rice can soak up some of that spice and this can turn into a main dish.
Course Main Course
Cuisine Indian Chinese
Diet Halal
Prep Time 10 minutes
Cook Time 25 minutes
Total Time 35 minutes
Servings 4 people
Calories 390kcal
Author Richa

Ingredients

For marinade

  • 500 gms boneless chicken thighs cut into Β½ inch pieces
  • Β½ teaspoon salt
  • Β½ teaspoon sugar
  • ΒΌ teaspoon baking soda
  • 3 tablespoons cornflour cornstarch
  • 3-4 tablespoons water
  • 1 tablespoon soy sauce
  • Β½ teaspoon crushed pepper

For sauce

  • 1 Β½ tablespoons vinegar
  • 1 tablespoon sugar
  • 2 tablespoons light soy sauce
  • 1 Β½ tablespoons dark soy sauce
  • 2 tablespoons oyster sauce
  • 1 Β½ teaspoons cornflour
  • ΒΎ + β…› cup water

For stir-fry

  • 3 tablespoons sunflower oil or any neutral flavoured oil divided
  • 10 dried red chillies whole
  • 1 large onion cut into petals, approx. 1 cup
  • 2 tablespoons finely chopped garlic
  • 2 teaspoons finely chopped ginger
  • 10 mushrooms halved
  • ΒΌ cup roasted peanuts
  • ΒΎ teaspoon white pepper powder
  • ΒΌ cup cut spring onion greens 1 inch pieces

Instructions

  • In a large bowl add all the ingredients listed under marinade, mix well to combine all the ingredients. Set aside for 30 minutes to an hour.
    500 gms boneless chicken thighs, Β½ teaspoon salt, Β½ teaspoon sugar, ΒΌ teaspoon baking soda, 3 tablespoons cornflour, 3-4 tablespoons water, 1 tablespoon soy sauce, Β½ teaspoon crushed pepper
  • Whisk together all the ingredients for the sauce and set aside.
    1 Β½ tablespoons vinegar, 1 tablespoon sugar, 2 tablespoons light soy sauce, 1 Β½ tablespoons dark soy sauce, 2 tablespoons oyster sauce, 1 Β½ teaspoons cornflour, ΒΎ + β…› cup water
  • Heat oil in a wok or kadai. Once the oil is hot, add chicken pieces and fry for 3 – 4 minutes, turning once or twice till golden brown. Do not over crowd the wok as the chicken pieces tend to stick together. Fry them in batches and set aside.
    3 tablespoons sunflower oil or any neutral flavoured oil
  • To the same wok, add onion petals, red chillies and saute on high for a few seconds till fragrant. Add garlic, ginger and saute on high for a few seconds, add mushrooms and stir fry on high heat for 1-2 minutes and add the fried chicken. Toss for 2 minutes till the chicken absorbs the flavours. Add the sauce, white pepper and toss well on high heat till the sauce coats the chicken. Stir fry for a minute or two and take off the heat. Top with spring onions and serve.
    10 dried red chillies, 1 large onion, 2 tablespoons finely chopped garlic, 2 teaspoons finely chopped ginger, 10 mushrooms, ΒΌ cup roasted peanuts, ΒΎ teaspoon white pepper powder, ΒΌ cup cut spring onion greens

Video

Notes

  1. Keep all ingredients chopped and ready before starting the stir fry process as it has to happen quickly and on high heat.
  2. To make onion petals cut onions into 3/4 inch wide slices, separate each layer of onion to form petals.
  3. Boneless chicken thighs are used in the recipe as they are juicy and tender

Nutrition

Calories: 390kcal | Carbohydrates: 21g | Protein: 31g | Fat: 21g | Saturated Fat: 3g | Polyunsaturated Fat: 3g | Monounsaturated Fat: 13g | Trans Fat: 0.02g | Cholesterol: 119mg | Sodium: 1788mg | Potassium: 690mg | Fiber: 3g | Sugar: 7g | Vitamin A: 424IU | Vitamin C: 6mg | Calcium: 51mg | Iron: 2mg

This article was researched and written by Urvi Dalal.

The post Easy Kung Pao Chicken Recipe appeared first on My Food Story.
❌