Papas Arrugadas are traditional Canary Island potato recipe called as wrinkled potatoes. It is made by cooking small potatoes in heavily salted water until potatoes are cooked through. These cooked potatoes are left to dry in the pan until the potato skins get wrinkly and the potatoes are lightly coated with salt. This wrinkled salt...
If you are looking for simple upma recipes for breakfast or dinner, then this rice flour upma is the answer. This arisi maavu upma is made with rice flour, simple tempering of mustard, urad dal, dry chillies, curry leaves and coconut. Easy to make rice upma with minimal steps. Rice flour upma Ever been in...
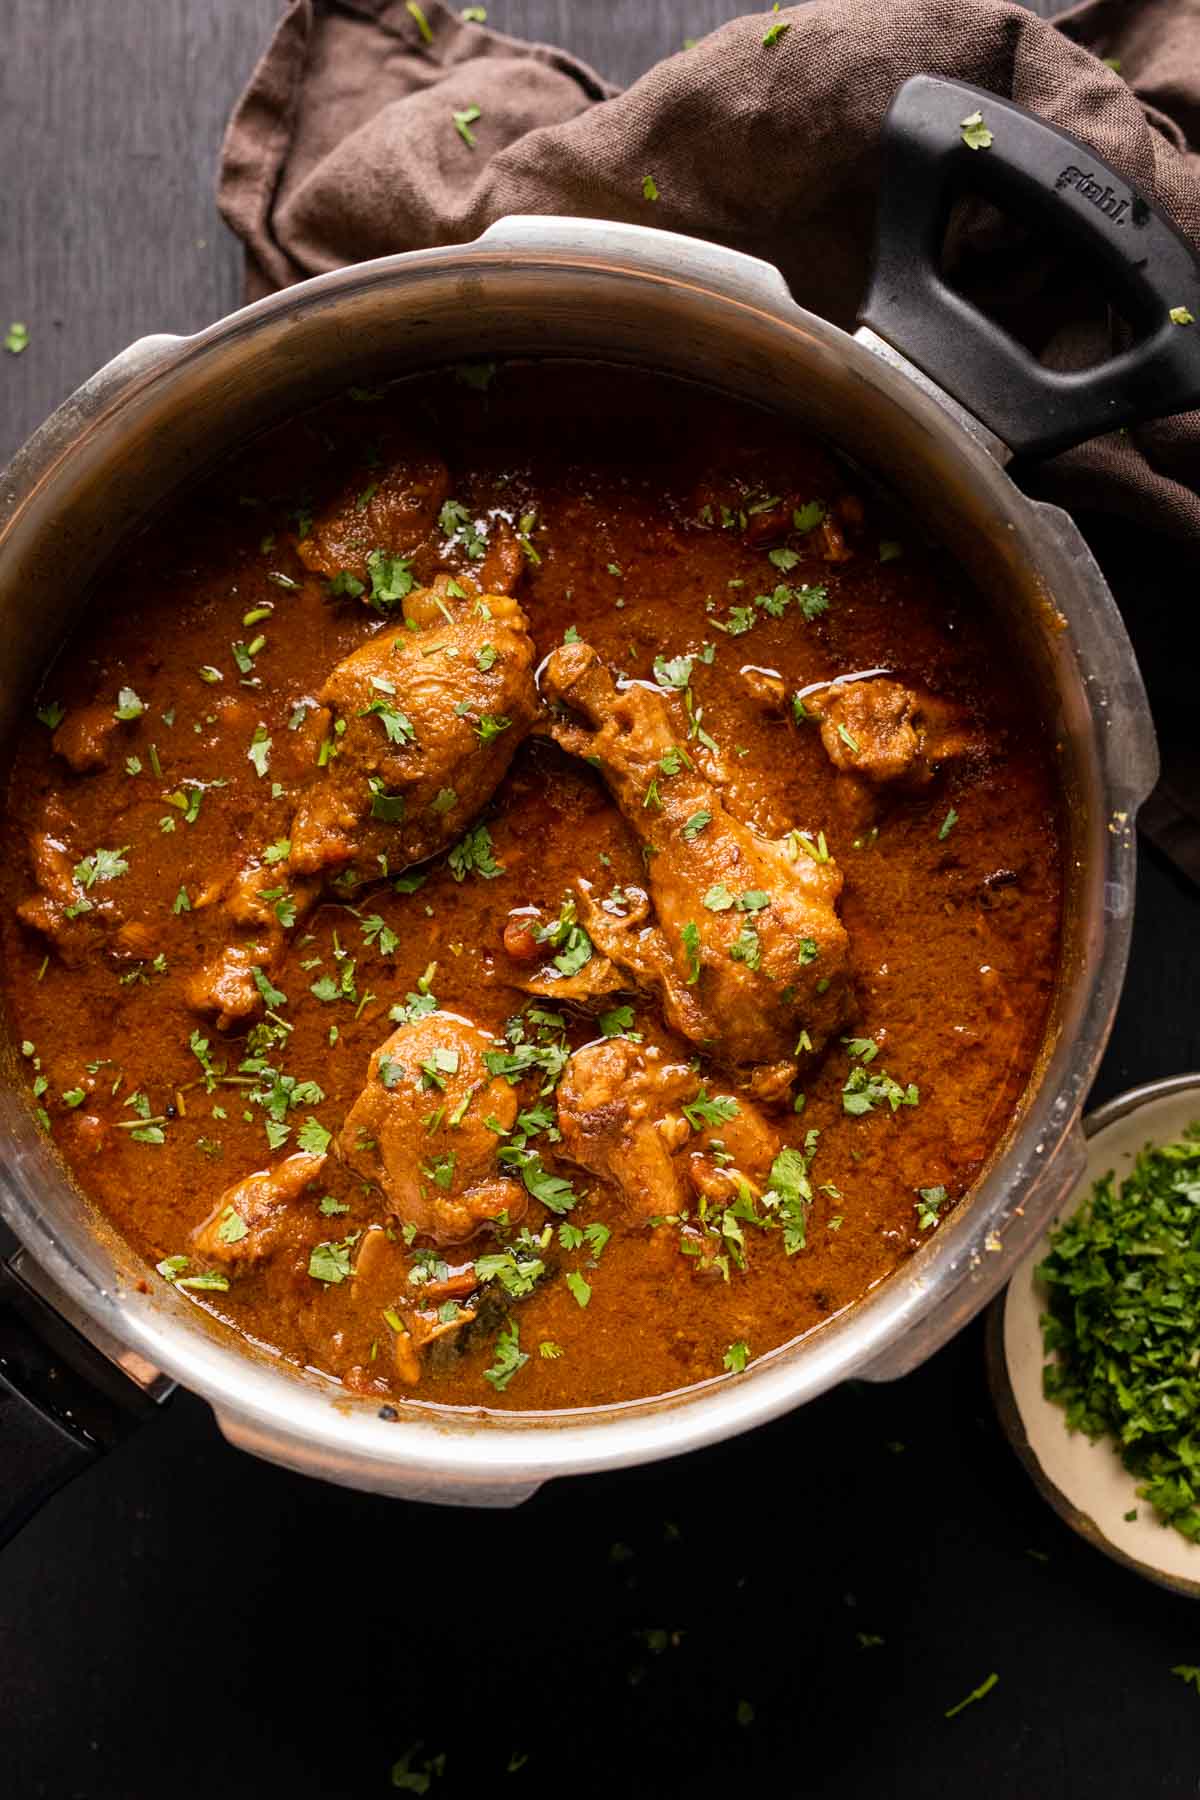
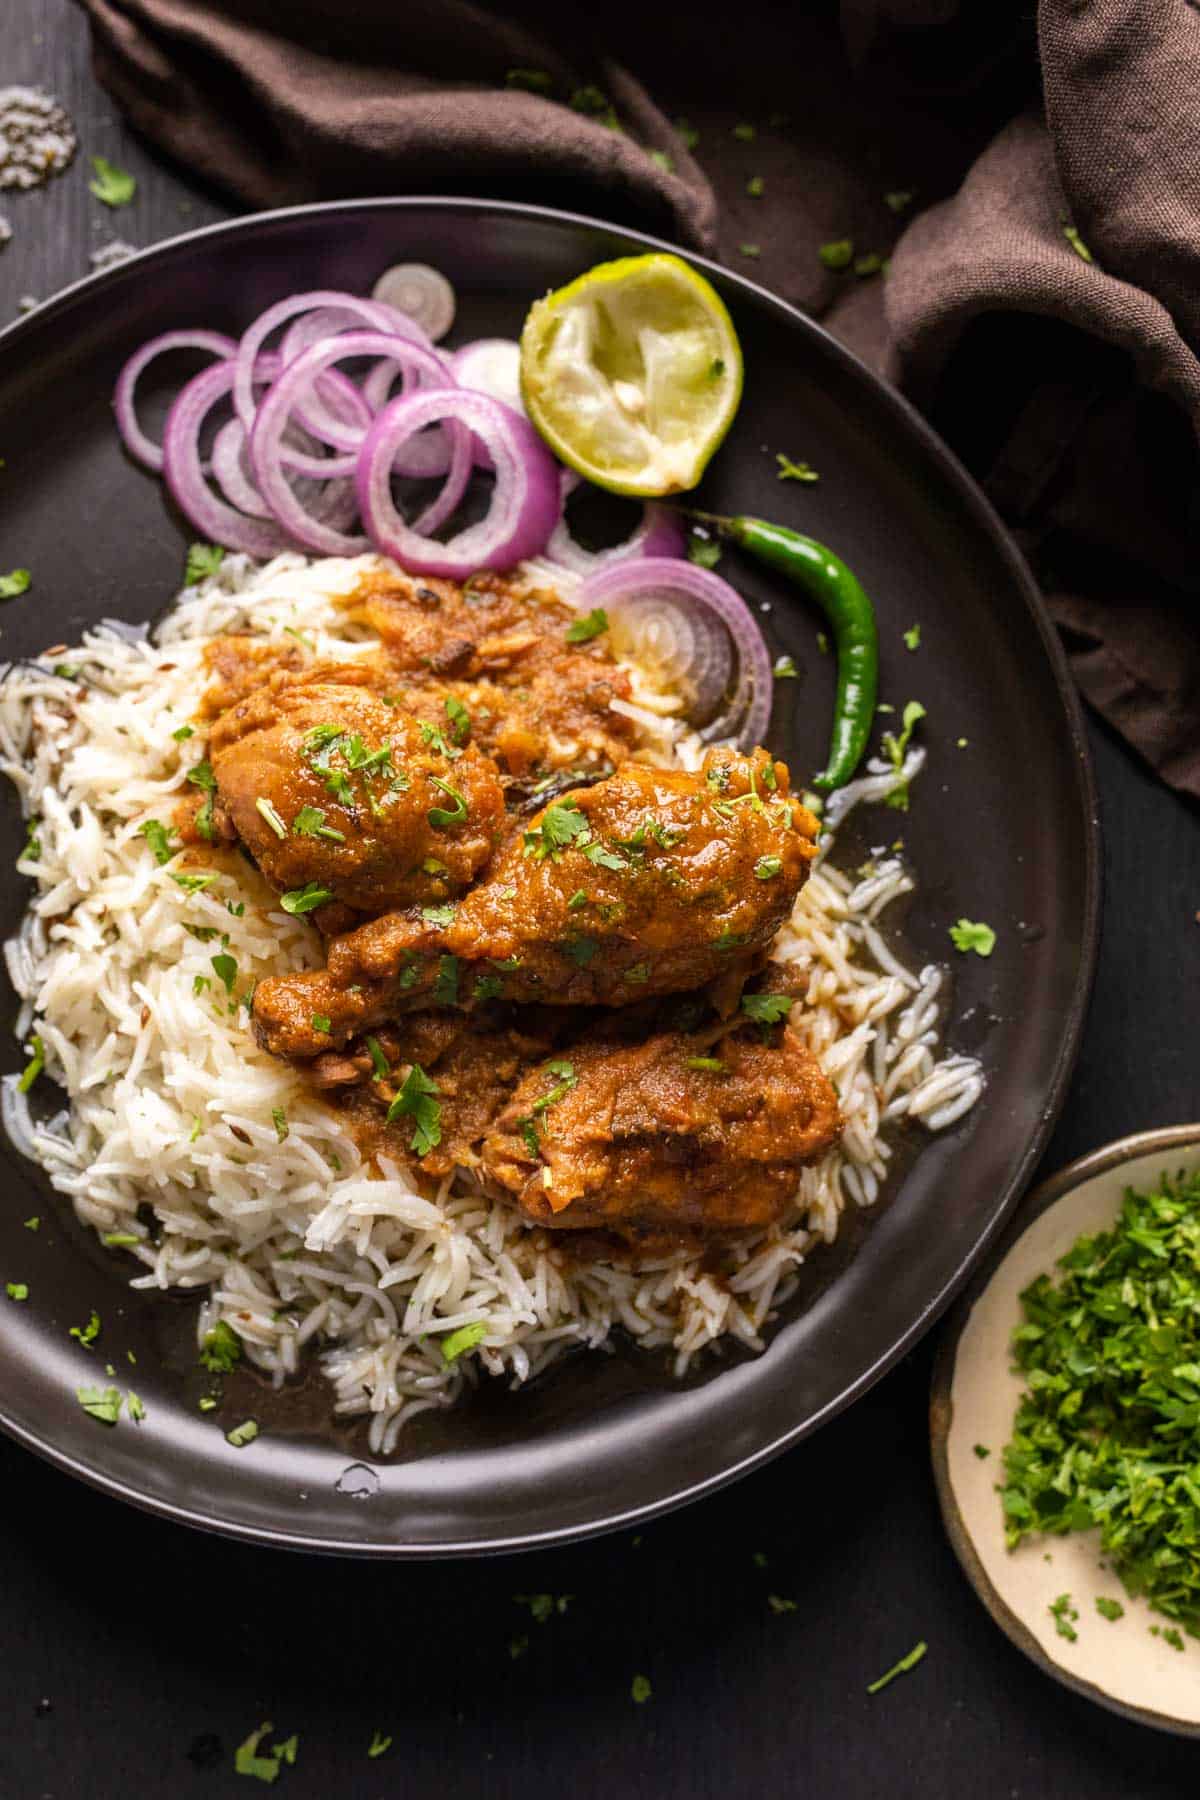
This Dhaba Style Chicken Curry stands for every road trip we’ve had with our families. Same bold flavours, hot, fragrant, and ready in under 45 minutes. Learn how to make it in a traditional pressure cooker, instant pot, and on the stovetop.
I think I’ve finally nailed it. This Dhaba Style Chicken Curry is SO good. Its legit, as close as it gets to eating it in a dhaba. Spicy, fragrant with spices, big, bold flavours and really juicy pieces of chicken.
Dhabas, for the uninitiated, are roadside restaurants that you’ll find along the highway. They’re road trip essentials and are scattered all over the country and really well-known for their bold, rustic flavors and ambience. Growing up, the highlight of any road trip was a stopover at a dhaba for steaming hot, spicy dhaba style chicken curry, dal fry or dal makhani and tandoori rotis fresh from the oven to mop it all up. These soul satisfying meals will always be etched on to my heart!
Unlike my other recipes, this one’s slightly time consuming because masala is ground and cooked till it’s color changes. This is characteristic of most Indian curries, and the slow cooking process or bhuno is what lends dishes a unique flavor.
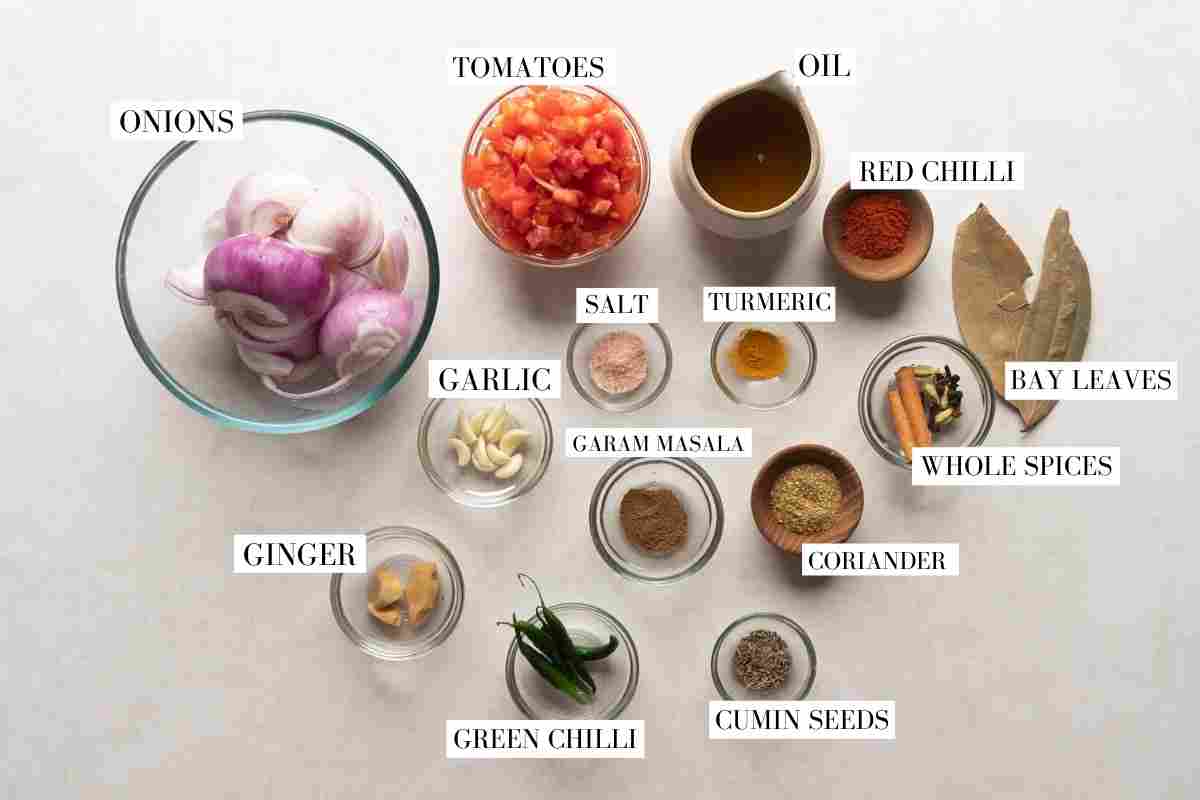
Here are the main ingredients you’ll need for this recipe:
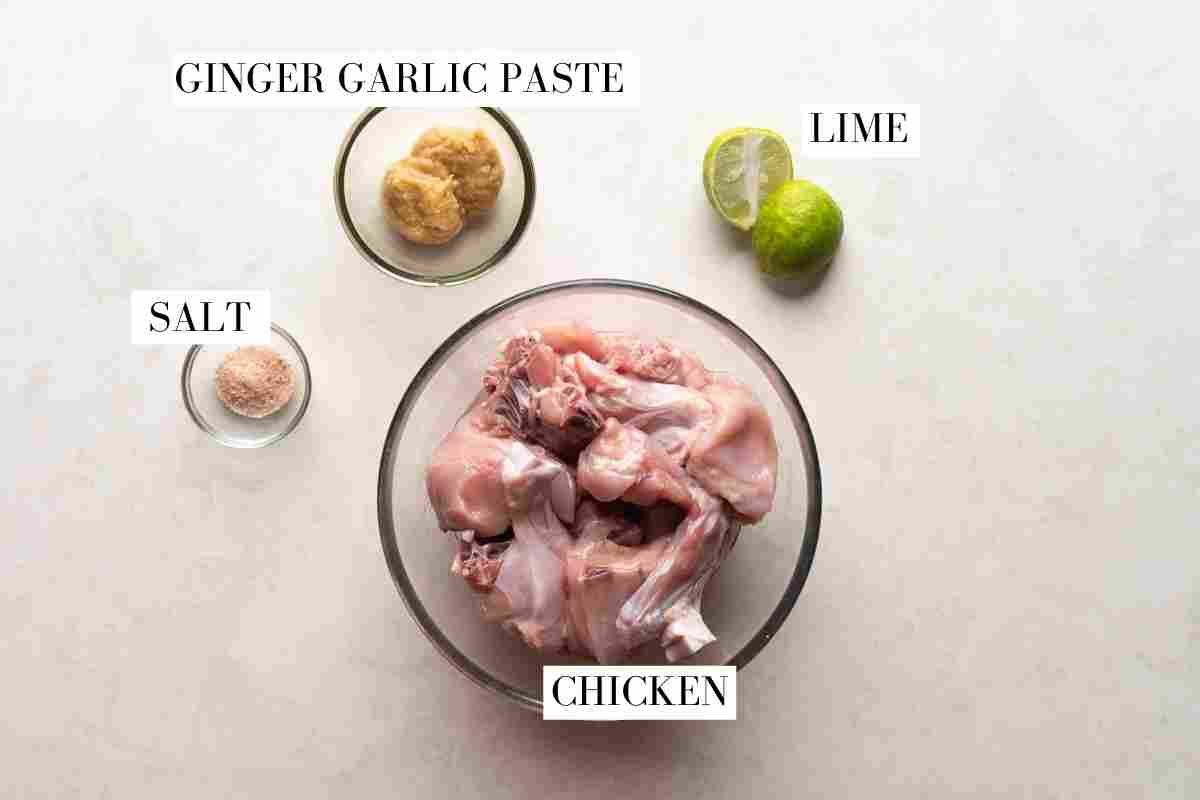
Chicken: Bone in chicken cut into 2 inch pieces. Most Indian curries use the entire bird (thighs, breast, drumsticks)
Ginger Garlic Paste: Fresh ginger and garlic in equal parts ground to a paste with a little water. Use store bought in a pinch but fresh adds more flavour
Lime Juice: Acid helps tenderise the meat
Mustard Oil: Key to getting that unique dhaba flavour. It’s more pungent and adds a smokiness
Whole Spices: Cumin, cloves, cardamom, cinnamon and bayleaf. Skip if you don’t have but I recommend using them for that burst of flavour
Ginger & Garlic: Ground with onions. You can substitute it with 1.5 tbsp store bought or homemade ginger garlic paste
Onions: Form the main base of the gravy and add flavour, density and thickness
Green Chillies: Add heat and flavour. Use serrano peppers if you don’t have Indian green chillies available
Ground Spices: Red Chilli Powder, Turmeric Powder, Coriander Powder and Garam Masala. I highly recommend using homemade garam masala. Add it towards the middle or end of the cooking process to retain its aroma and flavour
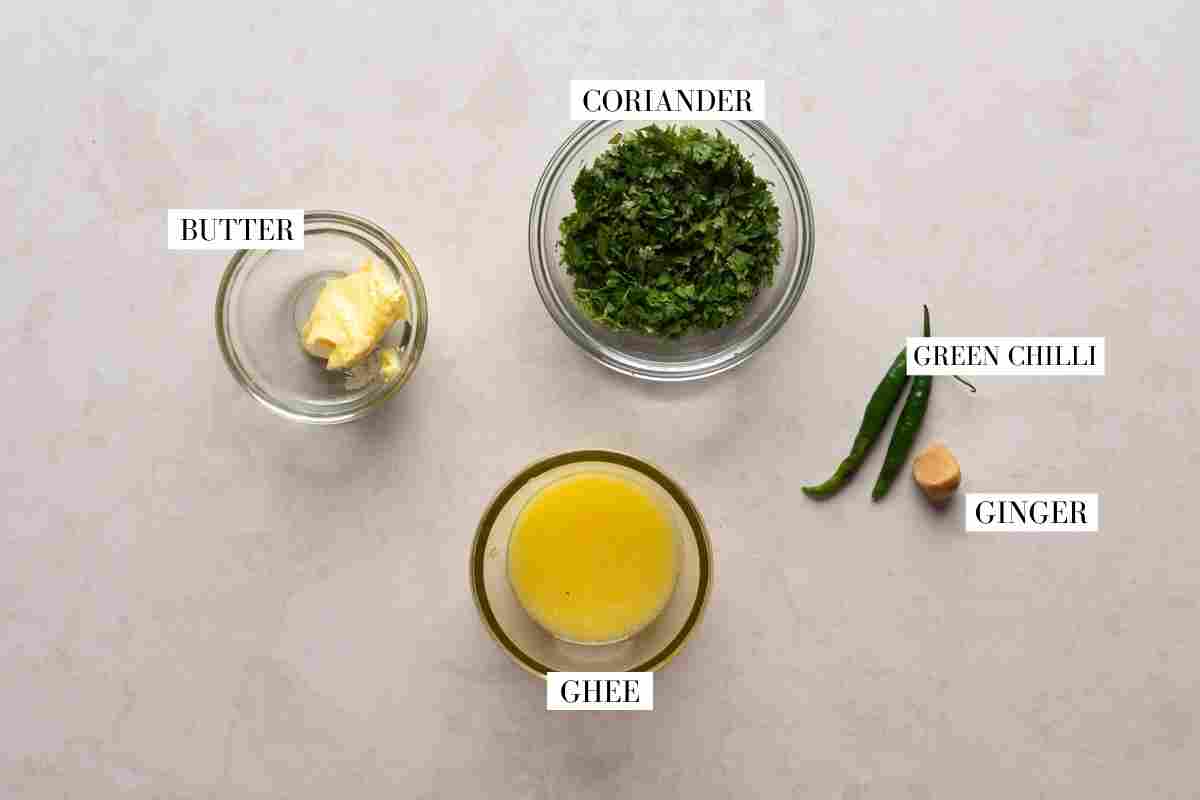
Tempering: We use ghee, ginger, and green chillies to add an additional layer of flavor to finish off the curry. Don’t skip this step!
Why is this Chicken Curry recipe so unique
We were asking this question ourselves while trying to replicate that dhaba like flavour – How is it that common dishes taste extra unique when they come from a dhaba?
Here’s what we found: Dhabas use more oil, ghee and butter to add richness and to cook the food faster, there’s a natural smoky flavour because all the cooking is done on a really high flame or using firewood. They liberally use freshly ground spices wherever possible and finally, they end the dish with a sizzling tadka/tempering!
We’ve taken all this information and compiled it into one beautiful chicken curry.
How to make Chicken Curry
Check out the simple steps that go into making this beautiful curry
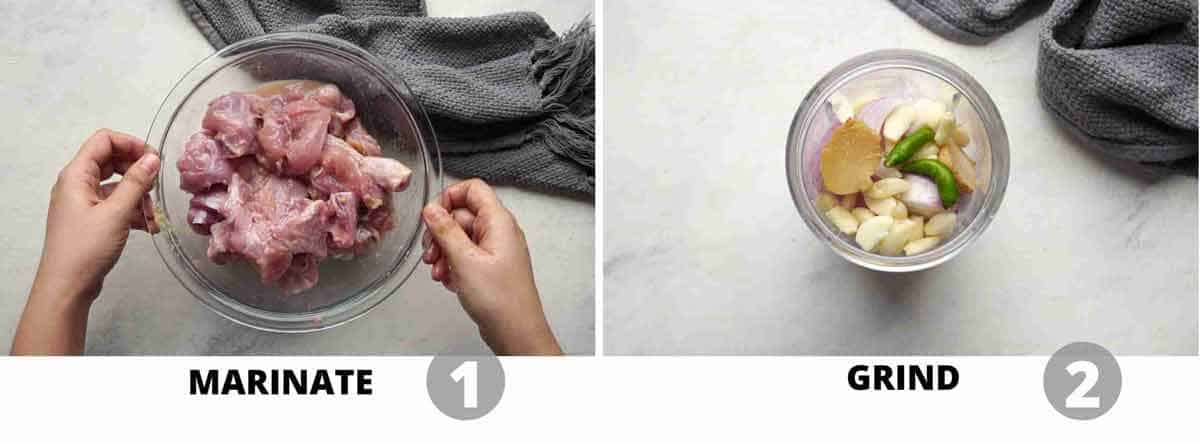
Marinate
1. Marinate the chicken in ginger garlic paste, lime juice and salt. This adds flavour from within and the acid helps tenderise the meat
2. Add onions, ginger, garlic and green chillies to a chopper and pulse to get a coarse mix.
Curry
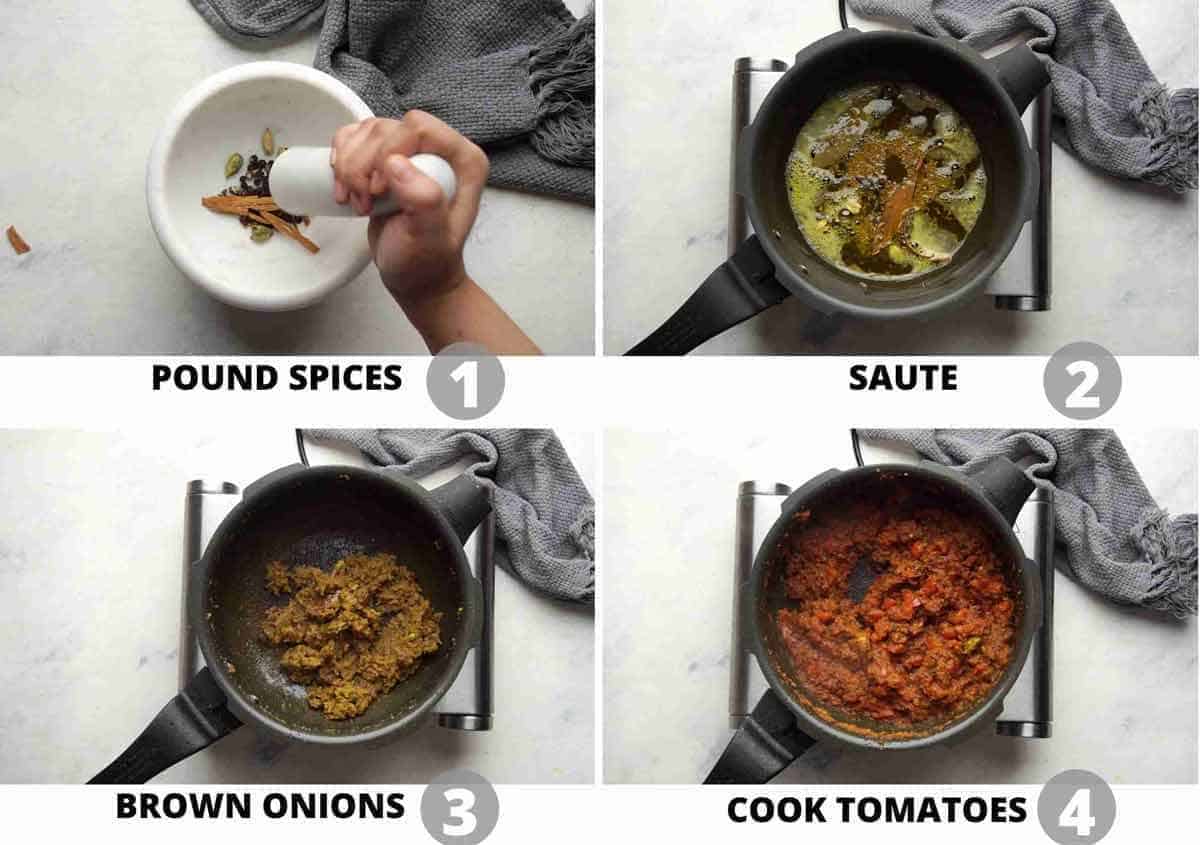
1. Pound spices roughly with a mortar pestle to break them down and release their flavour
2. Saute them in hot oil to temper them
3. Brown the onion paste in oil that’s tempered with whole spices. This is a slow cooking process where the onion paste is sauteed on a low flame till it changes colour and becomes a deep golden brown. You’ll see a thin layer of oil floating on the top and the sides – thats when you know its cooked through and isn’t raw anymore
4. Cooktomatoes and spices for a few minutes till the tomatoes become pulpy soft
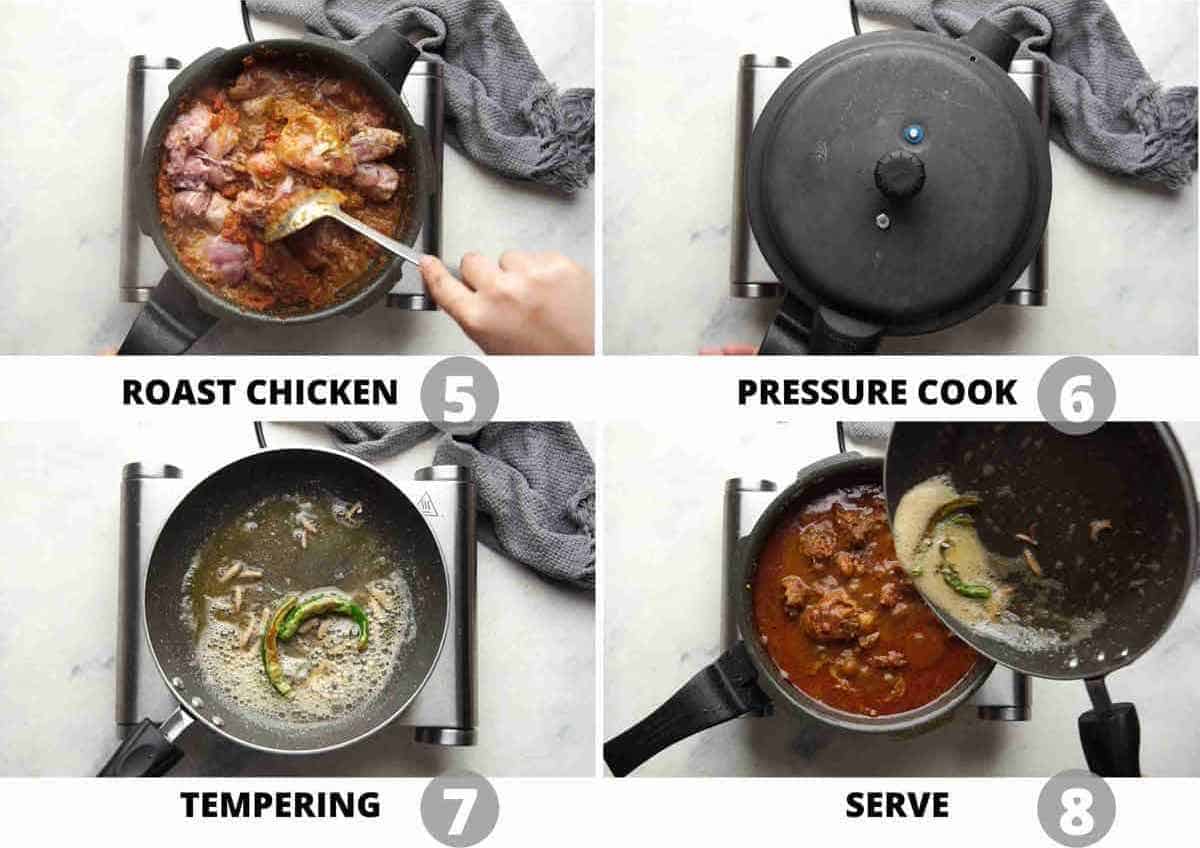
5. Roast the chicken along with garam masala in the onion tomato mixture, tossing it for a minute or two till the gravy coats all the pieces
6. Pressure Cook for 15 minutes. If using a traditional pressure cooker, start on high heat and after the first whistle, reduce the heat to low. Wait till you hear two more whistles and then turn off the flame. Let the pressure release naturally. To make instant pot chicken curry, pressure cook on high for 8 minutes
7. Temper julienned ginger and slit green chillies in butter and ghee.This adds an extra layer of flavour and gives it a nice hint of ginger
8. Serve chicken curry with tempering poured on top. Sprinkle some chopped coriander for freshness and flavour
Richa’s Top Tips
Always marinatethe chicken. The longer the better. This literally changes the game by adding flavour, seasoning, and tenderising.
Brown the onion paste. Don’t rush this process. Browning onions slowly gets rid of any raw smell and flavour. You’ll know its done when you see a little oil separating on the sides and the colour changes to a deep golden. This, in addition with the herbs, spices and tomatoes create the perfect balance.
Don’t skimp on oil. There is a fair amount of fat in this recipe in the form of oil, butter and ghee. I would not recommend skimping on oil as it will compromise the flavor.
Always use quality garam masala. I always recommend homemade garam masala. But even if using store bought, make sure its not more than a year old. Add it just before cooking the chicken so that it retains its freshness and aroma
Do not forget the tempering. It gives it that extra kick along with the richness from the ghee.
Storage Tips
If you have leftovers, let the chicken curry cool completely before transferring it to an airtight container. It will keep well in the refrigerator for 3–4 days.
If you’d like to store it for longer, you can freeze Dhaba Chicken Curry for up to 2–3 months. For convenience, portion it into freezer-safe containers so you can thaw only as much as you need.
When you’re ready to reheat, thaw the frozen curry in the refrigerator overnight and then warm it gently on the stovetop. The gravy tends to thicken as it sits, so add a splash of water while reheating if needed. Make sure the chicken is heated through before serving.
And the best part? The flavours have more time to come together as the curry sits, so leftovers can taste even better the next day. This also makes it a great make-ahead chicken curry for busy weeknights.
Serving Ideas
Wondering what to serve with Dhaba Chicken Curry? You really can’t go wrong with something that helps soak up all that delicious, spicy gravy!
If you’re craving a proper dhaba-style spread, go for tandoori roti or naan with a bowl of cool raita, sliced onions and lemon wedges on the side.
For a bigger Indian meal, add dal fryordal makhani and a simple vegetable sabzi. And don’t forget extra rotis or rice because you’ll want every last bit of that gravy!
I hope you guys enjoy this recipe as much as I do, it’s truly one of my favorites! And like all curries, this tastes even better the next day, so no need to worry about leftovers! If you love dhaba style food, check out my other favourite like Dhaba Dal Fry, Dhaba Dal Tadka, Matar Paneer, Karahi Chicken, Dal Makhani.
When you make this recipe, don’t forget to send me pictures over on my IG @my_foodstory. I love seeing your recreations!
The best dhaba style chicken curry recipe! Spicy, hot, fragrant curry made with ground spices, onions and tomatoes, and perfect for a family lunch or dinner.
Marinate the chicken pieces with ginger garlic paste, lime juice and salt. Cover and set aside while you prep everything else
Add onions, ginger, garlic and green chillies to a chopper and pulse to get a coarse mix.
Heat oil in a pressure cooker or a large heavy bottom pan. Add cumin seeds. Roughly pound all the whole spices (bay leaves, cinnamon, cardamom, peppercorns and cloves) and add to the oil.
once they start to splutter, add the onion mix. Cook the onion mix on a low flame, stirring occasionally till it is reduced to a golden brown mix and you see a thin layer of oil along the sides
Add tomatoes, salt, turmeric powder, red chili powder (if using) and coriander powder. Cook till the tomatoes start melting, and almost form a paste.
Add chicken and garam masala powder and roast for a minute or two till the chicken pieces turn pink and get coated with the masala. Add meat masala powder, 1 ¼ cups of water, mix well.
Pressure Cooker:
At this stage, if you are using a pressure cooker, place the lid and pressure cook on high till the first whistle goes off. Then reduce the flame to low and pressure cook for two more whistles and turn off the flame. If using a different kind of pressure cooker (without a whistle system), pressure cook on high for 15 minutes. Let the pressure release naturally.
Simmer for 5-10 mins on high flame, if required, to thicken the curry (chicken leaves a lot of water). I didn't need to do this.
Stovetop Method:
If you are using a heavy bottomed pan, bring the curry to a boil, reduce the heat, cover with a lid and let it cook on medium heat for 20-25 minutes. Uncover the pan, and cook for another 10-15 minutes till the curry starts to thicken. Once the curry is ready, switch off the flame.
Instant Pot Method:
If using an instant pot, place the lid and change the vent to sealing. Pressure cook on high for 8 minutes. Release pressure manually. Simmer the curry for a few minutes to achieve the desired thickness if there is too much water.
Tempering:
In another small pan, heat ghee and butter and add green chilies and ginger. Once they start to splutter, switch off the flame and mix the tadka (or tempering) into the curry. Top with coriander.
Let the curry sit for 10-15 minutes before serving. Tastes best with rotis or rice.
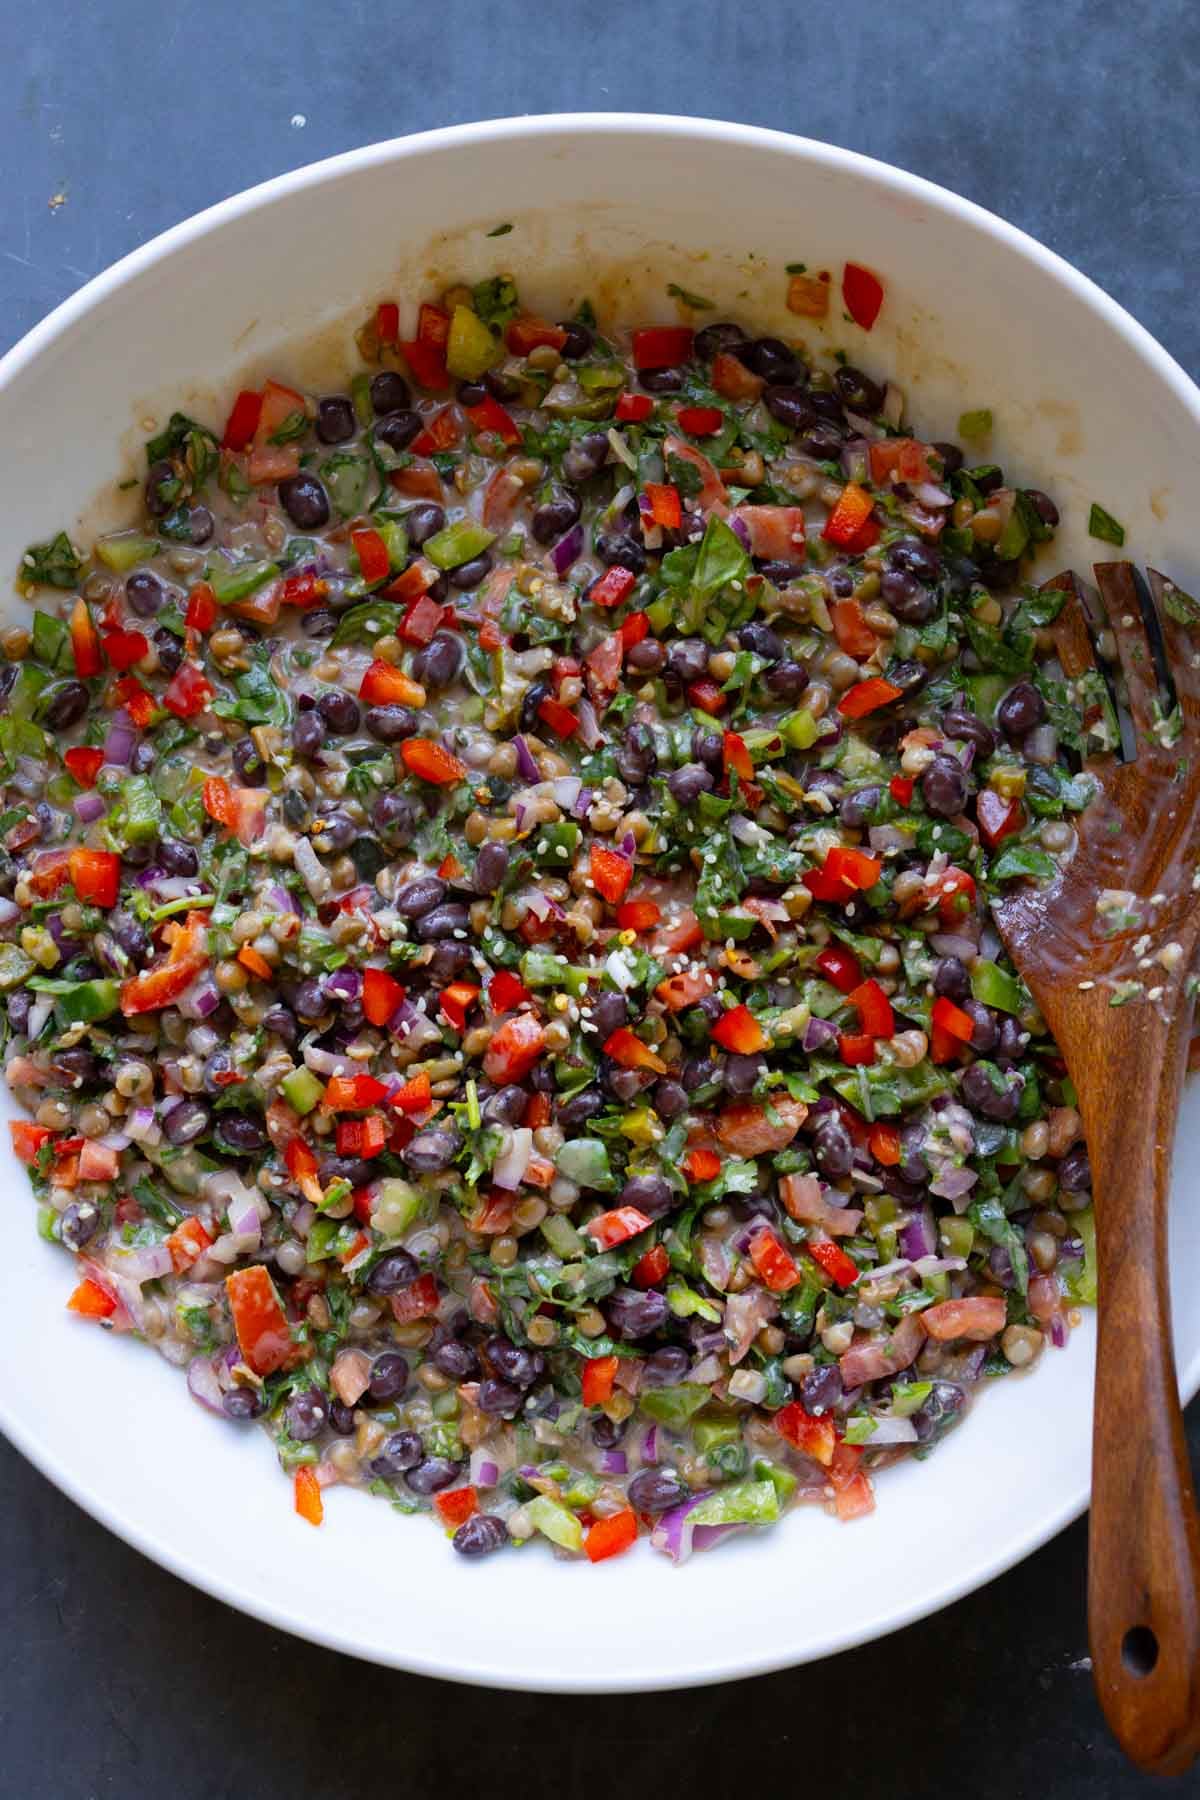
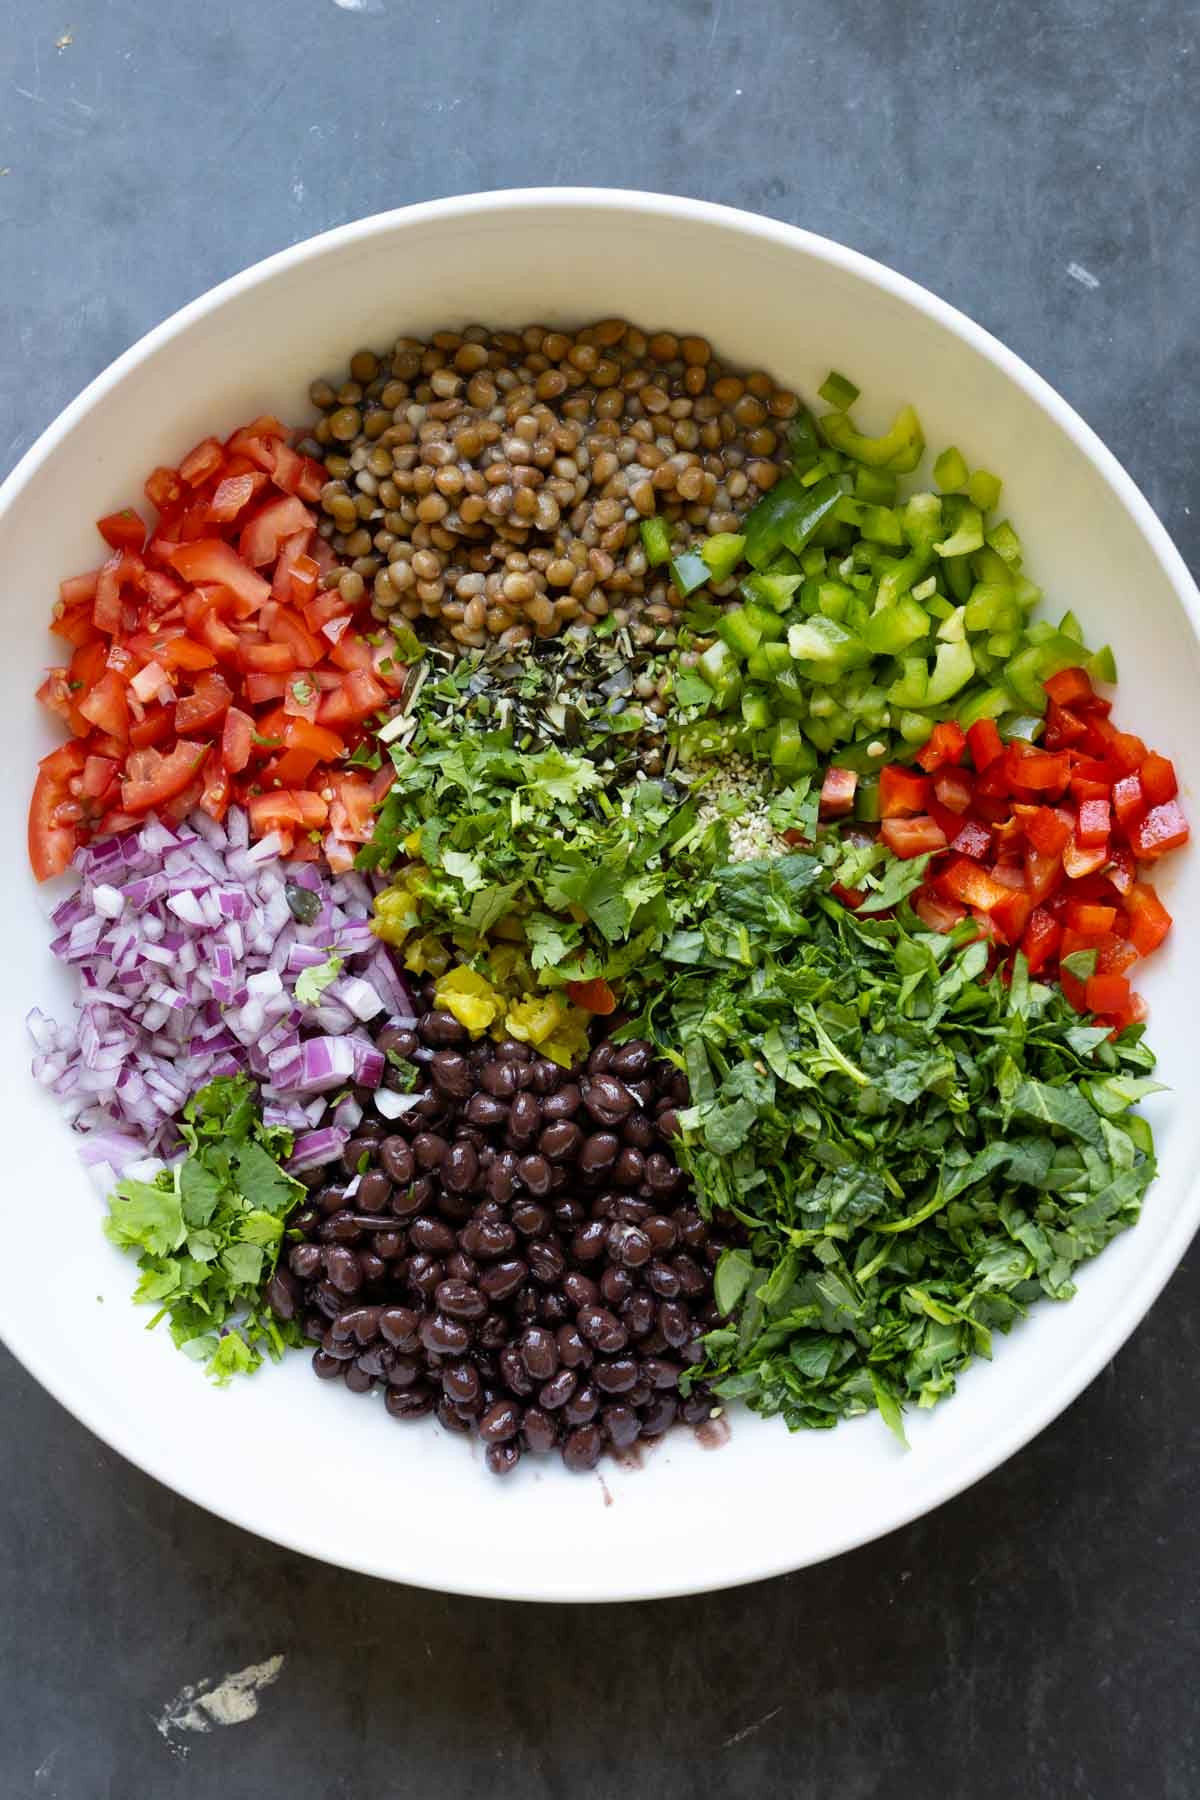
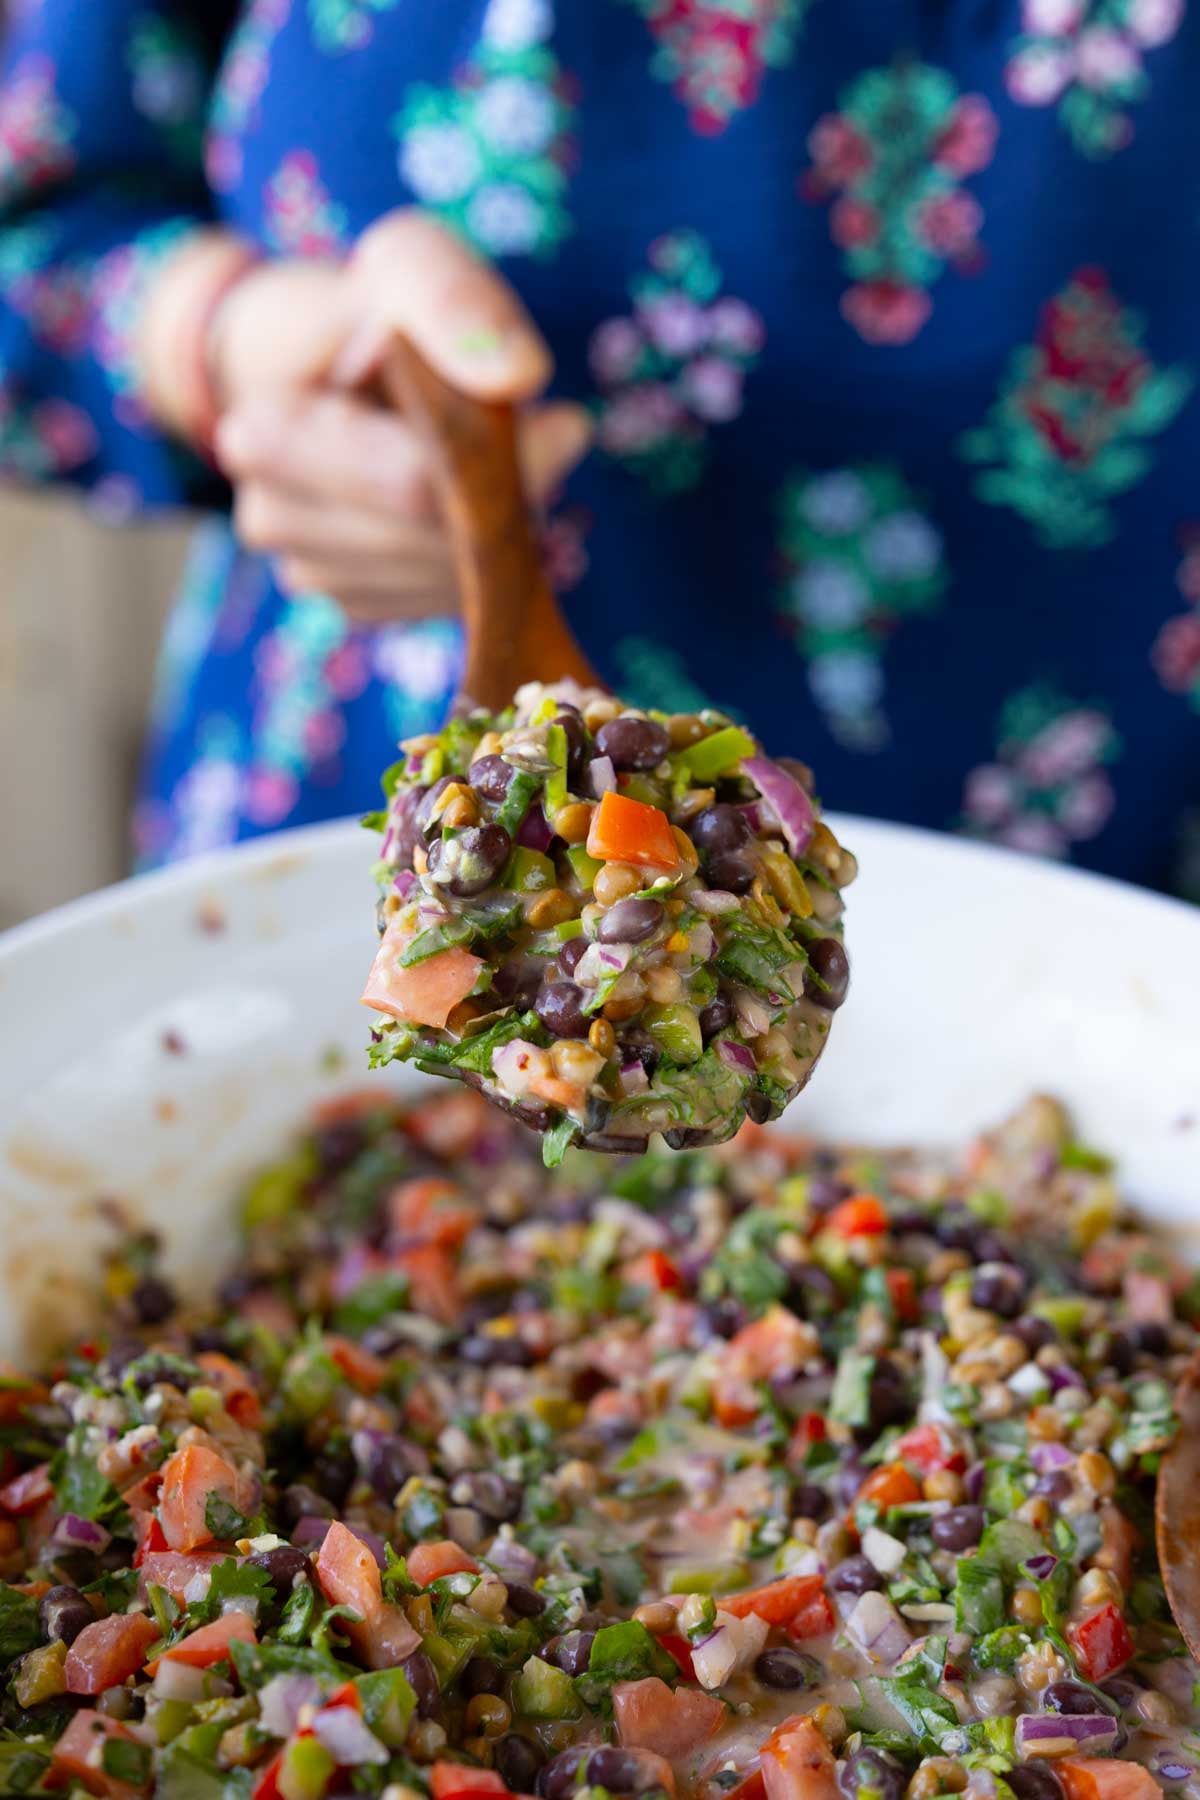
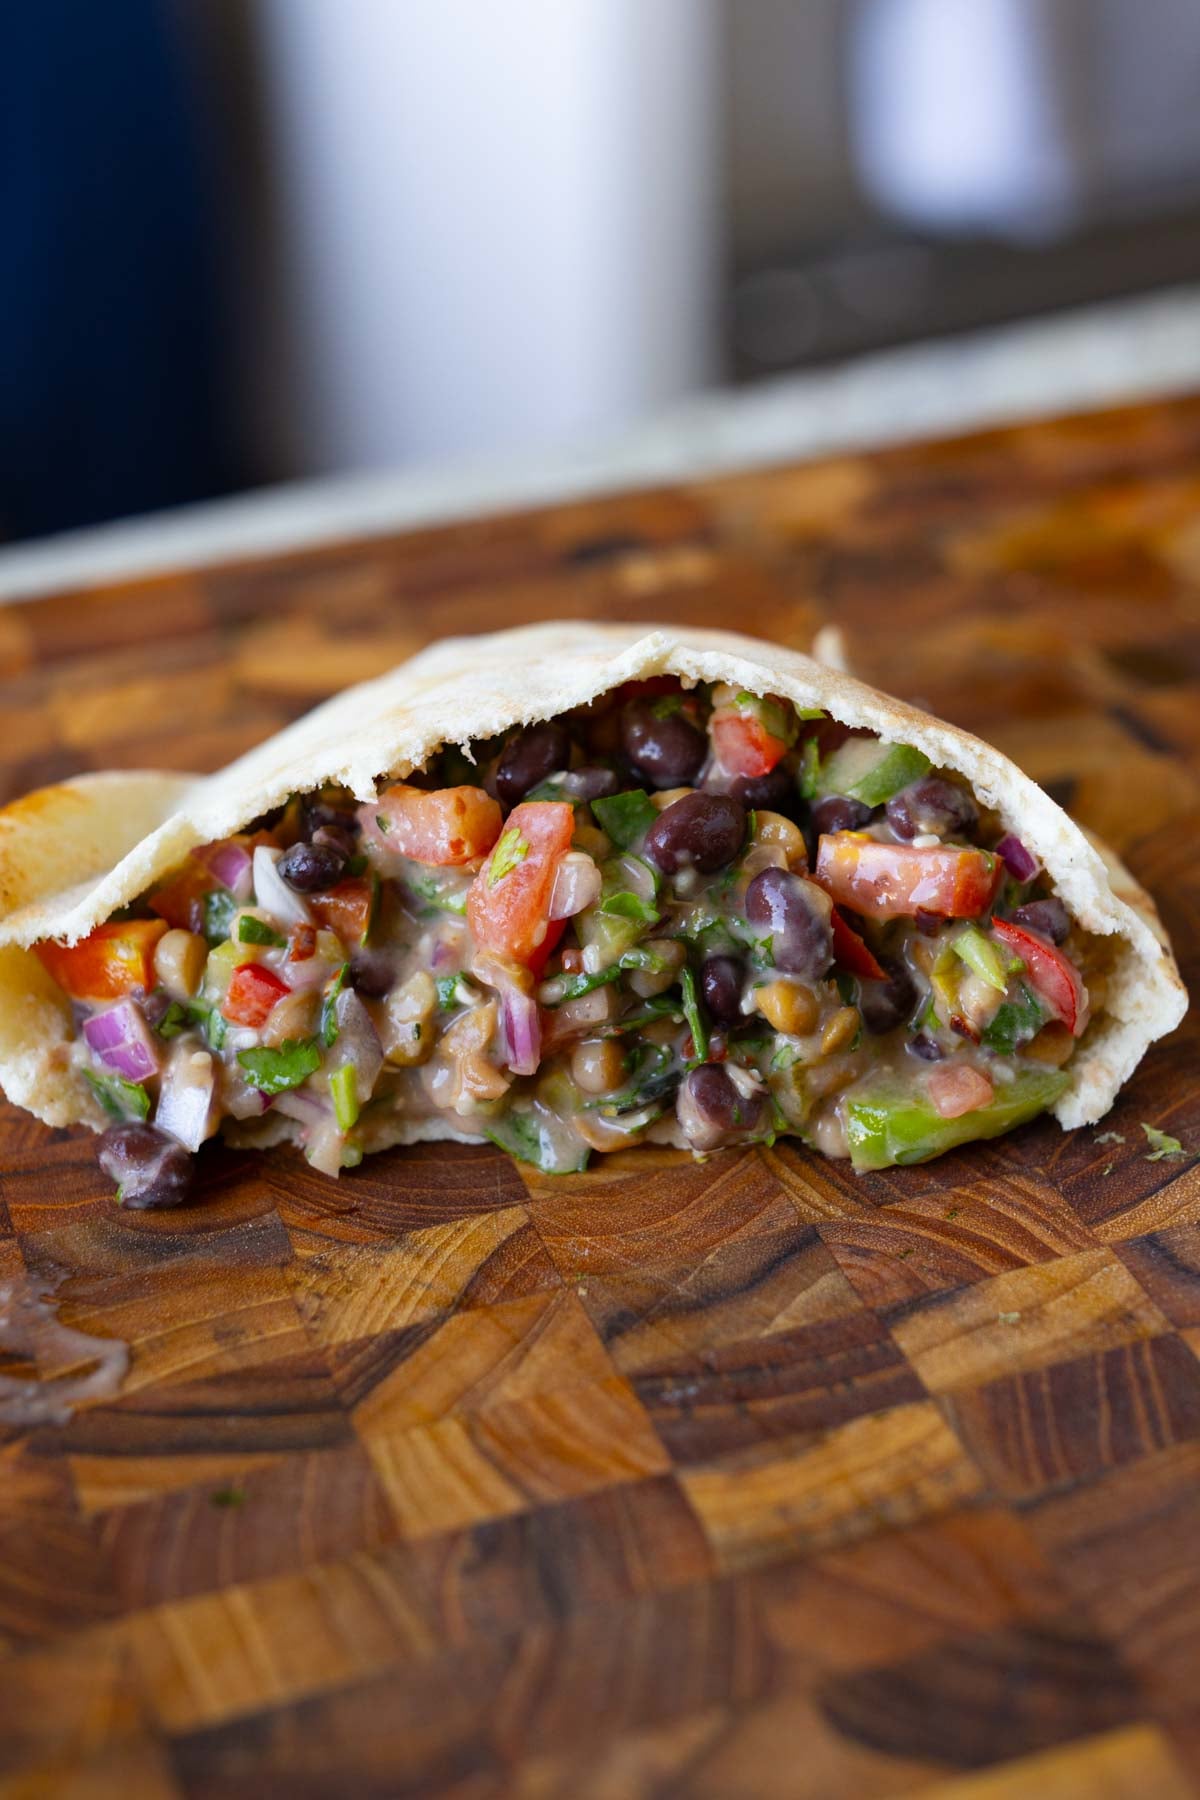
This Dense Bean Salad keeps you full for hours! Black beans, lentils, veggies, kale, seeds and a creamy, lemony dressing. High Protein, High fiber, anti-inflammatory (17 grams Protein, 14 grams fiber per serving. Gluten-free, Nut-free, option for soy-free)
This is my anti-inflammatory dense bean salad. Dense bean salads have been trending, and they are just amazing hearty meals with tons of beans and so many different combinations of flavors, textures, and veggies that you can add to them.
Beans, along with all of the vegetables and other ingredients in this salad, are a great source of fiber, protein, iron, and zinc.
The whole bowl has 65+ grams or more of protein, 50+ grams of fiber, 20+ milligrams of iron, and loads of vitamin C from the tomatoes, peppers, and lemon to help your body absorb all of that iron. There are omega-3s from the hemp seeds, along with pumpkin seeds, making this an incredibly nutrient-dense meal.
This is a great, budget-friendly, easy-to-put-together salad. There is no cooking involved. You just have to chop everything, make the dressing, toss it all together, and it’s ready. It’s also perfect for meal prep because the flavors enhance as the salad sits. The next day, it’s even more flavorful because the beans absorb all of that delicious dressing.
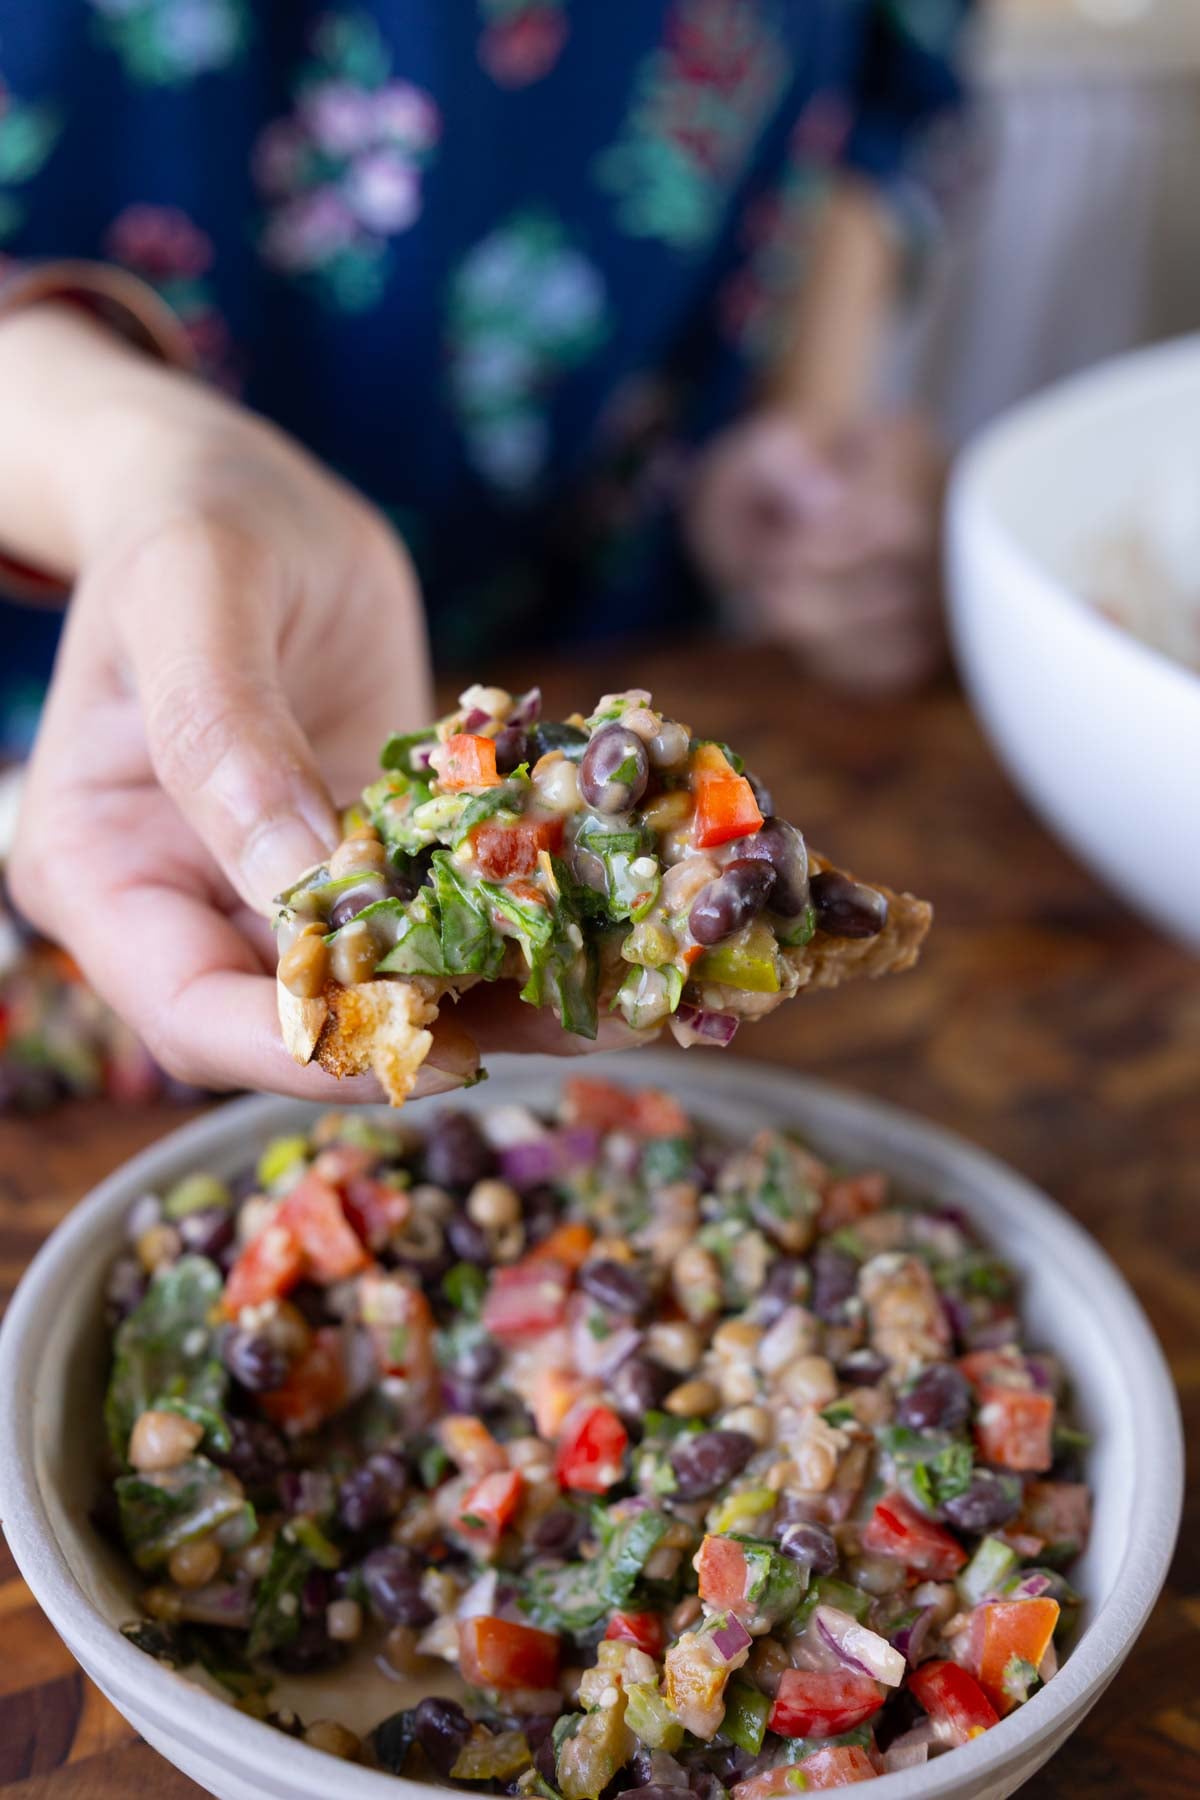
Serve this dense bean salad with tortilla chips, toasted sourdough or garlic bread, added to wraps or tacos, or served over grains, such as quinoa or farro. There are endless possibilities with this salad!
Why You’ll Love this Dense Bean Salad
easy, no-cook meal, perfect for hot weather!
packed with protein, fiber, vitamins, Antioxidants and minerals in every bowl
Anti-inflammatory ingredients
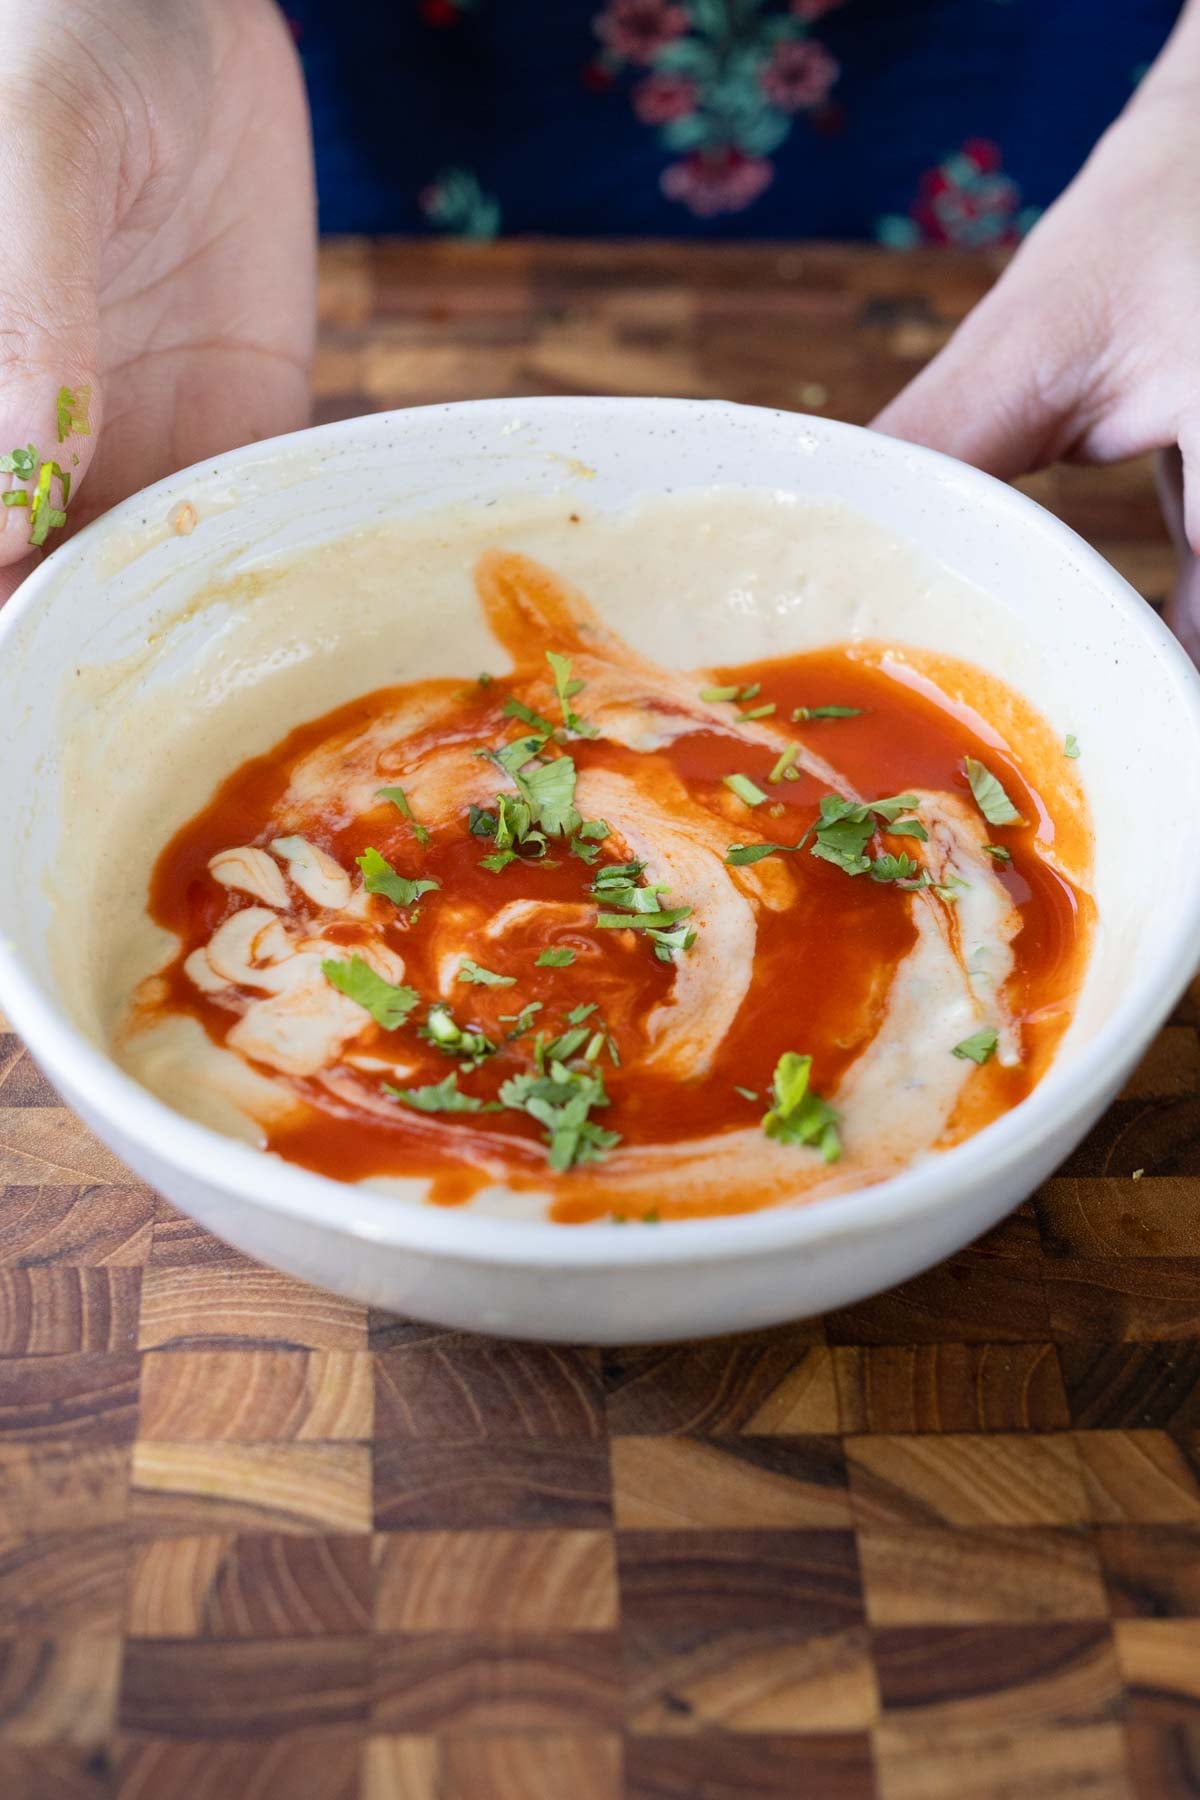
creamy lemon yogurt dressing sends the flavor profile over the top
naturally gluten-free and easy to make nut-free and soy-free
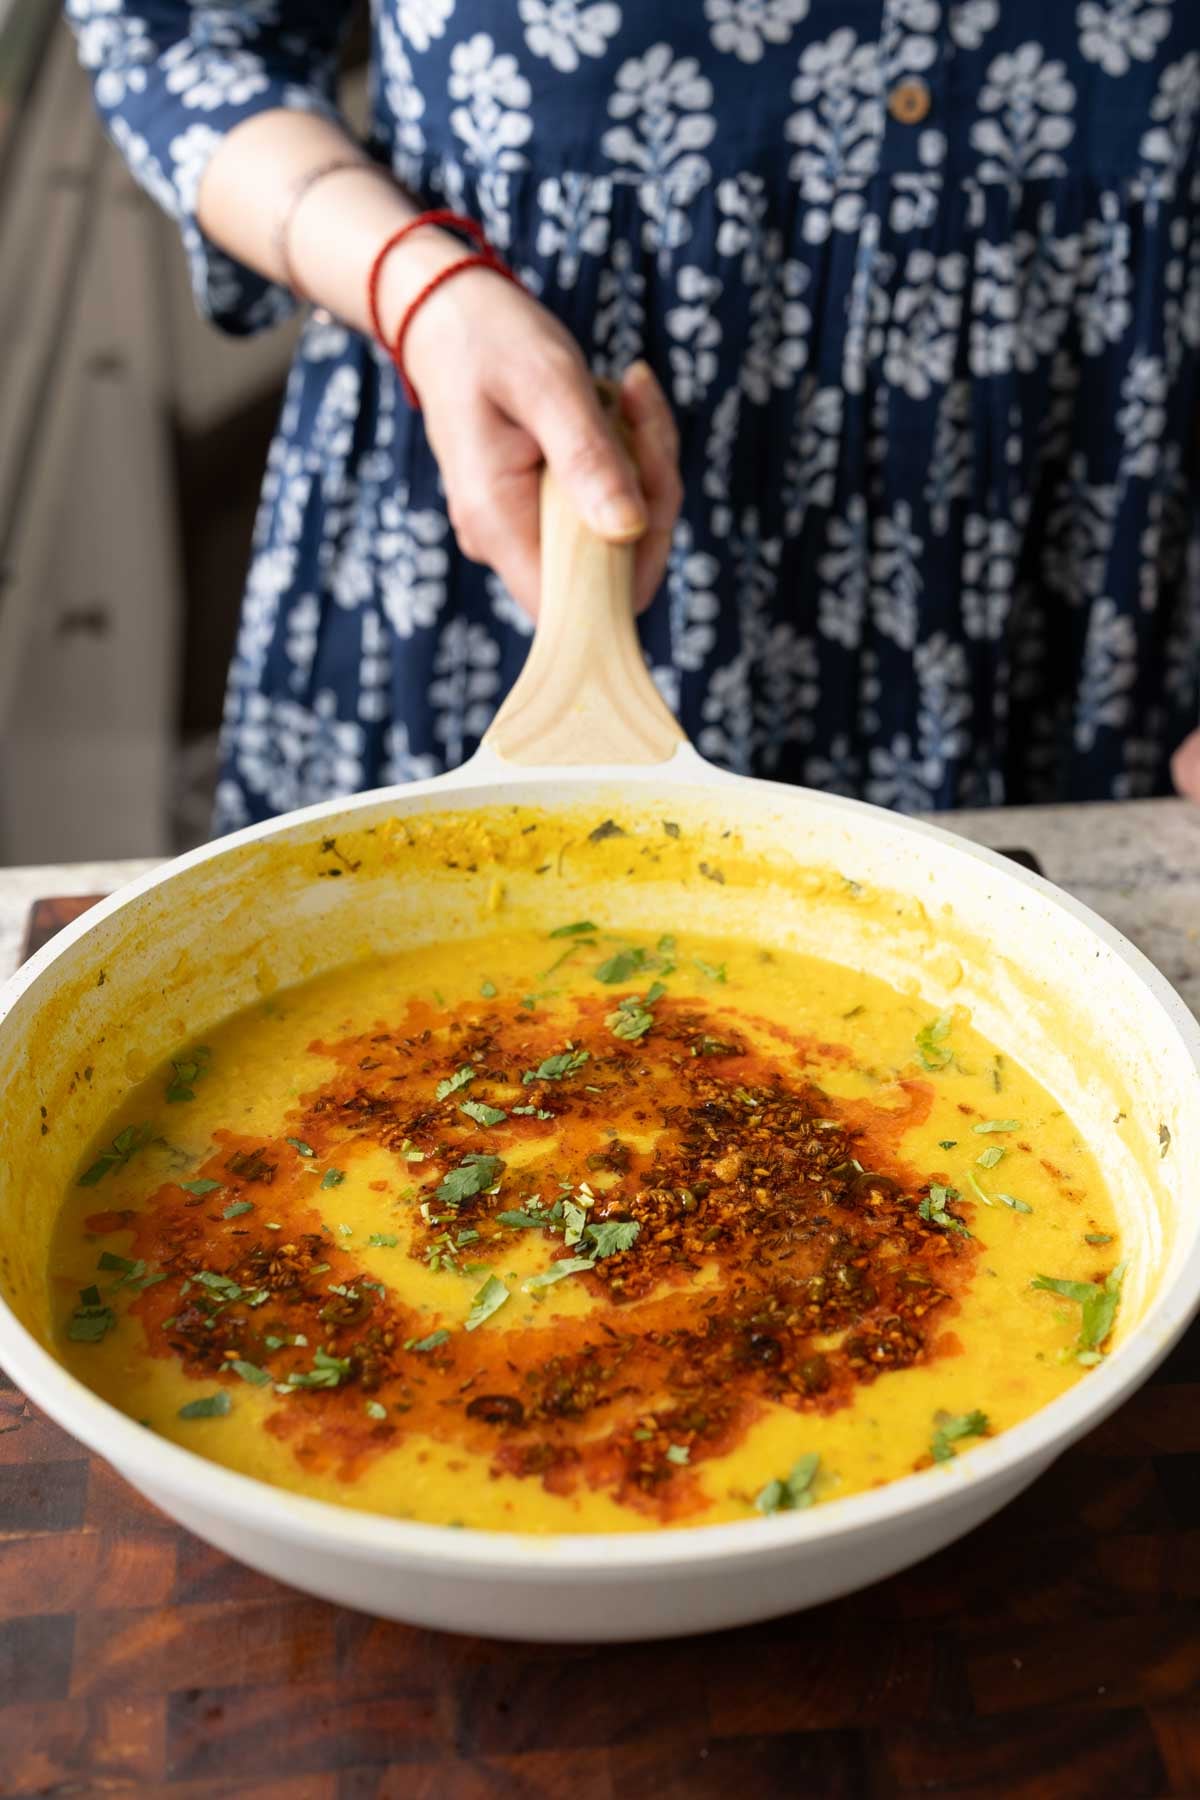
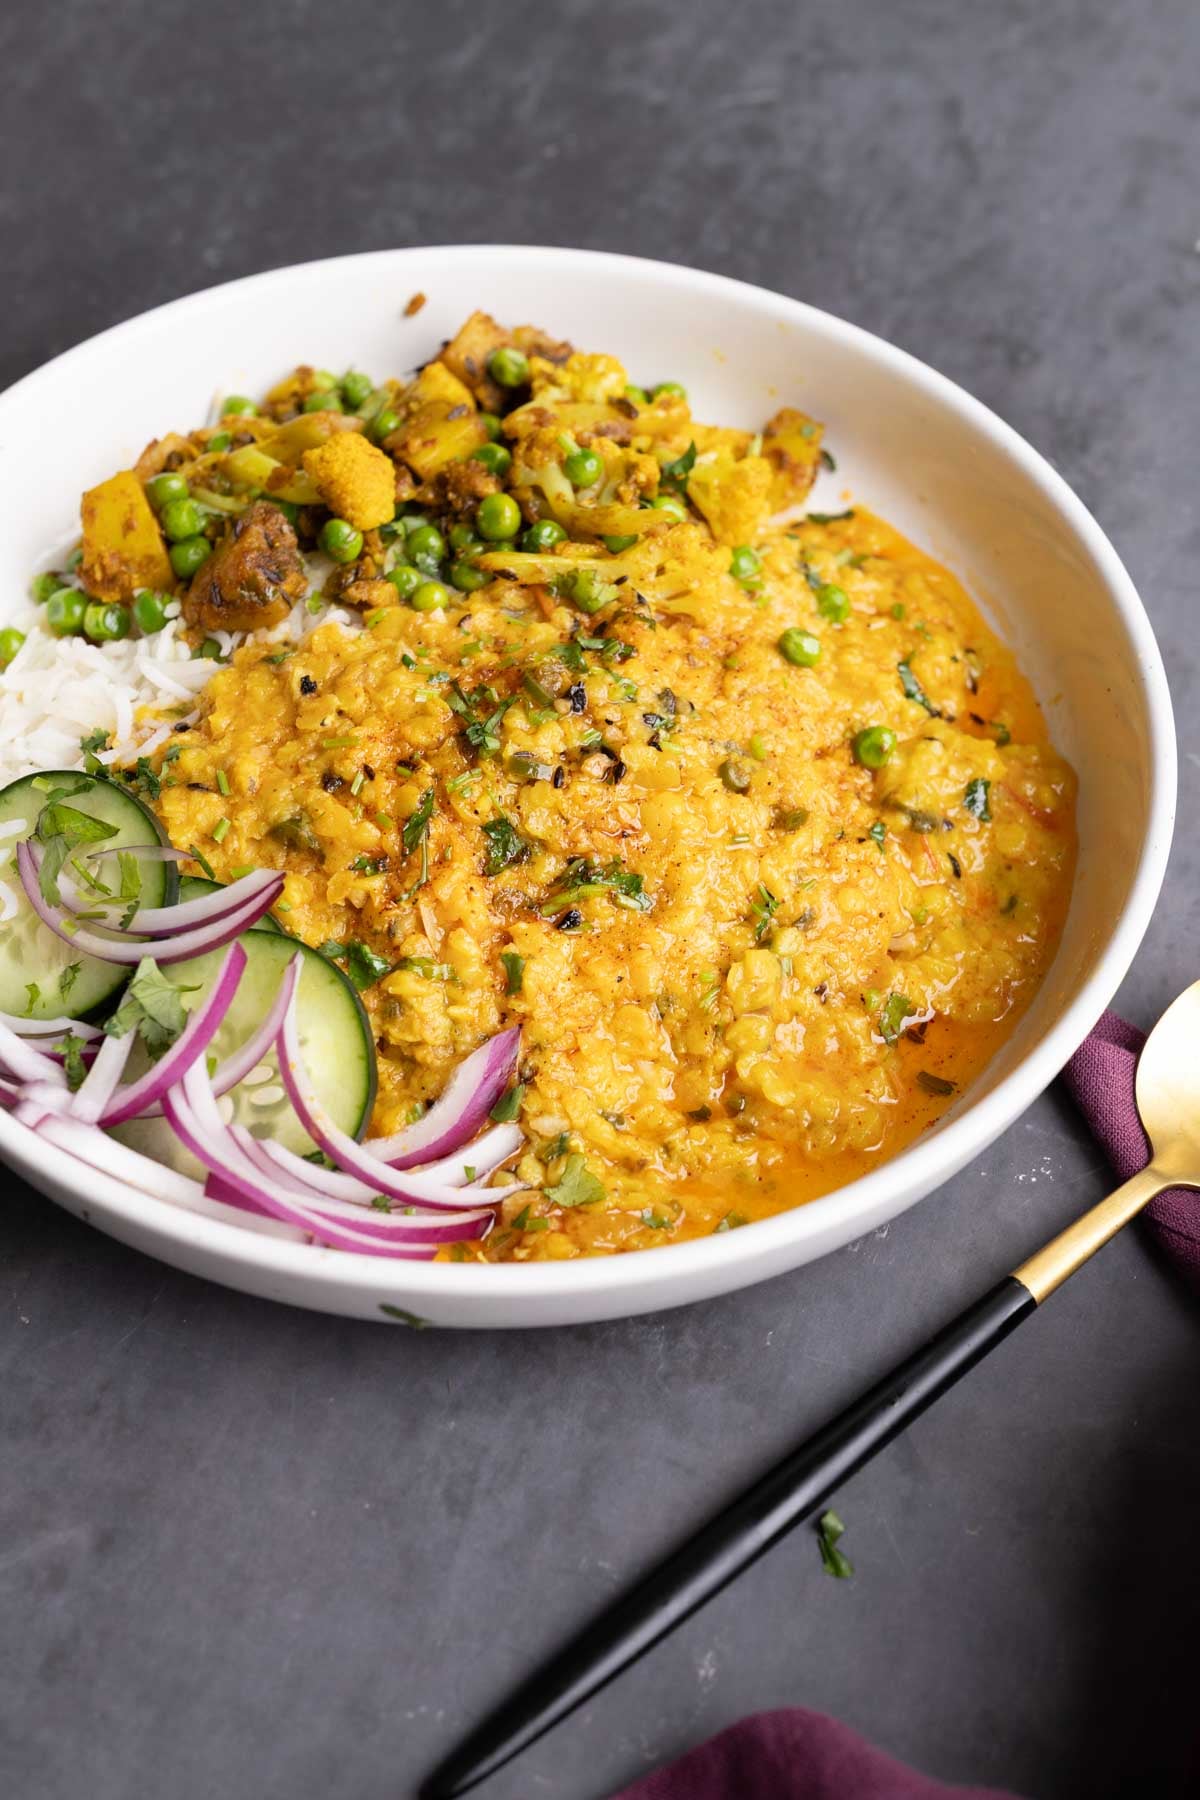
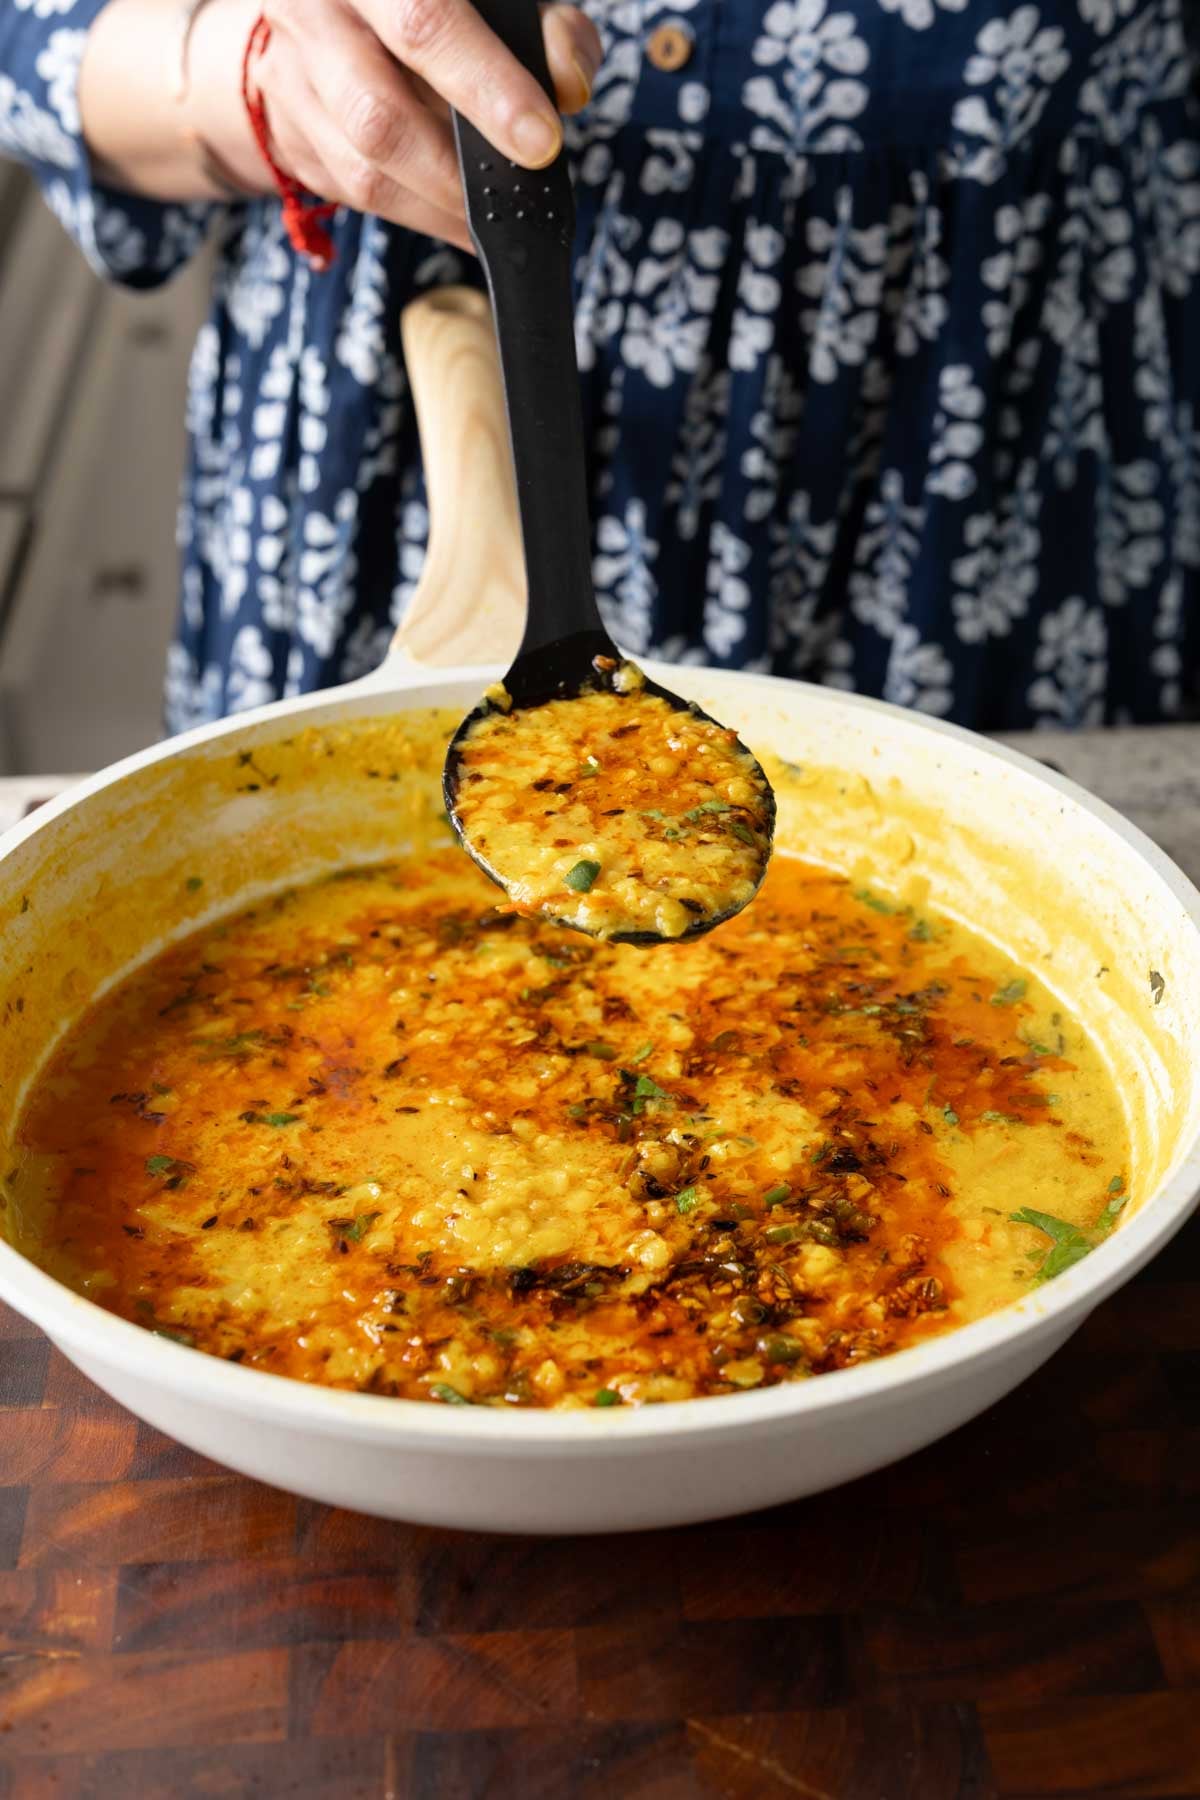
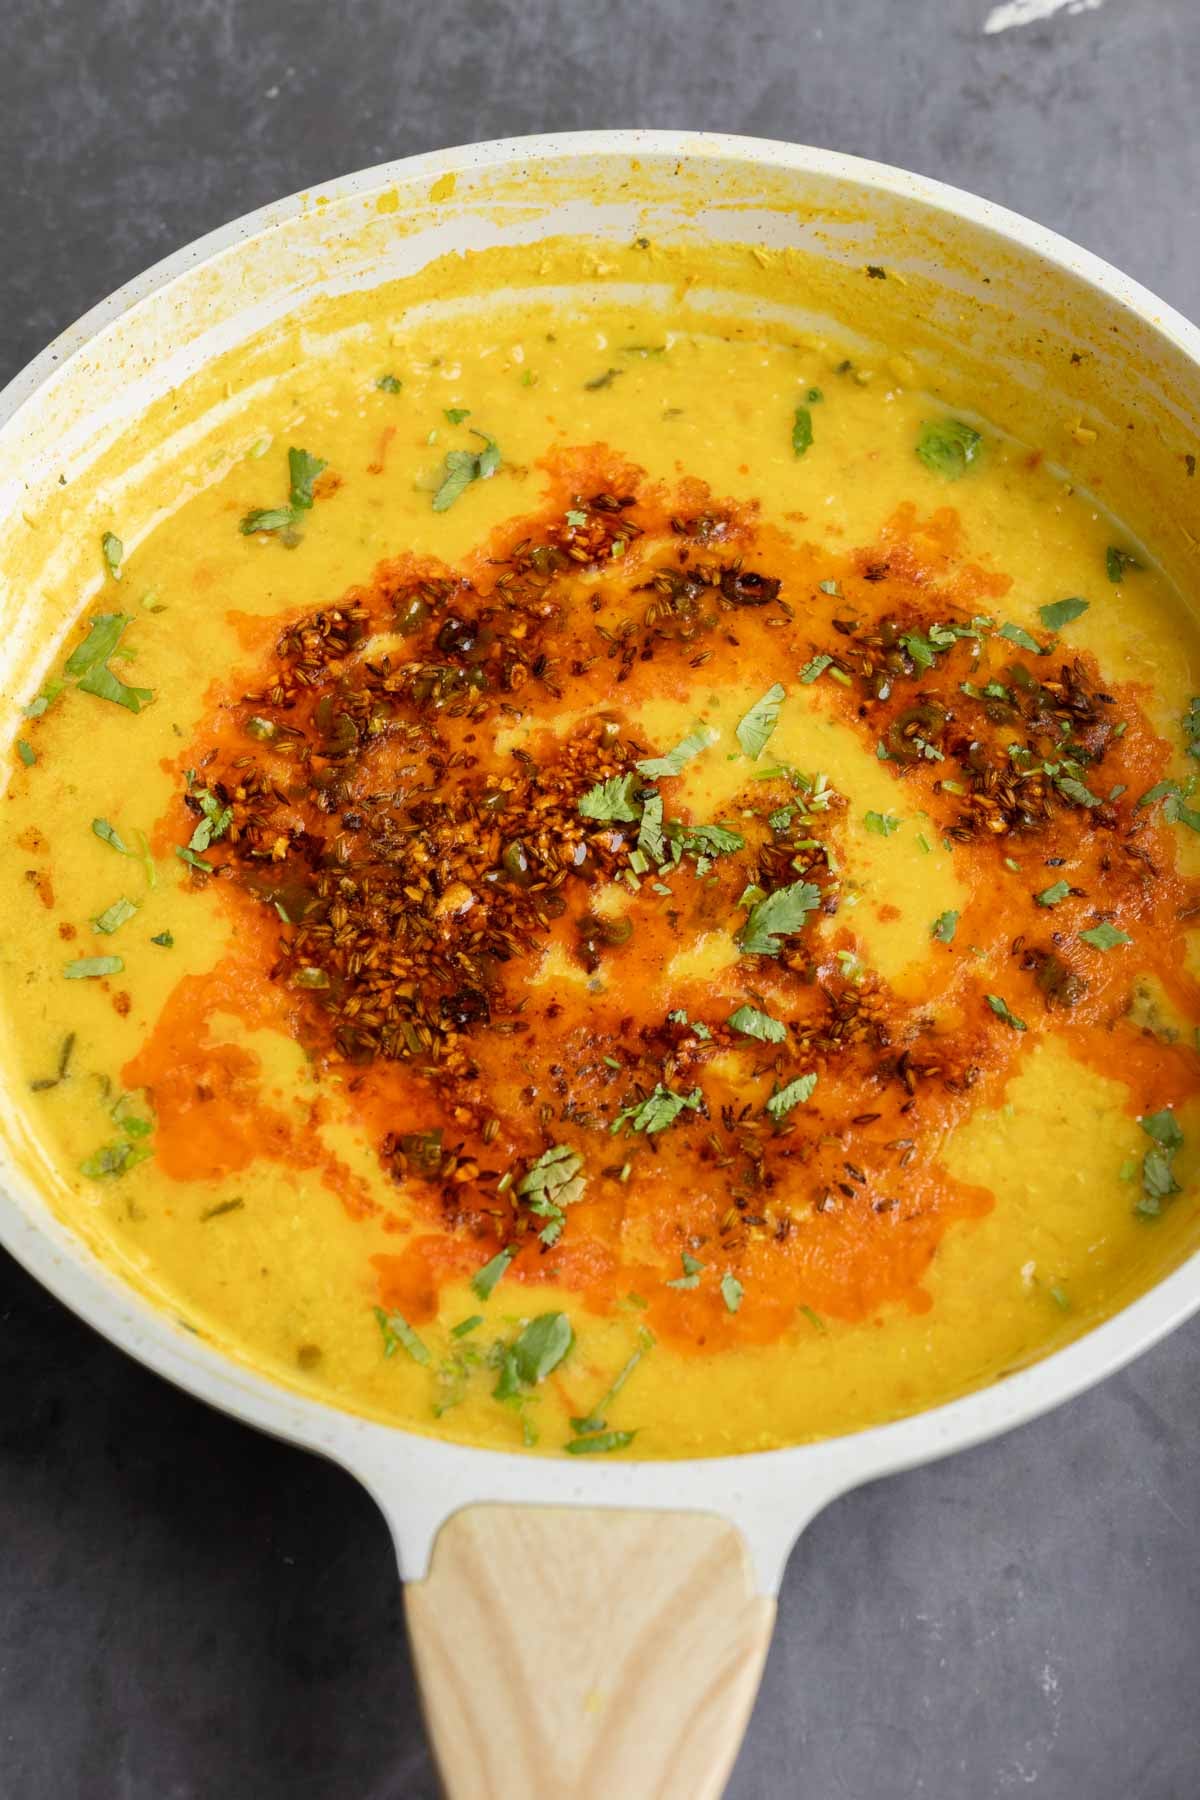
This easy jeera dal converts simple ingredients into incredible flavor! Red lentils cooked to creamy and scented with sizzling cumin, garlic, chili oil tadka. (gluten-free, soy-free, nut-free) 19 g fiber, 19 g protein!
Jeera means cumin, and dal means lentils. Together, they create a simple meal that doesn’t sacrifice flavor. This is a simple cumin-scented lentil soup that’s cozy and satisfying.
This is a simple recipe with everyday ingredients, but it makes such a delicious dal. It’s one of the simple, home-style dals that my mom used to make often.
I changed it up a little to make it slightly spicier and creamier with some non-dairy yogurt. If you cook the dal long enough, it becomes creamy on its own, so if you don’t want to add non-dairy yogurt, that works just as well.
We make this simple dal with red lentils (masoor dal), along with tomato and dried fenugreek leaves. While the lentils cook, we make an amazing tadka, which is a spiced oil with cumin seeds, green chili, and garlic. That tadka takes the dal to the next level!
This jeera dal is delicious served with your favorite Indian sides or sabzi! In the photo above, I’m serving it with my simple gobi aloo matar.
Why You’ll Love Jeera Dal
easy to make with simple ingredients
30-minute recipe with tons of flavor
while the lentils simmer, make the quick cumin spiced oil
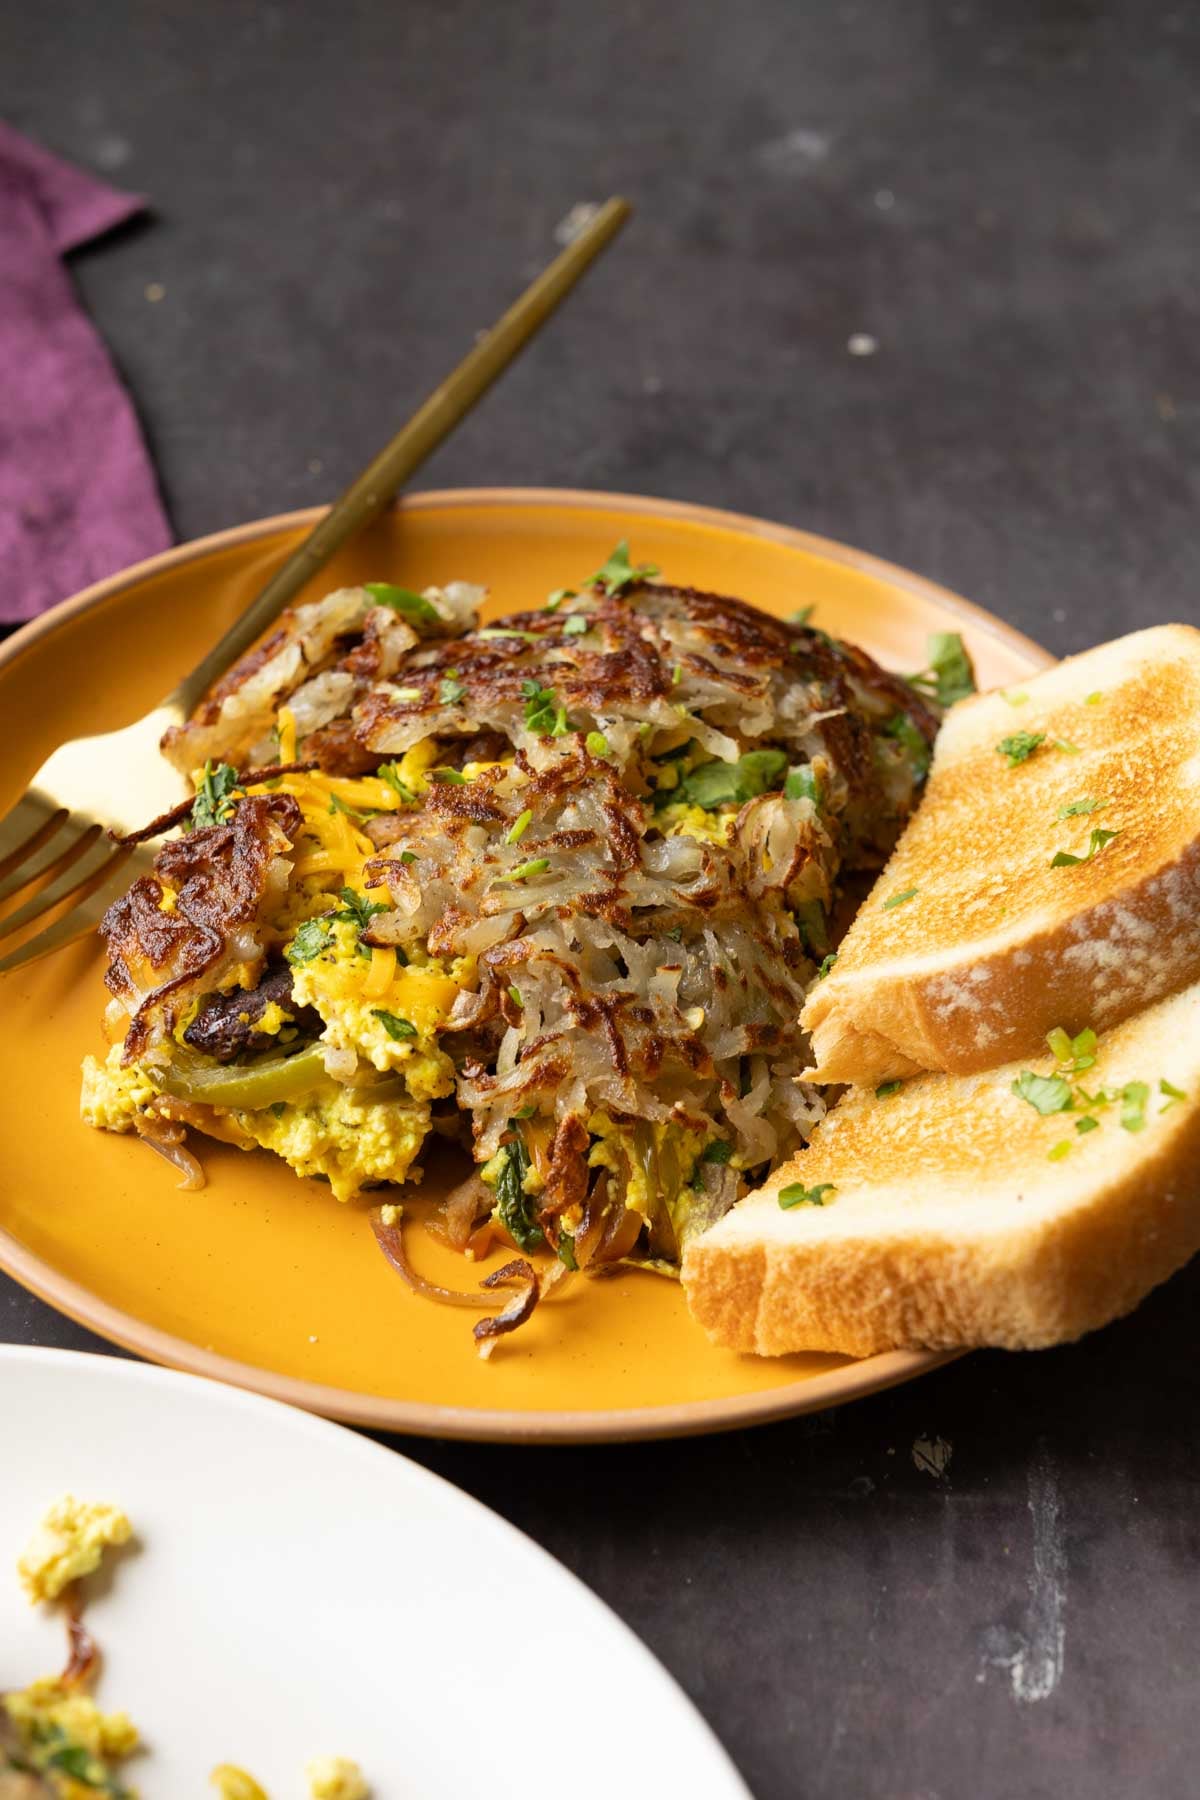
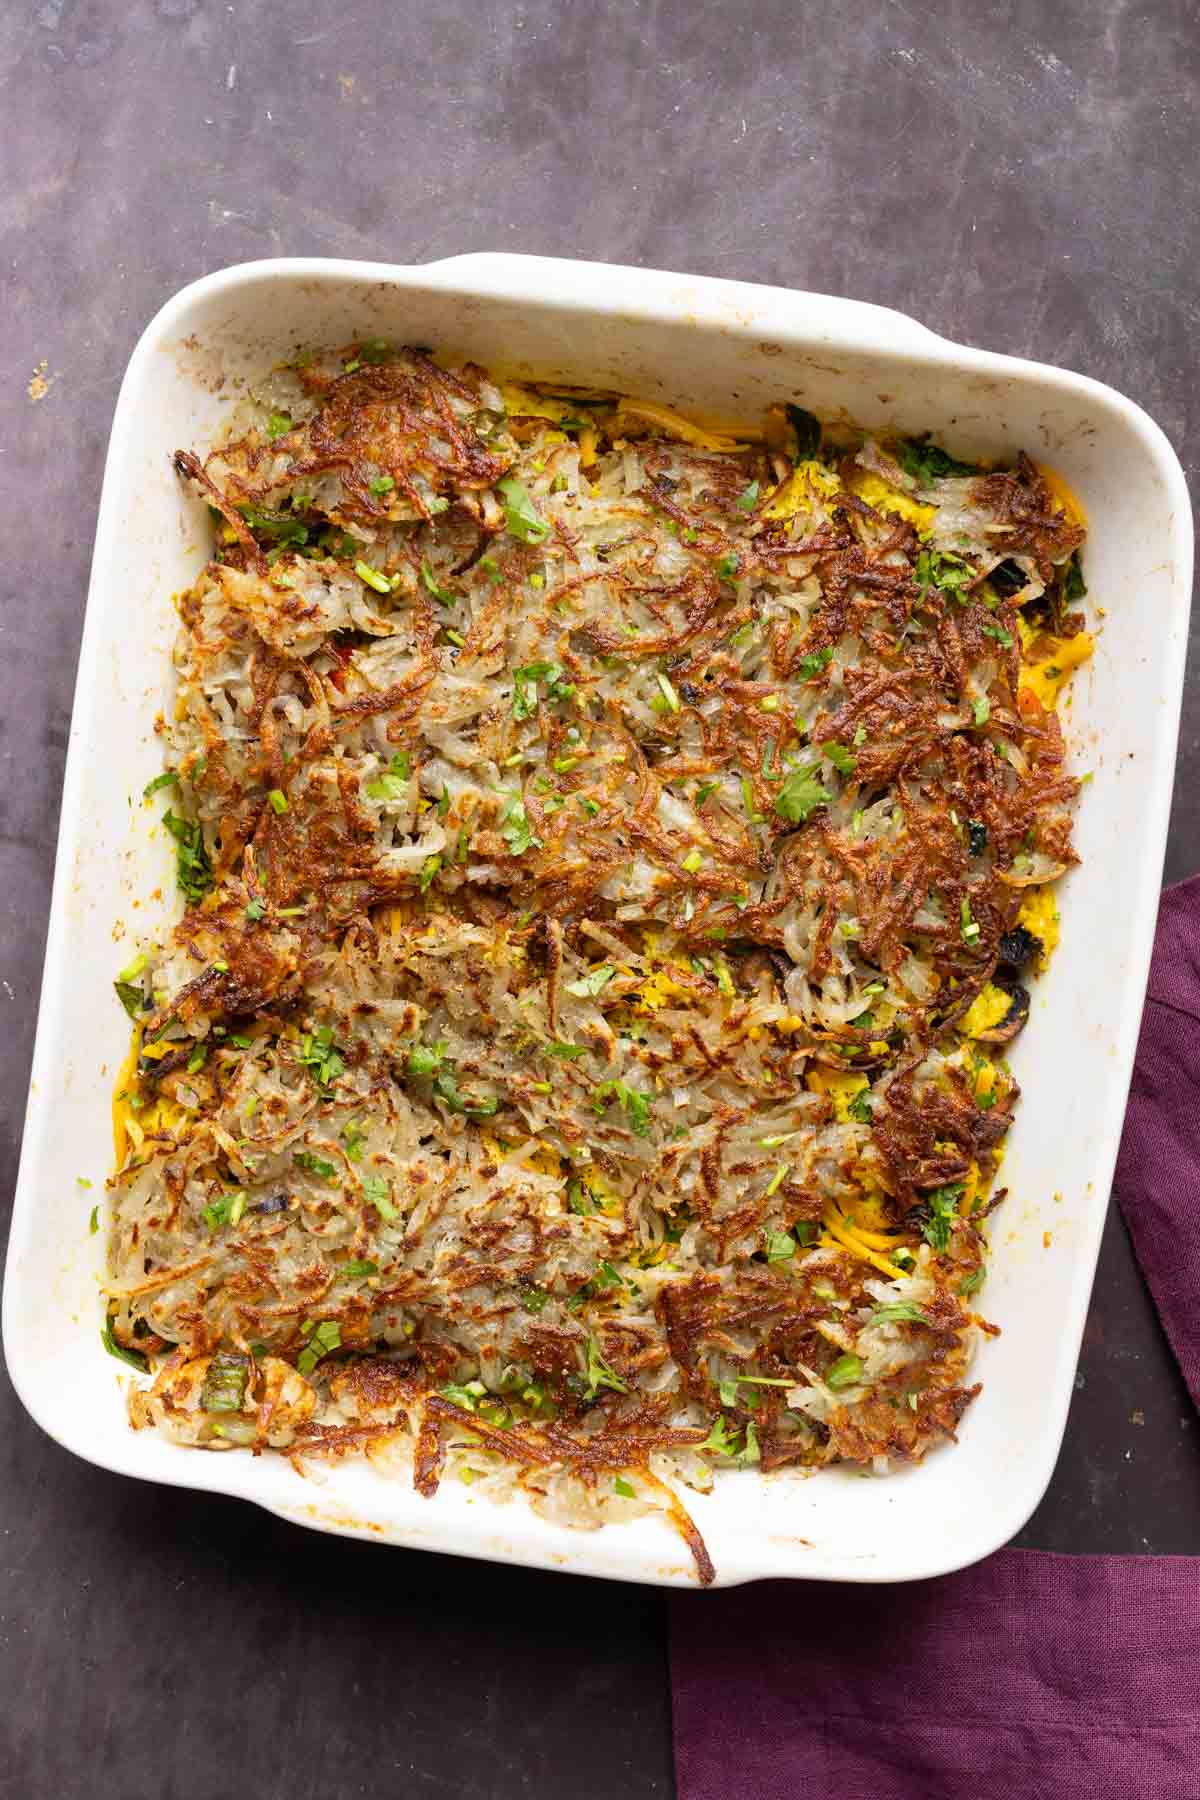
This Vegan hash-brown casserole has a crispy top, savory steak-style soy curls, fluffy tofu ’eggs.’ 27 grams of protein, rich in calcium, iron, and fiber, this is ultimate brunch centerpiece ! (27 grams protein, 8 grams fiber per serving! Gluten-free and nut-free with soy-free options.)
This casserole is based on the steak and eggs with hash browns from IHOP. I decided to turn it into a vegan casserole, so it has soy curls that are marinated and then baked along with onion, mushrooms, and peppers until everything starts to caramelize.
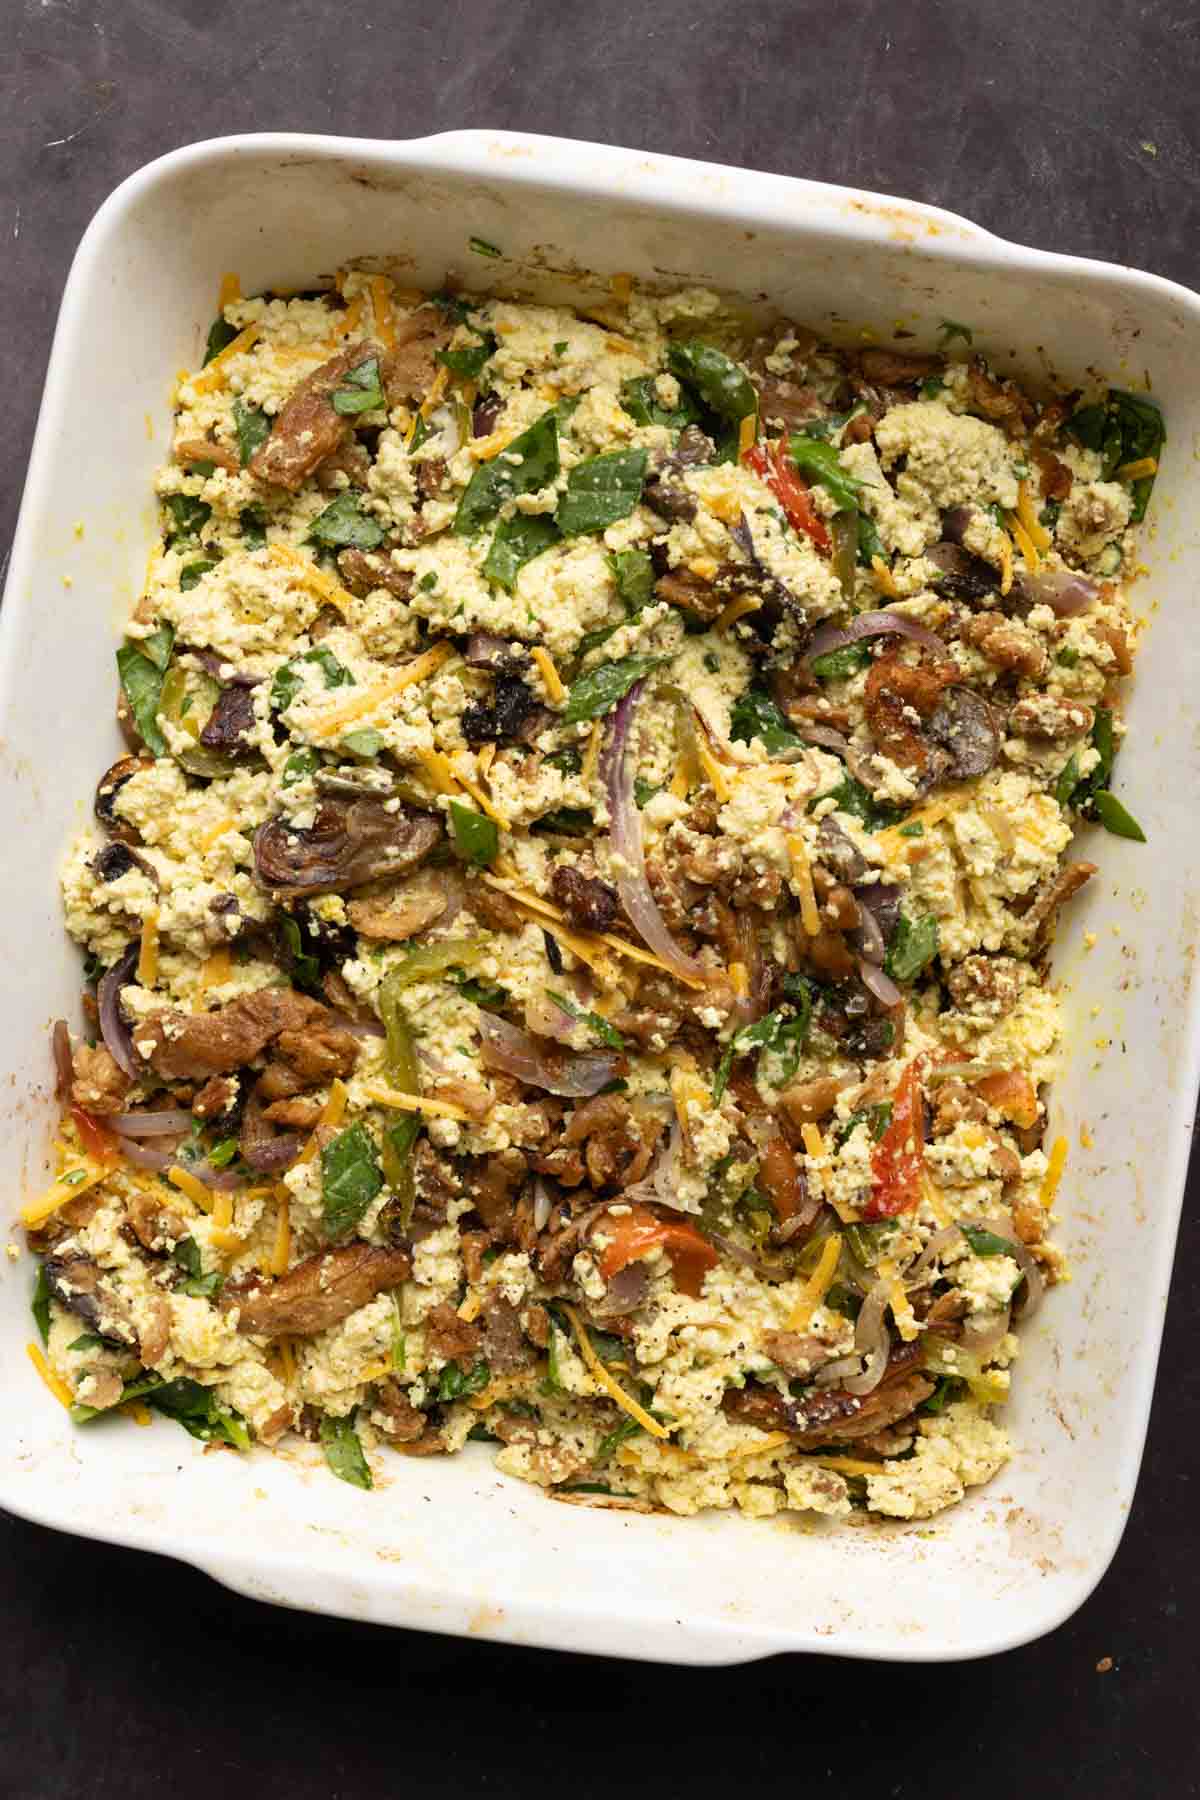
Then, we add crumbled tofu, seasonings, non-dairy yogurt or non-dairy cream, and vegan cheese. Spread that over everything, mix it up a little bit, and bake it again for a cheesy, 1-pan vegan steak and egg scramble.
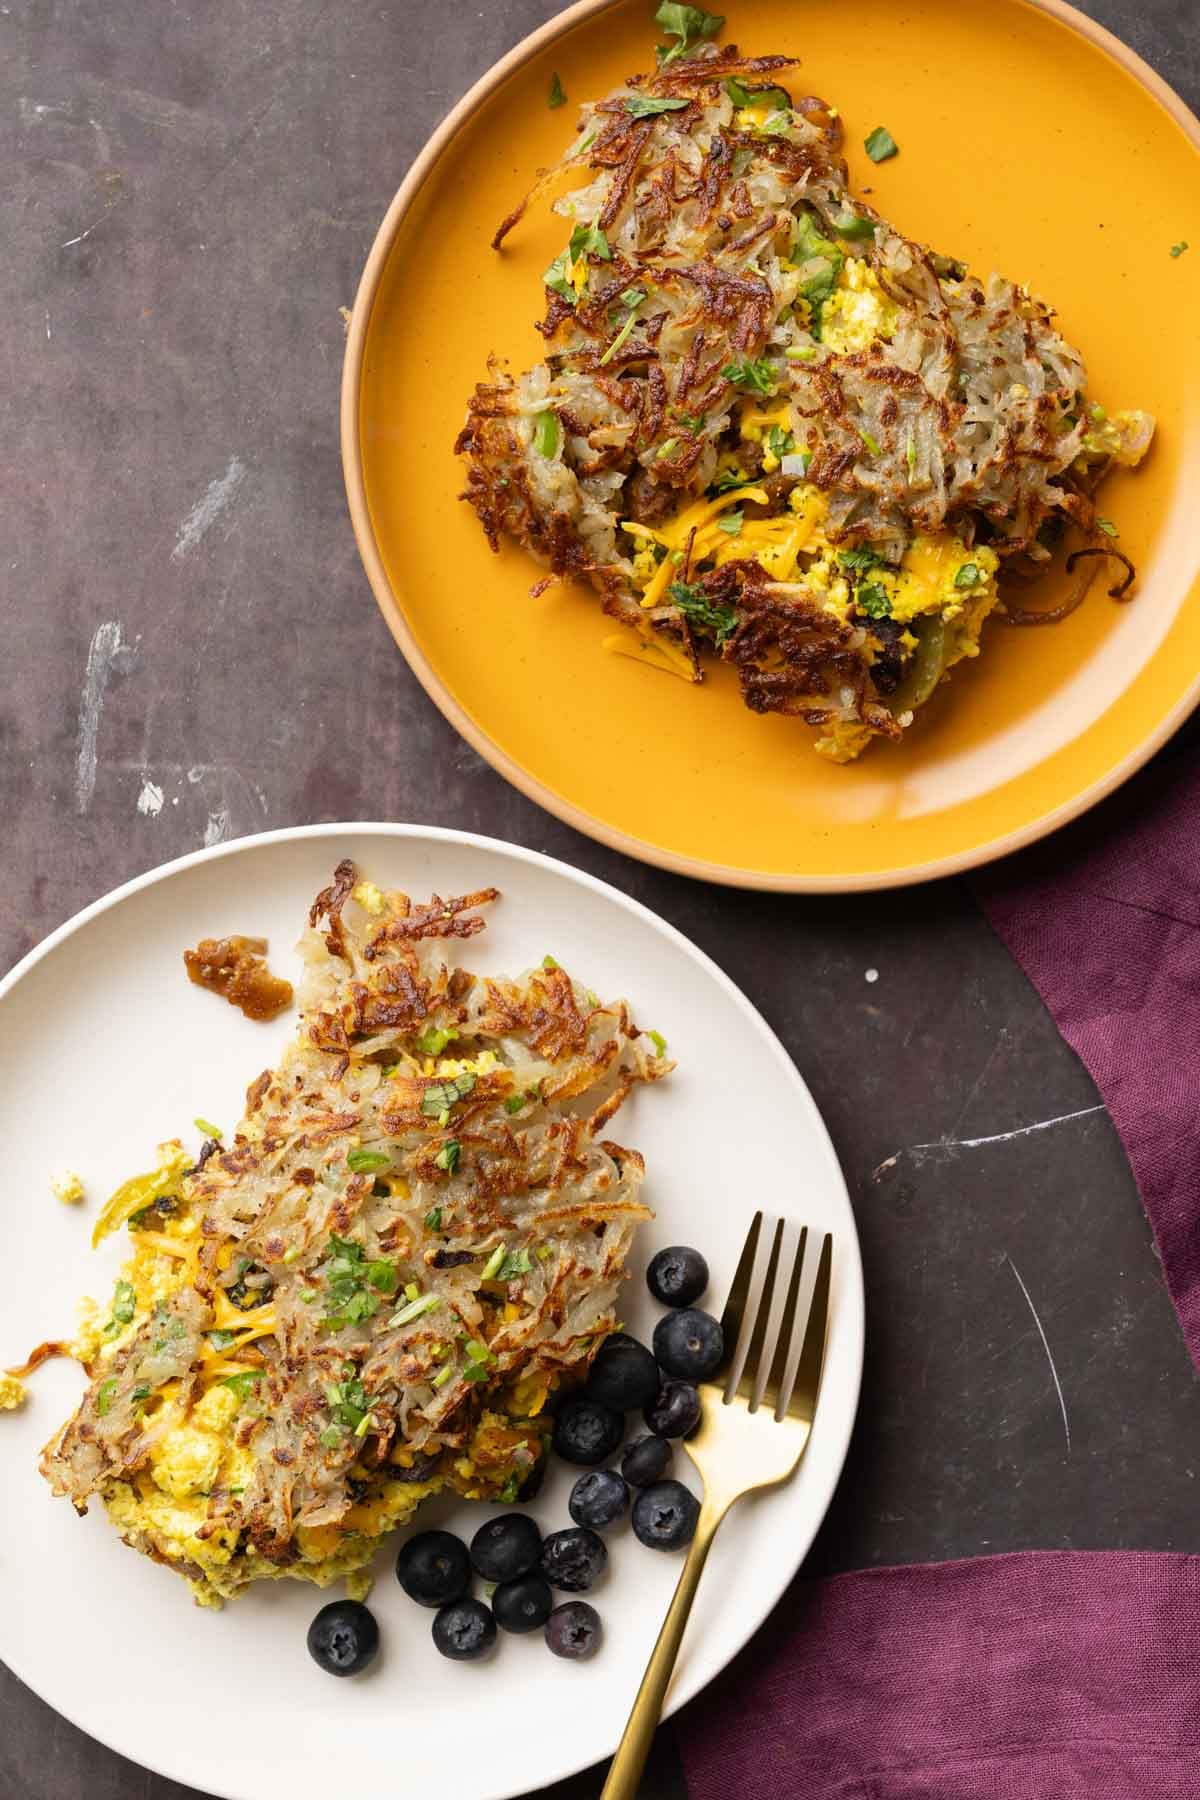
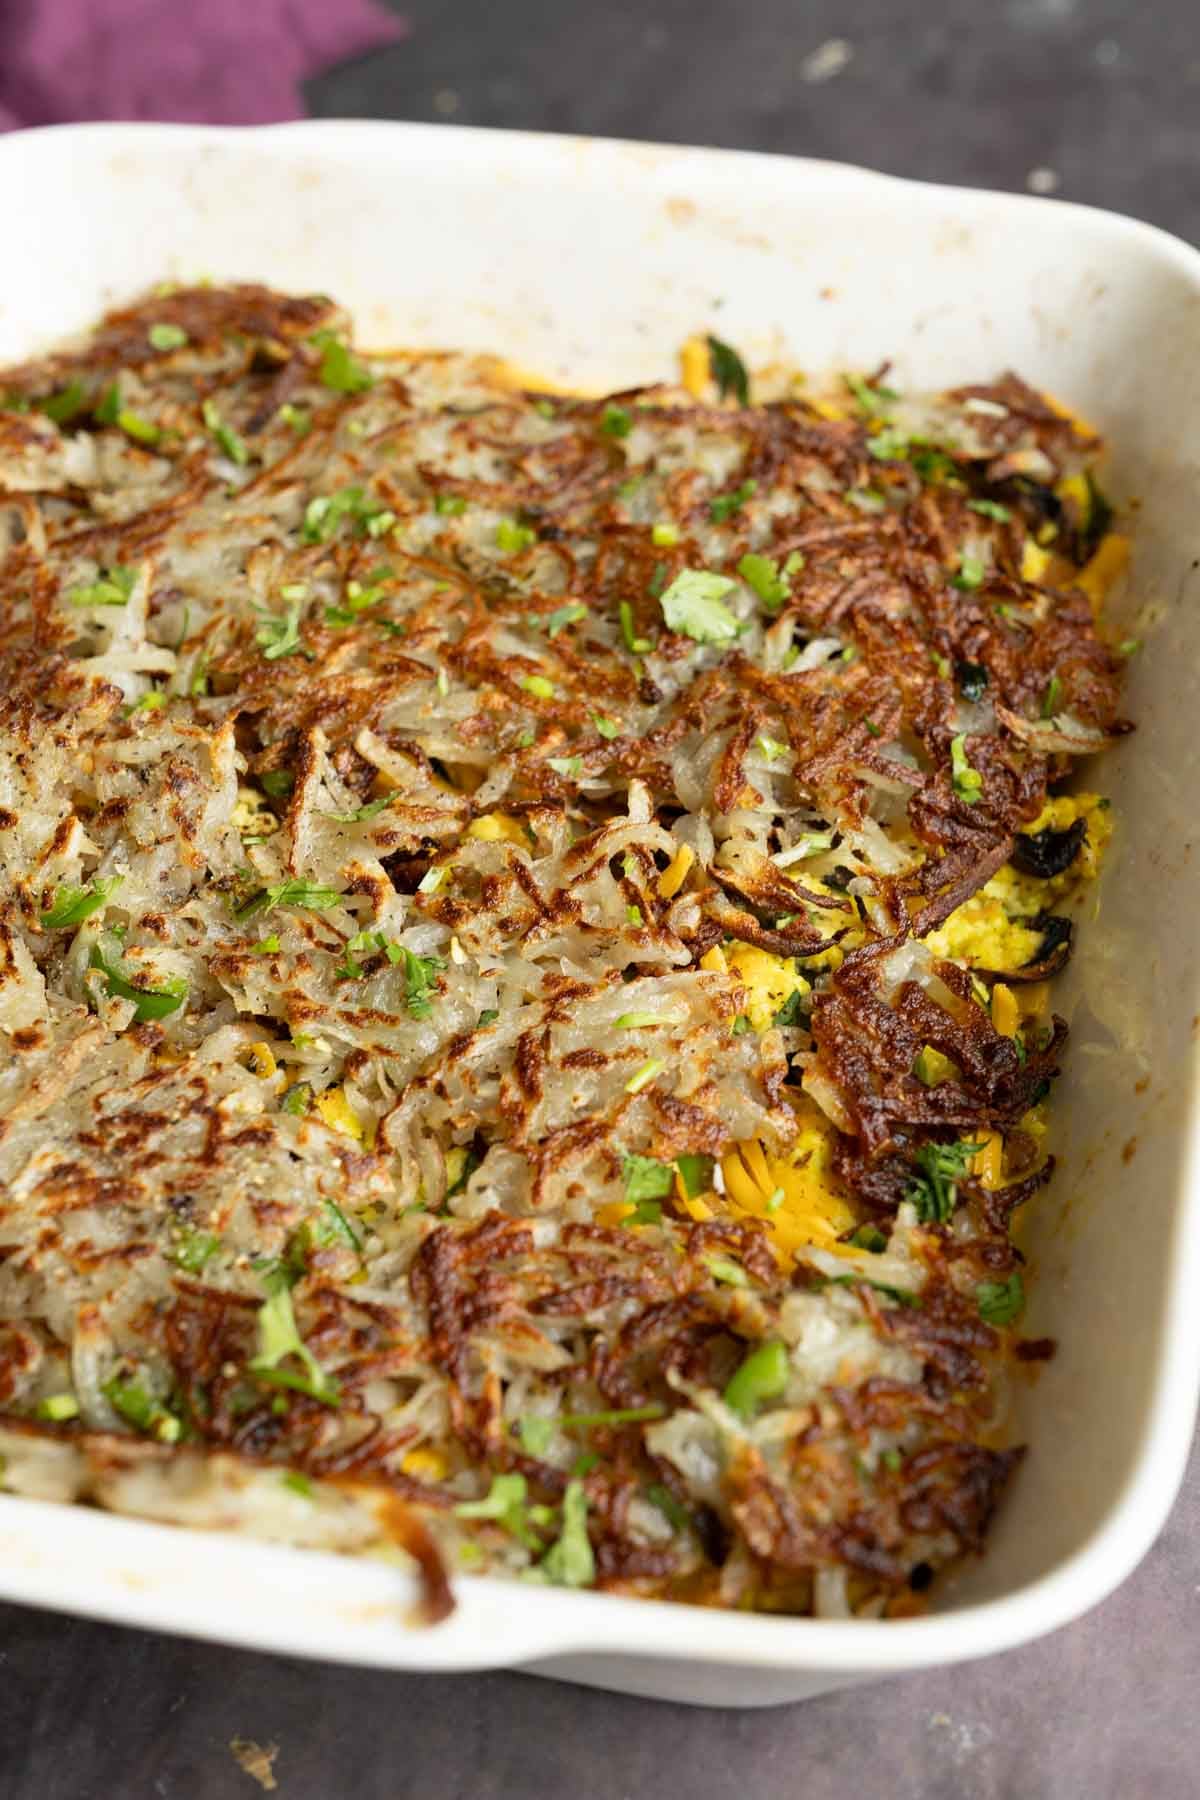
While all of this is baking, we make our hash browns and crisp them in a skillet, then put them on top of the casserole before serving. You can actually serve the hash browns on the side or on top of the casserole.
I love making breakfast casseroles, like my eggs Benedict casserole and my Mexican egg casserole. In those recipes, I blend the tofu to make the egg mixture. I wanted to make a version where I didn’t have to use the blender, so there are fewer dishes to clean.
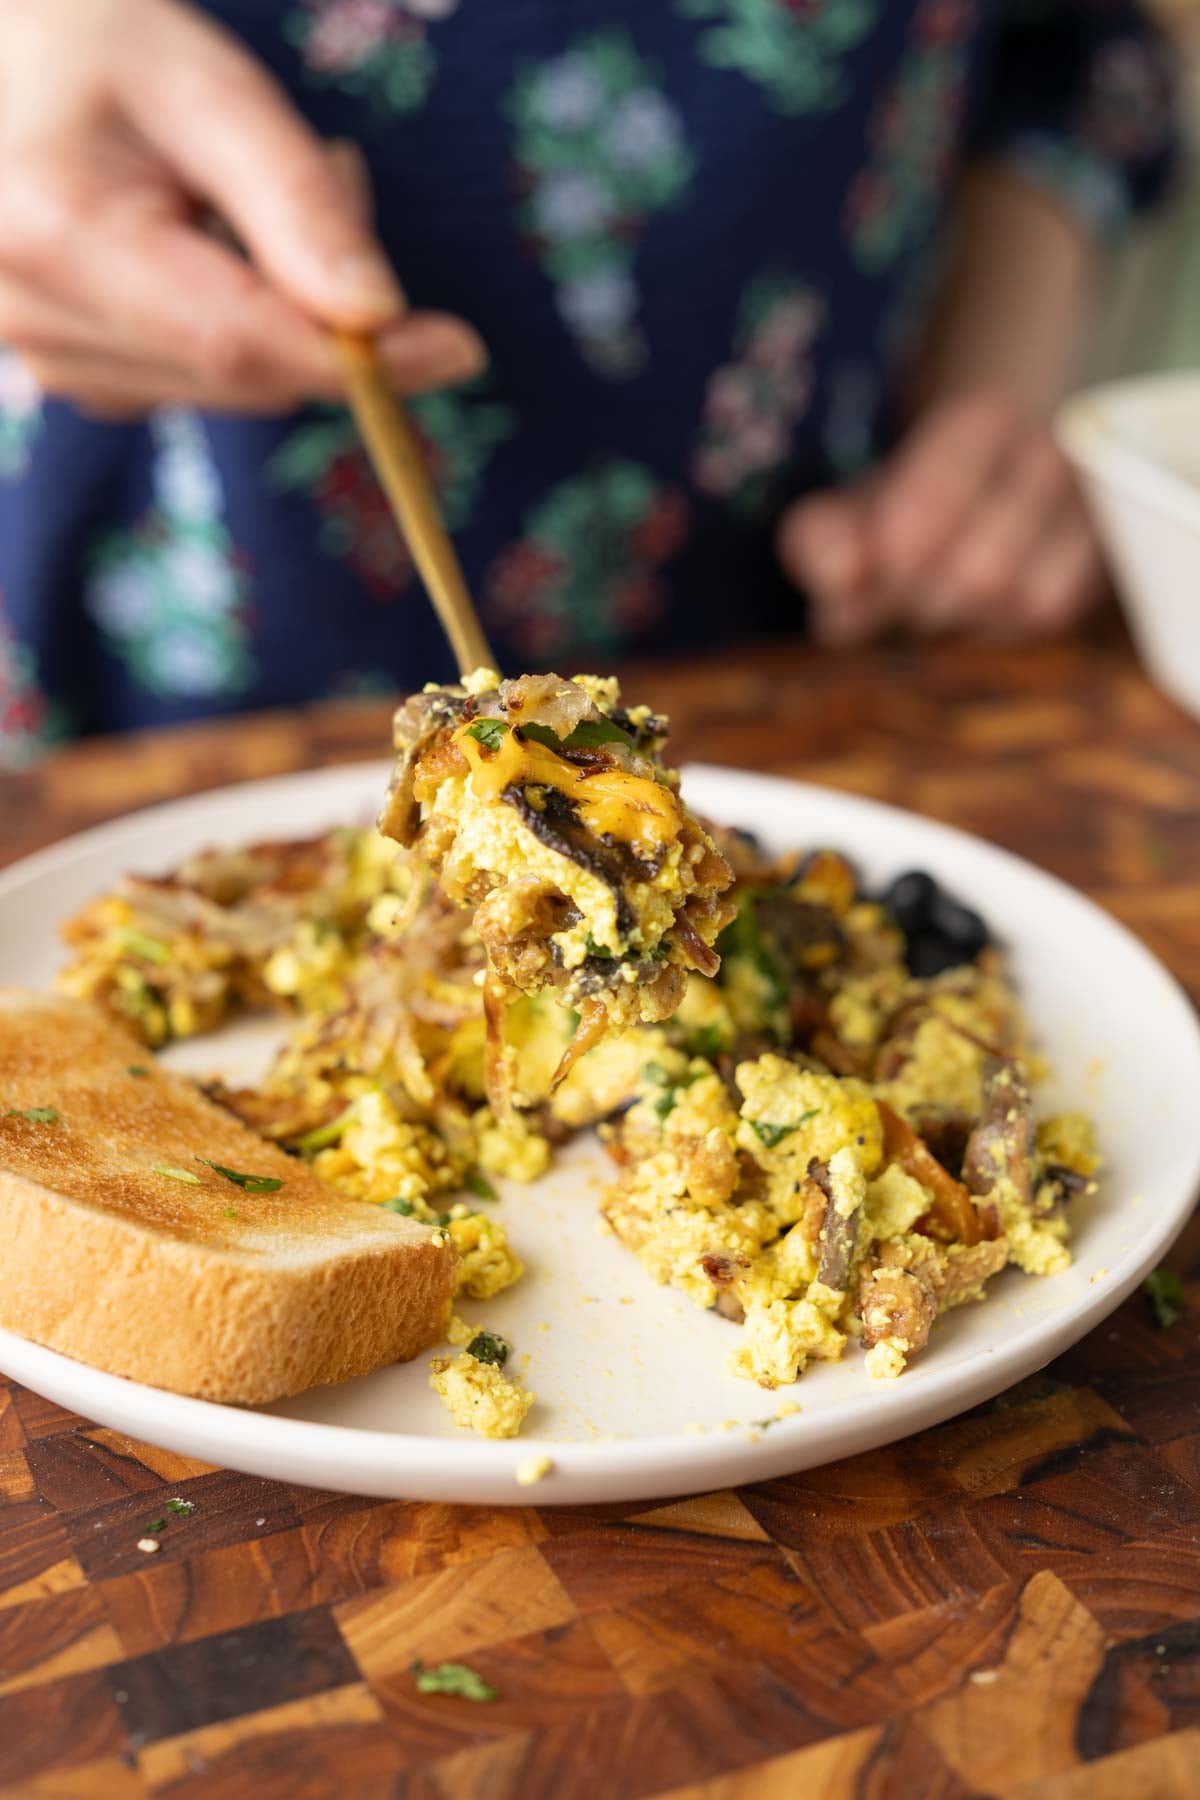
This is such a hearty breakfast, and it’s so delicious! For additional protein, you can add nutritional yeast and hemp seeds or more soy curls to the tofu mixture.
Why You’ll Love Hash Brown Casserole
27g protein
hearty, cozy breakfast casserole packed with fluffy tofu “egg”, vegan “steak”, cheese, and veggies
crispy hash brown topping
Meal prep friendly!
naturally gluten-free with nut-free and soy-free options
If you are looking for easy tofu recipes to include in your diet, then this the dish. It is simple basic fried tofu topped with chilli oil, scallions. Super simple, but filling and addictive when served hot. This makes a great ramen or rice bowl topping. Fried Tofu with chilli oil I bought a packet...
If you are someone like me who is looking for ways to include oats in your diet, then this baked oatmeal is the answer. This healthy and nutritious blueberry banana baked oatmeal can be made using either granola or rolled oats. This not only taste amazing but makes a great meal prep breakfast option. Baked...
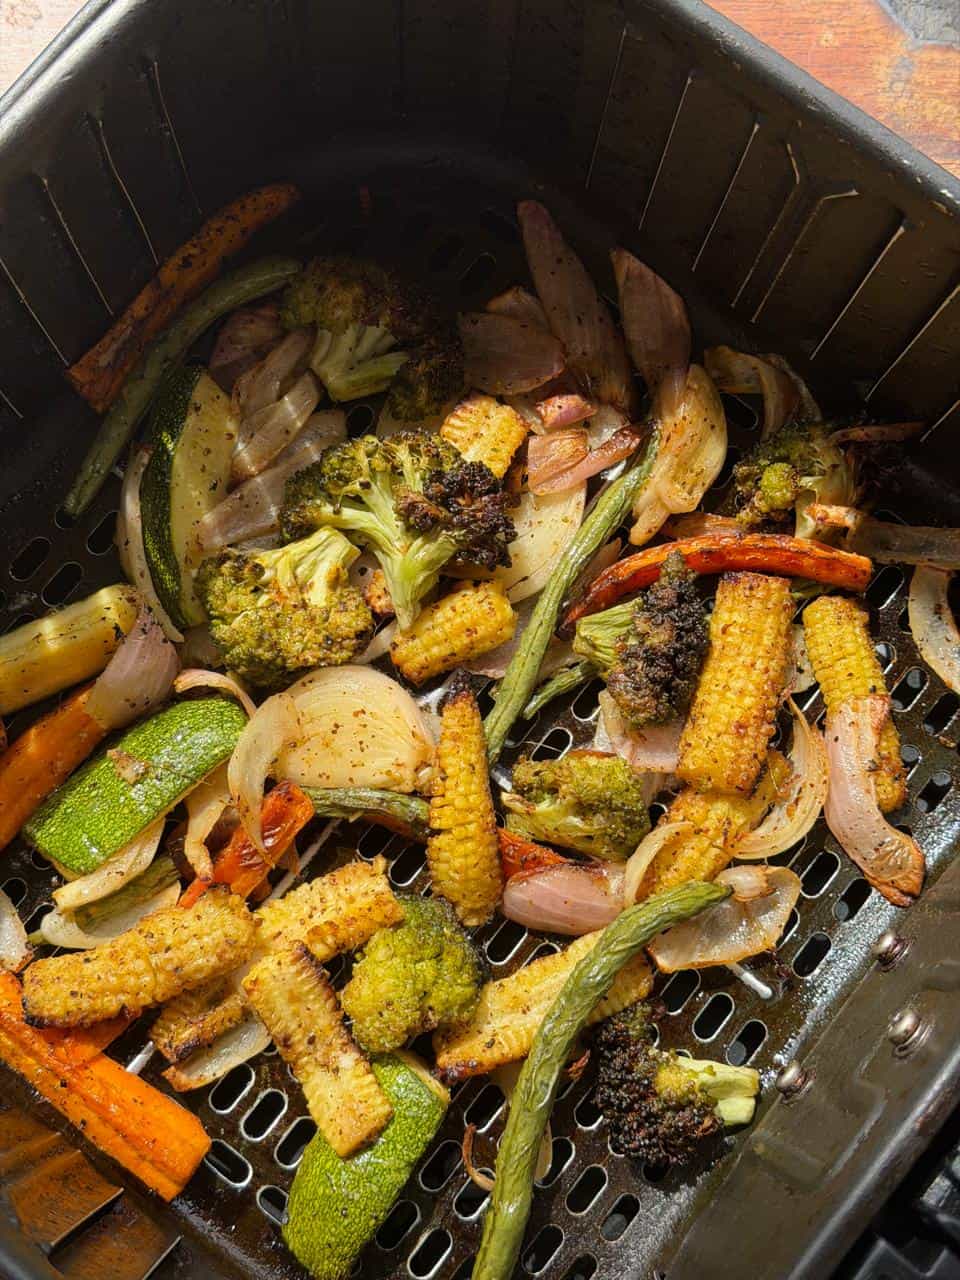
These air fryer roasted veggies is the easiest side dish I make at home! They go with pretty much everything, and the air fryer gets them perfectly golden and tender without any fuss.
These air fryer roasted vegetables have become our go-to side for pretty much every non-veg meal we make at home. They need barely any oil and no babysitting, which frees me up to focus on the main dish. Plus, that roasted, slightly charred flavour of the veggies makes them so addictive!
To make these roasted air fryer veggies, I have used babycorn, carrots, broccoli, beans, zucchini, and onions, but you can swap in whatever vegetables your family enjoys. If you’ve been using your air fryer regularly for recipes like our air fryer chicken tikka or air fryer lemon garlic chicken, these roasted vegetables make the perfect side to go with them.
Vegetables: Babycorn, carrots, broccoli florets, beans, zucchini, and onion
Seasoning: Salt and crushed pepper
Dijon mustard: Adds slight tanginess and depth of flavor. You can also use kasundi instead
Oil: Olive oil or any neutral cooking oil
Water: A couple of tablespoons added to the outer basket to prevent the vegetables from drying out while roasting
Frequently Asked Questions
What types of vegetables work best in the air fryer?
Root vegetables like potatoes, carrots, and sweet potatoes work brilliantly because they hold their shape and caramelise well. Broccoli, cauliflower, bell peppers, zucchini, beans, and onions are all great too. The key is to group vegetables with similar cooking times together so nothing ends up overcooked or underdone.
Can I use frozen veggies for this recipe?
Fresh is recommended because frozen vegetables release a lot of water as they thaw, which prevents them from crisping up in the air fryer. If frozen is all you have, thaw them completely and pat them very dry before tossing with oil and seasoning.
Why are my veggies not browning?
Usually one of three reasons. Not enough oil on the surface, too many vegetables crowded in the basket, or the air fryer wasn’t preheated. The vegetables need space for the hot air to circulate, a thin coating of oil to help them brown, and a fully preheated air fryer to start crisping immediately.
Do I need to flip the vegetables while air frying?
You don’t need to flip individual pieces, but giving the basket a gentle shake or toss halfway through helps everything cook more evenly.
Richa’s Top Tips
Cut the vegetables into large pieces. They shrink significantly while roasting, so what looks like a big chunk raw will be the perfect size by the time it’s done. Small pieces will shrivel up and dry out.
Add the vegetables in stages based on cooking time. Babycorn and carrots take longer, so they go in first. Broccoli, beans, zucchini, and onions cook faster and get added halfway through. This way everything finishes at the same time without anything being overcooked or undercooked.
Line the basket with baking paper. This traps the natural juices from the vegetables and prevents them from drying out while roasting. It also makes cleanup much easier.
Add water to the outer basket. Just a couple of tablespoons. This creates a little steam that keeps the vegetables moist on the inside while the air fryer crisps up the outside.
Storage Tips
In the fridge: Store in an airtight container for up to 3 days. The vegetables hold their flavour well but will soften as they sit.
Freezing: Not recommended. Roasted vegetables lose their texture once frozen and thawed, especially broccoli and beans, which turn mushy.
Reheating tip: Pop them back in the air fryer at 200°C for 3-4 minutes to crisp them up again. The oven works too but takes longer. Avoid the microwave, as it makes them soft and steamy rather than crispy.
Serving Ideas
These air fryer vegetables are a side dish at heart, so they pair well with almost anything:
With Chicken Ghee Roast: A plate of rich, spicy ghee roast with these roasted vegetables on the side makes for a really balanced meal.
With Pepper Mutton Fry: The simplicity of the roasted veggies pairs perfectly alongside a bold, peppery mutton fry.
In a grain bowl: Pile them over some cooked quinoa or rice, add a spoonful of hummus, and drizzle with olive oil for a healthy, filling lunch.
In a wrap: Stuff them into a warm whole wheat pita with some hummus and pickled onions for a quick vegetarian meal.
With Mediterranean Quinoa Salad: Toss the roasted veggies into this salad while they’re still warm for a heartier, more substantial version.
Customisation Ideas
Go Mediterranean: Toss the vegetables with dried oregano, garlic powder, and a squeeze of lemon after roasting. Crumble some feta on top while they’re still hot.
Make it Indian: Swap the salt and pepper for chaat masala, amchur, and kashmiri chilli powder. Finish with a squeeze of lemon, and your masaledar roasted veggie chaat is ready.
Add paneer or chicken: Toss marinated paneer cubes or chicken pieces in with the second batch of vegetables. They crisp up beautifully in the air fryer alongside the veggies.
Try different vegetables: Sweet potatoes, potatoes, mushrooms, bell peppers, and cauliflower all roast really well in the air fryer. Use whatever is in your fridge and adjust the timing accordingly.
Did You Know?
Roasting vegetables at high heat triggers the Maillard reaction, the same chemical process that makes a steak taste so good. When vegetables are exposed to temperatures above 150°C, the natural sugars and amino acids on their surface react with each other and create hundreds of new flavour compounds that don’t exist in the raw vegetable. That’s why roasted carrots taste sweeter than boiled ones, and why roasted broccoli has a nuttiness that steamed broccoli never will. The air fryer is particularly good at this because it circulates heat directly around the food, creating more surface contact than an oven.
If you’ve never roasted vegetables in the air fryer before, give this recipe a try, and I think you’ll wonder why you didn’t start sooner. It’s one of the easiest, most useful things your air fryer can do. Share your pictures with me on Instagram @my_foodstory when you try it.
Watch Roasted Vegetables in Air Fryer Recipe Video
Making Air Fryer Roasted Veggies is the easiest, quickest way to have a delicious side ready in minutes! Serve with a non-veg main, add to salads, sandwiches, or wraps… the options are endless.
3-4teaspoonolive oil or any neutral flavoured cooking oil
2tablespoonswater
Instructions
Pre-heat the airfryer at 200C and line the basket with baking paper. Refer note 1
Add carrots and babycorn to a bowl, add ¼ teaspoon pepper, ¼ teaspoon salt, 1 teaspoon dijon mustard or kasundi and 1.5 teaspoon oil and toss to combine well.
Add 2 tablespoons of water to the outer basket of the airfryer to prevent the veggies from drying out while roasting.
Add the carrots and babycorn to the airfryer basket and air fry for 12 minutes at 200C.
While the veggies are airfrying, prep the other veggies. Add onion, beans, broccoli and zucchini to the same bowl. Add the remaining ¼ teaspoon pepper, ¼ teaspoon salt, 1 teaspoon mustard, 1.5 teaspoon oil and toss to combine well.
Once the baby corn and carrots are semi-roasted, pause the air fryer and add the remaining veggies to the basket. Toss everything together.
Air fry for 12 minutes at 180 C till everything is roasted well. Depending on your air fryer and how tender you prefer the veggies, you might have to roast them for another 2-4 minutes. Transfer to a plate and serve.
Video
Notes
Cut the veggies into 1.5 inch long thick batons as they reduce in size while roasting.
You can line your air fryer basket with parchment paper if you wish.
Ranch Chicken Salad is a simple everyday salad made with lettuce, cucumbers, peppers, tomatoes drizzled with homemade ranch dressing. This is perfect to pack in lunch box or to serve as a light side salad for dinner. Ranch Chicken Salad If you are a salad person, then this simple chicken salad with homemade ranch dressing...
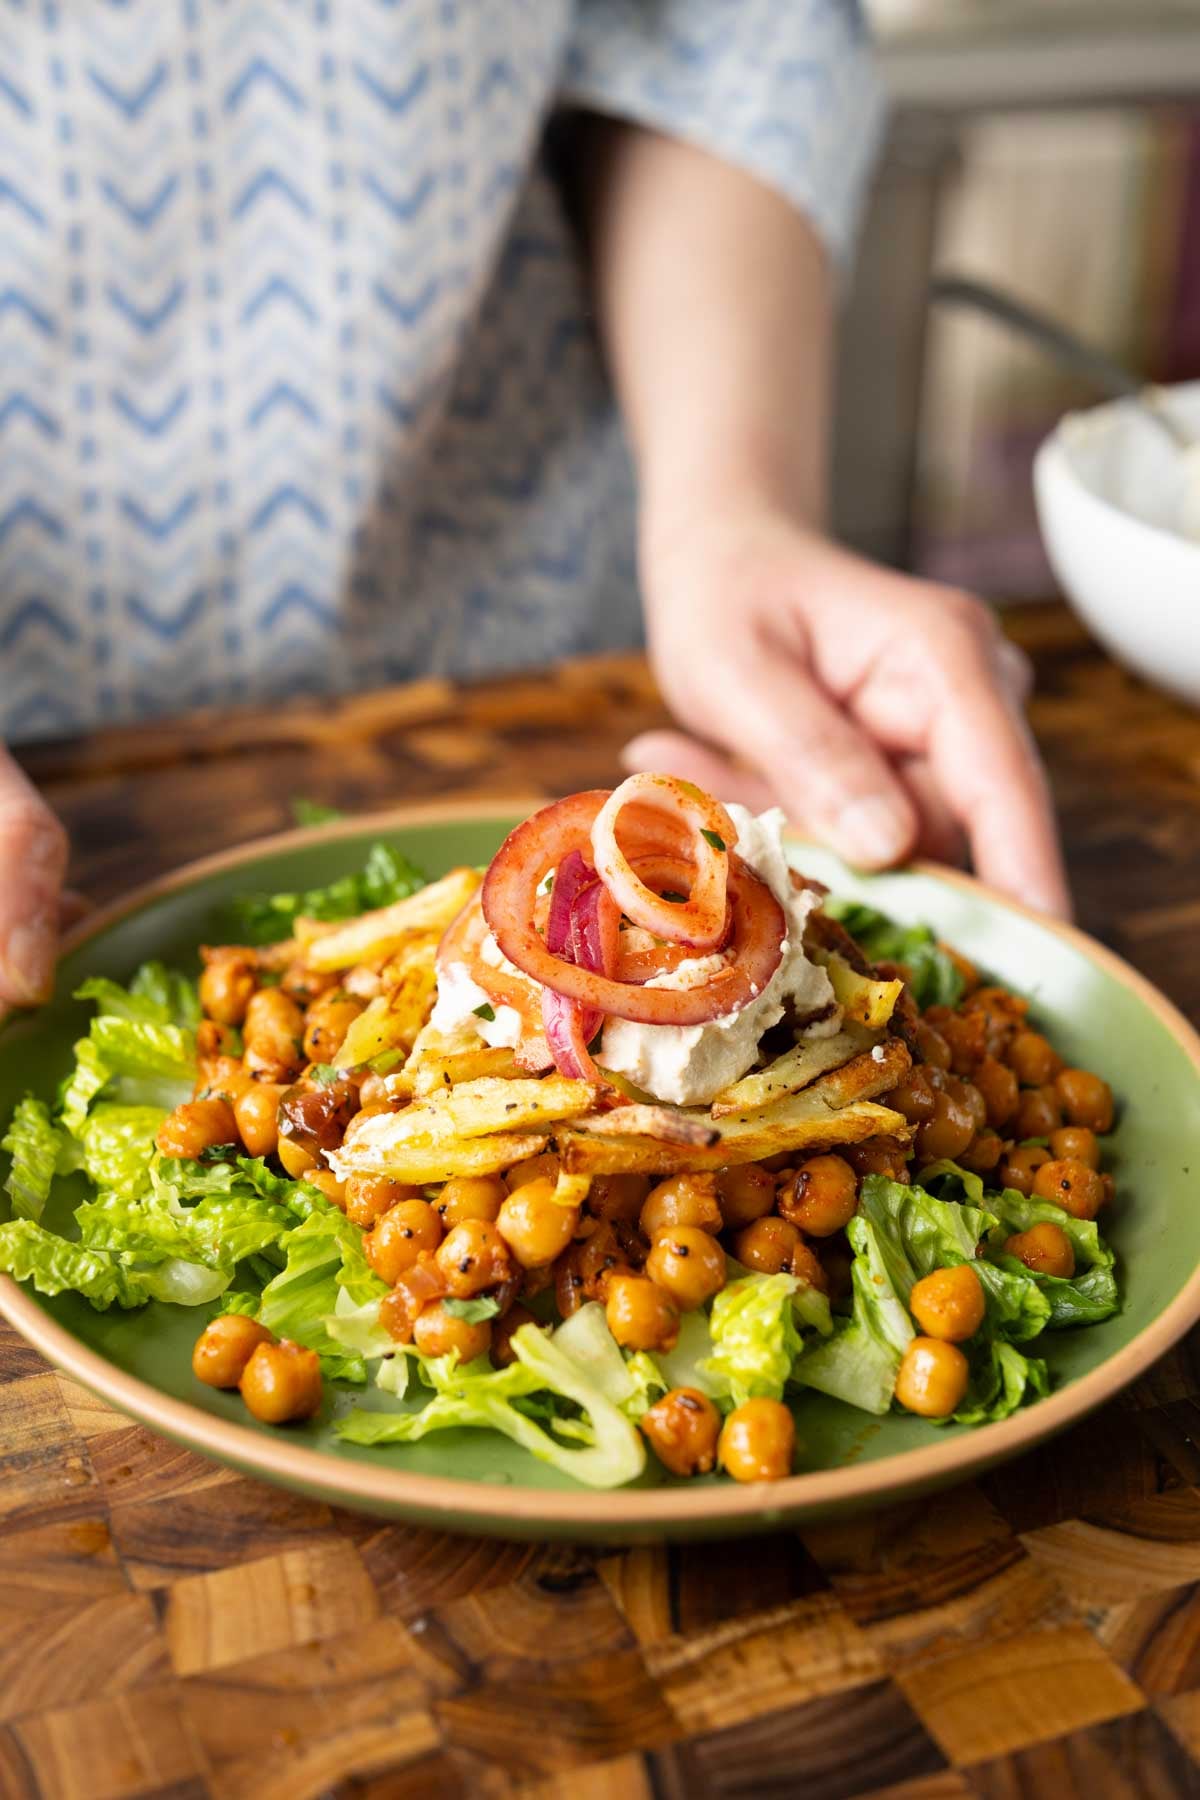
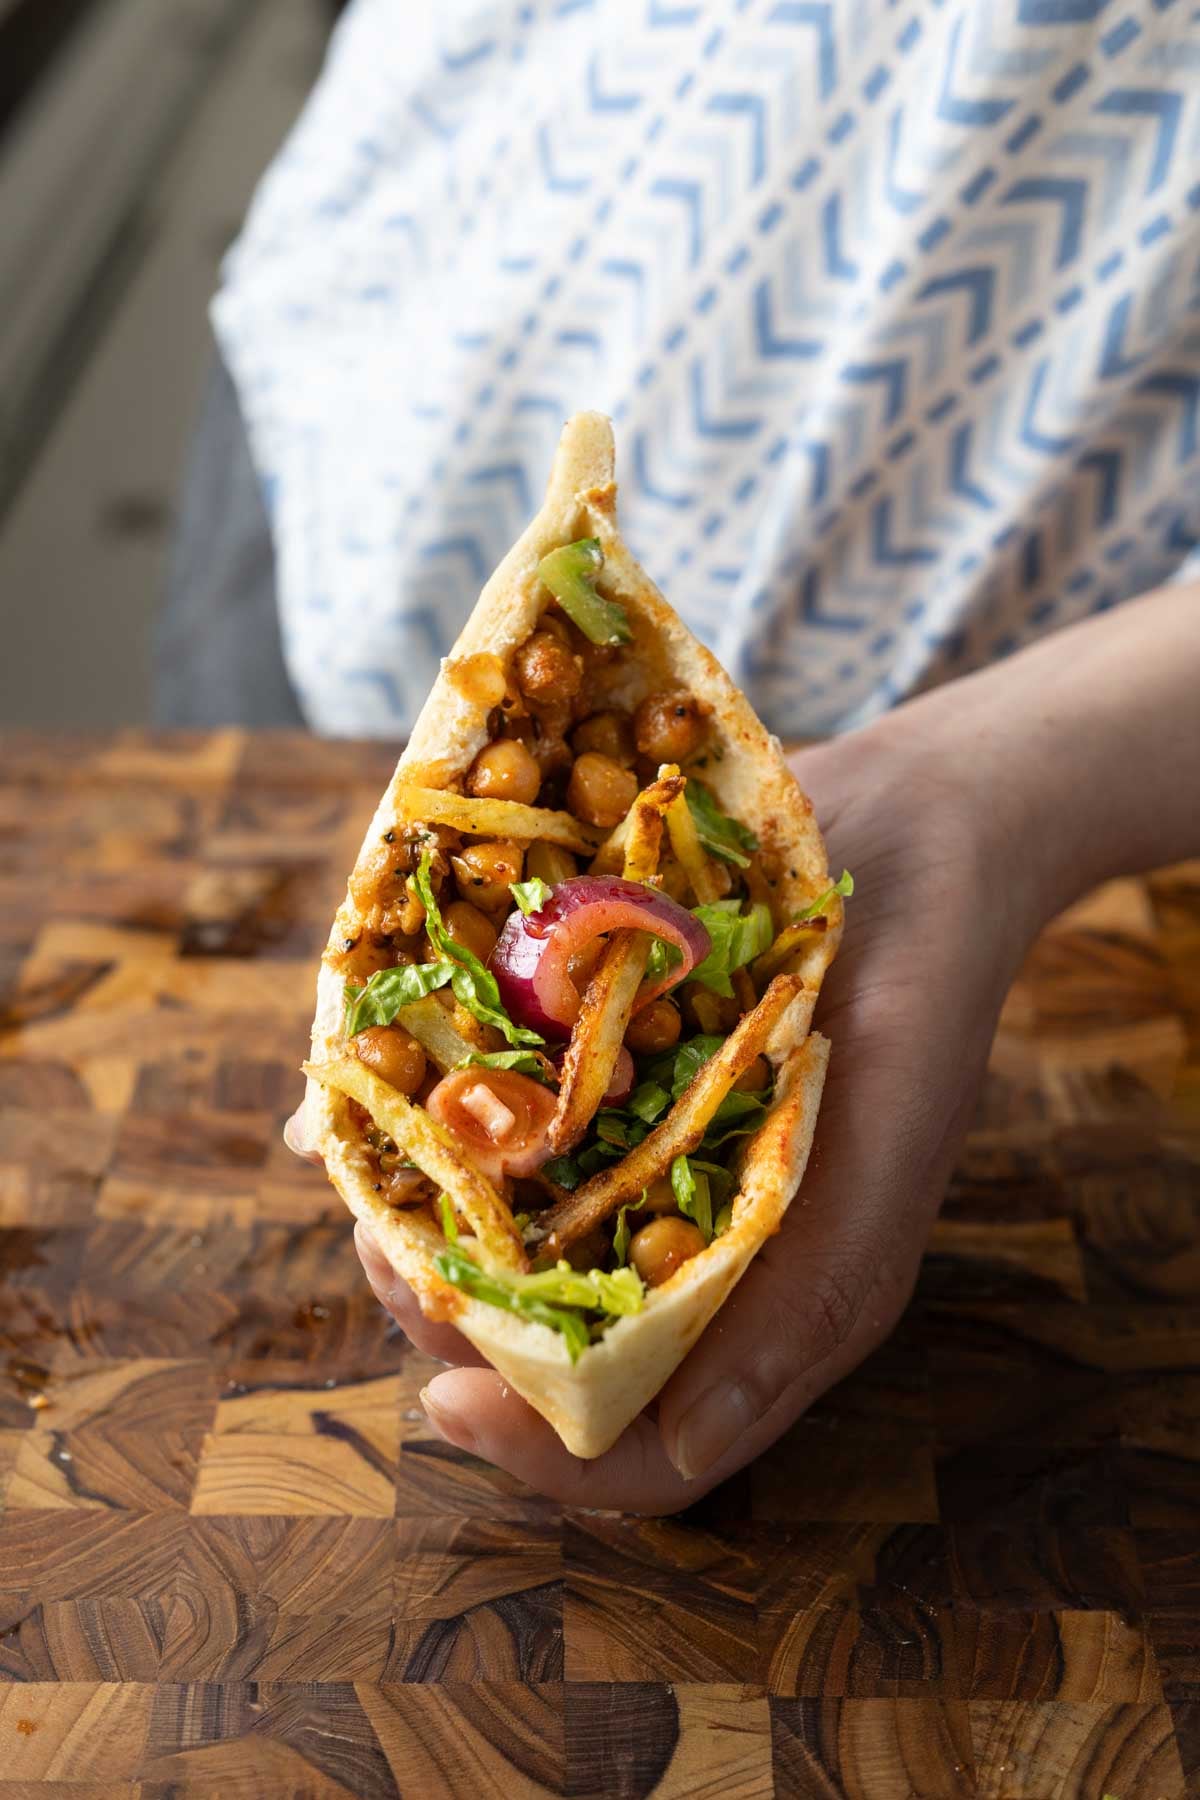
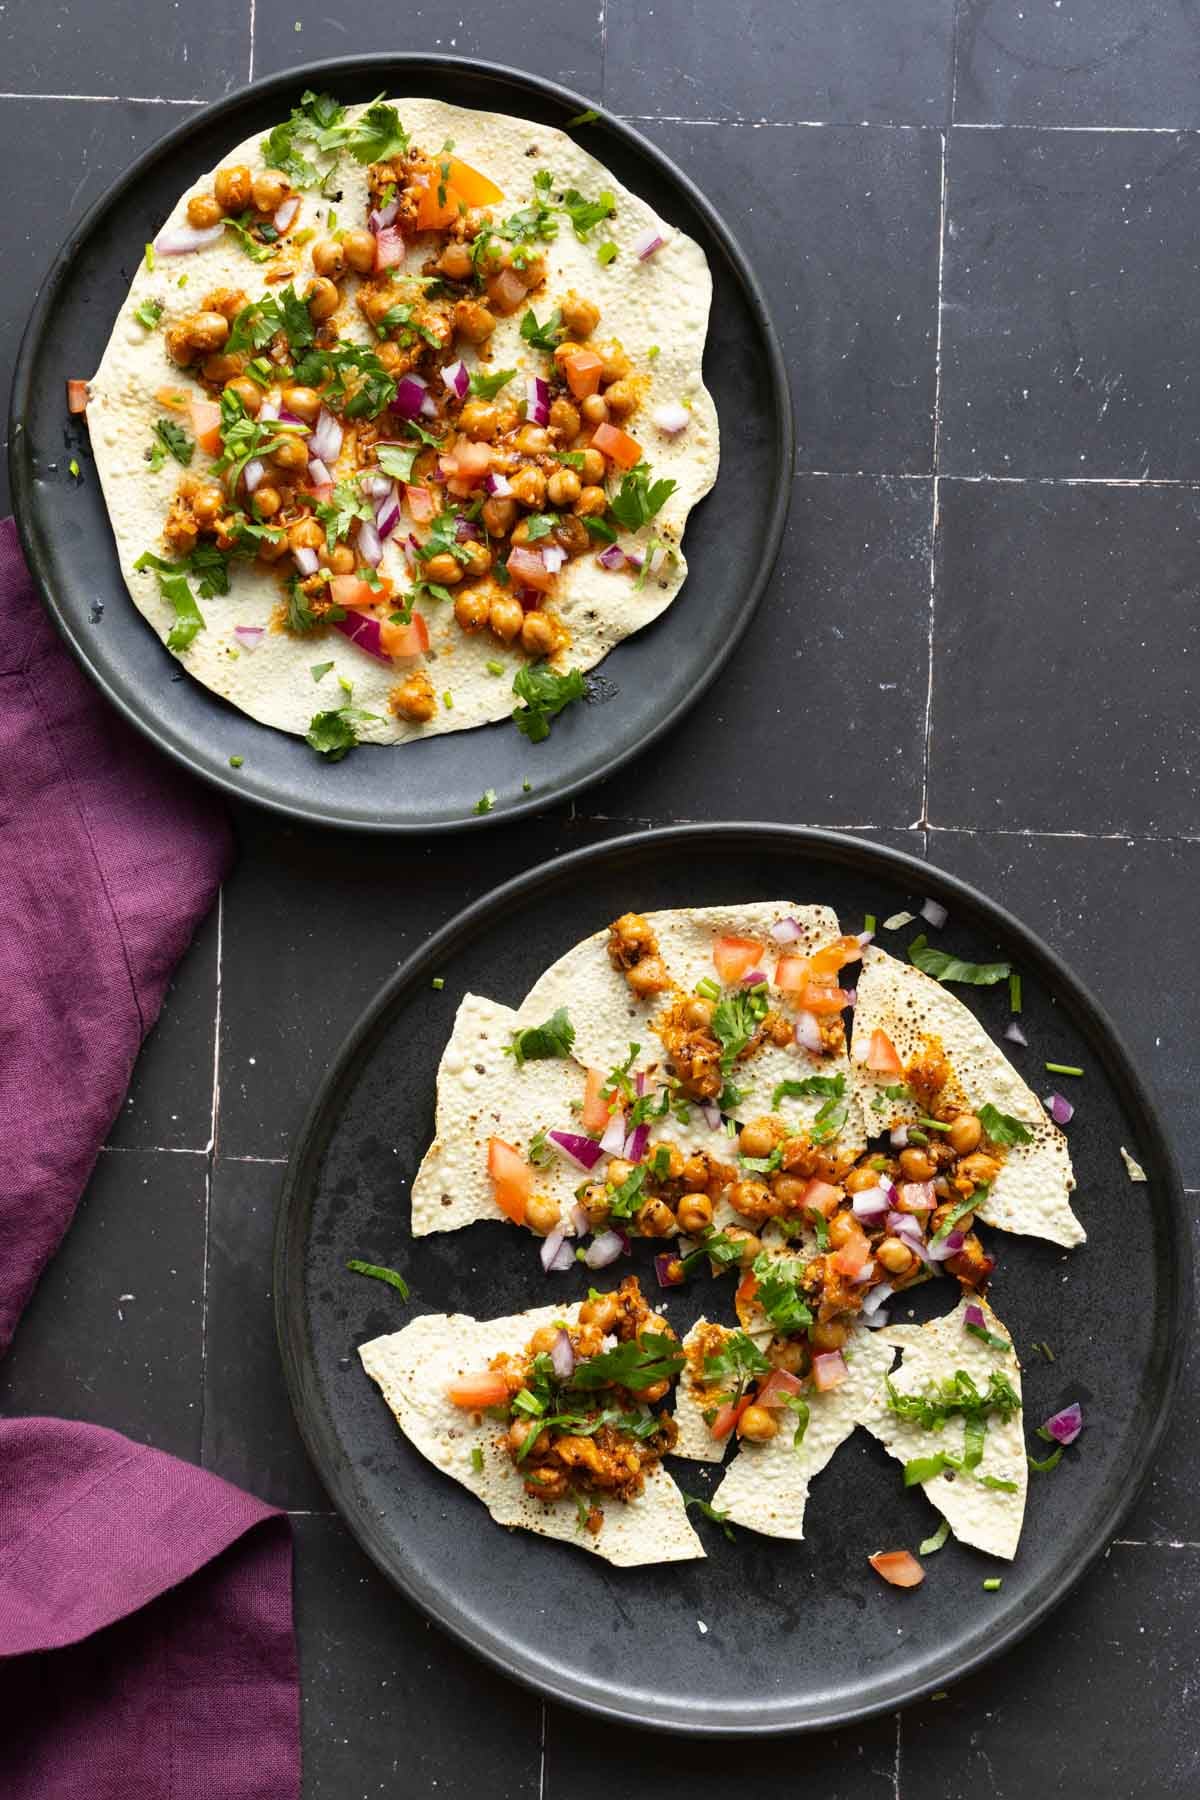
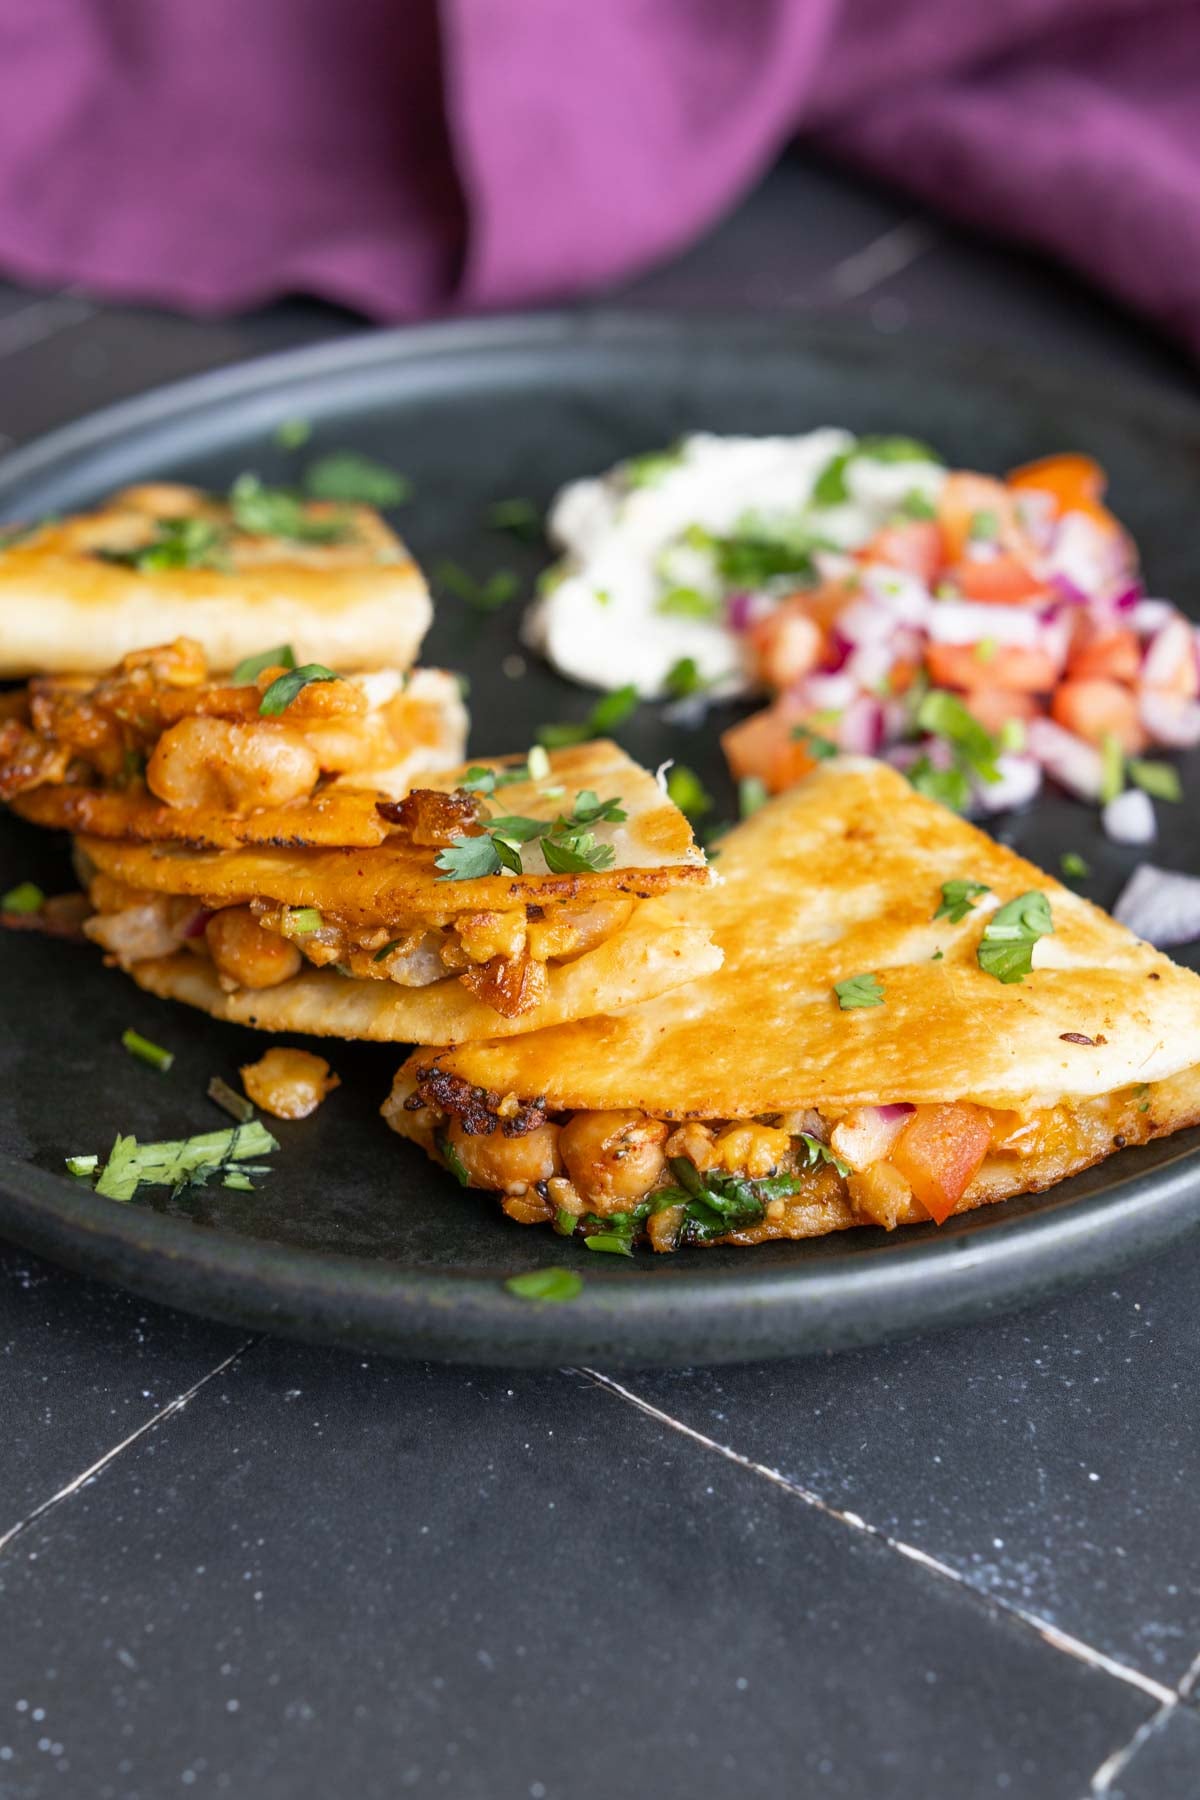
Chili Garlic Vinegar Chickpeas, 15 minute, bold ginger garlic heat and a vinegar snap. Use them on crispy potatoes, stuff pitas, smash tacos, toss salads, or top papadam nachos. Make once, meals and snacks all week. (gluten-free, soy-free, nut-free) 18g protein 15g fiber
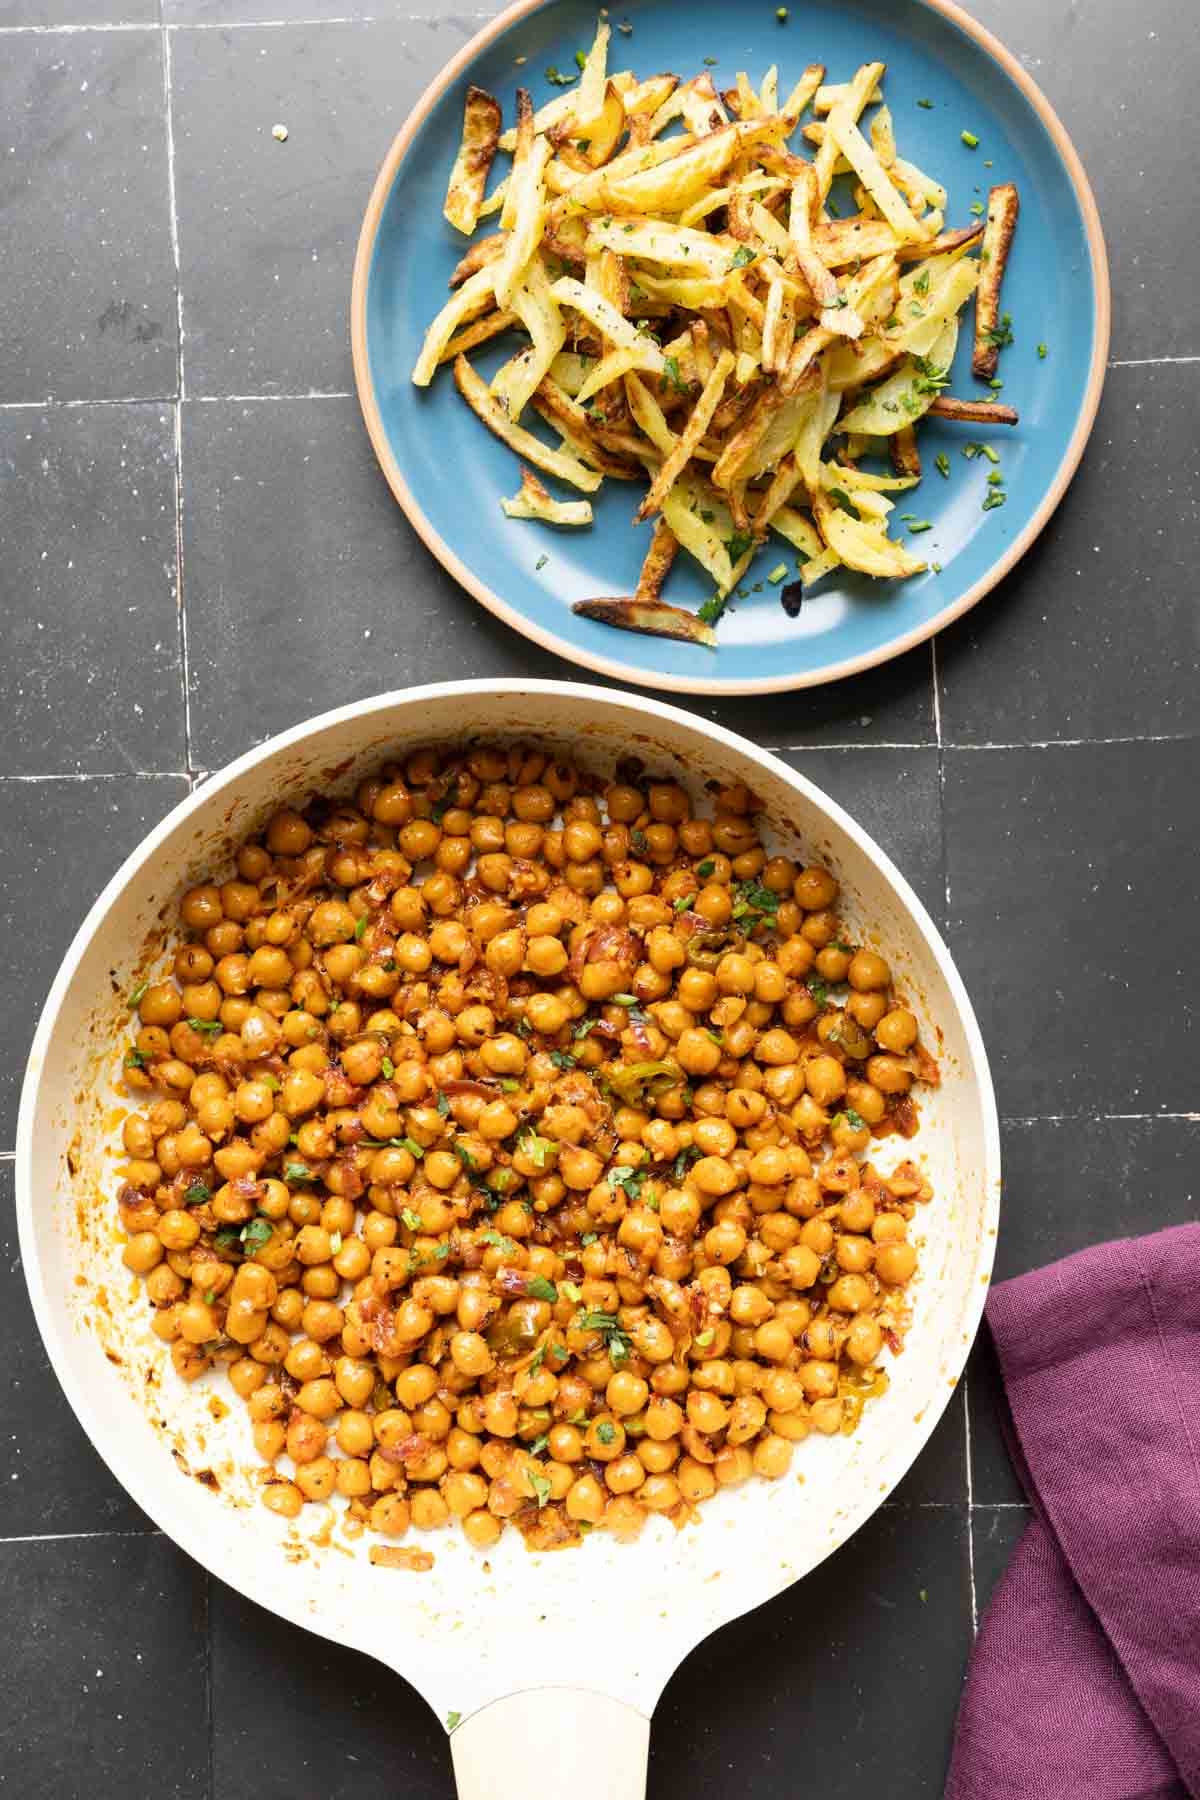
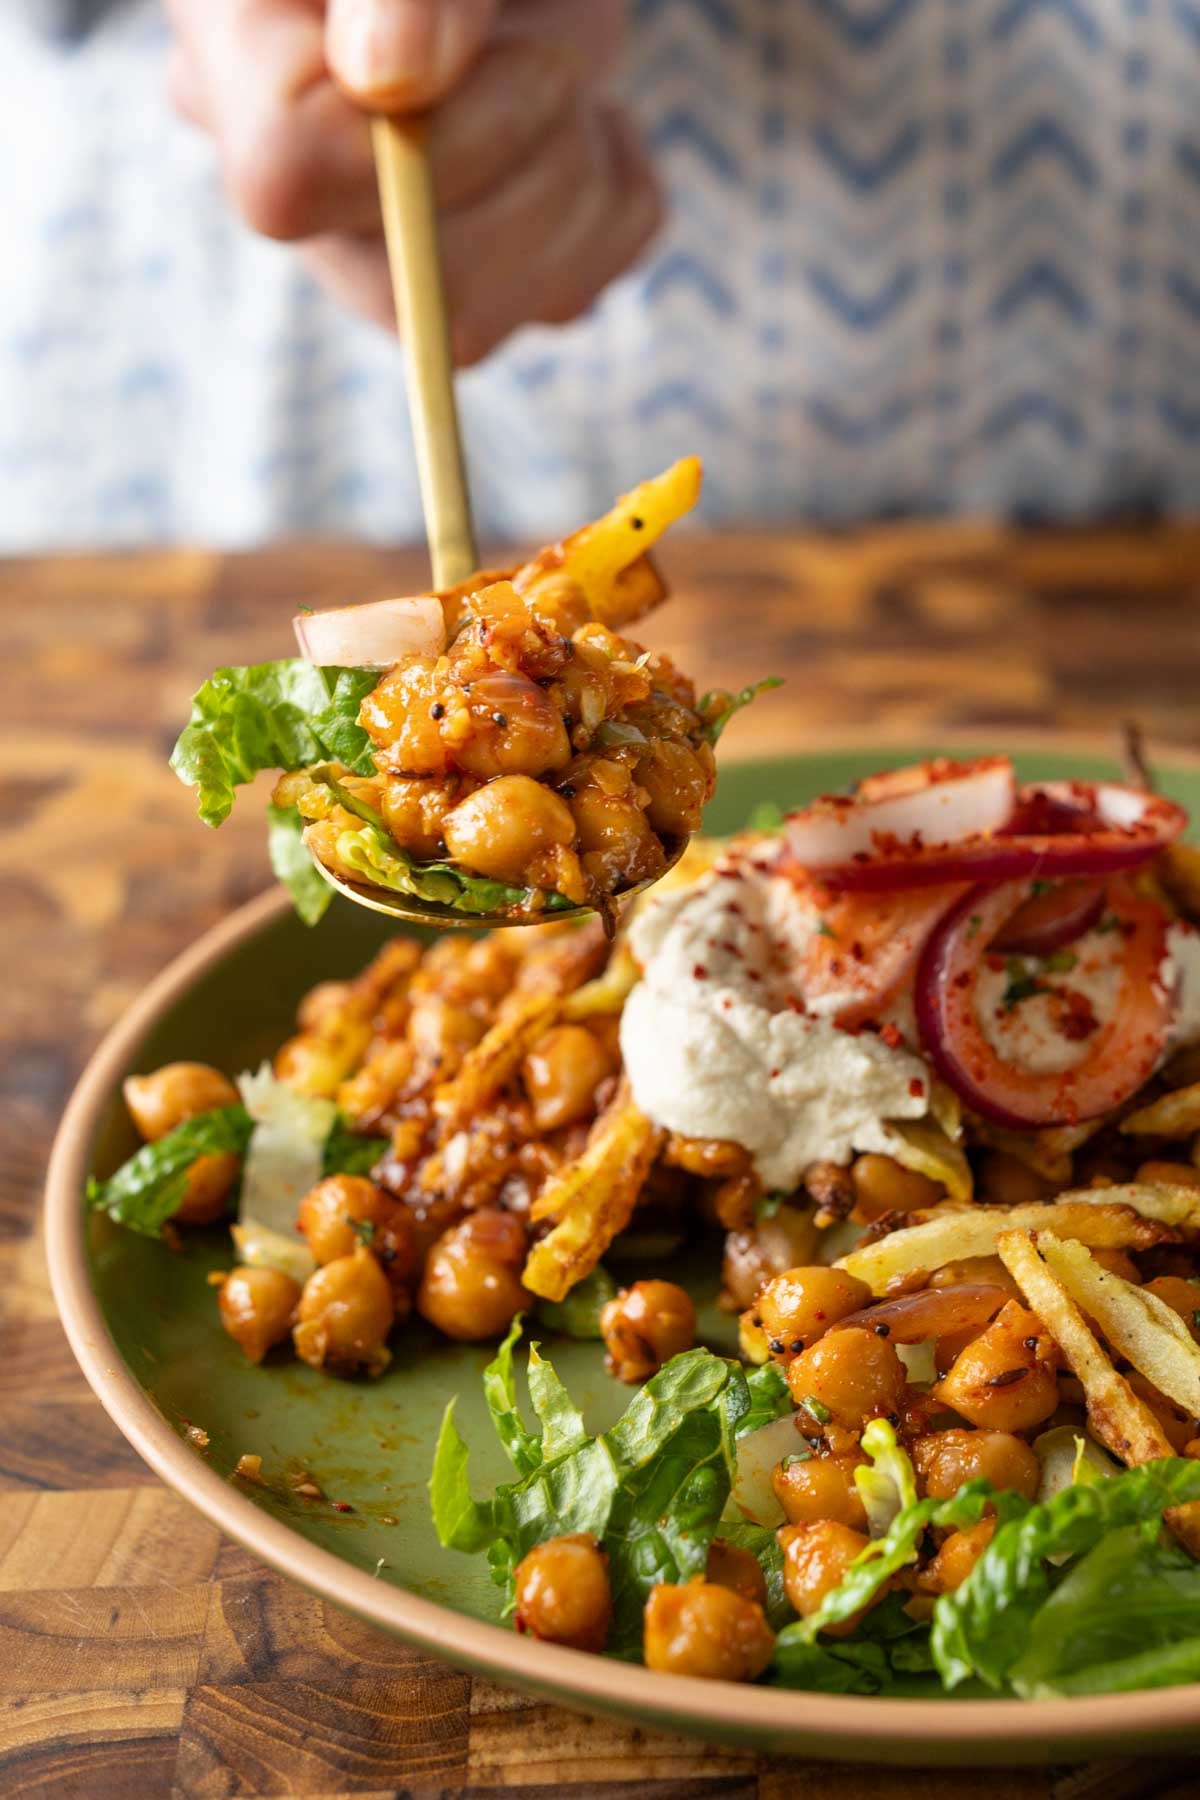
These tangy spicy 15 minute chickpeas are wildly flavorful and so versatile. Ginger for warmth, garlic for depth, chilies for spark, vinegar for snap. Cook these once, and you’ve got a building block for the week. Put them on crispy potatoes, stuff a pita, smash a taco, toss a salad, or make fusion pappadum nachos! These chili garlic vinegar chickpeas are inspired from my Nepali potatoes. I took that flavor profile and put it with the chickpeas, because it’s just so incredibly delicious.
For the chickpeas, we’re making this dry sauce of garlic, ginger, and green chilies and also adding some whole spices, like mustard seeds and cumin seeds. We are adding vinegar in the end, so the chickpeas pick up that tanginess and aromatic flavors from the sauce and get so flavorful and tender.
Pappadum nachos below
They are just so addictive, especially served with the easy baked or air fried crispy potatoes strips.
You can serve these chickpeas and potatoes together in various ways: as a bowl with salad greens, to make papadum nachos, in smashed tacos, or stuffed into warm pita bread. No matter how you serve them, you are going to love them!
Why You’ll Love Chili Garlic Chickpeas
easy, 1-pan chickpeas cook while the potato strips crisp up in the air fryer
full of rich, deep Indian flavors
versatile! Serve as a salad, nachos, tacos, or stuffed into a pita
Chicken Cheese Buldak also known as Korean Fire Chicken with Cheese is a popular Korean recipe made with chicken, gochujang, gochugaru, seasonings and cheese. It is also called as Cheese Buldak, Korean Chicken Buldak. Fiery chicken topped with mozzarella cheese and cooked till tender. Korean Cheese Buldak Recipe (Fire Chicken) My love for Korean foods...
Muttai Mittai also known as egg sweet or egg burfi is a well known sweet made with milk, sugar, ghee and eggs. It is popular in the Muslim community most famous in Villupuram district. Traditionally this sweet is prepared for weddings and festivals. Villupuram Muttai Mittai has gained worldwide attention thanks to the viral popularity...
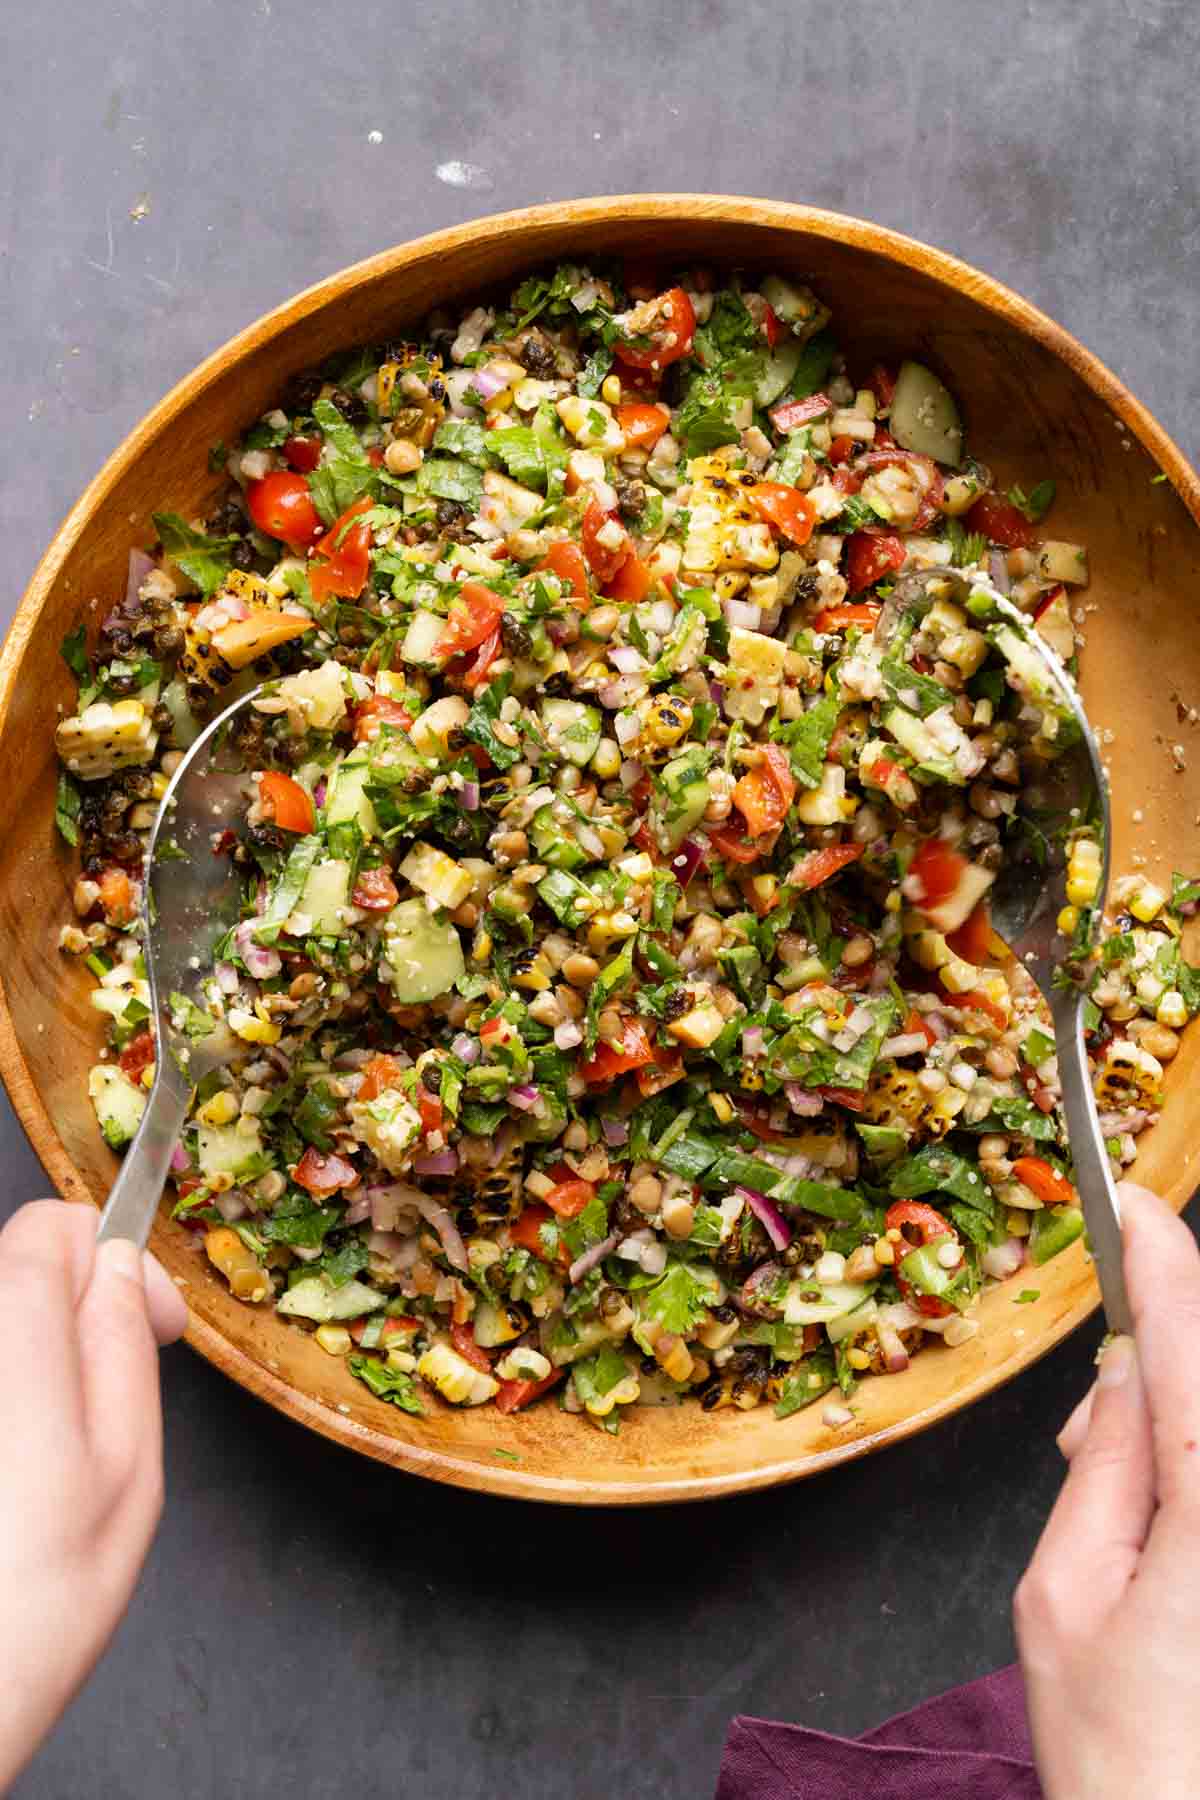
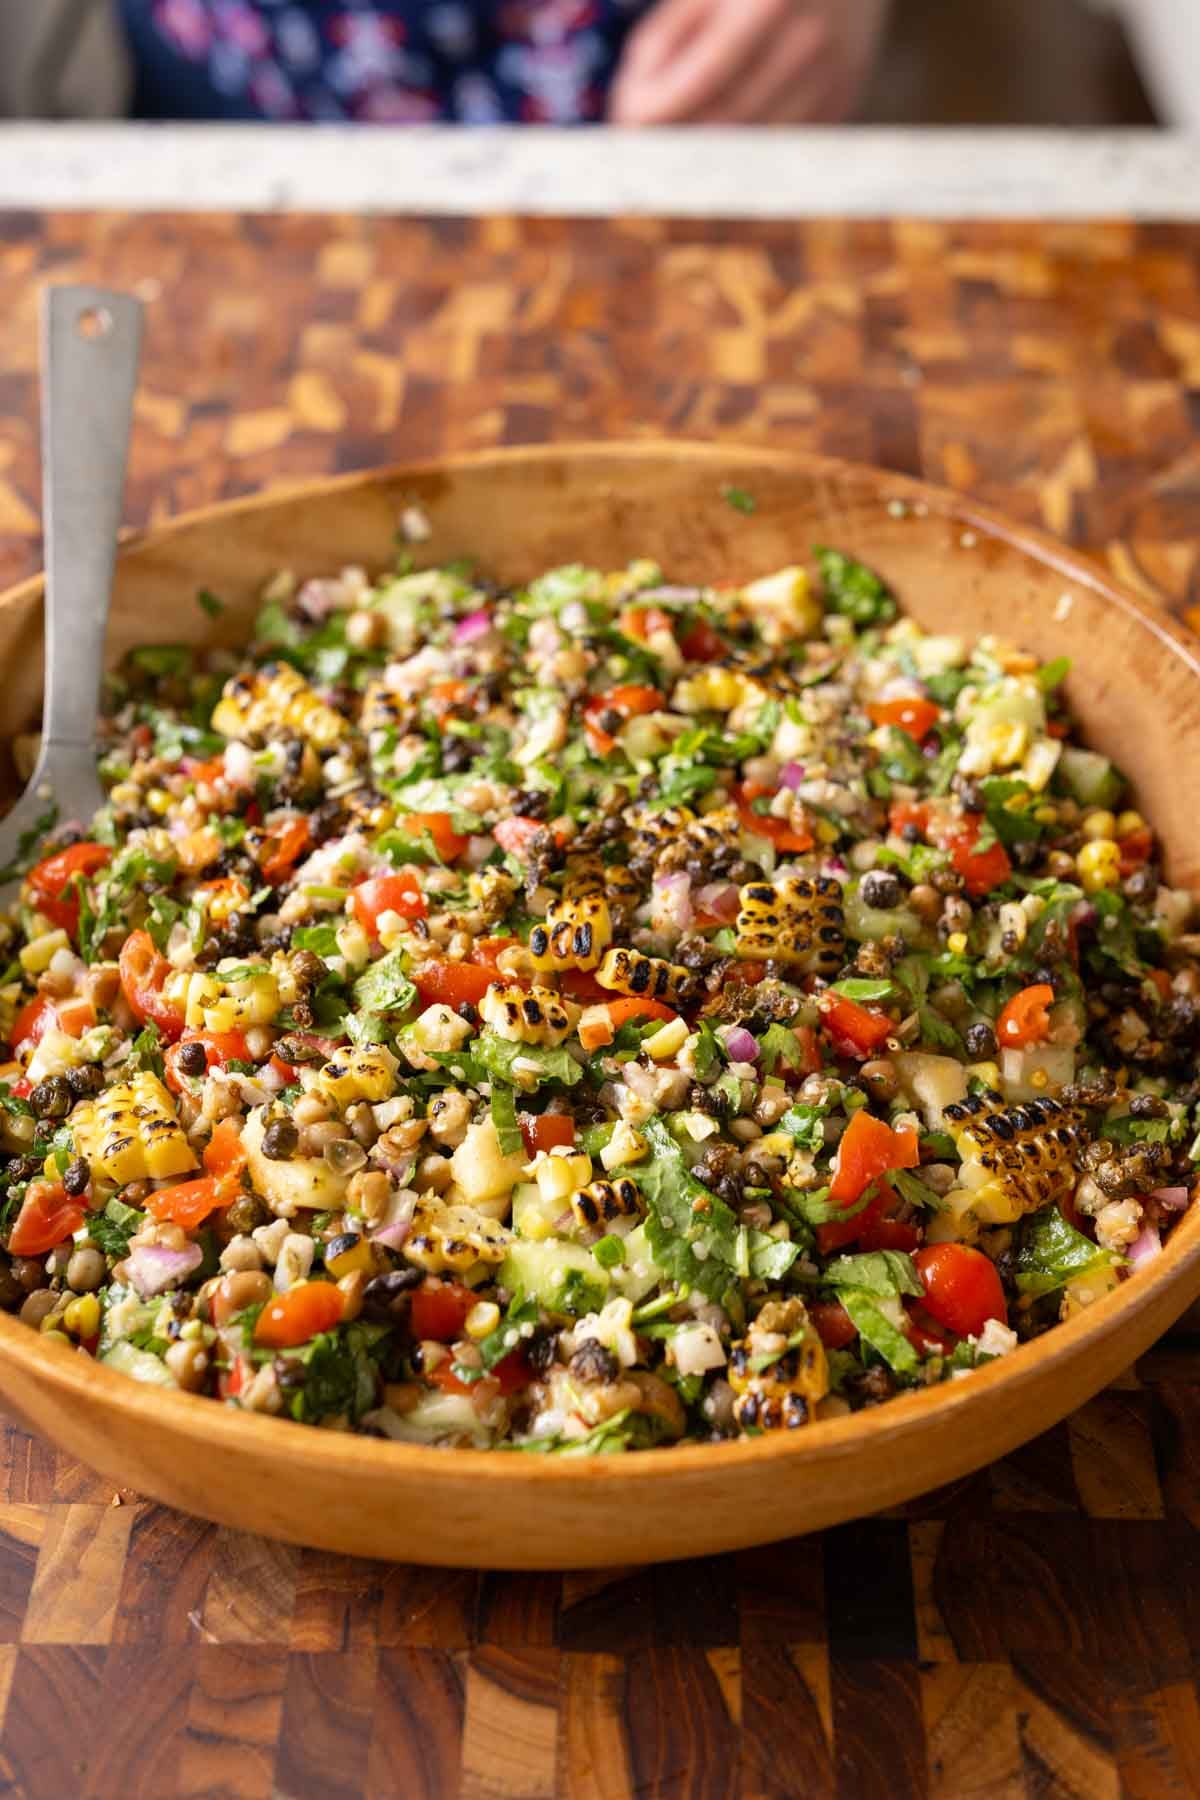
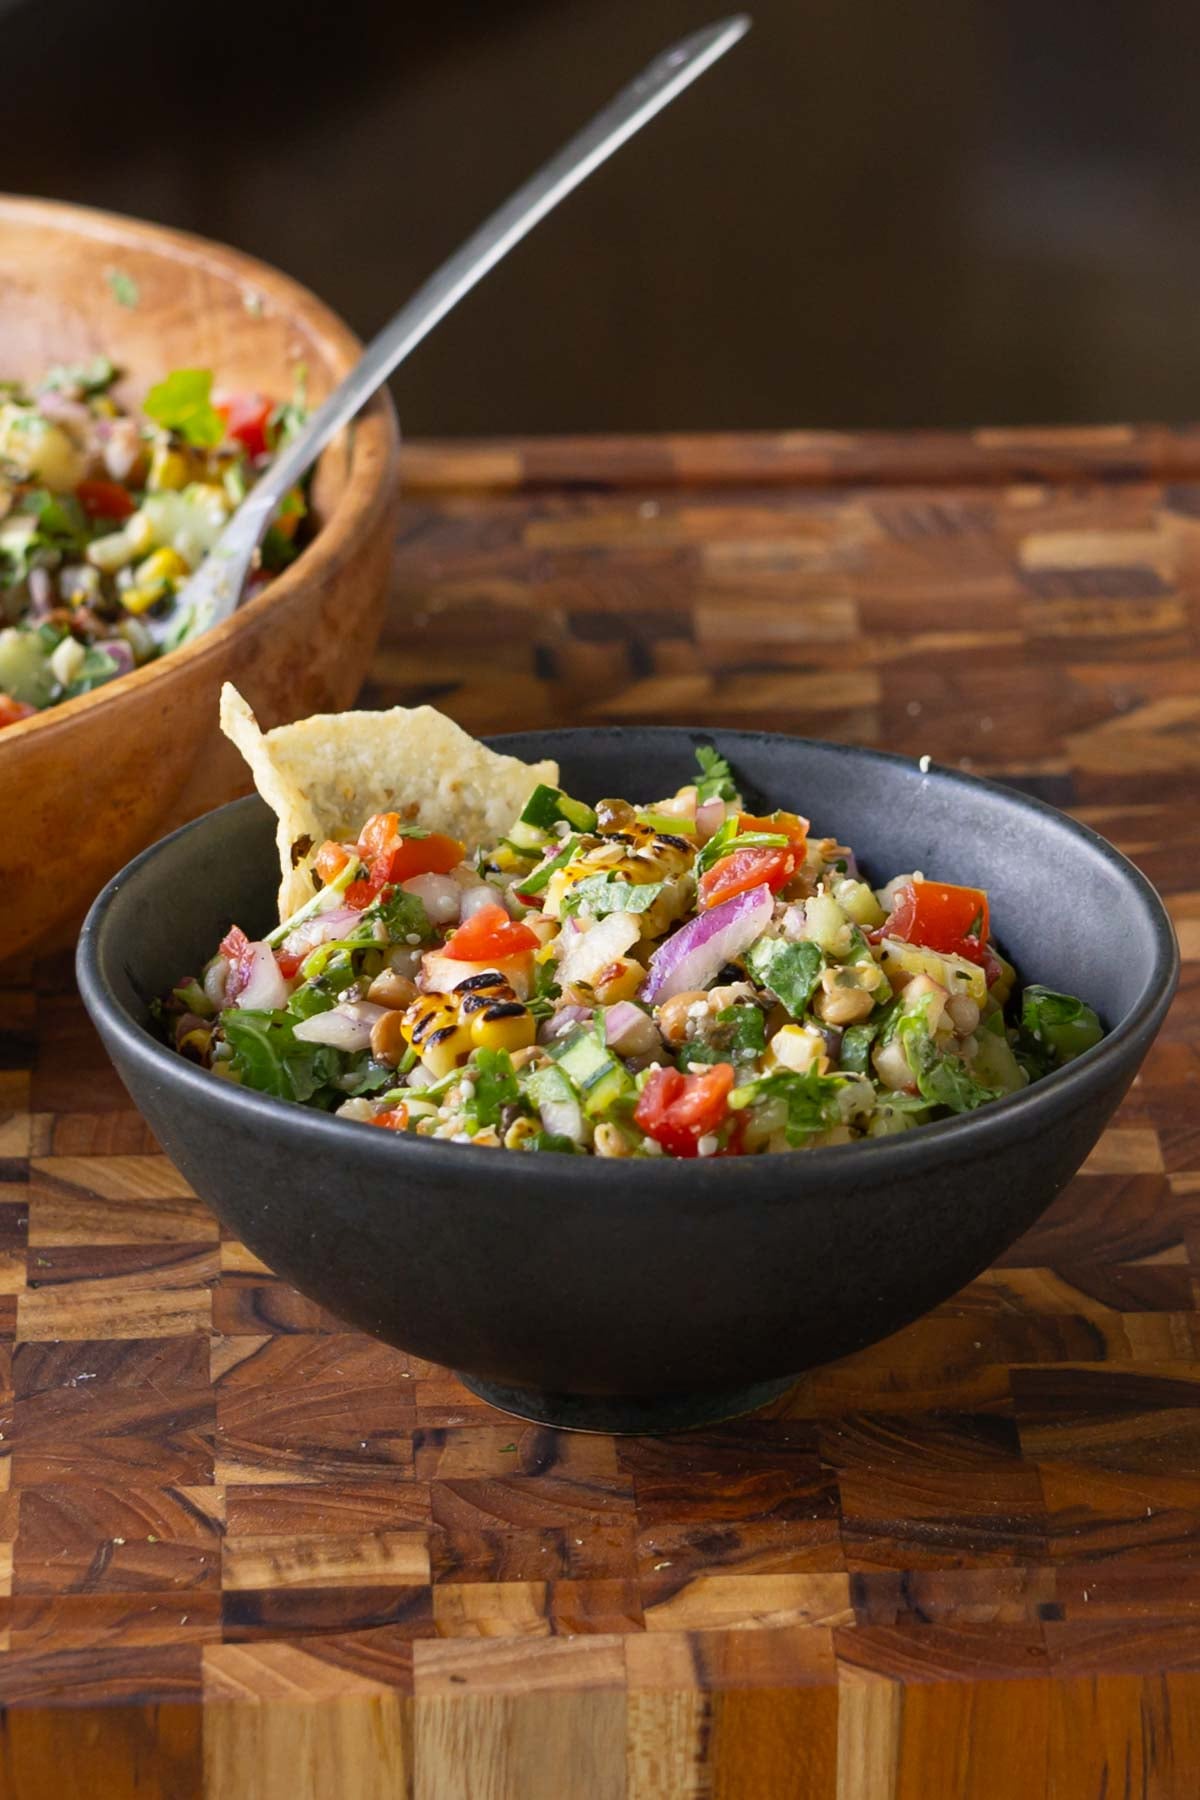
Flavor-packed lentil dip comes together fast with serious protein and fiber punch! Lentils, roasted corn, veggies and crispy capers with herby pepper lime dressing is perfect for parties, potlucks, cookouts, and snacking! (gluten-free, soy-free, nut-free) High fiber, protein and iron!
This is the perfect lentil dip for summer. I was inspired by a lentil dip that went viral on TikTok, where you just take some lentils, add bruschetta and feta, Instead of those flavors, we’re adding a load of veggies and a fantastic dressing, and also crisp capers! All these flavors and textures have made this my fave this summer!
This lentil dip is a great source of protein, fiber, vitamin C, B vitamins, potassium, magnesium, and iron and omegas. Protein from the lentils hemp seeds nutritional yeast, fiber from the veggies, lentils, kale. Major flavor boost from the Crispy capers! This indulgent Lentil dip packs a flavor and nutrition punch!
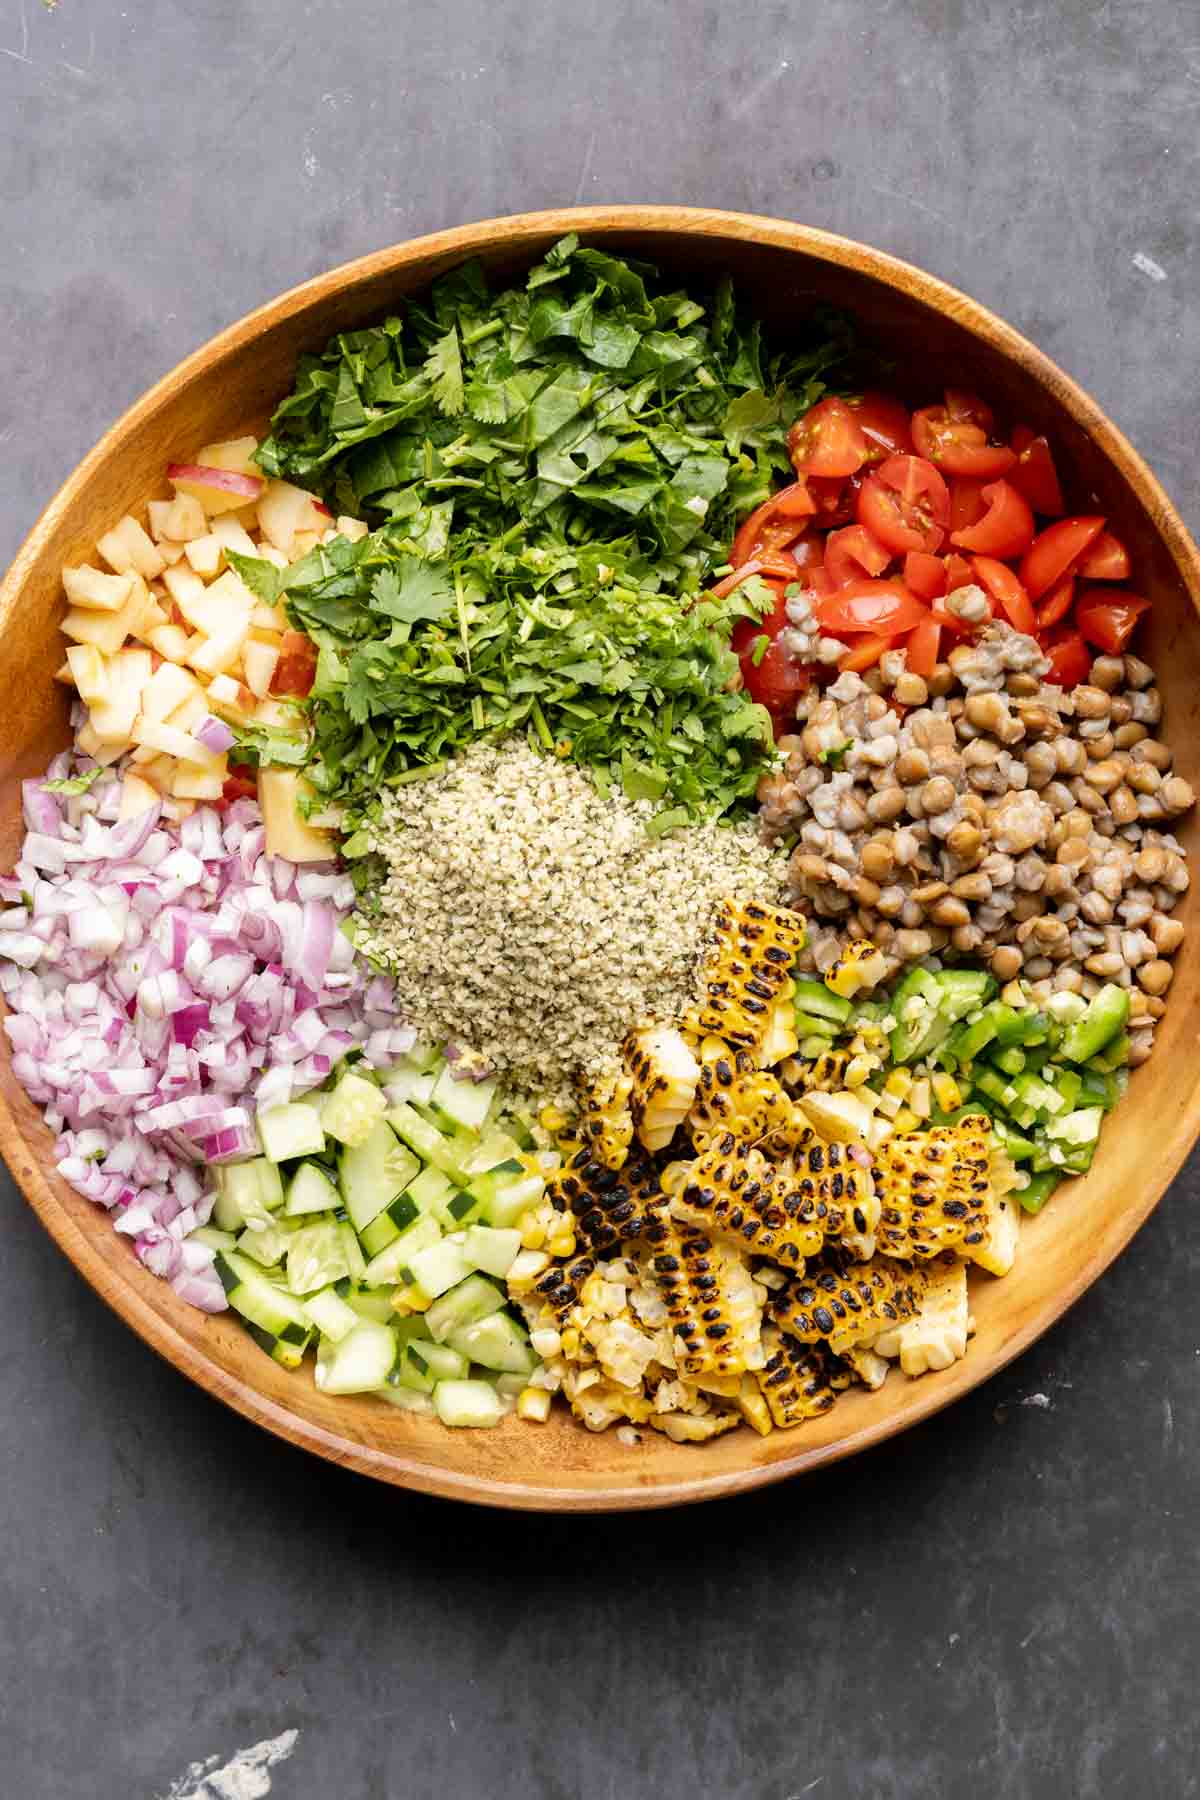
There’s the protein from the lentils. There are the fresh, crunchy veggies, jalapeño, and onion. There’s sweetness from the corn and the apple, the tart freshness from the cherry tomatoes, and refreshing vibrancy from the lime zest. There’s also kale in the dip, hidden along with some herbs, so it’s a great way to sneak in kale.
The nutritional yeast adds a bit of cheesiness and protein, while the hemp seeds bump up the protein and texture even more. And all of that balances out with a hint of spice from the jalapeño and the pepper flakes and a savory burst of flavor from the crispy capers.
You can use whichever veggies you have on hand. If you don’t like lentils, you can use chickpeas or white beans and add some more spices to the dressing.
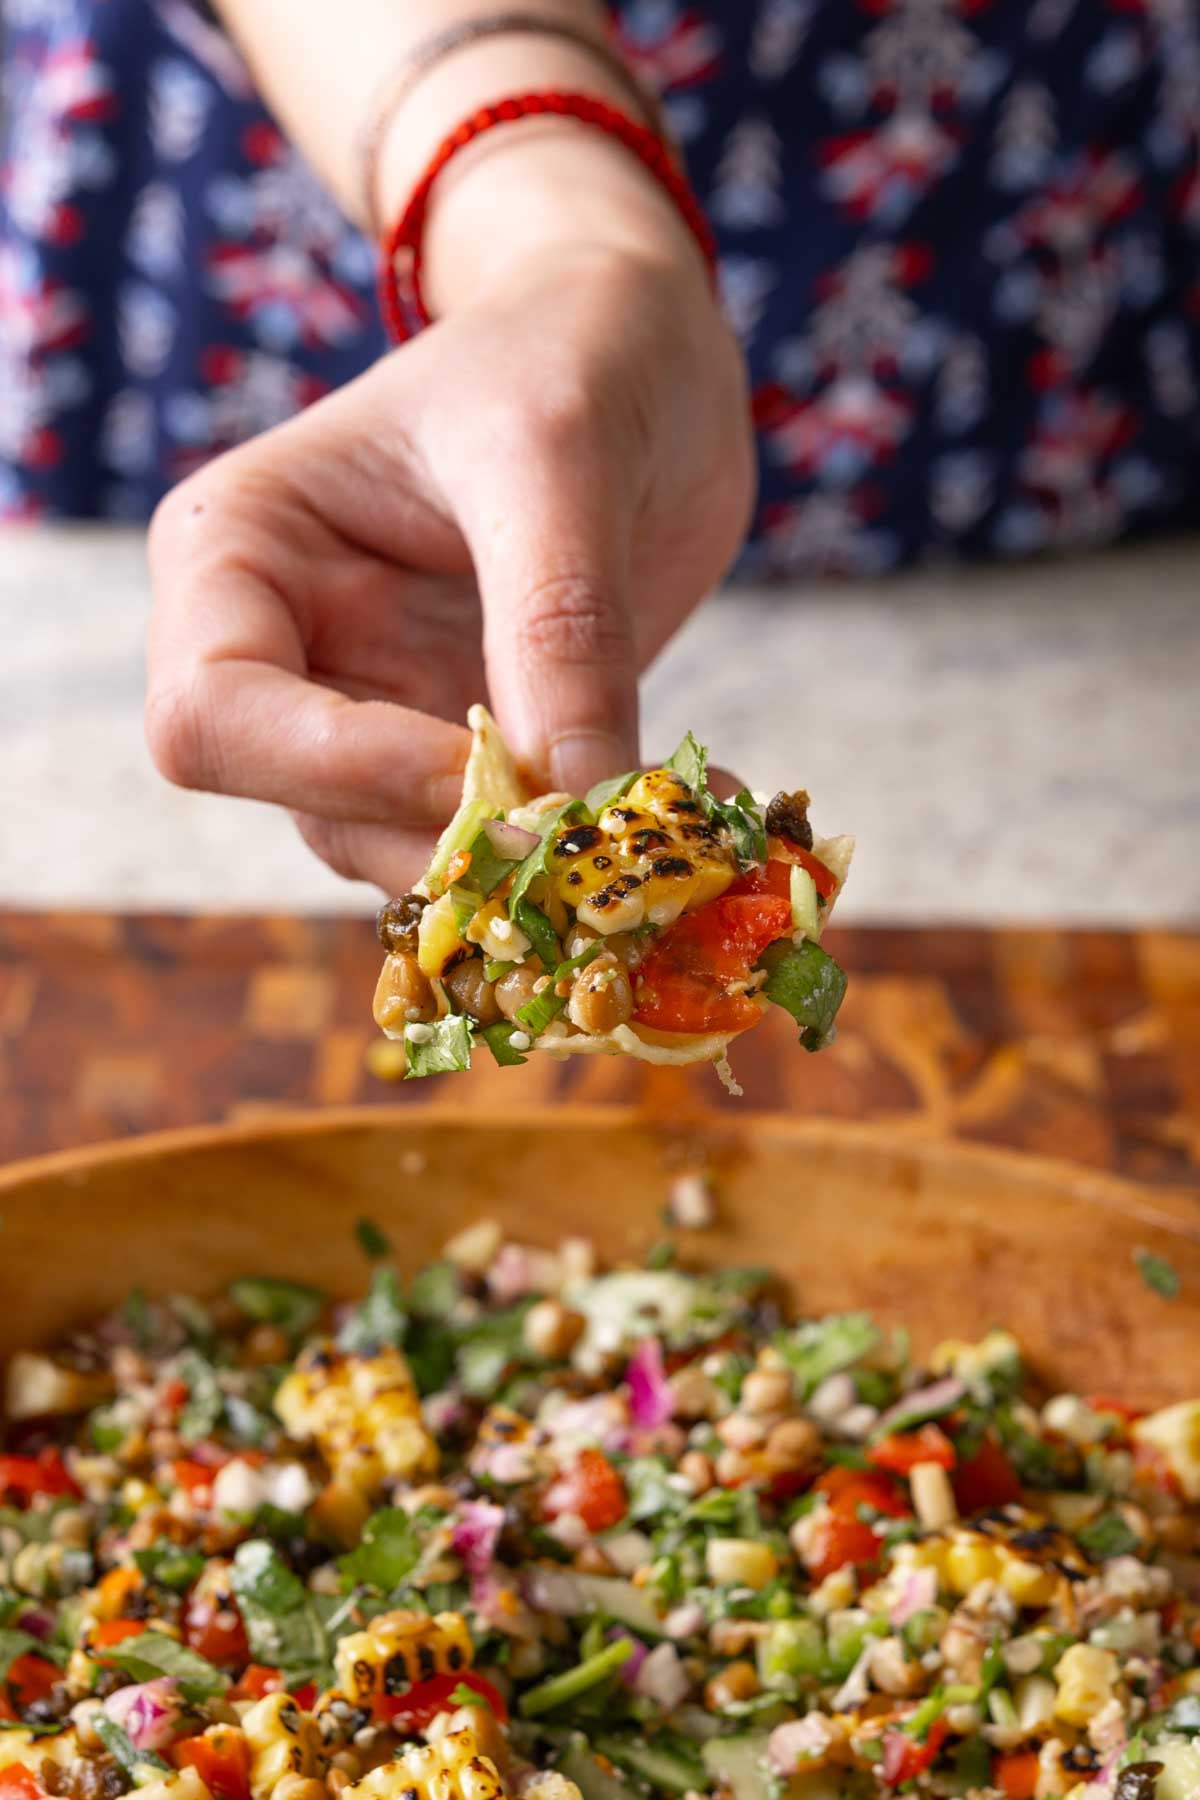
Make this dip and serve it with tortilla chips, crispy crackers, garlic bread or baguette slices. You can also use it to make wraps with pita bread or tortillas. It’s a versatile lentil dip that will disappear in no time.
Why You’ll Love this Lentil Dip
protein- and veggie-packed dip with amazing flavors and textures
quick and easy herb-lime dressing comes together in 1 jar
crispy capers add a little crunch and a ton of umami
Homemade oat milk is a healthy, dairy free milk made from oats and water. It is a great alternative for people who are following a vegan diet. All you need is two ingredients, oats and water, just blend, strain and enjoy. You don't need any special methods or fancy tools. This homemade oat milk is...
Homemade seed crackers are one of the healthy and easy snacks made with flax seeds, chia seeds, pumpkin seeds, sunflower seeds, sesame seeds and halim (garden cress) seeds. These crackers are naturally gluten-free, rich in fibre, and plant-based protein. They turn super crisp in the oven and are perfect for snacking, serving on a cheese...
Veg rice vermicelli noodles is a simple and delicious stir fry recipe made with rice vermicelli, vegetables, bean sprouts, chillies, ginger, garlic, soy sauce, and vinegar. This is a quick and wholesome dish that can be made in less than 30 minutes. It is perfect for busy days, a quick lunch or dinner option. Vegetarian...
Ragi Roti also known as Ragi Chapati or Finger millet chapati or nachni roti is a Gluten free chapati recipe made with ragi flour, salt, ghee. It has no other flour like wheat flour added. This soft and puffy ragi chapati is made with only ragi flour. This version of ragi roti is soft, easy...
This epic roasted garlic chili coconut tofu sandwich stars this toasty, flavor-packed chili-garlic-coconut chutney(Indian Vada Pav Chutney) that coats the tofu paired with this creamy, herbed yogurt sauce and tangy pickled cabbage. 18g Protein 7g fiber!
I am so excited to bring you another sandwich in my series of reimagining sandwiches inspired by popular Indian street food! This one is spicy, nutty, coconutty, sweet, crunchy, creamy, and tangy all at once. It’s such an incredible combination of flavors and textures. Don’t miss all the summer sandwiches in the series! These are some of my best sandwiches, Big flavor, and nutrient dense! Watch me make them on my YouTube channel! 🌶️
These stacked, make ahead friendly sandwiches and the Indian jalapeño popper toasts (15g protein per toast!) and my Indian crispy Chikin tofu sandwich, all pack incredible flavor and also Protein and fiber!
We’re going to make this chili garlic coconut chutney, which is a dry condiment (lasun chutney) often found in vada pav, a popular Indian sandwich. Vada pav usually has that chutney and a green chutney, and then there is this fried fritter of potatoes that’s tucked into bread. It’s so delicious.
I’m taking that amazing chutney and adding it on top of some tofu slices and baking them, then using them to fill up the coconut tofu sandwich. We’re piling them high in the sandwich along with a creamy, cooling, herby yogurt sauce as well as some tangy pickled cabbage. You can also use other pickled vegetables in this sandwich and add some roasted veggies, as well. This is a very flexible sandwich.
The main flavor component of this coconut tofu sandwich is that chili garlic chutney, so don’t skimp on it. Definitely make that chutney, and don’t skimp on the garlic or the chili when you do. They give it an amazing flavor.
You want to use super firm tofu for the best results, but extra firm tofu works, as well. I like to slice it thin, almost like deli slices, because the more surface area, the more flavor you get from all of that chutney.
The chili garlic chutney has loads of garlic that gets toasted, then process it up with toasted sesame seeds, peanuts, toasted coconut, and a good amount of Kashmiri chili powder. I use Kashmiri chili powder a lot in my Indian recipes. If you don’t have it, you definitely need to get some. It has a very distinctive flavor and isn’t overly hot, so you can use it in non-Indian recipes, as well, in place of paprika. It adds beautiful color and amazing flavor. You can find Kashmiri chili powder online or at Indian grocery stores.
We make the yogurt sauce with yogurt, herbs, lime juice, and a little maple syrup to balance the savoriness. The pickled cabbage is simply cabbage pickled with vinegar, salt, sugar, and pepper flakes. You can use the same ingredients to pickle other vegetables, like cucumber, radishes, or onions, as well.
This sandwich has amazing flavors and textures in every bite!!!
Why You’ll Love this Coconut Tofu Sandwich
toothsome tofu smothered in toasty, flavor-packed chili garlic coconut chutney
creamy, herbed non-dairy yogurt sauce
crunchy, tangy pickled cabbage contrasts all of those rich, deep flavors

 Login
Login