❌

Reading view

There are new articles available, click to refresh the page.

Chana Sundal Recipe – Easy South Indian Chickpea Salad for Navratri

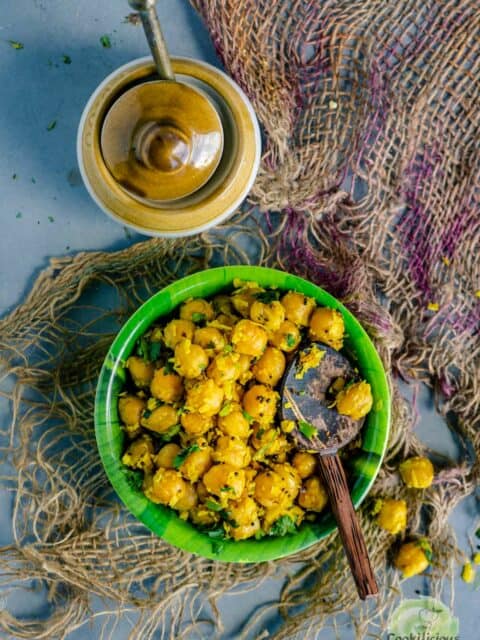
Overhead shot of chickpea sundal in a green bowl with a wooden spoon.

Chana Sundal Recipe – Easy South Indian Chickpea Salad for Navratri

Amma would make 9 varieties of sundal every year for Navratri, ever since I can remember - one for each of the nine days, the recipe almost always the same, just the type of bean or legume changing with each day. This chana (chickpea) sundal recipe is the version I know by heart now, and […]

READ:Chana Sundal Recipe – Easy South Indian Chickpea Salad for Navratri

Palkova Recipe

Palkova Recipe

Palkova, also called Therattipal is a traditional South Indian milk sweet made by slowly reducing whole milk until it becomes thick and granular, and then further cooking it with sugar. Also known as Paal Kova, it is traditionally made with just milk and sugar. Cardamom, saffron or a little ghee can also be added for...

READ: Palkova Recipe

Perfect Baby Back Ribs

Perfect Baby Back Ribs

I’ve cooked baby back ribs just about every way you can cook them. Different smokers, different seasonings, different sauces… and there’s really no one right way to do it. You can take just about any good rib recipe and make some great ribs.

What makes the biggest difference is knowing what to look for along the way.

It starts with picking out a good rack and trimming it up so it cooks evenly. Then you gotta know when the bark is set and the ribs are ready to wrap, what tender ribs should actually feel like, and when it’s time to get them off the pit. And one of the biggest things I’ve learned is to give ribs a good hold once they’re tender. That little bit of time lets everything settle down before you put on the final glaze.

For these ribs, I’m using Tyson Baby Back Ribs from Walmart and keeping the flavors pretty simple. But that’s really the point. Change the seasoning, change the sauce, cook them on whatever smoker you’ve got. If you pay attention to these little things during the cook, you’ll get tender, juicy ribs with that beautiful mahogany finish every time.

WHAT MALCOM USED IN THIS RECIPE:

Print
baby back ribs

Perfect Baby Back Ribs


5 Stars 4 Stars 3 Stars 2 Stars 1 Star

No reviews

Description

These baby back ribs are smoked at 275Β°F until the bark is set, wrapped until tender, then given a proper hold before finishing with a final glaze. It’s the little things along the way that give you tender, juicy ribs with a beautiful mahogany finish.


Ingredients


Instructions

  • PREP THE RIBS
    • Remove the membrane from the back of each rack. Square up the ends and trim away any loose fat or anything that doesn’t look like it will cook up appetizing. Squaring up the rack makes the finished ribs look better, and those thin ends tend to dry out during the cook anyway.
  • SEASON THE RIBSΒ 
    • Apply a medium-heavy coat of Killer Hogs The BBQ Rub to both sides of the ribs. No binder is needed.
  • SMOKE AT 275Β°F
    • Any smoker will work. Cook the ribs for aboutΒ 2–2Β½ hours, but don’t go strictly by time. You’re looking for the rub to fuse into the meat and form a good-looking bark. That’s when they’re ready to wrap.
  • MAKE THE WRAP MIXTURE
    • Combine the melted butter, apple juice, ΒΌ cup Killer Hogs The BBQ sauce and 1–2 Tablespoons of Killer Hogs The BBQ Rub.
  • WRAP THE RIBS
    • Place each rack meat-side down on a sheet of foil. Pour half of the wrap mixture over each rack. Fold the foil over the ribs and tuck in the ends to seal.
  • COOK UNTIL TENDER
    • Return the wrapped ribs to the smoker. After aboutΒ 1Β½ hours, start checking for tenderness. The ribs should feel very flexible through the foil, you should see some disintegration around the bones, and the internal temperature should be aroundΒ 204–208Β°F.
  • VENT AND HOLD
    • Open the foil and allow the steam to escape, then wrap the ribs back up and place them in a dry cooler for 1 hour.
    • Burp the cooler about every 15 minutes to release excess heat and steam. This gives the meat a chance to calm down and reabsorb some of the liquid from the wrap.
  • GLAZE & SET
    • Remove the ribs from the foil. Brush the bottom and top with a layer of Killer Hogs The BBQ Sauce and finish with a light dusting of Killer Hogs The BBQ Rub.
    • Return the ribs to the smoker for 15–20 minutes, just long enough for the sauce to caramelize and set.

Notes

  • Picking a good rack:Β When I’m buying Tyson Baby Back Ribs, I look for racks that are as even as possible, with straight bones and a tight vacuum seal. Starting with a good, uniform slab helps the ribs cook more evenly.
  • Don’t cook by the clock alone:Β The times are a guide. Look at the bark before wrapping and use the feel of the ribs, the bones and internal temperature to determine when they’re tender.
  • Make the wrap your own:Β Butter, apple juice and BBQ sauce is the combination used here, but the wrap can be changed to suit the flavor you want. Think about adding some combination ofΒ fat, sweet, vinegar and heat. Whatever you use, adding a little more of your original seasoning to the wrap helps reinforce the flavor you started with.
  • Don’t skip the hold:Β Giving the ribs an hour in a dry cooler after they’re tender lets them settle down and reabsorb some of that flavorful liquid before the final glaze.

Malcom Reed
Connect on Facebook
Follow me on TikTok
Subscribe to my YouTube Channel
Follow me on Instagram

Buy Killer Hogs Products Here

The post Perfect Baby Back Ribs appeared first on HowToBBBQRight.

Jeera Dal (Indian Cumin-Scented Lentil Dahl)

This easy jeera dal converts simple ingredients into incredible flavor! Red lentils cooked to creamy and scented with sizzling cumin, garlic, chili oil tadka. (gluten-free, soy-free, nut-free) 19 g fiber, 19 g protein!

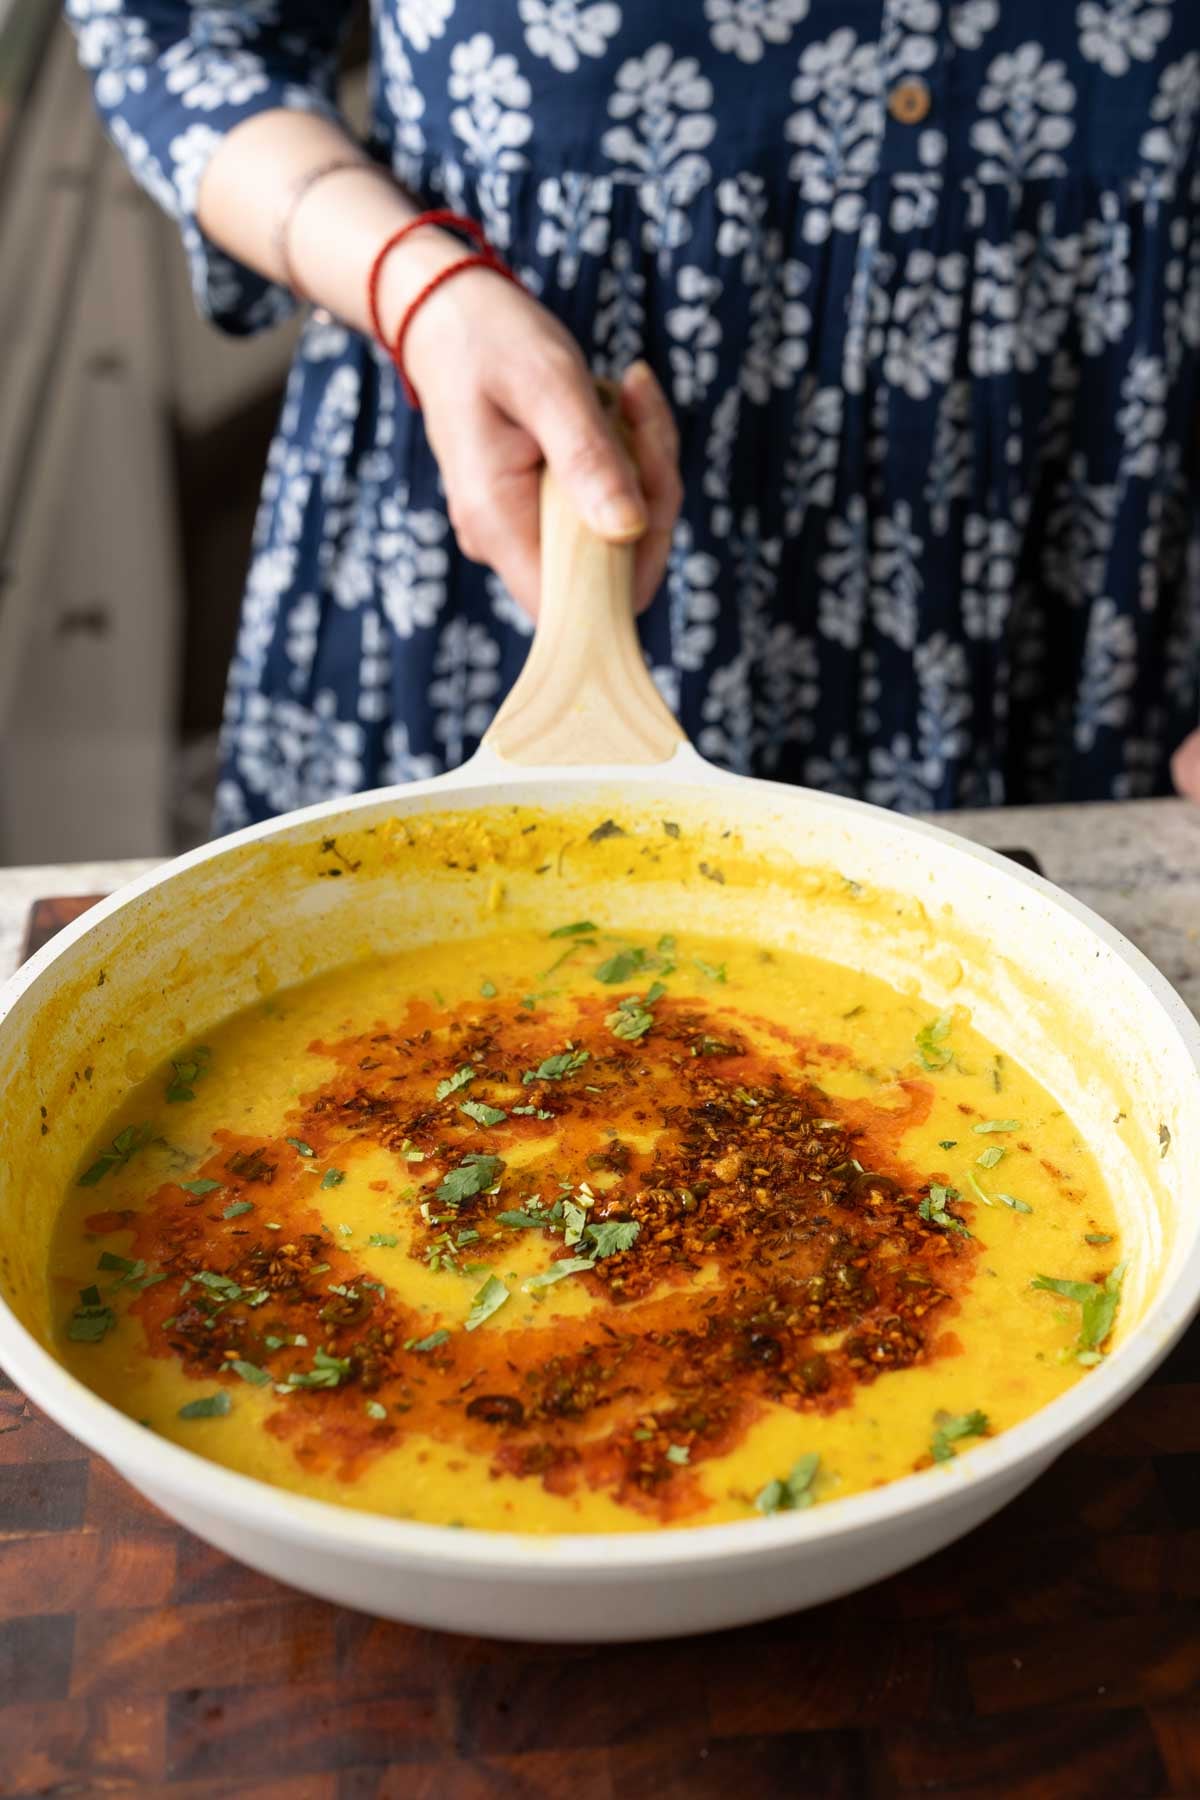
hand holding a pan of jeera dal

Jeera means cumin, and dal means lentils. Together, they create a simple meal that doesn’t sacrifice flavor. This is a simple cumin-scented lentil soup that’s cozy and satisfying.

This is a simple recipe with everyday ingredients, but it makes such a delicious dal. It’s one of the simple, home-style dals that my mom used to make often.

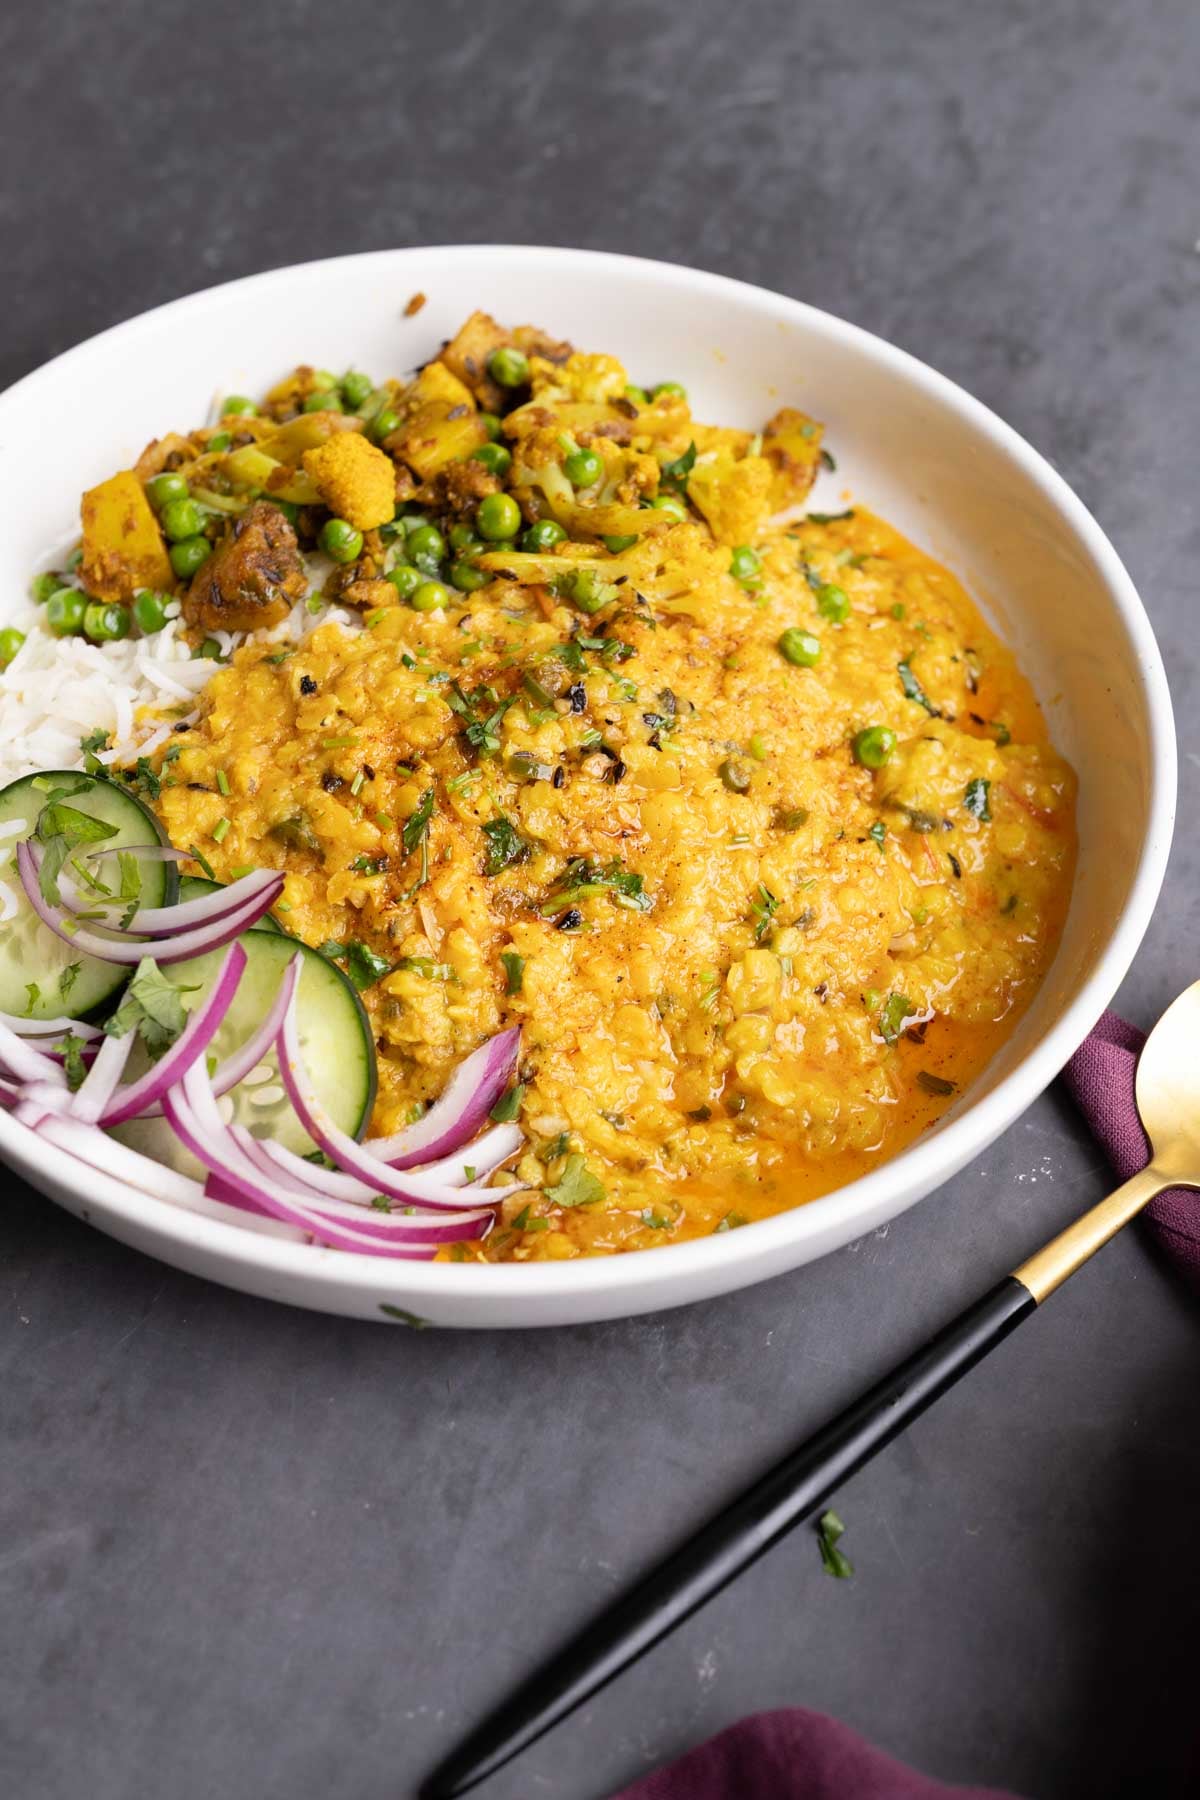
plate of jeera dal with a side of cauliflower and potatoes

I changed it up a little to make it slightly spicier and creamier with some non-dairy yogurt. If you cook the dal long enough, it becomes creamy on its own, so if you don’t want to add non-dairy yogurt, that works just as well.

We make this simple dal with red lentils (masoor dal), along with tomato and dried fenugreek leaves. While the lentils cook, we make an amazing tadka, which is a spiced oil with cumin seeds, green chili, and garlic. That tadka takes the dal to the next level!

This jeera dal is delicious served with your favorite Indian sides or sabzi! In the photo above, I’m serving it with my simple gobi aloo matar.

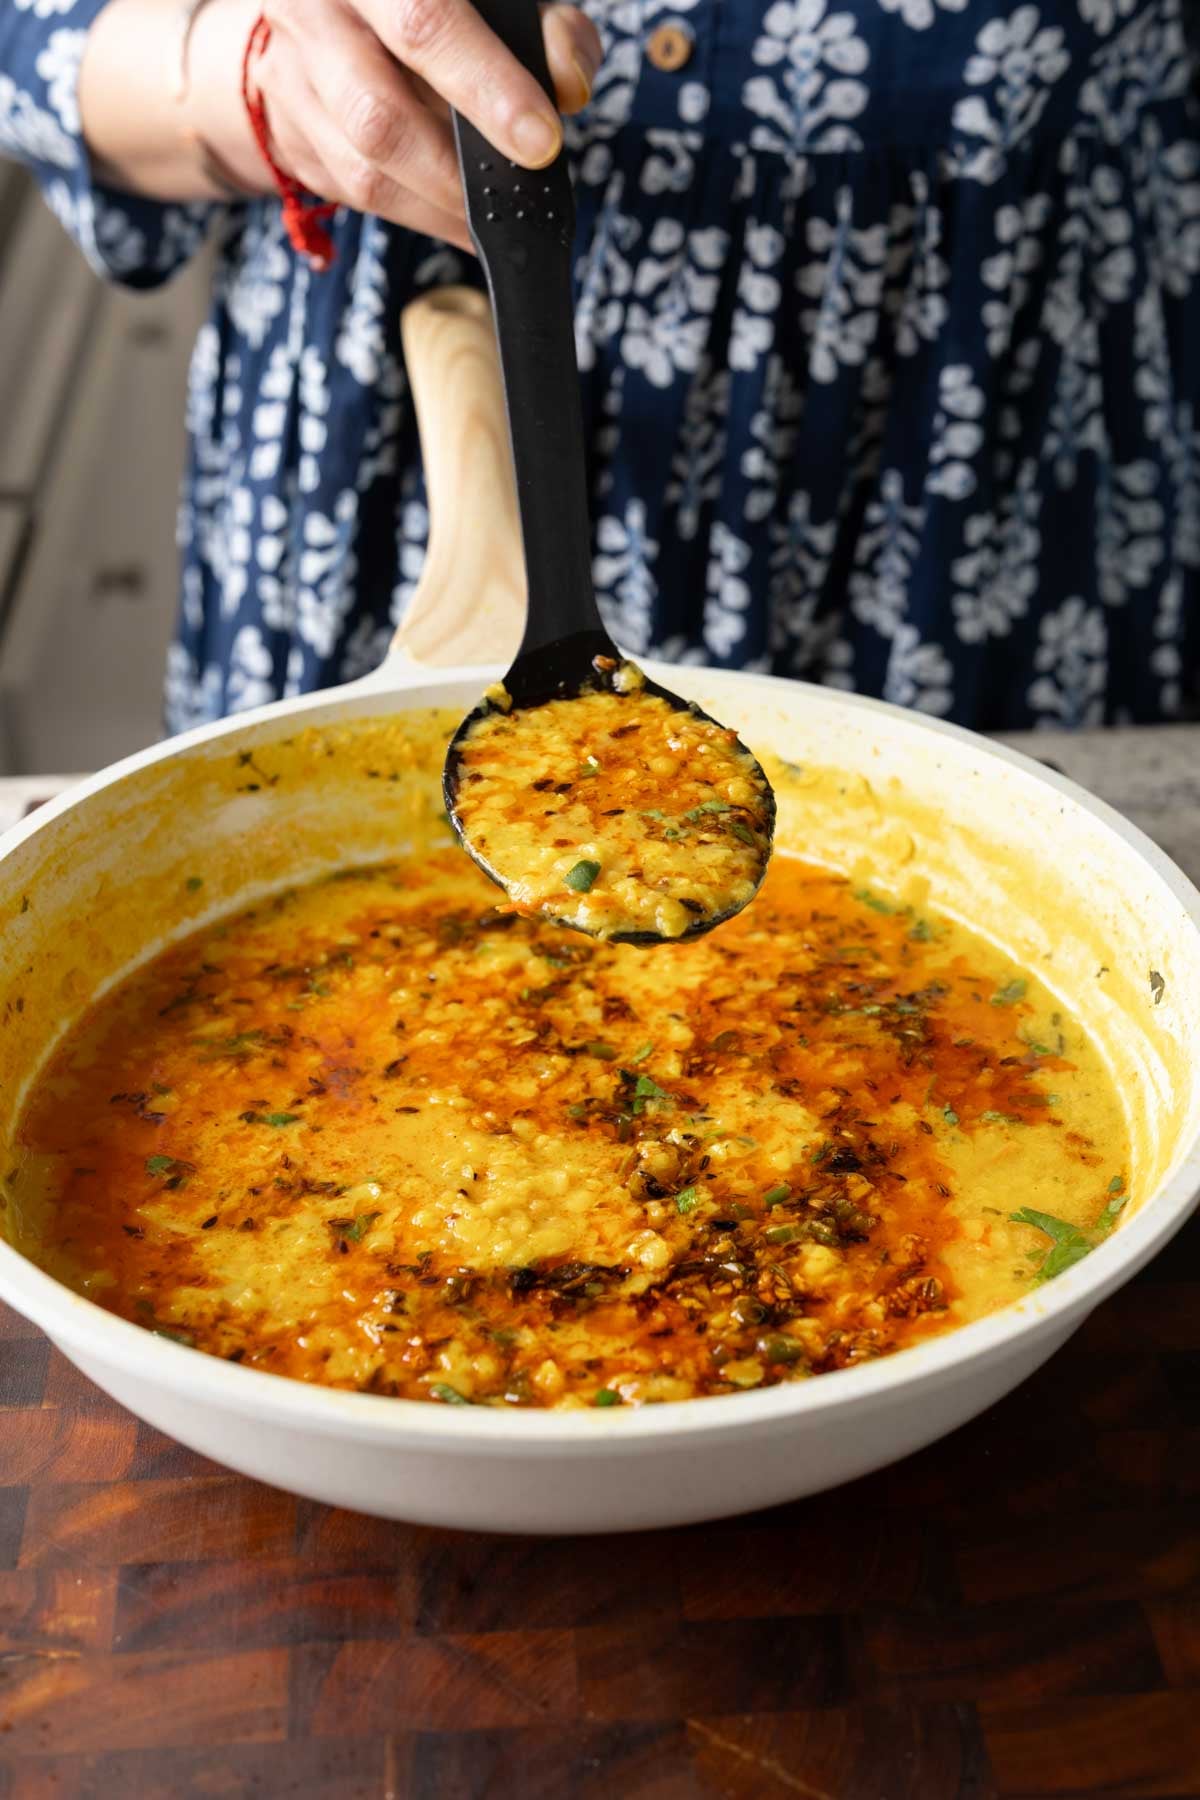
spoon serving jeera dal from the pan

Why You’ll Love Jeera Dal

  • easy to make with simple ingredients
  • 30-minute recipe with tons of flavor
  • while the lentils simmer, make the quick cumin spiced oil
  • naturally gluten-free, soy-free, and nut-free
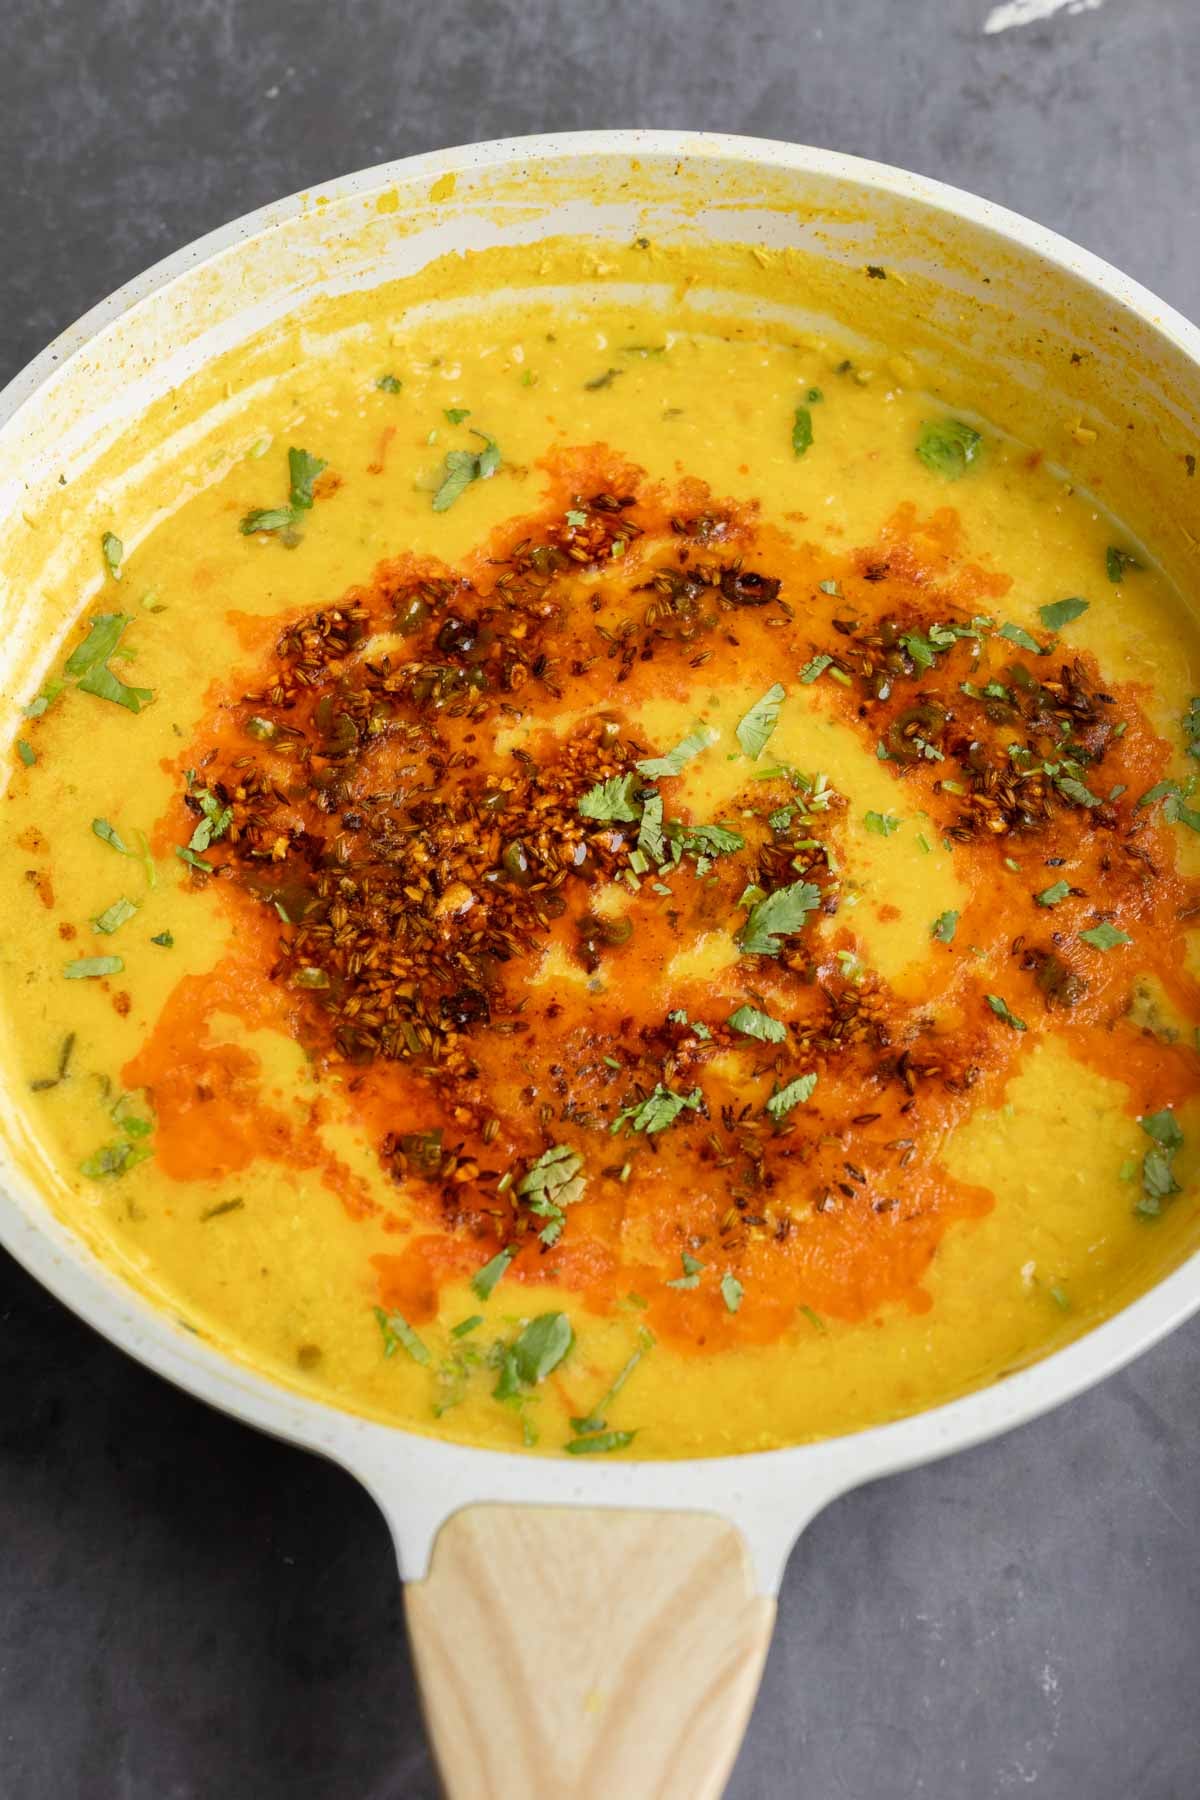
jeera dal in the pan after cooking and adding the spiced oil

Continue reading: Jeera Dal (Indian Cumin-Scented Lentil Dahl)

The post Jeera Dal (Indian Cumin-Scented Lentil Dahl) appeared first on Vegan Richa.

Veg Kothu Parotta Recipe

Vegetable kothu parotta also known as veg kothu parotta is a tasty and popular South Indian street food recipe made with shredded parotta, spices and vegetables. This dish is prepared at roadside thattu kadai stalls where it is cooked on a hot iron tawa and mixed quickly. Kothu parotta is one of my favorite recipes...

Read More

The post Veg Kothu Parotta Recipe appeared first on Yummy Tummy.

Startup Spotlight: Tech consultant returns to the farm with Reroot, connecting growers with consumers

Reroot founder Genevieve Priebe, a fourth-generation member of a Montana farm family. (Photos courtesy of Genevieve Priebe)

Genevieve Priebe took a business meeting this summer while bottle-feeding baby goats. A couple of years ago, she was advising executives at some of Seattle’s largest tech companies.

β€œBest decision I’ve ever made,” she said of her career change.

Priebe is the solo entrepreneur behind Reroot, a bootstrapped Seattle startup trying to make local food as easy to find and buy as anything else online.

Genevieve Priebe, founder of Reroot.

The company operates a marketplace where independent farmers, ranchers, bakers and makers sell direct to customers, currently live with founding partners in the Pacific Northwest. In July it launched a free companion app, Reroot: Find Local Food, that maps more than 50,000 producers across the U.S. and parts of Canada.

She has also built a patent-pending tool called Walk & Talk, which lets a farmer update an online store by voice while walking the field, with or without a cell signal. When they’re back in range, it reconciles what they said against any sales that came in while they were offline.

A fourth-generation farm kid from Whitefish, Mont., Priebe grew up driving her dad’s tractor before she could reach the pedals and counting change at farmers markets for her mom, a flower farmer. She left for college and spent two decades in Seattle consulting, starting at Accenture and working for clients including Microsoft, T-Mobile, Starbucks and Boeing.

After her parents passed away, she and her brother took over the family farm. Priebe ran the numbers on what it takes to make a living growing food, and found it β€œclose to impossible.” That’s a big part of what she’s now looking to solve as a startup founder.

β€œI didn’t want to be a founder,” she said, β€œbut I couldn’t walk away from the problem.”

Continue reading for Priebe’s answers to our Startup Spotlight questionnaire.

In 50 words or less, give us your startup’s elevator pitch?

Local food is all around you, but finding it is hard. Buying it directly from the source is even harder. Reroot exists to fix that. We’re a discovery app and marketplace that connects independent producers to the people who love what they grow, raise and make.

What problem are you obsessed with solving?

Something that perhaps most people wouldn’t see as a problem. That is: why is it easier to buy a mango from Peru than a tomato from a farm 10 miles away?

What surprised you after talking to customers?

My biggest surprise was that most small farms pay to be farmers. They don’t make money, they lose money. Less than 50% of the 1.9M farms in the US are profitable. Average median farm income is over a thousand dollars in the red. It’s no surprise that 15,000 farms go out of business every year and unfortunately the story isn’t much better for other independent food producers. Growing our food is one of the most important jobs, yet it’s close to impossible to make a living doing it.

How has AI changed the way you build your company?

Dramatically. Two years ago, I’d have needed a 5-person development team, 18 months, and $1.5M to do what I’ve done solo in about four months. Traditional development cannot compare to the speed with which AI has enabled me to operate.

I do have a strong tech background, but haven’t written a single line of code and yet I’m live with a fully functioning marketplace that processes financial transactions, integrates with Square and Stripe, has sent over 100,000 marketing emails for our customers, manages inventory, fulfillment, and analytics. And, bonus β€” we just launched a free discovery app called Reroot: Find Local Food that maps 50,000+ local food producers in the US and parts of Canada.

What’s one thing people misunderstand about your startup?

In a world of AI-powered, niche, technology businesses, people seem surprised at how simple the idea is. They assume it already exists. It doesn’t. There is no single place to discover, follow, and buy from local producers. That gap is exactly why I built Reroot.

What’s the toughest decision you’ve made in the past year?

Every advisor and investor I’ve talked to has told me to find a technical co-founder, and even better if he’s younger and male. The decision to ignore that advice and bootstrap solo as a woman in my forties was simultaneously the hardest decision I’ve made and the easiest. I’m choosing a different path than raise-and-burn: heads-down building for real customers who need what I’m making. It’s working.

What’s the one piece of advice you give to other entrepreneurs?

Don’t overthink it. I spent decades in environments where every decision needed a PowerPoint deck and three rounds of approvals. The best thing I’ve done as a founder is just move: build it, ship it, learn, repeat.

We’ll know our company has made it when…

When the hardest part of farming is no longer the marketing. When farmers like my parents, grandparents, and great grandparents can actually afford to do the work that they love. And when I can conveniently replace most of my grocery store spend with local food purchased directly from my favorite producers.

The Ultimate Guide to Grilling Fishβ€”Without Sticking, Drying Out, or Falling Apart!

People often ask me what my favorite food is to grill in the summer. You might be surprised to hear it’s not steak or ribs or pork loin. No, my number one favorite grill food this time of year is fishβ€”especially swordfish. And nowhere does it taste betterβ€”or grill betterβ€”than at my summer home on Martha’s Vineyard.

Fish on the grill. Four words that strike terror into the hearts of even experienced grillers. For as much as grilling endows fish with incredible smoky succulence, there’s a lot that can go wrong. Will it stick to the grate? Will it fall apart when you turn it? Will the high heat of the fire dry it out?

The Ultimate Guide to Grilling Fish

Well, grilling fish is easy, but it isn’t always simple. The secret is choosing the right grilling method for the particular fish you’re cooking.

Choose the Right Grilling Method for Your Fish

Direct Grill It

Direct grillingβ€”cooking the fish directly over the fireβ€”is ideal for firm, meaty fish steaks, such as swordfish, tuna, and salmon. These fish have enough structure to stand up to high heat and flipping without falling apart.

Start with a hot, clean, well-oiled grill grate. Pat the fish dry and brush it lightly with oil before it goes on the grill. Once the fish hits the grate, leave it alone long enough to develop a good sear. When properly browned, it will release more readily from the grate. Turn it with a thin-bladed spatula and, whenever possible, flip it only once.

Swordfish is particularly well suited to this techniqueβ€”one reason it remains one of my favorite fish to grill.

Try it:

Sicilian Grilled Swordfish with Salsa Verde

These meaty swordfish steaks are seasoned with lemon and rosemary, coated with breadcrumbs, and direct grilled until golden brown. A lively salsa verde of parsley, lemon, garlic, and red pepper flakes finishes the dish.

Sicilian Grilled Swordfish with Salsa Verde

Get The Recipe Β»

Indirect Grill It

Indirect grilling is ideal for whole fish, like snapper or salmon. Instead of positioning the fish directly over the fire, you cook it next to the heat with the grill covered. Think of your grill as a smoky outdoor oven.

This gentler method cooks the fish evenly from edge to center and is especially useful for larger fish that need more time over the fire. Brush the fish with oil, season it inside and out, and place it away from the direct heat. For an extra blast of wood smoke, toss a few wood chunks or chips onto the fire.

Try it:

Whole Grilled Snapper in Pipian Sauce

Whole snapper is stuffed with onion, garlic, cilantro, and poblano chile, then indirect grilled over wood smoke. Serve it with pipian, a Mexican sauce made with grilled vegetables and pumpkin seeds.
Whole Grilled Snapper in Pipian Sauce

Get The Recipe Β»

Smoke It

Few foods take to wood smoke as enthusiastically as oily fish. Salmon, bluefish, and whitefish have enough natural fat to stay moist as they cook, while soaking up all that wonderful smoky flavor.

For the best results, brine or cure the fish first, then let the surface dry before it goes into the smoker. Alder is the classic wood for salmon, but apple, cherry, and other mild hardwoods work beautifully, too. Serve the fish hot from the smoker, or chill it and enjoy it later.

Try it:

Maple-Cured and Smoked Salmon

This salmon gets a New England twist with a cure of maple sugar, salt, black pepper, and lemon zest, followed by a drizzle of maple syrup. Smoking adds another layer of flavor to the rich fish.
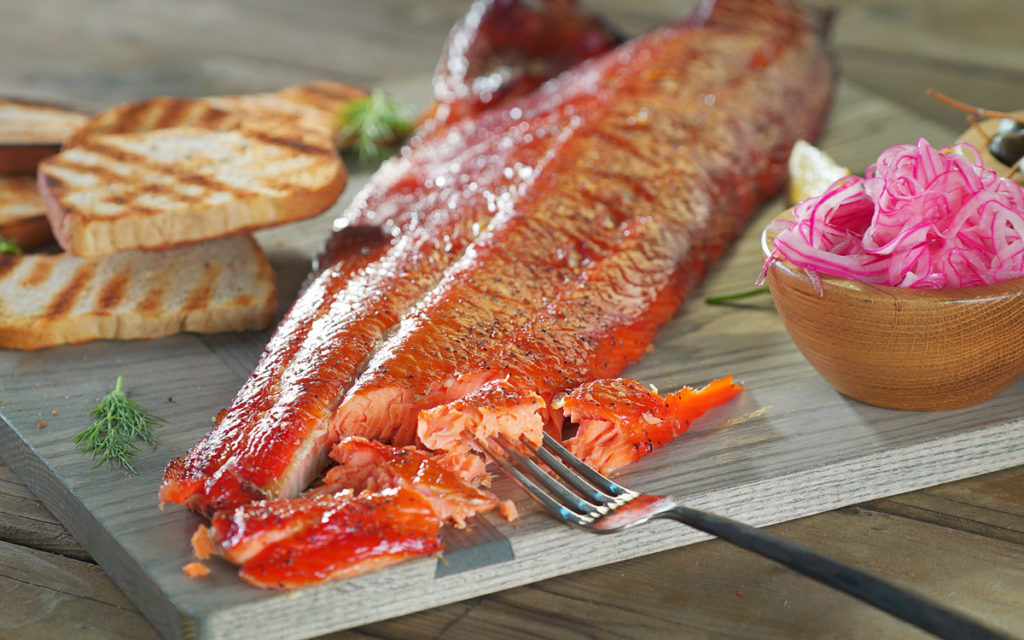
Maple-Cured and Smoked Salmon

Get The Recipe Β»

Griddle It

For delicate fish filletsβ€”think sole, flounder, or black bassβ€”a griddle or plancha can be your best friend. You get the intense heat and sizzling crust of the grill without the open spaces between the bars for the fish to stick toβ€”or fall through.

Preheat the griddle until hot, then slick it lightly with oil. Lay on the fish and let it sear undisturbed before turning it with a thin-bladed spatula. The broad, solid cooking surface makes this one of the easiest ways to grill fragile fish and still get plenty of live-fire flavor.

Try it:

Grill-Blackened Tuna with Cajun Remoulade

Thick ahi tuna steaks are coated with Cajun spices and seared on a screaming-hot plancha, cast-iron skillet, or griddle. The goal: an electrifying blackened crust with the center still beautifully rare, served with Cajun remoulade.

Grill-Blackened Tuna with Cajun Remoulade

Get The Recipe Β»

Use a Grill Basket

A grill basket is cheap insurance for fish that has a tendency to stick, tear, or fall through the grate. It’s particularly useful for whole trout and small snapper, as well as delicate fillets like halibut and turbot.

Oil the basket well before adding the fish. Once it’s clamped securely inside, you turn the basketβ€”not the fish. That means no wrestling with a spatula and far less chance of leaving half your dinner stuck to the grill grate. You still get plenty of heat, smoke, and char, but with considerably less drama.

Try it:

Mexican Grilled Trout with Mojo de Ajo

Whole trout are marinated with garlic, onion, celery, cumin, herbs, and sour orange juice, then grilled wholeβ€”using a fish basket if you like. Fried garlic sauce spooned over the fish gives it a powerful finish.
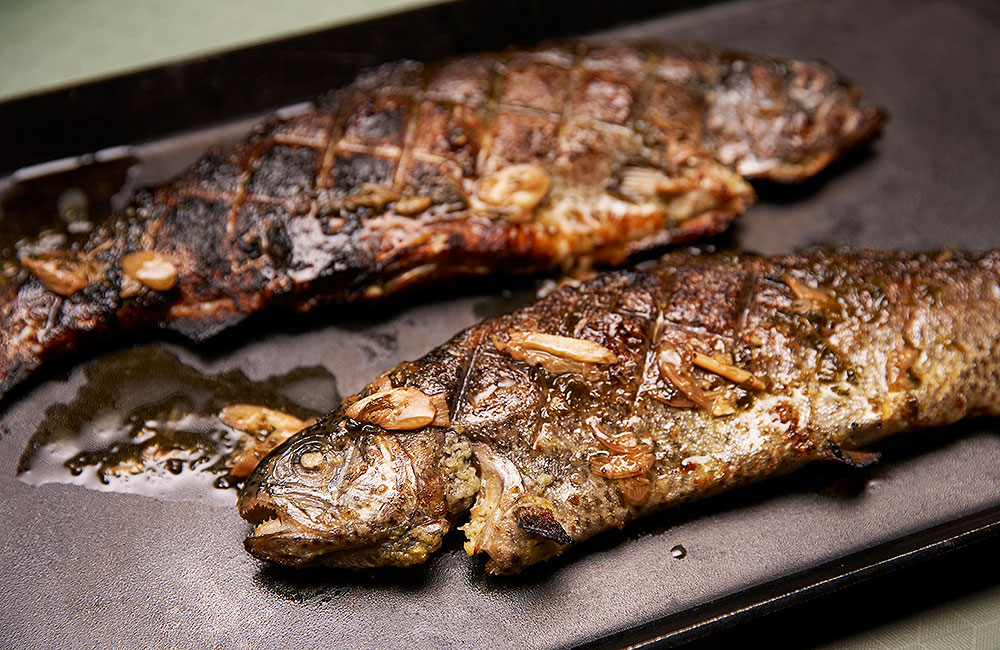
Mexican Grilled Trout with Mojo de Ajo

Get The Recipe Β»

Use a Cedar Plank

Planking is one of the most foolproof ways to grill fish. A cedar plank is ideal for fillets like salmon and striped bass, and because the fish never touches the grill grate, sticking and falling apart cease to be problems.

Set up your grill for indirect grilling. For extra flavor, char one side of the plank over the fire before adding the fish, then place the fish on the charred side and move the plank away from the direct heat. As the cedar plank heats, it perfumes the fish with wood smoke while helping keep it moist.

Try it:

Planked Salmon with Lemon Mustard Glaze

A whole salmon fillet cooks on a cedar plank over indirect heat under a simple glaze of Dijon mustard, mayonnaise, and lemon zest. Serve the fish right on the plank for maximum effect.

Planked Salmon with Lemon Mustard Glaze

Get The Recipe Β»

Use a Salt Slab

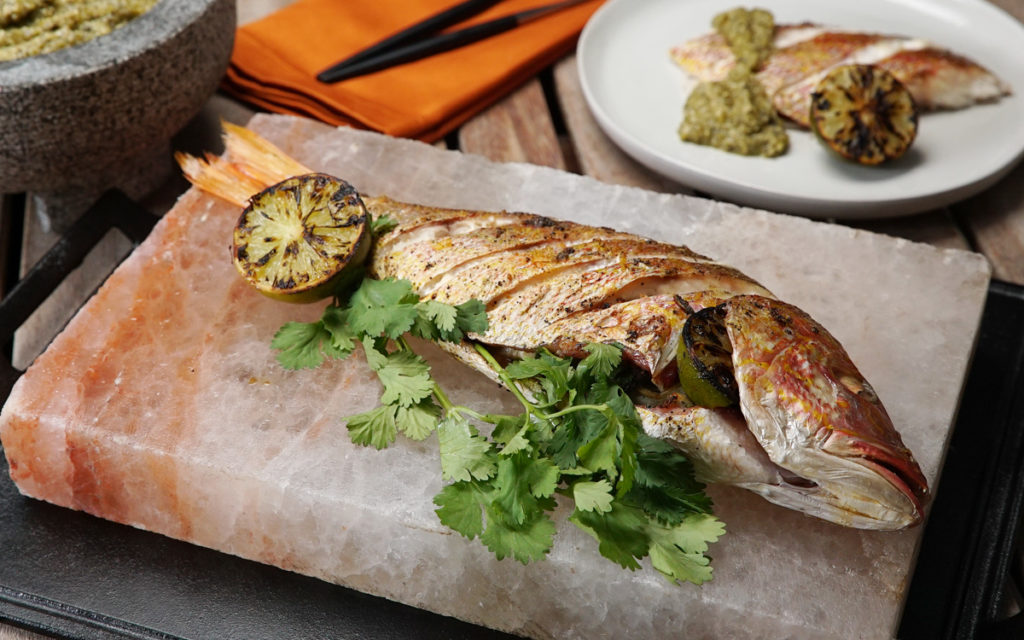
A salt slab turns your grill into a sizzling, mineral-rich plancha. It’s especially well-suited to delicate whole fish, such as snapper, black bass, and porgie, because the fish cooks on a solid surface instead of directly on the grate.

Heat the slab gradually to prevent cracking, then lay the fish right on top. The hot salt gives the exterior a beautiful sear while gently seasoning the fish as it cooks. And because there are no grill bars involved, there’s nothing for the delicate flesh to fall through.

Try it:

Salt Slab-Grilled Rockfish with Melon Mint Relish

A whole rockfish cooks directly on a preheated Himalayan salt slab, where it sizzles and browns while being basted with garlic butter. A fresh melon-mint relish provides a cool counterpoint.

Salt Slab-Grilled Rockfish with Melon Mint Relish

Get The Recipe Β»

Grill It in Leaves

Wrapping fish in leaves is an age-old grilling technique found throughout Asia, Latin America, and the Caribbean. It’s particularly useful for delicate fish: the leaves keep the flesh off the grate, trap moisture, and perfume the fish with an herbaceous smoke as they char over the fire.

Banana leaves are especially good for the job. Soften fresh leaves briefly over the grill, wrap the seasoned fish inside, and secure the package with toothpicks. The leaves take the punishment of the fire while the fish steams and smokes inside. No sticking. No falling apart. And when you open the package at the table, you get a blast of fragrant steam.

Try it:

Halibut Grilled in Banana Leaves with Lemongrass and Thai Basil

Delicate halibut fillets are coated with a fragrant paste of lemongrass, Thai basil, garlic, cilantro, chiles, and sesame oil, then wrapped in banana leaves and grilled. The leaves protect the fish while adding an herbaceous smoke flavor.

Halibut Grilled in Banana Leaves with Lemongrass and Thai Basil

Get The Recipe Β»

Grill It on a Stick

Sometimes the simplest grilling equipment is a sharpened stick and a good wood fire. This primitive method is perfect for camping, where fish can be positioned beside the embers and cooked by radiant heat rather than directly over the flames.

Thread the fish securely onto a sturdy stick or stake, then angle it toward the fire. Turn or reposition it as needed to cook both sides. Moving the fish closer to or farther from the embers gives you surprisingly precise control over the heatβ€”and there’s no grill grate for the fish to stick to.

Try it: Salmon on a Stick

Know Exactly When It’s Done

There’s a fine line between perfectly cooked fish and fish that’s dry enough to make you reach for the tartar sauce. Don’t guess. Use an instant-read thermometer.

Whole fish: Insert the probe into the thickest part of the flesh just above the bone.

Fish steaks: Insert the probe through the side to the center.

Most fish: Cook to an internal temperature of 140Β° to 145Β°F.

Blue tuna: 100Β° to 110Β°F.

Rare tuna: 120Β° to 125Β°F.

Medium-rare tuna: 130Β° to 135Β°F.

Tuna plays by different rules. However you cook it, the center should stay gloriously rosy.

Fish, Fire, and Summer

Grilling fish doesn’t have to strike fear into the heart of even the most seasoned griller. Once you learn how to match the fish to the fire, the rest gets a whole lot easier.

The payoff? Fish that’s moist, smoky, succulent, and beautifully brownedβ€”the kind of meal that reminds you why fish belongs over a live fire in the first place.

Want to go deeper on the craft? Explore our grilling techniques and how-to guides for ribs, steak, chicken, seafood, and more.

Get Steven’s weekly grilling tips, seasonal recipes, and live-fire ideas in your inbox. Join our Up in Smoke newsletter. Sign up and get a FREE PDF of Steven Raichlen's Best Ribs Recipes Ebook.

Preorder Man On Fire β€” A Steven Raichlen Memoir. And get some really cool rewards!

Looking for some fall grilling inspiration? Check out our Fall Grilling Guide.

The post The Ultimate Guide to Grilling Fishβ€”Without Sticking, Drying Out, or Falling Apart! appeared first on Barbecuebible.com.

32+ BBQ Party Food Ideas – Mains, Sides & Apps For A Crowd

There’s something about firing up the smoker with a full backyard of people that never gets old β€” it’s one of my favorite excuses to cook all day. Whether you’re throwing a birthday bash, a long weekend cookout, or just using any excuse to get the smoker going, a good spread makes the whole thing. […]

The post 32+ BBQ Party Food Ideas – Mains, Sides & Apps For A Crowd appeared first on Simply Meat Smoking.

Pizza Dough Recipe

Basic pizza dough recipe with step by step pictures. This is a very basic dough for pizza which gives you perfect pizza, buns, calzones all the time. You don't need any equipment or heavy machines like stand mixer to make this. Pizza Dough This is a basic pizza dough that I use to make all...

Read More

The post Pizza Dough Recipe appeared first on Yummy Tummy.

Crispy Potato Wedges Recipe

Potato wedges are a popular snack that are served at many fast food restaurants. This recipe is made using potatoes, plain flour, buttermilk added with some spice mix. In this blog post, learn how to make perfectly crispy potato wedges at home with simple ingredients. They are easy to prepare and taste even better than...

Read More

The post Crispy Potato Wedges Recipe appeared first on Yummy Tummy.

Amritsari Paneer Bhurji

This Amritsari paneer bhurji is the creamiest bhurji I’ve ever made, and there’s not a drop of cream in it. The secret is roasted besan and curd, and once you try it, regular bhurji just won’t feel the same.

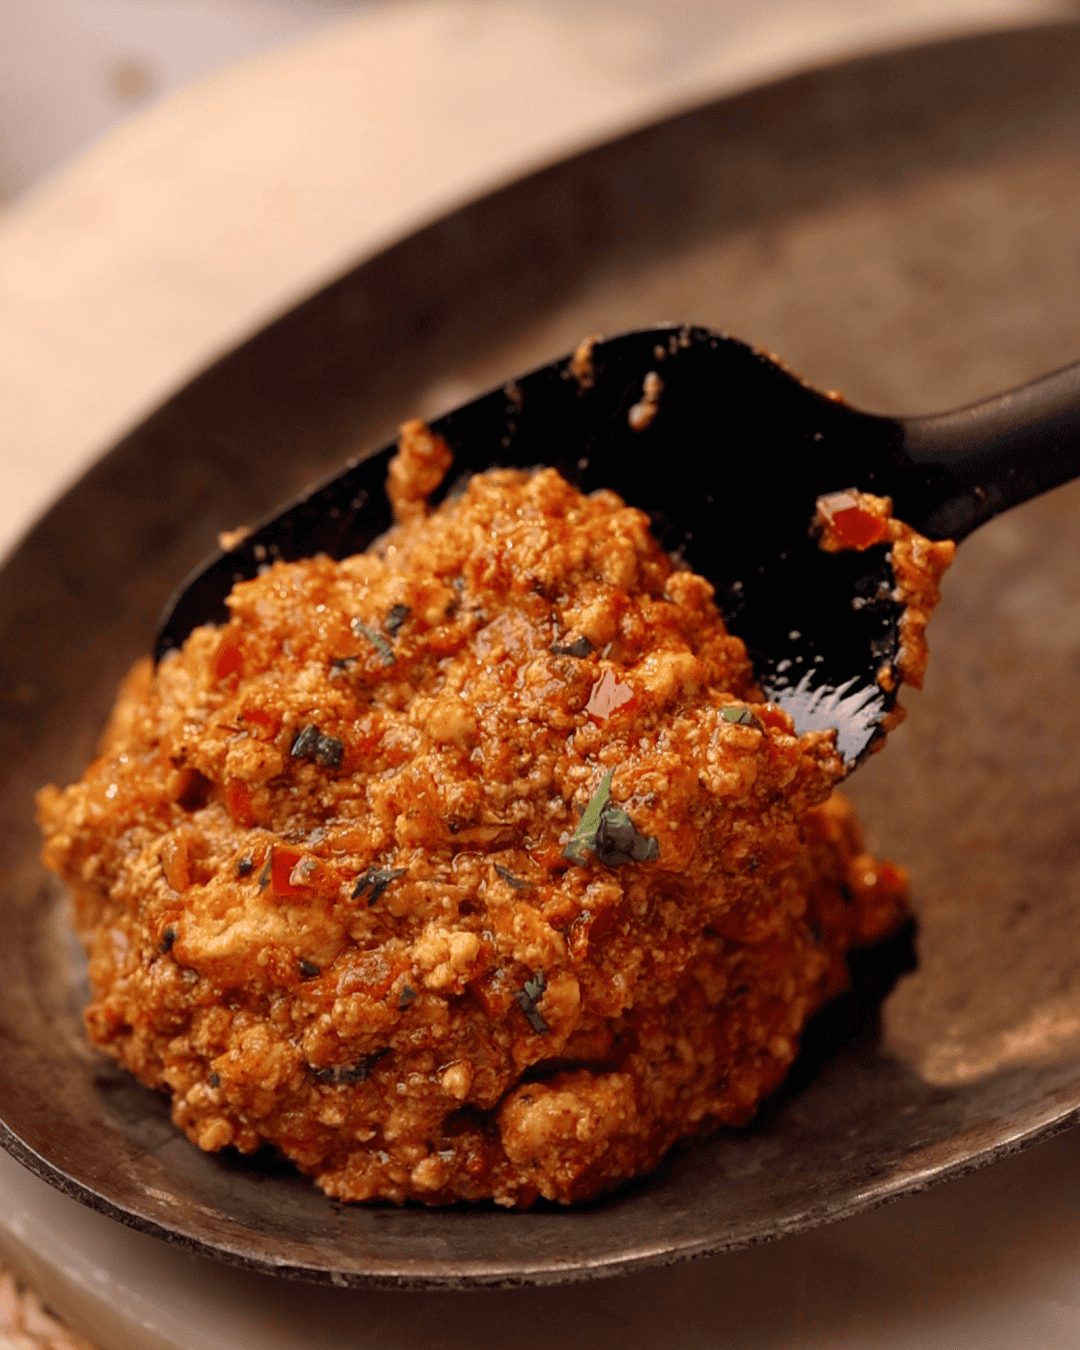
Amritsari paneer bhurji being served on a plate with a ladle

This Amritsari paneer bhurji is the kind of bhurji you get at old dhabas in Punjab where the paneer is soft, the masala is rich, and you end up ordering another plate before you’ve finished the first. That’s exactly how it tastes when you make it at home, and it takes about 40 minutes with ingredients you already have in your kitchen.

If you’ve been making our paneer bhurji at home, you know how good a simple bhurji can be. But this Amritsari version is a richer, more flavourful bhurji that feels like proper Punjabi food. If you have the time, making it with homemade paneer is really worth it because the fresh paneer stays so soft and absorbs every bit of that masala.

Ingredients for Amritsari Paneer Bhurji

Paneer: Grated for an even, creamy texture. Homemade paneer works best as it’s softer and absorbs the masala better, but store-bought is fine too.

Curd Masala Mix: Whisked curds mixed with turmeric, red chilli, coriander, garam masala, pav bhaji masala, amchur powder, and salt. This spiced curd base is what gives the bhurji its unique flavour.

Besan Mix: Besan or chickpea flour roasted in oil with kasuri methi and kashmiri chilli powder. This, mixed with spiced curd, is the secret behind the creaminess.

Aromatics: Green chillies, ginger, and garlic cooked in mustard oil and butter.

Onions & Tomatoes: Finely chopped to form the base of the bhurji.

Milk: For extra creaminess. Don’t skip this.

Mustard Oil & Butter: I’ve used mustard oil for its authentic Amritsari flavour, but any cooking oil works.

Coriander Leaves: Freshly chopped, for garnish.

Frequently Asked Questions

What is the difference between Amritsari paneer bhurji and regular paneer bhurji?

Regular paneer bhurji is a simpler dish where crumbled paneer is cooked quickly with onions, tomatoes, and basic spices. Amritsari paneer bhurji has a more elaborate masala with a roasted besan and curd mix that gives it a creamier, thicker texture and a deeper flavour. The addition of pav bhaji masala, amchur, and milk also sets it apart from the regular version.

How do I keep paneer soft in bhurji?

Two things help. First, use fresh paneer, ideally homemade, as it’s naturally softer than most store-bought options. Second, don’t overcook the paneer in the masala. Add it towards the end and cook for just 5-7 minutes, enough for it to absorb the flavours without drying out or turning rubbery.

Can I use store-bought paneer for this recipe?

Yes, it works fine. If your store-bought paneer feels hard or dry, soak it in warm water for 10-15 minutes before crumbling. This softens it up and makes it behave more like fresh paneer in the bhurji.

Why does my bhurji taste like raw besan?

The besan hasn’t been roasted long enough. It needs a good 3-4 minutes on low heat until the colour changes slightly and the raw smell is completely gone. If you can still smell the besan, keep roasting. This step is what makes or breaks the dish.Β 

Richa’s Top Tips

  • Roast the besan properly until the raw smell completely goes. This takes about 3-4 minutes on low heat. If the besan isn’t roasted enough, the bhurji will have a raw, floury taste that ruins the whole dish.
  • Take the pan off the heat before adding the curd-besan mix. Adding it on heat can cause the curd to split and make the masala grainy. Off the heat, it blends in smoothly and cooks evenly when you put it back on.
  • Use mustard oil if you can. It adds a sharpness and authenticity that regular cooking oil doesn’t have. If you don’t like the strong flavour of mustard oil, you can use half mustard oil and half regular oil.
  • Don’t skip the milk. It’s what gives the bhurji its creamy, luscious texture. Without it, the bhurji will be drier, and the masala won’t coat the paneer as well.
  • Use fresh, soft paneer and don’t overcook it. Paneer only needs 5-7 minutes in the masala to absorb the flavours. Any longer and it starts turning rubbery and chewy, especially if you’re using store-bought.
  • Skip pav bhaji masala if you don’t have it. Pav bhaji masala adds depth and a lovely street-style flavor to the paneer bhurji. But feel free to skip it, or replace it with Kitchen King masala or curry masala if you want.

Storage Tips

  • In the fridge: Store in an airtight container for up to 2 days. The flavours develop nicely overnight. Add a splash of milk when reheating to bring back the creamy texture.
  • Freezing: Not recommended. Paneer changes texture when frozen and becomes rubbery, and the curd-besan masala can split once thawed.
  • Reheating tip: Warm gently on the stove on low heat with a little milk. Stir frequently so the masala doesn’t stick to the bottom. It comes back to life really well on the stove. Avoid the microwave if you can as the paneer tends to harden.

Serving Ideas

This Amritsari paneer bhurji works for breakfast, lunch, dinner, and everything in between. Here are a few ways we enjoy it:

  • With Ladi Pav: Buttered pav with hot paneer bhurji is a match made in heaven. Toast the pav with a little butter on the tawa and you’re sorted.
  • With Lachha Paratha: The flaky layers with this creamy, rich bhurji is one of the best combinations you can put on a plate.
  • With No Yeast Naan: Tear, scoop, eat. Simple and satisfying.
  • In a sandwich: Spread the bhurji between two buttered slices and toast on the tawa. Makes for a really filling breakfast or snack.
  • With Jeera Rice and Dal Tadka: If you want to turn it into a proper thali-style meal, jeera rice with dal and this bhurji on the side is comfort food at its best.

Customisation Ideas

  • Make it with tofu: Crumble firm tofu and use it in place of paneer for a vegan version. Squeeze out the excess water first so it absorbs the masala properly. The besan-curd base gives it plenty of flavour.
  • Add veggies: Finely chopped capsicum, peas, or corn mixed in with the paneer adds colour and crunch without changing the flavour much.
  • Make it with eggs: Skip the paneer and scramble eggs directly into the besan-curd masala for an Amritsari style egg bhurji. The roasted besan trick works just as well with eggs.
  • Add cheese: A handful of grated mozzarella or cheddar stirred in right at the end makes it even more indulgent. It melts into the bhurji and adds a lovely stretch.
  • Make it drier for rolls or sandwiches: Cook the bhurji a few minutes longer until most of the moisture evaporates. The drier version holds together better inside a paratha roll or a toasted sandwich.
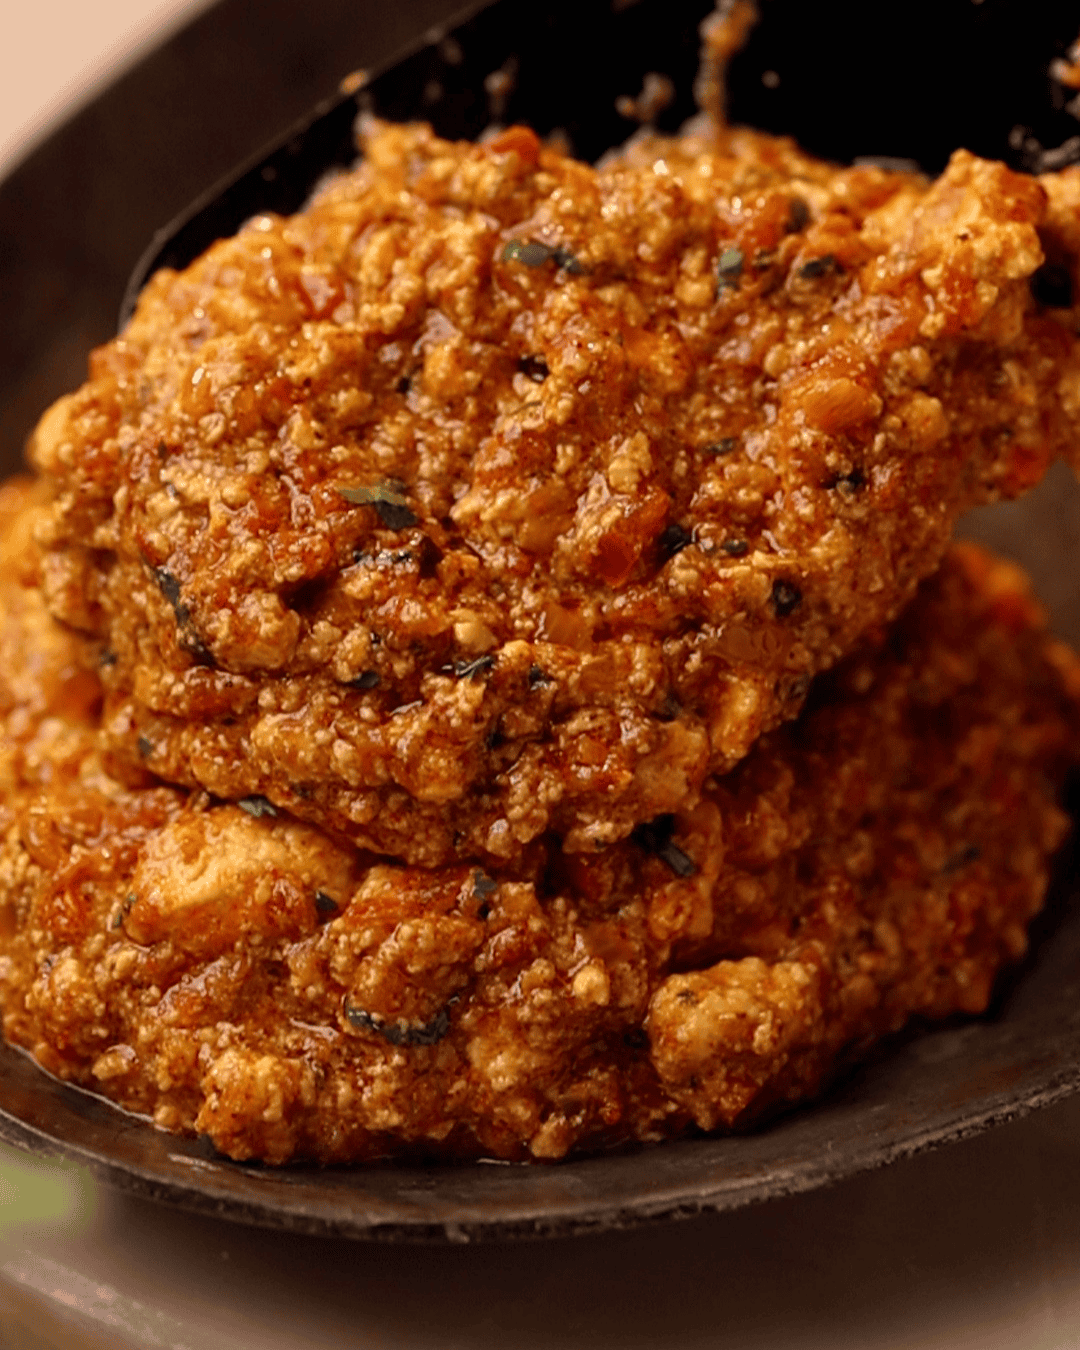
a close up shot amritsari paneer bhurji being served on a plate

If you take one thing away from this recipe, let it be the roasted besan and curd technique. It works in this bhurji, but honestly you can use it in so many other dishes to add creaminess without cream. Try this Amritsari paneer bhurji recipe first, though, and I promise you’ll see what I mean. When you make it, find me on Instagram @my_foodstory and let me know what you think.

Watch Amritsari Paneer Bhurji Recipe Video

a close up shot amritsari paneer bhurji being served on a plate
Print

Amritsari Paneer Bhurji

This Amritsari Paneer Bhurji is a creamier, softer, and more indulgent version of the regular bhurji. It uses milk, a spiced curd mix, and a roasted besan mix for the most delicious paneer bhurji recipe ever!
Course Main Course
Cuisine Indian
Diet Vegetarian
Prep Time 10 minutes
Cook Time 30 minutes
Total Time 40 minutes
Servings 4 people
Calories 678kcal
Author Richa

Ingredients

For curds masala mix

  • 1 cup curds whisked
  • Β½ teaspoon turmeric powder
  • 1 Β½ teaspoons red chilli powder
  • 1 Β½ teaspoons coriander powder
  • ΒΎ teaspoon garam masala powder
  • ΒΎ teaspoon salt
  • 1 tablespoon pav bhaji masala
  • 1 teaspoon amchur powder

For besan mix

  • 3 tablespoons cooking oil
  • 2 tablespoons besan
  • 1 Β½ teaspoons kasuri methi
  • ΒΎ teaspoon kashmiri red chilli powder

For bhurji

  • 500 gms paneer crumbled
  • 1 tablespoon mustard oil
  • 1 tablespoon butter
  • 3 green chillies finely chopped
  • 1 tablespoon finely chopped ginger
  • 1 tablespoon minced garlic
  • 1 cup finely chopped onions
  • 2 ΒΌ cup finely chopped tomatoes
  • ΒΎ teaspoon salt
  • 1 Β½ cup milk
  • 2 tablespoons finely chopped coriander leaves

Instructions

Curds mix

  • Take all the ingredients for curds masala mix in a bowl, mix it well and set aside.
    1 cup curds, Β½ teaspoon turmeric powder, 1 Β½ teaspoons red chilli powder, 1 Β½ teaspoons coriander powder, ΒΎ teaspoon garam masala powder, ΒΎ teaspoon salt, 1 tablespoon pav bhaji masala, 1 teaspoon amchur powder, ΒΎ teaspoon salt

Besan mix

  • Heat oil in a pan, add besan, kasuri methi, Kashmiri red chilli powder and fry for 3-4 minutes till the raw smell of besan goes. Once it cools, add it to the curd masala, mix them well and set aside.
    3 tablespoons cooking oil, 2 tablespoons besan, 1 Β½ teaspoons kasuri methi, ΒΎ teaspoon kashmiri red chilli powder

Making of bhurji

  • Heat oil and butter in a pan, add chopped green chillies, ginger and garlic & saute on low for 1-2 minutes till they turn light golden
    1 tablespoon mustard oil, 1 tablespoon butter, 3 green chillies, 1 tablespoon finely chopped ginger, 1 tablespoon minced garlic
  • Add onions and fry for 4-5 minutes on medium till they turn golden brown.
    1 cup finely chopped onions
  • Add tomatoes & salt and fry for 5-6 minutes till the tomatoes are cooked well and turn mushy.
    2 ΒΌ cup finely chopped tomatoes
  • Take off the heat, add the curd-besan mix, give a good mix and cook the mixture for 8-10 minutes till oil leaves the sides of the pan.
  • Add grated paneer & milk, give it a good mix and cook for 5-7 minutes till the paneer absorbs all the masalas.
    500 gms paneer, 1 Β½ cup milk
  • Garnish with coriander leaves and serve.
    2 tablespoons finely chopped coriander leaves

Video

Notes

  1. Mustard oil is used in this recipe for its authentic taste, which may be replaced with any cooking oil of your choice.
  2. Adding milk gives it the creamy texture and so do not skip it.

Nutrition

Calories: 678kcal | Carbohydrates: 25g | Protein: 25g | Fat: 54g | Saturated Fat: 25g | Polyunsaturated Fat: 4g | Monounsaturated Fat: 11g | Trans Fat: 0.2g | Cholesterol: 109mg | Sodium: 1130mg | Potassium: 578mg | Fiber: 4g | Sugar: 13g | Vitamin A: 1345IU | Vitamin C: 20mg | Calcium: 825mg | Iron: 1mg

This article was researched and written by Harita Odedra.

The post Amritsari Paneer Bhurji appeared first on My Food Story.

Carrot Juice Recipe

Learn how to make fresh, tasty and healthy carrot juice at home using a blender, you don't need juicer or slow juicer to make this. This easy recipe comes together in just a few minutes with three simple ingredients like carrot, sugar and water. Homemade fresh carrot juice is a joy to make at home,...

Read More

The post Carrot Juice Recipe appeared first on Yummy Tummy.

Homemade Oat Milk Recipe

Homemade oat milk is a healthy, dairy free milk made from oats and water. It is a great alternative for people who are following a vegan diet. All you need is two ingredients, oats and water, just blend, strain and enjoy. You don't need any special methods or fancy tools. This homemade oat milk is...

Read More

The post Homemade Oat Milk Recipe appeared first on Yummy Tummy.

Seed Crackers Recipe (Gluten-Free, No Flour Crackers)

Homemade seed crackers are one of the healthy and easy snacks made with flax seeds, chia seeds, pumpkin seeds, sunflower seeds, sesame seeds and halim (garden cress) seeds. These crackers are naturally gluten-free, rich in fibre, and plant-based protein. They turn super crisp in the oven and are perfect for snacking, serving on a cheese...

Read More

The post Seed Crackers Recipe (Gluten-Free, No Flour Crackers) appeared first on Yummy Tummy.

Millet Pulao Recipe

Millet vegetable pulao, also known as siruthaniya pulao, is a simple one pot meal made with millet, mixed vegetables, whole spices, green chillies, mint and coriander leaves. In this recipe, learn how to make this healthy and delicious millet pulao that is tasty like regular rice pulao and is perfect for lunch or dinner. Serve...

Read More

The post Millet Pulao Recipe appeared first on Yummy Tummy.

❌