
❌

Reading view

There are new articles available, click to refresh the page.

Cut And Fold Your 3D Printer’s Next Cover
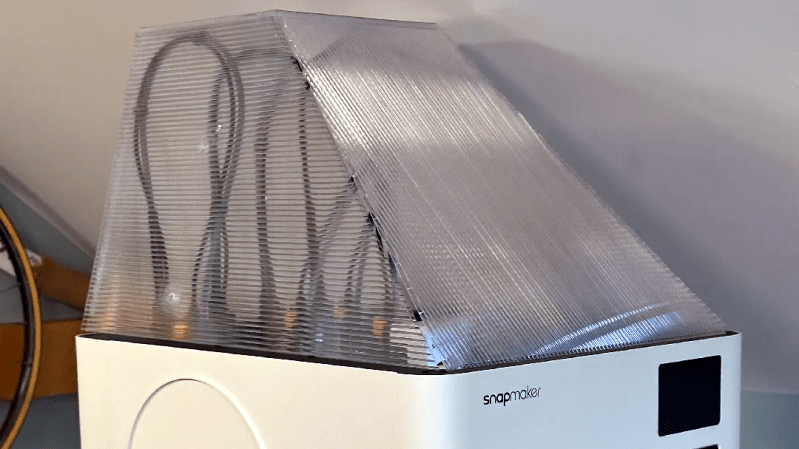
[cmh]’sΒ ultra-simple top cover for the Snapmaker U1 3D printer has a 3D model, but don’t let that fool you. There’s no 3D printing at all involved in this project. Rather, the model is a reference shape for making an effective top cover out of cardboard or corrugated plastic sheet (also known as Coroplast) which is what [cmh] used.
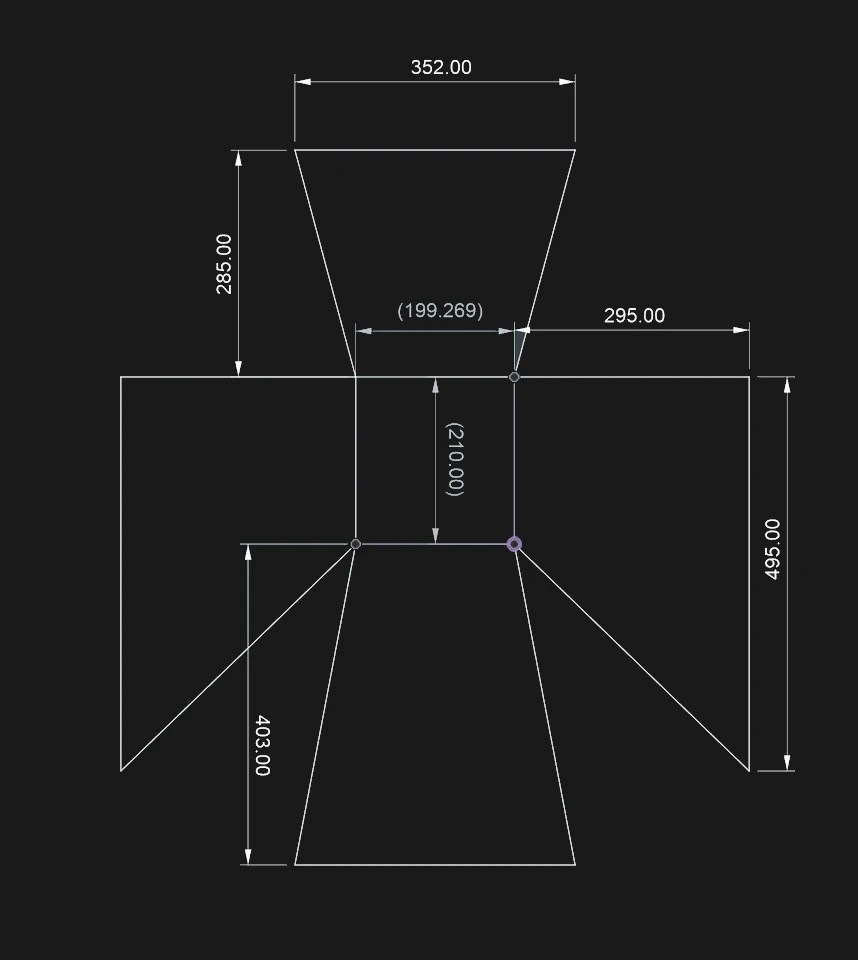
The pattern can be cut from a single sheet, or from multiple pieces taped together.

Corrugated plastic is a versatile option for things like printer enclosures. It’s cheap, a good insulator, easy to cut, and available from just about any plastics supplier. We’ve made the case that they’re a good alternative to acrylic sheets for printer enclosures, but [cmh] goes even further with a design that requires no additional hardware whatsoever. Assembly doesn’t even require more than tape, really.

He provides a cutout diagram for pieces that, when assembled, make a sort of hat that is just right to cover the top of the Snapmaker U1 without obstructing the extruders. One can even lift the front panel to access the inside without removing the cover, which is a nice touch. Should one wish to add a viewing window anywhere, just cut out a square and tape a sheet of clear plastic over the hole.

For a 3D printer, an enclosure and top cover helps retain heat, block drafts, and keep dust (or curious fingers) away from the printer’s build area. The cover doesn’t need to be completely sealed to deliver those benefits, but if you do prefer your covers completely enclosed, a carefully-chosen IKEA storage box makes a conveniently great cover for the U1.
Get a Handle on This Compact Pi Portable

Between the speed and reliability of modern desktop 3D printers and the abundance of powerful single-board computers, there’s never been a better time to build a personal computing device that bucks traditional forms for something more bespoke. Whether you want to go all in on Gibsonian cyberdeck aesthetic or a distraction-free writing device to take notes on, there’s no shortage of examples out there that you can turn to for inspiration.

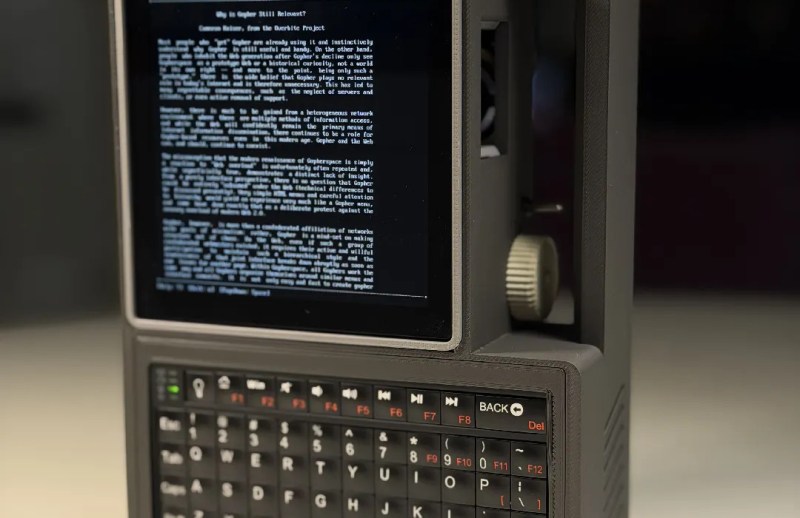
A recent entry into the field, the Don’t Panic Cyberdeck from [Paul Rickards], is a particularly approachable specimen for those looking to experiment with alternative computing experiences. While the final product certainly stands out among the throngs of nearly identical laptops, it doesn’t take a huge investment in time or money to put one of your own together.

Which is not to say the project is simplistic, exactly. Rather, as [Paul] released the design under the Creative Commons license and was kind enough to provide not only a detailed Bill of Materials but assembly instructions, the community is able to benefit from the sleepless nights he no doubt put into it.

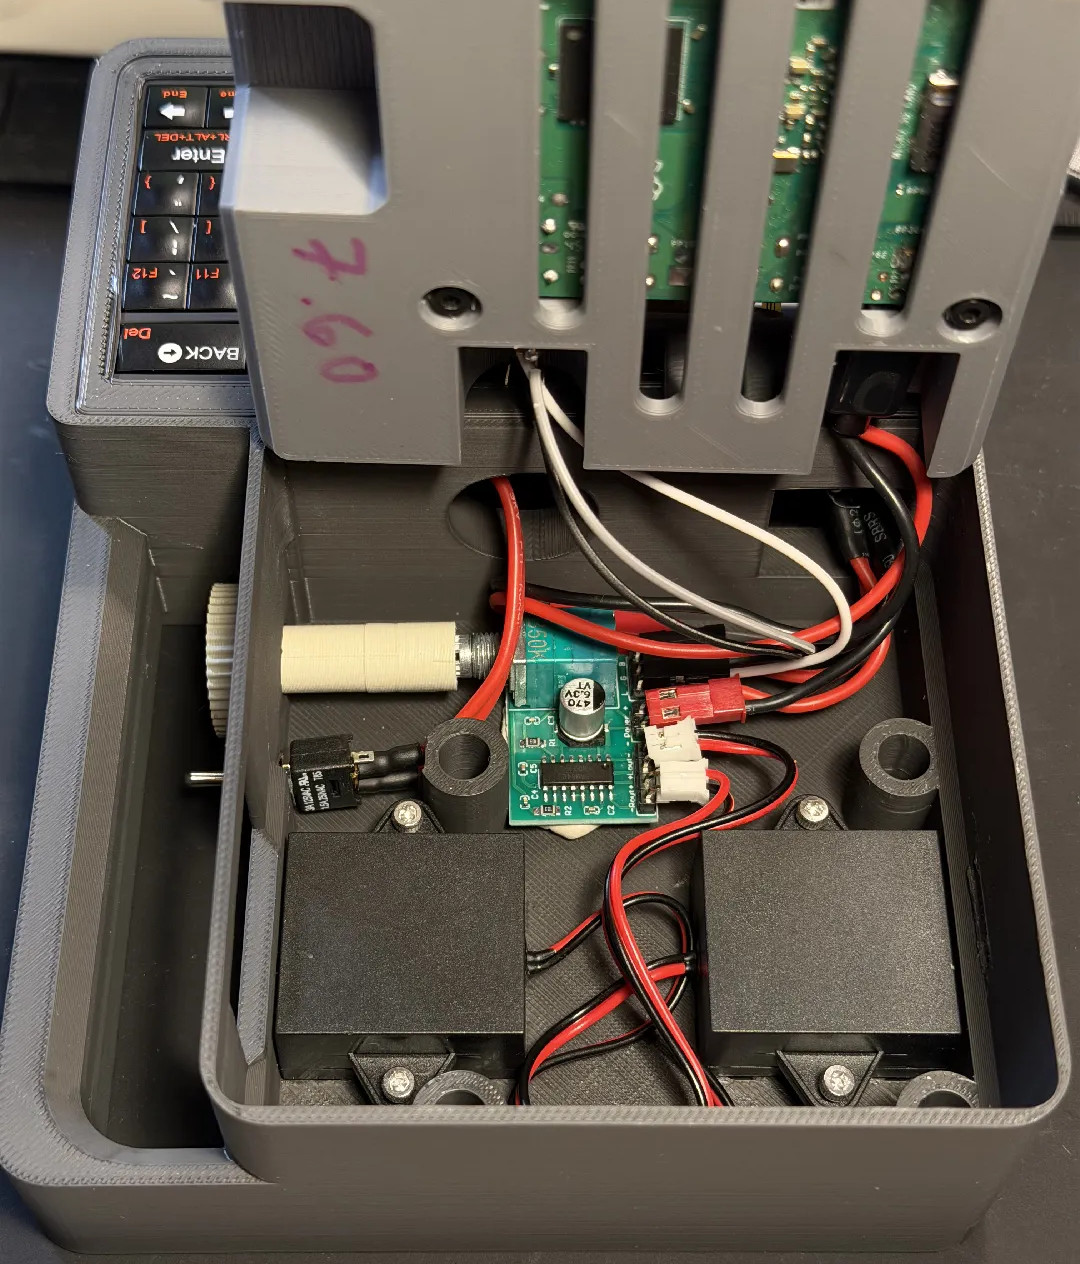
In it’s baseline configuration, the Don’t Panic uses a Raspberry Pi 3A+, a Pimoroni HyperPixel 4.0 Square LCD (touch optional), and a Rii 518BT keyboard. Those core components would be enough to get you up and running, but if you want battery power you’ll also need to add a LX-2BUPS UPS board and a pair of 18650 cells. Audio might be nice as well, and for that [Paul] recommends a PAM8403 breakout board. He’s even got a printable volume knob that slips over the board’s potentiometer and peeks outside the case.

Of course, the best cyberdeck builds are customized to meet their owner’s specific needs, so your loadout doesn’t need to match [Paul]’s exactly. Except the handle, anyway. That feature is non-negotiable. Mainstream computers have far too few handles for our liking.

❌