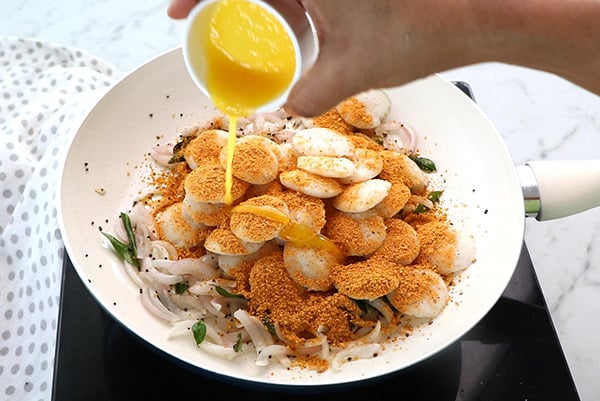
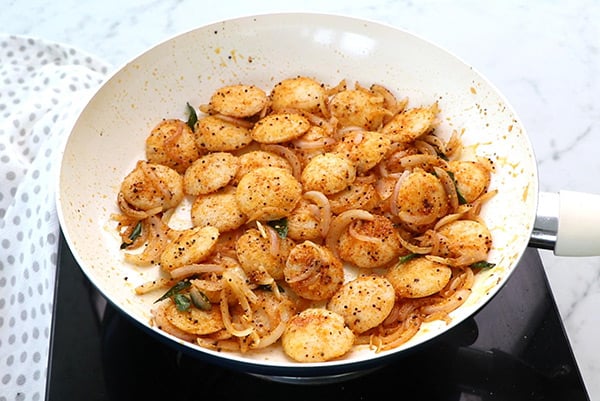
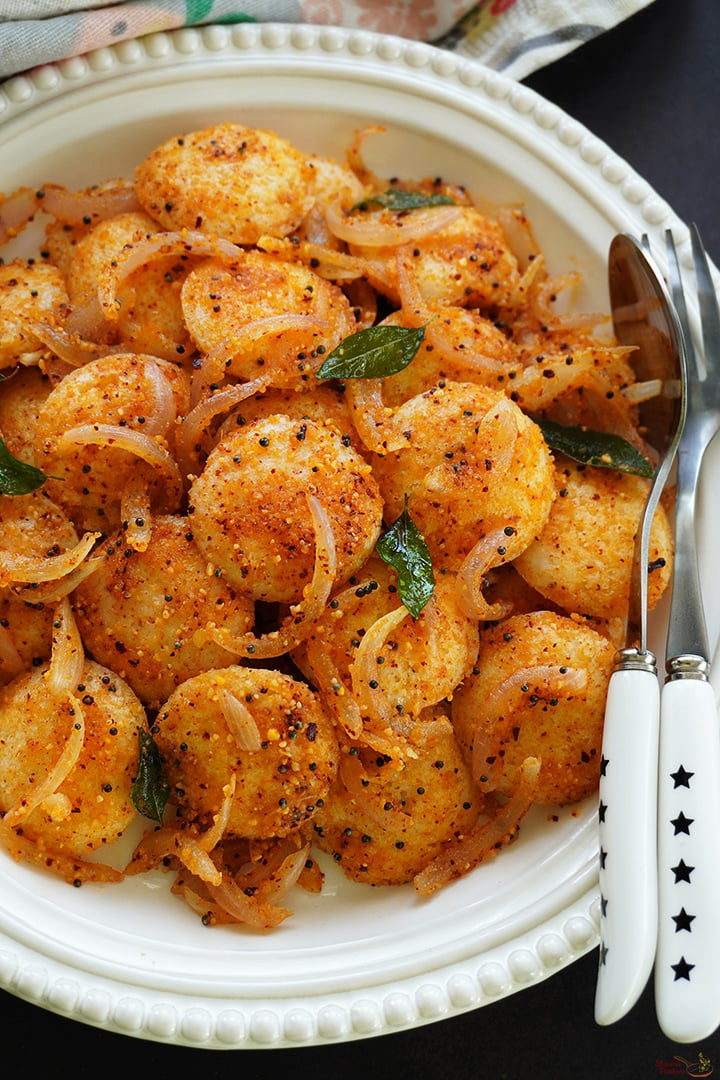
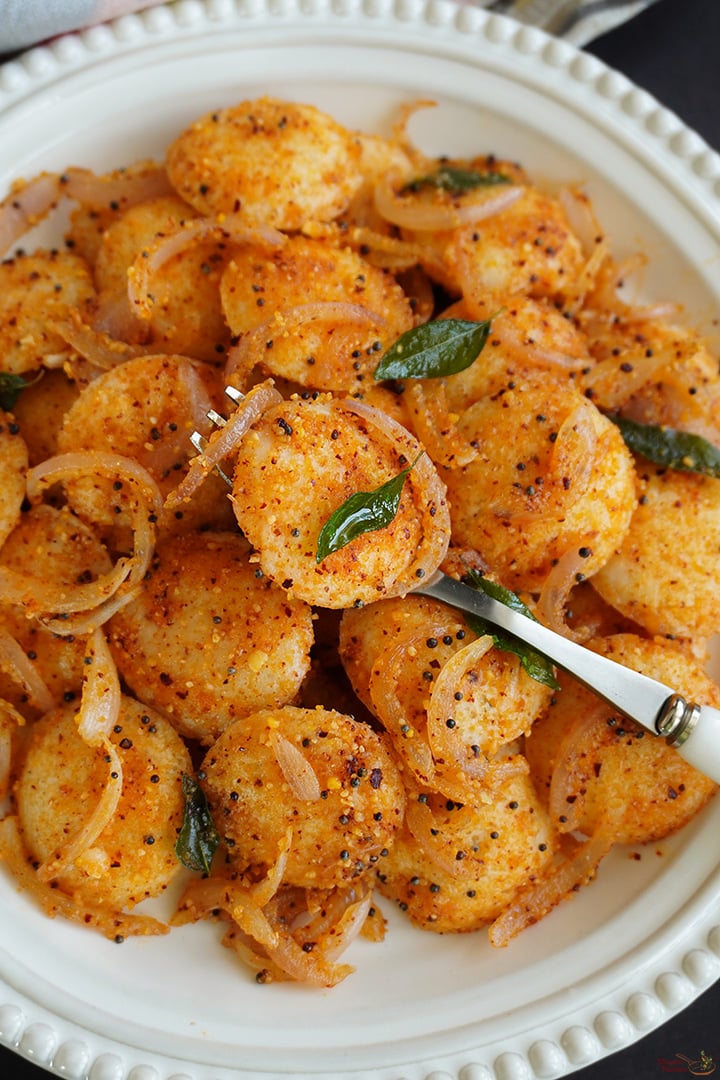
From ancient kitchens to modern breakfast tables, waffles have come a long way. This crispy potato waffle recipe brings a flavorful twist to a centuries-old favorite.When we think of waffles, we often picture golden, fluffy squares topped with maple syrup, fresh berries, or whipped cream. But did you know that waffles were not always the sweet breakfast treats we enjoy today? In fact, their
These simple vegan avocado parathas are made with wholemeal wheat flour, a little chickpea flour and a few everyday spices from my spice box. Read More ...
These Gujarati-inspired theplas are made with a combination of wheat flour, chickpea flour and bajra flour (pearl millet flour). I added grated paneer, frozen methi (fenugreek leaves), fresh ginger, spices and sesame seeds for extra Read More ...
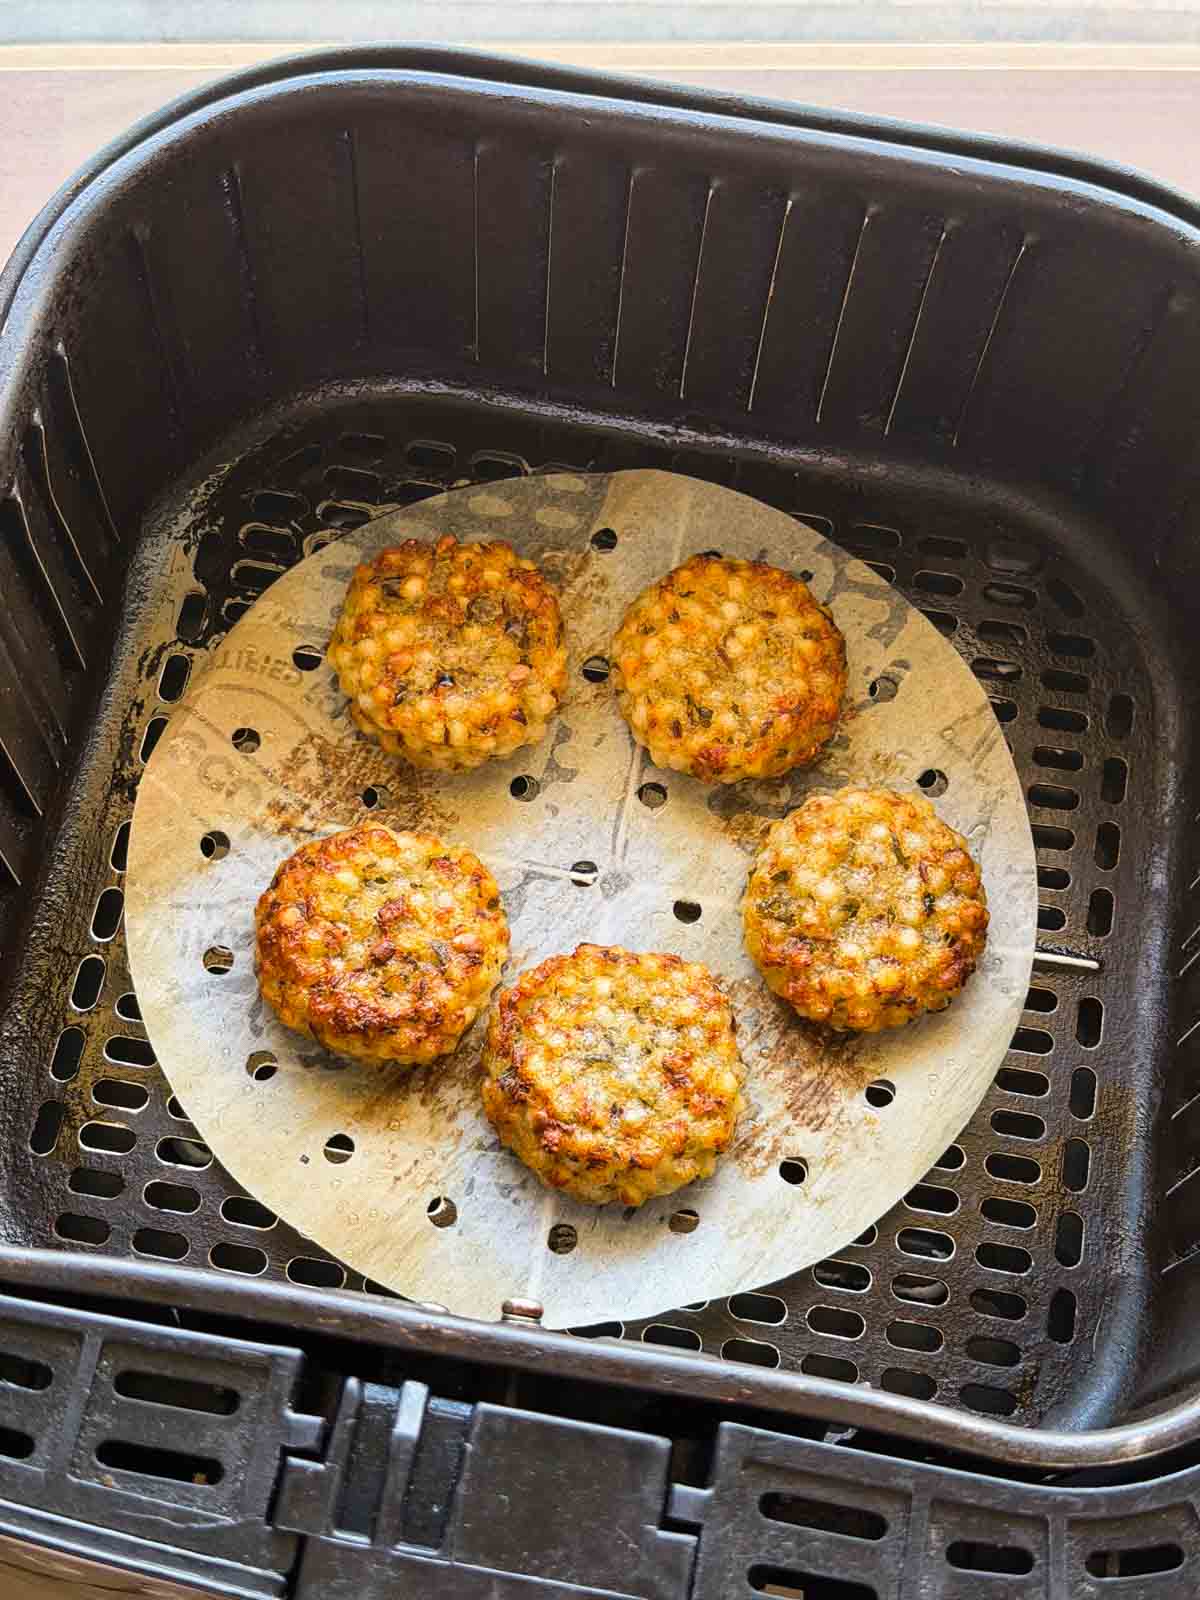
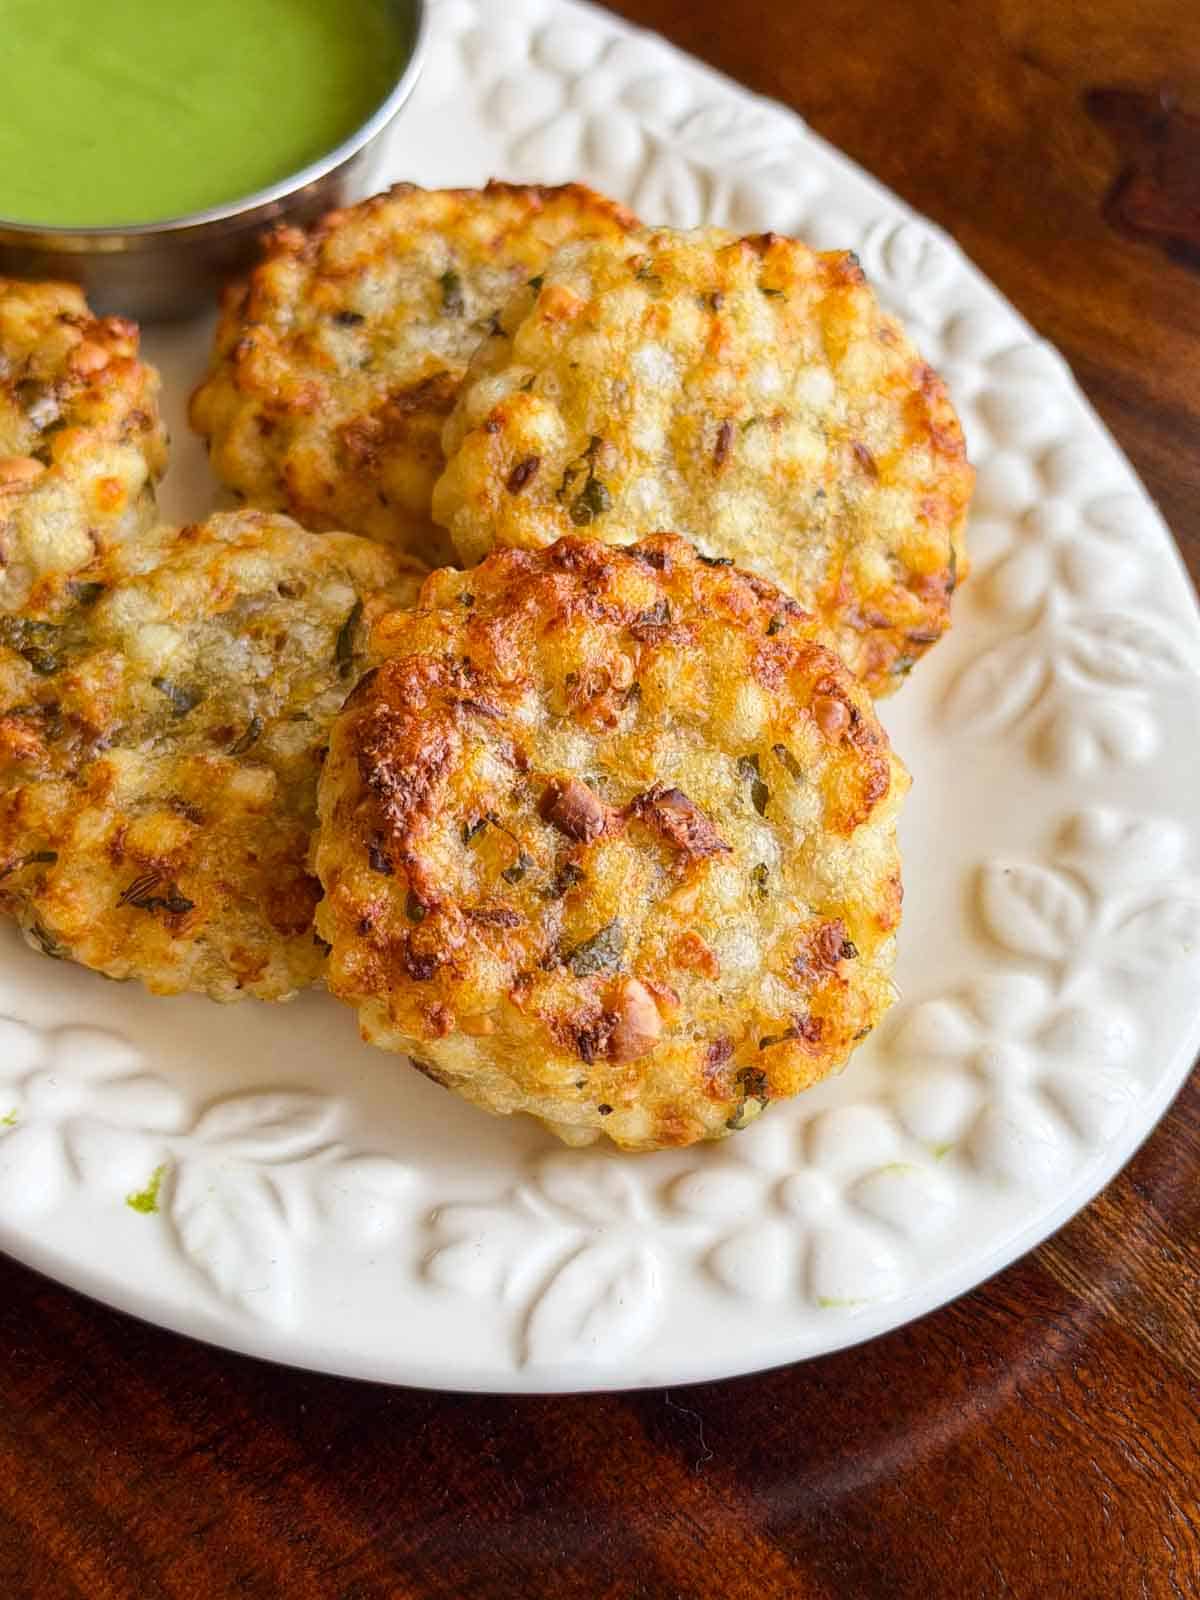
Craving sabudana vada without the guilt of deep frying? These Air Fryer Sabudana Vadas are your new go-to–crispy outside, soft inside, and every bit as delicious!
Sabudana vadas are a fasting classic, but this air fryer version is a total game-changer. They’re super easy to make, taste just like the fried ones, and you don’t need to stand over hot oil or deal with splatters. Honestly, these are on repeat at my place during Navratri or whenever I want a snack that feels comforting without the guilt.
It’s also one of my favorite Maharashtrian recipes along with Kanda Batata Poha and Misal Pav which I have loved since my college days!!
Sabudana (sago pearls) soaked in ¾ cup water for 6-8 hours (or overnight). Medium sized sabudanas work the best for this recipe
Potatoes, boiled and mashed – forms the base and acts as a binding agent to prevent the air fryer vadas from breaking apart
Roasted peanuts – adds lots of texture and a nutty flavor
Green chilli – for heat. Feel free to adjust according to your tolerance
Coriander and curry leaves – for earthy flavors and freshness
Cumin seeds – to temper the oil
Lemon juice – for freshness
Salt and sugar – for balance, flavor, and seasoning
Cooking oil – any neutral-flavored oil with a high smoke point
How to Soak Sabudana
Making anything with sabudana starts with soaking, and it’s key to get this step right to nail the dish. Here’s how to do it perfectly:
Wash and rinse the sabudana pearls: Soak sabudana in water in an even 1:1 ratio, until there’s enough water to cover all the sabudana without any excess. This recipe calls for ¾ cup sabudana pearls soaked in ¾ cup water. Too much water will result in extremely sticky sabudana.
Leave it to soak for a minimum of 6 hours or even better, overnight, and you’ll never use any other method again.
It’s important to put only as much water as necessary, because if there is extra liquid content which the sabudana can not soak in, the airfrying process becomes a mess. So stick to the ratio.
Once soaked, squish a few sabudana pearls between two fingers. If the insides are even a little hard, that means they need to be soaked for longer. They should get mashed easily between your fingers.
Get my Air Fryer cookbook!
My new Essentials Air Fryer Cookbook has 60+ fool-proof air fryer recipes, secret tips, and other essentials to help you make the most of your air fryer! Check it out now!
Absolutely! Just pop them back in the air fryer at 180°C for 2-3 minutes and they’ll crisp up nicely.
Why is my sabudana vada not holding shape?
This usually happens if the sabudana hasn’t soaked well or the potato mash isn’t binding enough. Make sure the sabudana is soft when pressed between your fingers, and if needed, add a bit more potato to the mix.
Can I make the sabudana vada mix ahead of time?
Yes! You can prep the mixture and store it in the fridge for up to 12 hours. Shape and air fry when ready to serve. This actually helps the mixture firm up and makes shaping easier.
How do I prevent the vadas from sticking to the air fryer basket?
Make sure to grease the basket well before placing the vadas so that they don’t stick!
My vadas didn’t crisp up as expected — what went wrong?
There could be a few reasons for this: – They may need a couple more minutes in the air fryer. The cook time can vary a little depending on your model. – Not enough oil brushed on the vadas (a light coat really helps) – The basket was overcrowded – make sure to space the vadas out so air can circulate.
Richa’s Top Tips
Make sure the sabudana is soaked properly. To check this, press the pearls between your fingers, they should mash easily.
Don’t skip oil brushing on the vadas. This helps them turn golden and crisp.
Air fry in batches. Overcrowding prevents them from crisping up evenly.
Let them cool for a couple of minutes before serving. These vadas crisp up as they cool!
Pair with a cup of masala chai for the ultimate snack.
Enjoy as part of a fasting thali during festivals.
Storage Tips
These vadas are best eaten fresh, but you can store leftovers in an airtight container in the fridge for up to 2 days.
To reheat, just pop them back in the air fryer at 180°C for 2-3 minutes and they’ll get nice and crisp.
These vadas are not freezer-friendly as sabudana tends to change texture after freezing.
You won’t be able to get enough of these Airfryer Sabudana Vadas once you give them a try! These are absolutely perfect for those days when you want a snack that feels indulgent, but isn’t. Comfort food made healthy? I’m soo in!
If you make these, do send me pics over on my IG @my_foodstory!! These are perfect for the monsoon season so you gotta give it a try ASAP <3
Wash & soak sabudana in ¾ cup water for 6-8 hours or overnight. After the soaking hours, the sabudana will soak up all the water and fluff up. Refer note 1.
Take soaked sabudana in a large bowl, add rest of the ingredients except oil & mix well.
Preheat the airfryer at 200C.
Grease your palm with oil, take a golf sized sabudana mixture on your palm and flatten it to form round discs or vadas. Repeat till all vadas are formed.
Line the airfryer mesh with parchment paper, brush with oil, place vadas and brush some oil over the vadas. Avoid overcrowding and make sure that there is some gap between the vadas.
Airfry the vadas for 7 minutes at 200C, flip them once, brush with oil and air fry them at 200 C for 6-7 more minutes. They turn crisp once they cool down.
Repeat the same process for all the remaining vadas.
Video
Notes
To check if sabudana is soaked well, press one sabudana pearl in between your fingers and it should mash easily.
Any cooking oil may be used, I have used groundnut oil.
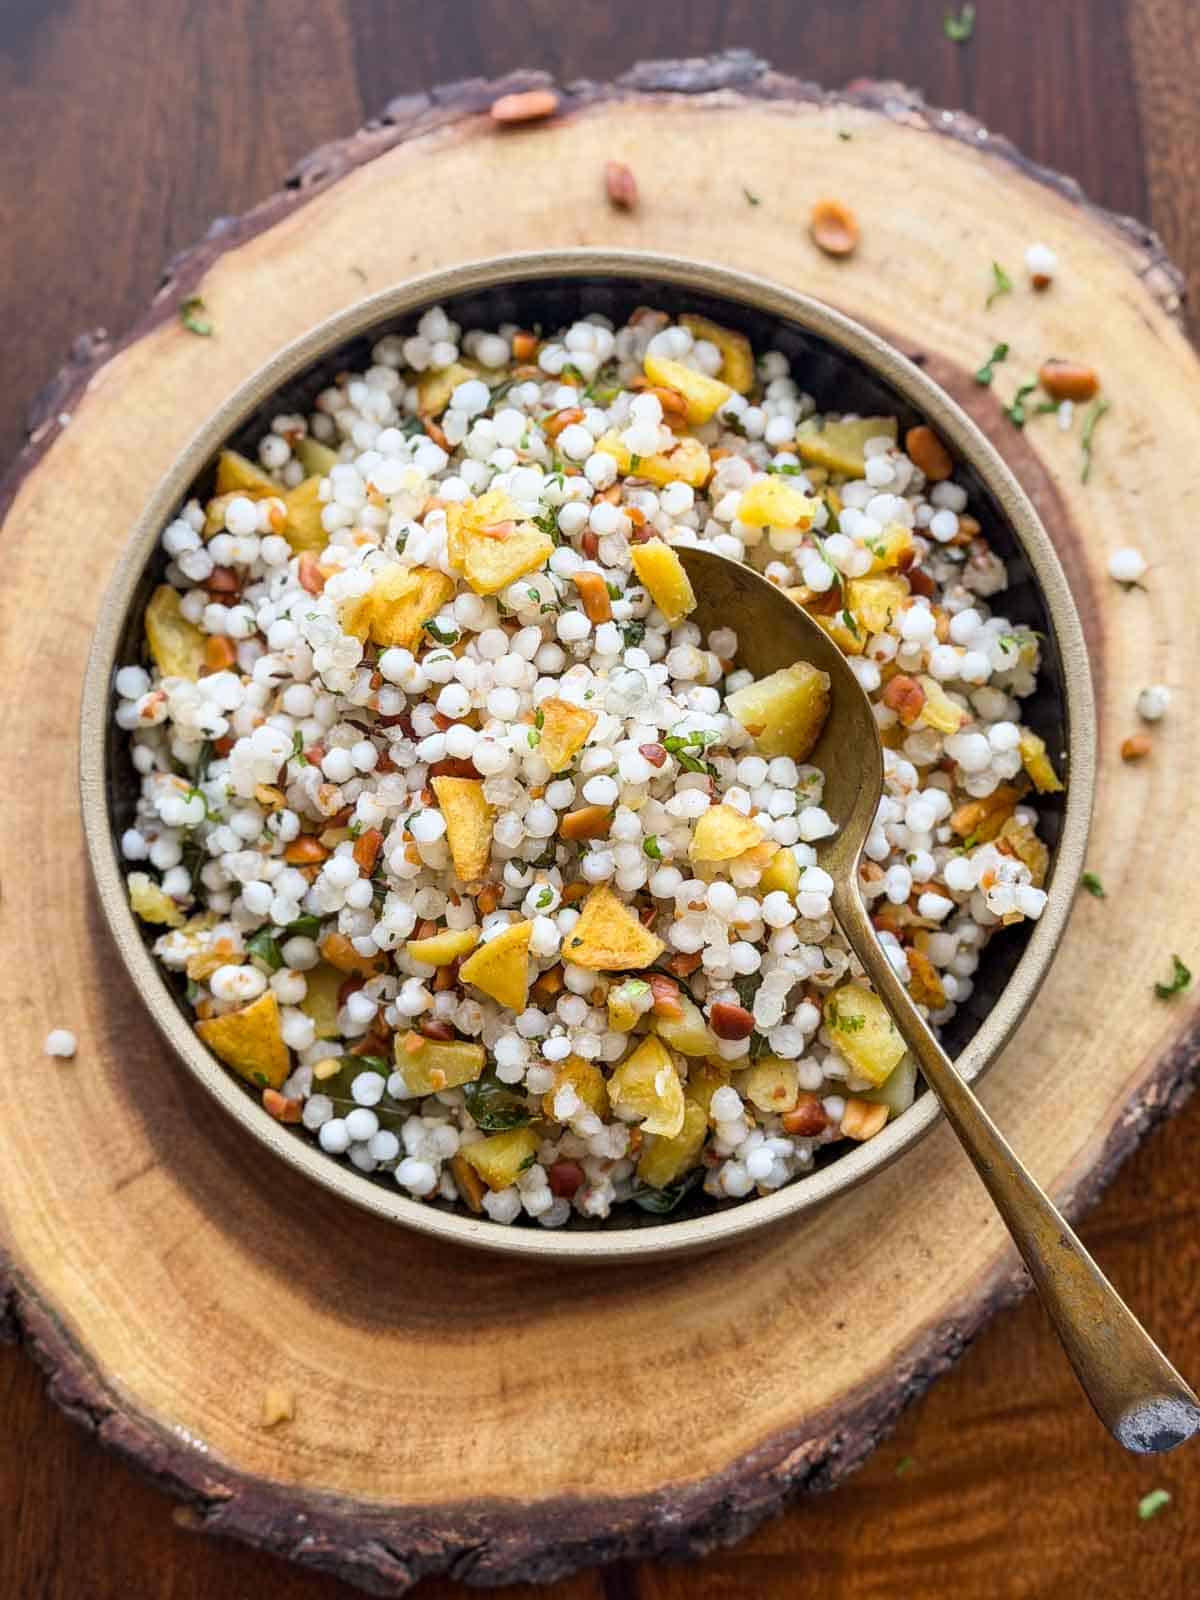
Making sabudana khichdi is easy, but can take some practice. But with my six tips to make non sticky Sabudana Khichdi, you’re going to be a pro in no time!
Sabudana Khichdi makes a weekly appearance on our breakfast table and we make it almost everyday during Navratri. We love the flavor and texture that aloo, sabudana, and peanut add to the dish, and how it all feels complete and a whole lot flavorful with the final drizzle of lemon juice.
But a lot of people who complain of their sabudana khichdi turning out slimy or clumpy. And while this may be a common problem, it is actually quite easy to fix. In this article, along with the recipe, I am sharing 7 fool-proof ways to make the most perfect sabudana khichdi ever. No more clumpy, slimy, unevenly flavored sabudana ever!
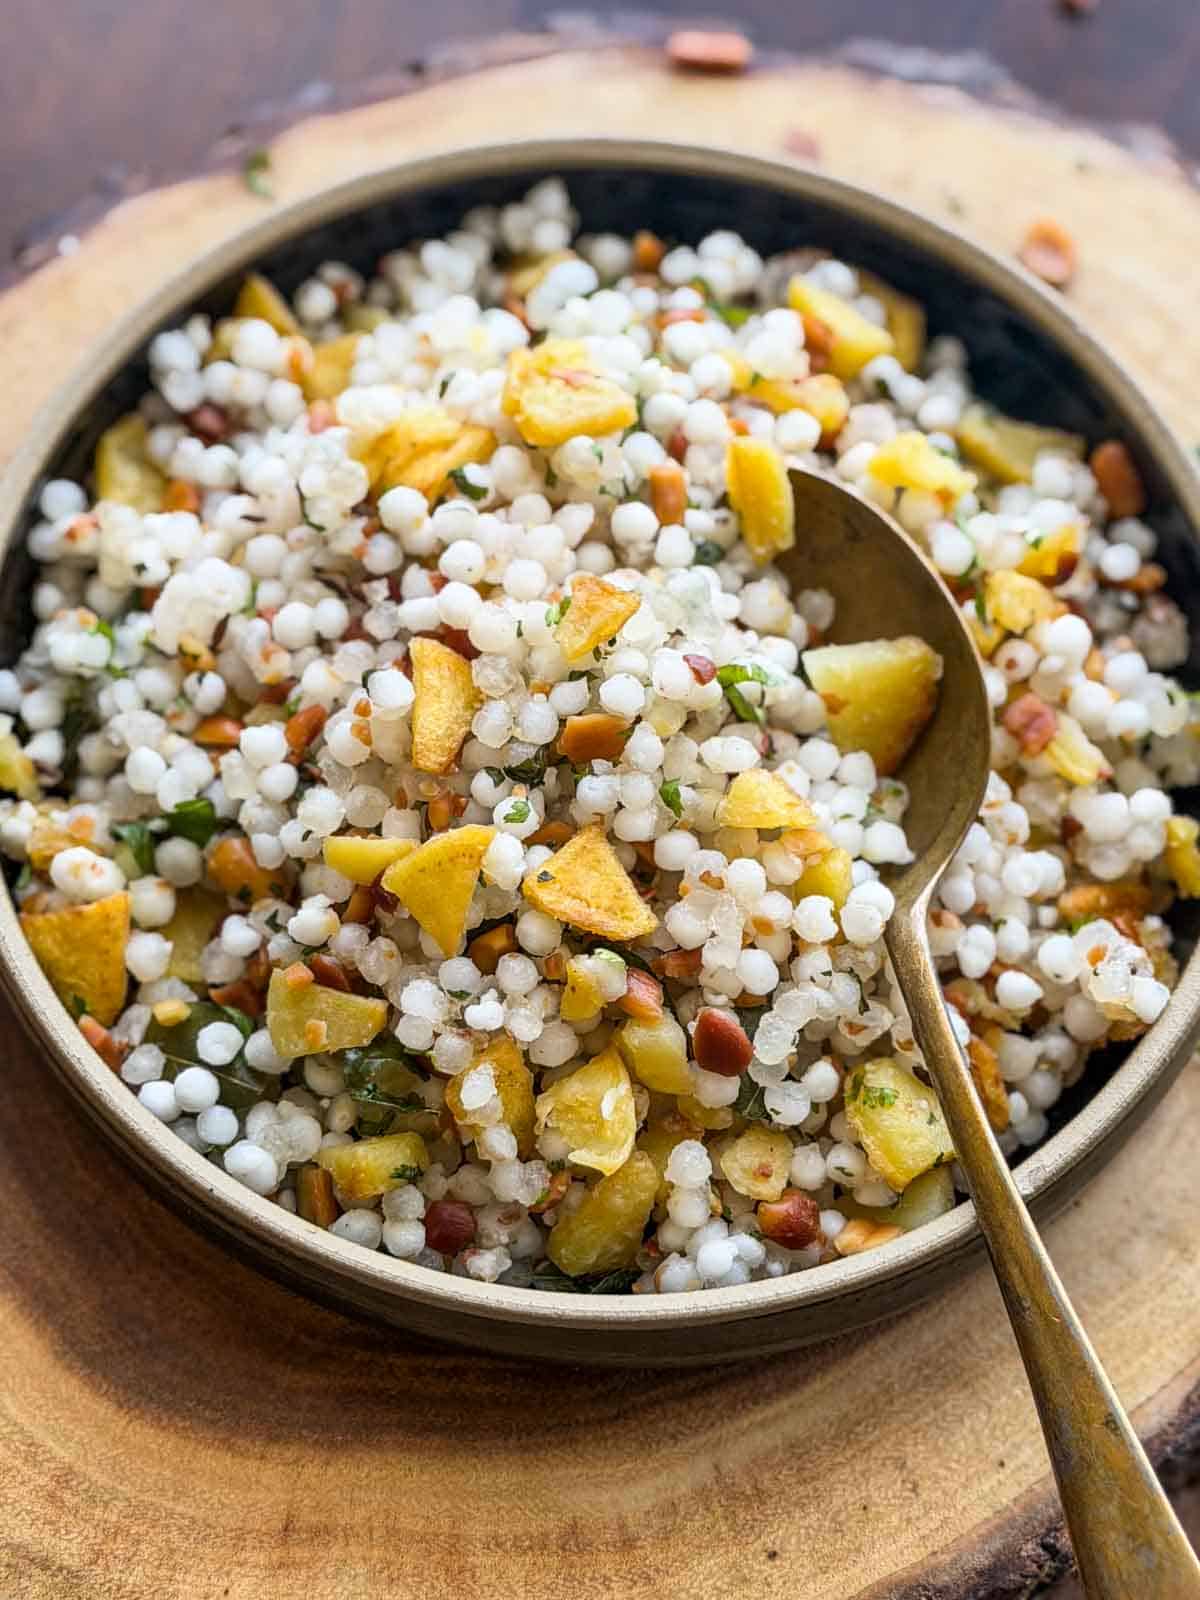
Sabudana Khichdi is really like a pilaf or pulao made with sago pearls. Its simplicity is what sets it apart. But if not made right, it can turn into quite a disaster with sticky, clumpy sabudana thats overcooked. We are looking for a dish where each sago pearl is separate, perfectly cooked and has just turned translucent.
Sabudana Khichdi Ingredients Overview
Sabudana: Also known as sago pearls. It is the hero ingredient. These come in three different sizes, but I think the medium ones work best for this recipe
Ghee: For flavor and richness. I love using my homemade ghee for the best results.
Spices: Cumin seeds or jeera, and curry leaves. It uses minimal spices because people traditionally eat it on fasting days
Potatoes: For texture and flavor
Peanuts: Adds some good fats, texture, and a lovely nutty flavor to each bite
Seasoning: Salt and sugar are added to season the dish
Lime juice and chopped coriander: Used as garnish for a hit of freshness. These are the perfect finishing touches
7 Fool-Proof Tips for Perfect Sabudana Khichdi
Wash: The sabudana should be washed thoroughly to get rid of any excess starch under running water in a colander. Gently rub the pearls between your fingers for even better results.
Soak: Follow a 1:1 ratio of sabudana to water. So for one cup of sabudana you need a cup of water. The water should just cover the sabudana.
Soak for at least 5 hours: I’ve seen recipes where sabudana is soaked for 2-4 hours but after a lot of trial, 5 hours minimum or overnight (approx 8 hours), if I have time, gives me best results. .
Use crushed peanuts: This keeps the khichdi stay dry while adding flavour, fats and protein
Make sabudana in ghee: The richness of ghee and the lovely flavor it adds are something else. However, you can make it vegan by using oil instead. But if you can, please make this in ghee for the best flavor!
Don’t over mix: Once you add soaked sabudana to the pan, stir it well till everything is mixed and then let it cook on a lot flame for a few minutes. Stirring it over and over again makes the sago pearls clumpy
Don’t overcookthe khichdi: Cook it for only a about 2-3 minutes on low flame until you can see the sabudana turn slightly translucent. If the sabudana overcooks, it’ll start sticking to each other
Serving Ideas
With yogurt: Serve sabudana khichdi hot with a bowl of chilled plain yoghurt or dahi on the side. It balances the heat from the green chillies and makes the meal more filling.
With a crunchy side: Pair it with roasted peanuts, potato chips or banana chips for a light, fasting-friendly crunch in every bite.
With a cup of chai: Sabudana khichdi makes a delicious breakfast or evening snack with a hot cup of masala chai.
Storage Tips
Refrigerator: Let the sabudana khichdi cool slightly, then transfer it to an airtight container and refrigerate within 2 hours of cooking. It will keep well for up to 2 days.
Reheat: Sabudana tends to turn a little sticky as it cools. Sprinkle a teaspoon or two of water over the khichdi and reheat it in a covered pan over low heat, stirring gently until warmed through. You can also microwave it in short intervals, stirring in between.
Restoring the texture: If the khichdi looks dry after refrigeration, add a small splash of water while reheating. A squeeze of lemon juice and a little fresh coriander added just before serving can also freshen it up.
Freezing: I wouldn’t recommend freezing sabudana khichdi, as the tapioca pearls can become mushy or change texture once thawed.
Make-ahead tip: You can soak and drain the sabudana ahead of time and refrigerate it until you’re ready to cook. Keep it covered and use it within a day for the best results.
Sabudana Khichdi is a delicious meal by itself. Some people serve it with curd or yogurt but I prefer it as is. This khichdi is gluten free and can be made vegan by replacing the ghee with oil.
Sabudana Khichdi is a delicious, filling breakfast or meal option made with Sago pearls and a few basic spices. With barely 9 ingredients, this is a fast, easy recipe. It's very popular during Navratri as a fasting recipe.
3/4teaspoonSaltor sendha namak if making it for fasting
1/2teaspoonSugar
1teaspoonLime Juice
2tablespoonschopped Coriander
Instructions
Wash 1 cup sabudana well in running water to remove any extra starch and soak it in 1 cup water overnight or for 8 hours.
To check if the sabudana is sufficiently soaked, press a pearl between your fingers and it should smash easily. Drain the sabudana after soaking to get rid of any excess water and set aside. This is an optional step – I've never had to do this.
Heat ghee in a pan and add cumin seeds or jeera. Once they start spluttering, add chopped potatoes and 1/4 teaspoon salt. Saute the potatoes and cook on low flame for 3-4 minutes till tender.
Add curry leaves and green chillies and saute for another minute.
Add soaked sabudana, crushed peanuts, remaining salt and sugar and mix well. Cook for a few minutes – about 3-4 minutes on a low flame until the sabudana starts to turn translucent.
Turn off the flame, add lime juice and chopped coriander and give it another quick mix. Serve hot.
Video
Notes
Wash Sabudana well to get rid of any excess starch under running water in a colander
Soak it in a 1:1 ratio of Sabudana to water. So for one cup of sabudana you need a cup of water. The water should just cover the sabudana.
Soak overnight for best results. I’ve seen recipes where sabudana is soaked for 2-4 hours but after a lot of trial, overnight gives me best results. Approximately 8 hours is good.
Use crushed peanuts which help reduce the stickiness of sabudana khichdi and also add flavours, fats and protein
Don’t overmix after adding the sabudana to the pan. Once you add soaked sabudana, stir it well till everything is mixed and then let it cook on a lot flame for a few minutes. Stirring it over and over again makes the sago pearls clumpy
Don’t overcook the khichdi. Cook it for only a few minutes on low flame after mixing the sabudana till they start to turn translucent. If the sabudana overcooks, it’ll start sticking to each other
Pottukadalai Chutney | Udacha kadalai Chutney Recipe with step by step pictures. You can eat coconut chutney with idli, dosa, vada, poori, Pongal, upma, bonda, goli baji, roti, chapatti, uttapam Pottukadalai Chutney Coconut chutney takes place in our breakfast menu quite often, since hubby loves it so much. I make quite a few variations to...
Mushroom Sandwich is a mild spicy sandwich made by grilling bread stuffed with mushroom and cheese. Mushroom Sandwich is healthy and a great choice for breakfast on weekends. It can be made in 35 minutes and tastes great when served hot.
It can be made easily with simple steps and you can make it in less than an hour. You can make this on weekends for breakfast as it feels warm and crispy. This is just healthy sandwich to make at home when you want something quick but filling.
[feast_advanced_jump_to]
About Mushroom Sandwich
Mushroom Sandwich is made using bread, mushrooms, cheese and spices. The mushrooms gives mild flavour and the spices bring it alive. Cheese adds richness without making it too heavy. These ingredients come together to make a sandwich that tastes really great.
You just need to sauté the filling and stuff it between bread slices, this sandwich is quick and easy to make. The sandwich maker does the work of grilling it perfectly. The outside becomes golden and crispy while the inside stays soft.
The mushroom filling is the star of this sandwich. When you sauté mushroom on high medium flame it does not let out too much water and stays crunchy. Ginger garlic paste brings depth to the flavour. Jeera adds nice aroma that makes sandwich smell amazing while it cooks.
I usually make mushroom sandwich for weekend breakfast or when guests come over. Cheese melts slightly inside while bread turns crispy outside. You can skip cheese if you like and it still tastes good.
Bread slices - I used regular bread slices. Four slices make two nice sandwiches.
Mushrooms - I chopped them finely so they are easy to stuff. Fresh mushrooms works best for this sandwich.
Onion - I used finely chopped onion. It adds sweetness and helps flavour blend nicely.
Capsicum - I chopped it fine too. It adds crunch and colour to the filling.
Pepper powder - I used for mild heat. It brings nice flavour to the mushroom filling.
Garam masala powder - I added for warmth and spice. It makes filling taste complete.
Cheese - I used mozzarella cheese grated. It melts nicely when sandwich is cooked.
Salt - I add for taste while cooking, add less because you can always add more later.
Oil - I used for sautéing the filling. It help flavours come out nicely.
Jeera - I used for tempering. It adds nice aroma and flavour.
Ginger garlic paste - I used for depth. It brings nice taste to the mushroom filling.
How to make Mushroom Sandwich Step by Step
1.Heat oil in a kadai/pan - add jeera let it splutter, add ginger garlic paste let it splutter then add onion along with salt and fry till transparent. Then add capsicum saute for a minute, do not let it soften.
2.Then add cleaned and chopped mushroom, saute in high medium flame so that it doesn't let out much water. Saute for 2 minutes then add pepper powder and garam masala powder.
3.Saute for 2 minutes and switch off. Take bread slices, add generous amount of mushroom filling then sprinkle cheese to cover the stuffing.
4.Seal it with another slice of bread, spread butter on top.Preheat sandwich maker - add the bread slices and cook as per sandwich maker instructions until golden and crisp.
Cut and serve hot!
Expert Tips
Sautéing - I cook mushroom on high medium flame so that it does not let out water. This keeps mushroom crunchy inside sandwich.
Capsicum - I sauté capsicum only for minute. If you cook too long it becomes soft and loose crunch.
Chop fine - I chop mushrooms finely so that it is easy to stuff. Halved or sliced mushroom makes sandwich difficult to eat.
Spread butter - I spread butter on top of bread before putting in sandwich maker. This helps bread turn golden and crispy.
Preheat - I preheat sandwich maker before adding bread. This helps it cook evenly and turn golden quickly.
Tempering - I temper oil with jeera and ginger garlic paste. This adds nice flavour to the filling.
Generous filling - I add generous amount of mushroom filling because it tastes better with more filling inside.
Serving and Storage
Serve mushroom sandwich hot right from sandwich maker. It tastes best when warm and crispy. You can cut diagonally and serve immediately. If you have leftover you can store it in container but it tastes best when fresh and hot.
FAQS
1. Can I skip cheese?
Yes you can skip cheese and it still tastes good. The mushroom filling tastes great even without cheese.
2. Can I use different cheese?
Yes you can use any cheese you like. Cheddar or other melting cheese works well too.
3. What if I don't have sandwich maker?
You can use tava or griddle and press with spatula. It takes a bit longer but works fine.
4. Can I add more vegetables?
Yes you can add tomato or corn but chop them fine. Don't add too much or bread tears while stuffing.
5. How do I store leftover?
You can store it in container but it tastes best when fresh and hot. You can store the stuffing for 2 days in fridge but sandwich is best when served hot and fresh.
If you have any more questions about this Mushroom SandwichRecipe do mail me at sharmispassions@gmail.com. In addition, follow me on Instagram, Facebook, Pinterest ,Youtube and Twitter .
Tried this Mushroom Sandwich Recipe? Do let me know how you liked it. Also tag us on Instagram @sharmispassions and hash tag it on #sharmispassions.
Mushroom Sandwich is a mild spicy sandwich made by grilling bread stuffed with mushroom and cheese. Mushroom Sandwich is healthy and a great choice for breakfast on weekends. It can be made in 35 minutes and tastes great when served hot.
If you are looking for a cool, new sandwich recipe, then this jalapeno popper toastie is the one you need to try. Tangy, spicy, cheesy, and full of flavor and texture, I promise this high protein snack will become your new favorite.
I love snacks that feel indulgent but are actually secretly healthy. And bonus points if it’s also easy to make. And this jalapeno popper toastie is all of that and more. It’s cheesy, crunchy, a little spicy, tangy, and a total breeze to put together! Plus, all you healthy eaters are going to love it because it’s actually full of protein from the paneer and yogurt.
This is my kids’ current favorite breakfast, but it’s sooo delicious that the husband and I can’t help be secretly happy when the kids demand it 😛We like to keep it simple by eating this with just a drizzle of tomato ketchup but you can it with any dip you like. Make extras though because these disappear fast!!
Jalapenos: The hero ingredient! Cut into slices for a bit in every bite
Paneer: Cut into cubes. I have used homemade paneer, but store-bought works great as a replacement
Veggies: Red capsicum, green capsicum, and chopped onions for texture and flavor
Hung curd: Adds creaminess and freshness. You can swap with Greek yogurt
Cheese: Grated mozzarella cheese for lovely cheesy flavor and richness
Coriander leaves: Finely chopped for freshness in every bite
Seasoning: Oregano, chilli flakes, and salt for flavor and heat
Bread: I have used sourdough slices, but sandwich bread slices work just as well
Frequently Asked Questions
Can I make these jalapeno popper toasties without an air fryer?
Yes. You can bake them in a preheated oven at 200°C for about 8–10 minutes, or until the cheese has melted and the tops are lightly roasted. Keep an eye on them towards the end so the bread doesn’t get too dark.
Can I use regular curd instead of hung curd?
Hung curd or Greek yoghurt works best because it is thicker and keeps the paneer filling from becoming watery. If using regular curd, strain it first to remove excess moisture.
Can I use fresh jalapenos instead of pickled jalapenos?
Absolutely. Fresh jalapenos will give you a brighter, crunchier heat, while pickled jalapenos add a tangy flavour that works really well with the creamy cheese filling.
How do I prevent the toasties from becoming soggy?
Make sure your hung curd or Greek yoghurt is thick and avoid adding too much filling to each slice. Also, serve the toasties soon after air frying while the bread is still crisp.
Richa’s Top Tips
Use thick yoghurt: Hung curd or Greek yogurt gives you a creamy filling without making the bread soggy. If your curd contains a lot of liquid, strain it before using.
Cut the paneer small: Since these are toasties, cutting the paneer into small ¼-inch cubes helps it mix evenly with the vegetables and makes every bite easier to eat.
Don’t overload the bread: It can be tempting to pile on the filling, but a moderate layer cooks more evenly and keeps the toastie crisp.
Use mozzarella on top: The extra cheese melts beautifully and gives you that lightly roasted, bubbly topping that makes these jalapeno popper toasties so good.
Watch the last couple of minutes: Air fryers can vary quite a bit, so start checking around the 6-minute mark. You want melted, lightly golden cheese rather than overly browned bread.
Serve immediately: These are at their best straight out of the air fryer, when the bread is crisp and the cheesy paneer filling is warm and creamy.
Storage Tips
These toasties are best eaten fresh because the bread gradually loses its crispness once refrigerated. However, if you have leftovers:
Fridge: Let them cool completely and store in an airtight container in the refrigerator for up to 2 days.
Reheat: To reheat, place them in the air fryer at 180°C for 3–4 minutes, or until warmed through and crisp again. Avoid the microwave if possible, as it can make the bread soft and chewy.
Make-Ahead Tips
The paneer filling can be made up to 1 day ahead and stored in an airtight container in the refrigerator. This makes these jalapeno popper toasties especially handy for busy mornings, quick lunches or when you’re making a larger batch for a party.
For the best texture, assemble the toasties just before air frying. Keep the bread, paneer filling, jalapenos and extra mozzarella separate until you’re ready to cook. You can also chop the vegetables and paneer a few hours ahead and refrigerate them separately. This way, all you need to do is assemble, air fry and serve.
Customisation Ideas
Make them extra spicy: Add finely chopped green chillies to the paneer mixture or increase the chilli flakes. You can also add a little hot sauce for an extra kick.
Add corn: Sweet corn works really well with the spicy jalapenos and cheesy filling. Add a couple of tablespoons to the paneer mixture.
Try different cheese: Swap some or all of the mozzarella for cheddar, processed cheese or a combination of cheeses for a richer, sharper flavour.
Add more vegetables: Finely chopped mushrooms, spring onions or grated carrots can easily be added to the filling. Just avoid adding vegetables with too much moisture.
Make it more protein-rich: Increase the paneer slightly or add finely chopped cooked chicken for a non-vegetarian version.
Give it an Indian twist: Add a little chaat masala or cumin powder to the filling. A small amount goes a long way and works particularly well with the jalapenos and paneer.
This jalapeno popper toastie is one of those recipes that is simple yet delicious enough to become a favorite. I love preppign everything in advance and then simply assembling them for my kids’ tiffins. It honestly makes life so simple.
If you make this high protein toastie, don’t forget to DM the pictures @my_foodstory. Happy cooking!
This jalapeno popper toastie is a cool, new, healthy breakfast in town. Tangy, spicy, cheesy, and full of flavor and texture, I promise this high protein snack will become your new favorite.
Add paneer, red & green capsicums, onions to a bowl. Add hung curd, ¼ cup mozzarella cheese and coriander leaves, sprinkle oregano, chilli flakes, salt, give a good mix and set aside.
Spread 2-3 tablespoons of the paneer mix on one side of each of the bread slices,, top with 1 tablespoon each of mozzarella cheese and 3-4 jalapeno slices each, sprinkle oregano and chilli flakes.
Place the bread slices on the airfryer basket or tray with the paneer mix facing up and air fry at 180 C for 8 minutes till the cheese melts and gets mildly roasted on top and serve.
These Broccoli Paneer Parathas will feel like a welcome change if your breakfast routine has been stuck on the same aloo paratha for months.. They’re packed with protein, easy to make, and work just as well on the breakfast table as they do in a tiffin box.
These paneer broccoli parathas are what I make when I want breakfast to be filling, nutritious, and something my kids will actually eat without negotiating. The combination of paneer, broccoli, and melted mozzarella inside a crispy paratha covers protein, greens, and flavour all in one go, which on a busy morning is exactly what I need.
If your mornings usually start with parathas or theplas, you need to give this broccoli paneer paratha recipe a shot. It takes about 20 minutes, and they’re perfect for a quick breakfast, lunch, or wholesome weeknight meal.
Onion: Finely chopped and adds a little sweetness and crunch
Mozzarella Cheese: It’s low calorie but adds a lovely flavor, especially if making for kids. You can replace with regular processed cheese in a pinch, but mozzarella works better
Italian Seasoning: Mixed into the stuffing for a subtle herby flavour
Flour: I have used whole wheat flour for more nutrition but whole purpose flour works if that’s all you have
Coriander Leaves: Finely chopped for freshness
Ghee: For frying the parathas. You may use a neutral-flavored oil but ghee adds extra flavor and richness that works really well with these parathas
Salt: For seasoning
Frequently Asked Questions
Can I replace paneer with tofu?
Yes. Use firm tofu, grate it the same way, and squeeze out any excess water before mixing it into the filling. The texture will be slightly different, but it works well, especially with the mozzarella and Italian seasoning holding everything together.
How do I stop the stuffing from coming out while rolling?
Three things help. Chop the broccoli very fine, so no large pieces are poking through, don’t overstuff the paratha, and make sure you pinch the dough closed tightly before you start rolling. Roll gently from the centre outward rather than pressing hard, and dust with flour if it starts sticking.
Can I use frozen broccoli for this paratha recipe?
You can, but thaw it completely and squeeze out all the excess water first. Frozen broccoli releases a lot of moisture, and if that water gets into the filling, the paratha will turn soggy, and the dough will tear while rolling.
I don’t like broccoli. What other vegetable will work in this recipe?
Finely chopped spinach, grated zucchini (squeeze out the water first), or even finely chopped mushrooms all work well with the paneer and mozzarella. The idea is to use a vegetable that’s mild enough to blend into the filling without overpowering the cheese and paneer.
Why is my paratha breaking apart during frying?
Usually this means the dough is either too dry or rolled too thin. Make sure the dough is soft and pliable, not stiff. Also check if you’ve overstuffed the paratha, too much filling stretches the dough beyond what it can handle and causes cracks.
Richa’s Top Tips
Chop the broccoli really fine. Large or uneven pieces will poke through the dough and cause the paratha to tear while rolling. The finer you chop it, the easier it is to roll out without any cracks.
Don’t overstuff the paratha. It’s tempting to add more filling, but too much makes the dough stretch thin and break. About 1-2 tablespoons of filling per paratha is the sweet spot.
Seal the edges properly before rolling. Pinch the dough closed tightly after adding the filling, and then roll gently from the centre outward. If the seal is loose, the filling will push out from the sides while rolling.
Cook on medium heat, not high. Medium heat gives the paratha time to cook through evenly and turn golden on both sides. High heat will burn the outside while the filling inside stays cold.
Apply ghee while cooking, not after. Brushing ghee on the paratha while it’s on the tawa is what gives it that crispy, golden finish. Adding it after doesn’t have the same effect.
Storage Tips
In the fridge: Store cooked parathas in an airtight container for up to 2 days. Reheat on a hot tawa with a little ghee to bring back the crispiness.
Freezing: You can freeze the uncooked, stuffed parathas by stacking them with parchment paper between each one. Freeze flat in a ziplock bag for up to two weeks. Cook directly from frozen on a hot tawa, adding a couple of extra minutes per side.
The filling: Can be made ahead and stored in the fridge for up to a day. This makes mornings quicker since you just need to roll and cook.
Tiffin tip: These travel really well at room temperature and taste good even a few hours after cooking, which makes them great for school or office tiffins.
Serving Ideas
These paneer broccoli parathas don’t need much on the side, but here are a few ways we enjoy them:
With Cucumber Raita: Cool, creamy raita on the side is the most natural pairing with any stuffed paratha.
With pickle and curd: Sometimes the simplest combination is the best.
With Masala Chai: A hot paratha and a cup of chai is the most classic Indian breakfast there is, and these parathas are perfect for it.
In a tiffin box: These hold up really well at room temperature, so they’re great for school or office tiffins. Pack with some homemade ketchup or green coriander chutney on the side.
Did You Know?
Broccoli has more protein per calorie than most vegetables. A cup of chopped broccoli has about 2.5 grams of protein, which is unusually high for a vegetable. Combined with paneer and mozzarella in this paratha, each one packs a surprisingly solid amount of protein for what looks like a simple stuffed flatbread. It’s one of the reasons broccoli is so valued in vegetarian cooking, it packs so much nutrition without changing the flavour of whatever it’s mixed into.
These broccoli paneer cheese parathas have made our mornings a lot easier and a lot more nutritious. If your family loves stuffed parathas, give this filling a try, and I think it’ll quickly earn a spot on your table. Share your pictures with me on Instagram @my_foodstory when you make them.
These broccoli paneer parathas are high-protien, rich, creamy, and loaded with nutrients in every bite. They make for a healthy breakfast and the kids love them too!
Add all ingredients for the stuffing to a bowl, mix well and set aside.
Add flour and salt to a bowl or plate with a high rim. Make a well in the centre and add ¼ cup of water, mix the water and flour together with your fingers, add ¼ cup of water and mix. Do the same thing again till the dough starts to come together. If the dough is too dry, add a teaspoon of water at a time. Once the dough comes together, knead the dough for 3-4 minutes till it is soft and pliable. Set aside covered with a damp cloth and rest for 20 minutes.
Divide the dough into 4 equal portions. Take one portion and smoothen into a ball, dip in the flour, dust off excess flour and roll into a 4 inch diameter roti. Hold the roti in your hand and add ¼ cup of broccoli paneer stuffing in the centre, bring the edges of the roti higher and closer and seal it (watch the detailed video for more info). Gently flatten the stuffed dough ball and roll to a 6 to 7 inch paratha.
Heat a tawa till it’s hot but not smoking. Place the paratha on the tawa and once you see bubbles on the surface, flip the paratha. Once you see bubbles on the other side, apply some ghee all over the paratha and roast till golden spots appear on both the sides. Transfer to a plate, repeat the same process for rest of the parathas and serve.
What could be better than corned beef? Corned beef hash!
And what could be better than corned beef hash? A corned beef hash burrito!
Yes, breakfast on the grill or griddle is a thing, and no one does it better than our own Steven Raichlen. An inveterate early riser, Steven loves nothing better than to greet the new day by firing up the grill. (Early?—we routinely get emails from the guy at 4:30 a.m.)
Which brings us to Steven’s favorite Irish / American / Mexican mashup: the corned beef breakfast burrito.
First the corned beef. This salt- and spice-cured beef has a long history in Ireland, with an early reference appearing in a satirical poem from the 12th century. Corned beef isn’t hard to prepare from scratch (to learn how, click here), but you can make excellent burritos with store-bought corned beef. That’s what we call for here.
Next comes the burrito, which you’ll recognize as a large flour tortilla stuffed with meat, cheese, refried beans or other savory fillings. What you may not know is that the burrito takes its name from the Spanish word for “little donkey.” The tightly rolled tortilla resembles the bedrolls traditionally tied to the backs of pack donkeys. Huh! We didn’t know that either.
As for hash, it derives from the French word hacher—“to chop,” literally—the same origin as our word hatchet. For that’s what hash is, meat, potatoes, onions and other flavorings chopped into pieces and pan-fried in a skillet.
Whew—all this word play is making us hungry. So it’s time to fire up your griddle and make the best breakfast ever: a corned beef breakfast burrito.
Corned beef hash, potatoes, peppers, and jalapeños are wrapped in flour tortillas with grated cheese, then browned on a hot griddle until crisp.
Ingredients
2 tablespoons butter or extra virgin olive oil, plus additional oil for the griddle
1 onion, finely chopped (about 3/4 cup)
1 bell pepper, seeded and diced
2 jalapeños, seeded and diced; for more heat, leave the seeds in
2 cups cooked corned beef, diced
2 cups cooked potatoes or other root vegetables, coarsely or finely diced
1 tablespoon Worcestershire sauce
1 tablespoon Louisiana-style hot sauce, or more to taste
Sea salt and freshly ground black pepper
4 large flour tortillas
About 1 cup grated cheddar or pepper Jack cheese
Instructions
Heat the butter or olive oil on a griddle or in a cast-iron skillet over medium-high heat. Add the onion, bell pepper, and jalapeños and cook until browned, about 3 minutes, stirring frequently.
Stir in the corned beef and potatoes and continue grilling until the potatoes are browned and the corned beef is heated through, 3 to 5 minutes.
Stir in the Worcestershire sauce and hot sauce and grill for 1 minute. Season with salt and pepper to taste.
Divide the corned beef hash among the flour tortillas. Sprinkle each with grated cheddar or pepper Jack cheese. Fold in the sides of each tortilla and roll tightly to form a burrito.
Heat the griddle to medium-hot and oil it well. Arrange the burritos seam-side down and griddle until crisp and browned on the bottom. Turn and brown the opposite side. Serve hot.
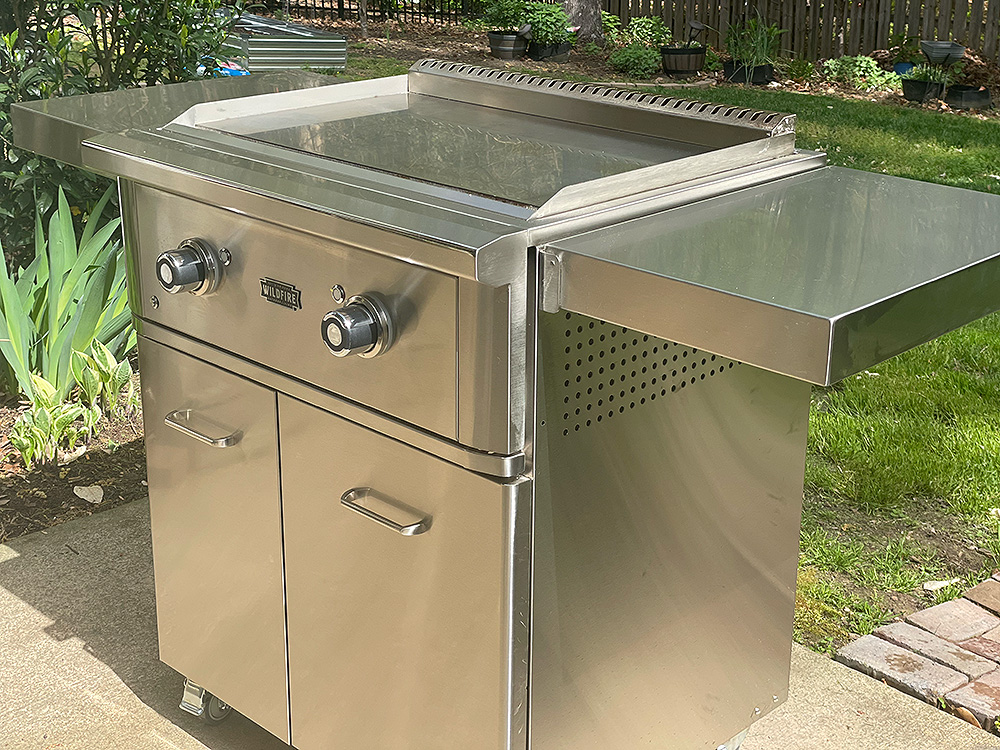
A big thank you to Wildfire Outdoor Living for sponsoring this cook.
Wildfire Outdoor Living is an Arizona-based company specializing in high-performance gas grills and premium outdoor kitchen solutions. Wildfire brings a commitment to cutting-edge technology and industry-leading innovation. Their 304 stainless steel design and illuminated LED knobs, cast stainless steel burners, and laser-cut stainless steel cooking grates create products that will provide peak performance. They also allow you to customize your outdoor kitchen with designer finish knobs and handles to meet the growing demand for designer outdoor kitchens.
The drop-in griddle will turn your Wildfire gas grill into a full-fledged kitchen for breakfast, lunch, and dinner. You can enjoy pancakes and bacon for breakfast, smash burgers for lunch, or stir-fry for dinner, all on the drop-in griddle.
Looking for more recipes like this? Browse our Recipe Index for grilled, smoked, and live-fire favorites.
Get Steven’s weekly grilling tips, seasonal recipes, and live-fire ideas in your inbox. Join our Up in Smoke newsletter. Sign up and get a FREE PDF of Steven Raichlen's Best Ribs Recipes Ebook.
Preorder Man On Fire — A Steven Raichlen Memoir. And get some really cool rewards!
These Savory Garlic Oats with mushroom and a masala fried egg is healthy and delicious way to switch up breakfast when you are bored of regular sweet oatmeal.
We eat a lot of oats in all forms, but lately I’ve been really tired of eating them sweet. So I started experimenting with a lot of savory oat recipes which are just as satisfying but healthier. Plus, you are totally omitting out the 2-3 teaspoons of sugar you might normally add to your oatmeal.
If you’re not really a savory oatmeal person, then I think this recipe is about to change that. Imagine warm, creamy oats with a lovely garlicky flavor, with mushrooms, a perfect runny egg, and topped with chilli oil. Sounds heavenly, right? These savory garlic oats are versatile and how! Make it a breakfast salad bowl with mixed greens or toss it up with some spices to quirk things up! Because who doesn’t want oats with a twist for breakfast?
Oats: I have used instant or quick oats for this recipe as they cook quickly, which makes them super convenient. You could also use rolled or steel-cut oats, just remember to adjust the cook time accordingly
Oil: Olive oil for it’s neutral flavor, but you could use peanut, canola, sunflower, vegetable, etc.
Garlic: Finely chopped for lots of flavor and aroma
Mushroom: Adds a lovely smokey flavor and sneaks in extra nutrition
Eggs: Half-fried until the yolk is cooked but still runny.
Chilli oil: For some heat. You can use red chilli powder instead
Water: To cook the oats
Seasoning: Salt and pepper for flavor
Frequently Asked Questions
How can I cook oats with a pressure cooker?
Pressure cooking oats make them cook super fast. But you can boil the oats in water until it’s cooked through and reaches the desired consistency.
Are savoury oats healthy?
They can make a nutritious breakfast, especially when paired with protein and vegetables. Oats provide fibre and the egg and mushrooms add protein and other nutrients.
Richa’s Top Tips
Pressure cook oats if possible. I would highly recommend pressure cooking the oats to help them cook fast and come to the perfect consistency. Believe me, it’s a game changer for rushed mornings.
Adjust the amount of water if you like. For thicker oats, use a little less water. Add a splash more after cooking if you prefer them looser and creamier.
Cook the egg just the way you like it. I love a sunny-side-up egg here so the runny yolk mixes into the creamy oats.
Storage Instructions
Store leftover savoury oats in an airtight container in the refrigerator for up to 2 days. The oats will thicken as they sit, so add a splash of water or milk while reheating and stir well until creamy again.
For the best texture, store the mushrooms and fried egg separately and add them fresh when serving. You can add chilli oil just before serving.
Customisation Ideas
Add more vegetables. Toss in spinach, peas, corn, broccoli or finely chopped bell peppers along with the mushrooms for added flavor, texture, and nutrition.
Make it cheesy. Stir some grated cheddar, mozzarella or parmesan into the hot oats for an extra creamy finish.
Switch up the toppings. Try sautéed paneer, tofu, avocado or crispy chickpeas instead of mushrooms.
Make it spicy. Add chopped green chillies, red chilli flakes or a spoonful of chilli crisp to the oats.
Change the flavour profile: Add a little soy sauce and sesame oil to the oats and top with spring onions for an Asian-inspired version.
I tried to keep this savoury oatmeal recipe healthier by not adding any cheese. But believe me a dash of grated cheddar cheese really takes things to a whole new level!
If you make this oatmeal for breakfast, do send me your pictures over on my Instagram @my_foodstory.
These savory garlic oats with a masala fried egg are healthy, delicious and a great way to switch up breakfast when you are bored of regular sweet oatmeal.
Add rolled oats, garlic, ½ teaspoon of salt and 3 cups of water to a pressure cooker. Close the lid, bring to pressure and cook for 3 whistles. Let the pressure release naturally.
While the oats are cooking, heat 2 teaspoons of oil in a pan, add sliced mushrooms and saute for 3-4 minutes till they turn golden brown. Take off the heat. Sprinkle ¼ teaspoon of salt, mix well and transfer to a plate or bowl.
Heat the same pan, add 1 teaspoon of oil, and once the pan is very hot, crack one egg and cook till the white part is cooked but the yolk is runny.
To serve, add 2-3 ladles of cooked oats from the pressure cooker to a bowl, top with half the fried mushrooms, place the fried egg on top, drizzle chilli oil on top and serve hot.
Repeat the same for serving the rest of the oats.
Video
Notes
Feel free to experiment with different herbs, cheeses and even toppings like sundried Tomatoes, Olives or Jalapenos.
Adjust water to keep oats to your desired consistency.
Feel free to swap the fried egg with soft boiled eggs or scrambled eggs. But we prefer the crispy, fried egg with a runny yolk.
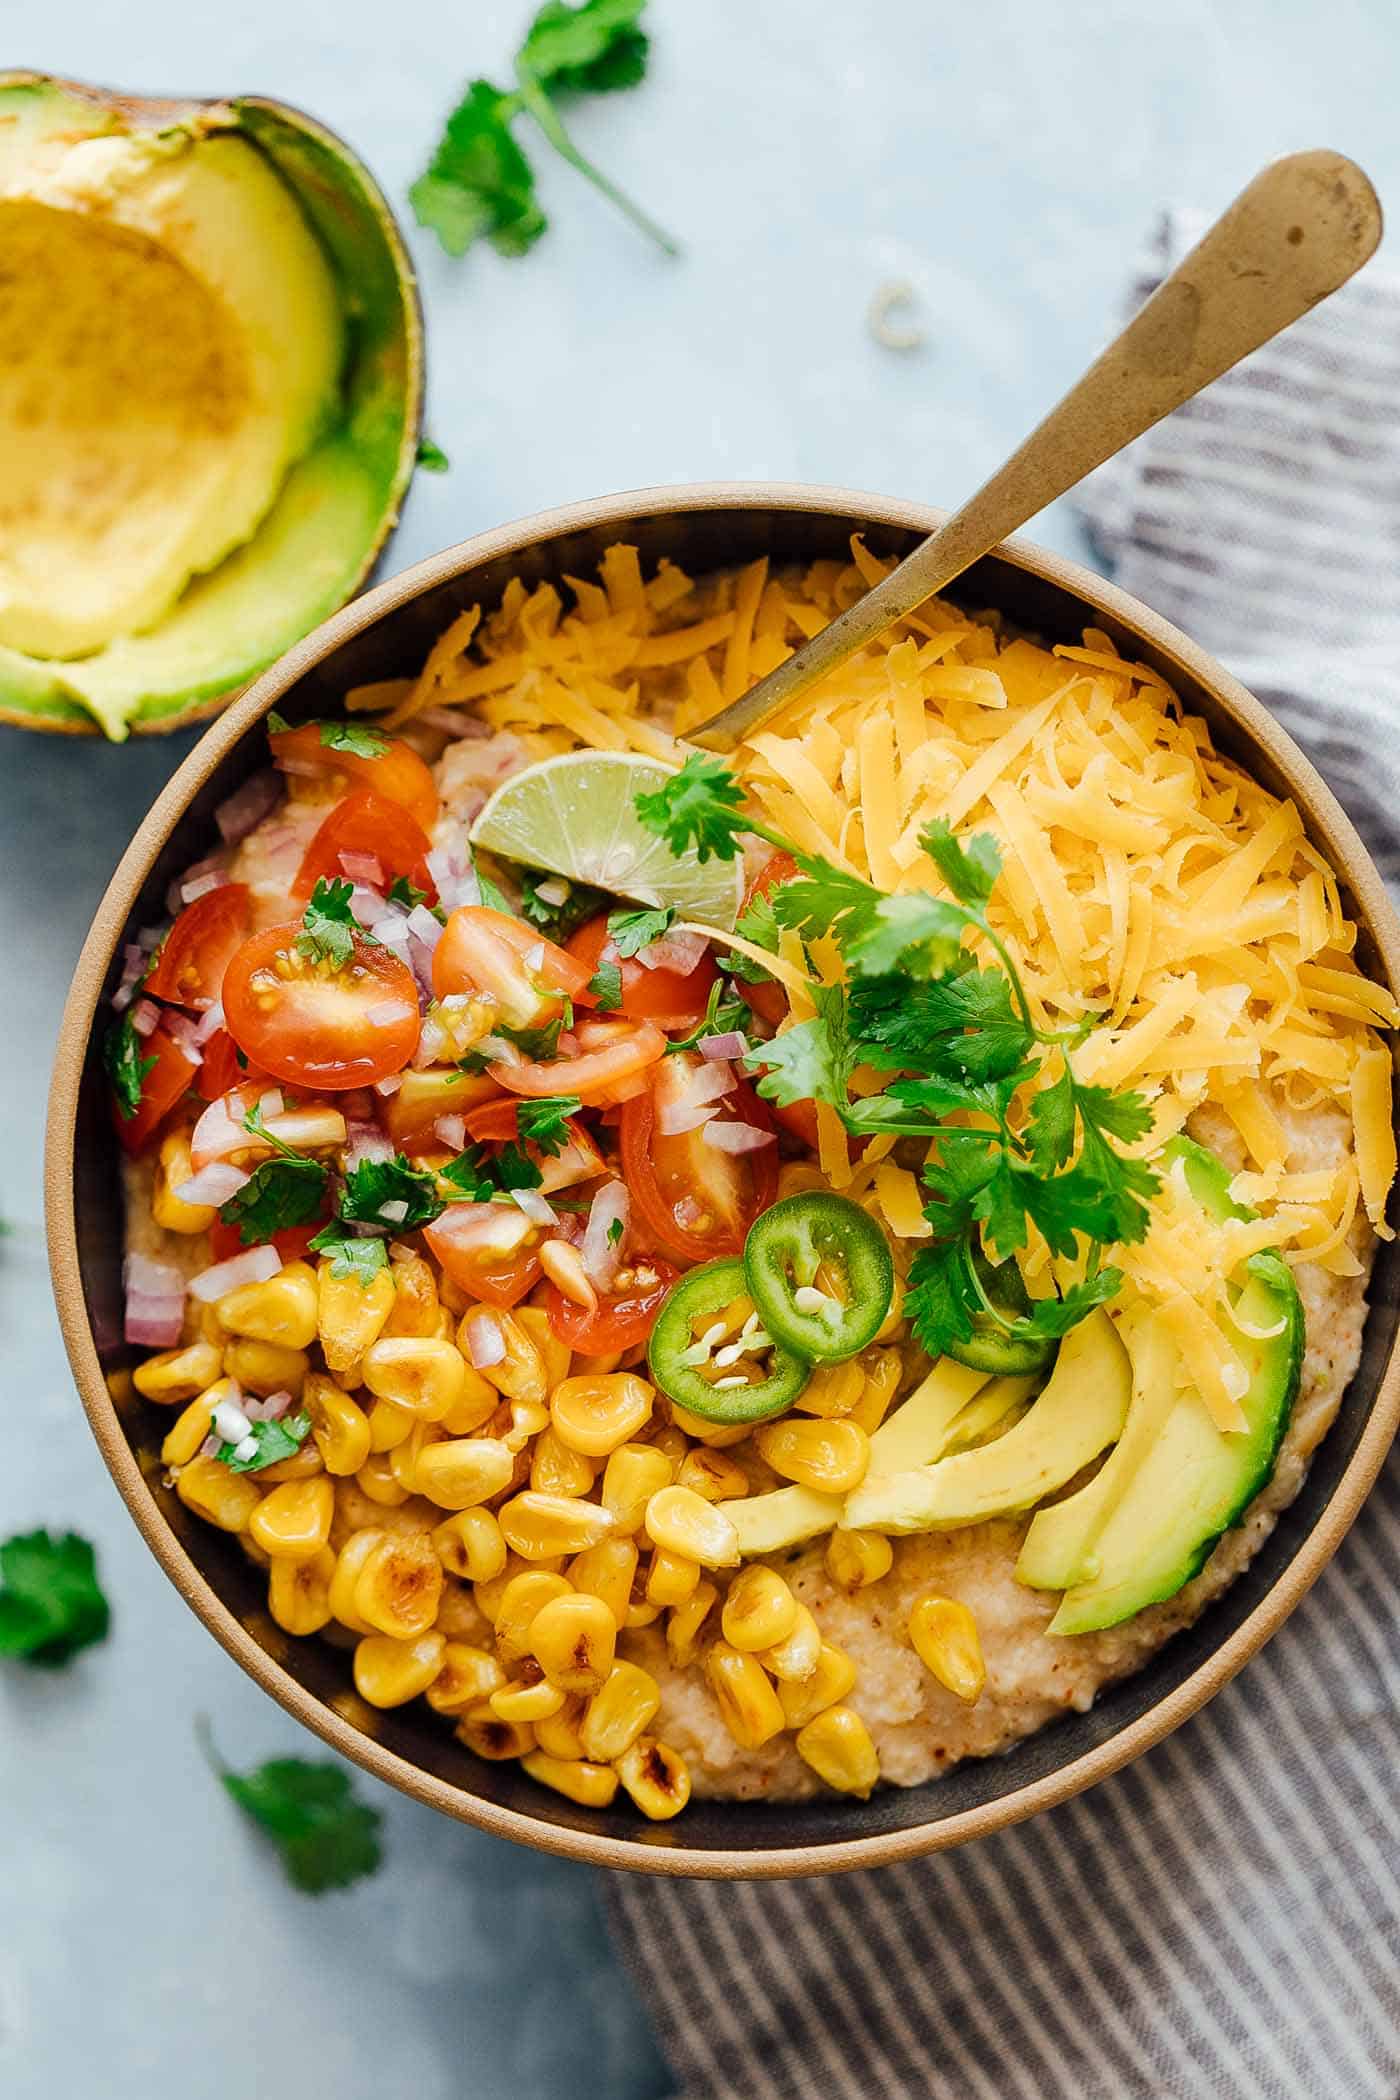
This Mexican oatmeal bowl recipe is savoury, spiced, and loaded with toppings that make it feel more like a taco bowl than a bowl of oats.
Oats for breakfast don’t have to mean the same old sweet porridge every morning. This Mexican oatmeal bowl is a really fun way to eat oats if you’ve never tried them savoury before. The oats in the recipe are cooked with garlic, taco seasoning, paprika, and a squeeze of lime, and then topped with things like corn salsa, avocado, cheddar, and jalapenos. It takes about 15 minutes and feels a lot more like brunch than a regular bowl of porridge.
The recipe is completely customisable, so you can top it with whatever you enjoy. If your family already loves our high protein dosa or moong dal chilla for breakfast, this oatmeal bowl makes a really nice change on mornings when you want something quick and different.
Oats: I have used rolled oats which I have pressure cooked to help them cook fast and come to the perfect consistency.
Garlic: Minced and sautéed before the oats go in.
Seasoning: Taco seasoning, paprika powder, lime juice, and salt. These give the oats their Mexican flavour.
Toppings: Corn salsa, grated cheddar, avocado, and jalapenos.
Oil: For sautéing the garlic.
Richa’s Top Tips
Don’t overcook the oats. They only need 3-4 minutes of simmering after the water comes to a boil. Any longer and they turn gluggy and lose their texture. You want them cooked but still with a little body to them.
Adjust the water to get the consistency you like. Some people prefer their oats thick and porridge-like, others like them a little looser. Start with the 2 cups and add more if needed.
Make this fresh and eat it immediately. Oatmeal dries out and turns stodgy really fast once it cools. This isn’t a recipe you want to make ahead or save for later. It’s best eaten straight from the pot.
Go heavy on the toppings. The toppings are what make this bowl exciting. Don’t hold back on the salsa, avocado, and cheddar. They add freshness, creaminess, and flavour that the oats need.
Frequently Asked Questions
Is this recipe spicy?
It has a mild warmth from the taco seasoning and paprika, but nothing overpowering. If you want more heat, add extra jalapenos on top or a dash of hot sauce. If you’re making this for kids or someone who doesn’t like spice, reduce the taco seasoning slightly and skip the jalapenos.
Do I need to soak my oats before making this recipe?
No. Quick cooking oats don’t need soaking. They cook in just 3-4 minutes once the water comes to a boil. That’s what makes this recipe so quick.
Can I use instant oats or steel cut oats instead?
Steel cut oats need significantly more time and water, so the recipe would need to be adjusted quite a bit. You can use instant oats for the recipe though.
Can I make this vegan?
Yes. Just skip the cheddar or use a plant-based cheese, and make sure your taco seasoning doesn’t contain any dairy. Everything else in the recipe is already vegan.
Storage Tips
Best eaten fresh. This is one of those recipes that doesn’t store well. Oatmeal dries out and becomes thick and gluggy as it cools, so make only as much as you plan to eat right away.
Freezing: Not recommended for the same reason. The texture won’t come back after freezing and thawing.
Prep ahead tip: If you want to speed up your mornings, you can pre-mix the dry seasoning (taco seasoning, paprika, salt) and keep it in a small jar. When you’re ready, just sauté the garlic, add oats, water, the seasoning mix, and you’ll have breakfast ready even faster.
Serving Ideas
These Mexican oats are a complete breakfast on their own, but here are a few ways to make the morning even better:
With a Watermelon Lime Smoothie: A cold, refreshing smoothie alongside a warm, savory oatmeal bowl is a really good morning combination.
With a cup of Masala Chai: If you want to keep it simple, a hot chai alongside this bowl is all you need.
With Air Fryer Poached Eggs on top: A poached egg with a runny yolk over the savoury oats adds protein and makes the bowl even more filling.
Customisation Ideas
Add protein: A fried egg, grilled chicken strips, sautéed prawns, or even some black beans on top turn this from a light breakfast into a really filling meal.
Swap the toppings: Guacamole instead of plain avocado, pico de gallo instead of corn salsa, or sour cream and pickled onions for a completely different flavour profile. Use whatever you enjoy on your tacos.
Make it Indian style: Skip the taco seasoning and add cumin powder, turmeric, and a pinch of chaat masala instead. Top with chopped onions, tomatoes, green chutney, and sev for a desi savoury oats bowl.
Did You Know?
Oats are one of the few grains that actually lower cholesterol. They contain a soluble fibre called beta-glucan that forms a gel-like substance in your gut, which binds to cholesterol and prevents it from being absorbed into the bloodstream. Studies have shown that eating just 3 grams of beta-glucan a day, roughly one bowl of oats, can reduce LDL cholesterol by 5-10%.
If you’ve been eating oats the same sweet way every morning, give this savoury breakfast oatmeal bowl a try and see how you feel about savoury oats. I think one bowl is all it’ll take to convert you. Share your bowls with me on Instagram @my_foodstory when you make it.
Pressure cook oats along with garlic, salt, and water for about 2 whistles on high heat. Turn off the flame allow the pressure to release naturally.
Transfer to a bowl and taco seasoning, paprika powder, and lime juice.
Top with corn, salsa, grated cheddar, avocado and jalapeno. Serve hot.
Video
Notes
You can substitute Taco seasoning with any Mexican flavoured seasoning readily available at supermarkets.
I have topped my meal with my favourites like corn salsa and avocado. You can top it with any condiments like salsa verde, proteins like – grilled chicken or prawns, chipotle dressing, guacamole etc.,
This is a very quick recipe. Do not prepare it and store it for later as oatmeal can very easily become dry and gluggy.
If you are looking for egg breakfast ideas, then you are in the right place. Here are 17 quick and easy egg breakfast ideas that are high protein and healthy!
Eggs are one of the most popular choice of breakfast, and I think it’s for all the right reasons! Firstly, egg breakfast recipes are quick and easy to make. Most often 15 minutes is all you need to put together an egg breakfast dish. And honestly, that is such a blessing on rushed weekday mornings. Secondly, eggs are so versatile and you can cook them in so many different ways. Which means you will never be bored eating eggs for breakfast again. From the simple boiled egg or poached eggs to omelette, shakshuka, fried, and frittata, you have an egg recipe for each day of the week.
And lastly, eggs are so incredibly healthy! They’re high in protein, full of good fats, and come loaded with micro nutrients. All of these things make them ideal to eat at the start of the day.
Being a big fan of eggs for breakfast myself, I had to create a post with all of my favorite egg breakfast recipes. These are all incredibly easy to make, come together quickly, and we have tested multiple times. so you know they’re both fool-proof and delicious. So if you are looking for egg breakfast ideas or high-protein egg recipes to start your right, look no further because this post has you covered!
Egg Breakfast Recipes
Air Fryer Poached Eggs
Making poached eggs in the air fryer is the easiest and mess-free way to do it. Once you try this method, you won't poaching eggs the traditional way ever again.
Chinese steamed eggs is a silky, savory custard-like dish made by steaming whisked eggs. It's one of the easiest and most delicious ways to eat eggs, tastes super silky, and comes together in under 20 minutes.
These Indian style Stuffed Eggs are the easiest way to give your daily boiled eggs an upgrade. Spicy, herby, and garlicky, this dish is an absolute banger!
A simple mayo recipe made from boiled eggs and a few other pantry staples. Perfectly creamy and delicious, but without all the excess fat and additives commonly found in store-bought mayonnaise!
These Korean Omelette rolls seem fancy but are a breeze to make, especially in a regular round pan. Packed with pantry staples like eggs and veggies, these rolls are a healthy, tasty, and kid-approved delight!
Spicy masala shakshuka is an Indian take on the traditional Middle Eastern dish. Eggs are poached till just set in a flavourful, spicy gravy that's so good you'll be licking the pan clean.
5 from 6 votes
Street Style Egg Bhurji
Try this street style egg bhurji, if you love eggs for breakfast. A twist on scrambled eggs, this recipe is spicy, buttery and full of flavour!
Watch recipe video above. This Spinach Potato Veggie Frittata packs in six to seven cups of veggies and has a creamy, custard like texture that’s incredible. It’s great when you want to feed a crowd, or meal prep a healthy breakfast for the week.
Baked Denver Omelet Breakfast Casserole is the perfect dish when you want to feed a crowd or even make freezer friendly breakfast bars that can be warmed up and eaten on the go. Loaded with onions, peppers, mushrooms, ham and a secret ingredients – this is a thick omelette thats hearty, healthy and delicious.
These savory garlic oats with a masala fried egg are healthy, delicious and a great way to switch up breakfast when you are bored of regular sweet oatmeal.
Check out this exciting recipe for a one pan Frittata that’s inspired by the Indian Masala Omelette. It’s spicy, has garam masala and can be made on the stovetop or the oven!
Loaded with onions, tomatoes, green chilies and coriander, these crisp Indian masala french toasts are perfect for breakfast, brunch or as a tea time snack.
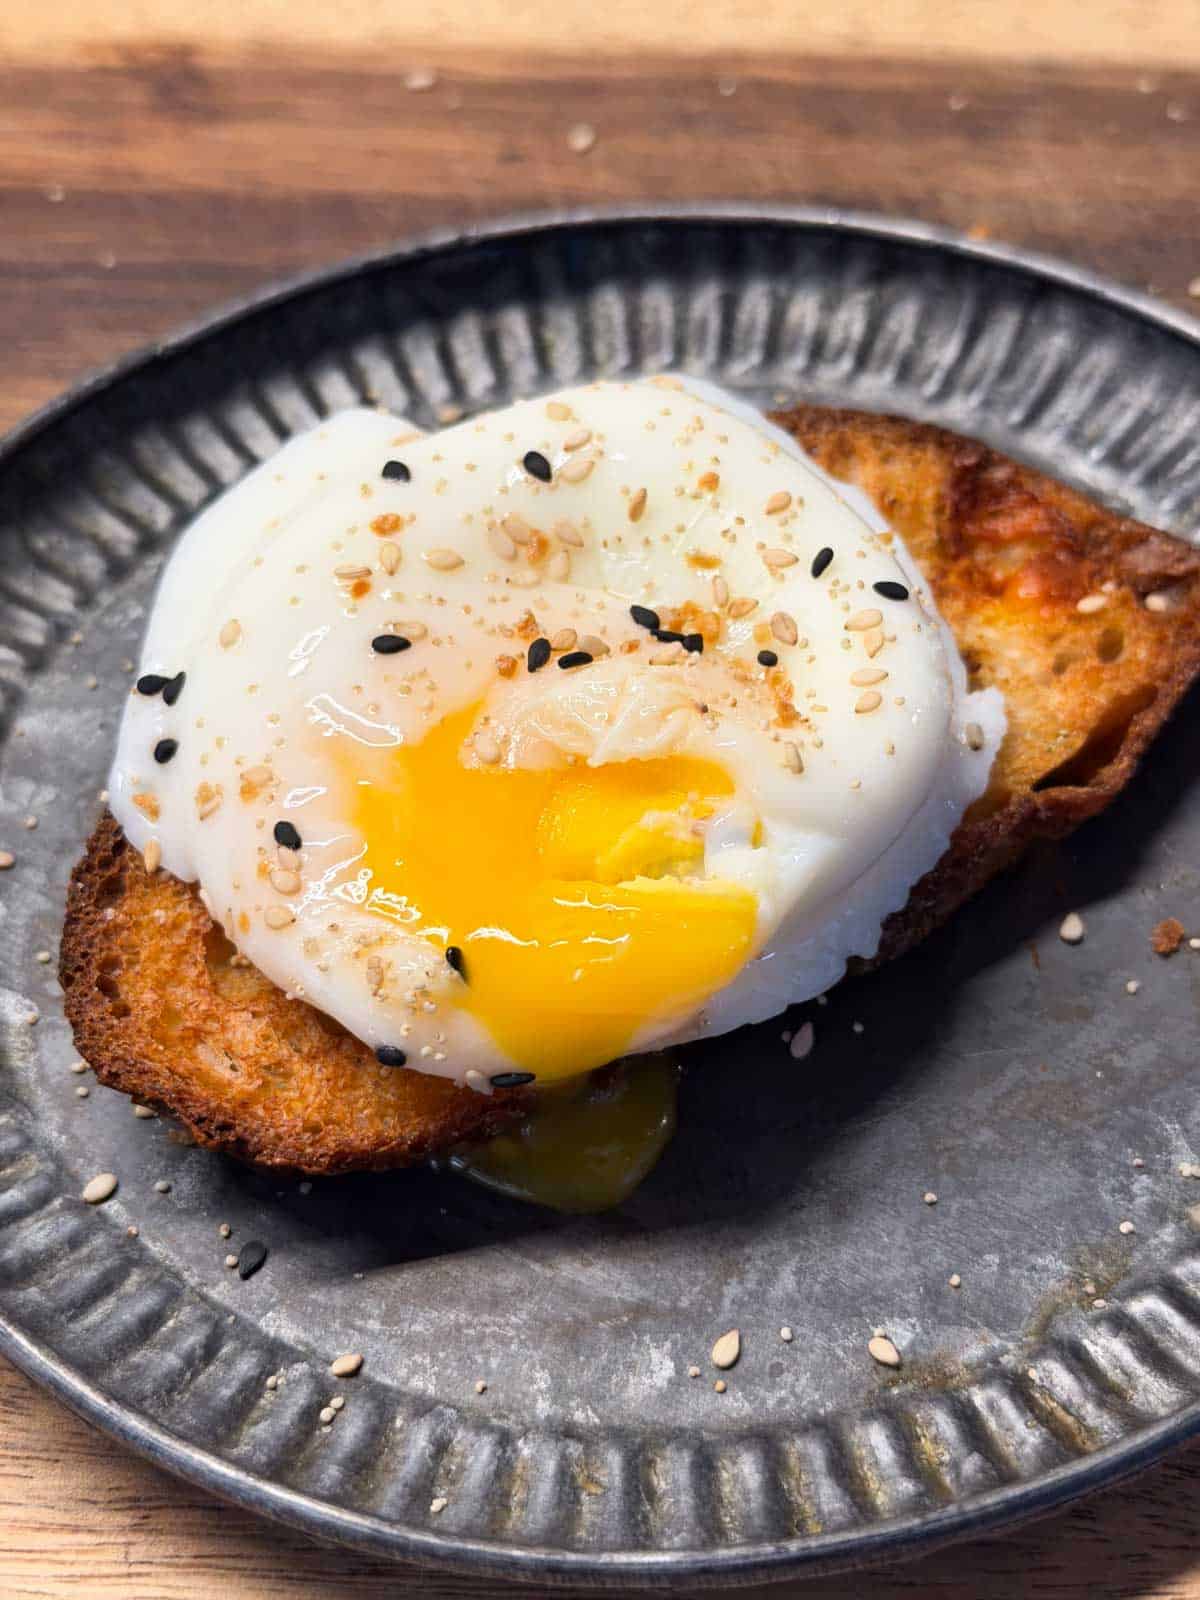
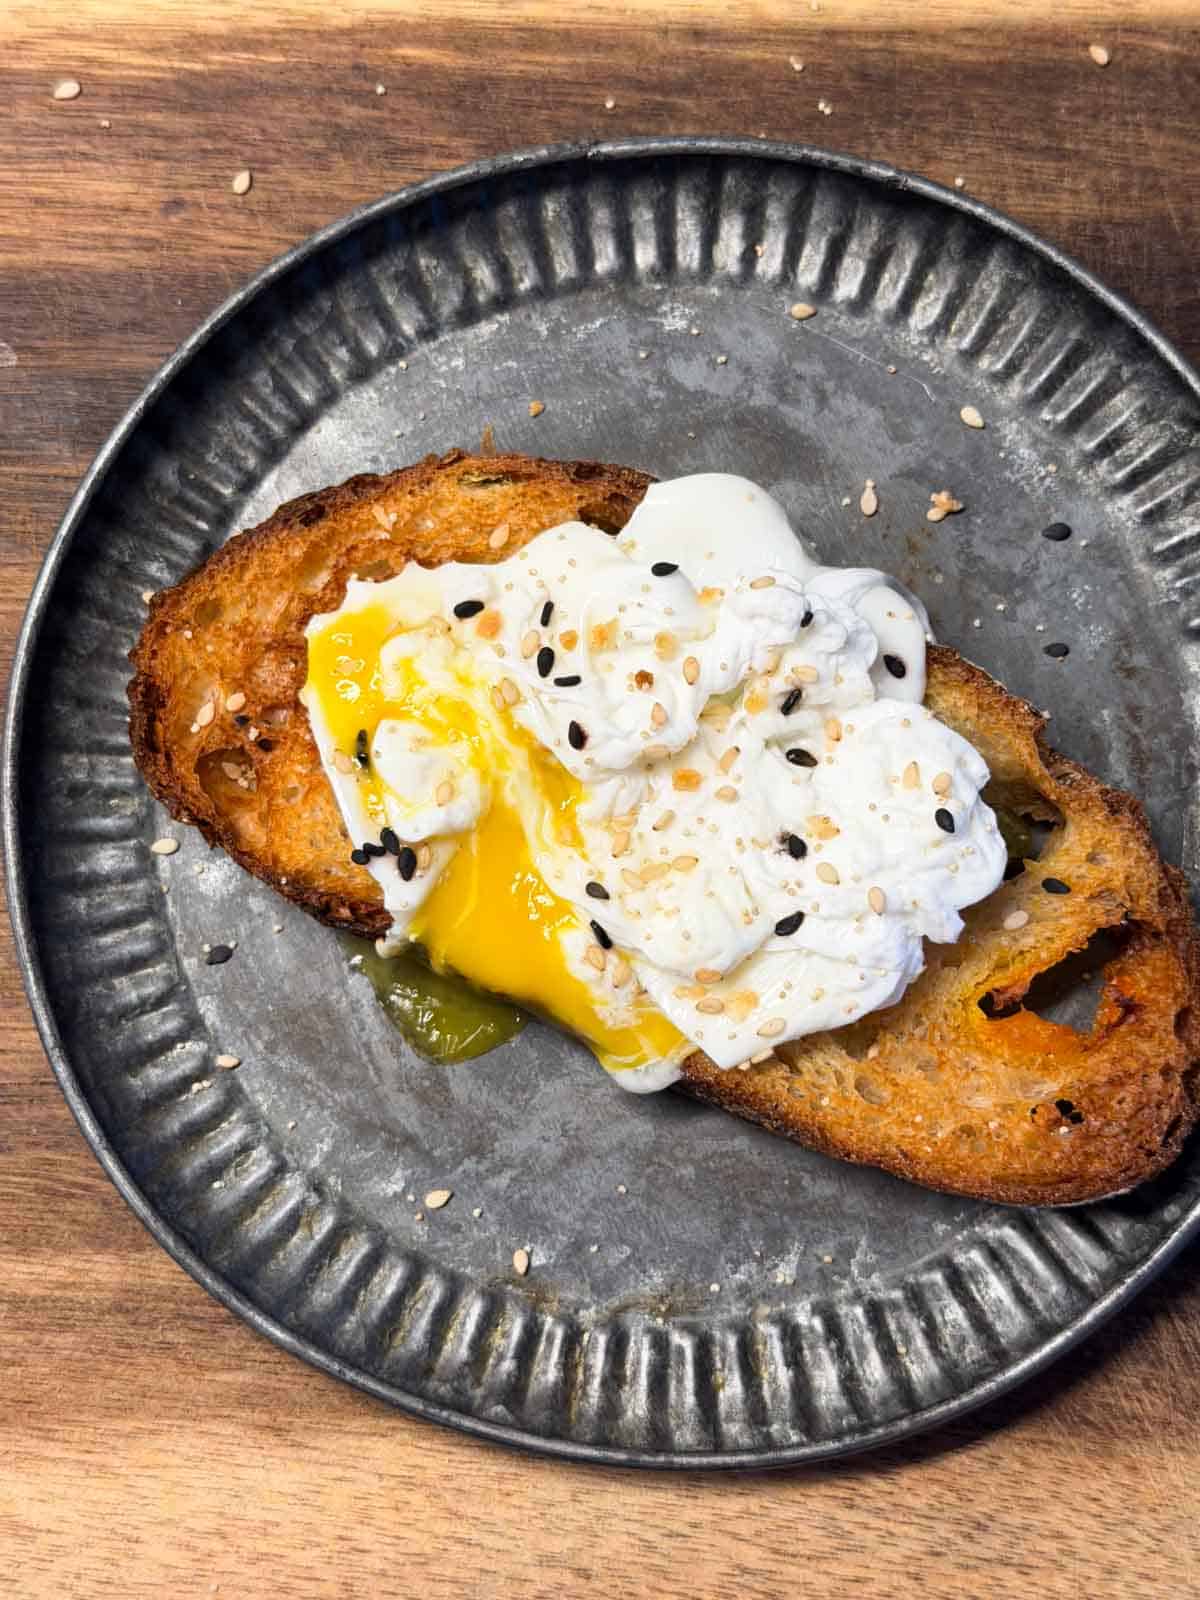
These Air Fryer Poached Eggs recipe is the easiest, fool-proof way of poaching eggs. They come out perfectly every time, you don’t even need to stand at the stove, and make your mornings a lot easier!
These air fryer poached eggs have made mornings so much simpler in our house. I no longer have to watch over the boiling water on the stove, or stress about swirling it at the right time. All you need is a ramekin, an egg, and 6 minutes in your air fryer. The eggs come out with perfectly set whites and a soft, runny yolk every single time.
We make eggs almost every day at home, and therefore I have come up with several different ways to enjoy them. My chilli oil fried eggs, mayak eggs, and Kerala egg roast have been my go-to recipes for a long time. And now this poached eggs recipe is one of the simplest of the lot. It’s a great one to have in your breakfast rotation when you want something healthy with zero fuss.
Eggs: Fresh eggs work best because the whites hold together better and give you a neater poached egg.
Water: You’ll need boiling water to create the hot water bath inside the ramekins while the eggs cook in the air fryer.
Salt: Optional, for seasoning the eggs before serving.
Frequently Asked Questions
How long do you poach eggs in an air fryer?
At 200°C, air fry the eggs for 6 minutes for set whites and soft, runny yolks. If you prefer a firmer yolk, add another 1-2 minutes of cooking time. But each air fryer is different, so you may need to experiment with the timing to achieve the best results in yours.
Can you poach eggs ahead of time?
Yes! Poached eggs can be made ahead of time and stored in the fridge for up to 2 days. Once they’re cooked, gently transfer them to an ice water bath to stop the cooking process. When you’re ready to serve, reheat them gently in warm water for a minute or two.
How do I prevent the egg from sticking to the ramekin or dish?
Lightly grease the ramekin with a little oil or butter before adding the boiling water and egg. This makes it much easier to gently scoop the poached egg out once it’s cooked. A silicone spatula or slotted spoon also helps when removing the egg.
Richa’s Top Tips
Don’t fill the ramekins too much. Fill them only halfway with water so there’s enough room for the egg without the water spilling over.
Use a small steel bowl: I found that using a small steel bowl or katori actually yielded much better results as compared to glass or ceramic.
Preheat the air fryer. Don’t skip the 200°C preheating step. Starting with a hot air fryer makes for the perfect poached eggs.
Use tongs to remove the ramekins. They’ll be very hot after cooking, so use tongs and handle them carefully.
Adjust the cooking time for your yolk. Six minutes gives you soft, runny yolks, but add a minute or two if you prefer your poached eggs more set.
Scoop the eggs out gently. A slotted spoon works best for lifting the eggs from the water without breaking the delicate yolk.
Storage Tips
Refrigerate: If you’re making these ahead, transfer the cooked poached eggs to an ice water bath immediately after cooking. Once cooled, drain and store them in an airtight container in the fridge for up to 2 days.
Reheating: Place the chilled poached eggs in a bowl of warm water for 1-2 minutes to warm them through. Avoid boiling water, as it can overcook the eggs and turn the yolks firm.
Freezing: Not recommended. Poached eggs don’t freeze and thaw particularly well, and the whites can become rubbery and watery.
Serving Ideas
Air fryer poached eggs are best served warm, with something to soak up that runny yolk. Here are a few easy ways to enjoy them:
On avocado toast: Spoon mashed avocado over crispy toast, top with a poached egg, and finish with salt, pepper, and chilli flakes.
Over a breakfast bowl: Add the poached egg to a bowl of sautéed vegetables, roasted potatoes, or grains for a filling breakfast.
With breakfast potatoes: Pair with crispy air fryer potatoes and a little hot sauce for an easy weekend breakfast.
On an English muffin: Add the poached egg to a toasted English muffin with a little butter or cheese for a quick breakfast sandwich.
Add it to a salad: Top a fresh salad with a poached egg and let the runny yolk act like a creamy dressing. It works especially well with greens, tomatoes, avocado, and a simple vinaigrette.
Did You Know?
That little white string attached to the yolk is called the chalaza. It might look like a piece of egg white that needs to be removed, but it actually has an important job. The chalaza anchors the yolk in place and helps keep it centred inside the egg. You will usually notice it more clearly in very fresh eggs, and that’s actually a good thing. A prominent chalaza is one of the little signs that your egg is fresh. So the next time you crack an egg and see that white, stringy bit, leave it there.
If you’ve always thought poaching eggs was too fiddly or complicated, these air fryer poached eggs are about to change your mind. Make them for breakfast, add one to a salad, or pile one onto toast when you want something simple but satisfying. /Once you try this method, poached eggs might just become one of the easiest ways to cook eggs. Tag me on Instagram @my_foodstory when you try it.
Making poached eggs in the air fryer is the easiest and mess-free way to do it. Once you try this method, you won't poaching eggs the traditional way ever again.
Black Rice Aapam is a wholesome twist to the traditional south indian favourite (rice aapam), made with nutrient rich black rice also known as “the forbidden rice”. The naturally earthy, nutty flavour of black rice gives these Aapams a unique depth of flavour and more intense taste than the white rice Aapams. Light, flavourful and...
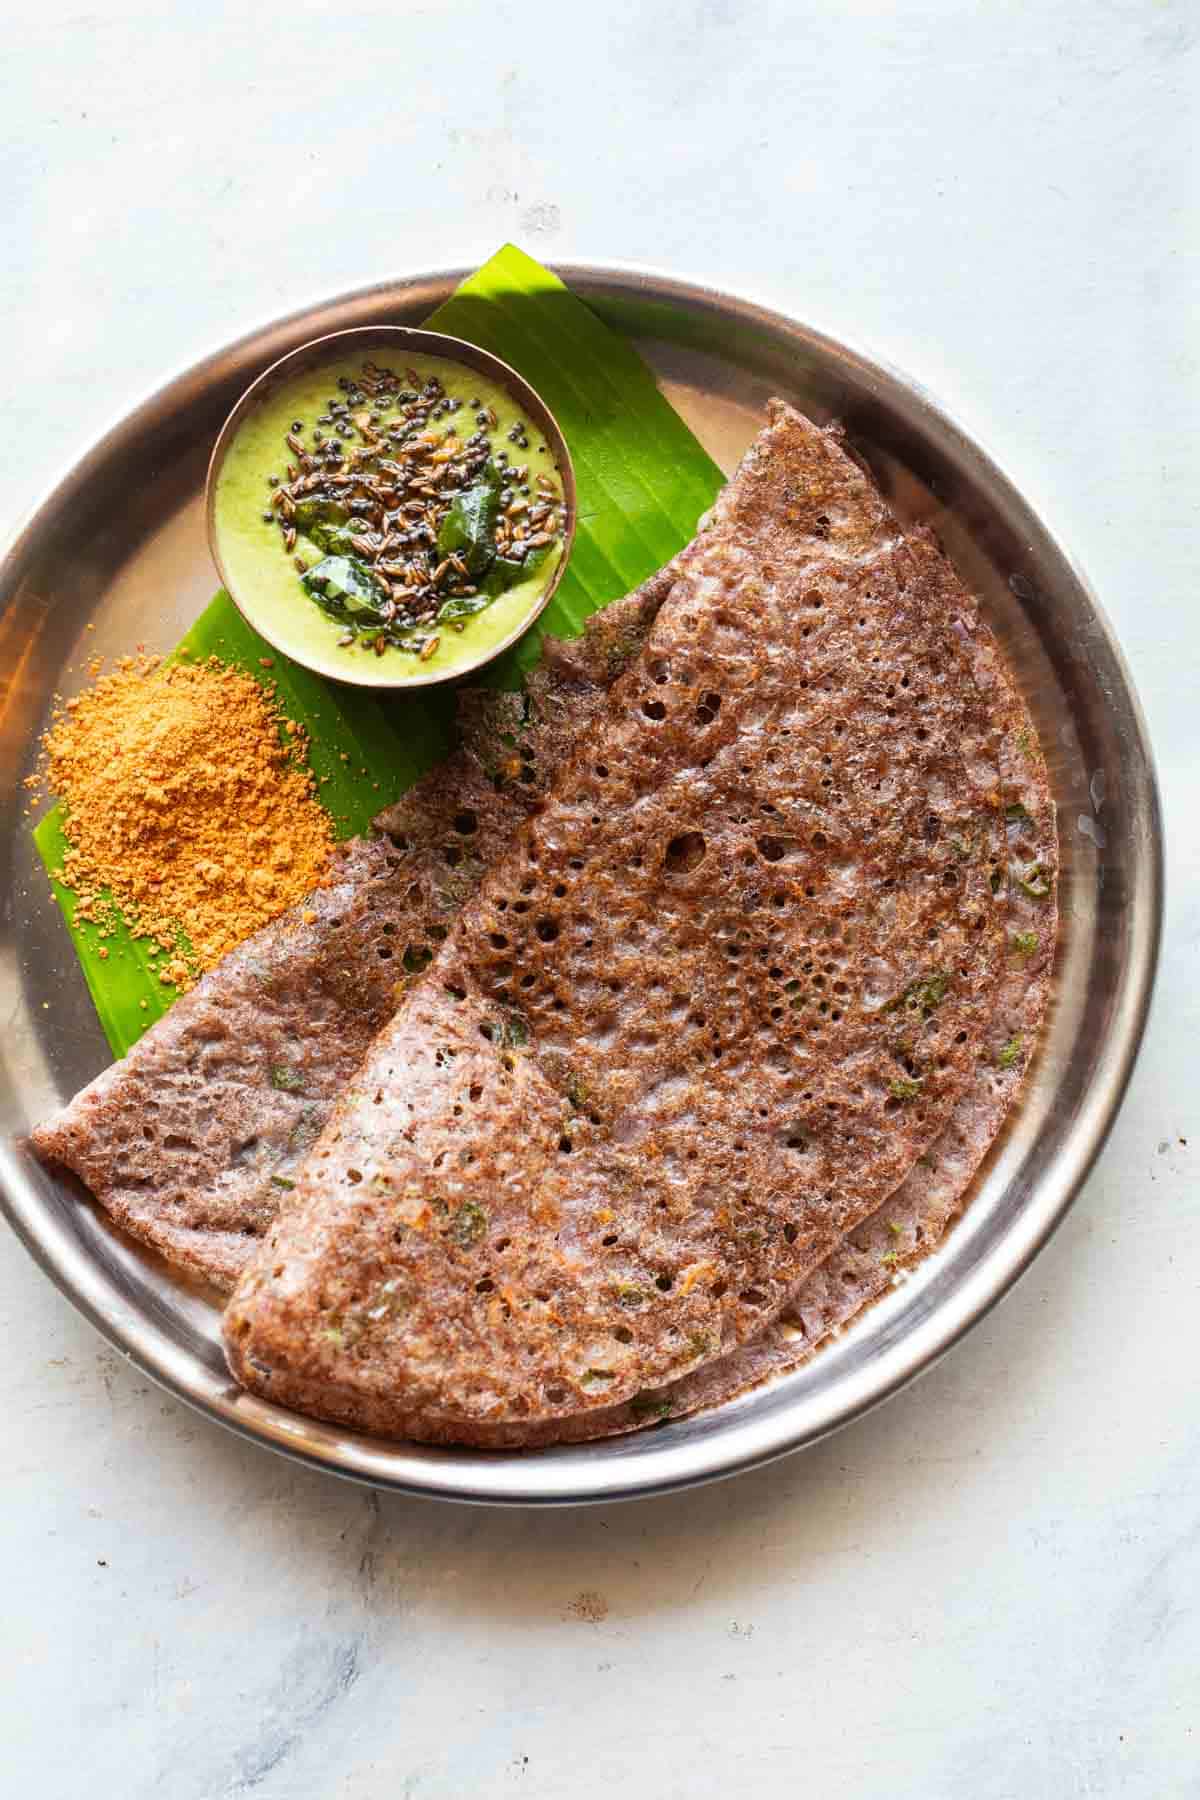
Crispy, nutritious and such an easy breakfast – Instant Ragi Dosa is best enjoyed with coconut chutney and podi. One of my favourite millet recipes and a really easy way to incorporate them in your diet.
We’ve spoken about how I’m trying to incorporate more millets in my diet and this by far is my favourite recipe. In fact now that I think about it, Ragi or Finger Millet is my most used millet. Because its so easy to incorporate – I use it to make ragi crepes, pancakes, cake and even ragi soup.
And today I have this delicious Instant Ragi Dosa for you – a super healthy, hearty breakfast that takes minutes to put together. Dosa is our go-to breakfast on my days and we do a lot of different kinds – regular dosa, oats dosa, banana dosa, millet dosa with a fermented batter, neer dosa, banana dosa and chilla. This Ragi Dosa is a current favourite because its more filling than regular dosa, doesn’t need fermentation and is a great way to incorporate ragi into the diet.
If you want to learn more about millets, including the types, how to cook them, ideas to include them in your diet and a lot more, make sure to check out my Millets 101 article.
Ingredients for Ragi Dosa
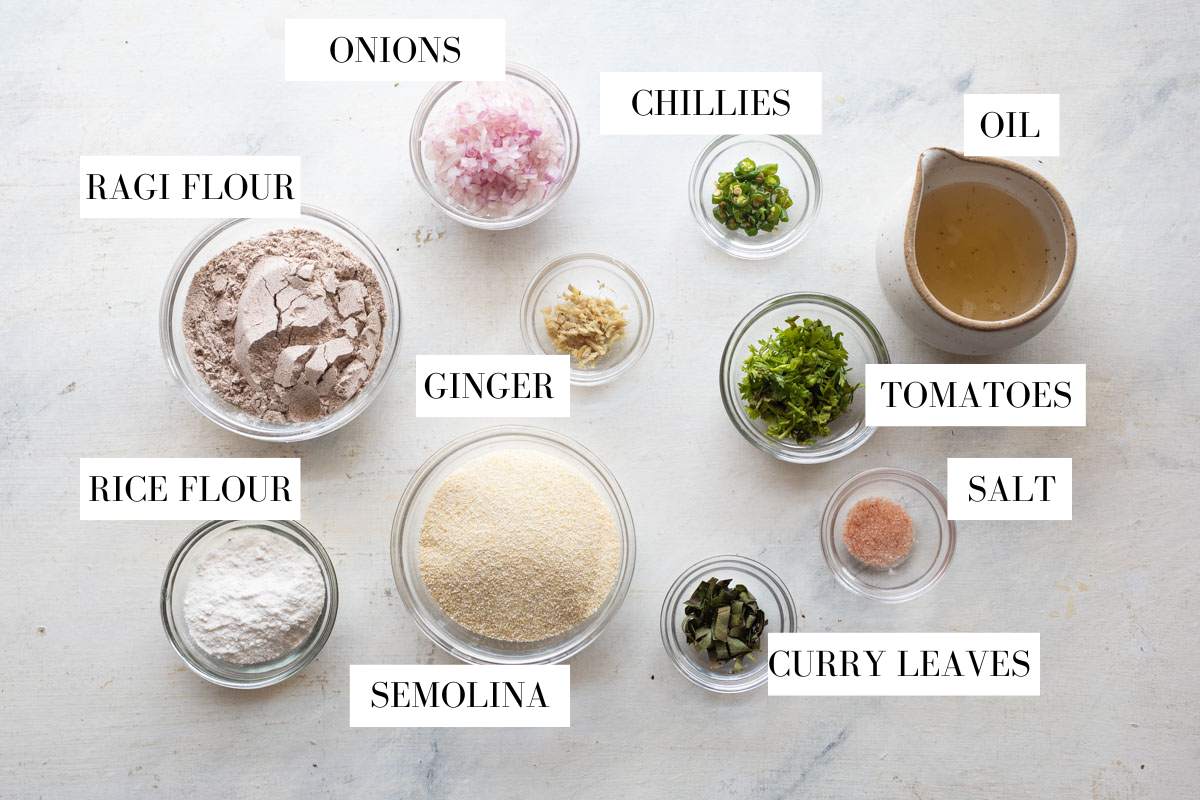
Here’s a quick picture of all the ingredients you’ll need for ragi dosa. Ragi flour or Finger Millet Flour is easily available at most places these days.
Ragi flour: Aka finger millet flour. It’s easily available in most stores both online and offline in India. If you’re outside India, you should be able to find it in any Indian supermarket near you
Semolina: Rava or semolina helps achieve that lacy, crispy texture of dosa. It also gives the dosa batter more body and prevents the dosa from falling apart
Rice flour: Helps make the batter light and airy and the dosa crispy
Onions: For texture and flavor in ever bite
Greens: Chopped coriander leaves and curry leaves add a lovely earthy flavor and freshness
Ginger: Finely chopped for flavor and aroma
Green chillies: Finely chopped for a kick of heat
Salt: For seasoning
Oil: Any neutral-flavored oil helps to prevent the dosa from sticking and makes it crispy. You can also use butter or ghee instead
Benefits of Finger Millet
Rich in calcium: Finger millet, also known as ragi, is naturally high in calcium, which supports strong bones and teeth.
Good source of fibre: Its fibre content can help support digestion and keep you feeling fuller for longer.
Naturally gluten-free: Ragi is a great grain option for people looking to include more gluten-free foods in their diet.
Provides plant-based iron: It contains iron, which plays an important role in supporting healthy red blood cell production.
Contains essential nutrients: Ragi provides nutrients such as magnesium, phosphorus and potassium, making it a wholesome addition to everyday meals.
Steady source of energy: Its combination of complex carbohydrates and fibre makes it a nourishing choice for breakfast, snacks or meals.
Frequently Asked Questions
Is ragi dosa healthier?
Yes, ragi dosa is much healthier than regular dosa thanks to its higher fiber content, and more nutrients such as calcium and iron.
Why is my ragi dosa sticking to the pan?
If your ragi dosa is sticking to the pan, the pan may not be at the right temperature or the batter may be too thick. Make sure the pan is well heated, use a thin, pourable batter, and avoid flipping the dosa until the edges are crisp and naturally start to release. If you’re using cast iron, a well-seasoned pan also makes a big difference.
Can I make instant ragi dosa without rava or semolina?
Yes, you can make instant ragi dosa without rava or semolina, but the dosa may be slightly less crispy and can be more delicate. Rava adds structure and helps create crisp edges, so if you leave it out, make sure the batter is thin and cook the dosa a little longer until it releases easily from the pan.
Richa’s Top Tips
Add water little by little. While making the batter, start by mixing all the dry flours with a little water to make a thick, lump free paste. Then add the other ingredients and water to make a thin, flowing batter
Rest the batterfor at least 30 minutes. This helps the semolina to swell up. The batter is best consumed on the same day, but can also be made the previous night and kept
Give the batter a stir before each dosa. This helps mix any flour thats settled at the bottom
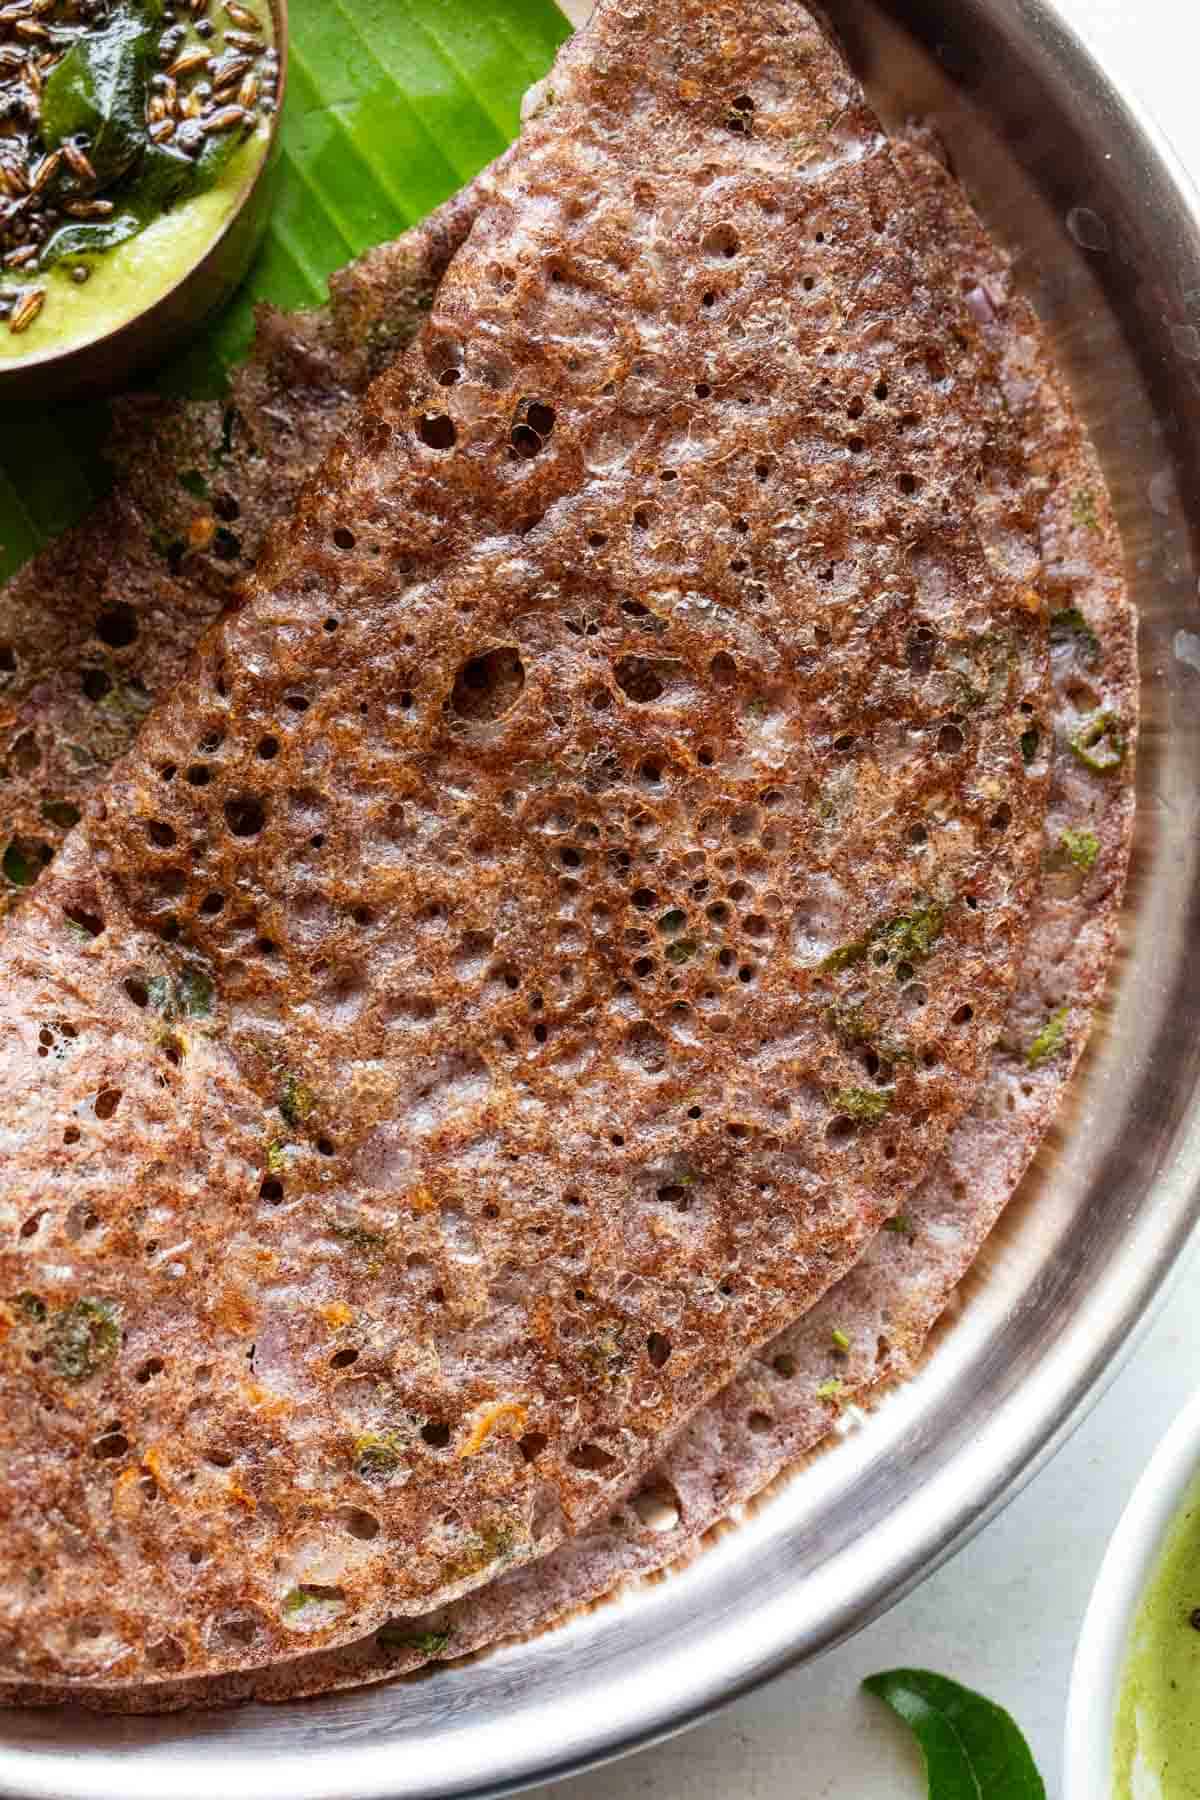
Always pour the batter, not spread. Unlike regular dosas, the batter doesn’t have to be spread. It should be poured and swirled around on a hot pan. As it hits the pan, it’ll set into a lacy pattern. If you see any large unfilled pockets, pour a little batter to fill them (watch the video to see how this is done)
Cook the dosas on a low flame. This ensures they cook well and become crispy
The consistency of the batter should be like milk. The batter can thicken so you might have to add a little more water to the batter mid way to adjust the consistency.
Storage Instructions
Dosa batter: Store leftover batter in an airtight container in the refrigerator for up to 1 day. The rava will continue to absorb liquid, so add a splash of water and whisk well before making the dosas.
Cooked dosa: Ragi dosa is best eaten fresh as it tends to lose its crispiness as it sits. If you do have leftovers, refrigerate them in an airtight container for up to 1 day.
Reheating: Reheat leftover dosas on a hot tawa for a couple of minutes on each side to bring back some of the crispness. Avoid microwaving as it can make them soft and chewy.
Serving Ideas
Instant ragi dosa tastes best hot and crisp, straight off the pan. Here are a few things you can serve it with:
Coconut chutney: A classic pairing that works beautifully with the nutty flavour of ragi.
Tomato or onion chutney: Great if you like a little extra tang and spice.
Sambar: Serve with a bowl of hot sambar for a more filling breakfast or meal.
Potato masala: Add a spoonful of South Indian-style potato masala and fold the dosa for a delicious ragi masala dosa.
Curd or yoghurt: A simple option that works especially well with a spicy chutney on the side.
Chutney powder: Sprinkle some podi over the dosa and drizzle with a little ghee for an easy, flavourful option.
This dosa is really versatile. You can also add some grated carrots or thinly sliced cabbage to the batter. Another great addition is to stuff the dosa with grated paneer, or crack an egg on it while its cooking. Choose from my trio of chutney recipes for a super delicious breakfast.
Ragi dosa is an instant dosa recipe that’s also a great way to include millets in your diet. It doesn’t need any grinding or fermenting. Rich in iron and fibre, these dosas are healthy, hearty & nutritious. The trick is to make sure the batter is the consistency of milk.
Add Ragi Flour, Rice Flour, Semolina and salt to a large mixing bowl. Add half the water and mix well to form a lump free batter. Add all the other ingredients and the remaining water to the bowl. The consistency of the batter should be like milk.
Rest the batter for 30 minutes.
Making the Dosa:
Heat a non-stick tawa or a seasoned cast iron tawa on medium heat.
Once hot, take a ladle full of batter and pour from about a 1-2 inch height in a circular motion starting from the edge to the center. Don't try to spread the batter, always pour it around the pan.
As the batter hits the hot pan, you’ll see the dosa setting with small holes. These holes allow the steam to escape and help make the dosa crispy. If there are any big holes, you can fill them up with a little batter. Turn the flame to low, drizzle ½ teaspoon oil and let it cook for a couple of minutes or till it turns golden.
The dosas take 4-5 minutes to cook on a low flame. Flip the dosa and cook for another minute or two.
Serve hot with coconut chutney or any other chutney of your choice.
Video
Notes
For Gluten Free ragi dosa, skip sooji rava or semolina. Dosas will taste as good, but will be a little thinner.
You may also add grated veggies like carrots, cabbage, beetroot etc to the batter if you like.
Leftover batter can be refrigerated and will stay fresh for up to 3 days.
You can use any Dosa Tawa, but I personally like using a Nonstick Tawa as the dosa doesn’t stick to the tawa and is easier to flip.
Feel free to use oil or ghee to cook the dosa
Give the batter a stir before each dosa. This helps mix any flour thats settled at the bottom
Cook the dosas on a low flame so that they cook well and become crispy
You might have to add a little more water to the batter mid way in case the batter becomes too thick. It should be the consistency of milk.
Unlike regular dosas, the batter doesn’t have to be spread. It should be poured and swirled around on a hot pan. As it hits the pan, it’ll set into a lacy pattern. If you see any large unfilled pockets, pour a little batter to fill them (watch the video to see how this is done).
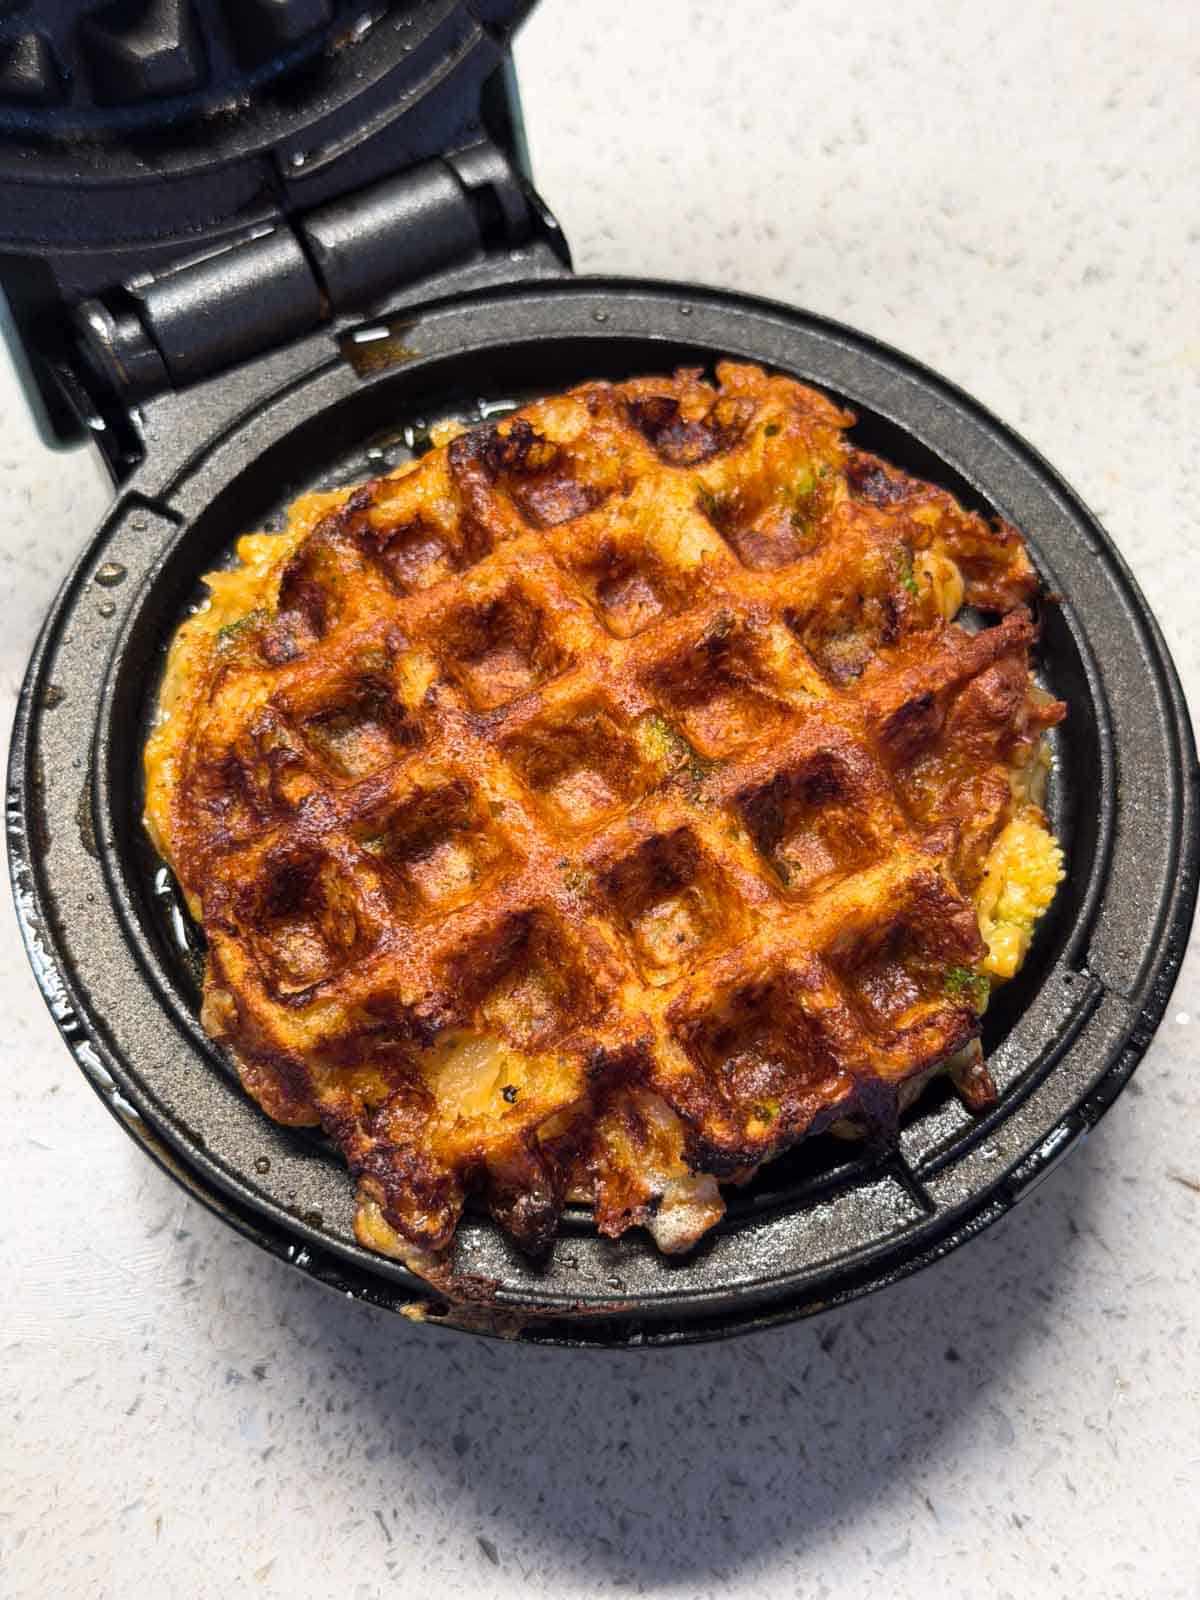
These potato waffles have made breakfast so much easier on busy mornings. A handful of ingredients, a waffle maker, and about 25 minutes are all you need to get something hot, cheesy, and filling on the table.
My kids are obsessed with these cheese potato waffles and honestly, so am I. They’re crispy, cheesy, and I manage to get broccoli into them without anyone complaining. The waffle maker does most of the work, which means I’m not standing over the stove on busy mornings, and that’s always a win.
If your mornings need a breakfast that’s quick and homemade but still gets everyone excited, give these a try. If our high protein dosa or moong dal chilla are already part of your morning routine, these potato waffles make a really nice change when you want something different.
Cheese: A mix of grated mozzarella and a processed cheese cube.
Egg & Milk: These bind the batter together and keep the waffles moist on the inside.
Broccoli: Cut into tiny bits and mixed right into the batter.
Tapioca Flour: Helps the waffle hold its shape and adds crispiness to the outside.
Seasoning: Salt, crushed pepper, grated garlic, and a pinch of Kashmiri chilli powder for colour.
Oil: Any neutral cooking oil like sunflower for greasing the waffle maker.
Frequently Asked Questions
What do potato waffles taste like?
Think of a crispy hash brown but in waffle form, with melted cheese running through it. They’re crispy on the outside, soft and cheesy on the inside, and have a gentle garlic and pepper flavour. Kids love them because they taste like a treat, and parents love them because they’re actually a proper breakfast.
My potato waffles are sticking to the waffle iron, what do I do?
Make sure you’re oiling the waffle plates generously before each waffle. Also let the waffle maker heat up fully before adding the batter. If you’re opening it too early, the waffle hasn’t had time to set and will stick and tear. Give it a full 3 minutes before checking.
Can I make these without egg?
I haven’t tried making it without eggs. Butyou can try using a tablespoon of yogurt or an extra tablespoon of tapioca flour as a binder instead. The waffle may not hold together quite as well, but with the cheese and tapioca flour already in there, it should still work.
Can I make these without a waffle maker?
You can cook them as pancakes on a hot tawa or pan. Flatten the batter into thin rounds and cook on medium heat with a little oil until golden on both sides. They won’t look like waffles, but the taste will be the same.
Richa’s Top Tips
Pat the potatoes completely dry after soaking. Any excess water in the batter will make the waffles steam instead of crisp. Take a minute to squeeze and pat them dry with a kitchen towel.
Make sure the waffle maker is fully heated before adding the batter. A cold or half-heated waffle maker is the main reason waffles stick and fall apart. Give it time to heat up properly between each waffle too.
Don’t open the waffle maker too early. It’s tempting to check, but opening it before the waffle has set will tear it apart. Give it a full 3 minutes on the first side before flipping.
Storage Tips
In the fridge: Store cooked waffles in an airtight container for up to a day. They lose their crispiness as they cool, but they reheat well.
Freezing: These freeze surprisingly well. Let them cool completely, stack with parchment paper between each waffle, and freeze in a Ziploc bag for up to two weeks. Great for meal prepping breakfast in advance.
Reheating tip: Pop them back in the waffle maker for a minute or two, or in the air fryer at 180°C for 3-4 minutes. Both bring back the crispiness really well. The microwave will make them soft and chewy, so avoid it if you can.
Serving Ideas
These potato waffles are great on their own but even better with a few things on the side:
With ketchup or mayo: The simplest way and usually how my kids eat them. A little boiled egg mayonnaise works really well if you want something homemade.
With Egg Bhurji: A cheesy waffle with spicy egg bhurji on the side makes for the most satisfying weekend breakfast spread.
With a stir-fried salad: Some quickly sautéed veggies alongside the waffles keeps the meal balanced and adds freshness.
With Mango Lassi: A cold glass of mango lassi with hot, crispy waffles is a combination my kids never say no to.
Customisation Ideas
Swap the broccoli: Finely chopped spinach, corn, bell peppers, or even grated zucchini work just as well. Use whatever your kids will eat without complaining.
Add chicken or keema: Mix in a couple of tablespoons of cooked shredded chicken or leftover keema into the batter for a more filling, protein-heavy waffle.
Turn them into waffle sandwiches: Make two thin waffles, spread some mayonnaise or ketchup between them, and press together. Kids go crazy for these.
Make a waffle chaat: Top the waffle with chopped onions, tomatoes, green chutney, sev, and a squeeze of lemon. Sounds odd, but the crispy cheesy base with chaat toppings is surprisingly addictive.
Did You Know?
Potatoes contain every nutrient a human needs to survive except calcium and vitamin D. In the 1800s, entire communities in Ireland and parts of South America lived almost exclusively on potatoes and milk for decades. The potato provided the carbohydrates, protein, fibre, and vitamins, while the milk filled the calcium gap. No other single vegetable comes close to being that nutritionally complete.
Mornings are chaotic enough without breakfast adding to the stress. This potato waffles recipe has taken that pressure off in our house, and I think they’ll do the same in yours. Let the waffle maker do the work, enjoy your chai, and put something hot and homemade on the table without the fuss. Tag me on Instagram @my_foodstory when you make them, I’d love to see how yours turn out.
Soak grated potatoes in hot water for 10 minutes to soften them a bit, drain and pat dry with a kitchen towel. Set aside. Refer note 2.
1 large potato grated or julienned, 1 ¾ cups boiling hot water
Take the egg in a bowl, whisk well, Add milk, salt, pepper, garlic, grated cheeses, tapioca flour, broccoli florets, kashmiri chilli powder, grated potatoes, give a good toss to combine well to form a thick batter.
Heat the waffle maker and coat the plates with a teaspoon of oil.
1 tablespoon sunflower or any neutral cooking oil
Fill the waffle iron with ⅓ cup of batter or as per the size of your waffle maker and cook for 2 minutes, flip and cook for 2-3 minutes or until they get crisp and golden on either side. Transfer to a plate. Repeat the same process for making waffles from the rest of the batter. Make sure waffle iron is fully heated between each waffle. Serve hot.
Video
Notes
Potatoes to be grated on the larger side of the grater, so they are like juliennes for best results.
Potatoes are soaked in hot water to tenderise/soften them or they tend to be raw and do not taste good in the waffles.
Poha Recipe is a popular breakfast made using flattened rice or poha, onion, spices and herbs. This Kanda Poha is a traditional authentic staple breakfast popular in Maharashtra. This takes just few minutes to put together and is perfect for breakfast.
Poha is a widely popular breakfast throughout India. This is a tasty dish which is wholesome, filling and nutritious too. Kanda Poha is easy to make, filling and comforting for breakfast, needs no side dish also.
[feast_advanced_jump_to]
About Poha Recipe (Kanda Poha)
Poha Recipe is made using flattened rice flakes, onion, spices and herbs. It is one of the easiest breakfast that even beginners or bachelors can try at home. This is Kanda Poha - 'Kanda' in Hindi means onion and 'Poha' is flattened rice flakes.
This Poha Recipe can be had for breakfast or snack or even for dinner. You can serve it as such or pair it up with any chutney of your choice. You can even garnish with some sev on top while serving, makes it taste so good with a crunch.
This Poha Recipe is highly nutritious yet light on the tummy making it ideal for snack or breakfast too. Roasted peanuts adds a nice flavour and crunch to this dish. You can replace it with cashews too. Poha with a cup of hot filter coffee is all that I want to curl up on a lazy weekend morning.
Flattened rice flakes or beaten rice absorbs water or milk easily so suitable for upma, vada, payasam etc. Many recipes can be made using rice flakes and it can be used to grind idli, dosa and appam batter to give it a spongy texture.
Quick recipes like sweet poha with jaggery or aval urundai can be made for evening snacks. Poha Chivda can also be made by deep frying poha and adding spices and nuts.
Poha means flattened rice flakes or also called as beaten rice or parched rice. It is called by different names : aval(tamil), atukulu(telugu), chirea(bengali), pauwa(hindi) etc. Poha is easily digestible and healthy too. Poha is usually crisp, thin or thick when soaked becomes soft and easy to cook.
Kanda Poha Video
Poha Recipe Ingredients
Poha - You can choose either thick poha or thin poha variety as per the availability and preference. Make sure to soak and drain accordingly that is the key for perfect poha recipe.
Onion - Use finely chopped onion, always cut it fresh and use it.
Mustard seeds - is added to oil and crackled.
Cumin seeds - is added once mustard seeds crackles, cumin seeds adds warmth and earthy flavour to the dish.
Curry leaves - is added for tempering, gives more flavour.
Green chilies - is added for spice, you can increase or decrease according to the spice level you want.
Turmeric powder - Turmeric powder is used for flavour and colour.
Peanuts - You can either add peanuts or cashew nuts for the crunch.
Coconut - is added at the final stage or while garnishing.
Coriander leaves - is added which makes the dish look more fresh and gives a good flavour.
Lemon juice - adds a slight tang to this dish.
Salt - is added to balance the flavours and taste.
How to make Kanda Poha Recipe Step by Step
Preparing Poha
1.Soak 1 cup poha in water for 2-3 minutes. I used thick poha (which I had in hand) so I soaked for 3-4 minutes. If its thin poha you can soak it for 2 minutes that is enough else it will become mushy.
2.Drain water rinse it well and set aside.
3.When you press with your fingers it should be soft and not mushy also it should not be stiff. If it is still stiff then soak for 2 more minutes. Make sure not to make poha mushy so take care while soaking.
4.Add salt to taste and ¼ teaspoon turmeric powder.
5.Mix it well toss for even mixing. Set aside.
6.Heat oil in a pan - add 2 tablespoon peanuts, roast until crisp. Transfer to a plate and set aside.
Tempering for Poha
7.In the same pan add 1 teaspoon mustard seeds let it splutter then add ½ teaspoon cumin seeds let it crackle then add few curry leaves and 1 green chilli, give a quick saute.
8.Now add 1 medium onion chopped.
9.Saute until it turns transparent.
Adding Poha
10.Add soaked and drained poha.
11.Give a quick mix.
Cooking Poha
12.Cook covered for 2 minutes. If you feel its too dry you can sprinkle little water then cook covered.
13.Now open give a quick mix. Adjust salt at this stage.
Garnishing
14.Add roasted peanuts, 1 tablespoon coconut, 1 teaspoon lemon juice and 1 tablespoon coriander leaves.
15.Give a quick mix and switch off.
Enjoy poha hot!
Expert Tips
Poha variety - Choose the right variety of poha thick is preferred for this recipe. Soaking and preparing poha is the key for perfect poha recipe. Remove speck if it is present. Rinse well before using but make sure not to make it mushy.
Vegetables - You can use carrot, peas and potato for a more filling and colorful poha recipe.
Soaking time - I usually soak the poha while starting to temper so by the time the tempering items are done poha becomes soft.Take care not to make the poha mushy so be careful in adding water. You can use thick or thin poha but accordingly soaking time will vary.
Peanuts - You can replace peanuts with cashews.
Coconut - Add more grated coconut while serving as garnish if you like the flavour.
Variation - You can add tomatoes for making a masala version of poha.
Serving & Storage
Serve it hot with a lavish sprinkle of sev and coriander leaves.
Poha can be stored for a day in room temperature not exactly a day may be for 10-12 hours depends on your climatic conditions too. After that refrigerate it, and while you serve you can reheat and serve it hot.
FAQS
1.What is poha recipe?
Poha recipe is prepared by first soaking and draining poha then cooking along with tempering spices and onion. Finally garnished with coconut and coriander leaves.
2.What to serve poha with?
Poha can be served along with chutney or garnished with sev and coconut.
3.Why does my poha turn mushy?
If poha is soaked for more time it turns mushy so take care while soaking and draining. Soak poha for 2-3 mins according to the variety you use.
4.Why is my poha hard and chewy?
Poha which is not usually soaked, cooked properly tastes chewy and hard. So make sure to soak poha for the desired amount of time.
If you have any more questions about this Poha Recipe do mail me at sharmispassions@gmail.com. In addition, follow me on Instagram, Facebook, Pinterest ,Youtube and Twitter .
Tried this Poha Recipe? Do let me know how you liked it. Also tag us on Instagram @sharmispassions and hash tag it on #sharmispassions.
Poha Recipe is a popular breakfast made using flattened rice or poha, onion, spices and herbs. This Kanda Poha is a traditional authentic staple breakfast popular in Maharashtra. This takes just few minutes to put together and is perfect for breakfast.
Soak poha in water for 2-3 mins. I used thick poha (which I had in hand) so I soaked for 3 mins. If its thin poha you can soak it for 2 mins that is enough else it will become mushy.
Drain water rinse it well and set aside.
When you press with your fingers it should be soft and not mushy also it should not be stiff. If it is still stiff then soak for 2 more mins. Make sure not to make poha mushy so take care while soaking.
Add salt to taste and turmeric powder.
Mix it well toss for even mixing. Set aside.
Heat oil in a pan - add whole peanuts, roast until crisp. Transfer to a plate and set aside.
In the same pan add mustard seeds let it splutter then add cumin seeds let it crackle then add curry leaves and green chillies, give a quick saute.
Now add chopped onion. Saute until it turns transparent.
Add soaked and drained poha. Give a quick mix.
Cook covered for 2 mins.If you feel its too dry you can sprinkle little water then cook covered.
Now open give a quick mix. Adjust salt at this stage.
Add roasted peanuts, coconut,lemon juice and coriander leaves.
Give a quick mix and switch off to complete Poha Recipe.
Video
Notes
Poha variety - Choose the right variety of poha thick is preferred for this recipe. Soaking and preparing poha is the key for perfect poha recipe. Remove speck if it is present. Rinse well before using but make sure not to make it mushy.
Vegetables - You can use carrot, peas and potato for a more filling and colorful poha recipe.
Soaking time - I usually soak the poha while starting to temper so by the time the tempering items are done poha becomes soft.Take care not to make the poha mushy so be careful in adding water. You can use thick or thin poha but accordingly soaking time will vary.
Peanuts - You can replace peanuts with cashews.
Coconut - Add more grated coconut while serving as garnish if you like the flavour.
Variation - You can add tomatoes for making a masala version of poha.
Podi Idli is a great South Indian breakfast that cab be made quickly with leftover idlis or mini idlis. It is made by tossing steamed idlis over a basic tempering along with a spicy ground lentil condiment called podi. These serve as a great snack too, kids will love it.
Podi idli is so tasty and a comforting food made with leftover idlis or mini idlis. I have always wondered how our elders turn even the leftovers to such tasty snack and avoid food wastage. So I have also stuck to this rule of no food wastage as far as I can.
[feast_advanced_jump_to]
About Podi Idli
Podi is a spicy condiment made using lentils. Idli is steamed rice cakes. So idlis tossed in podi is popularly known as Podi Idli. It is a quick South Indian breakfast made using left over idlis. Later hotels started to fancy it using mini idlis.
I started making podi ever since mittu started eating idli podi. I usually make a simple version in dosa tawa itself. But later when I tasted in restaurants and seeing kids enjoy it now this is the version I am making and everyone at home is a fan of it.
The key to a perfect tasting podi idli is idlis should be firm and podi should be slightly coarse. You can refrigerate the idlis for a while to make it a bit firm so that they don't crumble while tossing.
I always use homemade idli podi as it tastes great and is less spicy. I always have a batch of homemade idli podi as we aren't big fans of store bought ones. Once I see the bottle nearing to finish I make a fresh batch and store.
Over the years I have made so many versions of idli podi but the one posted here is our staple. For a change I try different varieties but finally come to our family staple recipe.
Podi Idli Video
Podi Idli Ingredients
Idli - You can use mini idli or big idlis cut into cubes. Make sure to refrigerate them for minimum 15 minutes before making podi idli.
Onion - Sliced onion adds a crunch and taste to this dish so do not miss it.
Oil - I always use gingelly oil for podi idli. But you can use any cooking oil too.
Ghee - Ghee is added for flavour. You can skip it if you do not prefer.
Mustard seeds - Mustard seeds is added to oil for tempering.
Curry leaves - is added for flavour.
Idli Podi - I always use homemade idli podi. But you can use store bought idli podi too make sure it is crunchy and slightly coarse.
1.To a pan add 1 tablespoon gingelly oil. Add ½ teaspoon mustard seeds, let it splutter.
2.Add 1 small sprig curry leaves, let it splutter.
3.Add 1 medium sized onion sliced along with little salt. Idli podi already has salt so keep an eye while adding salt.
4.Saute until it turns transparent. Do not let it soften it should be slightly crunchy.
5.Add around 30 mini idlis along with 3 tablespoon idli podi. My homemade idli posi is not spicy so I added more. You can adjust according to the spice level of your idli podi.
6.Add 1 ½ tablespoon ghee.
7.Give a quick mix.Toss in high flame and switch off.
Serve podi idli hot!
Expert Tips
Adding idli podi - Our recipe of idli podi is less spicy so I usually add more. But if you are using store bought then use little less as it may be spicy, adjust accordingly.
Add ons - You can add vegetables like carrot, capsicum to make it whole some. You can even add corn, peas or any other veggie of your choice. You can even add peanuts or almonds replacing cashews.
Oil - Gingelly oil is good for health so be generous in adding. You can replace it with coconut oil.
Idlis - Make sure your idlis are slightly porous so that it absorbs the podi well. So use the first batch of idli batter for best results. If you don't have mini idli mould, you can even make regular idlis, cube them and use it.
Avoid crumbling - Refrigerate steamed idlis for a while to make it firm and avoid crumbling.
Serving and Storage
Serve podi idli hot or warm for the best taste. Enjoy it as a breakfast, snack, or light dinner. It also tastes delicious with a cup of filter coffee or masala chai. Garnish with fresh coriander leaves and a drizzle of ghee for extra flavour.
FAQS
1. Can I use leftover idlis?
Yes. Leftover or a day-old idlis works very well because they hold their shape and absorb the podi without becoming mushy.
2. Can I make podi idli for lunch boxes?
Yes. Podi idli is a great lunch box recipe because it stays great and flavorful even after cooling.
3. Why is my podi idli dry?
It means there wasn't enough oil or ghee, or too much podi was used. Add a little more sesame oil or ghee and toss again for a better coating and to avoid drying.
If you have any more questions about this How to season Iron Tawa do mail me at sharmispassions@gmail.com. In addition, follow me on Instagram, Facebook, Pinterest, Youtube and Twitter .
Tried this How to season Iron Tawa? Do let me know how you liked it. Also tag us on Instagram @sharmispassions and hash tag it on #sharmispassions.
Podi Idli is a great South Indian breakfast that cab be made quickly with leftover idlis or mini idlis. It is made by tossing steamed idlis over a basic tempering along with a spicy ground lentil condiment called podi. These serve as a great snack too, kids will love it.
Course Breakfast, Snack
Cuisine Indian
Keyword chilli idli, chilli idly, easy idli for beginners, healthy idli, how to make chilli idli, how to make idli chaat, how to make idli fingers, how to make masala idli, how to make podi idli, idli milagai podi, idli podi recipe, Idli recipes, snack recipes
Prep Time 5 minutesminutes
Cook Time 10 minutesminutes
Total Time 15 minutesminutes
Servings 2
Calories 206kcal
Author Sharmilee J
Ingredients
30mini idli
1medium sized onion
1tablespoonoil
1 ½tablespoonghee
½teaspoonmustard seeds
1small sprig curry leaves
2tablespoonidli podi
salt to taste
Instructions
To a pan add 1 tablespoon gingelly oil. Add ½ teaspoon mustard seeds, let it splutter.
Add 1 small sprig curry leaves, let it splutter.
Add 1 medium sized onion sliced along with little salt. Idli podi already has salt so keep an eye while adding salt.
Saute until it turns transparent. Do not let it soften it should be slightly crunchy.
Add around 30 mini idlis along with 3 tablespoon idli podi. My homemade idli posi is not spicy so I added more. You can adjust according to the spice level of your idli podi.
Add 1 ½ tablespoon ghee.
Give a quick mix.Toss in high flame and switch off.
Serve podi idli hot!
Video
Notes
Adding idli podi - Our recipe of idli podi is less spicy so I usually add more. But if you are using store bought then use little less as it may be spicy, adjust accordingly.
Add ons - You can add vegetables like carrot, capsicum to make it whole some. You can even add corn, peas or any other veggie of your choice. You can even add peanuts or almonds replacing cashews.
Oil - Gingelly oil is good for health so be generous in adding. You can replace it with coconut oil.
Idlis - Make sure your idlis are slightly porous so that it absorbs the podi well. So use the first batch of idli batter for best results. If you don't have mini idli mould, you can even make regular idlis, cube them and use it.
Avoid crumbling - Refrigerate steamed idlis for a while to make it firm and avoid crumbling.

 Login