❌

Reading view

There are new articles available, click to refresh the page.

Egg Chapathi Recipe (Mutta Chapathi)

Egg Chapathi is made by crumbling chapathi & sauteeing it with egg, spices and basic veggies. Egg Chapathi is a good choice and tastes so good even with pantry ingredients. This is a quick to make breakfast perfect for weekend mornings.

egg chapathi served in a white kadai

It is perfect for weekend dinner or breakfast. Leftover chapathi can also be used for after school snack. Family like it because it is filling and ready in just few minutes. It is similar to kothu parotta but lighter and quicker to make. Kids also enjoy it as it is soft and easy to eat.

[feast_advanced_jump_to]

About Egg Chapathi

Egg chapathi is made with chapathi, eggs, onion and tomato. It is a South Indian style dish, often made at home. Everything cooks in one kadai and you can make it on busy days as they need very few things. It is a very simple tempering with egg still it tastes yum.

This Mutta Chapathi has many special memories attached with it. During my school days in my friends house there was a custom of having ragi koozh early morning and then this mutta chapathi for breakfast every sunday.

When I used to stay there on a saturday night, I have tasted this mutta chapathi for sunday breakfast. I used to be almost full after having ragi koozh itself but still used to wait for this as I loved it so much.

Hers was quite a big family with 3 sisters and I always remember the good times spent with them. Whenever I want to treat myself even with the laziness I have, I would make chapathi from the scratch just to make this and eat..love this simple dish so much.

You can add carrot or capsicum for extra veggies. Boiled egg pieces also work for different look. Pepper can be increased for more spice. You can just serve it with raita, tomato sauce or plain curd on the side. A squeeze of lemon on top also taste good.

I usually make this on Sunday evening or for school snack. My family enjoys it because it is filling and spicy. I like to use leftover chapathi from the night before.Β 

Similar Recipes

egg chapathi served in a white kadai

Egg Chapathi Ingredients

  • Chapathi - I have used leftover chapathi as the base. You can use fresh chapathi also.
  • Eggs - Eggs are added for protein and soft scramble, they coat every piece and gives good taste.
  • Onion - Onion is added for mild sweetness. It cooks down soft and makes the masala base.
  • Tomato - Tomato is used for mild tang and moisture. Ripe ones gives better colour and consistency.
  • Fennel seeds powder - Fennel seeds powder is added for light sweet aroma. It gives homely taste.
  • Pepper powder - This is added for gentle heat. Increase little if you like more spice.
  • Salt - Salt is added to taste. Go slow as chapathi already has some salt.
  • Oil - Oil is used for tempering. Ghee also work for more flavour.
  • Mustard seeds - Mustard seeds are added for crackle and flavour. They start the tempering.
  • Curry leaves - Curry leaves are used for fresh aroma. Dry ones can be skipped.
  • Green chilli - Green chilli is added for spice. Slit it so that heat is spread evenly.

How to make Egg Chapathi Step by Step

1.Take the chapathis, tear it roughly and set aside.

how to make egg chapathi step1

2.Heat oil in a kadai - add mustard seeds let it splutter then add curry leaves and green chillies quickly saute. Add onion and saute until it turns transparent. Then add tomatoes.

how to make egg chapathi step2

3.Saute for few minutes then using a masher mash it up, then keep sauteing until it turns mushy.

how to make egg chapathi step3

4.Add fennel seeds powder give a quick saute. Then add eggs and pepper powder. Scramble well.

how to make egg chapathi step4

5.Once it gets scrambled well add the torn chapathi pieces. Toss well until coated.

how to make egg chapathi step5

Serve hot!

egg chapathi served in a white kadai

Expert Tips

  • Chapathi - I prefer chapathi that is little dry or 1 day old. Tear into small even pieces for better coating.
  • Tomato - Mash tomato well and cook until it turns mushy. This removes rawness and gives good masala base. Use ripe tomato for better colour. Don't skip this step.
  • Tempering - I let mustard seeds splutter fully before adding curry leaves. Keep flame medium so that it does not burn.Β 
  • Scrambling - I scramble egg until it is almost cooked and little moist. Overcooked egg turns rubbery and dry. Keep stirring on low flame.
  • Tossing - Add chapathi pieces and toss gently on low flame. Rough mixing will break them into crumbs. Switch off once everything is coated.
  • Salt - Taste the masala before adding chapathi. Chapathi already has some salt, so add less than you think. You can always adjust later.

Serving and Storage

Serve this hot with raita, curd or tomato ketchup on the side. A cup of tea also goes well with it. It tastes best fresh from the kadai, so I serve right after cooking. Store leftover in airtight container in the fridge for 1 day. Reheat on a pan with few splashes of water on low flame. This keeps the pieces soft and not dry. Avoid microwave for long time as egg turn rubbery. Add little fresh coriander on top before serving. Don't keep it outside for more than 2 hours.

FAQS

1. Can I use fresh chapathi?

Yes you can use fresh chapathi but just let it cool down for minimum 30 minutes then use it.

2. Can I skip the egg?

Yes you can skip egg. Add paneer or extra veggies instead.

3. How to make it less spicy?

Reduce green chilli and pepper powder. It will taste mild.

4. Can I use butter instead of oil?

Yes butter work fine. It give richer flavour.

5. How long can I store it?

Store it in fridge for 1 day. Better to eat fresh.

egg chapathi served in a white kadai

If you have any more questions about this Egg Chapathi Recipe do mail me at sharmispassions@gmail.com. In addition, follow me on Instagram, Facebook,Β  Pinterest, Youtube andΒ TwitterΒ .

Tried this Egg Chapathi Recipe ? Do let me know how you liked it. Also tag us on Instagram @sharmispassions and hash tag it on #sharmispassions.

πŸ“– Recipe Card

EggChapathi3
Print

Egg Chapathi Recipe | Mutta Chapathi Recipe

Egg Chapathi is made by crumbling chapathi & sauteeing it with egg, spices and basic veggies. Egg Chapathi is a good choice and tastes so good even with pantry ingredients. This is a quick to make breakfast perfect for weekend mornings.
Course dinner, Snack
Cuisine Indian
Keyword chapati, chapati recipes, egg recipes, roti, roti recipes
Prep Time 10 minutes
Cook Time 15 minutes
Total Time 25 minutes
Servings 2 people
Calories 96kcal
Author Sharmilee J

Ingredients

  • 4 nos chapathi
  • 2 nos eggs
  • Β½ cup onion chopped finely
  • Β½ cup tomato chopped finely
  • ΒΌ teaspoon fennel seeds powder
  • salt to taste

To temper:

  • 1 tablespoon oil
  • Β½ teaspoon mustard seeds
  • few nos curry leaves
  • 1 no green chilli slitted

Instructions

  • Take the chapathis, tear it roughly and set aside.
  • Heat oil in a kadai - add mustard seeds let it splutter then add curry leaves and green chillies quickly saute. Add onion and saute until it shrinks and is transparent.
  • Then add tomatoes. SautΓ© for few min then using a masher mash it up, then keep sauteing until it turns mushy.
  • Add fennel seeds powder give a quick saute. Then add eggs and pepper powder. Scramble well.
  • Once it gets scrambled well add the torn chapathi pieces. Toss well until coated.
  • Switch off and serve Egg chapathi hot!

Notes

  • Chapathi - I prefer chapathi that is little dry or 1 day old. Tear into small even pieces for better coating.
  • Tomato - Mash tomato well and cook until it turns mushy. This removes rawness and gives good masala base. Use ripe tomato for better colour. Don't skip this step.
  • Tempering - I let mustard seeds splutter fully before adding curry leaves. Keep flame medium so that it does not burn.Β 
  • Scrambling - I scramble egg until it is almost cooked and little moist. Overcooked egg turns rubbery and dry. Keep stirring on low flame.
  • Tossing - Add chapathi pieces and toss gently on low flame. Rough mixing will break them into crumbs. Switch off once everything is coated.
  • Salt - Taste the masala before adding chapathi. Chapathi already has some salt, so add less than you think. You can always adjust later.

Nutrition

Serving: 125g | Calories: 96kcal | Carbohydrates: 7g | Protein: 1g | Fat: 8g | Saturated Fat: 1g | Polyunsaturated Fat: 2g | Monounsaturated Fat: 5g | Trans Fat: 0.03g | Cholesterol: 4mg | Sodium: 15mg | Potassium: 161mg | Fiber: 1g | Sugar: 3g | Vitamin A: 317IU | Vitamin C: 8mg | Calcium: 19mg | Iron: 0.4mg

The post Egg Chapathi Recipe (Mutta Chapathi) appeared first on Sharmis Passions.

Poha Cutlet Recipe

Poha Cutlet is a tasty savoury snack made by mixing soaked poha with cooked potato, veggies then shaping them to discs and shallow frying them in pan. The cutlets come out crispy on outside and soft inside. They are relished as a starter, snack and side dish for rice meal.

poha cutlet served with tomato ketchup

The poha is soaked and then mixed with mashed potatoes and vegetables. The mixture is shaped into flat patties and coated with cornflour paste and breadcrumbs. They are fried till golden brown on both sides with crispy outside.

[feast_advanced_jump_to]

About Poha Cutlet

Poha Cutlet is made by soaking poha, mixing it with boiled potatoes, vegetables, spices and herbs, then shaping into patties and shallow frying them until crisp and golden.

This poha cutlet with mixed vegetables tastes more or less like our regular cutlets so mittu enjoyed it so much as an after school snack. It can be served as a snack or an as appetizer too.

I got this idea of making cutlet using poha from amma. I made it almost like how we make vegetable cutletΒ and it turned out so delicious. Infact no one will ever find out that poha is added in these cutlets.

The breadcrumb coating adds nice golden colour and crunch, crisp on the outside. When you fry them shallow in pan they come out golden brown with crisp edges. The inside remains soft while outside turns crunchy. They taste good hot or at room temperature.

I usually make this for my kids snack box or for snack parties, I love the texture of this cutlet and it is simple to make, also tastes flavourful.

Similar Recipes

poha cutlet served with tomato ketchup

Poha Cutlet Ingredients

  • Poha - I used poha and soaked for few minutes. It should be mashable and slightly moist not too dry.
  • Boiled potatoes - I used boiled potatoes mashed. They add creaminess and helps bind mixture together.
  • Onion - I used finely chopped onions. It adds flavour and slight sweetness.
  • Ginger garlic paste - I used for depth and aroma. It brings nice taste to cutlets.
  • Boiled peas - I used peas for colour and nutrition. They adds nice texture.
  • Carrot - I used carrot grated. It adds nutrition and crunch.
  • Turmeric powder - I used for colour and flavour. It brings warmth to mixture.
  • Garam masala powder - I added for spice and aroma. It completes the flavour.
  • Red chilli powder - I used red chilli powder for heat and colour. Adjust based on your preference.
  • Chat masala powder - I added for tanginess. It brings nice flavour to cutlets.
  • Coriander leaves - I used fresh coriander finely chopped. It brings freshness.
  • Breadcrumbs - I used for coating. They give crispy texture when fried.
  • Corn flour - I used for coating paste. It helps breadcrumbs stick to cutlets.
  • Oil - I used oil for shallow frying. You can deep fry if you prefer.

How to make Poha Cutlet Step by Step

1.Soak poha for 3 minutes, rinse well and drain water. Poha should be mashable and slightly moist not too dry. Transfer to a mixing bowl.

how to make poha cutlet step1

2.Add boiled mashed potatoes, onion, boiled peas, carrot along with turmeric powder, red chilli powder, garam masala powder, chat masala powder, coriander leaves and salt. Mix well sprinkle little water if you feel its too dry. Make a big lemon sized ball.

how to make poha cutlet step2

3.Slightly flatten them like this, repeat to finish the dough. Now the patties are ready set aside. To another bowl add corn flour, salt and little water.

how to make poha cutlet step3

4.Mix well to form a slightly thin paste, should be in flowing consistency. Now take a pattie add it to the cornflour mixture flip over so that its evenly coated, add it immediately to breadcrumbs.

how to make poha cutlet step4

5.Flip over and coat well. Heat a pan with 2 tablespoon oil and add the cutlets in batches, fry until golden on both sides. Gently flip over and cook until it has crisp edges.

how to make poha cutlet step5

Serve hot with tomato ketchup.

poha cutlet served with tomato ketchup

Expert Tips

  • Soak poha - I soaked poha for 3 minutes and then rinsed well. Thick poha needs more time than thin poha for soaking.
  • Mixture - I made sure mixture is slightly moist and not too dry. Add little water if it is too dry but don't make it watery.
  • Shape patties - I shaped into flat discs like lemon sized balls. They fry better when they are flat and has even thickness.
  • Coating Β - I coated cutlets with cornflour mixture and breadcrumbs just before frying. If you coat ahead they become soggy and loose crispness.
  • Cornflour - I made cornflour paste in flowing consistency. This helps it spread evenly and breadcrumbs stick well.
  • Flip gently - I flipped cutlets gently while frying so they not break. Fry till golden on both sides and edges turn crisp.
  • Don't crowd pan - I fried in batches so cutlets fry evenly. Crowding the pan makes them stick to each other.

Serving and Storage

Serve poha cutlet hot with tomato ketchup or chutney. They taste best when freshly fried and turns crispy. You can store leftover in container at room temperature for one day. Reheat in pan before serving so they crispy again.

FAQS

1. Can I use thick poha or thin poha?

You can use either thick or thin poha. Thick poha needs more soaking time than thin poha so adjust accordingly.

2. Can I deep fry?

Yes you can deep fry if you prefer. Use more oil and fry till they are golden brown on all sides.

3. What if mixture is too dry?

Add little water and mix well. Don't add too much water or the mixture become sticky and difficult to shape.

4. Can I make ahead and store?

You can make patties ahead and refrigerate. But coat with cornflour and breadcrumbs just before frying so they stay crispy.

5. How long do they stay fresh?

Leftover stays good for 1 day at room temperature. After that they become soft so better to eat fresh.

poha cutlet served with tomato ketchup

If you have any more questions about this Poha CutletΒ Recipe do mail me at sharmispassions@gmail.com. In addition, follow me on Instagram, Facebook,Β  Pinterest, Youtube andΒ TwitterΒ .

Tried this Poha Cutlet Recipe? Do let me know how you liked it. Also tag us on Instagram @sharmispassions and hash tag it on #sharmispassions.

πŸ“– Recipe Card

PohaCutlet5
Print

Poha Cutlet Recipe

Poha Cutlet is a tasty savoury snack made by mixing soaked poha with cooked potato, veggies then shaping them to discs and shallow frying them in pan. The cutlets come out crispy on outside and soft inside. They are relished as a starter, snack and side dish for rice meal.
Course Snack
Cuisine Indian
Keyword Aloo Recipes, bread recipes, cutlet, masala recipes, peas recipes, poha cutlet, Potato, Potato Recipes, snack recipes, spice recipes, veg recipes, vegetable
Prep Time 30 minutes
Cook Time 15 minutes
Total Time 45 minutes
Servings 10 cutlets
Calories 125kcal
Author Sharmilee J

Ingredients

For cornflour mixture:

  • 3 tablespoon corn flour
  • salt to taste
  • water as needed

Instructions

  • Soak poha for 3 mins, rinse well and drain water. Poha should be mashable and slightly moist not too dry. Transfer to a mixing bowl.
  • Add boiled mashed potatoes, onion, boiled peas, carrot along with turmeric powder, red chilli powder, garam masala powder, chat masala powder, coriander leaves and salt.
  • Mix well sprinkle little water if you feel its too dry. Make a big lemon sized ball.
  • Slightly flatten them like this, repeat to finish the dough. Now the patties are ready set aside.
  • To another bowl add corn flour, salt and little water. Mix well to form a slightly thin paste, should be in flowing consistency.
  • Now take a pattie add it to the corn flour mixture flip over so that its evenly coated, add it immediately to breadcrumbs. Flip over and coat well.
  • Heat a pan with 2 tablespoon oil and add the cutlets in batches, fry until golden on both sides. Gently flip over and cook until it has crisp edges.
  • Serve Poha Cutlet hot with tomato ketchup.

Notes

  • Soak poha - I soaked poha for 3 minutes and then rinsed well. Thick poha needs more time than thin poha for soaking.
  • Mixture - I made sure mixture is slightly moist and not too dry. Add little water if it is too dry but don't make it watery.
  • Shape patties - I shaped into flat discs like lemon sized balls. They fry better when they are flat and has even thickness.
  • Coating Β - I coated cutlets with cornflour mixture and breadcrumbs just before frying. If you coat ahead they become soggy and loose crispness.
  • Cornflour - I made cornflour paste in flowing consistency. This helps it spread evenly and breadcrumbs stick well.
  • Flip gently - I flipped cutlets gently while frying so they not break. Fry till golden on both sides and edges turn crisp.
  • Don't crowd pan - I fried in batches so cutlets fry evenly. Crowding the pan makes them stick to each other.

Nutrition

Serving: 40g | Calories: 125kcal | Carbohydrates: 20g | Protein: 3g | Fat: 3g | Saturated Fat: 0.3g | Polyunsaturated Fat: 1g | Monounsaturated Fat: 2g | Trans Fat: 0.01g | Cholesterol: 2mg | Sodium: 169mg | Potassium: 55mg | Fiber: 1g | Sugar: 1g | Vitamin A: 628IU | Vitamin C: 2mg | Calcium: 21mg | Iron: 1mg

The post Poha Cutlet Recipe appeared first on Sharmis Passions.

Chapati Ladoo Recipe (Roti Ladoo)

Chapati Ladoo is a tasty sweet made using leftover chapati, jaggery and ghee. This ladoo is a surprise treat for kids for snack box to school and evening snacks that they will ask for more. The ladoos come out soft and sticky inside with nice texture. They are easy to make and comes together in just 15 minutes without any cooking involved.

chapati ladoo served in cupcake liners

The leftover chapati is ground coarsely with jaggery and then mixed with ghee and nuts. You just need to shape the mixture into small balls and they are ready to eat. The cardamom powder bring warmth and flavour to these simple ladoos.

[feast_advanced_jump_to]

About Chapati Ladoo

Chapati or Roti is a flatbread made using wheat flour, salt and water dough. the dough is first prepared then rolled into balls, spread into thin circles and toasted to make chapati or roti. Ladoos made using leftover chapati is Chapati Ladoo. It is also called as Policha Ladoo in Maharashtra.

Chapati Ladoo is made by grinding leftover chapati with jaggery and then mixing with ghee and nuts. The texture comes out soft and sticky when you mix everything well. Ghee binds all ingredients together so that. the ladoos hold their shape nicely.

I am sure there will at least few leftover chapati after serving all so this is an idea to use that up. This ladooΒ comes handy for those sudden sweet cravings too. This is one sweet that can be made under 15 minutes if you have leftover chapati in hand.

See a day old chapati transform into these delicious ladoos with nuts and flavored with cardamom. This is a nutritious and healthy sweet that can be served and relished.

Making chapati ladoo is simple because there is no cooking step involved. You grind leftover chapati, mix with jaggery and ghee, shape them and they ready. The mixture coarse and not fine so you get nice texture when you bite into it.

This is perfect for your sudden midnight cravings for sweet, in a way healthy too. What more do you need just leftover chapati and you are going to enjoy these ladoos for sure. Do not underestimate these by the tagline leftover, trust me and try it!

Similar Recipes

chapati ladoo served in cupcake liners

Chapathi Ladoo Video

Chapati Ladoo Ingredients

  • Chapati - Use leftover chapati or roti. It is ok if the chapati is hard, you can still use it for this ladoo.
  • Ghee - Use fresh ghee for best taste.
  • Sweetener - I have used jaggery powder but you can use either brown sugar or regular white sugar too.
  • Nuts - You can add a mix of nuts including almonds, pistachios, cashews too.
  • Flavoring - Cardamom powder is the nest flavoring that can be used for this ladoo.

How to make Chapati Ladoo Step by Step

1.Take leftover around 6 rotis / chapatis.

take chapathi

2.Tear it roughly.

tear it roughly

3.Transfer to a dry mixer jar.

transfer to the mixer jar

4.Add 3 tablespoon jaggery to it.

add jaggery to it

5.Grind to a coarse mixture.

grind it coarse

6.Transfer to a mixing bowl. Add 1 and Β½ tablespoon almonds along with 2 tablespoon ghee and a pinch of cardamom powder.

add nuts and cardamom powder

7.Mix it well.

mix it well

8.Take the mixture press, hold tight and shape them as ladoos.

press and hold tight

9.Chapati ladoo is ready. Repeat to finish.

shape into ladoo

10.Chapati ladoo is ready to serve. Store in a clean dry container.

chapati ladoo is ready

Expert Tips

  • Tear chapati roughly - I tore leftover chapati into rough pieces before grinding. This helps it grind better with jaggery.
  • Grinding Β - I ground the mixture coarse and not to a fine powder. This gives nice texture.
  • Mixing - I mixed jaggery, ghee and cardamom evenly into the ground chapati. This ensures each ladoo taste the same.
  • Press firmly - I pressed mixture tight in my palm and hold for few seconds. This helps ladoos stay intact without falling apart.
  • Use dry leftover chapati - I used leftover chapati because it is dry. Fresh chapati has moisture and makes mixture sticky and difficult to shape.
  • Don't add extra ghee - I added just enough ghee to bind mixture. Extra ghee makes it too oily and ladoos does not hold shape.

Serving & Storage

You can serve the ladoo as a tea time snack along with coffee or tea. You can also pack it for kids snack box. Keeps well in room temperature for 2 days and you can extend the shelf life for 2 more days when kept in fridge.

FAQS

1. Can I use fresh chapati?

Fresh chapati has too much moisture and makes mixture sticky. Leftover dry chapati works much better for shaping.

2. Can I use regular sugar instead of jaggery?

Yes you can use regular sugar but reduce the amount. White sugar is sweeter so use less quantity.

3. What if I don't have almonds?

You can use cashews, walnuts or other nuts. You can also powder the nuts fine if your kid does not like coarse bits.

4. How long do ladoos stay fresh?

They stay good for 2 days at room temperature. After that they start to harden so make small batches.

5. Can I freeze them?

Freezing change the texture and taste. Better to make fresh and eat within two days at room temperature.

chapati ladoo served in cupcake liners

If you have any more questions about this Chapati Ladoo Recipedo mail me at sharmispassions@gmail.com. In addition, follow me onΒ Instagram,Β Facebook,Β PinterestΒ ,YoutubeΒ andΒ TwitterΒ .

Tried this Chapati Ladoo Recipe? Do let me know how you liked it. Also tag us on Instagram @sharmispassions and hash tag it on #sharmispassions.

πŸ“– Recipe Card

Print

Chapati Ladoo Recipe | Roti Ladoo Recipe

Chapati Ladoo is a tasty sweet made using leftover chapati, jaggery and ghee. This ladoo is a surprise treat for kids for snack box to school and evening snacks that they will ask for more. The ladoos come out soft and sticky inside with nice texture. They are easy to make and comes together in just 15 minutes without any cooking involved.
Course Snack
Cuisine Indian
Keyword 30 mins recipes, cardamom powder recipe, ghee recipes, jaggery recipes, laddu, ladoo recipes, nuts recipes, wheat flour recipes, whole wheat recipes
Prep Time 15 minutes
Total Time 15 minutes
Servings 8 ladoos
Calories 142kcal
Author Sharmilee J

Ingredients

  • 6 small chapathis around 6 inches in diameter
  • 3 tablespoon jaggery powder
  • 2 tablespoon ghee melted
  • 1.5 tablespoon chopped almonds
  • β…› teaspoon cardamom powder

Instructions

  • Take leftover around 6 rotis / chapathis.
  • Tear it roughly.
  • Transfer to a dry mixer jar.
  • Add 3 tablespoon jaggery to it.
  • Grind to a coarse mixture.
  • Transfer to a mixing bowl. Add 1 and Β½ tablespoon almonds along with 2 tablespoon ghee and a pinch of cardamom powder.
  • Mix it well.
  • Take the mixture press, hold tight and shape them as ladoos.
  • Chapati ladoo is ready. Repeat to finish.
  • Chapati ladoo is ready to serve. Store in a clean dry container.

Video

Notes

  • Tear chapati roughly - I tore leftover chapati into rough pieces before grinding. This helps it grind better with jaggery.
  • Grinding Β - I ground the mixture coarse and not to a fine powder. This gives nice texture.
  • Mixing - I mixed jaggery, ghee and cardamom evenly into the ground chapati. This ensures each ladoo taste the same.
  • Press firmly - I pressed mixture tight in my palm and hold for few seconds. This helps ladoos stay intact without falling apart.
  • Use dry leftover chapati - I used leftover chapati because it is dry. Fresh chapati has moisture and makes mixture sticky and difficult to shape.
  • Don't add extra ghee - I added just enough ghee to bind mixture. Extra ghee makes it too oily and ladoos does not hold shape.

Nutrition

Serving: 30g | Calories: 142kcal | Carbohydrates: 22g | Protein: 3g | Fat: 5g | Saturated Fat: 2g | Polyunsaturated Fat: 1g | Monounsaturated Fat: 2g | Cholesterol: 10mg | Sodium: 126mg | Potassium: 65mg | Fiber: 2g | Sugar: 6g | Vitamin A: 0.02IU | Vitamin C: 0.01mg | Calcium: 11mg | Iron: 1mg

The post Chapati Ladoo Recipe (Roti Ladoo) appeared first on Sharmis Passions.

Mushroom Sandwich Recipe

Mushroom Sandwich is a mild spicy sandwich made by grilling bread stuffed with mushroom and cheese. Mushroom Sandwich is healthy and a great choice for breakfast on weekends. It can be made in 35 minutes and tastes great when served hot.

33206524718 1c002dfa4f o

It can be made easily with simple steps and you can make it in less than an hour. You can make this on weekends for breakfast as it feels warm and crispy. This is just healthy sandwich to make at home when you want something quick but filling.Β 

[feast_advanced_jump_to]

About Mushroom Sandwich

Mushroom Sandwich is made using bread, mushrooms, cheese and spices. The mushrooms gives mild flavour and the spices bring it alive. Cheese adds richness without making it too heavy. These ingredients come together to make a sandwich that tastes really great.Β 

You just need to sautΓ© the filling and stuff it between bread slices, this sandwich is quick and easy to make. The sandwich maker does the work of grilling it perfectly. The outside becomes golden and crispy while the inside stays soft.

The mushroom filling is the star of this sandwich. When you sautΓ© mushroom on high medium flame it does not let out too much water and stays crunchy. Ginger garlic paste brings depth to the flavour. Jeera adds nice aroma that makes sandwich smell amazing while it cooks.

I usually make mushroom sandwich for weekend breakfast or when guests come over. Cheese melts slightly inside while bread turns crispy outside. You can skip cheese if you like and it still tastes good.

Similar Recipes

33206524788 e92e574a78 o

Mushroom Sandwich Ingredients

  • Bread slices - I used regular bread slices. Four slices make two nice sandwiches.
  • Mushrooms - I chopped them finely so they are easy to stuff. Fresh mushrooms works best for this sandwich.
  • Onion - I used finely chopped onion. It adds sweetness and helps flavour blend nicely.
  • Capsicum - I chopped it fine too. It adds crunch and colour to the filling.
  • Pepper powder - I used for mild heat. It brings nice flavour to the mushroom filling.
  • Garam masala powder - I added for warmth and spice. It makes filling taste complete.
  • Cheese - I used mozzarella cheese grated. It melts nicely when sandwich is cooked.
  • Salt - I add for taste while cooking, add less because you can always add more later.
  • Oil - I used for sautΓ©ing the filling. It help flavours come out nicely.
  • Jeera - I used for tempering. It adds nice aroma and flavour.
  • Ginger garlic paste - I used for depth. It brings nice taste to the mushroom filling.
46358020264 42e98a21e8 o

How to make Mushroom Sandwich Step by Step

1.Heat oil in a kadai/pan - add jeera let it splutter, add ginger garlic paste let it splutter then add onion along with salt and fry till transparent. Then add capsicum saute for a minute, do not let it soften.

46167903515 496494b12b o

2.Then add cleaned and chopped mushroom, saute in high medium flame so that it doesn't let out much water. Saute for 2 minutes then add pepper powder and garam masala powder.

47081276971 deaccaa93c o

3.Saute for 2 minutes and switch off. Take bread slices, add generous amount of mushroom filling then sprinkle cheese to cover the stuffing.

47029187432 a1c6f6f916 o

4.Seal it with another slice of bread, spread butter on top.Preheat sandwich maker - add the bread slices and cook as per sandwich maker instructions until golden and crisp.

33206242128 74e106296a o

Cut and serve hot!

46358020504 4ca8dae94d o

Expert Tips

  • SautΓ©ing - I cook mushroom on high medium flame so that it does not let out water. This keeps mushroom crunchy inside sandwich.
  • Capsicum - I sautΓ© capsicum only for minute. If you cook too long it becomes soft and loose crunch.
  • Chop fine - I chop mushrooms finely so that it is easy to stuff. Halved or sliced mushroom makes sandwich difficult to eat.
  • Spread butter - I spread butter on top of bread before putting in sandwich maker. This helps bread turn golden and crispy.
  • Preheat - I preheat sandwich maker before adding bread. This helps it cook evenly and turn golden quickly.
  • Tempering - I temper oil with jeera and ginger garlic paste. This adds nice flavour to the filling.
  • Generous filling - I add generous amount of mushroom filling because it tastes better with more filling inside.

Serving and Storage

Serve mushroom sandwich hot right from sandwich maker. It tastes best when warm and crispy. You can cut diagonally and serve immediately. If you have leftover you can store it in container but it tastes best when fresh and hot.

FAQS

1. Can I skip cheese?

Yes you can skip cheese and it still tastes good. The mushroom filling tastes great even without cheese.

2. Can I use different cheese?

Yes you can use any cheese you like. Cheddar or other melting cheese works well too.

3. What if I don't have sandwich maker?

You can use tava or griddle and press with spatula. It takes a bit longer but works fine.

4. Can I add more vegetables?

Yes you can add tomato or corn but chop them fine. Don't add too much or bread tears while stuffing.

5. How do I store leftover?

You can store it in container but it tastes best when fresh and hot. You can store the stuffing for 2 days in fridge but sandwich is best when served hot and fresh.

46358020044 45631bfa84 o

If you have any more questions about this Mushroom Sandwich Recipe do mail me at sharmispassions@gmail.com. In addition, follow me on Instagram,Β Facebook,Β PinterestΒ ,YoutubeΒ andΒ TwitterΒ .

Tried this Mushroom Sandwich Recipe? Do let me know how you liked it. Also tag us on Instagram @sharmispassions and hash tag it on #sharmispassions.

πŸ“– Recipe Card

MushroomSandwich1
Print

Mushroom Sandwich Recipe

Mushroom Sandwich is a mild spicy sandwich made by grilling bread stuffed with mushroom and cheese. Mushroom Sandwich is healthy and a great choice for breakfast on weekends. It can be made in 35 minutes and tastes great when served hot.
Course Breakfast, Snack
Cuisine American, French, Indian, Italian, Mediterranean
Keyword 30 mins recipes, Baking, baking recipes, bread, bread recipes, mushroom recipes, recipes, sandwich, sandwich recipes, veg recipes
Prep Time 15 minutes
Cook Time 20 minutes
Total Time 35 minutes
Servings 2 Sandwiches
Calories 125kcal
Author Sharmilee J

Ingredients

  • 4 nos bread slices
  • Β½ cup mushrooms chopped
  • 2 tablespoon onion finely chopped
  • 2 tablespoon capsicum finely chopped
  • ΒΌ teaspoon pepper powder
  • Β½ teaspoon garam masala powder
  • 4 tablespoon grated cheese I used mozzarella
  • salt to taste

To temper:

Instructions

  • Heat oil in a kadai/pan - add jeera let it splutter, add ginger garlic paste let it splutter then add onion along with salt and fry till transparent.
  • Then add capsicum saute for a minute, do not let it soften.
  • Then add cleaned and chopped mushroom, saute in high medium flame so that it doesn't let out much water.
  • Saute for 2 mins then add pepper powder and garam masala powder.
  • Saute for 2 mins and switch off.Take bread slices, add generous amount of mushroom filling then sprinkle cheese to cover the stuffing.
  • Seal it with another slice of bread, spread butter on top.
  • Preheat sandwich maker - add the bread slices and cook as per sandwich maker instructions until golden and crisp.
  • Cut and serve Mushroom Sandwich hot!

Video

Notes

  • SautΓ©ing - I cook mushroom on high medium flame so that it does not let out water. This keeps mushroom crunchy inside sandwich.
  • Capsicum - I sautΓ© capsicum only for minute. If you cook too long it becomes soft and loose crunch.
  • Chop fine - I chop mushrooms finely so that it is easy to stuff. Halved or sliced mushroom makes sandwich difficult to eat.
  • Spread butter - I spread butter on top of bread before putting in sandwich maker. This helps bread turn golden and crispy.
  • Preheat - I preheat sandwich maker before adding bread. This helps it cook evenly and turn golden quickly.
  • Tempering - I temper oil with jeera and ginger garlic paste. This adds nice flavour to the filling.
  • Generous filling - I add generous amount of mushroom filling because it tastes better with more filling inside.

Nutrition

Serving: 75g | Calories: 125kcal | Carbohydrates: 3g | Protein: 5g | Fat: 10g | Saturated Fat: 4g | Polyunsaturated Fat: 1g | Monounsaturated Fat: 4g | Trans Fat: 0.01g | Cholesterol: 17mg | Sodium: 135mg | Potassium: 142mg | Fiber: 1g | Sugar: 1g | Vitamin A: 575IU | Vitamin C: 13mg | Calcium: 131mg | Iron: 1mg

The post Mushroom Sandwich Recipe appeared first on Sharmis Passions.

Makhana Chivda Recipe

Makhana Chivda is a crunchy and light savoury snack made by pan roasting makhana with cashews, peanuts and spices. Makhana Chivda is a healthy and quick to make evening snack time and for sudden visitors at home.

makhana chivda served

This is just a handy snack to make for tea time and desserts at home. It does not need much effort and comes together in 15 minutes. You can make it by roasting makhana in ghee until crispy then adding nuts and spices. It stays crispy for few days in a jar.

[feast_advanced_jump_to]

About Makhana Chivda

Makhana Chivda is made using makhana, fried gram dal, peanuts and cashews. These ingredients come together to make a snack with nice crunch. The makhana gives it light and airy texture. The cashews and peanuts adds richness and crunch to the snack.

The fried gram dal brings slight sweetness that balances the spices. When you roast everything together the flavours blend and create something really nice. It comes out crispy when fresh from the pan and stays crispy even after few days.

You can adjust the spice level based on what you like. The curry leaves adds earthy flavour that completes the snack. Some people add extra nuts and some keep it simple. The texture is light and it is not too heavy to eat. After it cools down completely it becomes crunchy and flaky.

I usually make makhana chivda during festival time and for unexpected guests. My family loves the crispy texture and mild flavour. It tis a raditional snack but I make it quick and simple at home.

Similar Recipes

makhana chivda served

Makhana Chivda Ingredients

  • Makhana - I used makhana for the base. It gives light and crispy texture when roasted properly. These puff up and become crispy in minutes.
  • Fried gram dal - I added this for sweetness. It is already roasted so you just need to toss it and it turns golden quickly.
  • Peanuts - I used unsalted peanuts for this. They roast quickly and adds protein and crunch to the mix.
  • Cashews - I used whole cashews. They become golden and adds richness without overpowering the other flavours.
  • Curry leaves - I prefer fresh ones. They add flavour that complete the snack and give nice taste.
  • Turmeric powder - I added for warmth and colour. It gives subtle flavour and nice golden colour to everything.
  • Red chilli powder - I used for heat and colour. Adjust based on how spicy you like it and taste as you go.
  • Salt - I added to taste. Start with less because you can always add more but you can't take it out.

How to make Makhana Chivda Step by Step

1.Measure and get ready with the ingredients. Heat ghee in a pan - add makhana roast until crisp. If you break and see it should be crisp that is the correct stage.

how to make makhana chivda step1

2.Transfer to plate and set aside. Heat oil in the same pan - add fried gram dal and peanuts roast until golden then add cashews.

how to make makhana chivda step2

3.Roast until golden brown. Then add curry leaves along with spice powders and salt.

how to make makhana chivda step3

4.Give a quick mix and switch off. Add roasted makhana toss it well.

how to make makhana chivda step4

Cool down for a while then store or serve immediately.

makhana chivda served

Expert Tips

  • Makhana roasting - I always check if makhana is completely crisp. Break one and look inside to make sure it is crisp. Soft makhana will get chewy once it cools down and that not good.
  • Use ghee - I roast makhana in ghee because it gives better flavour than oil. For nuts and dal, oil works fine and helps save money.
  • Curry leaves - I add them right before switching off heat so they stays crisp. They add flavour that you can't get from spices alone and make difference.
  • Spice balance - I start with less chilli powder and adjust. You can always add more if you like more it more spicy.
  • Cooling - I let it sit on plate for few minutes after roasting. Any moisture will make it soggy so this step is important.
  • Roast separately - I roast each ingredient at its own time. Don't throw everything in at once or some will burn and taste bad.

Serving and Storage

Serve makhana chivda fresh or at room temperature with tea or coffee. It pairs well with evening time and fill you up nicely. You can store this in airtight container at room temperature and it stay good for 4 to 5 days without any problem.

FAQS

1. Can I use store bought roasted makhana?

No you need to roast it fresh in ghee for best flavour. Store bought ones are not crispy enough and taste different.

2. What if makhana is not available?

You can make similar chivda with popcorn or other nuts too.

3. Can I add nuts?

Yes almonds, walnuts or pistachios work well. Just add them at same time as cashews and roast together.

4. How spicy should it be?

This recipe is mild. You can increase chilli powder for more heat based on what you prefer and like.

5. Can I make it ahead?

Yes you can make it day before if needed. Store in airtight jar for best result and it stay crispy.

makhana chivda served

If you have any more questions about this Makhana Chivda Recipe do mail me at sharmispassions@gmail.com. In addition, follow me on Instagram, Facebook,Β  Pinterest, Youtube andΒ TwitterΒ .

Tried this Makhana Chivda Recipe ? Do let me know how you liked it. Also tag us on Instagram @sharmispassions and hash tag it on #sharmispassions.

πŸ“– Recipe Card

MakhanaChivda2
Print

Makhana Chivda Recipe

Makhana Chivda is a crunchy and light savoury snack made by pan roasting makhana with cashews, peanuts and spices. Makhana Chivda is a healthy and quick to make evening snack time and for sudden visitors at home.
Course Snack
Cuisine Indian
Keyword makhana recipes, masala recipes, savoury recipes, snack recipes
Prep Time 5 minutes
Cook Time 10 minutes
Total Time 15 minutes
Servings 2 people
Calories 196kcal
Author Sharmilee J

Ingredients

  • 1 cup phool makhana
  • 2 tablespoon fried gram dal
  • 2 tablespoon peanuts
  • 10 cashews
  • few curry leaves
  • ΒΌ teaspoon turmeric powder
  • Β½ teaspoon red chilli powder
  • salt to taste

Instructions

  • Heat ghee in a pan - add makhana roast until crisp. If you break and see it should be crisp that is the correct stage. Transfer to plate and set aside.
  • Heat oil in the same pan - add fried gram dal and peanuts roast until golden then add cashews. Roast until golden brown.
  • Then add curry leaves along with spice powders and salt. Give a quick mix and switch off.
  • Add roasted makhana toss it well.
  • Cool down Makhana Chivda for a while, then store or serve immediately.

Nutrition

Serving: 75g | Calories: 196kcal | Carbohydrates: 22g | Protein: 10g | Fat: 9g | Saturated Fat: 1g | Polyunsaturated Fat: 3g | Monounsaturated Fat: 4g | Sodium: 52mg | Potassium: 473mg | Fiber: 5g | Sugar: 1g | Vitamin A: 161IU | Vitamin C: 1mg | Calcium: 48mg | Iron: 3mg


The post Makhana Chivda Recipe appeared first on Sharmis Passions.

Kunukku Recipe

Kunukku is a crispy, savoury fritter made from lentils, rice batter. The fritters are deep fried until golden brown and crispy. It has soft inside and tastes flavourful with a blend of spices and coconut bits.

kunukku served with chutney and coffee

This is traditional snack for evening tea time in South Indian homes. Kunukku is healthier snack because it made from dal and rice which give protein and fibre. It liked by all ages because taste is simple but delicious. You can make batch of these and keep for few days.

[feast_advanced_jump_to]

About Kunukku

Kunukku is made using a mix of parboiled rice, raw rice and three different lentils. Lentils gives protein and makes fritter taste wholesome. Rice gives texture and helps batter come together. When you grind everything together, you get a slightly coarse mixture which is perfect for frying.

The fritters has crispy outside and soft fluffy inside. When you bite into it, the texture is amazing. The flavour comes from combination of lentils and spices like chillies and curry leaves.

There are a lot of variations to this recipe. Some people add grated coconut for sweetness and crunch. You can add more chillies if you like spicy. The batter can be made thick or slightly loose based on preference. Thicker batter makes fritter more crispy and crunchy.

I usually make kunukku when I want quick evening snack for family. My kids enjoy it with chutney. The fritters taste best when hot, fresh and still warm. It is a good option when you have guests and want serve something homemade.

My friend used to say kunukku looks tiny, chubbyΒ  and cute they use this term 'kunukku' for pampering small babies and kids.

Similar Recipes

kunukku served with chutney and coffee

Kunukku Video

Kunukku Ingredients

  • Parboiled rice - Parboiled rice is used as base for batter. It gives good texture and makes fritters fluffy inside.
  • Raw rice - Raw rice is added for slight crispness. It helps batter not get too soft when fried.
  • Toor dal - I used toor dal for protein and flavour. It gives slight sweetness to the fritters.
  • Chana dal - I added chana dal for crunch and taste. It makes fritter feel more interesting texture-wise.
  • Urad dal - Urad dal is used for binding the batter. It helps fritter stay together while frying.
  • Red chillies - I used red chillies for spice. You can add more or less based on spice preference.
  • Coconut bits - I added coconut bits for sweetness and flavour. They add texture and taste to fritter.
  • Curry leaves - Curry leaves are added for aroma.
  • Salt - I used salt for seasoning batter. It brings out flavours of lentils and spices.
  • Hing - Hing is used for digestion. It also add subtle flavour to the fritters.

Gow to make Kunukku Step by Step

1,Measure the lentils, rice and add to a mixing bowl, soak in water atleast for 3 hours.

how to make kunukku step1

2.Rinse well, drain and add to mixer jar. Sprinkle little water and grind to a slightly coarse mixture.

how to make kunukku step2

3.Transfer the mixture to a mixing bowl, add coconut bits, curry leaves, salt and hing. Mix well. Heat oil in a kadai - pinch small portions and add to oil.

how to make kunukku step3

4.Flip over and cook until golden brown and crisp. Drain and serve hot!

how to make kunukku step4

Serve hot with chutney!

kunukku served with chutney and coffee

Expert Tips

  • Soaking time - I soak dals and rice for 3 hours minimum. This maked them soft and easy to grind into a batter.
  • Grinding - I grind to slightly coarse mixture, not too fine. If too fine, fritters become hard and drink more oil while frying. If too coarse, they crumble while frying.
  • Draining well - I drain soaked dals and rice completely before grinding. Extra water makes batter too thin and fritters absorb too much oil.
  • Adding water while grinding - I sprinkle little water while grinding. Too much water make batter thin and fritters fall apart in oil.
  • Oil temperature - I heat oil well before adding batter. Hot oil makes fritter crispy outside and soft inside.
  • Frying small portions - I pinch small portions and drop carefully. Small size cook evenly and turn golden brown easily.

Serving and Storage

Serve kunukku hot with coconut chutney or green chutney. The warm fritters tastes crispy and flavourful. You can also serve with cup of hot tea or coffee. It taste best when eaten fresh right after frying. Store leftover kunukku in airtight container at room temperature for 2 days.

FAQS

1.Can I use store bought adai batter?

You can use leftover adai batter if you have. Make sure batter is not too thin. Thick batter works better for frying kunukku.

2. Why is my kunukku coming out hard?

If grinding too fine, fritters become hard. Grind to slightly coarse mixture. Also don't add too much water while grinding.

3. Can I make kunukku without soaking?

You need to soak dals and rice minimum 3 hours. Soaking make them soft and easy to grind into batter.

4. How do I know oil is hot enough?

Drop small piece of batter in oil. If it float up quickly, oil is ready. If it sink, oil still not hot.

5. Can I add vegetables to kunukku?

You can add grated vegetables like carrot or beetroot.Β 

kunukku served with chutney and coffee

If you have any more questions about this Kunukku Recipe do mail me at sharmispassions@gmail.com. In addition, follow me on Instagram, Facebook,Β  Pinterest, Youtube andΒ TwitterΒ .

Tried this Kunukku Recipe ? Do let me know how you liked it. Also tag us on Instagram @sharmispassions and hash tag it on #sharmispassions.

πŸ“– Recipe Card

45990083085 d837ff3085 o
Print

Kunukku Recipe

Kunukku is a crispy, savoury fritter made from lentils, rice batter. The fritters are deep fried until golden brown and crispy. It has soft inside and tastes flavourful with a blend of spices and coconut bits.
Course Appetizer
Cuisine Indian
Keyword 30 mins recipes, dal recipes, fry, fry recipes, rice flour recipes, snack recipes, starter
Prep Time 5 minutes
Cook Time 25 minutes
Soaking Time 3 hours
Total Time 3 hours 30 minutes
Servings 2 people
Calories 277kcal
Author Sharmilee J

Ingredients

  • Β½ cup parboiled rice
  • 2 teaspoon raw rice
  • β…› cup toor dal
  • β…› cup chana dal
  • 1 tablespoon urad dal
  • 2 nos red chillies

Instructions

  • Measure the lentils, rice and add to a mixing bowl, soak in water at least for 3 hours.
  • Rinse well, drain and add to mixer jar. Sprinkle little water and grind to a slightly coarse mixture.
  • Transfer the mixture to a mixing bowl, add coconut bits, curry leaves, salt and hing. Mix well.
  • Heat oil in a kadai - pinch small portions and add to oil.
  • Flip over and cook until golden brown and crisp. Drain in container with holes / tissue paper!
  • Serve Kunukku hot with chutney!

Video

Notes

  • Soaking time - I soak dals and rice for 3 hours minimum. This maked them soft and easy to grind into a batter.
  • Grinding - I grind to slightly coarse mixture, not too fine. If too fine, fritters become hard and drink more oil while frying. If too coarse, they crumble while frying.
  • Draining well - I drain soaked dals and rice completely before grinding. Extra water makes batter too thin and fritters absorb too much oil.
  • Adding water while grinding - I sprinkle little water while grinding. Too much water make batter thin and fritters fall apart in oil.
  • Oil temperature - I heat oil well before adding batter. Hot oil makes fritter crispy outside and soft inside.
  • Frying small portions - I pinch small portions and drop carefully. Small size cook evenly and turn golden brown easily.

Nutrition

Serving: 75g | Calories: 277kcal | Carbohydrates: 57g | Protein: 9g | Fat: 1g | Saturated Fat: 0.1g | Polyunsaturated Fat: 0.1g | Monounsaturated Fat: 0.1g | Sodium: 11mg | Potassium: 62mg | Fiber: 6g | Sugar: 1g | Vitamin A: 10IU | Vitamin C: 2mg | Calcium: 44mg | Iron: 2mg

The post Kunukku Recipe appeared first on Sharmis Passions.

Millet Murukku Recipe

Millet Murukku is a healthy and crispy snack made by adding millet flour to regular rice flour and shaping using murukku press. It comes out golden and delicious and tastes just as good as regular murukku. It has mild nutty flavour from millet. Millet Murukku savours the celebration of people who are on diet without adding much of calories.

millet murukku served

This is usually made for people on diet or who want healthier snack. It makes a nice treat without adding much calories like regular murukku. It feels light and crispy and can stay stored for many days. It is perfect for tea time or quick snack at home.

[feast_advanced_jump_to]

About Millet Murukku

Millet Murukku is made using a mix of millet flour, rice flour and fried gram powder. Millet or thinai flour gives deep brown colour and very unique earthy and nutty taste. Rice flour gives crispness and fried gram dal adds mild soft bite inside. It is spiced with red chilli powder and ajwain for some aromatic touch.

The texture is light, crispy, and don't feel too oily also. It is a good variation to regular murukku we usually make with rice flour alone. This one feels little more nutritious and wholesome. Even butter added helps give nice crisp texture without making it hard. You can even use oil instead if you want to skip butter.

There are small variations you can try with this recipe. Some people add more chilli powder for extra spice. Few even add cumin seeds for different flavour. You can make it plain or adjust spice level based on what you like. It is a flexible recipe which you can customize based on your preference.

I usually make thinai murukku for healthy snack for my family. Instead of making regular murukku again, this feel like different idea to try. My family enjoys it because it stays fresh and crispy for many days.

Similar Recipes

millet murukku served

Millet Murukku Ingredients

  • Thinai Flour - I used thinai flour which is foxtail millet flour as main ingredient. It is highly nutritious and gives mild nutty flavour to murukku.
  • Fried Gram - I used fried gram powder which adds crunch and richness. Gram flour blends well with flours for good texture.
  • Rice Flour - I used rice flour mixed with millet flour for the right consistency. It helps bind dough and makes it easier to shape.
  • Butter - I used soft butter at room temperature. It helps in binding and makes murukku crisp but not hard. You can replace with hot oil also if you don't want to use butter.
  • Red chilli powder - This gives a mild spiciness. I used for my taste but you can adjust more or less based on your taste. It's enough to add flavor without making it very spicy.
  • Ajwain - I added ajwain for aromatic flavour and aid digestion. It blends well with other spices.

How to make Millet Murukku Step by Step

1.Take fried gram dal in a mixer and powder it. To a sieve addΒ thinai flour,rice flourΒ to it.

how to make millet murukku step1

2.Add powdered fried gram dal flour too. Sieve it well in a mixing bowl, discard the coarse mixture.

how to make millet murukku step2

3.To the sieved flour, add ajwain,red chilli powder,butter and required salt. Crumble it well with your fingers.

how to make millet murukku step3

4.Crumble well so that all the ingredients are evenly distributed. Now add water little by little to the flour and gather together to form a soft non-sticky dough.

how to make millet murukku step4

5.Grease the murukku press with oil, fill it with dough. Press in 2 ladles and keep it ready. Heat oil in a kadai, check by adding a pinch of dough if it rises immediately then oil is ready. Flip over the murukku from the ladle gently, cook in low medium flame.

how to make millet murukku step5

6.When bubbles ceases and it turns golden brown then remove and drain in a tissue paper.

how to make millet murukku step6

Cool down completely then store in a dry airtight container.

millet murukku served

Expert Tips

  • Powder the Gram - I powder fried gram dal fine in the mixer. This helps it mix evenly with flour.
  • Sieve the Flour - I sieve all flours together and discard coarse particles. This makes dough smooth and helps murukku shape nicely.
  • Crumble Well - I crumble all ingredients with my fingers so that they are evenly distributed. This helps all flavours spread evenly in each murukku.
  • Dough Consistency - I add water little by little to make soft non-sticky dough. Dough should come together easily without being wet.
  • Oil Temperature - I test oil by dropping small pinch of dough. If it rises immediately to top, oil is ready for frying.
  • Fry on Low Medium Flame - I fry on low to medium flame so murukku cook inside and outside evenly. High heat will burn it before it cook inside properly.
  • Check for Doneness - I fry until bubbles stop and murukku turn golden brown. This indicate it cooked perfectly and crispy inside.

Serving and StorageΒ 

Serve Thinai Murukku with hot chai or coffee in the evenings. It goes well as a snack just by itself also. Once it cools completely, store in clean airtight box. It stays crisp for 2 to 3 weeks.

FAQS

1. Can I fry many murukkus at a time?

You can fry 3 to 4 murukkus at time depending on size of your kadai.

2. Why is my murukku not crispy?

This happen when oil is not hot enough or you fry on high heat. Use correct temperature and fry on low medium flame.

3. Can I use only thinai flour?

No, it won't hold shape and turns chewy.

4.Β  Can I bake this murukku?

No, baking may turn it dry and hard. This is best when deep fried.

5. Can I use ghee replacing butter?

Yes, you can use ghee, it adds nice flavor.

millet murukku served

If you have any more questions about this Millet Murukku Recipe do mail me at sharmispassions@gmail.com. In addition, follow me on Instagram, Facebook,Β  Pinterest, Youtube andΒ TwitterΒ .

Tried this Millet Murukku Recipe ? Do let me know how you liked it. Also tag us on Instagram @sharmispassions and hash tag it on #sharmispassions.

πŸ“– Recipe Card

ThinaiMurukku4
Print

Millet Murukku Recipe (Thinai Murukku)

Millet Murukku is a healthy and crispy snack made by adding millet flour to regular rice flour and shaping using murukku press. It comes out golden and delicious and tastes just as good as regular murukku. It has mild nutty flavour from millet. Millet Murukku savours the celebration of people who are on diet without adding much of calories.
Course Snack
Cuisine Indian
Keyword diwali recipes, diwali snacks, diwali snacks recipes, easy diwali recipes, easy diwali snacks, millet recipes, murukku, savoury recipes, snack recipes
Prep Time 15 minutes
Cook Time 25 minutes
Total Time 40 minutes
Servings 3 people
Calories 273kcal
Author Sharmilee J

Ingredients

Instructions

  • Take fried gram dal in a mixer and powder it. ToΒ a sieve add thinai flour, rice flour to it.
  • Add powdered fried gram dal flour too. Sieve it well in a mixing bowl, discard the coarse mixture.
  • To the sieved flour, add ajwain, red chilli powder, butter and required salt. Crumble it well with your fingers.
  • Crumble well so that all the ingredients are evenly distributed. Now add water little by little to the flour and gather together to form a soft non-sticky dough.
  • Grease the murukku press with oil, fill it with dough. Press in 2 ladles and keep it ready.
  • Heat oil in a kadai,Β check by adding a pinch of dough if it rises immediately then oil is ready. Flip over the murukku from the ladle gently, cook in low medium flame.
  • When bubbles ceases and it turns golden brown then remove and drain in a tissue paper.
  • Cool down completely then store Millet Murukku in a dry airtight container.

Notes

  • Powder the Gram - I powder fried gram dal fine in the mixer. This helps it mix evenly with flour.
  • Sieve the Flour - I sieve all flours together and discard coarse particles. This makes dough smooth and helps murukku shape nicely.
  • Crumble Well - I crumble all ingredients with my fingers so that they are evenly distributed. This helps all flavours spread evenly in each murukku.
  • Dough Consistency - I add water little by little to make soft non-sticky dough. Dough should come together easily without being wet.
  • Oil Temperature - I test oil by dropping small pinch of dough. If it rises immediately to top, oil is ready for frying.
  • Fry on Low Medium Flame - I fry on low to medium flame so murukku cook inside and outside evenly. High heat will burn it before it cook inside properly.
  • Check for Doneness - I fry until bubbles stop and murukku turn golden brown. This indicate it cooked perfectly and crispy inside.

Nutrition

Serving: 75g | Calories: 273kcal | Carbohydrates: 46g | Protein: 7g | Fat: 6g | Saturated Fat: 3g | Polyunsaturated Fat: 2g | Monounsaturated Fat: 2g | Trans Fat: 0.2g | Cholesterol: 10mg | Sodium: 44mg | Potassium: 192mg | Fiber: 3g | Sugar: 2g | Vitamin A: 220IU | Vitamin C: 0.003mg | Calcium: 14mg | Iron: 2mg

The post Millet Murukku Recipe appeared first on Sharmis Passions.

Steamed Chocolate Pudding Recipe

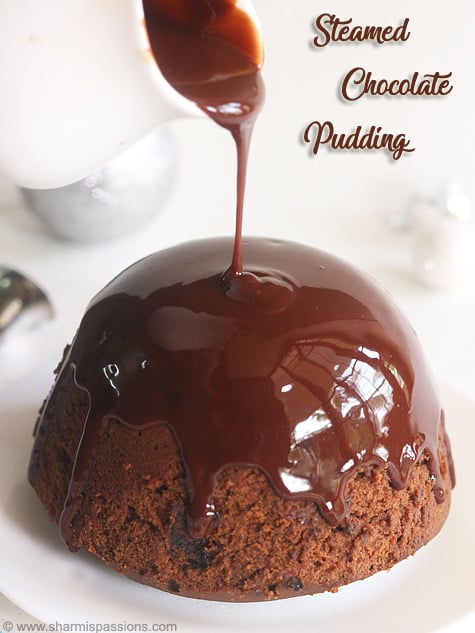
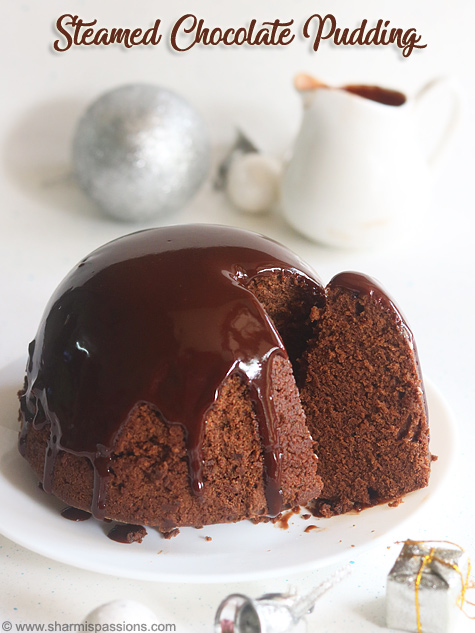
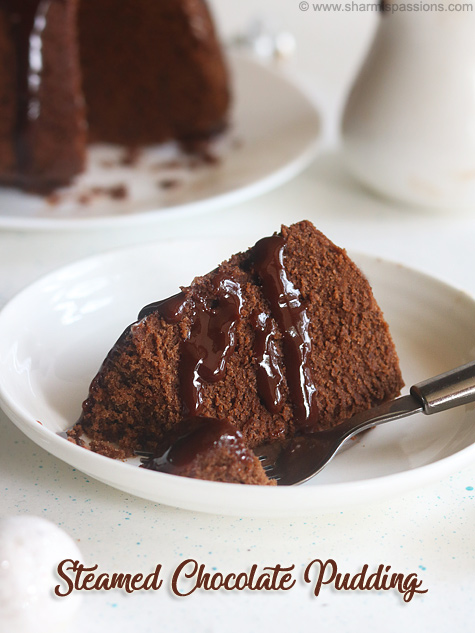
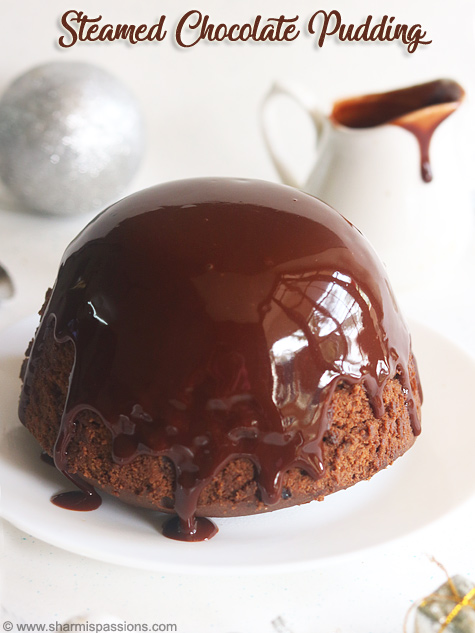
Steamed Chocolate Pudding is a rich and moist dessert made with flour, butter, eggs and melted chocolate. It has soft crumb texture that tastes really good with deep chocolate flavour and steamed pudding makes it soft, moist and not dry.

steamed chocolate pudding served with chocolate sauce

This pudding is perfect for Christmas or for special occasion. It takes about 2 hours from start to finish with steaming time. You can make this pudding because it feels homemade and indulgent but not too difficult to make. It doesn't feel heavy even though it has lot of butter.

[feast_advanced_jump_to]

About Steamed Chocolate Pudding

Steamed Chocolate Pudding isΒ rich, chocolatey yummy traditional pudding made for Christmas. It is made by mixing butter and sugar until creamy then adding eggs and melted chocolate. The texture of this recipe is silky smooth and slightly firm, it should not be sticky when you touch it once it is steamed properly.Β 

This recipe has smooth and slightly bouncy texture, not too hard if done right. Adding chocolate sauce on top makes it extra special but not necessary. You can cut into it for clean slices for serving.

After taking one bite I decided if someone asks me which is ur most favourite desert I would tell this as I loved the texture so much. Though this pudding looks cakeish it is in between pudding and cake and tastes so delicious. Though the time for steaming is more it is worth the time and effort.

There are few variations you can try in this recipe. You can add different dry fruits based on what you have and add nuts for extra crunch, you can adjust spice mix based on your taste. You can even try adding little coffee powder for taste.Β 

I usually make this when I want something easy but still delicious. You can make this for parties also as a quick dessert.

Similar Recipes

steamed chocolate pudding served with chocolate sauce

Steamed Chocolate Pudding Ingredients

  • Wheat flour - I used wheat flour for the base. It gives moist texture and keep pudding tender when steamed.
  • Butter - I used butter at room temperature. Butter abundant in pudding makes it rich and moist.
  • Brown sugar - I used light brown sugar for sweetness. It gives slight molasses flavour that works well with chocolate.
  • Eggs - I used two eggs to bind everything. It helps pudding come together and give structure.
  • Chocolate - I used choco chips to melt into batter. You can use cooking chocolate too. It gives deep chocolate flavour.
  • Coco powder - I added cocoa powder for extra chocolate flavour. It gives rich brown colour and deep taste.
  • Baking powder - I added little baking powder so that the pudding rises and stays light.
  • Vanilla essence - I added vanilla essence for flavour. It brings out chocolate taste.
  • Milk - I added milk to get right batter consistency. It helps batter smooth and not thick.
  • For chocolate sauce - I used powdered sugar, water and cocoa powder. Mix together to make smooth sauce.
45410986615 635d3a764f o

How to make Steamed Chocolate Pudding Step by Step

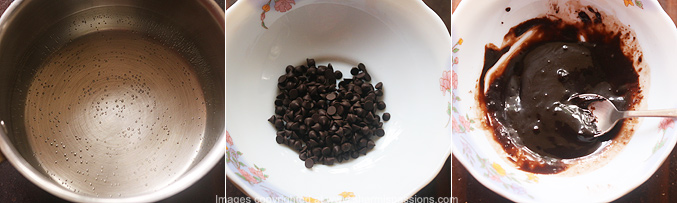
1.Boil water first, add choco chips in a heat resistant bowl, using double boiler method melt the chocolate. You can use cooking chocolate too, Set aside.

how to make steamed chocolate pudding step1

2.To a mixing bowl add butter, sugar.

how to make steamed chocolate pudding step2

3.Beat well until creamy. Crack open the eggs and add it.

how to make steamed chocolate pudding step3

4.Beat until smooth and creamy. Add vanilla essence, mix well

how to make steamed chocolate pudding step4

5.Now in another mixing bowl place a sieve, add wheat flour, cocoa powder, baking powder to it.

how to make steamed chocolate pudding step5

6.Add salt to it and sieve well.

how to make steamed chocolate pudding step6

7.Now add little of sieved flour to butter egg mixture, alternate with milk starting and ending with flour mixture.

how to make steamed chocolate pudding step7

8.Mix well to form a smooth lump free batter.

how to make steamed chocolate pudding step8

9.Add melted chocolate mix once. Grease a oven safe bowl with lots of butter. I placed a small circular butter paper at the bottom for easy demolding.

how to make steamed chocolate pudding step9

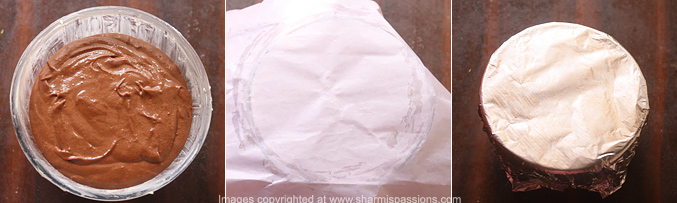
10.Transfer the prepared mixture to the bowl. The pudding rises well so choose a bowl accordingly. Grease a butter paper(I forgot but please do it), place over the bowl then wrap it with silver foil.

how to make steamed chocolate pudding step10

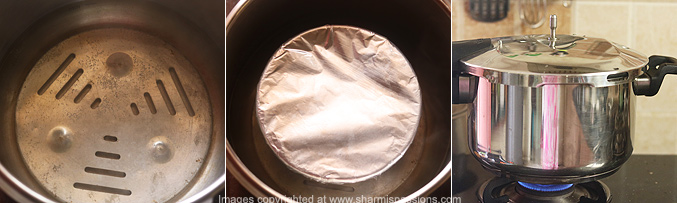
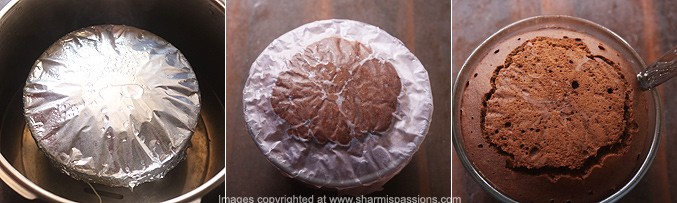
11.You can either use your steamer or pressure cooker. Put a plate inside the cooker, add water to it. Place the pudding bowl on the plate. Water should be touching β…“ rd of the bowl. Close with lid, no whistle needed. Steam cook for 1 hour 30 minutes in low flame(sim). In between check the water level and add water accordingly. Check after 1 hour then proceed accordingly.Insert a toothpick in the centre of the pudding if it comes out clean then the pudding is done else steam cook for few more minutes.

how to make steamed chocolate pudding step11

12.Mine got done in 1 hr 20 minutes. Remove from flame, set aside for 10 minutes. Gently remove the covers, Then slide a buttered knife at the edges.

how to make steamed chocolate pudding step12

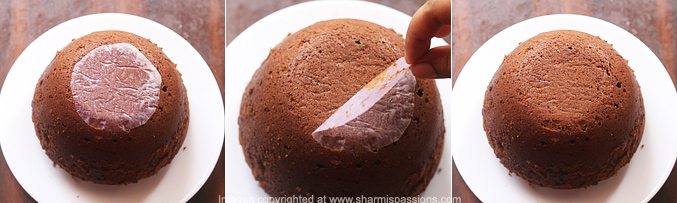
13.Then invert, remove the butter paper. Cool down completely at least for 30 minutes(meanwhile you can make the chocolate sauce) then slice and serve.

how to make steamed chocolate pudding step13

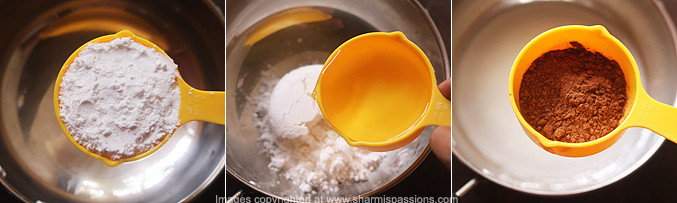
14.Measure and take powdered sugar, add water to it. Add cocoa powder to it.

how to make steamed chocolate pudding step14

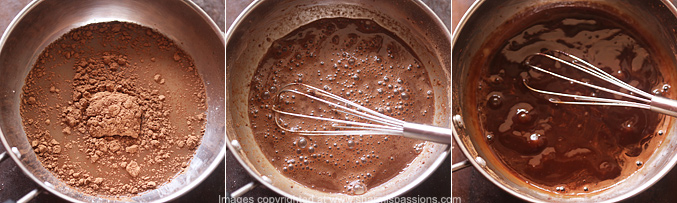
15.Whisk well so that there are no lumps, heat it up. Bring it to a boil and simmer for 2 minutes. Switch off.

how to make steamed chocolate pudding step15

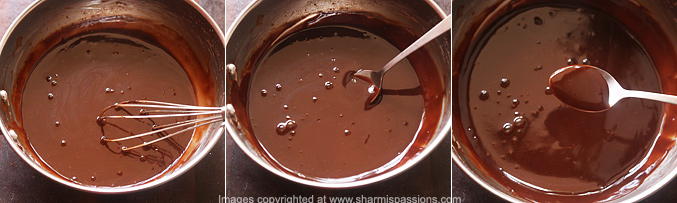
16.Look how the consistency is smooth and silky. Cool down then store in a clean jar.

how to make steamed chocolate pudding step16

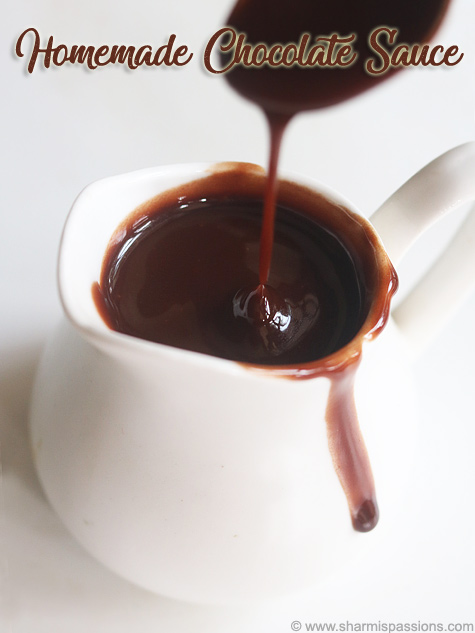
Yummy pudding and homemade chocolate sauce ready!

chocolate sauce

Expert Tips

  • Melting chocolate - I use double boiler method so it that it does not burn and stay smooth.
  • Soft butter - Always use butter at room temperature. It blends smoothly and makes pudding light.
  • Alternating - Add flour mixture and milk alternately to wet mixture. This prevents lumps in batter.
  • Greasing - Grease bowl and butter paper well. This make demoulding easy and pudding slides out smoothly.
  • Water level - Keep water at β…“ rd of bowl height during steaming. This cooks pudding evenly.
  • Testing - Insert knife in centre after 1 hour. If it comes out clean pudding is done.
  • Cooling - Wait 10 minutes after steaming before you demould. This help pudding set properly.
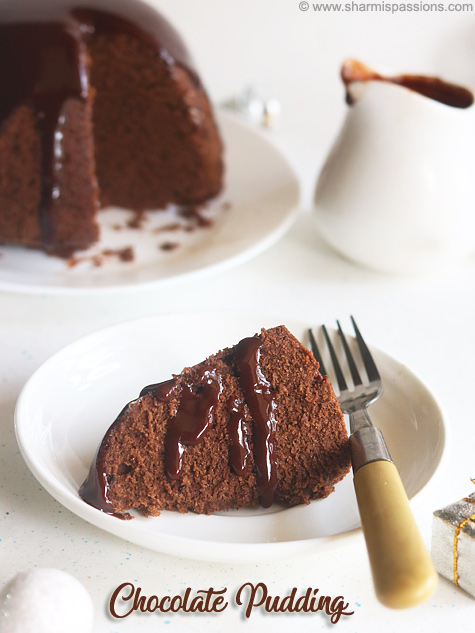
steamed chocolate pudding served with chocolate sauce

Serving and Storage

Serve this chilled, you can drizzle little chocolate sauce or add chopped fruits on top while serving. This goes well as after meal dessert. Store the leftover pudding in refrigerator in container. It stays good for about 2 days. Do not keep outside for long time especially in hot weather.

FAQS

1. Can I use white flour?

Yes you can use white flour. It gives pudding different texture but come out just as moist.

2. How do I know when pudding is done?

Insert knife in centre after 1 hour. If it comes out clean pudding is done.

3. Can I make pudding without sauce?

Yes pudding taste good on its own. Sauce just adds extra richness.

4. Can I use regular sugar?

Yes you can use white sugar but brown sugar gives caramel flavour and taste better in chocolate.

5. Can I make ahead for party?

Yes you can make pudding one day before and keep in fridge just add sprinkle on top when you serve so it look fresh.

steamed chocolate pudding served with chocolate sauce

If you have any more questions about this Steamed Chocolate Pudding Recipe do mail me at sharmispassions@gmail.com. In addition, follow me on Instagram, Facebook,Β  Pinterest, Youtube andΒ TwitterΒ .

Tried this Steamed Chocolate Pudding Recipe ? Do let me know how you liked it. Also tag us on Instagram @sharmispassions and hash tag it on #sharmispassions.

πŸ“– Recipe Card

SteamedChocolatePudding1
Print

Steamed Chocolate Pudding Recipe

Steamed Chocolate Pudding is a rich and moist dessert made with flour, butter, eggs and melted chocolate. It has soft crumb texture that tastes really good with deep chocolate flavour and steamed pudding makes it soft, moist and not dry.
Course Dessert
Cuisine American, French, Indian, Italian, Mexican
Keyword butter recipes, chocolate recipes, dessert recipes, pudding recipes, wheat flour recipes, whole wheat recipes
Prep Time 30 minutes
Cook Time 1 hour 30 minutes
Total Time 2 hours
Servings 4
Calories 518kcal
Author Sharmilee J

Ingredients

  • 1 cup wheat flour
  • 1 teaspoon baking powder
  • ΒΌ teaspoon salt
  • 3 tablespoon choco chips
  • ΒΌ cup unsalted butter at room temperature
  • ΒΎ cup light brown sugar
  • 2 nos eggs
  • 1 teaspoon vanilla essence
  • Β½ cup milk

For the chocolate sauce

  • Β½ cup powdered sugar
  • Β½ cup water
  • 3 tablespoon coco powder

Instructions

For the pudding:

  • Boil water first, add choco chips in aΒ  heat resistant bowl, using double boiler method melt the chocolate. You can use cooking chocolate too. Set aside.
  • To a mixing bowl add butter, sugar.
  • Beat well until creamy. Crack open the eggs and add it.
  • Beat until smooth and creamy. Add vanilla essence, mix well.
  • Now in another mixing bowl place a sieve, add wheat flour, coco powder, baking powder to it.
  • Add salt to it and sieve well.
  • Now add little of sieved flour to butter egg mixture, alternate with milk starting and ending with flour mixture.
  • Mix well to form a smooth lump free batter.
  • Add melted chocolate mix once. Grease a oven safe bowl with lots of butter. I placed a small circular butter paper at the bottom for easy demolding.
  • Transfer the prepared mixture to the bowl. The pudding rises well so choose a bowl accordingly. Grease a butter paper(I forgot but please do it), place over the bowl then wrap it with silver foil.
  • You can either use your steamer or pressure cooker. Put a plate inside the cooker, add water to it. Place the pudding bowl on the plate. Water should be touching β…“ rd of the bowl. Close with lid, no whistle needed. Steam cook for 1 hour 30 mins. In between check the water level and add water accordingly. Check after 1 hr then proceed. Insert a knife in the centre of the pudding if it comes out clean then the pudding is done else steam cook for few more mins.
  • Mine got done in 1 hr 30 mins. Remove from flame, set aside for 10 mins. Gently remove the covers, Then slide a buttered knife at the edges.
  • Then invert, remove the butter paper. Cool down completely at least for 30 mins(meanwhile you can make the chocolate sauce) then slice and serve.

How to make homemade chocolate sauce recipe:

  • Measure and take powdered sugar, add water to it. Add coco powder to it.
  • Whisk well so that there are no lumps, heat it up. Bring it to a boil and simmer for 2 mins. Switch off.
  • Look how the consistency is. Smooth and silky. Cool down Steamed Chocolate Pudding and store in a clean jar.

Notes

  • Melting chocolate - I use double boiler method so it that it does not burn and stay smooth.
  • Soft butter - Always use butter at room temperature. It blends smoothly and makes pudding light.
  • Alternating - Add flour mixture and milk alternately to wet mixture. This prevents lumps in batter.
  • Greasing - Grease bowl and butter paper well. This make demoulding easy and pudding slides out smoothly.
  • Water level - Keep water at one third of bowl height during steaming. This cooks pudding evenly.
  • Testing - Insert knife in centre after 1 hour. If it comes out clean pudding is done.
  • Cooling - Wait 10 minutes after steaming before you demould. This help pudding set properly.

Nutrition

Serving: 50g | Calories: 518kcal | Carbohydrates: 91g | Protein: 5g | Fat: 17g | Saturated Fat: 10g | Polyunsaturated Fat: 1g | Monounsaturated Fat: 3g | Trans Fat: 0.5g | Cholesterol: 36mg | Sodium: 280mg | Potassium: 229mg | Fiber: 2g | Sugar: 63g | Vitamin A: 407IU | Calcium: 153mg | Iron: 2mg

The post Steamed Chocolate Pudding Recipe appeared first on Sharmis Passions.

Whole Wheat Shortbread Cookies Recipe

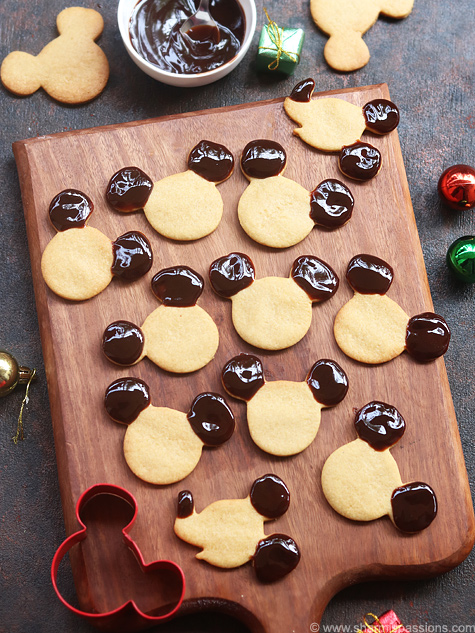
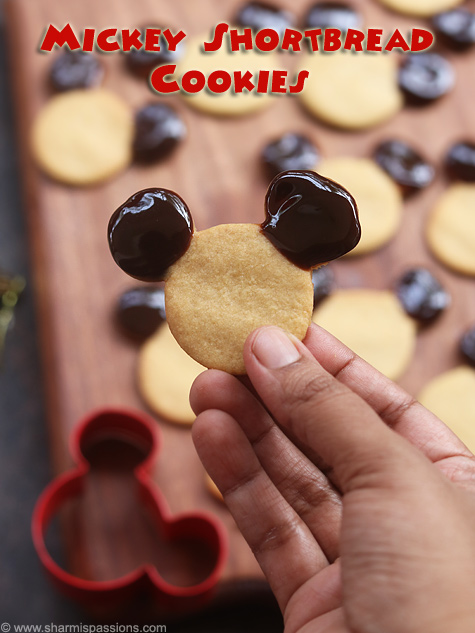
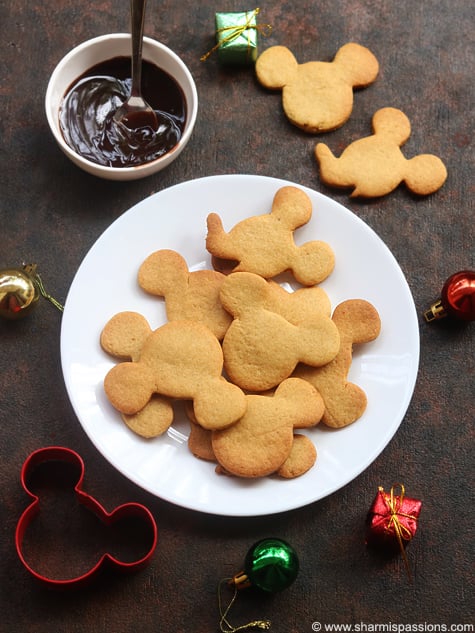
Whole Wheat Shortbread Cookies are soft buttery cookies made by baking a mix of butter, flour, eggs and sugar. The cookie dough is shaped with cookie cutter and glazed with chocolate. These make a festive treat and a hot with kids.

whole wheat short bread cookies served

You can make these during Christmas and special occasions for your family. They are soft on the inside and little crispy on the edges. The chocolate glaze adds richness and makes them special.

[feast_advanced_jump_to]

About Whole Wheat Shortbread Cookies

Whole Wheat Shortbread Cookies are a treat for the family during Christmas and special occasions. The dough is soft and easy to work with and has subtle nutty flavour that makes them taste homemade.

The texture comes out soft and tender inside with slightly crispy edges. When you bite into them they melt in your mouth. The chocolate glaze on top adds sweetness and shine. This combination makes it irresistible for everyone. This is the perfect time to bring out all your cookie cutters and have fun.

You can just use some maida instead of wheat flour if you prefer. Some people skip the glaze and just bake them plain. You can also use different cookie cutters to make different shapes. The dough is very versatile and works well with any design.

I usually make these cookies during holiday season for my family and friends. It gives me happiness knowing that I make something they truly enjoy.

Similar Recipes

whole wheat short bread cookies served

Whole Wheat Shortbread Cookies Ingredients

  • Wheat flour - I used flour for the base for the cookies. It gives subtle nutty flavour and keeps cookies soft.
  • Butter - I used butter at room temperature. It is added abundant in this recipe and make cookies rich and melt in mouth.
  • Powdered sugar - I added powdered sugar for sweetness. It dissolves into butter smoothly and distributes evenly.
  • Egg - I added egg to bind dough together. It helps bring all ingredients together without making them dry.
  • Salt - I added salt to balance sweetness. Even a little bit brings out all flavours nicely.
  • Baking powder - I used little baking powder for the slight lift. It helps cookies stay soft instead of becoming dense.
  • Chocolate glaze - I used chocolate glaze for coating. You can melt dark chocolate or use store bought glaze.

How to make Whole Wheat Short Bread Cookies Step by Step

1.To a mixing bowl - add powdered sugar and butter. Whisk well until creamy.

how to make whole wheat short bread cookies step1

2.Add vanilla essence and egg. Whisk well. It will look like curdling, do not panic but keep whisking.

4how to make whole wheat short bread cookies step2

3.After few minutes, it will become creamy, gather together. Place a sieve over the mixing bowl - add wheat flour.

how to make whole wheat short bread cookies step3

4.Add baking powder and salt. Sieve well to the mixing bowl.

how to make whole wheat short bread cookies step4

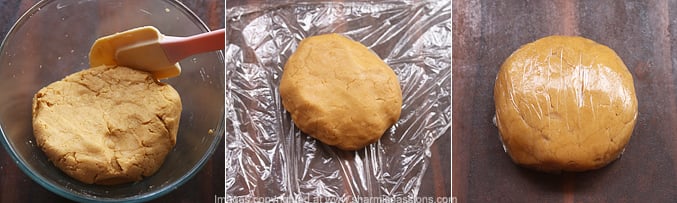
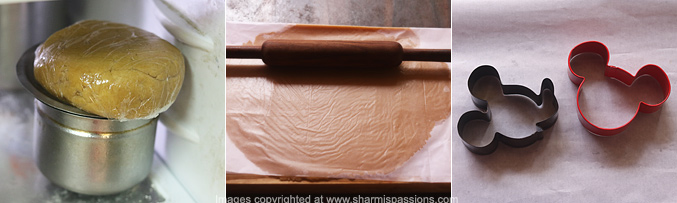
5.Gather together to form a soft dough. Cling wrap it and refrigerate it. The dough will be soft so refrigerate at least for a hour then use it. It keeps well at least for a week.

how to make whole wheat short bread cookies step5

6.Refrigerate it for at least an hour. Roll between butter paper to avoid sticking. Roll it to ΒΌ inch thickness, take your favourite cookie cutter.

how to make whole wheat short bread cookies step6

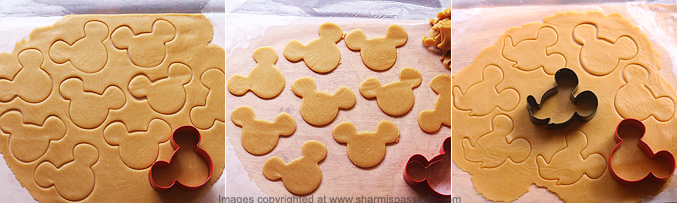
7.Cut shapes using the cutter.

how to make whole wheat short bread cookies step7

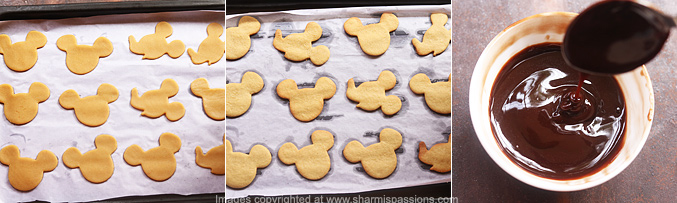
8.Arrange it in baking tray lined with butter paper.Bake in preheated oven at 180 deg C for 10-12 minutes or until the edges start to turn golden brown. Let the cookies cool down completely. Prepare theΒ chocolate glazeΒ and keep it ready.

how to make whole wheat short bread cookies step8

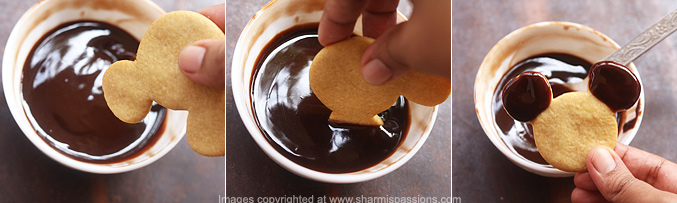
9.Take a cookie and dip it in. You can make icing cone and draw too. I made it simple by just dipping in chocolate glaze.

how to make whole wheat short bread cookies step9

Let it cool down then store.

whole wheat short bread cookies served

Expert Tips

  • Room temperature - I always use butter that's soft and at room temperature. This helps it blend smoothly with sugar.
  • Whisking - I whisk butter and sugar until creamy. When you add egg it looks like curdling but keep whisking and it will come together.
  • Dough resting - I refrigerate dough for at least one hour before rolling. This helps the dough firm up and prevents sticking.
  • Rolling - I roll dough between butter paper to avoid mess. This keeps the surface clean and the dough doesn't stick anywhere.
  • Thickness - I keep the dough thickness about 1 quarter inch. This gives perfect texture when baked.
  • Baking - I watch cookies carefully during baking. I remove them when the edges turn light golden brown.
  • Cooling before glazing - I always let cookies cool completely before dipping in chocolate. Hot cookies make the glaze runny.

Serving and Storage

Serve this with tea or coffee for a simple snack. It goes well for festive time or even regular evenings at home. Store in airtight container and it stay good at room temperature for few days. They stay good for one week if stored properly.

FAQS

1. Can I use white flour?

Yes you can use maida or white flour. It gives different texture to the cookies.

2. Why are my cookies hard?

It may be over baked or rolled very thin. Next time bake less time and keep little thick.

3. How long do these stay fresh?

They stay fresh for one week in airtight container. After that they start to lose softness.

4. Can I make the dough ahead?

Yes you can make dough and keep in fridge for one week. Just take it out when ready to roll and bake.

5. Why is my dough sticky?

If dough is sticky add little more flour while rolling. Roll between butter paper to help prevent sticking.

whole wheat short bread cookies served

If you have any more questions about this Whole Wheat Shortbread CookiesΒ Recipe do mail me at sharmispassions@gmail.com. In addition, follow me on Instagram, Facebook,Β  Pinterest, Youtube andΒ TwitterΒ .

Tried this Whole Wheat Shortbread CookiesΒ Recipe? Do let me know how you liked it. Also tag us on Instagram @sharmispassions and hash tag it on #sharmispassions.

πŸ“– Recipe Card

MickeyShortbreadCookies2
Print

Whole Wheat Shortbread Cookies Recipe

Whole Wheat Shortbread Cookies are soft buttery cookies made by baking a mix of butter, flour, eggs and sugar. The cookie dough is shaped with cookie cutter and glazed with chocolate. These make a festive treat and a hot with kids.
Course Snack
Cuisine American, French, Indian, Italian, Japanese, Mediterranean, Mexican
Keyword Baking, baking recipes, butter recipes, cinnamon shortbread cookies recipe, cookie recipes, egg recipes, wheat flour recipes, whole wheat recipes
Prep Time 30 minutes
Cook Time 15 minutes
Total Time 45 minutes
Servings 35 cookies
Calories 55kcal
Author Sharmilee J

Ingredients

  • 1 Β½ cups wheat flour
  • 1 no egg
  • Β½ cup powdered sugar
  • Β½ cup butter at room temperature
  • β…“ teaspoon salt
  • β…“ teaspoon baking powder
  • ΒΌ cup chocolate glaze

Instructions

  • To a mixing bowl - add powdered sugar and butter. Whisk well until creamy.
  • Add vanilla essence and egg. Whisk well. It will look like curdling, do not panic but keep whisking.
  • After few mins, it will become creamy, gather together. Place a sieve over the mixing bowl - add wheat flour.
  • Add baking powder and salt. Sieve well to the mixing bowl.
  • Gather together to form a soft dough. Cling wrap it and refrigerate it. The dough will be soft so refrigerate at least for a hour then use it. It keeps well at least for a week.
  • Roll between butter paper to avoid sticking. Roll it to ΒΌ inch thickness, take your favorite cookie cutter.
  • Cut shapes using the cutter. Arrange it in baking tray lined with butter paper.
  • Bake in preheated oven at 180 deg C for 10-12 mins or until the edges start to turn golden brown. Let the cookies cool down completely. Prepare the chocolate glazeΒ and keep it ready.
  • Take a cookie and dip it in. You can make icing cone and draw too. I made it simple by just dipping in chocolate glaze.
  • Let it cool down then store Whole Wheat Shortbread Cookies.

Notes

  • Room temperature - I always use butter that's soft and at room temperature. This helps it blend smoothly with sugar.
  • Whisking - I whisk butter and sugar until creamy. When you add egg it looks like curdling but keep whisking and it will come together.
  • Dough resting - I refrigerate dough for at least one hour before rolling. This helps the dough firm up and prevents sticking.
  • Rolling - I roll dough between butter paper to avoid mess. This keeps the surface clean and the dough doesn't stick anywhere.
  • Thickness - I keep the dough thickness about one quarter inch. This gives perfect texture when baked.
  • Baking - I watch cookies carefully during baking. I remove them when the edges turn light golden brown.
  • Cooling before glazing - I always let cookies cool completely before dipping in chocolate. Hot cookies make the glaze runny.

Nutrition

Serving: 20g | Calories: 55kcal | Carbohydrates: 7g | Protein: 1g | Fat: 3g | Saturated Fat: 2g | Polyunsaturated Fat: 0.1g | Monounsaturated Fat: 1g | Trans Fat: 0.1g | Cholesterol: 7mg | Sodium: 47mg | Potassium: 7mg | Fiber: 0.1g | Sugar: 3g | Vitamin A: 81IU | Calcium: 4mg | Iron: 0.3mg

The post Whole Wheat Shortbread Cookies Recipe appeared first on Sharmis Passions.

Christmas Morning Muffins Recipe

Christmas Morning Muffins is a soft mild cakes made with whole wheat flour, butter, eggs and sugar with crumble topping. It has a nice golden colour on the top with a mild icing. It has warm spice flavour from cinnamon and nutmeg. It is little different from usual muffins because of the crumble topping.

christmas morning muffins served

These are perfect celebration treats for Christmas and holiday season. You can gift these to friends and family during the festive times. These muffins stay soft and fresh for several days. Serve it warm with tea or coffee for simple morning treat.

[feast_advanced_jump_to]

About Christmas Morning Muffins

Christmas Morning Muffins is made using whole wheat flour, butter, eggs and sugar. Cinnamon and nutmeg gives it that warm, festive flavour. The addition of yogurt and milk makes the batter soft and tender. I usually make them with mild sweetness so that they not too heavy.

The texture comes out really soft inside with a slight crumb on top. The crumble topping adds a little crunch. The vanilla glaze drizzle over gives sweetness and shine. Everything works together to make it taste like Christmas.

You can use tutti frutti or cranberries for the topping. Both give nice colour and little bursts of flavour. You can skip the glaze if you prefer less sweet. You can also add dried cranberries to the batter itself if you like. Everyone enjoy them warm with tea or coffee. They stay soft for days and tastes just as good later on.

I make this for my kids as they love the combination of soft muffin with crumbly top. I feel happy when they ask for more because I know it tastes homemade and real.

Similar Recipes

christmas morning muffins served

Christmas Morning Muffins Ingredients

  • Whole wheat flour - I used whole wheat flour for the main batter which gives wholesome taste. You can use all-purpose flour if you prefer.
  • Baking powder - Added to help the muffins rise and come out light and fluffy.
  • Cinnamon powder - I added cinnamon for warm spice flavour which is perfect for Christmas.
  • Nutmeg powder - Used for nice warm aroma and flavour to the muffins.
  • Salt - Added to balance the sweetness in the muffins.
  • Sugar - It gives sweetness to the muffin for the batter and also in the crumble topping.
  • Egg - Added this to bind all the ingredients and gives the muffin structure.
  • Yogurt - I used yogurt to keep the muffins moist and tender inside.
  • Milk - Added to adjust the batter consistency and make it pourable.
  • Butter - I used butter for flavour and richness in the batter and crumble topping.
  • Vanilla essence - I added this for nice aroma which pair well with spices.
  • Tutti frutti - Added for colour and little tartness in the crumble topping.
  • Powdered sugar - Used for making the glaze which is drizzled over cooled muffins.

How to make Christmas Morning Muffins Recipe Step by Step

1.To a mixing bowl - add wheat flour, baking powder along with cinnamon powder, nutmeg powder and salt.

how to make christmas morning muffins step1

2.Mix well using a whisk.In another mixing bowl add butter and sugar.

how to make christmas morning muffins step2

3.Whisk it then add an egg.

how to make christmas morning muffins step3

4.Whisk well until creamy. Add curd and milk.

how to make christmas morning muffins step4

5.Whisk well. Then add vanilla essence.

how to make christmas morning muffins step5

6.Add flour mixture and mix it, Set aside.

how to make christmas morning muffins step6

7.To prepare the crumble topping : Add all the ingredients listed under 'for crumble topping', mix it and set aside.Now scoop out the batter.

how to make christmas morning muffins step7

8.Line muffin liners to a muffin tray and transfer scooped out batter to it.Add some crumble topping to each muffin, sprinkle some tutti frutti to it. Bake in preheated oven at 200 deg C for 18-20 minutes or until the top turns golden. Let the muffins cool down completely.

how to make christmas morning muffins step8

9.To prepare glaze : Add powdered sugar, nutmeg powder, vanilla essence and milk.

46how to make christmas morning muffins step9

10.Mix well to a creamy glaze consistency. Once the muffins are completely cool, drizzle the glaze over the muffins.

how to make christmas morning muffins step10

Enjoy!

christmas morning muffins served

Expert Tips

  • Mix dry - I mix all the dry ingredients like flour, baking powder and spices together first. This helps distribute them evenly.
  • Cream butter - I cream butter and sugar well before adding egg. This makes the batter light and fluffy.
  • Don't over mix - I mix the wet and dry ingredients just until combined. Over mixing makes the muffins tough and dense.
  • Right consistency - The batter should be thick but pourable. If too thick add little more milk.
  • Crumble texture - I rub the butter well with flour and sugar for the crumble topping. This gives nice sandy texture.
  • Fill properly - I fill the muffin liners halfway with batter then add crumble topping. This helps them rise evenly.
  • Cool completely - I let the muffins cool completely before adding glaze. Hot muffins will melt the glaze.

Serving and Storage

Serve this warm or at room temperature. You can have it for special occasions, evening tea, after-school snack, or even small birthday party. I like to serve it plain or with some milk. You can store them in air tight container for a day, stays good for 2-3 days in refrigerator Tastes soft and nice even the next day.

FAQS

1. Can I replace oil with butter?

Yes you can, but the muffins may feel little heavier. Oil keeps it more soft.

2. Can I skip yogurt?

Yes you can but it add moistness to the muffins

3. Can I make this without tutti frutti?

Yes, plain wheat muffins also taste nice. Or add nuts instead.

4. Why my muffins didn't puff up?

Check your baking soda and powder, it should be fresh. Also don't over mix the batter.

5. How to store these muffins?

Keep them in airtight box after cooled fully. Use within 2 days for best softness.

christmas morning muffins served

If you have any more questions about this Christmas Morning Muffins Recipe do mail me at sharmispassions@gmail.com. In addition, follow me on Instagram, Facebook,Β  Pinterest, Youtube andΒ TwitterΒ .

Tried this Christmas Morning Muffins Recipe? Do let me know how you liked it. Also tag us on Instagram @sharmispassions and hash tag it on #sharmispassions.

πŸ“– Recipe Card

ChristmasMorningMuffins1
Print

Christmas Morning Muffins Recipe

Christmas Morning Muffins is a soft mild cakes made with whole wheat flour, butter, eggs and sugar with crumble topping. It has a nice golden colour on the top with a mild icing. It has warm spice flavour from cinnamon and nutmeg. It is little different from usual muffins because of the crumble topping.
Course Baking, Snack
Cuisine American, French, Indian, Italian, Mediterranean, Mexican
Keyword 30 mins recipes, all purpose flour recipes, Baking, baking recipes, butter recipes, cake, Cake Recipes, cardamom powder recipe, christmas recipes, maida recipes, milk recipes, Muffins
Prep Time 15 minutes
Cook Time 20 minutes
Total Time 35 minutes
Servings 7 muffins
Calories 186kcal
Author Sharmilee J

Ingredients

  • 1 cup whole wheat flour
  • Β½ tablespoon baking powder
  • Β½ teaspoon cinnamon powder
  • ΒΌ teaspoon nutmeg powder
  • ΒΌ teaspoon salt
  • β…› cup + 1 tablespoon sugar
  • 1 no egg
  • Β½ cup yogurt
  • β…“ cup milk
  • β…› cup butter
  • Β½ teaspoon vanilla essence

For the crumble topping:

  • Β½ tablespoon butter
  • 1 tablespoon wheat flour
  • 1 tablespoon sugar
  • 1 pinch salt
  • ΒΌ teaspoon cinnamon powder
  • ΒΌ teaspoon nutmeg powder
  • 2 tablespoon tutti frutti / cranberries

For the glaze:

  • β…“ cup powdered sugar
  • ΒΌ teaspoon vanilla essence
  • β…› teaspoon nutmeg powder
  • 2 to 3 teaspoon milk

Instructions

  • To a mixing bowl - add wheat flour, baking powder along with cinnamon powder, nutmeg powder and salt.
  • Mix well using a whisk. InΒ another mixing bowl add butter and sugar.
  • Whisk it then add an egg.
  • Whisk well until creamy. Add curd and milk.
  • Whisk well. Then add vanilla essence.
  • Add flour mixture and mix it .Set aside.
  • To prepare the crumble topping :
    Add all the ingredients listed under 'for crumble topping', mix it and set aside. Now scoop out the batter.
  • Line muffin liners to a muffin tray and transfer scooped out batter to it. Add some crumble topping to each muffin, sprinkle some tutti frutti to it.
  • Bake in preheated oven at 200 deg C for 18-20 mins or until the top turns golden. Let the muffins cool down completely.
  • To prepare glaze :
    Add powdered sugar, nutmeg powder, vanilla essence and milk.
  • Mix well to a creamy glaze consistency. Once the muffins are completely cool, drizzle the glaze over the muffins. Enjoy Christmas Morning Muffins!

Notes

  • Mix dry - I mix all the dry ingredients like flour, baking powder and spices together first. This helps distribute them evenly.
  • Cream butter - I cream butter and sugar well before adding egg. This makes the batter light and fluffy.
  • Don't over mix - I mix the wet and dry ingredients just until combined. Over mixing makes the muffins tough and dense.
  • Right consistency - The batter should be thick but pourable. If too thick add little more milk.
  • Crumble texture - I rub the butter well with flour and sugar for the crumble topping. This gives nice sandy texture.
  • Fill properly - I fill the muffin liners halfway with batter then add crumble topping. This helps them rise evenly.
  • Cool completely - I let the muffins cool completely before adding glaze. Hot muffins will melt the glaze.

Nutrition

Serving: 30g | Calories: 186kcal | Carbohydrates: 32g | Protein: 4g | Fat: 6g | Saturated Fat: 3g | Polyunsaturated Fat: 0.4g | Monounsaturated Fat: 1g | Trans Fat: 0.2g | Cholesterol: 15mg | Sodium: 228mg | Potassium: 114mg | Fiber: 2g | Sugar: 17g | Vitamin A: 171IU | Vitamin C: 0.2mg | Calcium: 103mg | Iron: 1mg

The post Christmas Morning Muffins Recipe appeared first on Sharmis Passions.

Ragi Ribbon Pakoda Recipe

Ragi Ribbon Pakoda is a crispy savoury snack made with ragi flour, rice flour and besan flour. It has a nice crisp texture with mild spice and sesame flavour. Ragi flour give the pakoda a dark colour and earthy taste. It is little different from regular ribbon pakoda and much healthier too.

ragi ribbon pakoda served

This is a good snack to make for Diwali and other special occasions. It is also better option for those looking to add ragi in snacks. The pakoda comes out crispy and tasty without missing the savoury taste. Serve it with tea or coffee for simple evening snack and people always love it.

[feast_advanced_jump_to]

About Ragi Ribbon Pakoda

Ragi Ribbon Pakoda is made using ragi flour along with rice flour and besan flour. Ragi is the main ingredient here and gives earthy nutty flavour. Rice flour gives crispness and besan adds good texture to the pakoda. The flour combination makes it nutritious and tasty at the same time.

The dough is made soft with butter and water. Sesame seeds gives little crunch and mild flavour, chilli powder adds the needed spice. The ribbon pakoda turns crispy outside and breaks easily after frying. The inside stays light and soft while outside remains crunchy.

You can also replace sesame seeds with cumin seeds if preferred. The spice level can also be adjusted based on taste and preference. It can be served as tea time snack or packed for festivals and special occasions. You can make it in advance because it stays fresh and crispy for quite long, so best for storing too.

I usually make this along with other savoury snacks for special occasions. It is a good way to use ragi in a snack. My family enjoy it for its crispy texture and mild earthy taste.

Ragi Ribbon Pakoda is a twist to regular ribbon pakoda we make. I wanted to try snacks with different millets and surprisingly even kids enjoyed this Ragi Ribbon PakodaΒ which made me feel content. Ragi Ribbon Pakoda is also called as ribbon murukku, ola pakoda etc

Similar Recipes

ragi ribbon pakoda served

Ragi Ribbon Pakoda Ingredients

  • Ragi flour - I used ragi flour as the main flour. You can try with other millet flours too.
  • Rice flour - I add rice flour for crispness. It helps to make pakoda light and crunchy when fried.
  • Besan flour - This gives good texture and helps bind the dough nicely together.
  • Butter - I use butter for flavour and to give nice crisp texture to the pakoda.
  • Sesame seeds - I add sesame seeds for mild flavour and little crunch in each bite.
  • Red chilli powder - This adds spice and colour to the pakoda.
  • Salt - I add salt for balancing all the flavours nicely.
  • Water - I use water as needed to make soft and smooth dough.
  • Oil - I use oil to deep fry the pakoda until it turn golden.

How to make Ragi Ribbon Pakoda Step by Step

1.Measure and get your ingredients ready. Transfer everything to a mixing bowl. Mix this well first, crumble butter and mix well.

how to make ragi ribbon pakoda step1

2.Add water little by little and gather together.

how to make ragi ribbon pakoda step2

3.Gather together to form a soft dough. Take ribbon pakoda disc and insert it. Fill it with dough.

how to make ragi ribbon pakoda step3

4.Heat oil, check by adding a pinch of dough if it rises immediately then oil is ready. Press in hot oil. Flip over and cook. When bubbles ceases then remove.

how to make ragi ribbon pakoda step4

5.Remove and drain in tissue paper. Break into pieces. Repeat to finish the dough.

how to make ragi ribbon pakoda step5

Store in a clean airtight container.

ragi ribbon pakoda served

Expert Tips

  • Soft dough - I make the dough soft and smooth. A tight dough will be difficult to press through the mould.
  • Crumble butter - I crumble butter well with the flours before adding water. This helps to give crisp texture.
  • Add water - I add water little by little while making the dough. Do not add too much water at once.
  • Check oil - I drop a small piece of dough to check if oil is ready. It should rise up immediately.
  • Medium flame - I keep the flame medium while frying. Oil should not be smoking hot as pakoda will burn.
  • Remove properly - Once the bubbles reduce well I remove the pakoda from oil. Overcooking make it taste bitter.

Serving and Storage

Serve Ragi Ribbon Pakoda warm or at room temperature with tea or coffee. It can also be served along with other special occasions snacks. Store in clean airtight container, make sure the container is completely dry before storing and it stays crispy for few days if kept away from moisture.Β 

FAQS

1. Can I use cumin seeds?

Yes you can use cumin seeds instead. It gives nice flavour.

2. Why is my pakoda bitter?

It may be due to overcooking. Remove once the bubbles reduce well.

3. How to check the oil temperature?

Drop a small piece of dough into oil. It should rise up immediately else wait for few more minutes then check.

4. Can I make the dough ahead?

No the dough will dry up so making dough fresh and making the pakoda instantly will work better.

5. Why is the pakoda dark in colour?

Ragi flour naturally gives dark colour so do not judge cooking by colour alone.

ragi ribbon pakoda served

If you have any more questions about this Ragi Ribbon Pakoda Recipe do mail me at sharmispassions@gmail.com. In addition, follow me on Instagram, Facebook,Β  Pinterest, Youtube andΒ TwitterΒ .

Tried this Ragi Ribbon Pakoda Recipe? Do let me know how you liked it. Also tag us on Instagram @sharmispassions and hash tag it on #sharmispassions.

πŸ“– Recipe Card

RagiRibbonPakoda1
Print

Ragi Ribbon Pakoda Recipe

Ragi Ribbon Pakoda is a crispy savoury snack made with ragi flour, rice flour and besan flour. It has a nice crisp texture with mild spice and sesame flavour. Ragi flour give the pakoda a dark colour and earthy taste. It is little different from regular ribbon pakoda and much healthier too.
Course Snack
Cuisine Indian
Keyword diwali dishes, diwali recipes, diwali snacks, diwali snacks recipes, easy diwali recipes, easy diwali snacks, millet recipes, ragi recipes, rice flour recipes, savoury recipes, snack recipes
Prep Time 10 minutes
Cook Time 20 minutes
Total Time 30 minutes
Servings 2 cups
Calories 576kcal
Author Sharmilee J

Ingredients

  • 1 cup ragi flour / finger millet flour
  • ΒΌ cup rice flour
  • ΒΌ cup besan flour
  • 1 tablespoon butter
  • 1 teaspoon sesame seeds
  • ΒΌ teaspoon red chilli powder
  • salt to taste
  • water as needed
  • oil to deep fry

Instructions

  • Transfer everything to a mixing bowl. Mix this well first, crumble butter and mix well.
  • Add water little by little and gather together.
  • Gather together to form a soft dough. Take ribbon pakoda disc and insert it. Fill it with dough.
  • Heat oil, check by adding a pinch of dough if it rises immediately then oil is ready. Press in hot oil.
  • Flip over and cook. When bubbles ceases then remove.
  • Remove and drain in tissue paper. Break into pieces. Serve Ragi Ribbon Pakoda as snack!

Notes

  • Soft dough - I make the dough soft and smooth. A tight dough will be difficult to press through the mould.
  • Crumble butter - I crumble butter well with the flours before adding water. This helps to give crisp texture.
  • Add water - I add water little by little while making the dough. Do not add too much water at once.
  • Check oil - I drop a small piece of dough to check if oil is ready. It should rise up immediately.
  • Medium flame - I keep the flame medium while frying. Oil should not be smoking hot or pakoda will burn.
  • Remove properly - Once the bubbles reduce well I remove the pakoda from oil. Overcooking make it taste bitter.

Nutrition

Serving: 100g | Calories: 576kcal | Carbohydrates: 110g | Protein: 13g | Fat: 9g | Saturated Fat: 4g | Polyunsaturated Fat: 1g | Monounsaturated Fat: 3g | Trans Fat: 0.2g | Cholesterol: 15mg | Sodium: 72mg | Potassium: 636mg | Fiber: 2g | Sugar: 2g | Vitamin A: 255IU | Calcium: 428mg | Iron: 6mg

The post Ragi Ribbon Pakoda Recipe appeared first on Sharmis Passions.

Dry Jamun Recipe

Dry Jamun is a juicy, delicious sweet made by straining the sugar syrup from prepared jamuns and rolling it in powdered sugar. Dry Jamun is commonly made for Diwali and special occasions with Gulab Jamun mix. The taste of Dry Jamun lingers in mouth even after the festival is over.

dry jamuns served

It makes a nice treat for people on festive celebrations. This is usually made for special occasions at home. It feels light and healthy but still very satisfying. The jamuns keeps well for many days which makes them perfect for gifting or storing.

[feast_advanced_jump_to]

About Dry Jamun

Dry jamun is a soft and spongy sweet made with jamun mix, then fried and rolled in powdered sugar. It comes out light and delicious, has nice golden brown colour. It has delicate flavour from the saffron and rose essence. It is little different from usual gulab jamun. Also the sugar syrup with saffron gives it a beautiful fragrance and colour.

This recipe is different from the regular gulab jamun we eat because it is coated with powdered sugar instead of being soaked in syrup. It just blends well with cardamom and saffron. You can add rose flavour if want, but recipe tastes good without it. It suits for festival days or when you want something different from usual jamun.

The jamuns should come out soft and spongy on the inside and have a nice crisp exterior. The dough texture is very important because if too dry it make hard jamuns and if too sticky they will break while frying. The powdered sugar coating gives it sweetness and makes it look tempting.

I usually make this when I want a special sweet to serve at celebrations. My family loves eating these warm. Instead of making regular gulab jamun again, this feel like a different idea to try.

Similar Recipes

dry jamuns served

Dry Jamun Ingredients

  • Jamun mix - I used jamun mix for the dough. You can use khoya to make jamuns too.
  • Water - I add water little by little to form a sticky dough and you can just replace water with milk if you prefer a rich jamun.
  • Sugar - I used sugar for making the thick syrup and also for the outer coating. Extra sugar is needed for rolling.
  • Oil - I used oil to deep fry the jamuns. Keep the flame on low to medium so that they fry evenly and turn golden.
  • Ghee - I grease my palms with ghee before rolling the dough. It prevent sticking and make handling the dough so easy.
  • Saffron - I use this for aroma and color. You can skip or add little turmeric for color. It is optional but gives lovely touch.Β 
  • Rose essence - I add this for a delicate fragrance. Rose water or vanilla work just as well if you prefer.

How to make Dry Jamun Recipe Step by Step

1.Take any jamun mix, I used MTR mix. Transfer to a sieve and sieve it well. If there are lumps, press with your fingers and sieve it.

how to make dry jamun step1

2.Then measure and take it in a mixing bowl. Add water little by little.I used little less than ΒΌ cup water. You can replace water with milk too. I used 1 cup mix for these jamuns and used the rest forΒ kofta curry.

how to make dry jamun step2

3.It should just get together to form a sticky mass. Do not knead just use your finger tips for mixing. Do not panic seeing the sticky dough, if the dough is stiff ur jamuns will become dry and start to break while frying. Keep the dough aside for 15 minutes.

how to make dry jamun step3

4.Take sugar in a pan, add water to it.

how to make dry jamun step4

5.Let it boil, add saffron. Mix it for the sugar to dissolve quickly

how to make dry jamun step5

6.Boil the syrup until it forms a thick syrup no consistency check needed but the syrup will look more like oil in consistency. It will be glossy just like oil.

how to make dry jamun step6

7.Add rose essence and set aside to cool. Now after 15 minutes take the dough.

how to make dry jamun step7

8.Grease your palm with ghee, pinch the dough and roll into a small smooth ball without any cracks. Do not give pressure while rolling.

how to make dry jamun step8

9.Heat oil in a kadai - the oil should not be smoking hot. Pinch a tiny piece of dough and add it to oil, it should rise to top slowly that is the right temperature.If the dough rises immediately lower the flame. So keep in low medium flame through out the process and keep adjusting the flame. Add few balls , While frying do not touch the balls just swirl the oil using a ladle/spoon this way the jamuns will get evenly fried.

how to make dry jamun step9

10.Keep swirling the oil and fry until golden brown in low medium flame.

how to make dry jamun step10

11.Remove and drain in tissue paper.Leave in tissue paper for 2 minutes. Once the jamuns and the syrup is warm add the jamuns to sugar syrup.

how to make dry jamun step11

12.Let it soak for an hour. I just took few of them and made dry jamuns as we all love jamun with sugar syrup

how to make dry jamun step12

13.Take sugar in a dry mixer jar and grind it coarse.

how to make dry jamun step3

14.Strain the syrup and take the jamuns alone. Roll over in the sugar mixture. Store in a dry container and serve.

how to make dry jamun step14

Serve warm or chilled.

dry jamuns served

Expert Tips

  • Sieve well - I sieve the jamun mix to remove all lumps. Press any lumps with your fingers while sieving so the dough becomes smooth.
  • Keep it sticky - I keep the dough sticky, not stiff. A stiff dough makes hard jamuns that cracks. M ix gently with your fingertips, do not knead it.
  • Test temperature - I pinch a tiny piece of dough and add it to the oil first. If it rises slowly, the temperature is right. Lower the flame if it rises too fast.
  • Don't touch - While frying I do not touch the jamuns at all. I just swirl the oil with a spoon so they fry evenly.
  • Thick syrup - I make the sugar syrup thick and glossy like oil. Thin syrup will not coat properly so boils it down well.
  • Soak properly - I soak the jamuns in warm syrup for an hour. This helps them absorb the flavour and stay soft inside.
  • Powder coating - I grind the sugar to a slightly coarse powder before rolling. The jamuns should be completely dry before rolling.

Serving and Storage

Serve these warm or at room temperature, these jamuns taste great on its own or enjoy with tea or coffee. I like to serve it plain. These keep well in room temperature for about 1 week.

FAQS

1. Can I use regular sugar?

Yes you can but powdered sugar coat more evenly. Regular sugar might be grainy and rough.

2. What if my dough is too stiff?

Add a little more water and mix again. Stiff dough make them break while frying.

3. Can I use milk?

Yes milk makes them richer and softer. Use the same amount of milk as you would add for water.

4. My jamuns are breaking while frying?

The dough might be too stiff or the oil is too hot. Keep the dough sticky and oil at medium heat.

5. Can I make these without saffron?

Yes you can skip saffron if you don't have it. Rose essence alone give enough fragrance.

dry jamuns served

If you have any more questions about this Dry Jamun Recipe do mail me at sharmispassions@gmail.com. In addition, follow me on Instagram, Facebook,Β  Pinterest, Youtube andΒ TwitterΒ .

Tried this Dry Jamun Recipe ? Do let me know how you liked it. Also tag us on Instagram @sharmispassions and hash tag it on #sharmispassions.

πŸ“– Recipe Card

DryGulabJamun1
Print

Dry Jamun Recipe (Dry Gulab Jamun)

Dry Jamun is a juicy, delicious sweet made by straining the sugar syrup from prepared jamuns and rolling it in powdered sugar. Dry Jamun is commonly made for Diwali and special occasions with Gulab Jamun mix. The taste of Dry Jamun lingers in mouth even after the festival is over.
Course Dessert
Cuisine Indian
Keyword diwali mithai, diwali recipes, diwali sweets, diwali sweets recipes, easy diwali recipes, ghee recipes, gulab jamun, sweet recipes, virtual diwali party
Prep Time 15 minutes
Cook Time 20 minutes
Total Time 35 minutes
Servings 20 jamuns
Calories 122kcal
Author Sharmilee J

Ingredients

  • 1 cup jamun mix
  • water as needed
  • β…“ cup sugar for outer coating
  • oil to deep fry
  • ghee to grease your palm

For the sugar syrup :

  • 2 cups sugar
  • 2 cups water
  • 5 strands saffron

Instructions

  • Take any jamun mix, I used MTR mix. Transfer to a sieve and sieve it well. If there are lumps, press with your fingers and sieve it.
  • Then measure and take it in a mixing bowl. Add water little by little. I used little less than ΒΌ cup water. You can replace water with milk too.
  • It should just get together to form a sticky mass. Do not knead just use your finger tips for mixing. Do not panic seeing the sticky dough, if the dough is stiff your jamuns will become dry and start to break while frying. Keep the dough aside for 15 mins.
  • Take sugar in a pan, add water to it.
  • Let it boil, add saffron. Mix it for the sugar to dissolve quickly.
  • Boil the syrup until it forms a thick syrup no consistency check needed but the syrup will look more like oil in consistency. It will be glossy just like oil.
  • Add rose essence and set aside to cool. Now after 15 mins take the dough.
  • Grease your palm with ghee, pinch the dough and roll into a small smooth ball without any cracks. Do not give pressure while rolling.
  • Heat oil in a kadai - the oil should not be smoking hot. Pinch a tiny piece of dough and add it to oil, it should rise to top slowly that is the right temperature. If the dough rises immediately lower the flame. So keep in low medium flame through out the process and keep adjusting the flame.
  • Add few balls , While frying do not touch the balls just swirl the oil using a laddle / spoon this way the jamuns will get evenly fried, I saw this tip in a TV show. The jamun grows bigger while frying.
  • Keep swirling the oil and fry until golden brown in low medium flame.
  • Remove and drain in tissue paper. Leave in tissue paper for 2 mins. Once the jamuns and the syrup is warm add the jamuns to sugar syrup.
  • Let it soak for an hour. I just took few of them and made dry jamuns as we all love jamun with sugar syrup πŸ™‚
  • Take sugar in a dry mixer jar and grind it slightly coarse.
  • Strain the syrup and take the jamuns alone. Roll over in the sugar mixture. Store in a dry container and serve. Serve Dry Jamun warm or chilled.

Notes

  • Sieve well - I sieve the jamun mix to remove all lumps. Press any lumps with your fingers while sieving so the dough becomes smooth.
  • Keep it sticky - I keep the dough sticky, not stiff. A stiff dough makes hard jamuns that cracks. M ix gently with your fingertips, do not knead it.
  • Test temperature - I pinch a tiny piece of dough and add it to the oil first. If it rises slowly, the temperature is right. Lower the flame if it rises too fast.
  • Don't touch - While frying I do not touch the jamuns at all. I just swirl the oil with a spoon so they fry evenly.
  • Thick syrup - I make the sugar syrup thick and glossy like oil. Thin syrup will not coat properly so boils it down well.
  • Soak properly - I soak the jamuns in warm syrup for an hour. This helps them absorb the flavour and stay soft inside.
  • Powder coating - I grind the sugar to a slightly coarse powder before rolling. The jamuns should be completely dry before rolling.

Nutrition

Serving: 25g | Calories: 122kcal | Carbohydrates: 26g | Protein: 2g | Fat: 2g | Saturated Fat: 1g | Polyunsaturated Fat: 0.05g | Monounsaturated Fat: 1g | Cholesterol: 6mg | Sodium: 26mg | Potassium: 90mg | Fiber: 0.01g | Sugar: 26g | Vitamin A: 61IU | Vitamin C: 1mg | Calcium: 60mg | Iron: 0.1mg

The post Dry Jamun Recipe appeared first on Sharmis Passions.

Ragi Ladoo Recipe

Ragi ladoo is a tasty and healthy sweet made by roasting ragi flour with ghee, then shaping them into ball. It has soft and nutty taste from the roasted ragi. It has a mild sweetness which is not too much. It is little different from usual sweets because of the wholesome ragi and cashew inside.

ragi ladoo served in a beige bowl

This is usually made for Diwali and special occasions at home. It makes a nice treat for people on diet or with diabetes. It feels light and healthy but still very satisfying. The ladoos keeps well for many days which make them perfect for gifting or storing.

[feast_advanced_jump_to]

About Ragi Ladoo

Ragi ladoo is a simple sweet made with roasted ragi flour, ghee and cane sugar. The millet is first cleaned, roasted and then ground into fine flour, then mixed with sugar and shaped into balls. The cashews add a lovely crunch and richness to the ladoos.

The texture depends on how well you roast the ragi flour and how much ghee you add. If roasted properly and mixed well with ghee, the ladoos hold together nicely. The ragi gives a gentle nutty flavour which blends well with the sweetness.Β 

There are small variations that you can make, like use jaggery instead of cane sugar. Few even add nuts like almonds or coconut powder for extra richness. You can make it plain or different based on your preference. It is a flexible recipe which you can adjust based on what you like.

I usually make ragi ladoo when I want a healthy sweet for my family during special occasions. Instead of making same regular sweets again, this feels like a different idea to try.Β 

Similar Recipes

ragi ladoo served in a beige bowl

Ragi Ladoo Video

Ragi Ladoo Ingredients

  • Ragi Flour - I used ragi flour as the main ingredient which is roasted until golden and fragrant. It gives a nutty flavour and makes the ladoos wholesome and nutritious.
  • Cane Sugar - I used cane sugar for sweetness. You can also use powdered white sugar or jaggery based on your preference.
  • Ghee - I added ghee to roast cashews and helps bind the mixture together nicely. Ghee gives the best flavour to the ladoos.
  • Cashews - I used broken cashews fried until golden brown. The cashews add crunch and slight richness to each ladoo.
  • Cardamom Powder - I add this for sweet aroma. It balances sweetness and gives good flavor.

How to make Ragi Ladoo Step by Step

1.Heat half of the ghee that is β…› cup of ghee in a pan, roast the cashews till golden brown. Remove and set aside.

how to make ragi ladoo step1

2.Now add ragi flour to it, roast until nice aroma comes, it will become sandy in texture and there will no raw smell.

how to make ragi ladoo step2

3.Roast in low flame for 5-7 minutes so not burn the flour keep stirring.Cool down completely then add sugar to it.

how to make ragi ladoo step3

4.Mix well then add cashews, cardamom powder and remaining β…› cup ghee to it. Mix well so that it is evenly mixed.

how to make ragi ladoo step4

5.Take a handful of flour, press tight and shape them as ladoos. Repeat to finish the mixture.

how to make ragi ladoo step5

Store in a dry container. Keeps well at least for a week

ragi ladoo served in a beige bowl

Expert Tips

  • Roast well - I usually roast the ragi flour on low flame for 5 to 7 minutes. Keep stirring so it that does not burn and develop a nice nutty aroma and sandy texture.
  • Cool completely - I let the roasted mixture cool down fully before adding sugar. If sugar is added to hot mixture it will turn gooey and sticky.
  • Add sugar when warm - I add sugar when the mixture is just warm, not hot. This help the sugar mix evenly without turning the mixture wet or gooey.
  • Mix everything - I mix the flour, sugar, cashews, cardamom and ghee very well so they are evenly combined. This help the flavour spread throughout all the ladoos.
  • Shape when cool - I take a handful of the mixture and press it tight to shape into ladoo. The ghee help it hold together and get shaped well.
  • Store properly - I store the ladoos in a dry airtight container at room temperature. They keep well for at least a week without any issues.

Serving and Storage

Serve this as healthy snack during the day or after meals as light sweet. These ladoos also go well as small energy snack. Store the ladoos in airtight container at room temperature. They stay good for about 2 to 3 days.

FAQS

1. Can I use store bought ragi flour?

Yes you can use ready made ragi flour if available. Roasting it lightly before using will give better flavor.

2. Can I add nuts?

Yes you can add chopped cashews or almonds. It will give crunch to the ladoo.

3. Can I skip roasting?

No, roasting brings out the aroma and nutty flavor of millet also makes grinding easier.

4. Why my ladoos are not holding shape?

If mixture feels dry you can add little more ghee. Then try shaping again and it will hold better.

5. Can I make them ahead for gifting?

Yes, you can make them ahead and store in airtight container. They keep well for a week so perfect for gifting.

ragi ladoo served in a beige bowl

If you have any more questions about this Ragi Ladoo Recipedo mail me at sharmispassions@gmail.com. In addition, follow me onΒ Instagram,Β Facebook,Β PinterestΒ ,YoutubeΒ andΒ TwitterΒ .

Tried this Ragi Ladoo Recipe? Do let me know how you liked it. Also tag us on Instagram @sharmispassions and hash tag it on #sharmispassions.

πŸ“– Recipe Card

RagiLadoo3
Print

Ragi Ladoo

Ragi ladoo is a tasty and healthy sweet made by roasting ragi flour with ghee, then shaping them into ball. It has soft and nutty taste from the roasted ragi. It has a mild sweetness which is not too much. It is little different from usual sweets because of the wholesome ragi and cashew inside.
Course Dessert, sweet
Cuisine Indian
Keyword cardamom powder recipe, ghee recipes, laddu, ladoo recipes, millet recipes, nuts recipes, ragi recipes
Prep Time 10 minutes
Cook Time 15 minutes
Total Time 25 minutes
Servings 9 ragi ladoos
Calories 182kcal
Author Sharmilee J

Ingredients

Instructions

  • Heat half of the ghee that is β…› cup of ghee in a pan, roast the cashews till golden brown. Remove and set aside.
  • Now add ragi flour to it, roast until nice aroma comes, it will become sandy in texture and there will no raw smell.
  • Roast in low flame for 5-7 minutes so not burn the flour keep stirring. Cool down completely then add sugar to it.
  • Mix well then add cashews, cardamom powder and remaining β…› cup ghee to it. Mix well so that it is evenly mixed.
  • Take a handful of flour, press tight and shape them as ladoos. Repeat to finish the mixture.
  • Store in a dry container. Ragi Ladoo keeps well at least for a week.

Video

Notes

  • Roast well - I usually roast the ragi flour on low flame for 5 to 7 minutes. Keep stirring so it that does not burn and develop a nice nutty aroma and sandy texture.
  • Cool completely - I let the roasted mixture cool down fully before adding sugar. If sugar is added to hot mixture it will turn gooey and sticky.
  • Add sugar when warm - I add sugar when the mixture is just warm, not hot. This help the sugar mix evenly without turning the mixture wet or gooey.
  • Mix everything - I mix the flour, sugar, cashews, cardamom and ghee very well so they are evenly combined. This help the flavour spread throughout all the ladoos.
  • Shape when cool - I take a handful of the mixture and press it tight to shape into ladoo. The ghee help it hold together and get shaped well.
  • Store properly - I store the ladoos in a dry airtight container at room temperature. They keep well for at least a week without any issues.

Nutrition

Serving: 25g | Calories: 182kcal | Carbohydrates: 31g | Protein: 2g | Fat: 6g | Saturated Fat: 3g | Polyunsaturated Fat: 0.4g | Monounsaturated Fat: 2g | Cholesterol: 13mg | Sodium: 3mg | Potassium: 119mg | Fiber: 0.1g | Sugar: 11g | Vitamin C: 0.02mg | Calcium: 91mg | Iron: 1mg

The post Ragi Ladoo Recipe appeared first on Sharmis Passions.

Quinoa Muffins Recipe

Quinoa Muffins is made using cooked quinoa, wheat flour, sugar, butter and rising agents. It comes out soft and delicious, has nice golden crust on top. It has a mild nutty flavour from the quinoa. It is little different from usual muffins and nobody guesses that there is quinoa in it.

quinoa muffins served

It makes a nice treat for people on diet, kids like the soft texture and mild sweetness in it. It feels light and healthy but still very satisfying. It brings a nice healthy change to regular cake routine. This is usually made for breakfast or as a tea time snack.Β 

[feast_advanced_jump_to]

About Quinoa Muffins

Quinoa Muffins is a simple baked treat made with cooked quinoa and whole wheat flour. Instead of using only flour, quinoa is added for nutrition and texture. This makes the muffin more wholesome and nutritious. It is soft inside and has a nice tender crumb.

The texture depends on how well you mix the batter. If mixed until smooth and lump free, the muffins come out soft and fluffy. The quinoa gives a mild nutty flavour which blends well with wheat flour. Brown sugar add a slight caramel taste enhances the overall flavour nicely.

There are small variations you can try with this recipe, add chocolate chips for more richness. Few even add nuts or tutti frutti for extra texture. You can serve it plain or pair with a cup of tea or milk. It is a flexible recipe which you can adjust based on your preference and what you have at home.

I usually make this when I want a quick healthy treat for the family. Instead of making same cake again, this is like different idea to try.

Similar Recipes

Quinoa Muffins Recipe

Quinoa Muffins Ingredients

  • Wheat Flour - I added whole wheat flour as it gives a wholesome, nutty taste. You can use all-purpose flour if you prefer.
  • Cooked Quinoa - I added quinoa for nutrition and texture. It gives the muffins a light, fluffy crumb and make them more filling.
  • Brown Sugar - I used brown sugar for sweetness and caramel flavour. You can use white sugar or cane sugar if you prefer.
  • Curd - I used curd to keep the muffins moist and tender. It also helps bind the ingredients together nicely.
  • Milk - I used milk to adjust the batter consistency. Add little by little until the batter is in pourable consistency.
  • Butter - I used butter for richness and flavour. You can use oil if you prefer instead of butter.
  • Baking Powder and Baking Soda - I used these for rising and making the muffins fluffy. They help the muffins puff up nicely while baking.
  • Vanilla Essence - I added this for flavour. It gives a light sweet aroma which pairs nicely with quinoa.

How to make Quinoa Muffins Step by Step

1.Measure and take quinoa in a bowl, rinse it well. Drain and set aside.

how to make quinoa muffins step1

2.Add Β½ teaspoon oil in a sauce pan, add drained quinoa and toast for a minute.Then add 1 cup water and start cooking.Simmer the flame and cook covered for 15-20 minutes.

how to make quinoa muffins step2

3.You will see a small tail coming out and quinoa should have absorbed all the water.After 20 minutes switch off and set aside for 10 minutes. Then open and fluff it up.

how to make quinoa muffins step3

4.To a mixing bowl - measure and add wheat flour, add cooked quinoa to it. Add baking powder, soda and required salt to it.

how to make quinoa muffins step4

5.Mix well and set aside.In another mixing bowl add sugar. I used brown sugar, you can use cane sugar or even white sugar.

how to make quinoa muffins step5

6.Add curd and butter to it.

how to make quinoa muffins step6

7.Whisk well, add vanilla essence and cinnamon powder to it.

how to make quinoa muffins step7

8.Now add thisΒ  mixture to flour mixture. Mix well.

how to make quinoa muffins step8

9.Add milk and mix well to get a smooth lumpfree batter. Line muffin liners in muffin pan.

how to make quinoa muffins step9

10.Scoop out the batter and fill in the liners till ΒΎth. Bake in preheated oven at 180 deg C for 15-20 minutes. Check the doneness by inserting a toothpick in the center and the top should be golden.If the toothpick inserted inside comes out clean, then its done if its sticky then bake fore few more minutes.

how to make quinoa muffins step10

Cool down then store in airtight container.

quinoa muffins served

Expert Tips

  • Cooking - I rinse quinoa well before cooking. Toast it lightly then cook with water until all the water is absorbed and small tails come out.
  • Fluff After Cooking - I let the cooked quinoa sit for 10 minutes before fluffing it up. This helps it cool and separate nicely.
  • Mix Batter Smooth - I mix the wet and dry ingredients until smooth and lump free. This ensures even texture throughout the muffins.
  • Correct Consistency - The batter should be pourable not too thick. Add milk little by little to reach the right consistency.
  • Bake Until Golden - I bake at 180 deg C for 18-20 minutes until golden brown. Baking time may vary based on muffin size so check and adjust accordingly.

Serving and Storage

Serve these warm or at room temperature, these muffins taste great on its own or enjoy the muffins with tea or coffee. I like to serve it plain or with some milk. These keeps well in room temperature for 2 days.Β 

FAQS

1. Can I add chocolate?

Yes, chocolate chips tastes very good in this recipe. Kids usually prefer that.

2. Can I replace jaggery with sugar?

Yes you can use brown sugar or regular sugar, but taste will be little different.

3. Why my muffins turn so hard?

It may happen due to overmixing the batter or overbaking. Mix gently and check bake time.

4. Can I replace butter?

Yes you can just use oil instead of butter. It work just as well and give similar results.

5. How to know when muffins are baked?

You can also check by inserting a toothpick and if it come out clean, they are done.

quinoa muffins served

If you have any more questions about thisΒ Quinoa Muffins RecipeΒ do mail me at sharmispassions@gmail.com. In addition, follow me onΒ Instagram,Β Facebook,Β Β Pinterest,Β YoutubeΒ andΒ TwitterΒ .

Tried thisΒ Quinoa Muffins Recipe? Do let me know how you liked it. Also tag us on Instagram @sharmispassions and hash tag it on #sharmispassions.

πŸ“– Recipe Card

QuinoaMuffins1
Print

Quinoa Muffins Recipe

Quinoa Muffins is made using cooked quinoa, wheat flour, sugar, butter and rising agents. It comes out soft and delicious, has nice golden crust on top. It has a mild nutty flavour from the quinoa. It is little different from usual muffins and nobody guesses that there is quinoa in it.
Course Baking, Dessert
Cuisine American, French, Indian, Italian, Mediterranean, Mexican
Keyword Baking, baking recipes, cake, Cake Recipes, curd recipes, milk recipes, quinoa recipes, wheat flour recipes
Prep Time 10 minutes
Cook Time 20 minutes
Total Time 30 minutes
Servings 10 muffins
Calories 180kcal
Author Sharmilee J

Ingredients

  • 1 cup wheat flour
  • Β½ cup raw quinoa (1 heaped cup cooked quinoa)
  • ΒΎ cup brown sugar
  • Β½ cup curd
  • ΒΌ - Β½* cup milk
  • ΒΌ teaspoon baking soda
  • ΒΎ teaspoon baking powder
  • ΒΌ teaspoon salt
  • 1 teaspoon vanilla essence
  • β…› cup butter

*I used just ΒΌ cup only adjust according to the consistency.The batter should not be too thick should be pourable.

Instructions

  • Measure and take quinoa in a bowl, rinse it well. Drain.
  • Add Β½ teaspoon oil in a sauce pan, add drained quinoa and toast for a minute. Then add 1 cup water and start cooking. Simmer the flame and cook covered for 15-20 minutes.
  • You will see a small tail coming out and quinoa should have absorbed all the water. After 20 minutes switch off and set aside for 10 minutes. Then open and fluff it up.
  • To a mixing bowl - measure and add wheat flour, add cooked quinoa to it. Add baking powder, soda and required salt to it.
  • Mix well and set aside.Β  In another mixing bowl add sugar. I used brown sugar, you can use cane sugar or even white sugar.
  • Add curd and butter to it. Whisk well, add vanilla essence and cinnamon powder to it.
  • Now add thisΒ  mixture to flour mixture. Mix well.
  • Add milk and mix well to get a smooth lump free batter. Line muffin liners in muffin pan.
  • Scoop out the batter and fill in the liners till ΒΎth.
  • Bake in preheated oven at 180 deg C for 18-20 minutes. Bake it gets golden brown.
  • Enjoy Quinoa Muffins!

Notes

  • Cooking - I rinse quinoa well before cooking. Toast it lightly then cook with water until all the water is absorbed and small tails come out.
  • Fluff After Cooking - I let the cooked quinoa sit for 10 minutes before fluffing it up. This helps it cool and separate nicely.
  • Mix Batter Smooth - I mix the wet and dry ingredients until smooth and lump free. This ensures even texture throughout the muffins.
  • Correct Consistency - The batter should be pourable not too thick. Add milk little by little to reach the right consistency.
  • Bake Until Golden - I bake at 180 deg C for 18-20 minutes until golden brown. Baking time may vary based on muffin size so check and adjust accordingly.

Nutrition

Serving: 25g | Calories: 180kcal | Carbohydrates: 33g | Protein: 4g | Fat: 4g | Saturated Fat: 2g | Polyunsaturated Fat: 0.4g | Monounsaturated Fat: 1g | Trans Fat: 0.1g | Cholesterol: 10mg | Sodium: 153mg | Potassium: 131mg | Fiber: 1g | Sugar: 18g | Vitamin A: 114IU | Vitamin C: 0.1mg | Calcium: 75mg | Iron: 1mg

The post Quinoa Muffins Recipe appeared first on Sharmis Passions.

Gur Makhana Recipe

Gur Makhana is a delicious sweet snack made by tossing roasted makhana with jaggery syrup. It comes out in golden colour, crisp and slightly chewy, also a nice treat for an afternoon snack. It has a natural sweet taste and light texture that everyone enjoys.Β 

gur makhana served

It packs well for school and office snacks. Kids like the chewy texture and natural jaggery sweetness without feeling too heavy. It is different from usual sweets because makhana stays crunchy even after coating.

[feast_advanced_jump_to]

About Gur Makhana

Gur Makhana is a traditional Indian sweet snack made with roasted makhana, coated in jaggery syrup. Makhana or lotus seeds are light and airy, so the snack feels delicate to eat. Also sesame seeds and coconut adds more flavour and crunch to every bite.

The makhana stays crispy if you add them to jaggery at the right time and if you add them early, they become chewy, if you add them late, they stay more crispy. Jaggery has a rich deep sweetness that works perfectly with the makhana and cardamom give that warmth Indian sweet flavour.

Gur Makhana isan easy and quick snack to munch.I always make sweet popcorn using jaggery so wanted to try the same using makhana too and it came out soo good. This sweet jaggery makhana will sure be a addict for kids.

You can just adjust the texture according to your taste and texture preference. Some people like it very crispy, some prefer it chewy. The snack stays fresh for a week if stored in dry place. You can also add extra sesame or skip cardamom based on what you like.

I make this whenever I have makhana at home and want something quick. My family enjoy it and it get finished pretty fast. Sometimes I add extra sesame for more crunch, sometimes less cardamom if someone in the house do not like too much flavour.

Similar Recipes

gur makhana served

Gur Makhana Ingredients

  • Makhana (Lotus Seeds) - I roast these until they become light and crispy. Roasting makes them puffy and gives them a nice base to hold the jaggery coating.
  • Jaggery - This gives natural sweetness and beautiful colour to the snack. It melts into a syrup that coat each piece nicely when heated.
  • Sesame Seeds - These add a nutty taste and slight crunch. Toasting them before adding makes them taste even better.
  • Coconut - Fresh or dry coconut works fine and adds mild sweetness. It balances the strong jaggery flavour nicely.
  • Cardamom Powder - Just a pinch is enough to give that warm spice flavour. It makes the whole snack taste like a proper Indian sweet.

How to make Gur Makhana Step by Step

1.Add jaggery to a kadai, add water to it. Boil until jaggery dissolves completely.

how to make gur makhana served step1

2.Strain to remove impurities, Set aside. Heat ghee in the kadai - add makhana. Roast until crisp.

how to make gur makhana served step2

3.Break and check, now its done. Transfer roasted makhana to a plate and set aside. Add jaggery syrup let it boil.

how to make gur makhana served step3

4.Consistency check : Keep a separate plate ready filled with little water. Take a drop of jaggery syrup and put it in water, it should stand firm and not dissolve as shown below.Now try to gather and roll, it should form a soft loose ball, this is the right stage. If you want crisp makhana you can leave it to hard ball. Now add coconut, sesame seeds and cardamom powder to it.

how to make gur makhana served step4

5.Add roasted makhana to it. Toss well and switch off. It will be slightly sticky only.

how to make gur makhana served step5

Let it cool down then serve.

gur makhana served

Expert Tips

  • Roasting - Roast makhana until fully crisp and puffed up. Roasted makhana should break easily when you press.
  • Jaggery syrup - Boil jaggery with little water until it dissolves completely and becomes thin syrup. Always strain the syrup to remove any dirt or impurities before using it for coating.
  • Consistency check - Drop a bit of syrup in water and gather it to check if it form a soft ball. Soft ball mean chewy makhana, hard ball mean crispy makhana, so choose based on your preference.
  • Cooling down - I let the makhana cool completely before eating or storing it in container. Hot makhana feels soft but they become crispy as they cool down to room temperature.
  • Dry storage - I keep the snack in airtight container away from steam and moisture. Moisture make the makhana soft and chewy, so store in dry place to keep them crispy.

Serving and Storage

Serve Gur Makhana at room temperature with tea or as an evening snack at home. Store leftovers in an airtight container at room temperature and you can make it ahead and store for few days. It brings a healthy option to regular sweet routine.

FAQS

1. Can I use white sugar?

You can try but jaggery has much better flavour and tastes more traditional. White sugar gives a plain sweet taste without the depth that jaggery brings to the snack.

2. How do I make them extra crispy?

Use the hard ball stage of jaggery instead of soft ball stage for frying. Hard ball stage make the coating harder and keep makhana very crispy without any chewiness.

3. What if my makhana become soft and chewy?

This happen when you roast them less or add them to the syrup too early. Make sure makhana are fully crisp before adding to syrup.

4. Can I add other flavourings?

Yes you can just add dry ginger powder or even a little bit of rose water.Β 

5. Why does my jaggery get grainy?

This happen if you do not strain the jaggery syrup properly at the beginning. Always strain to remove impurities before using it for coating.

gur makhana served

If you have any more questions about this Gur Makhana Recipe do mail me at sharmispassions@gmail.com. In addition, follow me on Instagram, Facebook,Β  Pinterest, Youtube andΒ TwitterΒ .

Tried this Β Gur Makhana Recipe ? Do let me know how you liked it. Also tag us on Instagram @sharmispassions and hash tag it on #sharmispassions.

πŸ“– Recipe Card

GurMakhana3
Print

Gur Makhana Recipe

Gur Makhana is a delicious sweet snack made by tossing roasted makhana with jaggery syrup. It comes out in golden colour, crisp and slightly chewy, also a nice treat for an afternoon snack. It has a natural sweet taste and light texture that everyone enjoys.Β 
Course Snack
Cuisine Indian
Keyword 30 mins recipes, cardamom powder recipe, jaggery recipes, makhana recipes, snack recipes
Prep Time 10 minutes
Cook Time 10 minutes
Total Time 20 minutes
Servings 2 people
Calories 112kcal
Author Sharmilee J

Ingredients

  • 1 heaped cup phool makhana / lotus seeds
  • ΒΌ cup jaggery
  • 1 heaped tablespoon sesame seeds
  • 1 heaped tablespoon coconut
  • a pinch cardamom powder

Instructions

  • Add jaggery to a kadai, add water to it. Boil until jaggery dissolves completely.
  • Strain to remove impurities, Set aside.
  • Heat ghee in the kadai - add makhana. Roast until crisp.
  • Break and check, now its done. Transfer roasted makhana to a plate and set aside.
  • Add jaggery syrup let it boil.
  • Consistency check : Keep a separate plate ready filled with little water. Take a drop of jaggery syrup and put it in water, it should stand firm and not dissolve as shown below. Now try to gather and roll, it should form a soft loose ball, this is the right stage. If you want crisp makhana you can leave it to hard ball. Now add coconut, sesame seeds and cardamom powder to it.
  • Add roasted makhana to it. Toss well and switch off.
  • Let it cool down then serve. Enjoy Gur Makhana!

Notes

  • Roasting - Roast makhana until fully crisp and puffed up. Roasted makhana should break easily when you press.
  • Jaggery syrup - Boil jaggery with little water until it dissolves completely and becomes thin syrup. Always strain the syrup to remove any dirt or impurities before using it for coating.
  • Consistency check - Drop a bit of syrup in water and gather it to check if it form a soft ball. Soft ball mean chewy makhana, hard ball mean crispy makhana, so choose based on your preference.
  • Cooling down - I let the makhana cool completely before eating or storing it in container. Hot makhana feels soft but they become crispy as they cool down to room temperature.
  • Dry storage - I keep the snack in airtight container away from steam and moisture. Moisture make the makhana soft and chewy, so store in dry place to keep them crispy.

Nutrition

Serving: 75g | Calories: 112kcal | Carbohydrates: 26g | Protein: 0.2g | Fat: 0.4g | Saturated Fat: 0.2g | Polyunsaturated Fat: 0.1g | Monounsaturated Fat: 0.1g | Sodium: 0.2mg | Potassium: 11mg | Fiber: 0.1g | Sugar: 25g | Vitamin A: 0.3IU | Vitamin C: 0.01mg | Calcium: 14mg | Iron: 0.3mg

The post Gur Makhana Recipe appeared first on Sharmis Passions.

Panjiri Recipe

Panjiri is a traditional, Punjabi sweet snack made by roasting whole wheat flour, nuts, dry fruits, makhana, coconut, edible gum in ghee and mixing it together with sugar. Panjiri is a Janmashtami special sweet offered to Lord Krishna and can also be relished as an anytime snack. Panjiri is an energy boosting sweet and has good health benefits too.

panjiri sweet served

PanjiriΒ  is a traditional sweet and the version made with wheat flour is called atta panjiri. There are many versions of panjiri recipes and dhaniya and atta panjiri are most popular ones. This sweet is usually made during winter and for Janmashtami festival. Do try and enjoy for this Janmashtami!

[feast_advanced_jump_to]

About Panjiri

Panjiri is a Punjabi special sweet, easy to make and tastes so good even with such simple ingredients. Panjiri is a traditional sweet made for Janmashtami. Panjiri is made with whole wheat flour, sugar, dry fruits, nuts, makhana, dried coconut, edible gum etc.

Actually there are many variations to PanjiriΒ RecipeΒ like you can make it with rava, coriander seeds which is called dhaniya panjiri. But this one I am sharing here uses wheat flour as main ingredient so its healthy too. I have used cane sugar instead of white powdered sugar.

Some people even add cumin seeds powder, fennel seeds powder in minimal for a flavour variation. We can also add gond (edible gum) in panjiri, but adding gond can be done in winters since gond is warming. I have tried panjiri without gond too and it tastes good so you can skip it if you can't source it.

Panjiri is a easy to make snack, just grab few ingredients, roast them separately and mi it well and you are done. It is one of the healthy snacks that you can make for kids. Panjiri is made during winter.

The only time consuming process is roasting wheat flour which has to be done with patience and in low flame. Roasting it in ghee gives it a nutty flavour which elevates the taste of this dish.

Similar Recipes

panjiri sweet served

Panjiri Video

Panjiri Ingredients

  • Wheat Flour - Use good quality wheat flour. I used homemade wheat flour.
  • Sugar - You can use cane sugar or regular white sugar powdered.
  • Ghee - Use homemade ghee for best aroma and flavor as ghee forms the base for this recipe.
  • Nuts - I have used cashews, almonds and pistachios chopped roughly. You can use any nuts and dry fruits of your choice.
  • Dry Fruits - I have added raisins. You can use figs too.
  • Makhana - Makhana or Lotus seeds are also roasted and added. It should be roasted until crisp and then added.
  • Edible gum - It should be fried well in ghee until it puffs up else it will stick to the teeth.
  • Dried coconut - You can use kopra chopped or use dried coconut shreds.
  • Dry ginger powder - It adds flavour to this dish and also aids in digestion.
ingredients needed to make panjiri

How to make Panjiri Step by Step

1.We need ΒΌ cup + 2 tablespoon ghee in total. so we can add it little by little for frying. Heat little ghee in a kadai - add 2 tablespoon cashews, 2 tablespoon almonds, 1 tablespoon pistachios.

add nuts to ghee

2.Fry until crisp and golden. Remove and set aside.

fry until golden

3.Now add 1 tablespoon raisins.and fry until it bubbles up and is golden. Transfer to the same bowl and set aside.

fry raisin

4.Add little more ghee, add 2 tablespoon edible gum(gond). Add 1 tablespoon first.

add gond

5.Fry until it puffs up well. Then add remaining 1 tablespoon gond and fry well until it puffs up fully. Remove and set aside.

fry until it puffs

6.Add little ghee, Β½ cup makhana and roast it until crisp and golden.

add makhana

5.Break and see to check if its crisp. Remove to a bowl and set aside.

fry until crisp

6.Add 2 tablespoon dried coconut, fry until golden. Remove and set aside.

fry dried coconut

7.Now add remaining ghee to the kadai. Add 1 cup wheat flour.

add wheat flour to ghee

8.Roast without any lumps, even if it forms break it and roast the flour. Roast until its golden and nice aroma comes. See the colour and texture change in the picture below. Switch off and set aside to cool down a bit.

fry well

9.Now take fried gond.

puffed gond

10.Pulse it few times to grind it coarsely.

blend it coarsely

11.Now add fried wheat flour along with nuts, raisins, crushed makhana, Β½ cup cane sugar, ΒΌ teaspoon dry ginger powder, gond, coconut etc.

add all ingredients

12.Mix well.

mix well

Panjiri is ready!

Expert Tips

  • Flour - You can add half and half of wheat flour and sooji too.
  • Dry fruits and nuts - The choice of dry fruits and nuts is purely your preference.
  • Sugar - You can add powdered white sugar too but cane sugar tastes best.
  • Shelf life - You can keep in room temperature for about 2-3 days and enjoy.
  • Additions - Though adding makhana is purely your choice, I would recommend adding it as it gives such a nice crunch and taste to this dish.
  • Garnish - You can add dried rose petals as garnish if you like.

Serving & Storage

Store in an airtight container to retain freshness. Need not refrigerate. Panjiri keeps well for about 2-3 days in room temperature, after refrigerate and consume. You can serve Panjiri as such or with warm milk.

FAQS

1.Is Panjiri healthy?

Yes this Panjiri is healthy as I have used just whole wheat flour, cane sugar along with nuts and dry fruits.

2.What is the shelf life of Panjiri?

Panjiri keeps well for about 2-3 days in room temperature, after that refrigerate and consume.

3. Is panjiri dry or moist?

Panjiri can be moist or dry depending on the recipe. If you want it more moist, add more ghee and fry so that wheat flour is slightly moist. If you want a low fat version sprinkle little milk.

4.Does making Panjiri take time?

No not at all, just gather the ingredients roast one by one and mix together and Panjiri is done in no time. The only time it takes it for frying wheat flour, others all gets done quickly.

5.Can I add sooji to this?

Yes you can use around 2 tablespoon sooji / rava, roast in ghee and add it.

panjiri served

If you have any more questions about this Panjiri Recipe do mail me at sharmispassions@gmail.com. In addition, follow me on Instagram, Facebook,Β  Pinterest, Youtube andΒ TwitterΒ .

Tried this Panjiri Recipe ? Do let me know how you liked it. Also tag us on Instagram @sharmispassions and hash tag it on #sharmispassions.

πŸ“– Recipe Card

Print

Panjiri Recipe

Panjiri is a traditional, Punjabi sweet snack made by roasting whole wheat flour, nuts, dry fruits, makhana, coconut, edible gum in ghee and mixing it together with sugar. Panjiri is a Janmashtami special sweet offered to Lord Krishna and can also be relished as an anytime snack. Panjiri is an energy boosting sweet and has good health benefits too.
Course Snack, sweet
Cuisine Indian
Keyword 30 mins recipes, ghee recipes, janmashtami recipes, krishna jayanthi recipes, makhana recipes, nuts recipes, sweet recipes, wheat flour recipes
Prep Time 10 minutes
Cook Time 25 minutes
Total Time 35 minutes
Servings 2 people
Calories 1037kcal
Author Sharmilee J

Ingredients

  • 1 cup wheat flour
  • Β½ cup cane sugar
  • 2 tablespoon cashews
  • 2 tablespoon almonds
  • 1 tablespoon pistachio
  • 1 Β½ tablespoon raisin
  • 2 tablespoon dried coconut
  • Β½ cup makhana
  • ΒΌ cup + 2 tablespoon ghee
  • 2 tablespoon edible gum
  • ΒΌ teaspoon ginger powder

Instructions

  • We need ΒΌ cup + 2 tablespoon ghee in total. so we can add it little by little for frying. Heat little ghee in a kadai - add 2 tablespoon cashews, 2 tablespoon almonds, 1 tablespoon pistachios.
  • Fry until crisp and golden. Remove and set aside.
  • Now add 1 tablespoon raisins.and fry until it bubbles up and is golden. Transfer to the same bowl and set aside.
  • Add little more ghee, add 2 tablespoon edible gum. Add 1 tablespoon first.
  • Fry until it puffs up well. Then add remaining 1 tablespoon gond and fry well until it puffs up fully. Remove and set aside.
  • Add little ghee, Β½ cup makhana and roast it until crisp and golden.
  • Break and see to check if its crisp. Remove to a bowl and set aside.
  • Add 2 tablespoon dried coconut, fry until golden. Remove and set aside.
  • Now add remaining ghee to the kadai. Add 1 cup wheat flour.
  • Roast without any lumps, even if it forms break it and roast the flour. Roast until its golden and nice aroma comes. See the colour and texture change in the picture below. Switch off and set aside to cool down a bit.
  • Now take fried gond.
  • Pulse it few times to grind it coarsely.
  • Now add fried wheat flour along with nuts, raisins, crushed makhana, Β½ cup cane sugar, ΒΌ teaspoon dry ginger powder, gond, coconut etc.
  • Mix well.
  • Panjiri is ready!

Video

Notes

  • Flour - You can add half and half of wheat flour and sooji too.
  • Dry fruits and nuts - The choice of dry fruits and nuts is purely your preference.
  • Sugar - You can add powdered white sugar too but cane sugar tastes best.
  • Shelf life - You can keep in room temperature for about 2-3 days and enjoy.
  • Additions - Though adding makhana is purely your choice, I would recommend adding it as it gives such a nice crunch and taste to this dish.
  • Garnish - You can add dried rose petals as garnish if you like.

Nutrition

Serving: 100g | Calories: 1037kcal | Carbohydrates: 119g | Protein: 13g | Fat: 59g | Saturated Fat: 32g | Polyunsaturated Fat: 5g | Monounsaturated Fat: 19g | Cholesterol: 114mg | Sodium: 9mg | Potassium: 478mg | Fiber: 5g | Sugar: 52g | Vitamin A: 20IU | Vitamin C: 1mg | Calcium: 62mg | Iron: 5mg

The post Panjiri Recipe appeared first on Sharmis Passions.

Aval Pottukadalai Urundai

Aval Pottukadalai Urundai is a mild sweet made by using roasted aval, pottukadalai with ghee. It comes out soft and mildly sweet which looks nice on the plate. It has a mild nutty flavour. It is little different from usual ladoos because of the crispy poha texture inside.

aval pottukadalai urundai served in a bronze plate

It makes a nice treat for weekends at home. Kids especially like the soft texture and mild sweetness in it. It feels light to eat and still very satisfying. Its just a small variation to a regular ladoo routine. This is usually made for evening tea time when you want something quick and simple.Β 

[feast_advanced_jump_to]

About Aval Pottukadalai Urundai

Aval Pottukadalai Urundai is an Indian sweet made with roasted poha and gram dal. In this recipe instead of using only one ingredient, aval and pottukadalai are added for flavour and texture. This make the ladoo light and crispy inside.Β 

The texture of this ladoo is soft to bite and has a nice roasted flavour. If roasted until golden and crisp, the ladoos stay firm and do not break easily. The ghee gives a rich flavour that blends well with the roasted aval. Cardamom powder adds a light sweet aroma which enhances the overall taste.

There are small variations you can try with this recipe, you add moreΒ roasted peanuts for extra crunch or even add raisins soaked in ghee for extra sweetness. You can also serve it plain or with a cup of tea. It is a flexible recipe, you can adjust based on your preference.

I usually make this as a quick sweet for the kids. Instead of making same ladoo again, this feels like a different idea to try.

Similar Recipes

aval pottukadalai urundai served in a bronze plate

Aval Pottukadalai Urundai Ingredients

  • Poha - I used thick poha for this recipe and it gives light, crispy texture. You can use thin poha or even red poha if you prefer.
  • Gram Dal - I used this for nutty flavour and protein. It adds richness and makes the ladoo more wholesome.
  • Peanuts - I used roasted peanuts for crunch and extra nutrition. You can use deskinned peanuts or with skin based on your preference.
  • Ghee - I used this for frying and flavour and it binds all the ingredients together and gives a rich taste to the ladoos.
  • Sugar - I used brown sugar but you can use white sugar or jaggery. It adds sweetness and helps hold the ladoos together when shaping.
  • Cardamom Powder - I added cardamom powder for mild sweet aroma. It gives traditional taste which pairs nicely with the roasted poha and gram.

How to make Aval Pottukadalai Ladoo Step by Step

1.First heat a tablespoon of ghee in a kadai, add poha roast until golden and crisp. Transfer to a plate and set aside.

how to make aval pottukadalai urundai step1

2.Add gram dal and roast until golden, set aside.Now add peanuts and roast it. I had de skinned peanuts so used it. Remove the center white part Β and discard it(this step is purely optional but I recommend if you are going to give this for kids).

how to make aval pottukadalai urundai step2

3.Add poha to mixer jar first, grind it to a powder. Transfer to a mixing bowl. Now add roasted gram dal.

how to make aval pottukadalai urundai step3

4.Add roasted peanuts and grind it to a powder. Now add cane sugar to it.

how to make aval pottukadalai urundai step4

5.Pulse it few times just for blending. Cool down a bit then transfer to mixing bowl which already has poha mixture. Mix well.

how to make aval pottukadalai urundai step5

6.Heat β…› cup ghee and add raisins, let it bubble up. Add it to the mixing bowl, add cardamom powder. The aroma was so tempting that I couldn't wait for the aval pottukadalai urundai to get ready.

how to make aval pottukadalai urundai step6

7.After that mix well, take little mixture press and hold tight, shape them as ladoos. Finally shape them when its still warm so that it holds tight. Likewise repeat to finish. Aval pottukadalai urundai ready!

how to make aval pottukadalai urundai step7

So to summarize, compared to other recipes this ladoo is easy to make and will be liked by all especially kids.

aval pottukadalai urundai served in a bronze plate

Expert Tips

  • Roasting - I roast the poha, gram dal and peanuts separately until golden and crisp. This helps each ingredient cook evenly and add nice roasted flavour.
  • Powdering - I grind each roasted ingredient to a powder separately first, so they mix evenly and the texture become uniform throughout.
  • Ghee Temperature - I heat the ghee until it is warm and add raisins to let them soften. Do not make it too hot as it may burn the raisins.
  • Mixing - I mix everything together while still warm so it blends nicely. Cool it slightly before shaping so it does not burn your hands.
  • Shaping - I press and hold tight while shaping the ladoos. Shape them when they are still warm so they hold firm and do not crumble apart.

Serving and Storage

Serve this as snack with a cup of tea. It is best enjoyed directly or pair with milk or tea. Store leftover ladoos in an airtight box at room temperature for few days. It stays fresh and do not need refrigeration. You can keep it for upto a week if stored properly.

FAQS

1. Can I use regular sugar?

Yes, you can add white sugar or jaggery based on preference.

2. Why are my ladoos not holding together?

The mixture may need more ghee or you not pressing tight enough while shaping. Press firm so the ladoos hold their shape and do not crumble.

3. Can I skip cardamom powder?

Yes you can skip it, cardamom give nice aroma but ladoos taste good without it also.

4. Can I make it ahead?

Yes you can make it a few hours ahead and stay good for few days.

5. Can I skip removing peanut skins?

Yes, you can skip it if you don't mind the skins. But removing them make the ladoos smooth and nice in texture.

aval pottukadalai urundai served in a bronze plate

If you have any more questions on making of this Aval Pottukadalai Urundai Recipe do mail me at sharmispassions@gmail.com
Follow me on Instagram, Facebook, Pinterest ,Youtube and Twitter .

Tried this Aval Pottukadalai Urundai Recipe? Do let me know how you liked it.Tag us on Instagram @sharmispassions and hash tag it on #sharmispassions.

πŸ“– Recipe Card

PohaPeanutLadoo1
Print

Aval Pottukadalai Urundai Recipe

Aval Pottukadalai Urundai is a mild sweet made by using roasted aval, pottukadalai with ghee. It comes out soft and mildly sweet which looks nice on the plate. It has a mild nutty flavour. It is little different from usual ladoos because of the crispy poha texture inside.
Course Snack
Cuisine Indian
Keyword cardamom powder recipe, ghee recipes, laddu, ladoo recipes, peanut recipes, poha recipes, snack recipes, sweet recipes
Prep Time 10 minutes
Cook Time 20 minutes
Total Time 30 minutes
Servings 12 ladoos
Calories 133kcal
Author Sharmilee J

Ingredients

  • 1 cup thick poha / aval
  • Β½ cup gram dal / pottukadalai
  • Β½ cup peanut / kadalai
  • β…› cup + 1 tablespoon ghee
  • Β½ cup sugar I used brown sugar
  • ΒΌ teaspoon cardamom powder

Instructions

  • Heat a tablespoon of ghee in a kadai, add poha roast until golden and crisp. Transfer to a plate and set aside.
  • Add gram dal and roast until golden, set aside.
  • Now add peanuts and roast it. I had deskinned peanuts so used it.
  • Add poha to mixer jar first, grind it to a powder. transfer to a mixing bowl. Now add roasted gram dal.
  • Add roasted peanuts and grind it to a powder. Now add cane sugar to it.
  • Pulse it few times just for blending. Transfer to mixing bowl which already has poha mixture. Mix well.
  • Heat β…› cup ghee and add raisins, let it bubble up. Add it to the mixing bowl, add cardamom powder.
  • Mix well, take little mixture press and hold tight, shape them as ladoos. Shape them when its still warm so that it holds tight. Enjoy Aval Pottukadalai Urundai!

Notes

  • Roasting - I roast the poha, gram dal and peanuts separately until golden and crisp. This helps each ingredient cook evenly and add nice roasted flavour.
  • Powdering - I grind each roasted ingredient to a powder separately first, so they mix evenly and the texture become uniform throughout.
  • Ghee Temperature - I heat the ghee until it is warm and add raisins to let them soften. Do not make it too hot as it may burn the raisins.
  • Mixing - I mix everything together while still warm so it blends nicely. Cool it slightly before shaping so it does not burn your hands.
  • Shaping - I press and hold tight while shaping the ladoos. Shape them when they are still warm so they hold firm and do not crumble apart.

Nutrition

Serving: 25g | Calories: 133kcal | Carbohydrates: 16g | Protein: 3g | Fat: 7g | Saturated Fat: 3g | Polyunsaturated Fat: 1g | Monounsaturated Fat: 2g | Cholesterol: 9mg | Sodium: 20mg | Potassium: 50mg | Fiber: 2g | Sugar: 9g | Vitamin A: 42IU | Vitamin C: 1mg | Calcium: 28mg | Iron: 1mg

The post Aval Pottukadalai Urundai appeared first on Sharmis Passions.

Masala Corn Recipe

Masala corn is a quick, tasty and healthy Indian snack made using sweet corn kernels tossed in butter, salt, spices and lemon juice. This can be made with just few ingredients yet tastes so delicious. The sweetness of the corn pairs well with the spicy, tangy spices, which makes it tastes so good. Learn to make easy and tasty Masala Corn with the help of step by step pictures and video.

This masala corn is perfect for rainy days, after-school snacks, or when you're craving for something spicy and comforting. It brings the perfect mix of warmth and spice. With just a few ingredients and a few minutes, you can make this healthy snack.

[feast_advanced_jump_to]

About Masala Corn

Masala Corn is a spicy and flavorful Indian snack made using boiled sweet corn spices, lemon juice, salt and butter. The dish is known for its perfect balance of sweetness and spices, making it a favorite among all.

Butter adds a rich taste and flavor also makes corn moist. The buttery coating not only enhances flavor but also gives the dish a rich, melt-in-mouth texture. The recipe is super flexible , You can adjust the spice levels to suit your taste.

It's a perfect snack for everyone in the family from kids to grown-ups, especially when you're looking for something mild and flavorful. Whether served hot or warm, it always tastes good. The mix of spice powders which includes red chili powder, chat masala, pepper powder, cumin powder and garam masala brings a classic street food flavor.

This snack is great for health-conscious people, since it's made without deep frying or heavy sauces. It's naturally gluten-free and can be made vegan with simple swaps, making it suitable for different diets.Β 

Masala Corn can be made quickly in just few minutes if you have boiled sweet corn in hand. This recipe is a proof that simple ingredients, when paired right, can bring something truly delightful.

masala corn served

Masala Corn Video

Masala Corn Ingredients

  • Sweet cornΒ - I have used fresh sweet corn kernels. You can shave corn kernels from the corn, use it or can even use frozen sweet corn kernels.
  • ButterΒ - Adds flavor, richness to the corn.
  • Spice powders - This includes red chili powder, pepper powder, jeera powder, garam masala, and chat masala. Adjust spices according to your taste.
  • Lemon juiceΒ - Makes it more refreshing and gives a tangy flavor, also balances flavors.
ingredients needed to make masala corn

Similar Recipes

Why This Recipe Works

  • Quick and easy to make, perfect for snacking.
  • Healthy snack recipe and has less calories.
  • Balanced in flavor and taste.
  • Easily customizable - you can adjust the spice levels according to your taste.
  • No special equipment required - just a pan and a mixing bowl.
  • This recipe can be prepared in under 20 minutes.
  • An excellent snack for both adults and kids.

How to make Masala Corn Step by Step

1.To a kadai add water, salt let it boil then add 1 cup corn.

add corn to boiling water

2.Let it cook for 10-12 minutes.

cook for 10 mins

3.Taste check if it is cooked then switch off.

corn is cooked

4.Transfer to a strainer. Strain water, you can use this for soups.

transfer to a strainer

5.Measure and take 1 cup corn in a bowl. Add

1 teaspoon butter
β…› teaspoon pepper powder
Β½ teaspoon chat masala powder
Β½ teaspoon red chili powder
ΒΌ teaspoon jeera powder
ΒΌ teaspoon garam masala powder

add all spice powders

6. Add 1 teaspoon lemon juice.

add lemon juice

7.Mix it well.

mix it well

Masala Corn is ready!

Expert Tips

  • Sweet corn - Β You can use fresh, frozen, or canned sweet corn according to your availability.Β Adjust cooking time accordingly.
  • Cooking Corn -Β You can cook in open pot or pressure cook corn. If you prefer a crunchy texture, avoid overcooking the corn. Boil just until tender.
  • Spices -Β This is medium spicy, increase or decrease spices according to your taste.
  • Lemon juice -Β Use fresh lemon juice for extra tang and flavor.
  • Butter -Β Use unsalted butter for better control over the salt content.
  • Vegan option -Β You can use olive oil or vegan butter as a substitute for butter.

Serving and Storage

Serve Masala Corn hot or warm for the best flavor. It pairs well with other appetizers or drinks.

You can store it in an airtight container and refrigerate for up to 2 days. Reheat before serving.

FAQS

1.Can I add other vegetables to this?

Yes, you can add in finely chopped veggies like bell peppers, grated carrot, chopped onion for added flavor and texture.

2.Can I use a pressure cooker instead of boiling the corn?

Yes, you can pressure cook the corn for 4 whistles or until it's soft.

3.Can I make this recipe without butter?

Yes, you can skip the butter and instead use olive oil or any other cooking oil.

4.Can I add cheese?

Yes, prepare masala corn hot and top it with some grated cheese so that it slightly melts to make it more cheesy and tasty.

5.Can I use this as filling for wraps or sandwiches?

Yes, you can add some cream cheese or mayonnaise to make it sticky and add as filling.

masala corn served

If you have any more questions about this Masala Corn Recipe do mail me at sharmispassions@gmail.com. In addition, follow me on Instagram, Facebook,Β  Pinterest, Youtube andΒ TwitterΒ .

Tried this Masala Corn Recipe? Do let me know how you liked it. Also tag us on Instagram @sharmispassions and hash tag it on #sharmispassions.

πŸ“– Recipe Card

Print

Masala Corn Recipe

Masala corn is a quick, tasty and healthy Indian snack made using sweet corn kernels tossed in butter, salt, spices, lemon juice. This can be made with just few ingredients yet tastes so delicious. The sweetness of the corn pairs with the bold, tangy spices, creating a delicious treat. Learn to make easy and tasty masala corn with the help of step by step pictures and video.
Course Snack
Cuisine American, Chinese, Indian
Keyword corn recipes, masala recipes, peri peri masala, piri piri masala, snack recipes, sweet corn recipes
Prep Time 5 minutes
Cook Time 15 minutes
Total Time 20 minutes
Servings 2
Calories 83kcal
Author Sharmilee J

Ingredients

Instructions

  • To a kadai add water, salt let it boil then add 1 cup corn.
  • Let it cook for 10-12 minutes.
  • Taste check if it is cooked then switch off.
  • Transfer to a strainer. Strain water, you can use this for soups.
  • Measure and take 1 cup corn in a bowl. Add 1 teaspoon butter, β…› teaspoon pepper powder, Β½ teaspoon chat masala powder, Β½ teaspoon red chili powder, ΒΌ teaspoon jeera powder and ΒΌ teaspoon garam masala powder
  • Add 1 teaspoon lemon juice
  • Mix it well
  • Masala Corn is ready!

Video

Notes

  • Sweet corn - Β You can use fresh, frozen, or canned sweet corn according to your availability.Β Adjust cooking time accordingly.
  • Cooking Corn -Β You can cook in open pot or pressure cook corn. If you prefer a crunchy texture, avoid overcooking the corn. Boil just until tender.
  • Spices -Β This is medium spicy, increase or decrease spices according to your taste.
  • Lemon juice -Β Use fresh lemon juice for extra tang and flavor.
  • Butter -Β Use unsalted butter for better control over the salt content.
  • Vegan option -Β You can use olive oil or vegan butter as a substitute for butter.

Nutrition

Serving: 100g | Calories: 83kcal | Carbohydrates: 17g | Protein: 3g | Fat: 2g | Saturated Fat: 1g | Polyunsaturated Fat: 1g | Monounsaturated Fat: 0.4g | Cholesterol: 0.3mg | Sodium: 24mg | Potassium: 191mg | Fiber: 2g | Sugar: 4g | Vitamin A: 410IU | Vitamin C: 5mg | Calcium: 17mg | Iron: 1mg

The post Masala Corn Recipe appeared first on Sharmis Passions.

Aval Urundai Recipe

Aval Urundai is a traditional sweet made using flattened rice flakes, jaggery, coconut, ghee and cardamom powder. Aval Urundai is a no cook sweet that is prepared for Krishna Jayanthi festival, at times made as an evening snack for regular days too. It is very easy to make yet tastes so delicious.

aval urundai served

Last week during a chat session, my cousin sister gave me the idea of posting homemade butter and aval urundai for Gokulashtami. Butter and aval are Lord Krishna's favourite so here I am with this post. If you are looking for last minute ideas for Gokulashtami then this sweet is for you as it can made in just 10 minutes no pre preparations.

[feast_advanced_jump_to]

About Aval Urundai

Aval Urundai is an easy and quick snack that can be made easily. Aval Urundai is a sweet made by mixing aval or poha with powdered jaggery, cardamom powder, coconut, ghee and shaping them into small balls.

Aval Urundai is a no cook sweet that can be made in just few minutes. This is traditionally prepared for Gokulashtami. Aval Urundai can be made as an evening after school snack too. Kids will love it for sure.

It was this simple sweet my grandmother and mother used to make for Gokulashtami. As we don't have the tradition of making other dishes for this festival, it was always this simple sweet offered to Lord Krishna.

After I started cooking, I started to make bakshanams (snacks) like seedai, ladoo, murukku, appam, vadai for this festival. My son gugu has the same star as Krishna so my mother insisted to make it special. So it was always a small spread at least for Gokulashtami after his birth.

Aval Urundai is one of the most easy and quick sweets that you can prepare even at the last minute for the festival. Blogging has made all festivals come into our homes well in advance.

Similar Recipes

aval urundai served

Aval Urundai Video

Aval Urundai Ingredients

  • Poha - Poha is also called flattened rice flakes or aval. Use thick or thin aval but make sure to soak accordingly.
  • Jaggery - Prepare jaggery syrup, make it thick strain to remove impurities and use it.
  • Cashews - Fry broken cashews in ghee and use it.
  • Ghee - Use homemade ghee or store bought ghee.
  • Coconut - Use grated coconut or chopped coconut pieces.
  • Cardamom powder - Cardamom powder adds flavor to this sweet.
ingredients needed to make aval urundai

How to make Aval Urundai Step by Step

1.To a mixing bowl add 1 Β½ cups thick poha(flattened rice flakes).

add poha

2.Rinse it well in water. Drain water, squeeze water well and bring it back. It should be soft by now.

rinse well

3.Add ΒΌ cup powdered jaggery, Β½ cup coconut, ΒΌ teaspoon cardamom powder and 1 Β½ tablespoon ghee.

add other ingredients

4.Mix it well.

mix well

4.Start shaping. Press tight and shape into small balls.

press tight

5.Aval urundai is ready!

shape into ball

6.Your aval urundais are ready!

aval urundai is ready

Enjoy it!

Expert Tips

  • Poha - Use thick or medium thick poha which is best for this recipe.
  • Rinsing poha - Rinse it at least 2-3 times, by then it will become soft also so no need to soak further.
  • Adding jaggery - Make sure to add jaggery that is free from dirt as we are adding it directly.
  • Variations - You can add ghee fried cashews and raisins too.
  • Adding coconut - Do not reduce coconut as that is one of the main ingredients that gives taste to this sweet.

Serving and Storage

As coconut is added it keeps well in room temperature for just 1 day. Aval Urundai keeps well in fridge for 2 days.

FAQS

1. Which aval is best for Aval Urundai?

Thick or medium-thick aval works well. Thin aval is easier to blend with other ingredients well.

2.Do I need to roast the aval?

No need to roast aval, it tastes good even without roasting.

3.Why is my Aval Urundai not holding its shape?

The mixture may be too dry. Add a little more jaggery or little more ghee to make it moist.

aval urundai served

If you have any more questions about this Aval Urundai Recipe do mail me at sharmispassions@gmail.com. In addition, follow me on Instagram, Facebook,Β  Pinterest, Youtube andΒ TwitterΒ .

Tried this Aval UrundaiΒ Recipe? Do let me know how you liked it. Also tag us on Instagram @sharmispassions and hash tag it on #sharmispassions.

πŸ“– Recipe Card

Print

Aval Urundai Recipe

Aval Urundai is a traditional sweet made using flattened rice flakes, jaggery, coconut, ghee and cardamom powder. Aval Urundai is a no cook sweet that is prepared for Krishna Jayanthi festival, at times made as an evening snack for regular days too. It is very easy to make yet tastes so delicious.
Course Snack
Cuisine Indian
Keyword 30 mins recipes, aval paal recipe, dessert recipes, laddu, ladoo recipes, poha recipes, snack recipes, sweet recipes
Prep Time 10 minutes
Cook Time 10 minutes
Total Time 20 minutes
Servings 9 Balls
Calories 109kcal
Author Sharmilee J

Ingredients

  • 1 Β½ cups poha
  • ΒΌ cup powdered jaggery
  • Β½ cup coconut
  • ΒΌ teaspoon cardamom powder
  • 1 Β½ tablespoon ghee

Instructions

  • To a mixing bowl add 1 Β½ cups thick poha(flattened rice flakes).
  • Rinse it well in water. Drain water, squeeze water well and bring it back. It should be soft by now.
  • Add ΒΌ cup powdered jaggery, Β½ cup coconut, ΒΌ teaspoon cardamom powder and 1 Β½ tablespoon ghee.
  • Mix it well.
  • Start shaping. Press tight and shape into small balls.
  • Aval urundai is ready!
  • Your aval urundais are ready!

Video

Notes

  • Poha - Use thick or medium thick poha which is best for this recipe.
  • Rinsing poha - Rinse it at least 2-3 times, by then it will become soft also so no need to soak further.
  • Adding jaggery - Make sure to add jaggery that is free from dirt as we are adding it directly.
  • Variations - You can add ghee fried cashews and raisins too.
  • Adding coconut - Do not reduce coconut as that is one of the main ingredients that gives taste to this sweet.

Nutrition

Serving: 30g | Calories: 109kcal | Carbohydrates: 19g | Protein: 2g | Fat: 3g | Saturated Fat: 2g | Polyunsaturated Fat: 0.1g | Monounsaturated Fat: 1g | Cholesterol: 4mg | Sodium: 1mg | Potassium: 34mg | Fiber: 0.5g | Sugar: 3g | Vitamin C: 0.1mg | Calcium: 7mg | Iron: 0.3mg

The post Aval Urundai Recipe appeared first on Sharmis Passions.

Toor Dal Sundal Recipe

Toor Dal Sundal is a quick to make, tasty mild snack made by cooking toor dal and tempering it with spices, coconut, chillies. It is a healthy evening tea time snack and commonly made during festive times. It has a soft texture and mild flavour and makes it a nice option for a quick snack.

toor dal sundal served

This recipe is very easy to make once the dal is cooked. It has a wholesome taste and feels filling without making it heavy. Toor dal sundal is perfect for anytime when you want a healthy snack. It is mild, with just enough flavour to be enjoyed.

[feast_advanced_jump_to]

About Toor Dal Sundal

Toor dal sundal is a traditional South Indian recipe made with toor dal, coconut and simple tempering spices. Toor dal cooks fast, is soft and creamy once cooked. The tempering of mustard seeds, urad dal and dried red chillies gives nice aroma and little crunch.

This has balance of textures and flavours, also grated coconut adds mild sweetness, soft texture and also balances the warmth of the dal. This recipe comes out soft, creamy and lightly spiced, really comforting to eat anytime. You can also pack this for kids snacks box.

As navaratri has started, thought to post this easy toor dal sundal recipe. Sundal recipes are a must for Navartri. I havent't been to any kollu so to me kollu reminds of watching it in movies and of course sundal and batchanam they offer in kollu.

This recipe can be just customized according to your taste preference, you can add extra curry leaves for more flavour, or add in some roasted peanuts for crunch. Toor dal sundal is pretty versatile, you can have it warm, slightly cooled or at room temperature, still tastes good.

I usually make toor dal sundal as evening snack. My family likes to have it with tea in evening, and it come together so quick if you already have cooked dal.

Similar Recipes

toor dal sundal served

Toor Dal Sundal Video

Toor Dal Sundal Ingredients

  • Toor dal - Use the dal as the main ingredient and cook it until soft but still holding its shape.
  • Coconut - Added grated coconut at the end so it stays fresh in the sundal.
  • Mustard seeds, Split urad dalΒ  - I used mustard and urad dhal in the tempering for the sundal, this adds texture and flavour to the sundal.
  • Red chillies - Use small red chillies for the mild chilli flavour in the sundal.
  • Curry leaves - Add a few curry leaves to the tempering for flavour.
  • Hing - A small pinch is enough for the tempering.
  • Water - I used this for cooking the toor dal.

How to make Toor Dal Sundal Step by Step

1.Soak toor dal in water.Rinse well and drain water. Transfer this to pan. Add water to it.

how to make toor dal sundal step1

2.Cook in low medium flame. When the dal is mash able but still the grains should hold its shape then its cooked perfectly.

how to make toor dal sundal step2

3.Drain the dal and set aside. Heat oil in a pan - add the items listed under 'to temper' add cooked dal.

how to make toor dal sundal step3

Serve hot!

toor dal sundal served

Expert Tips

  • CookingΒ  - I cook the toor dal until it is mashable, but make sure the grains still hold their shape.
  • Do not overcook - I usually keep checking the dal while it cooks. Overcooking can make it too soft and may turn the sundal mushy.
  • Drain well - I just drain the cooked dal before adding it to the tempering. Excess water can make the sundal too moist.
  • Sauteing - I toss the cooked dal with the tempering and saute until the extra moisture has gone.
  • Coconut at end - I add the coconut after sauteing the dal and toss it well so it mixes evenly without making the sundal wet.

Serving and Storage

Serve this warm as an evening snack and this does not specify refrigeration, storage time or reheating instructions, so it is best to follow the serving suggestion of having it hot or warm.

FAQS

1. Can I use more water to cook the toor dal?

The recipe uses water specifically for cooking the dal. Add enough to cook it properly, then drain the cooked dal before using it for the sundal.

2. Should the toor dal be completely mashed?

No dal should be soft enough to mash but the grains should still hold its shape.

3. Why should the cooked dal be drained?

Draining removes the excess cooking water before the dal goes into the tempering. This helps the sundal become less moist as it is sauteed.

4. Can I skip coconut?

Yes but the coconut adds freshness and nice flavour to the sundal.Β 

5. How do I know the sundal is ready?

You can cook the sundal to perfection and add tempering its done.

toor dal sundal served

If you have any more questions about this Toor Dal Sundal Recipedo mail me at sharmispassions@gmail.com. In addition, follow me onΒ Instagram,Β Facebook,Β PinterestΒ ,YoutubeΒ andΒ TwitterΒ .

Tried this Toor Dal Sundal Recipe? Do let me know how you liked it. Also tag us on Instagram @sharmispassions and hash tag it on #sharmispassions.

πŸ“– Recipe Card

ToorDalSundal1
Print

Toor Dal Sundal Recipe

Toor Dal Sundal is a quick to make, tasty mild snack made by cooking toor dal and tempering it with spices, coconut, chillies. It is a healthy evening tea time snack and commonly made during festive times. It has a soft texture and mild flavour and makes it a nice option for a quick snack.
Course Snack
Cuisine Indian
Keyword 30 mins recipes, coconut recipes, dal recipes, navaratri sundal recipes, snack recipes, sundal recipes
Prep Time 20 minutes
Cook Time 15 minutes
Total Time 35 minutes
Servings 2 people
Calories 166kcal
Author Sharmilee J

Ingredients

  • Β½ cup toor dal
  • 1 Β½ cups water (for cooking toor dal)
  • 2 Β½ tablespoon coconut
  • salt to taste

To temper:

  • Β½ teaspoon mustard seeds
  • ΒΌ teaspoon split urad dal
  • 2 small red chillies
  • few nos curry leaves
  • a pinch of hing

Instructions

  • Soak toor dal in water. Rinse well and drain water. Transfer this to pan. Add water to it.
  • Cook in low medium flame. When the dal is mash able but still the grains should hold its shape then its cooked perfectly. Drain the dal and set aside.
  • Heat oil in a pan - add the items listed under 'to temper' add cooked dal.
  • Saute until moisture leaves. Add coconut and toss it well.
  • Serve Toor Dal Sundal hot or warm!

Video

Notes

  • CookingΒ  - I cook the toor dal until it is mashable, but make sure the grains still hold their shape.
  • Do not overcook - I usually keep checking the dal while it cooks. Overcooking can make it too soft and may turn the sundal mushy.
  • Drain well - I just drain the cooked dal before adding it to the tempering. Excess water can make the sundal too moist.
  • Sauteing - I toss the cooked dal with the tempering and saute until the extra moisture has gone.
  • Coconut at end - I add the coconut after sauteing the dal and toss it well so it mixes evenly without making the sundal wet.

Nutrition

Serving: 100g | Calories: 166kcal | Carbohydrates: 27g | Protein: 9g | Fat: 3g | Saturated Fat: 2g | Polyunsaturated Fat: 0.2g | Monounsaturated Fat: 0.3g | Sodium: 44mg | Potassium: 173mg | Fiber: 7g | Sugar: 4g | Vitamin A: 429IU | Vitamin C: 65mg | Calcium: 35mg | Iron: 2mg

The post Toor Dal Sundal Recipe appeared first on Sharmis Passions.

❌