❌

Reading view

There are new articles available, click to refresh the page.

Cashew Murukku Recipe (Mundhiri Murukku)

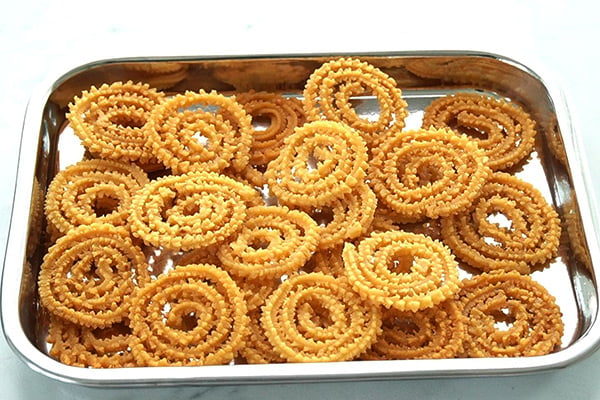
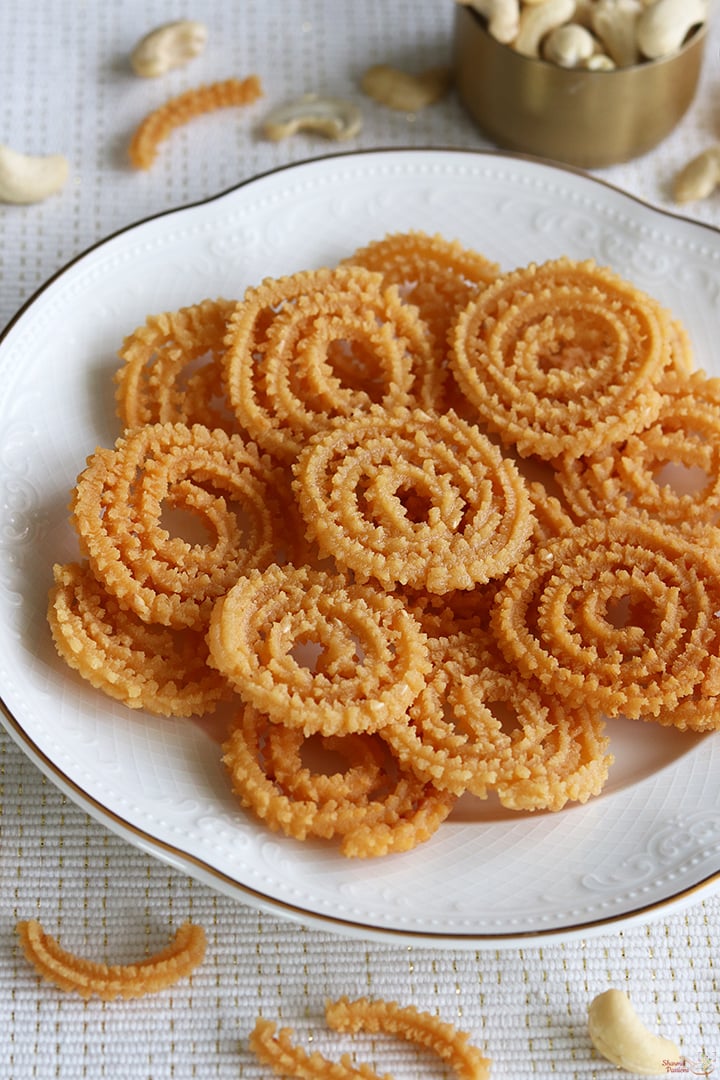
Cashew Murukku is a rich and tasty snack made by adding cashew paste into the normal murukku dough. It comes out crisp and crunchy with nutty flavour from cashews. The taste is little different from regular murukku because of the mild sweetness and special flavour that cashew gives.
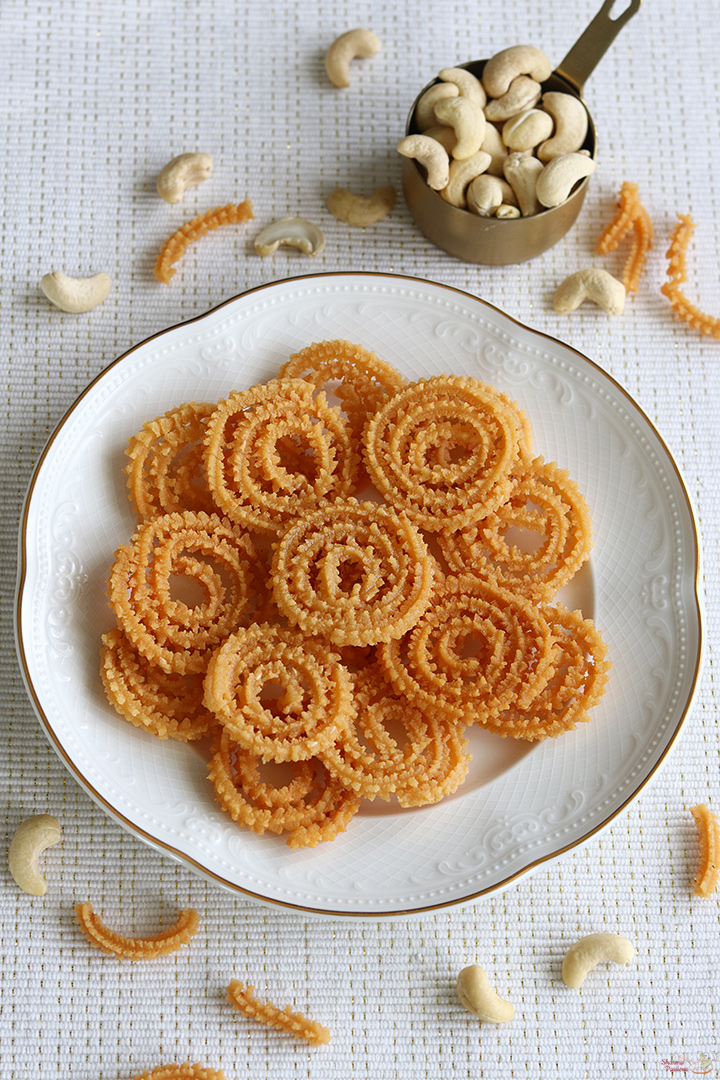
cashew murukku served in a plate

This murukku is a good choice to make for festival times or even just for evening snack time. It does not take too much time and comes out tasty and flavourful. The cashew in the dough gives a richer taste and makes it stand out from other usual snacks we make at home.

[feast_advanced_jump_to]

About Cashew Murukku

Cashew Murukku is a South Indian deep-fried snack with little twist from the normal version. 'Munthiri' in tamil means cashews so it is called munthiri murukku. Usually murukku is made with rice flour and simple spices, but here soaked cashews are grind to a paste and mixed with the flour.

It gives a nice buttery and nutty flavour which makes the murukku tastes rich. The cashew flavour always makes it feel rich and special. The cashew paste blends with rice flour very well and adds a natural sweetness. This makes it suitable for kids also as it is not very spicy.

You can try small variations like adding cumin seeds or even a pinch of chilli powder if you prefer spicier version. The shape can be made using thenkuzhal press or even star or flower press depending what you like. You can also make uthiri murukku (broken style) or swirled whole murukku. Both ways it tastes nice.

I usually make this murukku in small batch during weekends. Sometimes I pair it with tea in evening, and it always feels like a treat. It is also nice to prepare during festivals like Diwali to share with family and friends.

Similar Recipes
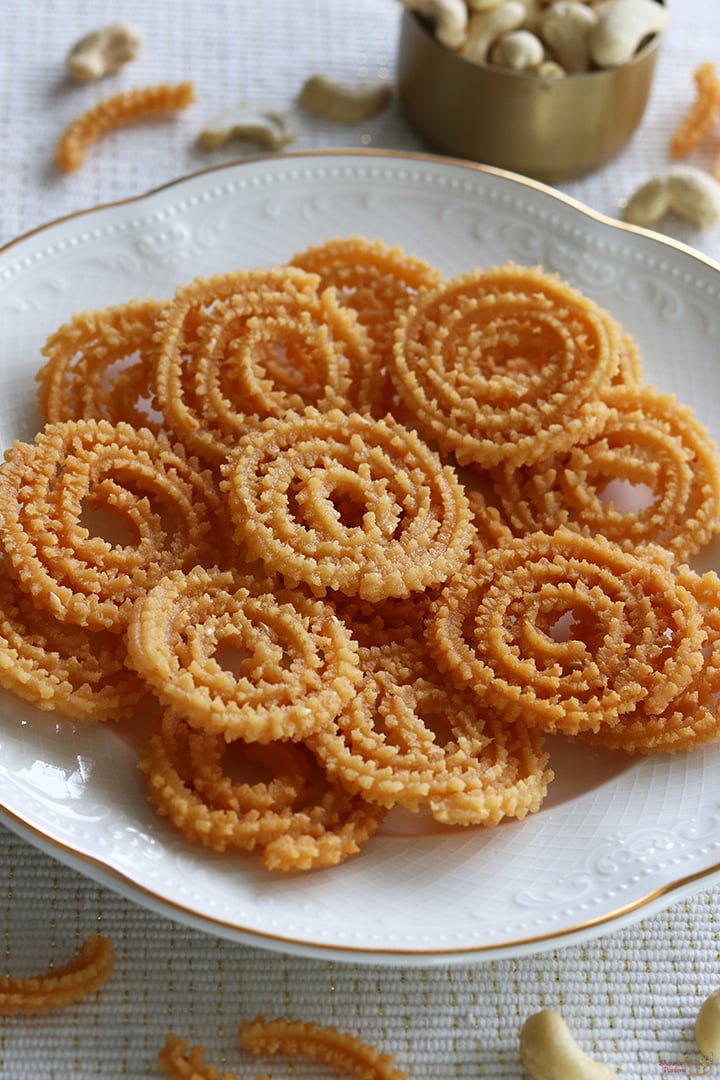
cashew murukku served in a plate

Cashew Murukku Video

Cashew Murukku Ingredients

  • Rice flour - I have used store bought idiyappam flour, it gives crisp texture to murukku. You can also use homemade rice flour if you have, both works well.
  • Cashews - I soaked cashews in hot water for 30 minutes so that it grinds easily to a smooth paste.
  • Butter - I added butter at room temperature while mixing flour, it gives nice aroma and makes murukku taste good.
  • Sesame seeds - Sesame seeds adds a nice crunch.
  • Hing - Hing adds flavour adn aids in digestion.
  • Oil - I used oil for deep frying, it should be hot enough so murukku cooks even, but not too smoking hot.
  • Water - Water is used to make the dough.
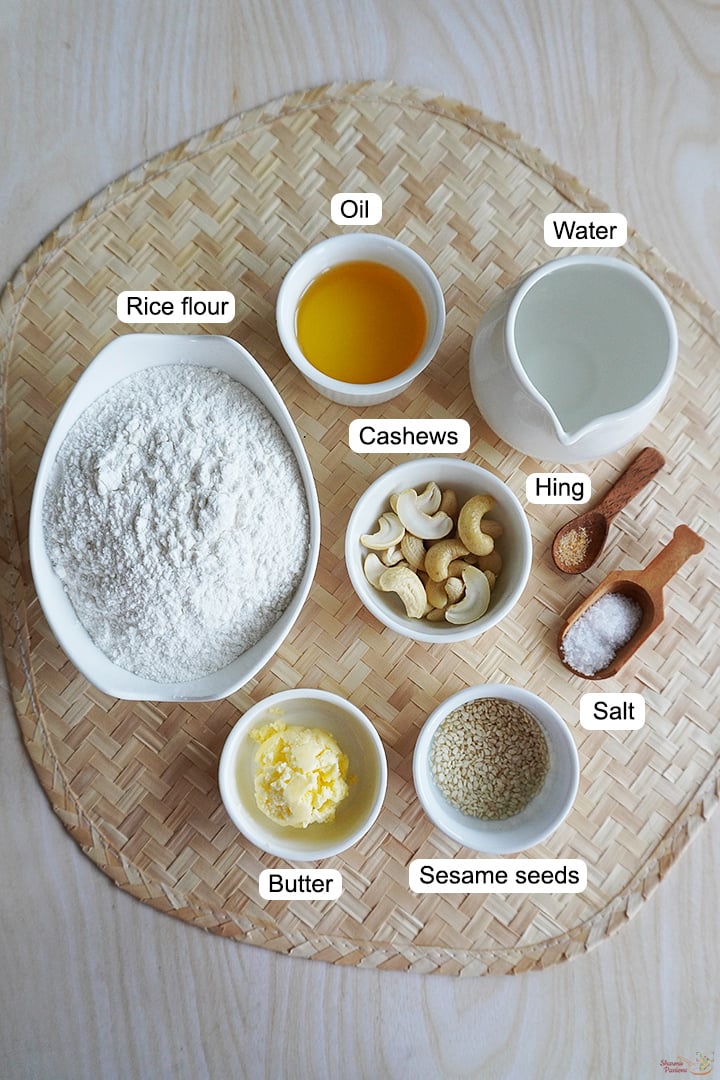
ingredients needed to make cashew murukku

How to make Cashew Murukku Recipe Step by Step

1.To a bowl add 20 cashews, add ΒΌ cup hot water to it. Soak for 30 minutes.
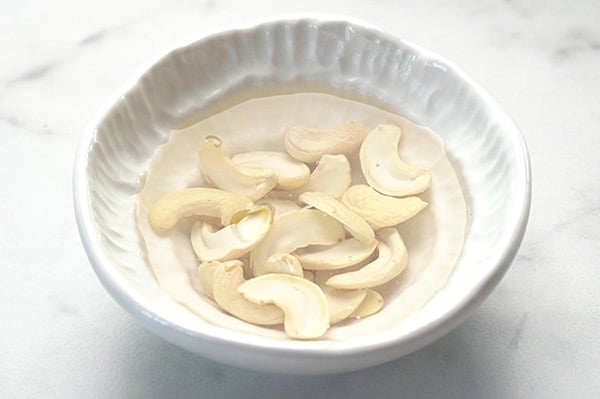
soak cashews in hot water

2.After 30 minutes grind it to a fine paste and set aside.
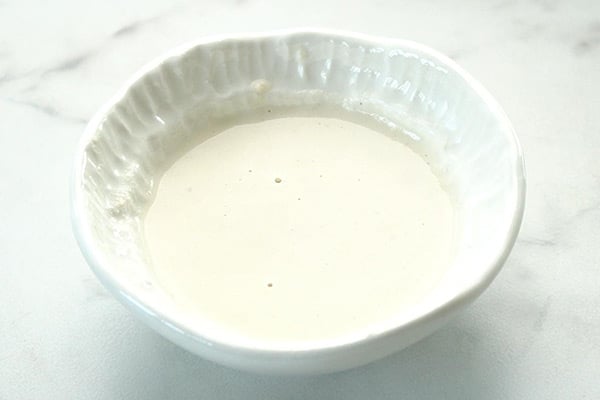
grind to a fine paste

3.To a mixing bowl add 1 cup rice flour, salt to taste and 1 tablespoon butter.
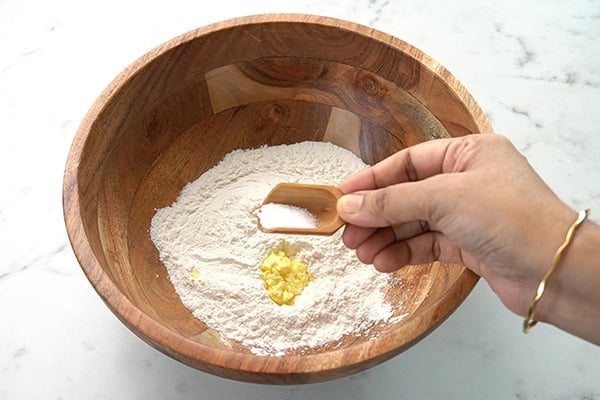
add salt, butter

4.Mix this well first for butter to be evenly distributed.
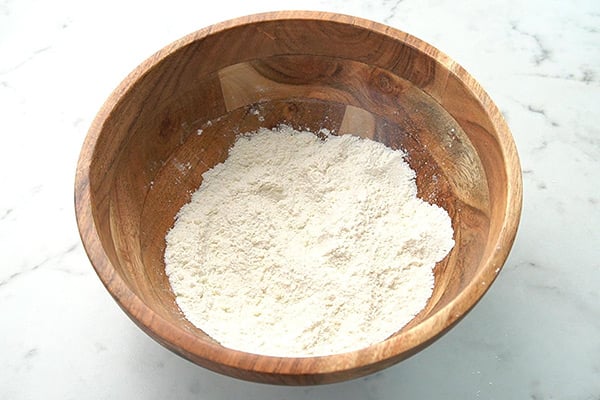
mix well

5.Now add 1 teaspoon sesame seeds, ΒΌ teaspoon hing and prepared cashew paste.
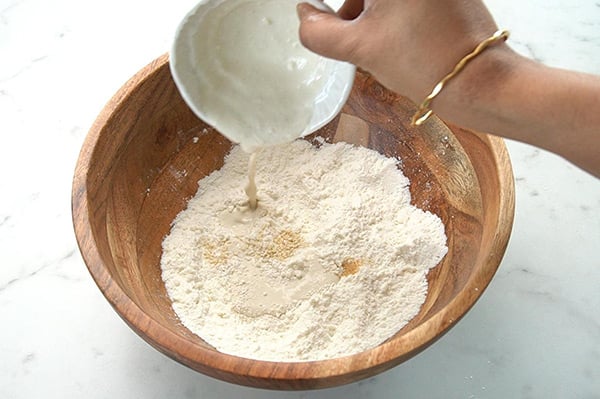
add other spices, cashew paste

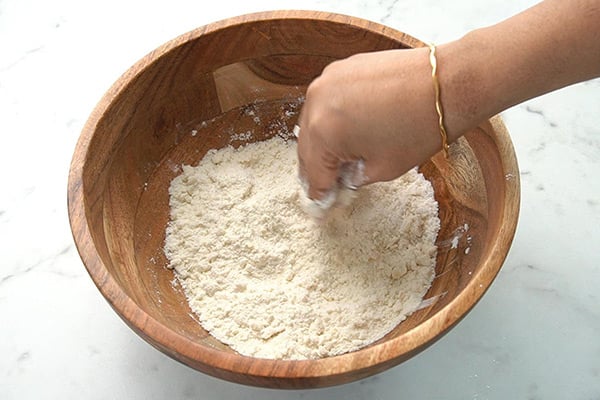
6.Mix it well.

mix well

7.Add water little by little and mix well.
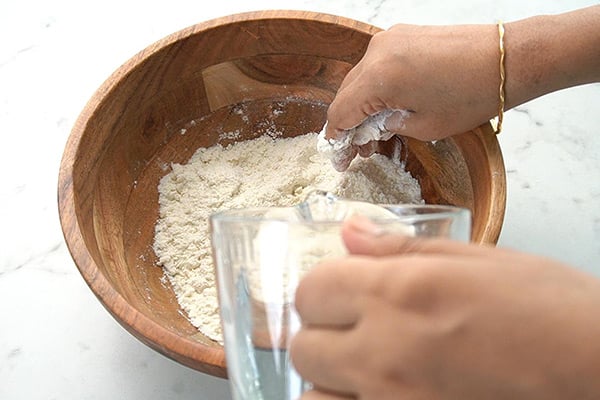
add water

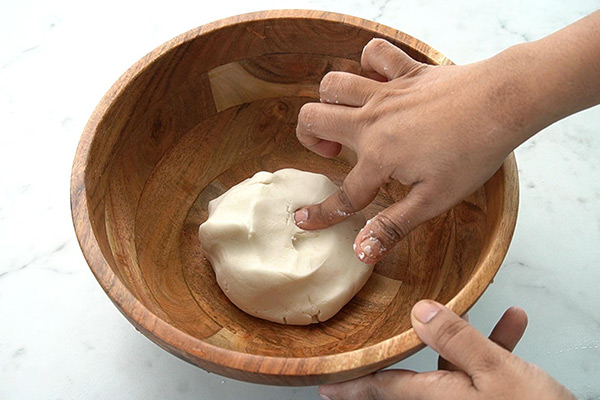
8.Gather to form a soft dough.

form a dough

9.Form cylinders like this so that fitting into murukku press will be easy.
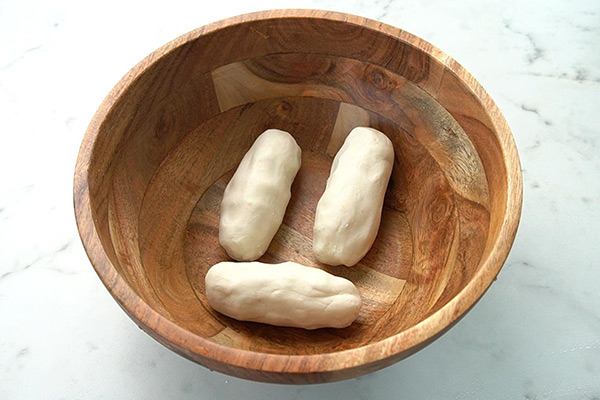
shape into cylinders

10.Fit the mould into the murukku press, I used star shape. Grease murukku press with oil.
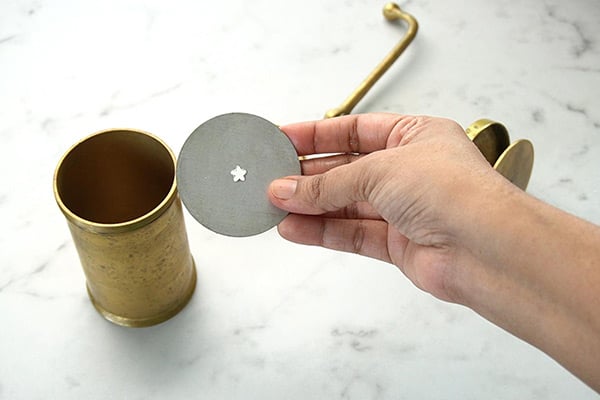
take mould

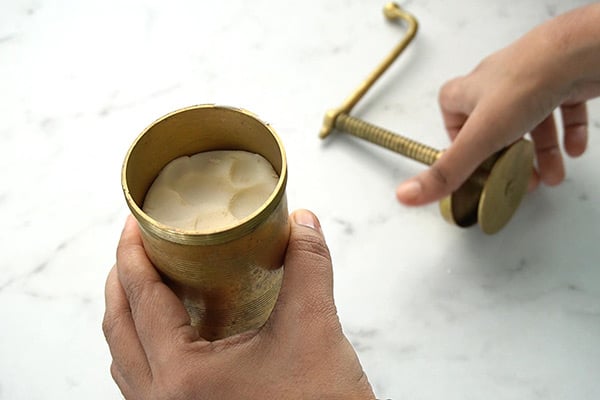
11.Fill in with dough.

fill with dough

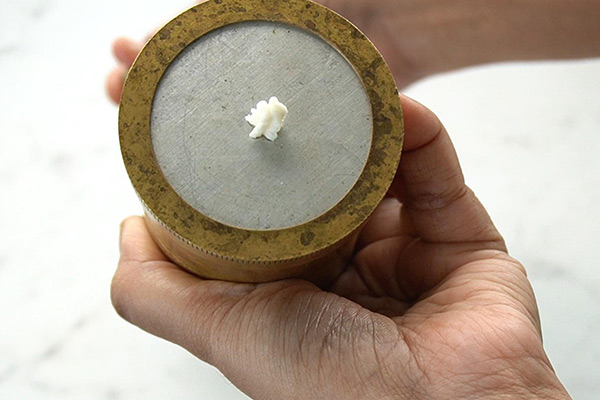
12.Press to check.

press and see

10.Grease 2-3 ladles and keep it ready. Press on it in concentric circles. Tuck in loose ends so that it doesn't open while frying. I made small murukkus. Pressing in ladles helps to flip in hot oil easily.
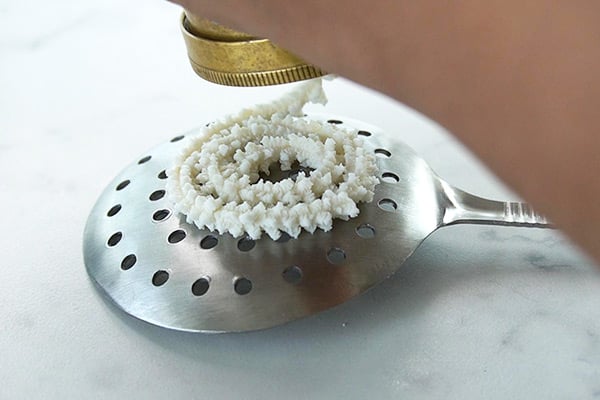
pree in ladle

11.You can press in butter paper or cloth too. Just slide in using a ladle to remove.
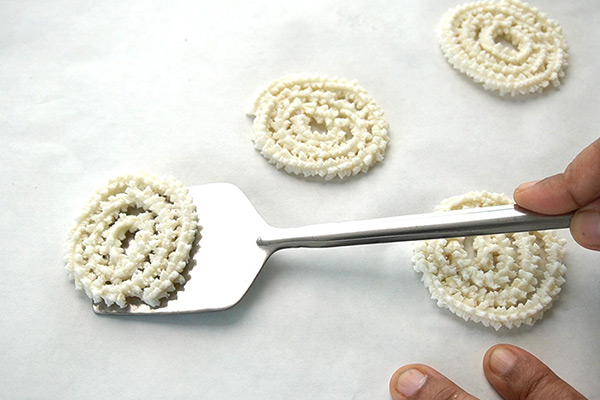
press in butter paper

12.Heat oil. Pinch a tiny pinch of dough and add it. If it rises immediately then oil is heated well. Now add 4-5 murukkus at a time.
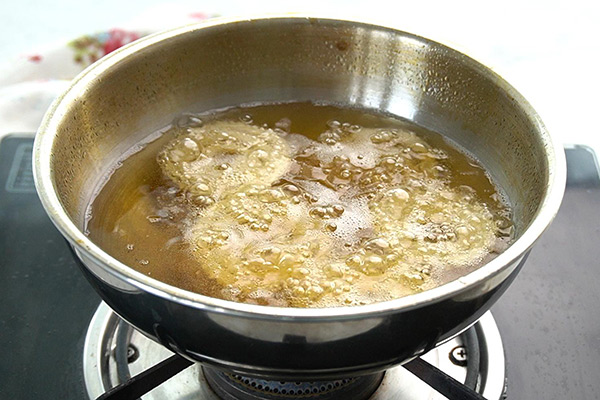
add in oil

13.When bubbles and 'shh' sound stops and murukku turns golden drain and remove.
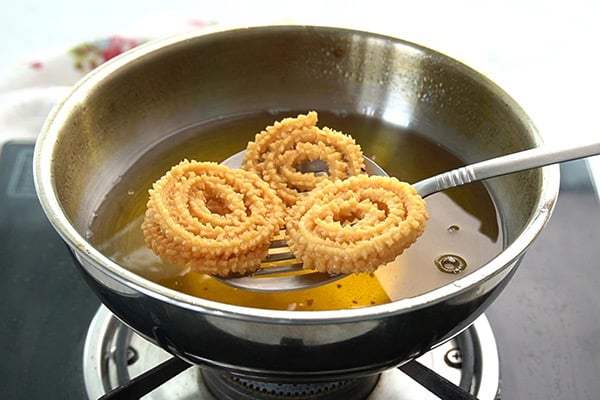
fry and remove

14.Repeat to finish.

cashew murukku ready

Cashew murukku is ready!

cashew murukku served in a plate

Expert Tips

  • Soak cashews well - I always soak cashews in hot water for at least 30 minutes. This makes it easy to grind smooth, otherwise the dough may get chunks.
  • Make smooth dough - I add water little by little while mixing. It should be soft and non sticky. If it gets watery, sprinkle little rice flour. If it's hard, sprinkle little water.
  • Choosing mould - You can either choose thenkuzhal or star or flower mould which best suits this murukku.
  • Fry in right flame - I always keep the flame medium. If oil is too hot, murukku will turn brown fast but stay raw inside. If oil is too low, murukku will drink oil.
  • Cover the dough - If I make in big batch, I always keep the dough covered with cloth so it does not dry and crack while pressing.

Serving and Storage

Serve this as evening snack along with evening drink or as a side snack for lunch during festivals. It goes well as a snack just by itself also. Once it cools completely, store in clean airtight box. It stays good for about a week and remains crisp.

FAQS

1.Can I skip cashews?

Yes, you can skip but then it becomes regular murukku. Cashews give rich and nutty taste.

2.Can I add spices?

Yes, you can add some cumin seeds or ajwain to the dough for a variation.

3.Which mould works best?

I usually use star or flower mould, you can use thenkuzhal mould too.

4.Can I make the dough earlier?

Better to make fresh, but if making large batch keep dough covered to avoid drying.

5.Is this suitable for kids?

Yes, it is mild and not spicy, kids will enjoy the nutty taste.
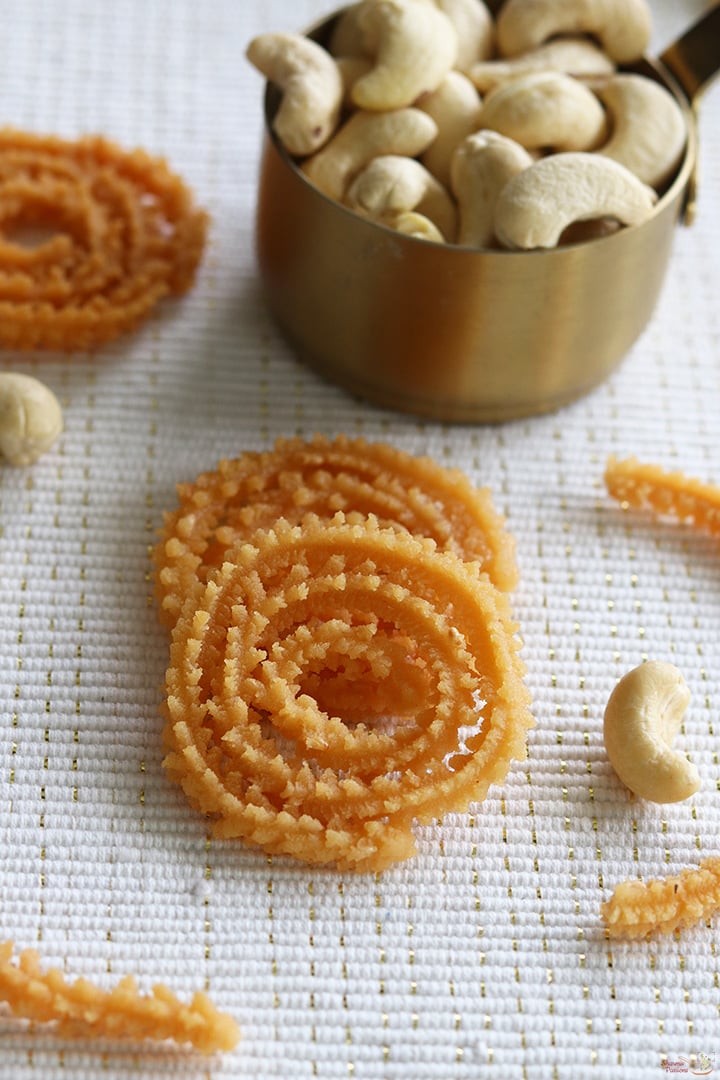
cashew murukku served

If you have any more questions about this Cashew Murukku RecipeΒ do mail me at sharmispassions@gmail.com. In addition, follow me on Instagram,Β Facebook,Β PinterestΒ ,YoutubeΒ andΒ TwitterΒ .

Tried this Cashew Murukku Recipe? Do let me know how you liked it. Also tag us on Instagram @sharmispassions and hash tag it on #sharmispassions.

πŸ“– Recipe Card

Print

Cashew Murukku Recipe | Mundhiri Murukku Recipe

Cashew Murukku is a rich and tasty snack made by adding cashew paste into the normal murukku dough. It comes out crisp and crunchy with nutty flavour from cashews. The taste is little different from regular murukku because of the mild sweetness and special flavour that cashew gives.
Course Snack
Cuisine Indian
Keyword diwali dishes, diwali recipes, diwali snacks, diwali snacks recipes, easy diwali recipes, easy diwali snacks, Festival, murukku, savoury recipes, snack recipes
Prep Time 10 minutes
Cook Time 20 minutes
Total Time 30 minutes
Servings 4
Calories 238kcal
Author Sharmilee J

Ingredients

  • 1 cup rice flour
  • 20 cashews
  • 1 tablespoon butter
  • 1 teaspoon sesame seeds
  • β…› teaspoon hing
  • salt to taste
  • water as needed.
  • oil to deep fry

Instructions

  • To a bowl add 20 cashews, add ΒΌ cup hot water to it. Soak for 30 minutes.
  • After 30 minutes grind it to a fine paste and set aside.
  • To a mixing bowl add 1 cup rice flour, salt to taste and 1 tablespoon butter.
  • Mix this well first for butter to be evenly distributed.
  • Now add 1 teaspoon sesame seeds, ΒΌ teaspoon hing and prepared cashew paste.
  • Mix it well.
  • Add water little by little and mix well.
  • Gather to form a soft dough.
  • Form cylinders like this so that fitting into murukku press will be easy.
  • Fit the mould into the murukku press, I used star shape. Grease murukku press with oil.
  • Fill in with dough.
  • Press to check.
  • .Grease 2-3 ladles and keep it ready. Press on it in concentric circles. Tuck in loose ends so that it doesn't open while frying. I made small murukkus. Pressing in ladles helps to flip in hot oil easily.
  • You can press in butter paper or cloth too. Just slide in using a ladle to remove.
  • Heat oil. Pinch a tiny pinch of dough and add it. If it rises immediately then oil is heated well. Now add 4-5 murukkus at a time.
  • When bubbles and 'shh' sound stops and murukku turns golden drain and remove.
  • Repeat to finish.
  • Cashew murukku is ready!

Video

Notes

  • Soak cashews well - I always soak cashews in hot water for at least 30 minutes. This makes it easy to grind smooth, otherwise the dough may get chunks.
  • Make smooth dough - I add water little by little while mixing. It should be soft and non sticky. If it gets watery, sprinkle little rice flour. If it's hard, sprinkle little water.
  • Choosing mould - You can either choose thenkuzhal or star or flower mould which best suits this murukku.
  • Fry in right flame - I always keep the flame medium. If oil is too hot, murukku will turn brown fast but stay raw inside. If oil is too low, murukku will drink oil.
  • Cover the dough - If I make in big batch, I always keep the dough covered with cloth so it does not dry and crack while pressing.

Nutrition

Serving: 75g | Calories: 238kcal | Carbohydrates: 34g | Protein: 4g | Fat: 9g | Saturated Fat: 3g | Polyunsaturated Fat: 2g | Monounsaturated Fat: 4g | Trans Fat: 0.1g | Cholesterol: 8mg | Sodium: 43mg | Potassium: 84mg | Fiber: 1g | Sugar: 1g | Vitamin A: 88IU | Vitamin C: 0.1mg | Calcium: 13mg | Iron: 1mg

The post Cashew Murukku Recipe (Mundhiri Murukku) appeared first on Sharmis Passions.
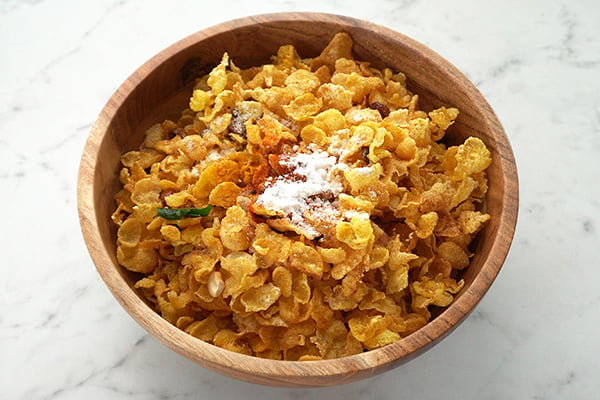
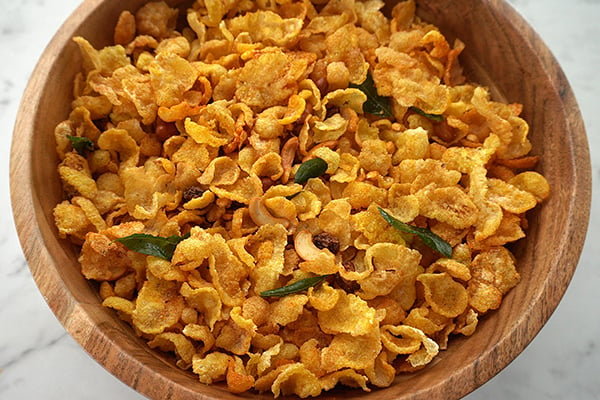
Cornflakes Mixture Recipe (Cornflakes Chivda)

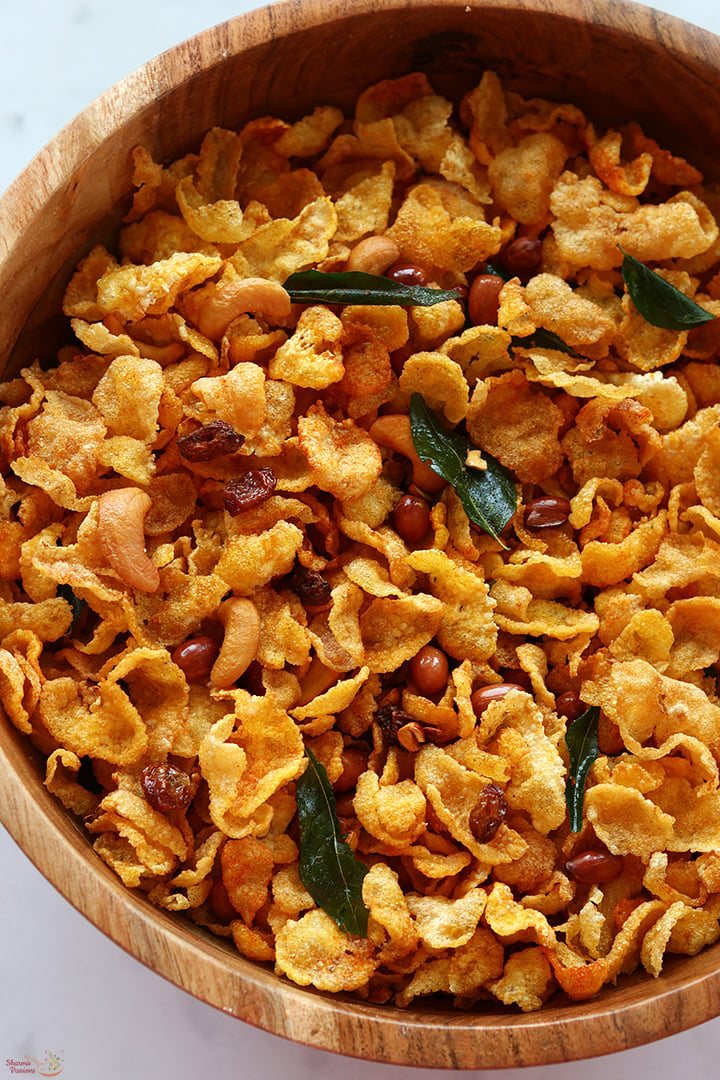
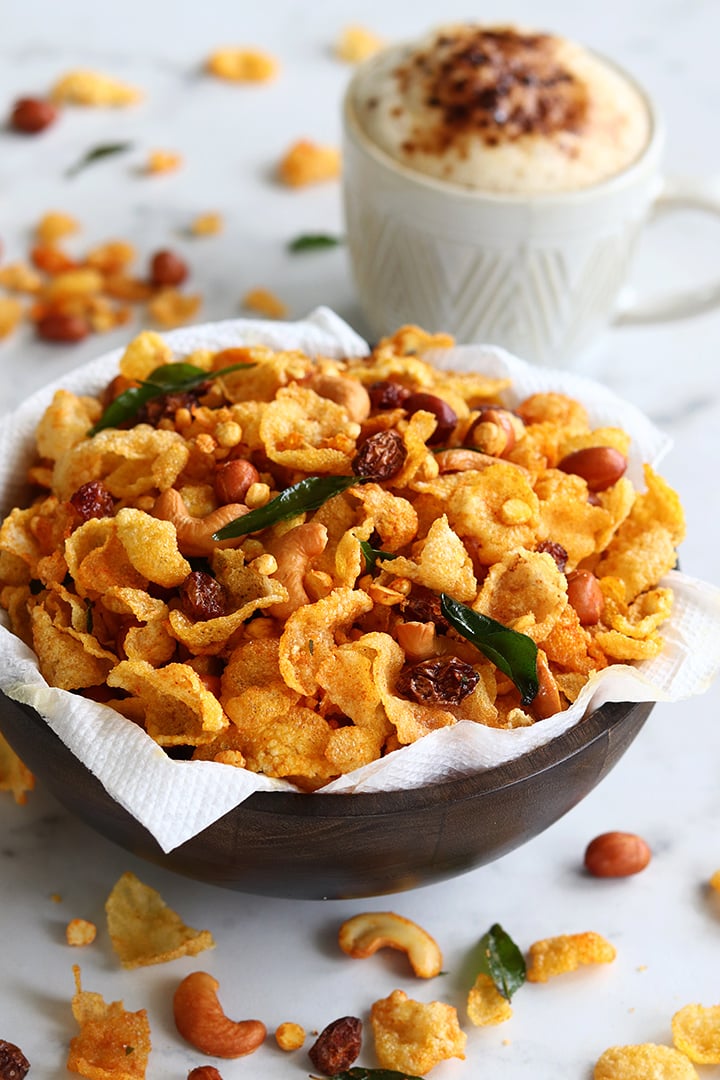
Cornflakes Mixture is a quick to make crunchy snack made by frying raw cornflakes, fried gram dal, peanuts, cashews, raisins, curry leaves and tossing it with spice powders and salt. Also known as Makai Chivda or Cornflakes Chivda it is an instant snack that can be made quickly perfect for this festive season.

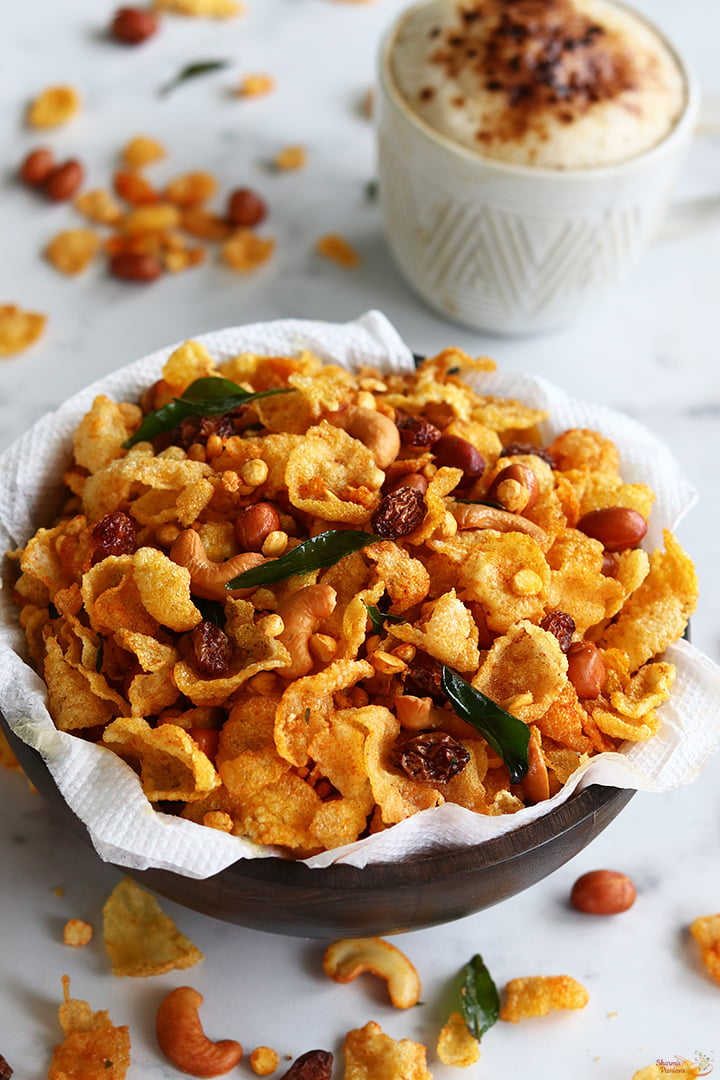
cornflakes mixture served with coffee

Cornflakes Mixture popularly known as Cornflakes Chivda is a instant to make snack, if you have the ingredients measured and ready then it takes just few minutes to make it. Do try this crunchy and delicious savoury snack and enjoy!

[feast_advanced_jump_to]

About Cornflakes Mixture

Cornflakes Mixture is a savoury crunchy snack which is quick to make and is addictive. This is a very easy snack that you can make for kids, gets ready in minutes. You can make a huge batch and store it.

I have tasted cornflakes mixture only few times. Last time when I visited my friend Sowmya she served us cornflakes sweet mixture , I loved the taste. So tried it for a Diwali and it was a huge hit with family and friends. So after that I started making it often as it is easy and quick to make.

Not only for occasions you can make it for evening tea time snack, kids will love it too. Raisins is the one of the main ingredient that gives taste to this mixture so do not skip it. Hubby who is not fond of raisins loved it too. Gugu and amma picks all the raisins first as they love it so much, haha.

You can get raw dried cornflakes in supermarket. Do not buy the cereal variety. Incase for those who are not able to source raw cornflakes, I have given alternate, you can check my faqs section.

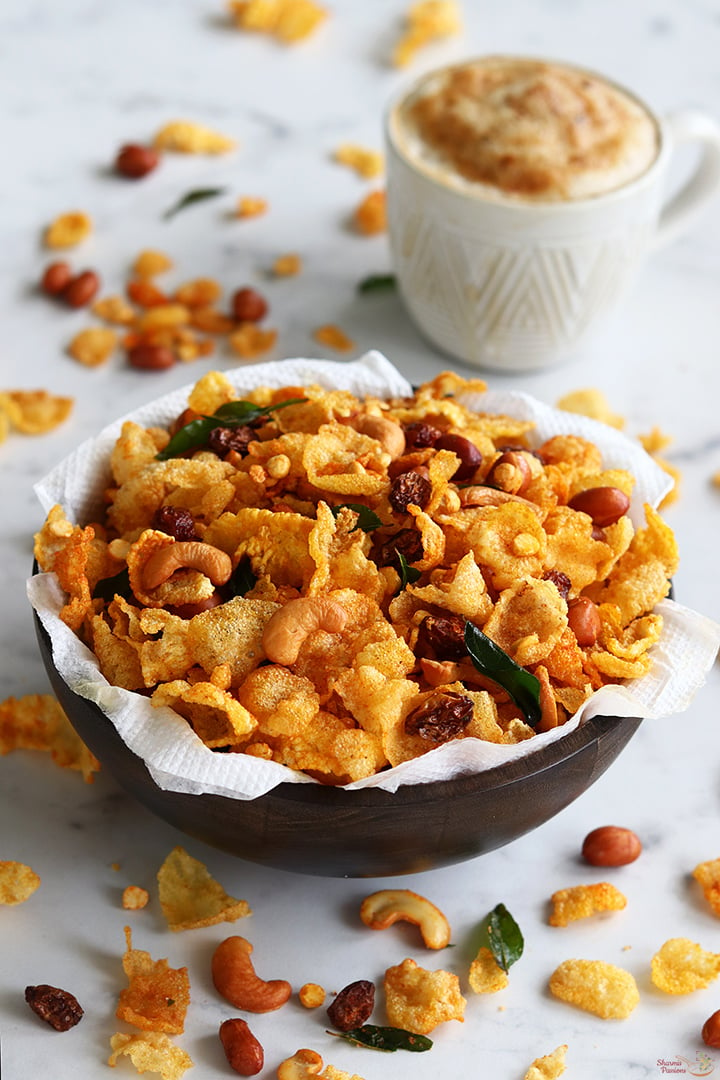
cornflakes mixture just made

Cornflakes Mixture Video

Cornflakes Mixture is crunchy with a mild nutty taste. If you are looking for a different snack variety to make for this Diwali then this is just for you. It is quite additive that you can stop munching.

Similar Recipes

cornflakes mixture served with coffee

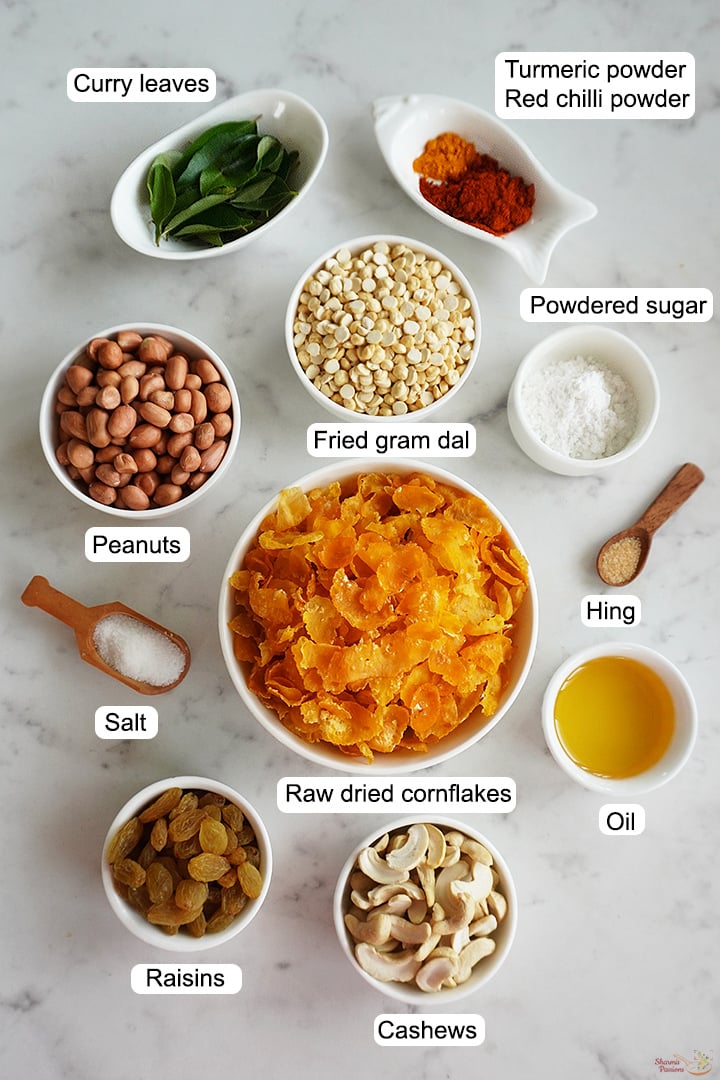
Cornflakes Mixture Ingredients

  • Cornflakes - Choose the dry raw cornflakes variety used for frying and not the cereal ones.
  • Fried gram dal - Fried gram dal is added for crunch and taste.
  • Cashew nuts - Cashew nuts is fried till golden and added.
  • Peanuts - I have used peanuts with skin, you can fry remove the skin and add it too.
  • Raisins - Raisins give a nice sweet taste to the mixture, do not miss adding it.
  • Red chilli powder - Red chilli powder is added for heat, adjust as per liking.
  • Turmeric powder - Turmeric powder is added for flavour and colour.
  • Hing - Hing is added to aid in digestion and adds flavour.
  • Powdered sugar - adds a balance to the spices.
  • Curry leaves - Curry leaves is added for taste and flavour.
  • Oil - Oil and ghee are used for frying the spices.

How to make Cornflakes Mixture Step by Step

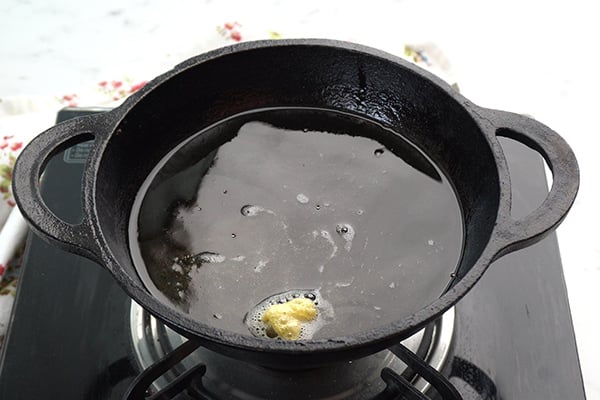
1.Heat oil in a kadai. Check if oil is hot by adding 1 cornflake if it rises immediately then it is ready. Use dried raw cornflakes and not the cereal variety.

fry and test

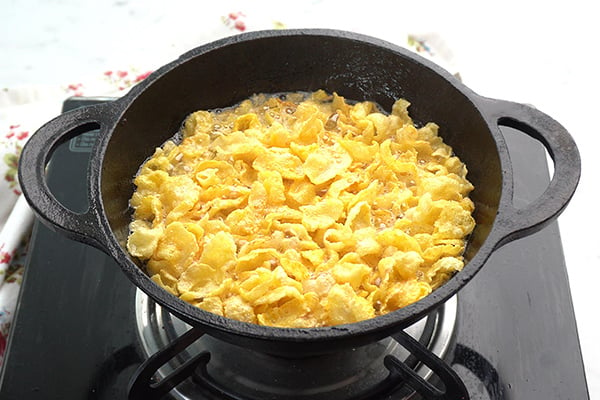
2.Add 3 cups raw cornflakes in batches. I fried in 4 batches. Add it and fry until 'shh' sound stops. Drain from oil and remove.

fry cornflakes

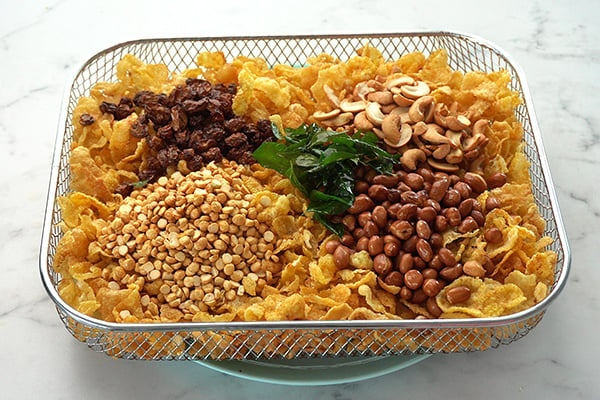
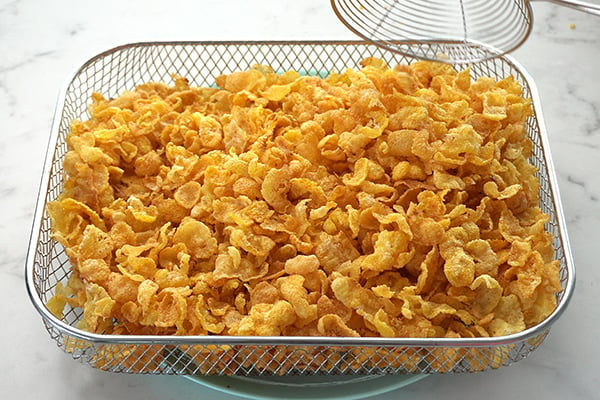
3.Add it to a straining basket. Repeat to finish the other batches too. Place a plate underneath the basket to collect the extra draining oil.

all fried and ready

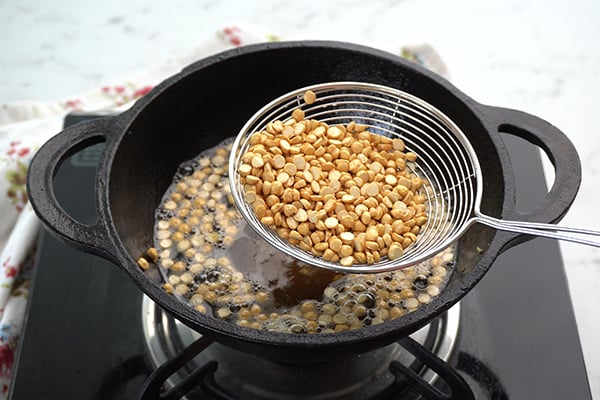
4.Add Β½ cup fried gram dal. Fry until golden, drain, remove and add it to the basket.

fry fried gram dal

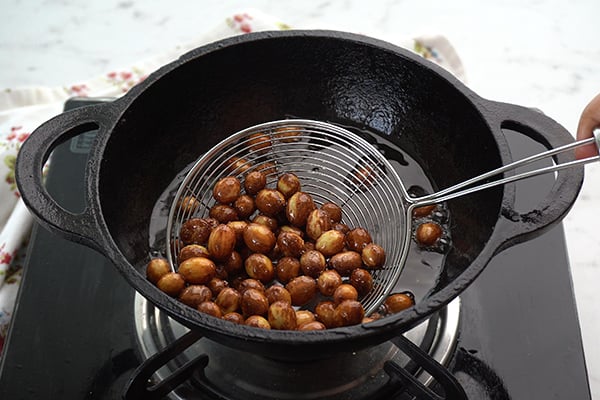
5.Add Β½ cup peanuts. Fry until golden brown, drain, remove and add it to the basket.

fry peanuts

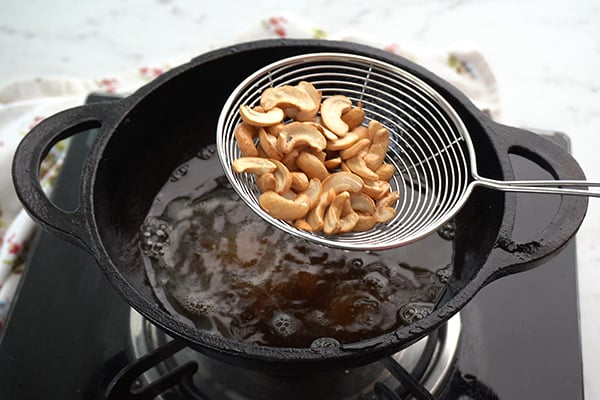
6.Add ΒΌ cup cashews. Fry until golden, drain, remove and add it to the basket.

fry cashews

7.Add ΒΌ cup raisins. Fry until golden, drain, remove and add it to the basket.

fry raisins

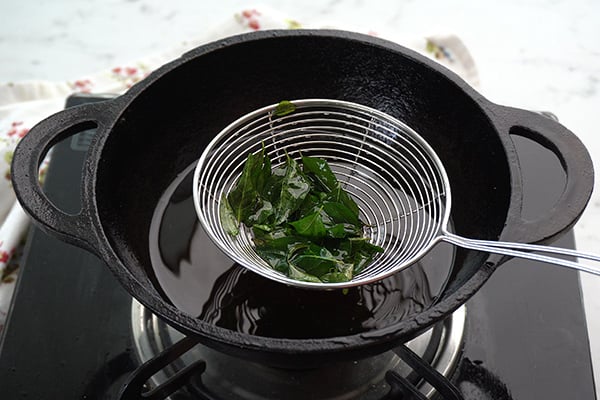
8.Switch off and add ΒΌ cup curry leaves. Fry until crisp, drain, remove and add it to the basket.

fry curry leaves

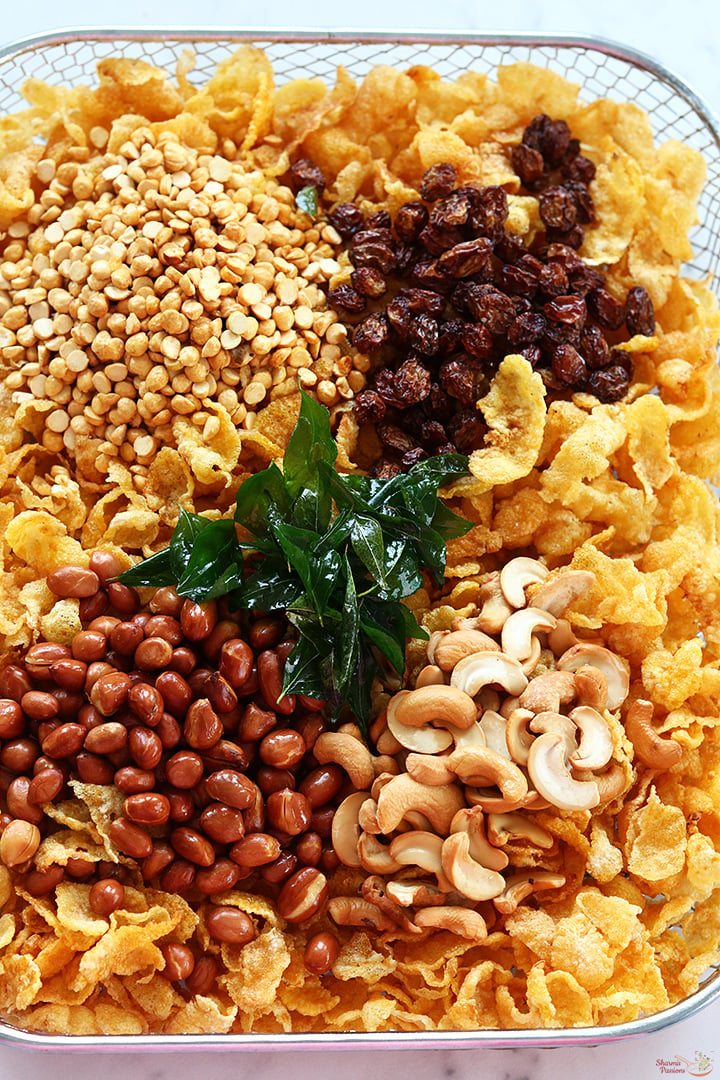
9.All fried and ready.

all fried and ready

10.Transfer this to a big mixing bowl. Add salt to taste, Β½ teaspoon turmeric powder, 1 tablespoon red chilli powder, 2 teaspoon powdered sugar, ΒΌ teaspoon hing.

add spices

11.Toss well for even mixing. Gently toss without breaking the cornflakes.

toss well

Store in an airtight container.

cornflakes mixture served with coffee

Expert Tips

  • Frying - Always fry cornflakes in batches as it tends to expand while frying. Fry until shh sound ceases.
  • Add ons - If you like garlic flavour just add 2 crushed garlic fry and add it. You can even fry ΒΌ cup poha and add it.
  • Ingredients ready - Measure and keep the ingredients ready so that frying will be easy and quick.
  • Draining - Drain it well from oil then transfer it to a straining basket with a plate placed under so that extra draining oil gets collected there. You can use kitchen towel too.
  • Measures - The measures of nuts and raisins is purely your choice. You can plus or minus as per your liking.

Serving and Storage

Cornflakes Mixture can be served with coffee or tea. Store in a clean dry airtight container. This keeps well in room temperature for 2 weeks.

FAQS

1.I couldn't get raw cornflakes, what can I replace it with?

Use cereal cornflakes, add 2-3 tablespoon oil and fry it until crisp. Do not deep fry. Adjust the measurement of other ingredients for cereal cornflakes.

2.I don't like sweet taste in my mixture, Can I skip sugar?

Yes you can very well do that. Here sweetness is very mild but still if you prefer to skip it, please do it.

3.What other ingredients can I add?

You can add garlic fried and added, fry and add chopped almonds, sesame seeds etc.

cornflakes mixture fried ingredients

If you have any more questions about this Cornflakes Mixture RecipeΒ do mail me at sharmispassions@gmail.com. In addition, follow me on Instagram,Β Facebook,Β PinterestΒ ,YoutubeΒ andΒ TwitterΒ .

Tried this Cornflakes Mixture Recipe? Do let me know how you liked it. Also tag us on Instagram @sharmispassions and hash tag it on #sharmispassions.

πŸ“– Recipe Card

Print

Cornflakes Mixture Recipe | Cornflakes Chivda Recipe

Cornflakes Mixture is a quick to make crunchy snack made by frying raw cornflakes, fried gram dal, peanuts, cashews, raisins, curry leaves and tossing it with spice powders and salt. Also known as Makai Chivda or Cornflakes Chivda it is an instant snack that can be made quickly perfect for this festive season.
Course Snack
Cuisine Indian
Keyword corn recipes, diwali snacks, diwali snacks recipes, easy diwali snacks, snack recipes
Prep Time 10 minutes
Cook Time 20 minutes
Total Time 30 minutes
Servings 10
Calories 115kcal
Author Sharmilee J

Ingredients

  • 3 cups raw dried cornflakes (not the cereal variety)
  • Β½ cup fried gram dal
  • Β½ cup peanuts
  • ΒΌ cup cashews
  • ΒΌ cup raisins
  • ΒΌ cup curry leaves
  • salt to taste
  • Β½ teaspoon turmeric powder
  • 1 tablespoon red chilli powder
  • 2 teaspoon powdered sugar
  • ΒΌ teaspoon hing

Instructions

  • Heat oil in a kadai. Check if oil is hot by adding 1 cornflake if it rises immediately then it is ready. Use dried raw cornflakes and not the cereal variety.
  • Add 3 cups raw cornflakes in batches. I fried in 4 batches. Add it and fry until 'shh' sound stops. Drain from oil and remove.
  • Add it to a straining basket. Repeat to finish the other batches too. Place a plate underneath the basket to collect the extra draining oil.
  • Add Β½ cup fried gram dal. Fry until golden, drain, remove and add it to the basket.
  • Add Β½ cup peanuts. Fry until golden brown, drain, remove and add it to the basket.
  • Add ΒΌ cup cashews. Fry until golden, drain, remove and add it to the basket.
  • Add ΒΌ cup raisins. Fry until golden, drain, remove and add it to the basket.
  • Switch off and add ΒΌ cup curry leaves. Fry until crisp, drain, remove and add it to the basket.
  • All fried and ready.
  • Transfer this to a big mixing bowl. Add salt to taste, Β½ teaspoon turmeric powder, 1 tablespoon red chilli powder, 2 teaspoon powdered sugar, ΒΌ teaspoon hing.
  • Toss well for even mixing. Gently toss without breaking the cornflakes.

Video

Notes

  • Frying - Always fry cornflakes in batches as it tends to expand while frying. Fry until shh sound ceases.
  • Add ons - If you like garlic flavour just add 2 crushed garlic fry and add it. You can even fry ΒΌ cup poha and add it.
  • Ingredients ready - Measure and keep the ingredients ready so that frying will be easy and quick.
  • Draining - Drain it well from oil then transfer it to a straining basket with a plate placed under so that extra draining oil gets collected there. You can use kitchen towel too.
  • Measures - The measures of nuts and raisins is purely your choice. You can plus or minus as per your liking.

Nutrition

Serving: 75g | Calories: 115kcal | Carbohydrates: 13g | Protein: 6g | Fat: 5g | Saturated Fat: 1g | Polyunsaturated Fat: 2g | Monounsaturated Fat: 2g | Sodium: 25mg | Potassium: 216mg | Fiber: 5g | Sugar: 1g | Vitamin A: 688IU | Vitamin C: 237mg | Calcium: 68mg | Iron: 2mg

The post Cornflakes Mixture Recipe (Cornflakes Chivda) appeared first on Sharmis Passions.
Millet Murukku Recipe

Millet Murukku is a healthy and crispy snack made by adding millet flour to regular rice flour and shaping using murukku press. It comes out golden and delicious and tastes just as good as regular murukku. It has mild nutty flavour from millet. Millet Murukku savours the celebration of people who are on diet without adding much of calories.

millet murukku served

This is usually made for people on diet or who want healthier snack. It makes a nice treat without adding much calories like regular murukku. It feels light and crispy and can stay stored for many days. It is perfect for tea time or quick snack at home.

[feast_advanced_jump_to]

About Millet Murukku

Millet Murukku is made using a mix of millet flour, rice flour and fried gram powder. Millet or thinai flour gives deep brown colour and very unique earthy and nutty taste. Rice flour gives crispness and fried gram dal adds mild soft bite inside. It is spiced with red chilli powder and ajwain for some aromatic touch.

The texture is light, crispy, and don't feel too oily also. It is a good variation to regular murukku we usually make with rice flour alone. This one feels little more nutritious and wholesome. Even butter added helps give nice crisp texture without making it hard. You can even use oil instead if you want to skip butter.

There are small variations you can try with this recipe. Some people add more chilli powder for extra spice. Few even add cumin seeds for different flavour. You can make it plain or adjust spice level based on what you like. It is a flexible recipe which you can customize based on your preference.

I usually make thinai murukku for healthy snack for my family. Instead of making regular murukku again, this feel like different idea to try. My family enjoys it because it stays fresh and crispy for many days.

Similar Recipes

millet murukku served

Millet Murukku Ingredients

  • Thinai Flour - I used thinai flour which is foxtail millet flour as main ingredient. It is highly nutritious and gives mild nutty flavour to murukku.
  • Fried Gram - I used fried gram powder which adds crunch and richness. Gram flour blends well with flours for good texture.
  • Rice Flour - I used rice flour mixed with millet flour for the right consistency. It helps bind dough and makes it easier to shape.
  • Butter - I used soft butter at room temperature. It helps in binding and makes murukku crisp but not hard. You can replace with hot oil also if you don't want to use butter.
  • Red chilli powder - This gives a mild spiciness. I used for my taste but you can adjust more or less based on your taste. It's enough to add flavor without making it very spicy.
  • Ajwain - I added ajwain for aromatic flavour and aid digestion. It blends well with other spices.

How to make Millet Murukku Step by Step

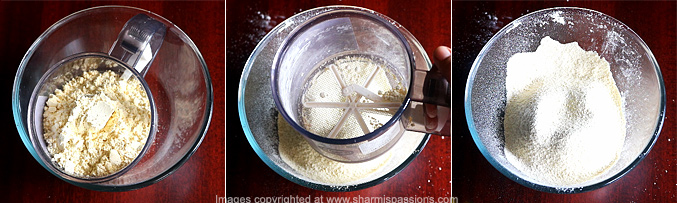
1.Take fried gram dal in a mixer and powder it. To a sieve addΒ thinai flour,rice flourΒ to it.

how to make millet murukku step1

2.Add powdered fried gram dal flour too. Sieve it well in a mixing bowl, discard the coarse mixture.

how to make millet murukku step2

3.To the sieved flour, add ajwain,red chilli powder,butter and required salt. Crumble it well with your fingers.

how to make millet murukku step3

4.Crumble well so that all the ingredients are evenly distributed. Now add water little by little to the flour and gather together to form a soft non-sticky dough.

how to make millet murukku step4

5.Grease the murukku press with oil, fill it with dough. Press in 2 ladles and keep it ready. Heat oil in a kadai, check by adding a pinch of dough if it rises immediately then oil is ready. Flip over the murukku from the ladle gently, cook in low medium flame.

how to make millet murukku step5

6.When bubbles ceases and it turns golden brown then remove and drain in a tissue paper.

how to make millet murukku step6

Cool down completely then store in a dry airtight container.

millet murukku served

Expert Tips

  • Powder the Gram - I powder fried gram dal fine in the mixer. This helps it mix evenly with flour.
  • Sieve the Flour - I sieve all flours together and discard coarse particles. This makes dough smooth and helps murukku shape nicely.
  • Crumble Well - I crumble all ingredients with my fingers so that they are evenly distributed. This helps all flavours spread evenly in each murukku.
  • Dough Consistency - I add water little by little to make soft non-sticky dough. Dough should come together easily without being wet.
  • Oil Temperature - I test oil by dropping small pinch of dough. If it rises immediately to top, oil is ready for frying.
  • Fry on Low Medium Flame - I fry on low to medium flame so murukku cook inside and outside evenly. High heat will burn it before it cook inside properly.
  • Check for Doneness - I fry until bubbles stop and murukku turn golden brown. This indicate it cooked perfectly and crispy inside.

Serving and StorageΒ 

Serve Thinai Murukku with hot chai or coffee in the evenings. It goes well as a snack just by itself also. Once it cools completely, store in clean airtight box. It stays crisp for 2 to 3 weeks.

FAQS

1. Can I fry many murukkus at a time?

You can fry 3 to 4 murukkus at time depending on size of your kadai.

2. Why is my murukku not crispy?

This happen when oil is not hot enough or you fry on high heat. Use correct temperature and fry on low medium flame.

3. Can I use only thinai flour?

No, it won't hold shape and turns chewy.

4.Β  Can I bake this murukku?

No, baking may turn it dry and hard. This is best when deep fried.

5. Can I use ghee replacing butter?

Yes, you can use ghee, it adds nice flavor.

millet murukku served

If you have any more questions about this Millet Murukku Recipe do mail me at sharmispassions@gmail.com. In addition, follow me on Instagram, Facebook,Β  Pinterest, Youtube andΒ TwitterΒ .

Tried this Millet Murukku Recipe ? Do let me know how you liked it. Also tag us on Instagram @sharmispassions and hash tag it on #sharmispassions.

πŸ“– Recipe Card

ThinaiMurukku4
Print

Millet Murukku Recipe (Thinai Murukku)

Millet Murukku is a healthy and crispy snack made by adding millet flour to regular rice flour and shaping using murukku press. It comes out golden and delicious and tastes just as good as regular murukku. It has mild nutty flavour from millet. Millet Murukku savours the celebration of people who are on diet without adding much of calories.
Course Snack
Cuisine Indian
Keyword diwali recipes, diwali snacks, diwali snacks recipes, easy diwali recipes, easy diwali snacks, millet recipes, murukku, savoury recipes, snack recipes
Prep Time 15 minutes
Cook Time 25 minutes
Total Time 40 minutes
Servings 3 people
Calories 273kcal
Author Sharmilee J

Ingredients

Instructions

  • Take fried gram dal in a mixer and powder it. ToΒ a sieve add thinai flour, rice flour to it.
  • Add powdered fried gram dal flour too. Sieve it well in a mixing bowl, discard the coarse mixture.
  • To the sieved flour, add ajwain, red chilli powder, butter and required salt. Crumble it well with your fingers.
  • Crumble well so that all the ingredients are evenly distributed. Now add water little by little to the flour and gather together to form a soft non-sticky dough.
  • Grease the murukku press with oil, fill it with dough. Press in 2 ladles and keep it ready.
  • Heat oil in a kadai,Β check by adding a pinch of dough if it rises immediately then oil is ready. Flip over the murukku from the ladle gently, cook in low medium flame.
  • When bubbles ceases and it turns golden brown then remove and drain in a tissue paper.
  • Cool down completely then store Millet Murukku in a dry airtight container.

Notes

  • Powder the Gram - I powder fried gram dal fine in the mixer. This helps it mix evenly with flour.
  • Sieve the Flour - I sieve all flours together and discard coarse particles. This makes dough smooth and helps murukku shape nicely.
  • Crumble Well - I crumble all ingredients with my fingers so that they are evenly distributed. This helps all flavours spread evenly in each murukku.
  • Dough Consistency - I add water little by little to make soft non-sticky dough. Dough should come together easily without being wet.
  • Oil Temperature - I test oil by dropping small pinch of dough. If it rises immediately to top, oil is ready for frying.
  • Fry on Low Medium Flame - I fry on low to medium flame so murukku cook inside and outside evenly. High heat will burn it before it cook inside properly.
  • Check for Doneness - I fry until bubbles stop and murukku turn golden brown. This indicate it cooked perfectly and crispy inside.

Nutrition

Serving: 75g | Calories: 273kcal | Carbohydrates: 46g | Protein: 7g | Fat: 6g | Saturated Fat: 3g | Polyunsaturated Fat: 2g | Monounsaturated Fat: 2g | Trans Fat: 0.2g | Cholesterol: 10mg | Sodium: 44mg | Potassium: 192mg | Fiber: 3g | Sugar: 2g | Vitamin A: 220IU | Vitamin C: 0.003mg | Calcium: 14mg | Iron: 2mg

The post Millet Murukku Recipe appeared first on Sharmis Passions.
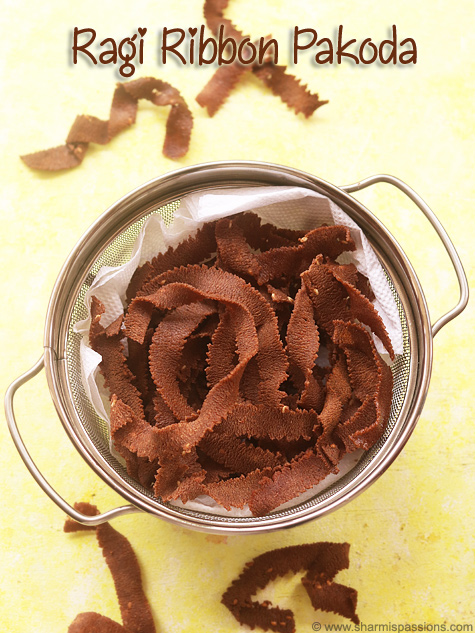
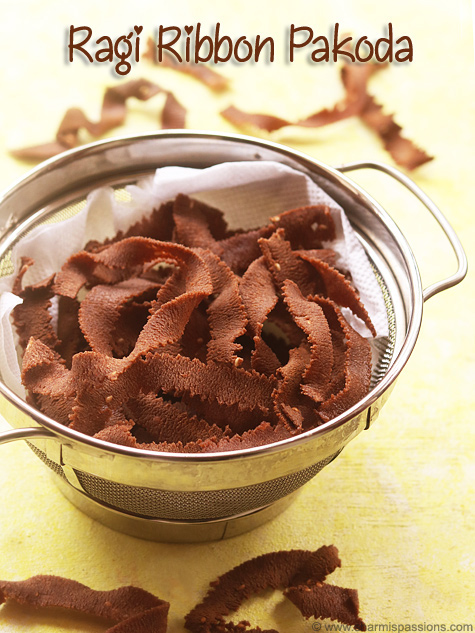
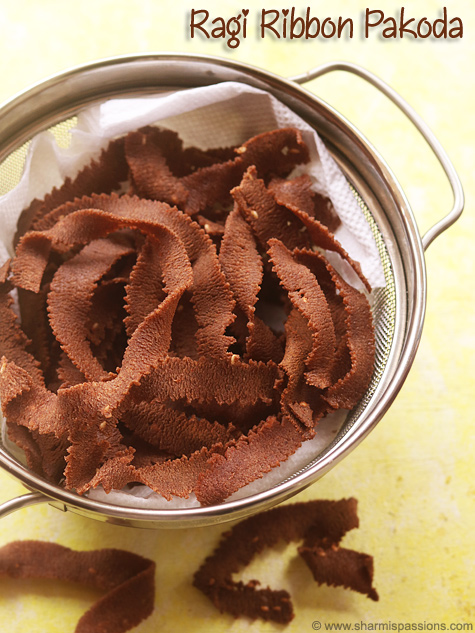
Ragi Ribbon Pakoda Recipe

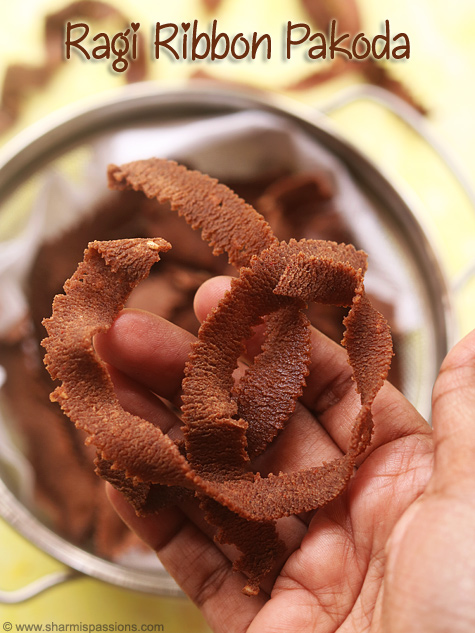
Ragi Ribbon Pakoda is a crispy savoury snack made with ragi flour, rice flour and besan flour. It has a nice crisp texture with mild spice and sesame flavour. Ragi flour give the pakoda a dark colour and earthy taste. It is little different from regular ribbon pakoda and much healthier too.

ragi ribbon pakoda served

This is a good snack to make for Diwali and other special occasions. It is also better option for those looking to add ragi in snacks. The pakoda comes out crispy and tasty without missing the savoury taste. Serve it with tea or coffee for simple evening snack and people always love it.

[feast_advanced_jump_to]

About Ragi Ribbon Pakoda

Ragi Ribbon Pakoda is made using ragi flour along with rice flour and besan flour. Ragi is the main ingredient here and gives earthy nutty flavour. Rice flour gives crispness and besan adds good texture to the pakoda. The flour combination makes it nutritious and tasty at the same time.

The dough is made soft with butter and water. Sesame seeds gives little crunch and mild flavour, chilli powder adds the needed spice. The ribbon pakoda turns crispy outside and breaks easily after frying. The inside stays light and soft while outside remains crunchy.

You can also replace sesame seeds with cumin seeds if preferred. The spice level can also be adjusted based on taste and preference. It can be served as tea time snack or packed for festivals and special occasions. You can make it in advance because it stays fresh and crispy for quite long, so best for storing too.

I usually make this along with other savoury snacks for special occasions. It is a good way to use ragi in a snack. My family enjoy it for its crispy texture and mild earthy taste.

Ragi Ribbon Pakoda is a twist to regular ribbon pakoda we make. I wanted to try snacks with different millets and surprisingly even kids enjoyed this Ragi Ribbon PakodaΒ which made me feel content. Ragi Ribbon Pakoda is also called as ribbon murukku, ola pakoda etc

Similar Recipes

ragi ribbon pakoda served

Ragi Ribbon Pakoda Ingredients

  • Ragi flour - I used ragi flour as the main flour. You can try with other millet flours too.
  • Rice flour - I add rice flour for crispness. It helps to make pakoda light and crunchy when fried.
  • Besan flour - This gives good texture and helps bind the dough nicely together.
  • Butter - I use butter for flavour and to give nice crisp texture to the pakoda.
  • Sesame seeds - I add sesame seeds for mild flavour and little crunch in each bite.
  • Red chilli powder - This adds spice and colour to the pakoda.
  • Salt - I add salt for balancing all the flavours nicely.
  • Water - I use water as needed to make soft and smooth dough.
  • Oil - I use oil to deep fry the pakoda until it turn golden.

How to make Ragi Ribbon Pakoda Step by Step

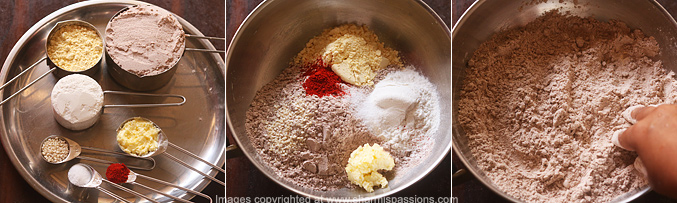
1.Measure and get your ingredients ready. Transfer everything to a mixing bowl. Mix this well first, crumble butter and mix well.

how to make ragi ribbon pakoda step1

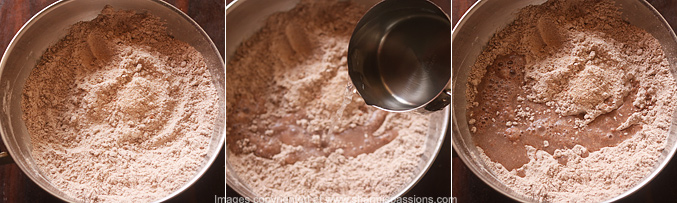
2.Add water little by little and gather together.

how to make ragi ribbon pakoda step2

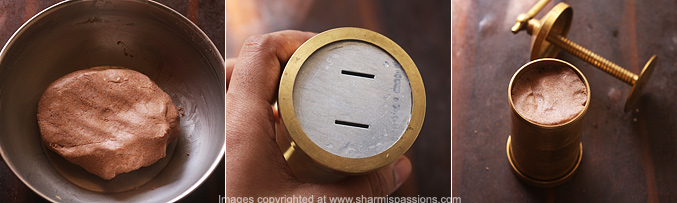
3.Gather together to form a soft dough. Take ribbon pakoda disc and insert it. Fill it with dough.

how to make ragi ribbon pakoda step3

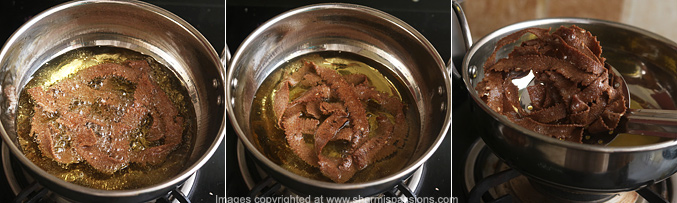
4.Heat oil, check by adding a pinch of dough if it rises immediately then oil is ready. Press in hot oil. Flip over and cook. When bubbles ceases then remove.

how to make ragi ribbon pakoda step4

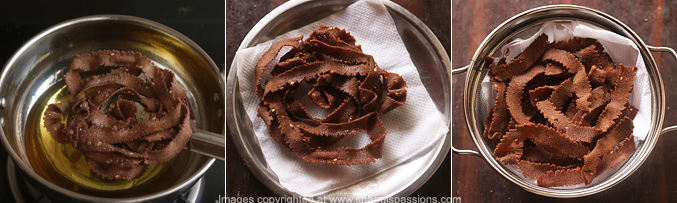
5.Remove and drain in tissue paper. Break into pieces. Repeat to finish the dough.

how to make ragi ribbon pakoda step5

Store in a clean airtight container.

ragi ribbon pakoda served

Expert Tips

  • Soft dough - I make the dough soft and smooth. A tight dough will be difficult to press through the mould.
  • Crumble butter - I crumble butter well with the flours before adding water. This helps to give crisp texture.
  • Add water - I add water little by little while making the dough. Do not add too much water at once.
  • Check oil - I drop a small piece of dough to check if oil is ready. It should rise up immediately.
  • Medium flame - I keep the flame medium while frying. Oil should not be smoking hot as pakoda will burn.
  • Remove properly - Once the bubbles reduce well I remove the pakoda from oil. Overcooking make it taste bitter.

Serving and Storage

Serve Ragi Ribbon Pakoda warm or at room temperature with tea or coffee. It can also be served along with other special occasions snacks. Store in clean airtight container, make sure the container is completely dry before storing and it stays crispy for few days if kept away from moisture.Β 

FAQS

1. Can I use cumin seeds?

Yes you can use cumin seeds instead. It gives nice flavour.

2. Why is my pakoda bitter?

It may be due to overcooking. Remove once the bubbles reduce well.

3. How to check the oil temperature?

Drop a small piece of dough into oil. It should rise up immediately else wait for few more minutes then check.

4. Can I make the dough ahead?

No the dough will dry up so making dough fresh and making the pakoda instantly will work better.

5. Why is the pakoda dark in colour?

Ragi flour naturally gives dark colour so do not judge cooking by colour alone.

ragi ribbon pakoda served

If you have any more questions about this Ragi Ribbon Pakoda Recipe do mail me at sharmispassions@gmail.com. In addition, follow me on Instagram, Facebook,Β  Pinterest, Youtube andΒ TwitterΒ .

Tried this Ragi Ribbon Pakoda Recipe? Do let me know how you liked it. Also tag us on Instagram @sharmispassions and hash tag it on #sharmispassions.

πŸ“– Recipe Card

RagiRibbonPakoda1
Print

Ragi Ribbon Pakoda Recipe

Ragi Ribbon Pakoda is a crispy savoury snack made with ragi flour, rice flour and besan flour. It has a nice crisp texture with mild spice and sesame flavour. Ragi flour give the pakoda a dark colour and earthy taste. It is little different from regular ribbon pakoda and much healthier too.
Course Snack
Cuisine Indian
Keyword diwali dishes, diwali recipes, diwali snacks, diwali snacks recipes, easy diwali recipes, easy diwali snacks, millet recipes, ragi recipes, rice flour recipes, savoury recipes, snack recipes
Prep Time 10 minutes
Cook Time 20 minutes
Total Time 30 minutes
Servings 2 cups
Calories 576kcal
Author Sharmilee J

Ingredients

  • 1 cup ragi flour / finger millet flour
  • ΒΌ cup rice flour
  • ΒΌ cup besan flour
  • 1 tablespoon butter
  • 1 teaspoon sesame seeds
  • ΒΌ teaspoon red chilli powder
  • salt to taste
  • water as needed
  • oil to deep fry

Instructions

  • Transfer everything to a mixing bowl. Mix this well first, crumble butter and mix well.
  • Add water little by little and gather together.
  • Gather together to form a soft dough. Take ribbon pakoda disc and insert it. Fill it with dough.
  • Heat oil, check by adding a pinch of dough if it rises immediately then oil is ready. Press in hot oil.
  • Flip over and cook. When bubbles ceases then remove.
  • Remove and drain in tissue paper. Break into pieces. Serve Ragi Ribbon Pakoda as snack!

Notes

  • Soft dough - I make the dough soft and smooth. A tight dough will be difficult to press through the mould.
  • Crumble butter - I crumble butter well with the flours before adding water. This helps to give crisp texture.
  • Add water - I add water little by little while making the dough. Do not add too much water at once.
  • Check oil - I drop a small piece of dough to check if oil is ready. It should rise up immediately.
  • Medium flame - I keep the flame medium while frying. Oil should not be smoking hot or pakoda will burn.
  • Remove properly - Once the bubbles reduce well I remove the pakoda from oil. Overcooking make it taste bitter.

Nutrition

Serving: 100g | Calories: 576kcal | Carbohydrates: 110g | Protein: 13g | Fat: 9g | Saturated Fat: 4g | Polyunsaturated Fat: 1g | Monounsaturated Fat: 3g | Trans Fat: 0.2g | Cholesterol: 15mg | Sodium: 72mg | Potassium: 636mg | Fiber: 2g | Sugar: 2g | Vitamin A: 255IU | Calcium: 428mg | Iron: 6mg

The post Ragi Ribbon Pakoda Recipe appeared first on Sharmis Passions.
Mushroom Puff Recipe

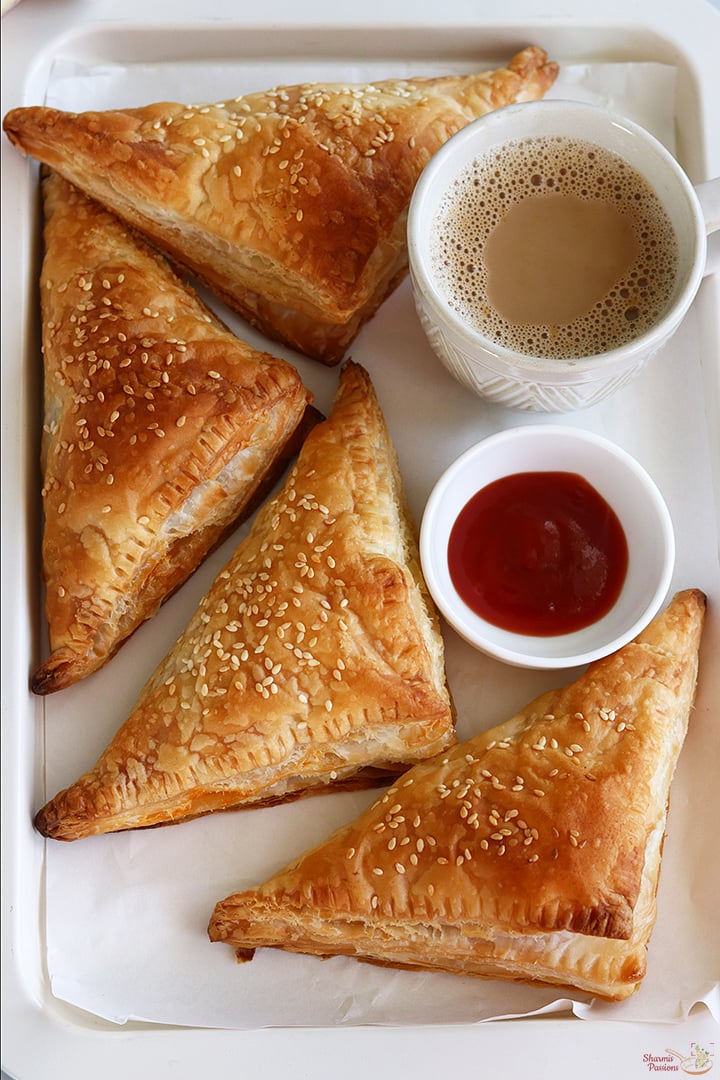
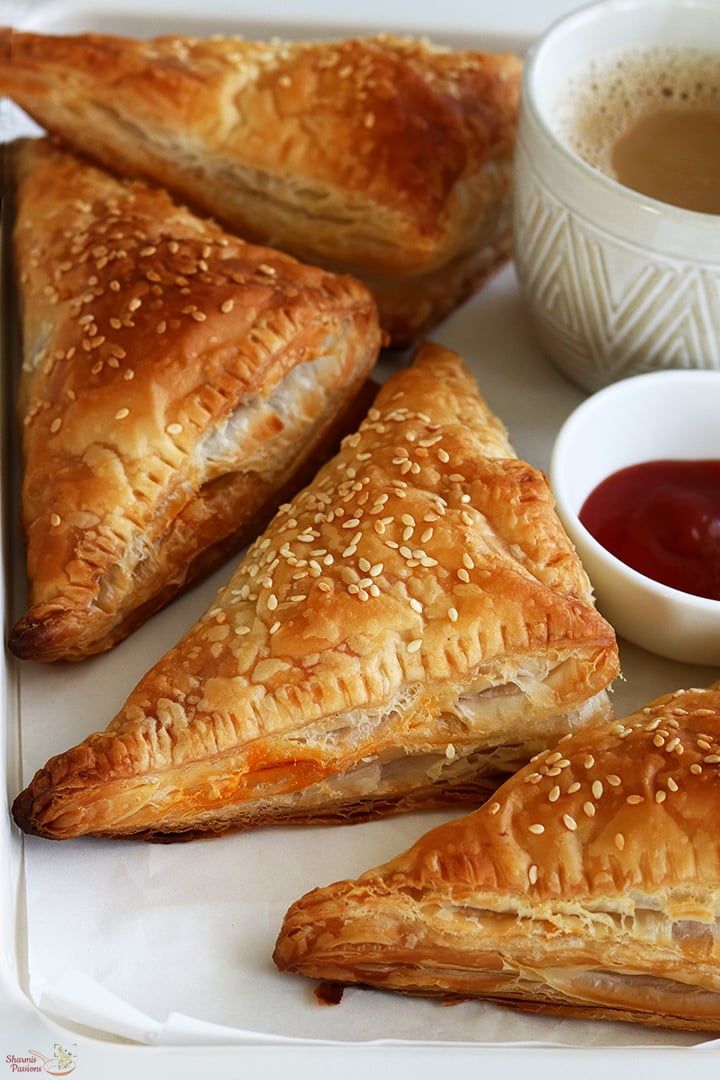
Mushroom Puff is a popular snack in Indian bakeries as they make a delicious evening snack with coffee or tea. This is one of the easiest and simple filling that I've made for puffs yet tastes so good. Mushroom Puff is so quick and easy to make in just few easy steps. This Indian style mushroom puff will be a instant hit so do try and enjoy!

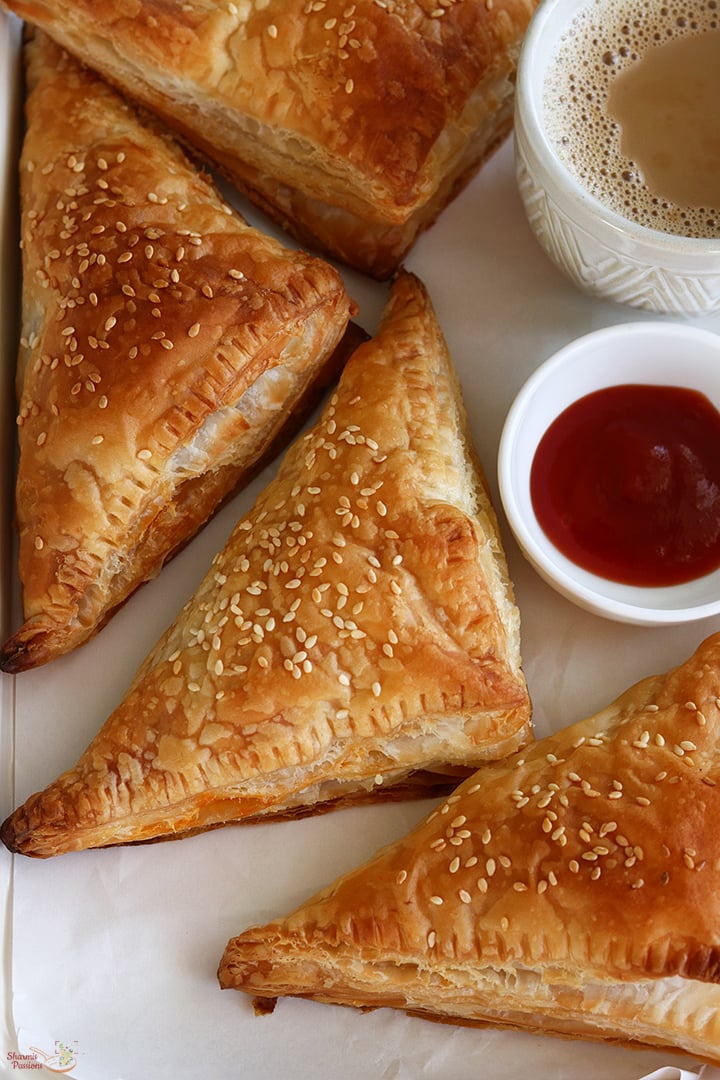
mushroom puffs served with tomato ketchup and coffee

These mushroom puff tastes just like the ones we get in local Indian bakeries. With store bought puff pastry sheets these puffs are so easy and quick to make. Over the years I have learnt the trick of making perfect puffs using store bought puff pastry sheets. I have shared all the tips and tricks in this post so don't miss till the end.

[feast_advanced_jump_to]

About Mushroom Puff

Mushroom Puff is made using puff pastry sheets, mushroom, onion, garlic and some basic spices. The mushroom filling comes together in just few minutes yes by the time you thaw the frozen puff pastry sheets the filling gets ready. Assemble them and bake it, your mushroom puff is ready!

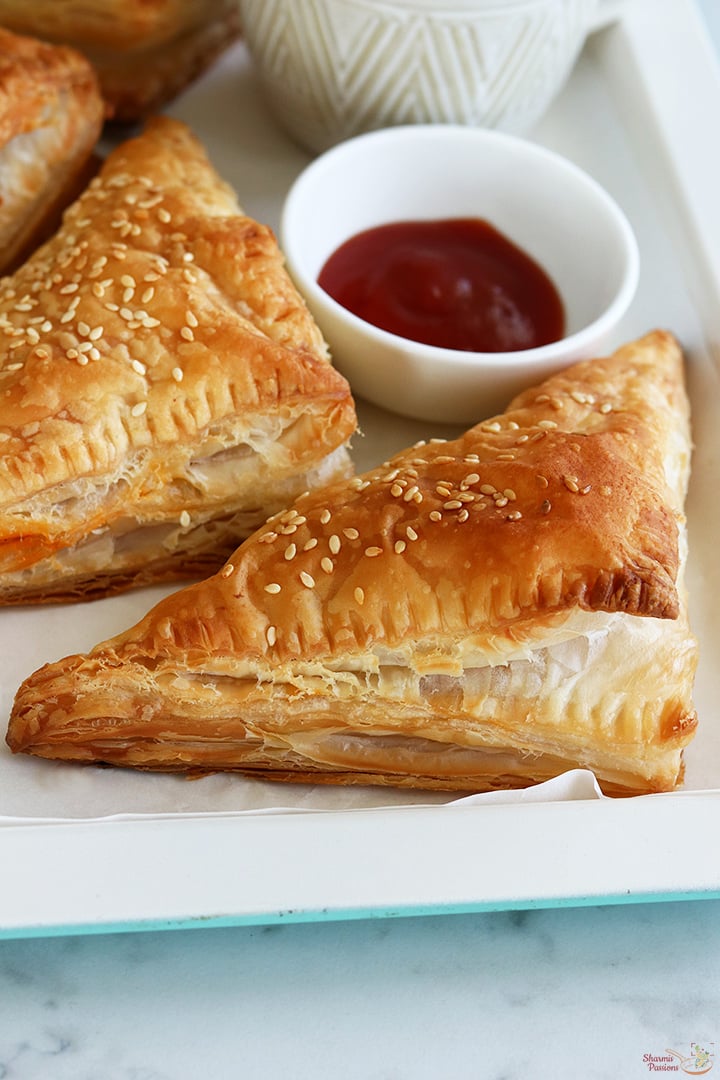
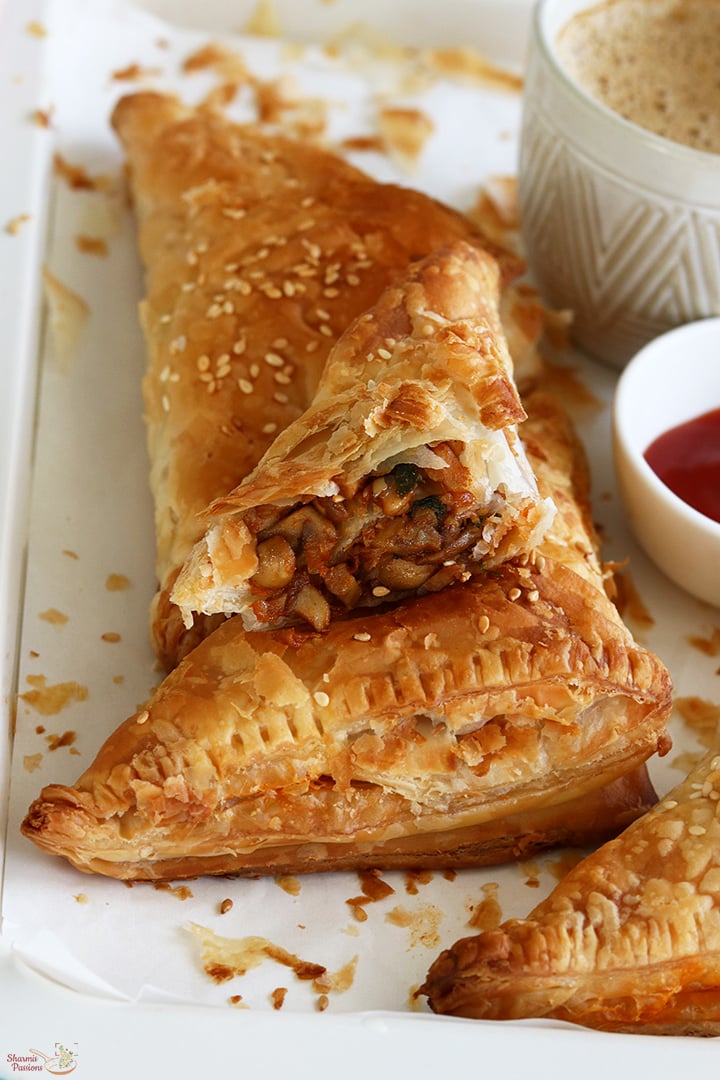
Mushroom puff is a delicious and easy snack made with flaky puff pastry sheets and a savory mushroom filling. The combination of crispy, golden pastry and flavorful mushroom filling makes them perfect for tea time, parties, or as a quick evening snack.

Trust me, my daughter who is not fond of puffs loves homemade puffs because of the filling. My son loves mushroom so this is his favourite too. Homemade puffs tastes good because you can customise the filling according to your liking and preference.

I have used button mushrooms but you can also try with shiitake, cremini or portobello mushrooms too. Make sure to chop them fine so that it blends well with the masala. These mushroom puff can be served with tomato ketchup and tea to make a perfect evening snack.

mushroom puffs served with tomato ketchup and coffee

Mushroom Puff Video

If you love puffs then this mushroom puff is a must try for you. Juicy mushroom filling with flaky puff outside makes it an outstanding combination. Mushroom puff tastes best when served warm and crisp.

One important tip when making mushroom puff is to cook the mushroom filling until they are dry. Mushrooms release a bit of water while cooking, and a wet filling can make the puff pastry soggy.

Similar Recipes

mushroom puffs served with tomato ketchup and coffee

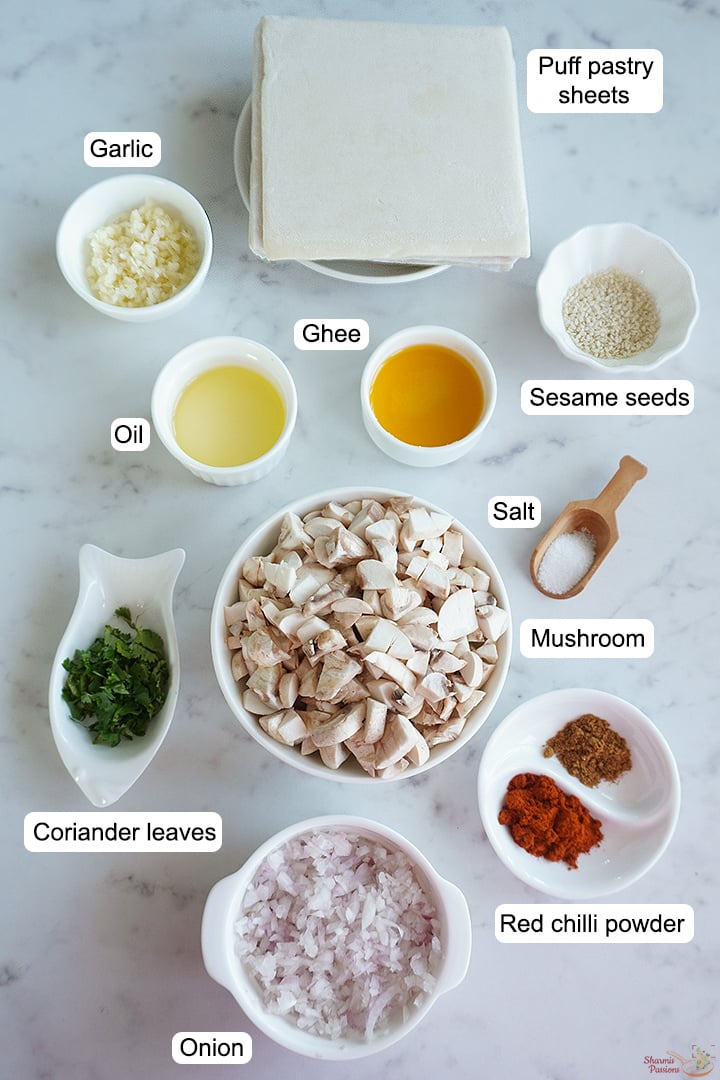
Mushroom Puff Ingredients

  • Puff Pastry Sheets - I used store bought puff pastry sheets. You can make your own or buy them from supermarkets to make the process quick.
  • Mushroom - I have used button mushroom chopped fine. You can try with other mushrooms too.
  • Onion, Garlic - Onion and garlic chopped fine is used for the filling to make it more flavourful and tasty.
  • Spice powders - I have used chilli powder and garam masala powder.
  • Ghee, Oil - Oil is used to cook the filling and ghee is used for brushing on top.
  • Sesame seeds - is added for crunch as topping.
  • Salt - is used for balance and to taste.
  • Coriander leaves - is added for freshness and flavour.
ingredients needed to make mushroom puffs

How to make Mushroom Puff Step by Step

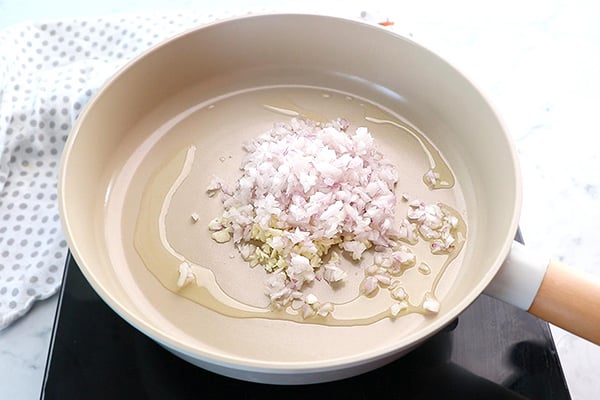
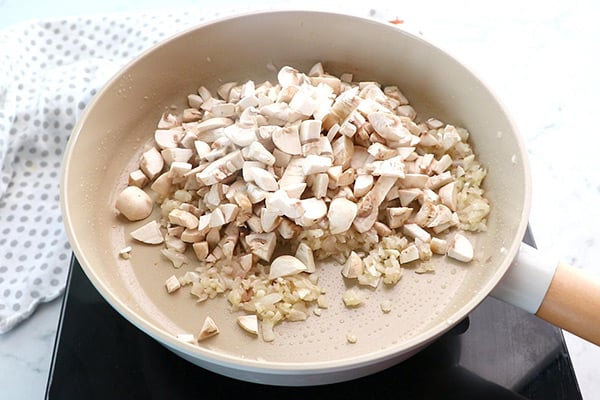
1.Heat 1 tablespoon oil, add 1 tablespoon garlic finely chopped, Β½ cup onion finely chopped.

add garlic, onion

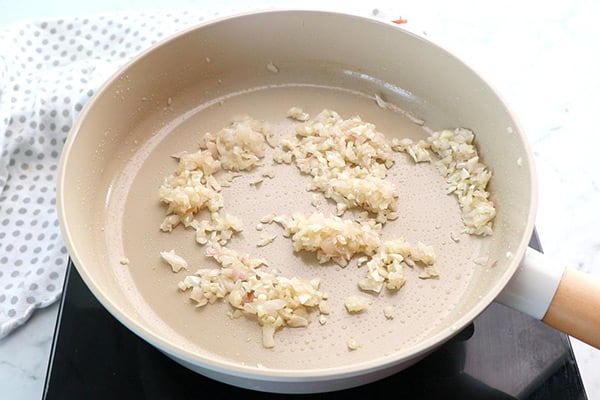
2.Saute until it turns golden.

saute

3.Add 1 Β½ cups mushroom.

add mushroom

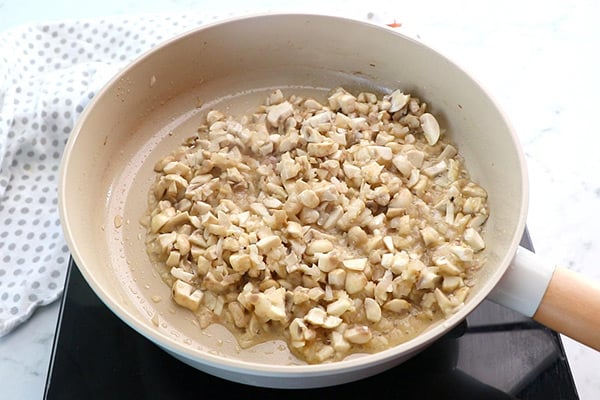
4.Cook in medium high flame. Mushroom lets out water.

cook in high flame

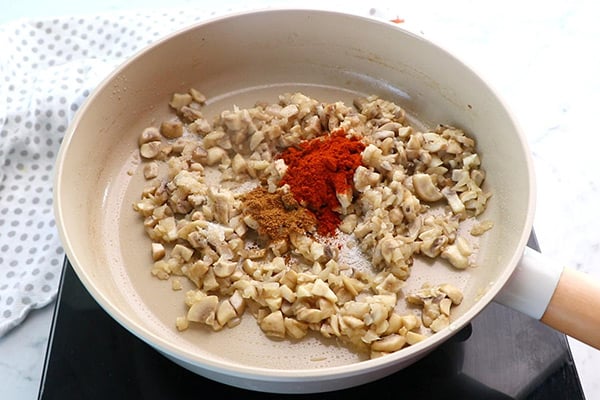
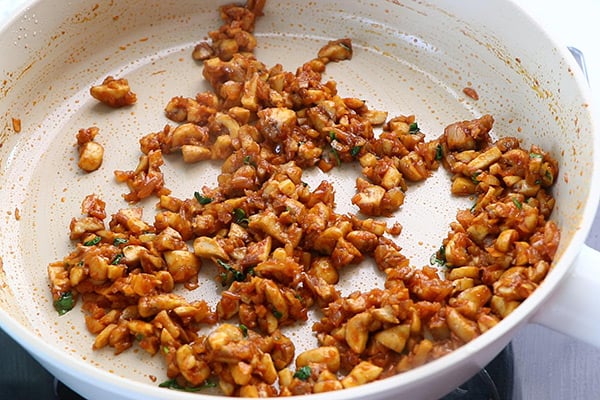
5.Cook until it becomes dry. Then add salt to taste, 1 Β½ teaspoon red chilli powder and ΒΎ teaspoon garam masala powder.

add spice powders

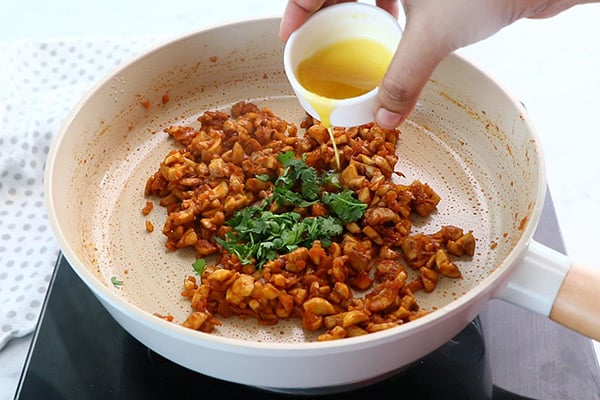
6.Cook until it comes together then finally add Β½ teaspoon ghee and 1 tablespoon coriander leaves.

add coriander, ghee

7.Give a quick saute and switch off. Let the mixture cool down.

saute well

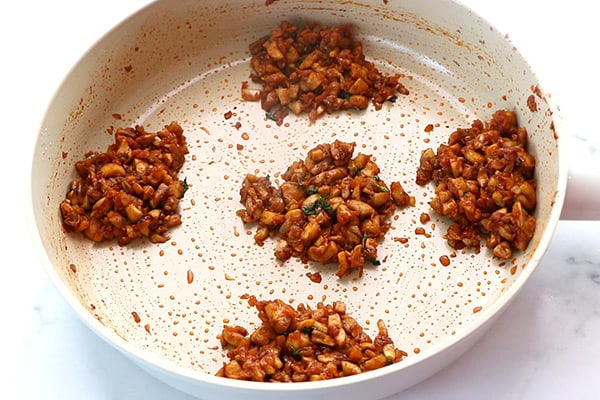
8.Mushroom filling is ready. Separate for 5 puffs and keep it ready.

filling is ready

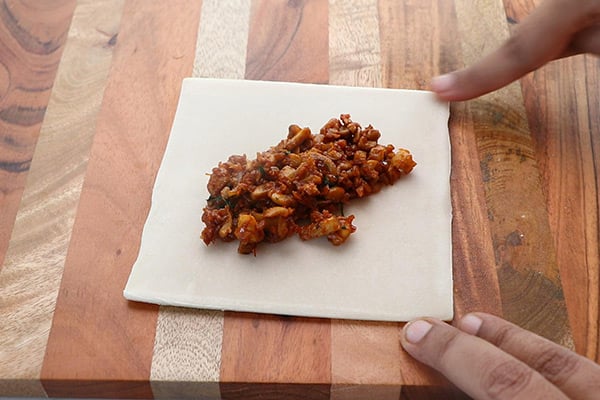
9.Take a puff pasty sheet, add the stuffing inside. Slightly wet all the 4 sides with water for it to seal. While you do this preheat oven at 220 DEG C for 10 minutes.

add filling inside

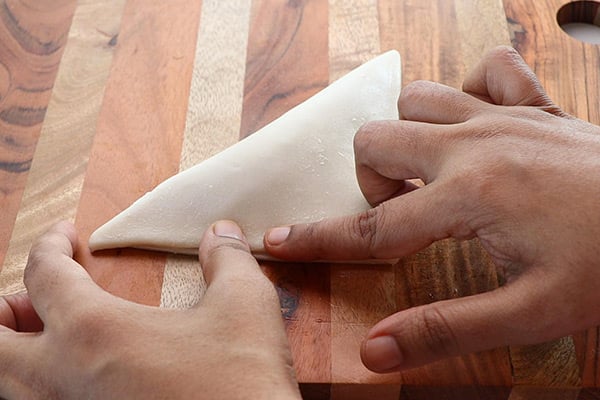
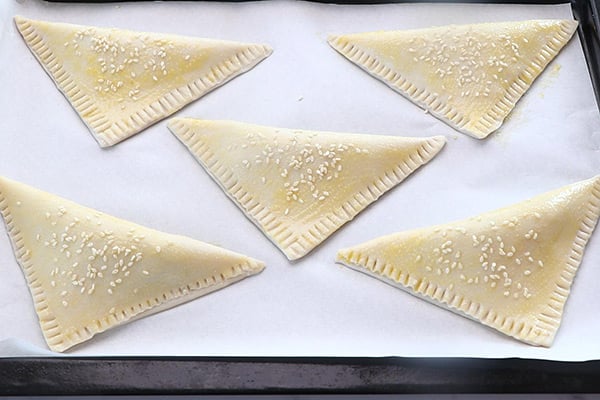
10.Fold it into a triangle.

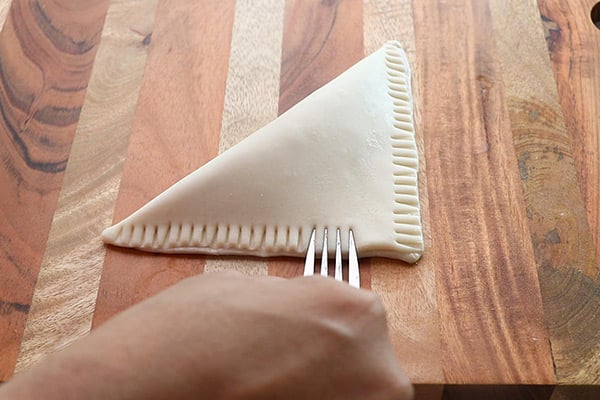
fold to triangle

11.Prick with fork to seal completely.

prick on the sides

12.Repeat to finish for the other puff pastry sheets also.

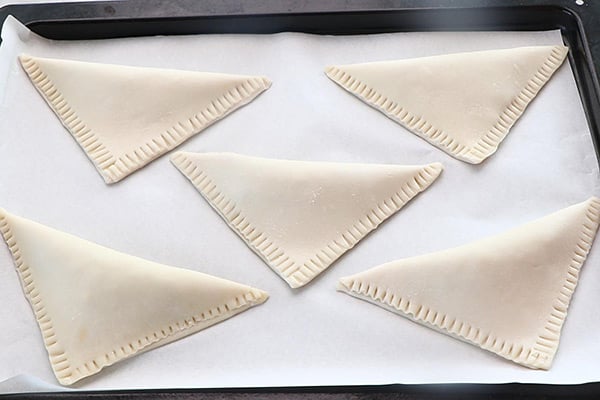
repeat to finish

13.Brush the top with ghee or oil.

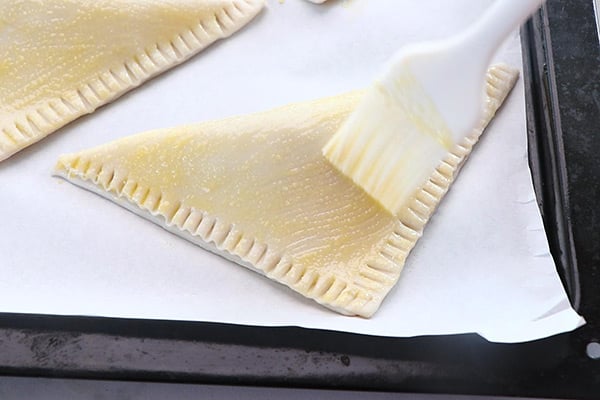
brush with ghee

14.Sprinkle sesame seeds on top.

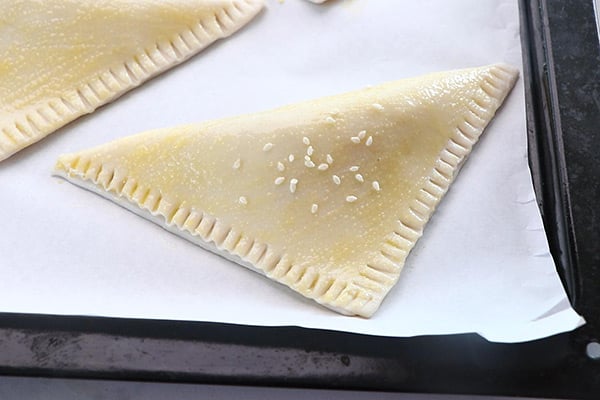
sprinkle sesame seeds

15.Repeat to finish.

repeat to finish

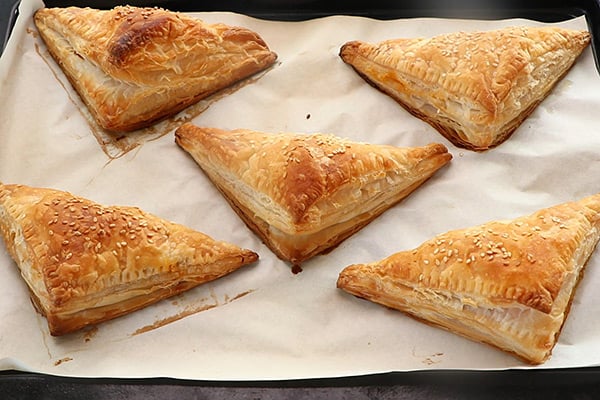
16.Bake in preheated oven at 220 DEG C for 20 minutes or until golden brown as shown.

bake until golden

Serve hot or warm with tomato ketchup and coffee or tea!

mushroom puffs served with tomato ketchup and coffee

Expert Tips

  • Thawing pastryΒ - I usually take puff pastry sheets out just 10-15 minutes before baking. Don't leave long, else it becomes sticky and hard to handle.
  • Filling - Make sure to make the filling slightly spicy so that it becomes balanced when combined with the pastry sheets. The filling should be dry and not watery as it might make the puffs soggy.
  • Brushing - I usually brush with oil or milk or ghee to get a golden colour. 1 egg with 1 tablespoon water mixed can also be used for brushing, with eggs it gives a shine too.
  • Sealing edgesΒ - I use little water at the edges to seal well. And used fork for sealing completely.
  • BakingΒ - I bake at 220Β°C until golden brown for 20 minutes. Baking puffs at slightly high temperature that is from 200- 220 DEG C is recommended.

Serving and Storage

Serve Mushroom Puffs hot or warm with tea, coffee and tomato ketchup. It tastes best when fresh and hot, right out of oven. If storing, keep in airtight container once cooled. You can reheat in oven or tawa before serving, but it is always most crisp on the same day.

FAQS

1. Can I use store-bought puff pastry sheets?

Yes, Store-bought puff pastry is easy to reach and convenient. It works very well for mushroom puffs.

2.Which mushrooms are best for mushroom puffs?

Button mushrooms are the most commonly used. You can try with other mushrooms too.

3. How do I prevent the mushroom filling from becoming watery?

Cook the mushrooms until all their moisture has evaporated and allow the filling to cool completely before filling the pastry.

4. Can I prepare mushroom puffs in advance?

Yes. You can assemble them ahead of time and refrigerate them until ready to bake.

5.Can I make mushroom puffs in an air fryer?

Yes. Air frying works well and gives the pastry a crisp exterior. The exact temperature and time depend on the air fryer and size of the puffs. You can try with 200 DEG for 12-15 minutes then proceed accordingly.

mushroom puffs served with tomato ketchup and coffee

If you have any more questions about thisΒ Mushroom Puffs RecipeΒ do mail me at sharmispassions@gmail.com. In addition, follow me onΒ Instagram,Β Facebook,Β Β Pinterest,Β YoutubeΒ andΒ TwitterΒ .

Tried thisΒ Mushroom Puffs Recipe? Do let me know how you liked it. Also tag us on Instagram @sharmispassions and hash tag it on #sharmispassions.

πŸ“– Recipe Card

Print

Mushroom Puffs Recipe

Mushroom Puffs is a popular snack in Indian bakeries as they make a delicious evening snack with tea. This is one of the easiest and simple filling that I've made for puffs yet tastes so good. Mushroom Puff is so quick and easy to make in just few easy steps. This Indian style mushroom puffs will be a instant hit so do try and enjoy!
Course Snack
Cuisine Indian
Prep Time 10 minutes
Cook Time 10 minutes
Total Time 20 minutes
Calories
Author Sharmilee J

Ingredients

  • 5 puff pastry sheets
  • 1 tablespoon oil
  • 1 tablespoon garlic
  • Β½ cup onion
  • 1 Β½ cups mushrooms
  • 1 Β½ teaspoon red chilli powder
  • ΒΎ teaspoon garam masala powder
  • 1 tablespoon coriander leaves
  • 1 tablespoon ghee
  • 1 tablespoon sesame seeds
  • salt to taste

Instructions

  • Heat 1 tablespoon oil, add 1 tablespoon garlic finely chopped, Β½ cup onion finely chopped.
  • Saute until it turns golden.
  • Add 1 Β½ cups mushroom.
  • Cook in medium high flame. Mushroom lets out water.
  • Cook until it becomes dry. Then add salt to taste, 1 Β½ teaspoon red chilli powder and ΒΎ teaspoon garam masala powder.
  • Cook until it comes together then finally add Β½ teaspoon ghee and 1 tablespoon coriander leaves.
  • Give a quick saute and switch off. Let the mixture cool down.
  • Mushroom filling is ready. Separate for 5 puffs and keep it ready.
  • Take a puff pasty sheet, add the stuffing inside. Slightly wet all the 4 sides with water for it to seal. While you do this preheat oven at 220 DEG C for 10 minutes.
  • Fold it into a triangle.
  • Prick with fork to seal completely.
  • Repeat to finish for the other puff pastry sheets also.
  • Brush the top with ghee or oil.
  • Sprinkle sesame seeds on top.
  • Repeat to finish.
  • Bake in preheated oven at 220 DEG C for 20 minutes or until golden brown as shown.
  • Serve hot or warm with tomato ketchup and coffee or tea!

Video

Notes

  • Thawing pastryΒ - I usually take puff pastry sheets out just 10-15 minutes before baking. Don't leave long, else it becomes sticky and hard to handle.
  • Filling - Make sure to make the filling slightly spicy so that it becomes balanced when combined with the pastry sheets. The filling should be dry and not watery as it might make the puffs soggy.
  • Brushing - I usually brush with oil or milk or ghee to get a golden colour. 1 egg with 1 tablespoon water mixed can also be used for brushing, with eggs it gives a shine too.
  • Sealing edges - I use little water at the edges to seal well. And used fork for sealing completely.
  • Baking - I bake at 220Β°C until golden brown. Baking puffs at slightly high temperature that is from 200- 220 DEG C is recommended.

The post Mushroom Puff Recipe appeared first on Sharmis Passions.
Zucchini Fritters Recipe

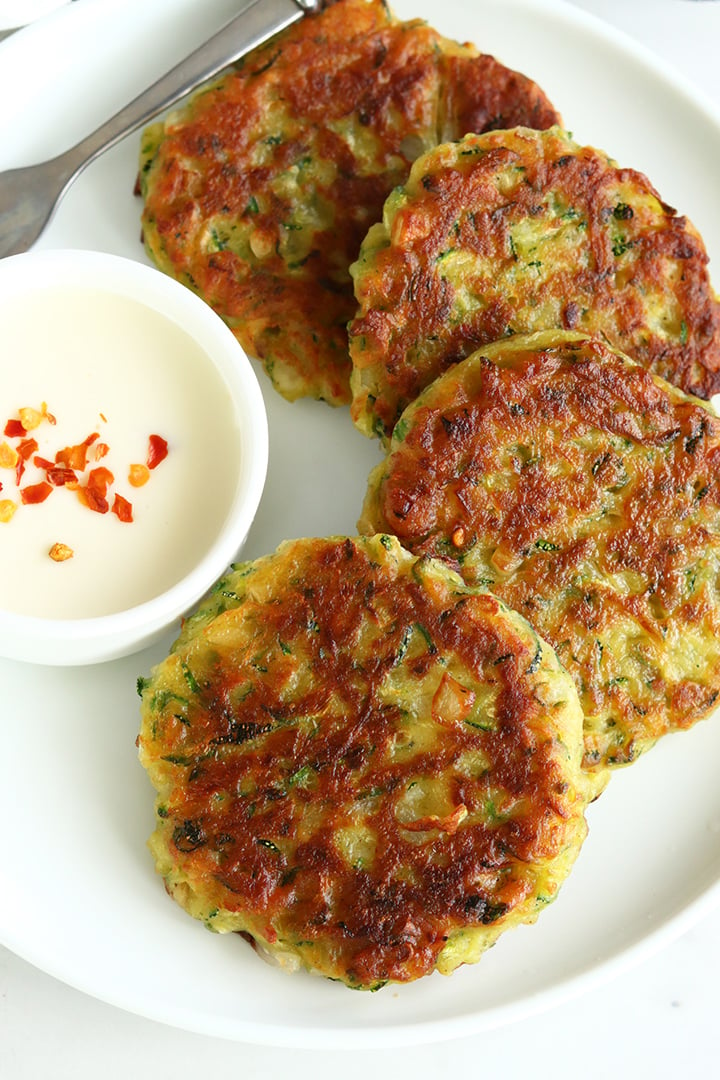
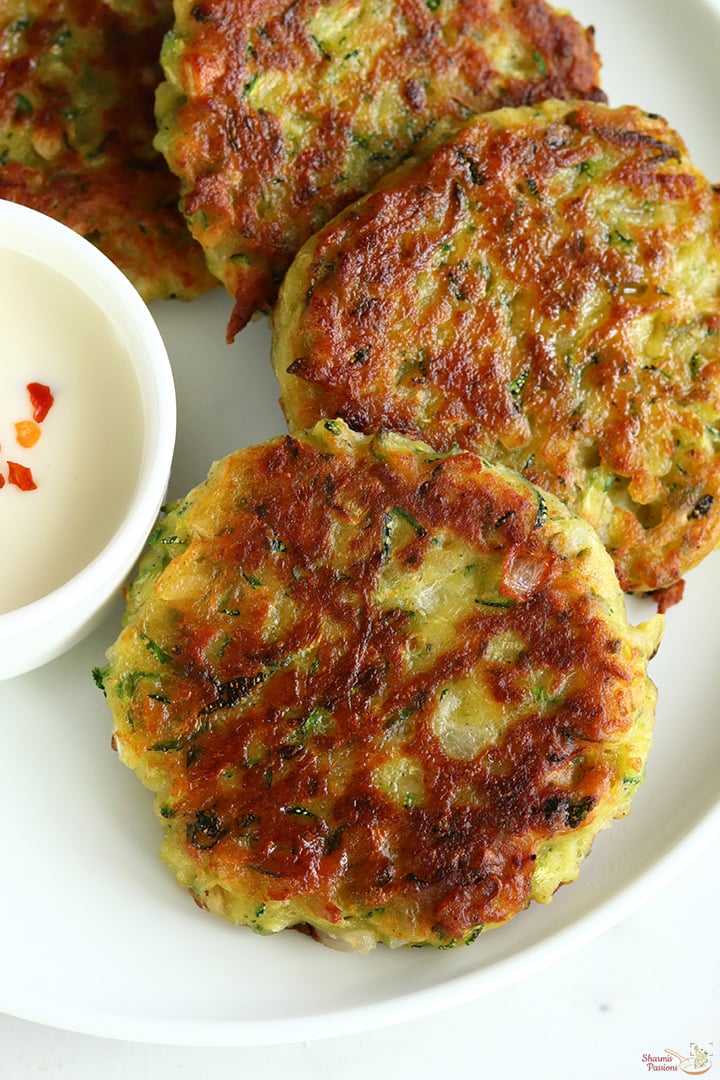
These Zucchini Fritters are crisp on the outside with a soft inside making it a perfect snack to munch anytime. They are easy and simple to make, only the grating part takes a bit of time otherwise gets ready in under 20 minutes. Made gluten free these fritters are great to snack anytime of the day.

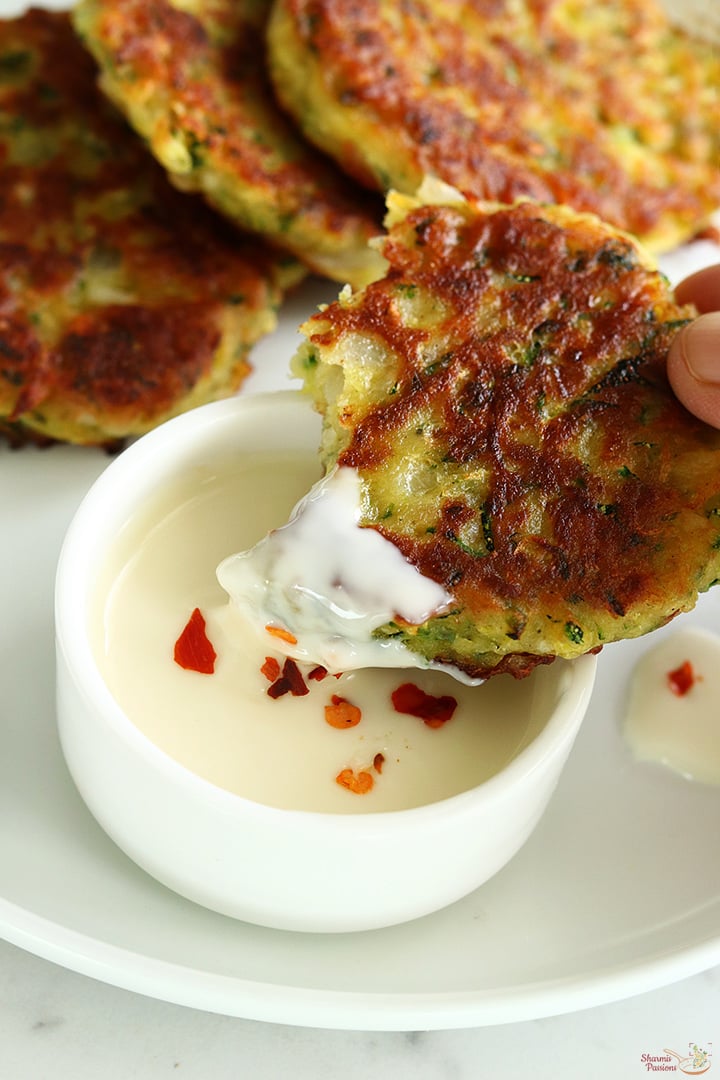
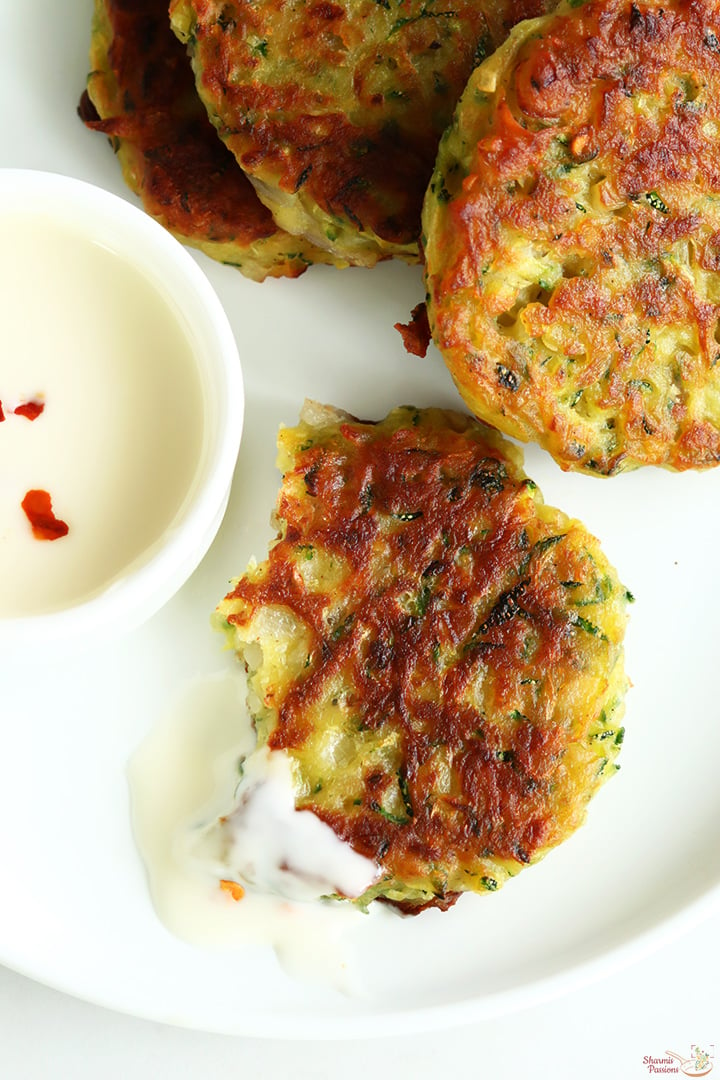
crispy zucchini fritters served with cheese spread

This is one of the best ways to use zucchini. The trick for making crisp zucchini fritters to squeeze the water as much as possible. They're easy to make, customise relatively inexpensive, and a great way to add more vegetables to a meal while still feeling satisfying to eat.

[feast_advanced_jump_to]

About Zucchini Fritters

Zucchini Fritters are crisp and crunchy on the outside with a soft textured inside. With the burst of flavours these fritters are great to snack that even kids would love it. Make it big sized and they serve as a great savoury pancakes for breakfast.

I wanted to make it gluten free so ended up creating this recipe. I have tried it couple of times and these turned out super good. So with perfect measures I am sharing the recipe here.

The first time I tried I was skeptical how my family would react so was waiting for them to taste it. But to my surprise everyone including my mother loved it so much and they complained saying it got over soon. So next time made a big batch to serve them and they all enjoyed it.

I served it with cheese spread that I had in hand and it was perfect combination. You can serve it with tomato ketchup too. This recipe is egg free, gluten free so try and enjoy it guilt free.

Similar Recipes

crispy zucchini fritters served with cheese spread

Zucchini Fritters Video

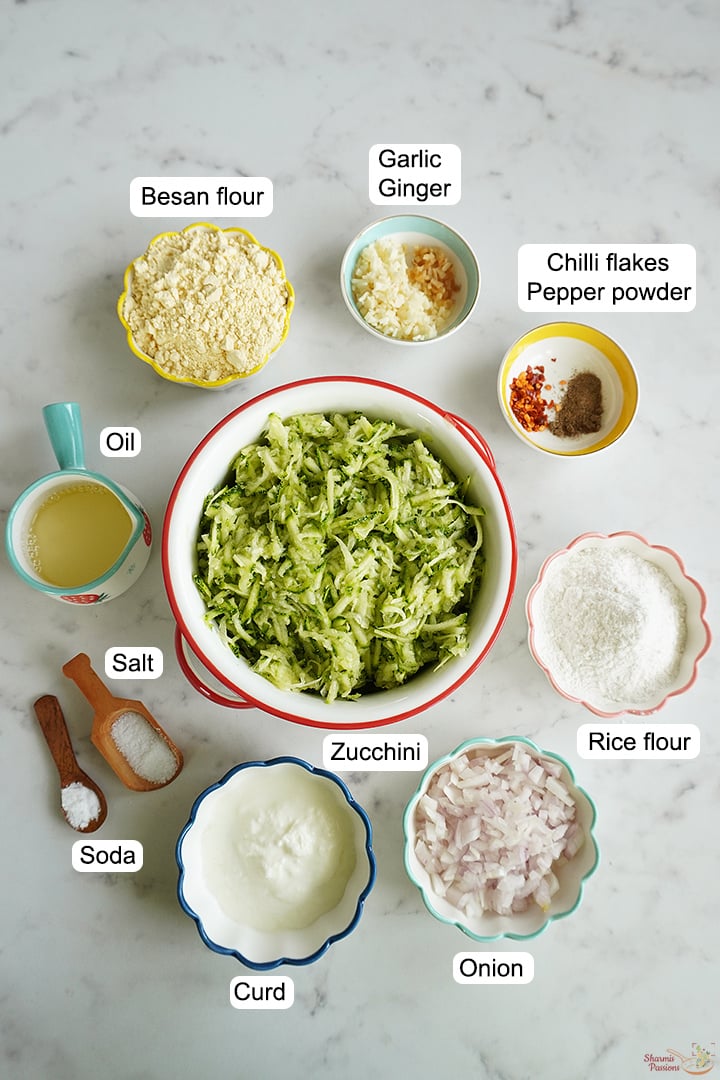
Zucchini Fritters Ingredients

  • Zucchini - Forms the base of these fritters. Grate them using big holed grater, squeeze water completely then use it.
  • Rice flour - is added to make the fritters crisp and makes the binding easier.
  • Besan flour - adds a nutty flavour and gives body to these fritters.
  • Chilli flakes , Pepper powder - Chilli flakes and pepper powder is added for spice.
  • Ginger, Garlic - is added for taste and flavour. You can grate or fine chop and add it.
  • Onion - Add it finely chopped to add crunch and taste to the fritters.
  • Curd - adds a mild sour taste.
  • Oil - is used for shallow frying. Any flavourless cooking oil can be used for this recipe.
  • Salt - is added to taste and balance the flavours.
  • Soda - helps to soften the inside texture. It helps to avoid fritters turning hard.
ingredients needed to make zucchini fritters

How to make Zucchini Fritters Step by Step

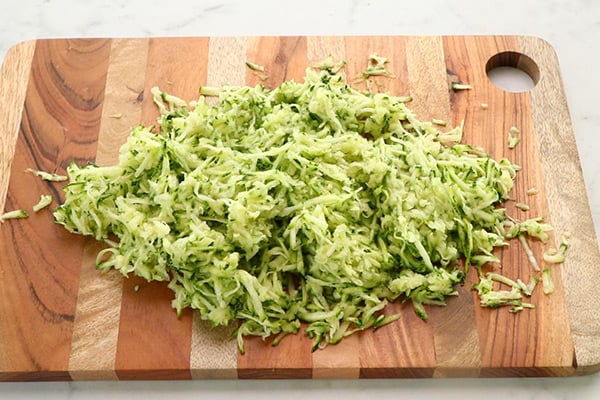
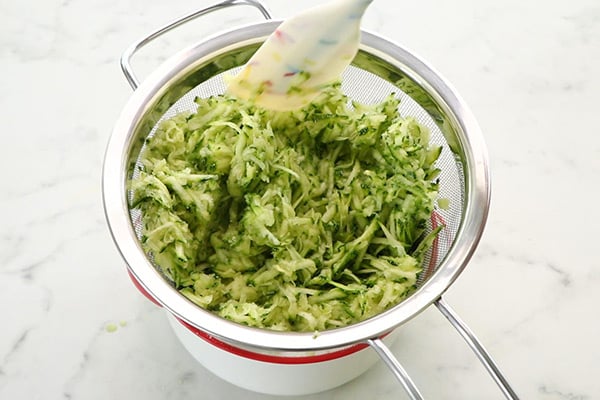
1.Grate 1 medium sized zucchini using a big holed grater. Trim both the edges and discard them. It is around 3 cups of grated zucchini.

grate zucchini

2.Transfer to a strainer, add salt to taste, mix well.

add salt

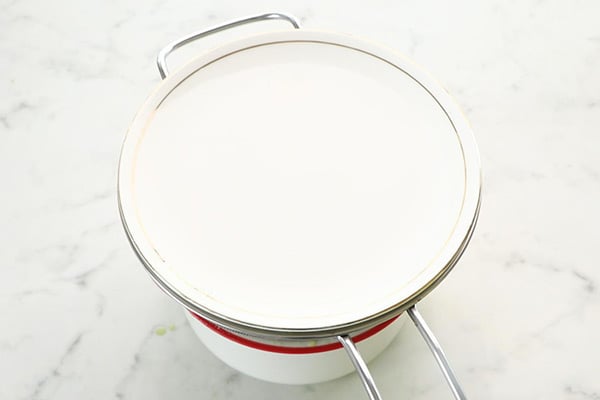
3.Keep covered and let it rest for 10-15 minutes.

rest for a while

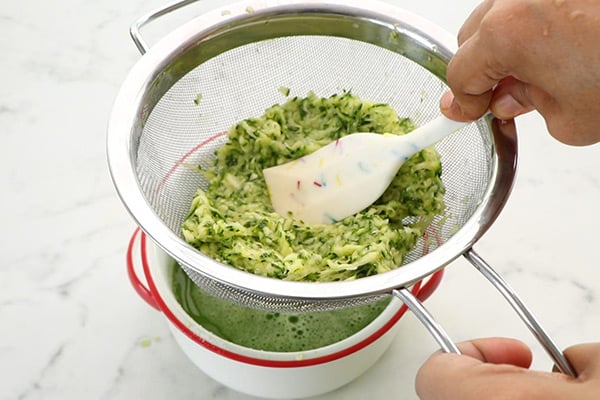
4.Press well to squeeze the juice, remove as much as water content as possible. This makes the fritters super crispy. Reserve the extracted juice for later use.

press well

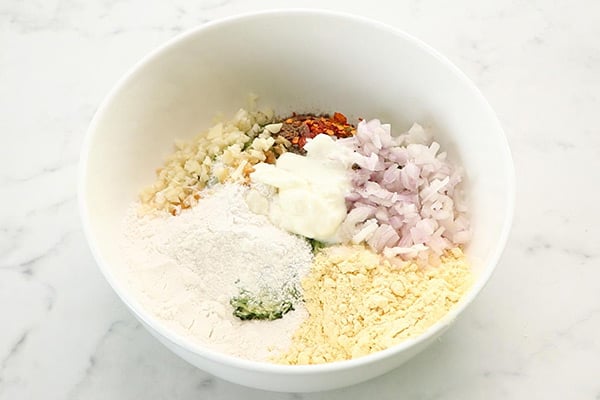
5.To a mixing bowl add

  • 3 cups grated zucchini
  • β…“ cup rice flour
  • β…“ cup besan flour
  • 1 tablespoon garlic
  • 1 teaspoon ginger
  • Β½ teaspoon chilli flakes
  • ΒΌ teaspoon pepper powder
  • salt to taste
  • Β½ cup onion
  • 2 tablespoon thick curd
  • ΒΌ teaspoon soda
add ingredients

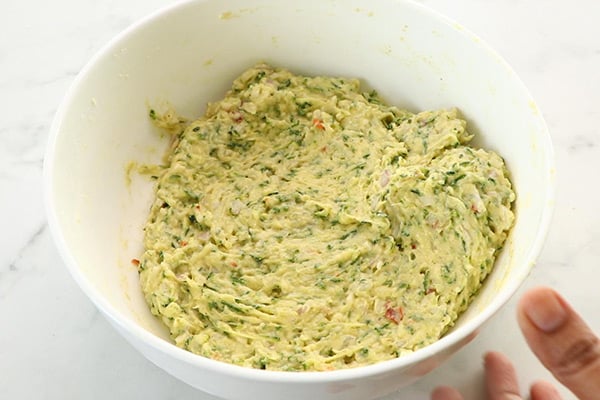
6.Mix it well to form a thick batter. Add little of extracted juice only if needed. I added around 2 tablespoon. First mix and see then add only if needed else it will become watery.

mix well to a batter

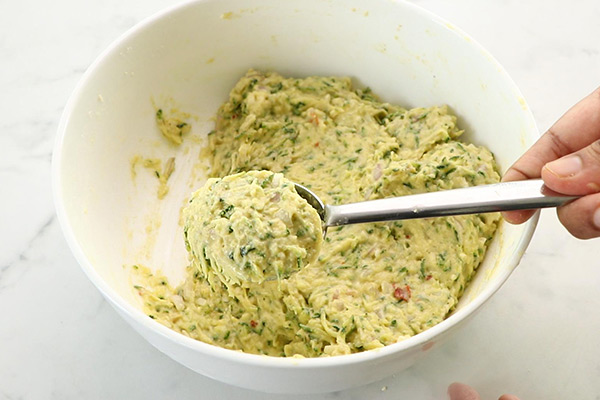
7.Scoop the batter using a deep curved ladle.

scoop the batter

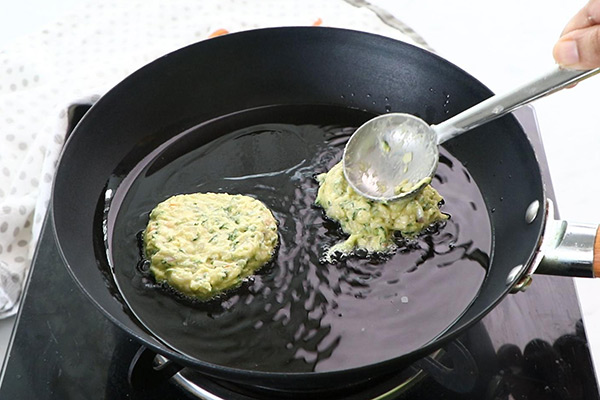
8.Heat oil in a pan for shallow frying. Make sure oil is hot before adding the batter. Add the batter and slightly flatten it. It should be slightly thick not too thin.

add to tawa in oil

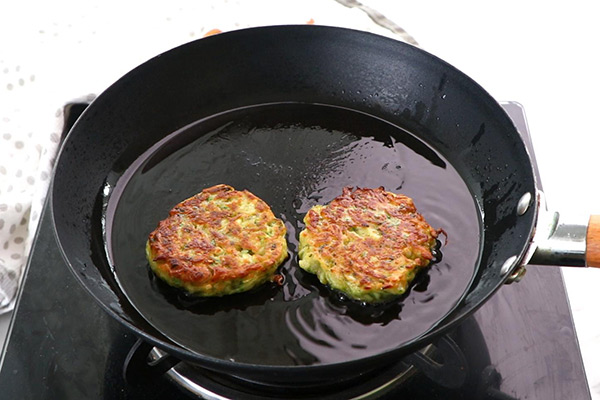
9.Flip over and cook. Cook both the sides until golden brown.

cook until golden brown

Serve hot!

crispy zucchini fritters served with cheese spread

Expert Tips

  • Zucchini - I used one whole medium sized zucchini. Trim the edges and grate it using big holed grater. Squeeze the water content as much as possible. You can even use a cloth to squeeze.
  • Balance - Measure zucchini after grating and adjust the flours accordingly.
  • Batter - The batter should be thick and not too loose. So add the extracted juice only if needed.
  • Pan - Use a flat pan which has lifted edges, that will be perfect for shallow frying. You can use any flat tawa for frying the fritters.
  • Frying - Fry until golden brown on both the sides, the fritters should have a crisp outside.

Serving and Storage

Zucchini fritters are best served hot and crisp, straight from the pan. Serve with Greek yogurt, sour cream, or even cheese spread. You can store the batter in fridge for 2 days. Fritters should be served right way for enjoying the best taste.

FAQS

1.Why is my fritters soggy and not crisp?

If you fry them when oil is not hot and ready the fritters might turn soggy. If the batter is too loose also it may turn soggy.

2.Can I air fry or bake them?

Yes you can but can't expect the same results as shallow frying.

  • Air Fryer - Reheat at 180Β°C (350Β°F) for 3-5 minutes until hot and crispy.
  • Oven - Bake at 180Β°C (350Β°F) for 10-12 minutes.

3.What can I serve fritters with?

You can serve it with tomato ketchup, green chutney or sour cream or cheese spread.

crispy zucchini fritters served with cheese spread

If you have any more questions about thisΒ  Zucchini Fritters Recipe do mail me at sharmispassions@gmail.com. In addition, follow me onΒ Instagram,Β Facebook,Β Β Pinterest,Β YoutubeΒ andΒ TwitterΒ .

Tried thisΒ Zucchini Fritters Recipe? Do let me know how you liked it. Also tag us on Instagram @sharmispassions and hash tag it on #sharmispassions.

πŸ“– Recipe Card

Print

Zucchini Fritters Recipe

These Zucchini Fritters are crisp on the outside with a soft inside making it a perfect snack to munch anytime. They are easy and simple to make, only the grating part takes a bit of time otherwise gets ready in under 20 minutes. Made gluten free these fritters are great to snack anytime of the day.
Course snacks
Cuisine American, Indian
Keyword 30 mins recipes
Prep Time 10 minutes
Cook Time 15 minutes
Total Time 25 minutes
Calories
Author Sharmilee J

Ingredients

  • 3 cups grated zucchini
  • β…“ cup rice flour
  • β…“ cup besan flour
  • 1 tablespoon garlic
  • 1 teaspoon ginger
  • Β½ teaspoon chilli flakes
  • ΒΌ teaspoon pepper powder
  • Β½ cup onion
  • 2 tablespoon thick curd
  • ΒΌ teaspoon soda
  • salt to taste

Instructions

  • Grate 1 medium sized zucchini using a big holed grater. Trim both the edges and discard them. It is around 3 cups of grated zucchini.
  • Transfer to a strainer, add salt to taste, mix well.
  • Keep covered and let it rest for 10-15 minutes.
  • Press well to squeeze the juice, remove as much as water content as possible. This makes the fritters super crispy. Reserve the extracted juice for later use.
  • To a mixing bowl add
  • 3 cups grated zucchini
    β…“ cup rice flour
    β…“ cup besan flour
    1 tablespoon garlic1 teaspoon ginger
    Β½ teaspoon chilli flakes
    ΒΌ teaspoon pepper powder
    salt to taste
    Β½ cup onion
    2 tablespoon thick curd
    ΒΌ teaspoon soda
  • Mix it well to form a thick batter. Add little of extracted juice only if needed. I added around 2 tablespoon. First mix and see then add only if needed else it will become watery.
  • Scoop the batter using a deep curved ladle.
  • Heat oil in a pan for shallow frying. Make sure oil is hot before adding the batter. Add the batter and slightly flatten it. It should be slightly thick not too thin.
  • Flip over and cook. Cook both the sides until golden brown.
  • Serve hot!

Video

Notes

  • Zucchini - I used one whole medium sized zucchini. Trim the edges and grate it using big holed grater. Squeeze the water content as much as possible. You can even use a cloth to squeeze.
  • Balance - Measure zucchini after grating and adjust the flours accordingly.
    Batter - The batter should be thick and not too loose. So add the extracted juice only if needed.
  • Pan - Use a flat pan which has lifted edges, that will be perfect for shallow frying. You can use any flat tawa for frying the fritters.
  • Frying - Fry until golden brown on both the sides, the fritters should have a crisp outside.

The post Zucchini Fritters Recipe appeared first on Sharmis Passions.
Onion Murukku Recipe

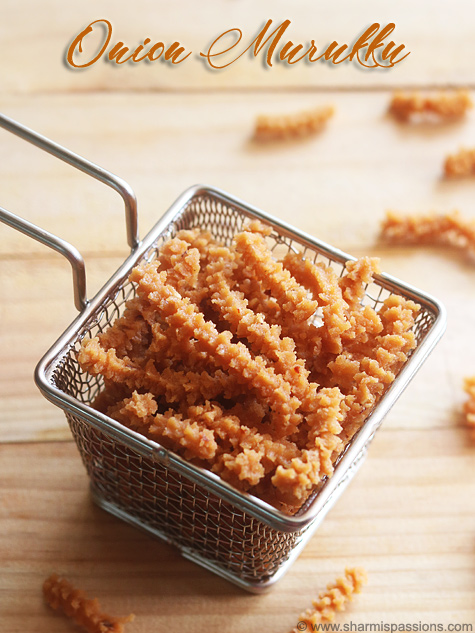
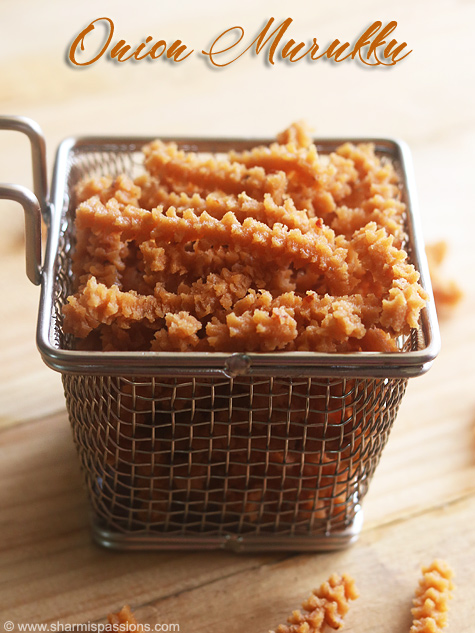
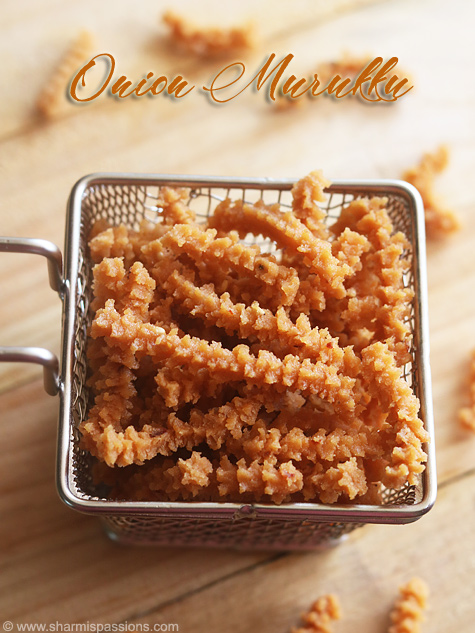
Onion Murukku is a crunchy, spicy murukku made by blending onion and chilli flavour in the making of regular murukku. It is commonly made at home for festivals and much healthier compared to packed snacks from store. Using small onion brings better flavour than big onion.

onion murukku served

The flavour of small onions in this murukku is really good and makes it taste completely different from regular murukku. Once the dough comes together, you need to press and fry them quickly. It stays crisp for several days without losing that fresh taste.Β 

[feast_advanced_jump_to]

About Onion Murukku

Onion Murukku is a flavourful variation to regular murukku. When you grind small onions into a paste, they have a mild, sweet flavour that blend beautifully with rice flour and urad dal flour. This combination give it a unique taste that make this snack stand out.

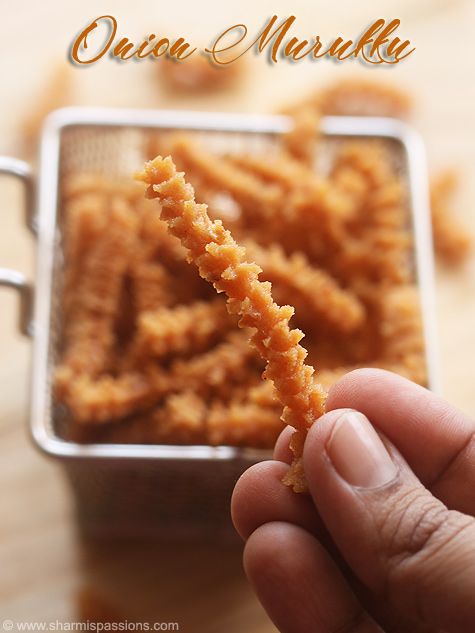
This murukku breaks easily since the dough is light and airy. It has golden brown colour, from frying at right temperature, and the texture is more delicate than plain murukku with onion paste. You get nice crunch outside but it is not heavy at all.

You can adjust spice level based on taste preference, some like more chillies and some prefer less heat. Also getting the right dough consistency is important, if too dry it is hard to press through the maker, if too wet it won't crisp up properly.

I wanted to try this for long time and every time I make it my family enjoy it too because flavour so fresh and nothing like store bought snack.

Similar Recipes

onion murukku served

Onion Murukku Video

Onion Murukku Ingredients

  • Rice Flour - I use rice flour as the base for light, crispy texture. It combines well with urad dal flour to give right texture when frying.
  • Urad Dal Flour - This helps dough stay together and also add nice flavour. Urad dal flour is needed for binding everything.
  • Small Onions - The flavour of small onion is really good in this murukku, so I strongly recommend small onion only. Big onion won't give same taste so choose small ones.
  • Red Chillies - I grind red chillies with onion to add spice and flavour. Amount depend son how spicy you like your murukku to be.
  • Sesame Seeds - I add these for crunch and flavour that spread throughout. They make each bite taste better.
  • Melted Butter - Butter give richness to dough and make murukku taste more flavourful.
  • Hot Oil - I add hot oil because it helps murukku come out crispy. This makes big difference in final texture.
  • Hing - Just a pinch of hing for flavour and digestion help. Don't add too much.
  • Salt - Season to your preference. Salt bring out flavour of all ingredients.
  • Water - Add gradually to get smooth dough. You need just enough so it is not too dry or too wet.

How to make Onion Murukku Step by Step

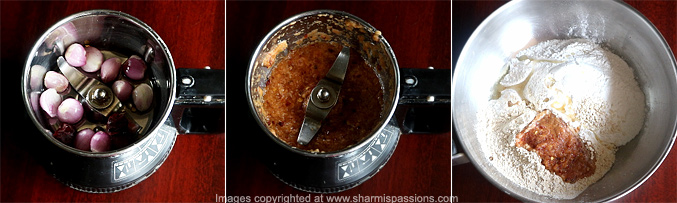
1.To a mixer jar add onion and red chillies grind it to a paste with little water. To a mixing bowl addΒ rice flour,urad dal flour, sesame seeds, butter, oil and onion chilli paste.

how to make onion murukku step1

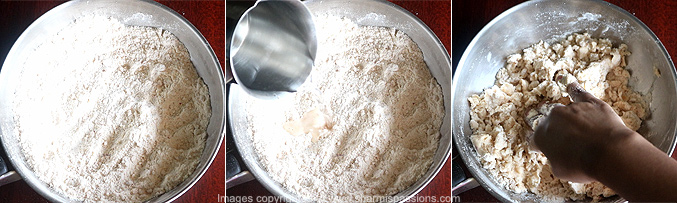
2.Mix it well first then add water little by little. Gather to form a dough.

how to make onion murukku step2

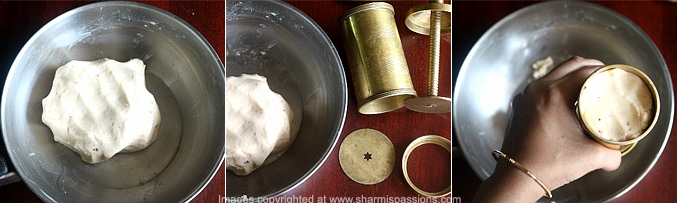
3.Gather to form a smooth dough. Grease the murukku maker with oil, place a star shaped murukku disc. You can use regular murukku plate too. Fill the murukku press with dough.

how to make onion murukku step3

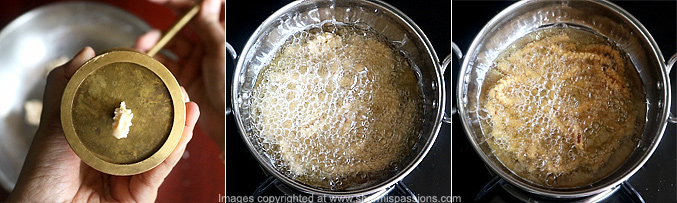
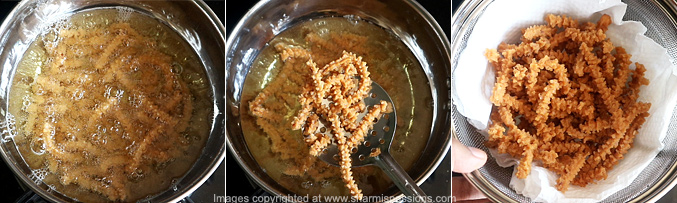
4.Heat oil in a kadai, when oil is hot enough press the murukku directly in hot oil. Let it cook for few seconds. Fry in low medium flame.

how to make onion murukku step4

5.Flip over and cook till golden brown on both sides. When the bubbles ceases its done. Drain in tissue paper. Repeat to finish the dough.

how to make onion murukku step5

After cooling down store in airtight dry container.

onion murukku served

Expert Tips

  • Grinding Onion - I grind onion and red chillies together to a paste with little water. Grinding them together helps flavour blend nicely.
  • Mixing Dough - Add all dry ingredients first, then add onion chilli paste and mix well. Only after that add water little by little.
  • Getting Dough Right - Dough should be smooth enough to press through murukku maker but not too loose. This takes little practice to get right.
  • Oil for Mould - I make sure to grease murukku maker properly with oil. This help sdough slide out easy when you press.
  • Check Oil Heat - When you press murukku into oil, it should sizzle immediately. If oil not hot enough, murukku absorb oil and become heavy.
  • Cook Both Sides - Press in hot oil for few seconds, then flip and cook till golden brown on other side. Don't leave one side too long or it burn.
  • Spiciness - Adjust amount of red chillies based on your spice preference.Β 

Serving and Storage

Serve Onion Murukku once it cools down a bit because thats when the flavour is best and texture is crisp. After completely cooling you can eat at room temperature too. Drain on tissue paper right after frying so excess oil come off, then store in dry airtight container. It stays good for several days as long as you keep away from moisture.

FAQS

1.Why must I use small onion?

Small onion has mild, sweet flavour that blends perfectly with murukku.Β 

2.How do I make it less spicy?

You can reduce red chillies. Just start with less and taste, then add more if you want more heat.

3.Why is my murukku so oily?

If the oil is not hot enough, make sure oil is hot enough that it sizzles when frying murukku. If the dough is too loose also the murukku drinks oil.

4.Can I store it longer?

Store in airtight dry container and it stays good for several days. If it starts to soften, you can't make it crispy again so better to eat within few days.

5.How crispy should it be?

It should break easily when you bite and sound crispy. If it too soft then oil was not hot enough, if too hard then you cooked too long.

onion murukku served

If you have any more questions about this Onion Murukku Recipe do mail me at sharmispassions@gmail.com. In addition, follow me on Instagram, Facebook,Β  Pinterest, Youtube andΒ TwitterΒ .

Tried this Onion Murukku Recipe ? Do let me know how you liked it. Also tag us on Instagram @sharmispassions and hash tag it on #sharmispassions.

πŸ“– Recipe Card

OnionMurukku3
Print

Onion Murukku Recipe

Onion Murukku is a crunchy, spicy murukku made by blending onion and chilli flavour in the making of regular murukku. It is commonly made at home for festivals and much healthier compared to packed snacks from store. Using small onion brings better flavour than big onion.
Course Snack
Cuisine Indian
Keyword butter recipes, diwali dishes, diwali recipes, diwali snacks, diwali snacks recipes, easy diwali recipes, easy diwali snacks, murukku, rice flour recipes, savoury recipes, snack recipes, virtual diwali party
Prep Time 10 minutes
Cook Time 20 minutes
Total Time 30 minutes
Servings 3 people
Calories 205kcal
Author Sharmilee J

Ingredients

  • 1 cup rice flour
  • ΒΌ cup urad dal flour
  • Β½ teaspoon sesame seeds
  • 1 teaspoon melted butter
  • 1 teaspoon hot oil
  • a pinch hing
  • salt to taste

To grind to a paste:

  • 12 nos small onion
  • 3 nos red chillies
  • β…› cup water

Instructions

  • To a mixer jar add onion and red chillies grind it to a paste with little water. ToΒ a mixing bowl add rice flour, urad dal flour, sesame seeds, butter, oil and onion chilli paste.Β 
  • Mix it well first then add water little by little. Gather to form a dough.
  • Grease the murukku maker with oil, place a star shaped murukku disc. You can use regular murukku plate too. Fill the murukku press with dough.
  • Heat oil in a kadai, when oil is hot enough press the murukku directly in hot oil. Let it cook for few seconds.
  • Flip over and cook till golden brown on both sides. Drain in tissue paper. Repeat to finish the dough.
  • After cooling down store in airtight dry container & enjoy Onion Murukku!

Video

Notes

  • Grinding Onion - I grind onion and red chillies together to a paste with little water. Grinding them together helps flavour blend nicely.
  • Mixing Dough - Add all dry ingredients first, then add onion chilli paste and mix well. Only after that add water little by little.
  • Getting Dough Right - Dough should be smooth enough to press through murukku maker but not too loose. This takes little practice to get right.
  • Oil for Mould - I make sure to grease murukku maker properly with oil. This help sdough slide out easy when you press.
  • Check Oil Heat - When you press murukku into oil, it should sizzle immediately. If oil not hot enough, murukku absorb oil and become heavy.
  • Cook Both Sides - Press in hot oil for few seconds, then flip and cook till golden brown on other side. Don't leave one side too long or it burn.
  • Spiciness - Adjust amount of red chillies based on your spice preference.Β 

Nutrition

Serving: 100g | Calories: 205kcal | Carbohydrates: 39g | Protein: 5g | Fat: 3g | Saturated Fat: 1g | Polyunsaturated Fat: 1g | Monounsaturated Fat: 1g | Trans Fat: 0.04g | Cholesterol: 3mg | Sodium: 9mg | Potassium: 39mg | Fiber: 4g | Sugar: 0.2g | Vitamin A: 39IU | Vitamin C: 2mg | Calcium: 15mg | Iron: 1mg

The post Onion Murukku Recipe appeared first on Sharmis Passions.
Millet Omapodi Recipe

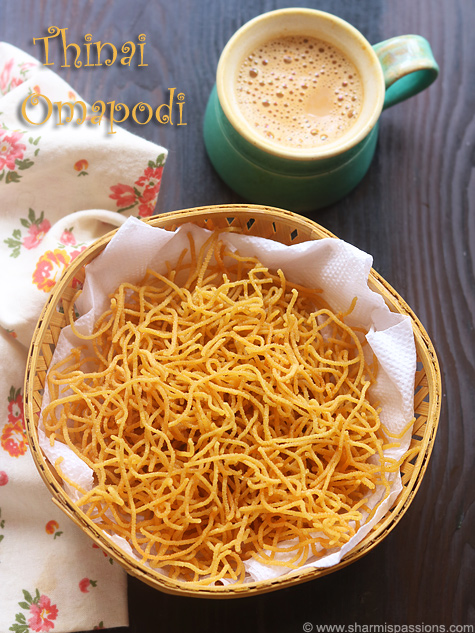
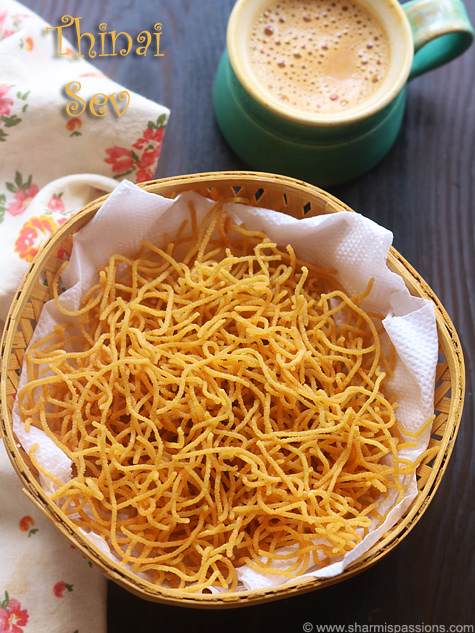
Millet Omapodi is a tasty, savoury snack made by blending millet flour, besan flour and ajwain to a dough consistency, then pressing it through a die mould and frying it. It is a delight for people on dietary plans because millet has high fibre content and very good for your health.Β 

omapodi served with tea

This snack is easy to make and take less time compared to other Diwali snacks like murukku. Millet is a nutritious grain that have high fibre content and good for digestive health, it makes this snack even better than regular sev. It has slight different taste from regular besan omapodi.

[feast_advanced_jump_to]

About Millet Omapodi

Millet Omapodi is a snack that is made with foxtail millet flour instead of regular besan flour like traditional omapodi. The combination of millet flour and besan flour together makes perfect blend for taste and texture. You can use homemade millet flour or buy readymade pack from store.

Texture is crispy and crunchy throughout, when you bite it break easily and don't feel heavy like regular sev. This look nice and appetizing. Because of the ajwain and hot oil, it become very crispy and stay crunchy for longer time.

You can adjust the dough consistency based on preference, if dough is too tight then pressing will be difficult and omapodi turns out hard. In that case you can sprinkle little water and mix and try pressing again. Some people like it very crispy and some prefer it bit soft, you can adjust by adding or skipping hot oil.

I usually make this during festive season and making millet snacks become new interest for me because millet so healthy and tasty when use in right way.

Similar Recipes

omapodi served with tea

Millet Omapodi Ingredients

  • Thinai Flour - I use foxtail millet flour as the base and it gives mild, nutty flavour to omapodi. You can use homemade millet flour or readymade pack from store.
  • Besan Flour - I add besan flour to balance the flavour and help with binding of dough. It combines well with millet flour.
  • Ajwain - I dry roast ajwain first till nice aroma come, then grind it with water. Ajwain gives nice flavour and help with digestion.
  • Melted Butter - I add melted butter for richness and flavour to the dough. Butter makes omapodi taste better.
  • Hot Oil - I add hot oil because it make omapodi turn out nicely crisp. If you want it bit soft then you can skip hot oil.
  • Salt - I add salt for seasoning and you can adjust to taste. Salt brings out flavour of the flours.
  • Water - I add water gradually to gather the dough to right consistency. Don't add too much water at once.
  • Oil - I use oil for deep frying and it should be hot but not smoking. Right temperature is important for crispy omapodi.

How to make Millet Omapodi Step by Step

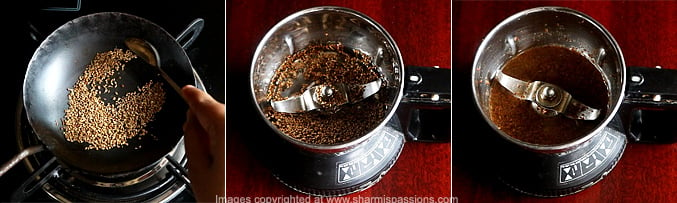
1.Dry roast ajwain till nice aroma comes. Add water to it and grind it. This will be a runny liquid, set aside.

how to make omapodi step1

2.To a sieve addΒ thinai flour, besan flour and sieve it well. Discard the coarse mixture

how to make omapodi step2

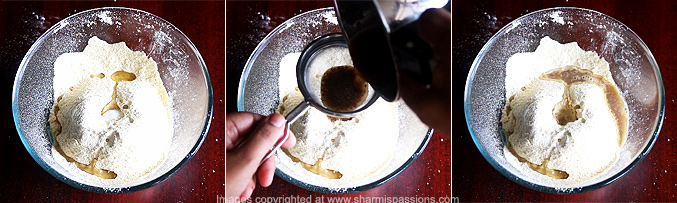
3.AddΒ butter, oil, hing and required salt. Strain and add ajwain water.

how to make omapodi step3

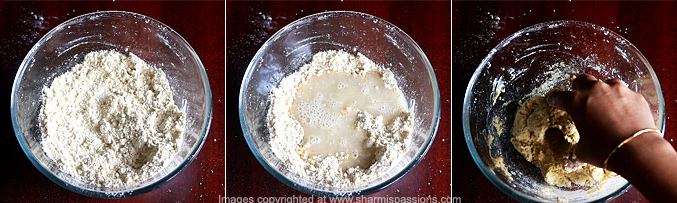
4.First mix this well, it will be crumbly. Now add water to it and gather the dough.

how to make omapodi step5

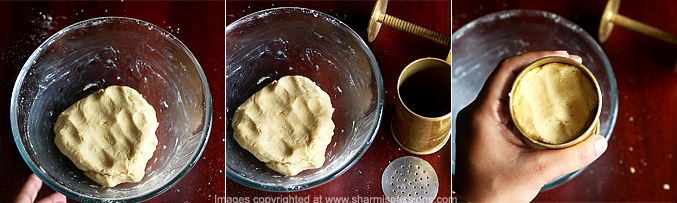
5.Gather to form a smooth dough. Grease the mould and disc with oil. Fill the mould with dough.

how to make omapodi step5

6.Close with lid.Heat oil - check by adding a pinch of oil, if it rises immediately then oil is ready.Oil should not be smoking hot, keep in low medium flame. Press in circles. Do not layer too much. Just a 1 or 2 layers should be good.

how to make omapodi step6

7.Deep fry in low medium flame.Flip over and cook on both sides till golden. Drain in tissue paper. After it cools down justΒ separate the pieces and store. Repeat to finish the dough.

how to make omapodi step7

Store in a clean dry airtight container.Serve with tea.

omapodi served with tea

Expert Tips

  • Roast Ajwain - I dry roast ajwain till nice aroma comes before grinding it. Roasting brings out flavour and make it taste better.
  • Sieve Flour - I sieve thinai and besan flour together to remove coarse mixture and makes flour light. This important for smooth dough.
  • Dough Consistency - I mix well and gather to form smooth dough, not too tight and not too loose. If the dough is too tight then pressing will be difficult and omapodi will turn out hard.
  • Oil Temperature Check - I check oil by adding pinch of flour, if it rises immediately then oil is ready. Oil should not be smoking hot while pressing.
  • Press in Circles - I press in circles and do not layer too much, just one or two layer should be good. If you crowd or layer too much it does not cook properly.
  • Flip and Cook - Once I press the dough I do not touch for few seconds, then I flip over and cook on both sides till golden. This is important for even cooking.
  • Separate After Cooling - I drain on tissue paper and after it cools down I separate the pieces. Separating after cooling makes it easier.

Serving and Storage

Serve Millet Omapodi hot or at room temperature with your tea or as snack anytime. You can serve immediately after frying or after it cool down completely. Drain on tissue paper to remove excess oil, then store in clean, dry airtight container and it stays crispy for several days. Keep away from moisture because that make it soft.

FAQS

1.Can I use other millet flour?

Yes you can follow same recipe for other millet like ragi, samai and other millet. The method stay same, only millet flour change.

2.How do I make it extra crispy?

I add hot oil to dough because it turn out nicely crisp. Make sure oil at right temperature and not smoking hot while pressing.

3.Why is my omapodi hard?

If dough too tight then pressing will be difficult and omapodi turn out hard. Sprinkle little water and mix and try pressing again.

4.Can I use store bought millet flour?

Yes you can buy readymade millet flour pack from store, it work fine. Homemade flour also work good if you have time to make.

5.How long they stay fresh?

Store in clean, dry airtight container and they stay crispy for several days. Keep away from moisture and they last longer.

omapodi served with tea

If you have any more questions about this Millet Omapodi Recipe do mail me at sharmispassions@gmail.com. In addition, follow me on Instagram, Facebook,Β  Pinterest, Youtube andΒ TwitterΒ .

Tried this Millet Omapodi Recipe ? Do let me know how you liked it. Also tag us on Instagram @sharmispassions and hash tag it on #sharmispassions.

πŸ“– Recipe Card

ThinaiSev1
Print

Millet Omapodi Recipe | Millet Sev Recipe

Millet Omapodi is a tasty, savoury snack made by blending millet flour, besan flour and ajwain to a dough consistency, then pressing it through a die mould and frying it. It is a delight for people on dietary plans because millet has high fibre content and very good for your health.Β 
Course Snack
Cuisine Indian
Keyword butter recipes, diwali dishes, diwali recipes, diwali snacks, diwali snacks recipes, easy diwali recipes, easy diwali snacks, millet recipes, savoury recipes, sev
Prep Time 10 minutes
Cook Time 20 minutes
Total Time 30 minutes
Servings 3 cups
Calories 267kcal
Author Sharmilee J

Ingredients

  • 1 cup thinai flour
  • Β½ cup besan flour
  • a pinch hing
  • 1 teaspoon melted butter
  • 1 teaspoon hot oil
  • salt to taste
  • water as needed
  • oil to deep fry

To blend together:

  • ΒΎ tablespoon ajwain
  • ΒΌ cup water

Instructions

  • Dry roast ajwain till nice aroma comes. Add water to it and grind it. This will be a runny liquid, set aside.
  • To a sieve add thinai flour, besan flour and sieve it well. Discard the coarse mixture.
  • Add butter, oil, hing and required salt. Strain and add ajwain water.
  • First mix this well, it will be crumbly. Now add water to it and gather the dough.
  • Gather to form a smooth dough. Grease the mould and disc with oil. Fill the mould with dough. Close with lid.
  • Heat oil - check by adding a pinch of oil, if it rises immediately then oil is ready. Press in circles. DoΒ not layer too much. Just a 1 or 2 layers should be good.
  • Deep fry in low medium flame. Flip over and cook on both sides till golden.
  • Drain in tissue paper. After it cools down justΒ  separate the pieces.
  • Store Millet Omapodi in a clean dry airtight container. Serve with tea.

Notes

  • Roast Ajwain - I dry roast ajwain till nice aroma comes before grinding it. Roasting brings out flavour and make it taste better.
  • Sieve Flour - I sieve thinai and besan flour together to remove coarse mixture and makes flour light. This important for smooth dough.
  • Dough Consistency - I mix well and gather to form smooth dough, not too tight and not too loose. If the dough is too tight then pressing will be difficult and omapodi will turn out hard.
  • Oil Temperature Check - I check oil by adding pinch of flour, if it rises immediately then oil is ready. Oil should not be smoking hot while pressing.
  • Press in Circles - I press in circles and do not layer too much, just one or two layer should be good. If you crowd or layer too much it does not cook properly.
  • Flip and Cook - Once I press the dough I do not touch for few seconds, then I flip over and cook on both sides till golden. This is important for even cooking.
  • Separate After Cooling - I drain on tissue paper and after it cools down I separate the pieces. Separating after cooling makes it easier.

Nutrition

Serving: 100g | Calories: 267kcal | Carbohydrates: 42g | Protein: 9g | Fat: 7g | Saturated Fat: 1g | Polyunsaturated Fat: 2g | Monounsaturated Fat: 2g | Trans Fat: 0.1g | Cholesterol: 4mg | Sodium: 1318mg | Potassium: 259mg | Fiber: 5g | Sugar: 3g | Vitamin A: 50IU | Calcium: 16mg | Iron: 3mg

The post Millet Omapodi Recipe appeared first on Sharmis Passions.
❌