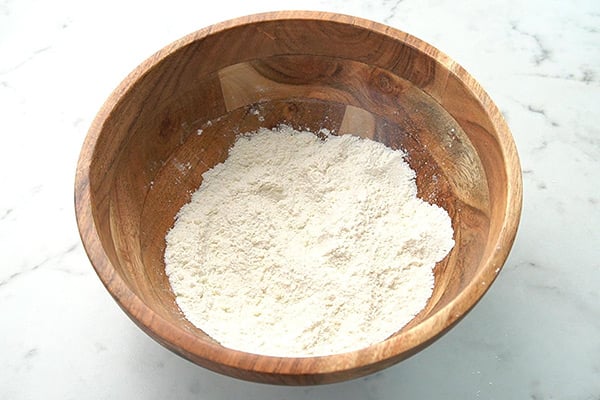
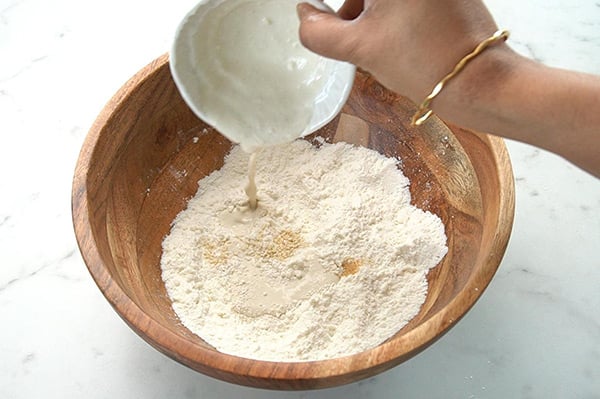
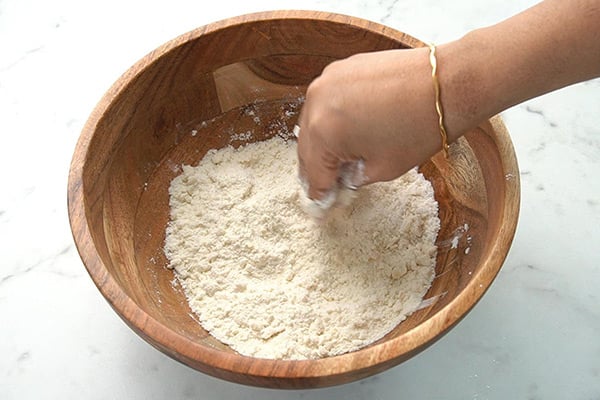
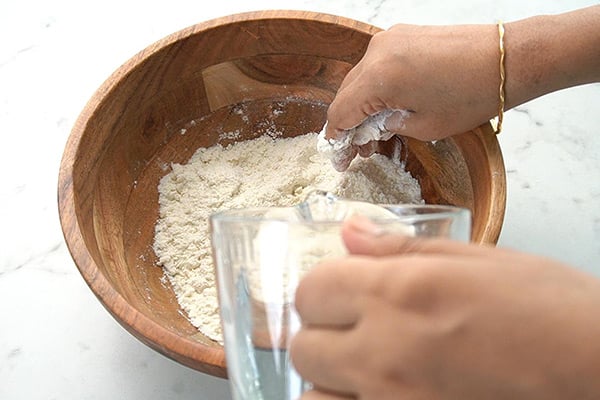
These simple vegan avocado parathas are made with wholemeal wheat flour, a little chickpea flour and a few everyday spices from my spice box. Read More ...
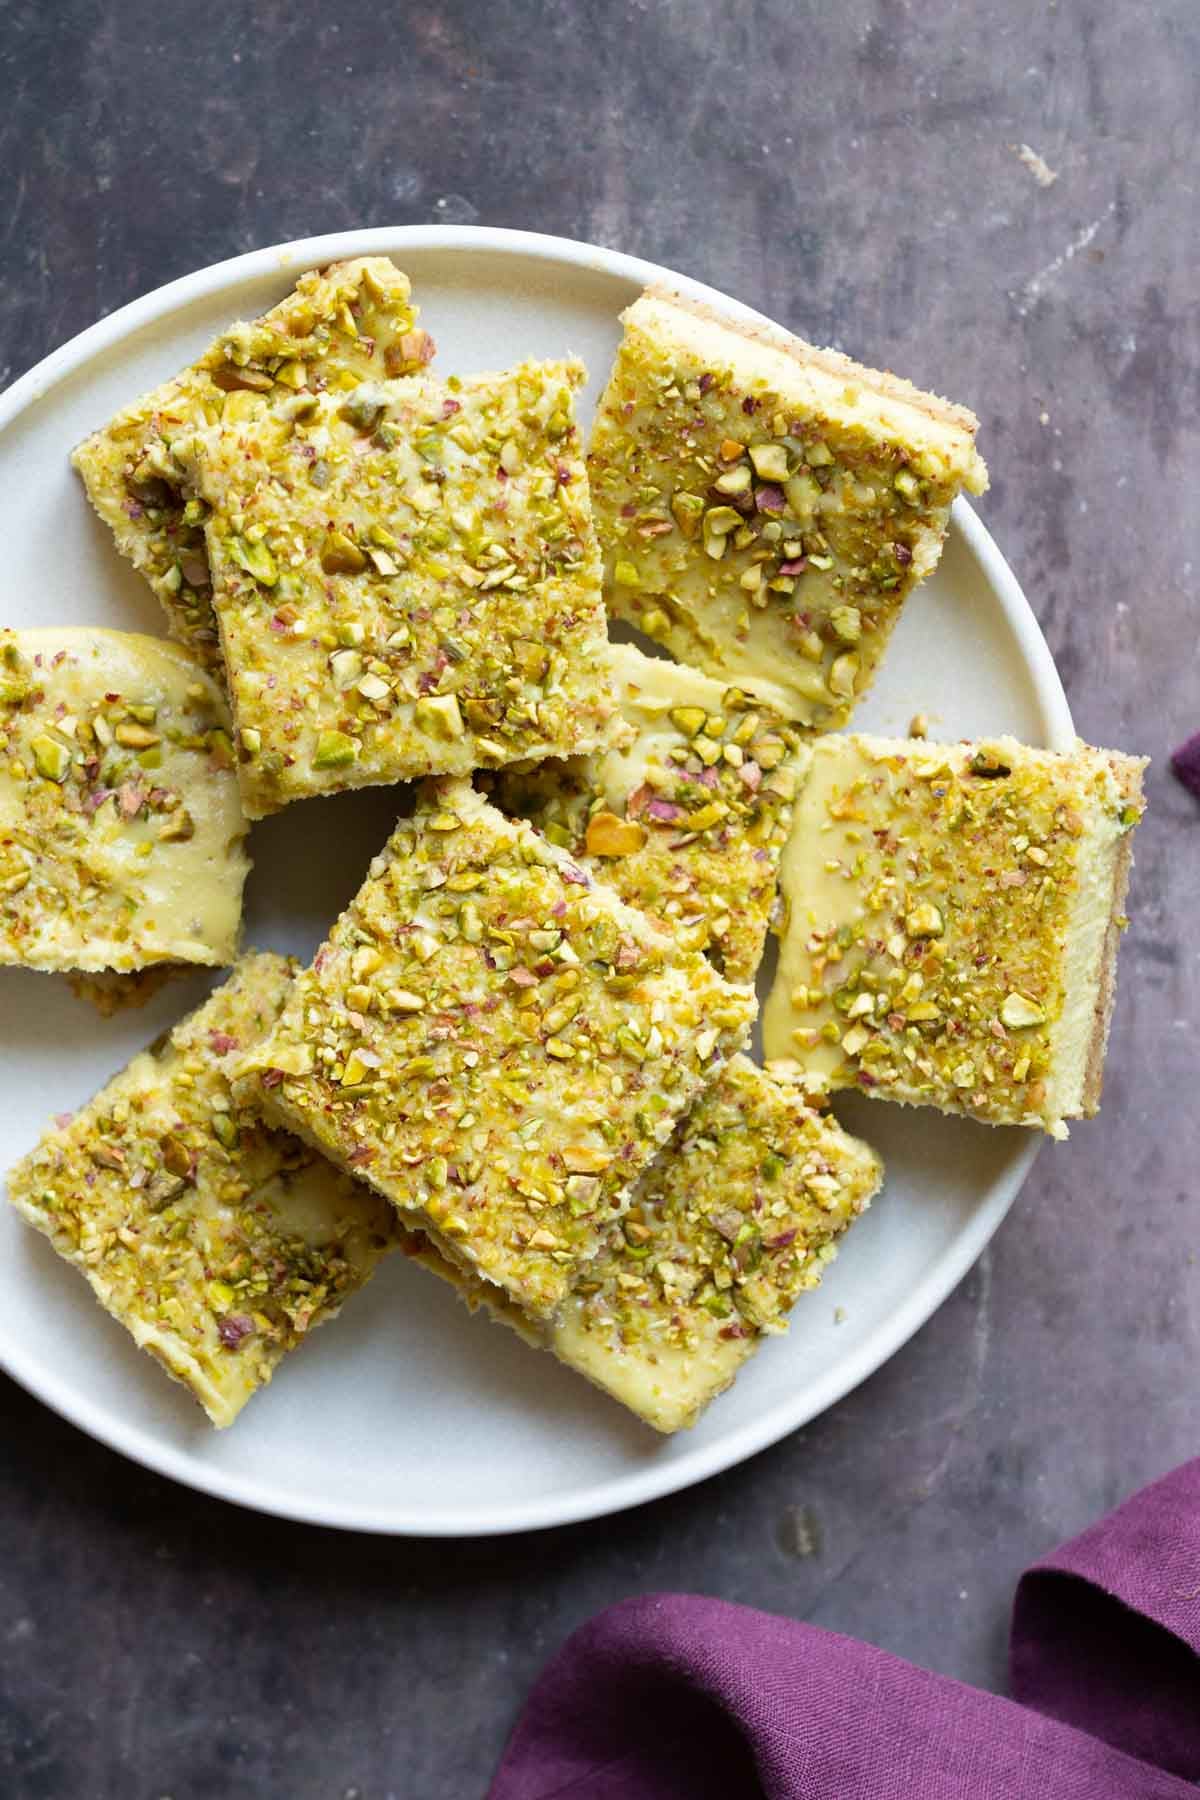
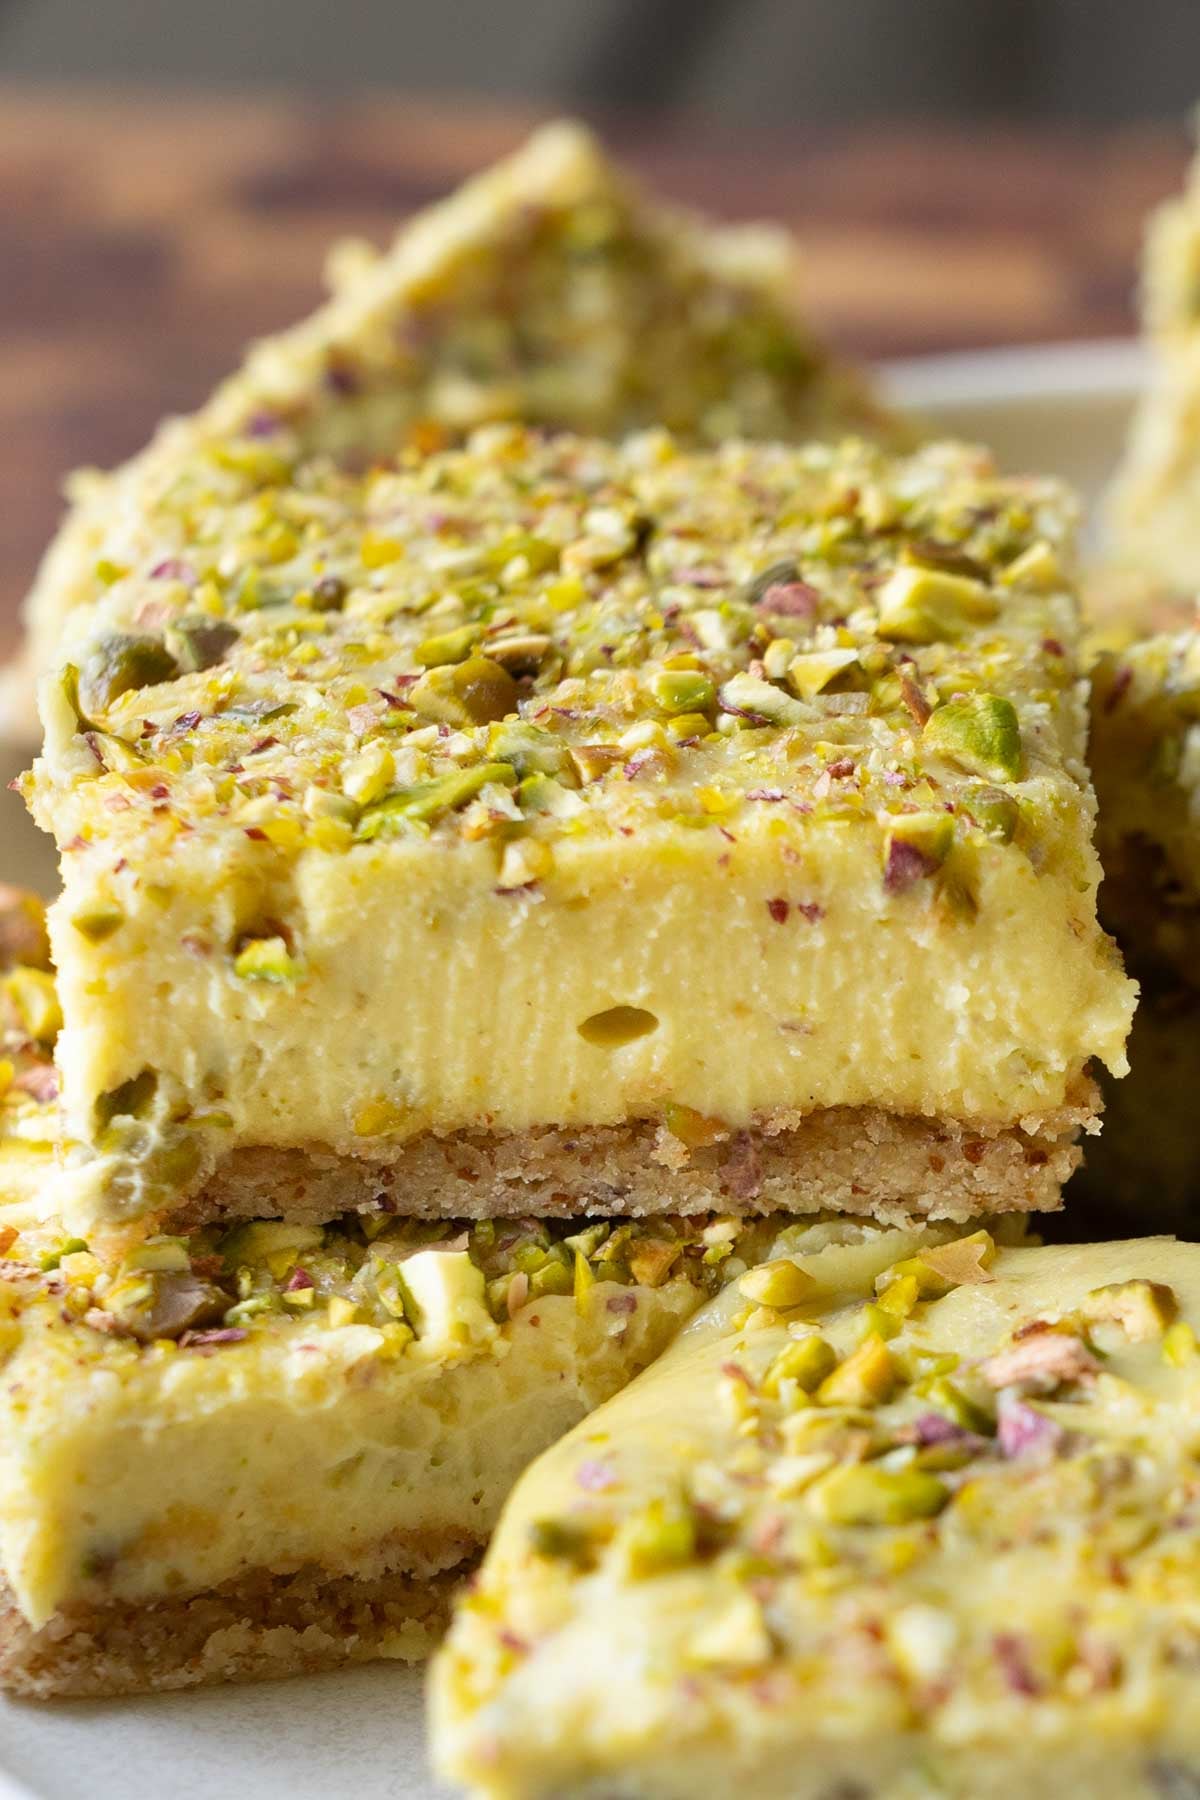
Luscious saffron, cardamom & pistachio cream layered over an almond crust! These gluten-free Kesar Pista bars secretly pack 7g protein. Perfect for Diwali or any other holiday meal! (soy-free, dairy-free, vegan)
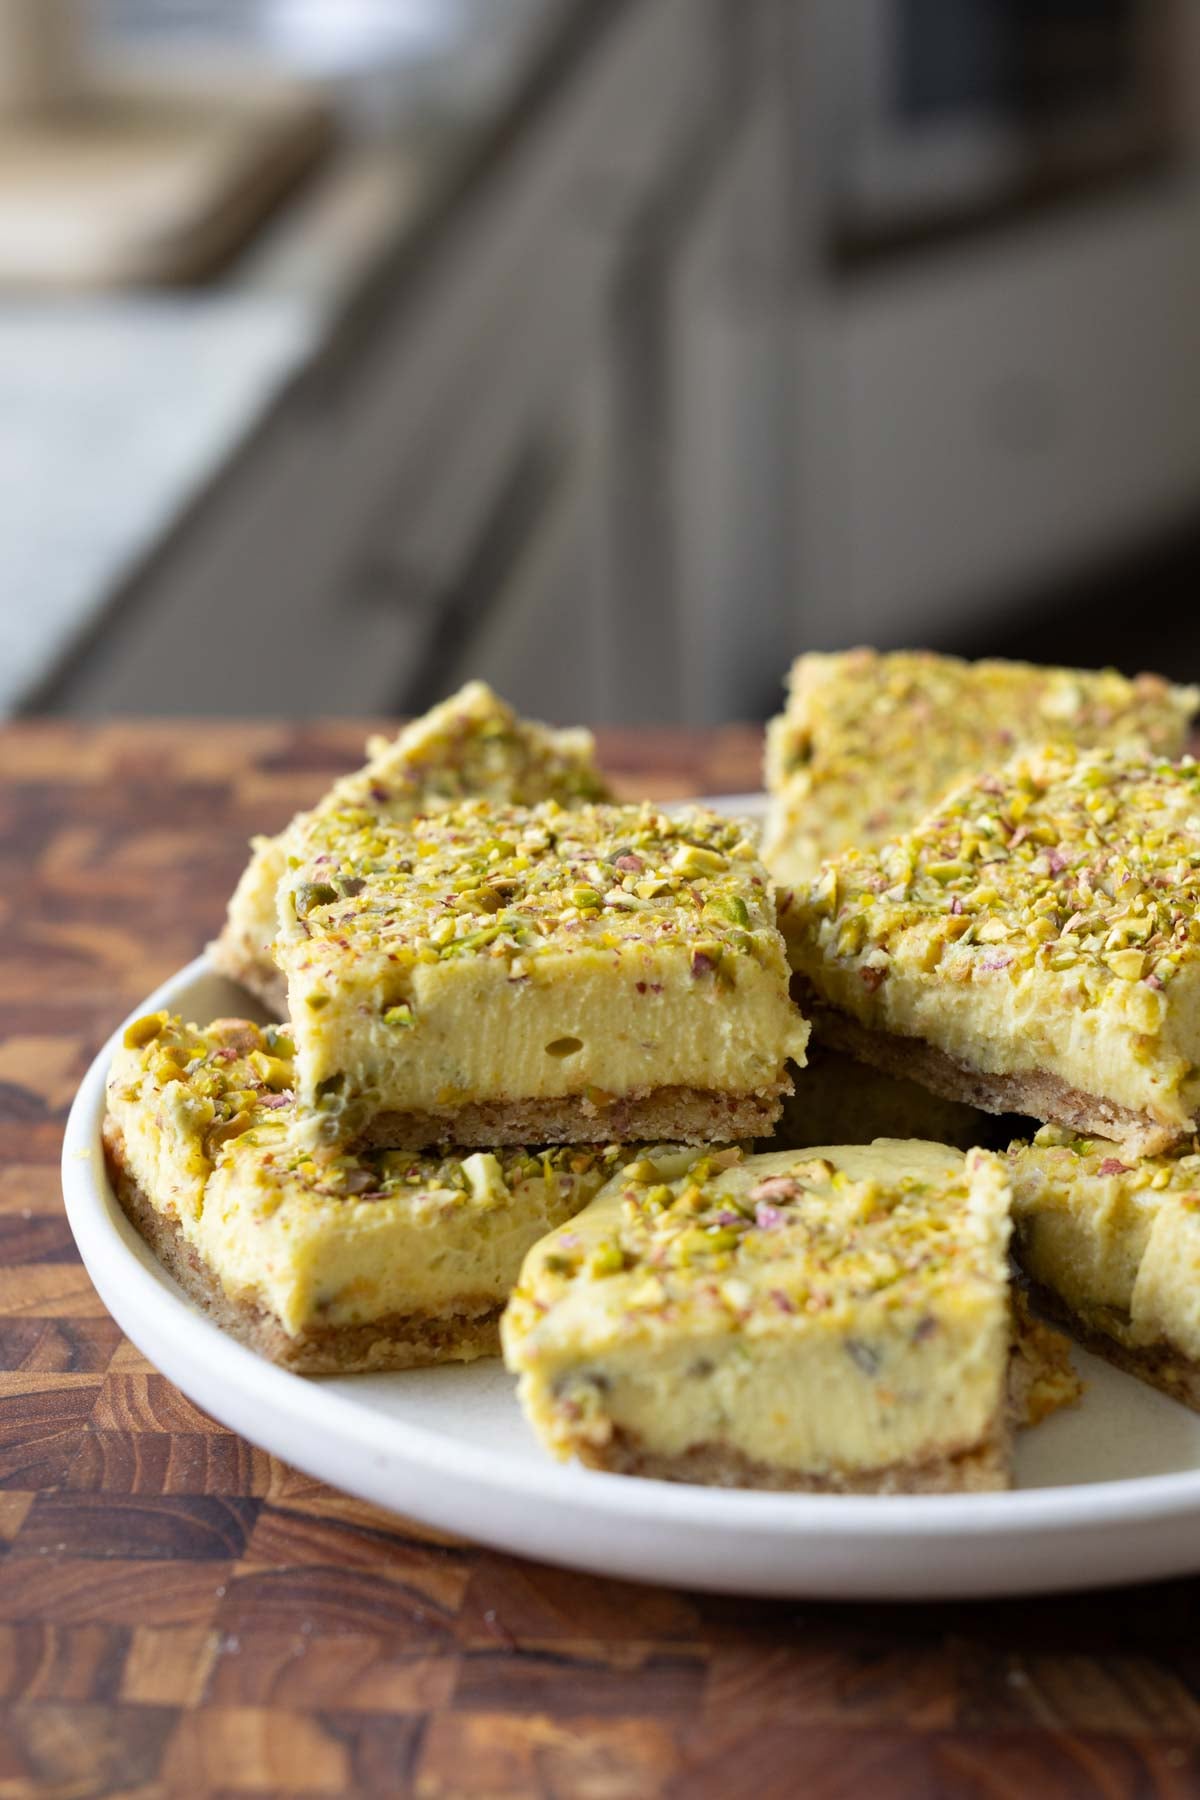
Kesar means saffron, and pista means pistachio. These saffron pistachio bars are just so delicious. I just wasn’t ready for how decadent and luxurious they were going to turn out! They’re kind of like creamy lemon bars, but with nutty pistachio and floral saffron flavors in them.
The saffron-pistachio combination is very popular in Indian desserts and also desserts from many other cuisines. These two flavors just work so amazingly well together, especially raw, fresh pistachios and floral saffron.
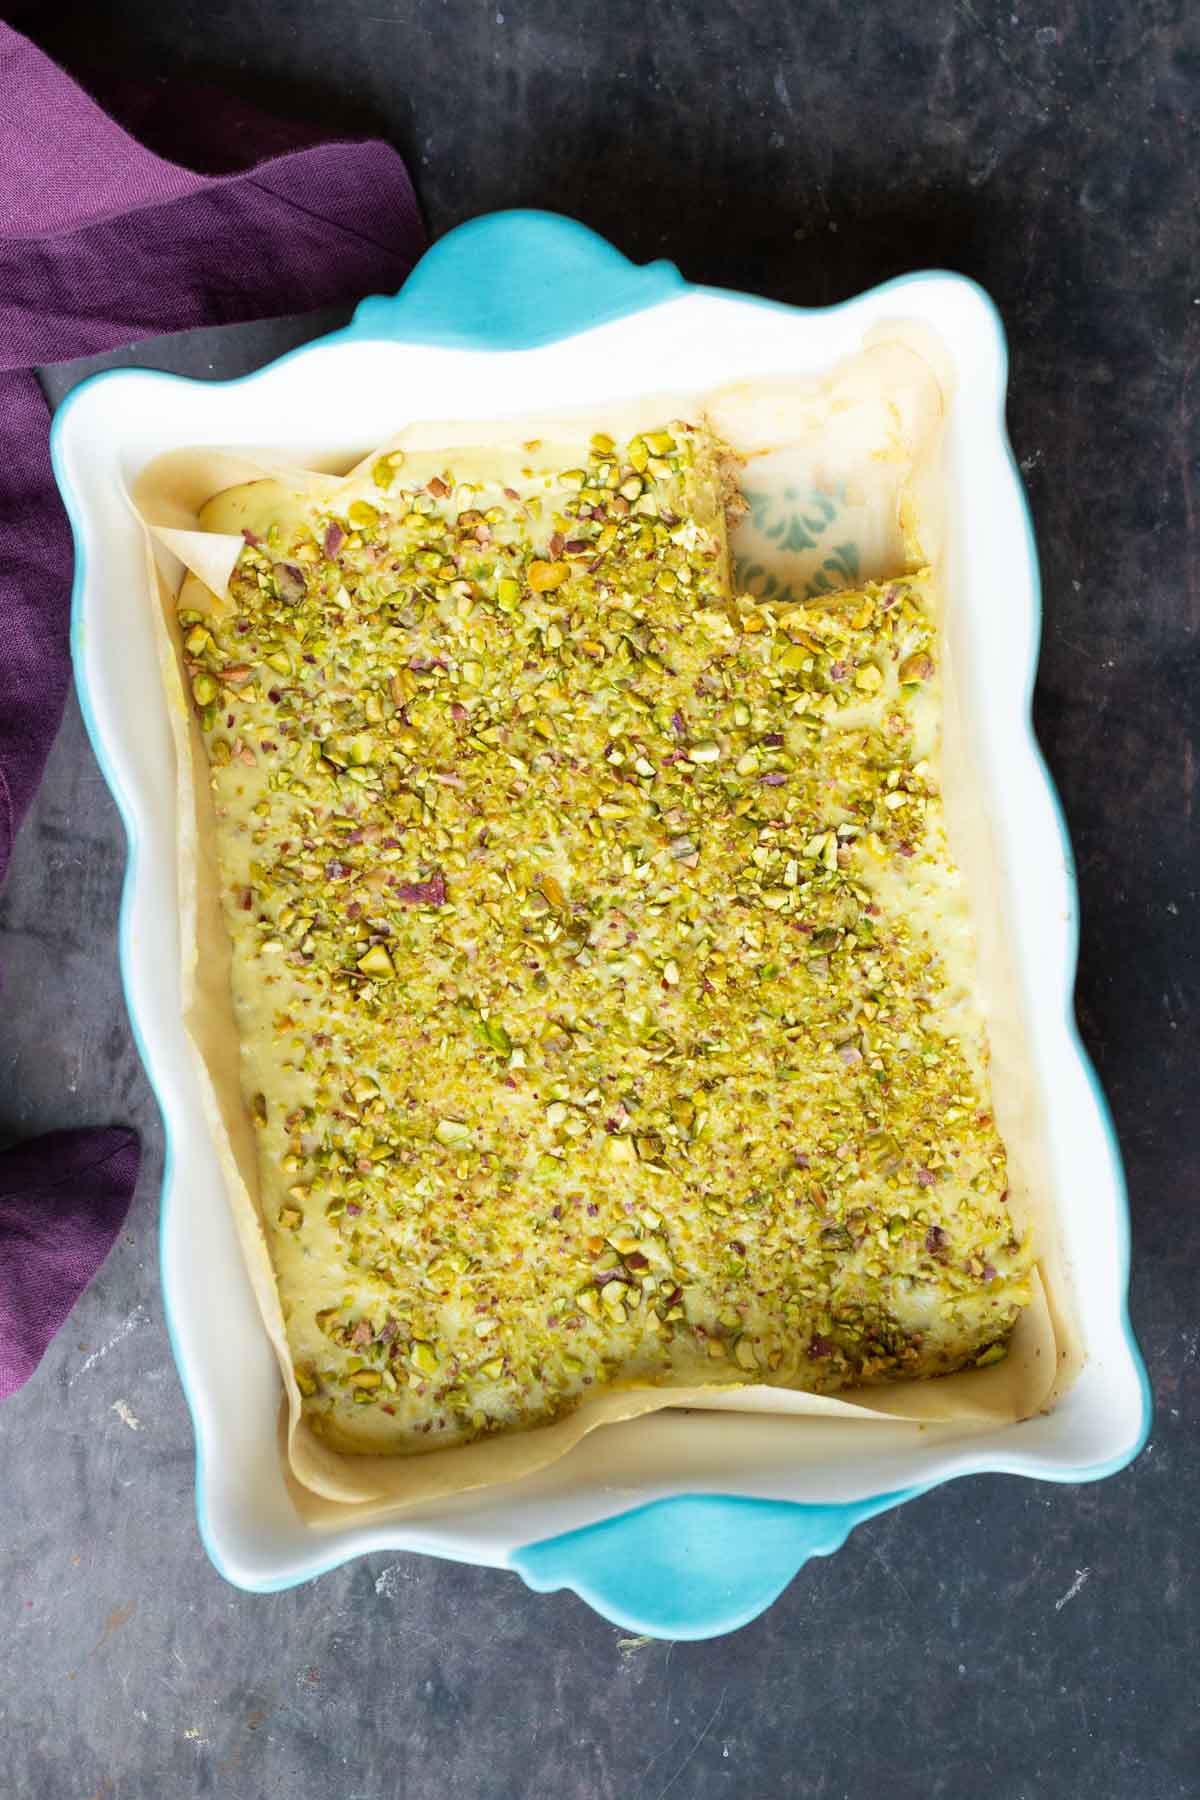
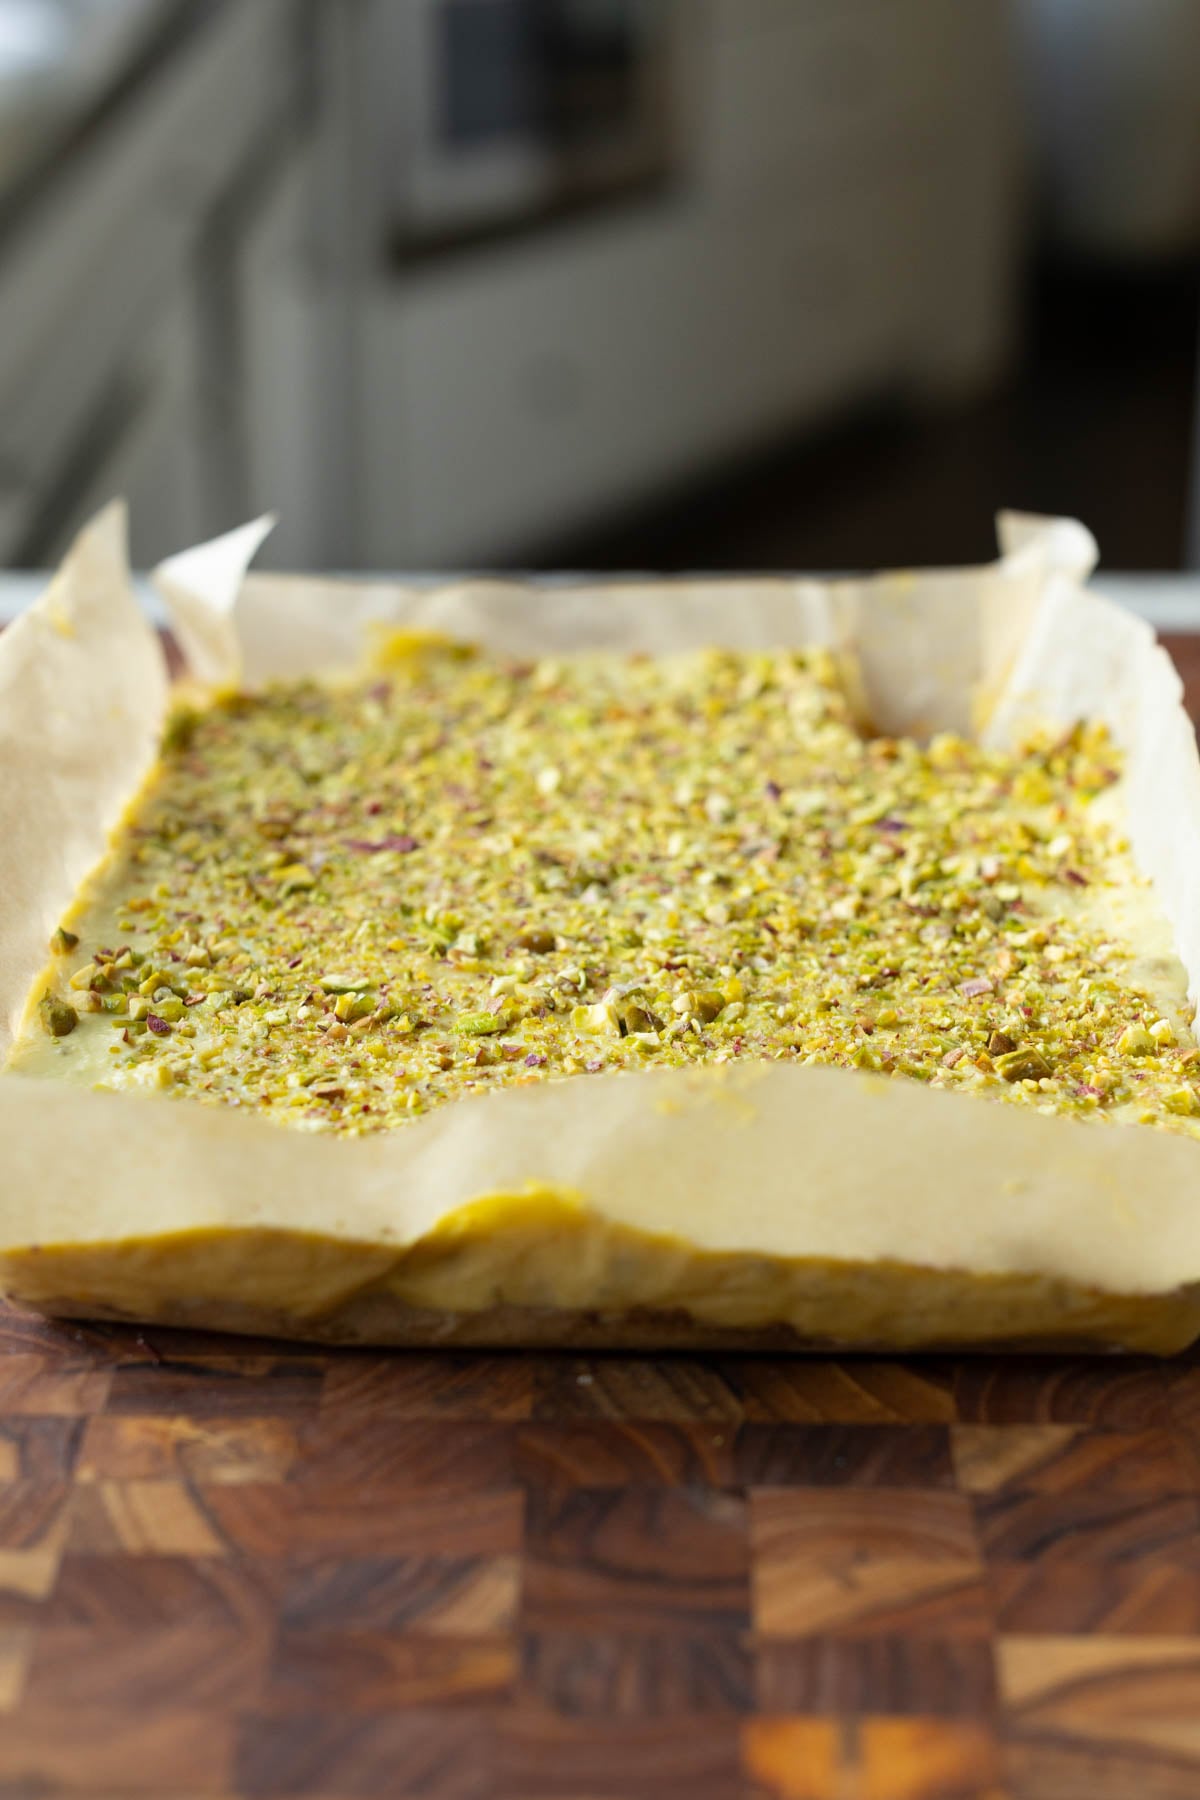
I’m using that today to make a fusion Indian dessert based on kesar burfi, kesar pista ladoo, or pedas, but I made them into these bars. We make this almond flour crust with some cardamom and then make the cream topping with cashews, coconut milk, saffron, and a little pistachio, and then top it with generous amounts of chopped pistachio. It all sets up and it becomes just amazing!
If you don’t have saffron, you can skip that flavor, and add extra cardamom, add a pinch of turmeric for color, and an extra splash of vanilla. That flavor profile pairs really well with the pistachios, as well.
Why You’ll Love Kesar Pista Bars
rich, creamy, decadent bars with nutty pistachios and floral saffron and cardamom flavors
quick almond flour crust
easy to make with simple ingredients
naturally gluten-free and soy-free with almond-free option
Kaju apple also known as kaju katli apple is a cute little dessert which is a twist to the traditional kaju katli. This sweet is made with cashews and sugar, then shaped into little apples to make them look pretty. These kaju apples are easy to make at home with just a few ingredients, specially...
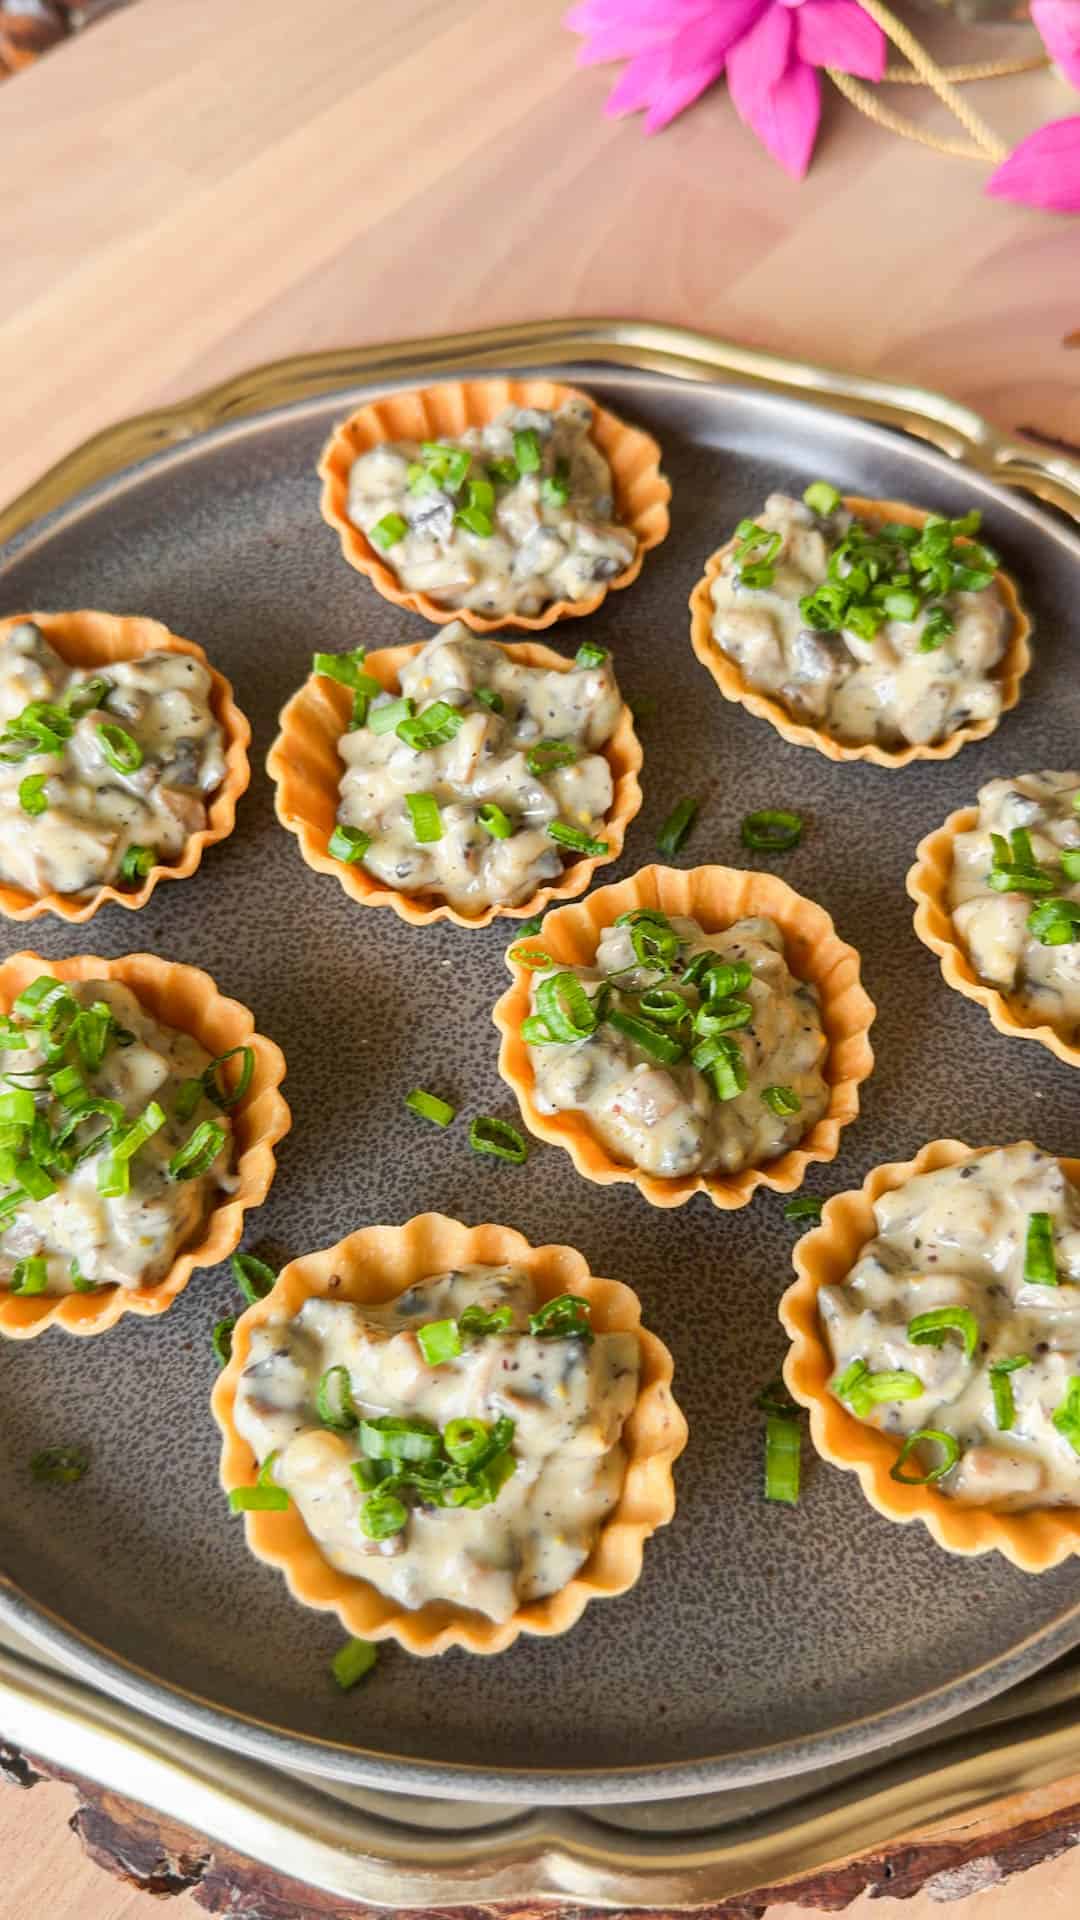
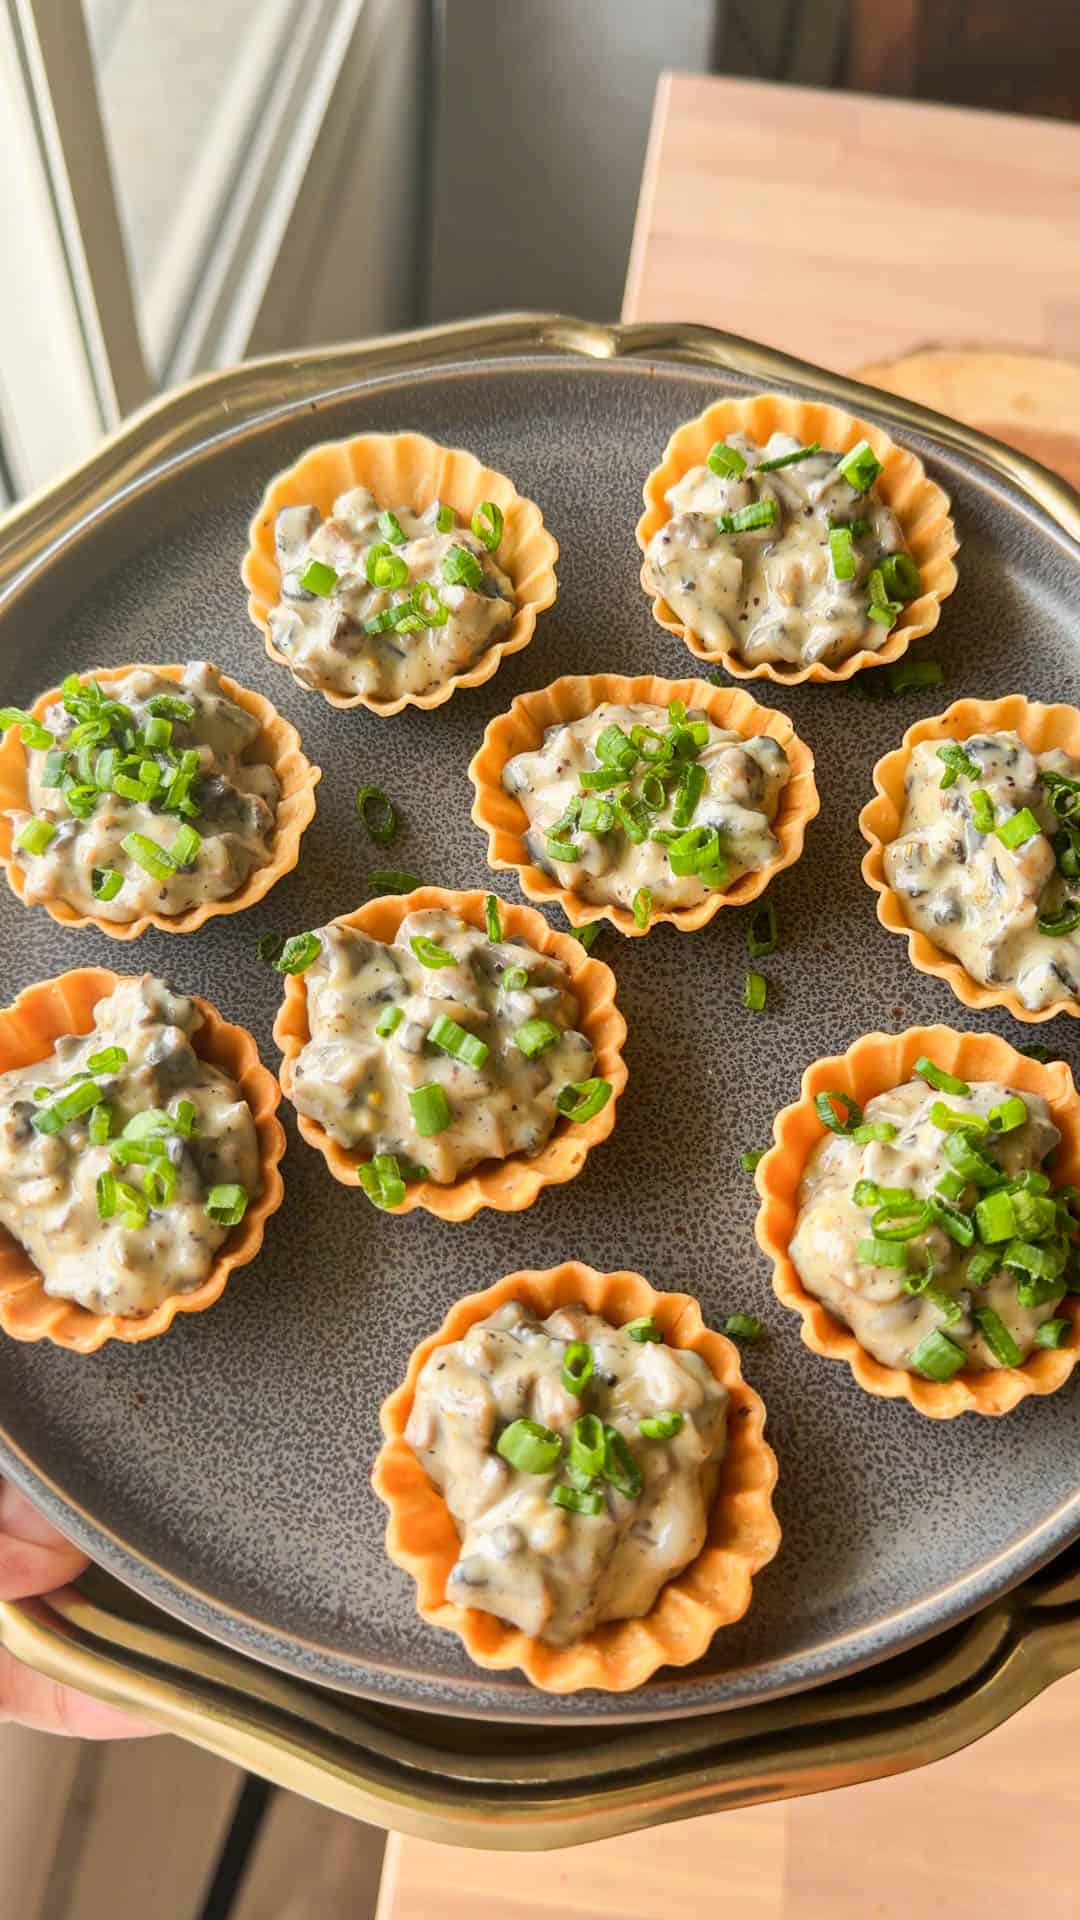
These mini mushroom tarts need to be on your menu when you’re hosting a party and want something that looks fancy but won’t stress you out. This recipe uses readymade shells and a quick homemade creamy filling to have the dish ready in only 30 mins!
I recently made these mini mushroom tarts for a friend’s baby shower and they were such a hit that I am now going to make them for every party I host this festive season! 😛 The filling is creamy, garlicky, and cheesy, and it tastes so good with that crunchy tart shell. The contrast between the warm mushroom filling and the crispy shell is what makes every bite so good, and they look delectable on every table.
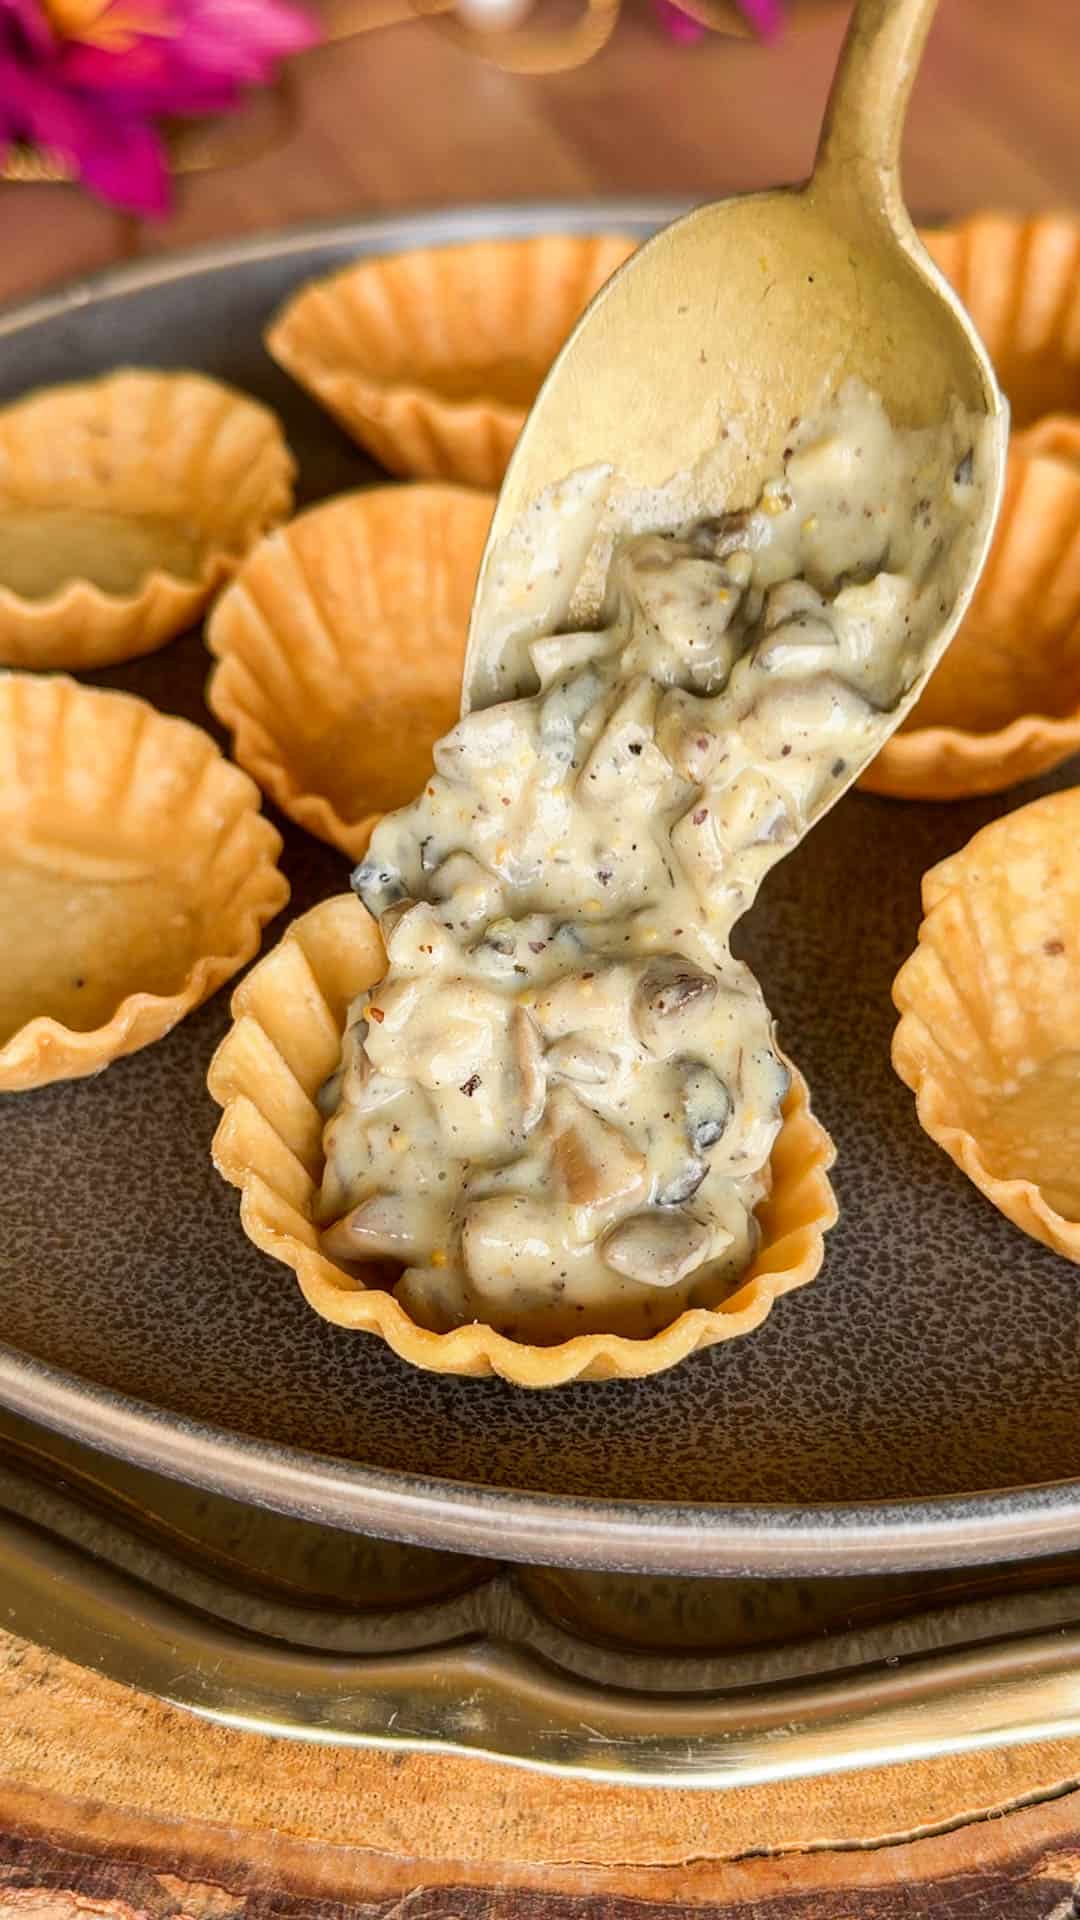
The filling takes about 20 minutes on the stove, and from there you just spoon it into the shells and serve. If you’ve been making our Dominos style garlic breadsticks or chilli cheese garlic bread for parties, these tarts will be the perfect add on to the spread. They’re great as a pass-around appetiser or set out on a platter for people to help themselves.
Mushrooms: Chopped into very small cubes so they cook evenly and fit neatly into the tart shells.
Butter: For sautéing. It adds a richness that oil doesn’t have in a cream-based filling.
Aromatics: Finely chopped garlic and celery.
All Purpose Flour (Maida): This thickens the filling and gives it that creamy, scoopable consistency that holds together inside the shell.
Milk & Cream Cheese: The milk loosens the filling and the cream cheese makes it rich and slightly tangy.
Seasoning: Italian seasoning, salt, and crushed pepper.
Readymade Mini Tart Shells: These save a lot of time and work just as well as homemade.
Spring Onion Greens: For garnish.
Frequently Asked Questions
What is a mushroom tart?
A mushroom tart is a savoury pastry shell filled with a cooked mushroom mixture. In this recipe, the filling is a creamy, cheesy blend of mushrooms, garlic, celery, cream cheese, and Italian seasoning, spooned into small readymade tart shells. They’re typically served as a starter or party snack.
What is the difference between a tart and a pastry?
A pastry is a broad term for any baked item made from dough, like croissants, puff pastry, or pie crust. A tart is a specific type of pastry with a firm, usually crumbly shell and an open top with no lid. Unlike a pie, which has deeper sides and often a top crust, a tart is shallow with straight edges and the filling is always visible.
Can I use homemade tart shells instead of readymade?
Absolutely. If you have a favourite shortcrust pastry recipe, blind bake the shells first and then fill them with the mushroom mixture. Readymade shells are recommended purely for convenience, but homemade will taste even better.
Can I make mushroom tart puff pastry instead?
You can cut puff pastry into small circles, bake them in a muffin tray until golden, press down the centres to create a well, and fill with the mushroom mixture. The texture will be flakier and lighter than a tart shell but equally delicious.
Richa’s Top Tips
Don’t brown the garlic. Sauté it on low heat just until fragrant. Browned garlic turns bitter and that bitterness carries through the entire filling.
Stir continuously when adding the flour and milk. If you stop stirring even for a moment, the flour clumps and you’ll end up with lumps in the filling that are very hard to get rid of. Keep it moving on low heat and the mixture will turn smooth and creamy.
Chop the mushrooms very small. You’re spooning this filling into tiny tart shells, so large chunks won’t fit well and will make the tarts hard to eat in one bite. Aim for roughly ⅛ inch cubes.
If the filling thickens too much, add a splash of milk to loosen it. The flour continues to absorb the milk as the filling rests, so it can get quite thick by the time you’re ready to serve. A tablespoon or two of milk stirred in on low heat brings it back to the right consistency.
Fill the tart shells right before serving. If the filling sits inside the shells too long, the shells absorb the moisture and go soft. For the best crunchy-creamy contrast, spoon the warm filling in at the last minute.
Storage Tips
The filling: Stores well in an airtight container in the fridge for up to 2 days. Reheat on the stove with a splash of milk to loosen it up before using, as the flour absorbs the liquid as it sits.
The assembled tarts: Best eaten immediately. The shells soften quickly once filled, so always assemble right before serving.
Freezing: The filling freezes well for up to two weeks. Thaw overnight in the fridge and reheat on the stove with a little milk. The tart shells should be kept at room temperature in their original packaging and filled fresh.
Serving Ideas
These mini creamy mushroom tarts work as a party starter or as part of a bigger spread:
WithRoasted Tomato Pesto Soup: A warm bowl of soup with a couple of mushroom tarts on the side makes for a really cosy evening snack or light dinner.
WithBroccoli Soup: The creamy, cheesy filling with a warm bowl of broccoli soup is a combination that works beautifully for a light meal.
With a glass of wine: If you’re hosting a more relaxed, adult gathering, these tarts with some wine and a cheese fondue make for a really elegant evening.
Customisation Ideas
Try a spinach and cheese filling: Sauté some blanched spinach with garlic, mix with cream cheese and mozzarella, and use that as the filling instead. Works really well for a vegetarian party platter with some variety.
Add chicken: Finely shredded cooked chicken mixed into the mushroom filling makes the tarts more substantial. A really good option if you’re serving these as a main snack rather than a starter.
Swap the mushrooms: Finely chopped broccoli, corn, or bell peppers sautéed the same way work as alternative fillings if mushrooms aren’t your thing.
Make it vegan: Use olive oil instead of butter. Use any plant-based milk in place of regular milk, and skip the cream cheese. A tablespoon of cashew butter blended with a splash of water gives you a similar creaminess without any dairy.
With the festive season in full swing, you should have this mushroom tart recipe you in your back pocket. They’re quick, reliable, and always a hit. Share your tarts with me on Instagram @my_foodstory when you make them.
Heat butter in a pan, add garlic, celery and saute on low for a minute till they turn fragrant. Take care not to brown the garlic.
Add mushrooms, saute for 3-4 minutes till the mushrooms are cooked well.
Add flour & stir continuously on low for 1-2 minutes till they get mildly roasted.
Add milk, while stirring continuously and cook on low for 1-2 minutes till the milk mixes well with the flour, cooks well and turns creamy. Refer note 1
Add cream cheese, salt, pepper, italian seasoning, mix well and cook for 1-2 minutes till the mushrooms absorb the seasoning. At this stage, if the mixture gets too dry you may add 1 ½ – 2 tablespoons of milk to adjust the consistency to be creamy.
Add 1 ½ tablespoons of the creamy mushroom mix to each of the tart shells, garnish with spring onion greens and serve immediately.
Video
Notes
Stir continuously while adding milk to avoid getting lumps in the mixture.
The flour in mushroom mixture tends to absorb the milk as it rests. So just before serving, heat the mixture, add 1 to 1 ½ tablespoons of milk to adjust the consistency, add in the tart shells and serve.
This has to be served immediately as the tart shells turn soggy.
October is National Apple Month—not to mention, prime picking and eating time for some of America’s best apples. What better occasion to celebrate the contributions this storied fruit has made to American barbecue?
Apples possess a natural affinity for pork, which probably gained the fruit admission to the barbecue world in the first place. But don’t stop there. Apple juice, apple sauce, and cider vinegar are essential ingredients in regional American barbecue sauce. Apple wood is the fuel some of the most decorated competition pitmasters swear by. Then there are grilled apples, smoked apples, and “baked” apples hot from the smoker.
Given the apple’s deep roots in American food culture, you may be surprised to learn that the fruit originated in Central Asia. The early colonists brought the apple to the New World along with the honeybees needed to pollinate the trees. Thousands of apple varieties have been grown in the U.S., though only a fraction are grown commercially.
So how else should you use apples and apple-based products to take your barbecue to the next level?
Apple Brines and Marinades
Make an apple brine: Replace a portion of the water in a standard brine recipe with apple cider or apple juice for pork, turkey, and game birds.
Make a simple apple marinade or injector sauce: Combine 2 cups of apple cider with 1/4 cup each apple cider vinegar, soy sauce, maple syrup, and vegetable oil. Add 2 tablespoons Worcestershire sauce.
Don’t forget hard cider, made by fermenting apple cider like beer. A dry hard cider is less sweet than apple cider, which makes it ideal for basting or as a base for marinade.
Apple Sprays, Basting Mixtures, and Mop Sauces
Place apple cider in a spray bottle and spray it on ribs or pork shoulder as they smoke to add another layer of flavor.
Combine apple cider, cider vinegar, bourbon, Worcestershire sauce, lemon juice, and a little water to make a “Cider Squirt” for basting pork and poultry. Squirt it from a spray bottle or brush it on with a basting brush.
Make a hog slather by combining mustard, apple cider, Worcestershire sauce, and melted butter in roughly equal proportions. Brush on the meat with a basting brush.
For a simple mop sauce for beef brisket, combine one bottle of beer with 1/2 cup apple cider vinegar, 1/2 cup cold-brewed coffee, and 2 tablespoons Worcestershire sauce. Swab it on with a barbecue mop at the 1-hour mark, and every hour after that.
Apple Cider or Apple Juice?
So what’s the difference between apple cider and apple juice? In the U.S., sweet cider is generally unfiltered, while apple juice is filtered for clarity. Either may be pasteurized. I prefer cider—especially freshly pressed at a farm stand. The aroma and flavor will vary depending on the season and which apples are used.
Three Apple Recipes for the Grill
Put the fruit itself on the menu with these recipes for a grilled side dish, savory stuffed apples, and a skillet dessert.
Apple “Steaks”
Thick slices of Granny Smith apples get a glaze of cider, honey, lemon juice, and butter before and during grilling. Direct high heat browns the slices while leaving them firm enough to hold their shape. Serve them alongside grilled pork chops.
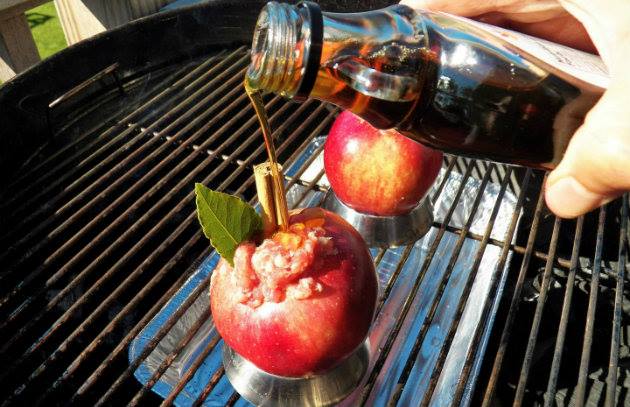
Pork sausage, onion, celery, and sage fill these apples, with a little maple syrup spooned over the stuffing. Smoke-roast them over indirect heat until the apples soften. They’re a savory side dish you can assemble several hours ahead and refrigerate until grilling time.
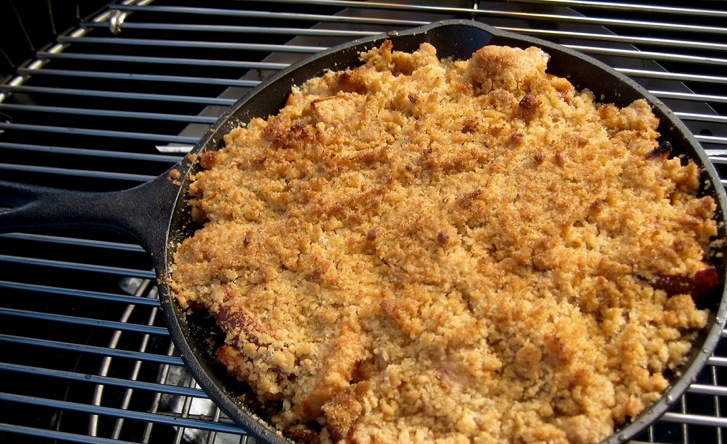
Apples, lemon, and cinnamon go into a cast-iron skillet beneath a topping of butter, granola, flour, and brown sugar. Smoke-roast over indirect heat until the filling bubbles and the topping browns. Let it cool for a few minutes before serving—with ice cream, if you like.
Next time you’re picking up apples, grab a few extra for the grill. Serve them alongside pork, stuff them with sausage, or save them for dessert. And if there’s cider in the fridge, you’ve got the start of a baste for whatever’s smoking.
Plan your next cook with our full recipe collection—weeknight grills, weekend projects, and special-occasion feasts.
Get Steven’s weekly grilling tips, seasonal recipes, and live-fire ideas in your inbox. Join our Up in Smoke newsletter. Sign up and get a FREE PDF of Steven Raichlen's Best Ribs Recipes Ebook.
Preorder Man On Fire — A Steven Raichlen Memoir. And get some really cool rewards!
Sesame chikki, also known as Ellu mittai or Til chikki, is a traditional Indian sweet made with sesame seeds and jaggery. It is a crunchy sweet to try during festivals like Diwali, Makar Sankranti and Lohri. Learn how to make this chikki at home with step-by-step pictures. Sesame Chikki Recipe I have been waiting to...
This Southern skillet cornbread comes out of the oven with crisp, golden edges and a soft, moist center. It’s mostly savory with just a hint of sweetness, and the buttermilk keeps every bite tender. It’s the cornbread I make most often at our place, usually while something is resting on the smoker. The secret is […]
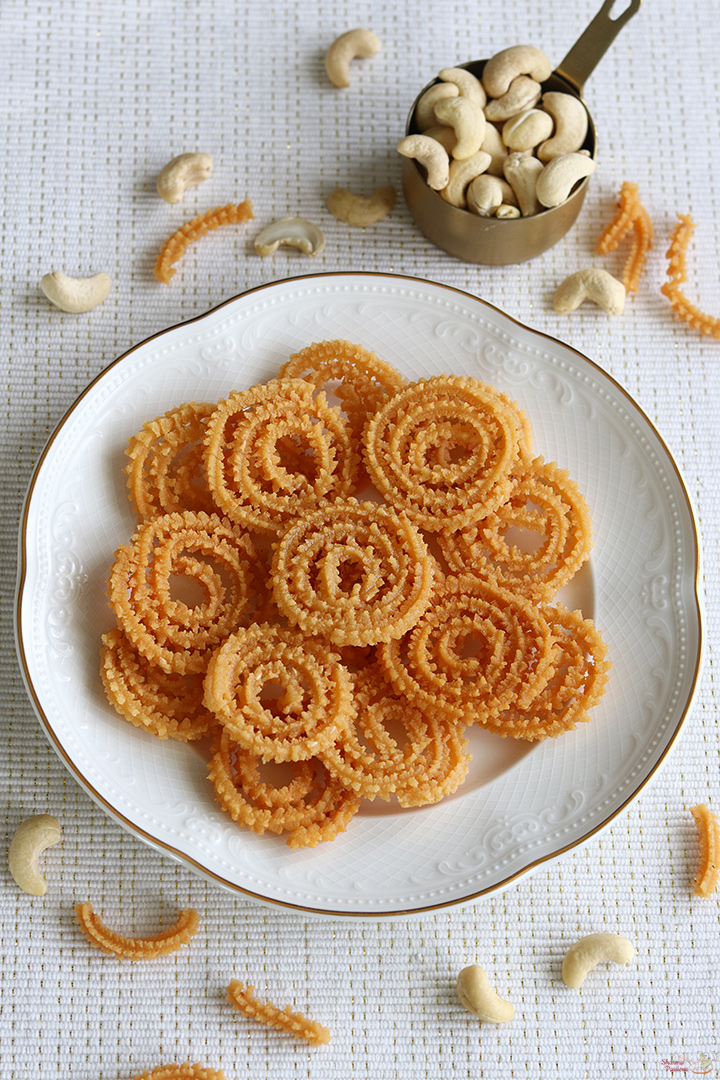
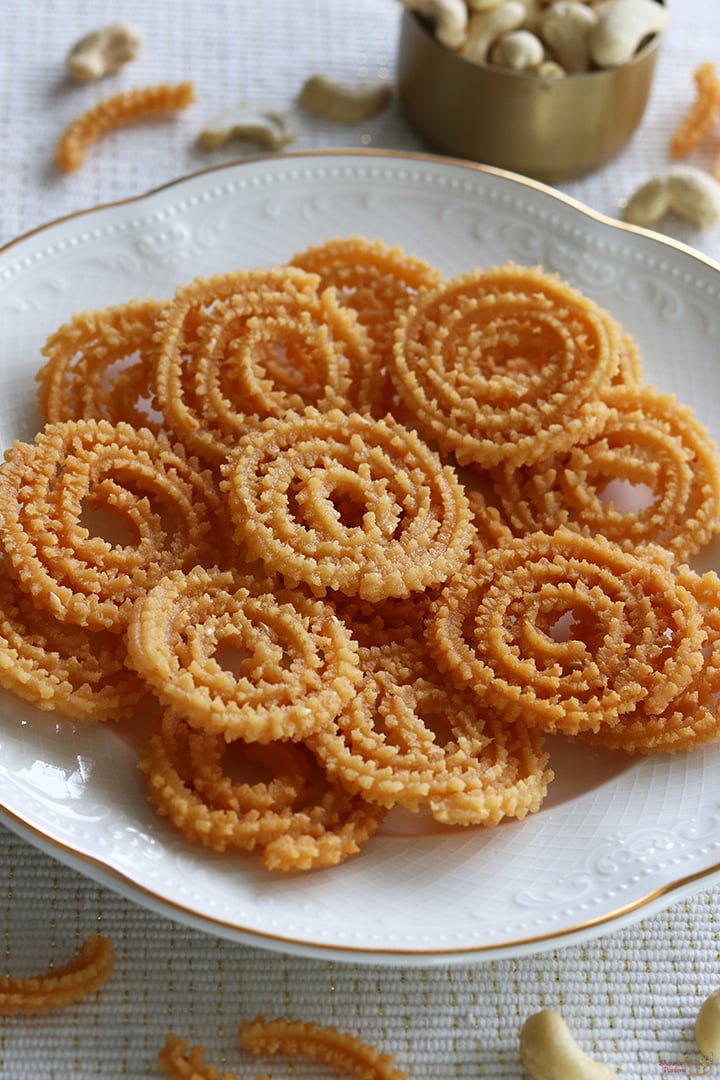
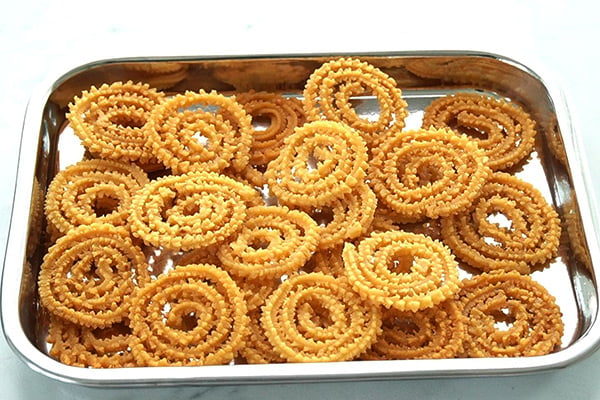
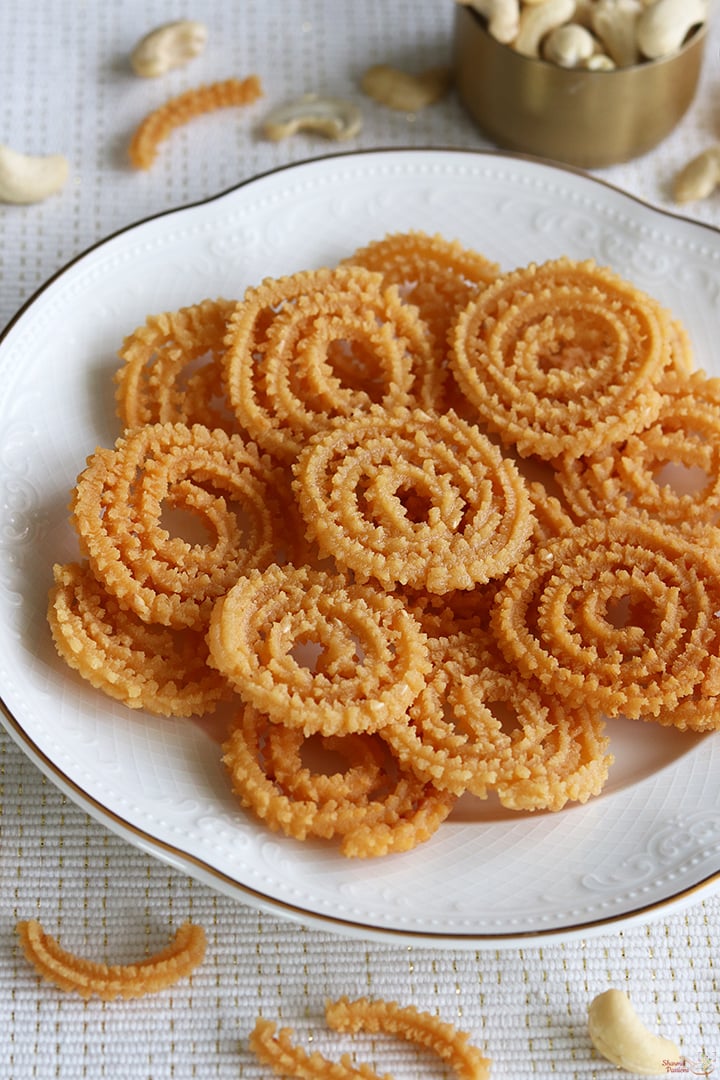
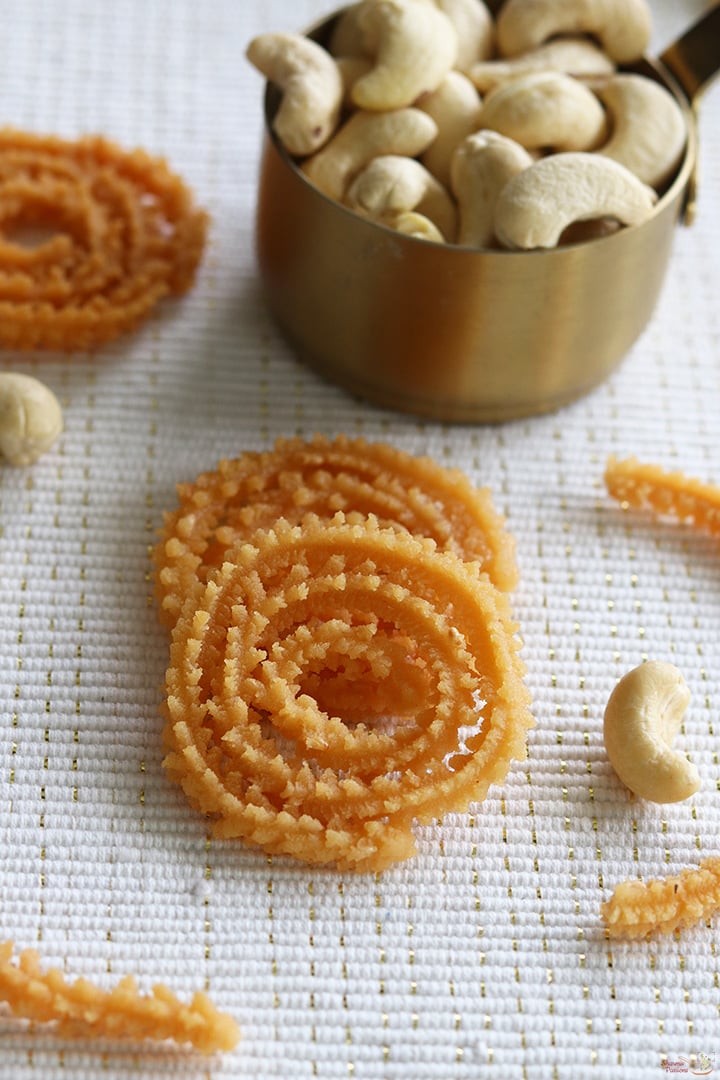
Cashew Murukku is a rich and tasty snack made by adding cashew paste into the normal murukku dough. It comes out crisp and crunchy with nutty flavour from cashews. The taste is little different from regular murukku because of the mild sweetness and special flavour that cashew gives.
This murukku is a good choice to make for festival times or even just for evening snack time. It does not take too much time and comes out tasty and flavourful. The cashew in the dough gives a richer taste and makes it stand out from other usual snacks we make at home.
[feast_advanced_jump_to]
About Cashew Murukku
Cashew Murukku is a South Indian deep-fried snack with little twist from the normal version. 'Munthiri' in tamil means cashews so it is called munthiri murukku. Usually murukku is made with rice flour and simple spices, but here soaked cashews are grind to a paste and mixed with the flour.
It gives a nice buttery and nutty flavour which makes the murukku tastes rich. The cashew flavour always makes it feel rich and special. The cashew paste blends with rice flour very well and adds a natural sweetness. This makes it suitable for kids also as it is not very spicy.
You can try small variations like adding cumin seeds or even a pinch of chilli powder if you prefer spicier version. The shape can be made using thenkuzhal press or even star or flower press depending what you like. You can also make uthiri murukku (broken style) or swirled whole murukku. Both ways it tastes nice.
I usually make this murukku in small batch during weekends. Sometimes I pair it with tea in evening, and it always feels like a treat. It is also nice to prepare during festivals like Diwali to share with family and friends.
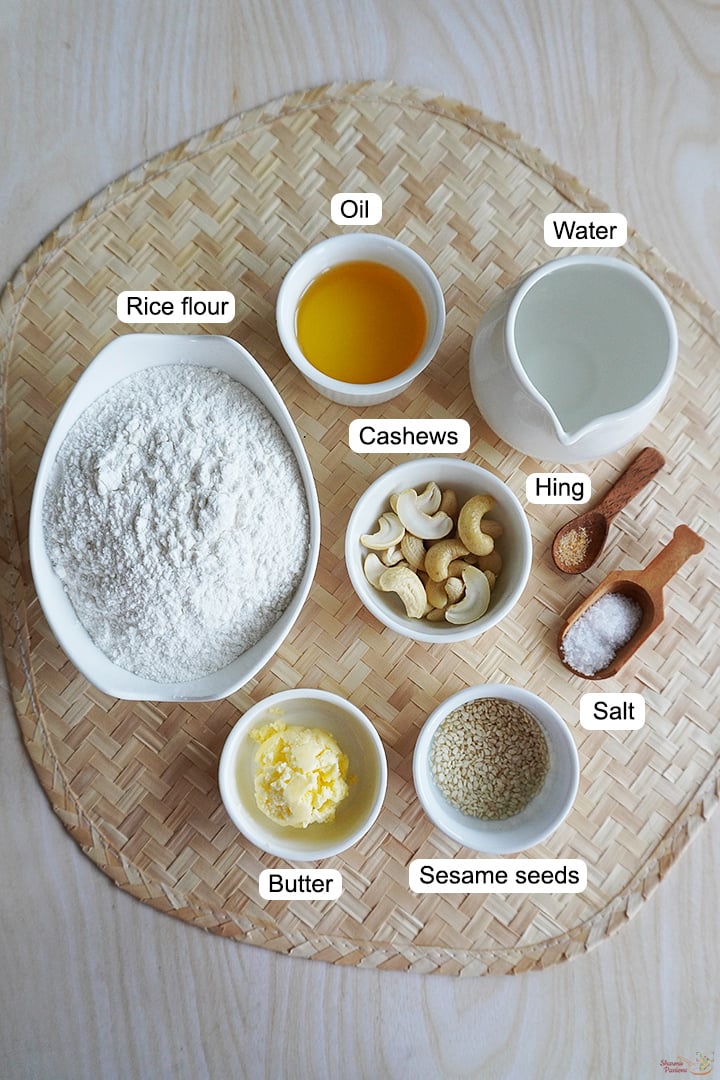
Rice flour - I have used store bought idiyappam flour, it gives crisp texture to murukku. You can also use homemade rice flour if you have, both works well.
Cashews - I soaked cashews in hot water for 30 minutes so that it grinds easily to a smooth paste.
Butter - I added butter at room temperature while mixing flour, it gives nice aroma and makes murukku taste good.
Sesame seeds - Sesame seeds adds a nice crunch.
Hing - Hing adds flavour adn aids in digestion.
Oil - I used oil for deep frying, it should be hot enough so murukku cooks even, but not too smoking hot.
Water - Water is used to make the dough.
How to make Cashew Murukku Recipe Step by Step
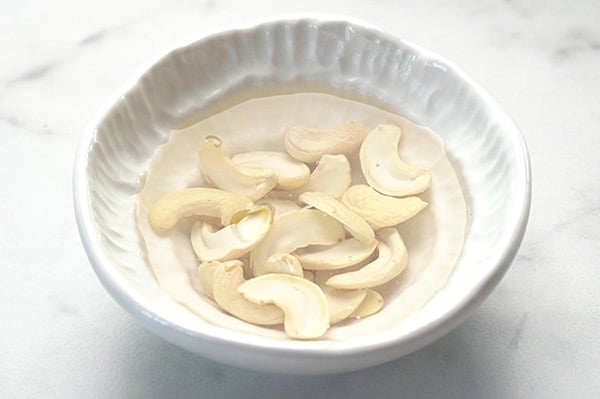
1.To a bowl add 20 cashews, add ¼ cup hot water to it. Soak for 30 minutes.
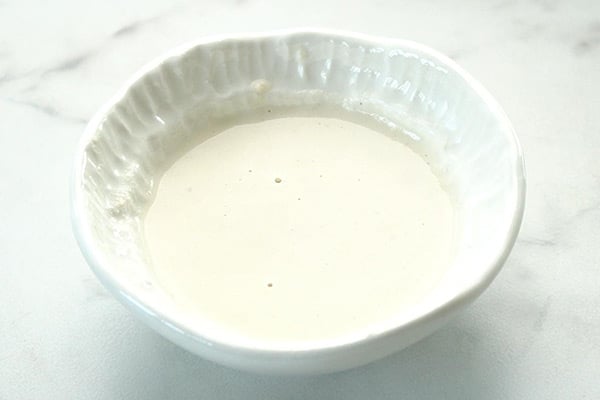
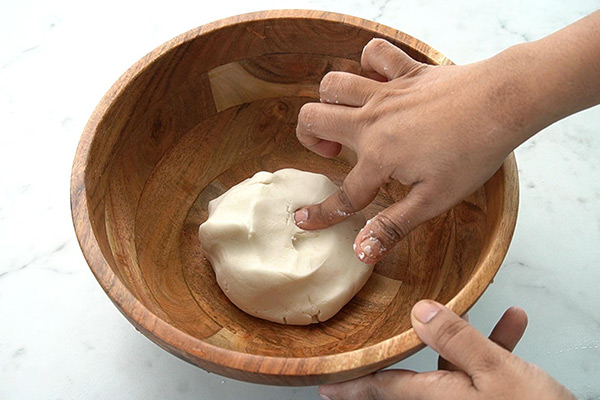
2.After 30 minutes grind it to a fine paste and set aside.
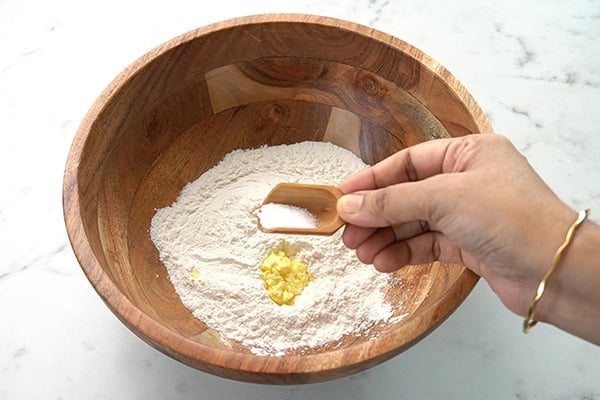
3.To a mixing bowl add 1 cup rice flour, salt to taste and 1 tablespoon butter.
4.Mix this well first for butter to be evenly distributed.
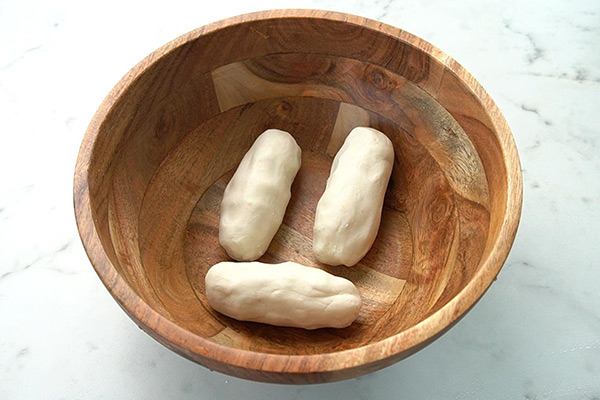
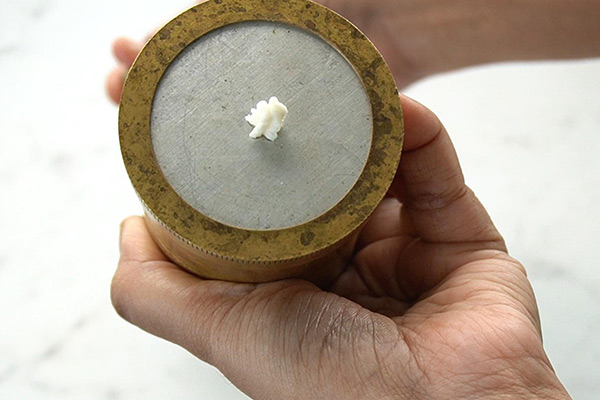
9.Form cylinders like this so that fitting into murukku press will be easy.
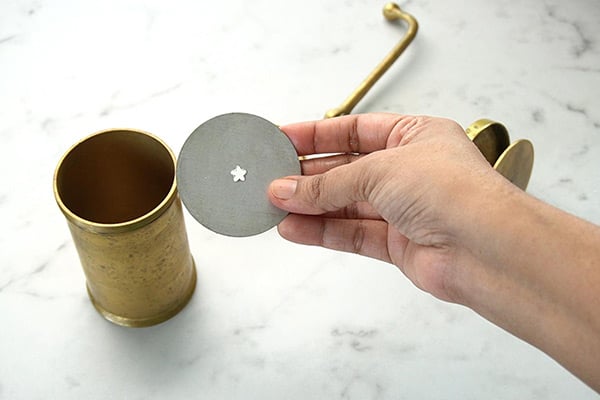
10.Fit the mould into the murukku press, I used star shape. Grease murukku press with oil.
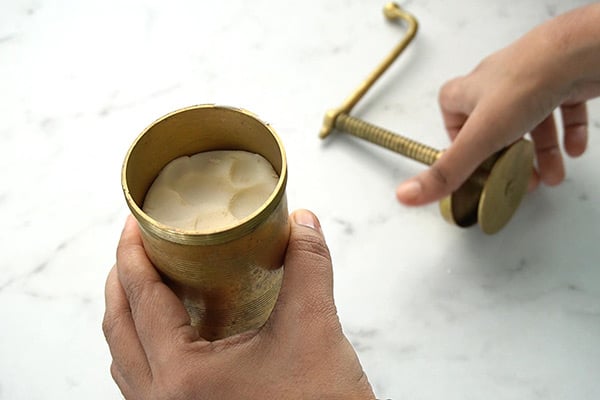
11.Fill in with dough.
12.Press to check.
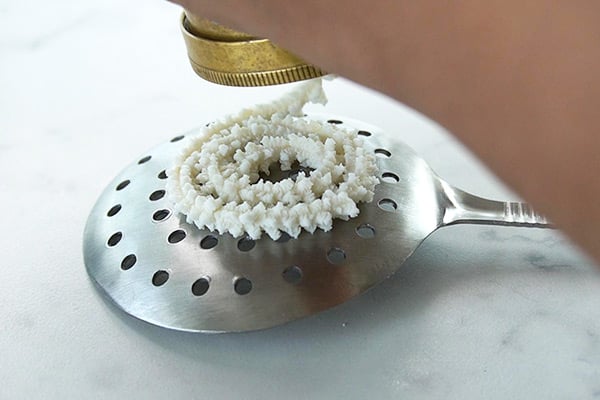
10.Grease 2-3 ladles and keep it ready. Press on it in concentric circles. Tuck in loose ends so that it doesn't open while frying. I made small murukkus. Pressing in ladles helps to flip in hot oil easily.
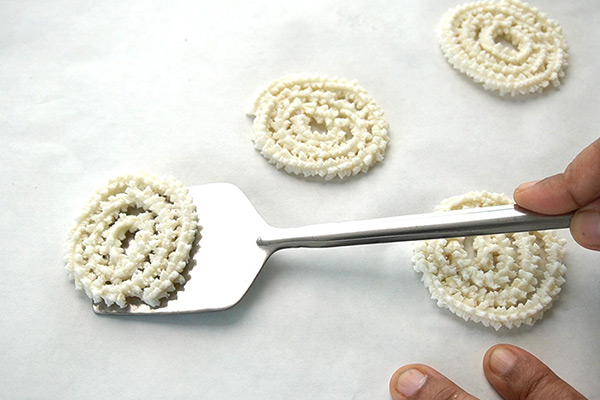
11.You can press in butter paper or cloth too. Just slide in using a ladle to remove.
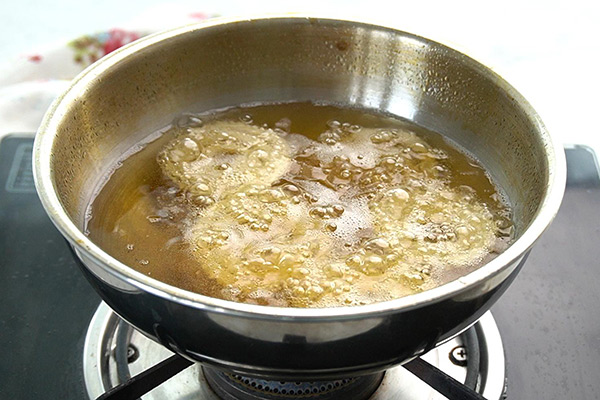
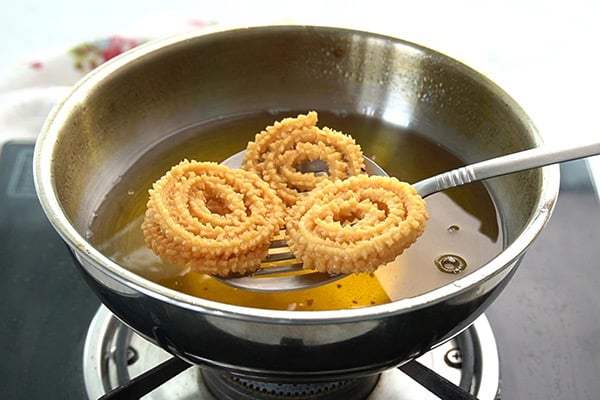
12.Heat oil. Pinch a tiny pinch of dough and add it. If it rises immediately then oil is heated well. Now add 4-5 murukkus at a time.
13.When bubbles and 'shh' sound stops and murukku turns golden drain and remove.
14.Repeat to finish.
Cashew murukku is ready!
Expert Tips
Soak cashews well - I always soak cashews in hot water for at least 30 minutes. This makes it easy to grind smooth, otherwise the dough may get chunks.
Make smooth dough - I add water little by little while mixing. It should be soft and non sticky. If it gets watery, sprinkle little rice flour. If it's hard, sprinkle little water.
Choosing mould - You can either choose thenkuzhal or star or flower mould which best suits this murukku.
Fry in right flame - I always keep the flame medium. If oil is too hot, murukku will turn brown fast but stay raw inside. If oil is too low, murukku will drink oil.
Cover the dough - If I make in big batch, I always keep the dough covered with cloth so it does not dry and crack while pressing.
Serving and Storage
Serve this as evening snack along with evening drink or as a side snack for lunch during festivals. It goes well as a snack just by itself also. Once it cools completely, store in clean airtight box. It stays good for about a week and remains crisp.
FAQS
1.Can I skip cashews?
Yes, you can skip but then it becomes regular murukku. Cashews give rich and nutty taste.
2.Can I add spices?
Yes, you can add some cumin seeds or ajwain to the dough for a variation.
3.Which mould works best?
I usually use star or flower mould, you can use thenkuzhal mould too.
4.Can I make the dough earlier?
Better to make fresh, but if making large batch keep dough covered to avoid drying.
5.Is this suitable for kids?
Yes, it is mild and not spicy, kids will enjoy the nutty taste.
If you have any more questions about this Cashew Murukku Recipe do mail me at sharmispassions@gmail.com. In addition, follow me on Instagram, Facebook, Pinterest ,Youtube and Twitter .
Tried this Cashew Murukku Recipe? Do let me know how you liked it. Also tag us on Instagram @sharmispassions and hash tag it on #sharmispassions.
Cashew Murukku is a rich and tasty snack made by adding cashew paste into the normal murukku dough. It comes out crisp and crunchy with nutty flavour from cashews. The taste is little different from regular murukku because of the mild sweetness and special flavour that cashew gives.
To a bowl add 20 cashews, add ¼ cup hot water to it. Soak for 30 minutes.
After 30 minutes grind it to a fine paste and set aside.
To a mixing bowl add 1 cup rice flour, salt to taste and 1 tablespoon butter.
Mix this well first for butter to be evenly distributed.
Now add 1 teaspoon sesame seeds, ¼ teaspoon hing and prepared cashew paste.
Mix it well.
Add water little by little and mix well.
Gather to form a soft dough.
Form cylinders like this so that fitting into murukku press will be easy.
Fit the mould into the murukku press, I used star shape. Grease murukku press with oil.
Fill in with dough.
Press to check.
.Grease 2-3 ladles and keep it ready. Press on it in concentric circles. Tuck in loose ends so that it doesn't open while frying. I made small murukkus. Pressing in ladles helps to flip in hot oil easily.
You can press in butter paper or cloth too. Just slide in using a ladle to remove.
Heat oil. Pinch a tiny pinch of dough and add it. If it rises immediately then oil is heated well. Now add 4-5 murukkus at a time.
When bubbles and 'shh' sound stops and murukku turns golden drain and remove.
Repeat to finish.
Cashew murukku is ready!
Video
Notes
Soak cashews well - I always soak cashews in hot water for at least 30 minutes. This makes it easy to grind smooth, otherwise the dough may get chunks.
Make smooth dough - I add water little by little while mixing. It should be soft and non sticky. If it gets watery, sprinkle little rice flour. If it's hard, sprinkle little water.
Choosing mould - You can either choose thenkuzhal or star or flower mould which best suits this murukku.
Fry in right flame - I always keep the flame medium. If oil is too hot, murukku will turn brown fast but stay raw inside. If oil is too low, murukku will drink oil.
Cover the dough - If I make in big batch, I always keep the dough covered with cloth so it does not dry and crack while pressing.
Cashew halwa is a popular Indian sweet made with cashews, milk, sugar, ghee and saffron. It has a rich taste, flavour and melt-in-mouth texture much like badam halwa. This cashew halwa is also a great choice for Diwali when you want to make something rich and delicious at home to share with your friends and...
Looking for an appetizer that’s as pretty as it is delicious? This Paneer Beetroot Toast has got you covered!
When you’re planning your party spread, you need an appetizer that’s as eye-catching as it is tasty. That’s where this Paneer Beetroot Toast comes in. It’s a snack that’s both fun to eat and make! This is a savory version of our popular rasmalai toast recipe. With its creamy beetroot-paneer spread, crunchy toasted bread, and a sprinkle of fresh herbs and feta, this recipe is a flavor-packed masterpiece.
It’s tangy, garlicky, and perfectly balanced, making it the ideal bite for any gathering. Whether it’s a New Year’s celebration or a laid-back weekend get-together, these toasts are your go-to for all your entertaining needs.
Here’s why this Beetroot Toast deserves a spot on your party menu:
Quick and Easy: Just 20 minutes from start to finish.
Bright and Beautiful: The vibrant beetroot spread adds a pop of color to your appetizer spread.
Flavorful Topping: Creamy paneer and tangy hung curd combined with garlic and lemon zest create a unique, savory topping.
Customizable: Use your favorite bread and garnish with rosemary, dill, or even microgreens to make it your own.
Beetroot Toast Ingredients Overview
Beetroot: Boiled or steamed until tender. Responsible for that vibrant color and a lovely earthy flavor
Paneer: To add creaminess and body the topping. I have used homemade malai paneer, but you can use high-protein paneer if you like
Hung Curd: Adds richness, creaminess, and a slight tang. I wouldn’t recommend replacing it with Greek yogurt or dahi as the mixture won’t come out as thick as needed
Garlic: Grated, for flavor and aroma
Lemon zest: Adds a beautiful lemon-y flavor and aroma
Bread: Golden-toasted bread cut in triangles. I have used regular white bread, but you can use brown, multigrain, sourdough, or whatever type you prefer
Frequently Asked Questions
Which is the best bread for this recipe?
A sturdy bread like multigrain, sourdough, or even baguette slices works best. Avoid soft, fluffy bread like brioche as it might not hold up well under the spread.
Can I make this ahead?
Yes! Prepare the beetroot spread and refrigerate it for up to 2 days. Toast the bread and assemble the toasts just before serving for the best texture.
How to store leftovers?
If you have leftover spread, store it in an airtight container in the fridge for up to 2 days. Assembled toasts are best enjoyed fresh, but you can refrigerate them briefly in a single layer if needed.
Richa’s Top Tips
Choose the Right Bread. Regular white bread works wonderfully for this recipe, but multigrain or sourdough bread are great alternatives as they hold their shape and add extra flavor.
Cook the Beetroot Well. Boil or steam beets until fork-tender for a smooth and creamy spread.
Chill the Spread. Refrigerate the beetroot topping for 30 minutes before piping. This helps the flavors meld and makes it easier to work with.
Get Creative with Garnishes. While rosemary and dill are classic, you can add crumbled feta, pomegranate seeds, or even a sprinkle of za’atar for a twist.
Toast Bread Just Before Serving. This ensures your toast stays crisp under the creamy topping.
Use Mild Hung Curd. Avoid using overly sour curd, as it can overpower the delicate flavor of the beetroot spread.
Packed with essential nutrients, beetroots are a great source of fiber, folate (vitamin B9), manganese, potassium, iron, and vitamin C. Healthy and delicious? Yes, please!
This Beetroot Toast is a showstopper! Perfect for holiday parties, New Year’s celebrations, or even a fancy brunch, it combines bright flavors, a stunning appearance, and irresistible creaminess. Serve it up, watch it disappear, and let your guests rave about your appetizer game.
Try it and tag me on IG @my_foodstory. I’d love to see your creations!
For this curry, I used the mangoes readily available at Tesco for this simple mango curry. They are usually sweet and juicy, so there is no need to add any sugar or jaggery. A teaspoon Read More ...
Authentic Traditional Halwai Style Kalakand Recipe, also known as paneer burfi or barfi. This paneer sweet is so popular in Rajasthan and is made with milk, khoya, sugar. This grainy milky kalakand is a labour intensive sweet which is made purely with milk and is worth the effort. Kalakand Sweet Recipe (Halwai Style) I originally...
Kalakand Sweet Recipe is a popular sweet originated in Alwar, Rajasthan. This sweet is made purely with milk and milk based ingredients. Making halwai style traditional kalakand requires time and patience, but this version which I have shared here is instant and can be made in less than 20 minutes and just 6 ingredients used...
Jalebi Recipe, one of the most popular and loved sweet recipe for the North of India. This is made with a flour, yogurt batter which is added to piping bag and piped on hot oil. This is a deep fried and then drenched in sweet sugar syrup. It taste more or like honeycomb. Traditionally it...
Mango Ice Lollies is a frozen treat made by freezing a blend of mango, milk and sugar in moulds. This recipe can be made in summer and in holidays when kids are at home. It has a soft mango taste with mild sweetness and creamy feel.
It takes about 15 minutes to prepare and the rest of the time is only freezing. You need only 3 ingredients from the kitchen. Even adults like it on a hot afternoon. This is a great option when you want a cold treat without ice cream or chocolate.
[feast_advanced_jump_to]
About Mango Ice Lollies
Mango Ice Lollies are made using ripe mangoes, milk and sugar. It is also called Mango Lollipop. Mango season is the best time for this recipe because the fruit is sweet and juicy. Kids can enjoy it more than store bought ones as there is no colour or preservatives.
The texture is smooth and creamy because of the milk. It is not very icy like normal fruit popsicles. This is bright yellow in colour and the taste is sweet with fresh mango flavour. When you bite it slowly, it melts in the mouth. Kids ask for more as they will love it.
You can change these lollies in many ways as per your taste. You can add few mango pieces inside the mould for chewy bites. You can use a silicon mould, a lolly mould or even an ice cube tray with sticks. A little cardamom powder or chopped nuts also goes well in it.
I make these lollies in summer when mangoes are plenty at home. I had one lollipop mould bought long time ago, and I use it every year. My kids finish them very fast and ask for more.
Mango Ice Lollies Ingredients
Mango - I have used ripe and sweet mangoes, chopped roughly. It gives the colour and main flavour to the lollies. You can use any mango without much fibre.
Milk - I add boiled and cooled milk to make the lollies creamy. It also help to blend the puree smoothly. You can use almond milk if you like.
Sugar - I use sugar for sweetness. It dissolve well while blending. You can reduce it if the mangoes are very sweet.
How to make Mango Ice Lollies Step by Step
1.To a mixer jar - add mango pulp along with sugar, puree it. Now add milk.
2.Blend well. Take your mould. You can use ice cube tray too like I have done here. I had this lollipop mould bought long time ago.
3.Fill in the mixture. Keep the stick.
4.I had more puree so filled it in my chocolate mould too.Wrap with silver foil. Freeze for atleast 6 hours or oevernight.
5.I freezed overnight. Next day gently press and lift the lollipops, as its silicon mould it was very easy to de mould. Mango lollipop is ready!
Serve immediately!
Expert Tips
Use ripe mangoes - I choose mangoes which are fully ripe and has sweet smell. Raw or sour ones need more sugar and the taste will change.
Cool the milk - I always cool the boiled milk completely before blending. Warm milk makes the lollies icy and they will not set well.
Blend smooth - I blend the mango and sugar first, then add the milk. This helps to get a smooth puree without any pieces.
Fill carefully - I pour the mixture into moulds slowly and leave little space on top. It expand when freezing, so do not fill too much.
Use silver foil - I cover the chocolate mould with silver foil before keeping in freezer. It stops the ice crystals and keep the lollies fresh.
Demould gently - I press the silicon mould gently and lift the lollies. If it is stuck, hold the mould under tap water for few seconds.
Serving and Storage
Serve this immediately after demoulding and you can enjoy it as a cool snack for kids during summer holidays or after lunch at home. Keep the lollies in the freezer in a closed container or wrapped with silver foil and use within few days for best taste and texture and it stay good when stored properly.
FAQS
1. Can I use frozen mango for this recipe?
Yes you can use frozen mango pieces and it works fine for this recipe. Thaw it little before blending.
2. Can I use an ice cube tray instead of lolly mould?
Yes you can use ice cube tray and it still taste good. Keep the sticks after the mixture is little frozen so they stand straight.
3. How long should I freeze the lollies?
You need to freeze for at least 6 hours and overnight is better. It sets properly and comes out easily from the mould.
4. Why are my lollies icy?
It may be due to warm milk or too less milk in the mixture.
5. Can I skip sugar?
Yes you can skip it if the mangoes are very sweet and it still taste good. Taste the puree once before freezing and then decide.
If you have any more questions about this Mango Ice Lollies Recipe do mail me at sharmispassions@gmail.com. In addition, follow me on Instagram, Facebook, Pinterest, Youtube and Twitter .
Tried this Mango Ice Lollies Recipe? Do let me know how you liked it. Also tag us on Instagram @sharmispassions and hash tag it on #sharmispassions.
Mango Ice Lollies is a frozen treat made by freezing a blend of mango, milk and sugar in moulds. This recipe can be made in summer and in holidays when kids are at home. It has a soft mango taste with mild sweetness and creamy feel.
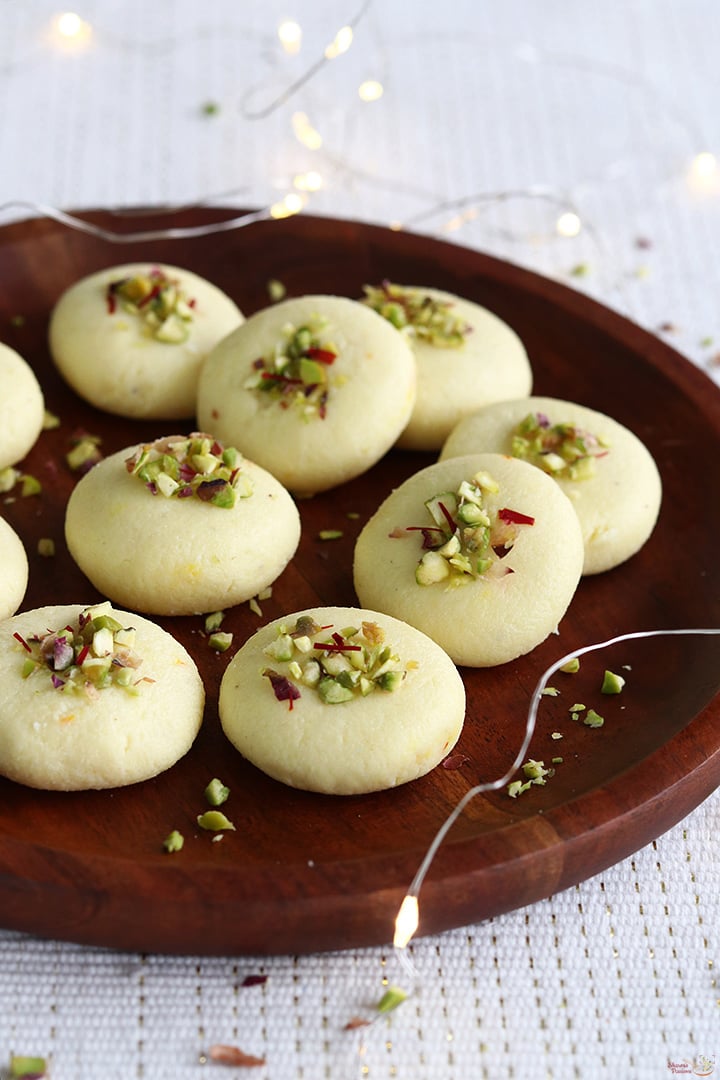
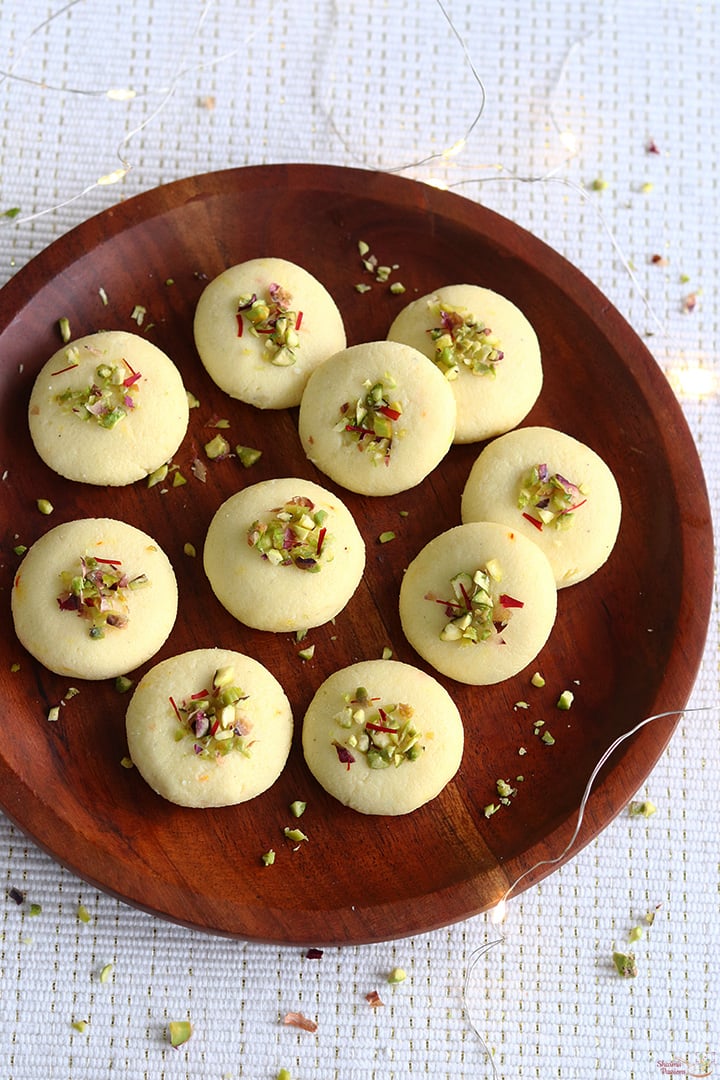
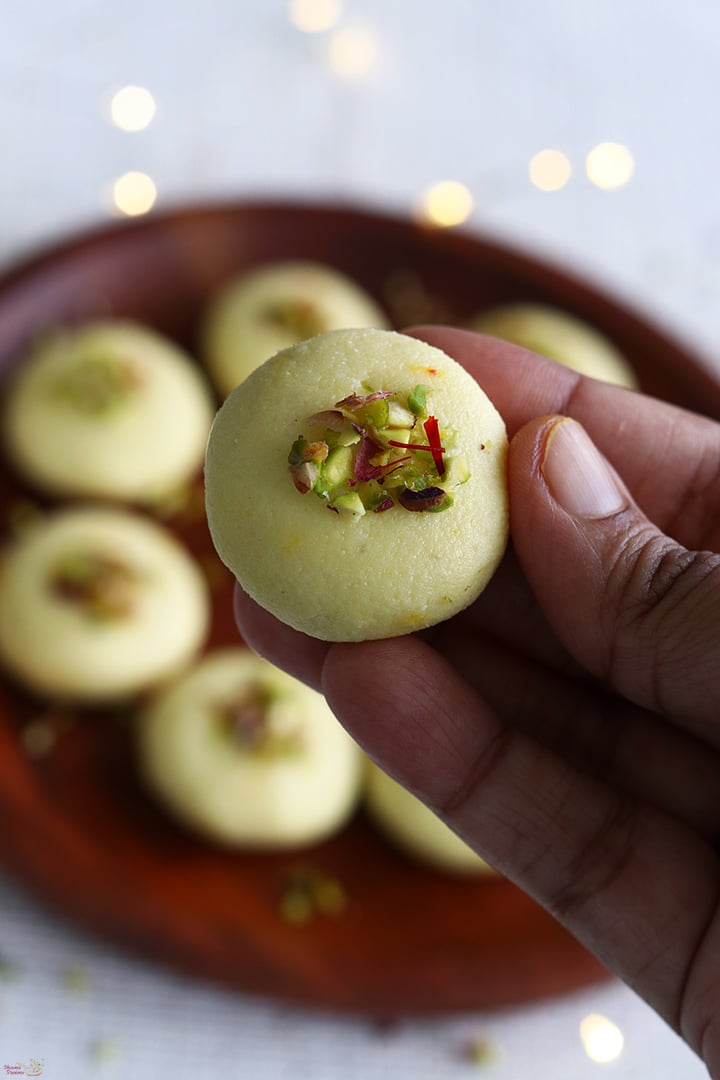
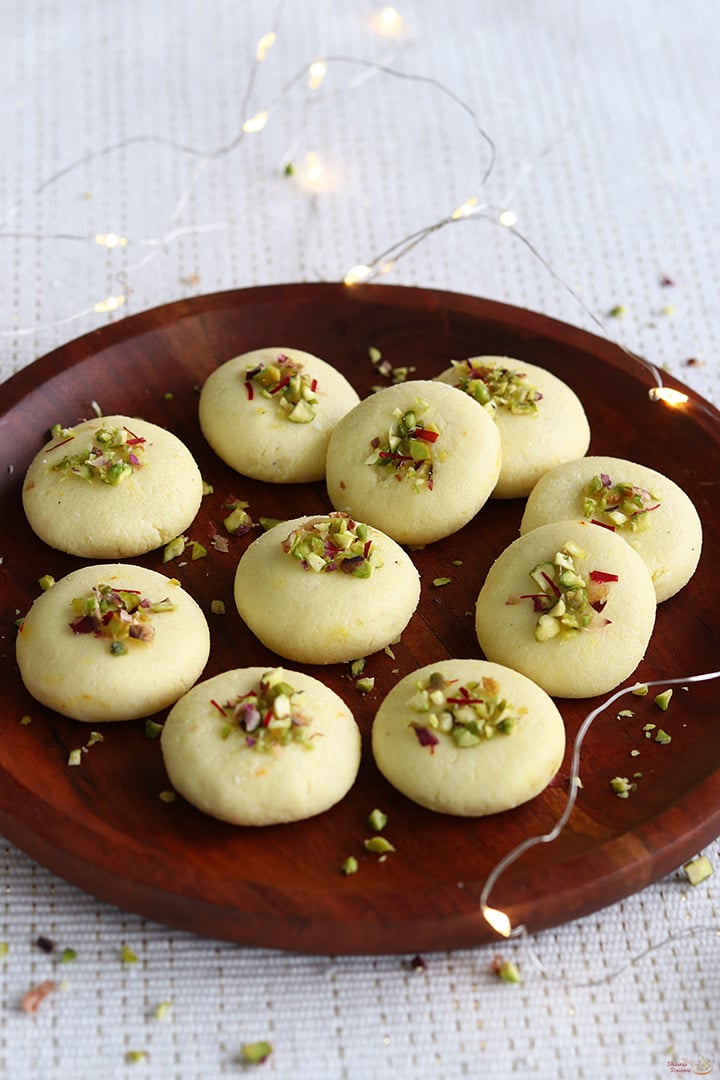
Sandesh is a delicious Bengali milk sweet popular all over India. Sandesh also known as Bengali Sondesh is milk cheese based rich sweet made using milk, sugar, nuts, cardamom powder and saffron. Sandesh is most commonly made for festivals and special occasions.
Sandesh sweet can be made for special occasions, festivals like Navratri, Diwali and Durga Pooja. It is made with just simple ingredients from your kitchen and can be made easily within just few minutes of time. Even beginners can try this simple, quick and easy sweet.
[feast_advanced_jump_to]
About Sandesh
Sandesh is a popular Bengali sweet made by first curdling milk to form chenna then mixing it with sugar and cooking until soft, non sticky, then shaping into small discs and garnishing with nuts.
There are many variations to sandesh including many flavours but the one I have shared here is the traditional one. The colour and taste of sandesh veries depending on the flavours we add.
This is the easiest sweet I have made, just few minutes and you are done with this yummy milk sweet. To make the best tasting sandesh, chenna should be prepared fresh and using store bought paneer may change the taste of sandesh.
The garnishings are end less you can add chocolte chips or nuts or dry fruits of your choice. Sandesh tastes incredibly delicious making it one of the popular sweets in Bengal.
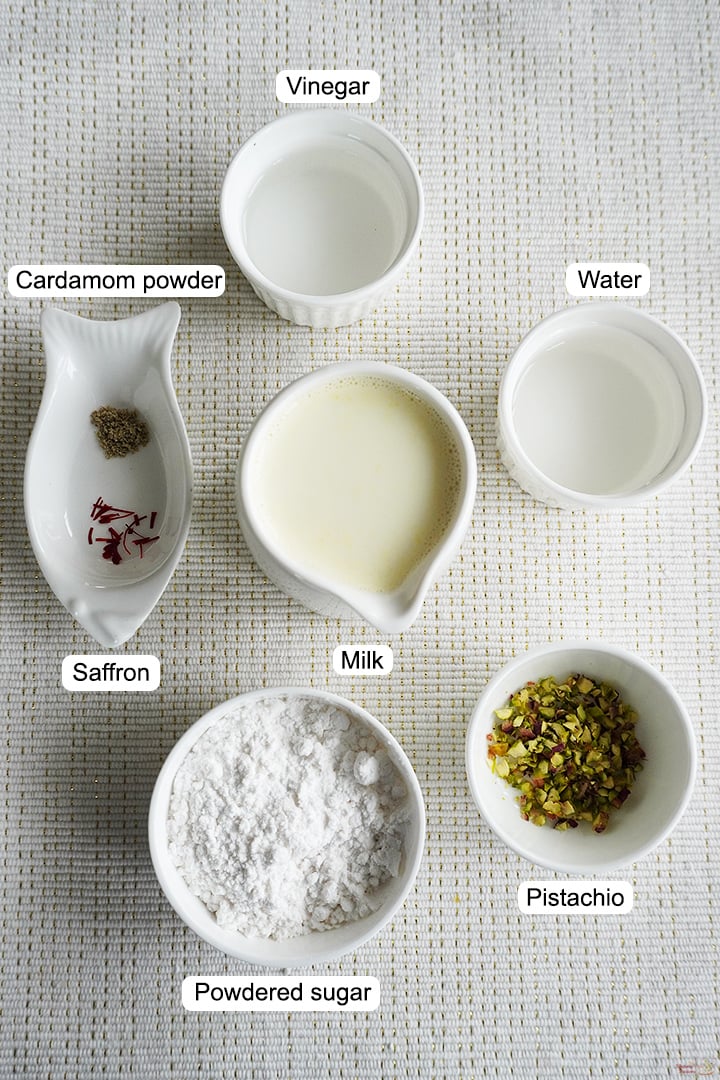
Milk - Use full cream milk either farm fresh or packed milk.
Vinegar - You can use vinegar or lemon juice to curdle milk.
Sugar - Grind sugar to a fine powder then use it.
Nuts - I have used chopped pistachios for garnish. You can even use almonds, cashews etc.
Saffron - Saffron adds a rich flavour and mild colour to this sweet.
Cardamom powder - This is one of the main flavourings for sandesh.
How to make Sandesh Step by Step
1.To a sauce pan add 1 liter milk. Stir and boil for a minute. Switch off and let it rest for 2-3 minutes.
2.To a small bowl add 2 tablespoon vinegar, 2 tablespoon water, mix it well and set aside.
3.Now add vinegar water solution little by little and stir gently. Now the flame is off, this helps to slowly curdle milk and the resulting chenna is so soft.
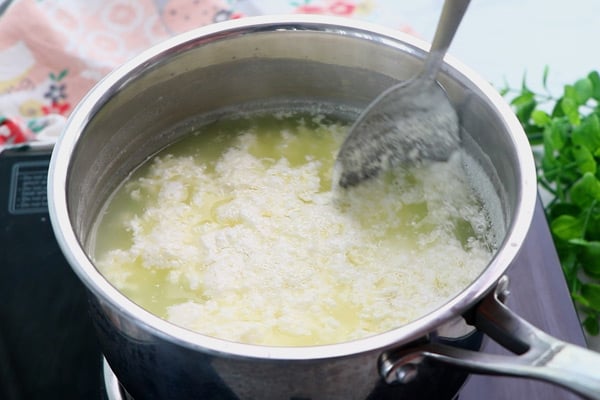
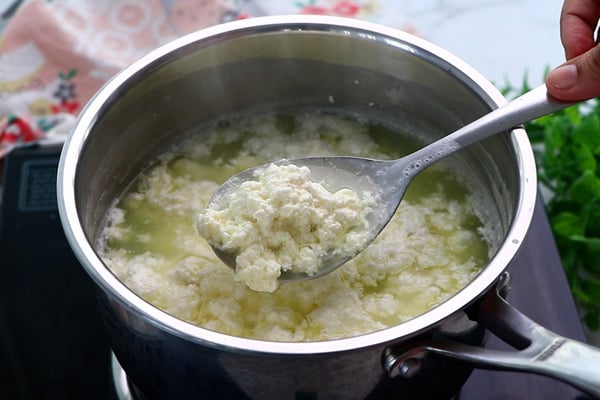
4.Now whey water(green liquid) and chenna(white solid) separates.
5.Now it is curdled completely. Switch off.
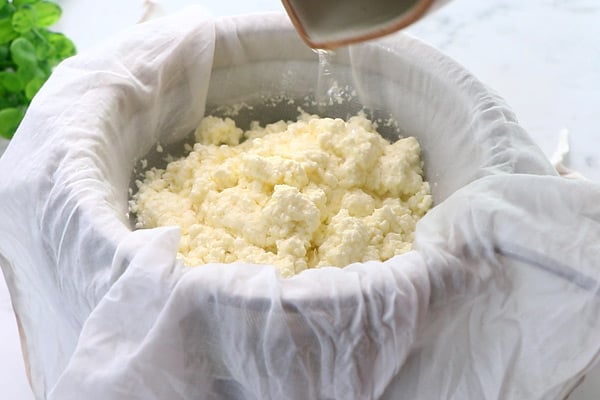
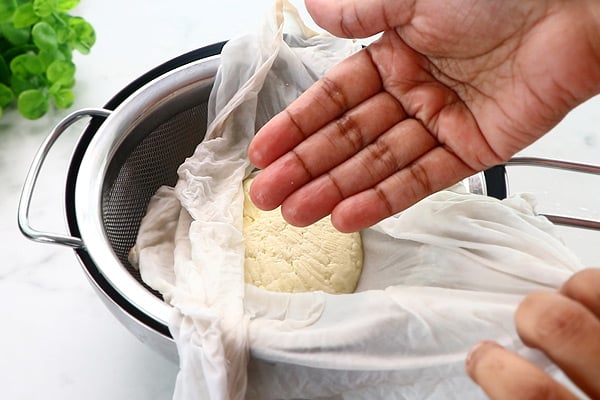
6.Transfer this to a cloth placed on a strainer. Keep a bowl underneath to collect the whey water. You can use this whey water for kneading chapathi dough or for curdling milk again.
7.Rinse it with water well.
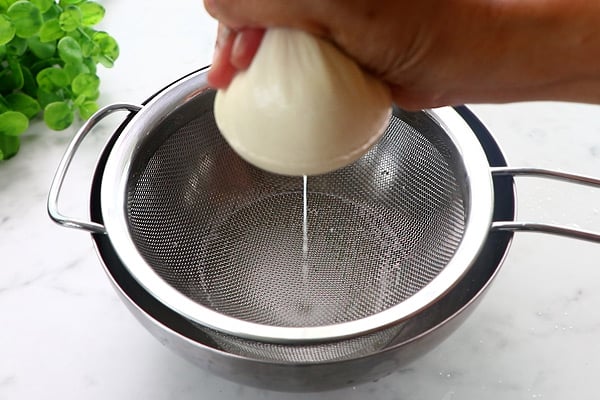
8.Squeeze excess water.
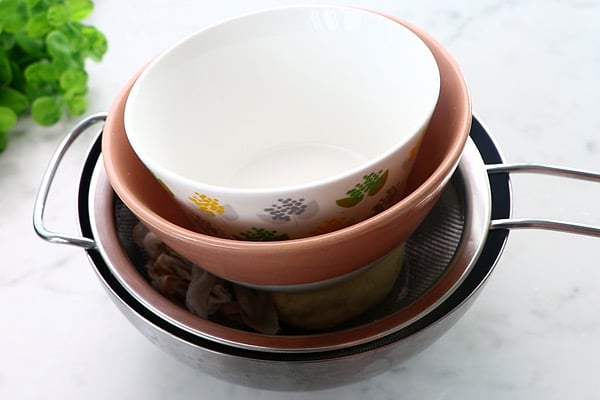
9.Roll and place it on the strainer. Keep 2 bowls on it. Do not keep heavy weight. Set aside for 30 minutes.
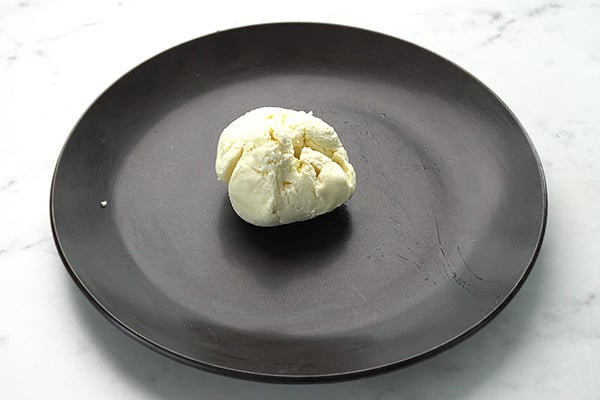
10.Now open, moisture should be still there slightly, it should not be dry.
11.Transfer it to a plate.
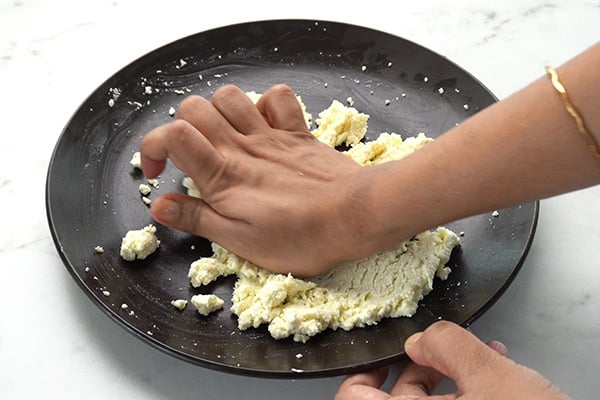
12.Knead it well using your palm like shown. Knead until the texture changes smooth and soft.
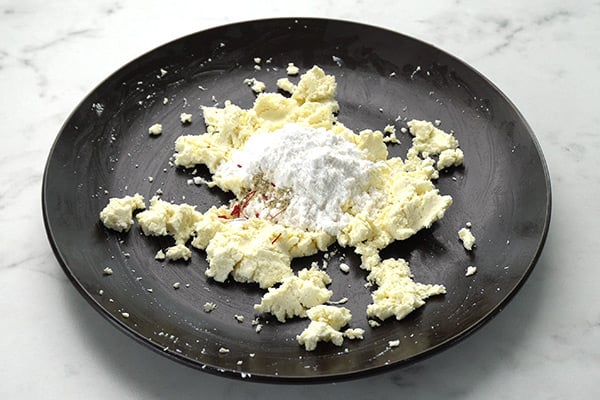
13.Add ⅓ cup powdered sugar, ¼ teaspoon cardamom powder and 5 strands saffron.
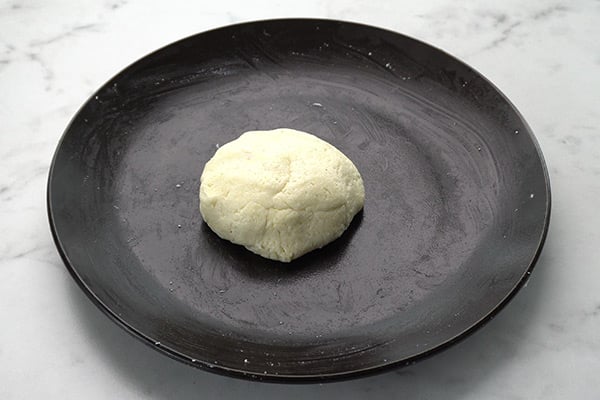
14.Mix well and gather to form a dough like this.
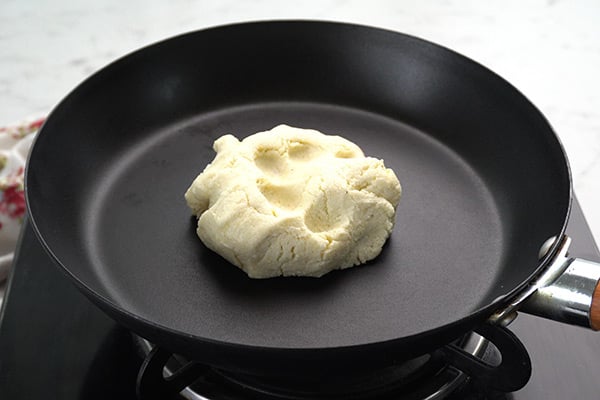
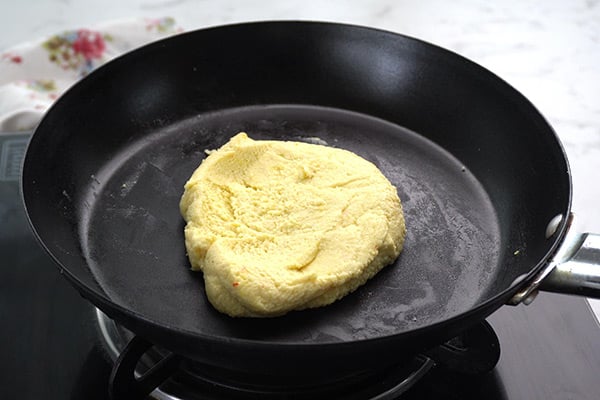
14.Keep a pan in low flame and add it to the pan.
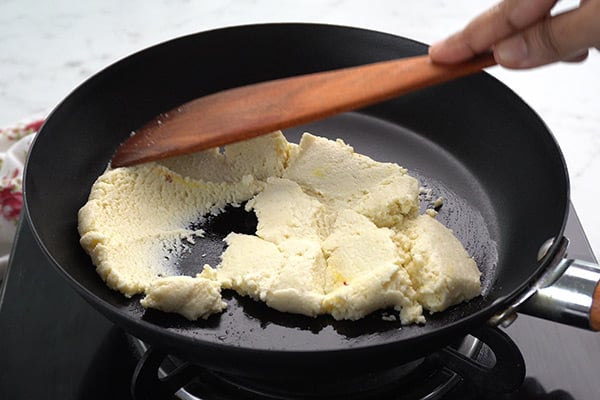
15.Keep cooking in low flame.
16.Cook for 3-5 minutes not more than that. If you cook longer it may become hard and will crumble. Switch off and remove from flame.
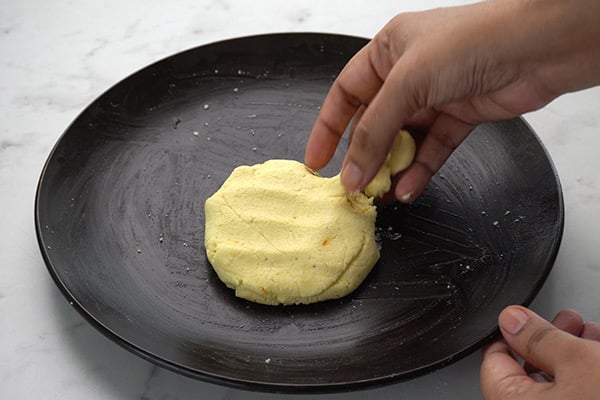
17.Transfer to a plate. Pinch a small portion.
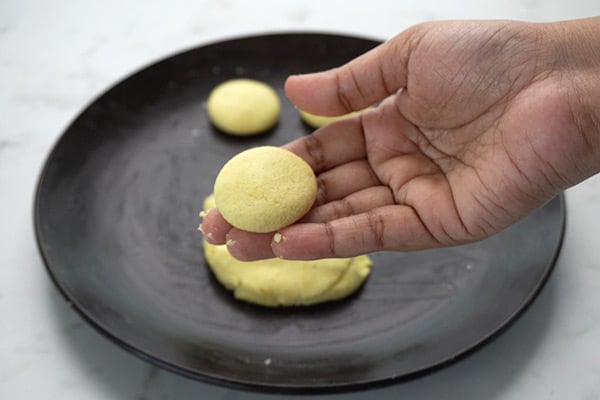
18. Make small balls, flatten it slightly.
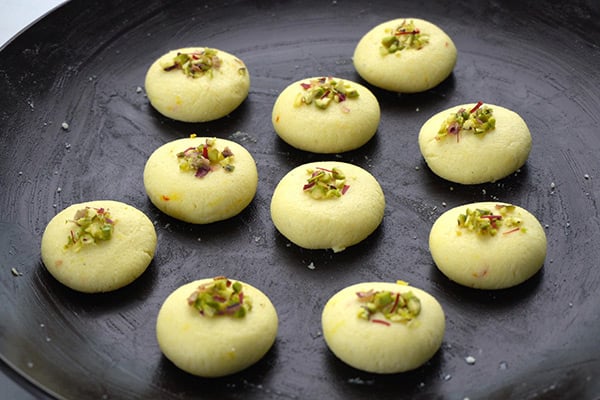
19.Garnish with chopped pistachio and saffron strands.
Sandesh is ready!
Expert Tips
Vinegar solution - Vinegar when mixed with water is more concentrated and makes chenna soft.
Preparing chenna - Boil milk give a quick stir and switch off, let it rest for few minutes before adding vinegar solution. Add vinegar, water mixture little by little and stir gently.
Kneading - I usually knead for at least 7-10 minutes till it becomes smooth and soft. Make sure you do not over knead then fat will get released.
Cooking - Cook the mixture in lowest flame and cook not more than 5 minutes.
Flavours - You can add cocoa powder to make chocolate sandesh, rose essence to make rose sandesh. Like wise you can make so many variations like orange sandesh, pista sandesh etc.
Serving and Storage
Sandesh is served as a sweet snack with other sweet varieties we make foe the festival. It can be stored in fridge for 3-5 days.
FAQS
1.What type of milk should I use?
Use full cream milk for best taste and volume. Avoid low fat or toned or skimmed milk.
2.While cooking it became crumbly, how to fix it?
Do no worry if happens when you over cook the mixture. Cool down the mixture then add to mixer and blend until smooth. Now transfer to a plate and shape it, sandesh is ready.
3.Can I add brown sugar or jaggery?
Yes you can use brown sugar or jaggery but make sure it is in powdered form and is free from impurities.
If you have any more questions about this Sandesh Recipe do mail me at sharmispassions@gmail.com. In addition, follow me on Instagram, Facebook, Pinterest ,Youtube and Twitter .
Tried this Sandesh Recipe? Do let me know how you liked it. Also tag us on Instagram @sharmispassions and hash tag it on #sharmispassions.
Sandesh is a delicious Bengali milk sweet popular all over India. Sandesh also known as Bengali Sondesh is milk cheese based rich sweet made using milk, sugar, nuts, cardamom powder and saffron. Sandesh is most commonly made for festivals and special occasions.
To a sauce pan add 1 liter milk. Stir and boil for a minute. Switch off and let it rest for 2-3 minutes.
To a small bowl add 2 tablespoon vinegar, 2 tablespoon water, mix it well and set aside.
Now add vinegar water solution little by little and stir gently. Now the flame is off, this helps to slowly curdle milk and the chenna is so soft.
Now whey water(green liquid) and chenna(white solid) separates.
Now it is curdled completely. Switch off.
Transfer this to a cloth placed on a strainer. Keep a bowl underneath to collect the whey water. You can use this for kneading chapathi dough or for curdling milk again.
Rinse it with water well.
Squeeze excess water.
Roll and place it on the strainer. Keep 2 bowls on it. Do not keep heavy weight. Set aside for 10 minutes.
Now open, moisture should be there, it should not be dry.
Transfer the prepared chenna to a wide plate.
Knead it well using your palm like shown. Knead until the texture changes smooth and soft.
Add ⅓ cup powdered sugar, ¼ teaspoon cardamom powder and 5 strands saffron.
Mix well and gather to form a dough like this.
Keep a pan in low flame and add it to the pan.
Keep cooking in low flame.
Cook for 3-5 minutes not more than that. If you cook longer it may become hard and will crumble. Switch off and remove from flame.
Transfer to a plate. Pinch a small portion.
Make small balls, flatten it slightly.
Garnish with chopped pistachio and saffron strands.
Sandesh is ready!
Video
Notes
Vinegar solution - Vinegar when mixed with water is more concentrated and makes chenna soft.
Preparing chenna - Boil milk give a quick stir and switch off, let it rest for few minutes before adding vinegar solution. Add vinegar, water mixture little by little and stir gently.
Kneading - I usually knead for at least 7-10 minutes till it becomes smooth and soft. Make sure you do not over knead then fat will get released.
Cooking - Cook the mixture in lowest flame and cook not more than 5 minutes.
Flavours - You can add cocoa powder to make chocolate sandesh, rose essence to make rose sandesh. Like wise you can make so many variations like orange sandesh, pista sandesh etc.

 Login