❌

Reading view

There are new articles available, click to refresh the page.

Cashew Murukku Recipe (Mundhiri Murukku)

Cashew Murukku is a rich and tasty snack made by adding cashew paste into the normal murukku dough. It comes out crisp and crunchy with nutty flavour from cashews. The taste is little different from regular murukku because of the mild sweetness and special flavour that cashew gives.
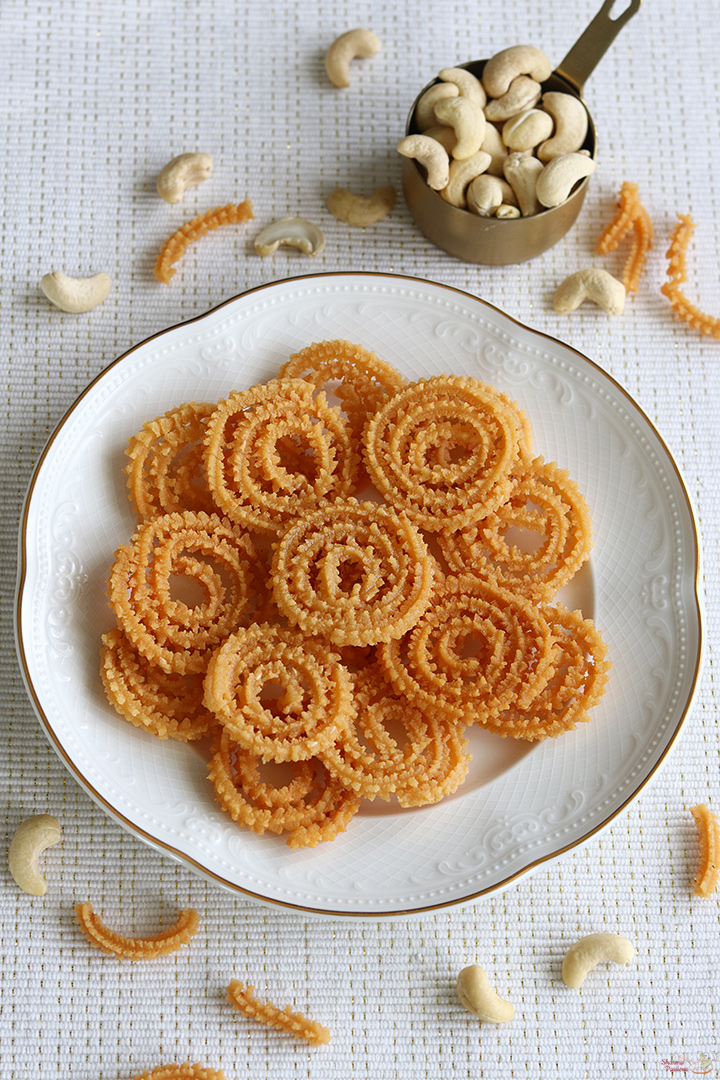
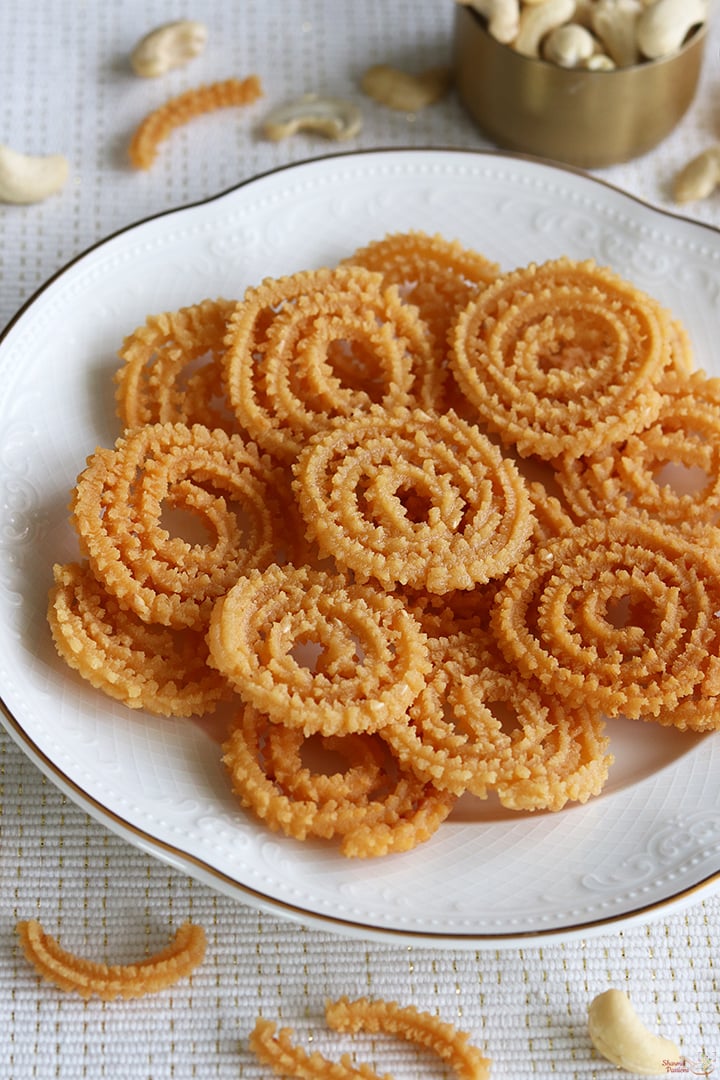
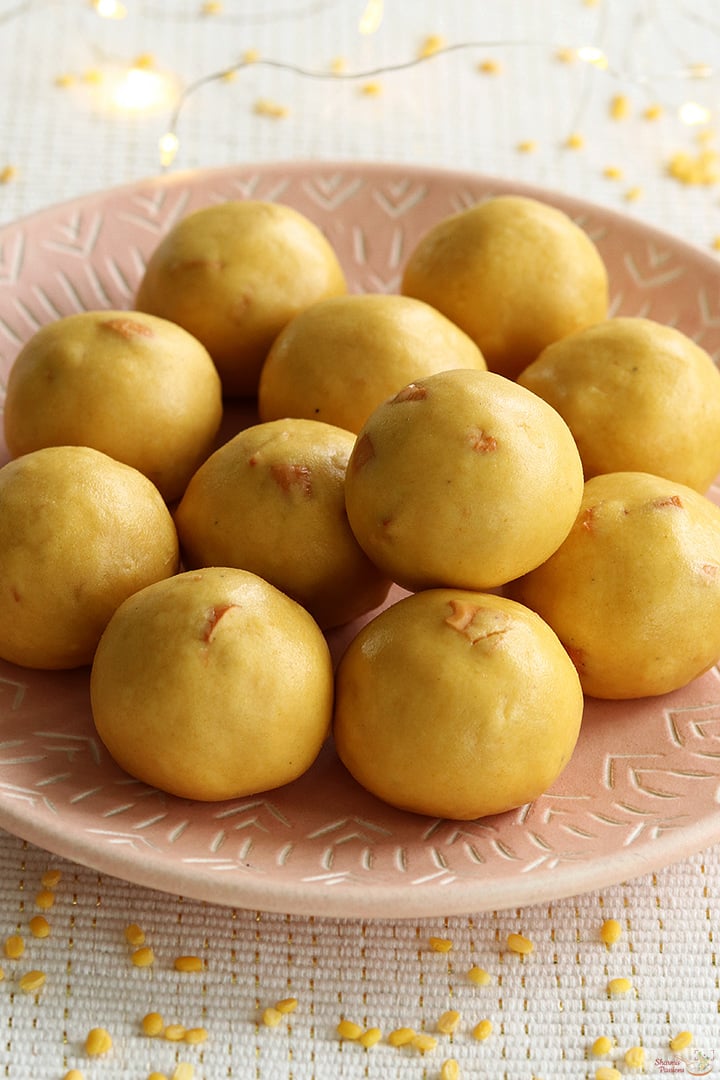
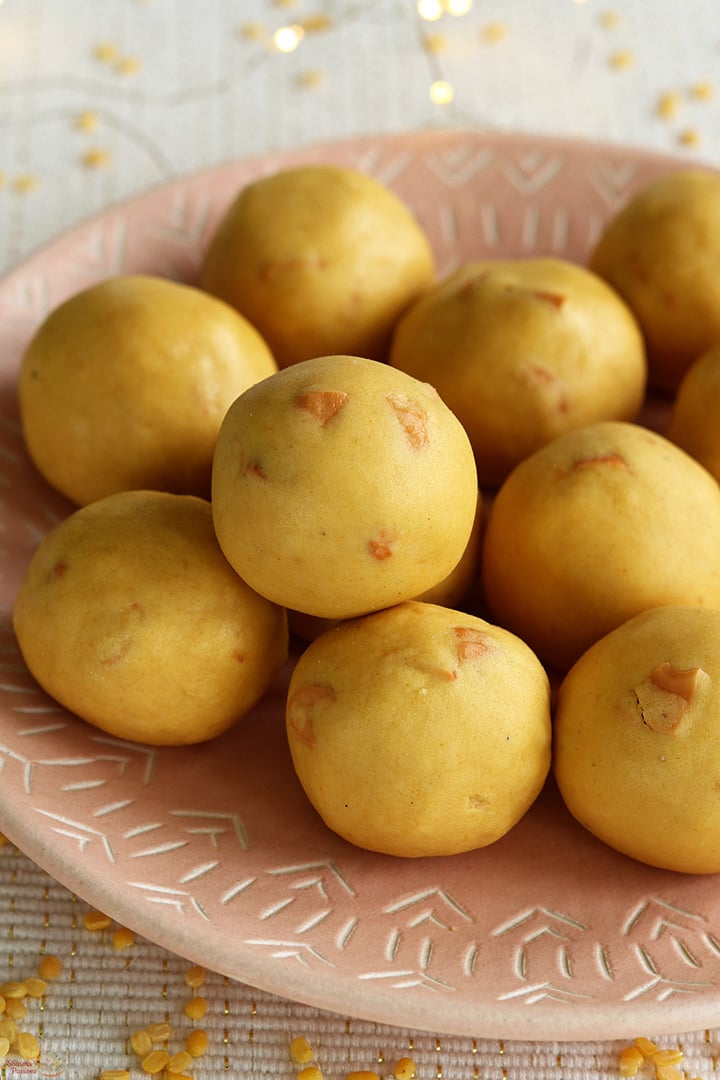
cashew murukku served in a plate

This murukku is a good choice to make for festival times or even just for evening snack time. It does not take too much time and comes out tasty and flavourful. The cashew in the dough gives a richer taste and makes it stand out from other usual snacks we make at home.

[feast_advanced_jump_to]

About Cashew Murukku

Cashew Murukku is a South Indian deep-fried snack with little twist from the normal version. 'Munthiri' in tamil means cashews so it is called munthiri murukku. Usually murukku is made with rice flour and simple spices, but here soaked cashews are grind to a paste and mixed with the flour.

It gives a nice buttery and nutty flavour which makes the murukku tastes rich. The cashew flavour always makes it feel rich and special. The cashew paste blends with rice flour very well and adds a natural sweetness. This makes it suitable for kids also as it is not very spicy.

You can try small variations like adding cumin seeds or even a pinch of chilli powder if you prefer spicier version. The shape can be made using thenkuzhal press or even star or flower press depending what you like. You can also make uthiri murukku (broken style) or swirled whole murukku. Both ways it tastes nice.

I usually make this murukku in small batch during weekends. Sometimes I pair it with tea in evening, and it always feels like a treat. It is also nice to prepare during festivals like Diwali to share with family and friends.

Similar Recipes
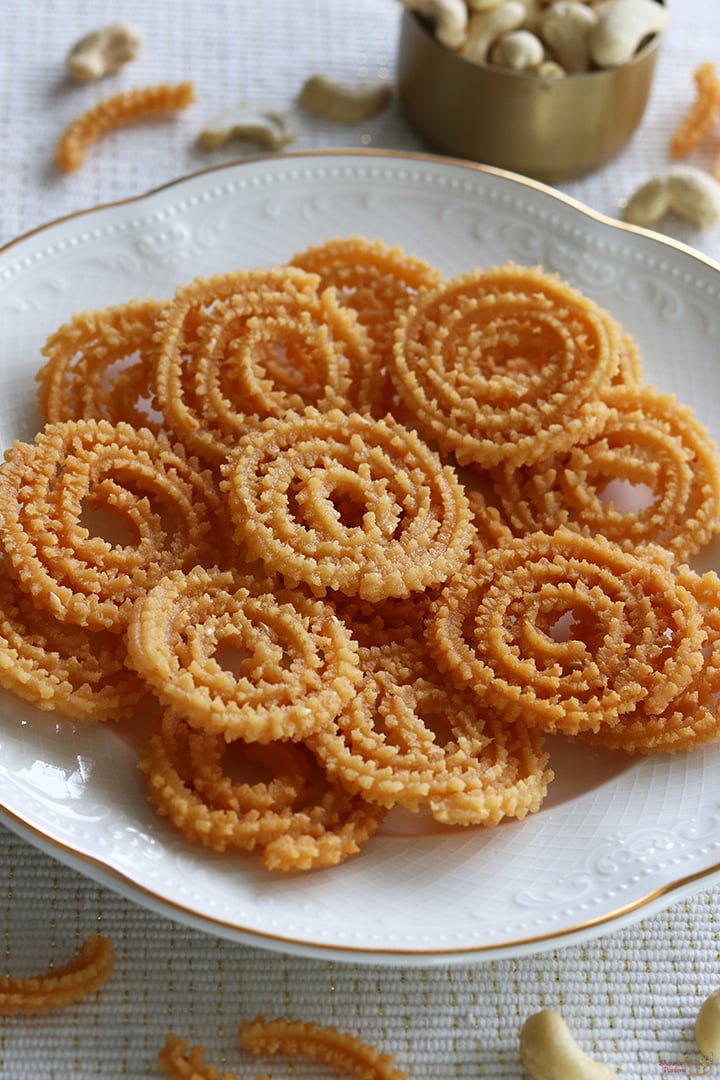
cashew murukku served in a plate

Cashew Murukku Video

Cashew Murukku Ingredients

  • Rice flour - I have used store bought idiyappam flour, it gives crisp texture to murukku. You can also use homemade rice flour if you have, both works well.
  • Cashews - I soaked cashews in hot water for 30 minutes so that it grinds easily to a smooth paste.
  • Butter - I added butter at room temperature while mixing flour, it gives nice aroma and makes murukku taste good.
  • Sesame seeds - Sesame seeds adds a nice crunch.
  • Hing - Hing adds flavour adn aids in digestion.
  • Oil - I used oil for deep frying, it should be hot enough so murukku cooks even, but not too smoking hot.
  • Water - Water is used to make the dough.
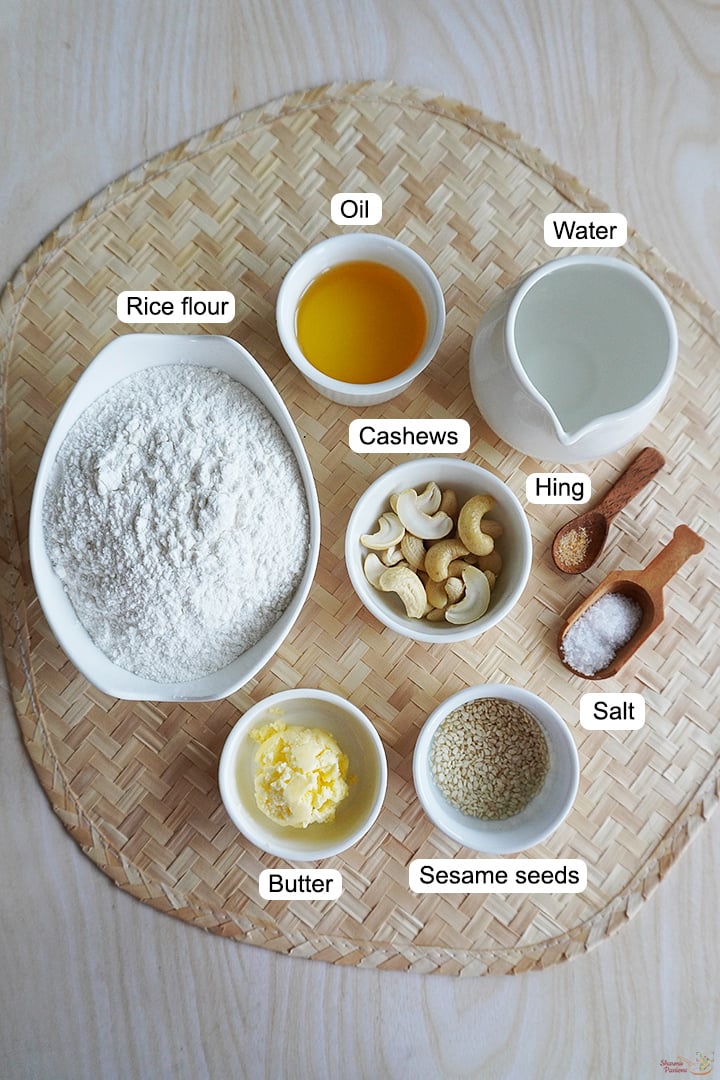
ingredients needed to make cashew murukku

How to make Cashew Murukku Recipe Step by Step

1.To a bowl add 20 cashews, add ΒΌ cup hot water to it. Soak for 30 minutes.
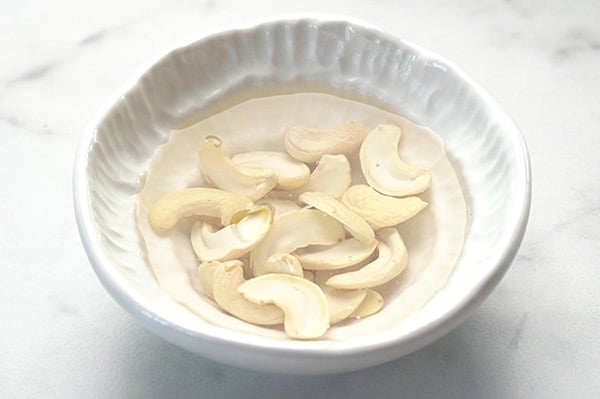
soak cashews in hot water

2.After 30 minutes grind it to a fine paste and set aside.
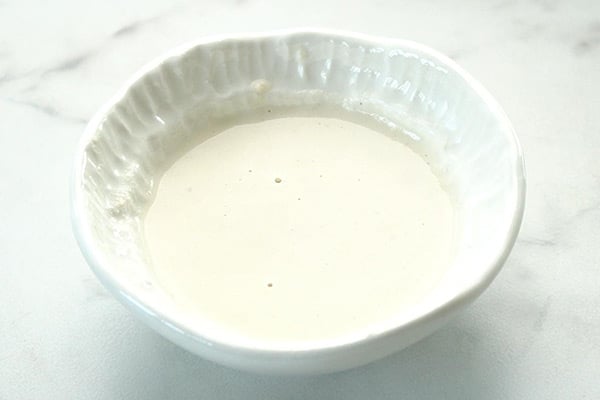
grind to a fine paste

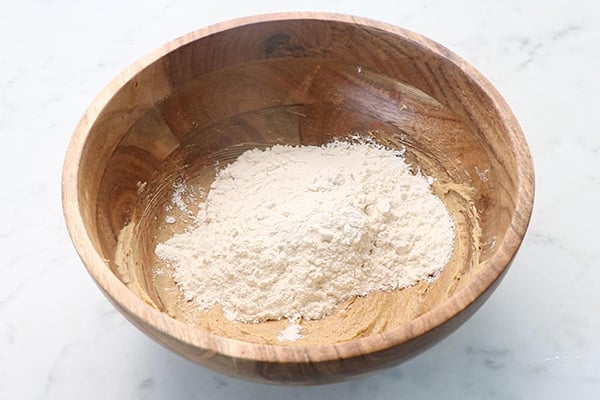
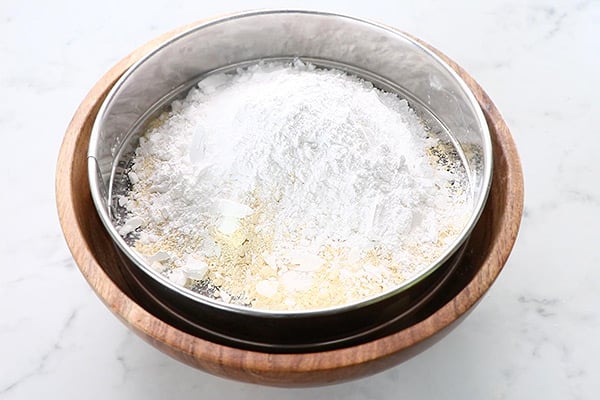
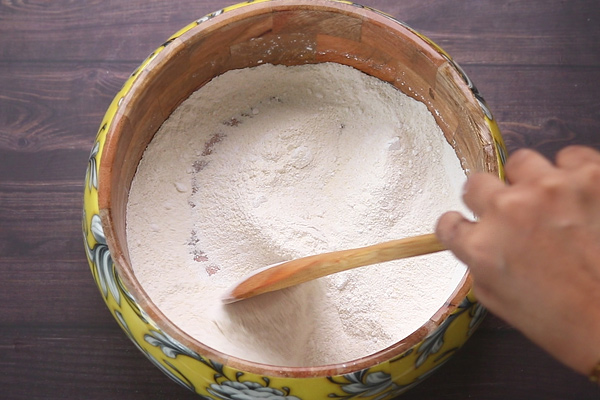
3.To a mixing bowl add 1 cup rice flour, salt to taste and 1 tablespoon butter.
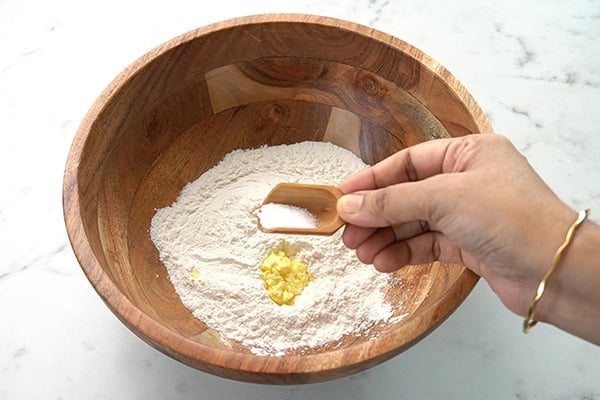
add salt, butter

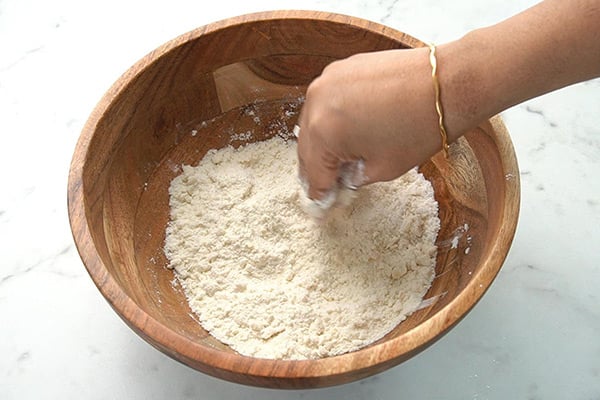
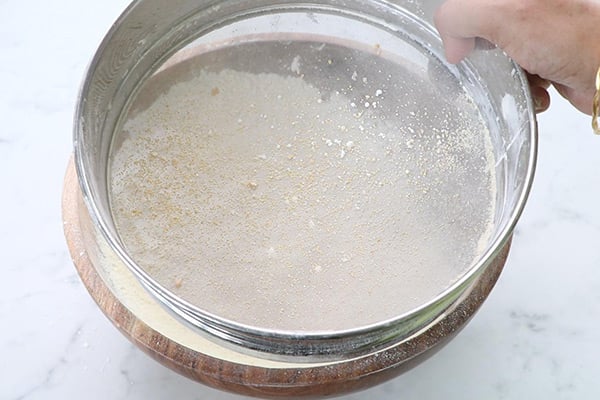
4.Mix this well first for butter to be evenly distributed.
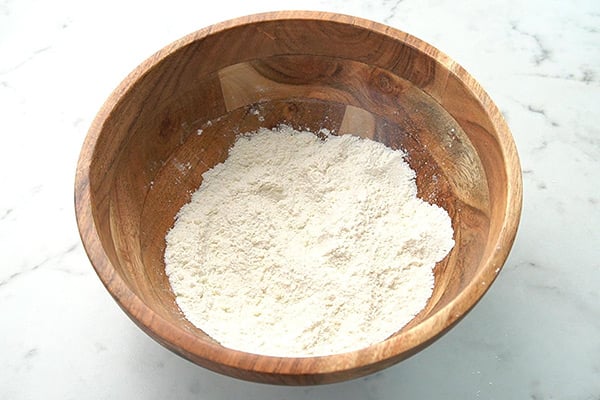
mix well

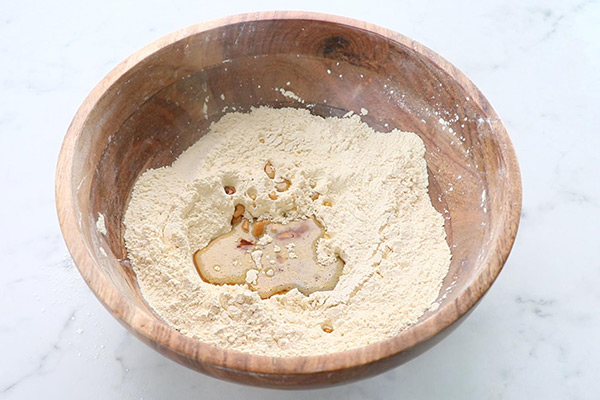
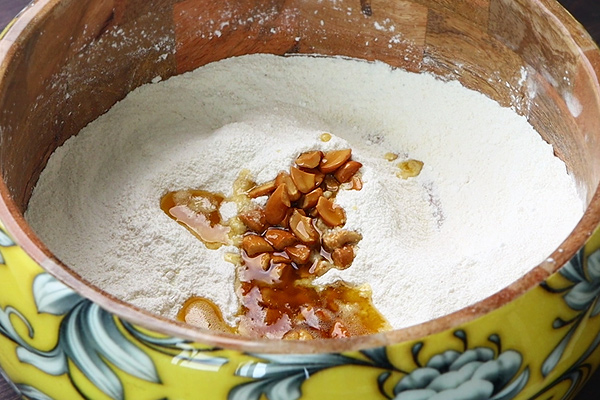
5.Now add 1 teaspoon sesame seeds, ΒΌ teaspoon hing and prepared cashew paste.
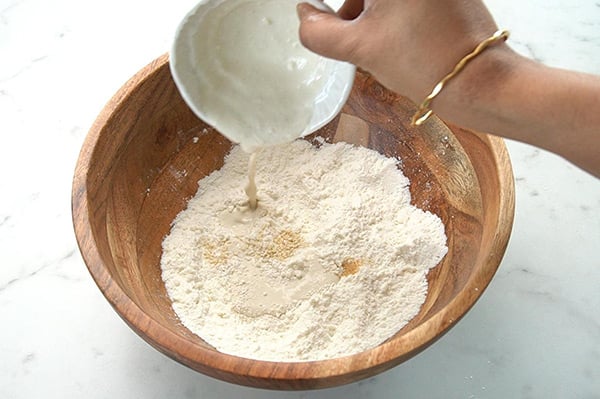
add other spices, cashew paste

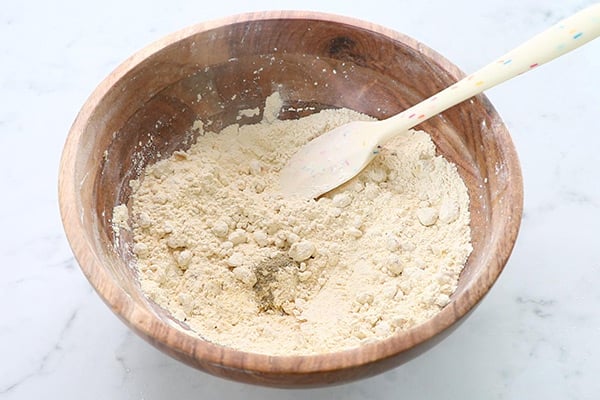
6.Mix it well.

mix well

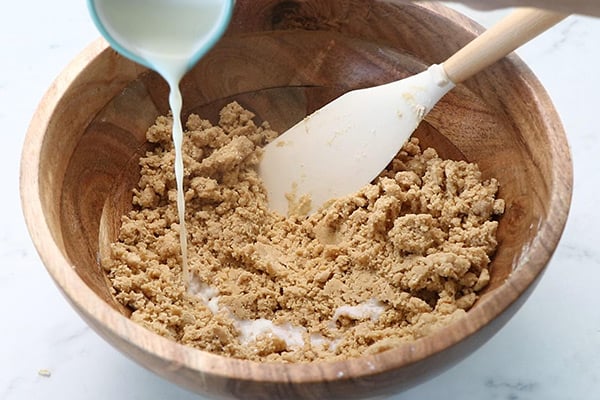
7.Add water little by little and mix well.
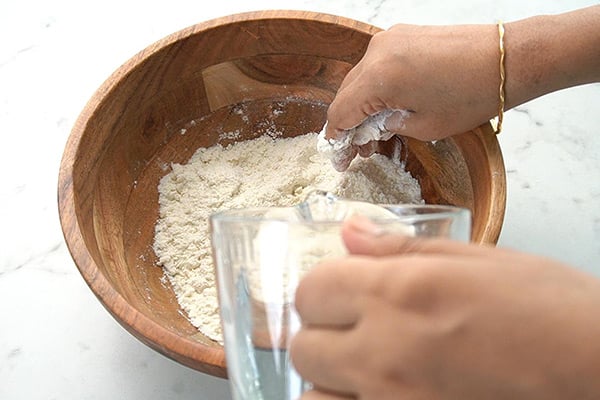
add water

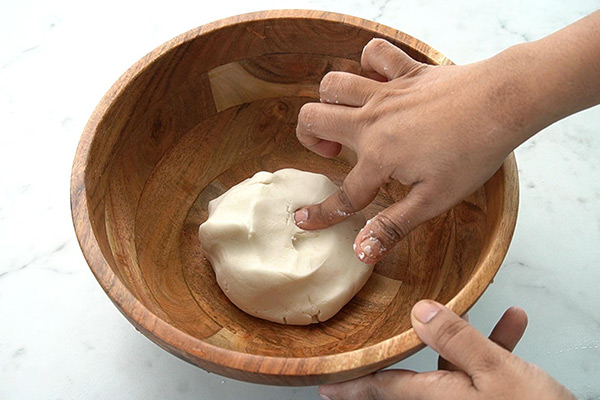
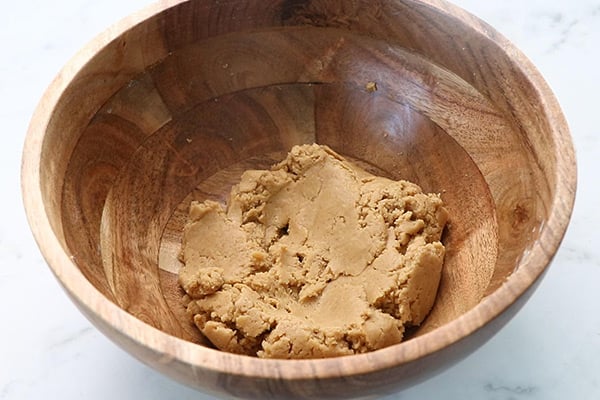
8.Gather to form a soft dough.

form a dough

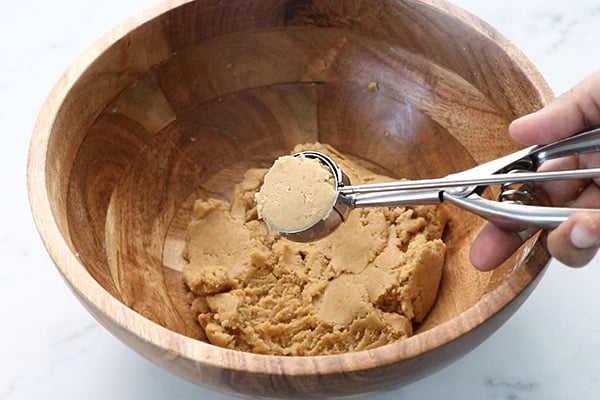
9.Form cylinders like this so that fitting into murukku press will be easy.
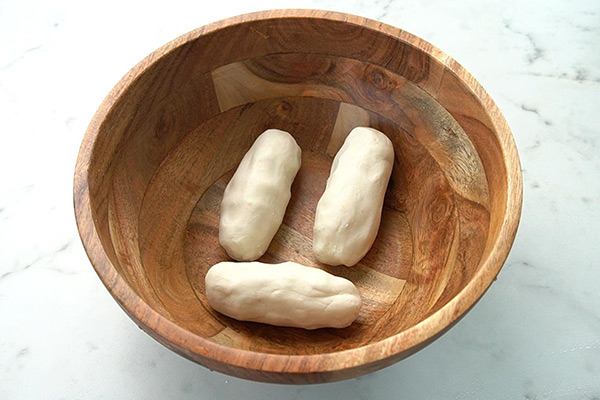
shape into cylinders

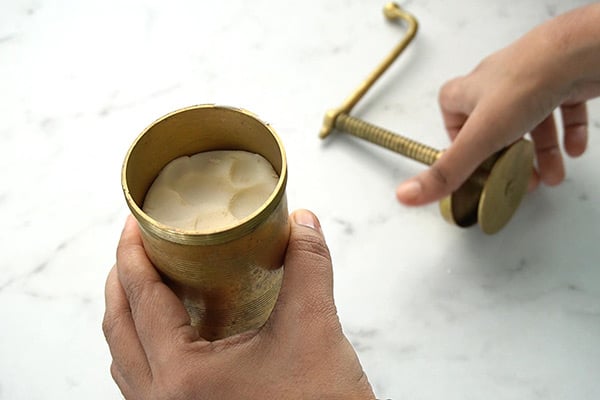
10.Fit the mould into the murukku press, I used star shape. Grease murukku press with oil.
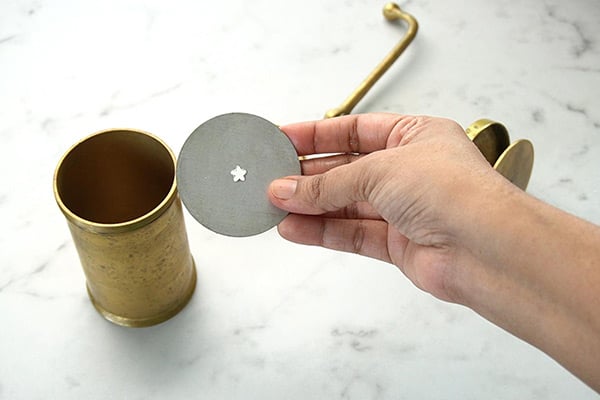
take mould

11.Fill in with dough.

fill with dough

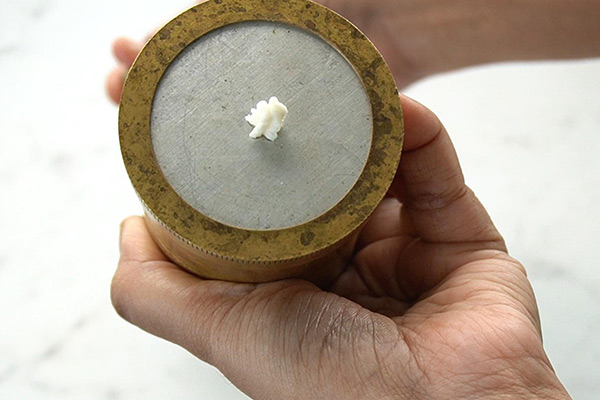
12.Press to check.

press and see

10.Grease 2-3 ladles and keep it ready. Press on it in concentric circles. Tuck in loose ends so that it doesn't open while frying. I made small murukkus. Pressing in ladles helps to flip in hot oil easily.
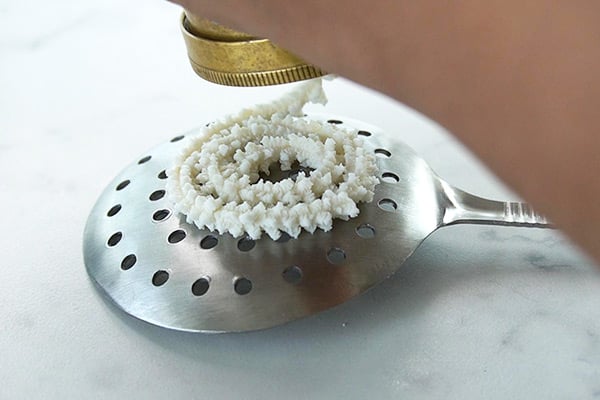
pree in ladle

11.You can press in butter paper or cloth too. Just slide in using a ladle to remove.
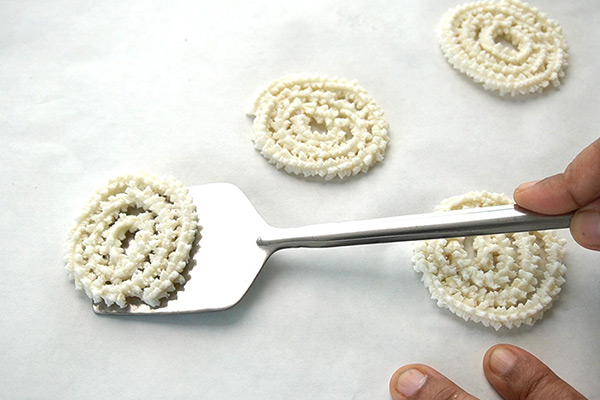
press in butter paper

12.Heat oil. Pinch a tiny pinch of dough and add it. If it rises immediately then oil is heated well. Now add 4-5 murukkus at a time.
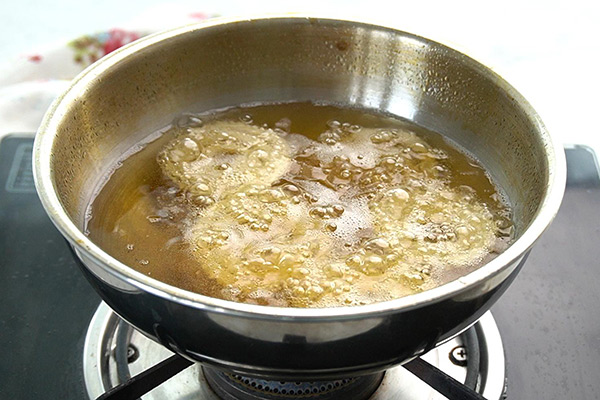
add in oil

13.When bubbles and 'shh' sound stops and murukku turns golden drain and remove.
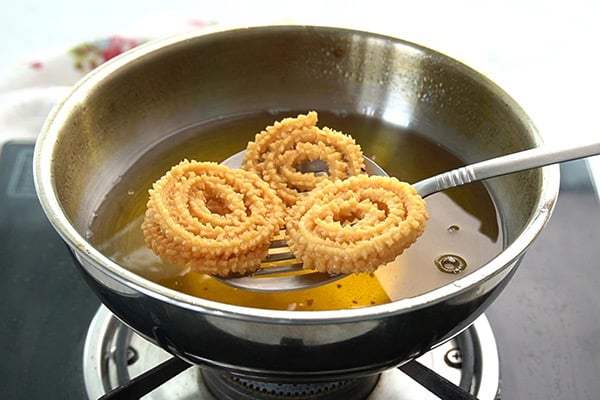
fry and remove

14.Repeat to finish.

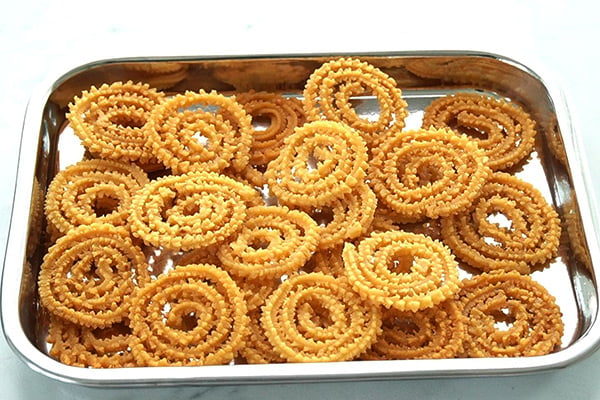
cashew murukku ready

Cashew murukku is ready!

cashew murukku served in a plate

Expert Tips

  • Soak cashews well - I always soak cashews in hot water for at least 30 minutes. This makes it easy to grind smooth, otherwise the dough may get chunks.
  • Make smooth dough - I add water little by little while mixing. It should be soft and non sticky. If it gets watery, sprinkle little rice flour. If it's hard, sprinkle little water.
  • Choosing mould - You can either choose thenkuzhal or star or flower mould which best suits this murukku.
  • Fry in right flame - I always keep the flame medium. If oil is too hot, murukku will turn brown fast but stay raw inside. If oil is too low, murukku will drink oil.
  • Cover the dough - If I make in big batch, I always keep the dough covered with cloth so it does not dry and crack while pressing.

Serving and Storage

Serve this as evening snack along with evening drink or as a side snack for lunch during festivals. It goes well as a snack just by itself also. Once it cools completely, store in clean airtight box. It stays good for about a week and remains crisp.

FAQS

1.Can I skip cashews?

Yes, you can skip but then it becomes regular murukku. Cashews give rich and nutty taste.

2.Can I add spices?

Yes, you can add some cumin seeds or ajwain to the dough for a variation.

3.Which mould works best?

I usually use star or flower mould, you can use thenkuzhal mould too.

4.Can I make the dough earlier?

Better to make fresh, but if making large batch keep dough covered to avoid drying.

5.Is this suitable for kids?

Yes, it is mild and not spicy, kids will enjoy the nutty taste.
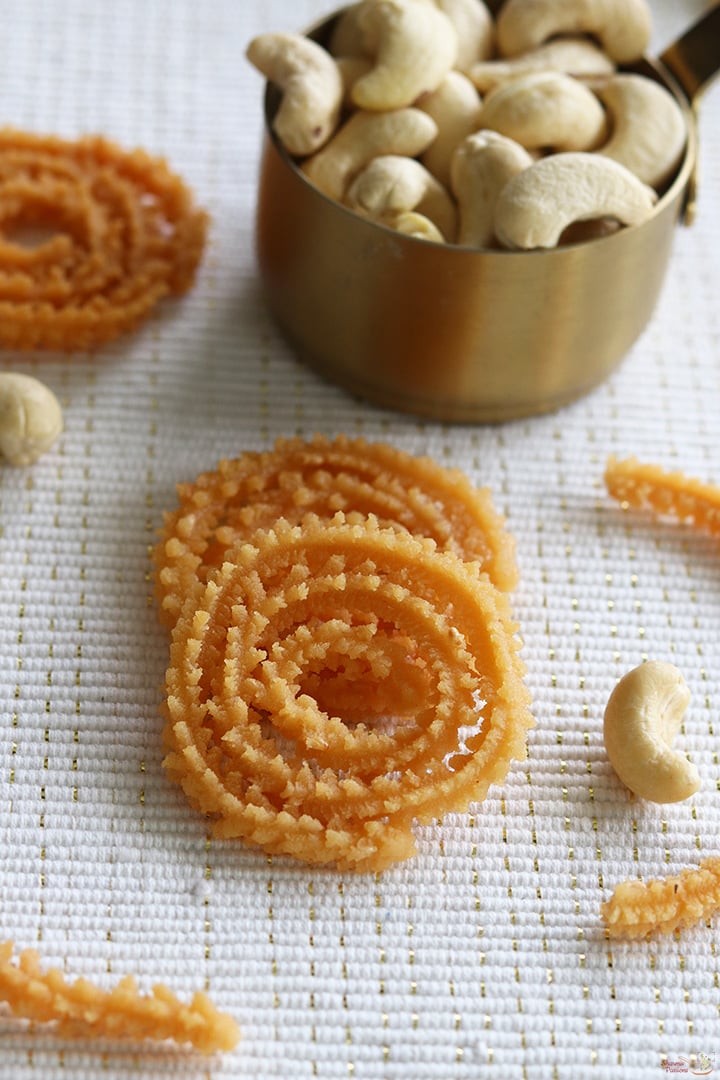
cashew murukku served

If you have any more questions about this Cashew Murukku RecipeΒ do mail me at sharmispassions@gmail.com. In addition, follow me on Instagram,Β Facebook,Β PinterestΒ ,YoutubeΒ andΒ TwitterΒ .

Tried this Cashew Murukku Recipe? Do let me know how you liked it. Also tag us on Instagram @sharmispassions and hash tag it on #sharmispassions.

πŸ“– Recipe Card

Print

Cashew Murukku Recipe | Mundhiri Murukku Recipe

Cashew Murukku is a rich and tasty snack made by adding cashew paste into the normal murukku dough. It comes out crisp and crunchy with nutty flavour from cashews. The taste is little different from regular murukku because of the mild sweetness and special flavour that cashew gives.
Course Snack
Cuisine Indian
Keyword diwali dishes, diwali recipes, diwali snacks, diwali snacks recipes, easy diwali recipes, easy diwali snacks, Festival, murukku, savoury recipes, snack recipes
Prep Time 10 minutes
Cook Time 20 minutes
Total Time 30 minutes
Servings 4
Calories 238kcal
Author Sharmilee J

Ingredients

  • 1 cup rice flour
  • 20 cashews
  • 1 tablespoon butter
  • 1 teaspoon sesame seeds
  • β…› teaspoon hing
  • salt to taste
  • water as needed.
  • oil to deep fry

Instructions

  • To a bowl add 20 cashews, add ΒΌ cup hot water to it. Soak for 30 minutes.
  • After 30 minutes grind it to a fine paste and set aside.
  • To a mixing bowl add 1 cup rice flour, salt to taste and 1 tablespoon butter.
  • Mix this well first for butter to be evenly distributed.
  • Now add 1 teaspoon sesame seeds, ΒΌ teaspoon hing and prepared cashew paste.
  • Mix it well.
  • Add water little by little and mix well.
  • Gather to form a soft dough.
  • Form cylinders like this so that fitting into murukku press will be easy.
  • Fit the mould into the murukku press, I used star shape. Grease murukku press with oil.
  • Fill in with dough.
  • Press to check.
  • .Grease 2-3 ladles and keep it ready. Press on it in concentric circles. Tuck in loose ends so that it doesn't open while frying. I made small murukkus. Pressing in ladles helps to flip in hot oil easily.
  • You can press in butter paper or cloth too. Just slide in using a ladle to remove.
  • Heat oil. Pinch a tiny pinch of dough and add it. If it rises immediately then oil is heated well. Now add 4-5 murukkus at a time.
  • When bubbles and 'shh' sound stops and murukku turns golden drain and remove.
  • Repeat to finish.
  • Cashew murukku is ready!

Video

Notes

  • Soak cashews well - I always soak cashews in hot water for at least 30 minutes. This makes it easy to grind smooth, otherwise the dough may get chunks.
  • Make smooth dough - I add water little by little while mixing. It should be soft and non sticky. If it gets watery, sprinkle little rice flour. If it's hard, sprinkle little water.
  • Choosing mould - You can either choose thenkuzhal or star or flower mould which best suits this murukku.
  • Fry in right flame - I always keep the flame medium. If oil is too hot, murukku will turn brown fast but stay raw inside. If oil is too low, murukku will drink oil.
  • Cover the dough - If I make in big batch, I always keep the dough covered with cloth so it does not dry and crack while pressing.

Nutrition

Serving: 75g | Calories: 238kcal | Carbohydrates: 34g | Protein: 4g | Fat: 9g | Saturated Fat: 3g | Polyunsaturated Fat: 2g | Monounsaturated Fat: 4g | Trans Fat: 0.1g | Cholesterol: 8mg | Sodium: 43mg | Potassium: 84mg | Fiber: 1g | Sugar: 1g | Vitamin A: 88IU | Vitamin C: 0.1mg | Calcium: 13mg | Iron: 1mg

The post Cashew Murukku Recipe (Mundhiri Murukku) appeared first on Sharmis Passions.
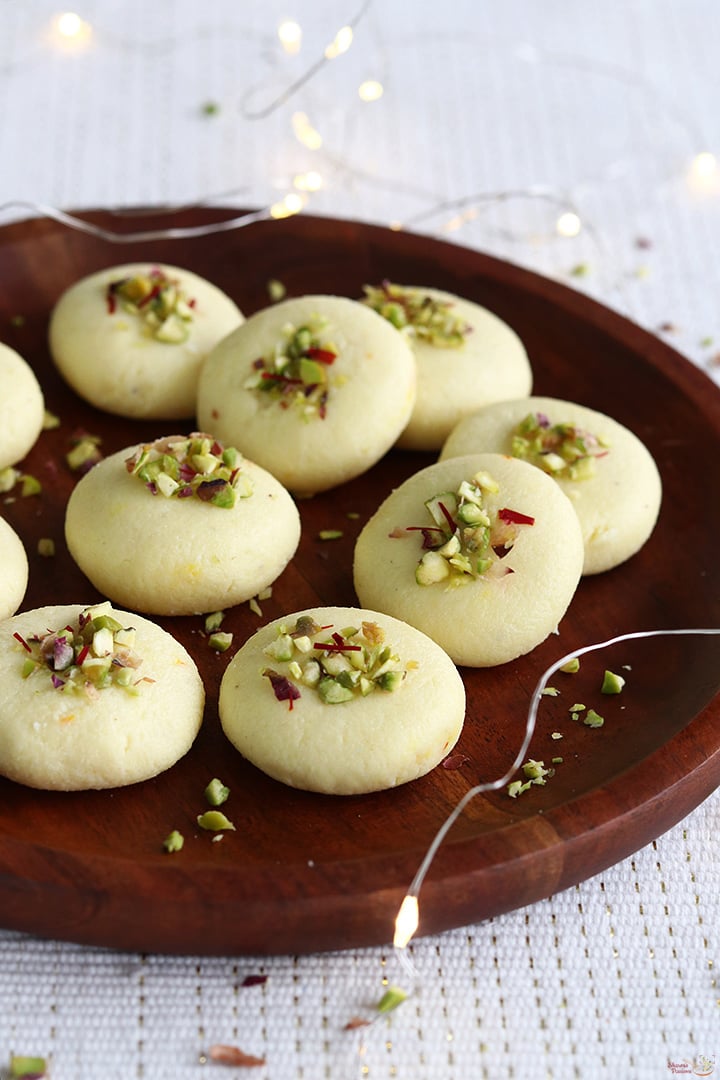
Sandesh Recipe | Bengali Sondesh Recipe

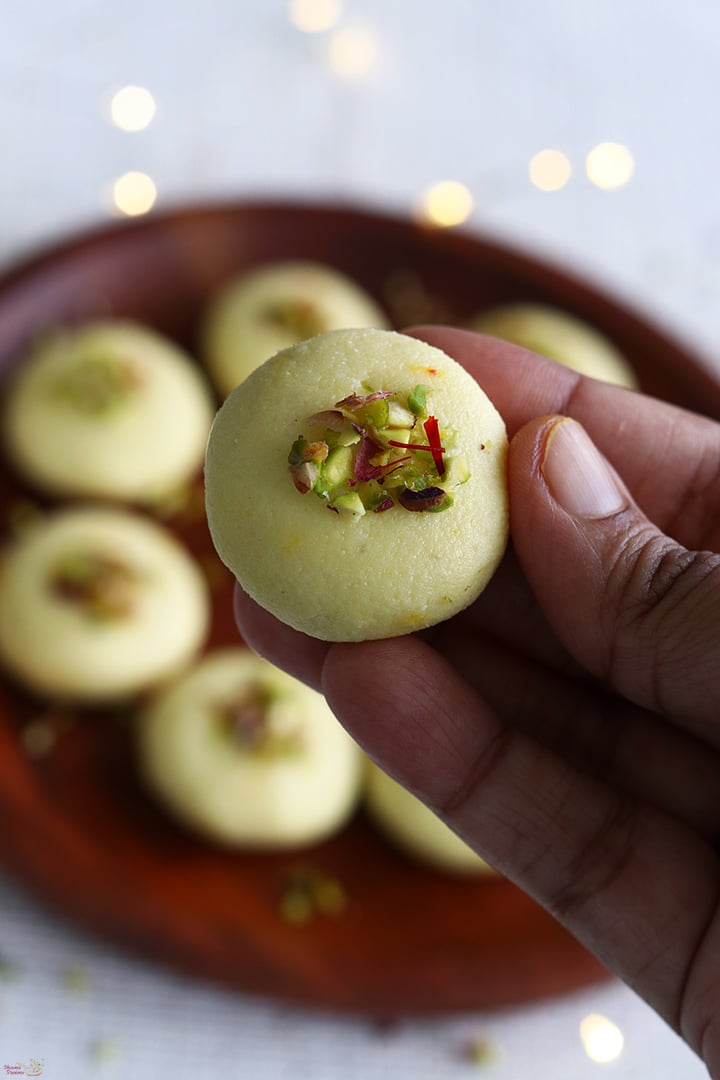
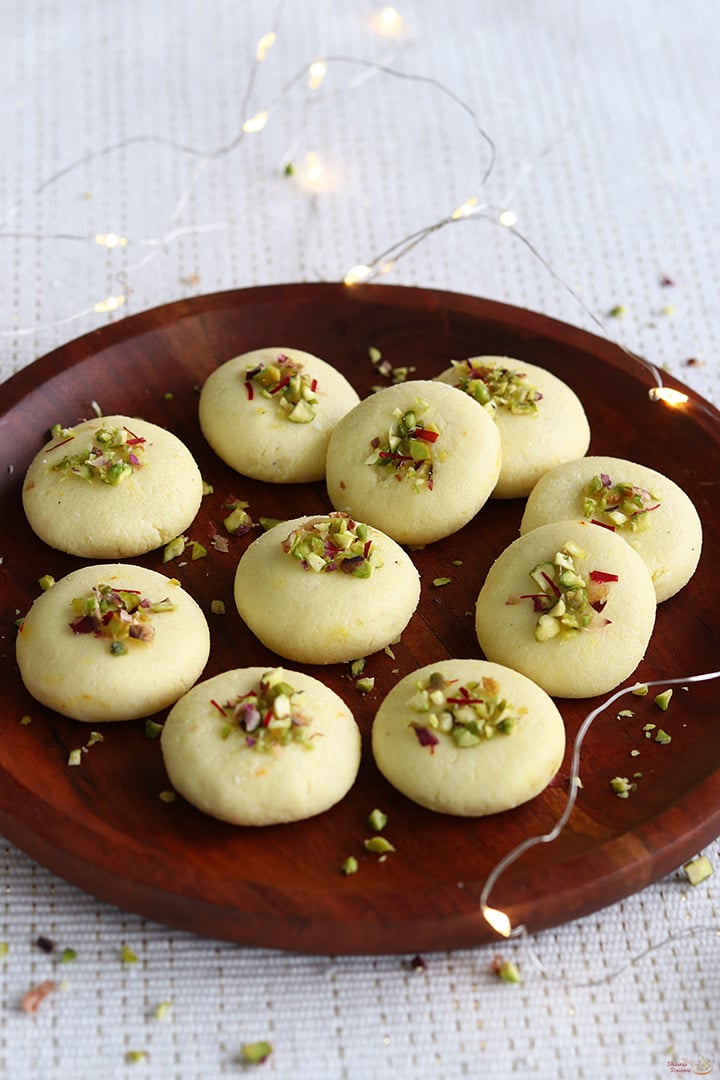
Sandesh is a delicious Bengali milk sweet popular all over India. Sandesh also known as Bengali Sondesh is milk cheese based rich sweet made using milk, sugar, nuts, cardamom powder and saffron. Sandesh is most commonly made for festivals and special occasions.

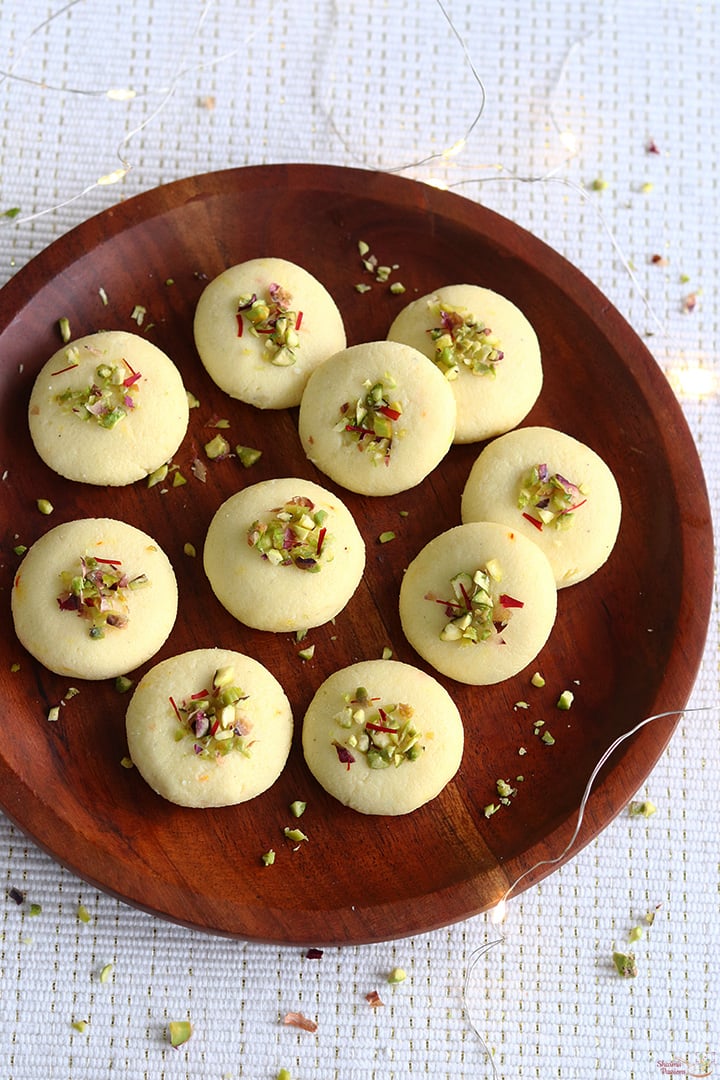
sandesh served in a wooden plate

Sandesh sweet can be made for special occasions, festivals like Navratri, Diwali and Durga Pooja. It is made with just simple ingredients from your kitchen and can be made easily within just few minutes of time. Even beginners can try this simple, quick and easy sweet.

[feast_advanced_jump_to]

About Sandesh

Sandesh is a popular Bengali sweet made by first curdling milk to form chenna then mixing it with sugar and cooking until soft, non sticky, then shaping into small discs and garnishing with nuts.

There are many variations to sandesh including many flavours but the one I have shared here is the traditional one. The colour and taste of sandesh veries depending on the flavours we add.

This is the easiest sweet I have made, just few minutes and you are done with this yummy milk sweet. To make the best tasting sandesh, chenna should be prepared fresh and using store bought paneer may change the taste of sandesh.

The garnishings are end less you can add chocolte chips or nuts or dry fruits of your choice. Sandesh tastes incredibly delicious making it one of the popular sweets in Bengal.

Similar Recipes

sandesh sweet served in a wooden plate

Sandesh Video

Sandesh Ingredients

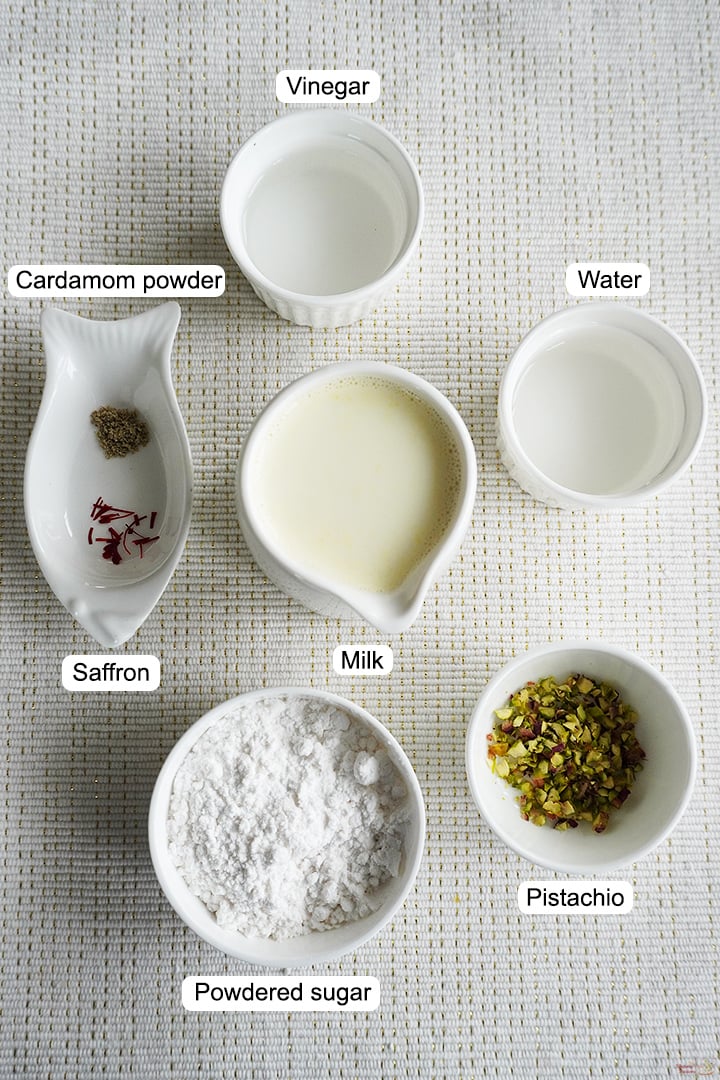
  • Milk - Use full cream milk either farm fresh or packed milk.
  • Vinegar - You can use vinegar or lemon juice to curdle milk.
  • Sugar - Grind sugar to a fine powder then use it.
  • Nuts - I have used chopped pistachios for garnish. You can even use almonds, cashews etc.
  • Saffron - Saffron adds a rich flavour and mild colour to this sweet.
  • Cardamom powder - This is one of the main flavourings for sandesh.
ingredients needed to make sandesh

How to make Sandesh Step by Step

1.To a sauce pan add 1 liter milk. Stir and boil for a minute. Switch off and let it rest for 2-3 minutes.

boil milk

2.To a small bowl add 2 tablespoon vinegar, 2 tablespoon water, mix it well and set aside.

mix vinegar with water

3.Now add vinegar water solution little by little and stir gently. Now the flame is off, this helps to slowly curdle milk and the resulting chenna is so soft.

add it to milk

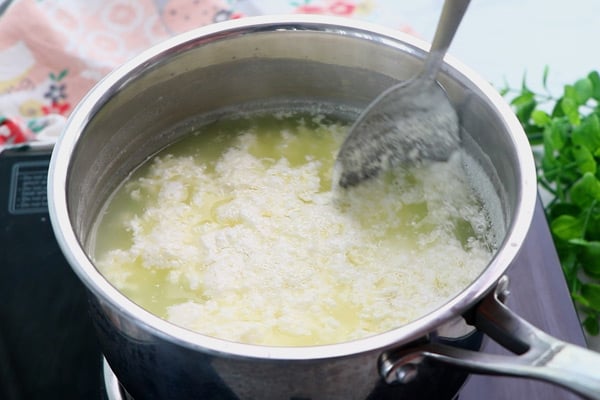
4.Now whey water(green liquid) and chenna(white solid) separates.

milk is curdled

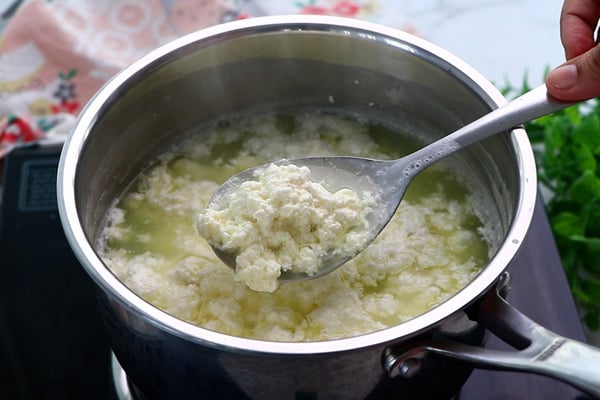
5.Now it is curdled completely. Switch off.

chenna in a ladle

6.Transfer this to a cloth placed on a strainer. Keep a bowl underneath to collect the whey water. You can use this whey water for kneading chapathi dough or for curdling milk again.

add to a strainer

7.Rinse it with water well.

rinse well with water

8.Squeeze excess water.

squeeze water

9.Roll and place it on the strainer. Keep 2 bowls on it. Do not keep heavy weight. Set aside for 30 minutes.

set aside for 10 mins

10.Now open, moisture should be still there slightly, it should not be dry.

moisture is still there

11.Transfer it to a plate.

transfer to a plate

12.Knead it well using your palm like shown. Knead until the texture changes smooth and soft.

knead well

13.Add β…“ cup powdered sugar, ΒΌ teaspoon cardamom powder and 5 strands saffron.

add sugar, cardamom powder and saffron

14.Mix well and gather to form a dough like this.

mix it well

14.Keep a pan in low flame and add it to the pan.

add to pan

15.Keep cooking in low flame.

cook the mixture

16.Cook for 3-5 minutes not more than that. If you cook longer it may become hard and will crumble. Switch off and remove from flame.

cooked

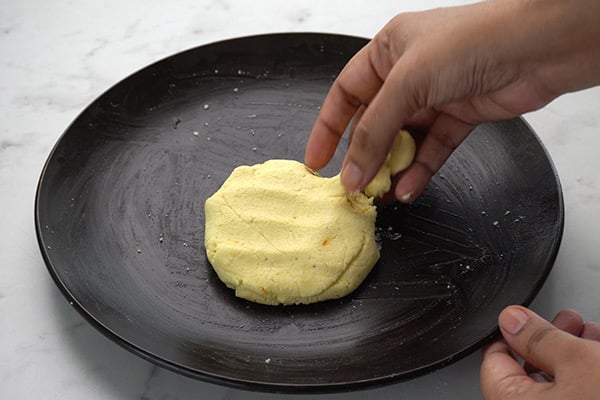
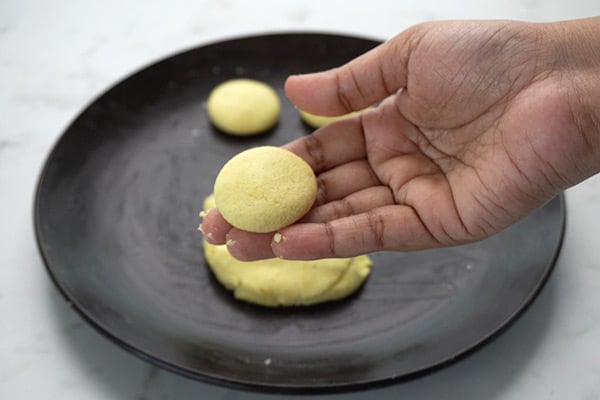
17.Transfer to a plate. Pinch a small portion.

pinch a small portion

18. Make small balls, flatten it slightly.

shape into discs

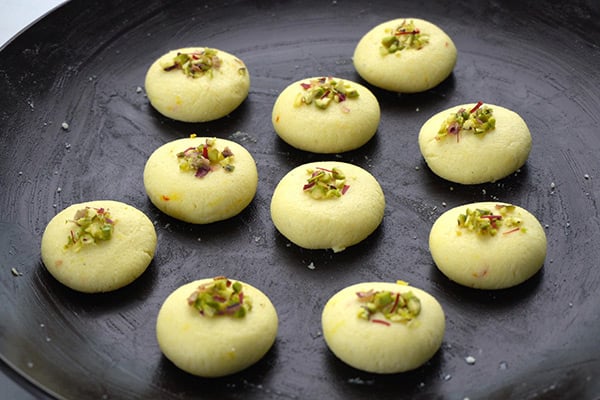
19.Garnish with chopped pistachio and saffron strands.

garnish with nuts

Sandesh is ready!

sandesh sweet served in a wooden plate

Expert Tips

  • Vinegar solution - Vinegar when mixed with water is more concentrated and makes chenna soft.
  • Preparing chenna - Boil milk give a quick stir and switch off, let it rest for few minutes before adding vinegar solution. Add vinegar, water mixture little by little and stir gently.
  • Kneading - I usually knead for at least 7-10 minutes till it becomes smooth and soft. Make sure you do not over knead then fat will get released.
  • Cooking - Cook the mixture in lowest flame and cook not more than 5 minutes.
  • Flavours - You can add cocoa powder to make chocolate sandesh, rose essence to make rose sandesh. Like wise you can make so many variations like orange sandesh, pista sandesh etc.

Serving and Storage

Sandesh is served as a sweet snack with other sweet varieties we make foe the festival. It can be stored in fridge for 3-5 days.

FAQS

1.What type of milk should I use?

Use full cream milk for best taste and volume. Avoid low fat or toned or skimmed milk.

2.While cooking it became crumbly, how to fix it?

Do no worry if happens when you over cook the mixture. Cool down the mixture then add to mixer and blend until smooth. Now transfer to a plate and shape it, sandesh is ready.

3.Can I add brown sugar or jaggery?

Yes you can use brown sugar or jaggery but make sure it is in powdered form and is free from impurities.

sandesh sweet served in a wooden plate

If you have any more questions about this Sandesh Recipe do mail me at sharmispassions@gmail.com. In addition, follow me on Instagram,Β Facebook,Β PinterestΒ ,YoutubeΒ andΒ TwitterΒ .

Tried this Sandesh Recipe? Do let me know how you liked it. Also tag us on Instagram @sharmispassions and hash tag it on #sharmispassions.

πŸ“– Recipe Card

Print

Sandesh Recipe | Bengali Sondesh Recipe

Sandesh is a delicious Bengali milk sweet popular all over India. Sandesh also known as Bengali Sondesh is milk cheese based rich sweet made using milk, sugar, nuts, cardamom powder and saffron. Sandesh is most commonly made for festivals and special occasions.
Course sweets
Cuisine Indian
Keyword dessert recipes, diwali dishes, diwali food, diwali mithai, diwali recipes, diwali sweets, diwali sweets recipes, easy diwali recipes, easy paneer recipes, indian paneer recipes, milk recipes, paneer dishes, paneer recipes, sweet recipes
Prep Time 20 minutes
Cook Time 10 minutes
Total Time 30 minutes
Servings 6 pieces
Calories 129kcal
Author Sharmilee J

Ingredients

To curdle milk

  • 1 litre milk
  • 2 tablespoon vinegar
  • 2 tablespoon water

To make sandesh

Instructions

  • To a sauce pan add 1 liter milk. Stir and boil for a minute. Switch off and let it rest for 2-3 minutes.
  • To a small bowl add 2 tablespoon vinegar, 2 tablespoon water, mix it well and set aside.
  • Now add vinegar water solution little by little and stir gently. Now the flame is off, this helps to slowly curdle milk and the chenna is so soft.
  • Now whey water(green liquid) and chenna(white solid) separates.
  • Now it is curdled completely. Switch off.
  • Transfer this to a cloth placed on a strainer. Keep a bowl underneath to collect the whey water. You can use this for kneading chapathi dough or for curdling milk again.
  • Rinse it with water well.
  • Squeeze excess water.
  • Roll and place it on the strainer. Keep 2 bowls on it. Do not keep heavy weight. Set aside for 10 minutes.
  • Now open, moisture should be there, it should not be dry.
  • Transfer the prepared chenna to a wide plate.
  • Knead it well using your palm like shown. Knead until the texture changes smooth and soft.
  • Add β…“ cup powdered sugar, ΒΌ teaspoon cardamom powder and 5 strands saffron.
  • Mix well and gather to form a dough like this.
  • Keep a pan in low flame and add it to the pan.
  • Keep cooking in low flame.
  • Cook for 3-5 minutes not more than that. If you cook longer it may become hard and will crumble. Switch off and remove from flame.
  • Transfer to a plate. Pinch a small portion.
  • Make small balls, flatten it slightly.
  • Garnish with chopped pistachio and saffron strands.
  • Sandesh is ready!

Video

Notes

  • Vinegar solution - Vinegar when mixed with water is more concentrated and makes chenna soft.
  • Preparing chenna - Boil milk give a quick stir and switch off, let it rest for few minutes before adding vinegar solution. Add vinegar, water mixture little by little and stir gently.
  • Kneading - I usually knead for at least 7-10 minutes till it becomes smooth and soft. Make sure you do not over knead then fat will get released.
  • Cooking - Cook the mixture in lowest flame and cook not more than 5 minutes.
  • Flavours - You can add cocoa powder to make chocolate sandesh, rose essence to make rose sandesh. Like wise you can make so many variations like orange sandesh, pista sandesh etc.

Nutrition

Serving: 40g | Calories: 129kcal | Carbohydrates: 13g | Protein: 6g | Fat: 6g | Saturated Fat: 3g | Polyunsaturated Fat: 0.4g | Monounsaturated Fat: 1g | Cholesterol: 21mg | Sodium: 66mg | Potassium: 283mg | Fiber: 0.2g | Sugar: 13g | Vitamin A: 287IU | Vitamin C: 2mg | Calcium: 214mg | Iron: 0.1mg

The post Sandesh Recipe | Bengali Sondesh Recipe appeared first on Sharmis Passions.

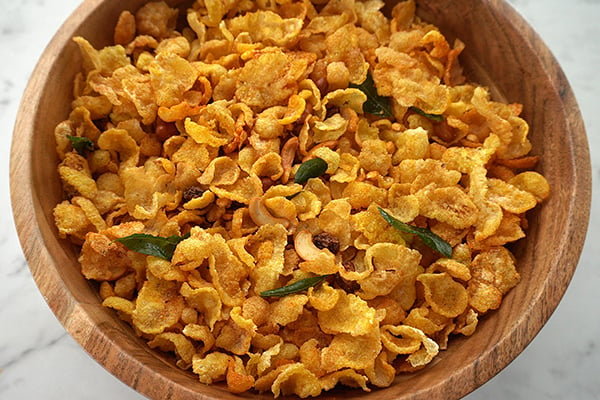
Cornflakes Mixture Recipe (Cornflakes Chivda)

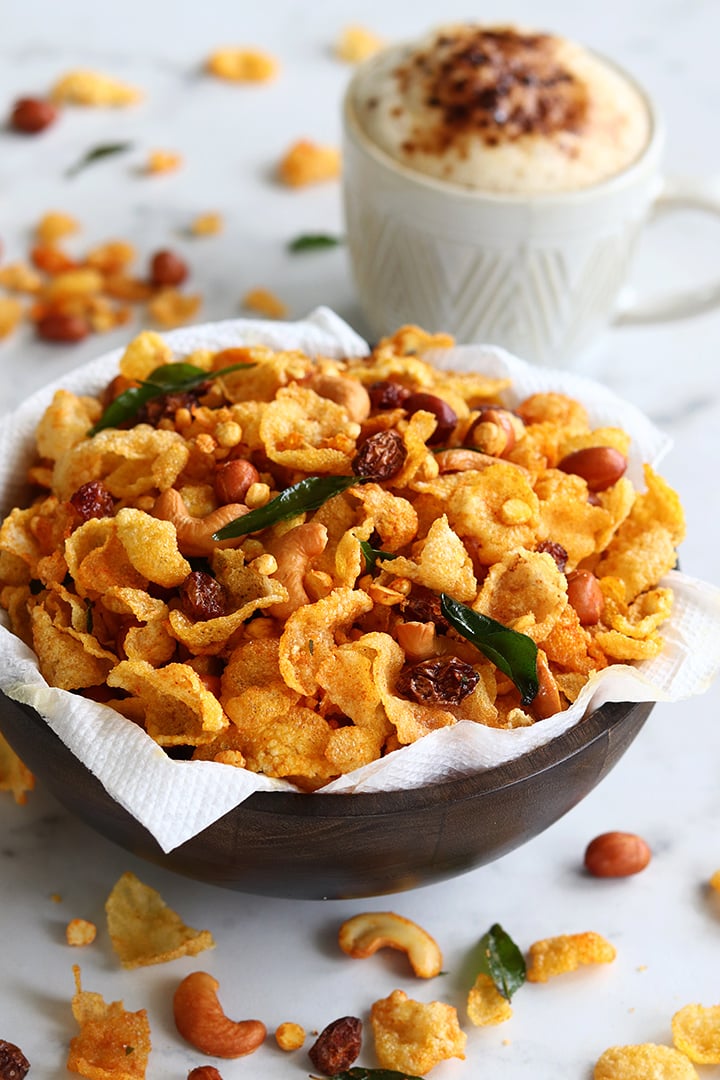
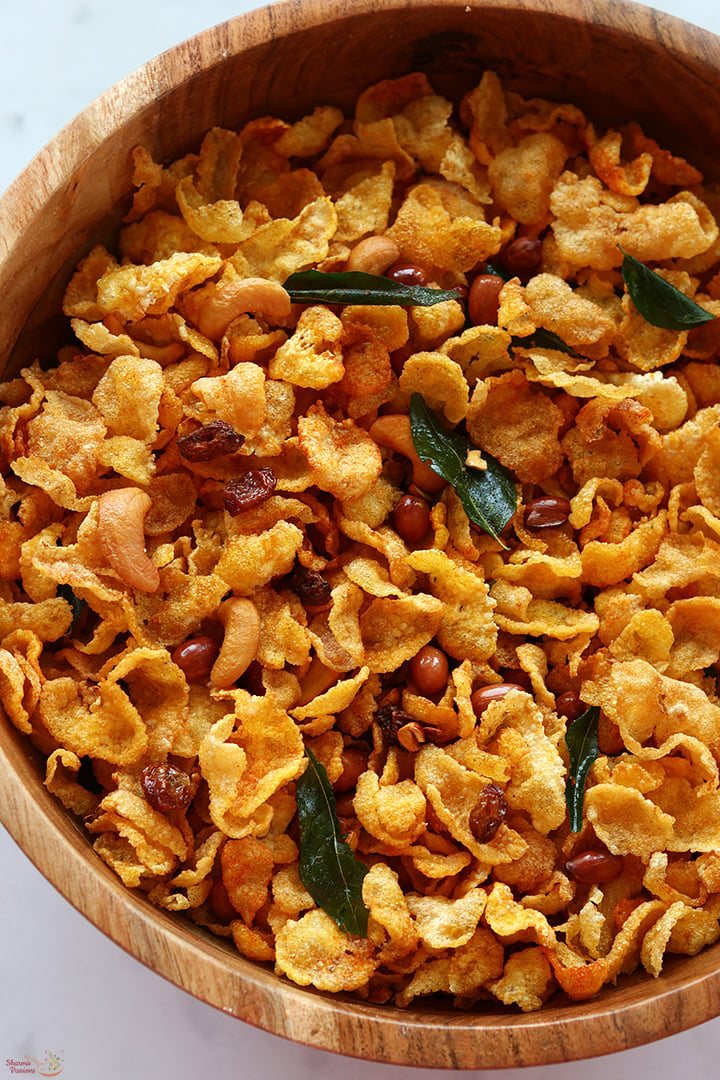
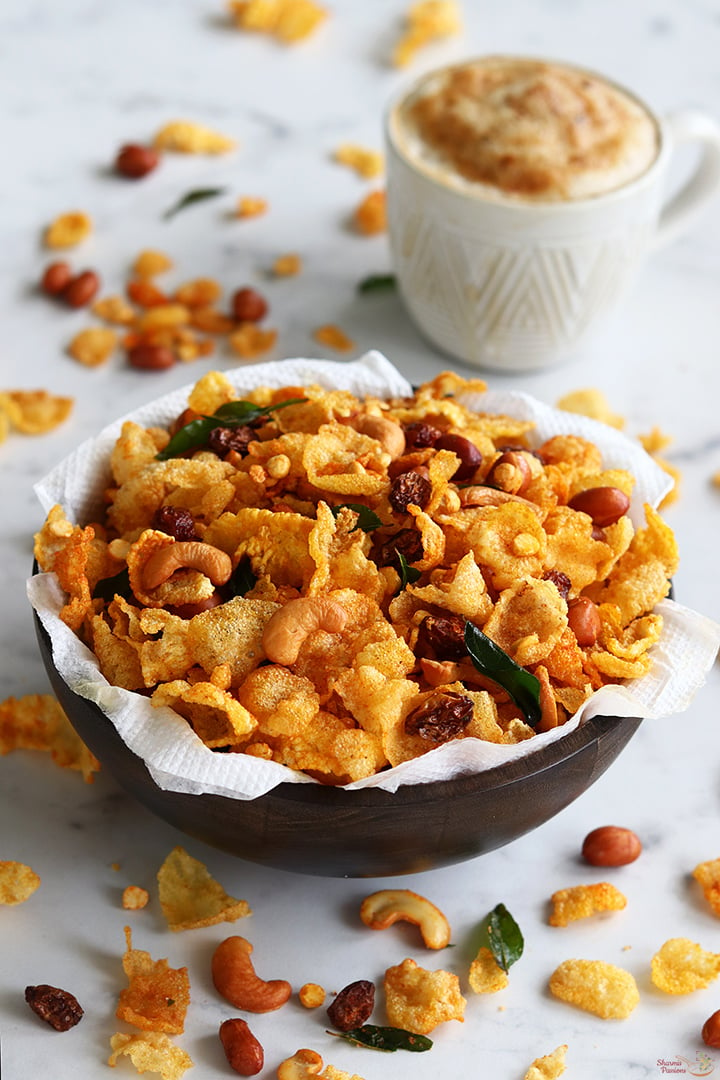
Cornflakes Mixture is a quick to make crunchy snack made by frying raw cornflakes, fried gram dal, peanuts, cashews, raisins, curry leaves and tossing it with spice powders and salt. Also known as Makai Chivda or Cornflakes Chivda it is an instant snack that can be made quickly perfect for this festive season.

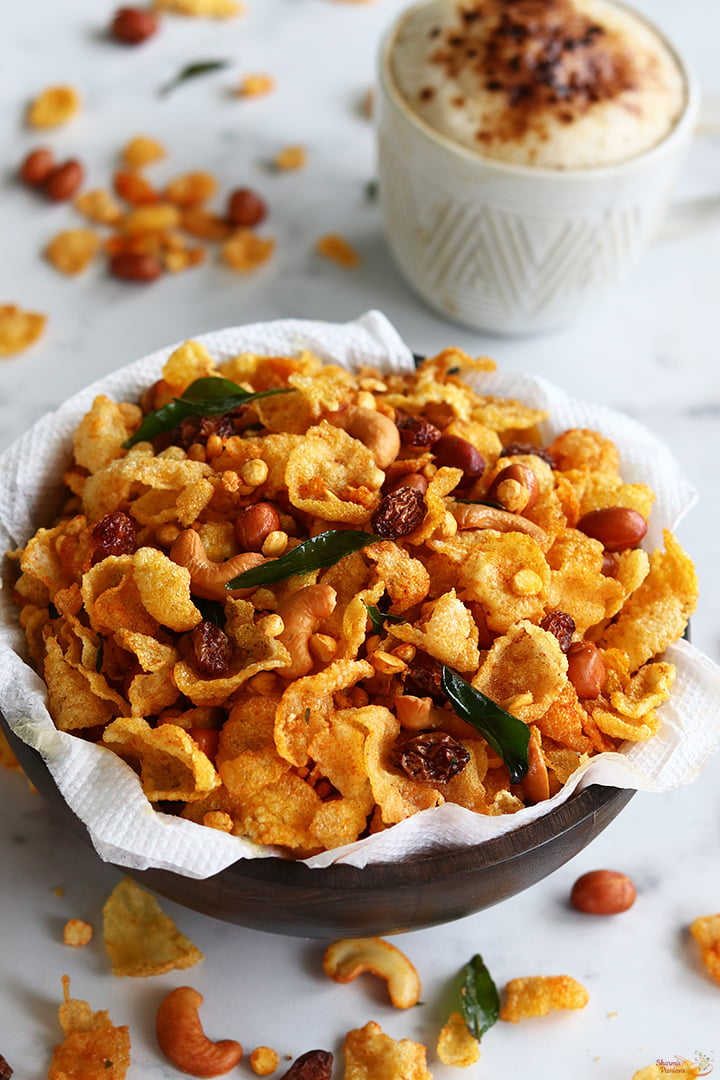
cornflakes mixture served with coffee

Cornflakes Mixture popularly known as Cornflakes Chivda is a instant to make snack, if you have the ingredients measured and ready then it takes just few minutes to make it. Do try this crunchy and delicious savoury snack and enjoy!

[feast_advanced_jump_to]

About Cornflakes Mixture

Cornflakes Mixture is a savoury crunchy snack which is quick to make and is addictive. This is a very easy snack that you can make for kids, gets ready in minutes. You can make a huge batch and store it.

I have tasted cornflakes mixture only few times. Last time when I visited my friend Sowmya she served us cornflakes sweet mixture , I loved the taste. So tried it for a Diwali and it was a huge hit with family and friends. So after that I started making it often as it is easy and quick to make.

Not only for occasions you can make it for evening tea time snack, kids will love it too. Raisins is the one of the main ingredient that gives taste to this mixture so do not skip it. Hubby who is not fond of raisins loved it too. Gugu and amma picks all the raisins first as they love it so much, haha.

You can get raw dried cornflakes in supermarket. Do not buy the cereal variety. Incase for those who are not able to source raw cornflakes, I have given alternate, you can check my faqs section.

cornflakes mixture just made

Cornflakes Mixture Video

Cornflakes Mixture is crunchy with a mild nutty taste. If you are looking for a different snack variety to make for this Diwali then this is just for you. It is quite additive that you can stop munching.

Similar Recipes

cornflakes mixture served with coffee

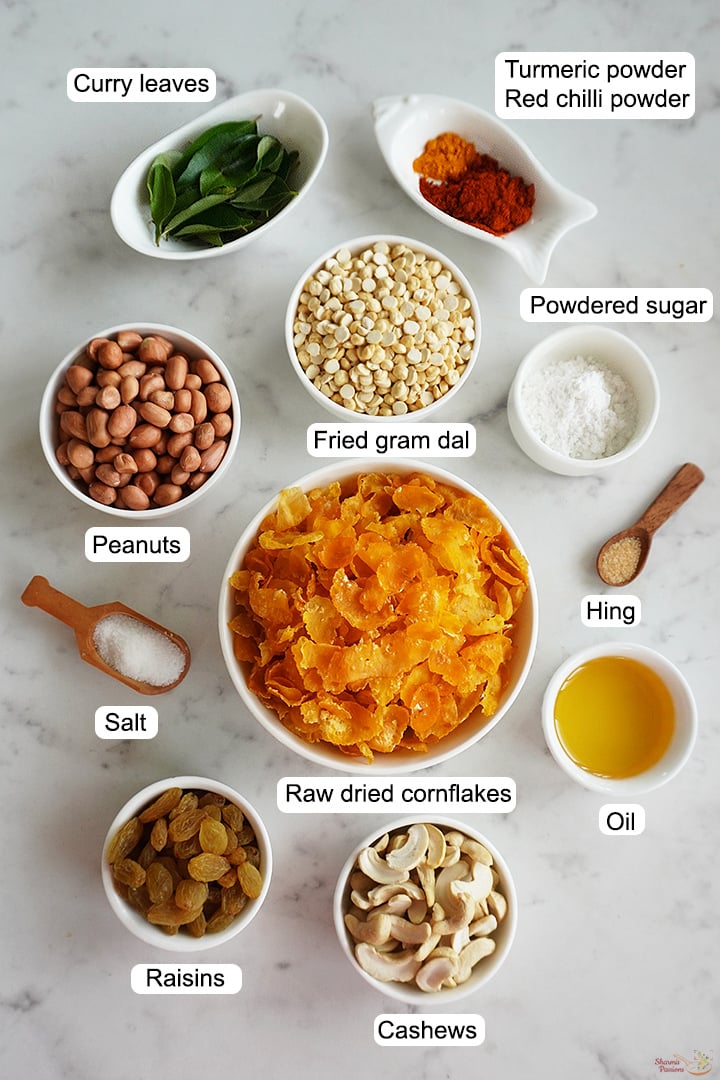
Cornflakes Mixture Ingredients

  • Cornflakes - Choose the dry raw cornflakes variety used for frying and not the cereal ones.
  • Fried gram dal - Fried gram dal is added for crunch and taste.
  • Cashew nuts - Cashew nuts is fried till golden and added.
  • Peanuts - I have used peanuts with skin, you can fry remove the skin and add it too.
  • Raisins - Raisins give a nice sweet taste to the mixture, do not miss adding it.
  • Red chilli powder - Red chilli powder is added for heat, adjust as per liking.
  • Turmeric powder - Turmeric powder is added for flavour and colour.
  • Hing - Hing is added to aid in digestion and adds flavour.
  • Powdered sugar - adds a balance to the spices.
  • Curry leaves - Curry leaves is added for taste and flavour.
  • Oil - Oil and ghee are used for frying the spices.

How to make Cornflakes Mixture Step by Step

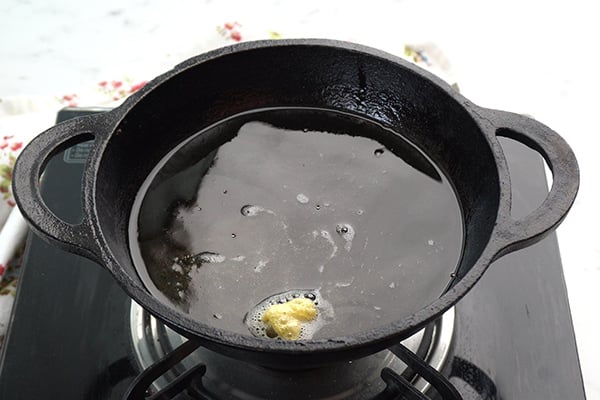
1.Heat oil in a kadai. Check if oil is hot by adding 1 cornflake if it rises immediately then it is ready. Use dried raw cornflakes and not the cereal variety.

fry and test

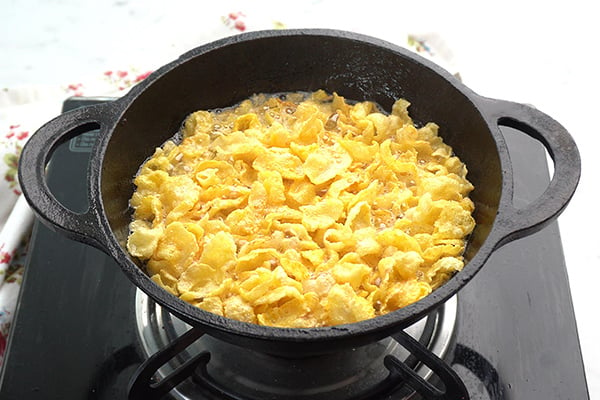
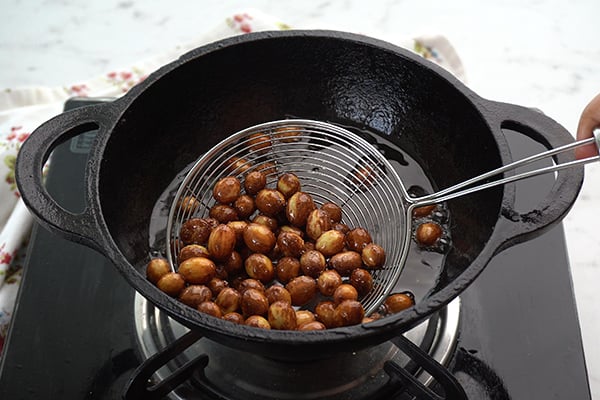
2.Add 3 cups raw cornflakes in batches. I fried in 4 batches. Add it and fry until 'shh' sound stops. Drain from oil and remove.

fry cornflakes

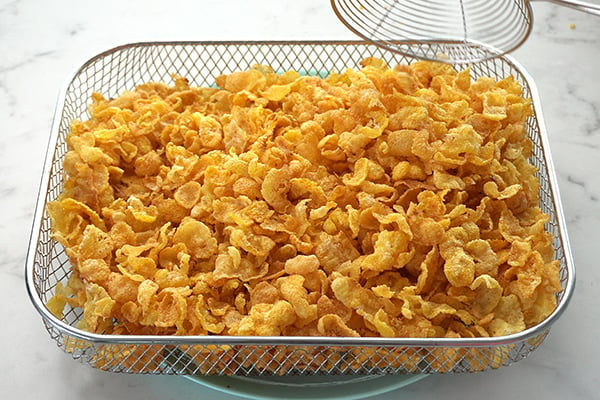
3.Add it to a straining basket. Repeat to finish the other batches too. Place a plate underneath the basket to collect the extra draining oil.

all fried and ready

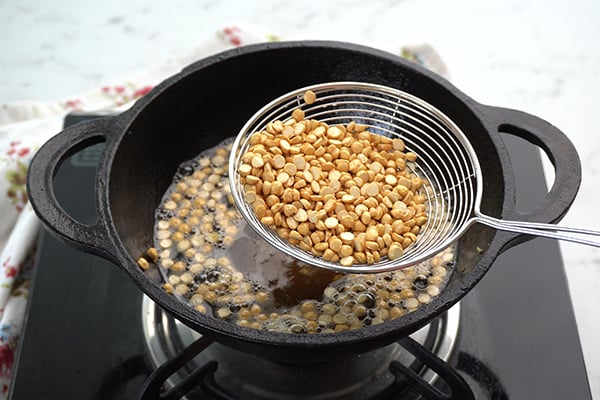
4.Add Β½ cup fried gram dal. Fry until golden, drain, remove and add it to the basket.

fry fried gram dal

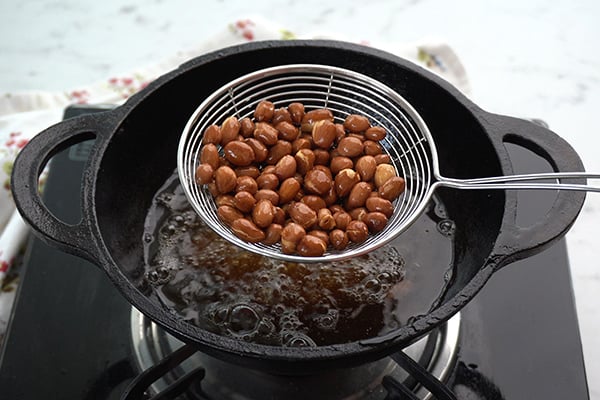
5.Add Β½ cup peanuts. Fry until golden brown, drain, remove and add it to the basket.

fry peanuts

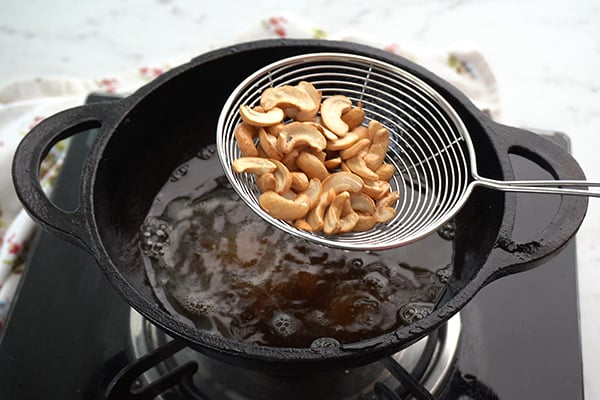
6.Add ΒΌ cup cashews. Fry until golden, drain, remove and add it to the basket.

fry cashews

7.Add ΒΌ cup raisins. Fry until golden, drain, remove and add it to the basket.

fry raisins

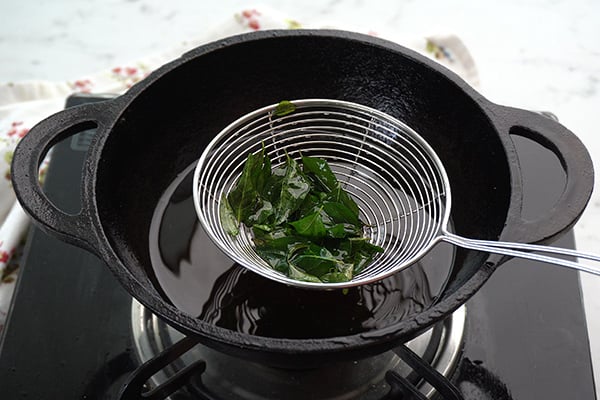
8.Switch off and add ΒΌ cup curry leaves. Fry until crisp, drain, remove and add it to the basket.

fry curry leaves

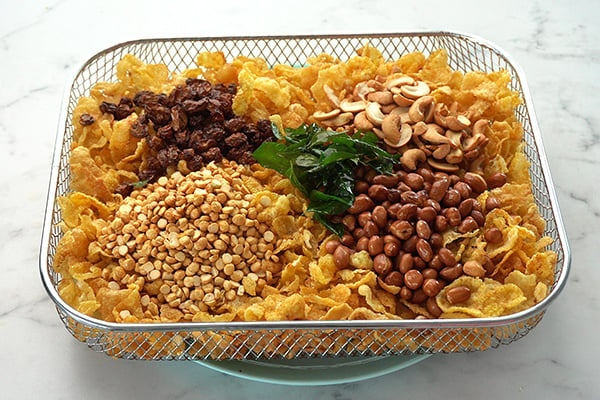
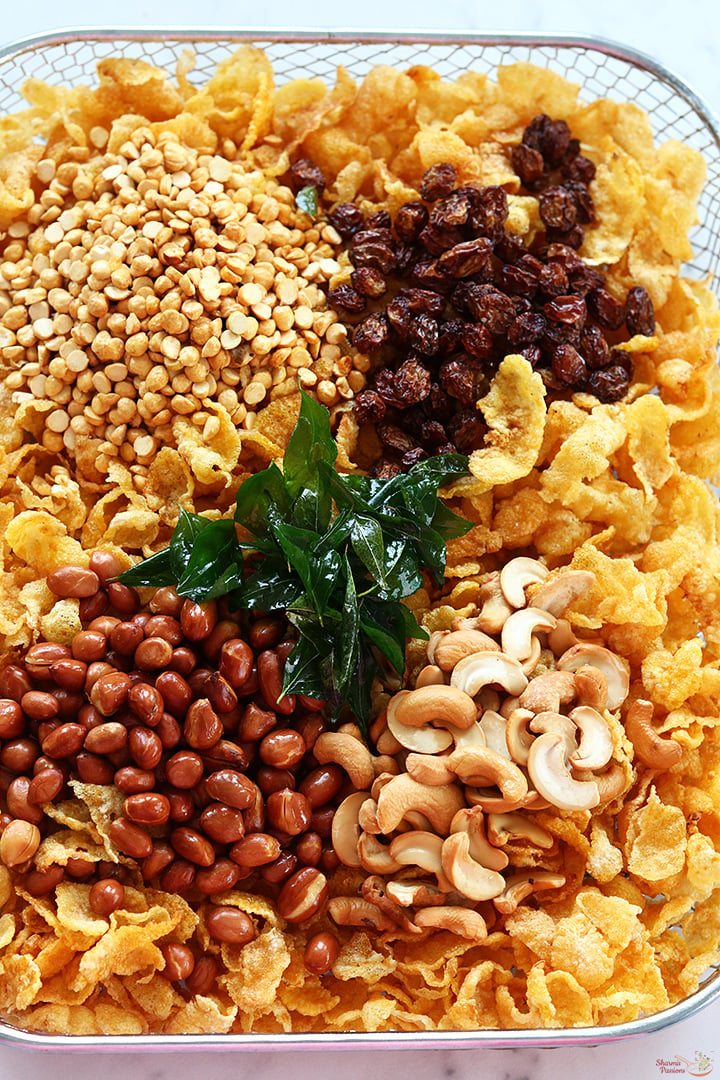
9.All fried and ready.

all fried and ready

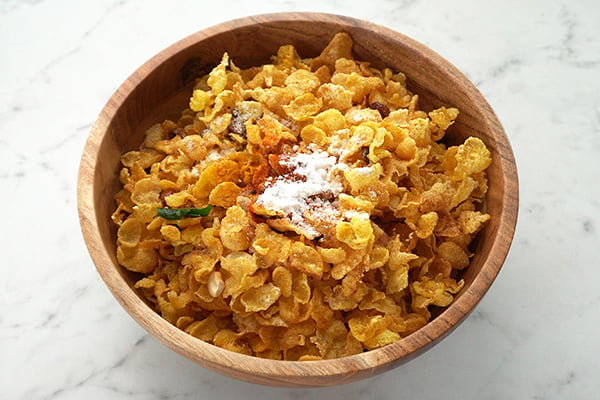
10.Transfer this to a big mixing bowl. Add salt to taste, Β½ teaspoon turmeric powder, 1 tablespoon red chilli powder, 2 teaspoon powdered sugar, ΒΌ teaspoon hing.

add spices

11.Toss well for even mixing. Gently toss without breaking the cornflakes.

toss well

Store in an airtight container.

cornflakes mixture served with coffee

Expert Tips

  • Frying - Always fry cornflakes in batches as it tends to expand while frying. Fry until shh sound ceases.
  • Add ons - If you like garlic flavour just add 2 crushed garlic fry and add it. You can even fry ΒΌ cup poha and add it.
  • Ingredients ready - Measure and keep the ingredients ready so that frying will be easy and quick.
  • Draining - Drain it well from oil then transfer it to a straining basket with a plate placed under so that extra draining oil gets collected there. You can use kitchen towel too.
  • Measures - The measures of nuts and raisins is purely your choice. You can plus or minus as per your liking.

Serving and Storage

Cornflakes Mixture can be served with coffee or tea. Store in a clean dry airtight container. This keeps well in room temperature for 2 weeks.

FAQS

1.I couldn't get raw cornflakes, what can I replace it with?

Use cereal cornflakes, add 2-3 tablespoon oil and fry it until crisp. Do not deep fry. Adjust the measurement of other ingredients for cereal cornflakes.

2.I don't like sweet taste in my mixture, Can I skip sugar?

Yes you can very well do that. Here sweetness is very mild but still if you prefer to skip it, please do it.

3.What other ingredients can I add?

You can add garlic fried and added, fry and add chopped almonds, sesame seeds etc.

cornflakes mixture fried ingredients

If you have any more questions about this Cornflakes Mixture RecipeΒ do mail me at sharmispassions@gmail.com. In addition, follow me on Instagram,Β Facebook,Β PinterestΒ ,YoutubeΒ andΒ TwitterΒ .

Tried this Cornflakes Mixture Recipe? Do let me know how you liked it. Also tag us on Instagram @sharmispassions and hash tag it on #sharmispassions.

πŸ“– Recipe Card

Print

Cornflakes Mixture Recipe | Cornflakes Chivda Recipe

Cornflakes Mixture is a quick to make crunchy snack made by frying raw cornflakes, fried gram dal, peanuts, cashews, raisins, curry leaves and tossing it with spice powders and salt. Also known as Makai Chivda or Cornflakes Chivda it is an instant snack that can be made quickly perfect for this festive season.
Course Snack
Cuisine Indian
Keyword corn recipes, diwali snacks, diwali snacks recipes, easy diwali snacks, snack recipes
Prep Time 10 minutes
Cook Time 20 minutes
Total Time 30 minutes
Servings 10
Calories 115kcal
Author Sharmilee J

Ingredients

  • 3 cups raw dried cornflakes (not the cereal variety)
  • Β½ cup fried gram dal
  • Β½ cup peanuts
  • ΒΌ cup cashews
  • ΒΌ cup raisins
  • ΒΌ cup curry leaves
  • salt to taste
  • Β½ teaspoon turmeric powder
  • 1 tablespoon red chilli powder
  • 2 teaspoon powdered sugar
  • ΒΌ teaspoon hing

Instructions

  • Heat oil in a kadai. Check if oil is hot by adding 1 cornflake if it rises immediately then it is ready. Use dried raw cornflakes and not the cereal variety.
  • Add 3 cups raw cornflakes in batches. I fried in 4 batches. Add it and fry until 'shh' sound stops. Drain from oil and remove.
  • Add it to a straining basket. Repeat to finish the other batches too. Place a plate underneath the basket to collect the extra draining oil.
  • Add Β½ cup fried gram dal. Fry until golden, drain, remove and add it to the basket.
  • Add Β½ cup peanuts. Fry until golden brown, drain, remove and add it to the basket.
  • Add ΒΌ cup cashews. Fry until golden, drain, remove and add it to the basket.
  • Add ΒΌ cup raisins. Fry until golden, drain, remove and add it to the basket.
  • Switch off and add ΒΌ cup curry leaves. Fry until crisp, drain, remove and add it to the basket.
  • All fried and ready.
  • Transfer this to a big mixing bowl. Add salt to taste, Β½ teaspoon turmeric powder, 1 tablespoon red chilli powder, 2 teaspoon powdered sugar, ΒΌ teaspoon hing.
  • Toss well for even mixing. Gently toss without breaking the cornflakes.

Video

Notes

  • Frying - Always fry cornflakes in batches as it tends to expand while frying. Fry until shh sound ceases.
  • Add ons - If you like garlic flavour just add 2 crushed garlic fry and add it. You can even fry ΒΌ cup poha and add it.
  • Ingredients ready - Measure and keep the ingredients ready so that frying will be easy and quick.
  • Draining - Drain it well from oil then transfer it to a straining basket with a plate placed under so that extra draining oil gets collected there. You can use kitchen towel too.
  • Measures - The measures of nuts and raisins is purely your choice. You can plus or minus as per your liking.

Nutrition

Serving: 75g | Calories: 115kcal | Carbohydrates: 13g | Protein: 6g | Fat: 5g | Saturated Fat: 1g | Polyunsaturated Fat: 2g | Monounsaturated Fat: 2g | Sodium: 25mg | Potassium: 216mg | Fiber: 5g | Sugar: 1g | Vitamin A: 688IU | Vitamin C: 237mg | Calcium: 68mg | Iron: 2mg

The post Cornflakes Mixture Recipe (Cornflakes Chivda) appeared first on Sharmis Passions.
Chocolate Peda Recipe

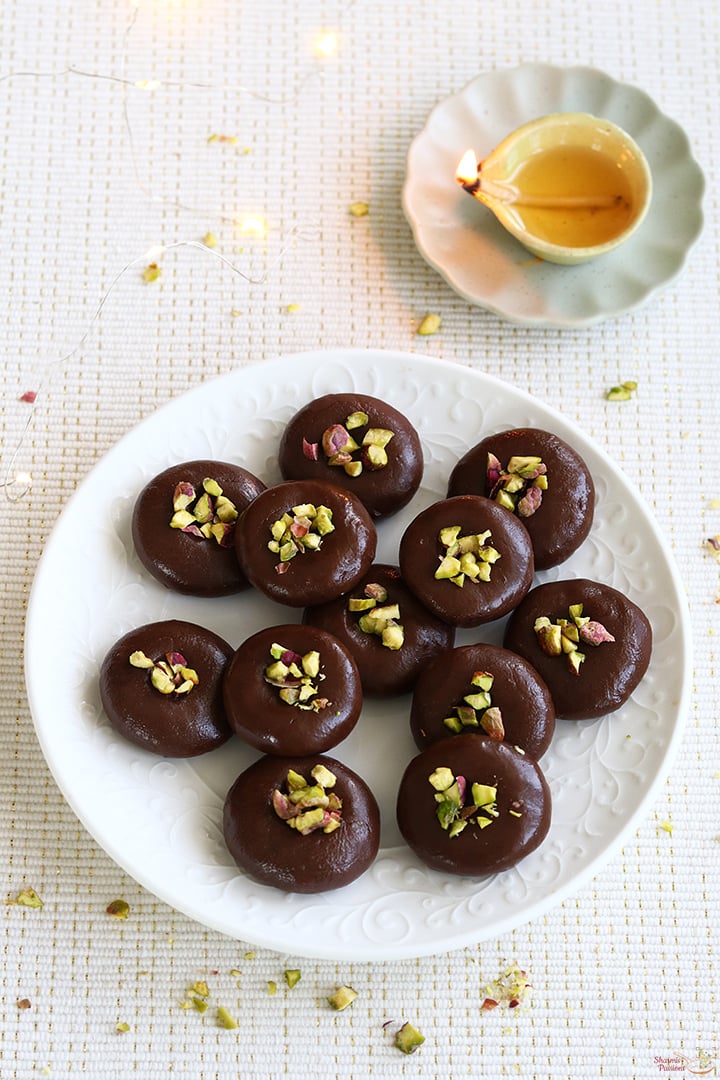
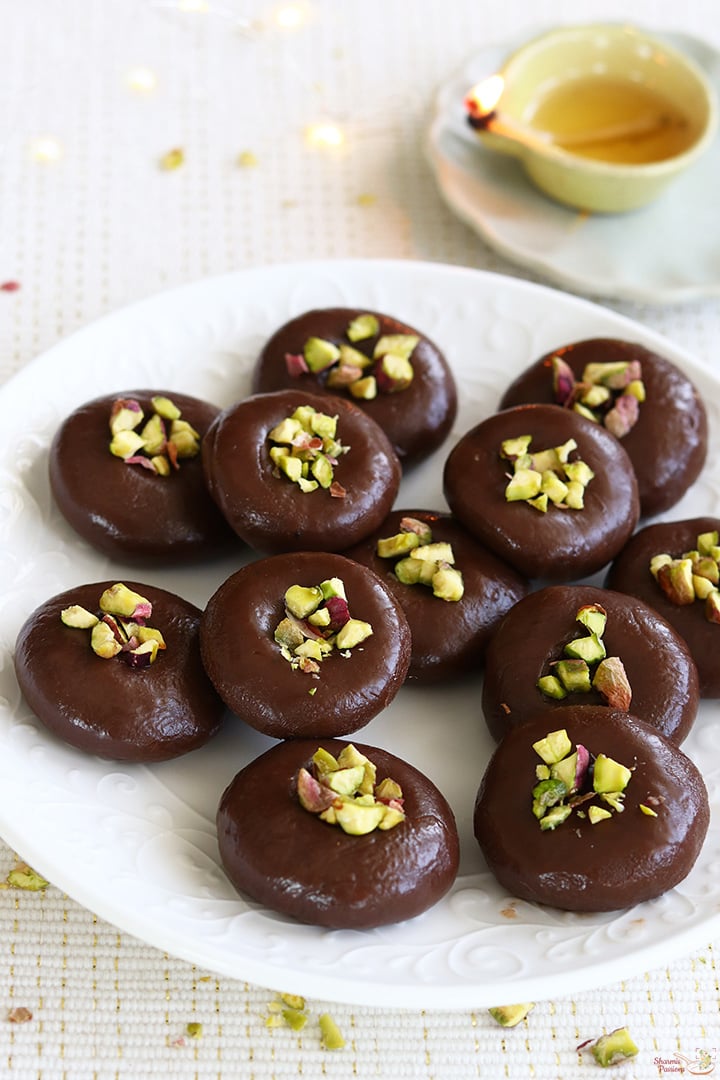
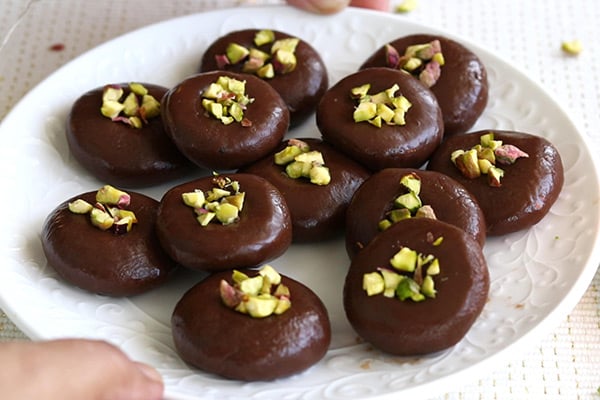
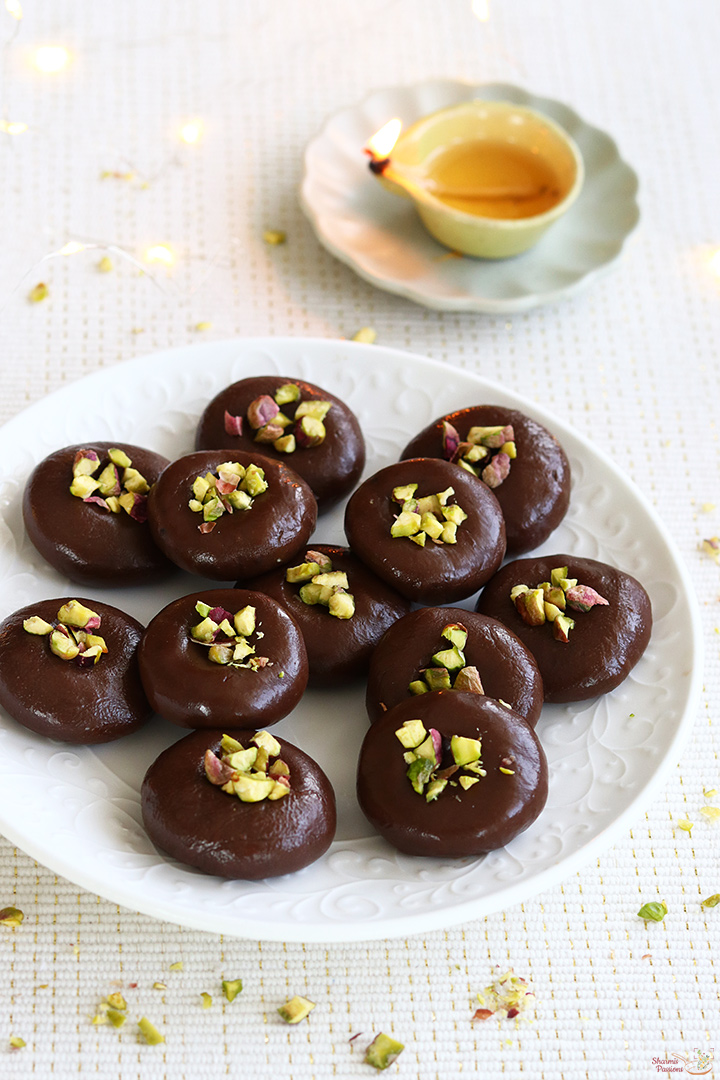
Chocolate Peda is a modern variation of the traditional Indian milk peda sweet. This sweet has rich chocolate flavour with mild milk taste which makes it very enjoyable to eat. The chocolate taste makes it more appealing especially for kids and chocolate lovers. It takes just few minutes to make this sweet, also beginner friendly.

chocolate peda served in a plate

This Chocolate Milk Peda is often prepared for festivals and also for special occasions at home. It is a quick sweet recipe that does not take much time to prepare. Its texture is soft, fudgy and the chocolate flavour makes it very tempting. This sweet may look simple but the taste is really rich.

[feast_advanced_jump_to]

About Chocolate Peda

Chocolate Peda is a simple sweet made with milk powder, condensed milk, sugar, milk, ghee and cocoa powder. The ingredients are mixed and cooked until it thickens then shaped into small discs and topped with nuts. Normally peda is made with milk solids and sugar, but in this version cocoa powder and chocolate is added.

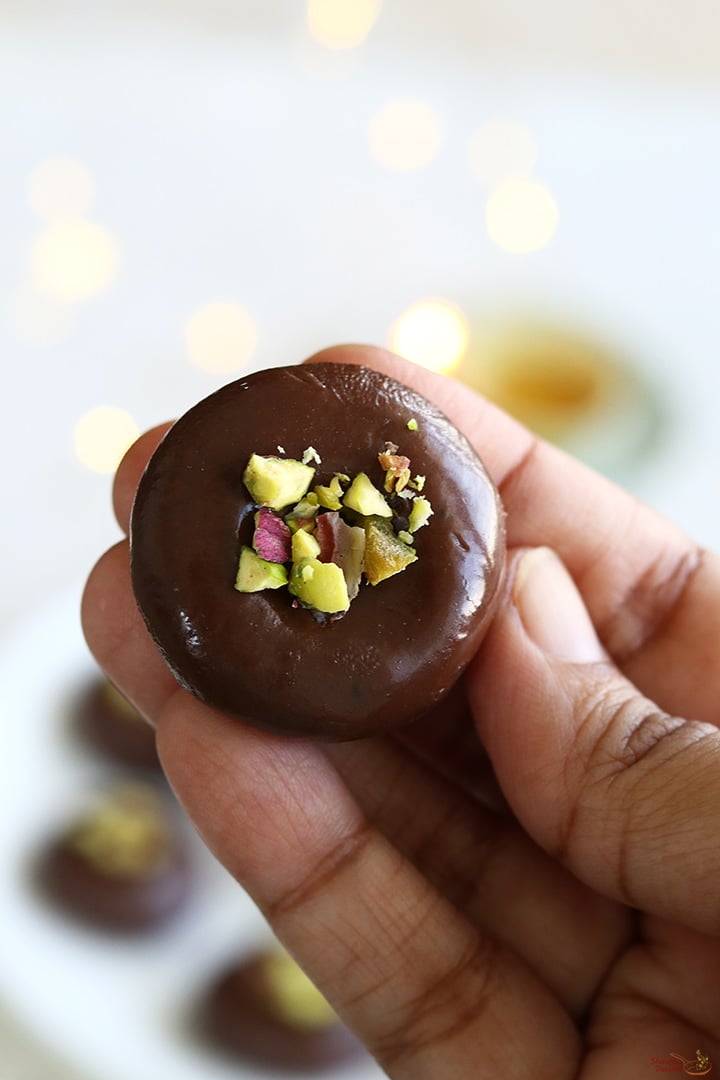
The mixture is cooked slowly until it becomes thick and leaves the sides of the pan. After cooling for a while, it is rolled into small balls and then flattened slightly into peda shape. Also chopped pistachios are added on top for garnish, this makes this sweet look appealing and the nuts add crunch while eating.

This recipe has soft and slightly chewy texture when freshly made. After resting for few hours it becomes little firm and the flavours develop better. Chocolate added in the mixture gives extra chocolate taste., also the peda gets deeper colour.

I usually make this chocolate peda during festivals when I want to make a quick sweet recipe. It does not need many ingredients and the result comes very tasty. My family always enjoys it with evening tea or after meals. It also works well when guests arrive suddenly.

Similar Recipes

chocolate peda served in a plate

Chocolate Peda Video

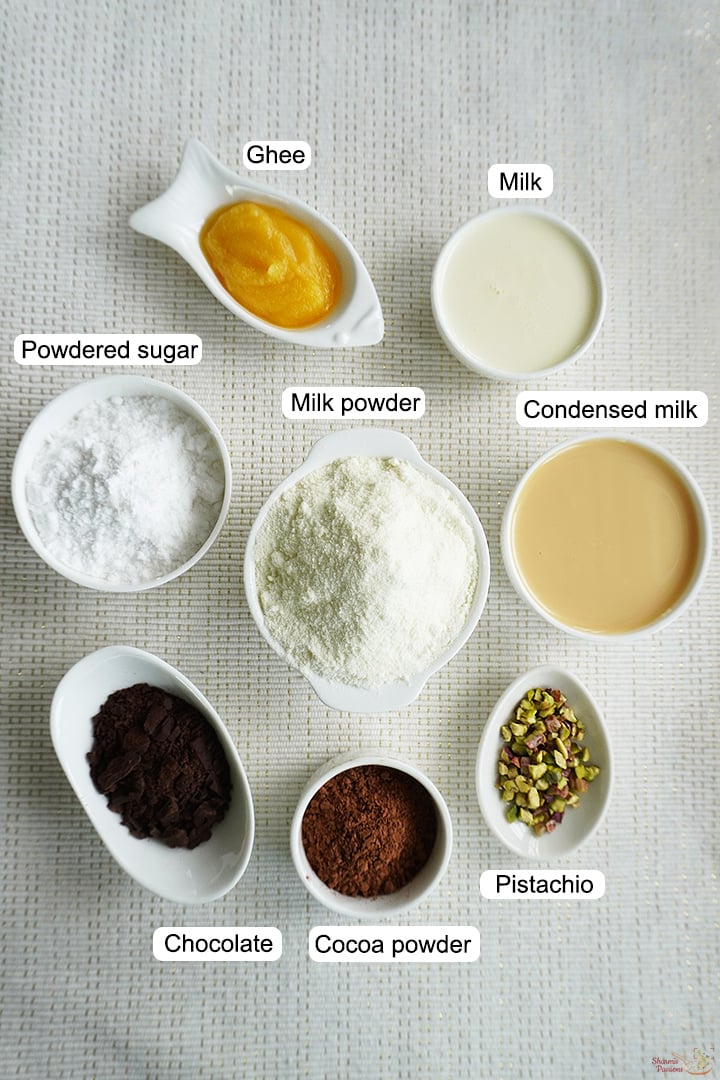
Chocolate Peda Ingredients

  • Condensed Milk - I used this for sweetness and creamy texture in the peda. It helps mixture become smooth and rich.
  • Milk Powder - This is the main base ingredient for this peda, it thickens the mixture and gives that milk sweet flavour.
  • Cocoa Powder - I added to give chocolate flavour and dark colour. You can sieve if there are lumps in the powder.
  • Powdered sugar - is added for more sweetness.
  • Milk - I added to mix cocoa powder smoothly, this helps to avoid lumps.
  • Chocolate - I added chocolate for extra chocolate taste in peda. When it melts it blends nicely with the mixture.
  • Ghee - I added ghee while cooking mixture. It adds richness and also helps mixture not stick to pan.
  • Pistachios - I add chopped pistachios for garnish on top of the peda. It gives little crunch and also makes peda look attractive.
ingredients needed to make chocolate peda

How to make Chocolate Peda Step by Step

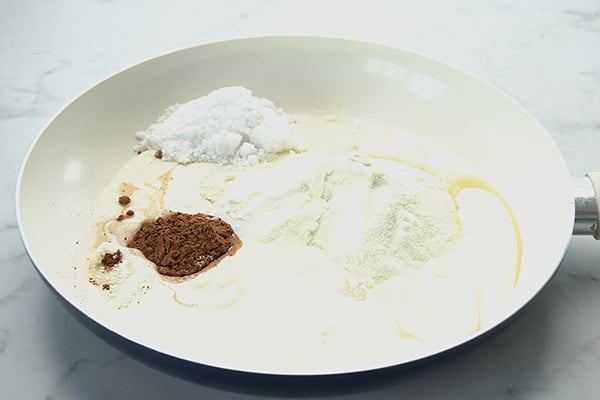
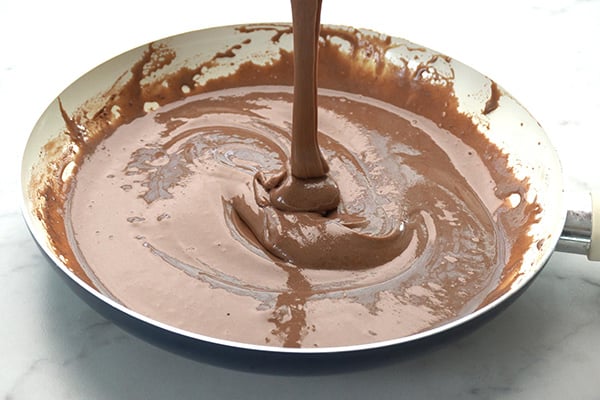
1.To a pan add 1 cup milk powder, Β½ cup condensed milk, ΒΌ cup powdered sugar, ΒΌ cup milk and 2 tablespoon cocoa powder. This is done off the flame step 1 to step 3.

add ingredients

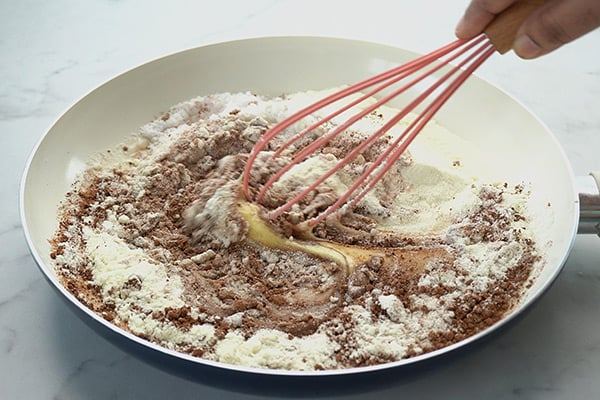
2.Mix well with a whisk.

mix well

3.Whisk until smooth and there are no lumps.

mix without lumps

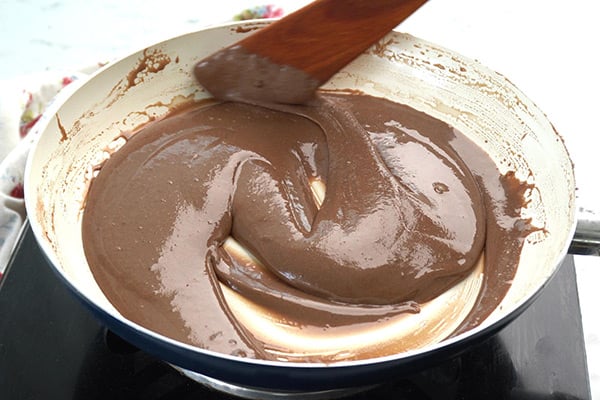
4.Now keep the pan in flame and start stirring. Only now we are switching on the flame.

start cooking

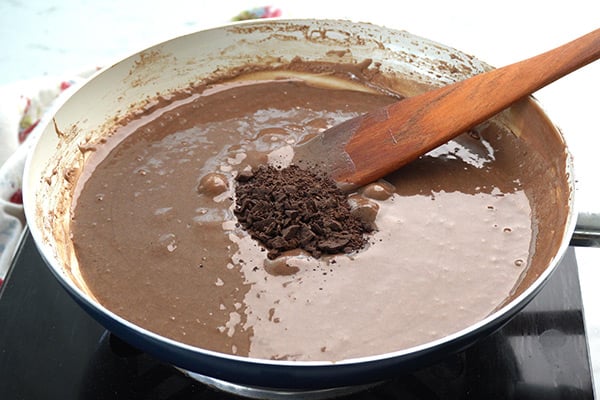
5.When it starts to thicken add 2 tablespoon dark chocolate. I have used dark chocolate you can use milk chocolate too.

add chocolate

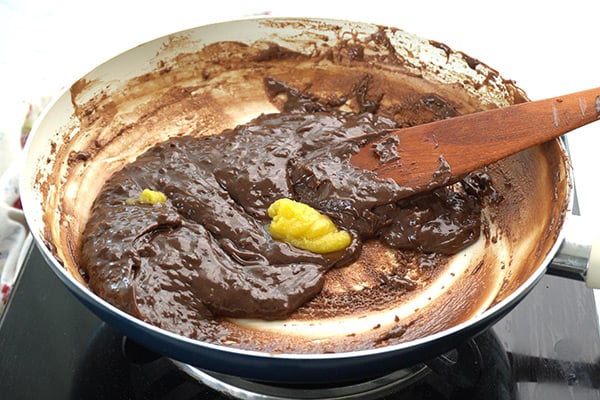
6.Mix it well and cook in low flame, it will thicken more and start to leave the sides of the pan. At this stage add 1 tablespoon ghee and mix well.

add ghee

7.Now add another 1 tablespoon ghee and mix it well. Do not overcook.

add more ghee

8.Gathers to a mass, leaves the sides of the pan. Switch off. The whole process till this step should take around 10-12 minutes. Over cooking may affect the texture of the pedas.

gathers to a mass

9.Transfer the mixture to a plate and cool down.

transfer to plate

10.When it is still warm grease 1 tablespoon measure with ghee and scoop out. This is to ensure even sized pedas.

scoop out

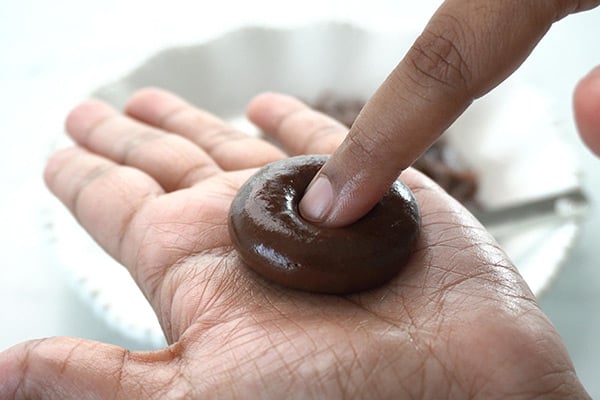
11.Roll between your palms and flatten it slightly. Make a dent in the center like this. Repeat to finish. I got around 16 small pedas.

roll, flatten and make dent

12.Sprinkle chopped pistachios.

add chopped pista

Chocolate Peda is ready!

chocolate peda served in a plate

Expert Tips

  • Cook slowly - I cook the mixture in low flame while stirring often. This helps the mixture thicken evenly without burning.
  • Milk - Add fresh milk that is boiled well. Raw milk has the risk of getting spoiled which may affect the sweet completely.
  • Check consistency - When the mixture forms thick mass and leaves sides of the pan it is ready. Do not overcook then it may harden and become like a candy.
  • Rest the mixture - I allow the mixture to cool for some time before shaping. This makes rolling pedas easier and is less sticky.
  • Fix cracks - If the mixture cracks while rolling you can add little milk and mix again. Do not add too much milk.

Serving and Storage

Serve Chocolate Peda as sweet treat during festivals or special occasions. This sweet taste even better after few hours of resting. Store the pedas in airtight container at room temperature for about two days. If refrigerated it stays good for around one week.

FAQS

1.Can I sieve cocoa powder with milk powder?

Yes, you can sieve both together before cooking. This helps remove lumps in the mixture.

2.Why my peda mixture is not forming balls?

If the mixture is under cooked it will remain soft. Cook little more until it thickens properly.

3.Why is my peda cracking while shaping?

If mixture becomes too dry it may crack. Adding little milk and mixing again can help. Overcooking the mixture may lead to cracks while shaping.

4.Can I add other nuts?

Yes you can add cashews or almonds if you like. It also gives slightly richer taste.

5.Does chocolate peda taste better later?

Yes, the flavou r improves after few hours of resting. The texture also becomes slightly firm.

chocolate peda served in a plate

If you have any more questions about this Chocolate Peda RecipeΒ do mail me at sharmispassions@gmail.com. In addition, follow me on Instagram,Β Facebook,Β PinterestΒ ,YoutubeΒ andΒ TwitterΒ .

Tried this Chocolate Peda Recipe? Do let me know how you liked it. Also tag us on Instagram @sharmispassions and hash tag it on #sharmispassions.

πŸ“– Recipe Card

Print

Chocolate Peda Recipe

Chocolate Peda is a modern variation of the traditional Indian milk peda sweet. This sweet has rich chocolate flavour with mild milk taste which makes it very enjoyable to eat. The chocolate taste makes it more appealing especially for kids and chocolate lovers. It takes just few minutes to make this sweet, also beginner friendly.
Course Dessert, sweet, sweets
Cuisine Indian
Keyword barfi, chocolate recipes, diwali dishes, diwali recipes, diwali sweets, diwali sweets recipes, easy diwali recipes, Festival, milk recipes, sweet recipes, virtual diwali party
Prep Time 10 minutes
Cook Time 15 minutes
Total Time 25 minutes
Servings 10 pedas
Calories 180kcal
Author Sharmilee J

Ingredients

  • 1 cup milk powder
  • Β½ cup condensed milk
  • ΒΌ cup powdered sugar
  • ΒΌ cup milk
  • 2 tablespoon cocoa powder
  • 2 tablespoon chocolate
  • 2 tablespoon ghee
  • 2 tablespoon chopped pistachios

Instructions

  • To a pan add 1 cup milk powder, Β½ cup condensed milk, ΒΌ cup powdered sugar, ΒΌ cup milk and 2 tablespoon cocoa powder. This is done off the flame step 1 to step 3.
  • Mix well with a whisk.
  • Whisk until smooth and there are no lumps.
  • Now keep the pan in flame and start stirring. Only now we are switching on the flame.
  • When it starts to thicken add 2 tablespoon dark chocolate. I have used dark chocolate you can use milk chocolate too.
  • Mix it well and cook in low flame, it will thicken more and start to leave the sides of the pan. At this stage add 1 tablespoon ghee and mix well.
  • Now add another 1 tablespoon ghee and mix it well. Do not overcook.
  • Gathers to a mass, leaves the sides of the pan. Switch off. The whole process till this step should take around 10-12 minutes. Over cooking may affect the texture of the pedas.
  • Transfer the mixture to a plate and cool down.
  • When it is still warm grease 1 tablespoon measure with ghee and scoop out. This is to ensure even sized pedas.
  • Roll between your palms and flatten it slightly. Make a dent in the center like this. Repeat to finish. I got around 16 small pedas.
  • Sprinkle chopped pistachios.
  • Chocolate Peda is ready!

Video

Notes

  • Cook slowly - I cook the mixture in low flame while stirring often. This helps the mixture thicken evenly without burning.
  • Milk - Add fresh milk that is boiled well. Raw milk has the risk of getting spoiled which may affect the sweet completely.
  • Check consistency - When the mixture forms thick mass and leaves sides of the pan it is ready. Do not overcook then it may harden and become like a candy.
  • Rest the mixture - I allow the mixture to cool for some time before shaping. This makes rolling pedas easier and is less sticky.
  • Fix cracks - If the mixture cracks while rolling you can add little milk and mix again. Do not add too much milk.

Nutrition

Serving: 40g | Calories: 180kcal | Carbohydrates: 19g | Protein: 5g | Fat: 10g | Saturated Fat: 6g | Polyunsaturated Fat: 0.5g | Monounsaturated Fat: 3g | Cholesterol: 26mg | Sodium: 70mg | Potassium: 275mg | Fiber: 1g | Sugar: 18g | Vitamin A: 177IU | Vitamin C: 2mg | Calcium: 171mg | Iron: 0.4mg

The post Chocolate Peda Recipe appeared first on Sharmis Passions.

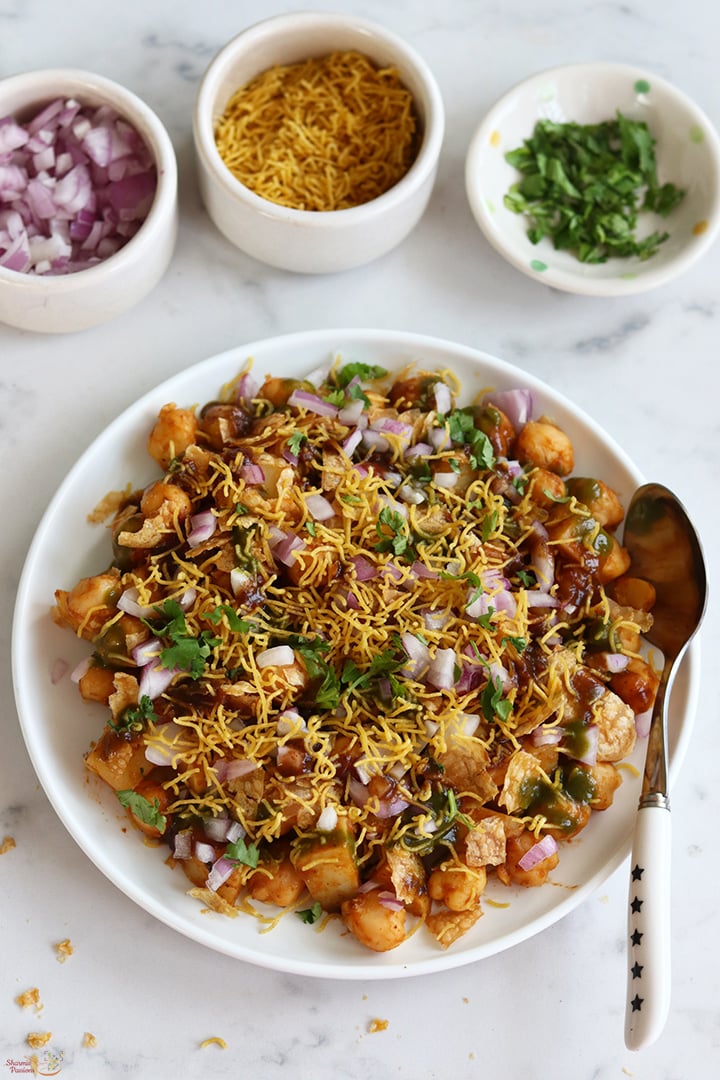
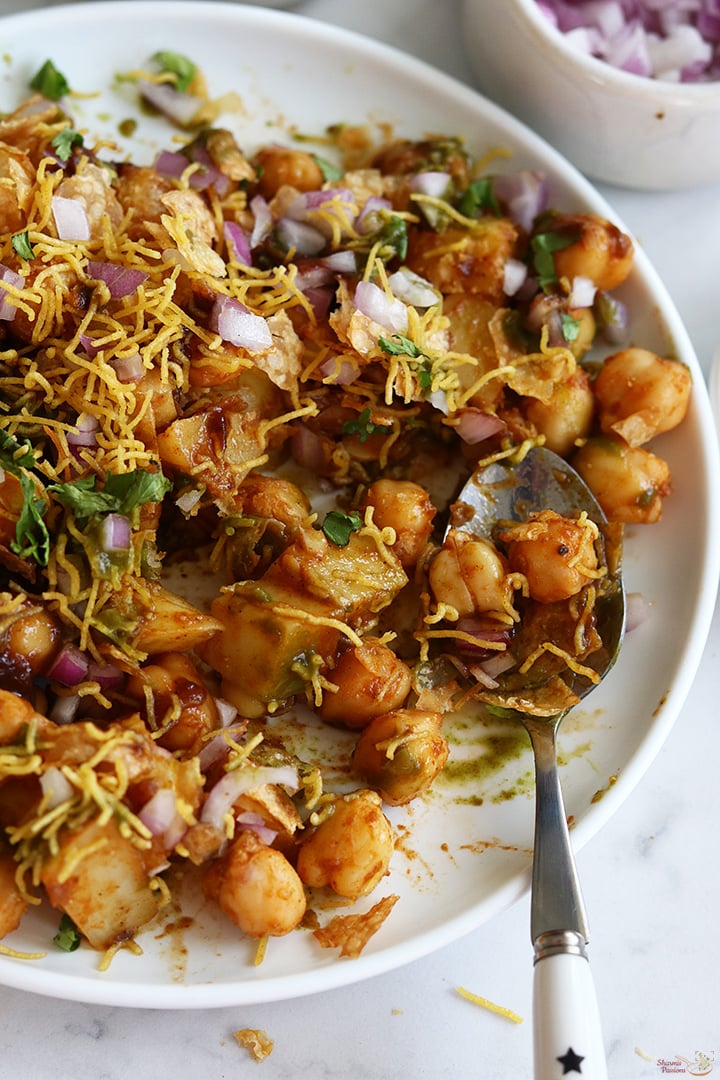
Aloo Chana Chaat Recipe

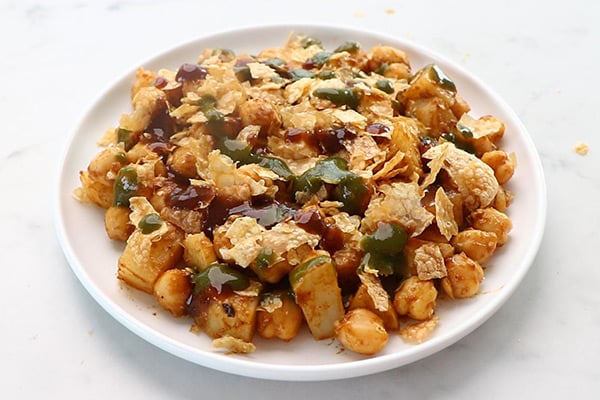
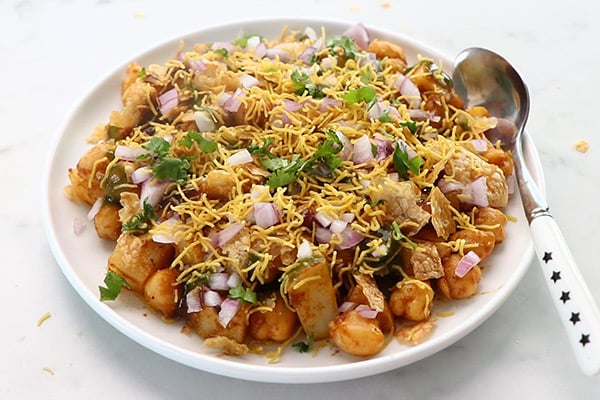
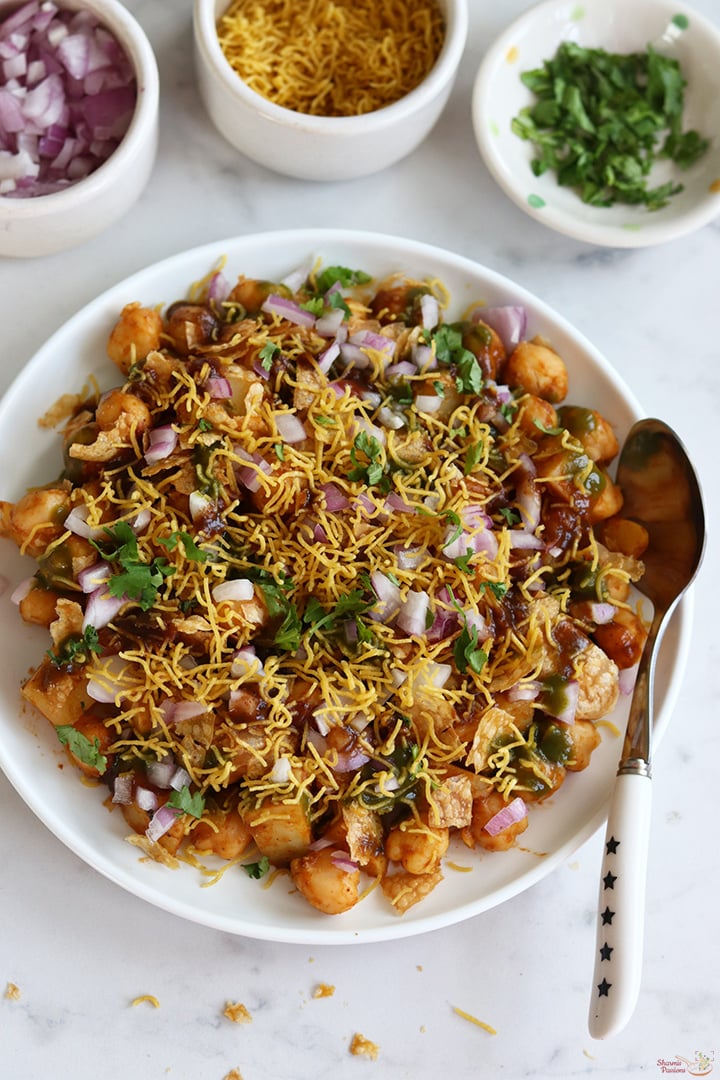
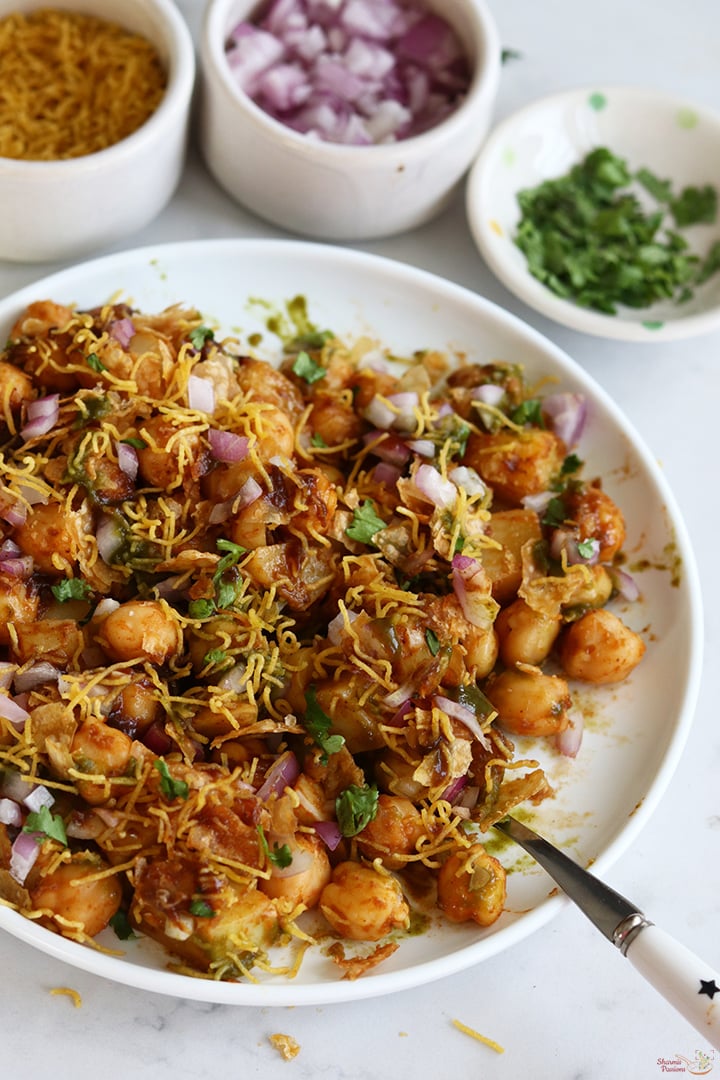
Aloo Chana Chaat is a tasty chat made using potatoes and white chickpeas as main ingredients. This chat comes together quickly with just staple ingredients from your kitchen. Aloo Chana Chat is a healthy filler when craving for chat at home. Do try this at home and satisfy your chaat cravings in a healthy way.

Aloo Chana Chat is sure a healthy alternative to other chats as its guiltfree snack. I usually make the chat chutneys at home a day before so that making chat is very quick and easy. If you are ready with cooked chana and potatoes then this chat can be assembled in just few minutes.

[feast_advanced_jump_to]

About Aloo Chana Chat

Aloo Chana Chat is a healthy chat made using potatoes, white chickpeas, chat chutneys, spice powders, puri, onion, sev and coriander leaves. This is a guilt free snack that you can have anytime of the day.

Puri is added just for extra crunch so you can skip it if you don't have it. I usually have a pack of this puri dried version, I air fry them whenever needed that way it is not soaked in oil. You can replace it with cornflakes too.

This is one of the easy and quick chat you can make. If you have the ingredients ready, assembling chats is a breeze. You can cook chana and potatoes morning then assemble and serve the chat for evening snack.

These days chat chutneys both green chutney and sweet chutney is readily available in supermarkets. If you buy and use them then this chat can be made in very leass time.

If you are craving for chat in a hurry you can make this and enjoy. It satisfies your chat cravings and is whole some, filling and healthy too.

Similar Recipes

Aloo Chana Chaat Video

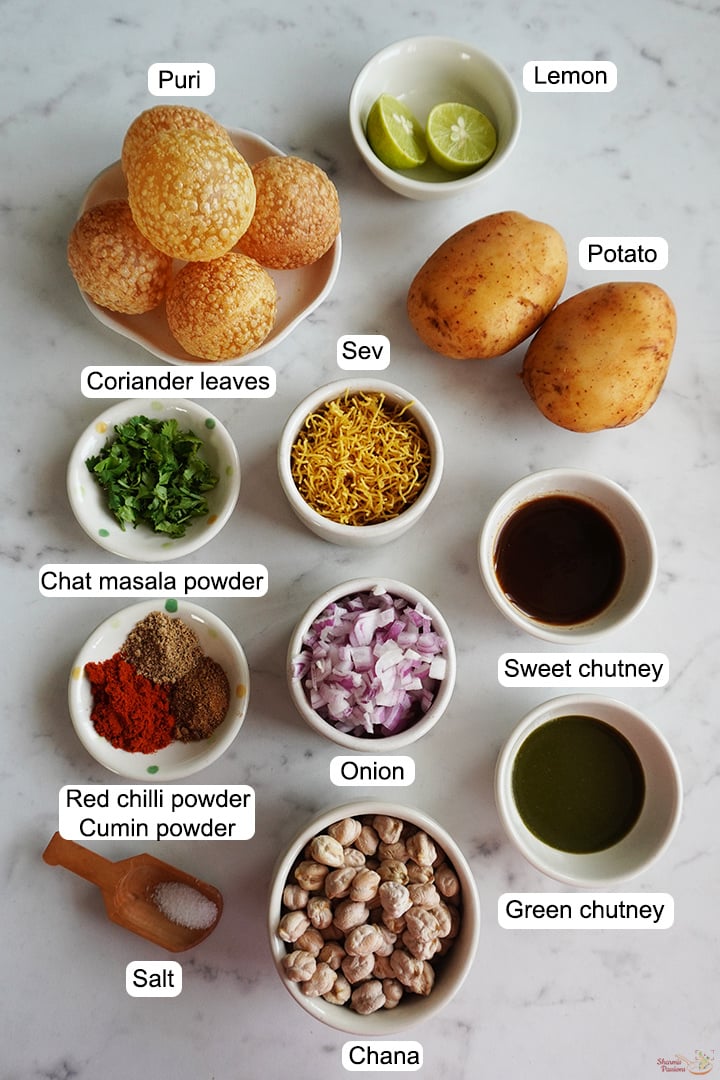
Aloo Chana Chat Ingredients

  • Potato - Cook potatoes until soft. I used 4 medium sized potatoes.
  • Chana - Soak white chickpeas overnight and pressure cook until soft.
  • Chat Chutneys - Green chutney and sweet chutney is preferred to be used for this recipe.
  • Spice powders - Red chilli powder, chat masala powder, and roasted cumin powders are added. I used all homemade spice powders.
  • Puri, Sev - I crushed and added puris. I garnished with plain sev, these add extra crunch to the chat.
  • Onion - Adding raw onion as garnish gives a nice taste.
  • Coriander leaves - Add chopped coriander leaves for garnish, gives a fresh taste.
  • Lemon juice - adds a tangy taste and moisture to the chat.

How to make Aloo Chana Chat Step by Step

1.Soak Β½ cup chickpeas in water for 8 hours or overnight.

soak chickpeas in water

2.After 8 hours rinse it well and drain water. Add it to pressure cooker.

drain water

3.Add water till immersing level.

drain water and add to cooker

4.Pressure cook for 4 whistles. Switch off.

pressure cook for 4 whistles

5.Let pressure release by itself.

chickpeas cooked

6.Drain water completely.

drain water completely

7.Rinse potatoes well to get of dirt and mud - Rub and wash it at least 2-3 times. Then add 4 medium sized potatoes to a pressure cooker. Add water till half immersing level at least.

potatoes are added along with water to pressure cooker

8.Pressure cook for 2 whistles. You can choose to boil or steam potatoes too. Make sure it is soft but not mushy.

potatoes are pressure cooked until soft

9.Remove the potatoes from the cooker and add it to a bowl containing cold water.

potatoes are added to a bowl with cold water

10.Once it becomes warm peel off the skin from the potatoes.

potato skin is peeled

11.Cut into small cubes. Set aside.

potatoes are cut into small cubes

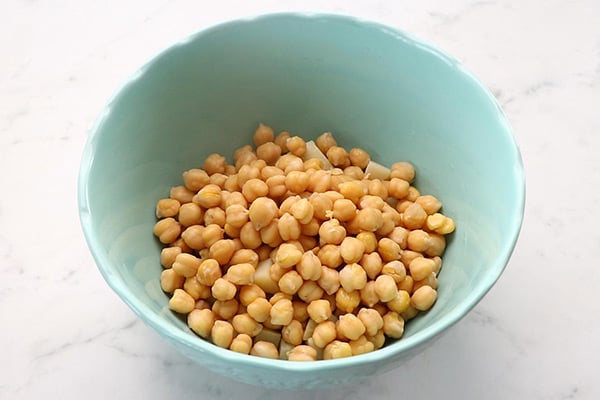
12.To a mixing bowl add cubed potatoes and cooked chana.

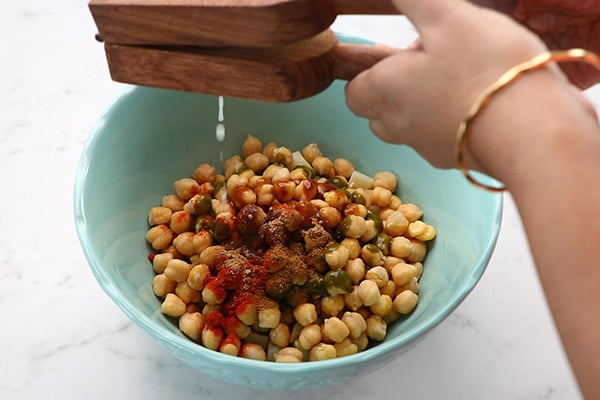
13.Add salt to taste, 2 tablespoon green chutney, 2 tablespoon sweet chutney, 1 teaspoon red chilli powder, 1 teaspoon roasted cumin powder and 1 teaspoon chat masala powder and juice from 1 lemon.

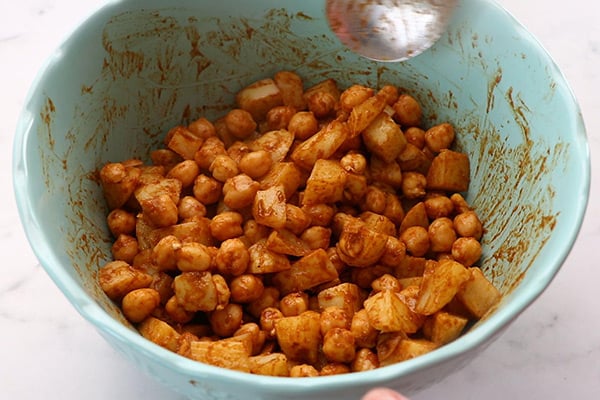
14.Mix it well.

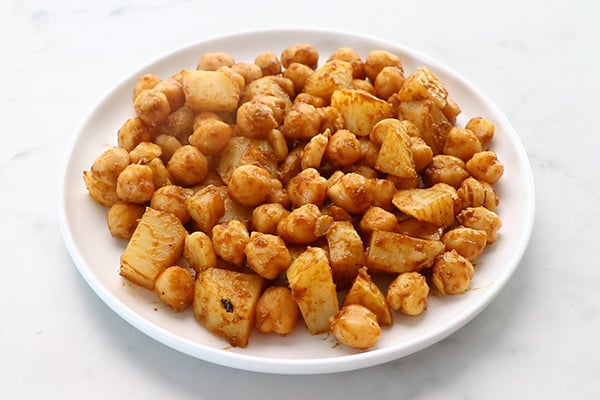
15.Add required portion to a serving plate.

16.Crush and add 2-3 puris. Drizzle sweet chutney, green chutney.

17.Add raw onion, sev and finally garnish with coriander leaves.

Serve and enjoy!

Expert Tips

  • Ratio - The measurement of potato and chana is purely your choice. You can plus or minus according to your preference.
  • Add ons - The recipe is totally flexible to our preference so do experiment and enjoy.
  • Replacements - You can alternatively use black chana too for a more healthier version.
  • Chat Chutneys - You can use homemade chat chutneys or store bought too.
  • Crunch - I have added puris and sev. You can replace it with cornflakes too.

Serving and Storage

You can make the chutneys, sev ready. On the day of serving cook chickpeas, potatoes and assemble the chat and serve immediately.

If you have any more questions about this Aloo Chana Chaat Recipe do mail me at sharmispassions@gmail.com. In addition, follow me on Instagram, Facebook,Β  Pinterest, Youtube andΒ Twitter.

Tried this Aloo Chana Chaat Recipe? Do let me know how you liked it. Also tag us on Instagram @sharmispassions and hash tag it on #sharmispassions.

πŸ“– Recipe Card

Print

Aloo Chana Chaat Recipe

Aloo Chana Chaat is a tasty chat made using potatoes and white chickpeas as main ingredients. This chat comes together quickly with just staple ingredients from your kitchen. Aloo Chana Chat is a healthy filler when craving for chat at home. Do try this at home and satisfy your chaat cravings in a healthy way.
Course Snack
Cuisine Indian
Keyword Aloo Recipes, chaat, Potato, Potato Recipes, street food
Prep Time 8 hours 10 minutes
Cook Time 20 minutes
Total Time 8 hours 30 minutes
Servings 4 people
Calories 250kcal
Author Sharmilee J

Ingredients

Instructions

  • Soak Β½ cup chickpeas in water for 8 hours or overnight.
  • After 8 hours rinse it well and drain water. Add it to pressure cooker.
  • Add water till immersing level.
  • Pressure cook for 4 whistles. Switch off.
  • Let pressure release by itself.
  • Drain water completely.
  • Rinse potatoes well to get of dirt and mud - Rub and wash it at least 2-3 times. Then add 4 medium sized potatoes to a pressure cooker. Add water till half immersing level at least.
Pressure cook for 2 whistles. You can choose to boil or steam potatoes too. Make sure it is soft but not mushy.
  • Remove the potatoes from the cooker and add it to a bowl containing cold water.
  • Once it becomes warm peel off the skin from the potatoes.
  • Cut into small cubes. Set aside.
  • To a mixing bowl add cubed potatoes and cooked chana.
  • Add salt to taste, 2 tablespoon green chutney, 2 tablespoon sweet chutney, 1 teaspoon red chilli powder, 1 teaspoon roasted cumin powder and 1 teaspoon chat masala powder and juice from 1 lemon.
  • Mix it well.
  • Add required portion to a serving plate.
  • Crush and add 2-3 puris. Drizzle sweet chutney, green chutney.
  • Add raw onion, sev and finally garnish with coriander leaves.
  • Serve and enjoy!

Video

Notes

  • Ratio - The measurement of potato and chana is purely your choice. You can plus or minus according to your preference.
  • Add ons - The recipe is totally flexible to our preference so do experiment and enjoy.
  • Replacements - You can alternatively use black chana too for a more healthier version.
  • Chat Chutneys - You can use homemade chat chutneys or store bought too.
  • Crunch - I have added puris and sev. You can replace it with cornflakes too.

Nutrition

Serving: 125g | Calories: 250kcal | Carbohydrates: 54g | Protein: 8g | Fat: 1g | Saturated Fat: 0.1g | Polyunsaturated Fat: 0.2g | Monounsaturated Fat: 0.1g | Sodium: 42mg | Potassium: 953mg | Fiber: 11g | Sugar: 3g | Vitamin A: 165IU | Vitamin C: 56mg | Calcium: 79mg | Iron: 3mg

The post Aloo Chana Chaat Recipe appeared first on Sharmis Passions.

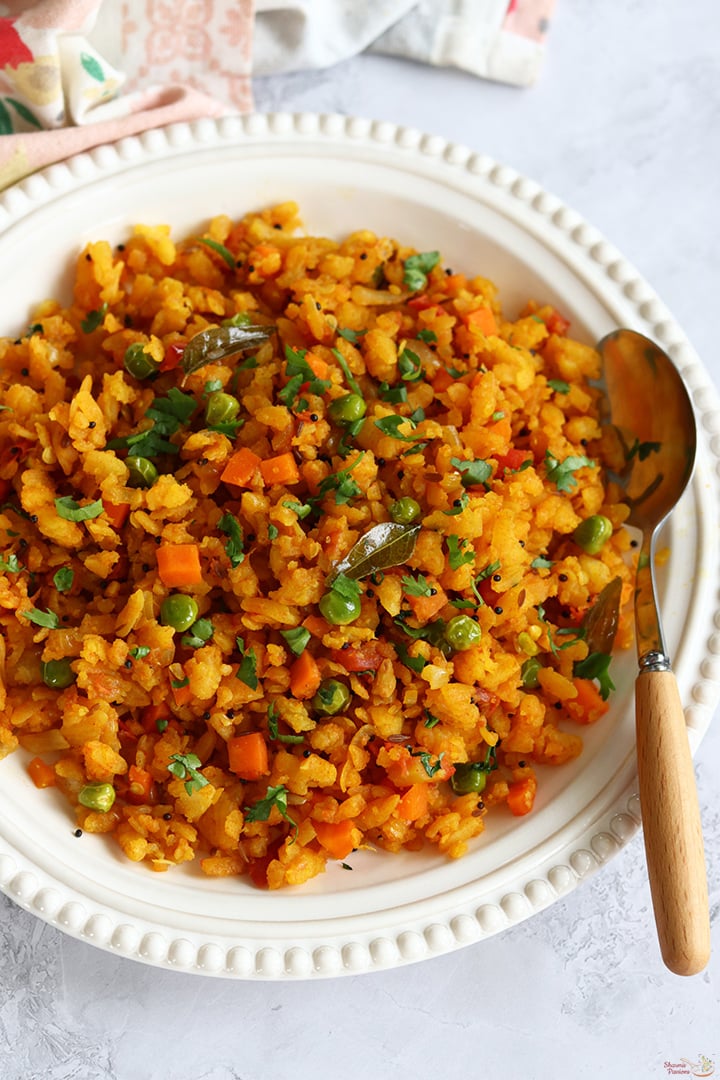
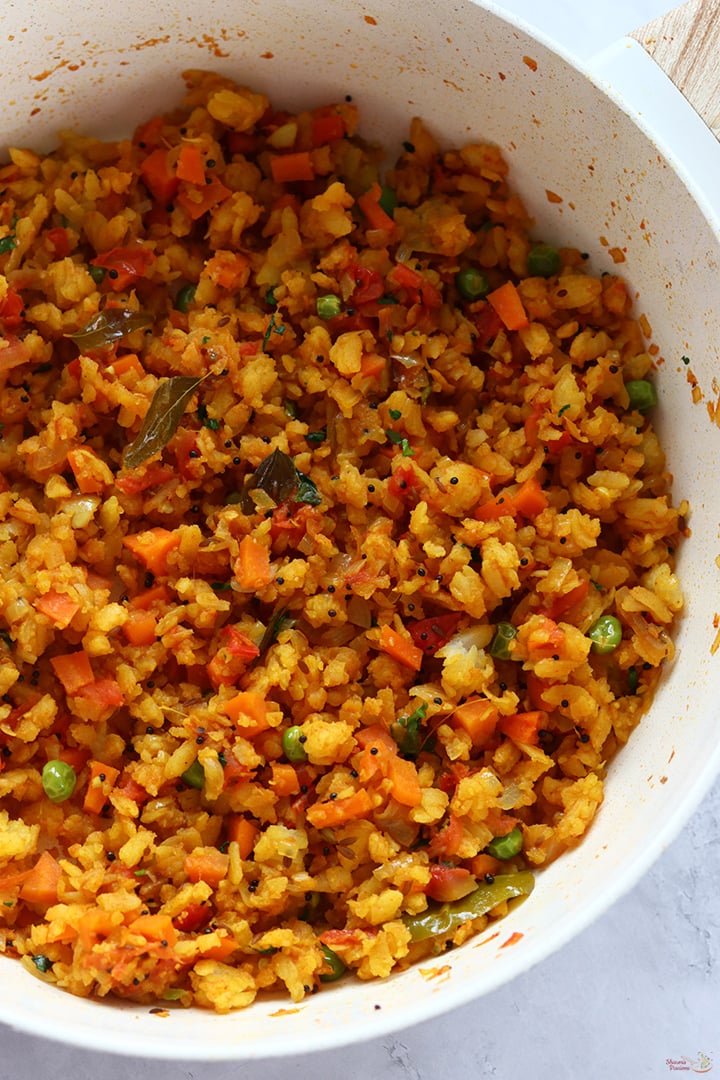
Masala Poha Recipe

Masala Poha is a mild spicy and filling dish made by cooking poha with masala powders, tempered onions and vegetables. It could be relished as a light breakfast or even for lunch. It keeps you full for a long time without being heavy.

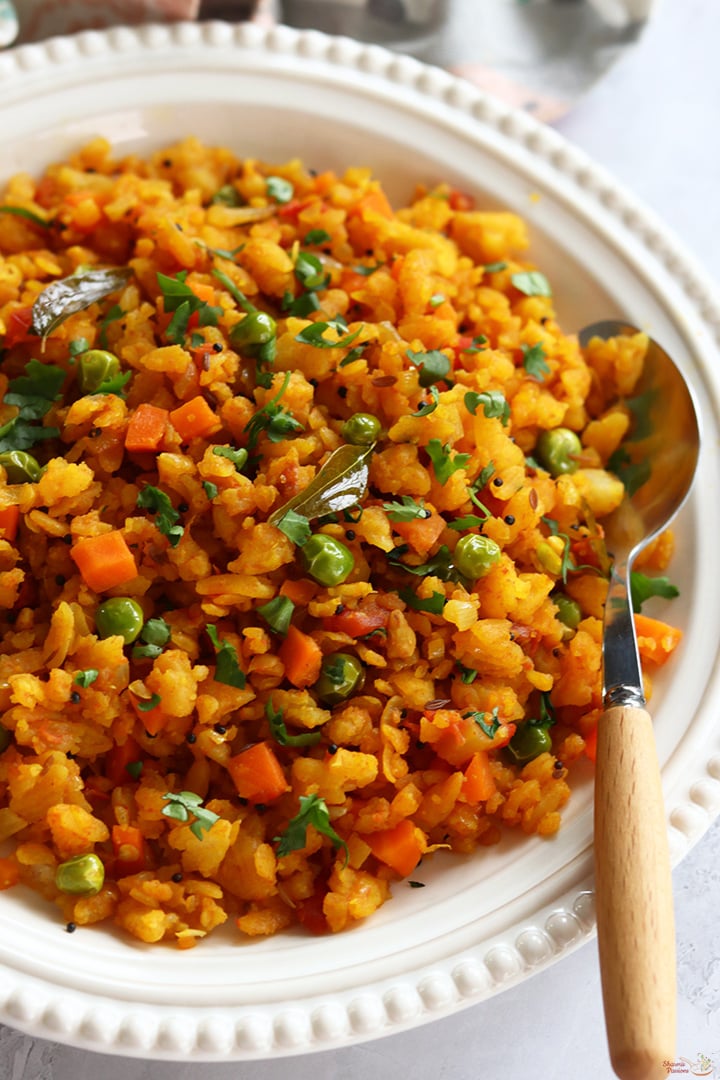
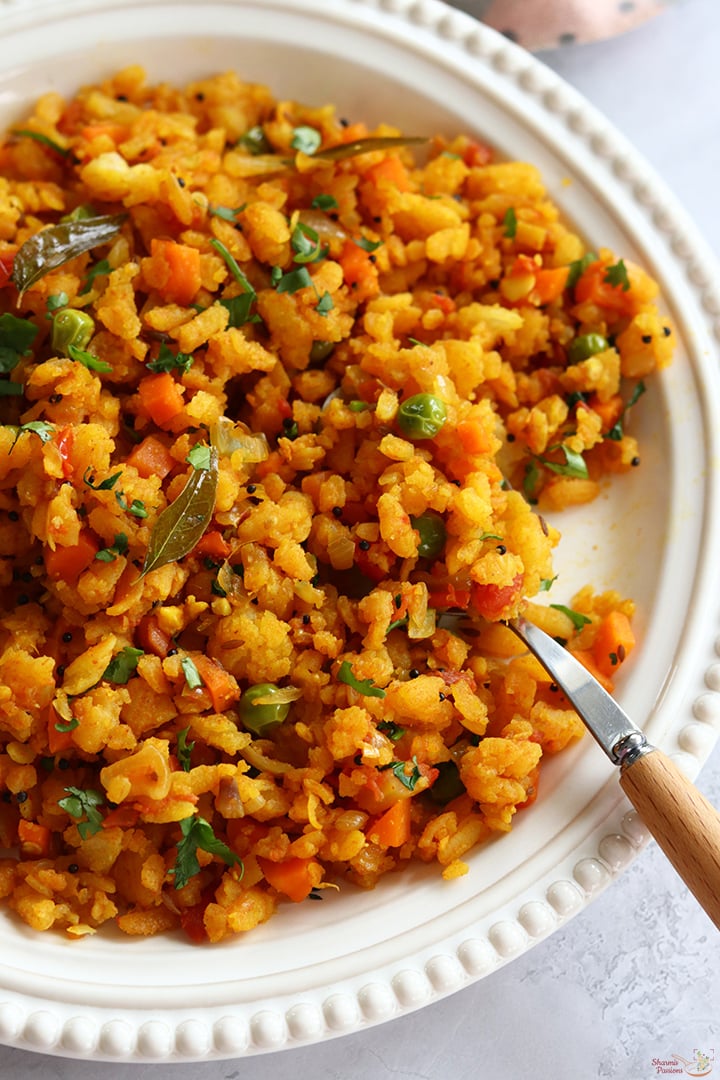
masala poha served hot

Masala Poha is an easy poha spiced with indian masalas and vegetables. This is just a quick dish to make for breakfast or dinner at home. It does not need much effort and can be made quickly when you have the ingredients ready.

[feast_advanced_jump_to]

About Masala Poha

Masala Poha is made using poha, vegetables, Indian spices and spice powders. These ingredients come together to make something filling and nice that is not too heavy and the poha absorbs all the flavours when you toss it well.

This is a different take on the usual poha or aval upma we make. The veggies add texture and nutrition to the dish. It is quite filling for breakfast but light enough so you don't feel too full.Β 

Poha is my resort whenever I run out of idli dosa batter. I always have a pack of poha for those lazy days. It can be cooked quickly yet makes a tasty and satisfying dish.

The tempering give this dish its real flavour. Mustard seeds and cumin seeds crackle in hot oil and release their flavour. This make the base for everything else and it is an important step. Adding vegetables makes it wholesome.

I make this because it is quick to make and tastes really nice. My family loves it with curd on the side because the curd balances out the spices.

Similar Recipes

masala poha served hot

Masala Poha Video

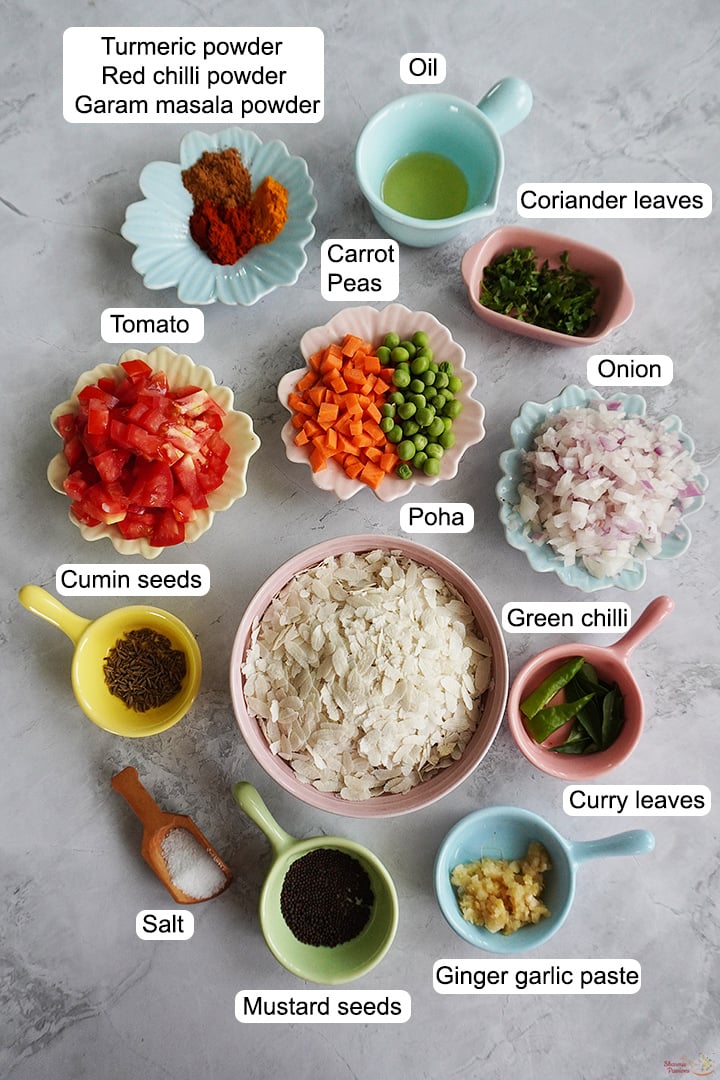
Masala Poha Ingredients

  • Poha - I used thick poha for this dish. It holds shape better and absorbs the spices and masalas well when tossed.
  • Mixed vegetables - I used vegetables like carrots, peas. You can add beans or even other vegetables.
  • Onion - I chopped it finely so it cooks fast and evenly. Onion gives slight sweetness that balance the spices.
  • Tomato - Gives moisture and adds tanginess to this dish.
  • Spice powders - I add turmeric powder, red chilli powder and garam masala powder. Adjust chilli powder based on how spicy you like it.
  • Mustard seeds - I use mustard seeds for tempering, add other ingredients only after it splutters fully.
  • Cumin seeds - Added after mustard seeds crackle fully. Cumin seeds adds a taste.
  • Green chilli - I slit it and add. It gives heat and flavour .
  • Curry leaves - is added for tempering.
  • Coriander leaves - I added fresh ones at the end. They add freshness and nice flavour to the dish.
  • Salt - I add to taste. Start with less because you can always add more later.
  • Oil - I used regular cooking oil, you can use coconut oil or groundnut oil too.
ingredients needed to make masala poha

How yo make Masala Poha Step by Step

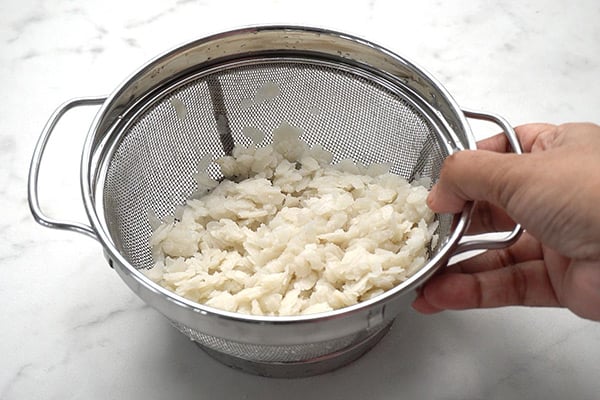
1.Take 1 Β½ cups poha, rinse it well and drain water completely. Add little salt, toss well and set aside.

rinse poha

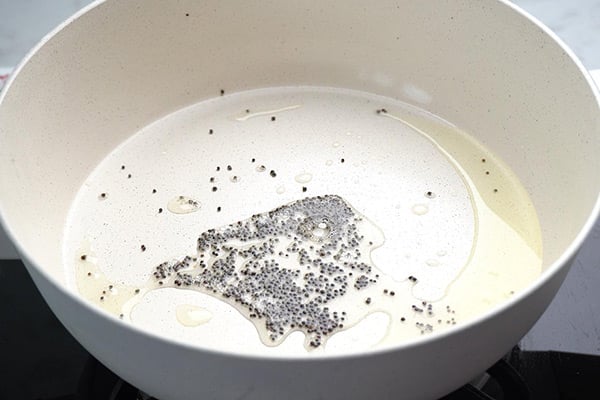
2.To a pan heat 1 tablespoon oil, add 1 teaspoon mustard seeds let it splutter.

splutter mustard seeds

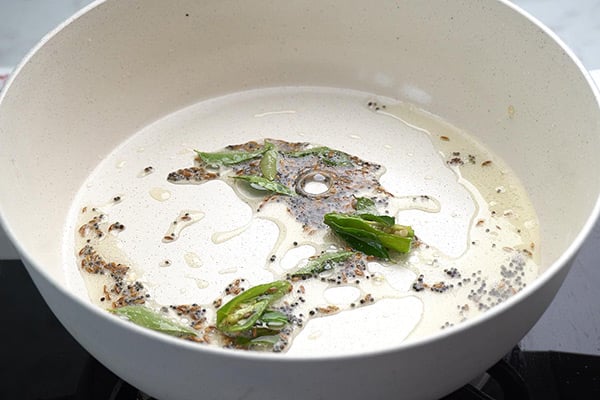
3.Add Β½ teaspoon cumin seeds let it crackle then add 1 small sprig curry leaves and 1 green chilli. Give a quick saute.

temper items

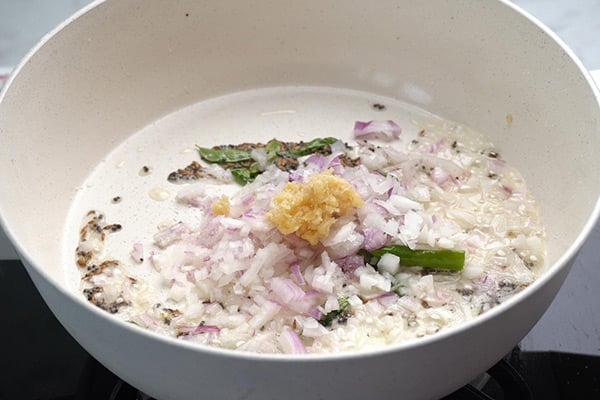
4.Add 1 medium sized onion finely chopped then add 1 heaped teaspoon ginger garlic paste, and salt to taste.

add onion, ginger garlic paste

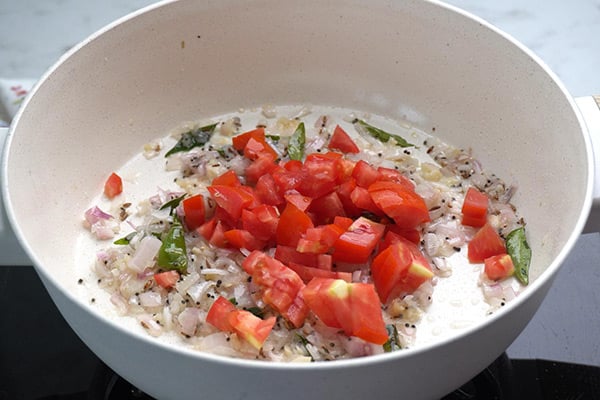
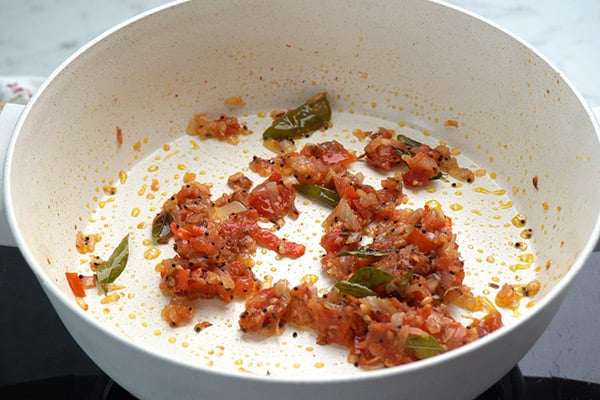
5. Saute until onions turn golden then 1 medium sized tomato finely chopped.

add tomato

6. Saute until it turns mushy. Cook covered so that is mushes up well and fast.

saute well

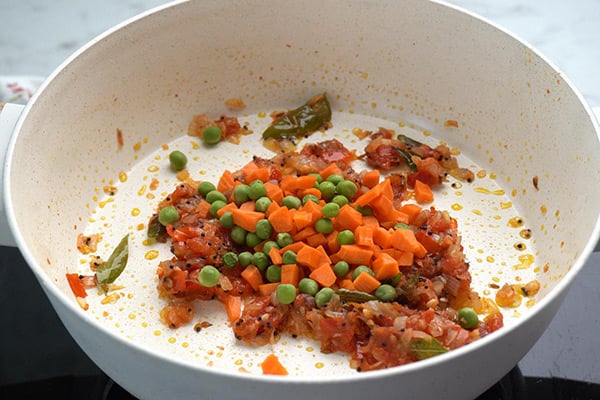
7.Add ΒΌ cup carrot, ΒΌ cup peas.

add veggies

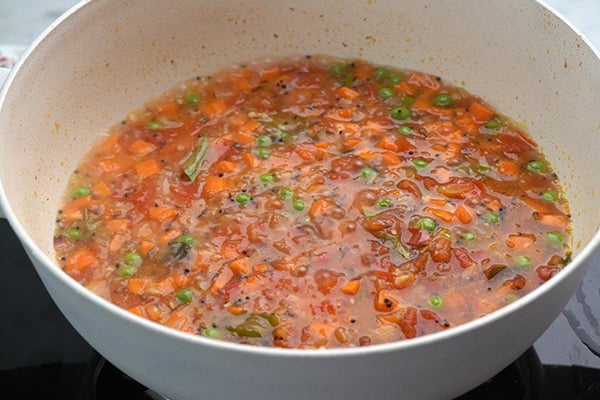
8.Saute well then add around 1 cup water and let it boil. Cook covered until veggies are soft.

add water, simmer

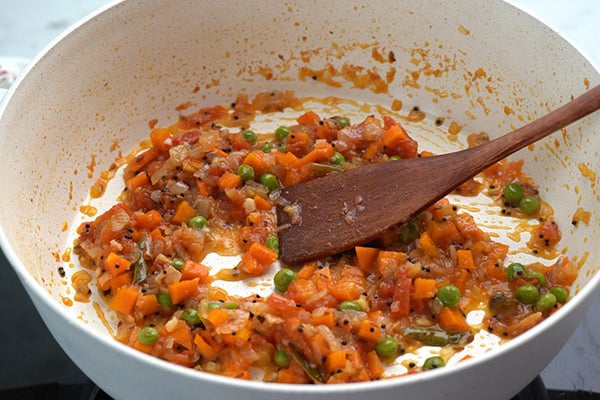
9.Check if the veggies are cooked soft.

check veggies

10.Add ΒΌ teaspoon turmeric powder, Β½ teaspoon red chilli powder and Β½ teaspoon garam masala powder.

add spice powders

11.Give a quick mix until the raw smell of masalas leave.

mix well

12.Add poha along with 1 tablespoon coriander leaves.

add poha, coriander leaves

13.Give a quick mix, cook covered for 2 minutes and switch off.

mix well

Serve hot or warm!

masala poha served hot

Expert Tips

  • Rinse well - Rinse it well for 2 times which makes poha soft. Use thick poha which is best for this recipe.
  • Tempering - I let mustard seeds crackle completely then add cumin seeds, green chillies and curry leaves.
  • Vegetables - I cook them until soft but not mushy. They should hold shape when you toss them with poha. Don't overcook.
  • Poha - I wait until the veggies are cooked and there is still some moisture left. If you add poha when it is too wet it becomes mushy.
  • Toss well - I toss poha gently but thoroughly so masalas coat every grain. Don't be rough or it will mash up and become mushy.
  • Serve hot - I serve masala poha fresh from the pan. It tastes best when hot and the texture better when warm.

Serving and Storage

Serve masala poha hot with curd on the side. The curd balance the spices and make it taste really nice. It filling enough for breakfast or light dinner and pair well with pickle or chutney. Store leftover in airtight container in fridge and it stay good for one day only.

FAQS

1. Can I use thin poha?

Yes you can use thin poha but thick poha hold shape better and texture comes out good. If using thin poha be careful while rinsing and cooking it as it may break easily.

2. What vegetables can I use?

You can use any veggies you have like carrots, peas, beans, corn. You can add other vegetables of your choice too.

3. Can I skip garam masala?

You can skip it but it add nice flavour. If you don't have it just use jeera powder.

4. Can I reduce spiciness?

You can reduce red chilli powder and skip the green chilli.Β 

5. Can I make it ahead?

Not really because poha gets mushy if you keep it too long. Make fresh and eat same day for best result.

masala poha served hot

If you have any more questions about this Masala Poha Recipe do mail me at sharmispassions@gmail.com. In addition, follow me on Instagram,Β Facebook,Β PinterestΒ ,YoutubeΒ andΒ TwitterΒ .

Tried this Masala Poha Recipe ? Do let me know how you liked it. Also tag us on Instagram @sharmispassions and hash tag it on #sharmispassions.

πŸ“– Recipe Card

Print

Masala Poha Recipe

Masala Poha is a mild spicy and filling dish made by cooking poha with masala powders, tempered onions and vegetables. It could be relished as a light breakfast or even for lunch. It keeps you full for a long time without being heavy.
Course Breakfast, dinner, Snack
Cuisine Indian
Keyword 30 mins recipes, masala recipes, poha recipes, recipes, upma, upma recipes, veg recipes
Prep Time 15 minutes
Cook Time 20 minutes
Total Time 35 minutes
Servings 2
Calories 620kcal
Author Sharmilee J

Ingredients

  • 1 Β½ cups poha
  • 1 tablespoon oil
  • 1 teaspoon mustard seeds
  • Β½ teaspoon cumin seeds
  • 1 small sprig curry leaves
  • 1 green chilli
  • 1 medium sized onion finely chopped
  • 1 medium sized medium sized tomato
  • 1 heaped teaspoon ginger garlic paste
  • ΒΌ cup carrot
  • ΒΌ cup peas
  • ΒΌ teaspoon turmeric powder
  • Β½ teaspoon red chilli powder
  • Β½ teaspoon garam masala powder
  • 1 tablespoon coriander leaves
  • salt to taste
  • water as needed

Instructions

  • Take 1 Β½ cups poha, rinse it well and drain water completely. Add little salt, toss well and set aside.
  • To a pan heat 1 tablespoon oil, add 1 teaspoon mustard seeds let it splutter.
  • Add Β½ teaspoon cumin seeds let it crackle then add 1 small sprig curry leaves and 1 green chilli. Give a quick saute.
  • Add 1 medium sized onion finely chopped then add 1 heaped teaspoon ginger garlic paste, and salt to taste.
  • Saute until onions turn golden then 1 medium sized tomato finely chopped.
  • Saute until it turns mushy. Cook covered so that is mushes up well and fast.
  • Add ΒΌ cup carrot, ΒΌ cup peas.
  • Saute well then add around 1 cup water and let it boil. Cook covered until veggies are soft.
  • Check if the veggies are cooked soft.
  • Add ΒΌ teaspoon turmeric powder, Β½ teaspoon red chilli powder and Β½ teaspoon garam masala powder.
  • Give a quick mix until the raw smell of masalas leave.
  • Add poha along with 1 tablespoon coriander leaves.
  • Give a quick mix, cook covered for 2 minutes and switch off.
  • Serve hot or warm!

Video

Notes

  • Rinse well - Rinse it well for 2 times which makes poha soft. Use thick poha which is best for this recipe.
  • Tempering - I let mustard seeds crackle completely then add cumin seeds, green chillies and curry leaves.
  • Vegetables - I cook them until soft but not mushy. They should hold shape when you toss them with poha. Don't overcook.
  • Poha - I wait until the veggies are cooked and there is still some moisture left. If you add poha when it is too wet it becomes mushy.
  • Toss well - I toss poha gently but thoroughly so masalas coat every grain. Don't be rough or it will mash up and become mushy.
  • Serve hot - I serve masala poha fresh from the pan. It tastes best when hot and the texture better when warm.

Nutrition

Serving: 125g | Calories: 620kcal | Carbohydrates: 110g | Protein: 19g | Fat: 11g | Saturated Fat: 1g | Polyunsaturated Fat: 3g | Monounsaturated Fat: 5g | Trans Fat: 0.03g | Cholesterol: 16mg | Sodium: 1151mg | Potassium: 278mg | Fiber: 6g | Sugar: 3g | Vitamin A: 3043IU | Vitamin C: 31mg | Calcium: 108mg | Iron: 7mg

The post Masala Poha Recipe appeared first on Sharmis Passions.

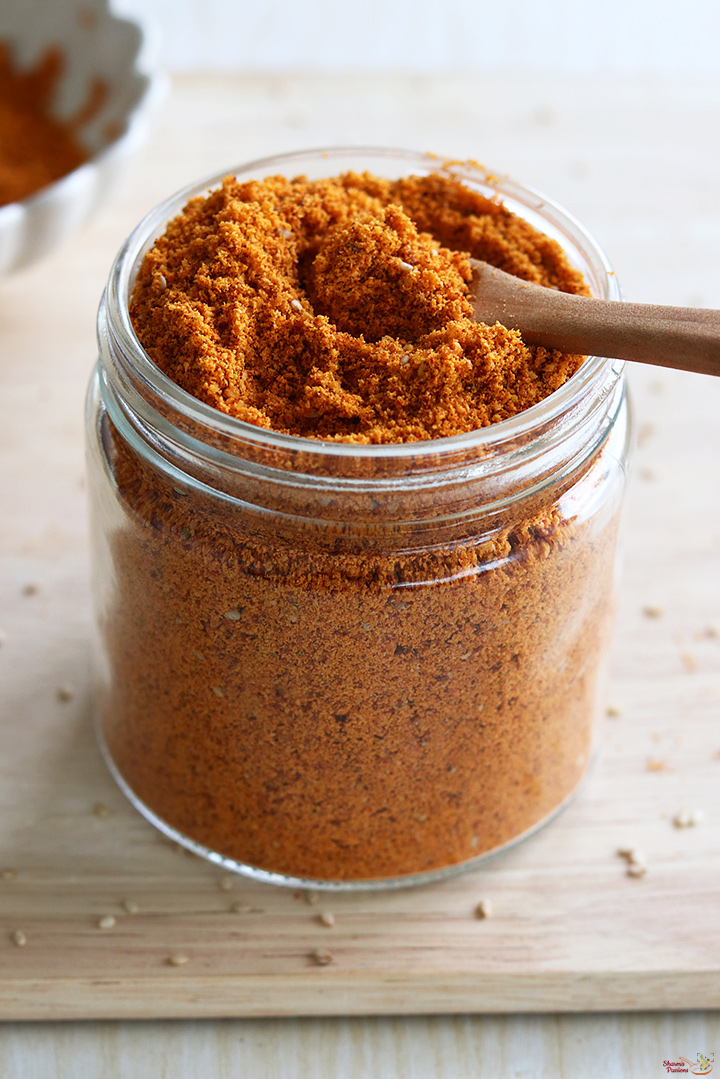
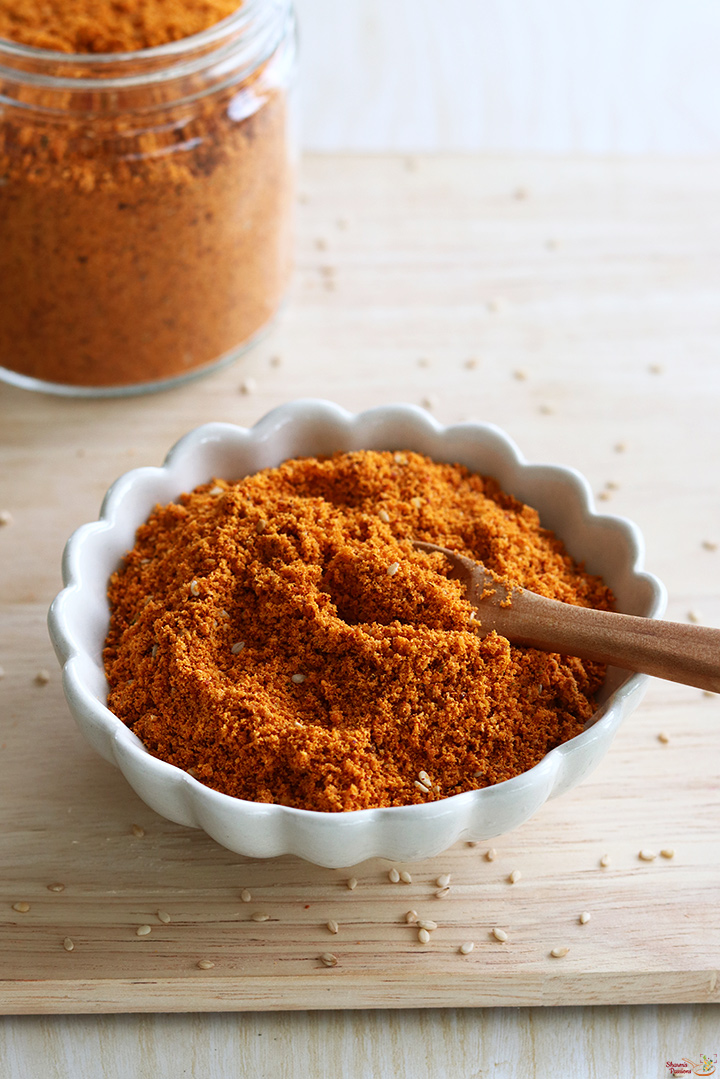
Ellu Podi Recipe (Sesame Seeds Powder)

Ellu Podi is a flavourful condiment made by grinding roasted lentils, sesame seeds and few basic spices. This podi is slightly coarse with nice crunch, flavour and aroma. It is used as a side for idli, dosa by mixing it with oil or ghee, you can also add this in hot rice along with ghee.

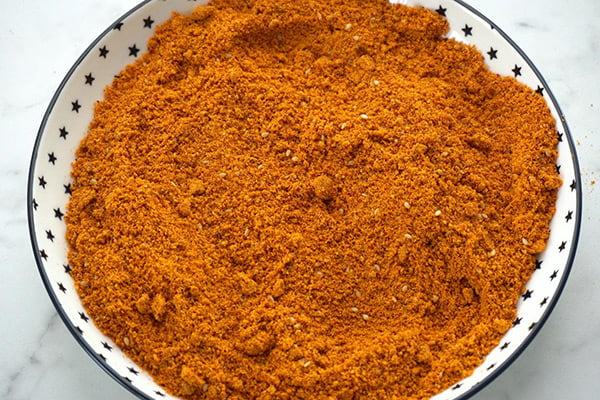
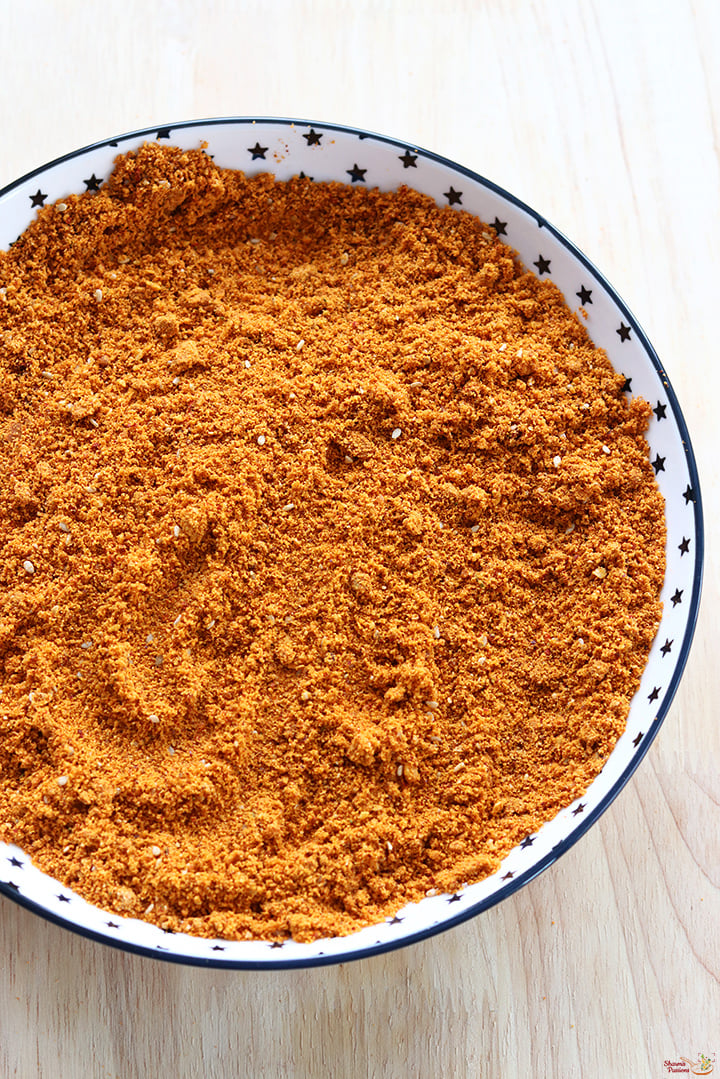
sesame seeds podi served

The ingredients are roasted well and then grind together to make this powder. Each ingredient is roasted to golden brown colour and brings out nice flavour. Sesame seeds has more calcium than in milk so do try to include it often. This is one of my favourite podi variety for idli, dosa.

[feast_advanced_jump_to]

About Ellu Podi

Ellu Podi is made by roasting urad dal, chana dal, sesame seeds, red chillies, curry leaves and rock salt. When you roast each ingredient it brings out different flavours. Sesame seeds becomes fragrant and pops up when they are ready. The lentils turns golden and adds nutty taste.

The texture comes out slightly coarse because you grind everything together. This coarse texture feels nice on idli, dosa and adds crunch to every bite. When you mix this powder with oil it coats the rice or idli nicely.

The powder stays dry and crispy when stored properly in an airtight container. Red chillies adds heat and kashmiri chillies adds colour to the podi. I have kept it simple to enjoy the full flavour and taste of sesame seeds.

Years back, I remember the first time I tasted this podi was in my aunts place and immediately got the recipe from her. I wrote it in a piece of paper, came home and tried it. We all loved it so much that now it has become a staple at home.

Similar Recipes

sesame seeds podi served

Ellu Podi Video

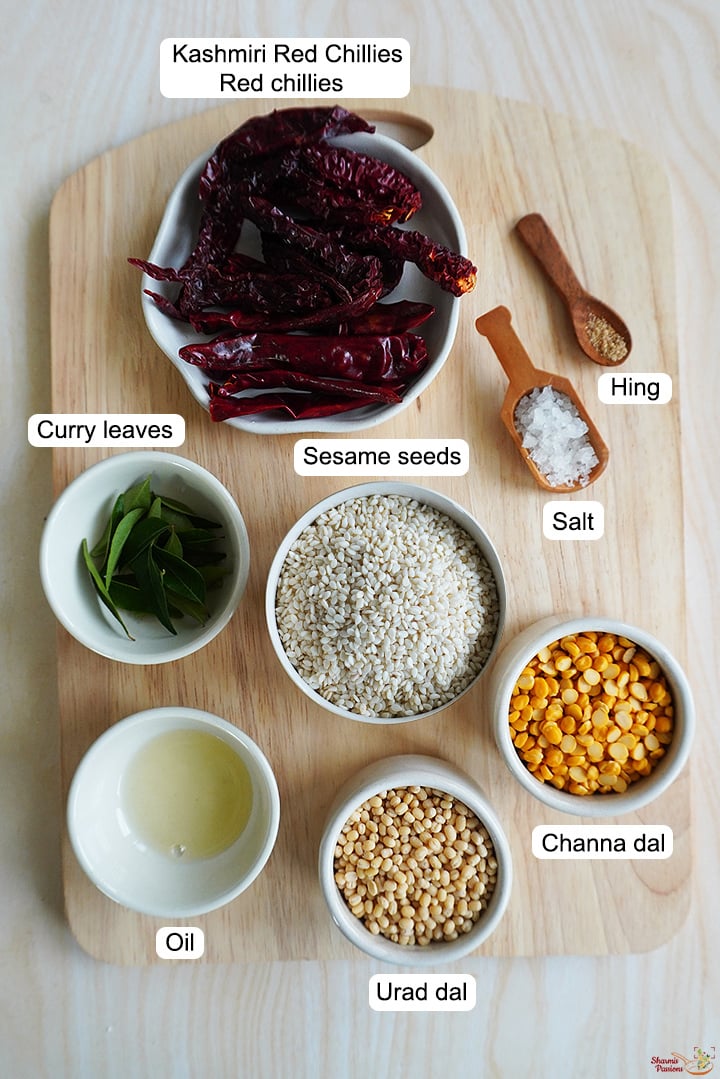
Ellu Podi Ingredients

  • Urad dal - I used urad dal for the base. It is roasted well until golden brown along with chillies.
  • Chana dal - Chana dal adds flavour and crunch to the podi, so do not miss adding it.
  • Sesame seeds - I used sesame seeds for main flavour. They pop up when roasted and brings nice aroma.
  • Red chillies - I used red chillies for heat.
  • Kashmiri chillies - I added kashmiri chillies for colour.
  • Curry leaves - I used fresh curry leaves. They are roasted till crisp and adds aroma.
  • Hing - I added a pinch of hing. It brings flavour and aids in digestion
  • Salt - I used salt to taste. Add according to your preference.
ingredients needed to make sesame seeds powder

How to make Sesame Podi Step by Step

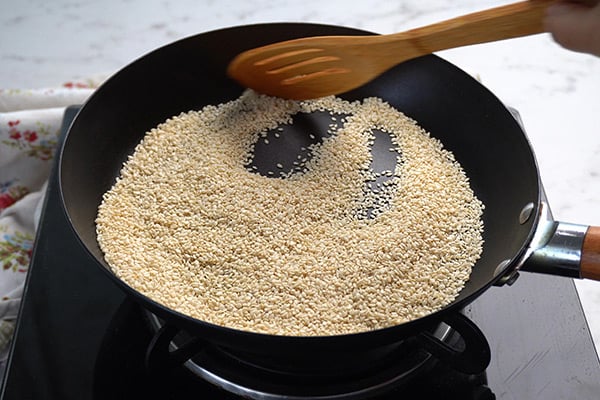
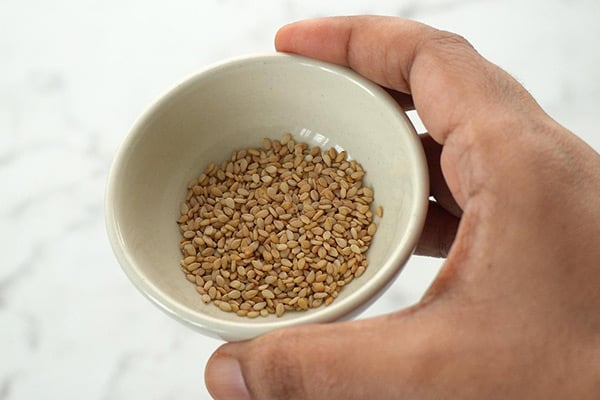
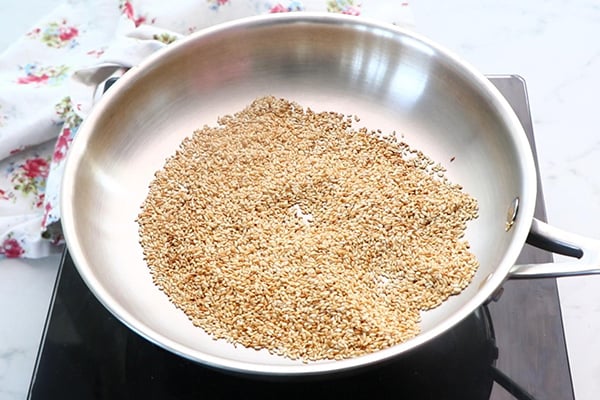
1.To a pan add ΒΎ cup sesame seeds. Start roasting in low flame.

roast sesame seeds

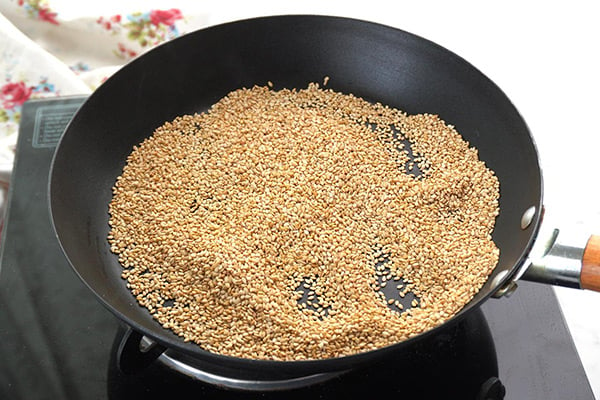
2.Roast until golden and sesame seeds pop well. Transfer to a plate and bring back the pan.

sesame seeds pop

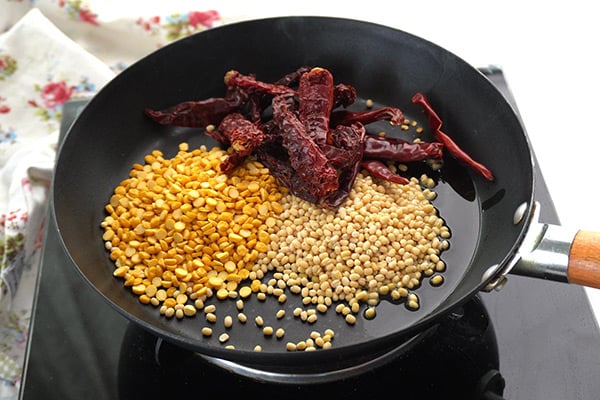
3.To the same pan heat 1 teaspoon oil. Add ΒΌ cup urad dal, ΒΌ cup chana dal, 6 red chillies and 6 kashmiri red chillies.

add lentils, chillies

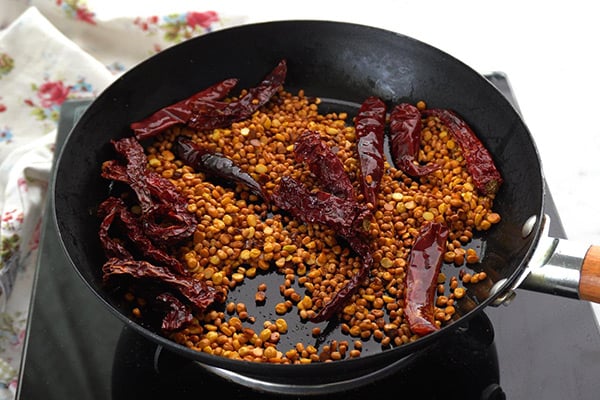
4.Roast until golden brown. Transfer to a plate and bring back the pan.

roast till golden brown

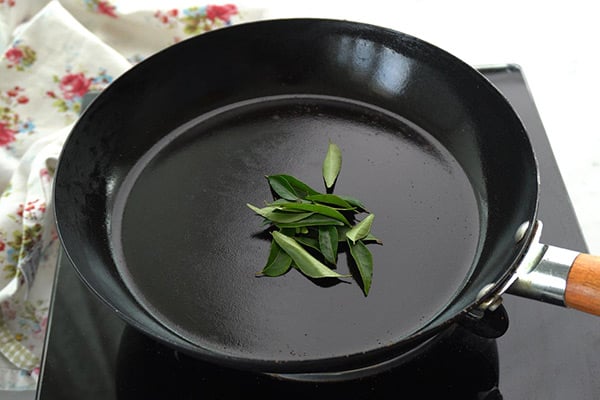
5.Add few curry leaves.

add curry leaves

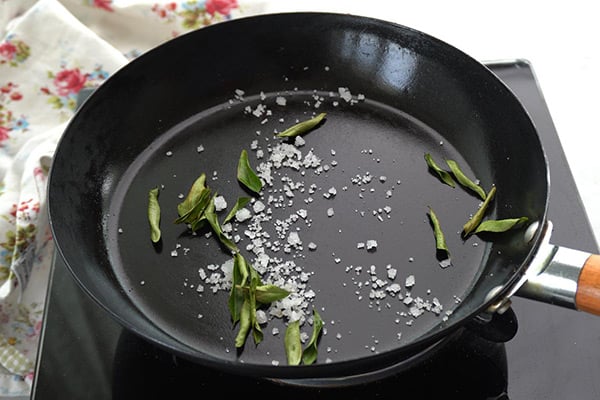
6.Roast until crisp then switch off and add rock salt to atste. Give a quick saute and switch off.

add rock salt

7.Reserve 1 tablespoon roasted sesame seeds.

reserve sesame seeds

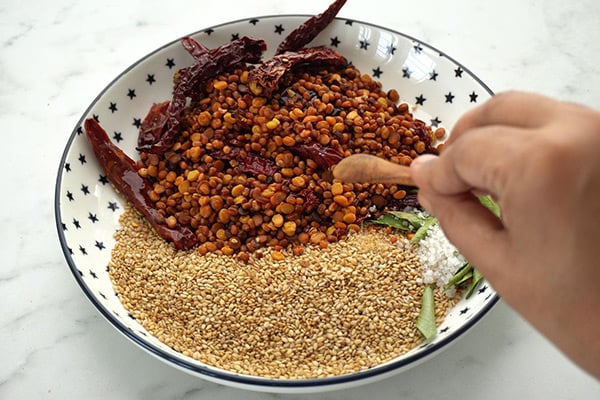
8.Cool down the roasted ingredients then add β…› teaspoon hing.

add hing

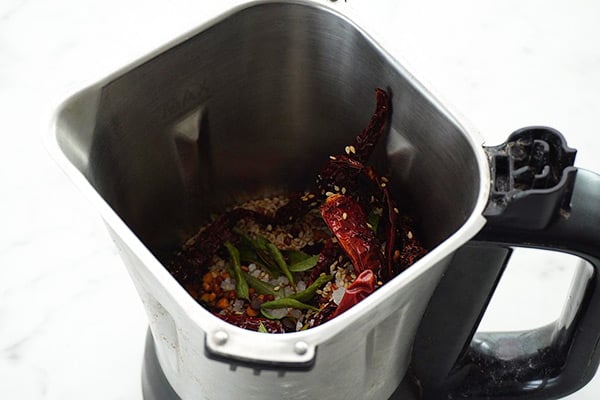
9.Transfer to a dry mixer jar.

transfer to mixer

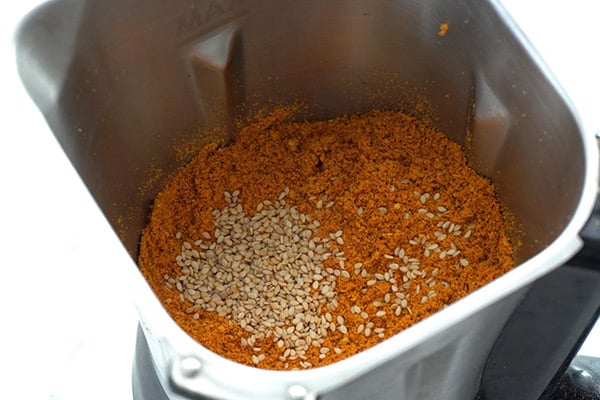
10.Grind it slightly coarse then add reserved roasted seeds and mix it well.

grind it

11.Transfer to a plate, cool down then store.

cool down

Enjoy with idli, dosa or rice.

Expert Tips

  • Roast well - I roast it in low flame or low medium flame storring constantly. Make sure not to burn them.
  • Check colour - I watch closely while roasting lentils and seeds. They should turn golden brown and start to pop up.
  • Cool completely - I cool down all roasted ingredients completely before grinding. Hot ingredients are difficult to grind and might loose aroma.
  • Grind to coarse mixture - I grind to slightly coarse texture and not to a fine powder. This gives nice crunch and texture to the powder.
  • Add hing at end - I add hing after roasting and before grinding. This helps flavour spread evenly.
  • Grinding - I grind without oil so powder stays dry. You add oil while serving based on how you like it.

Serving and Storage

Serve ellu podi with idli and dosa by mixing with oil or ghee. Add required salt and mix well before serving. Store in airtight container at room temperature and it stays good for two to three weeks without any problem.

FAQS

1. Can I use black sesame seeds?

Yes you can use black sesame seeds instead of white. The taste and falvour may slightly vary.

2. Can I reduce the spice level?

Yes you can use less red chillies and skip kashmiri chillies if you prefer mild spice.

3. How do I know when sesame seeds are roasted properly?

They pop up and turn golden brown. Once they stop popping that is the right stage to remove from pan.

4. Can I add other spices?

You can add cumin seeds or coriander seeds if you like but keep other ingredients minimal to enjoy the full taste and benefits of sesame seeds.

5. How long does it stay fresh?

Ellu Podi stay good for two to three weeks in airtight container at room temperature. Keep away from moisture.

sesame seeds podi freshly grind

If you have any more questions about this Ellu Podi Recipe do mail me at sharmispassions@gmail.com. In addition, follow me on Instagram,Β Facebook,Β PinterestΒ ,YoutubeΒ andΒ TwitterΒ .

Tried this Ellu Podi Recipe? Do let me know how you liked it. Also tag us on Instagram @sharmispassions and hash tag it on #sharmispassions.

πŸ“– Recipe Card

Print

Ellu Podi Recipe | Sesame Seeds Powder Recipe

Ellu Podi is a flavourful condiment made by grinding roasted lentils, sesame seeds and few basic spices. This podi is slightly coarse with nice crunch, flavour and aroma. It is used as a side for idli, dosa by mixing it with oil or ghee, you can also add this in hot rice along with ghee.
Course Breakfast
Cuisine Indian
Keyword 30 mins recipes, dosa sidedish, idli side dish, podi recipes, Side Dish, veg recipes
Prep Time 5 minutes
Cook Time 10 minutes
Total Time 15 minutes
Servings 4
Calories 291kcal
Author Sharmilee J

Ingredients

  • ΒΎ cup sesame seeds
  • ΒΌ cup urad dal
  • ΒΌ cup chana dal
  • 6 red chillies
  • 6 kashmiri red chillies
  • 1 small sprig curry leaves
  • β…› teaspoon hing
  • rock salt to taste

Instructions

  • To a pan add ΒΎ cup sesame seeds. Start roasting in low flame.
  • Roast until golden and sesame seeds pop well. Transfer to a plate and bring back the pan.
  • To the same pan heat 1 teaspoon oil. Add ΒΌ cup urad dal, ΒΌ cup chana dal, 6 red chillies and 6 kashmiri red chillies.
  • Roast until golden brown. Transfer to a plate and bring back the pan.
  • Add few curry leaves.
  • Roast until crisp then switch off and add rock salt to atste. Give a quick saute and switch off.
  • Reserve 1 tablespoon roasted sesame seeds.
  • Cool down the roasted ingredients then add β…› teaspoon hing.
  • Transfer to a dry mixer jar.
  • Grind it slightly coarse then add reserved roasted seeds and mix it well.
  • Transfer to a plate, cool down then store.
  • Enjoy with idli, dosa or rice.

Video

Notes

  • Roast well - I roast it in low flame or low medium flame storring constantly. Make sure not to burn them.
  • Check colour - I watch closely while roasting lentils and seeds. They should turn golden brown and start to pop up.
  • Cool completely - I cool down all roasted ingredients completely before grinding. Hot ingredients are difficult to grind and might loose aroma.
  • Grind to coarse mixture - I grind to slightly coarse texture and not to a fine powder. This gives nice crunch and texture to the powder.
  • Add hing at end - I add hing after roasting and before grinding. This helps flavour spread evenly.
  • Grinding - I grind without oil so powder stays dry. You add oil while serving based on how you like it.

Nutrition

Serving: 20g | Calories: 291kcal | Carbohydrates: 32g | Protein: 12g | Fat: 15g | Saturated Fat: 2g | Polyunsaturated Fat: 6g | Monounsaturated Fat: 5g | Sodium: 16mg | Potassium: 567mg | Fiber: 11g | Sugar: 7g | Vitamin A: 1307IU | Vitamin C: 205mg | Calcium: 323mg | Iron: 7mg

The post Ellu Podi Recipe (Sesame Seeds Powder) appeared first on Sharmis Passions.
Oreo Milkshake Recipe

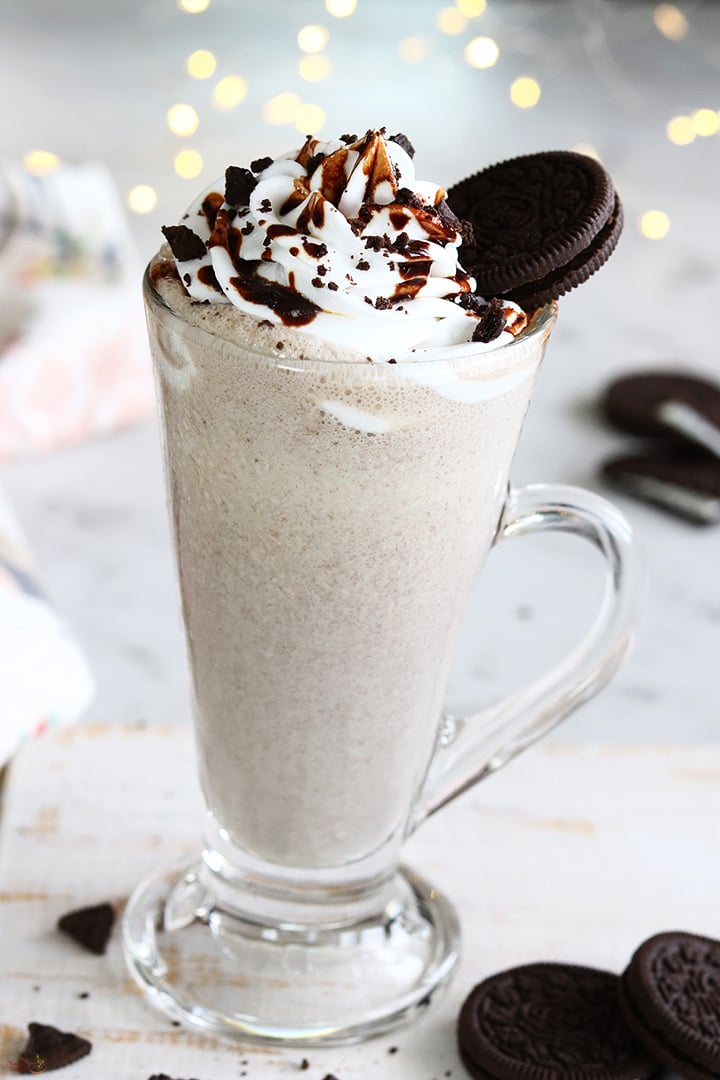
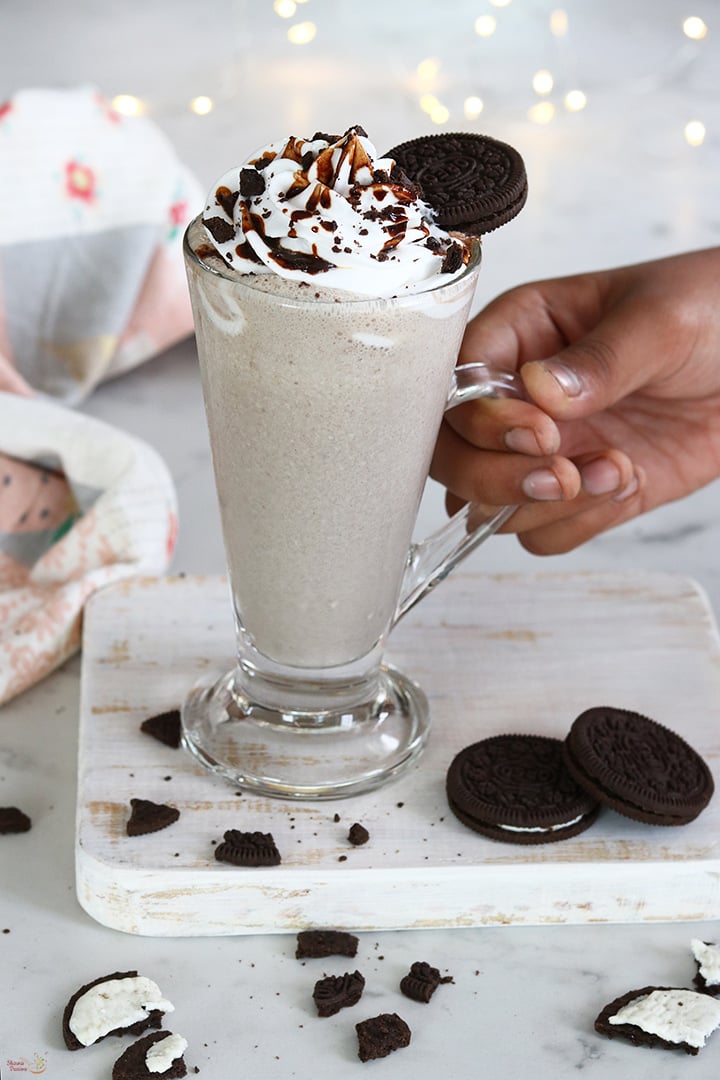
Oreo Milkshake is a cafe-style milkshake made by blending oreo biscuits with chilled milk, chocolate sauce and vanilla ice cream. Topped with whipped cream, chocolate sauce and crushed oreo biscuits it looks very tempting. This milkshake is simple, quick to make and tastes so delicious.

Oreo Milkshake is a great idea to finish the leftover pack of oreo biscuits. Mittu loves oreo so wanted to try a milkshake with it. I always make milkshake with biscuits and this oreo milkshake is a hit at home. Both mittu and gugu are fond of this milkshake.

[feast_advanced_jump_to]

About Oreo Milkshake

Oreo Milkshake is one of the yummy milkshakes that you can make at home. It is made using oreo biscuits, vanilla ice cream, chocolate sauce and chilled milk. This milkshake is one of the popular shakes at cafes and restaurants. With the addition of ice cream and oreo cream biscuits this milkshake comes out so thick and creamy.

Oreo Milkshake is a treat to kids and a great idea for birthday parties, get together and special occasions. This sweet chilled drink is a hit with the whole family on a hot day. This recipe is simple that even kids can prepare it with ease.

This Oreo Milkshake tastes incredibly delicious. You can make oreo milkshake with or without ice cream. But with the addition of ice cream it tastes just like in cafes. Do try this rich and decadent milkshake and enjoy!

Similar Recipes

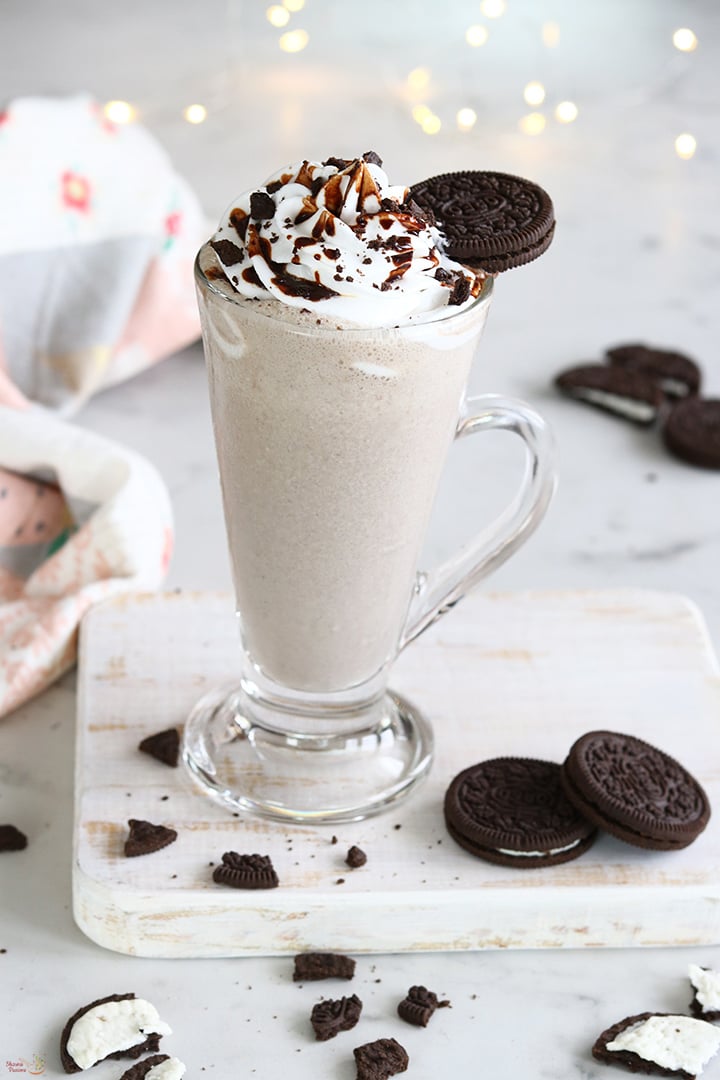
oreo milkshake served

Oreo Milkshake Video

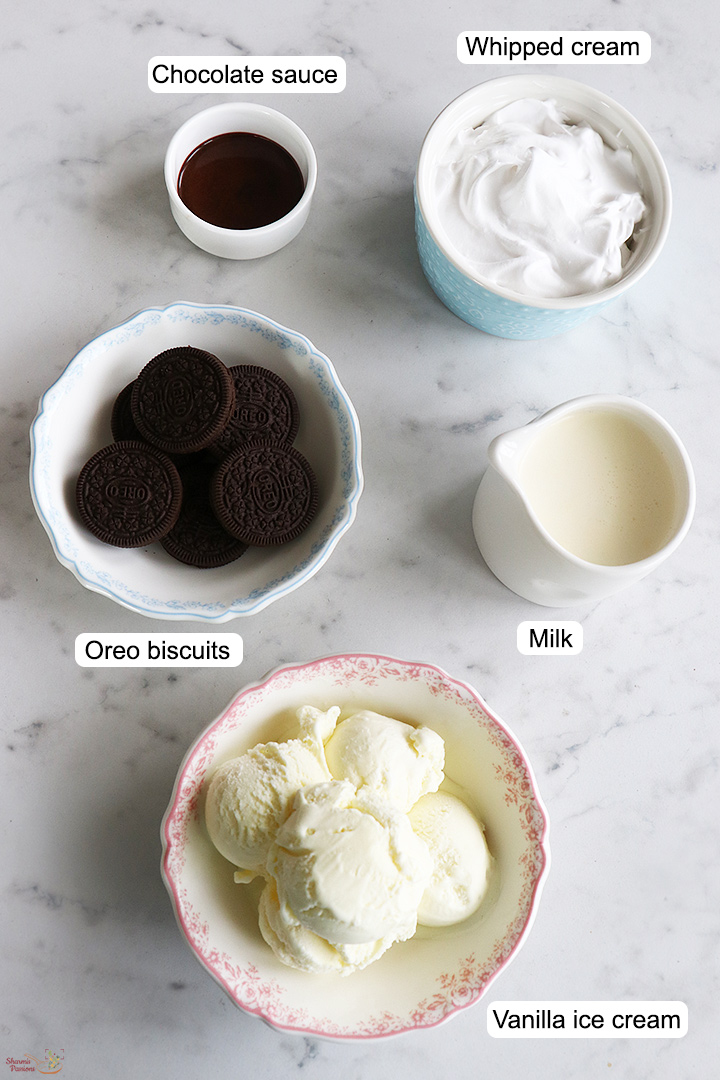
Oreo Milkshake Ingredients

  • Oreo biscuits - I have used vanilla cream oreo biscuits. You can even use strawberry or other flavors available.
  • Milk - Use full cream milk. Boil milk, cool down then chill it.
  • Ice cream - Ice cream makes milkshakes rich and more creamy. I have used vanilla ice cream. You can replace it with chocolate ice cream too.
  • Chocolate sauce - Chocolate sauce is added to make the drink more chocolaty.
  • Whipped cream - I used whipped cream for topping. You can skip it and use a scoop of vanilla ice cream.

How to make Oreo Milkshake Step by Step

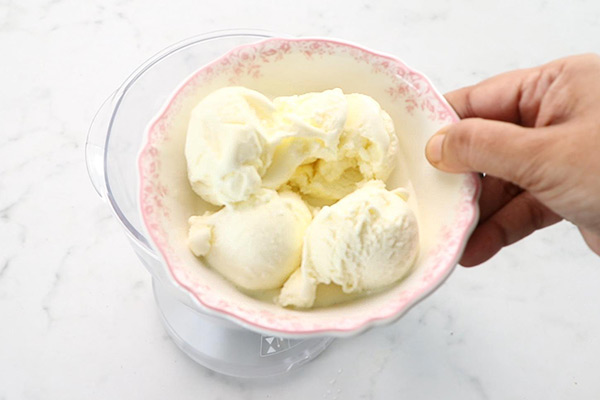
1.To a blender add 4 big scoops of vanilla ice cream which will be around 2 cups.

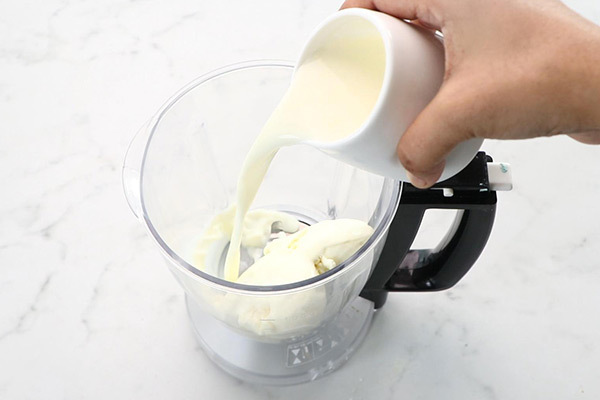
2.Add 1 cup chilled milk.

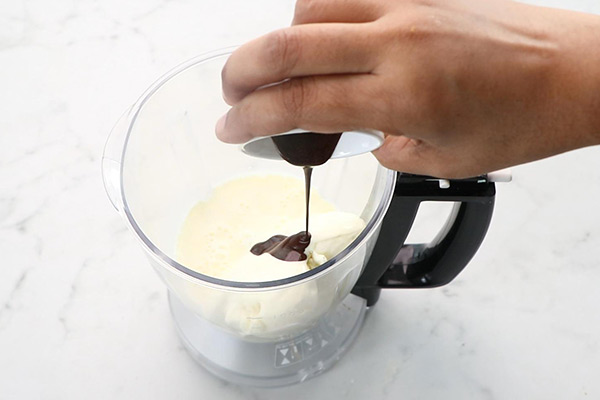
3.Add 1 tablespoon chocolate sauce.

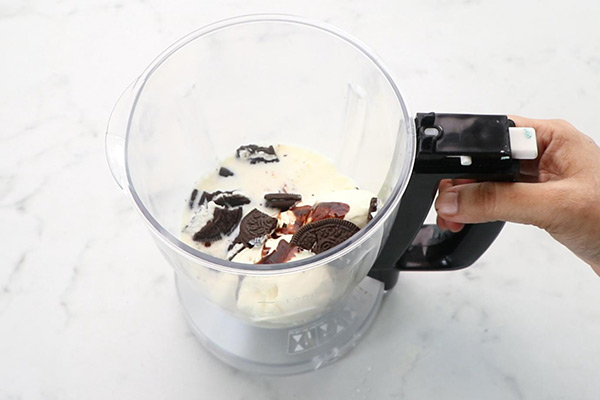
4.Add 6 oreo biscuits. Break into pieces and add it.

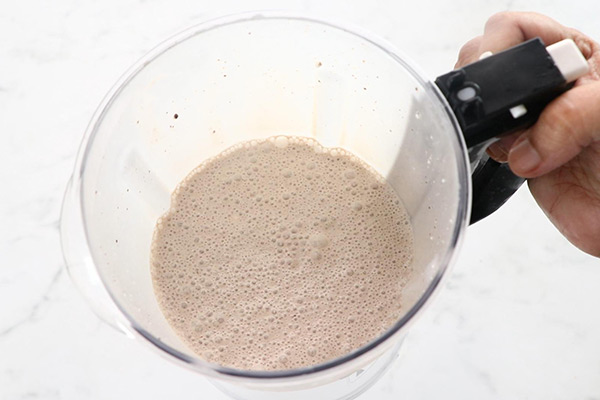
5.Blend until smooth and creamy.

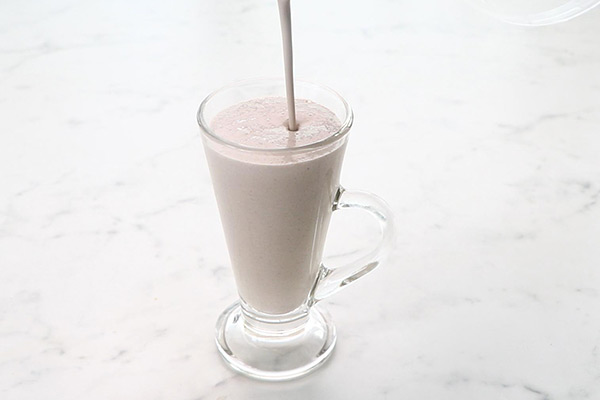
6.Pour into serving glass.

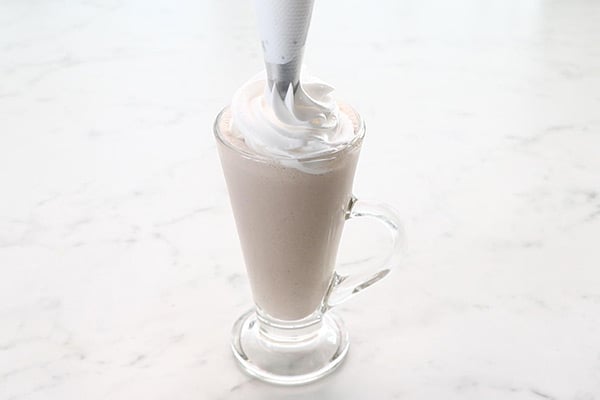
7.Top with whipped cream.

8.Drizzle chocolate sauce.

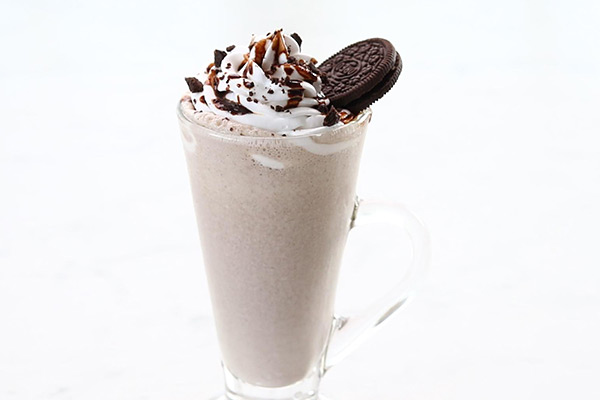
9.Crush oreo biscuit and add it. Place a oreo cookie on the side and serve chilled!

Serve immediately!

Expert Tips

  • Milk - You can reduce milk and add more vanilla ice cream for a more thick and creamy shake. I use farm fresh milk so always boil , chill it and then use for milkshakes.
  • Ice cream - I used vanilla ice cream which is best for this recipe. However you can use chocolate ice cream too.
  • Sweetness - I don't add sugar as the cookies are already sweet, also vanilla ice cream is also sweet.
  • Variation - You can also add 1 teaspoon of cocoa powder if you prefer. This is kid friendly recipe you can try with any cream based cookie/biscuit too.
  • Do not over blend - Blend only till its smooth, do not over blend as it can melt the ice cream and make the shake runny.

Serving and Storage

Always serve Oreo Milkshake chilled! You can make the milkshake and store it in fridge up to 2 days.

FAQS

1.Can I skip ice cream?

Yes you can skip ice cream and make this shake with 1 cup milk and 1 cup frozen milk. But the taste won't be the same as the shake made with ice cream.

2.Can I skip chocolate sauce?

Yes you can skip chocolate sauce and make the shake with other ingredients.

3.Is the milkshake suitable for kids or is it heavy?

It is absolutely kids friendly and they will enjoy it a lot!

oreo milkshake served

If you have any more questions about this Oreo Milkshake Recipe do mail me at sharmispassions@gmail.com. In addition, follow me on Instagram, Facebook,Β  Pinterest, Youtube andΒ TwitterΒ .

Tried this Oreo Milkshake Recipe? Do let me know how you liked it. Also tag us on Instagram @sharmispassions and hash tag it on #sharmispassions.

πŸ“– Recipe Card

Print

Oreo Milkshake Recipe

Oreo Milkshake is a cafe-style milkshake made by blending oreo biscuits with chilled milk, chocolate sauce and vanilla ice cream. Topped with whipped cream, chocolate sauce and crushed oreo biscuits it looks very tempting. This milkshake is simple, quick to make and tastes so delicious.
Course Dessert, milkshakes
Cuisine American, French, Indian, Italian
Keyword 30 mins recipes, dessert recipes, drink recipes, milk recipes, milkshake recipes
Prep Time 5 minutes
Cook Time 10 minutes
Total Time 15 minutes
Servings 2
Calories 77kcal
Author Sharmilee J

Ingredients

  • 6 oreo biscuits + for topping
  • 1 cup chilled milk
  • 4 big scoops vanilla ice cream
  • 1 tablespoon chocolate sauce + for topping
  • whipped cream for topping

Instructions

  • To a blender add 4 big scoops of vanilla ice cream which will be around 2 cups.
  • Add 1 cup chilled milk.
  • Add 1 tablespoon chocolate sauce.
  • Add 6 oreo biscuits. Break into pieces and add it.
  • Blend until smooth and creamy.
  • Pour into serving glass.
  • Top with whipped cream.
  • Drizzle chocolate sauce.
  • Crush oreo biscuit and add it. Place a oreo cookie on the side and serve chilled!
  • Serve immediately!

Video

Notes

  • Milk - You can reduce milk and add more vanilla ice cream for a more thick and creamy shake. I use farm fresh milk so always boil , chill it and then use for milkshakes.
  • Ice cream - I used vanilla ice cream which is best for this recipe. However you can use chocolate ice cream too.
  • Sweetness - I don't add sugar as the cookies are already sweet, also vanilla ice cream is also sweet.
  • Variation - You can also add 1 teaspoon of cocoa powder if you prefer. This is kid friendly recipe you can try with any cream based cookie/biscuit too.
  • Do not over blend - Blend only till its smooth, do not over blend as it can melt the ice cream and make the shake runny.

Nutrition

Serving: 200ml | Calories: 77kcal | Carbohydrates: 6g | Protein: 4g | Fat: 4g | Saturated Fat: 2g | Polyunsaturated Fat: 0.1g | Monounsaturated Fat: 1g | Cholesterol: 16mg | Sodium: 48mg | Potassium: 187mg | Fiber: 0.01g | Sugar: 6g | Vitamin A: 206IU | Vitamin C: 0.01mg | Calcium: 153mg

The post Oreo Milkshake Recipe appeared first on Sharmis Passions.
Masala Macaroni Recipe (Desi Pasta)

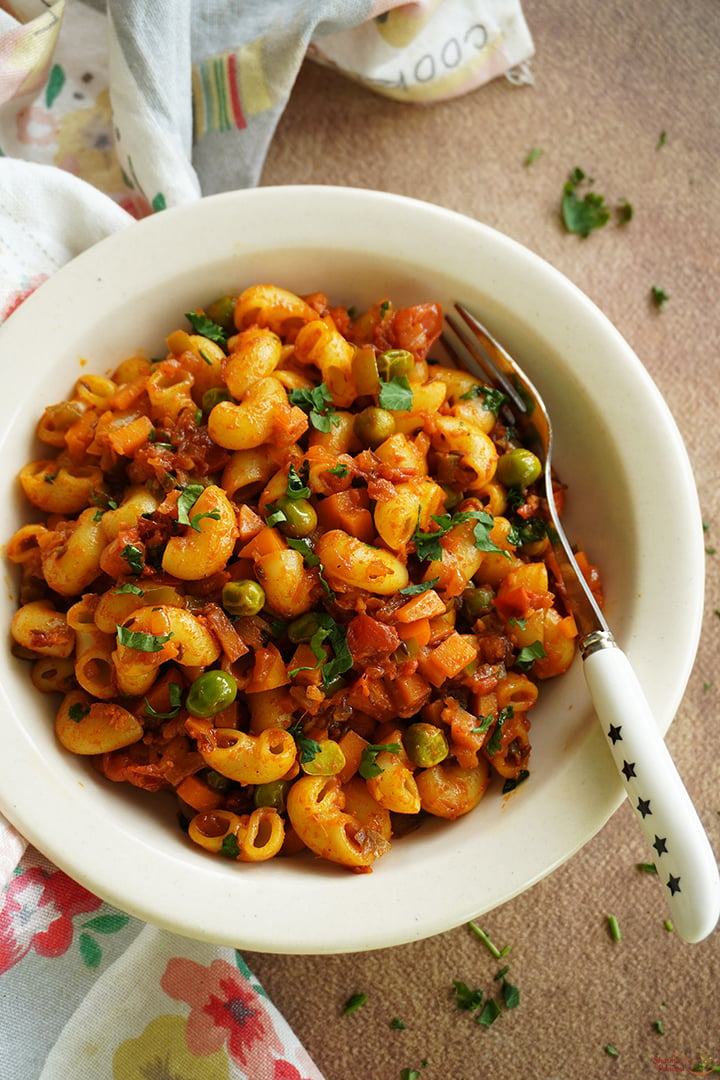
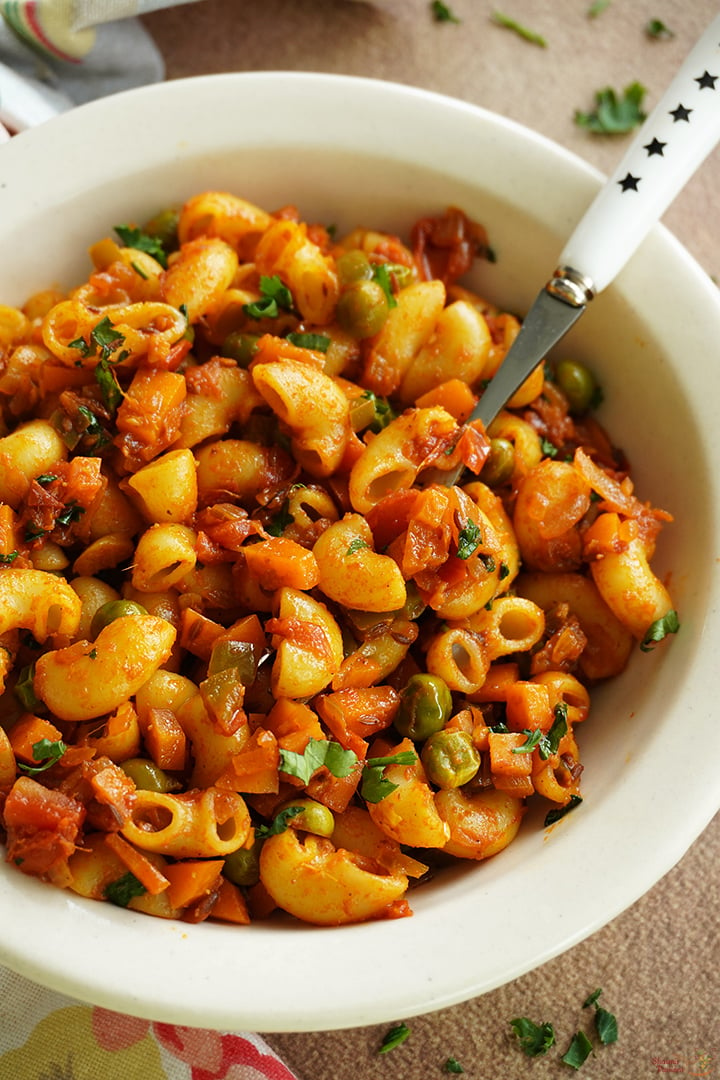
This Masala Macaroni is a flavourful spicy twist to the classic macaroni. This is so easy and simple to make with the available ingredients in your pantry. This is great to pack for lunchbox too, kids will love it too. This Desi style masala macaroni is irresistibly delicious.

masala macaroni served

This is my go to recipe during my busy hours or for weekend dinner. I sometimes make it without vegetables too, just with onion, tomato and basic spice powders and still it turns out delicious. Do try and enjoy!

[feast_advanced_jump_to]

About Masala Macaroni

Masala Macaroni is a flavour packed pasta dish made using macaroni, onion, tomato and some basic Indian spices. This needs some basic ingredients to put together along with cooked macaroni. It is quick to make and ideal for lunch or dinner.

As I have told many times, I am not fond of pasta but can have it once in a while. Among the pasta dishes I make, I like red sauce pasta and this desi style pasta. the most. I somehow like the mini pasta varieties than the bigger ones.

You can use mini macaroni as I have used for the best tasting desi pasta. This dish is an Indian - Italian fusion, where macaroni gets an Indian twist. I would always cook pasta a bit soft and not al dente mainly because of kids sake. It has a soft and chewy texture which makes it absorb the masala well.

Once when I was bored to make the regular creamy macaroni, white sauce pasta I tried this desi style pasta dish and all of us loved it so now this has become my go to recipe.

Similar Recipes

masala macaroni served

Masala Macaroni Video

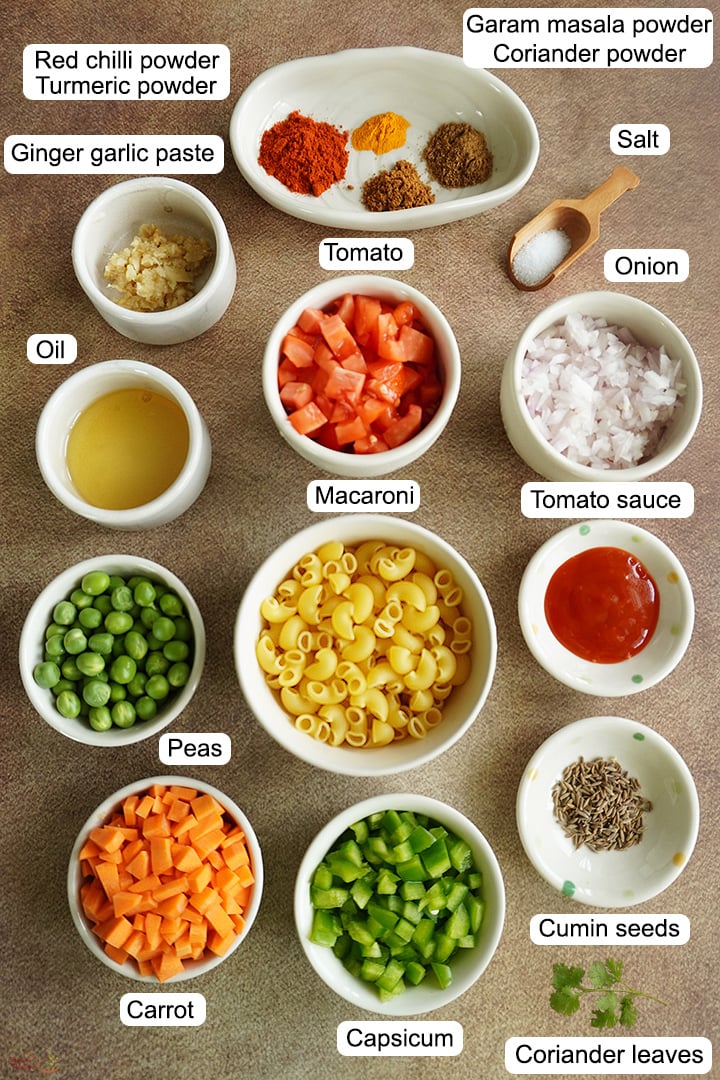
Masala Macaroni Ingredients

  • Pasta - Macaroni Pasta variety is preferred for this recipe however you can use any pasta for this dish which includes penne, fussili etc. I recommend using small variety pasta for this dish.
  • Oil - I have used regular cooking oil for this dish.
  • Cumin seeds - Cumin seeds is used for tempering.
  • Ginger garlic paste - adds taste and flavour to this dish.
  • Onion, Tomato - Onion is first sauteed with ginger garlic paste then tomato is added and cooked until mushy.
  • Tomato sauce - is used to add a tangy taste to the pasta.
  • Vegetables - I have used capsicum, carrot and peas. Additionally you can add mushrooms, cooked sweet corn, baby corn or any other veggies of your choice.
  • Spices - Indian spice powders like turmeric powder, red chilli powder, coriander powder and garam masala powders are used.
  • Herbs - Fresh coriander leaves is used.
ingredients needed to make masala macaroni

How to make Masala Macaroni Step by Step

1.Boil 4 cups water, add salt to it. Add 1 cup macaroni pasta to it.

cook pasta

2.Cook until it becomes soft but not mushy.

cook until soft

3.Once cooked drain water, rinse with cold water to avoid further cooking.

drain water

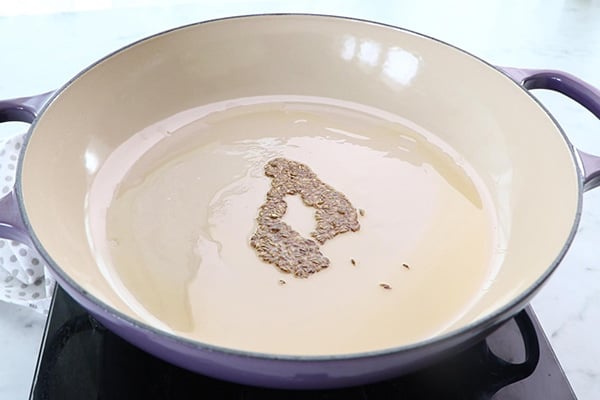
4.Heat 1 tablespoon oil, add ΒΎ teaspoon cumin seeds, let it splutter.

temper cumin seeds

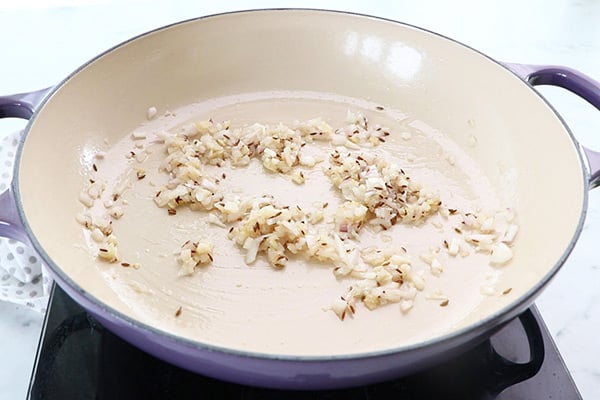
5.Then add Β½ cup onion along with 1 teaspoon ginger garlic paste and salt to taste. Saute until golden.

saute onion

6.Add Β½ cup tomatoes, ΒΌ cup capsicum.

add tomato, capsicum

7. Cook until tomatoes turn mushy.

saute well

8.Then add ΒΌ cup carrot, ΒΌ cup green peas, 1 Β½ teaspoon red chilli powder, ΒΌ teaspoon turmeric powder, ΒΎ teaspoon coriander powder and ΒΎ teaspoon garam masala powder.

add veggies, spice powders

9.Cook until the masalas are well blended with the vegetables.

saute well

10.Add around 1 cup water along with little salt. Let it boil.

add water

11.Cook covered for few minutes until the vegetables are done.

cook covered

12.Check if vegetables are cooked.

check if veggies are done

13.Add 1 tablespoon tomato ketchup.

add tomato sauce

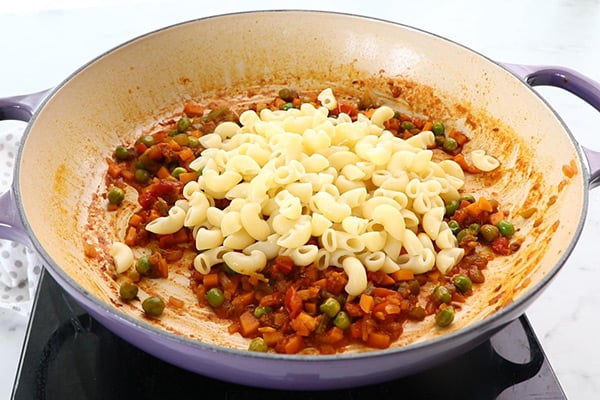
14.Add cooked macaroni.

add cooked pasta

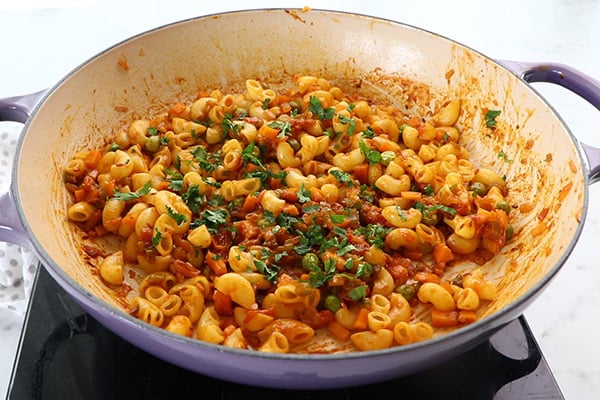
15.Mix it well then finally add 1 tablespoon coriander leaves. Give a quick mix and switch off.

mix well, add coriander leaves

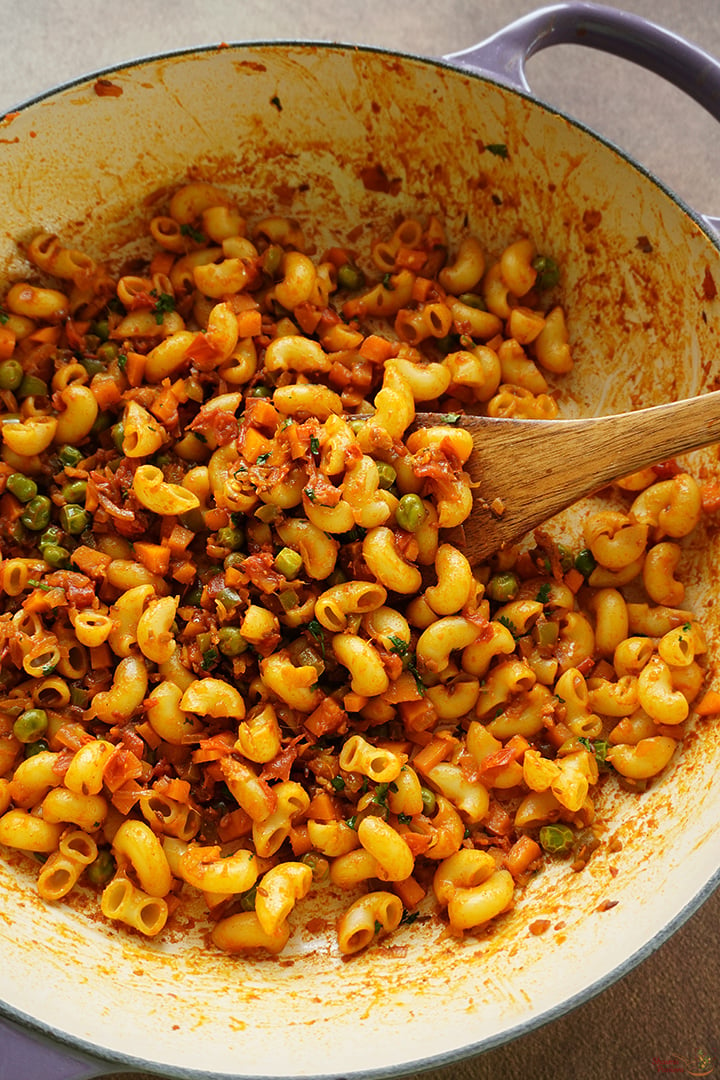
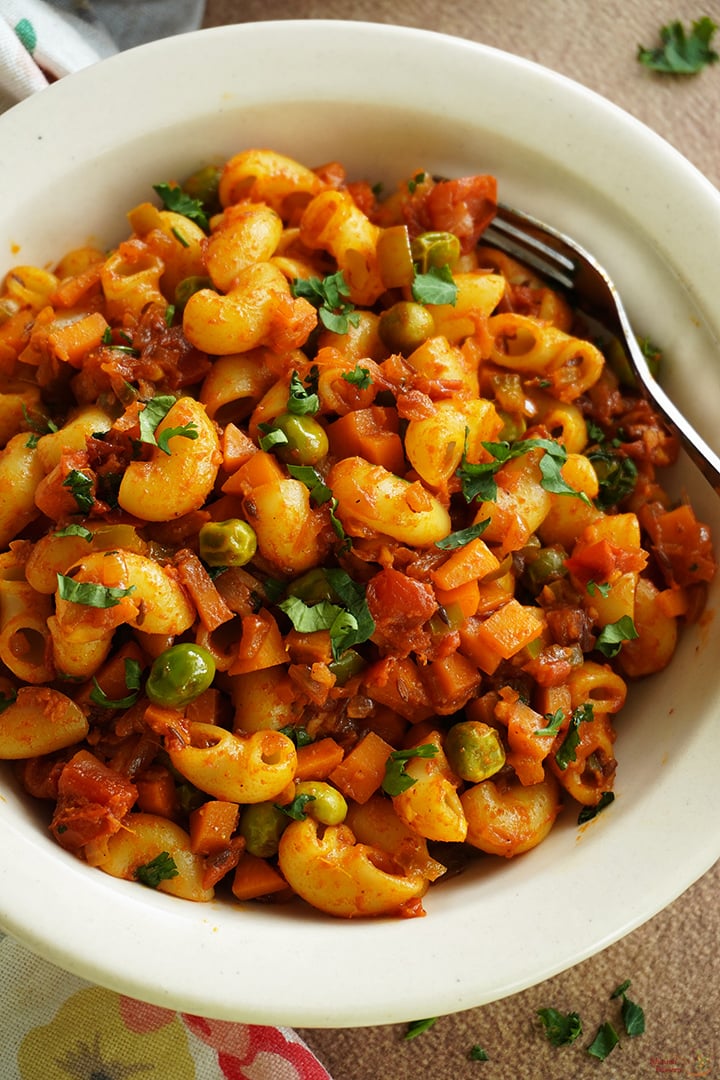
Serve masala macaroni pasta hot!

masala macaroni just cooked

Expert Tips

  • Pasta variety - Use any small variety pasta which is nest suited for this dish. However you can use any pasta variety you have.
  • Adding pasta cooked water - Always reserve pasta cooked water and add it to if the dish is too dry.
  • Cooking pasta - If the pasta is not cooked soft then it will not absorb the masalas fully so make sure to cook pasta perfectly.
  • Add ons - You can add 2 tablespoon cheese sauce or grated cheese to make it more rich. You can add parmesan cheese or regular grated cheese.
  • Vegetables - Adding vegetables is purely of your choice. You can add baby corn, mushroom, cherry tomatoes etc.

Serving and Storage

Serve it as such hot or serve it along with a toast of bread. I would recommend to consume it fresh. In case you want to store, make the sauce separately store in fridge then mix it with pasta while serving.

masala macaroni served

If you have any more questions about thisΒ Masala Macaroni RecipeΒ do mail me at sharmispassions@gmail.com. In addition, follow me onΒ Instagram,Β Facebook,Β Β Pinterest,Β YoutubeΒ andΒ TwitterΒ .

Tried thisΒ Masala Macaroni Recipe? Do let me know how you liked it. Also tag us on Instagram @sharmispassions and hash tag it on #sharmispassions.

πŸ“– Recipe Card

Print

Masala Macaroni Recipe (Desi Pasta)

This Masala Macaroni is a flavourful spicy twist to the classic macaroni. This is so easy and simple to make with the available ingredients in your pantry. This is great to pack for lunchbox too, kids will love it too. This Desi style masala macaroni is irresistibly delicious.
Course dinner
Cuisine Indian
Keyword 30 mins recipes
Prep Time 10 minutes
Cook Time 20 minutes
Total Time 30 minutes
Servings 2
Calories
Author Sharmilee J

Ingredients

To cook pasta

  • 1 cup macaroni pasta
  • 4 cups water
  • salt to taste

To make masala macaroni

Instructions

  • Boil 4 cups water, add salt to it. Add 1 cup macaroni pasta to it.
  • Cook until it becomes soft but not mushy.
  • Once cooked drain water, rinse with cold water to avoid further cooking.
  • Heat 1 tablespoon oil, add ΒΎ teaspoon cumin seeds, let it splutter.
  • Then add Β½ cup onion along with 1 teaspoon ginger garlic paste and salt to taste. Saute until golden.
  • Add Β½ cup tomatoes, ΒΌ cup capsicum.
  • Cook until tomatoes turn mushy.
  • Then add ΒΌ cup carrot, ΒΌ cup green peas, 1 Β½ teaspoon red chilli powder, ΒΌ teaspoon turmeric powder, ΒΎ teaspoon coriander powder and ΒΎ teaspoon garam masala powder.
  • Cook until the masalas are well blended with the vegetables.
  • Add around 1 cup water along with little salt. Let it boil.
  • Cook covered for few minutes until the vegetables are done.
  • Check if vegetables are cooked.
  • Add 1 tablespoon tomato ketchup.
  • Add cooked macaroni.
  • Mix it well then finally add 1 tablespoon coriander leaves. Give a quick mix and switch off.
  • Serve masala macaroni pasta hot!

Video

Notes

  • Pasta variety - Use any small variety pasta which is nest suited for this dish. However you can use any pasta variety you have.
  • Adding pasta cooked water - Always reserve pasta cooked water and add it to if the dish becomes too dry.
  • Cooking pasta - If the pasta is not cooked soft then it will not absorb the masalas fully so make sure to cook pasta perfectly.
  • Add ons - You can add 2 tablespoon cheese sauce or grated cheese to make it more rich. You can add parmesan cheese or regular grated cheese.
  • Vegetables - Adding vegetables is purely of your choice. You can add baby corn, mushroom, cherry tomatoes etc.

The post Masala Macaroni Recipe (Desi Pasta) appeared first on Sharmis Passions.

Peanut Butter Cookies Recipe

Peanut Butter Cookies are flavourful, nutty cookies made using flour, peanut butter, milk, butter, sugar and baking powder. These cookies are eggless, has a wonderful melt in the mouth texture and absolutely irresistible. It is full of peanut butter flavour, has a great texture and a classic recipe.

peanut butter cookies served with milk

Using good quality peanut butter is the key to best tasting cookies. These cookies are soft, chewy from inside and have crispy outer edges. The best serving suggestion for this cookie would be to have along with a glass of warm or hot milk. Do try this and enjoy it with your kids.

[feast_advanced_jump_to]

About Peanut Butter Cookies

Peanut Butter Cookies are a great delight when you are craving to have something sweet and mild. This recipe can be a great option for those looking for eggless cookies. They are so easy to make with the simple ingredients that you have in your pantry.

Peanut cookies are enjoyed by kids and quite a healthy alternative when compared to store-bought cookies. This is one of the classic cookie recipes that any one can try as it is easy and no fail.

My kids love homemade cookies and these cookies are their favourite. Whenever I make, they turn out so delicious that my kids finish them off in no time. Even hubby and my mother who are not fond of cookies love these as they are mild and no so heavy.

These cookies are soft, chewy in the center and crisp at the edges, both my kids love it so much. I added little vanilla extract but you can skip it and make it with out any flavouring too.

Similar Recipes

peanut butter cookies served with milk

Peanut Butter Cookies Video

Peanut Butter Cookies Ingredients

  • Peanut butter - Good quality peanut butter gives good flavour and texture to the cookies. You can use creamy or crunchy variety as per your liking and preference.
  • Flour - I have used maida(white flour). You can replace it with half and half of wheat flour with maida too.
  • Sugar - I have used castor sugar and brown sugar for sweetness and colour.
  • Butter - Provides the richness and acts a binding agent. Use unsalted butter.
  • Baking soda - Helps the dough to rise and creates a light, fluffy texture.
  • Milk - Adding warm milk is used to bring the dough together.
  • Vanilla extract - Vanilla extract adds a mild vanilla flavour to the cookies. I used homemade vanilla extract, you can use store bought extract or essence too.
ingredients needed to make peanut butter cookies

How to make Peanut Butter Cookies Step by Step

1.To a bowl add 1 cup (120 grams) flour and Β½ teaspoon baking powder.

add flour with baking powder

2.Whisk it well and set aside.

mix well

3.To a mixing bowl add ΒΌ cup (55 grams) butter , ΒΌ cup (50 grams) castor sugar, ΒΌ cup(50 grams) brown sugar and Β½ cup(65 grams) peanut butter.

add ingredients

4.Whisk it well until creamy.

cream it well

5.Then add Β½ teaspoon vanilla extract. Give a quick mix.

add vanilla extract

6.Add flour mixture.

add flour mix

7.Mix it with a spatula until no dry flour is seen, it will look crumbly. Add 1 Β½ tablespoon warm milk to it.

add milk

8.Mix to bring it together to a dough. If it does not come together then add little more milk around Β½ tablespoon not more than that.

gatehr to a dough

9.Scoop out the dough using a cookie scoop or use 1 tablespoon measure.

scoop out the dough

10.Scoop out the dough. We can get even sized cookies when using cookie scoop or tablespoon measure.

scoop out

11.Roll between your palms and flatten it slightly.

roll and flatten

12.Repeat to finish the dough. Place it on a baking tray with parchment paper. Press using a fork. Preheat oven at 180 DEG C for 10 minutes.

press with fork

13.Press both sides to get a check pattern.

check pattern

14.All cookies are ready to bake. If you don't want the cookies to spread then chill the tray for 15 minutes before baking.

cookies are ready to bake

15. Bake in preheated oven at 180 DEG C for 12-15 minutes or until the edges starts to turn golden. Remove from oven, cool down then store.

Enjoy cookies warm or at room temperature, either ways they taste amazing.

peanut butter cookies served with milk

Expert Tips

  • Healthy variant - For a healthier option, you could opt for whole wheat flour or almond flour, you can try with 50:50 ratio with maida.
  • Sweeteners - I have used a combination of sugar brown sugar and castor sugar. You can use just castor sugar fully too.
  • Butter - Butter should be at room temperature and measured. I used homemade butter, you can use store bought too, make sure it is unsalted.
  • Oven settings - The oven should be preheated before baking. Additionally, the center rack is the best preferred choice due to even heat distribution.
  • Refrigeration - You can keep the dough in fridge until preheating time as this prevents the cookies from spreading too thin, but I skipped doing this.
  • Baking time - The baking time depends on the cookie size and thickness. Mine got done in 12 minutes.

Serving and Storage

Peanut cookies are best served when warm or at room temperature. You can accompany them with a glass of warm beverage of your choice.

They can be stored in an airtight container at room temperature for 5 days. They should be cooled down to room temperature completely and then stored as this prevents them from turning soggy.

FAQS

1.Why do my cookies turn hard?

Over mixing your cookie dough can make it dry and tough, so to avoid this always make sure you just fold in all the ingredients gently. Over baking can also make cookies hard.

2.Can butter be replaced?

Yes, it can be substituted with oil, but results vary depending on the substitute of oil variety.

3.Can whole wheat or almond flour be used instead of maida?

Definitely yes, but adjustments has to be made to the recipe. Using almond or whole wheat flour caters to healthier and gluten-free choice. You can try with half maida and half wheat flour.

4.Can palm sugar be used?

Yes you can use palm sugar replacing brown sugar, though the taste may vary.

5.Does the same recipe work when an egg is added?

If adding egg you have to adjust the recipe accordingly. This recipe as such cannot be used for a egg version.

peanut butter cookies served with milk

If you have any more questions about this Peanut Butter Cookies Recipe do mail me at sharmispassions@gmail.com. In addition, follow me on Instagram, Facebook,Β  Pinterest, Youtube andΒ TwitterΒ .

Tried this Peanut Butter Cookies Recipe ? Do let me know how you liked it. Also tag us on Instagram @sharmispassions and hash tag it on #sharmispassions.

πŸ“– Recipe Card

Print

Peanut Butter Cookies Recipe

Peanut Butter Cookies are flavourful, nutty cookies made using flour, peanut butter, milk, butter, sugar and baking powder. These cookies are eggless, has a wonderful melt in the mouth texture and absolutely irresistible. It is full of peanut butter flavour, has a great texture and a classic recipe.
Course Baking
Cuisine American, French, Indian, Italian, Mediterranean, Mexican
Keyword 30 mins recipes, all purpose flour recipes, Baking, baking recipes, butter recipes, cook, cookie recipes, maida recipes, peanut recipes, whole wheat recipes
Prep Time 15 minutes
Cook Time 25 minutes
Total Time 40 minutes
Servings 15 cookies
Calories 1kcal
Author Sharmilee J

Ingredients

  • 1 cup (120 grams) flour
  • Β½ teaspoon baking powder
  • ΒΌ cup (55 grams) butter
  • ΒΌ cup (50 grams) castor sugar
  • ΒΌ cup (50 grams) brown sugar
  • Β½ cup (65 grams) peanut butter
  • Β½ teaspoon vanilla extract
  • 1 Β½ tablespoon warm milk

Instructions

  • To a bowl add 1 cup (220 grams) flour and Β½ teaspoon baking powder.
  • Whisk it well and set aside.
  • To a mixing bowl add ΒΌ cup (55 grams) butter , ΒΌ cup (50 grams) castor sugar, ΒΌ cup(50 grams) brown sugar and Β½ cup(65 grams) peanut butter.
  • Whisk it well until creamy.
  • Then add Β½ teaspoon vanilla extract. Give a quick mix.
  • Add flour mixture.
  • Mix it with a spatula until no dry flour is seen, it will look crumbly. Add 1 Β½ tablespoon warm milk to it.
  • Mix to bring it together to a dough. If it does not come together then add little more milk around Β½ tablespoon not more than that.
  • Scoop out the dough using a cookie scoop or use 1 tablespoon measure.
  • Scoop out the dough. We can get even sized cookies when using cookie scoop or tablespoon measure.
  • Roll between your palms and flatten it slightly.
  • Repeat to finish the dough. Place it on a baking tray with parchment paper. Press using a fork. Preheat oven at 180 DEG C for 10 minutes.
  • Press both sides to get a check pattern.
  • All cookies are ready to bake. If you don't want the cookies to spread then chill the tray for 15 minutes before baking.
  • Bake in preheated oven at 180 DEG C for 12-15 minutes or until the edges starts to turn golden. Remove from oven, cool down then store.
  • Enjoy cookies warm or at room temperature, either ways they taste amazing.

Video

Notes

  • Healthy variant - For a healthier option, you could opt for whole wheat flour or almond flour, you can try with 50:50 ratio with maida.
  • Sweeteners - I have used a combination of sugar brown sugar and castor sugar. You can use just castor sugar fully too.
  • Butter - Butter should be at room temperature and measured. I used homemade butter, you can use store bought too, make sure it is unsalted.
  • Oven settings - The oven should be preheated before baking. Additionally, the center rack is the best preferred choice due to even heat distribution.Β 
  • Refrigeration - You can keep the dough in fridge until preheating time as this prevents the cookies from spreading too thin, but I skipped doing this.
  • Baking time - The baking time depends on the cookie size and thickness. Mine got done in 12 minutes.

Nutrition

Serving: 20g | Calories: 1kcal | Carbohydrates: 0.1g | Protein: 0.05g | Fat: 0.05g | Saturated Fat: 0.03g | Polyunsaturated Fat: 0.001g | Monounsaturated Fat: 0.01g | Cholesterol: 0.2mg | Sodium: 15mg | Potassium: 2mg | Sugar: 0.1g | Vitamin A: 2IU | Calcium: 10mg | Iron: 0.01mg

The post Peanut Butter Cookies Recipe appeared first on Sharmis Passions.
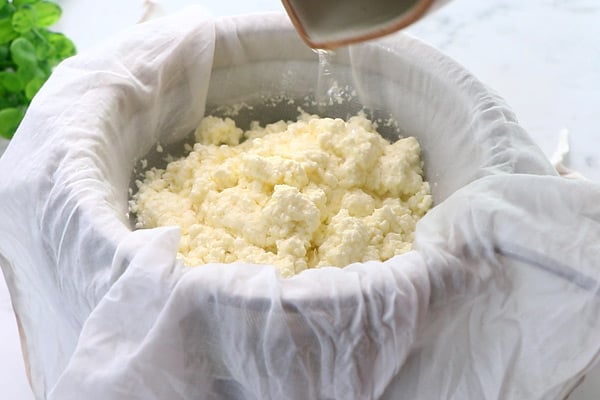
London's Viral Chocolate Strawberry Recipe

Chocolate Strawberry is a London's viral recipe which got so popular in social media. Juicy fresh strawberries in a glass with melted milk chocolate no wonder this got so viral in the streets of London. This is so simple and easy to make yet tastes so delicious, so do recreate the magic and enjoy!

london's viral chocolate strawberry served

This chocolate strawberry is a match made as it tastes so delicious. If you like strawberries then this is a must try. I am not a big fan of berries still I loved it. I made it for my kids as they both love strawberries, and they absolutely loved it.

[feast_advanced_jump_to]

About London's Viral Chocolate Strawberry

Chocolate Strawberries needs just 2 ingredients fresh, juicy sweet strawberries and good quality milk chocolate. I wanted to try it ever since I saw in instagram as this recipe went so viral. I was waiting to try it with the best strawberries and finally I did, and these chocolate strawberries tastes so delicious.

I love cooking any dish with strawberries as it gives a bright vibrant colour to the dish and of course makes the dish look so tempting and beautiful. And needless to say about the taste, if you are a strawberry lover then you will know it.

I love recreating such trending recipes in my kitchen and this is one worth a try viral recipe. Use strawberries when they are peak in season and use good quality milk chocolate and you are in for the best treat.

I loved making and shooting these as much as as I enjoyed eating them. Strawberries are so photogenic and this dish with chocolate made it look even more appealing.

Similar Recipes

london's viral chocolate strawberry served

Chocolate Strawberry Video

Chocolate Strawberries Ingredients

  • Strawberries - Choose the best juicy, ripe and sweet strawberries as it is the star ingredient of this recipe.
  • Chocolate - Use good quality milk chocolate for best taste. You can use chocolate compound or chocolate chips.
  • Oil - I used coconut oil, you can use any flavourless oil.
ingredients needed to make chocolate strawberry

How to make Chocolate Strawberries Step by Step

Preparing strawberries

1.Take around 10 big strawberries, remove the green leaf stalk part and discard them.

remove stalk

2.All removed and ready.

all ready

3.Add it to water and let it rest for few minutes.

add to water

4.Remove the strawberries and pat dry them and set aside.

wipe with cloth

Melting chocolate

5.To a sauce pan add little water. Let it start boiling.

boil water

6.Keep a heat proof bowl, add Β½ cup milk chocolate and 1 tablespoon coconut oil to it. Make sure the bottom of the bowl does not touch water inside the sauce pan.

add chocolate, oil to a bowl

7.Mix well until the chocolate melts completely. Switch off and remove from flame.

melt chocolate

8.The consistency should be pourable.

pourable consistency

9.Transfer this to a spouted creamer. If you don't have one such creamer then use a ladle to pour.

transfer to spouted creamer

10.Arrange the strawberries in a glass.

arrange strawberries

11.Pour melted chocolate over it.

pour chocolate

Serve immediately and enjoy!

london's viral chocolate strawberry served

Expert Tips

  • Choosing strawberries - Choose ripe, sweet, fresh and juicy strawberries. Add it as such as cutting them may release water.
  • Chocolate - Milk chocolate is best for this recipe. However you can choose to use half and half of milk chocolate with dark chocolate. Couverture chocolate is best too.
  • Oil - Though adding oil is optional I would recommend adding it as it makes the consistency just perfect to pour. Coconut oil is best recommended as it goes well with chocolate. Make sure to use neutral tasting oil.
  • Glass - Choose a glass that is medium tall.
  • Pouring - You can arrange half of the strawberries then pour melted chocolate first then arrange the rest and pour the remaining chocolate.

Serving and Storage

This is best when served fresh so I would not recommend storing. You can prepare the strawberries ahead and while serving melt the chocolate and pour over and serve it immediately.

FAQS

1. What chocolate is best for chocolate strawberries?

Use good-quality compound chocolate or couverture chocolate. Milk is best preferred for this recipe however, dark and white chocolate can also be used if you prefer.

2.Should I wash the strawberries before dipping them in chocolate?

Yes rinse well to make sure strawberries are clean, but make sure they are completely dry before adding it to glass. Any water can prevent the chocolate from sticking properly.

3.What toppings can I use?

You can use chopped nuts like pistachios, almonds, hazelnuts or sprinkles, chocolate chips etc.

london's viral chocolate strawberry served

If you have any more questions about thisΒ London's Viral Chocolate Strawberry RecipeΒ do mail me at sharmispassions@gmail.com. In addition, follow me onΒ Instagram,Β Facebook,Β Β Pinterest,Β YoutubeΒ andΒ TwitterΒ .

Tried thisΒ London's Viral Chocolate Strawberry Recipe? Do let me know how you liked it. Also tag us on Instagram @sharmispassions and hash tag it on #sharmispassions.

πŸ“– Recipe Card

Print

London's Viral Chocolate Strawberry Recipe

Chocolate Strawberry is a London's viral recipe which got so popular in social media. Juicy fresh strawberries in a glass with melted milk chocolate no wonder this got so viral in the streets of London. This is so simple and easy to make yet tastes so delicious, so do recreate the magic and enjoy!
Course Dessert
Cuisine American
Keyword 15 mins recipes
Servings 2
Calories 299kcal
Author Sharmilee J

Ingredients

  • 10 strawberries
  • Β½ cup milk chocolate
  • 1 tablespoon coconut oil

Instructions

  • Take around 10 big strawberries, remove the green leaf stalk part and discard them.
  • All removed and ready.
  • Add it to water and let it rest for few minutes.
  • Remove the strawberries and pat dry them and set aside.
  • To a sauce pan add little water. Let it start boiling.
  • Keep a heat proof bowl, add Β½ cup milk chocolate and 1 tablespoon coconut oil to it. Make sure the bottom of the bowl does not touch water inside the sauce pan.
  • Mix well until the chocolate melts completely. Switch off and remove from flame.
  • The consistency should be pourable.
  • Transfer this to a spouted creamer. If you don't have one such creamer then use a ladle to pour.
  • Arrange the strawberries in a glass.
  • Pour melted chocolate over it.
  • Serve immediately and enjoy!

Video

Notes

  • Choosing strawberries - Choose ripe, sweet, fresh and juicy strawberries. Add it as such as cutting them may release water.
  • Chocolate - Milk chocolate is best for this recipe. However you can choose to use half and half of milk chocolate with dark chocolate. Couverture chocolate is best too.
  • Oil - Though adding oil is optional I would recommend adding it as it makes the consistency just perfect to pour. Coconut oil is best recommended as it goes well with chocolate. Make sure to use neutral tasting oil.
  • Glass - Choose a glass that is medium tall.
  • Pouring - You can arrange half of the strawberries then pour melted chocolate first then arrange the rest and pour the remaining chocolate.

Nutrition

Calories: 299kcal | Carbohydrates: 31g | Protein: 2g | Fat: 22g | Saturated Fat: 15g | Polyunsaturated Fat: 1g | Monounsaturated Fat: 5g | Sodium: 8mg | Potassium: 219mg | Fiber: 4g | Sugar: 25g | Vitamin A: 7IU | Vitamin C: 35mg | Calcium: 20mg | Iron: 1mg

The post London's Viral Chocolate Strawberry Recipe appeared first on Sharmis Passions.
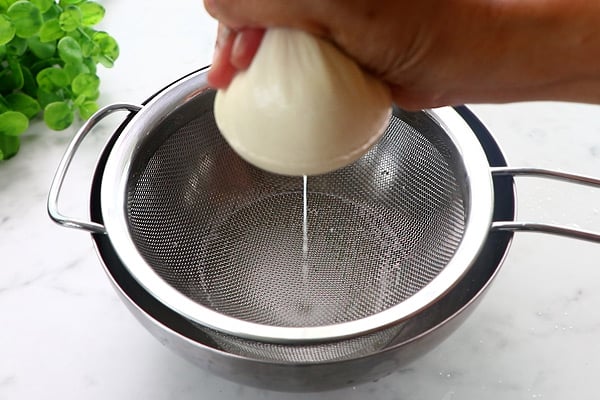
Chocolate Modak Recipe

Chocolate Modak is a simple sweet made with khoya, cocoa powder, chocolate and sugar as main ingredients. It is mostly prepared during Ganesh Chaturthi festive as a special homemade sweet. It takes only few minutes to make but the taste comes very rich and satisfying. It is also a great option when you want something quick yet special at home for the festival.

chocolate modak served

The texture of the modak is soft and slightly fudgey inside which makes it very enjoyable to eat. You can also use the chocolate mixture as stuffing inside steamed rice flour covering if you prefer that. You can make as per your preference. Do try and enjoy this easy chocolate modak.

[feast_advanced_jump_to]

About Chocolate Modak

Chocolate Modak is an easy variation of traditional modak prepared during festive times. Instead of coconut jaggery filling, khoya is cooked with sugar and cocoa powder to create a chocolate mixture which is then shaped into modaks.

Milk chocolate added gives a rich chocolate flavour so do not miss it. When cooked in low flame the mixture becomes thick and starts leaving the sides of pan then shaped into small modak. You can add in chopped nuts for extra crunch.

The flavor is rich and chocolaty with mild creaminess from khoya. Cocoa powder gives deep color and slight bitterness which balances the sweetness. Little ghee is added for smooth texture and shine. Once cooled, the mixture becomes firm and easy to shape without breaking. It also holds the mould design well after cooling a bit.

You can press the mixture directly into modak mould or prepare rice flour dough and use chocolate khoya mixture as stuffing. This version is easy and quick to make, kids will love it as it tastes just like chocolate peda.

I usually prepare this fresh. It adds more variety to your festive sweets table. Using mould makes them look neat and festive. Do try this easy festive sweet and enjoy!

Similar Recipes

chocolate modak served

Chocolate Modak Video

Chocolate Modak Ingredients

  • Khoya - I used khoya the base for this sweet. It gives creamy texture and richness, use fresh khoya for better result.
  • Sugar - I added sugar for sweetness. You can adjust according to your taste preference.
  • Cocoa powder - I used for chocolate flavour. It gives dark colour and slight bitterness which balance the sweetness nicely.
  • Milk Chocolate - I added milk chocolate for extra richness and melt in the mouth texture. You can use chocolate chips also, it works same.
  • Ghee - I added little ghee for smoothness and shine. It helps the mixture not stick too much to the pan.
ingredients needed to make chocolate modak

How to make Chocolate Modak Step by Step

1.Heat 1 teaspoon ghee in a pan, add 1 cup (200 grams) unsweetened khoya.

add khoya

2.Stir for few minutes until it turn goey. Then add ΒΌ cup + 1 tablespoon sugar.

add sugar

3.Mix it well and stir continuously until sugar dissolves completely.

cook till goey

4.Add 1 Β½ tablespoon cocoa powder.

add cocoa powder

5.Mix it until it is evenly blended.

mix well

6.Add 1 Β½ tablespoon milk chocolate.

add milk chocolate

6.Keep stirring and cooking. Cook until it leaves the sides of the pan. Switch off and remove from flame.

keep stirring

7.Transfer to a plate and let it become warm.

transfer to a plate

8.Knead it once when it is warm.

knead well

9.Grease modak mould with ghee.

grease mould with ghee

10.Pinch a small ball from the dough and add it to the modak mould.

add dough

11.Close and remove the extras. Fill the dough where there is gaps.

close and remove extras

12.Gently open and remove.

gently open

13.Chocolate modak is ready!

chocolate modak is ready

14.Decorate with silver varak.

decorate with silver varak

Enjoy it!

chocolate modak served

Expert Tips

  • Cook in low flame - I usually keep flame low while cooking khoya mixture. High flame may burn it fast at the bottom and make it hard.
  • Keep stirring - I stir well so that the mixture does not stick. Once it leaves the sides of the pan and comes together, switch off immediately.
  • Cooling - The mixture will be very hot. I let it cool before shaping otherwise it may burn hands.
  • Grease mould - I just apply ghee inside mould so modak comes out easily without sticking.
  • Knead dough - For stuffed version, the dough should be smooth and soft. If cracks appears, sprinkle little warm water and knead again.

Serving and Storage

Serve Chocolate Modak as prasad during Ganesh Chaturthi or as festive sweet for family. It tastes good at room temperature itself. Store leftover in refrigerator in airtight box for up to 3 to 4 days. Before serving from fridge, keep outside for some time so it becomes soft again.

FAQS

1.Can I skip chocolate?

Yes you can skip chocolate if not available. But it gives more rich chocolate taste and flavour.

2.How can I make stuffed version?

Make the outer covering as mentioned here, add prepared chocolate stuffing and steam the modaks.

3.Why my mixture is very sticky, How long should I cook?

If the mixture is sticky, it may need little more cooking in low flame. Cook until it leaves the sides of pan properly.

4.Can I reduce sugar in this recipe?

Yes you can reduce sugar as milk chocolate also adds sweetness. Adjust based on your liking.

5.Can I prepare this in advance?

Yes you can prepare one or two days before and refrigerate. It stays good for few days when stored in fridge.

chocolate modak served

If you have any more questions about this Chocolate Modak do mail me at sharmispassions@gmail.com. In addition, follow me onΒ Instagram,Β Facebook,Β PinterestΒ ,YoutubeΒ andΒ TwitterΒ .

Tried this Chocolate Modak Recipe? Do let me know how you liked it. Also tag us on Instagram @sharmispassions and hash tag it on #sharmispassions.

πŸ“– Recipe Card

Print

Chocolate Modak Recipe

Chocolate Modak is a simple sweet made with khoya, cocoa powder, chocolate and sugar as main ingredients. It is mostly prepared during Ganesh Chaturthi festive as a special homemade sweet. It takes only few minutes to make but the taste comes very rich and satisfying. It is also a great option when you want something quick yet special at home for the festival.
Course Snack
Cuisine Indian
Keyword chocolate recipes, Ganesh Chaturthi Recipes, Modak recipes, recipes, sweet recipes
Prep Time 10 minutes
Cook Time 10 minutes
Total Time 20 minutes
Servings 12 small modaks
Calories 113kcal
Author Sharmilee J

Ingredients

  • 1 cup unsweetened khoya
  • ΒΌ cup + 1 tablespoon sugar
  • 1 Β½ tablespoon cocoa powder
  • 1 Β½ tablespoon milk chocolate
  • 1 teaspoon ghee

Instructions

  • Heat 1 teaspoon ghee in a pan, add 1 cup (200 grams) unsweetened khoya.
  • Stir for few minutes until it turn goey. Then add ΒΌ cup + 1 tablespoon sugar.
  • Mix it well and stir continuously until sugar dissolves completely.
  • Add 1 Β½ tablespoon cocoa powder.
  • Mix it until it is evenly blended.
  • Add 1 Β½ tablespoon milk chocolate.
  • Keep stirring and cooking. Cook until it leaves the sides of the pan. Switch off and remove from flame.
  • Transfer to a plate and let it become warm.
  • Knead it once when it is warm.
  • Grease modak mould with ghee.
  • Pinch a small ball from the dough and add it to the modak mould.
  • Close and remove the extras. Fill the dough where there is gaps.
  • Gently open and remove.
  • Chocolate modak is ready!
  • Decorate with silver varak.
  • Enjoy it!

Video

Notes

  • Cook in low flame - I usually keep flame low while cooking khoya mixture. High flame may burn it fast at the bottom and make it hard.
  • Keep stirring - I stir well so that the mixture does not stick. Once it leaves the sides of the pan and comes together, switch off immediately.
  • Cooling - The mixture will be very hot. I let it cool before shaping otherwise it may burn hands.
  • Grease mould - I just apply ghee inside mould so modak comes out easily without sticking.
  • Knead dough - For stuffed version, the dough should be smooth and soft. If cracks appears, sprinkle little warm water and knead again.

Nutrition

Serving: 25g | Calories: 113kcal | Carbohydrates: 12g | Protein: 4g | Fat: 6g | Saturated Fat: 4g | Polyunsaturated Fat: 0.2g | Monounsaturated Fat: 2g | Trans Fat: 0.02g | Cholesterol: 5mg | Sodium: 54mg | Potassium: 15mg | Fiber: 0.3g | Sugar: 7g | Vitamin A: 90IU | Vitamin C: 0.2mg | Calcium: 136mg | Iron: 0.1mg

The post Chocolate Modak Recipe appeared first on Sharmis Passions.
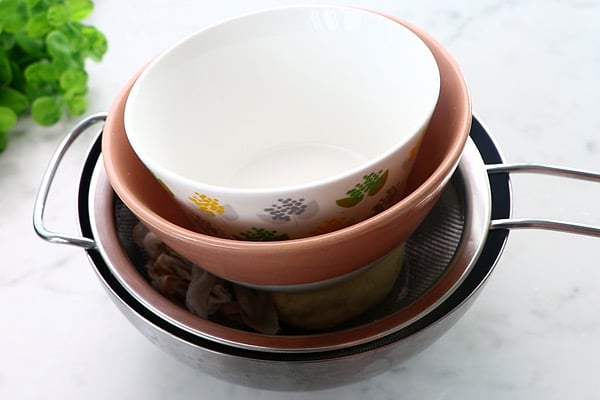
Ellu Kozhukattai Recipe (Sesame Modak)

Ellu Kozhukattai is a mild sweet dumpling made with rice flour outer covering and sesame jaggery filling with coconut and cardamom powder inside. Ellu Kozhukattai is made during Ganesh Chaturthi festival. This easy ellu kozhukattai has a nutty taste from sesame seeds and sweetness from jaggery.

ellu kozhukattai served

Ellu Kozhukattai is a sweet dumpling with sesame jaggery filling. Sesame modak is very tasty and enjoyable by all. This ellu kozhukattai also known as sesame modak is popular during Vinayagar Chaturthi festival, but they make a wonderful traditional sweet for any occasion or a tea time snack.

[feast_advanced_jump_to]

About Ellu Kozhukattai

'Ellu' in tamil means sesame seeds and 'Kozhukattai' means dumpling so it translates to sesame modak. Ellu Kozhakattai also known as Ellu Mothagam is similar to poorna kozhukattai with ellu(sesame filling).

Ellu kozhukattai or Sesame modak gives you a mixed taste of both the sweetness of jaggery and nutty flavour of sesame seeds and crunch from grated coconut. Try this Ellu kozhukattai recipe and enjoy the delicious combination of sesame and jaggery wrapped in soft rice flour dough.

I love ellu urundai amma makes, soft and flavourful, you can even make that as stuffing for this kozhukattai. But I usually make sesame kozhukattai this way as it gives a juicy and moist filling which tastes so delicious.

This ellu kozhukattai is simple, easy to make and tastes delicious. If you love the flavour of sesame seeds then this kozhukattai is just for you. Hope you enjoy making this recipe as much as I did sharing it here.

Similar Recipes

ellu kozhukattai served

Ellu Kozhukattai Video

Ellu Kozhukattai Ingredients

  • Idiyappam flour - Use homemade rice flour or store bought idiyappam flour.
  • Jaggery - I used block jaggery crushed. You can use powdered jaggery too.
  • Sesame seeds - I have used white sesame seeds but you can replace it with black sesame seeds too. If using black sesame seeds, rinse dry then roast it and proceed.
  • Coconut - Using coconut gives a mild crunch and taste so do not skip it.
  • Sesame oil - I used sesame oil while mixing the dough and also for greasing the fingers.
  • Cardamom powder - It is used for flavouring the sesame jaggery filling.
  • Salt - to taste
  • Water - Water is boiled rigorously and used for making the dough.
ellu kozhukattai ingredients

How to make Ellu Kozhukattai Recipe Step by Step

Making sesame filling

1.To a sauce pan add ΒΎ cup jaggery along with Β½ cup water.

add jaggery, water

2.Let it boil. Mix it well until jaggery dissolves.

boil it

3.No need to check for any consistency. Just let jaggery dissolve completely, switch off and set aside.

let it dissolve

4.To a pan add Β½ cup white sesame seeds.

add sesame seeds

5.Roast it until golden brown. Remove and set aside.

roast until golden brpwn

6.Cool down and add it to mixer jar. Add 3 tablespoon coconut to it.

add sesame seeds with coconut

7.Grind it coarsely and set aside.

grind it coarsely

8.To the pan strain the jaggery syrup and add it.

strain and add jaggery syrup

9.Add the sesame coconut mixture along with ΒΌ teaspoon cardamom powder.

add mixture

10.Mix it well until it starts to thicken. Cook in low medium flame.

mix well

11.At one stage it will start to leave the sides of the pan, now switch off.

cook until thick

12.Transfer to a plate, let it become warm. Make small balls and set aside.

make balls

Preparing the outer dough

13.To a mixing bowl add ΒΎ cup idiyappam flour along with 1 teaspoon sesame oil and salt to taste. Mix this well first.

add flour, salt, oil

14.Boil water.

boil water

15.Add hot water little by little and start mixing.

mix well

16.Mix well and stop adding water until no dry flour is seen. Keep covered and set aside for few minutes until it is warm enough to handle.

mix well

17.Knead it well until the dough is smooth and without cracks.

knead the dough

18.Make lemon sized balls.

make balls

19.Take a ball, flatten it slightly so that the edges are thin and the center is thick.

start shaping

20.Add the filling and start sealing.

add filling, seal it

21.Pull the edges to the center.

pull edges to center

22.Make it smooth, shape it like a modak.

shape into modak

23.Grease the steamer plate with sesame oil or ghee.

grease steamer plate

24.Arrange the prepared modak on the steamer plate.

add prepared modak

25.Add water to a steamer, let it boil.

boil water

26.Place the plate inside. Steam cook for 10-12 minutes or until the outer looks shiny and cooked.

place steamer plate

27.Sesame modak is ready!

steam it

Enjoy it hot or warm!

Expert Tips

  • Rice flour -Β Use good quality store bought rice flour(idiyappam flour) or homemade rice flour.
  • Dough -Β Make the dough soft and pliable. Do not let the dough dry up. If it dries up, it will crack while shaping. So always keep covered with a slightly wet cloth to retain moisture.
  • Outer Covering -Β Make thin outer layer so that the kozhukattai is soft and gets cooked easily.
  • Sesame filling - Alternate to the method I have shared here, you can roast sesame seeds and grind it along with coconut, cardamom and jaggery. The filling is ready but this type of filling will be slightly dry.

Serving and Storage

Ellu Kozhukattai tastes great on its own, you can serve it along with savory kozhukattai or sundal. It tastes best when served hot or warm, however tastes good even after it cools down. Consume on the same day of making as the recipes contain coconut.

FAQS

1. Can I make Ellu Kozhukattai without coconut?

Yes. You can make the sesame-jaggery filling without coconut if you prefer. The flavour will be slightly different but still delicious.

2. Why is my kozhukattai outer layer becoming hard?

The rice flour dough may have become too dry, or the kozhukattai may have been steamed for too long. The dough should be smooth without any cracks and also steam it only till just done, do not overcook.

3. Can I prepare the Ellu Kozhukattai filling in advance?

Yes, you can prepare the sesame-jaggery filling ahead of time and store it in the fridge. Bring it to room temperature before shaping the kozhukattai.

sesame modak served

If you have any more questions about this Ellu Kozhukattai RecipeΒ  do mail me at sharmispassions@gmail.com. In addition, follow me on Instagram,Β Facebook,Β PinterestΒ ,YoutubeΒ andΒ TwitterΒ .

Tried this Ellu Kozhukattai Recipe? Do let me know how you liked it. Also tag us on Instagram @sharmispassions and hash tag it on #sharmispassions.

πŸ“– Recipe Card

Print

Ellu Kozhukattai Recipe | Sesame Modak Recipe

Ellu Kozhukattai is a mild sweet dumpling made with rice flour outer covering and sesame jaggery filling with coconut and cardamom powder inside. Ellu Kozhukattai is made during Ganesh Chaturthi festival. This easy ellu kozhukattai has a nutty taste from sesame seeds and sweetness from jaggery.
Course Snack, sweet
Cuisine Indian
Keyword easy kozhukattai recipe, Festival, Ganesh Chaturthi Recipes, how to make kozhukattai, kozhukattai recipe, kozhukattai recipes, snack recipes
Prep Time 20 minutes
Cook Time 10 minutes
Total Time 30 minutes
Servings 12 Kozhukattais
Calories 123kcal
Author Sharmilee J

Ingredients

For outer covering:

For the stuffing

  • Β½ cup black sesame seeds
  • ΒΎ cup jaggery powdered
  • Β½ cup water
  • ΒΌ teaspoon cardamom powder
  • 3 tablespoon coconut

Instructions

  • To a sauce pan add ΒΎ cup jaggery along with Β½ cup water.
  • Let it boil. Mix it well until jaggery dissolves.
  • No need to check for any consistency. Just let jaggery dissolve completely, switch off and set aside.
  • To a pan add Β½ cup white sesame seeds.
  • Roast it until golden brown. Remove and set aside.
  • Cool down and add it to mixer jar. Add 3 tablespoon coconut to it.
  • Grind it coarsely and set aside.
  • To the pan strain the jaggery syrup and add it.
  • Add the sesame coconut mixture along with ΒΌ teaspoon cardamom powder.
  • Mix it well until it starts to thicken. Cook in low medium flame.
  • At one stage it will start to leave the sides of the pan, now switch off.
  • Transfer to a plate, let it become warm. Make small balls and set aside.
  • To a mixing bowl add ΒΎ cup idiyappam flour along with 1 teaspoon sesame oil and salt to taste. Mix this well first.
  • Boil water.
  • Add hot water little by little and start mixing.
  • Mix well and stop adding water until no dry flour is seen. Keep covered and set aside for few minutes until it is warm enough to handle.
  • Knead it well until the dough is smooth and without cracks.
  • Make lemon sized balls.
  • Take a ball, flatten it slightly so that the edges are thin and the center is thick.
  • Add the filling and start sealing.
  • Pull the edges to the center.
  • Make it smooth, shape it like a modak.
  • Grease the steamer plate with sesame oil or ghee.
  • Arrange the prepared modak on the steamer plate.
  • Add water to a steamer, let it boil.
  • Place the plate inside. Steam cook for 10-12 minutes or until the outer looks shiny and cooked.
  • Enjoy it hot or warm!

Video

Notes

  • Rice flour -Β Use good quality store bought rice flour(idiyappam flour) or homemade rice flour.
  • Dough -Β Make the dough soft and pliable. Do not let the dough dry up. If it dries up, it will crack while shaping. So always keep covered with a slightly wet cloth to retain moisture.
  • Outer Covering -Β Make thin outer layer so that the kozhukattai is soft and gets cooked easily.
  • Sesame filling - Alternate to the method I have shared here, you can roast sesame seeds and grind it along with coconut, cardamom and jaggery. The filling is ready but this type of filling will be slightly dry.

Nutrition

Serving: 25g | Calories: 123kcal | Carbohydrates: 21g | Protein: 2g | Fat: 4g | Saturated Fat: 1g | Polyunsaturated Fat: 1g | Monounsaturated Fat: 1g | Sodium: 1mg | Potassium: 43mg | Fiber: 1g | Sugar: 9g | Vitamin A: 1IU | Vitamin C: 0.04mg | Calcium: 66mg | Iron: 1mg

The post Ellu Kozhukattai Recipe (Sesame Modak) appeared first on Sharmis Passions.
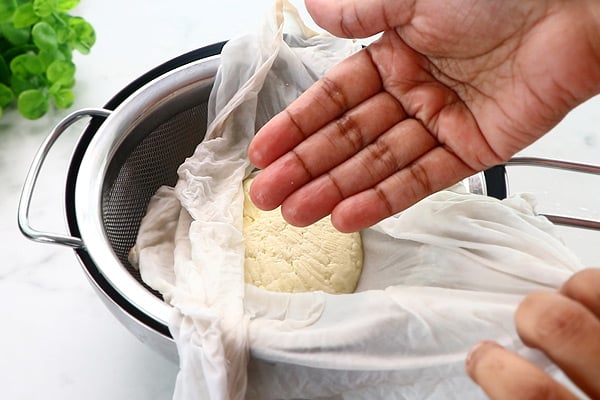
Butterscotch Milkshake Recipe

Butterscotch Milkshake is a delicious drink made by blending milk with butterscotch ice cream, butterscotch sauce and serving it chilled with whipped cream topping. It has a rich golden colour, smooth creamy and frothy texture. It hardly takes 10 minutes to make but still feels rich and special.

butterscotch milkshake served

The taste is sweet, rich and slight caramel like in every sip. Butterscotch flavor stands out nicely and ice cream makes it more thick and creamy in texture. It is a good homemade alternate when compared to carbonated drinks from store. You can make this when kids asks for something sweet and cold, it always become instant favorite.

[feast_advanced_jump_to]

About Butterscotch Milkshake

Butterscotch Milkshake is a simple milkshake made using milk, butterscotch ice cream and butterscotch sauce. The main taste comes from butterscotch sauce and ice cream which gives that signature caramel taste and flavour. Ice cream is optional but it makes the shake more rich and creamy just like in shops.

The texture is smooth and frothy when blended perfectly. Ice cream helps in making the drink chilled and gives it a creamy and rich taste. When you drizzle sauce inside the glass before pouring, it looks more attractive and little fancy.

This butterscotch ice cream is creamy, rich and irresistibly delicious. Made with butterscotch ice cream this tastes just like the ones served in cafe. It is a perfect combination of creaminess, sweetness and caramel crunch in every sip. I used butterscotch ice cream which had butterscotch chips inside.

I usually make it during weekends when kids are at home so that I can serve them instantly. It's jst quick to make and no cooking needed for this recipe. Both mittu and gugu are fond of butterscotch flavour and they absolutely love this milkshake.

Similar Recipes

butterscotch milkshake served

Butterscotch Milkshake Video

Butterscotch Milkshake Ingredients

  • Milk - I used full cream milk for base. It makes the drink perfect in consistency when combined with ice cream.
  • Butterscotch ice cream - I used butterscotch ice cream blended with milk. Ice cream gives richness and creaminess to the milkshake.
  • Butterscotch sauce - I used this for strong butterscotch flavour and extra sweetness. I used it for blending and for drizzling over the topping to make it look attractive.
  • Whipped cream - I mixed little butterscotch sauce with whipped cream and used it for topping.
butterscotch milkshake ingredients

How to make Butterscotch Milkshake Step by Step

1.To a mixer jar add ΒΎ cup milk along with 2 cups butterscotch ice cream.

add milk, butterscotch ice cream

2.Add 1 tablespoon butterscotch sauce.

add butterscotch sauce

3.All ready in mixer to blend.

all ready to blend

4.Blend until smooth and creamy. Pour into serving glass.

blend and pour

5.Top with whipped cream.

whipped cream topping

6.Drizzle butterscotch sauce generously.

drizzle butterscotch sauce

Serve chilled!

Expert Tips

  • Chilled milk - I usually keep milk in fridge for some time before making the milkshake.
  • Blending - I blend until it is smooth, creamy and frothy. Immediately pour and serve.
  • Drizzle sauce - You can even slide the glass and add butterscotch sauce along the sides of glass before pouring the milkshake. It makes it look more attractive and kids like that.
  • Check sweetness - Some ice creams are already very sweet. Taste once and then decide if extra sauce is needed or not.
  • Serving - I serve fresh and cold for best. If kept for long time, ice cream may melt and make the milkshake runny.

Serving and Storage

Serve Butterscotch Milkshake immediately in tall glasses with little extra sauce drizzle on top if you like. This goes well as evening treat or simple dessert after lunch. It is best consumed fresh and not stored for long hours. If you refrigerate also, texture may change little and froth will reduce.

FAQS

1.Can I skip ice cream?Β 

Yes you can skip ice cream if you want lighter shake. Instead add 2 cups frozen milk with Β½ teaspoon butterscotch essence to make the milkshake rich and creamy.

2.Can I use other flavor ice cream?Β 

Yes you can use vanilla or caramel flavour ice cream.

3.Is it very sweet?Β 

Sweetness depends on ice cream and sauce used. You can reduce sauce if you feel it is too much sweet.

4.Can I make it in advance?Β 

It is better to prepare fresh and serve it immediately. If making earlier, keep in fridge and mix once before serving.

5.Can I add in nuts?Β 

Yes you can add chopped nuts for extra crunch.Β 

butterscotch milkshake served

If you have any more questions about this Butterscotch Milkshake Recipe do mail me at sharmispassions@gmail.com. In addition, follow me on Instagram, Facebook,Β  Pinterest, Youtube andΒ TwitterΒ .

Tried this Β Butterscotch Milkshake Recipe? Do let me know how you liked it. Also tag us on Instagram @sharmispassions and hash tag it on #sharmispassions.

πŸ“– Recipe Card

Print

Butterscotch Milkshake Recipe

Butterscotch Milkshake is a delicious drink made by blending milk with butterscotch ice cream, butterscotch sauce and serving it chilled with whipped cream topping. It has a rich golden colour, smooth creamy and frothy texture. It hardly takes 10 minutes to make but still feels rich and special.
Course Drinks
Cuisine American, French, Indian, Italian, Japanese, Mexican
Keyword butterscotch recipes, dessert recipes, drink recipes, Healthy tea time drink, milk recipes, milkshake recipes, Nutritional Beverage, Nutritional Drink
Prep Time 10 minutes
Total Time 10 minutes
Servings 2 glasses
Calories 328kcal
Author Sharmilee J

Ingredients

  • ΒΎ cup milk
  • 2 cups butterscotch ice cream
  • 1 tablespoon butterscotch sauce + extra for drizzling
  • whipped cream for topping

Instructions

  • To a mixer jar add ΒΎ cup milk along with 2 cups butterscotch ice cream.
  • Add 1 tablespoon butterscotch sauce.
  • All ready in mixer to blend.
  • Blend until smooth and creamy. Pour into serving glass.
  • Top with whipped cream.
  • Drizzle butterscotch sauce generously.

Video

Notes

  • Chilled milk - I usually keep milk in fridge for some time before making the milkshake.
  • Blending - I blend until it is smooth, creamy and frothy. Immediately pour and serve.
  • Drizzle sauce - You can even slide the glass and add butterscotch sauce along the sides of glass before pouring the milkshake. It makes it look more attractive and kids like that.
  • Check sweetness - Some ice creams are already very sweet. Taste once and then decide if extra sauce is needed or not.
  • Serving - I serve fresh and cold for best. If kept for long time, ice cream may melt and make the milkshake runny.

Nutrition

Serving: 250ml | Calories: 328kcal | Carbohydrates: 35g | Protein: 8g | Fat: 17g | Saturated Fat: 11g | Polyunsaturated Fat: 1g | Monounsaturated Fat: 5g | Cholesterol: 69mg | Sodium: 140mg | Potassium: 400mg | Fiber: 1g | Sugar: 32g | Vitamin A: 704IU | Vitamin C: 1mg | Calcium: 282mg | Iron: 0.1mg

The post Butterscotch Milkshake Recipe appeared first on Sharmis Passions.
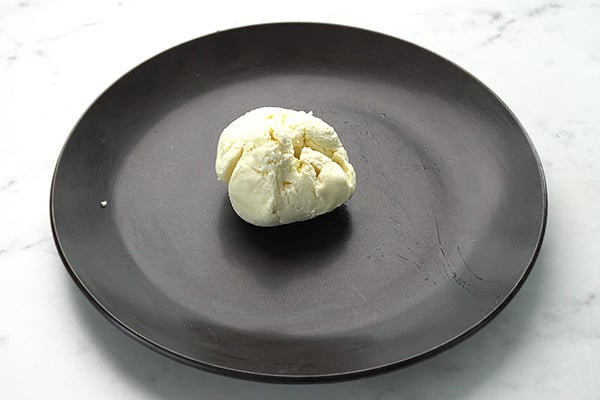
Ganesh Chaturthi Recipes | Vinayaka Chaturthi Recipes

Ganesh Chaturthi Recipes collection featured here with step by step photos along with videos for easy preparation of your menu on Ganesh Chaturthi festival day. Ganesh Chaturthi Recipes include kozhukattai, modak, ladoo, sweets, sundal etc.

ganesh chaturthi recipes collection

Here I have posted many modak and kozhukattai recipes that you can try for this Ganesh Chaturthi or Vinayagar Chaturthi. Modak is Lord Ganesha's favorite sweet and is one of the popular Ganesh Chaturthi Recipe that everyone tries especially in Indian homes. There are varieties of modak and kozhukattai recipes that you can try!

[feast_advanced_jump_to]

About Ganesh Chaturthi

Ganesh Chaturthi also known as Vinayaka Chaturthi marks the arrival of Lord Ganesh to earth from Kailash! We celebrate Ganesh Chaturthi by doing special pooja for Lord Ganesha, offering him his favourite food and visiting Ganesha temples & pandals. Ganesh Chaturthi is the next big festival after Diwali which is almost celebrated with equal fervour and devotion across all the states of India!

  • Ganesha's Favorites : Modak / Kozhukattai (in Tamil), Sundal are his favorites. At home we make wide varieties of Modak - sweet modak, savour modak, spicy modak, plain modak, fried modak, gravyish modak on his day. In this Ganesh Chaturthi edition, we are going to see the collection of the modak / kozhukattai recipes and other recipes which can be prepared that day for you to choose & plan your celebration.
  • Ganesh Idol : Installation of huge crafted and beautifully decorated statutes of Ganesha in pandals/ podiums marks the beginning of celebration Visiting the various public displays / pandals is a popular activity during the festival. At homes, we buy new Ganesh idols, perform abishekam of the idol and do pooja on the day. Modaks, fruits, sundal, coconut and jaggery, are offered to the God and then shared with friends & relatives as well.
  • Ganesh Visarjan : It is a belief that Lord Ganesh gets back to Kailash after 10 day visit to earth on Visarjan day! It signifies the cycle of birth, life and death. Visarjan means immersion - On Anant Chaturdashi (the last day), the statues are paraded through the streets, accompanied by much singing and dancing and immersed in sea, river or a water body! It is also believed that Lord Ganesh gives a new beginning by taking away our obstacles by getting it immersed in water!
kozhukattai served with sundal

Video

Ganesh Chaturthi Recipes Essentials

Ganesh Chaturthi Recipes Must Try

  1. Modak Recipe - With and without mold

    Modak is a divinely tasty sweet dumpling offered for Lord Ganesh on Ganesh Chaturthi festival as it is considered to be his favourite. Modak is made by steaming rice flour molds filled with blend of coconut & jaggery. Learn how to make Modak with step by step pictures and video.
    Total time : 30 minutes
  2. Kozhukattai Recipe | Kolukattai Recipe

    Kozhukattai is one of the most favorite sweets of Lord Ganesha hence commonly made and offered on Ganesh Chaturthi. Kozhukattai also called as Kolukattai is steamed dumplings with sweet filling inside. Learn to make perfect Kozhukattai with step by step pictures and video.
    Total time : 30 minutes
  3. AMMINIKOZHUKATTAI4

    Ammini Kozhukattai

    Ammini Kozhukattai is a quick & tasty steamed rice flour mini dumplings with a simple tadka. Ammini Kozhukattai is traditionally made on Ganesh Chaturthi and favourite for all ages. How to make Ammini kozhukattai with step by step pictures and video for easy understanding.
    Total time : 50 minutes
  4. Chana Sundal Recipe

    Chana Sundal is a simple South Indian stir fry made with chickpeas or kondakadalai. Chickpeas also known as kabuli chana or white chana is a savory snack traditionally made for Ganesh Chaturthi. It is a protein rich snack that you can pack for your kids snack box as well. Learn to make Chana Sundal with step by step pictures and video.
    Total time : 8 hours 15 minutes
  5. Ellu Kozhukattai Recipe | Sesame Modak Recipe

    Ellu Kozhukattai is a mild sweet dumpling made with rice flour outer covering and sesame jaggery filling with coconut and cardamom powder inside. Ellu Kozhukattai is made during Ganesh Chaturthi festival. This easy ellu kozhukattai has a nutty taste from sesame seeds and sweetness from jaggery.
    Total time : 30 minutes
  6. CoconutRoseModak2

    Coconut Rose Modak | Rose Modak

    Rose Modak is a tasty, delight dish made by blending coconut, condensed milk, beet juice / rose syrup into a dough and steamed in modak moulds. Rose Modak is a must try for Ganesh Chaturthi and special occasions – very healthy compared to the packed junk foods.
    Total time : 45 minutes
  7. 29382472825 c723a03981 o

    Kesari Modak

    Kesari modak is a unique, delicious modak using kesari as filling. Kesari modak presents a surprising element with Kesari filling and is liked by all. How to make Kesari Modak is described in this recipe with step by step pictures.
    Total time : 45 minutes
  8. Chocolate Modak Recipe

    Chocolate Modak is a simple sweet made with khoya, cocoa powder, chocolate and sugar as main ingredients. It is mostly prepared during Ganesh Chaturthi festive as a special homemade sweet. It takes only few minutes to make but the taste comes very rich and satisfying. It is also a great option when you want something quick yet special at home for the festival.
    Total time : 20 minutes
  9. 29330845172 849a0791b6 o

    Mawa Modak | Khoya Modak

    Mawa Modak is a delicious delight sweet made by steaming flavoured khoya in molds. Mawa Modak translated as Khoya Modak is commonly made on Ganesh Chaturthi & kids favourite as it resembles milk peda in taste. Mawa modak Recipe explained in this post with step by step pictures.
    Total time : 20 minutes
  10. DryFruitsModak2

    Dry Fruits Modak Recipe

    Dry Fruits Modak is a rich, delicious modak made with dry fruits and nuts filling that you can try for Ganesh Chaturthi. Dry Fruits Modak is a very good alternate special modak and is relished by all. How to make Dry Fruits Modak is presented in this post with step by step pictures.
    Total time : 25 minutes

Ganesh Chaturthi Recipes

View more Ganesh Chaturthi Recipes

Ganesh Chaturthi Modak Recipes

Modak is made using rice flour for outer covering shell and for the inner filling traditionally freshly grated coconut and jaggery are used. But now there are many variations and alternates to the traditional modak recipe and here are some. I have given modak recipes with mould and without the mold.

The South Indian version of modak is called Kozhukattai or Modakam which is very popular in Southern States especially in Tamil Nadu.

Recipes by Categories

My fond memories of this day

We started our life at our new home 10 years back on this day.All the firsts are always special so does this home to us. As this is the first house we bought from our hard earned money.So to whichever house we move in future either big or small this house is always special to us.Β  Cherished moments which I will carry for a life time!

FAQS

1. How do we celebrate Ganesh Chaturthi at home?

a. Get an Ganesh Idol from shop.
b. Decide the menu for the day, shop accordingly and plan the timing for pooja.
c. Cook modak and the menu you have in mind.
d. Gather the family members, offer the menu to Lord Ganesh and do pooja & pray.
e. Relish the dishes and also share it friends & relatives.
f. Visit Ganesha temples & pandals.

2. What are the 3 important and easy recipes for Ganesh Chaturthi / Vinayaka Chaturthi?

Sweet Modak, Spicy Modak and Sundal (a snack) are easy, common and important dishes for Ganesh / Vinayak Chaturthi.

3. I did not buy an idol? What to do?

2 ways to manage if you did not get a new idol. One - A Ganesh Photo / picture would do! Two - Mix a palmful of turmeric powder with little water and make it as a paste. Now grip the paste in your hand, remove it and smoothen the surface - Ganesh is ready! This is how all Poojaris / priest make Lord Ganesh for Ganesh Pooja & then start any function / pooja.

4. How do you do Pooja for Lord Ganesh?

a. Place the idol / photo / turmeric mold
b. Clean and decorate all the idol & all God Photos / Idols
c. Offer the menu prepared in a banana leaf before the idol as neivedhyam
d. Also add fruits in the banana leaf if you have,
e. Light a diva or villaku, put dhoop / sambrani and break coconut if you have
f. Chant "Ganpati Bappa Morya" or ask children to sing any Ganesh song (Mundhi Mundhi Vinayagane in tamil)
g. Light the camphor and circle around the idol / photo while you continue chanting.

5. When is Ganesh Chaturthi celebrated this year?

This year, it is celebrated on 14th September 2026, Monday.

modak served in a yellow plate

If you have any more questions about this Ganesh Chaturthi RecipesΒ do mail me at sharmispassions@gmail.com. In addition, follow me onΒ Instagram,Β Facebook,Β PinterestΒ ,YoutubeΒ andΒ TwitterΒ .

Tried this Ganesh Chaturthi Recipes? Do let me know how you liked it. Also tag us on Instagram @sharmispassions and hash tag it on #sharmispassions.

πŸ“– Recipe Card

Print

Ganesh Chaturthi Recipes | Vinayaka Chaturthi Recipes

Ganesh Chaturthi Recipes collection featured in this edition of Ganesh Chaturthi special. Step by step photos along with videos posted here for easy & cool preparation of your menu on this day.
Course Snack, sweet
Cuisine Indian
Prep Time 1 hour
Cook Time 30 minutes
Total Time 1 hour 30 minutes
Servings 4
Calories
Author Sharmilee J

Video

The post Ganesh Chaturthi Recipes | Vinayaka Chaturthi Recipes appeared first on Sharmis Passions.
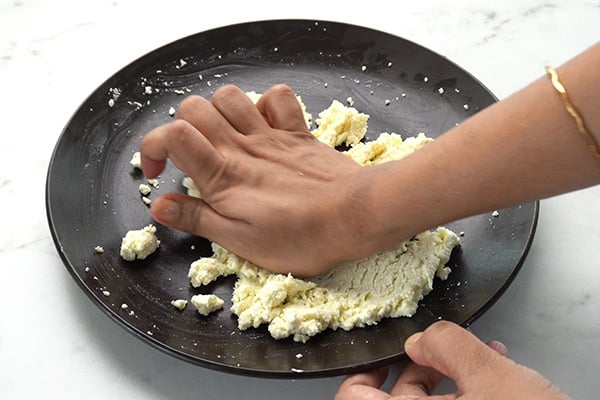
Panjiri Recipe

Panjiri is a traditional, Punjabi sweet snack made by roasting whole wheat flour, nuts, dry fruits, makhana, coconut, edible gum in ghee and mixing it together with sugar. Panjiri is a Janmashtami special sweet offered to Lord Krishna and can also be relished as an anytime snack. Panjiri is an energy boosting sweet and has good health benefits too.

panjiri sweet served

PanjiriΒ  is a traditional sweet and the version made with wheat flour is called atta panjiri. There are many versions of panjiri recipes and dhaniya and atta panjiri are most popular ones. This sweet is usually made during winter and for Janmashtami festival. Do try and enjoy for this Janmashtami!

[feast_advanced_jump_to]

About Panjiri

Panjiri is a Punjabi special sweet, easy to make and tastes so good even with such simple ingredients. Panjiri is a traditional sweet made for Janmashtami. Panjiri is made with whole wheat flour, sugar, dry fruits, nuts, makhana, dried coconut, edible gum etc.

Actually there are many variations to PanjiriΒ RecipeΒ like you can make it with rava, coriander seeds which is called dhaniya panjiri. But this one I am sharing here uses wheat flour as main ingredient so its healthy too. I have used cane sugar instead of white powdered sugar.

Some people even add cumin seeds powder, fennel seeds powder in minimal for a flavour variation. We can also add gond (edible gum) in panjiri, but adding gond can be done in winters since gond is warming. I have tried panjiri without gond too and it tastes good so you can skip it if you can't source it.

Panjiri is a easy to make snack, just grab few ingredients, roast them separately and mi it well and you are done. It is one of the healthy snacks that you can make for kids. Panjiri is made during winter.

The only time consuming process is roasting wheat flour which has to be done with patience and in low flame. Roasting it in ghee gives it a nutty flavour which elevates the taste of this dish.

Similar Recipes

panjiri sweet served

Panjiri Video

Panjiri Ingredients

  • Wheat Flour - Use good quality wheat flour. I used homemade wheat flour.
  • Sugar - You can use cane sugar or regular white sugar powdered.
  • Ghee - Use homemade ghee for best aroma and flavor as ghee forms the base for this recipe.
  • Nuts - I have used cashews, almonds and pistachios chopped roughly. You can use any nuts and dry fruits of your choice.
  • Dry Fruits - I have added raisins. You can use figs too.
  • Makhana - Makhana or Lotus seeds are also roasted and added. It should be roasted until crisp and then added.
  • Edible gum - It should be fried well in ghee until it puffs up else it will stick to the teeth.
  • Dried coconut - You can use kopra chopped or use dried coconut shreds.
  • Dry ginger powder - It adds flavour to this dish and also aids in digestion.
ingredients needed to make panjiri

How to make Panjiri Step by Step

1.We need ΒΌ cup + 2 tablespoon ghee in total. so we can add it little by little for frying. Heat little ghee in a kadai - add 2 tablespoon cashews, 2 tablespoon almonds, 1 tablespoon pistachios.

add nuts to ghee

2.Fry until crisp and golden. Remove and set aside.

fry until golden

3.Now add 1 tablespoon raisins.and fry until it bubbles up and is golden. Transfer to the same bowl and set aside.

fry raisin

4.Add little more ghee, add 2 tablespoon edible gum(gond). Add 1 tablespoon first.

add gond

5.Fry until it puffs up well. Then add remaining 1 tablespoon gond and fry well until it puffs up fully. Remove and set aside.

fry until it puffs

6.Add little ghee, Β½ cup makhana and roast it until crisp and golden.

add makhana

5.Break and see to check if its crisp. Remove to a bowl and set aside.

fry until crisp

6.Add 2 tablespoon dried coconut, fry until golden. Remove and set aside.

fry dried coconut

7.Now add remaining ghee to the kadai. Add 1 cup wheat flour.

add wheat flour to ghee

8.Roast without any lumps, even if it forms break it and roast the flour. Roast until its golden and nice aroma comes. See the colour and texture change in the picture below. Switch off and set aside to cool down a bit.

fry well

9.Now take fried gond.

puffed gond

10.Pulse it few times to grind it coarsely.

blend it coarsely

11.Now add fried wheat flour along with nuts, raisins, crushed makhana, Β½ cup cane sugar, ΒΌ teaspoon dry ginger powder, gond, coconut etc.

add all ingredients

12.Mix well.

mix well

Panjiri is ready!

Expert Tips

  • Flour - You can add half and half of wheat flour and sooji too.
  • Dry fruits and nuts - The choice of dry fruits and nuts is purely your preference.
  • Sugar - You can add powdered white sugar too but cane sugar tastes best.
  • Shelf life - You can keep in room temperature for about 2-3 days and enjoy.
  • Additions - Though adding makhana is purely your choice, I would recommend adding it as it gives such a nice crunch and taste to this dish.
  • Garnish - You can add dried rose petals as garnish if you like.

Serving & Storage

Store in an airtight container to retain freshness. Need not refrigerate. Panjiri keeps well for about 2-3 days in room temperature, after refrigerate and consume. You can serve Panjiri as such or with warm milk.

FAQS

1.Is Panjiri healthy?

Yes this Panjiri is healthy as I have used just whole wheat flour, cane sugar along with nuts and dry fruits.

2.What is the shelf life of Panjiri?

Panjiri keeps well for about 2-3 days in room temperature, after that refrigerate and consume.

3. Is panjiri dry or moist?

Panjiri can be moist or dry depending on the recipe. If you want it more moist, add more ghee and fry so that wheat flour is slightly moist. If you want a low fat version sprinkle little milk.

4.Does making Panjiri take time?

No not at all, just gather the ingredients roast one by one and mix together and Panjiri is done in no time. The only time it takes it for frying wheat flour, others all gets done quickly.

5.Can I add sooji to this?

Yes you can use around 2 tablespoon sooji / rava, roast in ghee and add it.

panjiri served

If you have any more questions about this Panjiri Recipe do mail me at sharmispassions@gmail.com. In addition, follow me on Instagram, Facebook,Β  Pinterest, Youtube andΒ TwitterΒ .

Tried this Panjiri Recipe ? Do let me know how you liked it. Also tag us on Instagram @sharmispassions and hash tag it on #sharmispassions.

πŸ“– Recipe Card

Print

Panjiri Recipe

Panjiri is a traditional, Punjabi sweet snack made by roasting whole wheat flour, nuts, dry fruits, makhana, coconut, edible gum in ghee and mixing it together with sugar. Panjiri is a Janmashtami special sweet offered to Lord Krishna and can also be relished as an anytime snack. Panjiri is an energy boosting sweet and has good health benefits too.
Course Snack, sweet
Cuisine Indian
Keyword 30 mins recipes, ghee recipes, janmashtami recipes, krishna jayanthi recipes, makhana recipes, nuts recipes, sweet recipes, wheat flour recipes
Prep Time 10 minutes
Cook Time 25 minutes
Total Time 35 minutes
Servings 2 people
Calories 1037kcal
Author Sharmilee J

Ingredients

  • 1 cup wheat flour
  • Β½ cup cane sugar
  • 2 tablespoon cashews
  • 2 tablespoon almonds
  • 1 tablespoon pistachio
  • 1 Β½ tablespoon raisin
  • 2 tablespoon dried coconut
  • Β½ cup makhana
  • ΒΌ cup + 2 tablespoon ghee
  • 2 tablespoon edible gum
  • ΒΌ teaspoon ginger powder

Instructions

  • We need ΒΌ cup + 2 tablespoon ghee in total. so we can add it little by little for frying. Heat little ghee in a kadai - add 2 tablespoon cashews, 2 tablespoon almonds, 1 tablespoon pistachios.
  • Fry until crisp and golden. Remove and set aside.
  • Now add 1 tablespoon raisins.and fry until it bubbles up and is golden. Transfer to the same bowl and set aside.
  • Add little more ghee, add 2 tablespoon edible gum. Add 1 tablespoon first.
  • Fry until it puffs up well. Then add remaining 1 tablespoon gond and fry well until it puffs up fully. Remove and set aside.
  • Add little ghee, Β½ cup makhana and roast it until crisp and golden.
  • Break and see to check if its crisp. Remove to a bowl and set aside.
  • Add 2 tablespoon dried coconut, fry until golden. Remove and set aside.
  • Now add remaining ghee to the kadai. Add 1 cup wheat flour.
  • Roast without any lumps, even if it forms break it and roast the flour. Roast until its golden and nice aroma comes. See the colour and texture change in the picture below. Switch off and set aside to cool down a bit.
  • Now take fried gond.
  • Pulse it few times to grind it coarsely.
  • Now add fried wheat flour along with nuts, raisins, crushed makhana, Β½ cup cane sugar, ΒΌ teaspoon dry ginger powder, gond, coconut etc.
  • Mix well.
  • Panjiri is ready!

Video

Notes

  • Flour - You can add half and half of wheat flour and sooji too.
  • Dry fruits and nuts - The choice of dry fruits and nuts is purely your preference.
  • Sugar - You can add powdered white sugar too but cane sugar tastes best.
  • Shelf life - You can keep in room temperature for about 2-3 days and enjoy.
  • Additions - Though adding makhana is purely your choice, I would recommend adding it as it gives such a nice crunch and taste to this dish.
  • Garnish - You can add dried rose petals as garnish if you like.

Nutrition

Serving: 100g | Calories: 1037kcal | Carbohydrates: 119g | Protein: 13g | Fat: 59g | Saturated Fat: 32g | Polyunsaturated Fat: 5g | Monounsaturated Fat: 19g | Cholesterol: 114mg | Sodium: 9mg | Potassium: 478mg | Fiber: 5g | Sugar: 52g | Vitamin A: 20IU | Vitamin C: 1mg | Calcium: 62mg | Iron: 5mg

The post Panjiri Recipe appeared first on Sharmis Passions.
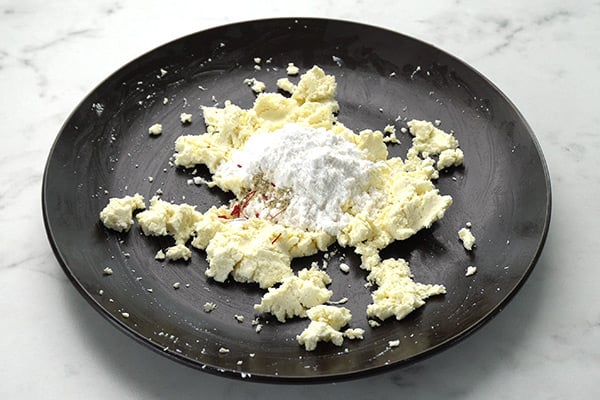
Moong Dal Ladoo Recipe (Nei Urundai)

Moong Dal Ladoo is a tasty and melt in the mouth Indian sweet made using moong dal, sugar, ghee, nuts and flavoured with cardamom powder. Moong Dal Ladoo is also known as Nei Urundai or Paasi Paruppu Ladoo. It is one of the traditional South Indian sweets which is made often during special festivals.

moong dal ladoo served in a pink plate

I make this ladoo whenever I want a simple sweet but still special. It needs only few basic ingredients from pantry and takes very less time to make. The aroma of roasted dal mixed with ghee fills the kitchen and feels so festive. It is one of those sweets which tastes rich but still very light to eat.

[feast_advanced_jump_to]

About Moong Dal Ladoo

Moong Dal Ladoo is a traditional sweet from South India made mainly with roasted moong dal and ghee. We call it Nei Urundai in tamil. "Nei" means ghee in Tamil, and "Urundai" means round ball, so the name perfectly fits this soft and melt in the mouth sweet. It is prepared during special functions or even when guests visit home.

The main flavor comes from roasted moong dal which gives a nice nutty aroma and unique taste. When it is powdered and mixed with sugar, ghee and cardamom, the mixture turns soft and smooth that can be shaped easily into ladoos. The taste is rich and full of flavor, and it just melts when you take one bite.

There are few variations for this ladoo in each home. Some add a small pinch of edible camphor for extra flavour, and few people replaces suga with jaggery for a more rustic taste and make it more healthy. Either way, the base stays same - roasted moong dal powder mixed with warm ghee. This recipe is very forgiving, even beginners can do it easily without much effort.

I usually makes Nei Urundai during festivals. The smell of roasting moong dal fills the whole house and brings that festive feel. Once you start eating, really it is hard to stop with just one. My family loves this sweet and it disappears so fast every single time.

It is one of the easy ladoo recipes even beginners can try. My mother loves this nei urundai so when ever I make it she feels very happy. It is one of the nutritious and healthy ladoo recipes that you can try.

Similar Recipes

moong dal ladoo served in a pink plate

Moong Dal Ladoo Video

Moong Dal Ladoo Ingredients

  • Moong dal - I have used yellow split moong dal, it gives nutty taste and soft texture after roasting. You can use whole moong dal also but the colour will be little darker.
  • Sugar - I used regular white granulated sugar powdered finely. This adds sweetness and mixes well.
  • Ghee - I used homemade ghee. It gives more flavour and makes the ladoos so soft and melt in the mouth. Just add in warm ghee slowly so mixture binds well.
  • Cashews broken - I fried cashews in little ghee till golden and added for light crunch.
  • Cardamom powder - This gives mild flavour. Use freshly ground powder makes ladoos smell so good. You can even add cardamom with sugar and powder it.
ingredients needed to make moong dal ladoo

How to make Moong Dal Ladoo Step by Step

1.To a pan add 1 cup moong dal and start roasting in low flame.

roast moong dal

2.Dry roast moong dal in low medium flame till it turns golden brown, it will take around 8-10 minutes. Set aside to cool.

roast until golden brown

3.To another pan add ΒΌ cup + 1 tablespoon ghee heat it. Add 2 tablespoon broken cashews. Fry until golden brown, remove from flame and set aside.

fry cashews

4.By now roasted moong dal would have cooled down. Now add it to a dry mixer jar.

moong dal in mixer

5.Powder it finely. Add it to sieve.

powder it fine

6.Add ΒΎ cup granulated white sugar to the same mixer jar.

add sugar

7.Powder it finely.

powder it fine

8.Now add it to the same sieve.

add to sieve

9.Sieve it well to a bowl. This ensures even mixing and also avoids grains and remains in the ladoo. Discard the remains. If there is more remains you can again grind, sieve and add.

sieve it well

10.Add ghee with cashews. Make sure ghee is slightly hot when you add it.

add ghee with cashews

11.Slightly mix it then add ΒΌ teaspoon cardamom powder.

add cardamom powder

12.Add 1 tablespoon ghee. So in total we have used ΒΌ cup + 2 tablespoon ghee.

add more ghee

13.Mix it well until you see a mixture like this.

mix well

14.Take a small portion and press tight.

press tight

15.Shape into balls or ladoos.

shape into balls

Moong Dal Ladoo is ready!

moong dal ladoo served in a pink plate

Expert Tips

  • Roasting dal - Roast moong dal slowly in low flame, keep stirring to avoid burning. It should turn nice golden colour and smell nutty.
  • Sieving - I always sieve both powdered dal and sugar, this helps to remove grainy bits and gives smooth texture.
  • Adding ghee - Add slightly hot ghee, mix with spoon and then shape when warm.
  • Sweetness - If you like sweeter ladoos, you can use equal ratio of dal and sugar. The sweetness in this measure is perfect and balanced. You can replace powdered sugar with jaggery for a more healthy variation.
  • Storage - Store in airtight box, it keeps good for more than two weeks. The flavor stays same if you keep it in cool place.

Serving and Storage

Serve this as festival sweet or after meal dessert. It goes very well with a cup of filter coffee also. You can make it ahead and store for gifting during special days. Store in clean airtight jar, no need to refrigerate. It stays fresh for around two weeks easily.

FAQS

1.Can I use jaggery?

Yes, you can use jaggery instead for slightly different taste. But make sure to use jaggery without impurities as we are adding it directly.

2.Why my ladoos are not holding shape?

Maybe less ghee added or mixture is too dry. Add few spoons of warm ghee again and mix, it will come together.

3.Can I roast dal in advance?

Yes, you can roast and store moong dal powder in airtight jar for few days. Just warm slightly before mixing with sugar and ghee.

4.Is this ladoo healthy?

It is made from moong dal which is protein rich, and ghee gives good fat. It is healthy when eaten in small quantity.

5.Is sieving mandatory?

Yes, I would recommend sieving for 2 reasons : one is that you can ensure even mixing of powdered sugar and moong dal and second being you can avoid the grainy bits in your ladoo.

moong dal ladoo served in a pink plate

If you have any more questions about thisΒ Moong Dal Ladoo RecipeΒ do mail me atΒ sharmispassions@gmail.com. In addition, follow me onΒ Instagram,Β Facebook,Β Β Pinterest,Β YoutubeΒ andΒ TwitterΒ .

Tried thisΒ Moong Dal Ladoo Recipe? Do let me know how you liked it. Also tag us on Instagram @sharmispassions and hash tag it on #sharmispassions.

πŸ“– Recipe Card

Print

Moong Dal Ladoo Recipe

Moong Dal Ladoo is a tasty and melt in the mouth Indian sweet made using moong dal, sugar, ghee, nuts and flavoured with cardamom powder. Moong Dal Ladoo is also known as Nei Urundai or Paasi Paruppu Ladoo. It is one of the traditional South Indian sweets which is made often during special festivals.
Course Snack, sweet
Cuisine Indian
Keyword dal recipes, diwali dishes, diwali mithai, diwali recipes, diwali snacks, diwali snacks recipes, diwali sweets, diwali sweets recipes, easy diwali recipes, easy diwali snacks, ghee recipes, laddu, ladoo recipes, sweet recipes, virtual diwali party
Prep Time 1 hour 5 minutes
Cook Time 15 minutes
Total Time 1 hour 20 minutes
Servings 11 ladoos
Calories 128kcal
Author Sharmilee J

Ingredients

  • 1 cup moong dal
  • ΒΎ cup granulated white sugar
  • ΒΌ cup + 2 tablespoon ghee
  • ΒΌ teaspoon cardamom powder
  • 2 tablespoon broken cashews

Instructions

  • To a pan add 1 cup moong dal and start roasting in low flame.
  • Dry roast moong dal in low medium flame till it turns golden brown, it will take around 8-10 minutes. Set aside to cool.
  • To another pan add ΒΌ cup + 1 tablespoon ghee heat it. Add 2 tablespoon broken cashews. Fry until golden brown, remove from flame and set aside.
  • By now roasted moong dal would have cooled down. Now add it to a dry mixer jar.
  • Powder it finely. Add it to sieve.
  • Add ΒΎ cup granulated white sugar to the same mixer jar.
  • Powder it finely.
  • Now add it to the same sieve.
  • Sieve it well to a bowl. This ensures even mixing and also avoids grains and remains in the ladoo. Discard the remains. If there is more remains you can again grind, sieve and add.
  • Add ghee with cashews. Make sure ghee is slightly hot when you add it.
  • Slightly mix it then add ΒΌ teaspoon cardamom powder.
  • Add 1 tablespoon ghee. So in total we have used ΒΌ cup + 2 tablespoon ghee.
  • Mix it well until you see a mixture like this.
  • Take a small portion and press tight.
  • Shape into balls or ladoos.

Video

Notes

  • Roasting dal - Roast moong dal slowly in low flame, keep stirring to avoid burning. It should turn nice golden colour and smell nutty.
  • Sieving - I always sieve both powdered dal and sugar, this helps to remove grainy bits and gives smooth texture.
  • Adding ghee - Add slightly hot ghee, mix with spoon and then shape when warm.
  • Sweetness - If you like sweeter ladoos, you can use equal ratio of dal and sugar. The sweetness in this measure is perfect and balanced. You can replace powdered sugar with jaggery for a more healthy variation.
  • Storage - Store in airtight box, it keeps good for more than two weeks. The flavor stays same if you keep it in cool place.

Nutrition

Serving: 30g | Calories: 128kcal | Carbohydrates: 25g | Protein: 5g | Fat: 1g | Saturated Fat: 0.2g | Polyunsaturated Fat: 0.1g | Monounsaturated Fat: 0.4g | Cholesterol: 0.1mg | Sodium: 6mg | Potassium: 13mg | Fiber: 2g | Sugar: 14g | Vitamin A: 36IU | Vitamin C: 0.02mg | Calcium: 8mg | Iron: 1mg

The post Moong Dal Ladoo Recipe (Nei Urundai) appeared first on Sharmis Passions.
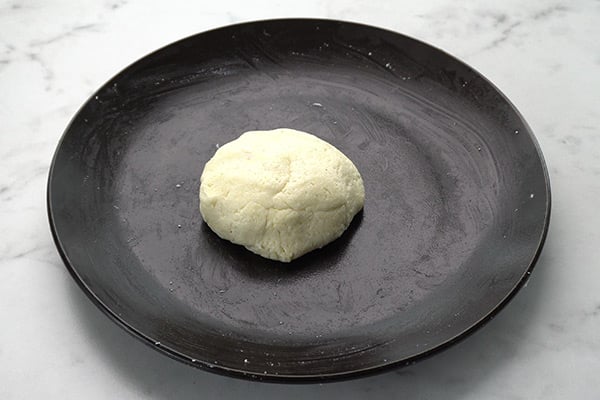
Chocolate Popcorn Recipe

Chocolate Popcorn is a tasty snack made by freshly popping corn kernels and tossing it in chocolate sauce. Chocolate Popcorn is a must try at home as an alternate to the regular popcorn for the family movie times during weekend. It is a must try for all chocolate and popcorn lovers, kids will love it!

chocolate popcorn served

This recipe comes together very fast once the kernels are popped. It has sweet and crunchy texture and feels satisfying without making it heavy. Chocolate popcorn is perfect for anytime when you want a tasty snack or to serve at parties or get together.

[feast_advanced_jump_to]

About Chocolate Popcorn

Chocolate Popcorn is a simple snack made with popcorn kernels and a simple homemade chocolate sauce. The popcorn pops in a closed pan with oil until all kernels pop, then tossed with freshly made chocolate sauce. Chocolate Popcorn is a variation to caramel popcorn.

This snack is usually made for kids or family get together. It comes together with everyday ingredients and does not need much preparation time or effort. Crispy texture and sweet flavour makes it favourite with both kids and adults. Everyone at home enjoys it and it gets over quickly.

There are a lot of variations to this recipe, you can skip cocoa powder and add only chocolate and sugar. You can add peanuts, almonds or coconut for crunch, also adjust sugar according to your taste preference.

I usually make this for my kids and also for parties rather than buying store bought popcorn as it just tastes fresh and has a nice chocolate flavour.

Similar Recipes

chocolate popcorn served

Chocolate Popcorn Video

Chocolate Popcorn Ingredients

  • Popcorn Kernels - I used popcorn kernels and not the regular corn kernels as not all varieties of corn kernels pop. Use good quality popcorn kernels.
  • Oil - I use regular cooking oil for popping the kernels. It helps distribute heat evenly and gives popcorn a light flavour. Make sure the oil you use if flavourless.
  • Butter - I used butter for making chocolate sauce. It gives a rich, smooth texture to the sauce.
  • Brown Sugar - I use brown sugar for a intense caramel flavour. It adds sweetness and caramel flavour to the sauce.
  • Cocoa Powder - Cocoa powder is used for the chocolate taste. It gives a deep chocolate flavour to the coating.
  • Chocolate - I used a mix if milk chocolate for taste and dark chocolate for a deep intense flavour and colour.Β 
  • Salt - is used for adding a balance and gives a mild salt taste to the popcorn.
ingredients needed to make chocolate popcorn

How to make Chocolate Popcorn Step by Step

1.To a pan add 1.5 tablespoon oil, heat it. Add a corn kernel to check. If it pops in few seconds then oil is ready.

pop a corn to check

2.Now add β…“ cup corn kernels, give a quick mix.

add corn kernsl

3.Close immediately with a lid and keep flame in low once it starts to pop. Use a lid with a tiny hole else slightly leave a gap while closing for steam to escape.

close and let it pop

4.Switch off once the popping sound stops completely. Open and measure 3 cups popcorn and add to a bowl and set aside.

popcorn ready

5.Place a heatproof bowl on a sauce pan with water. Add β…“ cup chocolate - I used a mix of dark chocolate and milk chocolate. Melt it well, remove from flame and set aside.

melt chocolate

6.To a small pan add 2 tablespoon butter, let it melt. Now add ΒΌ cup brown sugar, 1 teaspoon cocoa powder and β…› teaspoon salt.

add ingredients

7.Mix it well using a spoon or whisk. Cook until it froths like this, do not overcook. Switch off. This should take just a minute or 2 thats all.

chocolate sauce is ready

8.Add the sauce to popcorn.

add to popcorn

9.Add melted chocolate.

add melted chocolate

10.Mix it well.

mix well

11.Transfer to a tray with parchment paper lined. Set aside for 15 minutes or until it does not stick and becomes dry.

transfer to tray

12.Gently break.

break

13.Chocolate Popcorn is ready! It becomes crisp after it dries.

chocolate popcorn ready

Store in airtight container.

chocolate popcorn served

Expert Tips

  • Right temperature - I add few corn kernels first to test if the oil is hot enough. When they pop, I know the temperature is right for all the kernels.
  • Constant shaking - I lift the pan off the flame and shake it every few seconds, then put it back. This helps all the kernels pop evenly and prevent burning.
  • Popping sound - I switch off the flame once the popping sound stops.
  • Chocolate sauce - I cook the chocolate sauce until it become saucy and thick. It should coat the popcorn nicely without being too runny.
  • Chocolate - I used a mix of milk and dark chocolate. You can use milkchocolate alone also.
  • Tossing - I toss the popcorn with the warm chocolate sauce so it coats evenly. Warm sauce works better.

Serving and Storage

Serve this at room temperature on a plate, tastes good as snack or treat at home. You can eat it fresh right after making or spread on plate for few minutes to let chocolate set. Store leftover in airtight container and it stays fresh.

FAQS

1. Can I skip oil?

Yes you can skip oil and use butter fully instead.Β 

2. What pan to use for making popcorn?

You need space for the popcorn kernels to pop out completely so choose your cookware accordingly.Β 

3. Is salt must to add?

Yes just add a pinch of salt to balance the sweetness, many like this combination.

4. What type of corn kernels to buy?

Buy only popcorn kernels. sweet corn or other varieties of corn does not pop. So ask in the supermarket before you buy.

5. What type of chocolate is best to use?

Use cooking chocolate either milk or dark. It is purely your taste preference. I like to add a mix of dark chocolate and milk chocolate.

chocolate popcorn served

If you have any more questions about this Chocolate Popcorn Recipe do mail me at sharmispassions@gmail.com. In addition, follow me on Instagram, Facebook,Β  Pinterest, Youtube andΒ TwitterΒ .

Tried this Chocolate Popcorn Recipe ? Do let me know how you liked it. Also tag us on Instagram @sharmispassions and hash tag it on #sharmispassions.

πŸ“– Recipe Card

Print

Chocolate Popcorn Recipe

Chocolate Popcorn is a tasty snack made by freshly popping corn kernels and tossing it in chocolate sauce. Chocolate Popcorn is a must try at home as an alternate to the regular popcorn for the family movie times during weekend. It is a must try for all chocolate and popcorn lovers, kids will love it!
Course Snack
Cuisine Indian
Keyword butter recipes, chocolate recipes, popcorn recipes, snack recipes
Prep Time 5 minutes
Cook Time 10 minutes
Total Time 15 minutes
Servings 2 people
Calories 1472kcal
Author Sharmilee J

Ingredients

To make popcorn

  • β…“ cup popcorn
  • 1 Β½ tablespoon oil

To make chocolate popcorn

  • 3 cups popcorn
  • 2 tablespoon butter
  • ΒΌ cup brown sugar
  • 1 teaspoon cocoa powder
  • β…“ cup chocolate
  • β…› teaspoon salt

Instructions

  • To a pan add 1 Β½ tablespoon oil, heat it. Add a corn kernel to check. If it pops in few seconds then oil is ready.
  • Now add β…“ cup corn kernels, give a quick mix.
  • Close immediately with a lid and keep flame in low once it starts to pop. Use a lid with a tiny hole else slightly leave a gap while closing for steam to escape.
  • Switch off once the popping sound stops completely. Open and measure 3 cups popcorn and add to a bowl and set aside.
  • Place a heatproof bowl on a sauce pan with water. Add β…“ cup chocolate - I used a mix of dark chocolate and milk chocolate. Melt it well, remove from flame and set aside.
  • To a small pan add 2 tablespoon butter, let it melt. Now add ΒΌ cup brown sugar, 1 teaspoon cocoa powder and β…› teaspoon salt.
  • Mix it well using a spoon or whisk. Cook until it froths like this, do not overcook. Switch off. This should take just a minute or 2 thats all.
  • Add the sauce to popcorn.
  • Add melted chocolate.
  • Mix it well.
  • Transfer to a tray with parchment paper lined. Set aside for 15 minutes or until it does not stick and becomes dry.
  • Gently break.
  • Chocolate Popcorn is ready! It becomes crisp after it dries.
  • Store in airtight container.

Video

Notes

  • Right temperature - I add few corn kernels first to test if the oil is hot enough. When they pop, I know the temperature is right for all the kernels.
  • Constant shaking - I lift the pan off the flame and shake it every few seconds, then put it back. This helps all the kernels pop evenly and prevent burning.
  • Popping sound - I switch off the flame once the popping sound stops.
  • Chocolate sauce - I cook the chocolate sauce until it become saucy and thick. It should coat the popcorn nicely without being too runny.
  • Chocolate - I used a mix of milk and dark chocolate. You can use milk chocolate alone also.
  • Tossing - I toss the popcorn with the warm chocolate sauce so it coats evenly. Warm sauce works better.

Nutrition

Serving: 100g | Calories: 1472kcal | Carbohydrates: 247g | Protein: 31g | Fat: 44g | Saturated Fat: 16g | Polyunsaturated Fat: 10g | Monounsaturated Fat: 16g | Trans Fat: 1g | Cholesterol: 30mg | Sodium: 267mg | Potassium: 881mg | Fiber: 37g | Sugar: 44g | Vitamin A: 350IU | Calcium: 48mg | Iron: 9mg

The post Chocolate Popcorn Recipe appeared first on Sharmis Passions.
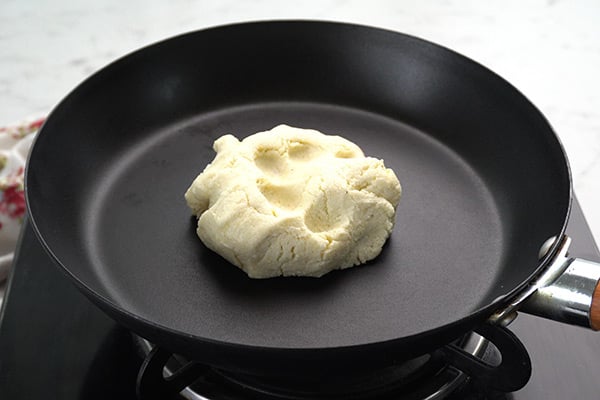
Aval Urundai Recipe

Aval Urundai is a traditional sweet made using flattened rice flakes, jaggery, coconut, ghee and cardamom powder. Aval Urundai is a no cook sweet that is prepared for Krishna Jayanthi festival, at times made as an evening snack for regular days too. It is very easy to make yet tastes so delicious.

aval urundai served

Last week during a chat session, my cousin sister gave me the idea of posting homemade butter and aval urundai for Gokulashtami. Butter and aval are Lord Krishna's favourite so here I am with this post. If you are looking for last minute ideas for Gokulashtami then this sweet is for you as it can made in just 10 minutes no pre preparations.

[feast_advanced_jump_to]

About Aval Urundai

Aval Urundai is an easy and quick snack that can be made easily. Aval Urundai is a sweet made by mixing aval or poha with powdered jaggery, cardamom powder, coconut, ghee and shaping them into small balls.

Aval Urundai is a no cook sweet that can be made in just few minutes. This is traditionally prepared for Gokulashtami. Aval Urundai can be made as an evening after school snack too. Kids will love it for sure.

It was this simple sweet my grandmother and mother used to make for Gokulashtami. As we don't have the tradition of making other dishes for this festival, it was always this simple sweet offered to Lord Krishna.

After I started cooking, I started to make bakshanams (snacks) like seedai, ladoo, murukku, appam, vadai for this festival. My son gugu has the same star as Krishna so my mother insisted to make it special. So it was always a small spread at least for Gokulashtami after his birth.

Aval Urundai is one of the most easy and quick sweets that you can prepare even at the last minute for the festival. Blogging has made all festivals come into our homes well in advance.

Similar Recipes

aval urundai served

Aval Urundai Video

Aval Urundai Ingredients

  • Poha - Poha is also called flattened rice flakes or aval. Use thick or thin aval but make sure to soak accordingly.
  • Jaggery - Prepare jaggery syrup, make it thick strain to remove impurities and use it.
  • Cashews - Fry broken cashews in ghee and use it.
  • Ghee - Use homemade ghee or store bought ghee.
  • Coconut - Use grated coconut or chopped coconut pieces.
  • Cardamom powder - Cardamom powder adds flavor to this sweet.
ingredients needed to make aval urundai

How to make Aval Urundai Step by Step

1.To a mixing bowl add 1 Β½ cups thick poha(flattened rice flakes).

add poha

2.Rinse it well in water. Drain water, squeeze water well and bring it back. It should be soft by now.

rinse well

3.Add ΒΌ cup powdered jaggery, Β½ cup coconut, ΒΌ teaspoon cardamom powder and 1 Β½ tablespoon ghee.

add other ingredients

4.Mix it well.

mix well

4.Start shaping. Press tight and shape into small balls.

press tight

5.Aval urundai is ready!

shape into ball

6.Your aval urundais are ready!

aval urundai is ready

Enjoy it!

Expert Tips

  • Poha - Use thick or medium thick poha which is best for this recipe.
  • Rinsing poha - Rinse it at least 2-3 times, by then it will become soft also so no need to soak further.
  • Adding jaggery - Make sure to add jaggery that is free from dirt as we are adding it directly.
  • Variations - You can add ghee fried cashews and raisins too.
  • Adding coconut - Do not reduce coconut as that is one of the main ingredients that gives taste to this sweet.

Serving and Storage

As coconut is added it keeps well in room temperature for just 1 day. Aval Urundai keeps well in fridge for 2 days.

FAQS

1. Which aval is best for Aval Urundai?

Thick or medium-thick aval works well. Thin aval is easier to blend with other ingredients well.

2.Do I need to roast the aval?

No need to roast aval, it tastes good even without roasting.

3.Why is my Aval Urundai not holding its shape?

The mixture may be too dry. Add a little more jaggery or little more ghee to make it moist.

aval urundai served

If you have any more questions about this Aval Urundai Recipe do mail me at sharmispassions@gmail.com. In addition, follow me on Instagram, Facebook,Β  Pinterest, Youtube andΒ TwitterΒ .

Tried this Aval UrundaiΒ Recipe? Do let me know how you liked it. Also tag us on Instagram @sharmispassions and hash tag it on #sharmispassions.

πŸ“– Recipe Card

Print

Aval Urundai Recipe

Aval Urundai is a traditional sweet made using flattened rice flakes, jaggery, coconut, ghee and cardamom powder. Aval Urundai is a no cook sweet that is prepared for Krishna Jayanthi festival, at times made as an evening snack for regular days too. It is very easy to make yet tastes so delicious.
Course Snack
Cuisine Indian
Keyword 30 mins recipes, aval paal recipe, dessert recipes, laddu, ladoo recipes, poha recipes, snack recipes, sweet recipes
Prep Time 10 minutes
Cook Time 10 minutes
Total Time 20 minutes
Servings 9 Balls
Calories 109kcal
Author Sharmilee J

Ingredients

  • 1 Β½ cups poha
  • ΒΌ cup powdered jaggery
  • Β½ cup coconut
  • ΒΌ teaspoon cardamom powder
  • 1 Β½ tablespoon ghee

Instructions

  • To a mixing bowl add 1 Β½ cups thick poha(flattened rice flakes).
  • Rinse it well in water. Drain water, squeeze water well and bring it back. It should be soft by now.
  • Add ΒΌ cup powdered jaggery, Β½ cup coconut, ΒΌ teaspoon cardamom powder and 1 Β½ tablespoon ghee.
  • Mix it well.
  • Start shaping. Press tight and shape into small balls.
  • Aval urundai is ready!
  • Your aval urundais are ready!

Video

Notes

  • Poha - Use thick or medium thick poha which is best for this recipe.
  • Rinsing poha - Rinse it at least 2-3 times, by then it will become soft also so no need to soak further.
  • Adding jaggery - Make sure to add jaggery that is free from dirt as we are adding it directly.
  • Variations - You can add ghee fried cashews and raisins too.
  • Adding coconut - Do not reduce coconut as that is one of the main ingredients that gives taste to this sweet.

Nutrition

Serving: 30g | Calories: 109kcal | Carbohydrates: 19g | Protein: 2g | Fat: 3g | Saturated Fat: 2g | Polyunsaturated Fat: 0.1g | Monounsaturated Fat: 1g | Cholesterol: 4mg | Sodium: 1mg | Potassium: 34mg | Fiber: 0.5g | Sugar: 3g | Vitamin C: 0.1mg | Calcium: 7mg | Iron: 0.3mg

The post Aval Urundai Recipe appeared first on Sharmis Passions.
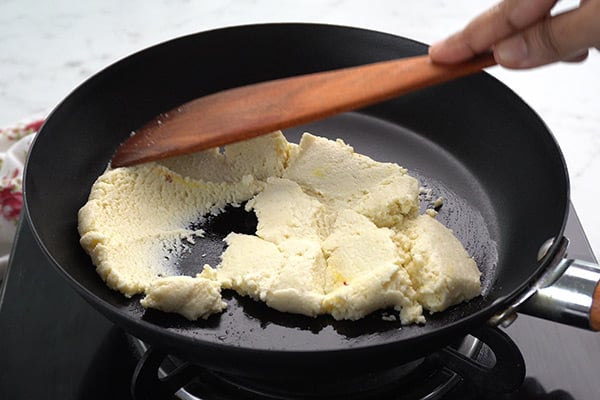
Rava Laddu Recipe (Rava Ladoo)

Rava Laddu is a popular Indian festive sweet made using rava, sugar, ghee, nuts and cardamom powder. Also popularly known as suji laddu, these are quick and easy to make perfect for even beginners to try. These rava laddus tastes so delicious, has a melt in the mouth texture with a slight crunch from rava and cashews.

rava laddu served in a yello colour plate

Rava Laddu is one of the popular sweets that you can make for any festival. It is a quick and easy to make sweet and is one of the first few sweets I learned to prepare. I should admit it came out perfect in my first try itself so it is so special to me. Do try this easy Rava Laddu and enjoy!

[feast_advanced_jump_to]

About Rava Laddu

Rava Laddu is sweet semolina balls made using semolina or rava or sooji along with sugar, ghee, cardamom powder and nuts. Rava Laddu is also popularly known as Suji ke Laddu. Rava Laddu is one of the delicious laddu that you can make for any festival especially Gokulashtami or Krishna Jayanthi.

Rava Laddu is made using rava or sooji(cream of wheat), sugar, ghee, cashewnuts and flavored with cardamom. Basically Rava Laddu is nothing but sweet sooji balls with nuts and flavors.

"Krishnar Jayanthi / Gokulashtami" - The festival I look forward each year. The little footprints drawn gives the home a divine look. In hindu customs, it is believed that the footprints drawn brings little krishna home. Rava Laddu is made for Gokulashtami or any festive occasions like Diwali etc.

There are many variations to this easy Rava Laddu but I am sharing my family recipe which is easy, quick to make and tastes delicious. This Rava laddu can be tried even by beginners, its so easy and not that tricky too.

This recipe is from my mother who is making it for the past 30 years and it is a no fail recipe that any one can try. Beginners are always scared to try sweet recipes because of the consistency but this sweet is quick and easy to make with no consistency checks.

Similar Recipes

rava laddu served in a yello colour plate

Rava Ladoo Video

Rava Laddu Ingredients

  • Rava / Sooji / Semolina - I have used store bought semi fine rava (upma rava) for this recipe.
  • Sugar - Traditionally white sugar is added for Rava Laddu. You can alternate sugar with jaggery powder, or brown sugar and make sure to increase the quantity accordingly.
  • Ghee - Use homemade ghee for best aroma and flavour. If using store bought ghee make sure it is fresh for best taste.
  • Nuts - I have used cashew nuts broken fried in ghee, you can add almonds, pistachios or even raisins based on your choice.
  • Cardamom - The best flavour for rava laddu is from cardamom so use freshly powdered cardamom powder.
ingredients needed to make rava laddu

How to make Rava Laddu Step by Step

1.Heat 1 teaspoon ghee to a pan. We need ΒΌ cup ghee for this recipe so take 1 teaspoon ghee from it for roasting.

heat ghee

2.Add 1 cup rava to the pan and dry roast it until nice aroma comes and it turns slightly golden. You can feel the aroma in the kitchen and that is the sign that rava is roasted well.

roast sooji

3.Take care not to brown them, turn off heat, keep aside and allow it to cool. Immediately transfer it to a bowl to cool down.

roast until aroma comes

4.To a mixer jar add ΒΎ cup sugar along with 2 cardamom. I peeled the skin and added, you can add it as such with skin too.

add sugar and cardamom

5.Powder the sugar very fine, set aside in a bowl.

powder it fine

6.Then transfer roasted rava to the same mixer jar.

add roasted sooji

7.Grind it to a semi coarse mixture.

powder it coarsely

8.Transfer powdered rava and sugar to a mixing bowl.

add to miixing bowl

9.Mix until it is combined well.

mix well

10.Heat ΒΌ cup ghee in a tadka pan - add 2 tablespoon broken cashews.

heat ghee add cashews

11.Fry until golden. Switch off and remove from flame.

fry until golden brown

12.Then add fried cashews along with ghee to the mixing bowl.

add to mixing bowl

13.Mix everything together, by this time it will look like bread crumbs. First mix with a spatula as it will be hot.

mix well

14.Then with your fingers mix it well, break lumps if any.

rava laddu recipe - mix well

15.Shape them into rounds balls by pressing tight. Press it tight and form balls. Repeat to finish.

shape into ladoos

16. Rava Laddus are ready.

rava ladoo is ready

Store in an airtight container.

rava laddu served in a yello colour plate

Expert Tips

  • Choosing Sooji / Rava - Choose fine variety of semolina or rava or sooji preferably.
  • Roasting Sooji - While roasting rava take care not to brown it, be very careful to turn over if not it might get browned at the bottom. Roast it well for 5-7 minutes stirring continuously. After roasting immediately transfer it to a bowl to cool down, do not let it in the pan itself as the heat of the pan might brown the rava.
  • Grinding Sooji - The texture of rava should be slightly coarse else while eating it will not have the crunch and will not taste good. Also take care not to grind the rava too coarse else shaping will be difficult.
  • Mixing - While mixing sooji and sugar, mix thoroughly so that the sugar is evenly distributed. Also add sugar only when rava is warm, if it is too hot then sugar will start melting making the mixture runny.
  • Adding ghee - Do not add more ghee, it will make the laddu look dull and alter the taste. Also use homemade or fresh ghee for best flavor.
  • Nuts - I have used chopped cashews, you can even use almonds, raisins too.
  • Sugar - Adding ΒΎ cup sugar will be just perfect, it will taste a bit over sweet when you taste it just after making but will be perfect after few hrs.

Variations

  • You can add half and half ghee and milk if you are looking for a low fat version. After the milk is added quickly form them into balls, don't let it dry. If its dried add few drops of ghee and form into balls.
  • The ghee version keeps well even for a week but for the milk version the shelf life is very less consume it within a day or two.
  • You can add 2 tablespoon desiccated coconut, saute in ghee for 2 minutes then add it. Add 1 tablespoon ghee extra if adding coconut.
  • Add Β½ teaspoon rose essence and few drops pink food color to make rose rava laddu. Likewise you can try with other flavors of your choice too.
  • You can also add raisins fry and add it. You can add almonds along with cashews too.

Serving & Storage

Serve it as a snack along with tea or coffee. Store in an airtight container to retain freshness. Need not refrigerate. Rava Laddu keeps well for about 2-3 days in room temperature.

FAQS

1.Why is my laddu breaking while shaping?

If there is no enough moisture content then the laddu may break. So add little more ghee and start shaping. Warm ghee helps laddu to hold its shape well.

2.Can I made rava laddu using jaggery / cane sugar?

Yes you can make rava laddu with jaggery or cane sugar but make sure to use organic variety which is free from impurities as we have to add it as such.

3.What type of pan is best suited for making rava laddu?

You can use any heavy bottomed flat based pan or kadai to roast rava. But make sure not to burn it and stir at regular intervals.

rava laddu served in a yello colour plate

If you have any more questions about this Rava Laddu RecipeΒ do mail me at sharmispassions@gmail.com. In addition, follow me onΒ Instagram,Β Facebook,Β PinterestΒ ,YoutubeΒ andΒ TwitterΒ .

Tried this Rava Laddu Recipe? Do let me know how you liked it. Also tag us on Instagram @sharmispassions and hash tag it on #sharmispassions

πŸ“– Recipe Card

Print

Rava Laddu Recipe | Rava Ladoo Recipe

Rava Laddu is a popular Indian festive sweet made using rava, sugar, ghee, nuts and cardamom powder. Also popularly known as suji laddu, these are quick and easy to make perfect for even beginners to try. These rava laddus tastes so delicious, has a melt in the mouth texture with a slight crunch from rava and cashews.
Course sweet
Cuisine Indian
Keyword diwali dishes, diwali food, diwali mithai, diwali recipes, diwali sweets, diwali sweets recipes, easy diwali recipes, laddu, ladoo recipes, Rava Ladoo / Rava Laddu, rava recipes, sweet recipes, virtual diwali party
Prep Time 10 minutes
Cook Time 15 minutes
Total Time 25 minutes
Servings 10 laddus
Calories 167kcal
Author Sharmilee J

Ingredients

  • 1 cup rava
  • ΒΎ cup sugar
  • ΒΌ cup ghee melted
  • 2 nos cardamom
  • 2 tablespoon cashew nuts broken

Instructions

  • Add rava to a kadai and dry roast it until nice aroma comes and it turns slightly golden. Take care not to brown them, turn off heat, keep aside and allow it to cool.
  • Add 1 cup rava to the pan and dry roast it until nice aroma comes and it turns slightly golden. You can feel the aroma in the kitchen and that is the sign that rava is roasted well.
  • Take care not to brown them, turn off heat, keep aside and allow it to cool. Immediately transfer it to a bowl to cool down.
  • Powder the sugar very fine, set aside in a bowl. Then transfer roasted rava to the same mixer jar.
  • Grind it to a semi coarse mixture. Transfer powdered rava and sugar to a mixing bowl and mix until it is combined well.
  • Then add the fried cashews, cardamom powder. Add ghee.
  • Mix everything together, by this time it will look like bread crumbs. With your hands form them into rounds balls by pressing tight.
  • Press it tight and form balls. set aside. Store in airtight container.
  • Enjoy Rava Laddu!

Video

Notes

  • Choosing Sooji / Rava - Choose fine variety of semolina or rava or sooji preferably.
  • Roasting Sooji - While roasting rava take care not to brown it, be very careful to turn over if not it might get browned at the bottom. Roast it well for 5-7 minutes stirring continuously. After roasting immediately transfer it to a bowl to cool down, do not let it in the pan itself as the heat of the pan might brown the rava.
  • Grinding Sooji - The texture of rava should be slightly coarse else while eating it will not have the crunch and will not taste good. Also take care not to grind the rava too coarse else shaping will be difficult.
  • Mixing - While mixing sooji and sugar, mix thoroughly so that the sugar is evenly distributed. Also add sugar only when rava is warm, if it is too hot then sugar will start melting making the mixture runny.
  • Adding ghee - Do not add more ghee, it will make the laddu look dull and alter the taste. Also use homemade or fresh ghee for best flavor.
  • Nuts - I have used chopped cashews, you can even use almonds, raisins too.
  • Sugar - Adding ΒΎ cup sugar will be just perfect, it will taste a bit over sweet when you taste it just after making but will be perfect after few hrs.

Nutrition

Serving: 40g | Calories: 167kcal | Carbohydrates: 28g | Protein: 2g | Fat: 5g | Saturated Fat: 3g | Polyunsaturated Fat: 0.4g | Monounsaturated Fat: 2g | Cholesterol: 12mg | Sodium: 1mg | Potassium: 44mg | Fiber: 1g | Sugar: 15g | Vitamin C: 0.1mg | Calcium: 4mg | Iron: 1mg

The post Rava Laddu Recipe (Rava Ladoo) appeared first on Sharmis Passions.
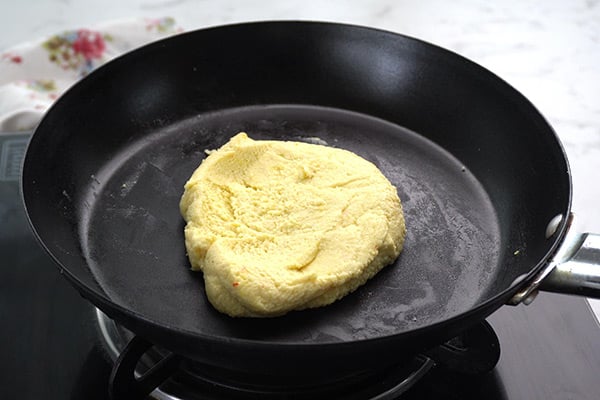
❌