Reading view

There are new articles available, click to refresh the page.

Chocolate Covered Almonds in the air fryer

You won’t believe how easy and hassle-free it is to make Chocolate Covered Almonds in the air fryer. All it takes is 4 ingredients and 10 minutes to make the most addictive snack ever! 
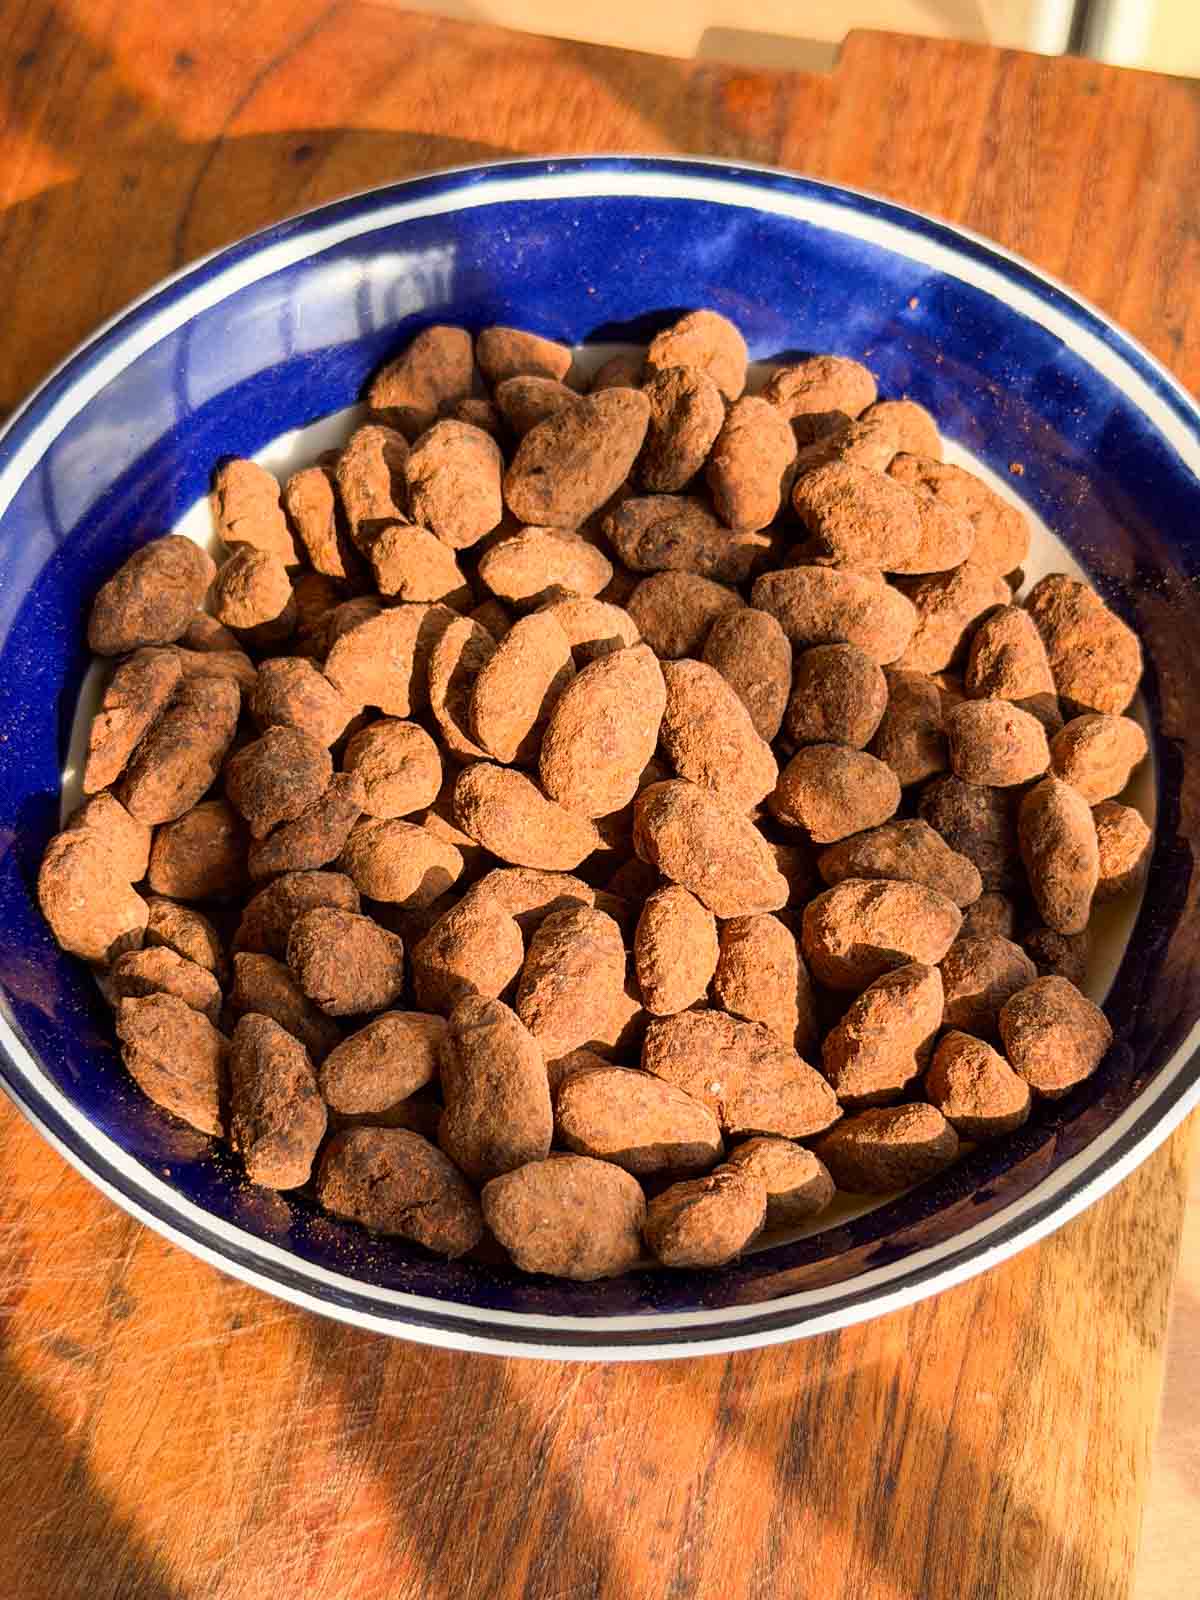
chocolate covered almonds in a bowl

These chocolate covered almonds might look fancy and complicated, but trust me, they are a breeze to make. Especially if you have an air fryer. It calls for zero prep, only a couple of ingredients, just one container, and then the air fryer does most of the work for you. We roast the almonds in the air fryer, melt the chocolate in there, and then use the same container to coat them too. Sounds easy-peasy, right?

This recipe is super customisable too! You can use whatever chocolate and nuts you like and have or throw in some add-ins for a different flavor. Plus, you can make one big batch of these chocolate coated almonds and eat them for a long time, because they basically stay well forever! So let’s find out how to make them!

Ingredients for Chocolate Covered Almonds

Chocolate bar: I have used half a bar of dark chocolate and half a bar of milk chocolate, but you can use full dark or milk based on how your preference 

Nuts: I have used almonds for this recipe, but you can use any nut of your choice  

Cocoa powder: I have used sugar-free cocoa powder for an intense chocolate flavor, but you can use whatever you have available. 

Sugar: This is optional, but I would recommend using a little for balance, especially if you’re using only dark chocolate

Frequently Asked Questions

Can I use only milk chocolate for this recipe?

Yes, why not! Milk chocolate, white chocolate, dark chocolate, spiked chocolate, flavored chocolate, half and half like I have, or a mix of different chocolates, whatever you have and like works in this recipe.

Can I make these chocolate coated almonds without an air fryer?

Yes, you can make this recipe on the stove top as well, but it takes a little more effort. Start by dry roasting the almonds until slightly brown. Then melt the chocolate on a double boiler until it’s smooth and creamy. Follow the rest of the recipe as is for an easy chocolate covered almonds recipe on the stovetop.

Can I make this recipe using another type of nut?

Of course! You can use cashews, pecan nuts, peanuts, macadamia, walnuts, or a mix of all of them. This recipe is very customisable and forgiving. Use whatever you have and like, it all tastes amazing!! 

Richa’s Top Tips

  • Melting chocolate: If your chocolate is not becoming very smooth when melting, stir in a drop or two of coconut oil to the melted chocolate.
  • Adjust the sugar: We prefer the slight bitterness of dark chocolate, but you can increase or reduce the quantity of sugar in your cocoa powder depending on how sweet you like your chocolate coated almonds. 
  • Add cocoa powder in batches: Adding the entire quantity of cocoa powder at once leads to clamping and uneven coating. So add in a little at a time, shake, and repeat for the most evenly coated choco almonds. 

Storage Tips

  • Countertop/Room temperature: These chocolate almonds keep well in an airtight container on the countertop (away from humidity, heat, and direct sunlight) for 2-3 days. 
  • Fridge: If you are making a larger batch and won’t be able to finish quickly, store these chocolate covered almonds in the fridge for up to 2 weeks. 
  • Freeze: These choco almonds are super freezer friendly and stay good for months. 

Customisation Ideas

  • Add some spice: Mix some cayenne pepper or red chilli powder into the chocolate for hint of spicy, smoky flavor
  • Make it citrusy: Fold in a tablespoon of lemon or orange zest for a bright, citrusy flavor. A little goes a long way here 
  • Sprinkle sea salt: For a sweet and salty flavor, sprinkle a pinch of sea salt before the chocolate covered almonds harden 
  • Coffee flavored: Add a teaspoon or two of instant coffee powder mixed with hot water to deepen the flavor of chocolate.
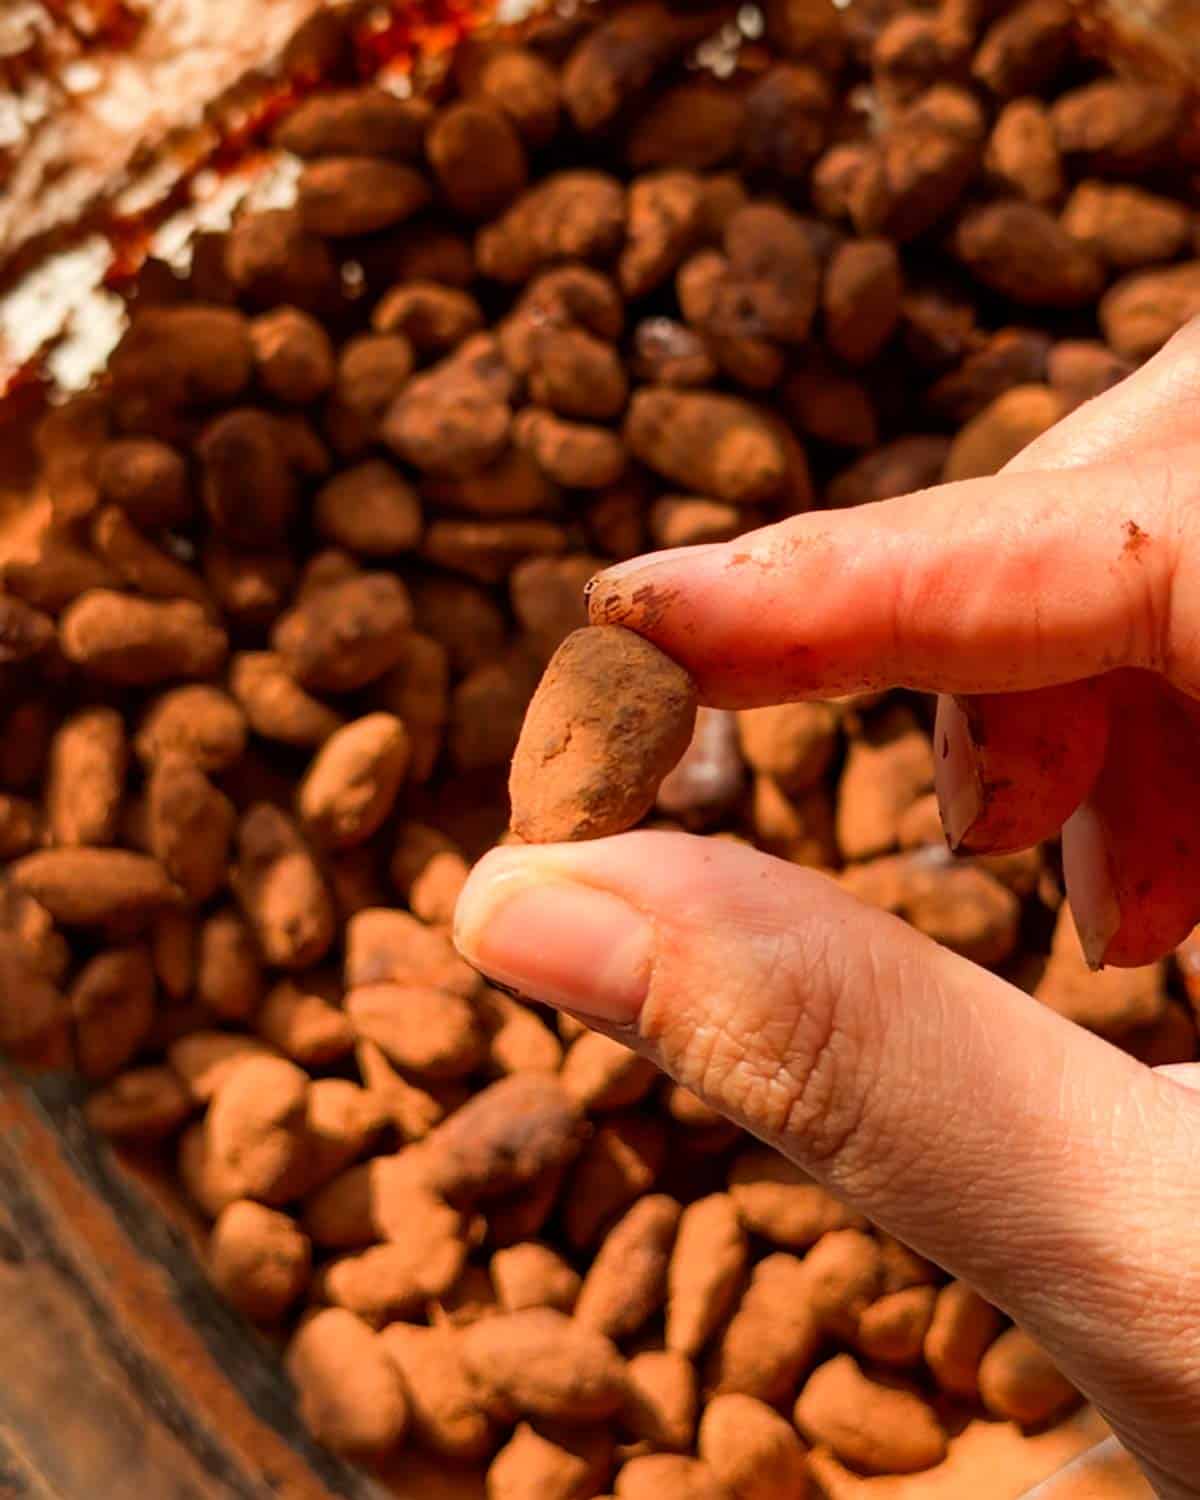
a person holding one chocolate covered almond to showcase its color and texture

This chocolate almond recipe in the air fryer is a fun, mess-free way to make an addictive snack in no time. It’s a clean, healthy snack (when eaten in moderation), and my kids absolutely love it! 

If you make this chocolate covered almonds recipe, don’t forget to DM the pictures @my_foodstory. Happy cooking!

Watch Chocolate Almonds Recipe Video

chocolate covered almonds in a bowl
Print

Chocolate Covered Almonds | Chocolate Almonds

Making chocolate covered almonds in your air fryer is sooo easy and hassle-free! All it takes is 4 ingredients and 10 minutes to make the most addictive snack ever!
Course Desserts, Snacks & Appetisers
Cuisine international
Diet Vegetarian
Cook Time 10 minutes
Total Time 10 minutes
Servings 6 servings
Calories 228kcal
Author Richa

Equipment

Ingredients

  • 175 grams almonds approx. 1¼ cups
  • 35 grams milk chocolate
  • 35 grams dark chocolate
  • 1 tablespoon sugar
  • 30 grams cocoa powder

Instructions

  • Take almonds in an air fryer safe container and air fry at 180C for 6 minutes till it’s mildly roasted. Use the container which has a lid.
  • Place chocolate on top of the roasted almonds and air fry at 150C for 3 minutes. Add sugar, mix the chocolate, sugar and almonds with a spatula till all the almonds are coated well with chocolate. Set aside to cool.
  • Once it’s completely cool, add ⅓ quantity (10 grams) of cocoa powder, cover the container with the lid and shake well to coat the almonds. Open the lid, add another ⅓ quantity (10 grams) of the cocoa powder and repeat the same process. Add the remaining ⅓ quantity (10 grams) of cocoa powder and shake well to coat all the almonds. cocoa powder is added in 3 parts to ensure even coating of the almonds, if you add the cocoa powder all at once, it tends to clump at some places and does not taste good.

Video

Nutrition

Calories: 228kcal | Carbohydrates: 14g | Protein: 8g | Fat: 18g | Saturated Fat: 3g | Polyunsaturated Fat: 4g | Monounsaturated Fat: 10g | Trans Fat: 0.01g | Cholesterol: 1mg | Sodium: 6mg | Potassium: 341mg | Fiber: 6g | Sugar: 5g | Vitamin A: 8IU | Vitamin C: 0.1mg | Calcium: 96mg | Iron: 2mg

This article was researched and written by Urvi Dalal.

The post Chocolate Covered Almonds in the air fryer appeared first on My Food Story.

Air Fryer Roti Pizza with leftover rotis

Ask any parent what their kids want for dinner and pizza will be in the top three. This air fryer roti pizza has been my shortcut to making that happen on busy weeknights using leftover rotis.

air fryer roti pizza ready to be served

This air fryer roti pizza is one of the easiest things I make for my kids and they love it every single time. The roti gets super crispy in the air fryer first, then you load it up with pizza sauce, cheese, and veggies, and pop it back in for a few minutes. It takes about 20 minutes and you probably already have all the roti pizza ingredients you need in the fridge. 

If leftover rotis usually end up sitting in your fridge untouched, this recipe and our smashed tacos are two really good reasons to start saving them. You can also try our mini veg pizza if you want to make pizza from scratch, but for those evenings when you just need something quick and the kids are already hungry, this roti pizza is hard to beat.

Roti Pizza Ingredients 

Leftover Rotis: Day-old rotis work better than fresh ones because they hold their shape and crisp up nicely in the air fryer.

Pizza Sauce: Store-bought or homemade, either works.

Mozzarella Cheese: Shredded. Be generous, it’s pizza after all.

Veggie Toppings: Corn, red and green bell peppers, and onions. But you can use whatever your family likes.

Italian Seasoning: Sprinkled on top before air frying for that classic pizza flavour.

Frequently Asked Questions

How is roti pizza different from regular pizza?

Regular pizza uses a yeasted dough that’s proofed, shaped, and baked. Roti pizza skips all of that and uses a leftover roti or chapati as the base instead. The result is thinner, crispier, and a lot quicker to make. It won’t taste exactly like a traditional pizza, but it’s delicious in its own way and takes a fraction of the time.

What kind of roti works best for roti pizza?

Day-old leftover rotis work best because they’ve lost some moisture and crisp up really well in the air fryer. Fresh rotis are too soft and tend to stay floppy even after air frying. Whole wheat, multigrain, or regular maida rotis all work fine.

Why is my roti pizza soggy?

Most likely the roti wasn’t air fried plain before adding the toppings. That first 3 minutes of air frying the bare roti is what crisps up the base. Also check if you’ve added too much sauce or piled on too many toppings, both release moisture and make the base soggy.

Can I use naan instead of roti for pizza?

You can, but naan is thicker and softer so the texture will be quite different. It’ll feel more like a flatbread pizza than a crispy thin crust. If using naan, air fry it plain for an extra minute or two to get a crispier base before adding toppings.

Can I make this without an air fryer?

Yes. Heat a tawa on medium, place the roti with toppings, cover with a lid, and cook for 4-5 minutes until the cheese melts and the base crisps up. The air fryer gives a more even crispiness, but the tawa method works well too. 

a person holding a slice of air fryer roti pizza

Richa’s Top Tips

  • Air fry the roti plain first before adding toppings. Three minutes at 180°C crisps up the base and prevents the pizza from turning soggy. 
  • Place a bowl or plate on top of the roti while air frying it plain. The hot air can cause the roti to fly around in the basket. A small bowl or plate on top keeps it flat and ensures it crisps up evenly.
  • Leave a small gap around the edges when spreading the sauce. About a quarter inch all around is enough. If the sauce reaches the edges, it spills over during air frying and makes the base soggy.
  • Don’t overload the toppings. It’s tempting, but too many veggies and cheese weigh down the roti and prevent the base from staying crispy. A thin layer of each is all you need.
  • Serve immediately. Roti pizza is at its best straight out of the air fryer when the cheese is still melty, and the base is still crispy. It softens quickly as it cools.

Storage Tips

  • Best eaten fresh. This is one of those recipes that’s meant to be made and eaten right away. The roti loses its crispiness quickly once it cools, and the toppings make it soggy if it sits too long.
  • Freezing: Not recommended. The roti base goes chewy and the vegetables release water once thawed.
  • Prep ahead tip: If you’re making these for a party or a bigger group, you can prep the toppings and sauce in advance. Then just assemble and air fry each roti pizza fresh as people are ready to eat. It only takes about 7 minutes per pizza so they come out quickly.

Serving Ideas

Roti pizza is a snack that works best fresh out of the air fryer. Here are a few ways to make it more of a moment:

  • With Roasted Tomato Pesto Soup: Pizza and tomato soup is a classic pairing, and this roti pizza version is no different. 
  • With Air Fryer Sweet Potato Fries: Pizza and fries on the same plate. Kids won’t believe their luck. 
  • With Lychee Soda: A cold, fizzy glass of lychee soda alongside hot roti pizza makes for the most fun snack time spread.
  • As a movie night snack: Make a few chapati pizzas with different toppings, cut them into wedges, and serve on a big board. Easy, fun, and everyone gets to pick their favourite.

Customisation Ideas

  • Go desi: Skip the pizza sauce and spread green coriander chutney as the base instead. Top with paneer cubes, onions, and green chillies for a fully Indian version.
  • Make it non-veg: Shredded chicken, leftover keema, or chicken tikka pieces work really well as toppings. Add them over the cheese so they warm through while the pizza air fries.
  • Try a white pizza: Skip the pizza sauce entirely and use veg mayonnaise or garlic butter as the base. Top with mushrooms, corn, and extra cheese for a creamy, saucy version.
air fryer roti pizza ready to be served

If this air fryer roti pizza recipe saves you from one pizza delivery order, my job here is done. But honestly, it’ll probably save you from a lot more than one. When you make it, share your pictures with me on Instagram @my_foodstory, I’d love to see what toppings your family goes with.

Watch Roti Pizza Recipe Video

air fryer roti pizza ready to be served
Print

Air Fryer Roti Pizza

This air fryer roti pizza is the quickest way to make a delicious thin crust pizza at home in no time. It's a quick and easy recipe that uses leftover rotis and a few other ingredients for a meal the kids will love!
Course Snacks & Appetisers
Cuisine international
Diet Vegetarian
Prep Time 10 minutes
Cook Time 10 minutes
Total Time 20 minutes
Servings 2 servings
Calories 173kcal
Author Richa

Equipment

Ingredients

  • 2 leftover rotis
  • 3 tablespoons pizza sauce
  • ¼ cup cooked or frozen corn
  • ¼ cup red bell peppers cut into ¼ inch pieces
  • ¼ cup green bell peppers cut into ¼ inch pieces
  • 2 tablespoons onions cut into ¼ inch pieces
  • ¼ cup + 2 tablespoons shredded mozzarella cheese
  • ½ teaspoon italian seasoning

Instructions

  • Pre-heat air fryer at 180 C.
  • Place one roti in the air fryer basket, place a bowl or plate big enough to cover the roti. This is to make sure that the roti does not fly around while air frying and gets uniformly fried. Air fry at 180 C for 3-4 minutes (depending on your air fryer) till it gets crisp on the edges. This step ensures that the pizza does not turn soggy.
    2 leftover rotis
  • Take out the air fried roti and place on a plate or chopping board. Spread 1 ½ tablespoons of pizza sauce onto the roti leaving ¼ inch from the edges all around the roti so that the sauce does not spill over from the edges while air frying.
    3 tablespoons pizza sauce
  • Sprinkle 2-3 tablespoons of mozzarella cheese on top of the pizza sauce.
    ¼ cup + 2 tablespoons shredded mozzarella cheese
  • Place 2 tablespoons each of the veggie toppings – corn, red & green bell peppers on top and sprinkle some italian seasoning.
    ¼ cup cooked or frozen corn, ¼ cup red bell peppers, ¼ cup green bell peppers, 2 tablespoons onions, ½ teaspoon italian seasoning
  • Place the roti in the air fryer basket and air fry at 180C for 4 minutes, till the cheese melts and veggies are cooked well.
  • Transfer to a plate, repeat the same process for the second roti and serve.

Video

Notes

  1. Corn may be replaced with any veggie of your choice such as baby corn. 

Nutrition

Calories: 173kcal | Carbohydrates: 24g | Protein: 7g | Fat: 6g | Saturated Fat: 3g | Polyunsaturated Fat: 1g | Monounsaturated Fat: 2g | Cholesterol: 11mg | Sodium: 418mg | Potassium: 268mg | Fiber: 3g | Sugar: 4g | Vitamin A: 854IU | Vitamin C: 43mg | Calcium: 132mg | Iron: 2mg

This article was researched and written by Harita Odedra.

The post Air Fryer Roti Pizza with leftover rotis appeared first on My Food Story.

Masala Potato Wedges in Air Fryer

Making potato wedges in air fryer is easy-peasy! This is a quick and mess-free masala potato wedges recipe that cooks that delivers perfect results each time. 

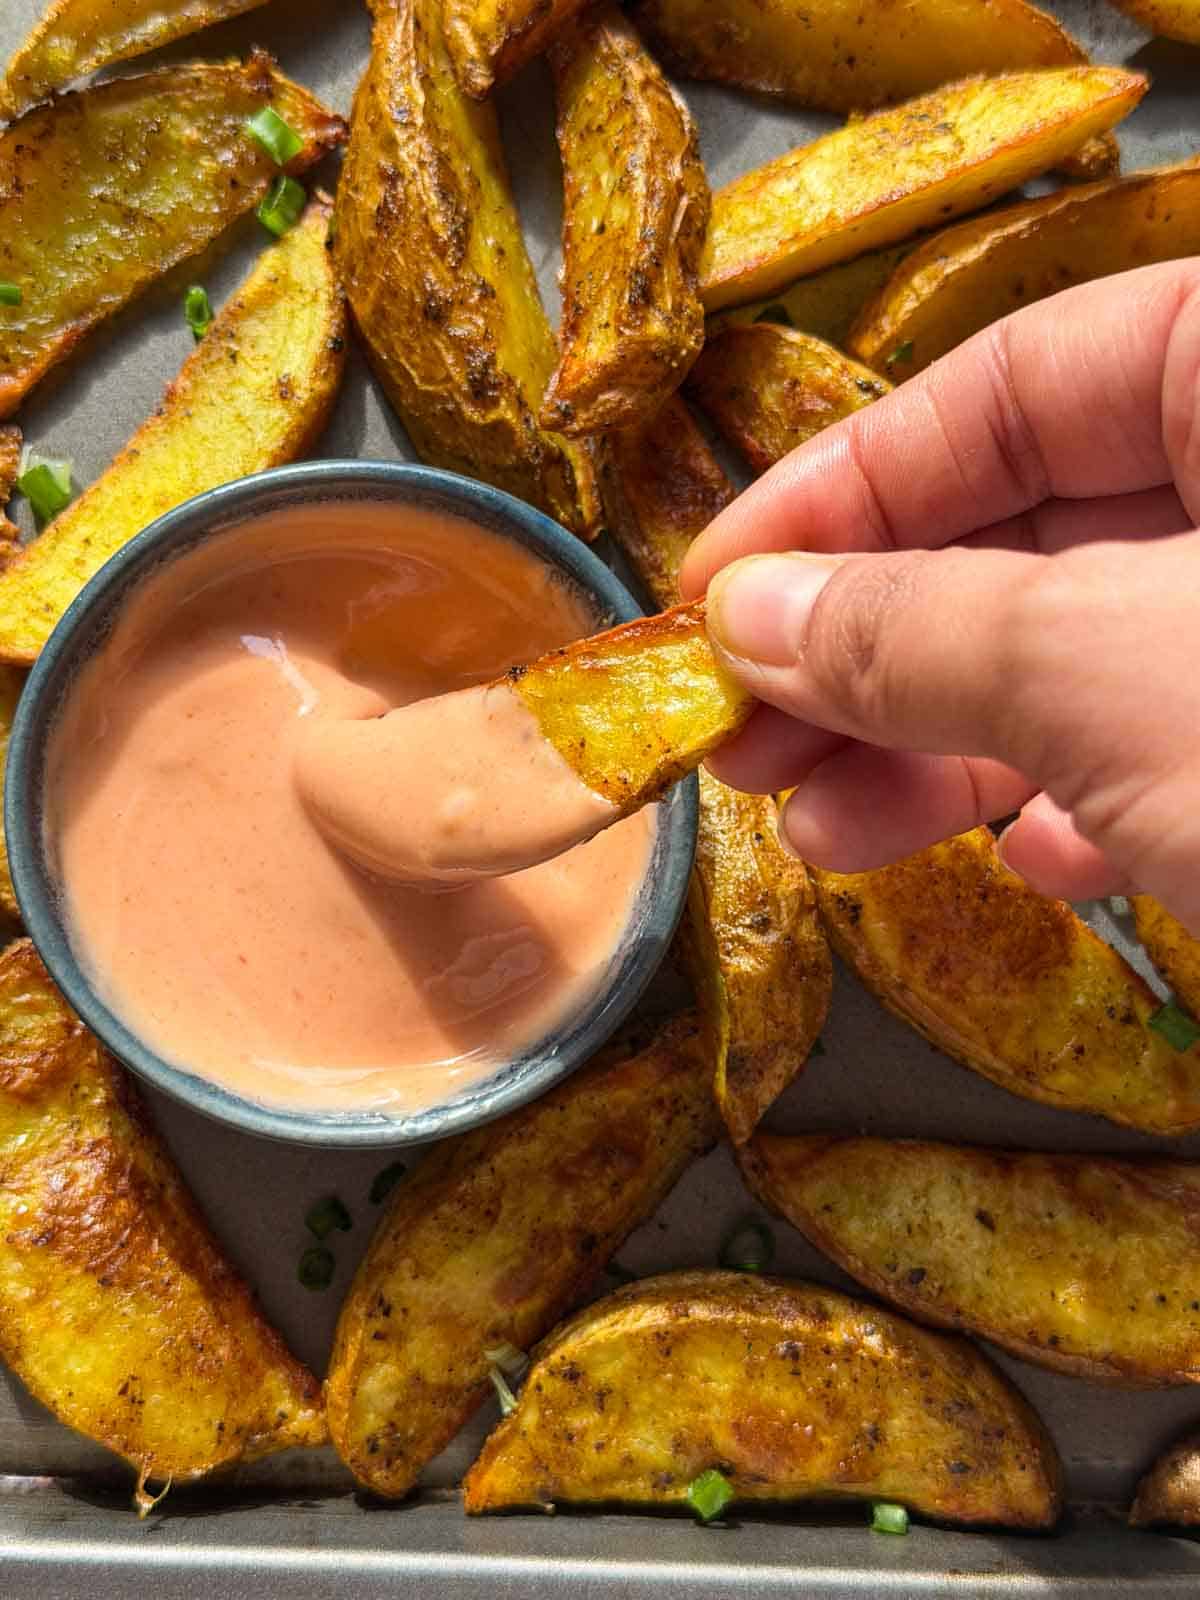
air fryer potato wedges with an accompanying dip

There is nothing more delicious than a plate of hot potato wedges and a couple of dip options. It’s nostalgic, comfort food that always works right from being a kiddie snack to beers and conversations with friends.   

This masala potato wedges come together in the air fryer, which means no deep frying, no excess oil, and no guilt. And the result is the same delicious golden-brown, crispy outside and creamy, fluffy insides that are so hard to resist. I love eating these on their own, but they taste so good with roast chicken, burgers and sandwiches, and salads among other things., You need to try this air fryer potato wedges recipe today! 

Masala Potato Wedges Ingredients 

  • Potato: Cut into wedges with the skin on. I have used an older crop of regular Indian potatoes, but Russet potatoes or Yukon Gold work really well if you’re outside India 
  • Ginger garlic paste: Adds a lovely flavor and aroma 
  • Spices: Turmeric powder, cumin powder, and crushed pepper add for flavor and color
  • Salt: To season
  • Corn flour: Helps the masala coat the potatoes evenly and makes the wedges light and crispy 
  • Oil: I have used sunflower oil, but any neutral-flavored oil with a high-smoke point will work for this recipe 

Frequently Asked Questions 

Why are my potato wedges not crispy?

This happens for a number of reasons like excess moisture in potatoes, an overcrowded air fryer basket, too much oil, and not enough cooking time. But to troubleshoot, make sure to soak and wipe the potatoes thoroughly, sprinkle a little extra cornflour, and try air frying them for a minute or two. 

Do I need to peel the potatoes?

Nope! Potato wedges actually taste better with skin on. The skin adds extra texture and crisps up beautifully in the air fryer. Just give the potatoes a good scrub before cutting them into wedges.

Can I use sweet potatoes instead?

Yes, but sweet potato wedges cook a little differently. They won’t become quite as crispy as regular potatoes because they contain more moisture and natural sugars. Reduce the cooking time slightly and avoid overcrowding the basket. I would recommend trying out my air fryer sweet potato fries recipe instead. 

Richa’s Top Tips

  • Cut the wedges into the same size to help them cook evenly. 
  • If making a large batch, cook in batches: Make sure to line the potato wedges in a single layer with space in the between. An overcrowded basket can steam the potatoes instead of crisping and browning them. 
  • Soak the potatoes well: Soaking the potatoes is an important step to strip away excess starch, prevent steaming, and have crispy wedges. Please don’t skip this step. 

Storage Tips

  • Refrigerate: Even though these are best served fresh, you can store any leftovers in the fridge for up to 3 days in an airtight container.  
  • Freezer: Cool down the fries completely and line them on a tray. Stick it into the freezer overnight and then transfer to a freezer-safe bag and store for up to 3 months. 
  • Reheat: You can easily reheat these in the air fryer at 180℃ for about 5 minutes if refrigerated and about 8 to 10 minutes if frozen. 

Serving Ideas

These air fryer potato wedges taste incredible with any dip. Here are some of my favorites! 

Potato Wedges Seasoning Ideas 

When it comes to potato wedges seasoning, the world is your oyster! Once you’ve got the basic method down, you can play around with different spice blends depending on what you’re craving.

  • Classic Garlic Herb: Garlic powder, onion powder, dried oregano, dried parsley and black pepper.
  • Peri Peri: Peri peri seasoning, smoked paprika and a pinch of garlic powder for spicy, smoky wedges.
  • Cheesy Parmesan: Toss the hot wedges with grated parmesan, garlic powder and chopped parsley just before serving.
  • Indian Masala: Chaat masala, roasted cumin powder, Kashmiri chilli powder and a squeeze of fresh lemon juice.
  • Cajun: Cajun seasoning with a pinch of smoked paprika for bold, smoky flavour.
  • Lemon Pepper: Lemon pepper seasoning with a little garlic powder for bright, zesty wedges.
  • Italian Herb: Italian seasoning, garlic powder and a sprinkle of parmesan for wedges that pair beautifully with pasta.
  • Spicy BBQ: Smoked paprika, garlic powder, onion powder, chilli powder and a pinch of brown sugar for a sweet and smoky finish.
  • Tandoori: Tandoori masala with a little Kashmiri chilli powder and dried fenugreek leaves (kasuri methi) for an Indian-inspired twist.

Tip: If you’re adding parmesan, fresh herbs or lemon juice, do it after the wedges come out of the air fryer. This keeps the cheese from burning and the herbs tasting fresh.

air fryer potato wedges with an accompanying dip

Whether you’re serving them as a snack, a side or loading them up with your favourite toppings, these air fryer potato wedges are always a hit. They’re crispy on the outside, fluffy on the inside, and so easy to customise with different seasonings. Once you try them, you’ll wonder why you ever bought frozen wedges!

If you make this recipe, DM me your pictures or tag me in stories over on my IG @my_foodstory ❤️   

Watch Air Fryer Potato Wedges Recipe Video

air fryer potato wedges with an accompanying dip
Print

Masala Potato Wedges in Air Fryer

Making potato wedges in air fryer is easy-peasy! This is a quick and mess-free masala potato wedges recipe that cooks that delivers perfect results each time.
Course Snacks & Appetizers
Cuisine international
Diet Vegan, Vegetarian
Prep Time 10 minutes
Cook Time 10 minutes
Total Time 20 minutes
Servings 6 servings
Calories 148kcal
Author Richa

Equipment

Ingredients

  • 4 potatoes approx. 400 gms
  • 1 teaspoon ginger garlic paste
  • 1 teaspoon salt
  • 1 teaspoon crushed pepper
  • A pinch ‘turmeric powder
  • ¼ teaspoon cumin powder
  • 2 teaspoons corn flour
  • 1 ½ tablespoons sunflower or any neutral flavored cooking oil divided

Instructions

  • Wash and cut the potatoes into wedges with skin-on. keep them soaked in water till using as they turn brown if exposed to air.
    4 potatoes
  • Drain the potato wedges and pat dry with a kitchen towel. Add to a bowl.
  • Add ginger garlic paste, salt, crushed pepper, turmeric powder, cumin powder, cornflour, ½ tablespoon sunflower oil and combine it all to ensure the wedges are coated well.
    1 teaspoon ginger garlic paste, 1 teaspoon salt, 1 teaspoon crushed pepper, A pinch ‘turmeric powder, ¼ teaspoon cumin powder, 2 teaspoons corn flour
  • Pre-heat air fryer at 200C and brush the basket with oil.
  • Place the potato wedges on the air fryer basket with some gap between each. Brush with a few drops of oil and air fry at 200C for 5 minutes. Brush with oil, flip and air fry at 200C for 5 minutes or until they are golden & crisp.
    1 ½ tablespoons sunflower or any neutral flavored cooking oil

Video

Nutrition

Calories: 148kcal | Carbohydrates: 26g | Protein: 3g | Fat: 4g | Saturated Fat: 1g | Polyunsaturated Fat: 0.2g | Monounsaturated Fat: 3g | Sodium: 397mg | Potassium: 599mg | Fiber: 3g | Sugar: 2g | Vitamin A: 4IU | Vitamin C: 28mg | Calcium: 19mg | Iron: 1mg

The post Masala Potato Wedges in Air Fryer appeared first on My Food Story.

Crispy Potato Waffles (Hash Brown Waffles)

These potato waffles have made breakfast so much easier on busy mornings. A handful of ingredients, a waffle maker, and about 25 minutes are all you need to get something hot, cheesy, and filling on the table.

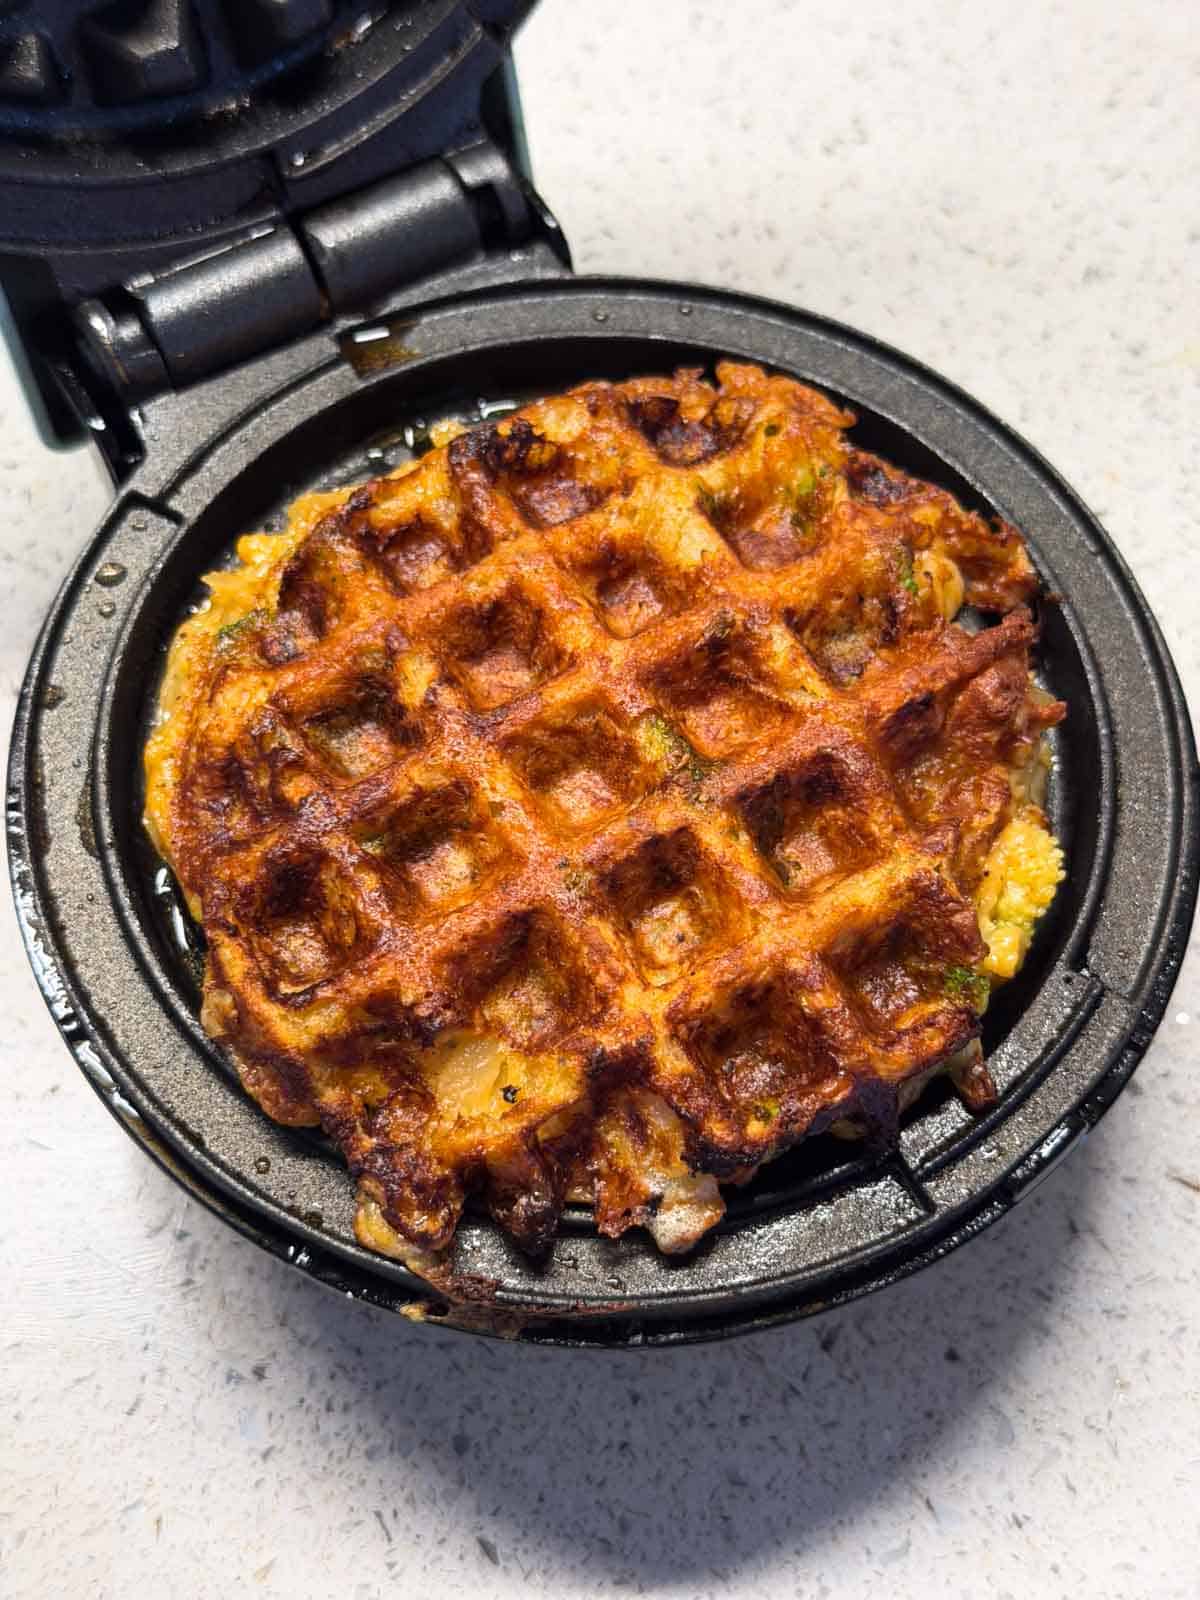
crispy potato waffle still in the waffle maker

My kids are obsessed with these cheese potato waffles and honestly, so am I. They’re crispy, cheesy, and I manage to get broccoli into them without anyone complaining. The waffle maker does most of the work, which means I’m not standing over the stove on busy mornings, and that’s always a win.

If your mornings need a breakfast that’s quick and homemade but still gets everyone excited, give these a try. If our high protein dosa or moong dal chilla are already part of your morning routine, these potato waffles make a really nice change when you want something different.

Ingredients for Potato Waffle

Potato: rated into julienne-like strips. 

Cheese: A mix of grated mozzarella and a processed cheese cube. 

Egg & Milk: These bind the batter together and keep the waffles moist on the inside.

Broccoli: Cut into tiny bits and mixed right into the batter.

Tapioca Flour: Helps the waffle hold its shape and adds crispiness to the outside.

Seasoning: Salt, crushed pepper, grated garlic, and a pinch of Kashmiri chilli powder for colour.

Oil: Any neutral cooking oil like sunflower for greasing the waffle maker.

Frequently Asked Questions

What do potato waffles taste like?

Think of a crispy hash brown but in waffle form, with melted cheese running through it. They’re crispy on the outside, soft and cheesy on the inside, and have a gentle garlic and pepper flavour. Kids love them because they taste like a treat, and parents love them because they’re actually a proper breakfast.

My potato waffles are sticking to the waffle iron, what do I do?

Make sure you’re oiling the waffle plates generously before each waffle. Also let the waffle maker heat up fully before adding the batter. If you’re opening it too early, the waffle hasn’t had time to set and will stick and tear. Give it a full 3 minutes before checking.

Can I make these without egg?

I haven’t tried making it without eggs. But you can try using a tablespoon of yogurt or an extra tablespoon of tapioca flour as a binder instead. The waffle may not hold together quite as well, but with the cheese and tapioca flour already in there, it should still work.

Can I make these without a waffle maker?

You can cook them as pancakes on a hot tawa or pan. Flatten the batter into thin rounds and cook on medium heat with a little oil until golden on both sides. They won’t look like waffles, but the taste will be the same. 

Richa’s Top Tips

  • Pat the potatoes completely dry after soaking. Any excess water in the batter will make the waffles steam instead of crisp. Take a minute to squeeze and pat them dry with a kitchen towel.
  • Make sure the waffle maker is fully heated before adding the batter. A cold or half-heated waffle maker is the main reason waffles stick and fall apart. Give it time to heat up properly between each waffle too.
  • Don’t open the waffle maker too early. It’s tempting to check, but opening it before the waffle has set will tear it apart. Give it a full 3 minutes on the first side before flipping.

Storage Tips

  • In the fridge: Store cooked waffles in an airtight container for up to a day. They lose their crispiness as they cool, but they reheat well.
  • Freezing: These freeze surprisingly well. Let them cool completely, stack with parchment paper between each waffle, and freeze in a Ziploc bag for up to two weeks. Great for meal prepping breakfast in advance.
  • Reheating tip: Pop them back in the waffle maker for a minute or two, or in the air fryer at 180°C for 3-4 minutes. Both bring back the crispiness really well. The microwave will make them soft and chewy, so avoid it if you can.

Serving Ideas

These potato waffles are great on their own but even better with a few things on the side:

  • With ketchup or mayo: The simplest way and usually how my kids eat them. A little boiled egg mayonnaise works really well if you want something homemade.
  • With Egg Bhurji: A cheesy waffle with spicy egg bhurji on the side makes for the most satisfying weekend breakfast spread.
  • With a stir-fried salad: Some quickly sautéed veggies alongside the waffles keeps the meal balanced and adds freshness.
  • With Mango Lassi: A cold glass of mango lassi with hot, crispy waffles is a combination my kids never say no to.

Customisation Ideas

  • Swap the broccoli: Finely chopped spinach, corn, bell peppers, or even grated zucchini work just as well. Use whatever your kids will eat without complaining.
  • Add chicken or keema: Mix in a couple of tablespoons of cooked shredded chicken or leftover keema into the batter for a more filling, protein-heavy waffle.
  • Turn them into waffle sandwiches: Make two thin waffles, spread some mayonnaise or ketchup between them, and press together. Kids go crazy for these. 
  • Make a waffle chaat: Top the waffle with chopped onions, tomatoes, green chutney, sev, and a squeeze of lemon. Sounds odd, but the crispy cheesy base with chaat toppings is surprisingly addictive.

Did You Know?

Potatoes contain every nutrient a human needs to survive except calcium and vitamin D. In the 1800s, entire communities in Ireland and parts of South America lived almost exclusively on potatoes and milk for decades. The potato provided the carbohydrates, protein, fibre, and vitamins, while the milk filled the calcium gap. No other single vegetable comes close to being that nutritionally complete. 

crispy potato waffle topped with a half fried egg and served on a plate

Mornings are chaotic enough without breakfast adding to the stress. This potato waffles recipe has taken that pressure off in our house, and I think they’ll do the same in yours. Let the waffle maker do the work, enjoy your chai, and put something hot and homemade on the table without the fuss. Tag me on Instagram @my_foodstory when you make them, I’d love to see how yours turn out.

Watch Hash Brown Waffles Recipe Video

a bunch of crispy potato waffles served on a plate
Print

Potato Waffle

Crispy, cheesy, and incredibly delicious, these crispy cheese potato waffles are kid-friendly, and a quick breakfast idea for busy mornings.
Course Breakfast, Snacks & Appetizers
Cuisine Continental
Diet Halal
Prep Time 10 minutes
Cook Time 15 minutes
Total Time 25 minutes
Servings 4 waffles
Calories 150kcal
Author Richa

Equipment

  • 1 Waffle Maker

Ingredients

  • 1 large potato grated or julienned approx. 1 ¼ cups, refer note 1
  • 1 ¾ cups boiling hot water
  • 1 egg
  • 2 tablespoons milk
  • ¼ teaspoon salt
  • ½ teaspoon crushed pepper
  • 1 teaspoon grated garlic
  • 1 tablespoon grated mozzarella cheese
  • 1 cheese cube grated, approx. 1 ½ tablespoons
  • ¼ cup cheddar cheese
  • 1 tablespoon tapioca flour
  • ¾ cup broccoli florets cut into tiny bits
  • teaspoon kashmiri chilli powder
  • 1 tablespoon sunflower or any neutral cooking oil

Instructions

  • Soak grated potatoes in hot water for 10 minutes to soften them a bit, drain and pat dry with a kitchen towel. Set aside. Refer note 2.
    1 large potato grated or julienned, 1 ¾ cups boiling hot water
  • Take the egg in a bowl, whisk well, Add milk, salt, pepper, garlic, grated cheeses, tapioca flour, broccoli florets, kashmiri chilli powder, grated potatoes, give a good toss to combine well to form a thick batter.
    1 egg, 2 tablespoons milk, ¼ teaspoon salt, ½ teaspoon crushed pepper, 1 teaspoon grated garlic, 1 tablespoon grated mozzarella cheese, 1 cheese cube, ¼ cup cheddar cheese, 1 tablespoon tapioca flour, ¾ cup broccoli florets, ⅛ teaspoon kashmiri chilli powder
  • Heat the waffle maker and coat the plates with a teaspoon of oil.
    1 tablespoon sunflower or any neutral cooking oil
  • Fill the waffle iron with ⅓ cup of batter or as per the size of your waffle maker and cook for 2 minutes, flip and cook for 2-3 minutes or until they get crisp and golden on either side. Transfer to a plate. Repeat the same process for making waffles from the rest of the batter. Make sure waffle iron is fully heated between each waffle. Serve hot.

Video

Notes

  1. Potatoes to be grated on the larger side of the grater, so they are like juliennes for best results.
  2. Potatoes are soaked in hot water to tenderise/soften them or they tend to be raw and do not taste good in the waffles.

Nutrition

Calories: 150kcal | Carbohydrates: 14g | Protein: 6g | Fat: 8g | Saturated Fat: 3g | Polyunsaturated Fat: 1g | Monounsaturated Fat: 4g | Trans Fat: 0.01g | Cholesterol: 52mg | Sodium: 250mg | Potassium: 318mg | Fiber: 2g | Sugar: 2g | Vitamin A: 296IU | Vitamin C: 26mg | Calcium: 106mg | Iron: 1mg

This article was researched and written by Harita Odedra.

The post Crispy Potato Waffles (Hash Brown Waffles) appeared first on My Food Story.

❌