❌

Reading view

There are new articles available, click to refresh the page.

An Ode to Apples: Grilled, Stuffed, and Smoked

October is National Apple Month—not to mention, prime picking and eating time for some of America’s best apples. What better occasion to celebrate the contributions this storied fruit has made to American barbecue?

Apples possess a natural affinity for pork, which probably gained the fruit admission to the barbecue world in the first place. But don’t stop there. Apple juice, apple sauce, and cider vinegar are essential ingredients in regional American barbecue sauce. Apple wood is the fuel some of the most decorated competition pitmasters swear by. Then there are grilled apples, smoked apples, and “baked” apples hot from the smoker.

Given the apple’s deep roots in American food culture, you may be surprised to learn that the fruit originated in Central Asia. The early colonists brought the apple to the New World along with the honeybees needed to pollinate the trees. Thousands of apple varieties have been grown in the U.S., though only a fraction are grown commercially.

So how else should you use apples and apple-based products to take your barbecue to the next level?

Apple Brines and Marinades

  • Make an apple brine: Replace a portion of the water in a standard brine recipe with apple cider or apple juice for pork, turkey, and game birds.
  • Make a simple apple marinade or injector sauce: Combine 2 cups of apple cider with 1/4 cup each apple cider vinegar, soy sauce, maple syrup, and vegetable oil. Add 2 tablespoons Worcestershire sauce.
  • Don’t forget hard cider, made by fermenting apple cider like beer. A dry hard cider is less sweet than apple cider, which makes it ideal for basting or as a base for marinade.

Apple Sprays, Basting Mixtures, and Mop Sauces

  • Place apple cider in a spray bottle and spray it on ribs or pork shoulder as they smoke to add another layer of flavor.
  • Combine apple cider, cider vinegar, bourbon, Worcestershire sauce, lemon juice, and a little water to make a “Cider Squirt” for basting pork and poultry. Squirt it from a spray bottle or brush it on with a basting brush.
  • Make a hog slather by combining mustard, apple cider, Worcestershire sauce, and melted butter in roughly equal proportions. Brush on the meat with a basting brush.
  • For a simple mop sauce for beef brisket, combine one bottle of beer with 1/2 cup apple cider vinegar, 1/2 cup cold-brewed coffee, and 2 tablespoons Worcestershire sauce. Swab it on with a barbecue mop at the 1-hour mark, and every hour after that.

Apple Cider or Apple Juice?

So what’s the difference between apple cider and apple juice? In the U.S., sweet cider is generally unfiltered, while apple juice is filtered for clarity. Either may be pasteurized. I prefer cider—especially freshly pressed at a farm stand. The aroma and flavor will vary depending on the season and which apples are used.

Three Apple Recipes for the Grill

Put the fruit itself on the menu with these recipes for a grilled side dish, savory stuffed apples, and a skillet dessert.

Apple “Steaks”

Fire Roasted Apple - October Dinner Plan

Thick slices of Granny Smith apples get a glaze of cider, honey, lemon juice, and butter before and during grilling. Direct high heat browns the slices while leaving them firm enough to hold their shape. Serve them alongside grilled pork chops.

Get the Apple “Steaks” Recipe »

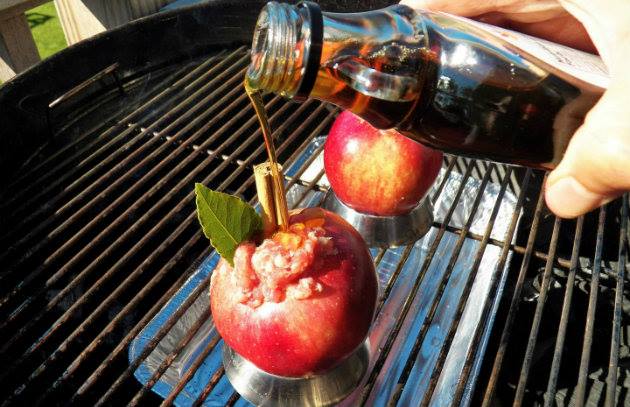
Apples Stuffed with Sausage and Sage

apples stuffed

Pork sausage, onion, celery, and sage fill these apples, with a little maple syrup spooned over the stuffing. Smoke-roast them over indirect heat until the apples soften. They’re a savory side dish you can assemble several hours ahead and refrigerate until grilling time.

Get the Sausage-and-Sage Stuffed Apples Recipe »

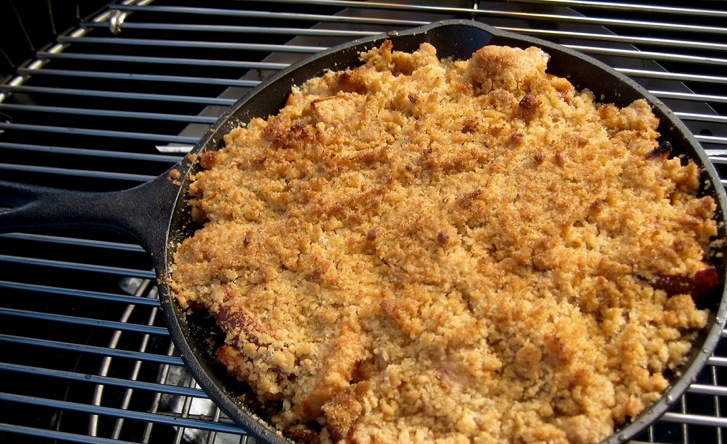
Smoke-Roasted Apple Crisp

Grilled Apple Crisp

Apples, lemon, and cinnamon go into a cast-iron skillet beneath a topping of butter, granola, flour, and brown sugar. Smoke-roast over indirect heat until the filling bubbles and the topping browns. Let it cool for a few minutes before serving—with ice cream, if you like.

Get the Smoke-Roasted Apple Crisp Recipe »

Next time you’re picking up apples, grab a few extra for the grill. Serve them alongside pork, stuff them with sausage, or save them for dessert. And if there’s cider in the fridge, you’ve got the start of a baste for whatever’s smoking.

Plan your next cook with our full recipe collection—weeknight grills, weekend projects, and special-occasion feasts.

Get Steven’s weekly grilling tips, seasonal recipes, and live-fire ideas in your inbox. Join our Up in Smoke newsletter. Sign up and get a FREE PDF of Steven Raichlen's Best Ribs Recipes Ebook.

Preorder Man On Fire — A Steven Raichlen Memoir. And get some really cool rewards!

Looking to upgrade your tailgating setup? Check out our Tailgating Essentials.

The post An Ode to Apples: Grilled, Stuffed, and Smoked appeared first on Barbecuebible.com.

Back to Basics: Crispy Pulled Pork Bacon Sliders

Photo Credit: Daniel Hale

By Daniel Hale

Presented by Wildfire Outdoor Living

Pulled pork is one of those foods that may be even better the second time around.

For this installment of Back to Basics, we’re turning leftover pulled pork into a quick griddle meal that works just as well at home as it does at a tailgate.

Of course, here at BarbecueBible, we’re happy to smoke a pork shoulder from scratch. But if you already have pulled pork in the refrigerator—or pick some up from your favorite barbecue joint—you’re most of the way there.

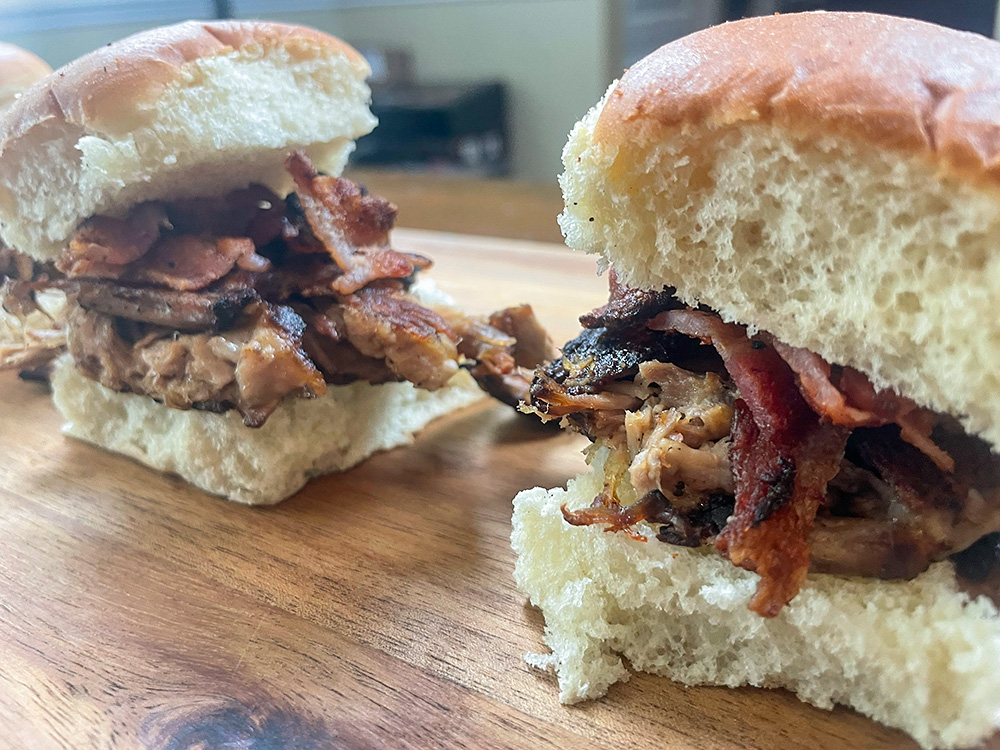
For this recipe, I used the Wildfire Ranch Pro 30″ Griddle to turn the pork into crispy little slider patties. Think of them as pulled pork burgers, with bacon doing double duty as both topping and flavor.

Start With the Bacon

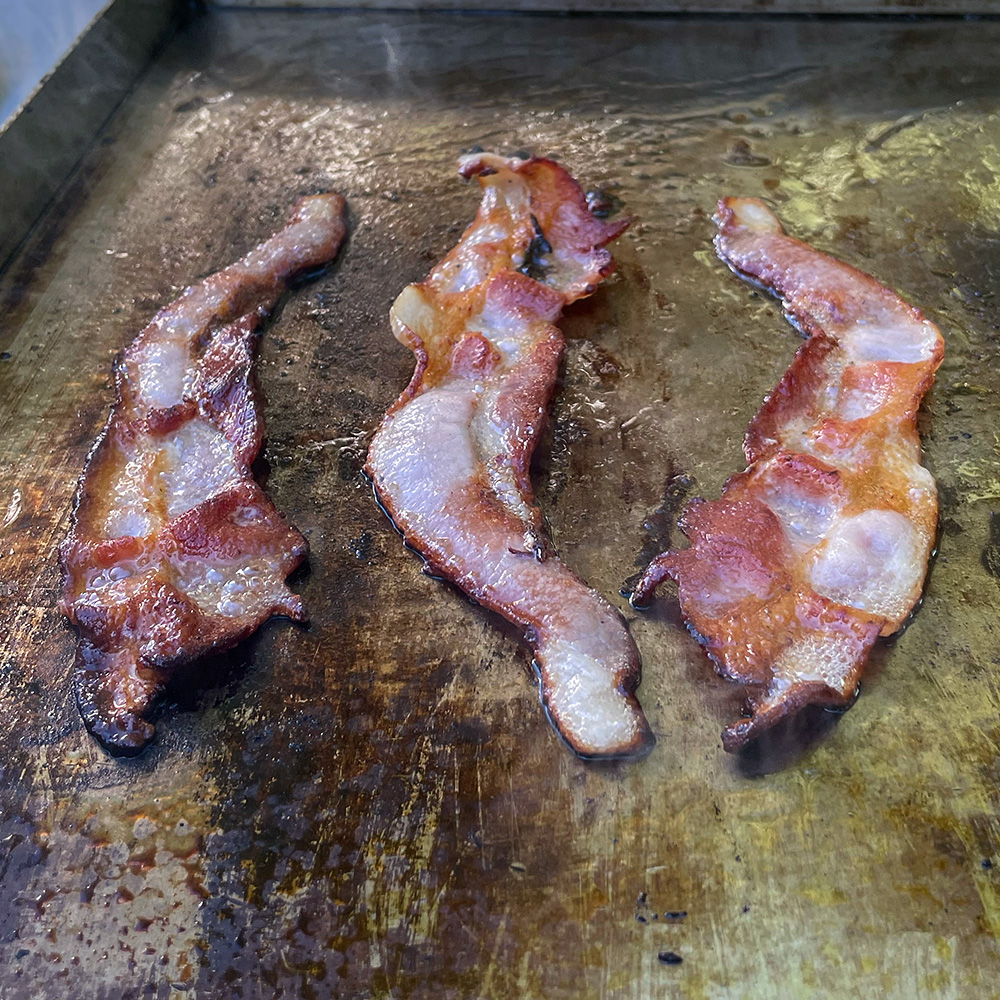
I started by cooking strips of bacon directly on the Wildfire griddle.

Once the bacon was crisp, I removed it from the griddle and set it aside for the sliders. More importantly, I left the rendered bacon fat right where it was.

That fat becomes the base for crisping the pulled pork.

bacon on griddle

Photo Credit: Daniel Hale

You could certainly use butter or olive oil instead, but if bacon is going on the finished slider anyway, why not? Also: it’s bacon.

Turn Pulled Pork Into Crispy Patties

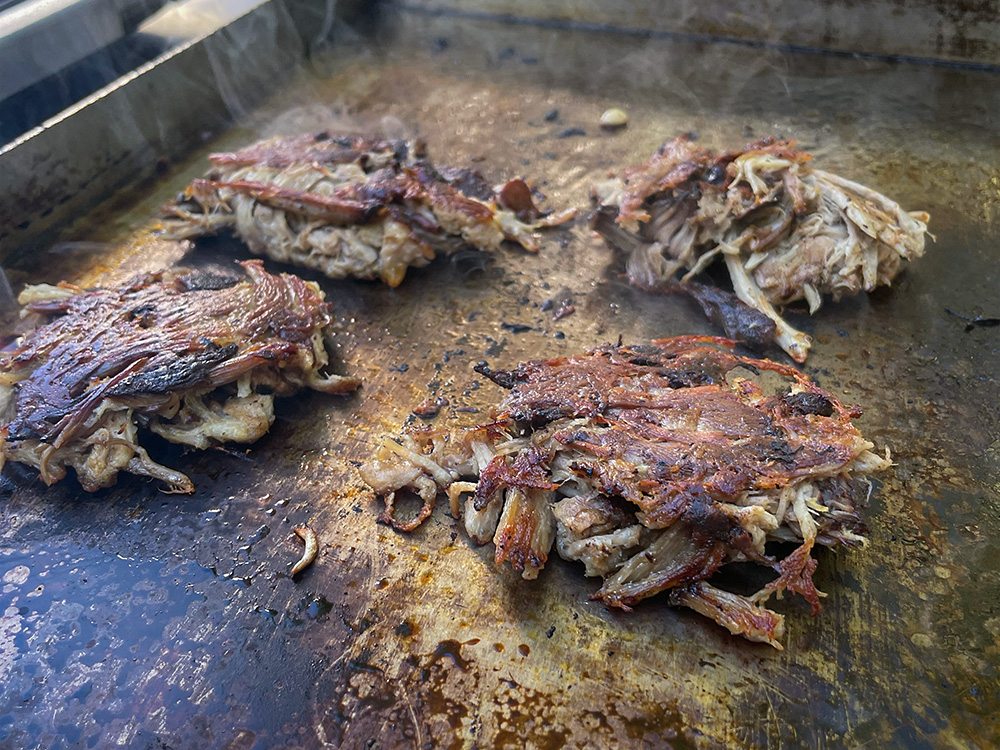
Instead of simply piling the pulled pork onto the griddle, I formed it into small patties about the size of the slider buns.

The patties don’t need to be packed tightly like hamburgers. Press them together just enough to hold their shape.

Place them directly in the hot bacon fat and let them cook without moving them around too much. You want the pork making solid contact with the griddle so the bottom develops a crisp, browned crust.

crispy pork on griddle

Photo Credit: Daniel Hale

Flip the patties and crisp the second side.

The result is still tender pulled pork in the center, but with deeply browned edges and a crunchy exterior.

That contrast is what makes these different from simply reheating leftover barbecue.

Keep the Sliders Simple

Once the pork patties are crisp, the rest comes together quickly.

Chop the cooked bacon and pile it onto the pork. Add your favorite barbecue sauce if you like, then sandwich everything between slider buns.

Coleslaw makes a good topping, particularly if you want something cool and crunchy against the hot pork. Pickles would work, too.

But you don’t need much. The crispy pork and bacon should stay at the center of the slider.

crispy pork sliders

Photo Credit: Daniel Hale

A big thank you to Wildfire Outdoor Living for sponsoring this post.

Wildfire Outdoor Living is an Arizona-based company specializing in high-performance gas grills and premium outdoor kitchen solutions. Wildfire brings a commitment to cutting-edge technology and industry-leading innovation. Their 304 stainless steel design and illuminated LED knobs, cast stainless steel burners, and laser-cut stainless steel cooking grates create products that will provide peak performance. They also allow you to customize your outdoor kitchen with designer finish knobs and handles to meet the growing demand for designer outdoor kitchens.

Want to go deeper on the craft? Explore our grilling techniques and how-to guides for ribs, steak, chicken, seafood, and more.

Get Steven’s weekly grilling tips, seasonal recipes, and live-fire ideas in your inbox. Join our Up in Smoke newsletter. Sign up and get a FREE PDF of Steven Raichlen's Best Ribs Recipes Ebook.

Preorder Man On Fire — A Steven Raichlen Memoir. And get some really cool rewards!

Looking to upgrade your tailgating setup? Check out our Tailgating Essentials.

The post Back to Basics: Crispy Pulled Pork Bacon Sliders appeared first on Barbecuebible.com.

Big Beef Flavor, Little Buns: Smoked Chuck Roast Sliders

By Daniel Hale

Tailgating calls for food that’s easy to serve, easy to eat, and substantial enough to satisfy hungry sports fans. Here at BarbecueBible.com, we believe you can do better than the usual burgers and hotdogs. BBQ beef sliders check all three boxes, especially when the beef has been smoked low and slow over smoldering hardwood. Just one catch: You’ll want to smoke the beef the day before the game. Which, come to think of it, isn’t a catch at all, because by doing most of the prep ahead of time, you get to enjoy the game.

For this recipe, I went with chuck roast instead of brisket. It’s a smaller, more manageable cut of beef with plenty of marbling and rich flavor. It’s a lot more affordable (and these days, who isn’t worried about the grocery bill.). And when smoked properly, it makes a spectacular filling for BBQ sandwiches.

I used the Monument Denali 605Pro gas grill and Monument smoker box to smoke the chuck roast low and slow, developing a flavorful, smoky bark before chopping the beef for our sliders.

And yes, you can smoke beef on a gas grill. You just need the right setup, some wood chips, and patience.

Why Chuck Roast Works for BBQ Sliders

Chuck roast comes from the shoulder of the steer, an area that gets plenty of exercise. The meat contains loads of connective tissue and intramuscular fat, which make it particularly well-suited to low-and-slow smoking.

As the roast heats, the connective tissue gradually breaks down, helping transform a tough cut of beef into meat tender enough to cut with the side of a fork.

Chuck also has a practical advantage over brisket. You can purchase a roast weighing three to five pounds rather than committing to a 12 pound packer. For this smoke, I started with a boneless chuck roast weighing a little over 4 1/2 pounds.

If you have the time and patience, you can smoke a chuck roast until it’s tender enough to pull or shred with forks. I had neither, so I chopped the smoked chuck with a cleaver instead. It makes an excellent sandwich filling, especially when mixed with barbecue sauce.

How to Set Up the Monument Denali 605Pro for Smoking

A gas grill might not be the first thing that comes to mind when you think about smoking beef, but with indirect heat and a smoker box, it’s entirely possible.

I used the Monument Denali 605 gas grill, setting it up for indirect grilling with a target temperature of approximately 250°F.

The Monument smoker box holds wood chips, allowing them to smolder over an active burner and produce smoke inside the grill. The chuck roast sits away from the direct heat, where it can smoke slowly without scorching.
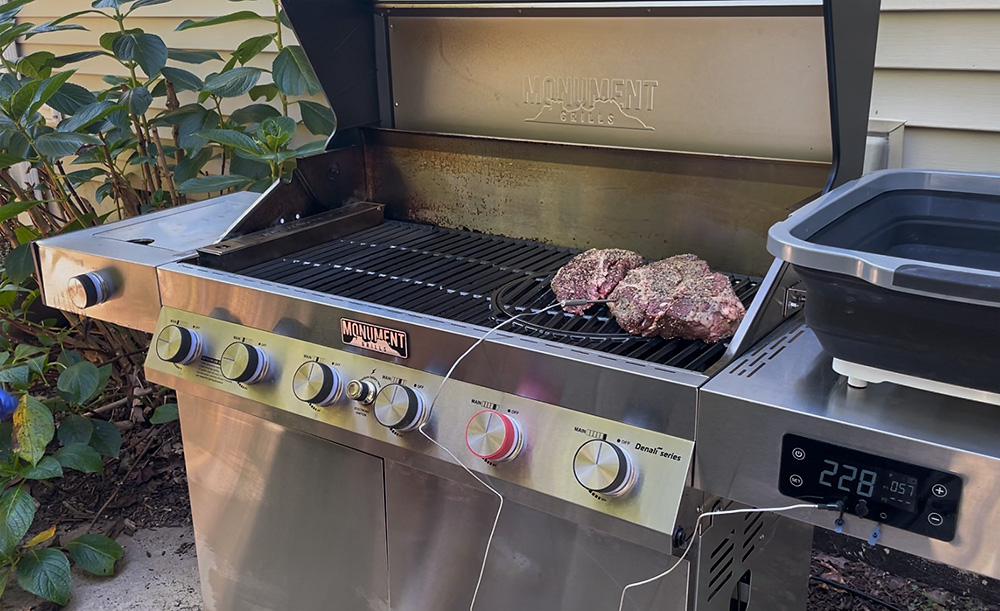
Chuck Roast on the Monument Denali 605

My target was 250°F, although the grill temperature fluctuated between approximately 230°F and 280°F throughout the smoke. Maintaining a steady low temperature can be tricky on a gas grill, even with the burners turned down.

Steven shared a little hack for managing the heat: Prop the grill lid open slightly with a small metal rod to allow some heat to escape. (I wish I’d known that one before I started!)

I added wood chips twice during the initial smoking stage. The goal was to develop a noticeable smoke flavor and a dark exterior bark, not to produce heavy smoke for the entire grilling session.

A few tips for smoking on a gas grill:

  • Use indirect heat so the roast isn’t sitting directly over an active burner.
  • Monitor the grill temperature and adjust the burners as necessary.
  • Replenish wood chips when needed, especially during the early stages of smoking.
  • Use a meat thermometer to follow the roast’s progress.

Smoking the Chuck Roast

I started by seasoning the chuck roast generously with Steven’s Texas Brisket Rub, covering all sides of the meat.

Once the Denali 605Pro was preheated and the smoker box was producing smoke, I placed the roast over indirect heat and closed the lid.
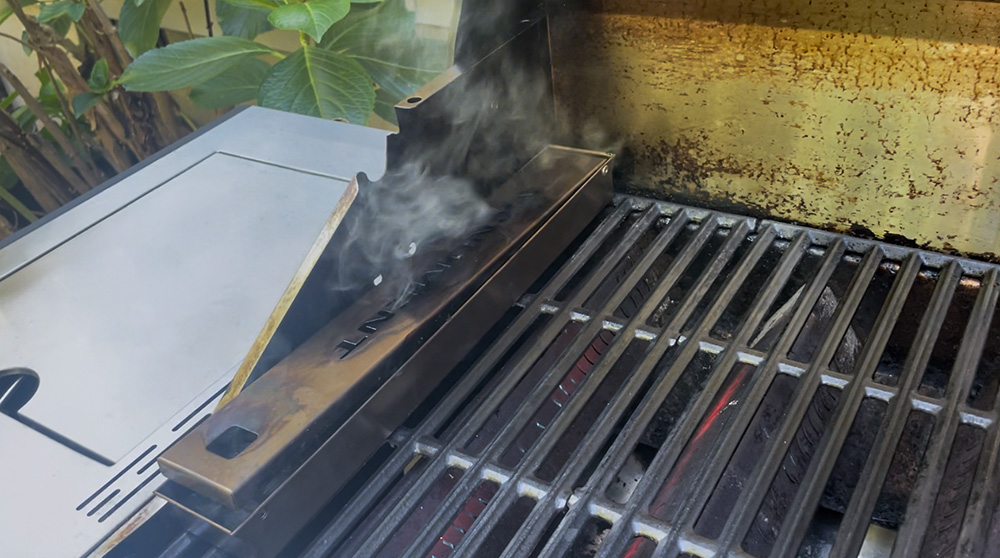
Monument Grills Smoker Box

After four hours, the internal temperature was approximately 142°F. An hour later, it had only climbed to 147°F.

That slow progression isn’t unusual with a large piece of beef. Evaporative cooling can slow the rise in internal temperature, a phenomenon barbecue enthusiasts know as the stall. And personally, it drove me crazy.

By this point, the chuck roast had spent around five hours in the smoke, developing its bark and smoke flavor.

Rather than continuing to smoke the beef uncovered, I moved to the next stage: a covered finish to help tenderize the meat.
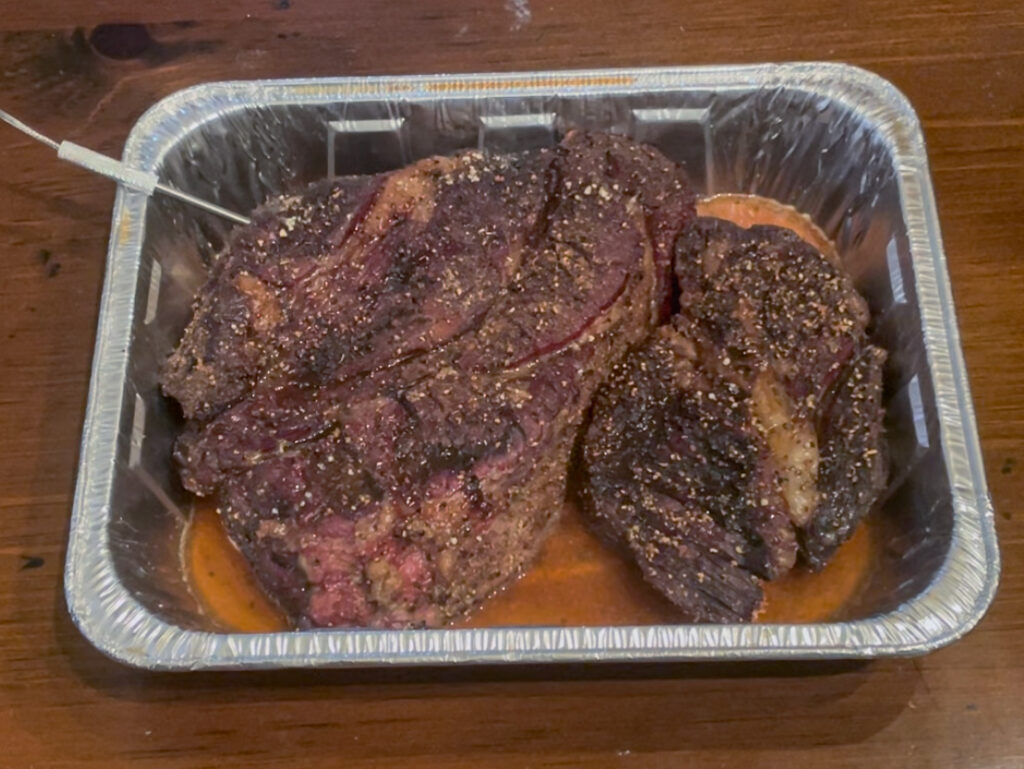
Chuck Roast in Pan

Finishing the Chuck Roast

Once the smoking stage was complete, I transferred the roast to a foil pan with beef broth, Worcestershire sauce, minced garlic, and onion powder.

I covered the pan tightly to retain moisture and moved it to the oven to finish. That’s a little tip I picked up from barbecuebible.com editor Nancy Loseke: Once the grill has done its job developing the smoke flavor and bark, there’s no need to keep burning propane—unless you want to. Your oven can take it from there.

The purpose of this stage is to help break down the connective tissue while keeping the meat moist. The liquid also collects beef juices that can be used later when preparing the sliders.

After more than eight hours of total grilling and finishing time, the chuck roast reached approximately 205°F internally.

Here’s something worth emphasizing: Internal temperature alone doesn’t guarantee tender beef.

Although the roast had reached the temperature normally associated with shreddable chuck, it wasn’t quite as tender as I had hoped. One section pulled apart relatively easily, while the larger portion still offered a little resistance.
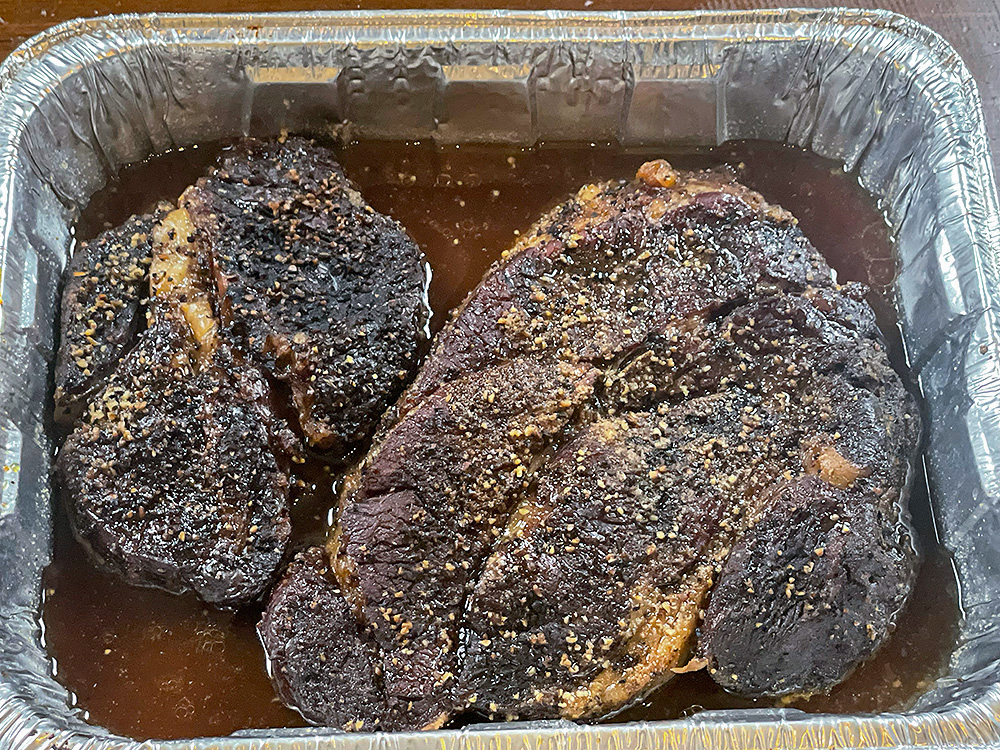
Chuck Roast

Since it was getting late, it was time for Plan B. I decided to chop the meat instead.

And that proved excellent for sliders.

If you’re aiming for fully shredded beef, you have to keep cooking until a temperature probe or skewer slides into the thickest part with very little resistance. That final tenderness test is more important than reaching a particular temperature on the thermometer.

Building the Smoked Chuck Roast BBQ Sliders

With the beef rested and chopped, it was time to assemble the sliders.

I mixed some of the chopped smoked chuck roast with barbecue sauce, using just enough to coat the beef without overpowering the smoke flavor. You can use any barbecue sauce you like, including Steven’s Chipotle Molasses Barbecue Sauce. Personally, I prefer a sauce with less sugar for health reasons. I’m partial to Stubb’s Simply Sweet Reduced Sugar BBQ Sauce.
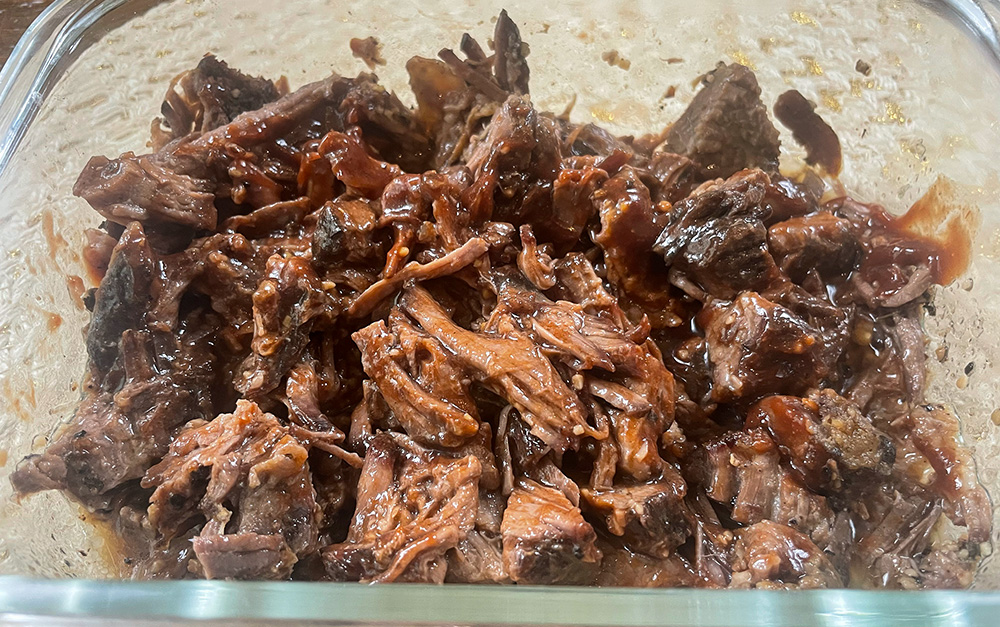
Chuck Roast Chopped with Barbecue Sauce

For the sandwiches, I kept it simple: Hawaiian slider rolls, smoked BBQ beef, and provolone cheese. The sweetness of the rolls worked nicely with the smoky beef and barbecue sauce.

These sliders are ideal for tailgating because you can prepare the beef the day before the game. Save some of the juices from the covered finishing stage to keep the meat moist when reheating.

On game day, simply reheat the beef until hot, toast the slider rolls, add the provolone, and assemble the sandwiches.

Smoked Chuck Roast BBQ Sliders for Game Day

The finished sliders were fantastic. The smoky beef, barbecue sauce, melted provolone, and sweetness of the Hawaiian rolls made a spectacular sandwich!

The Monument Denali 605Pro did a great job smoking the chuck roast. Paired with the Monument smoker box, it gave the beef plenty of smoke flavor and developed a nice bark, all on a gas grill.

Not bad for a tailgate sandwich!
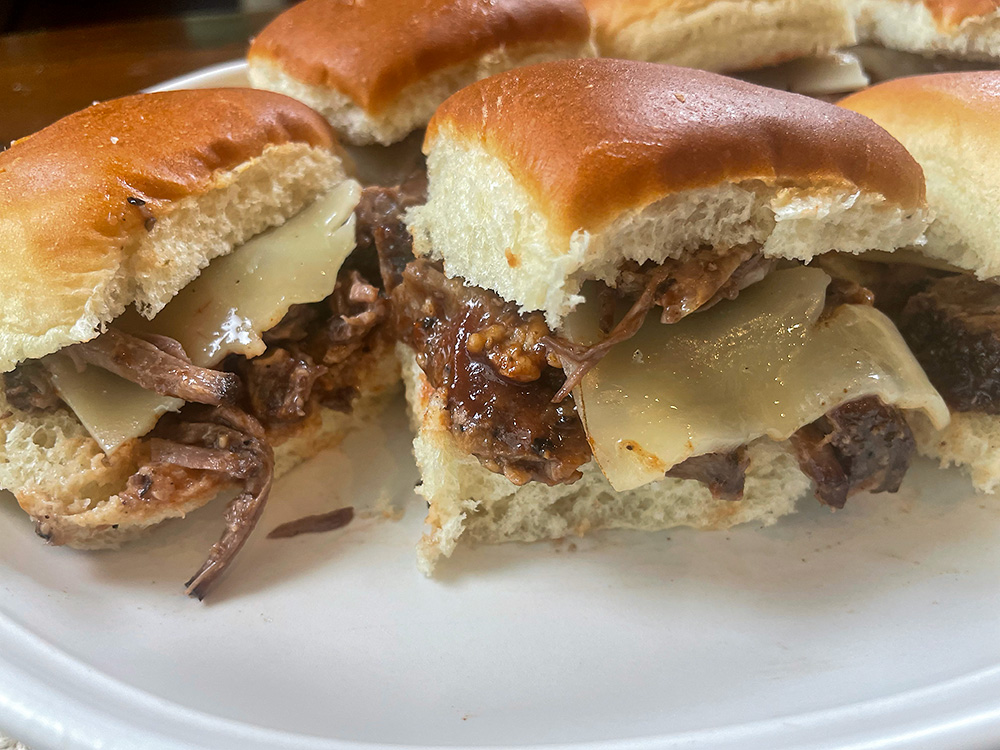
Chuck Roast Sliders

Recipe

Smoked Chuck Roast BBQ Sliders

Smoked chuck roast, chopped or shredded and tossed with barbecue sauce, served on Hawaiian slider rolls with melted provolone cheese.

Yield: Approximately 16–20 sliders (estimated)

Method: Indirect smoking

Equipment: Gas grill, smoker box, meat thermometer, disposable foil pan, aluminum foil

Ingredients

For the smoked chuck roast:

  • 1 boneless beef chuck roast (approximately 4 1/2 pounds)
  • Steven Raichlen’s Texas Brisket Rub (or your favorite barbecue rub), enough to generously season the roast
  • Wood chips, for smoking
  • 1 cup beef broth
  • 2 tablespoons Worcestershire sauce
  • 1 tablespoon jarred minced garlic
  • 1 teaspoon onion powder

For the sliders:

  • 16–20 Hawaiian slider rolls
  • Your favorite barbecue sauce, to taste
  • Sliced provolone cheese, enough for each slider

Instructions

  1. Season the beef: Generously season the chuck roast on all sides with Steven Raichlen’s Texas Brisket Rub.
  2. Set up the grill: Prepare the gas grill for indirect smoking at approximately 250°F. Fill the smoker box with wood chips and position it over an active burner according to the manufacturer’s instructions.
  3. Smoke the chuck roast: Place the roast over indirect heat and close the lid. Maintain a grill temperature near 250°F, replenishing the wood chips as needed. Smoke until the roast develops a dark bark and reaches an internal temperature of approximately 165°F.
  4. Cover the roast: Transfer the chuck roast to a disposable foil pan. Add the beef broth, Worcestershire sauce, minced garlic, and onion powder. Cover the pan tightly with aluminum foil.
  5. Finish the roast: Return the covered pan to the grill over indirect heat. Continue smoking at approximately 250°F. When the internal temperature reaches 205°F, begin checking for tenderness. The beef is ready when a temperature probe or skewer slides into the thickest part with very little resistance.
  6. Rest and chop: Remove the roast from the grill and let it rest for 20–30 minutes. Chop or shred the beef, reserving some of the pan juices.
  7. Add the barbecue sauce: Toss the beef with enough barbecue sauce to coat it. Add a little reserved pan liquid if needed to keep the meat moist.
  8. Prepare the slider rolls: Split the Hawaiian slider rolls and lightly toast them on the grill. Place a portion of BBQ beef on each bottom bun and top with provolone cheese. Warm briefly until the cheese melts.
  9. Assemble and serve: Replace the top buns and serve warm.

Make-Ahead Tailgating Tip

Prepare the smoked chuck roast the day before the game. Refrigerate the chopped or shredded beef with some of the reserved pan juices in a covered container. On game day, reheat the beef thoroughly to 165°F, adding reserved liquid as needed to keep it moist. Toss with barbecue sauce and assemble the sliders shortly before serving.

A big thank you to Monument Grills for sponsoring this post.

Plan your next cook with our full recipe collection—weeknight grills, weekend projects, and special-occasion feasts.

Get Steven’s weekly grilling tips, seasonal recipes, and live-fire ideas in your inbox. Join our Up in Smoke newsletter. Sign up and get a FREE PDF of Steven Raichlen's Best Ribs Recipes Ebook.

Preorder Man On Fire — A Steven Raichlen Memoir. And get some really cool rewards!

Looking to upgrade your tailgating setup? Check out our Tailgating Essentials.

The post Big Beef Flavor, Little Buns: <br />Smoked Chuck Roast Sliders appeared first on Barbecuebible.com.

Back to Basics: A Labor Day Feast Without the Labor!

By Steven Raichlen

Labor Day already? It seems like summer just began. I hope you’ve been grilling as much as I have this summer. For Labor Day this year, I propose something different.

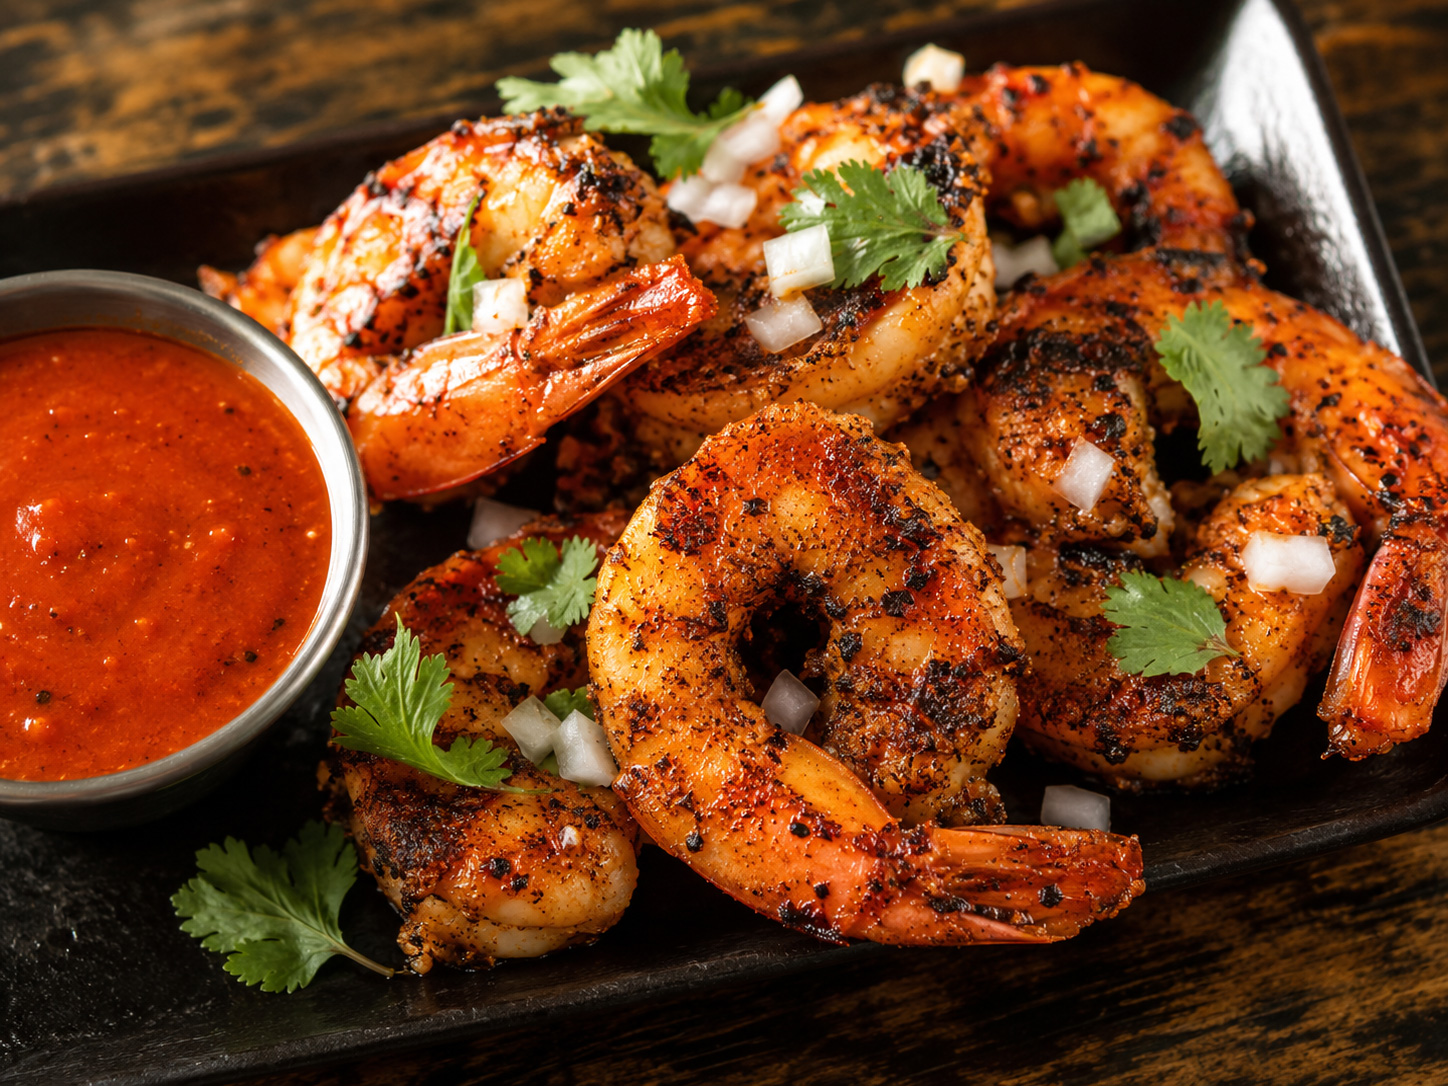
This Labor Day, we’re planning a feast that’s the opposite of labor intensive, and we’re firing up the griddle to cook it. We start with a Raichlen twist on classic shrimp cocktail—spice blackened shrimp with chipotle tequila cocktail sauce.

Wildfire Banner

For the main course, we’re taking a page from the Philadelphia playbook: cheesesteak. But not just any cheesesteak. No, we’re making this one with thinly sliced rib-eyes. (Of course, you can use the more traditional top or bottom round.) And to crank up the heat, we’ll use poblano chiles instead of bell peppers. For mushrooms, you can’t beat the elegance of shiitakes.

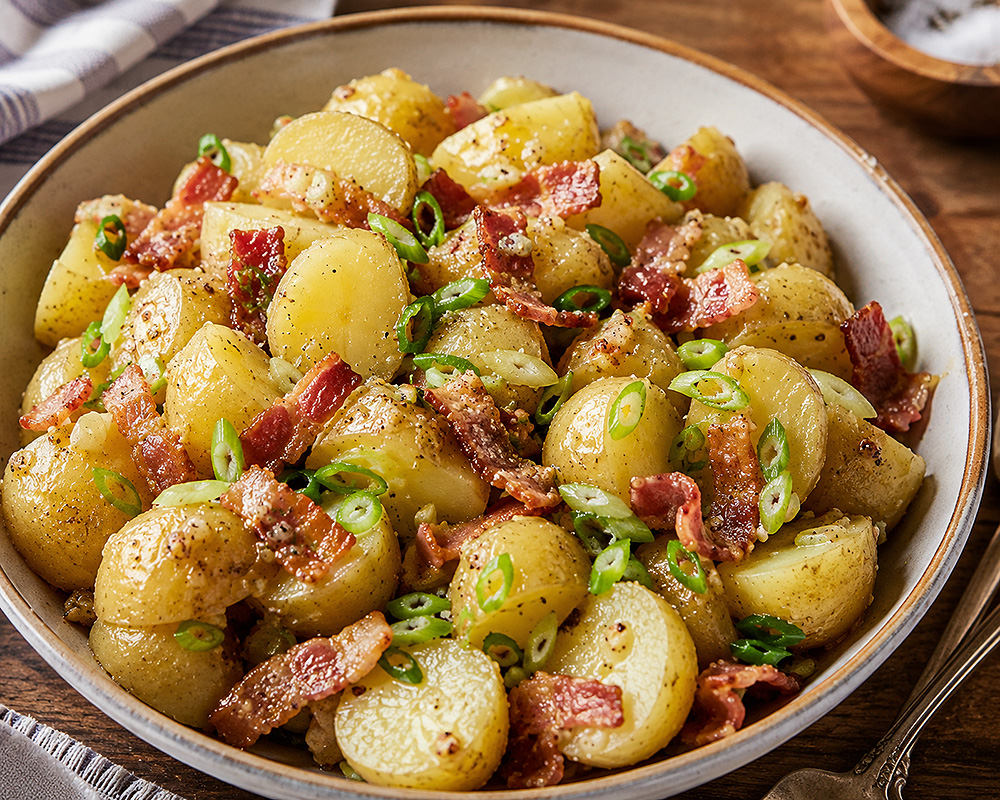
Our side dish is—you guessed it—potato salad, but, oh, what potato salad. German-style potato salad enhanced with griddled onion, capers, and bacon.

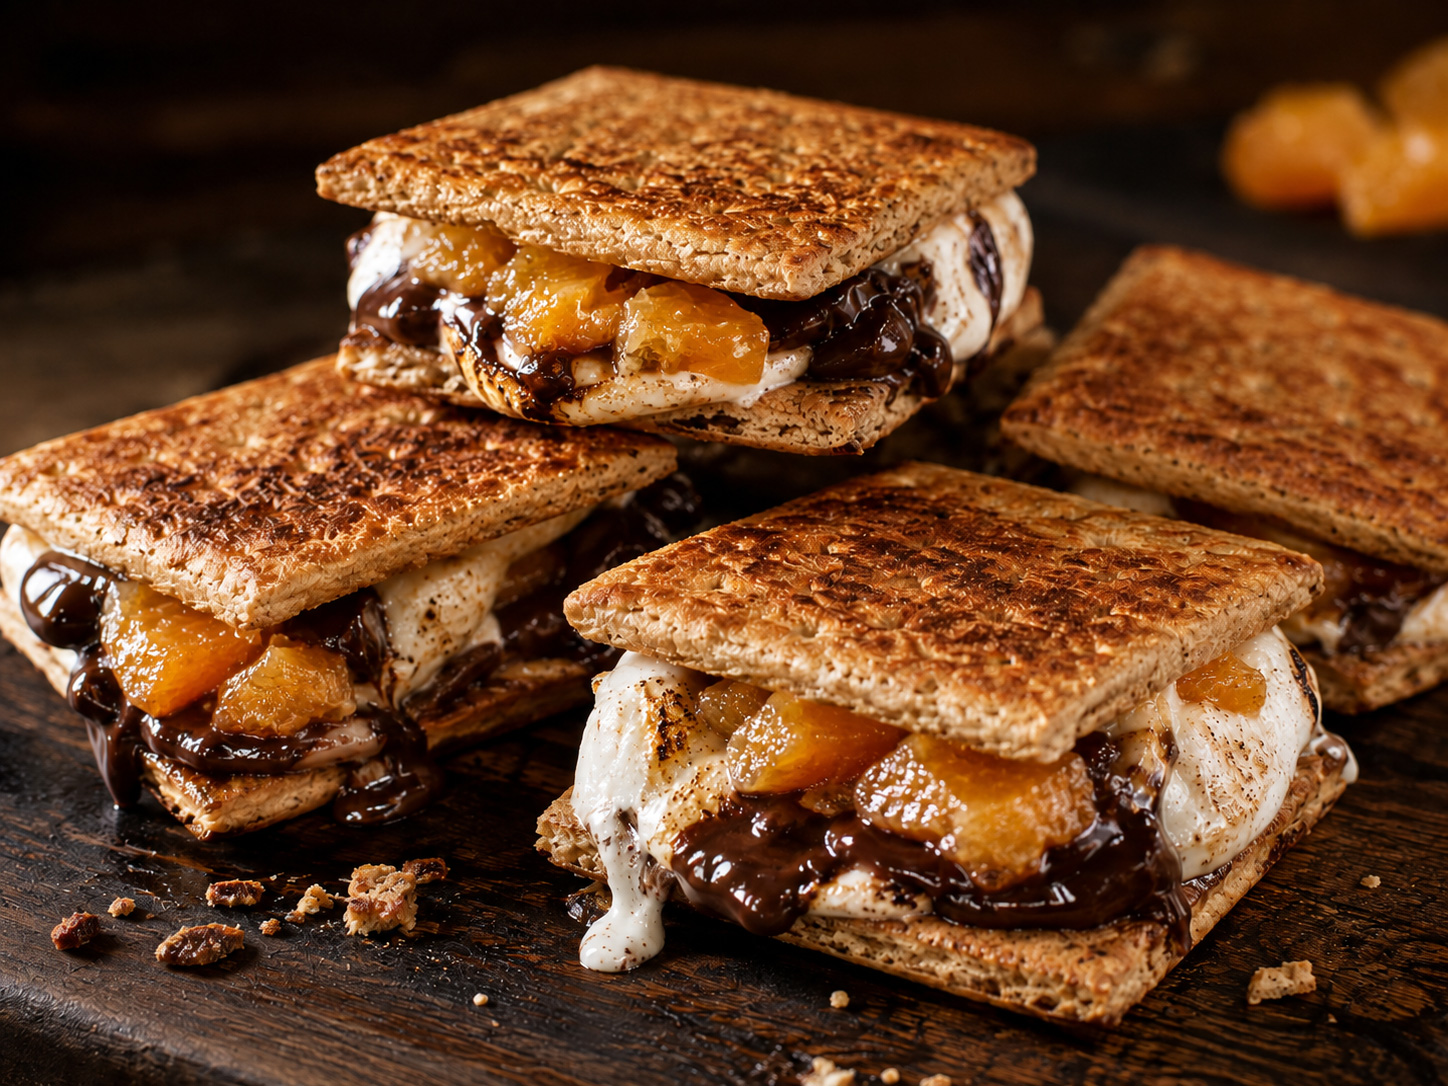
And for dessert? That campfire classic, s’mores, only for these, you don’t need a campfire. You don’t even need a grill. The secret, deconstruct and reconstruct the classic s’more into a sandwich: 2 graham crackers sandwiched with marshmallow and bittersweet chocolate. The Raichlen touch? A slice of candied orange. You’ll crisp the whole shebang on the griddle. Who says s’mores are only for kids?

Finally, to wash it all down? One of my favorite cocktails: the smoky mezcalini. Think margarita meets mojito and don’t think of Labor Day without it.

Happy Labor Day everyone! Don’t work too hard as you celebrate.

The BarbecueBible.com Labor Day Menu

Wildfire Outdoor Living is an Arizona-based company specializing in high-performance gas grills and premium outdoor kitchen solutions. Wildfire brings a commitment to cutting-edge technology and industry-leading innovation. Their 304 stainless steel design and illuminated LED knobs, cast stainless steel burners, and laser-cut stainless steel cooking grates create products that will provide peak performance. They also allow you to customize your outdoor kitchen with designer finish knobs and handles to meet the growing demand for designer outdoor kitchens.

Plan your next cook with our full recipe collection—weeknight grills, weekend projects, and special-occasion feasts.

Get Steven’s weekly grilling tips, seasonal recipes, and live-fire ideas in your inbox. Join our Up in Smoke newsletter. Sign up and get a FREE PDF of Steven Raichlen's Best Ribs Recipes Ebook.

Preorder Man On Fire — A Steven Raichlen Memoir. And get some really cool rewards!

Looking for some fall grilling inspiration? Check out our Fall Grilling Guide.

The post Back to Basics:<br /> A Labor Day Feast Without the Labor! appeared first on Barbecuebible.com.

❌