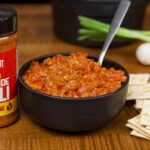
When chili season rolls around, you can’t beat a big pot of homemade chili. This is my quick and easy chili recipe, and it’s about as simple as it gets.
I like to use ground beef and breakfast sausage together because the sausage adds a little extra seasoning and gives the chili a richer flavor.
Once the meat is browned, everything goes in the pot to simmer until all those flavors come together. You don’t have to spend all day in the kitchen to make a good pot of chili, and I think the leftovers taste even better the next day.
This easy homemade chili recipe is thick, hearty, and full of rich, savory flavor with just the right amount of spice. It’s simple to make and perfect for those nights when you’re craving a big bowl of delicious chili.
I’ve cooked baby back ribs just about every way you can cook them. Different smokers, different seasonings, different sauces… and there’s really no one right way to do it. You can take just about any good rib recipe and make some great ribs.
What makes the biggest difference is knowing what to look for along the way.
It starts with picking out a good rack and trimming it up so it cooks evenly. Then you gotta know when the bark is set and the ribs are ready to wrap, what tender ribs should actually feel like, and when it’s time to get them off the pit. And one of the biggest things I’ve learned is to give ribs a good hold once they’re tender. That little bit of time lets everything settle down before you put on the final glaze.
For these ribs, I’m using Tyson Baby Back Ribs from Walmart and keeping the flavors pretty simple. But that’s really the point. Change the seasoning, change the sauce, cook them on whatever smoker you’ve got. If you pay attention to these little things during the cook, you’ll get tender, juicy ribs with that beautiful mahogany finish every time.
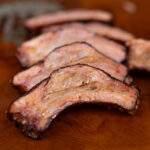
These baby back ribs are smoked at 275°F until the bark is set, wrapped until tender, then given a proper hold before finishing with a final glaze. It’s the little things along the way that give you tender, juicy ribs with a beautiful mahogany finish.
Ingredients
2 racks Tyson Tender & Juicy Extra Meaty Fresh Pork Baby Back Ribs
Remove the membrane from the back of each rack. Square up the ends and trim away any loose fat or anything that doesn’t look like it will cook up appetizing. Squaring up the rack makes the finished ribs look better, and those thin ends tend to dry out during the cook anyway.
SEASON THE RIBS
Apply a medium-heavy coat of Killer Hogs The BBQ Rub to both sides of the ribs. No binder is needed.
SMOKE AT 275°F
Any smoker will work. Cook the ribs for about 2–2½ hours, but don’t go strictly by time. You’re looking for the rub to fuse into the meat and form a good-looking bark. That’s when they’re ready to wrap.
MAKE THE WRAP MIXTURE
Combine the melted butter, apple juice, ¼ cup Killer Hogs The BBQ sauce and 1–2 Tablespoons of Killer Hogs The BBQ Rub.
WRAP THE RIBS
Place each rack meat-side down on a sheet of foil. Pour half of the wrap mixture over each rack. Fold the foil over the ribs and tuck in the ends to seal.
COOK UNTIL TENDER
Return the wrapped ribs to the smoker. After about 1½ hours, start checking for tenderness. The ribs should feel very flexible through the foil, you should see some disintegration around the bones, and the internal temperature should be around 204–208°F.
VENT AND HOLD
Open the foil and allow the steam to escape, then wrap the ribs back up and place them in a dry cooler for 1 hour.
Burp the cooler about every 15 minutes to release excess heat and steam. This gives the meat a chance to calm down and reabsorb some of the liquid from the wrap.
GLAZE & SET
Remove the ribs from the foil. Brush the bottom and top with a layer of Killer Hogs The BBQ Sauce and finish with a light dusting of Killer Hogs The BBQ Rub.
Return the ribs to the smoker for 15–20 minutes, just long enough for the sauce to caramelize and set.
Notes
Picking a good rack: When I’m buying Tyson Baby Back Ribs, I look for racks that are as even as possible, with straight bones and a tight vacuum seal. Starting with a good, uniform slab helps the ribs cook more evenly.
Don’t cook by the clock alone: The times are a guide. Look at the bark before wrapping and use the feel of the ribs, the bones and internal temperature to determine when they’re tender.
Make the wrap your own: Butter, apple juice and BBQ sauce is the combination used here, but the wrap can be changed to suit the flavor you want. Think about adding some combination of fat, sweet, vinegar and heat. Whatever you use, adding a little more of your original seasoning to the wrap helps reinforce the flavor you started with.
Don’t skip the hold: Giving the ribs an hour in a dry cooler after they’re tender lets them settle down and reabsorb some of that flavorful liquid before the final glaze.

 Login

 Print Recipe
 Pin Recipe