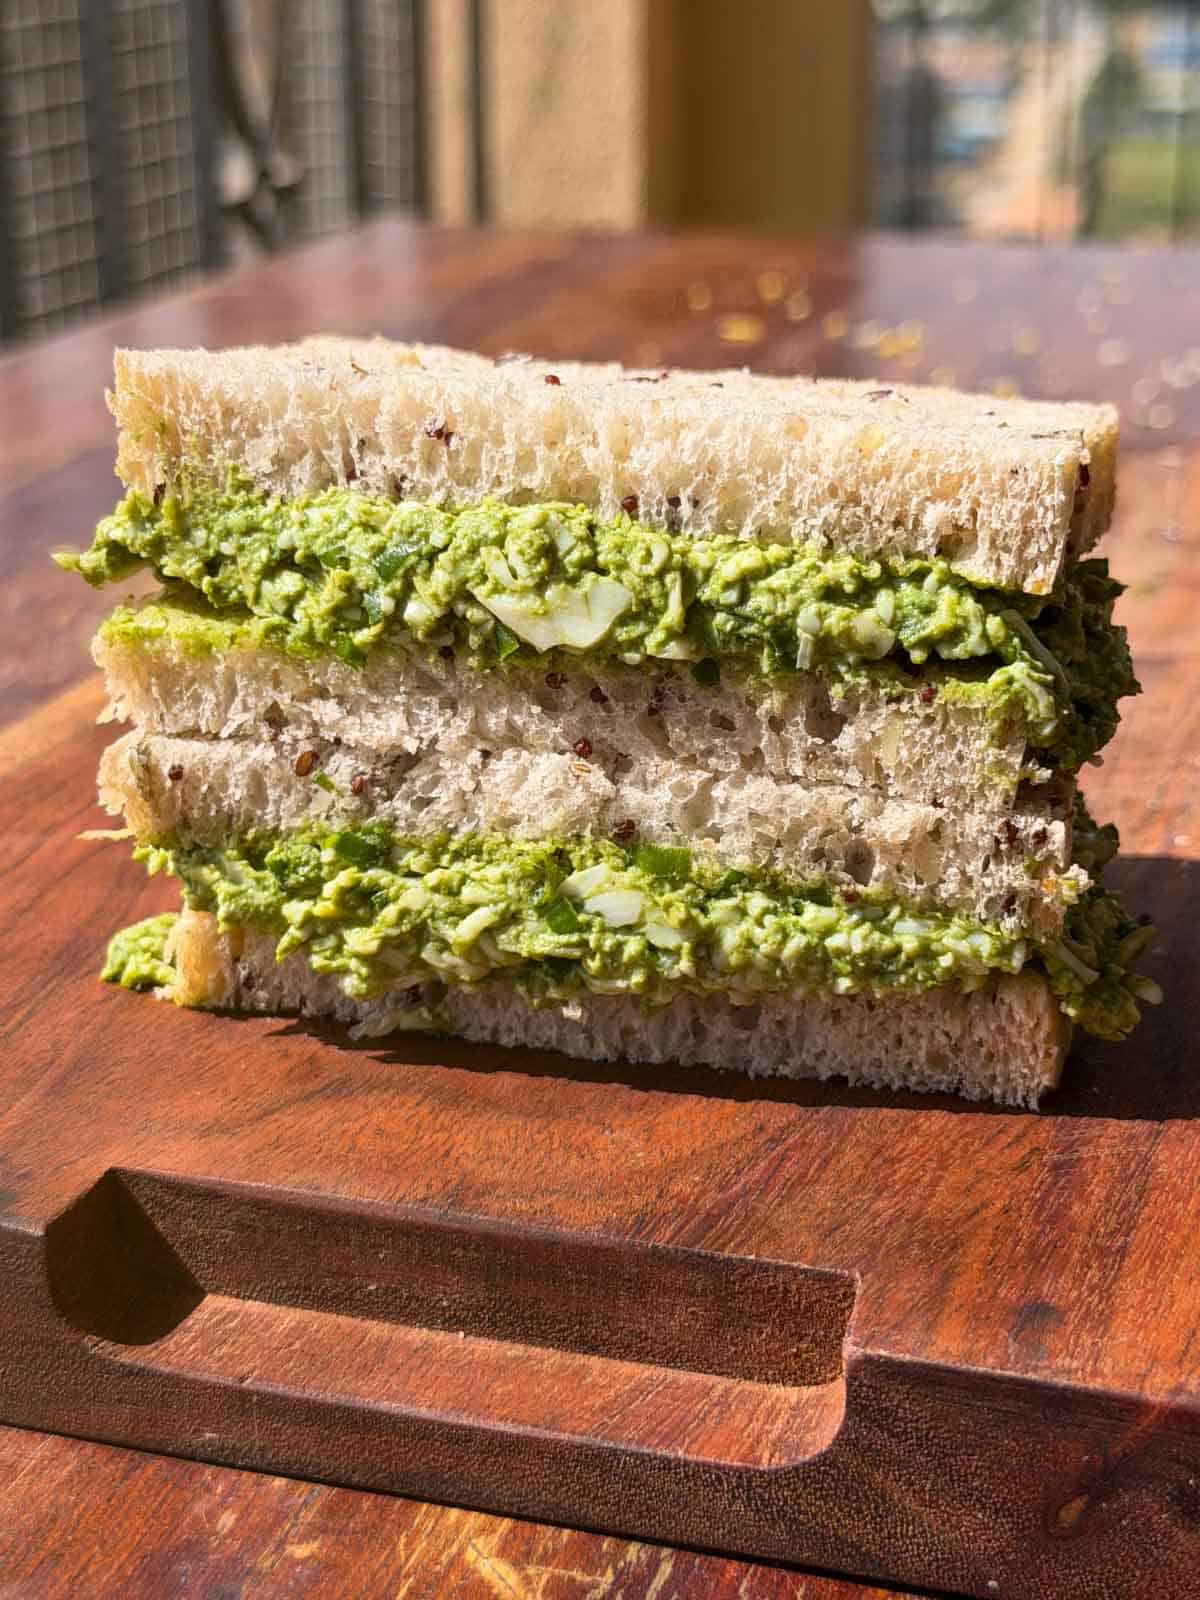
❌

Reading view

There are new articles available, click to refresh the page.

Masala Egg Roll Ready in 20 Minutes

If you’ve got eggs and some parathas at home, making these Masala Egg Rolls takes just  20 minutes. The secret ingredient is sambar powder gives the eggs a smoky, tangy flavor  that you won’t find in any regular egg roll.
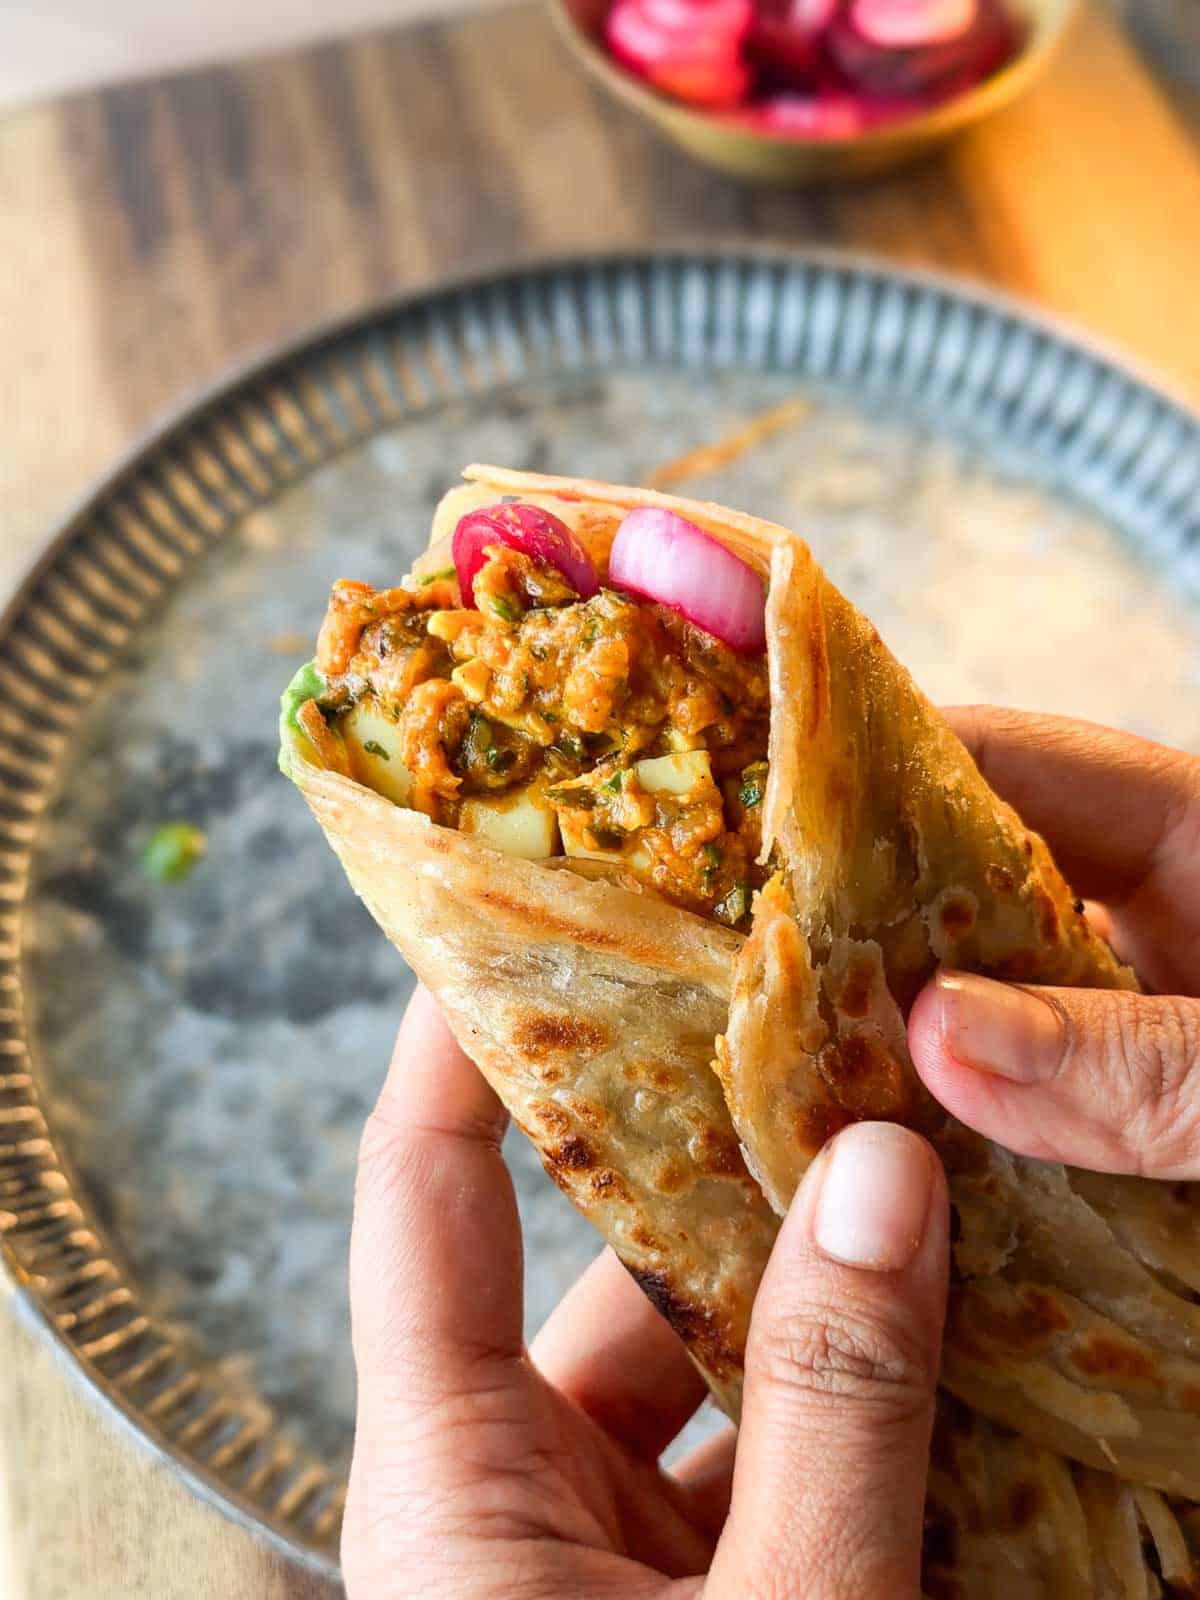
a person holding an assembled masala egg  roll

This Masala Egg Roll recipe is nothing like the deep-fried versions you see online. It’s a completely homemade, paratha-wrapped version that takes about 20 minutes of your time. The spiced egg masala layered inside a warm, flaky paratha with mint chutney and quick pickled onions makes for a very delicious to-go snack, and my family loves it so much that we make it almost every week.

The beauty of this recipe is that it works with whatever you have. Frozen laccha parathas, homemade rotis, leftover chapatis, all of them work. The sambar flavor-infused egg masala is the star of the dish, and it comes together really quickly, so even on your busiest evenings, this is very doable.

Ingredients for Masala Egg Rolls

  • Eggs: Boiled and chopped into small cubes so they absorb the masala evenly.
  • Sambar Powder: This is what makes the egg masala taste so different from a regular egg curry. It adds a smoky, tangy depth that cumin-coriander-based masalas can’t match. 
  • Aromatics: Cumin seeds, ginger, garlic, curry leaves, and green chillies. 
  • Onions & Tomatoes: Finely chopped onions and pureed tomatoes form the masala base. Pureeing the tomatoes helps them cook down faster and gives the masala a smoother consistency.
  • Parathas: I’ve used frozen lacchha parathas that I meal-prepped over the weekend.  Homemade rotis, leftover chapatis, or even lachha paratha made from scratch all work too.
  • Mint Chutney: The freshness of the mint against the warm, spicy eggs makes every bite so addictive. 
  • Pickled Onions: Quick pickled with beetroot, lemon juice, salt, and a pinch of sugar. 
  • Coriander Leaves: Mixed into the masala and also used as garnish inside the roll.
  • Oil: Groundnut or any neutral cooking oil.

Richa’s Top Tips

  • Cook the tomato masala properly before adding the eggs. The tomato puree needs a good 2-3 minutes on low heat until the rawness goes and the oil starts separating. If you add the eggs too early, the masala will taste raw and acidic.
  • Don’t overcook the eggs in the masala. They only need 1-2 minutes to absorb the flavours. Any longer and they start releasing water and the masala becomes thin.
  • Fry the parathas with a little ghee for the best result. Whether you’re using frozen or homemade, a few drops of ghee while frying gives them that golden, crispy finish that holds up well when you roll them.
  • Make the pickled onions first. They need about 15 minutes to sit and develop flavour, so start with them before anything else. The beetroot in the pickle isn’t just for colour, it adds a subtle sweetness that works really well with the spicy egg masala.
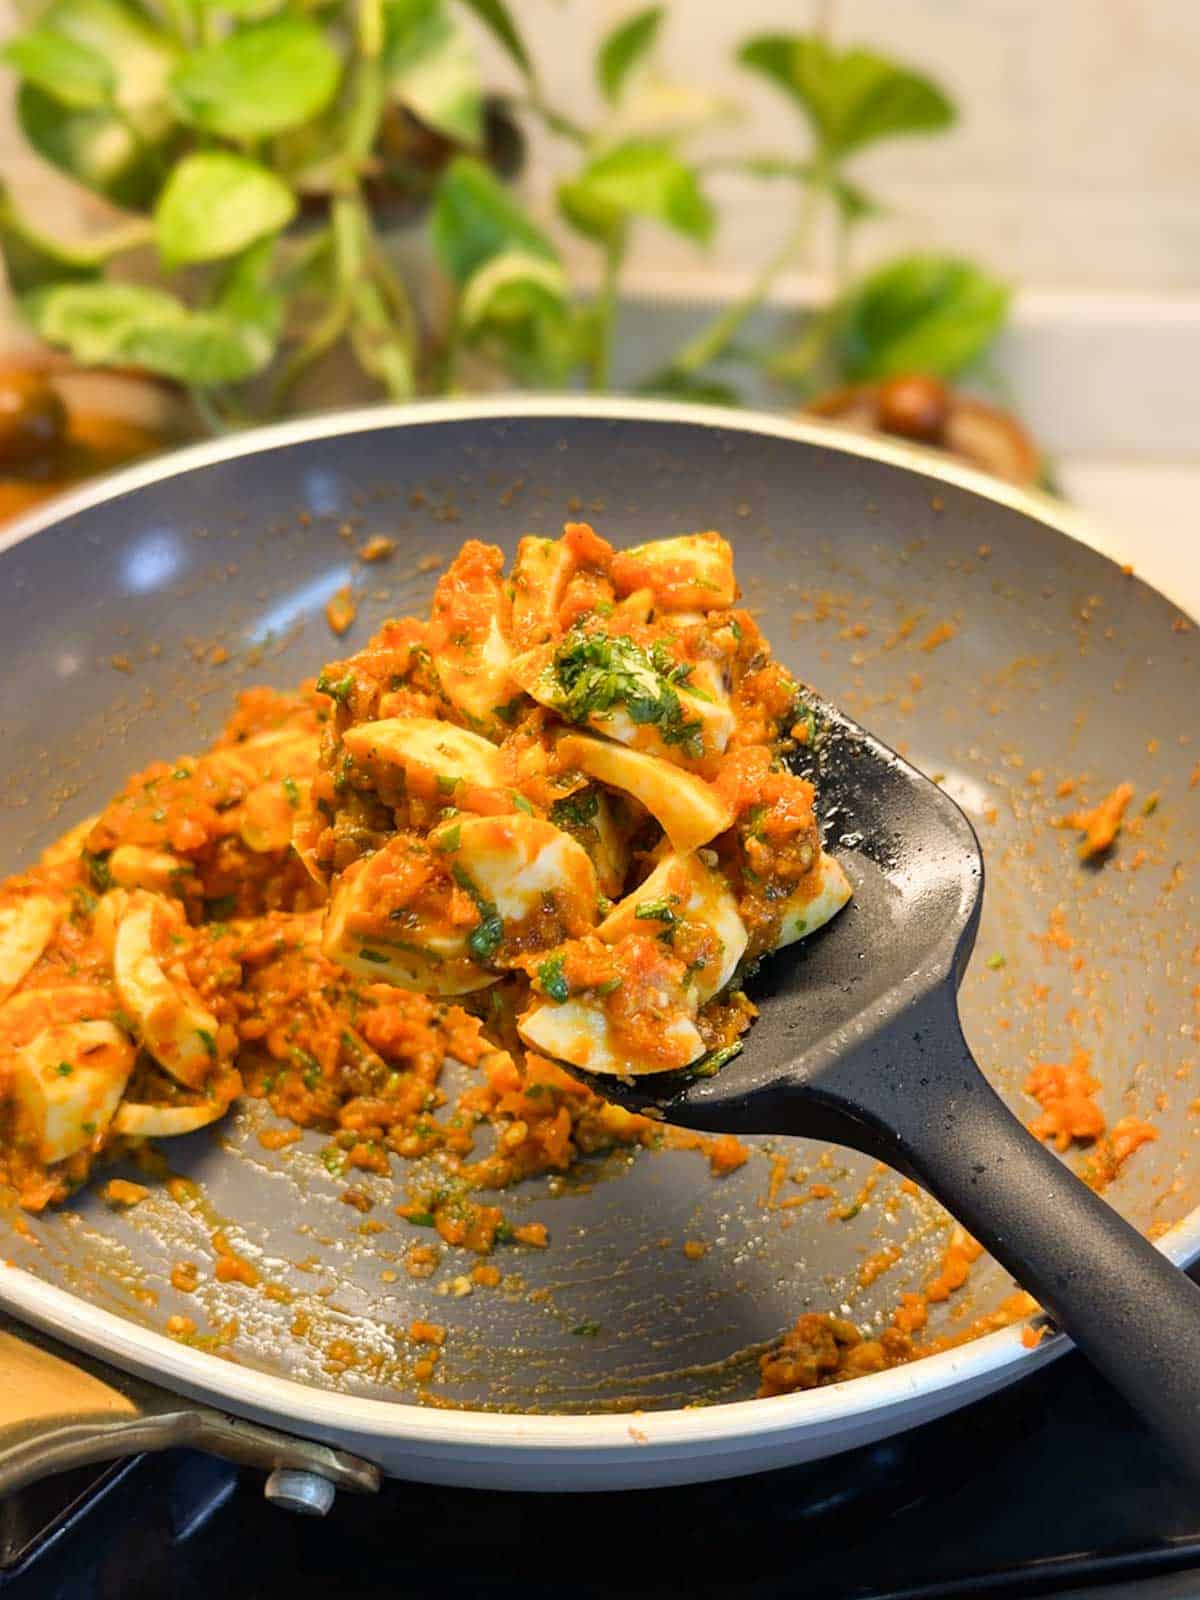
a bit of egg roll masala scooped up in a spoon to showcase it's texture and color

Frequently Asked Questions

Is masala egg roll the same as a Chinese egg roll?

No. Chinese egg rolls are deep-fried, with a thin wrapper and a filling of cabbage, vegetables, and sometimes meat. This masala egg roll is a completely different dish. It’s boiled eggs cooked in a spiced sambar masala, wrapped in a flaky paratha with mint chutney and pickled onions. No deep frying involved at all.

Can I use any other masala instead of sambar powder?

Sambar powder is what gives this recipe its unique flavour, so it’s worth using if you can. Rasam powder works as a milder substitute. Regular garam masala or meat masala will give you a good egg roll, but it won’t have that same smoky, tangy character.

Can I make the egg masala ahead of time?

Yes. The masala keeps well in the fridge for up to 2 days. When you’re ready to eat, just warm it up, fry your parathas, and assemble. This actually makes it an even faster meal on busy nights.

Can I use rotis or chapatis instead of laccha parathas?

Absolutely. Laccha parathas give you that flaky, layered texture which is great for rolls, but regular rotis, chapatis, or even naan work fine. Use whatever you have.

Do I have to make the pickled onions?

You don’t have to, but I’d really recommend it. The tangy crunch of the pickled onions against the warm, spicy egg masala and cool mint chutney is what makes every bite of this roll feel complete. 

Storage Tips

  • The egg masala: Stores well in an airtight container in the fridge for up to 2 days. Warm it up on the stove before assembling the rolls.
  • The pickled onions: Keep in the fridge for up to 3 days. They actually taste better the longer they sit.
  • The assembled roll: Best eaten immediately. Once assembled, the paratha absorbs moisture from the masala and chutney and goes soft pretty quickly. Always assemble right before eating.
  • The parathas: If using homemade, you can fry them and keep them warm wrapped in a kitchen towel until you’re ready to assemble. Don’t fry too far in advance or they’ll lose their crispiness.

Serving Ideas

This masala egg roll is a full meal on its own, but a couple of things on the side make it even better:

  • With Chaas: A cold glass of spiced buttermilk alongside a warm, spicy egg roll is the most refreshing combination.
  • With Masala Chai: If you’re having these as an evening snack, a hot cup of chai is really all you need on the side.
  • With a simple salad: Some sliced cucumber, tomatoes, and a squeeze of lemon keeps the meal light and fresh.

Customisation Ideas

  • Try a different masala: Swap the sambar powder for pav bhaji masala or garam masala for a completely different flavour profile. Each one gives the eggs a different character.
  • Add veggies to the masala: Finely chopped capsicum, peas, or corn mixed in with the eggs while the masala cooks adds colour and crunch to the filling.
  • Make it with paneer or chicken: Crumbled paneer or shredded cooked chicken in the sambar masala instead of eggs works just as well for a different version.
  • Use different chutneys: Swap the mint chutney for green coriander chutney or even thecha if you want a spicier, more rustic roll.
  • Make it cheese-loaded: Sprinkle some grated mozzarella or cheddar on the paratha before adding the egg masala. The melted cheese with the spicy eggs is really good.

Did You Know?

The colour of an egg yolk has nothing to do with its nutritional value. Darker, more orange yolks come from hens that eat a diet rich in carotenoids, like marigold petals, paprika, or leafy greens. Paler yellow yolks come from hens on a grain-heavy diet. Both have essentially the same protein, fat, and vitamin content. Egg producers know consumers associate darker yolks with quality, so some add marigold extract to chicken feed specifically to darken the yolk colour. Next time you crack an egg, the colour is telling you what the hen ate, not how nutritious the egg is. 
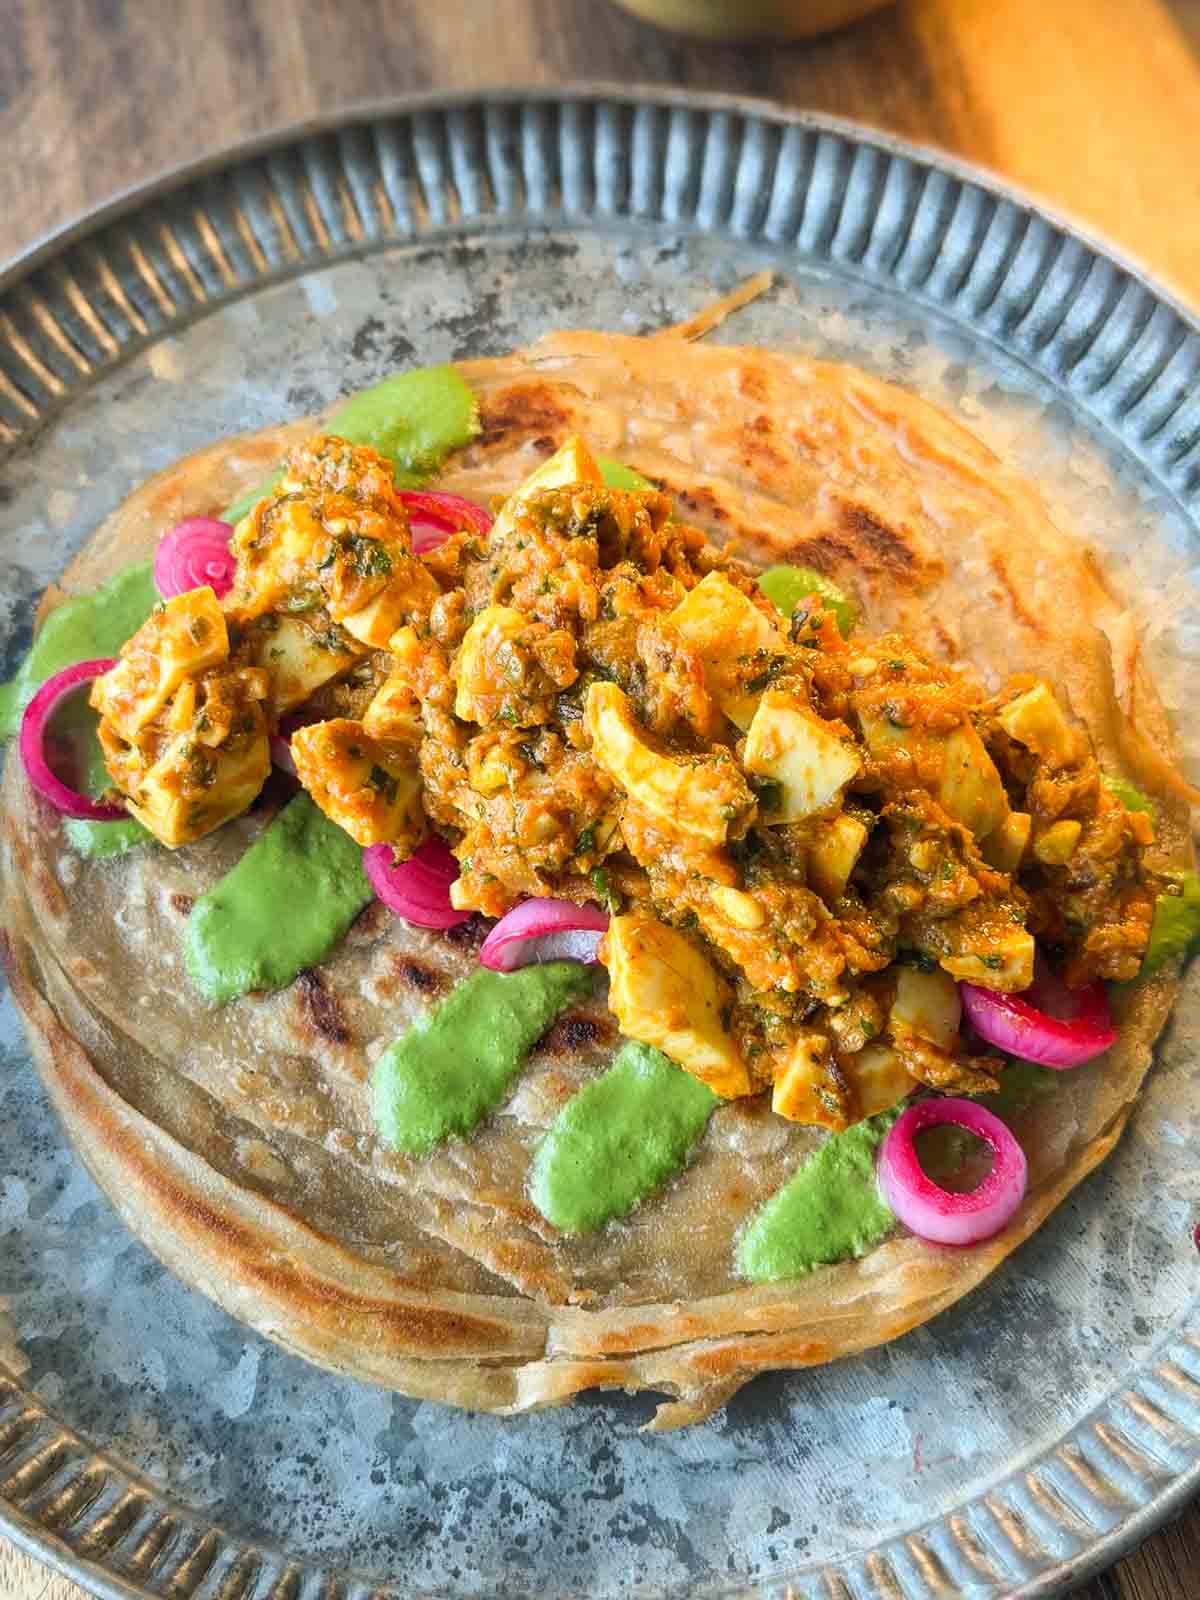
masala egg roll assembled on a plate ready to be folded and served

This masala egg roll deserves a spot in every Indian kitchen. It’s the perfect answer to those evenings when you want something warm, filling, and homemade without spending too long cooking. If the sambar powder in your pantry has only ever been used for sambar, give it a new job. When you try this, come find me on Instagram  @my_foodstory and tell me what you think. 

Watch Masala Egg Roll Recipe Video
a person holding an assembled masala egg roll
Print

Masala Egg Roll

These Masala Egg Rolls are ready in just 20 minutes and are the easiest way to have a delicious, hassle-free dinner ready on the table in just 20 minutes.
Course Main Course
Cuisine Indian
Diet Halal
Prep Time 15 minutes
Cook Time 5 minutes
Total Time 20 minutes
Servings 3 rolls
Calories 341kcal
Author Richa

Ingredients

  • 2 tablespoons groundnut or any neutral cooking oil
  • 1 teaspoon cumin seeds jeera
  • 1 teaspoon finely chopped ginger
  • 2 teaspoons finely chopped garlic
  • 2 sprigs curry leaves finely chopped
  • 2 green chillies finely chopped
  • 1 cup finely chopped onions
  • 2 medium tomatoes pureed
  • 2 ½ teaspoons sambar powder
  • ½ teaspoon salt
  • ½ cup water
  • 4 boiled eggs chopped into ¼ inch cubes
  • 2 tablespoons finely chopped coriander leaves

To serve

  • 3 frozen laccha parathas
  • 3 tablespoons mint chutney MFS link
  • ½ cup pickled onion rings refer notes
  • 2 teaspoons finely chopped coriander leaves

Instructions

  • Heat oil in a pan, add cumin seeds and once they crackle, add ginger, garlic, curry leaves, green chillies and saute on medium for a few seconds till fragrant.
  • Add onions and fry till they turn golden.
  • Add tomato puree, sambar powder, salt and cook on low for 2-3 minutes till the rawness of tomatoes goes. Add water, mix well and cook for 1-2 minutes on low till the gravy thickens.
  • Add chopped eggs, coriander leaves, mix well and cook for 1-2 minutes till the eggs absorb the masalas.
  • Heat a tawa or pan and fry all the parathas on either side with a few drops of ghee or oil till they are light golden and set aside.
  • Just before serving, take one fried paratha on a plate, spread mint chutney all over the paratha, add egg masala to the center, add a few onion rings, garnish with coriander leaves, wrap into a roll and serve. Follow the same steps to make rest of the egg masala rolls.

Video

Notes

  1. To make pickled onions: Add ½ cup of onion rings to a bowl, 3-4 slices of beetroot, juice of ½ lemon, ¼ teaspoon salt, a pinch of sugar, mix well, rest for 10-15 minutes and use.

Nutrition

Calories: 341kcal | Carbohydrates: 26g | Protein: 12g | Fat: 21g | Saturated Fat: 6g | Polyunsaturated Fat: 4g | Monounsaturated Fat: 7g | Cholesterol: 249mg | Sodium: 1092mg | Potassium: 407mg | Fiber: 5g | Sugar: 7g | Vitamin A: 1530IU | Vitamin C: 36mg | Calcium: 94mg | Iron: 2mg

This article was researched and written by Harita Odedra.

The post Masala Egg Roll Ready in 20 Minutes appeared first on My Food Story.

Healthy Lemon Dill Potato Salad (No Mayo)

This healthy lemon dill potato salad is a healthier version of the heavy duty mayo laden potato salad recipes. Its super light and refreshing and absolutely perfect to serve at a barbecue dinner.

Healthy Lemon Dill Potato Salad (no mayo) served in a white speckled bowl with lemon wedges

While I love indulging in the classic mayo laden, creamy potato salads, this lighter and healthier version has my heart right now. It’s so easy and refreshing to put together. The combination of dill and lemon is classic and the potatoes really soak up the dressing, so that they aren’t bland or boring!

I love serving this with my chicken tikkas or mutton curries as a refreshing side to balance the out the meatiness with some carbs. But honestly, you could add it to sandwiches, wraps, or even serve along with a stir-fry for a side dish that’s going to be a memorable event.

Ingredients Lemon Dill Potato Salad

Picture of all the ingredients for healthy lemony potato dill saladwith text to identify them
  • Baby Potato: The hero ingredient of this salad soaks in all the dressing. The starch in the potatoes adds a creamy texture to the salad
  • Dill leaves: The sharpness from the dill leaves pairs perfectly with the lemony and pungent taste of the onions. It balances out the creaminess of the potato as well
  • Olive Oil: Extra virgin olive oil is light and has a neutral flavor which makes it the best base for the dressing of this potato salad
  • Lemon: We add both fresh lemon juice and lemon zest for that fresh lemon flavor, zing, and aroma
  • Seasoning: Salt and sugar season the dressing and help balance the tang and brightness of the lemon
  • Dijon Mustard: for emulsification and that extra tang
  • Black pepper: Freshly ground black pepper for a subtle kick of heat
  • Spring Onions and Garlic: These aromatics give a pungent and herby flavour to the salad

Best Potatoes For This Salad

If you have an option, the best potatoes for a potato salad are waxy potatoes like Yukon Gold or Red Potatoes. I picked up a pack of baby potatoes, because thats whats available in India and they are not very starchy. So they hold their shape and don’t disintegrate when tossed around in the dressing.

Frequently Asked Questions

Which are the best potatoes for this salad?

If you have an option, the best potatoes for a potato salad are waxy potatoes like Yukon Gold or Red Potatoes. I picked up a pack of baby potatoes, because thats whats available in India and they are not very starchy. So they hold their shape and don’t disintegrate when tossed around in the dressing.

Can I use regular potatoes instead of baby potatoes?

Yes, absolutely. Baby potatoes tend to be less waxy hence they work really well in this salad. But you can definitely use regular potatoes too. Just make sure to cook them slightly under so they don’t disintegrate into the salad.

How do I stop the potatoes from becoming mushy?

Make sure to cook the potatoes only until they are fork tender. Which means you should easily be able to insert a knife or fork into the potato without it falling apart completely. This is essential to making sure that the potatoes stay firm and don’t become mushy.

Can I use dried dill instead of fresh?

Yes, you can use dried dill instead of fresh dill, although fresh dill gives the salad a brighter, more delicate flavour. Since dried herbs are more concentrated, use about 1 tablespoon dried dill in place of the ¼ cup fresh dill called for in the recipe.

How to Make Lemon Dill Potato Salad

Step by step picture collage showing how to make healthy lemon dill potato salad

1. Add all the dressing ingredients for the dressing in a bowl and whisk till combined.

2. Cut the potatoes in half leaving the skin on, and place them in a pot. Add enough water to submerge them completely. Add 1 teaspoon salt and bring to a boil. Cover and simmer for 15-20 minutes or until fork tender. Drain the water from the potatoes and place the potatoes in a large bowl.

3. Add the prepared dressing to the potatoes while warm and mix to combine.

4. Add dill and spring onions to the bowl with the potatoes toss well and let this salad sit for at least 10 minutes before serving to let the potatoes soak up the liquid.

Richa’s Top Tips

  • Season the water well while boiling potatoes. This ensures the potatoes don’t end up feeling bland in the salad.
  • Dress the salad while it’s still warm. This helps them soak the dressing up, which means you have MORE FLAVOUR in each bite.
  • Make this salad the day before. This salad is sooo good when its made a day early because that really helps develop the flavours and mellows the salad down from being extra lemony. I like to warm it up in the microwave (warm, not reheat), so that the dressing isn’t waxy and melts down before serving.
  • Cook the potatoes until they’re fork tender. Overcooking the potatoes will prevent them from holding shape and give you a soggy and messy salad.

Storage Tips

  • Fridge: This salad is super make-ahead friendly. You can either make it in advance or store leftovers in the fridge for up to 3 days. The flavors deepen as it sits, so making it ahead will actually mean a more flavorful salad.
  • Reheat: Gently warm (not reheat) this healthy potato salad in the microwave and sprinkle a bit of fresh dill and spring onion greens before serving for a boost of fresh flavors.
  • Freeze: I would not recommend freezing this salad as the potatoes become waxy and lose their texture after thawing.

Serving Ideas

  • This lemon dill potato salad is light, fresh and tangy, so it works especially well alongside grilled, roasted or air-fried mains. Serve it with air fryer chicken tikka, soy chicken wings or chicken seekh kebabs for an easy dinner or party spread.
  • For a vegetarian meal, pair it with crispy chili tofu, tandoori paneer tikka or a simple vegetable stir-fry.
  • It also makes a great side for sandwiches, burgers and wraps when you want something a little fresher than fries.
  • And if you’re putting together a bigger spread, this salad fits right in with grilled meats, barbecue dishes and other summer-style sides. I especially love serving it slightly chilled but not straight-from-the-fridge cold, so you can really taste all that lemon, dill and mustard.

Customisation Ideas

  • Add some crunch: Finely chopped celery, cucumber, radishes or red onions would add a lovely fresh crunch to the soft potatoes.
  • Make it creamy: A couple tablespoons of greek yogurt or mayonnaise in the dressing gives this lemon dill potato salad a lovely rich and creamy texture.
  • Add more herbs: Throw in some parsley, coriander, or fresh chives instead of or along with dill for even more herby flavour.
  • Make it spicy: Add some red chilli flakes, freshly chopped green chilli, or a pinch of cayenne to the dressing.
  • Add some protein: Toss in boiled eggs, chickpeas or shredded chicken to turn this into a more filling meal.
  • Add some cheese: Crumbled feta would work particularly well with the lemon, dill and mustard dressing
  • Use different potatoes: Baby potatoes work beautifully here, but you can also use regular potatoes cut into bite-sized pieces. Just make sure you don’t overcook them or they’ll become mushy when tossed with the dressing.
Close up of Healthy Lemon Dill Potato Salad (no mayo) served in a white speckled bowl with lemon wedges

This healthy lemon dill potato salad is sooo good, you’ll probably never go back to using mayonnaise again. It’s light, herby, and so refreshing. I love making this as a carb source along with our meat-heavy dinners, but you can honestly have it whenever and however you like. It tastes amazing either ways.

If you make this healthy lemon and dill potato salad, don’t forget to DM the pictures @my_foodstory. Happy cooking!

Watch Lemon Dill Potato Salad Recipe Video

Healthy Lemon Dill Potato Salad (no mayo) served in a white speckled bowl with lemon wedges
Print

Healthy Lemon Dill Potato Salad (No Mayo)

This Healthy Lemon Dill Potato Salad is dressed in a zesty vinaigrette so fresh that you’ll never miss the traditional mayo based potato salad! It’s best served warm so that the potatoes soak up all that good dressing and goes best with sides like wings, ribs and all the barbecue foods.
Course Salads
Cuisine French
Diet Gluten Free, Vegan, Vegetarian
Prep Time 10 minutes
Cook Time 20 minutes
Total Time 30 minutes
Servings 6 portions
Calories 156kcal
Author Richa

Ingredients

For the Salad:

  • 500 g Baby Potatoes
  • 1 teaspoon Salt
  • 1/4 cup Dill chopped
  • 1/4 cup Spring Onion Greens finely chopped

Dressing

  • 1/4 cup Olive Oil Extra Virgin
  • 2 tablespoon Lemon Juice
  • 1 Lemon zest
  • 1 Garlic Clove finely minced
  • 2 tablespoon Dijon Mustard
  • 1/2 teaspoon Salt
  • 1/4 teaspoon Black Pepper ground
  • 1/2 teaspoon Sugar

Instructions

  • Cut the potatoes in half leaving the skin on, and place them in a pot. Add enough water to submerge them completely. Add 1 teaspoon salt and bring to a boil. Cover and simmer for 15-20 minutes or until fork tender. Drain the water and place the potatoes in a large bowl.
  • While the potatoes are cooking, make the dressing and keep it ready. Add all the ingredients for the dressing in a bowl and whisk till combined.
  • Add dill and spring onions to the bowl with the potatoes and pour the dressing over the potatoes while they are still warm. Toss well and let this salad sit for at least 10 minutes before serving to let the potatoes soak up the liquid.

Video

Notes

  1. Peeled vs. unpeeled Potatoes: This depends on how you like your potato salad but both ways work. I prefer to leave them unpeeled.
  2. Lemon vs Lime Juice: If you are using lime juice instead of lemon juice in the vinaigrette, reduce the amount by half. Lime juice is more tart than lemon juice.
  3. Using larger potatoes:  If you are using larger potatoes, dice them in quarters or six pieces depending on the size of the potato you are using.
  4. Other Ingredients: I love adding chopped celery and boiled egg to this potato salad too.

Nutrition

Calories: 156kcal | Carbohydrates: 17g | Protein: 2g | Fat: 9g | Saturated Fat: 1g | Sodium: 645mg | Potassium: 408mg | Fiber: 3g | Sugar: 1g | Vitamin A: 193IU | Vitamin C: 30mg | Calcium: 25mg | Iron: 1mg

This article was researched and written by Urvi Dalal.

The post Healthy Lemon Dill Potato Salad (No Mayo) appeared first on My Food Story.

Savory Garlic Oats with Egg and Mushroom

These Savory Garlic Oats with mushroom and a masala fried egg is healthy and delicious way to switch up breakfast when you are bored of regular sweet oatmeal.

We eat a lot of oats in all forms, but lately I’ve been really tired of eating them sweet. So I started experimenting with a lot of savory oat recipes which are just as satisfying but healthier. Plus, you are totally omitting out the 2-3 teaspoons of sugar you might normally add to your oatmeal.

If you’re not really a savory oatmeal person, then I think this recipe is about to change that. Imagine warm, creamy oats with a lovely garlicky flavor, with mushrooms, a perfect runny egg, and topped with chilli oil. Sounds heavenly, right? These savory garlic oats are versatile and how! Make it a breakfast salad bowl with mixed greens or toss it up with some spices to quirk things up! Because who doesn’t want oats with a twist for breakfast?

Ingredients for Savory Garlicky Oatmeal

Oats: I have used instant or quick oats for this recipe as they cook quickly, which makes them super convenient. You could also use rolled or steel-cut oats, just remember to adjust the cook time accordingly

Oil: Olive oil for it’s neutral flavor, but you could use peanut, canola, sunflower, vegetable, etc.

Garlic: Finely chopped for lots of flavor and aroma

Mushroom: Adds a lovely smokey flavor and sneaks in extra nutrition

Eggs: Half-fried until the yolk is cooked but still runny.

Chilli oil: For some heat. You can use red chilli powder instead

Water: To cook the oats

Seasoning: Salt and pepper for flavor

Frequently Asked Questions

How can I cook oats with a pressure cooker?

Pressure cooking oats make them cook super fast. But you can boil the oats in water until it’s cooked through and reaches the desired consistency.

Are savoury oats healthy?

They can make a nutritious breakfast, especially when paired with protein and vegetables. Oats provide fibre and the egg and mushrooms add protein and other nutrients.

Richa’s Top Tips

  • Pressure cook oats if possible. I would highly recommend pressure cooking the oats to help them cook fast and come to the perfect consistency. Believe me, it’s a game changer for rushed mornings.
  • Adjust the amount of water if you like. For thicker oats, use a little less water. Add a splash more after cooking if you prefer them looser and creamier.
  • Cook the egg just the way you like it. I love a sunny-side-up egg here so the runny yolk mixes into the creamy oats.

Storage Instructions

  • Store leftover savoury oats in an airtight container in the refrigerator for up to 2 days. The oats will thicken as they sit, so add a splash of water or milk while reheating and stir well until creamy again.
  • For the best texture, store the mushrooms and fried egg separately and add them fresh when serving. You can add chilli oil just before serving.

Customisation Ideas

  • Add more vegetables. Toss in spinach, peas, corn, broccoli or finely chopped bell peppers along with the mushrooms for added flavor, texture, and nutrition.
  • Make it cheesy. Stir some grated cheddar, mozzarella or parmesan into the hot oats for an extra creamy finish.
  • Switch up the toppings. Try sautéed paneer, tofu, avocado or crispy chickpeas instead of mushrooms.
  • Make it spicy. Add chopped green chillies, red chilli flakes or a spoonful of chilli crisp to the oats.
  • Change the flavour profile: Add a little soy sauce and sesame oil to the oats and top with spring onions for an Asian-inspired version.
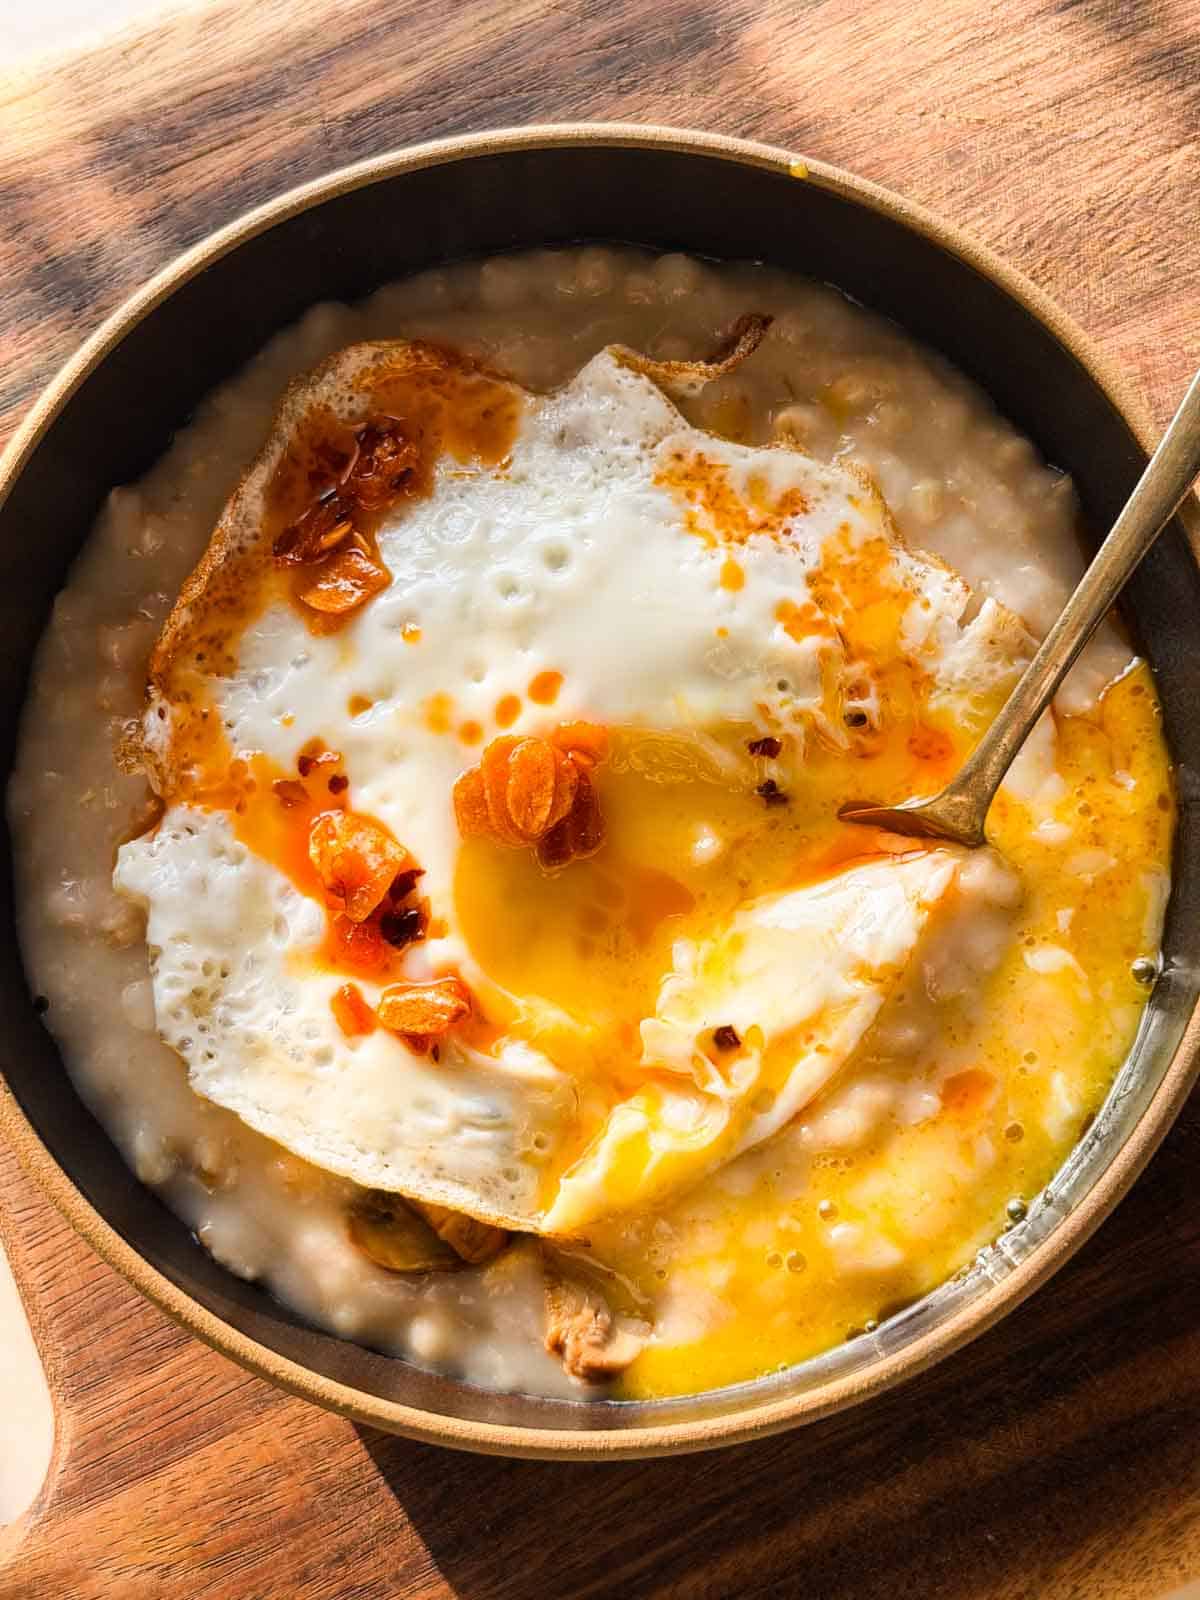
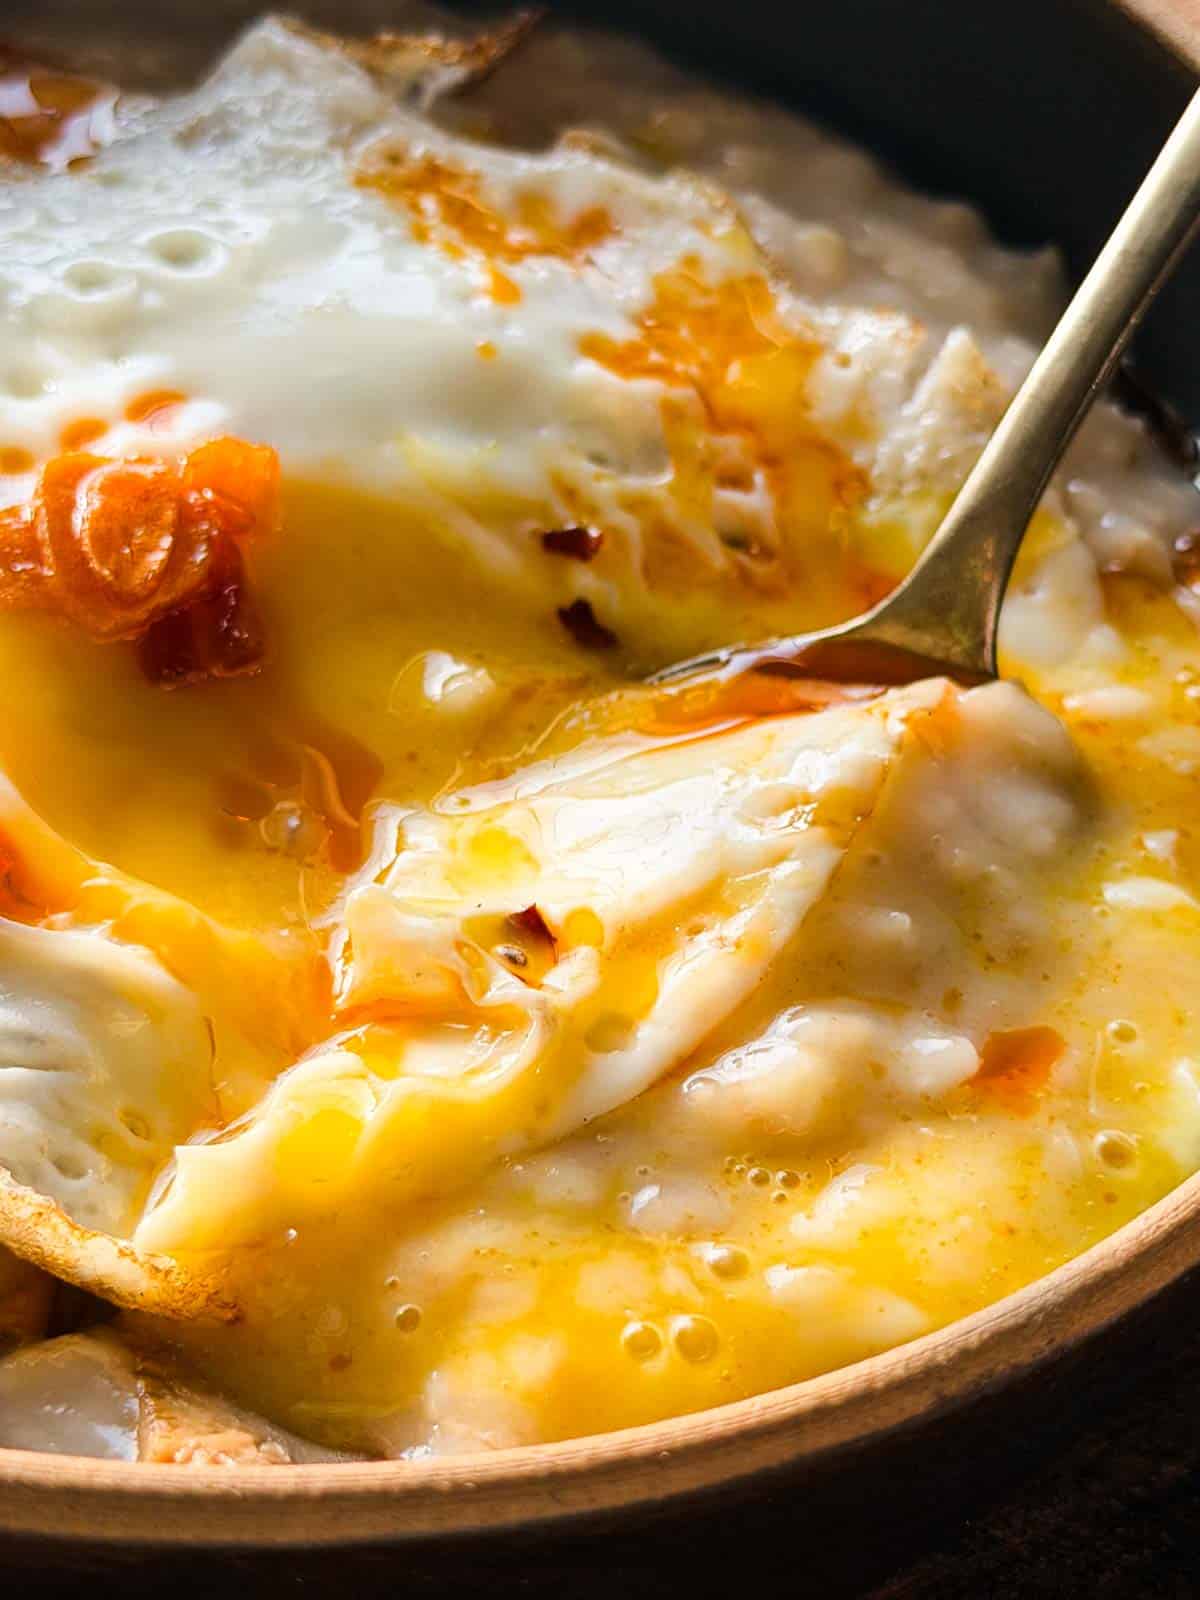
a close up image of savoury garlic oats to showcase it's creamy texture

I tried to keep this savoury oatmeal recipe healthier by not adding any cheese. But believe me a dash of grated cheddar cheese really takes things to a whole new level!

If you make this oatmeal for breakfast, do send me your pictures over on my Instagram @my_foodstory.

Watch Savory Garlic Oats Recipe Video

savoury garlic oats served in a bowl with a spoon
Print

Savory Garlic Oats with Masala Fried Egg

These savory garlic oats with a masala fried egg are healthy, delicious and a great way to switch up breakfast when you are bored of regular sweet oatmeal.
Course Breakfast
Cuisine international
Diet Halal
Prep Time 5 minutes
Cook Time 10 minutes
Total Time 15 minutes
Servings 2 Portions
Calories 167kcal
Author Richa

Equipment

Ingredients

  • 1/2 cup rolled oats
  • ½ teaspoon grated garlic
  • ¾ teaspoon salt. divided
  • 1 ½ cups water
  • 2 teaspoons olive oil or any neutral cooking oil
  • 200 gms mushrooms sliced
  • 1 egg

Instructions

  • Add rolled oats, garlic, ½ teaspoon of salt and 3 cups of water to a pressure cooker. Close the lid, bring to pressure and cook for 3 whistles. Let the pressure release naturally.
  • While the oats are cooking, heat 2 teaspoons of oil in a pan, add sliced mushrooms and saute for 3-4 minutes till they turn golden brown. Take off the heat. Sprinkle ¼ teaspoon of salt, mix well and transfer to a plate or bowl.
  • Heat the same pan, add 1 teaspoon of oil, and once the pan is very hot, crack one egg and cook till the white part is cooked but the yolk is runny.
  • To serve, add 2-3 ladles of cooked oats from the pressure cooker to a bowl, top with half the fried mushrooms, place the fried egg on top, drizzle chilli oil on top and serve hot.
  • Repeat the same for serving the rest of the oats.

Video

Notes

  1. Feel free to experiment with different herbs, cheeses and even toppings like sundried Tomatoes, Olives or Jalapenos.
  2. Adjust water to keep oats to your desired consistency.
  3. Feel free to swap the fried egg with soft boiled eggs or scrambled eggs. But we prefer the crispy, fried egg with a runny yolk.

Nutrition

Calories: 167kcal | Carbohydrates: 17g | Protein: 9g | Fat: 8g | Saturated Fat: 2g | Polyunsaturated Fat: 1g | Monounsaturated Fat: 4g | Trans Fat: 0.01g | Cholesterol: 82mg | Sodium: 919mg | Potassium: 425mg | Fiber: 3g | Sugar: 2g | Vitamin A: 119IU | Vitamin C: 2mg | Calcium: 33mg | Iron: 2mg

This article was researched and written by Urvi Dalal.

The post Savory Garlic Oats with Egg and Mushroom appeared first on My Food Story.

17 Egg Breakfast Recipes to help meet your protein goals

If you are looking for egg breakfast ideas, then you are in the right place. Here are 17 quick and easy egg breakfast ideas that are high protein and healthy!

a collage of 4 egg breakfast recipes with text overlay

Eggs are one of the most popular choice of breakfast, and I think it’s for all the right reasons! Firstly, egg breakfast recipes are quick and easy to make. Most often 15 minutes is all you need to put together an egg breakfast dish. And honestly, that is such a blessing on rushed weekday mornings. Secondly, eggs are so versatile and you can cook them in so many different ways. Which means you will never be bored eating eggs for breakfast again. From the simple boiled egg or poached eggs to omelette, shakshuka, fried, and frittata, you have an egg recipe for each day of the week.

And lastly, eggs are so incredibly healthy! They’re high in protein, full of good fats, and come loaded with micro nutrients. All of these things make them ideal to eat at the start of the day.

Being a big fan of eggs for breakfast myself, I had to create a post with all of my favorite egg breakfast recipes. These are all incredibly easy to make, come together quickly, and we have tested multiple times. so you know they’re both fool-proof and delicious. So if you are looking for egg breakfast ideas or high-protein egg recipes to start your right, look no further because this post has you covered!

Egg Breakfast Recipes

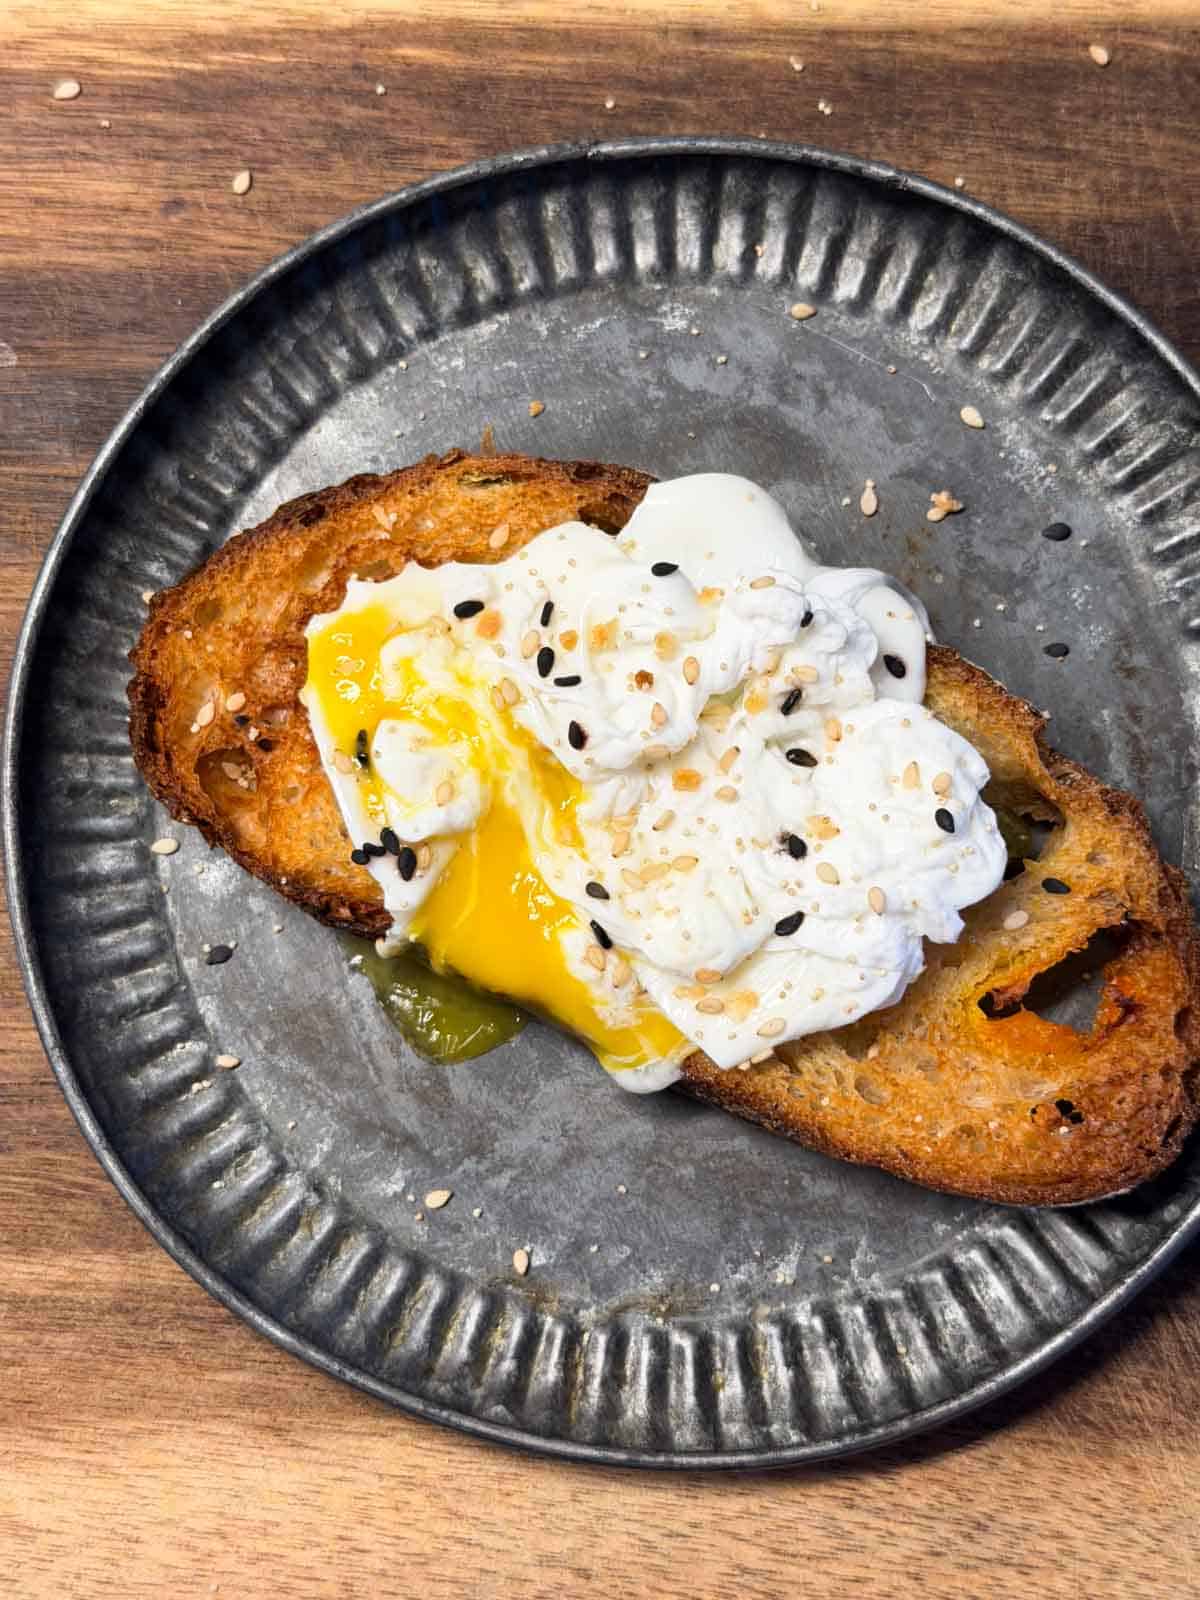
air fryer poached egg served on top of a toast

Air Fryer Poached Eggs

Making poached eggs in the air fryer is the easiest and mess-free way to do it. Once you try this method, you won't poaching eggs the traditional way ever again.
View Recipe
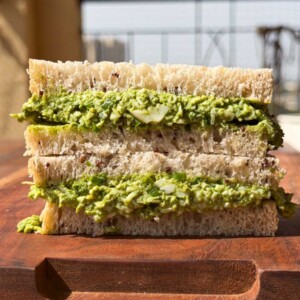
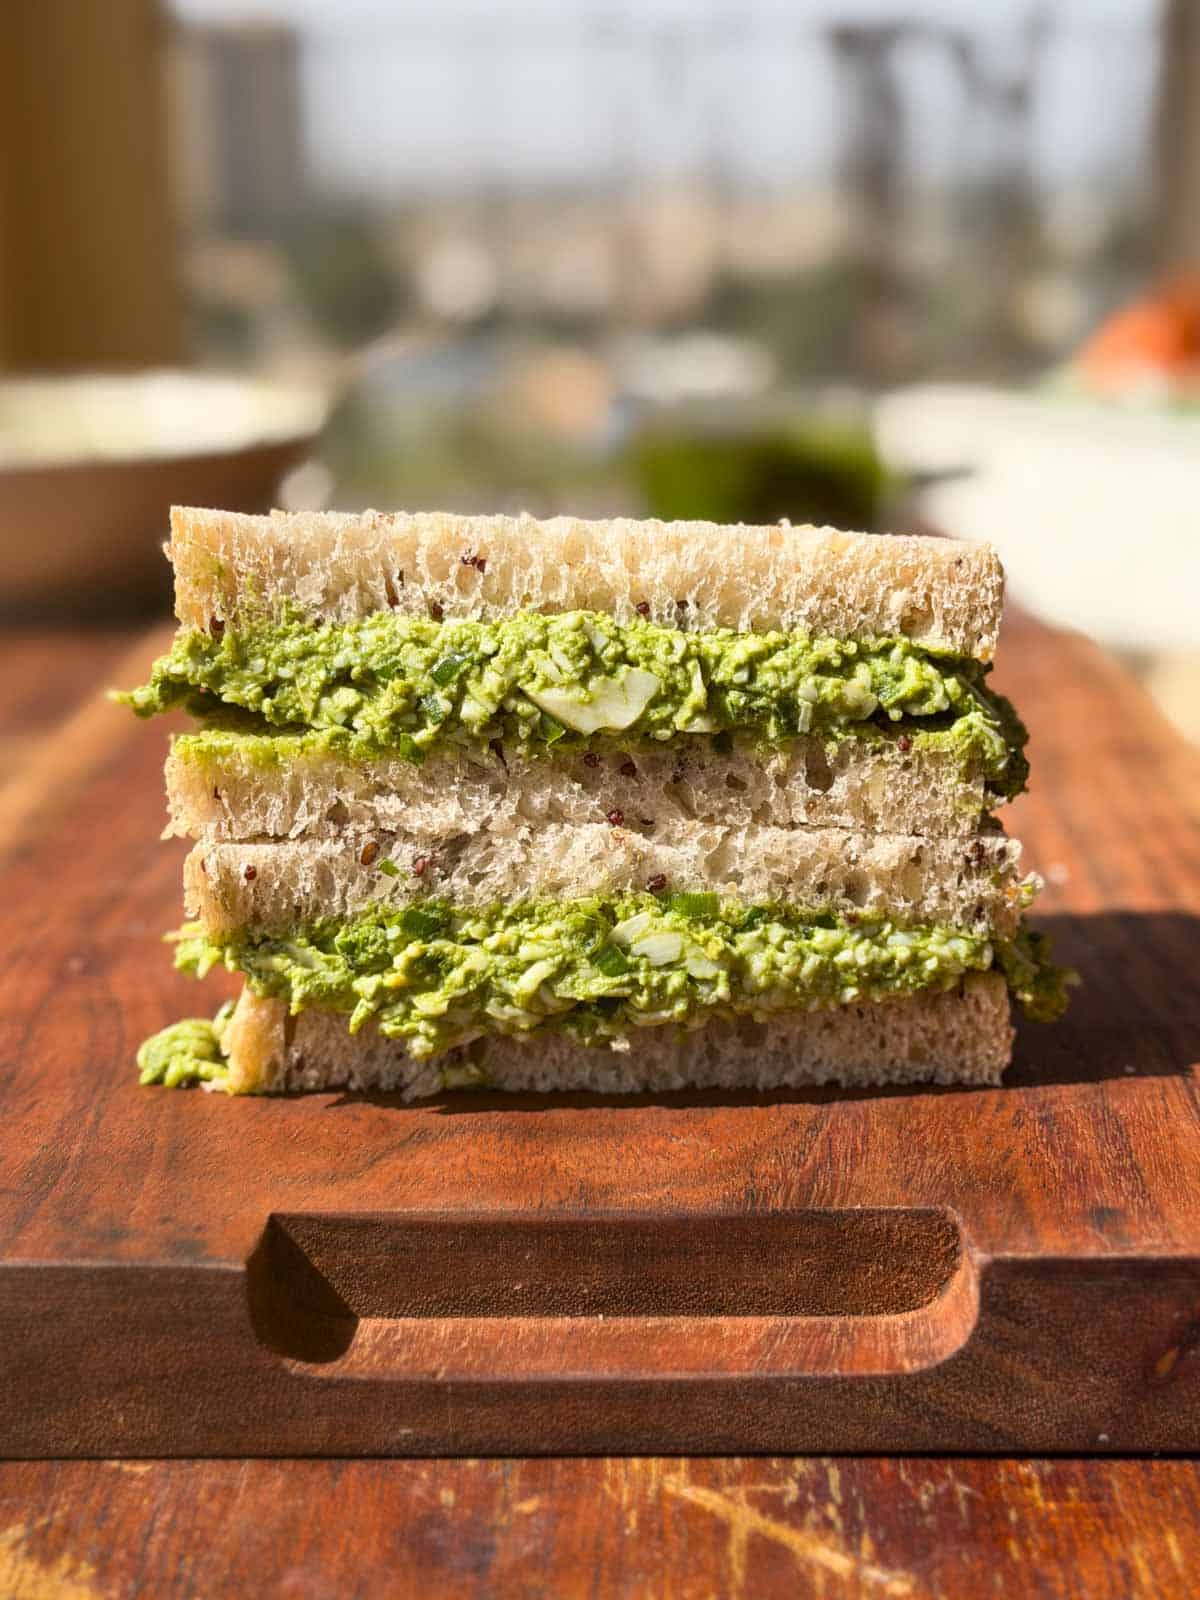
chutney cheese egg sandwich assembled and ready to be served

Chutney Cheese Egg Sandwich

Creamy, cheese-y, and spicy, this chutney cheese egg sandwich is a quick, easy, and healthy recipe that's perfect for breakfast or as a 5 pm snack!
View Recipe
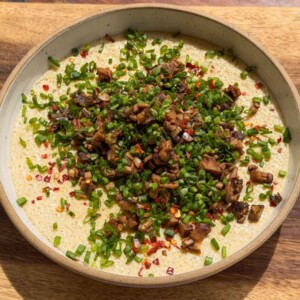
an image of chinese steamed eggs garnished with mushroom and spring onion ready to be eaten

Chinese Steamed Eggs (with mushroom topping)

Chinese steamed eggs is a silky, savory custard-like dish made by steaming whisked eggs. It's one of the easiest and most delicious ways to eat eggs, tastes super silky, and comes together in under 20 minutes.
View Recipe
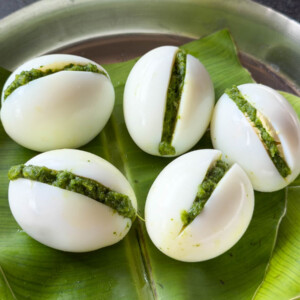
stuffed eggs served on a steel plate covered with banana leaf

Stuffed Eggs (Indian Style)

These Indian style Stuffed Eggs are the easiest way to give your daily boiled eggs an upgrade. Spicy, herby, and garlicky, this dish is an absolute banger!
View Recipe
perfectly jammy air fryer boiled eggs on toast

Air Fryer Boiled Eggs

This air fryer boiled eggs recipe is the perfect mess-free way to make your eggs every morning. Saves so much effort and precious stove space!
View Recipe
2 anda parathas served on a platter with green chutney
4 from 1 vote

Anda Paratha

Flaky paratha meets fluffy spiced egg in this super easy Anda Paratha recipe that’s equal parts nostalgic and next-level delicious!
View Recipe
boiled egg mayo served with french fries
1 from 1 vote

Boiled Egg Mayonnaise

A simple mayo recipe made from boiled eggs and a few other pantry staples. Perfectly creamy and delicious, but without all the excess fat and additives commonly found in store-bought mayonnaise!
View Recipe
a close up shot of korean omelette roll stacked one on top of the other in a white bowl

Korean Omelette Rolls

These Korean Omelette rolls seem fancy but are a breeze to make, especially in a regular round pan. Packed with pantry staples like eggs and veggies, these rolls are a healthy, tasty, and kid-approved delight!
View Recipe
Chilli Oil Fried Eggs-2
5 from 1 vote

Chilli Oil Fried Eggs

A splendid breakfast dish made with homemade chilli oil combined with a fried egg!
View Recipe
A slice of bread being dipped into the egg yolk

Spicy Masala Shakshuka

Spicy masala shakshuka is an Indian take on the traditional Middle Eastern dish. Eggs are poached till just set in a flavourful, spicy gravy that's so good you'll be licking the pan clean.
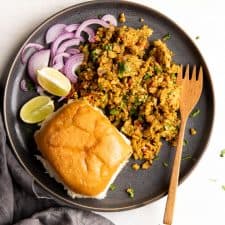
Street style egg bhurji served on a plate with pav
5 from 6 votes

Street Style Egg Bhurji

Try this street style egg bhurji, if you love eggs for breakfast. A twist on scrambled eggs, this recipe is spicy, buttery and full of flavour!
View Recipe
A slice of spinach potato veggie frittata topped with a dollop of sour cream and chopped green onions

Spinach Potato Veggie Frittata

Watch recipe video above. This Spinach Potato Veggie Frittata packs in six to seven cups of veggies and has a creamy, custard like texture that’s incredible. It’s great when you want to feed a crowd, or meal prep a healthy breakfast for the week.
View Recipe
A slice of baked denver omelet breakfast casserole on a plate.
4.91 from 10 votes

Baked Denver Omelet Breakfast Casserole

Baked Denver Omelet Breakfast Casserole is the perfect dish when you want to feed a crowd or even make freezer friendly breakfast bars that can be warmed up and eaten on the go. Loaded with onions, peppers, mushrooms, ham and a secret ingredients – this is a thick omelette thats hearty, healthy and delicious.
View Recipe
savoury garlic oats served in a bowl with a spoon
4.88 from 8 votes

Savory Garlic Oats with Masala Fried Egg

These savory garlic oats with a masala fried egg are healthy, delicious and a great way to switch up breakfast when you are bored of regular sweet oatmeal.
View Recipe
Spiced Indian Potatoes and Egg cooked in a skillet and garnished with coriander.
5 from 4 votes

Spiced Indian Potatoes and Egg Skillet

Spiced Indian Potatoes & Eggs, cooked in a skillet for a easy holiday morning breakfast recipe. Crowd pleaser, kid friendly and gluten free.
View Recipe
One Pan Indian Masala Omelette Frittata drizzled with sriracha and served on a white plate.
5 from 1 vote

One Pan Indian Masala Omelette Frittata

Check out this exciting recipe for a one pan Frittata that’s inspired by the Indian Masala Omelette. It’s spicy, has garam masala and can be made on the stovetop or the oven!
View Recipe
Masala french toast served from a large white plate.

Indian Masala Egg French Toast

Loaded with onions, tomatoes, green chilies and coriander, these crisp Indian masala french toasts are perfect for breakfast, brunch or as a tea time snack.
View Recipe

The post 17 Egg Breakfast Recipes to help meet your protein goals appeared first on My Food Story.
Chilli Egg Stir Fry (Spicy and Saucy)

This Chilli Egg Stir Fry is the latest Indo-Chinese dish in town! Spicy, saucy, tangy, and full of umami, it’s a dish you absolutely need to make ASAP! 

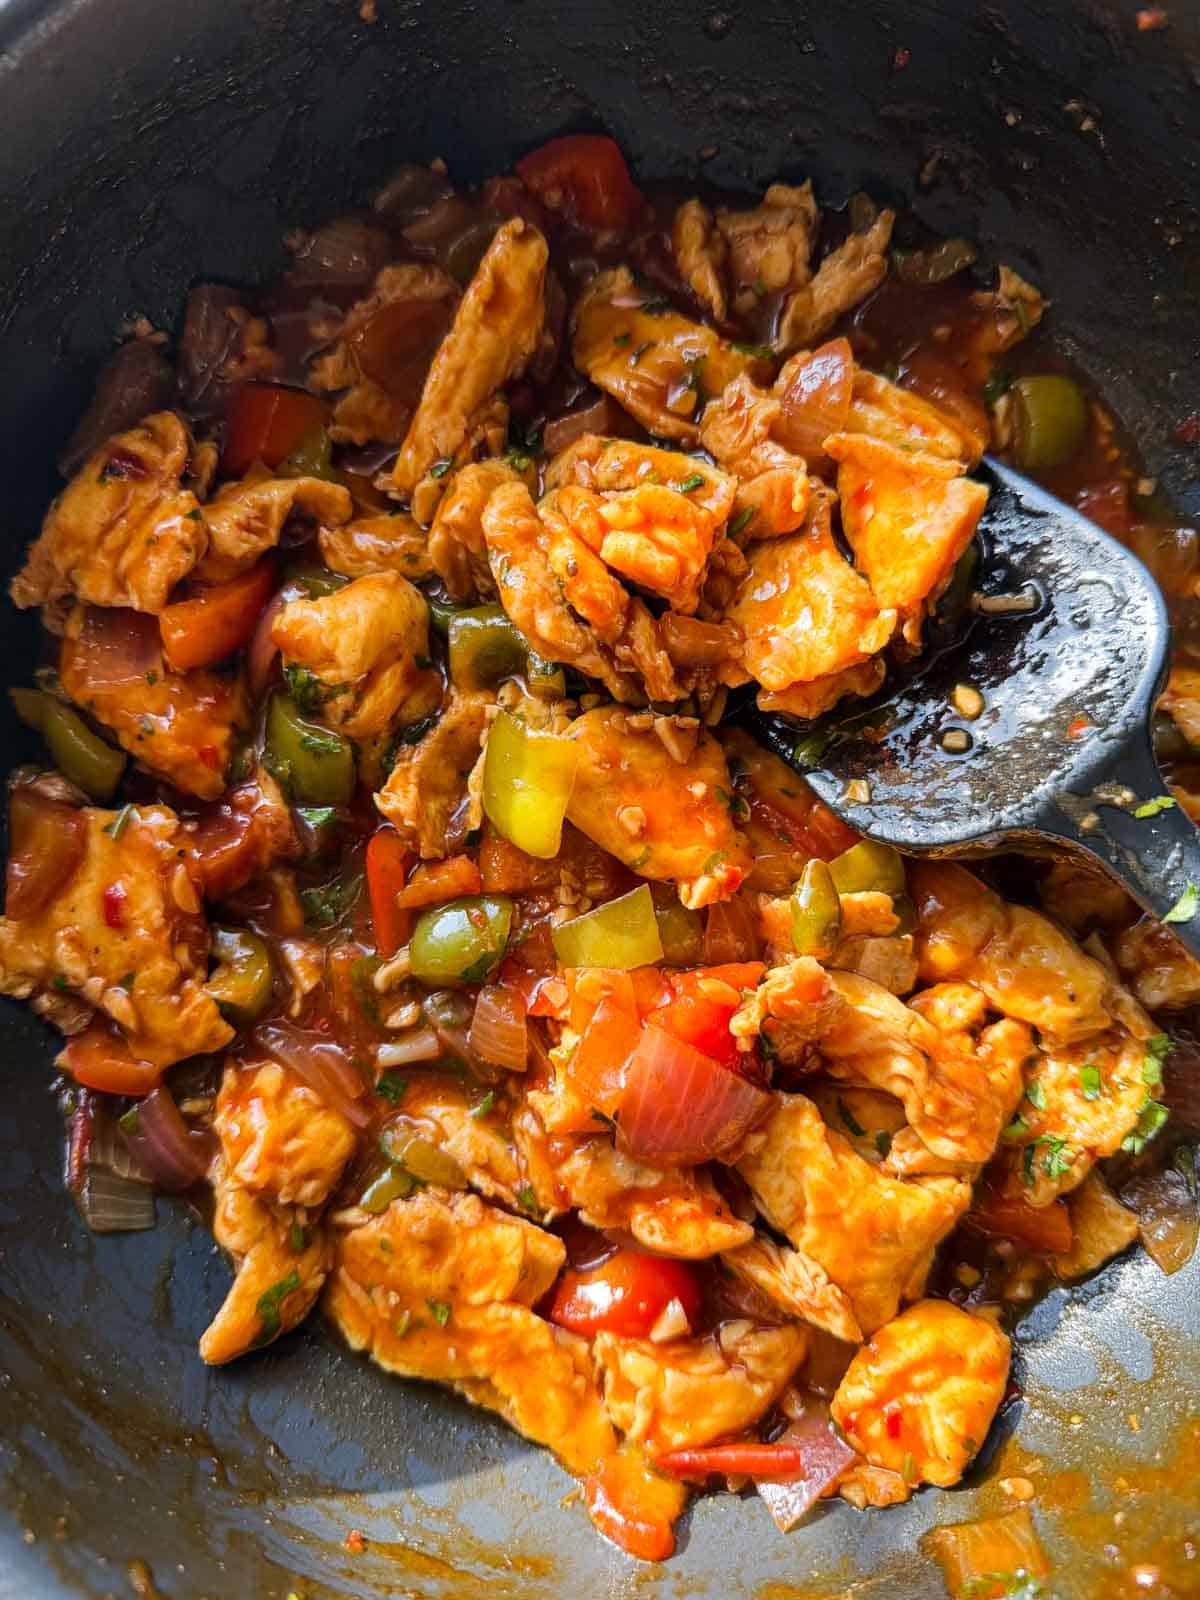
chilli egg stir fry in its cooking pan with ladle

This Chilli Eggs Stir Fry is my latest Indo-Chinese favorite dish. It’s spicy, tangy, addictive, and like most Indo-Chinese dishes, super quick and easy to make. All you need is eggs, some basic Indo-Chinese sauces, a few veggies, and only 20 minutes to make this dish that will climb right up on your favorites list. This is an egg chilli dry style recipe, but you can easily turn it into a gravy if you want to serve it for dinner. 

You can serve these chilli eggs as a starter as well as a quick and filling 5-pm snack. But I recently served as a side for dinner with some fried rice and noodles and believe me, the bowls were licked clean! Let’s find out how to make this delicious chilli egg recipe. 

Chilli Eggs Stir Fry Ingredients 

Eggs: Whole eggs, whisked to make an omelette 

Spices: Crushed pepper, green chilli, and red chilli flakes for a slight kick of heat

Veggies: Tomatoes and capsicum for flavor and texture

Aromatics: Onions, spring onion greens, and minced garlic for flavor and aroma

Sauces: Light and dark soy sauce, ketchup, sriracha or red chilli sauce, and vinegar mixed together to make the sauce 

Sugar: For balance and a hint of sweetness

Salt: To season 

Corn flour: Mixed in water to form a slurry. Helps the sauce thicken

Oil: I have used groundnut oil but any neutral-flavored oil with a high smoke point like sunflower, vegetable, canola, etc. will work here

Frequently Asked Questions 

How do I prevent the omelette from breaking apart during stir fry?

The key here is to be gentle. Make sure to cut the omelette into large pieces and put them into the pan only after the vegetables have been stir-fried. Toss gently once the sauce is added.

Can I make this chilli egg stir fry spicy?

Absolutely. Increase the green chilli, sriracha or red chilli flakes according to your preference. For a milder version, reduce the green chilli and sriracha.

Why is my sauce not thickening?

Make sure the corn flour is evenly mixed into the sauce before adding it to the pan. The sauce also needs to simmer for 1-2 minutes for the corn flour to activate and thicken it.

Richa’s Top Tips

  • Whisk the eggs well: This helps incorporate air into the eggs and gives you a fluffy omelette. It’s an important step to ensure the omelette holds up well when tossed with the sauce.
  • Keep the vegetables crunchy: You want the veggies to be slightly charred but still crispy, rather than soft and mushy. To achieve that, make sure to cook the onion, tomato and capsicum briefly over high heat. 
  • Cut the omelette into large pieces: Larger pieces are easier to toss with the sauce without breaking apart. Smaller pieces tend to make the dish soggy.
  • Mix the sauce before adding it to the pan: The corn flour settles quickly, so give the sauce a good stir just before pouring it in.
  • Don’t overcook after adding the sauce: The sauce only needs 1-2 minutes to thicken and coat the eggs. Cooking it for too long can make the omelette rubbery.

Storage Tips

  • Fridge: Store leftover chilli egg stir fry in an airtight container in the refrigerator for up to 2 days.
  • Reheat: Reheat it gently in a pan over medium-low heat until warmed through. Add a splash of water if the sauce has thickened too much. You can also microwave it in short intervals, stirring between each interval.
  • Freezing not recommended: The texture of the omelette and vegetables can become rubbery and watery after thawing.

Serving Ideas

  • Along with a rice dish: This chilli egg stir fry is great as a quick side dish with steamed rice, jeera rice or fried rice. 
  • With noodles: You can also serve it with hakka noodles or even these chilli garlic noodles for a quick weeknight meal.
  • For a lighter meal: Serve it alongside some steamed vegetables or a simple cucumber salad. 
  • In a roll: You can also spoon the saucy eggs into a roti or wrap with some fresh spring onions and veggies for an easy egg roll.

Customisation Ideas

  • Add more vegetables: Sliced mushrooms, carrots, cabbage, broccoli or baby corn would all work well. Cut them into small pieces so they cook quickly.
  • Make it extra spicy: Add more green chilli, sriracha or red chilli flakes. You can also add a little chilli oil before serving.
  • Add protein: Toss in cooked chicken, prawns or tofu along with the omelette for a more substantial stir fry.
  • Make it more saucy: Increase the sauce quantities slightly and add a splash more water if you want something that works particularly well with rice or noodles.
  • Add ginger: Finely minced or julienned ginger can be sautéed along with the garlic for extra flavour.
  • Use different greens: Finish with chopped spring onion greens, coriander or even a handful of finely sliced spring onion whites for extra freshness.
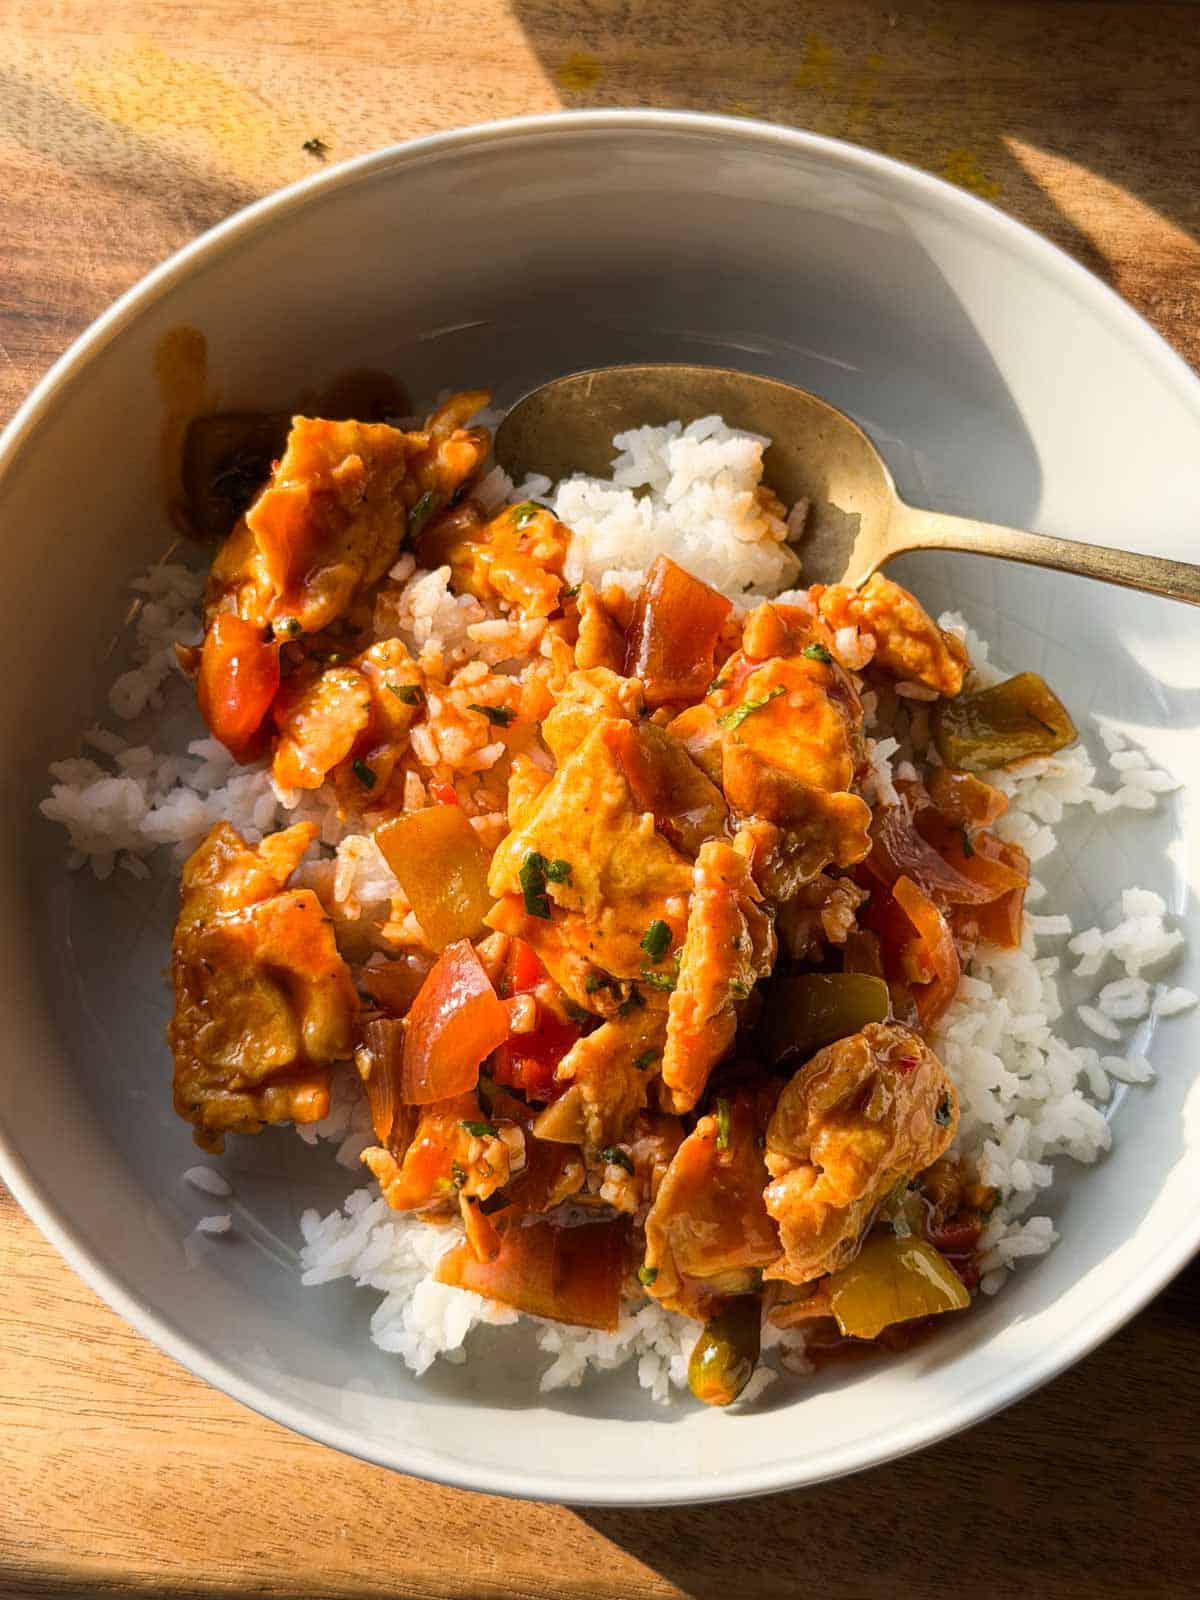
chilli egg stir fry in a white bowl with spoon

This egg chilli stir fry isn’t your usual starter, but once you try it, there is no going back. It’s spicy, tangy, and full of delicious flavors and textures. It’s a total must-try! If you make this recipe, DM me your pictures or tag me in stories over on my IG @my_foodstory ❤️  

Watch Chilli Egg Recipe Video

Spicy chilli egg stir fry served over white rice in a bowl.
Print

Chilli Egg Stir Fry

Spicy and saucy, this chilli egg stir fry is best served on it's on as a snack, or along with fried rice or noodles for a satisfying weeknight dinner.
Course Snacks & Appetisers
Cuisine Indian Chinese
Diet Halal
Prep Time 10 minutes
Cook Time 10 minutes
Total Time 20 minutes
Servings 2 servings
Calories 185kcal
Author Richa

Ingredients

  • 2 eggs
  • A pinch salt
  • ⅛ teaspoon crushed pepper
  • 2 ½ teaspoons groundnut or any neutral cooking oil divided
  • 2 teaspoons minced garlic
  • 1 green chilli sliced diagonally
  • 1 onion cut into petals
  • 1 tomato deseeded and cut into petals
  • ½ capsicum cut into ½ inch triangles or squares
  • 3 tablespoons finely chopped spring onion greens

Sauce mix

  • 1 teaspoon light soy sauce
  • ½ teaspoon dark soy sauce
  • 1 tablespoon ketchup
  • ½ tablespoon sriracha or red chilli sauce
  • 1 teaspoon vinegar
  • ½ teaspoon sugar
  • ⅛ teaspoon salt
  • ¼ teaspoon crushed pepper
  • ½ teaspoon red chilli flakes
  • ½ teaspoon corn flour
  • ¼ cup water

Instructions

  • Break 2 eggs into a bowl, add a pinch of salt, ⅛ teaspoon of crushed pepper, whisk well and set aside.
  • Take all the ingredients for sauce mix in another bowl, stir to combine well and set aside.
  • Heat a flat bottomed pan, brush with ½ teaspoon of oil, pour the whisked eggs and make a fluffy omelette. Cut into 5-6 large pieces and transfer to a plate.
  • Heat the same pan with 2 teaspoons of oil, add garlic and green chillies and saute for a few seconds till fragrant. Add onions, tomatoes & capsicum and saute for a minute on high till they get lightly roasted and crunchy.
  • Add omelette pieces and saute for a few seconds.
  • Mix the sauce mix, add to the pan and cook on medium for 1-2 minutes till the sauce coats the eggs well. Take off the heat and serve.

Video

Notes

  1. Sauce mix has to be mixed and kept handy before making the stir fry as its a quick recipe.
  2. Do not overcook the eggs and veggies as they turn soggy & do not taste good in the stir fry. 

Nutrition

Calories: 185kcal | Carbohydrates: 17g | Protein: 8g | Fat: 10g | Saturated Fat: 3g | Polyunsaturated Fat: 3g | Monounsaturated Fat: 4g | Trans Fat: 0.01g | Cholesterol: 164mg | Sodium: 823mg | Potassium: 432mg | Fiber: 4g | Sugar: 10g | Vitamin A: 1964IU | Vitamin C: 59mg | Calcium: 64mg | Iron: 2mg

This article was researched and written by Urvi Dalal.

The post Chilli Egg Stir Fry (Spicy and Saucy) appeared first on My Food Story.
Air Fryer Poached Eggs

These Air Fryer Poached Eggs recipe is the easiest, fool-proof way of poaching eggs. They come out perfectly every time, you don’t even need to stand at the stove, and make your mornings a lot easier!

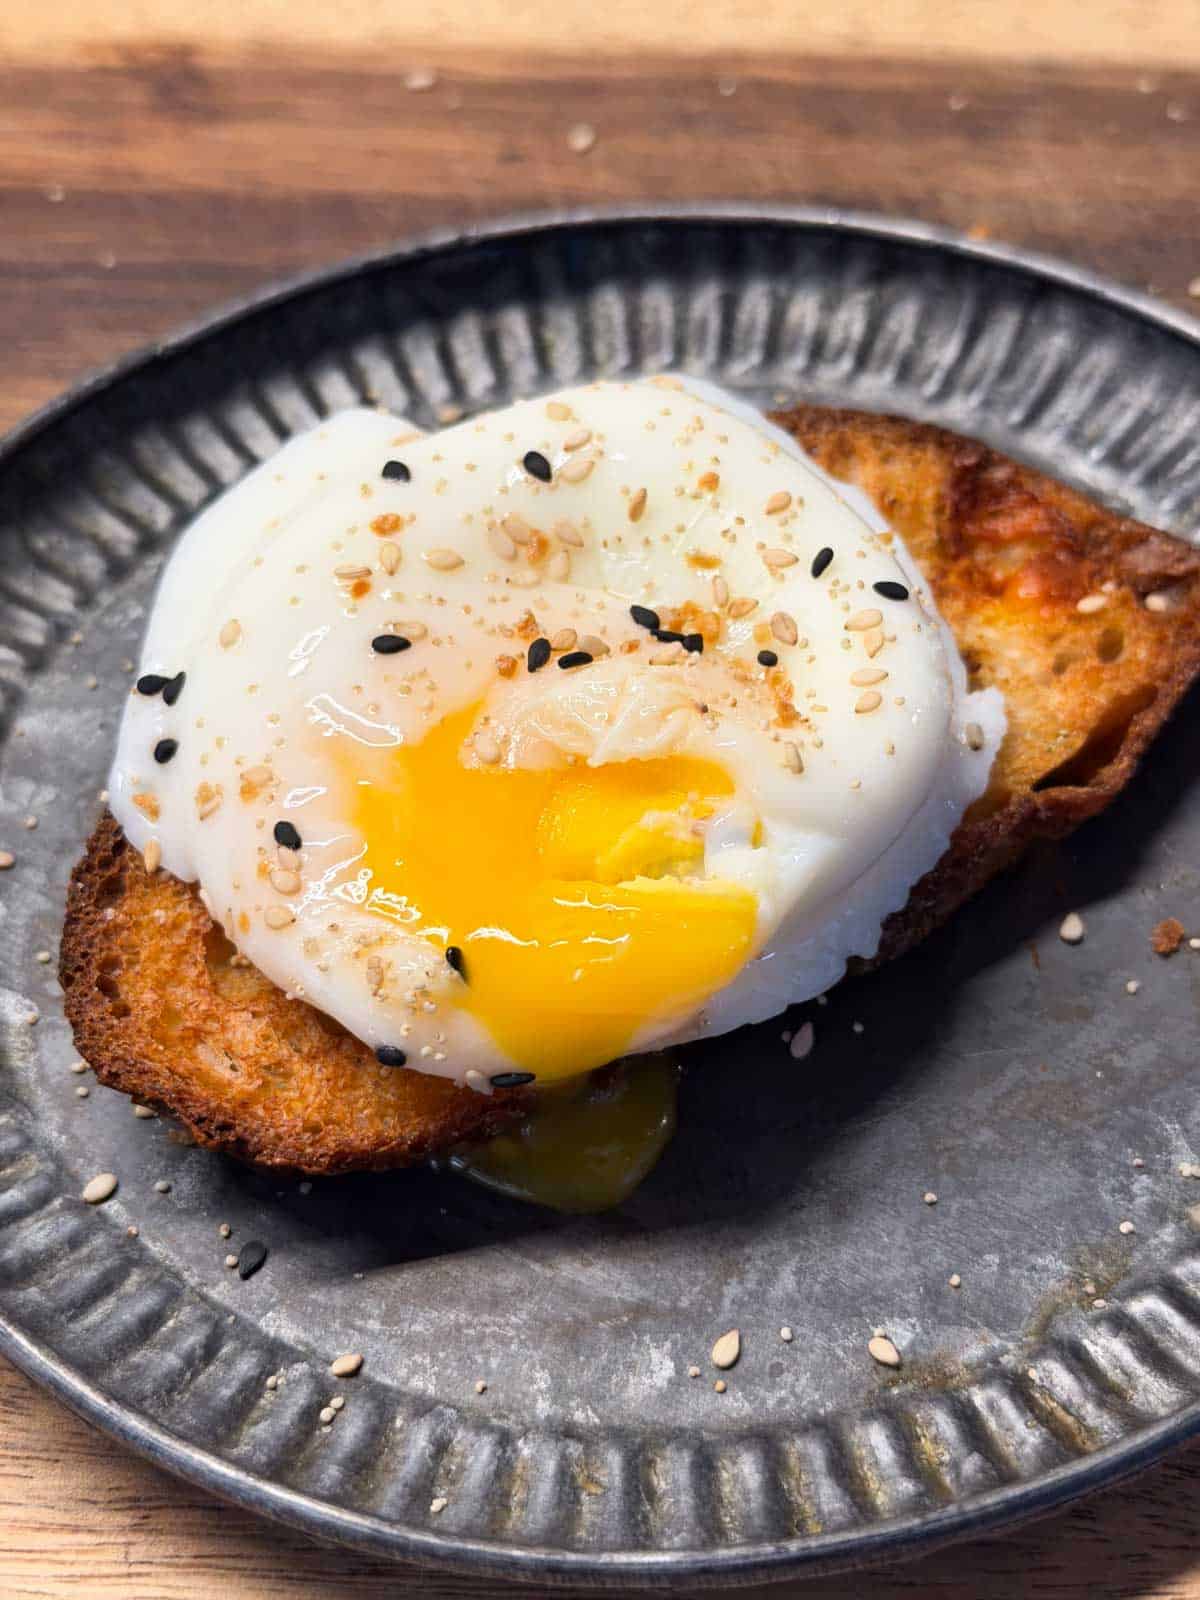
air fryer poached egg served on top of a toast

These air fryer poached eggs have made mornings so much simpler in our house. I no longer have to watch over the boiling water on the stove, or stress about swirling it at the right time. All you need is a ramekin, an egg, and 6 minutes in your air fryer. The eggs come out with perfectly set whites and a soft, runny yolk every single time.

We make eggs almost every day at home, and therefore I have come up with several different ways to enjoy them.  My chilli oil fried eggs, mayak eggs, and Kerala egg roast have been my go-to recipes for a long time. And now this poached eggs recipe is one of the simplest of the lot. It’s a great one to have in your breakfast rotation when you want something healthy with zero fuss.

Ingredients for Perfect Poached Eggs

Eggs: Fresh eggs work best because the whites hold together better and give you a neater poached egg.

Water: You’ll need boiling water to create the hot water bath inside the ramekins while the eggs cook in the air fryer.

Salt: Optional, for seasoning the eggs before serving.

Frequently Asked Questions

How long do you poach eggs in an air fryer?

At 200°C, air fry the eggs for 6 minutes for set whites and soft, runny yolks. If you prefer a firmer yolk, add another 1-2 minutes of cooking time. But each air fryer is different, so you may need to experiment with the timing to achieve the best results in yours. 

Can you poach eggs ahead of time?

Yes! Poached eggs can be made ahead of time and stored in the fridge for up to 2 days. Once they’re cooked, gently transfer them to an ice water bath to stop the cooking process. When you’re ready to serve, reheat them gently in warm water for a minute or two.

How do I prevent the egg from sticking to the ramekin or dish?

Lightly grease the ramekin with a little oil or butter before adding the boiling water and egg. This makes it much easier to gently scoop the poached egg out once it’s cooked. A silicone spatula or slotted spoon also helps when removing the egg.

Richa’s Top Tips

  • Don’t fill the ramekins too much. Fill them only halfway with water so there’s enough room for the egg without the water spilling over.
  • Use a small steel bowl: I found that using a small steel bowl or katori actually yielded much better results as compared to glass or ceramic.
  • Preheat the air fryer. Don’t skip the 200°C preheating step. Starting with a hot air fryer makes for the perfect poached eggs.
  • Use tongs to remove the ramekins. They’ll be very hot after cooking, so use tongs and handle them carefully.
  • Adjust the cooking time for your yolk. Six minutes gives you soft, runny yolks, but add a minute or two if you prefer your poached eggs more set.
  • Scoop the eggs out gently. A slotted spoon works best for lifting the eggs from the water without breaking the delicate yolk.

Storage Tips

  • Refrigerate: If you’re making these ahead, transfer the cooked poached eggs to an ice water bath immediately after cooking. Once cooled, drain and store them in an airtight container in the fridge for up to 2 days.
  • Reheating: Place the chilled poached eggs in a bowl of warm water for 1-2 minutes to warm them through. Avoid boiling water, as it can overcook the eggs and turn the yolks firm.
  • Freezing: Not recommended. Poached eggs don’t freeze and thaw particularly well, and the whites can become rubbery and watery.

Serving Ideas

Air fryer poached eggs are best served warm, with something to soak up that runny yolk. Here are a few easy ways to enjoy them:

  • On avocado toast: Spoon mashed avocado over crispy toast, top with a poached egg, and finish with salt, pepper, and chilli flakes.
  • Over a breakfast bowl: Add the poached egg to a bowl of sautéed vegetables, roasted potatoes, or grains for a filling breakfast.
  • With breakfast potatoes: Pair with crispy air fryer potatoes and a little hot sauce for an easy weekend breakfast.
  • On an English muffin: Add the poached egg to a toasted English muffin with a little butter or cheese for a quick breakfast sandwich.
  • Add it to a salad: Top a fresh salad with a poached egg and let the runny yolk act like a creamy dressing. It works especially well with greens, tomatoes, avocado, and a simple vinaigrette. 

Did You Know?

That little white string attached to the yolk is called the chalaza. It might look like a piece of egg white that needs to be removed, but it actually has an important job. The chalaza anchors the yolk in place and helps keep it centred inside the egg. You will usually notice it more clearly in very fresh eggs, and that’s actually a good thing. A prominent chalaza is one of the little signs that your egg is fresh. So the next time you crack an egg and see that white, stringy bit, leave it there. 

air fryer poached egg served on top of a toast

If you’ve always thought poaching eggs was too fiddly or complicated, these air fryer poached eggs are about to change your mind. Make them for breakfast, add one to a salad, or pile one onto toast when you want something simple but satisfying. /Once you try this method, poached eggs might just become one of the easiest ways to cook eggs. Tag me on Instagram @my_foodstory when you try it.

Watch Air Fryer Poached Eggs Recipe Video

air fryer poached egg served on top of a toast
Print

Air Fryer Poached Eggs

Making poached eggs in the air fryer is the easiest and mess-free way to do it. Once you try this method, you won't poaching eggs the traditional way ever again.
Course Breakfast, Snacks & Appetisers
Cuisine international
Diet Halal
Cook Time 15 minutes
Total Time 15 minutes
Servings 2 eggs
Calories 63kcal
Author Richa

Equipment

Ingredients

  • 1 cup water
  • 2 eggs

Instructions

  • Boil water in a pot.
  • Pre-heat airfryer at 200 C.
  • Pour boiling water into 2 ramekins or any air fryer safe bowl to fill upto half the bowl. Crack an egg into each bowl.
  • Airfry at 200C for 6 minutes to make soft centred poached eggs.
  • Remove the ramekin bowls using tongs, gently scoop out the poached eggs, transfer to a plate and serve.

Video

Nutrition

Calories: 63kcal | Carbohydrates: 0.3g | Protein: 6g | Fat: 4g | Saturated Fat: 1g | Polyunsaturated Fat: 1g | Monounsaturated Fat: 2g | Trans Fat: 0.01g | Cholesterol: 164mg | Sodium: 68mg | Potassium: 61mg | Sugar: 0.2g | Vitamin A: 238IU | Calcium: 28mg | Iron: 1mg

This article was researched and written by Harita Odedra.

The post Air Fryer Poached Eggs appeared first on My Food Story.

Healthy Chutney Cheese Egg Sandwich

This Chutney Cheese Egg Sandwich is a delicious, high-protein snack for the whole family. It’s creamy, cheese-y, spicy, flavorful, yet incredibly healthy, quick, and simple! 

chutney cheese egg sandwich assembled and ready to be served

This chutney cheese egg sandwich is like an upgrade to your morning bread and egg breakfast situation. It’s spicy, flavor, cheesy, but just as quick, easy, hassle-free, and delicious as the latter. I first made this a few months ago for my diabetic dad in an attempt to add more protein to his everyday meals, but I really couldn’t believe how flavorful it turned out! 

The egg sandwich recipe calls for just 7 ingredients, and you’ll most likely have all of them at home already. Besides boiling eggs, it’s a no-cook sandwich recipe that makes busy morning breakfasts quick and effortless. Believe me, it’s one of those recipes you need to have in your back pocket! 

Chutney Cheese Egg Sandwich Ingredients 

  • Bread: I have used whole wheat bread, but any kind of bread you prefer and have available will work for this recipe.   
  • Chutney: To serve along with the bread pakoras. I love green coriander chutney with this. 
  • Eggs: Hard-boiled and grated. Check out this article for some exclusive tips on how to make perfect hard-boiled eggs each time.   
  • Cheese: I have grated regular processed cheese cubes for that savory salty flavor.    
  • Yogurt: I have used Greek yogurt. But you can also use hung curd (if you have time) for a creamier consistency. 
  • Spring onion: For a sharp fresh flavor, and a slight crunch. 
  • Salt: for seasoning.
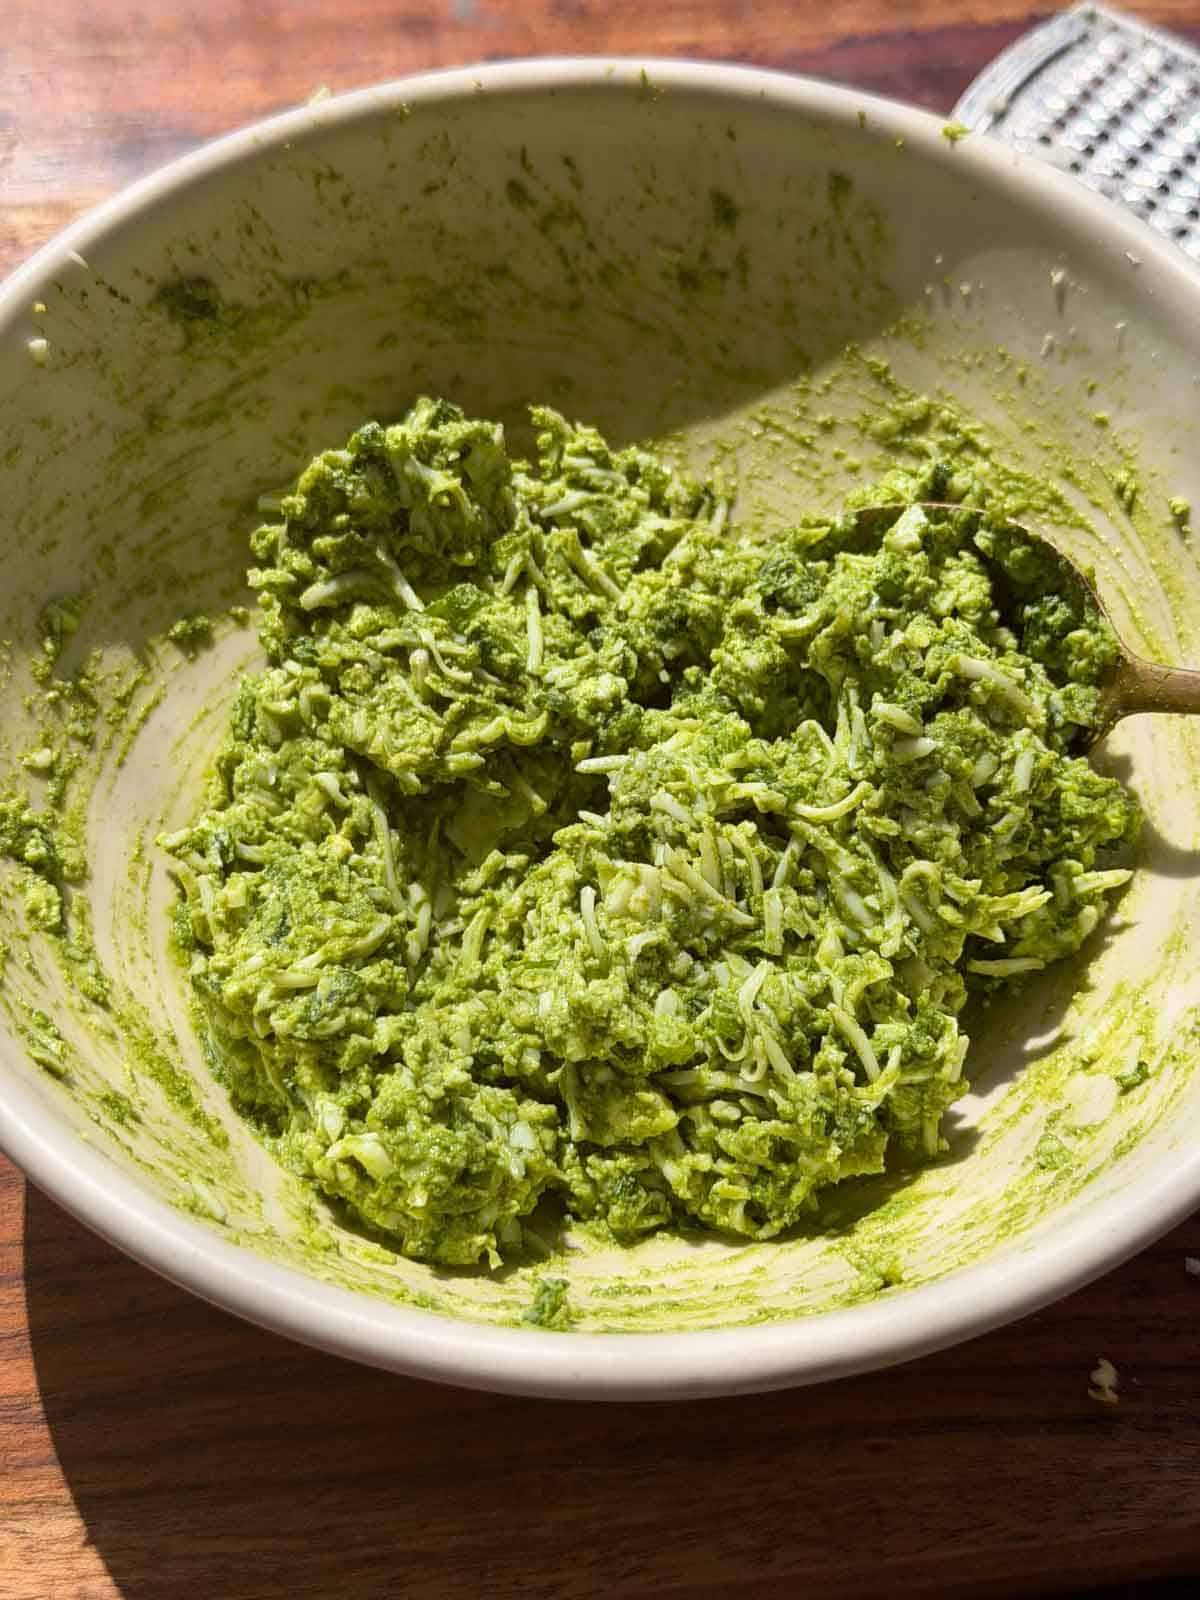
an image of the filling for chutney cheese egg sandwich

Frequently Asked Questions 

Which bread works best for this egg sandwich recipe?

I have used whole wheat bread, but you can use white bread, sandwich bread, multigrain bread, sourdough or any other bread you prefer.

Can I prepare the sandwiches in advance?

Yes. Assemble the sandwiches and refrigerate them for up to a few hours. As an extra step, you can wrap them in cling foil to prevent them from turning soggy or breaking apart. 

Can I eat add veggies to this recipe?  

Absolutely! Bellpeppers, grated carrot, finely chopped onions, tomatoes and diced cucumber are some veggies that taste really good in this egg sandwich.

Can I eat this bread toasted?

Yess! You can easily toast the sandwich if you like. It will taste just as delicious! 

Storage Tips

This cheese and egg sandwich is best enjoyed fresh. But If you’d like to prep ahead, make the filling and store it in an airtight container in the refrigerator for up to 2 days. Assemble the sandwich just before serving to keep the bread from becoming soggy.

If you’ve already assembled the sandwich, wrap it tightly and refrigerate for up to 12 hours. It’s perfect for packing into a lunchbox but is best eaten the same day.

chutney cheese egg sandwich assembled and ready to be served

If you’re looking for a quick, protein-packed sandwich that doesn’t compromise on flavour, this chutney cheese egg sandwich is a great one to have in your rotation. It comes together in just a few minutes with simple ingredients, making it perfect for busy mornings, lunchboxes, or those days when you need an easy meal without much effort. Once you try it, it’s bound to become a regular in your kitchen.

If you make this recipe, DM me your pictures or tag me in stories over on my IG @my_foodstory ❤️   

Watch Chutney Cheese Egg Sandwich Recipe Video

chutney cheese egg sandwich assembled and ready to be served
Print

Chutney Cheese Egg Sandwich

Creamy, cheese-y, and spicy, this chutney cheese egg sandwich is a quick, easy, and healthy recipe that's perfect for breakfast or as a 5 pm snack!
Course Breakfast, Snacks & Appetisers
Cuisine Indian
Diet Halal
Prep Time 10 minutes
Cook Time 25 minutes
Total Time 35 minutes
Servings 3 people
Calories 105kcal
Author Richa

Ingredients

  • 2 tablespoons green chutney MFS link
  • 2 hard boiled eggs grated
  • 1/2 cheese cube grated
  • 1 tablespoon greek yoghurt / hung curd
  • ¼ cup finely chopped spring onion greens
  • ⅛ teaspoon salt
  • 2 slices whole wheat bread

Instructions

Stuffing

  • Add green chutney, grated eggs, cheese, yogurt/hung curd spring onion greens, salt to a bowl and give it a good mix.
    2 tablespoons green chutney, 2 hard boiled eggs, 1/2 cheese cube, 1 tablespoon greek yoghurt / hung curd, ¼ cup finely chopped spring onion greens, ⅛ teaspoon salt

Assembling the sandwich

  • Place a bread slice on the work-top and spread approx. 3 tablespoons of the stuffing evenly. Cover with the other slice, press gently, cut into 2 and serve.
    2 slices whole wheat bread

Video

Notes

  1. This sandwich can also be grilled – it tastes just as good!

Nutrition

Calories: 105kcal | Carbohydrates: 9g | Protein: 7g | Fat: 4g | Saturated Fat: 1g | Polyunsaturated Fat: 1g | Monounsaturated Fat: 1g | Cholesterol: 125mg | Sodium: 226mg | Potassium: 119mg | Fiber: 1g | Sugar: 2g | Vitamin A: 259IU | Vitamin C: 2mg | Calcium: 60mg | Iron: 1mg

This article was researched and written by Urvi Dalal.

The post Healthy Chutney Cheese Egg Sandwich appeared first on My Food Story.

❌