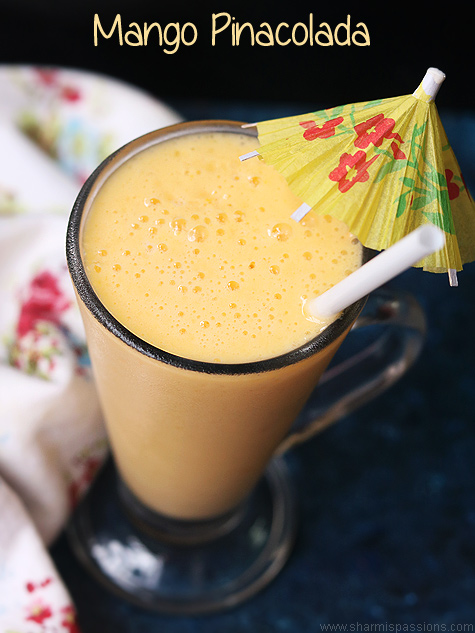
❌

Reading view

There are new articles available, click to refresh the page.

Sambaram Recipe | Spiced Buttermilk | Kerala Pacha Moru

SambaramΒ is a Kerala style spiced buttermilk. Sambaram is a refreshing drink made by blending curd with water, green chili, ginger and salt. Sambaram is served as a part of Onam Sadhya as it helps in digestion of the huge spread of Sadhya. Learn to make Sambaram with step by step pictures and video.

sambaram served with onion, green chillies

I have tasted sambaram only few times, now I can easily make at home itself. Sambaram is served in Onam Sadya meal as it helps in digestion. Not only for Sadya you can even make this spiced buttermilk to beat the scorching heat.

[feast_advanced_jump_to]

About Sambaram

Sambaram is a Kerala style spiced buttermilk made using thick curd, small onion, green chilies, curry leaves and salt. Sambaram is a popular drink served in Onam Sadya meal. It takes just 5 minutes to prepare Sambaram.

Sambaram is a refreshing summer drink, a slightly different take to the South Indian Neer Mor. Sambaram or Spiced buttermilk is the Kerala version of Moru / Chass / Majjiga / Majjige / Taak. This Kerala version of spiced buttermilk is also called as Sambharam or Moru or Pacha moru or Morum vellam.

Sambaram is sold commercially as a street food and in juice & petti (local) shops in Kerala. It is a very good replacement for tea, coffee or juices in summer between breakfast and lunch. It is a very refreshing drink to beat the heat.

My memory of Sambaram dates back to childhood days during my train journey to Goa where it was offered in packets - I could not stop with one - well most of us could not! You feel the stomach is really filled after having Moru during the diet / fasting days.

Sambaram is best in summer and gives a refreshing feel. It also aids in digestion and hence can be served as one of the dish whenever we have huge spread. Since Sambaram is a body cooler, it is better to avoid in rainy days and after evening or else one may catch cold!

sambaram served with onion, green chillies

Sambaram Video

Related Recipes

Sambaram Ingredients

  • Curd - Thick curd / Yogurt is recommended for this recipe. Fresh curd or the buttermilk churned after separating butter while making homemade butter gives a perfect blend. Add water based on your taste of having it like a lassi or buttermilk. Curd available at stores will also be good for this recipe.
  • Ginger - Ginger gives good flavor to this buttermilk also aids in digestion.
  • Green Chili - You can use regular green chilies or the long variety ones as per the availability.
  • Small Onion - Small onion adds aroma and flavor to the buttermilk.
ingredients needed to make sambaram

Why this recipe works?

  • Easy and quick to make.
  • Customizable according to our preference.
  • Healthy and nutritious.
  • Perfect to serve as a part of Sadya meal.
  • Can be made under 15 minutes.

Similar Recipes

How to make Sambaram Step by Step

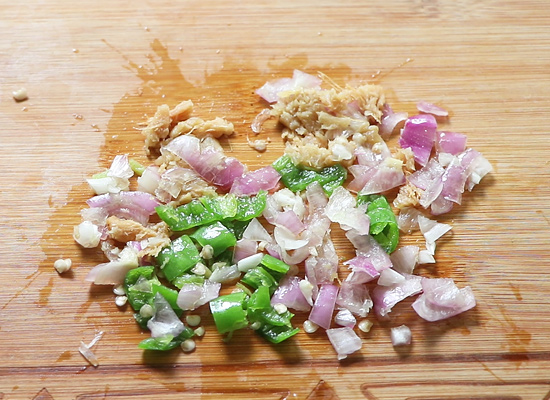
1.First get ready with Β½ inch ginger, 2 small onion and 1 long green chili. Chop them roughly.
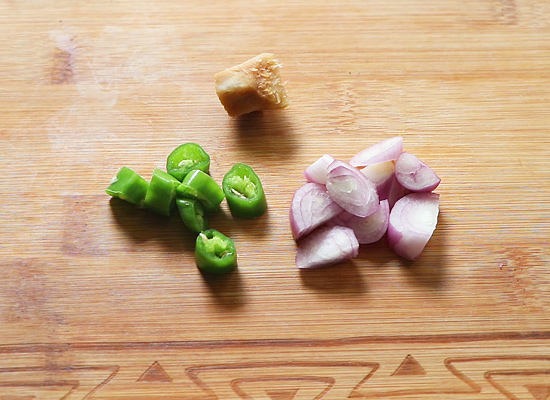
get ready with ginger,onion and green chilli

2.Take a hand mortar and pestle and crush using it. You can use mixer to crush it roughly too.
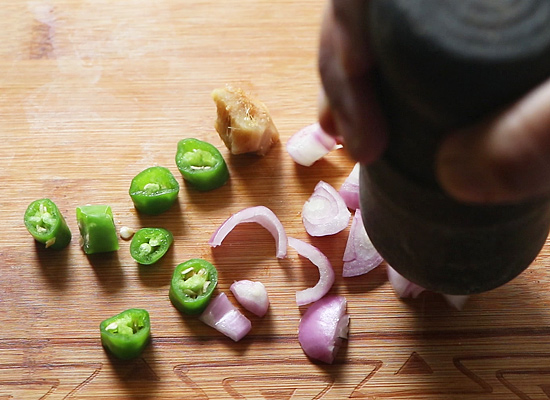
crush roughly

3.Crush roughly but do not make it a fine paste if using a mixer just crush it coarsely.
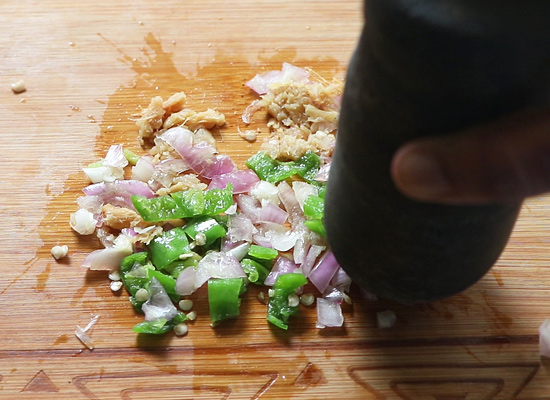
crush with mortar and pestle

4.Crush like shown below. Set aside.

crushed and ready

5.To a mixing bowl : add 1 cup thick curd.
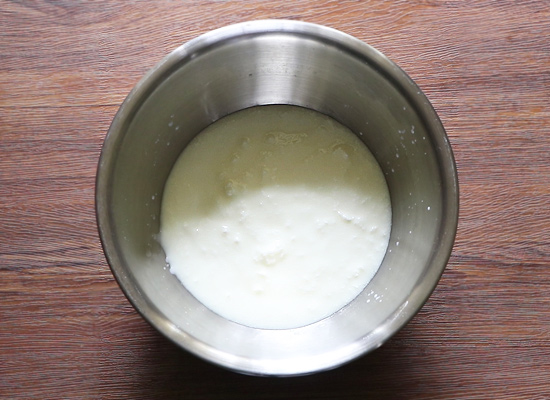
add curd

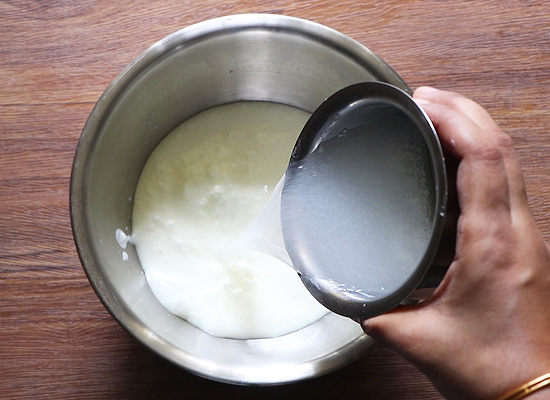
6.Add 1 and Β½ cups water to it.

add water

7.Whisk well. I used my hand churner to do this.
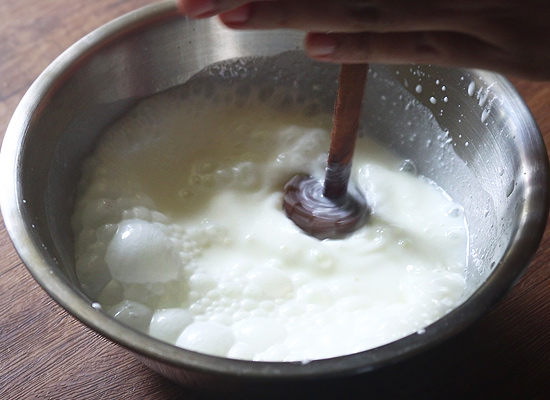
whisk well

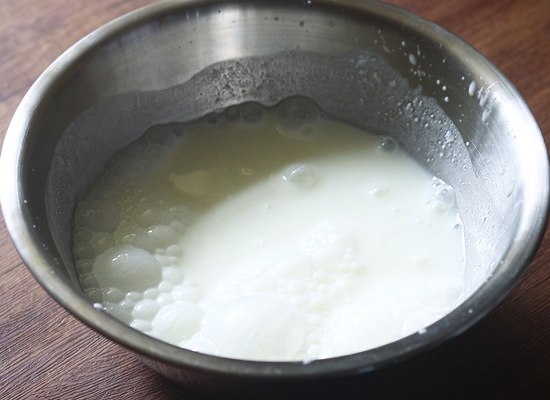
8.Whisk until smooth and creamy.

whisked buttermilk

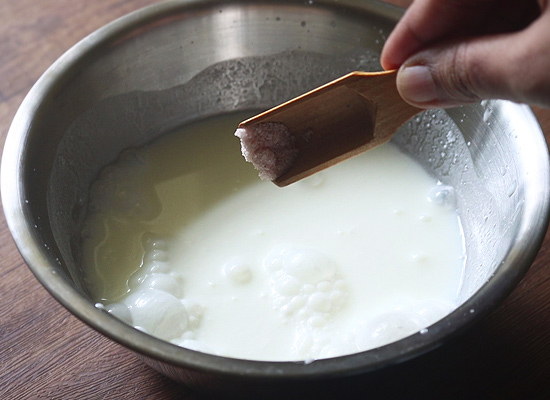
9.Add required salt to it.

add salt to taste

10.Add crushed ginger,onion and green chili.
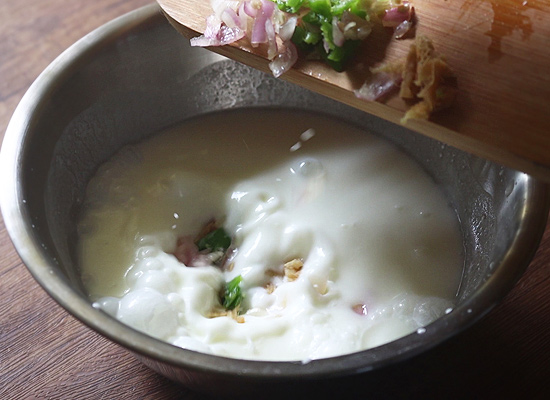
add crushed items

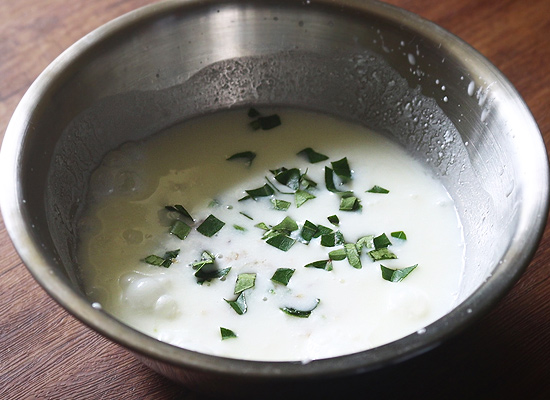
11.Add finely chopped curry leaves.

add curry leaves

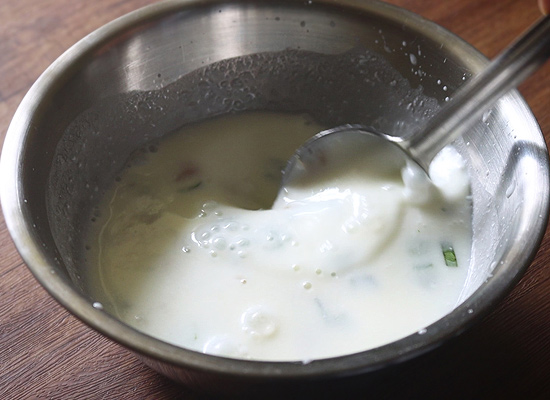
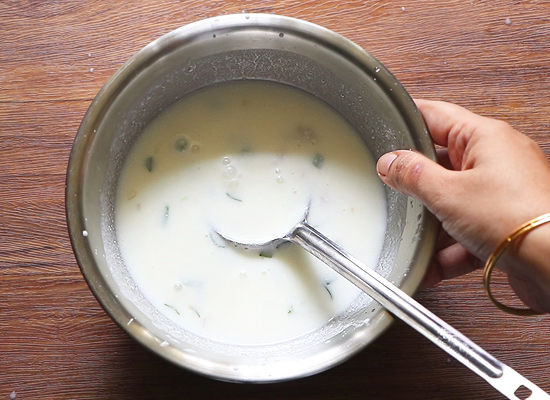
12.Mix it well.

mix well

13. Sambaram is ready to serve!

serve

Serve chilled!

sambaram served with onion, green chillies

Expert Tips

  • Curd - Use thick fresh curd. Thin it down by adding water. Use thick chilled curd for best results.
  • Whisking - You can use the traditional mathu(wooden ladle) or wired whisk to whisk the curd.
  • Flavorings - Small onion, ginger and green chilies are crushed and added which gives the drink a great flavor.
  • Consistency - The consistency can be adjusted to your liking, add more water if you like it a bit runny.
  • Spice level - Adjust spice level according to your preference. You can add more green chilies if you want it more spicy.
  • Resting time - You can give resting time of 30 minutes, keep it covered. Then if you want you can strain it and drink, the flavors will still be there.

Serving & Storage

Serve Sambaram chilled. Sambaram can be served as a part of meals or as a mid day drink. Garnish with coriander leaves or mint leaves to make Sambaram more appealing and refreshing.

Add ice cubes to make Sambaram exciting for kids and those who likes to have it with ice. Since buttermilk becomes sour after few hours, consume it fresh.

FAQS

1.What is Sambaram?

SambaramΒ  (Sambharam / Moru) is a refreshing drink made by blending curd (yogurt) with water, chili, ginger and salt. Sambaram is the Kerala version of Moru (Tamil) / Chass (Hindi) / Majjiga (Kannada) / Majjige (Telugu) / Taak (Marathi).

2.Is Sambaram and buttermilk the same ?

No. While the buttermilk is raw, Sambaram is flavored with chilli,, ginger and salt. However Sambaram, Moru, Chass, Majjiga, Majjige, Taak are all similar but prepared with slight variations in the ingredients.

sambaram served with onion, green chillies

If you have any more questions about this Sambaram RecipeΒ do mail me at sharmispassions@gmail.com. In addition, follow me onΒ Instagram,Β Facebook,Β PinterestΒ ,YoutubeΒ andΒ TwitterΒ .

Tried this Sambaram Recipe? Do let me know how you liked it. Also tag us on Instagram @sharmispassions and hash tag it on #sharmispassions.

πŸ“– Recipe Card

Print

Sambaram Recipe

SambaramΒ is a Kerala style spiced buttermilk. Sambaram is a refreshing drink made by blending curd with water, green chili, ginger and salt. Sambaram is served as a part of Onam Sadhya as it helps in digestion of the huge spread of Sadhya. Learn to make Sambaram with step by step pictures and video.
Course Drinks
Cuisine Indian
Keyword curd recipes, drink recipes, Healthy tea time drink, Nutritional Beverage, Nutritional Drink, yogurt recipes
Prep Time 10 minutes
Total Time 10 minutes
Servings 2
Calories 79kcal
Author Sharmilee J

Ingredients

  • 1 cup curd
  • 1 and Β½ cups water
  • Β½ inch ginger
  • 2 small onion
  • 1 long green chilli
  • salt to taste
  • few curry leaves

Instructions

  • First get ready with Β½ inch ginger, 2 small onion and 1 long green chili. Chop them roughly.
  • Take a hand mortar and pestle and crush using it. You can use mixer to crush it roughly too.
  • Crush roughly but do not make it a fine paste if using a mixer just crush it coarsely.
  • Crush like shown below. Set aside.
  • To a mixing bowl : add 1 cup thick curd.
  • Add 1 and Β½ cups water to it.
  • Whisk well. I used my hand churner to do this.
  • Whisk until smooth and creamy.
  • Add required salt to it.
  • Add crushed ginger,onion and green chilli.
  • Add finely chopped curry leaves.
  • Mix it well.
  • Sambaram is ready to serve!
  • Serve chilled!

Video

Notes

  • Curd - Use thick fresh curd. Thin it down by adding water. Use thick chilled curd for best results.
  • Whisking - You can use the traditional mathu(wooden ladle) or wired whisk to whisk the curd.
  • Flavorings - Small onion, ginger and green chilies are crushed and added which gives the drink a great flavor.
  • Consistency - The consistency can be adjusted to your liking, add more water if you like it a bit runny.
  • Spice level - Adjust spice level according to your preference. You can add more green chilies if you want it more spicy.
  • Resting time - You can give resting time of 30 minutes, keep it covered. Then if you want you can strain it and drink, the flavors will still be there.

Nutrition

Serving: 200ml | Calories: 79kcal | Carbohydrates: 7g | Protein: 4g | Fat: 4g | Saturated Fat: 3g | Polyunsaturated Fat: 0.1g | Monounsaturated Fat: 1g | Cholesterol: 16mg | Sodium: 67mg | Potassium: 199mg | Fiber: 0.2g | Sugar: 6g | Vitamin A: 310IU | Vitamin C: 101mg | Calcium: 175mg | Iron: 0.1mg

The post Sambaram Recipe | Spiced Buttermilk | Kerala Pacha Moru appeared first on Sharmis Passions.
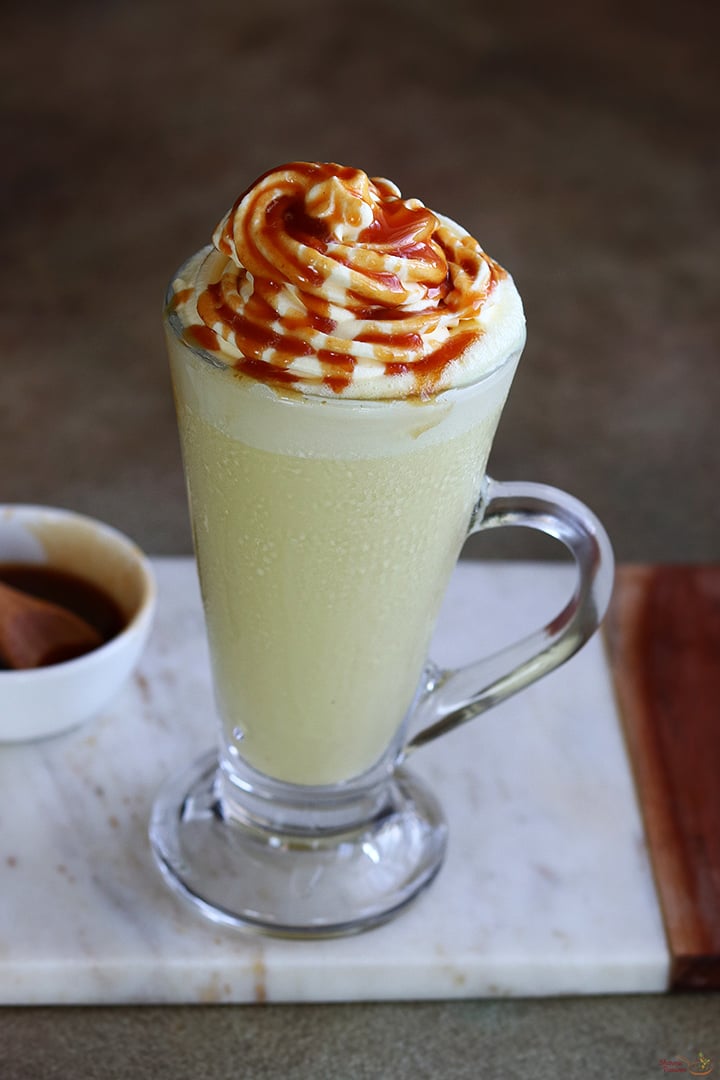
Butterscotch Milkshake Recipe

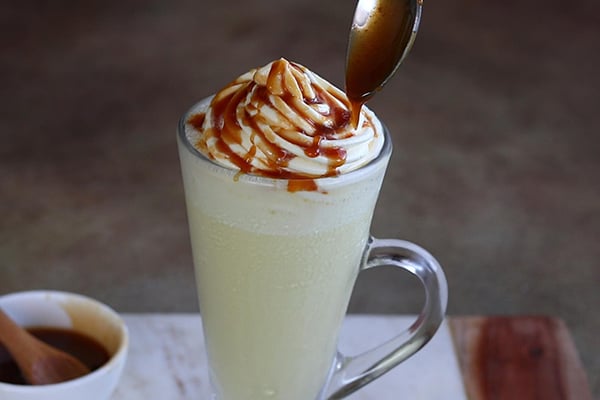
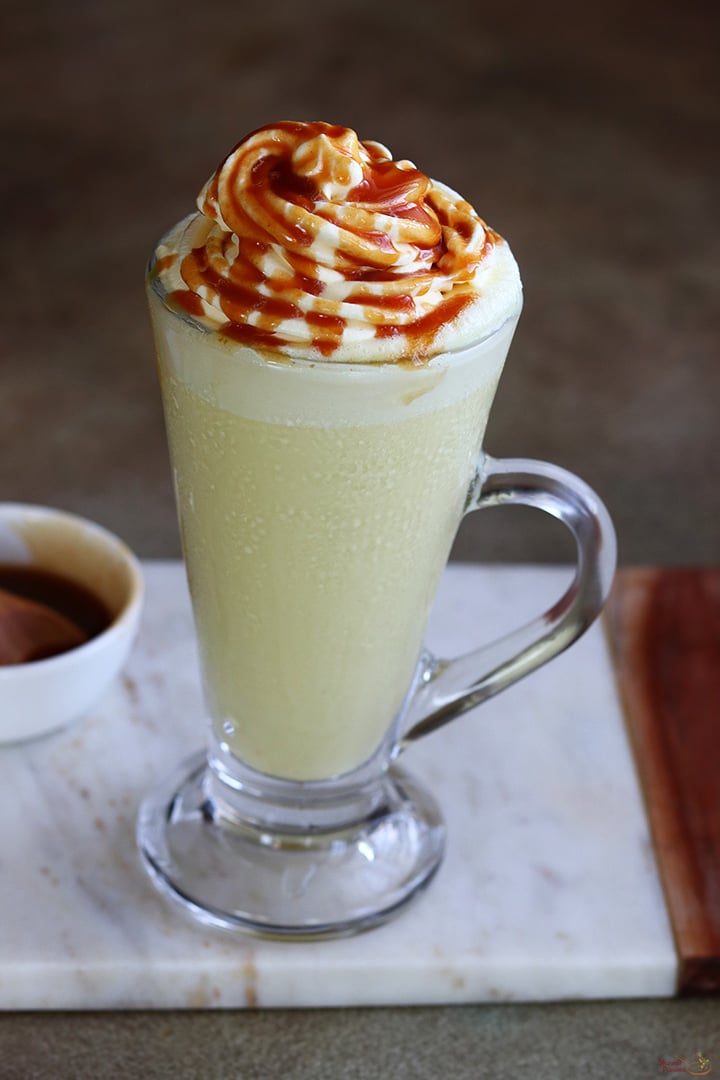
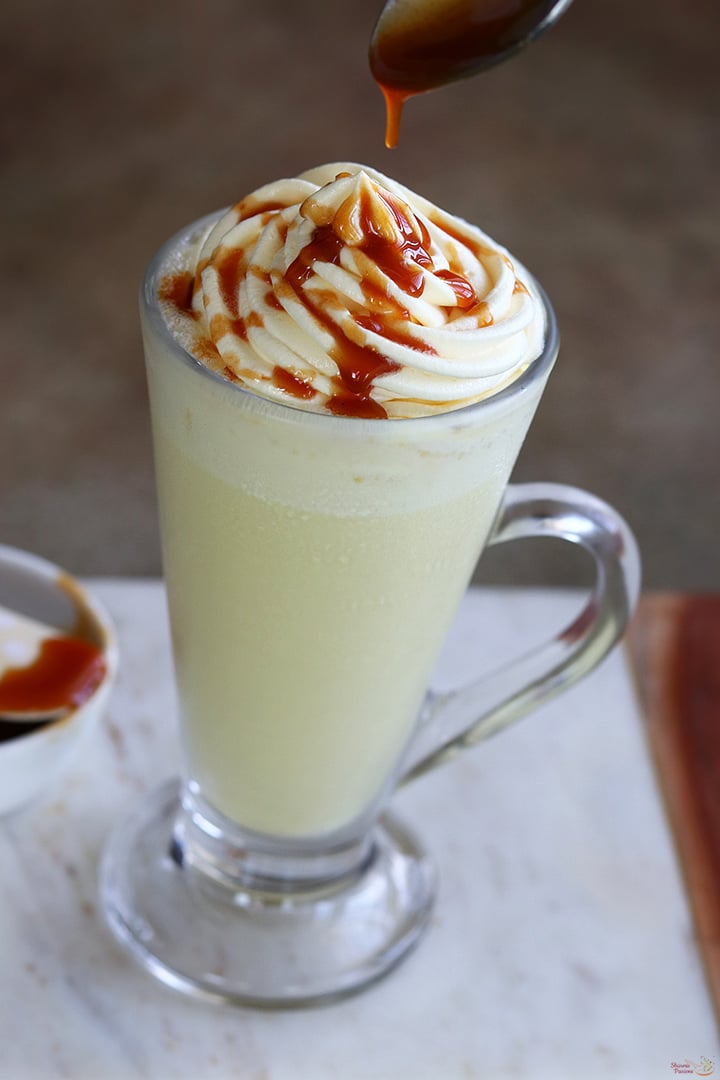
Butterscotch Milkshake is a delicious drink made by blending milk with butterscotch ice cream, butterscotch sauce and serving it chilled with whipped cream topping. It has a rich golden colour, smooth creamy and frothy texture. It hardly takes 10 minutes to make but still feels rich and special.

butterscotch milkshake served

The taste is sweet, rich and slight caramel like in every sip. Butterscotch flavor stands out nicely and ice cream makes it more thick and creamy in texture. It is a good homemade alternate when compared to carbonated drinks from store. You can make this when kids asks for something sweet and cold, it always become instant favorite.

[feast_advanced_jump_to]

About Butterscotch Milkshake

Butterscotch Milkshake is a simple milkshake made using milk, butterscotch ice cream and butterscotch sauce. The main taste comes from butterscotch sauce and ice cream which gives that signature caramel taste and flavour. Ice cream is optional but it makes the shake more rich and creamy just like in shops.

The texture is smooth and frothy when blended perfectly. Ice cream helps in making the drink chilled and gives it a creamy and rich taste. When you drizzle sauce inside the glass before pouring, it looks more attractive and little fancy.

This butterscotch ice cream is creamy, rich and irresistibly delicious. Made with butterscotch ice cream this tastes just like the ones served in cafe. It is a perfect combination of creaminess, sweetness and caramel crunch in every sip. I used butterscotch ice cream which had butterscotch chips inside.

I usually make it during weekends when kids are at home so that I can serve them instantly. It's jst quick to make and no cooking needed for this recipe. Both mittu and gugu are fond of butterscotch flavour and they absolutely love this milkshake.

Similar Recipes

butterscotch milkshake served

Butterscotch Milkshake Video

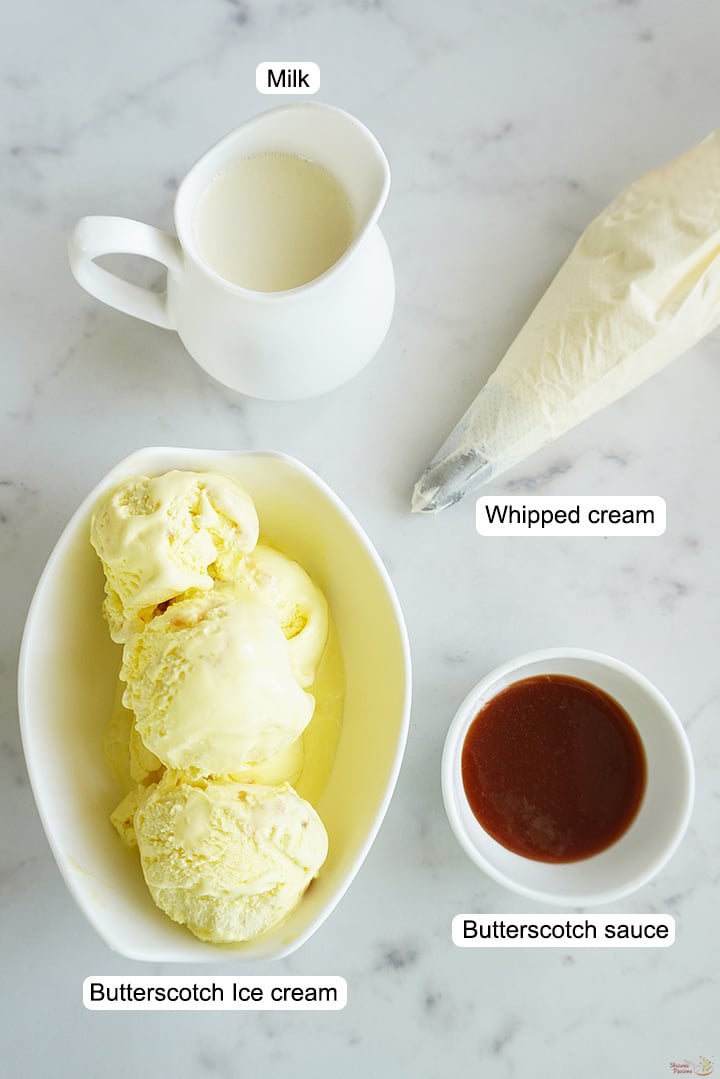
Butterscotch Milkshake Ingredients

  • Milk - I used full cream milk for base. It makes the drink perfect in consistency when combined with ice cream.
  • Butterscotch ice cream - I used butterscotch ice cream blended with milk. Ice cream gives richness and creaminess to the milkshake.
  • Butterscotch sauce - I used this for strong butterscotch flavour and extra sweetness. I used it for blending and for drizzling over the topping to make it look attractive.
  • Whipped cream - I mixed little butterscotch sauce with whipped cream and used it for topping.
butterscotch milkshake ingredients

How to make Butterscotch Milkshake Step by Step

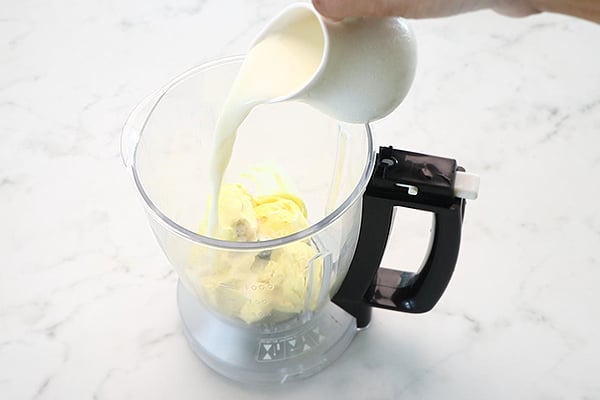
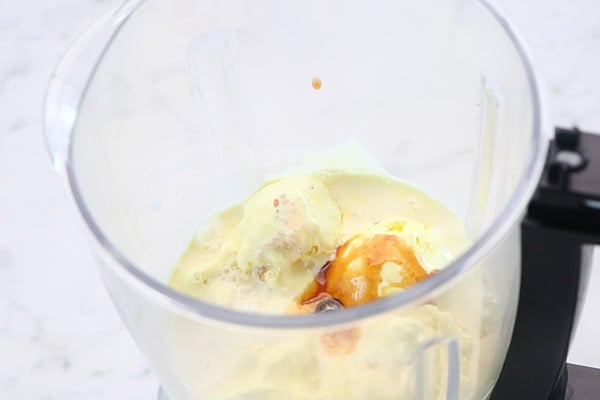
1.To a mixer jar add ΒΎ cup milk along with 2 cups butterscotch ice cream.

add milk, butterscotch ice cream

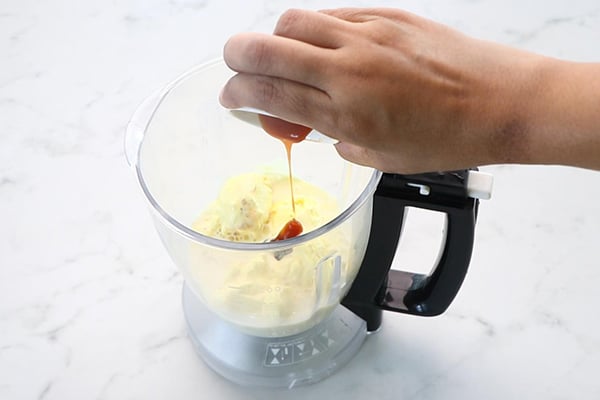
2.Add 1 tablespoon butterscotch sauce.

add butterscotch sauce

3.All ready in mixer to blend.

all ready to blend

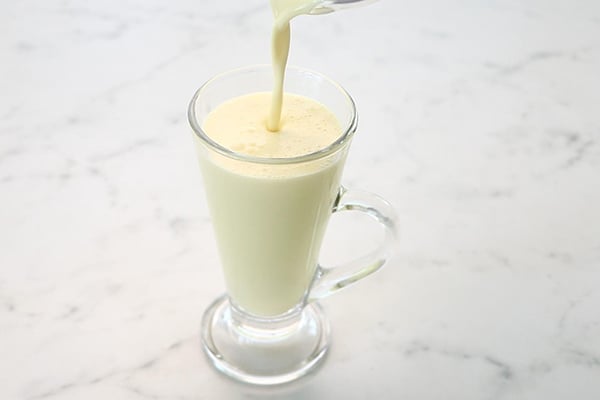
4.Blend until smooth and creamy. Pour into serving glass.

blend and pour

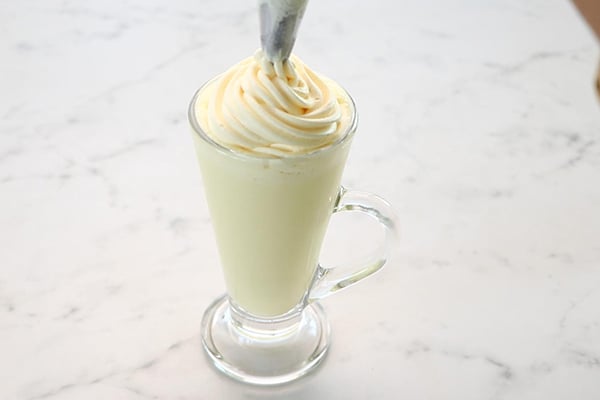
5.Top with whipped cream.

whipped cream topping

6.Drizzle butterscotch sauce generously.

drizzle butterscotch sauce

Serve chilled!

Expert Tips

  • Chilled milk - I usually keep milk in fridge for some time before making the milkshake.
  • Blending - I blend until it is smooth, creamy and frothy. Immediately pour and serve.
  • Drizzle sauce - You can even slide the glass and add butterscotch sauce along the sides of glass before pouring the milkshake. It makes it look more attractive and kids like that.
  • Check sweetness - Some ice creams are already very sweet. Taste once and then decide if extra sauce is needed or not.
  • Serving - I serve fresh and cold for best. If kept for long time, ice cream may melt and make the milkshake runny.

Serving and Storage

Serve Butterscotch Milkshake immediately in tall glasses with little extra sauce drizzle on top if you like. This goes well as evening treat or simple dessert after lunch. It is best consumed fresh and not stored for long hours. If you refrigerate also, texture may change little and froth will reduce.

FAQS

1.Can I skip ice cream?Β 

Yes you can skip ice cream if you want lighter shake. Instead add 2 cups frozen milk with Β½ teaspoon butterscotch essence to make the milkshake rich and creamy.

2.Can I use other flavor ice cream?Β 

Yes you can use vanilla or caramel flavour ice cream.

3.Is it very sweet?Β 

Sweetness depends on ice cream and sauce used. You can reduce sauce if you feel it is too much sweet.

4.Can I make it in advance?Β 

It is better to prepare fresh and serve it immediately. If making earlier, keep in fridge and mix once before serving.

5.Can I add in nuts?Β 

Yes you can add chopped nuts for extra crunch.Β 

butterscotch milkshake served

If you have any more questions about this Butterscotch Milkshake Recipe do mail me at sharmispassions@gmail.com. In addition, follow me on Instagram, Facebook,Β  Pinterest, Youtube andΒ TwitterΒ .

Tried this Β Butterscotch Milkshake Recipe? Do let me know how you liked it. Also tag us on Instagram @sharmispassions and hash tag it on #sharmispassions.

πŸ“– Recipe Card

Print

Butterscotch Milkshake Recipe

Butterscotch Milkshake is a delicious drink made by blending milk with butterscotch ice cream, butterscotch sauce and serving it chilled with whipped cream topping. It has a rich golden colour, smooth creamy and frothy texture. It hardly takes 10 minutes to make but still feels rich and special.
Course Drinks
Cuisine American, French, Indian, Italian, Japanese, Mexican
Keyword butterscotch recipes, dessert recipes, drink recipes, Healthy tea time drink, milk recipes, milkshake recipes, Nutritional Beverage, Nutritional Drink
Prep Time 10 minutes
Total Time 10 minutes
Servings 2 glasses
Calories 328kcal
Author Sharmilee J

Ingredients

  • ΒΎ cup milk
  • 2 cups butterscotch ice cream
  • 1 tablespoon butterscotch sauce + extra for drizzling
  • whipped cream for topping

Instructions

  • To a mixer jar add ΒΎ cup milk along with 2 cups butterscotch ice cream.
  • Add 1 tablespoon butterscotch sauce.
  • All ready in mixer to blend.
  • Blend until smooth and creamy. Pour into serving glass.
  • Top with whipped cream.
  • Drizzle butterscotch sauce generously.

Video

Notes

  • Chilled milk - I usually keep milk in fridge for some time before making the milkshake.
  • Blending - I blend until it is smooth, creamy and frothy. Immediately pour and serve.
  • Drizzle sauce - You can even slide the glass and add butterscotch sauce along the sides of glass before pouring the milkshake. It makes it look more attractive and kids like that.
  • Check sweetness - Some ice creams are already very sweet. Taste once and then decide if extra sauce is needed or not.
  • Serving - I serve fresh and cold for best. If kept for long time, ice cream may melt and make the milkshake runny.

Nutrition

Serving: 250ml | Calories: 328kcal | Carbohydrates: 35g | Protein: 8g | Fat: 17g | Saturated Fat: 11g | Polyunsaturated Fat: 1g | Monounsaturated Fat: 5g | Cholesterol: 69mg | Sodium: 140mg | Potassium: 400mg | Fiber: 1g | Sugar: 32g | Vitamin A: 704IU | Vitamin C: 1mg | Calcium: 282mg | Iron: 0.1mg

The post Butterscotch Milkshake Recipe appeared first on Sharmis Passions.
Black Tea Recipe

Making a cup of black tea is not rocket science, but I am sharing few of my tips and tricks to make the perfect cup of black tea so it is not bitter. Enjoy this hot cup of tea with black tea with biscuits or cookies. Black Tea Recipe Making black tea is not rocket...

Read More

The post Black Tea Recipe appeared first on Yummy Tummy.

Ragi Milkshake Recipe (Millet Milkshake)

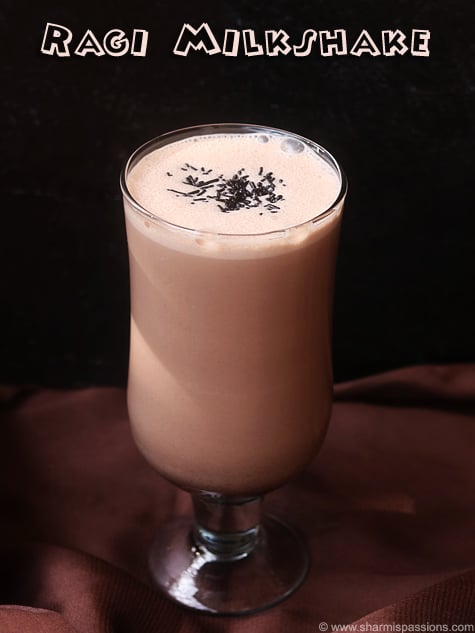
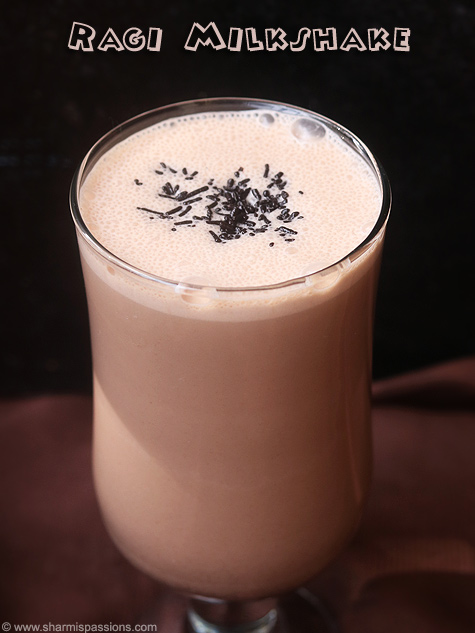
Ragi Milkshake is a mild and filling drink made using ragi flour, cocoa powder and sugar. It is a healthy and kid friendly drink to enjoy. This drink can be made in 30 minutes and you can serve it cold as it is nutritious and also tasty.

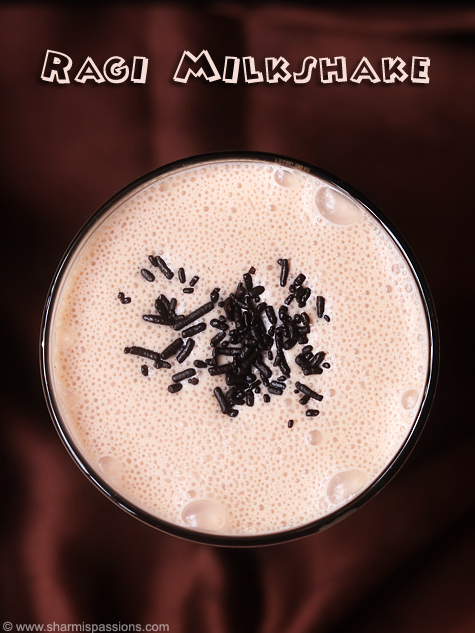
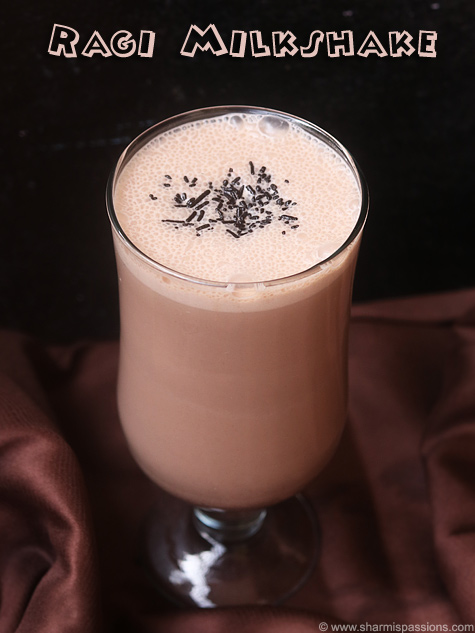
ragi milkshake served

The combination of ragi and cocoa work so well together, cocoa hides the ragi flavour completely so kids drink this without fuss. It is creamy and smooth and tastes almost like chocolate milkshake. Ragi is rich in calcium and other nutrients needed for healthy growth and bone development.

[feast_advanced_jump_to]

About Ragi Milkshake

Ragi Milkshake is a nutritious drink that can be given to kids and adults and has health benefits. This is made by mixing ragi with cocoa powder and milk, this drink tastes good and is also packed with nutrition.

Ragi milkshake is creamy and delicious making it a favourite among kids. This has chocolate brown colour because of the cocoa powder, it also looks appealing to kids and chocolate lovers will enjoy this drink. Vanilla extract adds extra flavour.

You can adjust how much sugar you add depending on preference, some people like it sweeter and some prefer less sweet. The cocoa powder reduce the ragi flavour so well that you can make it without cocoa also if you prefer, but cocoa really makes the difference for kids.Β 

I usually make this for my kids as breakfast drink when in hurry the whole glass gets finished quickly as it tastes like chocolate shake.Β 

This Ragi Milkshake is so tasty that you will not find its actually ragi in it.I made it chocolate flavoured as its my kids favourite but its purely your wish. Check my tips for variations.

Similar Recipes

ragi milkshake served

Ragi Milkshake Ingredients

  • Ragi Flour - I use ragi flour for nutrition and it is the base of this milkshake. It gives calcium and other nutrients for growth.
  • Cocoa Powder - I add cocoa powder because it suppresses the flavour of ragi. Cocoa also gives chocolate taste and make it more appealing.
  • Milk - I use full cream milk for making it creamy and smooth. Cold milk is preferred.
  • Sugar - I add sugar for sweetness and you can adjust the amount according to your preference. Some like it sweet and some prefer less sweet so add to taste.
  • Vanilla Essence - I add vanilla essence which is optional but it gives a nice flavour to the milkshake.Β 
  • Water - I use water for cooking ragi flour mixture before adding milk. Water helps ragi flour cook proper and become thick before mixing with milk.

How to make Ragi Milkshake Step by Step

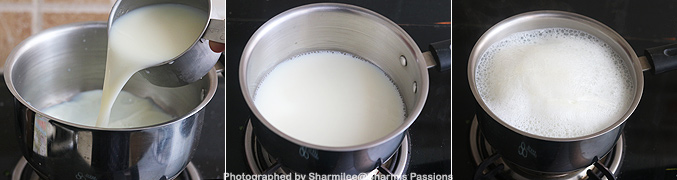
1.Take milk in a sauce pan, boil for 3-5 minutes. Set aside to cool down.

how to make ragi milkshake step1

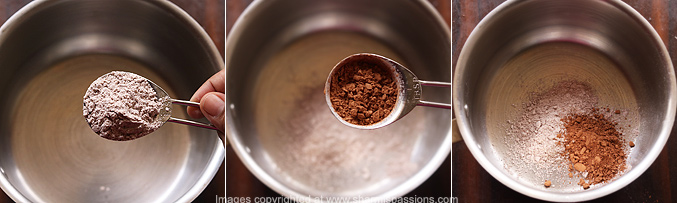
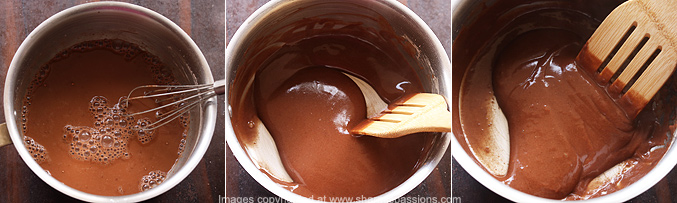
2.To a sauce pan - measure and add ragi flour and coco powder to it.

how to make ragi milkshake step2

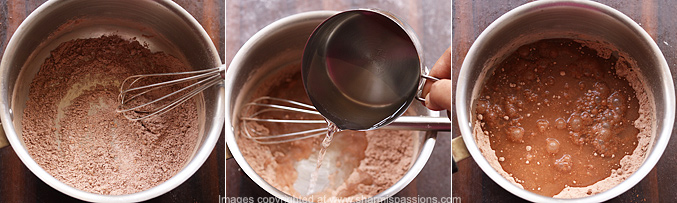
3.Whisk well then add water to it.

how to make ragi milkshake step3

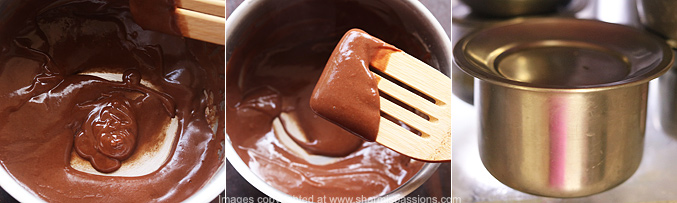
4.Whisk well to avoid lumps. All this is done off the stove. Now switch on and cook until it becomes thick and shiny.

how to make ragi milkshake step4

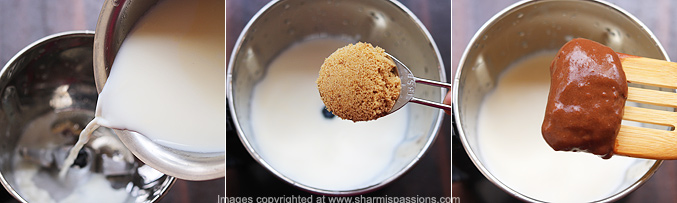
5.It should coat the ladle like this. Switch off and cool down completely. Chill the milk at least for 15-30 minutes.

how to make ragi milkshake step5

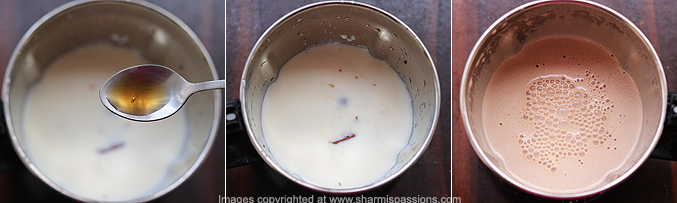
6.Add chilled milk to mixer jar, add sugar and cooked ragi mixture.

how to make ragi milkshake step6

7.Add vanilla essence to it and blend it well until smooth and creamy. Chill it until serving time and Serve chilled.

how to make ragi milkshake step7

Serve with a garnish of chocolate shavings or chocolate semiya like how I did. You can even sprinkle coco powder(as in video).

ragi milkshake served

Expert Tips

  • Mixing - I whisk ragi flour and cocoa powder with water first off the stove before cooking. Whisking well help avoid lumps.
  • Cooking - I cook the mixture until it becomes thick and shiny and coat the ladle properly. This is an important step so that it blends well with milk and taste smooth.
  • Cool Completely - I let the cooked ragi mixture cool down completely before adding it to blender.Β 
  • Chill Milk Well - I chill milk at least for 15 to 30 minutes in the fridge before blending. Cold milk make milkshake smooth and creamy.
  • Blend Smooth - I add chilled milk, sugar and cooked ragi mixture to mixer and blend well until smooth and creamy.Β 
  • Use Full Fat Milk - I use full cream milk for creamy and richness, you can use low fat milk if you prefer lighter version.

Serving and Storage

Serve ragi milkshake chilled in glass with garnish of chocolate shavings or chocolate sprinkles on top. You can serve it right after blending or chill until serving time, both work fine. Store leftover in fridge for one day in airtight container and shake well before serving because it might settle.Β 

FAQS

1.Why my milkshake is grainy and not smooth?

Lumps in ragi flour makes it grainy so whisk well with water off the stove before cooking. Cook until thick and blend well with cold milk to get smooth texture.

2.Can I skip cocoa powder?

Yes you can skip cocoa and just add vanilla essence, but cocoa powder hide the flavour of ragi so kids will love it. Cocoa makes big difference specially for kids.

3.How much sugar to add?

You can just adjust sugar according to your preference, some like it sweet and some prefer less sweet.Β 

4.Can I skip vanilla essence?

Yes vanilla essence is optional, cocoa powder alone gives good flavour to milkshake.

5.How long can I store this?

You can just leftover in fridge for one day in an airtight container and shake well before serving. Better to make fresh because it tastes best when just made and cold.

ragi milkshake served

If you have any more questions about this Ragi Milkshake Recipe do mail me at sharmispassions@gmail.com. In addition, follow me on Instagram, Facebook,Β  Pinterest, Youtube andΒ TwitterΒ .

Tried this Ragi Milkshake Recipe? Do let me know how you liked it. Also tag us on Instagram @sharmispassions and hash tag it on #sharmispassions.

πŸ“– Recipe Card

RagiMilkshake1
Print

Ragi Milkshake Recipe

Ragi Milkshake is a mild and filling drink made using ragi flour, cocoa powder and sugar. It is a healthy and kid friendly drink to enjoy. This drink can be made in 30 minutes and you can serve it cold as it is nutritious and also tasty.
Course Drinks
Cuisine Indian
Keyword milk recipes, milkshake recipes, millet recipes, Nutritional Beverage, Nutritional Drink, ragi recipes, vanilla recipes
Prep Time 10 minutes
Cook Time 5 minutes
Chilling Time 15 minutes
Total Time 30 minutes
Servings 2 glasses
Calories 140kcal
Author Sharmilee J

Ingredients

  • 1 Β½ heaped tablespoon ragi flour
  • Β½ tablespoon coco powder
  • 1 Β½ cups milk
  • 1 tablespoon sugar
  • ΒΌ teaspoon vanilla essence (optional)
  • ΒΎ cup water

Instructions

  • To a sauce pan - measure and add ragi flour and coco powder to it.
  • Whisk well add water to it.
  • Whisk well to avoid lumps. All this is done off the stove. Now switch on and cook until it becomes thick and shiny.
  • It should coat the ladle like this. Switch off and cool down completely. Chill the milk at least for 15-30 mins.
  • Add chilled milk to mixer jar, add sugar and cooked ragi mixture.
  • Add vanilla essence to it and blend it well until smooth and creamy. Chill it until serving time and Serve chilled.
  • Serve Ragi Milkshake with a garnish of chocolate shavings or chocolate sprinkles.

Video

Notes

  • Mixing - I whisk ragi flour and cocoa powder with water first off the stove before cooking. Whisking well help avoid lumps.
  • Cooking - I cook the mixture until it becomes thick and shiny and coat the ladle properly. This is an important step so that it blends well with milk and taste smooth.
  • Cool Completely - I let the cooked ragi mixture cool down completely before adding it to blender.Β 
  • Chill Milk Well - I chill milk at least for 15 to 30 minutes in the fridge before blending. Cold milk make milkshake smooth and creamy.
  • Blend Smooth - I add chilled milk, sugar and cooked ragi mixture to mixer and blend well until smooth and creamy.Β 
  • Use Full Fat Milk - I use full cream milk for creamy and richness, you can use low fat milk if you prefer lighter version.

Nutrition

Serving: 200ml | Calories: 140kcal | Carbohydrates: 16g | Protein: 6g | Fat: 6g | Saturated Fat: 4g | Polyunsaturated Fat: 0.2g | Monounsaturated Fat: 1g | Cholesterol: 22mg | Sodium: 74mg | Potassium: 297mg | Fiber: 0.5g | Sugar: 15g | Vitamin A: 296IU | Calcium: 232mg | Iron: 0.2mg

The post Ragi Milkshake Recipe (Millet Milkshake) appeared first on Sharmis Passions.
Golden Milk Latte | Turmeric Milk Latte

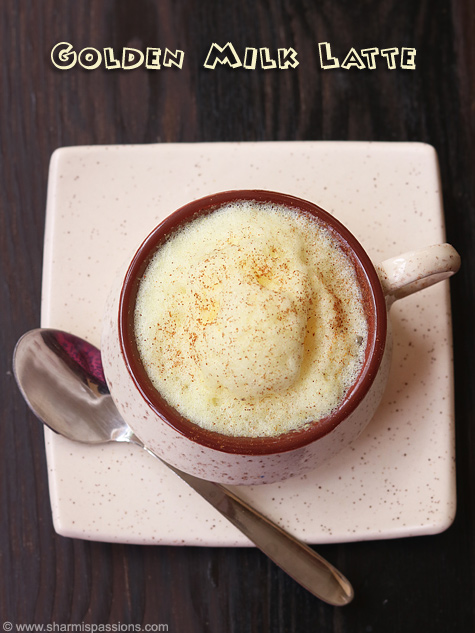
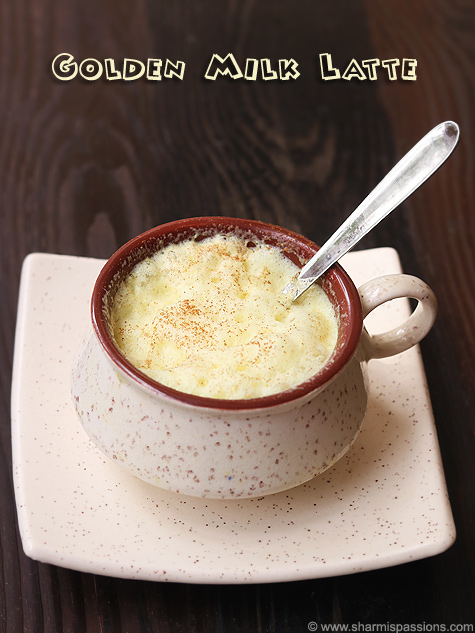
Golden Milk Latte is a flavourful, yummy drink made by simmering milk with turmeric powder & flavours and frothed to give a cloud like effect on top.Β Golden Milk Latte is a healthy alternate to tea /coffee with additional benefits of relieving common cold & fever.

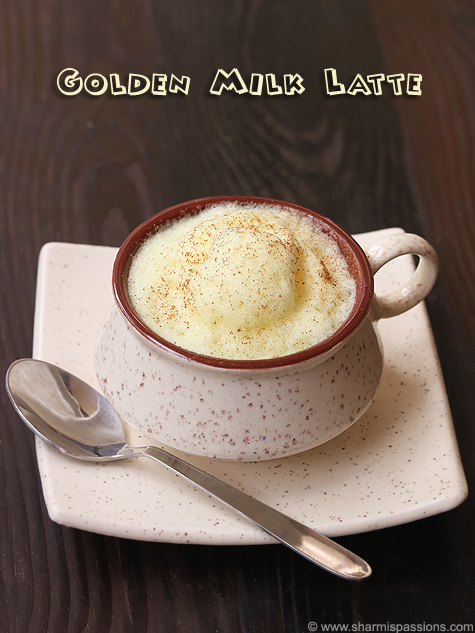
golden milk latte served

Golden Milk Latte is a quick yummy drink made with milk and turmeric powder. Usually latte is prepared with coffee as base. A latte is an drink that consists of espresso, steamed milk, and foam. Do try this drink and enjoy!

[feast_advanced_jump_to]

About Golden Milk Latte

Golden Milk Latte is a drink that has been used in Ayurveda for long time for health benefits. Turmeric is the main ingredient and it is known for medicinal values. This warm, comforting drink is perfect for any time of day when you want something warm and soothing.

I saw this Turmeric Milk Latte idea in a show that I got so tempted to try it. I tried it once and loved it so much. Then again tried couple of times with proper measures to post it here.

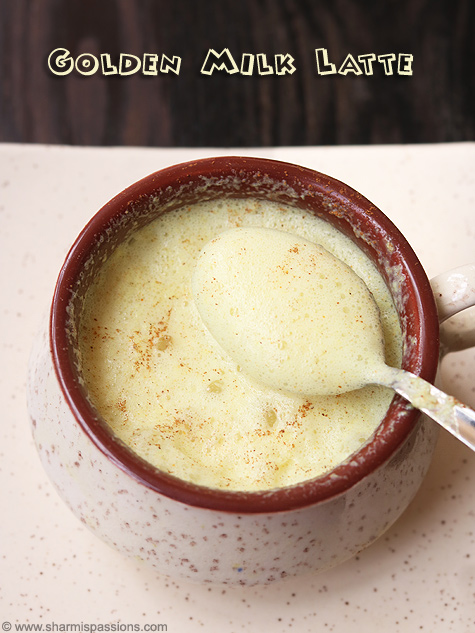
The flavour is just warm and spiced, not too strong but taste special. This has a creamy texture when you froth the milk well, and the froth on top adds a nice layer. The colour is golden yellow because of turmeric.

You can make this drink according to your taste, some people add more sugar and some add less, some use honey instead of sugar. You can also use plant based milk if you prefer. The base recipe stays the same, just milk, spices and frothing.

I usually make this on cold days for my family. Everyone loves it because it tastes good and feels soothing, and it has its health benefits too.

Similar Recipes

golden milk latte served

Golden Milk Latte Ingredients

  • Milk - I use milk as base for making creamy latte. Full fat milk work best because it froths better and makes a richer drink.
  • Turmeric Powder - I add a pinch of turmeric powder for flavour and health benefit. Turmeric help relieve common cold and fever and gives golden colour to latte.
  • Cinnamon Powder - I just add a pinch of cinnamon powder for warmth and flavour. It complements with turmeric well.
  • Sugar - I add sugar for sweetness and you can adjust according to your preference. Some prefer less sweet so add to taste, or you can also use honey instead.
  • Fresh Cream - I add fresh cream to make latte creamy and rich, gives better taste.

How to make Golden Latte Step by Step

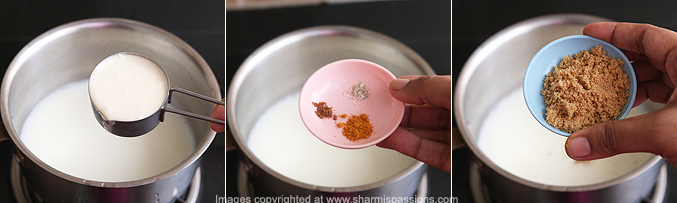
1.Take milk in a sauce pan, boil for 3-5 minutes.

how to make golden milk latte step1

2.Add fresh cream to it along with cardamom powder, turmeric powder and cinnamon powder. Add sugar.

how to make golden milk latte step2

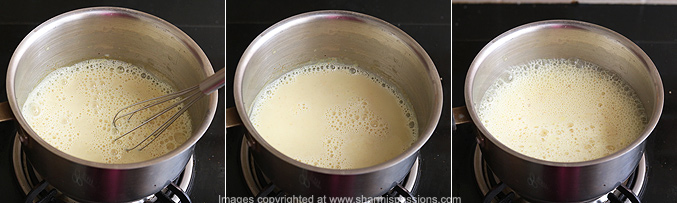
3.Whisk well. Let it come to a boil and switch off.

how to make golden milk latte step3

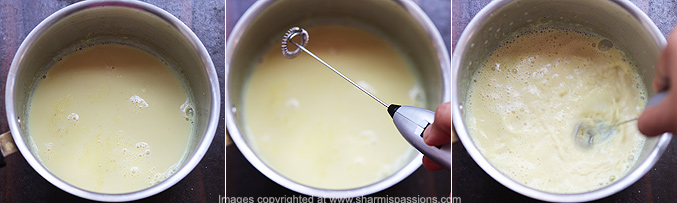
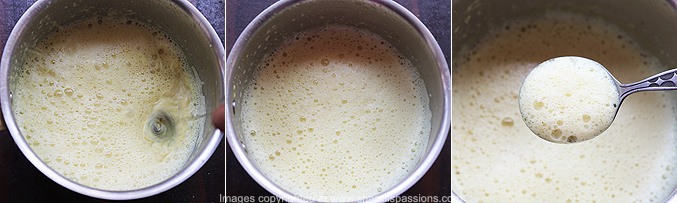
4.I used just a cup of milk so used my coffee frother, you can use a blender too. Just froth it well.

how to make golden milk latte step4

5.Scoop out and serve immediately along with froth.

how to make golden milk latte step5

Serve hot!

golden milk latte served

Expert Tips

  • Boil Milk First - I take milk in a sauce pan and boil for 3 to 5 minutes before adding spices. Boiling milk helps it froth better and makes latte smoother.
  • Add All Together - I add fresh cream, cardamom powder, turmeric powder, cinnamon powder and sugar all at same time. This helps to blend flavours well.
  • Whisk Well - I whisk milk well after adding spices and cream so that the flavours are evenly mixed.
  • Froth Properly - I use coffee frother to froth milk well, you can use blender also. Frothing makes it creamy and thick on top which make it taste better.
  • Serve Hot - I serve golden milk latte hot immediately after frothing. Serving hot is important for its soothing and taste better when warm.

Serving and Storage

Serve Golden Milk Latte hot in cup or mug with scoop of froth on top. You can serve immediately after making or keep warm for little while. Don't store leftover because it taste best when just made and hot, the froth also disappear after sometime.

FAQS

1.How can I make it vegan?

You can use almond milk or oat milk instead of regular milk. Plant based milk also froth well but full fat milk work best.

2.How do I get good froth?

Use a coffee frother or blender to froth milk well after cooking with spices. Good frothing make nice thick layer on top which taste better.

3.Can I add honey instead of sugar?

Yes you can add honey instead of sugar if you prefer. Add honey after milk cool down a little bit because heat destroy honey benefits.

4.How much turmeric should I add?

I add just a pinch of turmeric powder, you can adjust based on preference.Β Do not add too much as it might be overpowering.

5.Can I make it without cream?

Yes you can make it without fresh cream if you prefer. Milk alone work fine and you can still froth it, cream just makes it more creamy.

golden milk latte served

If you have any more questions about this Golden Milk Latte Recipe do mail me at sharmispassions@gmail.com. In addition, follow me on Instagram, Facebook,Β  Pinterest, Youtube andΒ TwitterΒ .

Tried this Golden Milk Latte Recipe? Do let me know how you liked it. Also tag us on Instagram @sharmispassions and hash tag it on #sharmispassions.

πŸ“– Recipe Card

44754710322 fb55b05aee o
Print

Golden Milk Latte Recipe

Golden Milk Latte is a flavourful, yummy drink made by simmering milk with turmeric powder & flavours and frothed to give a cloud like effect on top.Β Golden Milk Latte is a healthy alternate to tea /coffee with additional benefits of relieving common cold & fever.
Course Drinks
Cuisine Indian
Keyword 30 mins recipes, adhirasam, drink recipes, healthmix recipes, healthy recipes, Healthy tea time drink, milk recipes
Prep Time 10 minutes
Cook Time 10 minutes
Total Time 20 minutes
Servings 2 glasses
Calories 182kcal
Author Sharmilee J

Ingredients

Instructions

  • Take milk in a sauce pan, boil for 3-5 minutes.
  • Add fresh cream to it along with cardamom powder, turmeric powder and cinnamon powder. Add sugar.
  • Whisk well. Let it come to a boil and switch off.
  • I used just a cup of milk so used my coffee frother, you can use a blender too. Just froth it well.
  • Scoop out and serve immediately along with froth.
  • Serve Golden Milk Latte hot!

Notes

  • Boil Milk First - I take milk in a sauce pan and boil for 3 to 5 minutes before adding spices. Boiling milk helps it froth better and makes latte smoother.
  • Add All Together - I add fresh cream, cardamom powder, turmeric powder, cinnamon powder and sugar all at same time. This helps to blend flavours well.
  • Whisk Well - I whisk milk well after adding spices and cream so that the flavours are evenly mixed.
  • Froth Properly - I use coffee frother to froth milk well, you can use blender also. Frothing makes it creamy and thick on top which make it taste better.
  • Serve Hot - I serve golden milk latte hot immediately after frothing. Serving hot is important for its soothing and taste better when warm.

Nutrition

Serving: 200ml | Calories: 182kcal | Carbohydrates: 21g | Protein: 6g | Fat: 9g | Saturated Fat: 5g | Polyunsaturated Fat: 0.3g | Monounsaturated Fat: 2g | Cholesterol: 30mg | Sodium: 72mg | Potassium: 284mg | Fiber: 0.1g | Sugar: 21g | Vitamin A: 407IU | Vitamin C: 0.1mg | Calcium: 231mg | Iron: 0.04mg

The post Golden Milk Latte | Turmeric Milk Latte appeared first on Sharmis Passions.
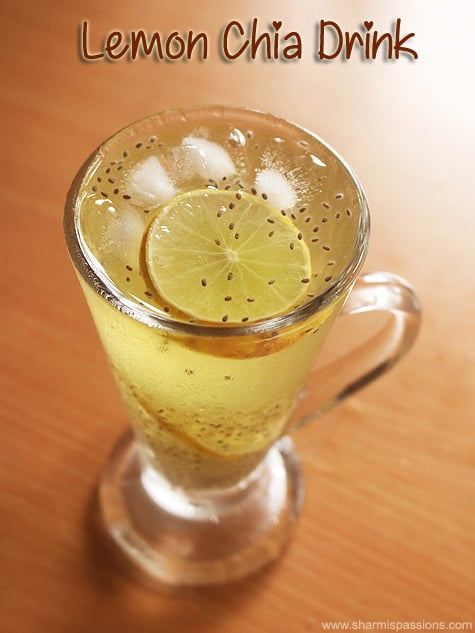
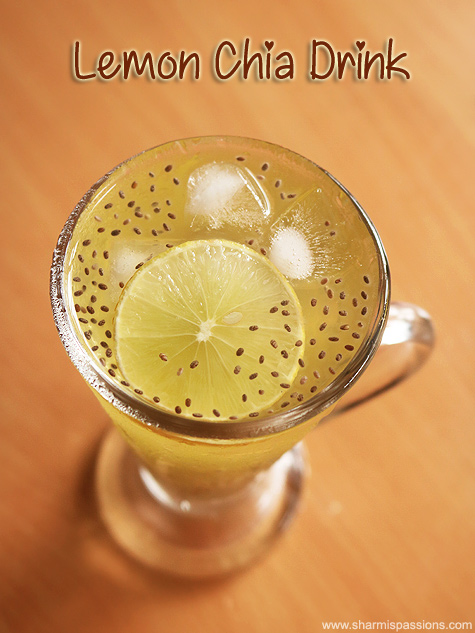
Chia Lemonade | Lemon Chia Drink

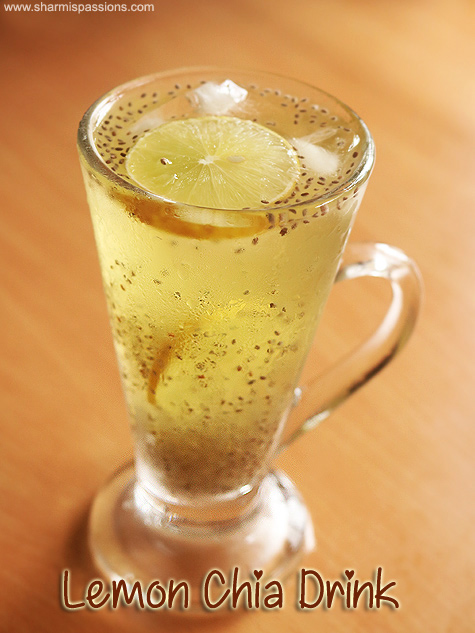
Chia Lemonade is a refreshing drink that can be made in a few minutes. It is perfect for beating the summer heat. This lemonade drink is refreshing to drink and has bloomed chia seeds, nannari sarbath with fresh lemon juice feels soothing to enjoy.

lemon chia drink

This drink has good nutritional value because of chia seeds. These seeds are packed with fibre and omega fatty acids which helps your body stay hydrated. You can make this drink fresh and have it whenever you want and its a good alternative to regular tea and coffee.

[feast_advanced_jump_to]

About Chia Lemonade

Chia Lemonade has become quite popular as a cooling drink during summer. The combination of lemon, nannari and chia seeds work really well together in a cold drink. When chia seeds sit in liquid they expand and the texture makes this to lemonade.

The flavour is just bright and has lemon taste and the nannari syrup gives mild sweetness. Chia seeds don't have much flavour, they just add texture and make the drink feel more filling. It tastes simply amazing and make you feel refreshing to drink.

You can adjust this like add more lemon for sharper taste, or reduce nannari if they don't want it too sweet. Mint leaves or ginger work well in this drink you can add or skip according to your taste, Base taste stays the same and you can adjust it to what you like.

I usually make this on really hot days or for parties, My kids enjoy this as it is so light and refreshing, and chia seeds makes it feel special.

lemon chia drink

Lemon Chia Video

Chia Lemonade Ingredients

  • Chia seeds - Bloomed chia seeds give this drink its texture and thickness. They absorb liquid and create that gel coating around each seed.
  • Water - Cold water is the base here, it keep drink light and drinkable.Β 
  • Lemon juice - Fresh lemon juice gives the drink its flavour and tang. It brighten everything.
  • Sugar - I added for sweetness, but you can go lighter since nannari syrup already adds sweetness. Add it slowly after tasting..
  • Nannari syrup - Nannari have its own cooling properties and add mild flavour that balance the sharpness of lemon.
  • Ice cubes - This is essential for keeping drink properly chilled. Add just before serving so it stay cold longer.
  • Lemon slices - Use for garnish, they add visual appeal and you get hint of fresh lemon with each sip.

How to make Chia Lemonade Step by Step

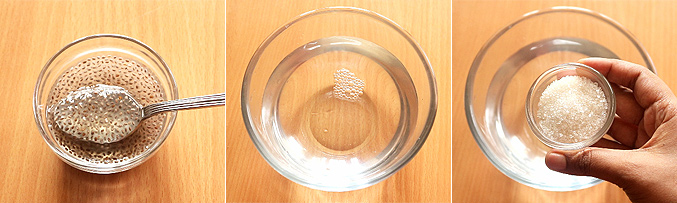
1.Measure and take bloomed chia seeds.In a mixing bowl - take water.Add sugar.

how to make lemon chia drink step1

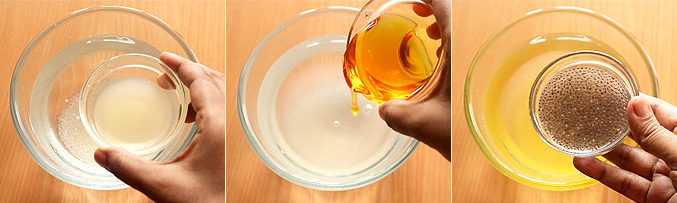
2.Add lemon juice, sarbathΒ followed by bloomed chia seeds.

how to make lemon chia drink step2

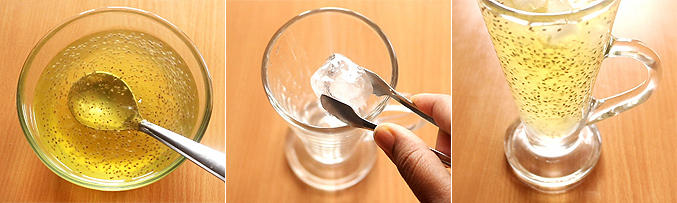
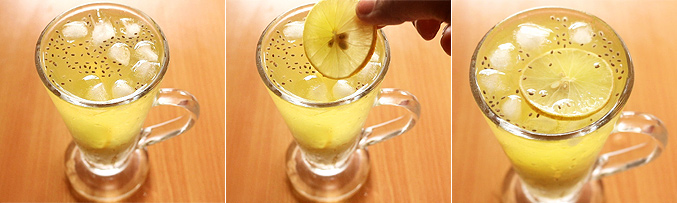
3.Mix well until sugar completely dissolves. To the serving glass add few icecubes.Add chia lemon juice.

how to make lemon chia drink step3

4.Add lemon slices and enjoy chilled.

how to make lemon chia drink step4

Serve chilled!

Expert Tips

  • Blooming the chia - I always bloom chia seeds in water first, this way they hydrate properly and gel form nicely. If you skip this, seeds can feel a bit hard when you drink.
  • Nannari - I add and adjust the nannari syrup according to the taste and sweetness we like, because nannari has sweetness already.
  • Mixing well - I make sure sugar dissolves completely before adding to glass.Β 
  • Serving - I serve this immediately after putting the ice, You can store this before adding ice.
  • Cold ingredients - I chill everything beforehand, water, lemon juice, everything. This makes the final drink taste fresher and chill.

Serving and Storage

Serve Chia Lemonade cold in glass with ice and lemon slices. Work well on its own or with light snacks. You can store leftover in fridge for about day, though chia seeds do settle at bottom so give it stir before drinking.

FAQS

1.Can I make this without blooming the chia seeds?

You can but they feel harder when you drink. Blooming them first makes the texture much better.

2.How long does it take to bloom chia seeds?

About 15 to 20 minutes in water. Seeds swell up and develop that gel coating.

3.Can I make this ahead of time?

Yes you can make it few hours before but best consumed on the same day.Β 

4.What if I don't have nannari syrup?

You can skip it and just use sugar and lemon, but drink lose that cooling element. It still tastes good though.

5.Can I adjust the sweetness?

Absolutely. Start with less sugar, taste it, then add more if you need.Β 

lemon chia drink

If you have any more questions about this Chia Lemonade Recipe do mail me at sharmispassions@gmail.com. In addition, follow me on Instagram, Facebook,Β  Pinterest, Youtube andΒ TwitterΒ .

Tried this Chia Lemonade Recipe? Do let me know how you liked it. Also tag us on Instagram @sharmispassions and hash tag it on #sharmispassions.

πŸ“– Recipe Card

LemonChiaDrink4 1
Print

Chia LemonadeΒ Recipe

Chia Lemonade is a refreshing drink that can be made in a few minutes. It is perfect for beating the summer heat. This lemonade drink is refreshing to drink and has bloomed chia seeds, nannari sarbath with fresh lemon juice feels soothing to enjoy.
Course Drinks
Cuisine Indian
Keyword chia recipes, drink recipes, Healthy tea time drink, juice recipes, lemon recipes, Nutritional Beverage, Nutritional Drink
Prep Time 10 minutes
Total Time 10 minutes
Servings 2 glasses
Calories 115kcal
Author Sharmilee J

Ingredients

  • 2 cups water
  • 1 tablespoon sugar
  • 1 and Β½ tablespoon nannari sarbath
  • 1 tablespoon lemon juice
  • 2 tablespoon bloomed chia seeds
  • few ice cubes
  • few lemon slices

Instructions

  • Measure and takeΒ bloomed chia seeds. In a mixing bowl - take water. Add sugar.
  • Add lemon juice, sarbath followed by bloomed chia seeds.
  • Mix well until sugar completely dissolves.Β  ToΒ the serving glass add few ice cubes. Add chia lemon juice.
  • Add lemon slices and enjoy chilled Chia Lemonade.

Video

Notes

  • Blooming the chia - I always bloom chia seeds in water first, this way they hydrate properly and gel form nicely. If you skip this, seeds can feel a bit hard when you drink.
  • Nannari - I add and adjust the nannari syrup according to the taste and sweetness we like, because nannari has sweetness already.
  • Mixing well - I make sure sugar dissolves completely before adding to glass.Β 
  • Serving - I serve this immediately after putting the ice, You can store this before adding ice.
  • Cold ingredients - I chill everything beforehand, water, lemon juice, everything. This makes the final drink taste fresher and chill.

Nutrition

Serving: 250ml | Calories: 115kcal | Carbohydrates: 20g | Protein: 2g | Fat: 4g | Saturated Fat: 0.4g | Polyunsaturated Fat: 3g | Monounsaturated Fat: 0.3g | Trans Fat: 0.01g | Sodium: 65mg | Potassium: 67mg | Fiber: 4g | Sugar: 15g | Vitamin A: 20IU | Vitamin C: 3mg | Calcium: 91mg | Iron: 1mg

The post Chia Lemonade | Lemon Chia Drink appeared first on Sharmis Passions.
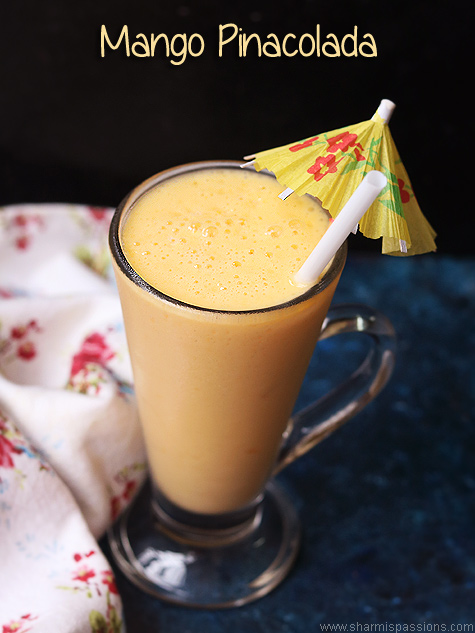
Mango Pina Colada Recipe

Mango Pina Colada is a refreshing mocktail made with mango, pineapple juice, coconut water and tender coconut water. It has a naturally sweet and fruity taste. This drink has creamy texture and looks yellow in colour. It has rich taste from mangoes and freshness from pineapple and coconut.

mango pina colada served

This drink is usually prepared on summer days, family get together party or for festive occasions. This can be served as a welcome drink for guests and before a special meal. It is quick and easy to make recipe, just everything is blended to smooth consistency, anyone can prepare without much effort.

[feast_advanced_jump_to]

About Mango Pina Colada

Mango Pina Colada is a simple drink made inspired by the classic pina colada recipe, mango adds fruity twist to this drink. It is a non alcoholic drink that can be enjoyed by both children and adults. It can be enjoyed on warm days as a simple drink and uses very few ingredients.

This drink has a smooth and creamy texture with a naturally sweet taste. Mango gives the drink golden colour and adds some thickness and creaminess. Also pineapple adds mild tangy flavour, and tender coconut water makes it light and refreshing.

This drink can be made with either fresh or frozen mangoes depending on the season, both works well. You can adjust the texture, taste, and thickness according for your preference. Add in more tender coconut water or skipping if you prefer. It still tastes refreshing and feels soothing to drink on hot days.

I usually make this for special occasions or for weekend parties, this is quick refreshing drink to enjoy.

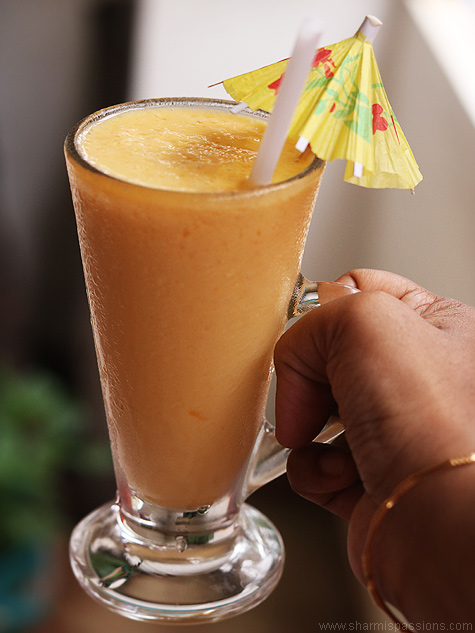
mango pina colada served

Mango Pina Colada Ingredients

  • Mango - I used ripe, sweet mangoes for the best taste. Mango gives natural sweetness, thick texture and bright golden colour.
  • Pineapple juice - This brings a fresh fruity taste with a slight tanginess. Fresh pineapple juice can be used instead of packaged juice.
  • Coconut milk - I simply added coconut milk for creamy texture and gives mild coconut flavour.
  • Tender coconut water - Adding tender coconut water makes the drink lighter and adds a fresh flavour.
  • Ice cubes - I prefer to add some ice cubes to chill the drink immediately. It also gives that refreshing feel.
  • Sugar - Added sugar for sweetness, but its optional, it can be skipped if the fruit is naturally sweet.

Similar Recipes

How to make Mango Pina colada Step by Step

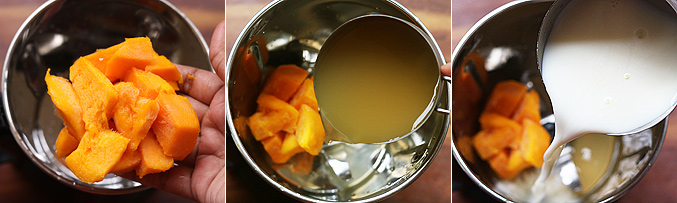
1.To a mixer jar - add frozen mangoes. Add pineapple juice and coconut milk. If you want you can add sugar. I did not add as the mangoes and pineapple juice was already sweet enough.

how to make mango pina colada step1

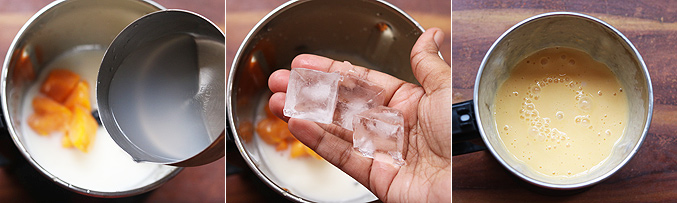
2.Add tender coconut water and few icecubes. Blend until smooth.

how to make mango pina colada step2

Serve immediately.

Expert Tips

  • Choose Mangoes - I choose ripe and sweet mangoes so there is no need to add extra sugar.
  • Blending - You blend the drink well so that it turns out creamy without any fruit pieces.
  • Chilled - I feel the drink tastes much better when all the ingredients are cold.
  • Adjust sweetness - I taste the drink before serving and add sugar only if it really needs it.
  • Serving - I always serve this just after blending because it tastes more fresh.
  • Water - I keep the amount of liquid balanced so the drink stays thick and creamy.

Serving and Storage

Serve chilled Mango Pina Colada as welcome drink or with light snacks. It is best to have it once freshly made, but you can store the leftovers and consume it within a day.

FAQS

1. Can I use fresh mango ?

Yes you can use fresh ripe mango for this recipe, any variety is fine.

2. Can I skip sugar?

No it depends on the sweetness of mangoes and pineapple juice. just taste the drink before adding sugar.

3. Can I skip tender coconut water?

Yes, chilled water can be used. The drink will still taste refreshing.

4. Can I make this ahead?

Yes this can e made ahead and kept in in the refrigerator for hours.

5. Can kids have it?

Yes kids can have it since it is aΒ  non alcoholic drink.

mango pina colada served

If you have any more questions about this Mango Pina Colada Recipe do mail me at sharmispassions@gmail.com. In addition, follow me on Instagram, Facebook,Β  Pinterest, Youtube andΒ TwitterΒ .

Tried this Mango Pina Colada Recipe? Do let me know how you liked it. Also tag us on Instagram @sharmispassions and hash tag it on #sharmispassions.

πŸ“– Recipe Card

Mangopinacolada3
Print

Mango Pina Colada Recipe

Mango Pina Colada is a refreshing mocktail made with mango, pineapple juice, coconut water and tender coconut water. It has a naturally sweet and fruity taste. This drink has creamy texture and looks yellow in colour. It has rich taste from mangoes and freshness from pineapple and coconut.
Course Drinks
Cuisine American, French, Indian, Italian, Japanese, Mediterranean, Mexican
Keyword 30 mins recipes, dessert recipes, drink recipes, easy mango recipes, Healthy tea time drink, juice recipes, pineapple recipes
Prep Time 10 minutes
Total Time 10 minutes
Servings 2 glasses
Calories 210kcal
Author Sharmilee J

Ingredients

Instructions

  • To a mixer jar - add frozen mangoes.
  • Add pineapple juice and coconut milk. If you want you can add sugar. I did not add as the mangoes and pineapple juice was already sweet enough.
  • Add tender coconut water and few ice cubes.
  • Blend until smooth. Enjoy Mango Pina Colada!

Notes

  • Choose Mangoes - I choose ripe and sweet mangoes so there is no need to add extra sugar.
  • Blending - You blend the drink well so that it turns out creamy without any fruit pieces.
  • Chilled - I feel the drink tastes much better when all the ingredients are cold.
  • Adjust sweetness - I taste the drink before serving and add sugar only if it really needs it.
  • Serving - I always serve this just after blending because it tastes more fresh.
  • Water - I keep the amount of liquid balanced so the drink stays thick and creamy.

Nutrition

Serving: 250ml | Calories: 210kcal | Carbohydrates: 26g | Protein: 2g | Fat: 13g | Saturated Fat: 11g | Polyunsaturated Fat: 0.2g | Monounsaturated Fat: 1g | Sodium: 41mg | Potassium: 450mg | Fiber: 2g | Sugar: 21g | Vitamin A: 1123IU | Vitamin C: 45mg | Calcium: 36mg | Iron: 2mg

The post Mango Pina Colada Recipe appeared first on Sharmis Passions.
❌