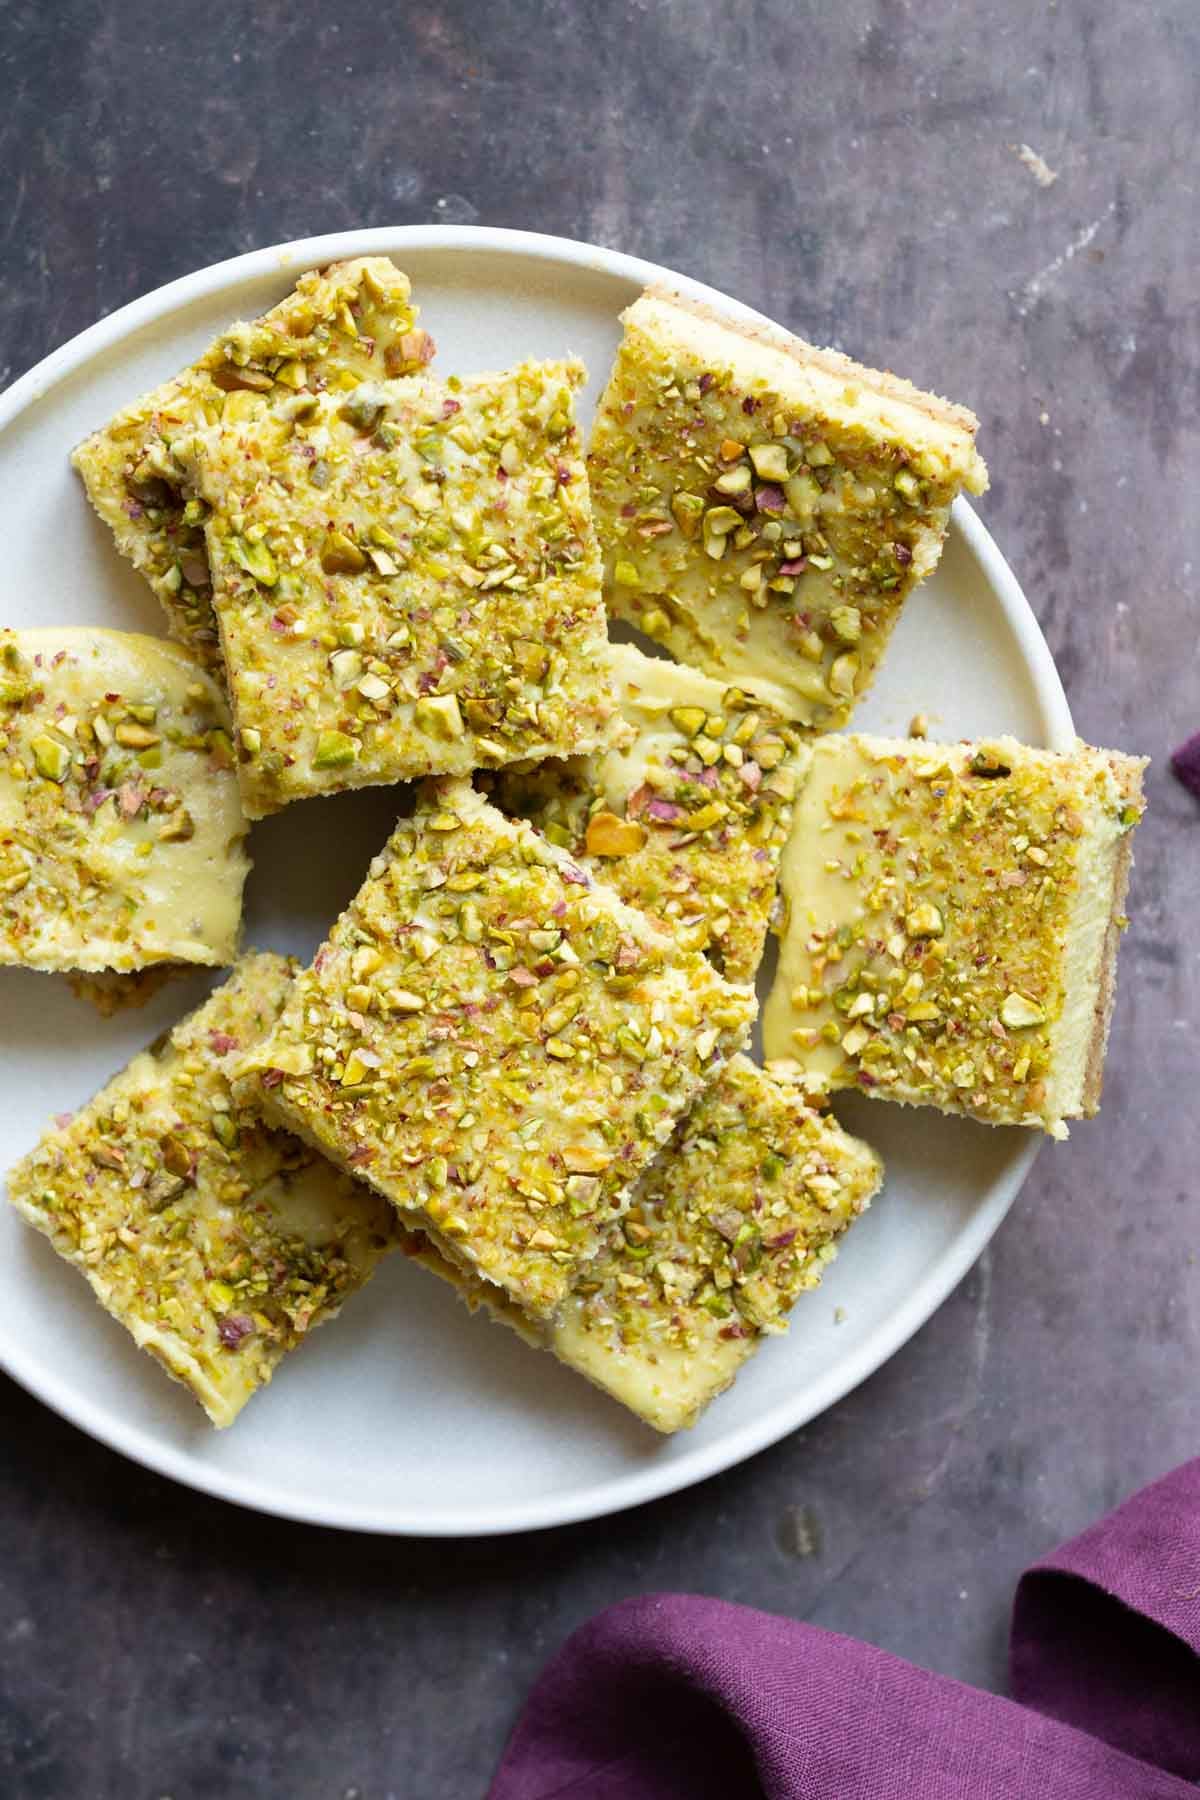
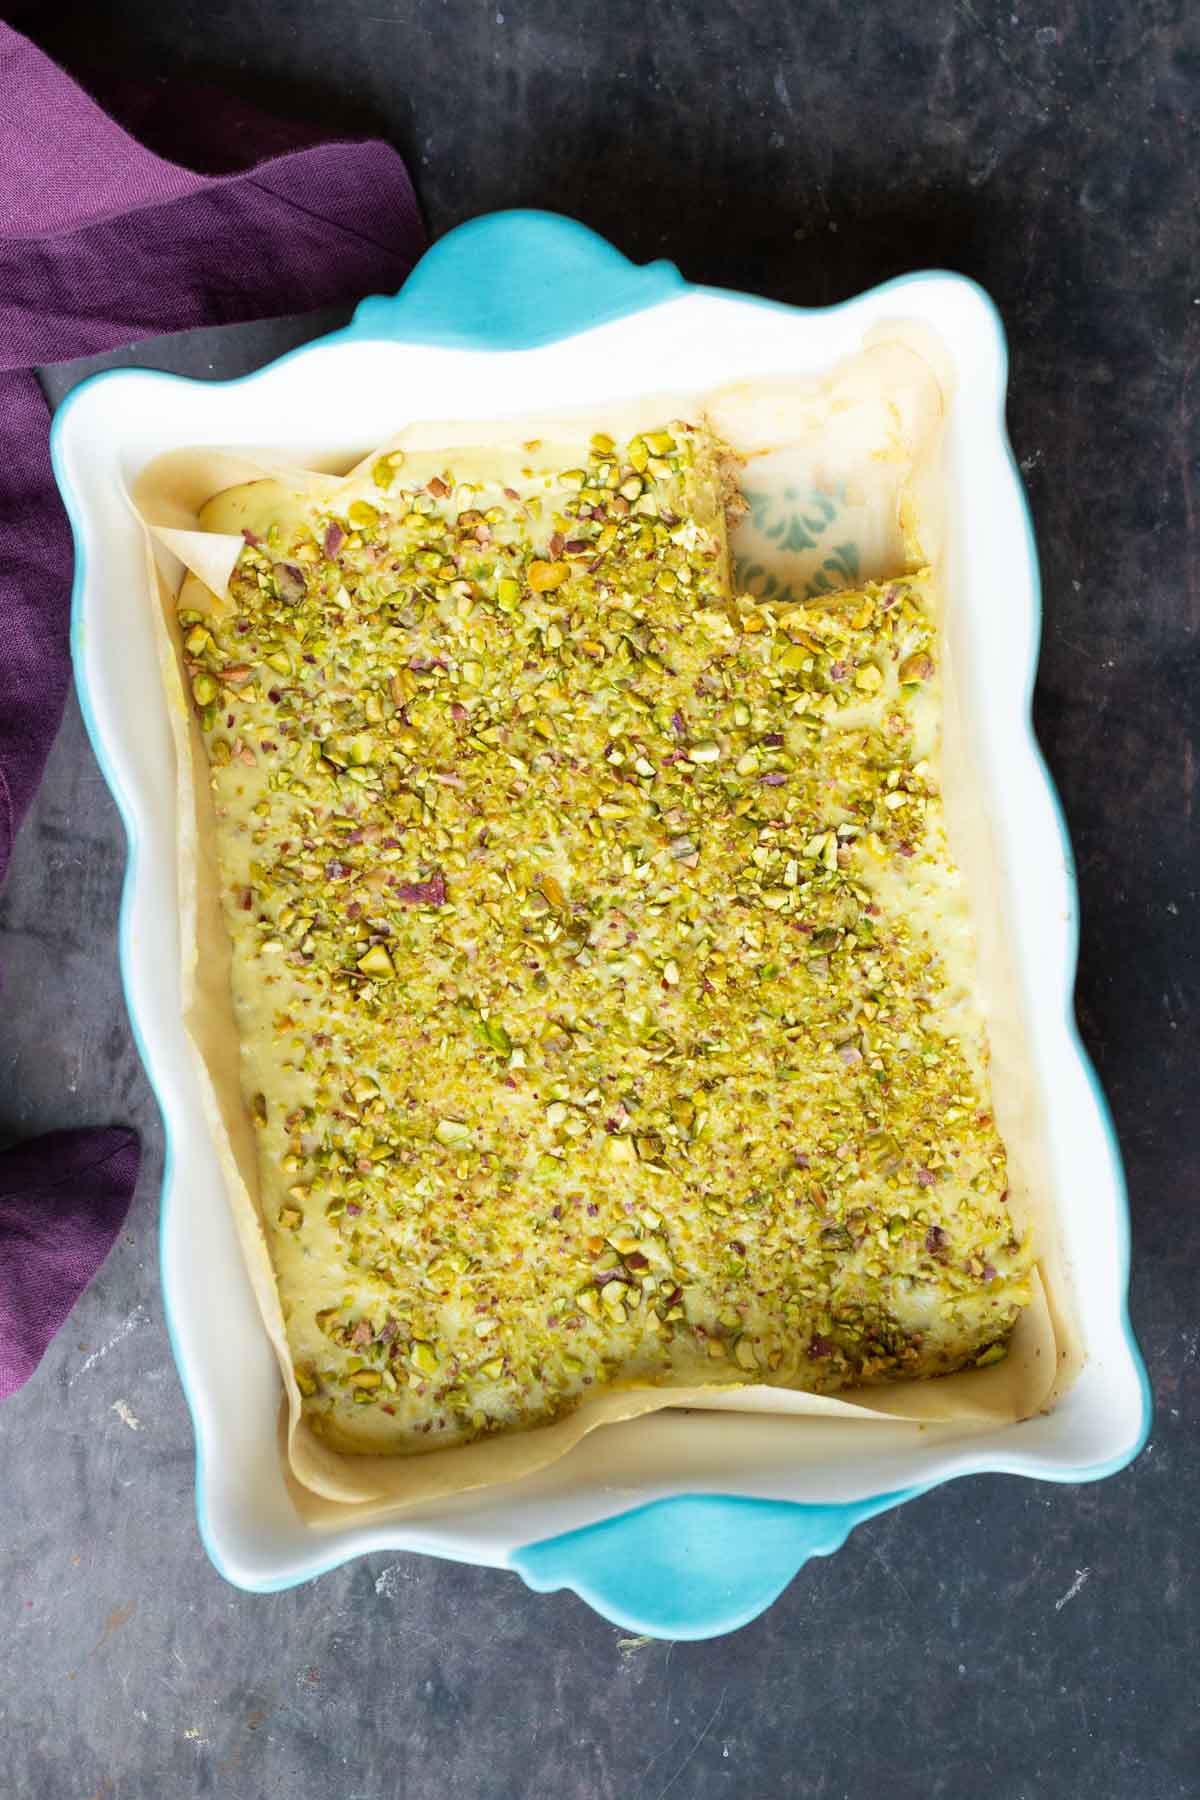
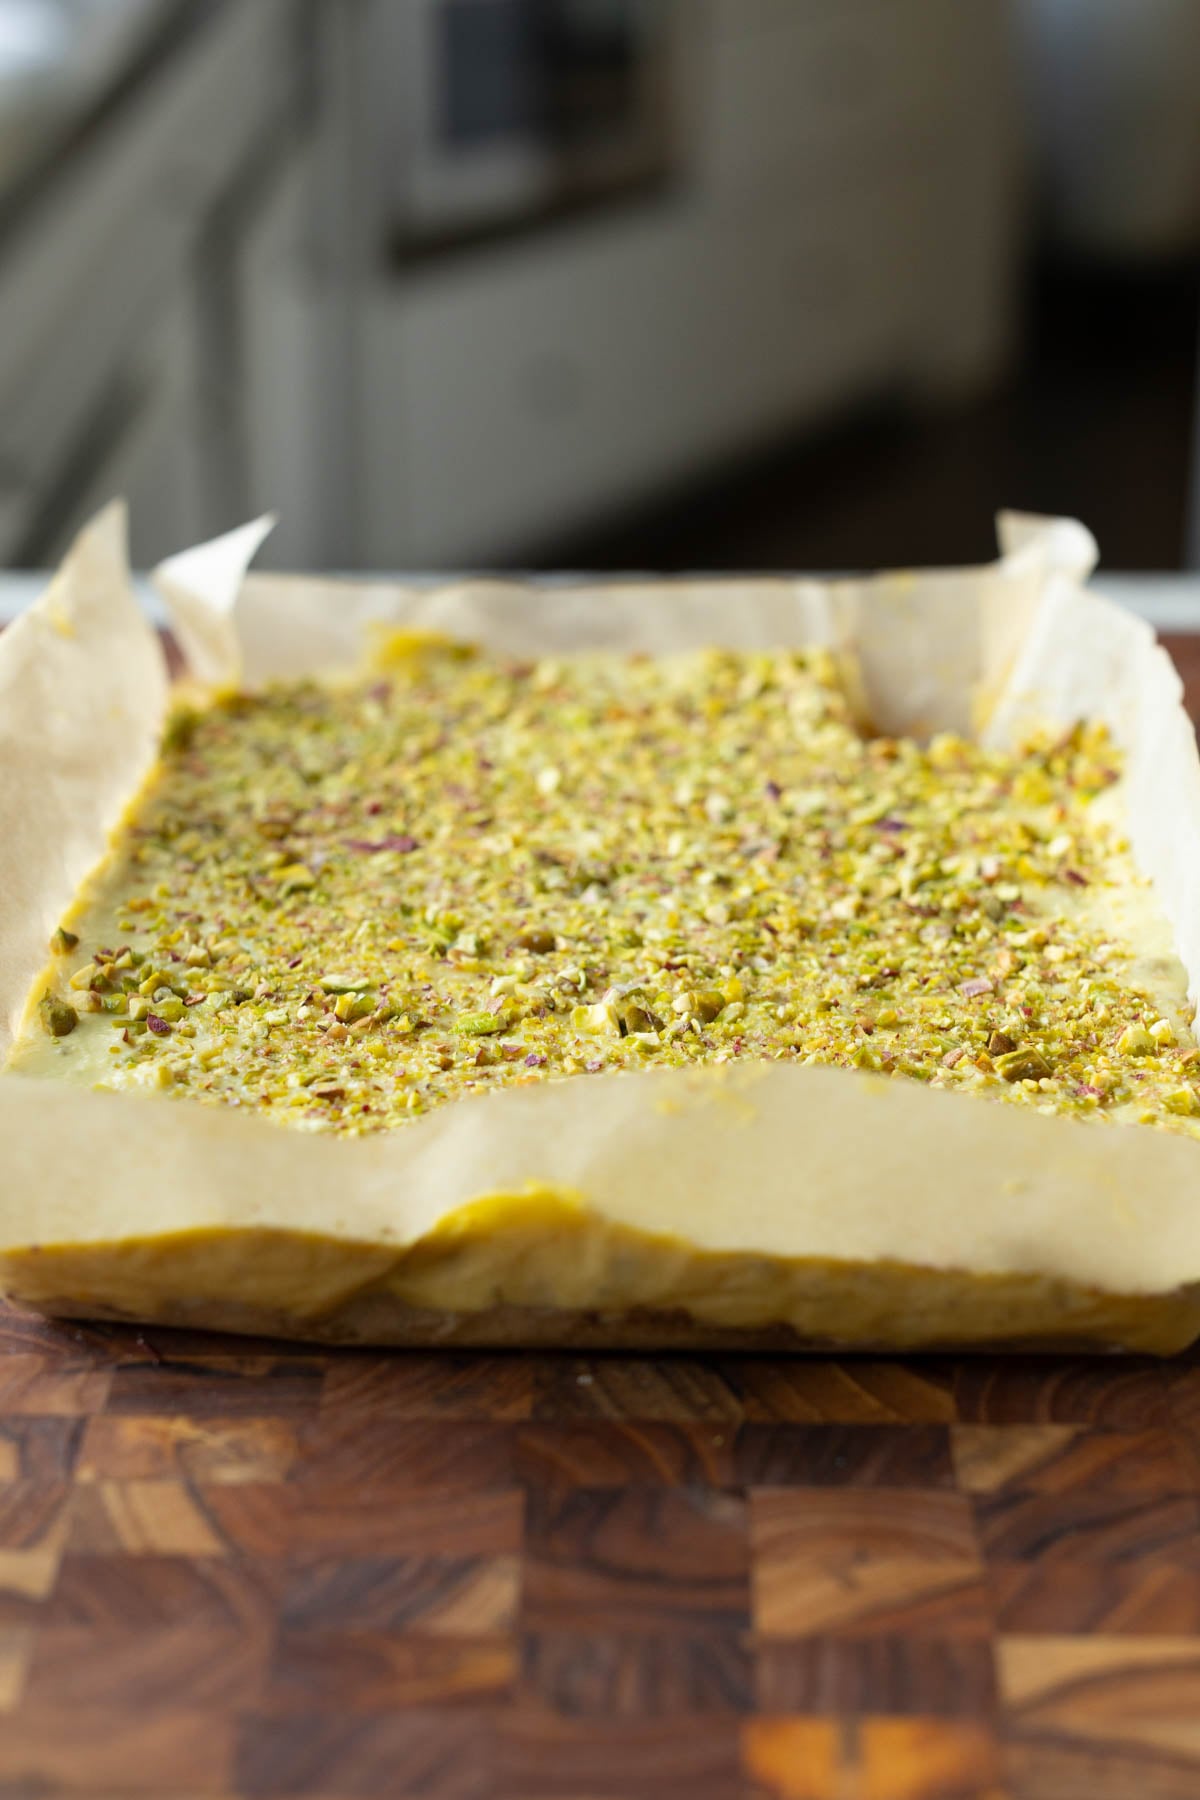
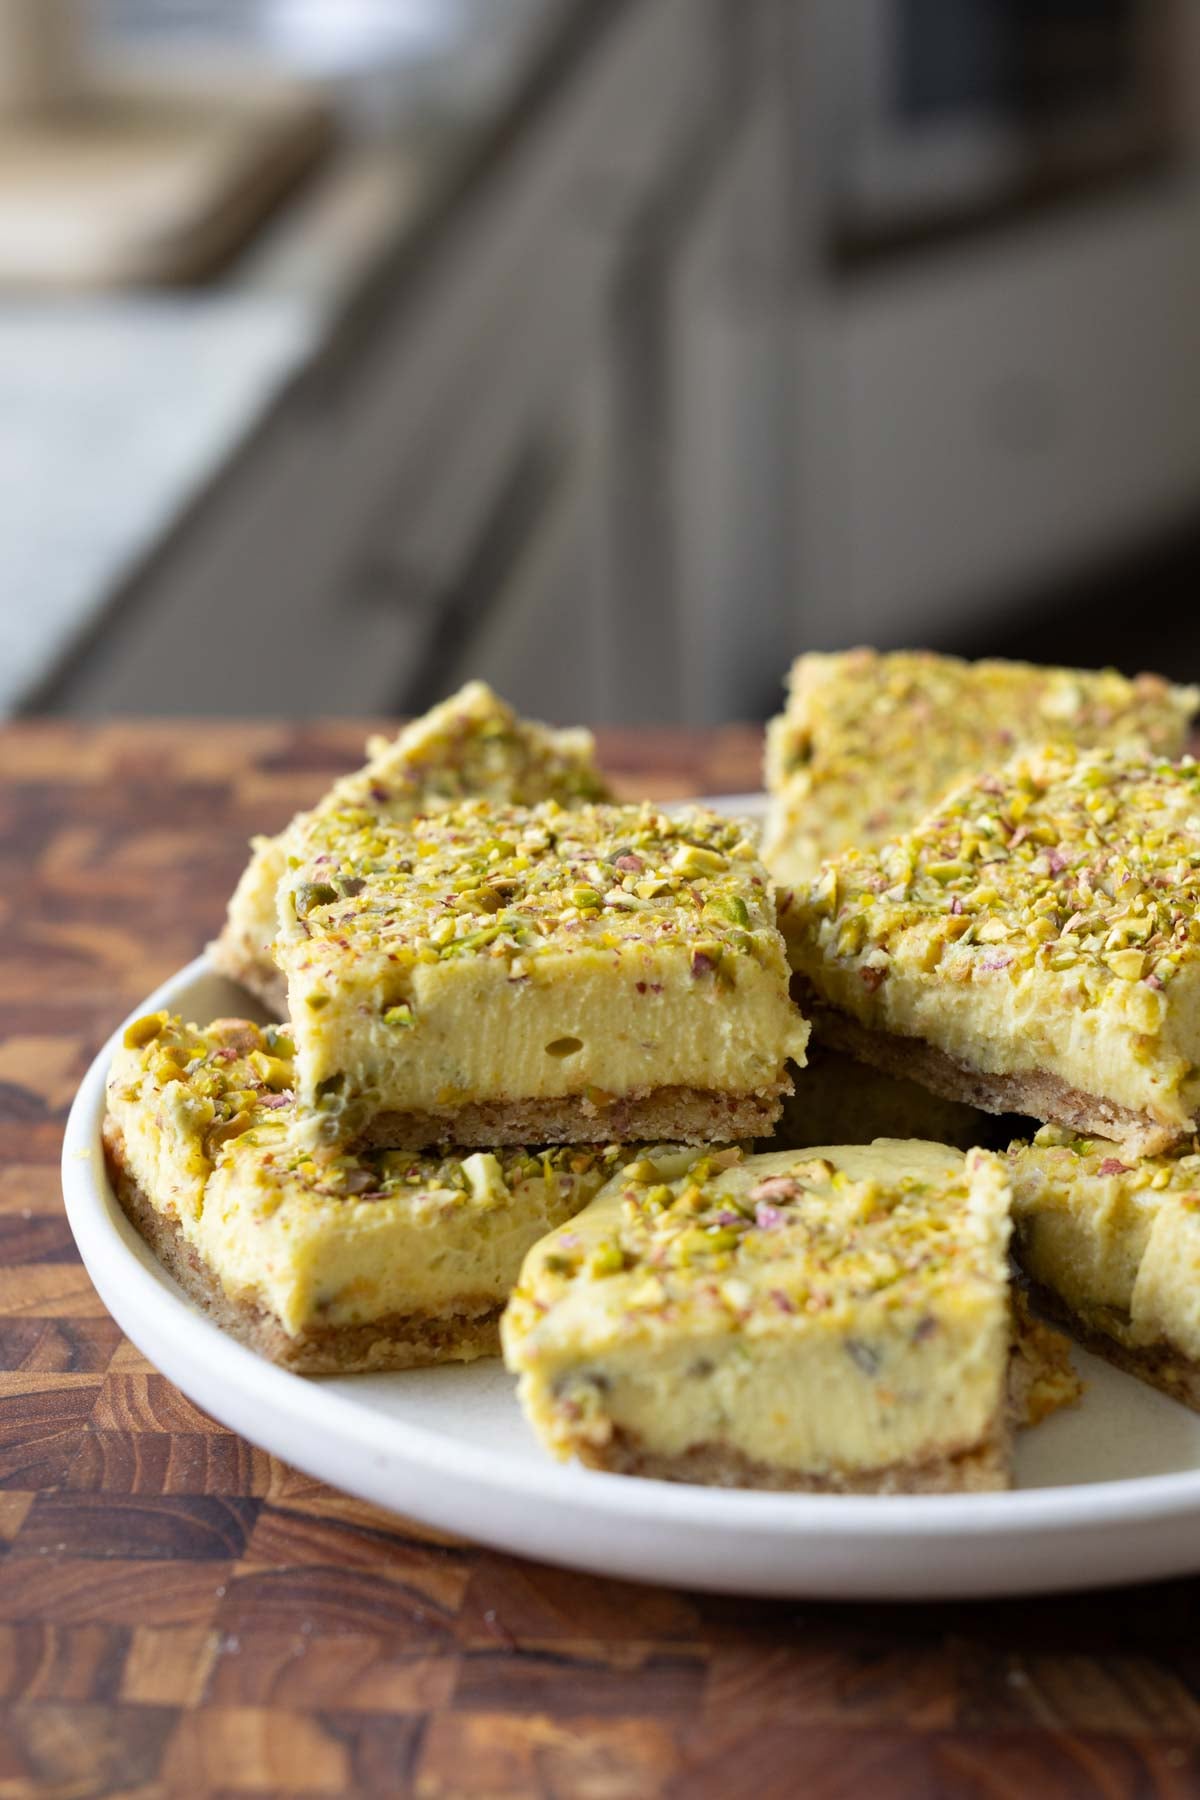
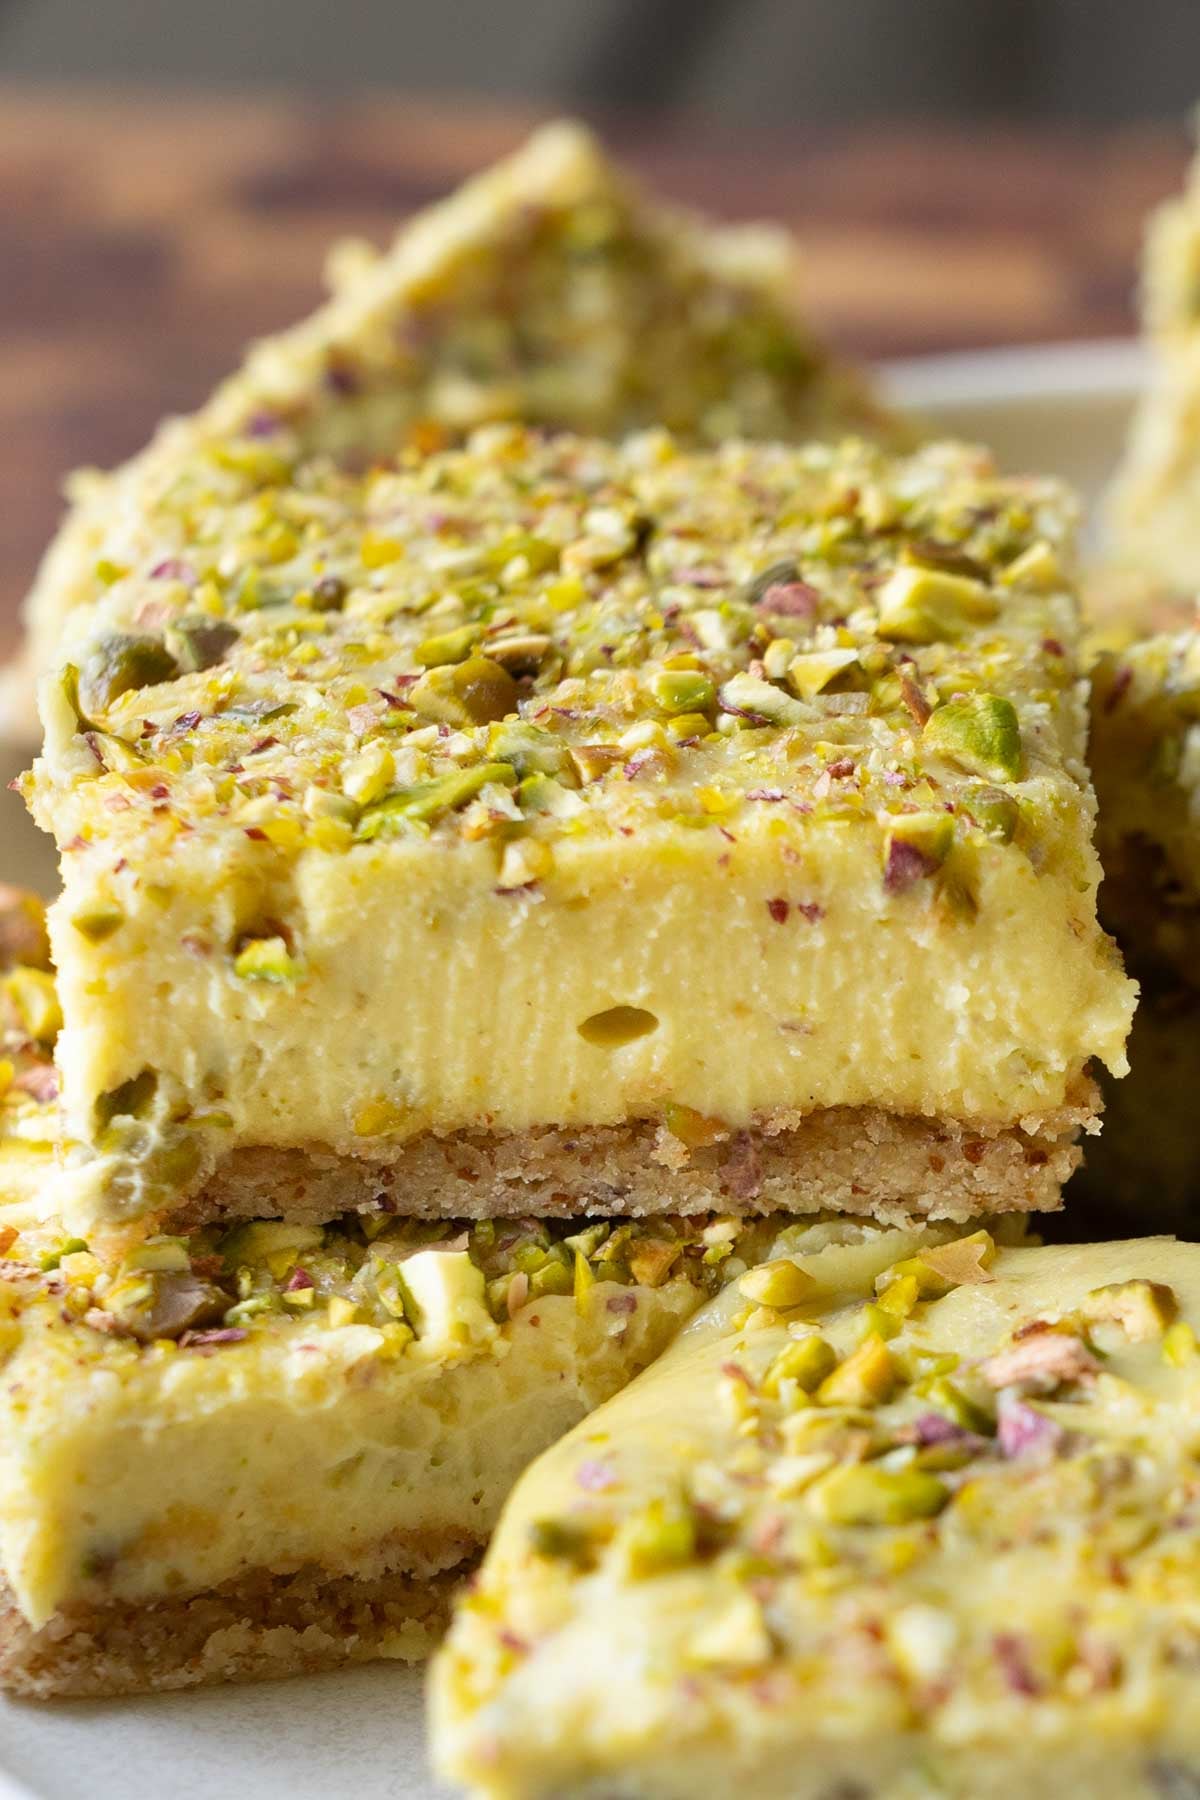
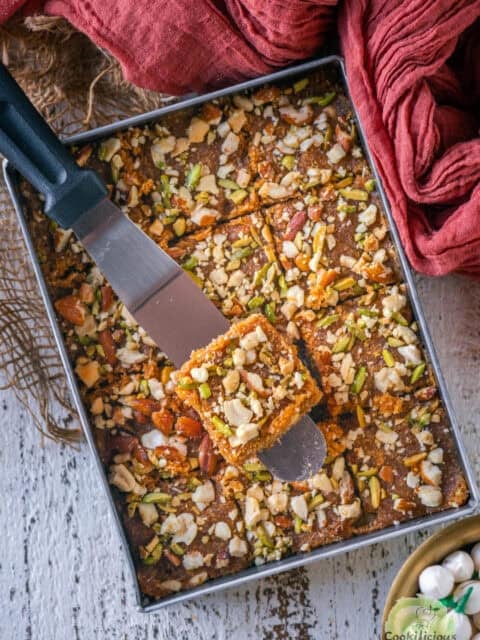
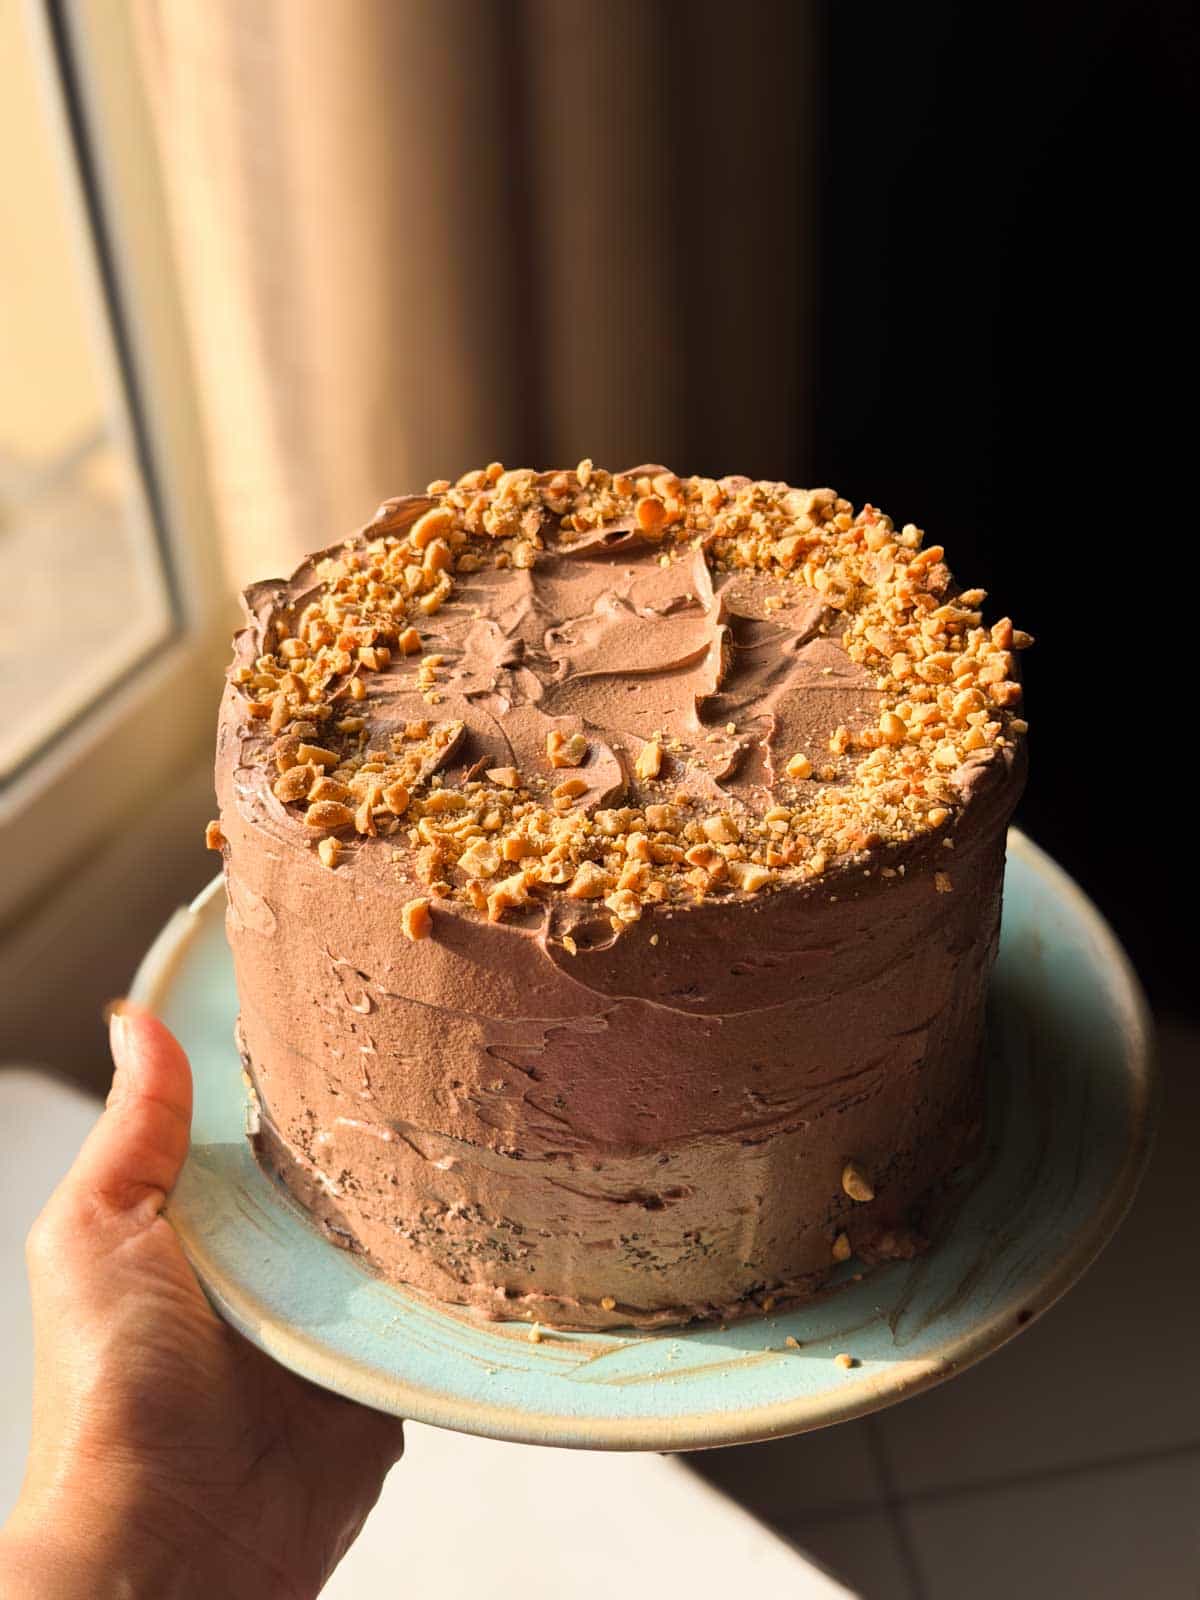
Luscious saffron, cardamom & pistachio cream layered over an almond crust! These gluten-free Kesar Pista bars secretly pack 7g protein. Perfect for Diwali or any other holiday meal! (soy-free, dairy-free, vegan)
Kesar means saffron, and pista means pistachio. These saffron pistachio bars are just so delicious. I just wasn’t ready for how decadent and luxurious they were going to turn out! They’re kind of like creamy lemon bars, but with nutty pistachio and floral saffron flavors in them.
The saffron-pistachio combination is very popular in Indian desserts and also desserts from many other cuisines. These two flavors just work so amazingly well together, especially raw, fresh pistachios and floral saffron.
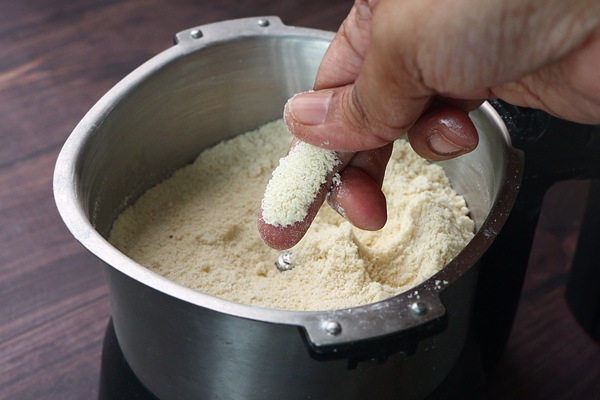
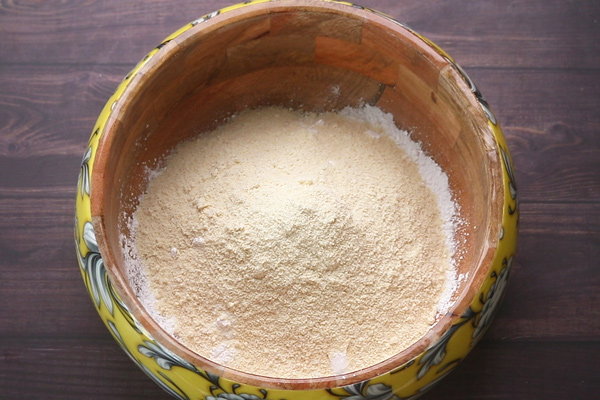
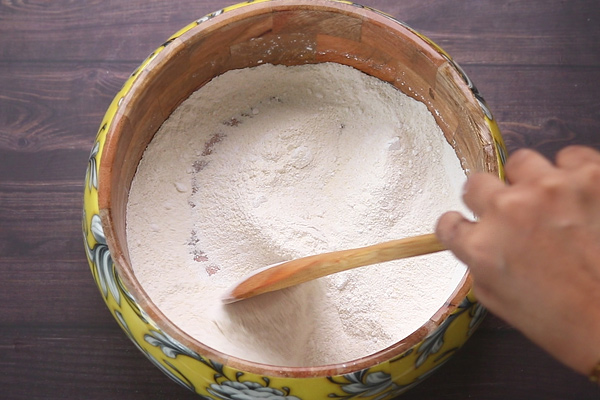
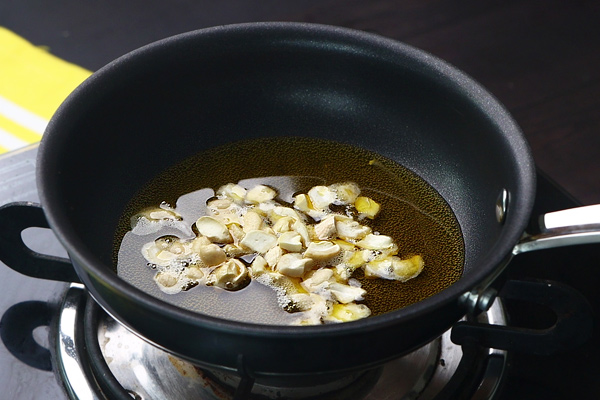
I’m using that today to make a fusion Indian dessert based on kesar burfi, kesar pista ladoo, or pedas, but I made them into these bars. We make this almond flour crust with some cardamom and then make the cream topping with cashews, coconut milk, saffron, and a little pistachio, and then top it with generous amounts of chopped pistachio. It all sets up and it becomes just amazing!
If you don’t have saffron, you can skip that flavor, and add extra cardamom, add a pinch of turmeric for color, and an extra splash of vanilla. That flavor profile pairs really well with the pistachios, as well.
Why You’ll Love Kesar Pista Bars
rich, creamy, decadent bars with nutty pistachios and floral saffron and cardamom flavors
quick almond flour crust
easy to make with simple ingredients
naturally gluten-free and soy-free with almond-free option
Mango Ice Lollies is a frozen treat made by freezing a blend of mango, milk and sugar in moulds. This recipe can be made in summer and in holidays when kids are at home. It has a soft mango taste with mild sweetness and creamy feel.
It takes about 15 minutes to prepare and the rest of the time is only freezing. You need only 3 ingredients from the kitchen. Even adults like it on a hot afternoon. This is a great option when you want a cold treat without ice cream or chocolate.
[feast_advanced_jump_to]
About Mango Ice Lollies
Mango Ice Lollies are made using ripe mangoes, milk and sugar. It is also called Mango Lollipop. Mango season is the best time for this recipe because the fruit is sweet and juicy. Kids can enjoy it more than store bought ones as there is no colour or preservatives.
The texture is smooth and creamy because of the milk. It is not very icy like normal fruit popsicles. This is bright yellow in colour and the taste is sweet with fresh mango flavour. When you bite it slowly, it melts in the mouth. Kids ask for more as they will love it.
You can change these lollies in many ways as per your taste. You can add few mango pieces inside the mould for chewy bites. You can use a silicon mould, a lolly mould or even an ice cube tray with sticks. A little cardamom powder or chopped nuts also goes well in it.
I make these lollies in summer when mangoes are plenty at home. I had one lollipop mould bought long time ago, and I use it every year. My kids finish them very fast and ask for more.
Mango Ice Lollies Ingredients
Mango - I have used ripe and sweet mangoes, chopped roughly. It gives the colour and main flavour to the lollies. You can use any mango without much fibre.
Milk - I add boiled and cooled milk to make the lollies creamy. It also help to blend the puree smoothly. You can use almond milk if you like.
Sugar - I use sugar for sweetness. It dissolve well while blending. You can reduce it if the mangoes are very sweet.
How to make Mango Ice Lollies Step by Step
1.To a mixer jar - add mango pulp along with sugar, puree it. Now add milk.
2.Blend well. Take your mould. You can use ice cube tray too like I have done here. I had this lollipop mould bought long time ago.
3.Fill in the mixture. Keep the stick.
4.I had more puree so filled it in my chocolate mould too.Wrap with silver foil. Freeze for atleast 6 hours or oevernight.
5.I freezed overnight. Next day gently press and lift the lollipops, as its silicon mould it was very easy to de mould. Mango lollipop is ready!
Serve immediately!
Expert Tips
Use ripe mangoes - I choose mangoes which are fully ripe and has sweet smell. Raw or sour ones need more sugar and the taste will change.
Cool the milk - I always cool the boiled milk completely before blending. Warm milk makes the lollies icy and they will not set well.
Blend smooth - I blend the mango and sugar first, then add the milk. This helps to get a smooth puree without any pieces.
Fill carefully - I pour the mixture into moulds slowly and leave little space on top. It expand when freezing, so do not fill too much.
Use silver foil - I cover the chocolate mould with silver foil before keeping in freezer. It stops the ice crystals and keep the lollies fresh.
Demould gently - I press the silicon mould gently and lift the lollies. If it is stuck, hold the mould under tap water for few seconds.
Serving and Storage
Serve this immediately after demoulding and you can enjoy it as a cool snack for kids during summer holidays or after lunch at home. Keep the lollies in the freezer in a closed container or wrapped with silver foil and use within few days for best taste and texture and it stay good when stored properly.
FAQS
1. Can I use frozen mango for this recipe?
Yes you can use frozen mango pieces and it works fine for this recipe. Thaw it little before blending.
2. Can I use an ice cube tray instead of lolly mould?
Yes you can use ice cube tray and it still taste good. Keep the sticks after the mixture is little frozen so they stand straight.
3. How long should I freeze the lollies?
You need to freeze for at least 6 hours and overnight is better. It sets properly and comes out easily from the mould.
4. Why are my lollies icy?
It may be due to warm milk or too less milk in the mixture.
5. Can I skip sugar?
Yes you can skip it if the mangoes are very sweet and it still taste good. Taste the puree once before freezing and then decide.
If you have any more questions about this Mango Ice Lollies Recipe do mail me at sharmispassions@gmail.com. In addition, follow me on Instagram, Facebook, Pinterest, Youtube and Twitter .
Tried this Mango Ice Lollies Recipe? Do let me know how you liked it. Also tag us on Instagram @sharmispassions and hash tag it on #sharmispassions.
Mango Ice Lollies is a frozen treat made by freezing a blend of mango, milk and sugar in moulds. This recipe can be made in summer and in holidays when kids are at home. It has a soft mango taste with mild sweetness and creamy feel.
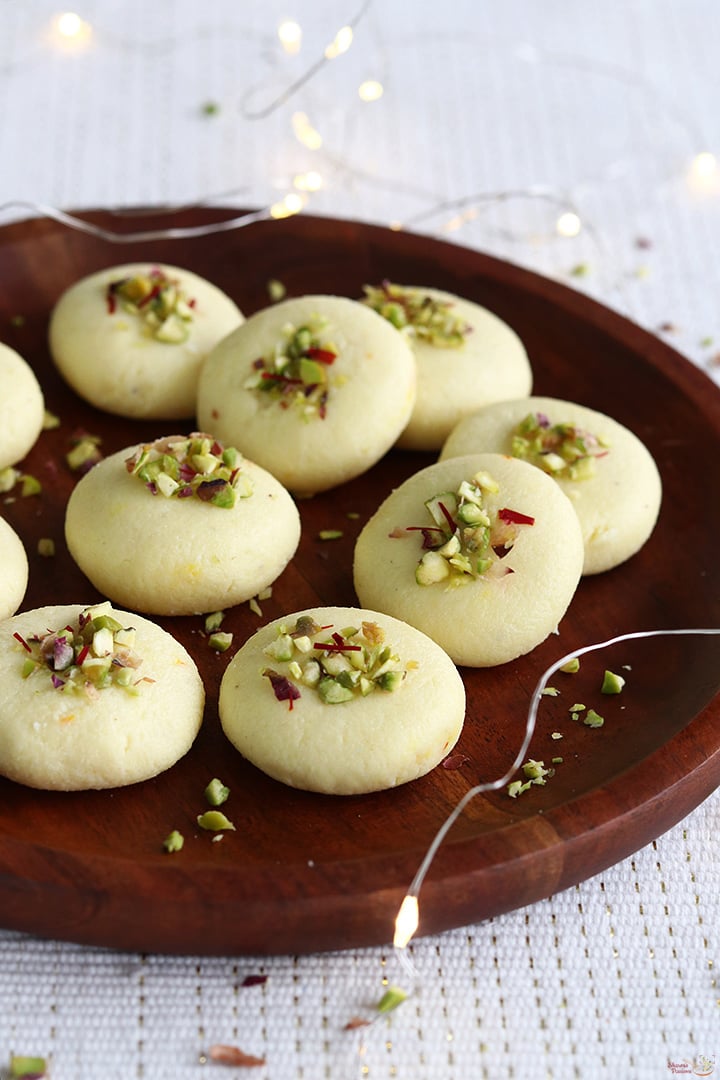
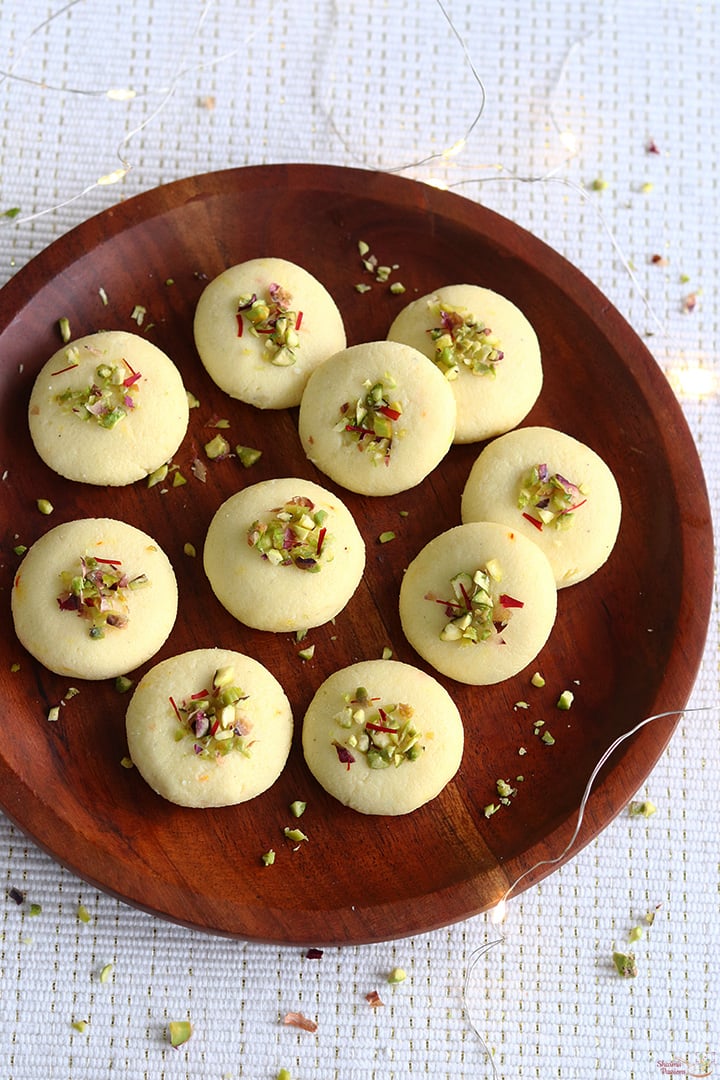
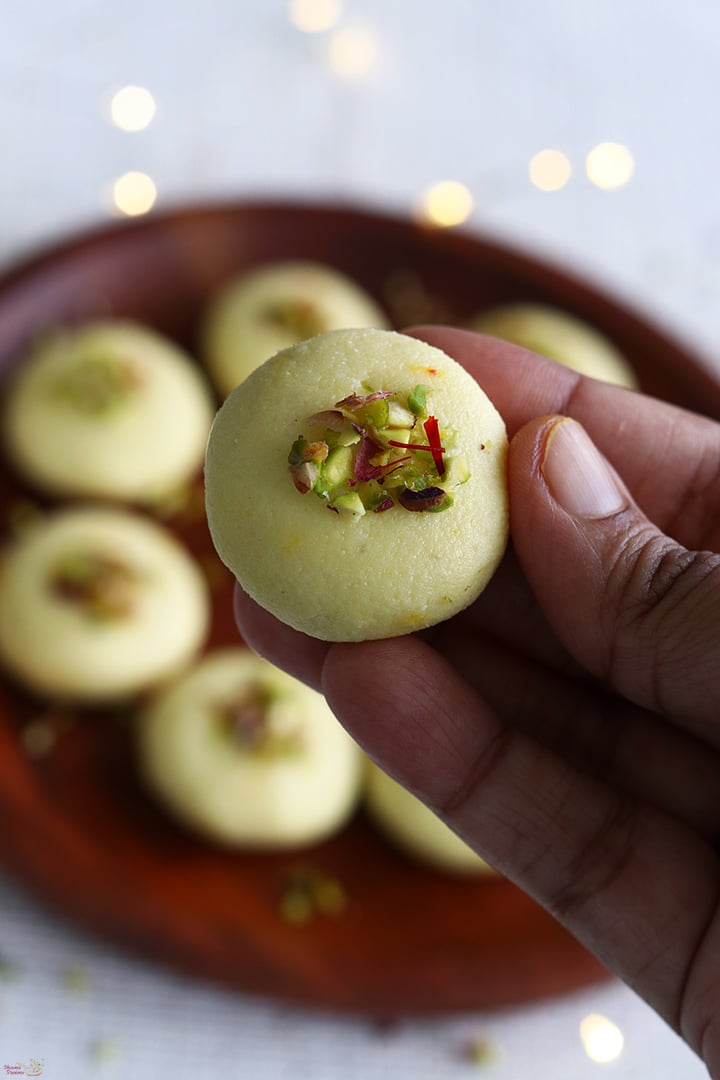
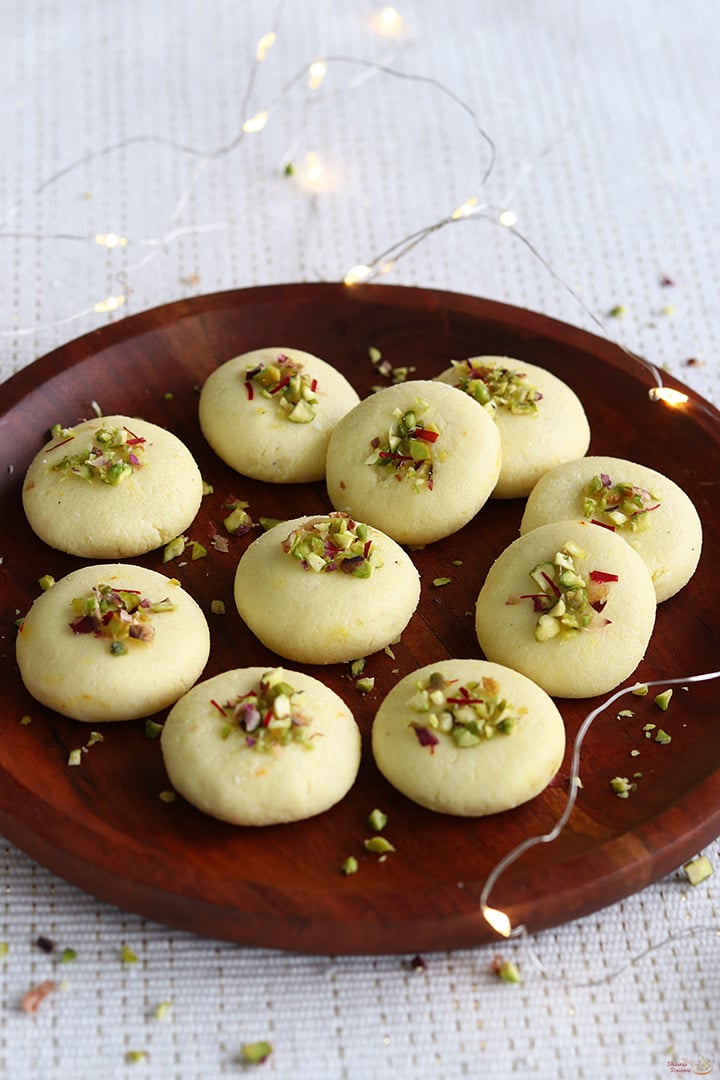
Sandesh is a delicious Bengali milk sweet popular all over India. Sandesh also known as Bengali Sondesh is milk cheese based rich sweet made using milk, sugar, nuts, cardamom powder and saffron. Sandesh is most commonly made for festivals and special occasions.
Sandesh sweet can be made for special occasions, festivals like Navratri, Diwali and Durga Pooja. It is made with just simple ingredients from your kitchen and can be made easily within just few minutes of time. Even beginners can try this simple, quick and easy sweet.
[feast_advanced_jump_to]
About Sandesh
Sandesh is a popular Bengali sweet made by first curdling milk to form chenna then mixing it with sugar and cooking until soft, non sticky, then shaping into small discs and garnishing with nuts.
There are many variations to sandesh including many flavours but the one I have shared here is the traditional one. The colour and taste of sandesh veries depending on the flavours we add.
This is the easiest sweet I have made, just few minutes and you are done with this yummy milk sweet. To make the best tasting sandesh, chenna should be prepared fresh and using store bought paneer may change the taste of sandesh.
The garnishings are end less you can add chocolte chips or nuts or dry fruits of your choice. Sandesh tastes incredibly delicious making it one of the popular sweets in Bengal.
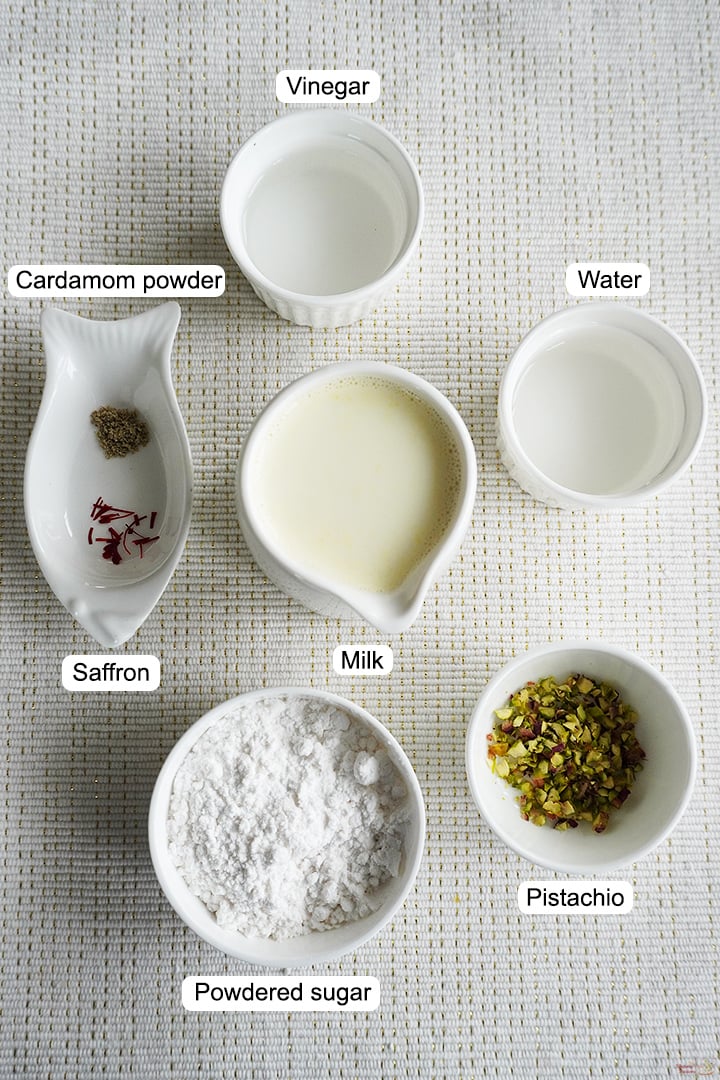
Milk - Use full cream milk either farm fresh or packed milk.
Vinegar - You can use vinegar or lemon juice to curdle milk.
Sugar - Grind sugar to a fine powder then use it.
Nuts - I have used chopped pistachios for garnish. You can even use almonds, cashews etc.
Saffron - Saffron adds a rich flavour and mild colour to this sweet.
Cardamom powder - This is one of the main flavourings for sandesh.
How to make Sandesh Step by Step
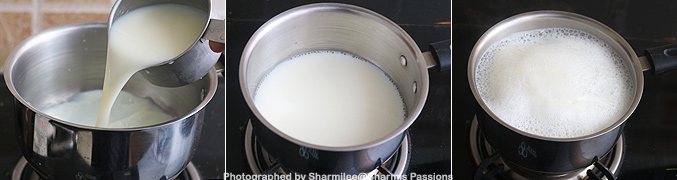
1.To a sauce pan add 1 liter milk. Stir and boil for a minute. Switch off and let it rest for 2-3 minutes.
2.To a small bowl add 2 tablespoon vinegar, 2 tablespoon water, mix it well and set aside.
3.Now add vinegar water solution little by little and stir gently. Now the flame is off, this helps to slowly curdle milk and the resulting chenna is so soft.
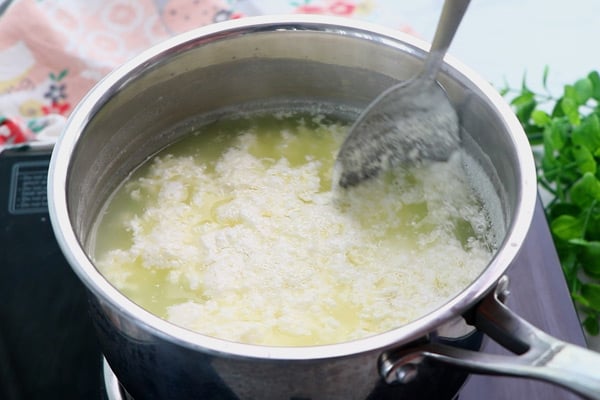
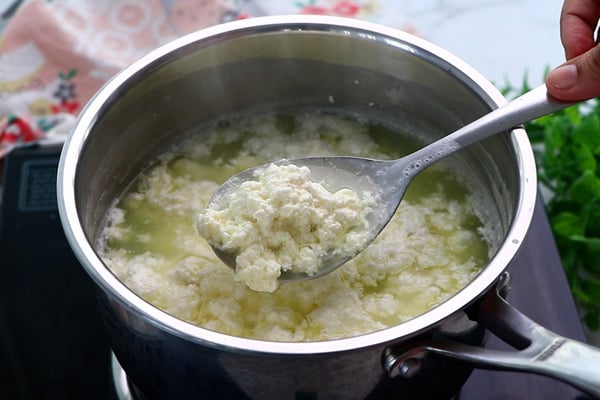
4.Now whey water(green liquid) and chenna(white solid) separates.
5.Now it is curdled completely. Switch off.
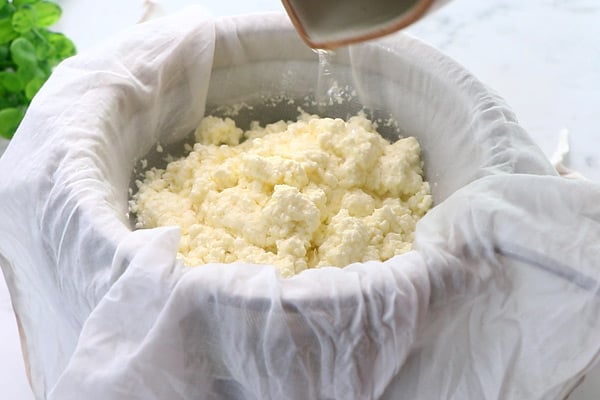
6.Transfer this to a cloth placed on a strainer. Keep a bowl underneath to collect the whey water. You can use this whey water for kneading chapathi dough or for curdling milk again.
7.Rinse it with water well.
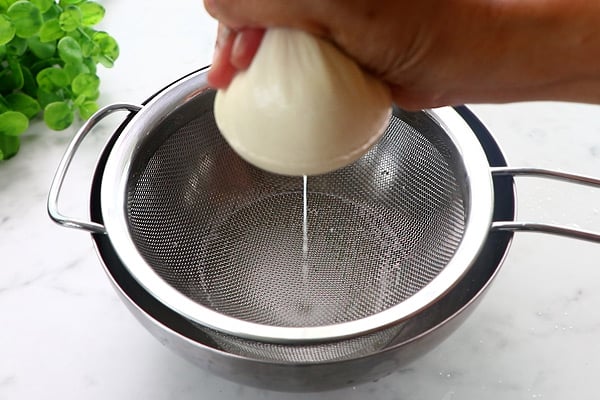
8.Squeeze excess water.
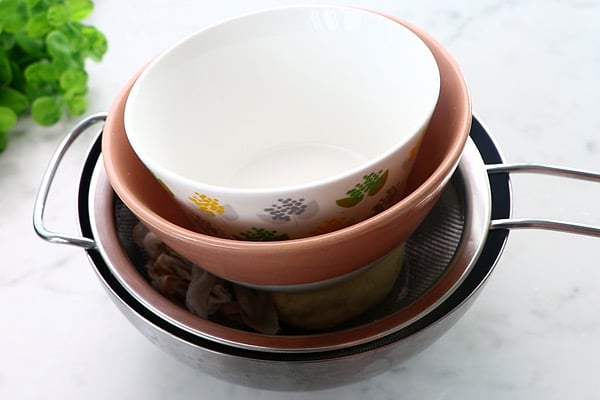
9.Roll and place it on the strainer. Keep 2 bowls on it. Do not keep heavy weight. Set aside for 30 minutes.
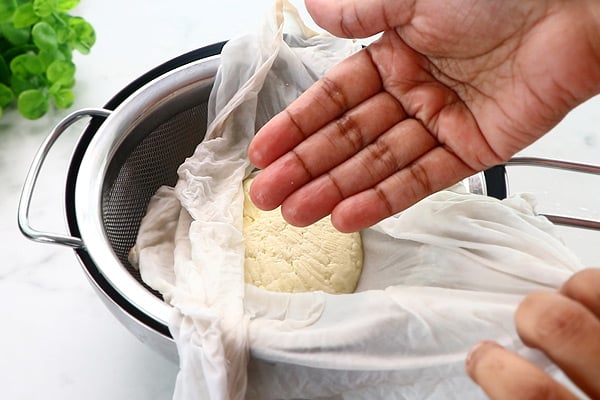
10.Now open, moisture should be still there slightly, it should not be dry.
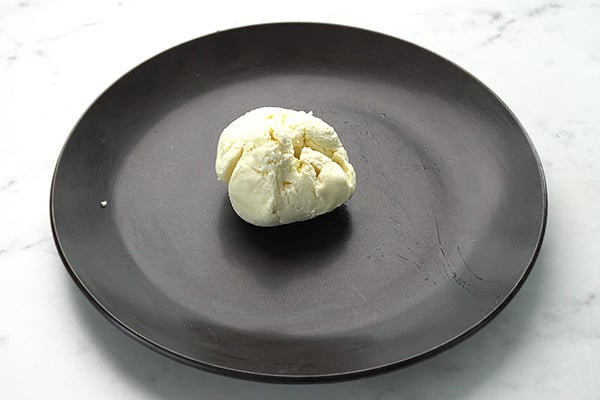
11.Transfer it to a plate.
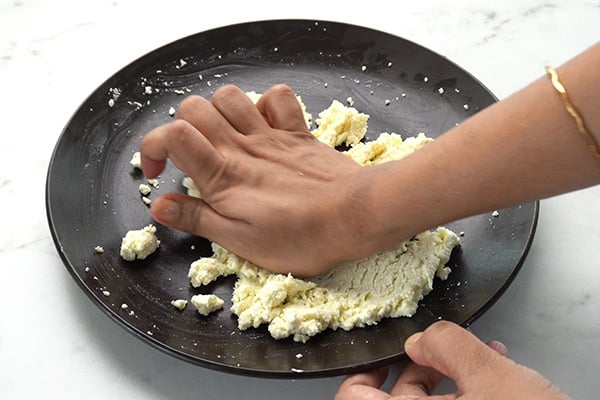
12.Knead it well using your palm like shown. Knead until the texture changes smooth and soft.
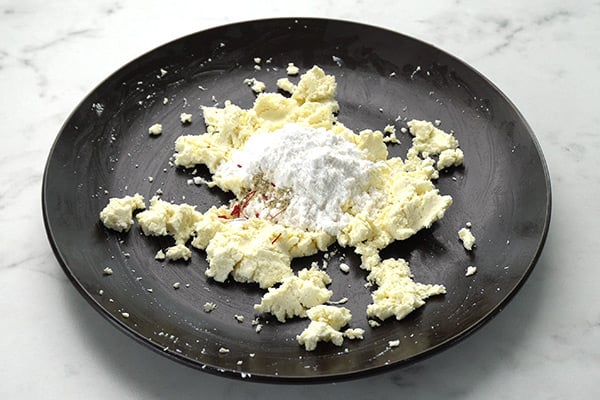
13.Add ⅓ cup powdered sugar, ¼ teaspoon cardamom powder and 5 strands saffron.
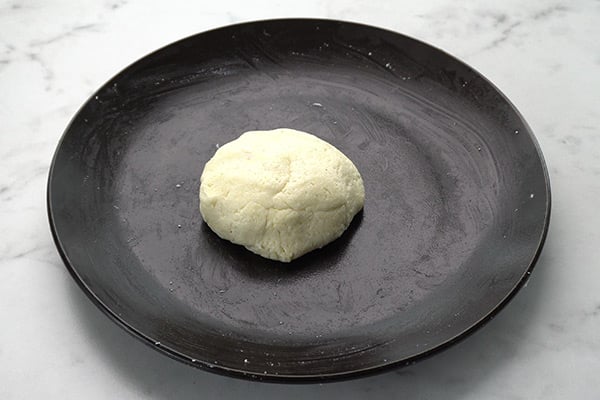
14.Mix well and gather to form a dough like this.
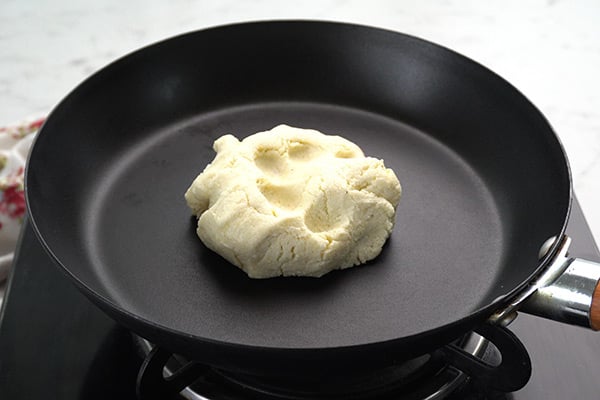
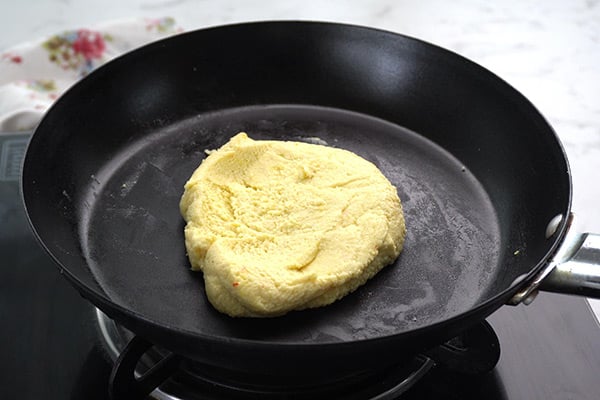
14.Keep a pan in low flame and add it to the pan.
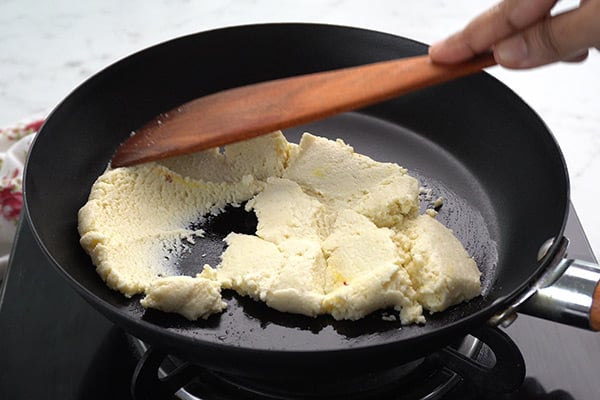
15.Keep cooking in low flame.
16.Cook for 3-5 minutes not more than that. If you cook longer it may become hard and will crumble. Switch off and remove from flame.
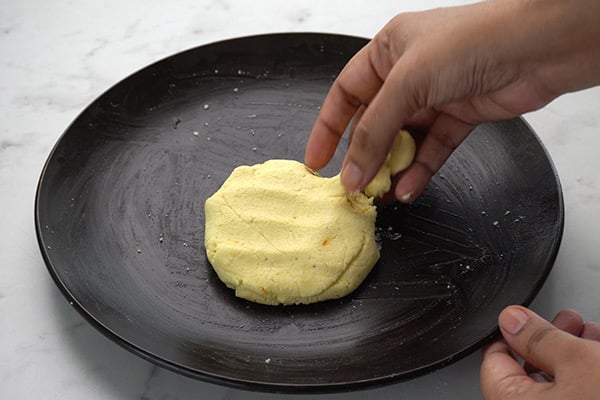
17.Transfer to a plate. Pinch a small portion.
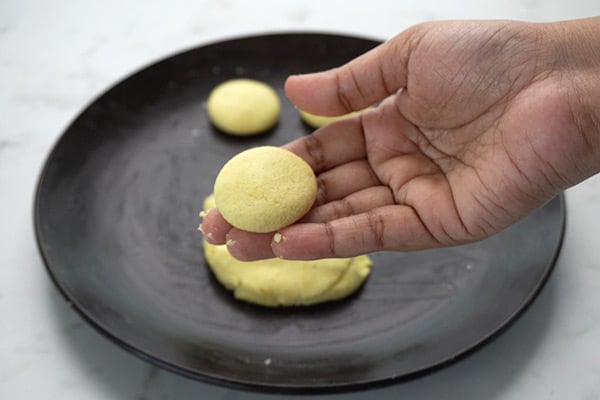
18. Make small balls, flatten it slightly.
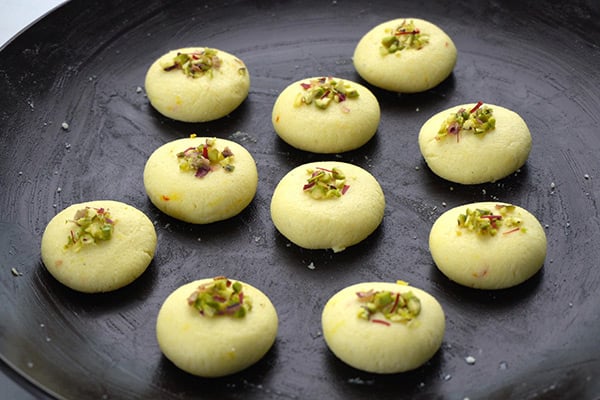
19.Garnish with chopped pistachio and saffron strands.
Sandesh is ready!
Expert Tips
Vinegar solution - Vinegar when mixed with water is more concentrated and makes chenna soft.
Preparing chenna - Boil milk give a quick stir and switch off, let it rest for few minutes before adding vinegar solution. Add vinegar, water mixture little by little and stir gently.
Kneading - I usually knead for at least 7-10 minutes till it becomes smooth and soft. Make sure you do not over knead then fat will get released.
Cooking - Cook the mixture in lowest flame and cook not more than 5 minutes.
Flavours - You can add cocoa powder to make chocolate sandesh, rose essence to make rose sandesh. Like wise you can make so many variations like orange sandesh, pista sandesh etc.
Serving and Storage
Sandesh is served as a sweet snack with other sweet varieties we make foe the festival. It can be stored in fridge for 3-5 days.
FAQS
1.What type of milk should I use?
Use full cream milk for best taste and volume. Avoid low fat or toned or skimmed milk.
2.While cooking it became crumbly, how to fix it?
Do no worry if happens when you over cook the mixture. Cool down the mixture then add to mixer and blend until smooth. Now transfer to a plate and shape it, sandesh is ready.
3.Can I add brown sugar or jaggery?
Yes you can use brown sugar or jaggery but make sure it is in powdered form and is free from impurities.
If you have any more questions about this Sandesh Recipe do mail me at sharmispassions@gmail.com. In addition, follow me on Instagram, Facebook, Pinterest ,Youtube and Twitter .
Tried this Sandesh Recipe? Do let me know how you liked it. Also tag us on Instagram @sharmispassions and hash tag it on #sharmispassions.
Sandesh is a delicious Bengali milk sweet popular all over India. Sandesh also known as Bengali Sondesh is milk cheese based rich sweet made using milk, sugar, nuts, cardamom powder and saffron. Sandesh is most commonly made for festivals and special occasions.
To a sauce pan add 1 liter milk. Stir and boil for a minute. Switch off and let it rest for 2-3 minutes.
To a small bowl add 2 tablespoon vinegar, 2 tablespoon water, mix it well and set aside.
Now add vinegar water solution little by little and stir gently. Now the flame is off, this helps to slowly curdle milk and the chenna is so soft.
Now whey water(green liquid) and chenna(white solid) separates.
Now it is curdled completely. Switch off.
Transfer this to a cloth placed on a strainer. Keep a bowl underneath to collect the whey water. You can use this for kneading chapathi dough or for curdling milk again.
Rinse it with water well.
Squeeze excess water.
Roll and place it on the strainer. Keep 2 bowls on it. Do not keep heavy weight. Set aside for 10 minutes.
Now open, moisture should be there, it should not be dry.
Transfer the prepared chenna to a wide plate.
Knead it well using your palm like shown. Knead until the texture changes smooth and soft.
Add ⅓ cup powdered sugar, ¼ teaspoon cardamom powder and 5 strands saffron.
Mix well and gather to form a dough like this.
Keep a pan in low flame and add it to the pan.
Keep cooking in low flame.
Cook for 3-5 minutes not more than that. If you cook longer it may become hard and will crumble. Switch off and remove from flame.
Transfer to a plate. Pinch a small portion.
Make small balls, flatten it slightly.
Garnish with chopped pistachio and saffron strands.
Sandesh is ready!
Video
Notes
Vinegar solution - Vinegar when mixed with water is more concentrated and makes chenna soft.
Preparing chenna - Boil milk give a quick stir and switch off, let it rest for few minutes before adding vinegar solution. Add vinegar, water mixture little by little and stir gently.
Kneading - I usually knead for at least 7-10 minutes till it becomes smooth and soft. Make sure you do not over knead then fat will get released.
Cooking - Cook the mixture in lowest flame and cook not more than 5 minutes.
Flavours - You can add cocoa powder to make chocolate sandesh, rose essence to make rose sandesh. Like wise you can make so many variations like orange sandesh, pista sandesh etc.
Piyush is a thick, creamy and chilled drink made by blending curd, milk and shrikhand with saffron and cardamom powder. This recipe is made in summer season and has a creamy taste with mild sweetness and aroma of saffron. Many people serve it as a welcome drink at parties.
This recipe is very simple and need only few ingredients. It take about 10 minutes to prepare, and you do not need any cooking for it. This gives a rich and creamy taste to the drink. You can have it after lunch or in the evening time.
[feast_advanced_jump_to]
About Piyush
Piyush is a traditional drink from Maharashtra and Gujarat. It is made mostly during festival days and summer months. And also Piyush is the main part of this drink, and it is mixed with milk and curd to make it light. This recipe texture is thick and smooth and it feels creamy when you drink it.
The flavour is mildly sweet with little sourness from the curd. Saffron gives a light golden colour to the drink, and cardamom powder and nutmeg powder gives a warm aroma. Chopped pistachios on top add a light crunch in every sip.
You can change this drink in many ways as per your taste. You can also add a little rose syrup or some more dry fruits on top. For a light version, you can use thin buttermilk in place of some milk.
Piyush is a close cousin to lassi, the main thing is that piyush has shrikhand so its more rich and creamy. This piyush recipe was given to me by my friend last summer itself but it got missed, I kept postponing as its a easy recipe finally this summer made it and enjoyed.
Curd - I use fresh and thick curd for this recipe. It gives a mild sourness and creamy taste to the drink. Do not use very sour curd as taste will change.
Milk - I add boiled and cooled milk to make the drink light and easy to drink. You can replace it with almond milk if you like.
Shrikhand - I have used store bought shrikhand. It gives the sweetness and thick texture, so you can skip the extra sugar if it is sweet enough. You can use any flavour of shrikhand.
Saffron - I add a pinch of saffron strands for colour and aroma. It gives a soft golden shade to the Piyush. You can soak it in warm milk for few minutes before adding.
Cardamom Powder - I use cardamom powder for a fresh and sweet aroma. It goes very well with curd and milk. You can use freshly ground one for better smell.
Nutmeg Powder - I add a tiny pinch of nutmeg powder for a warm flavour. It is strong, so use very little. You can skip it if you do not like the smell.
Pistachios - I use chopped pistachios for garnish on top for crunch and mild nutty taste. You can use almonds or cashews also.
How to make Piyush Step by Step
1.To a mixing bowl add curd, then add milk and shrikhand(I used storebought).
2.Add cardamom powder, saffron strands and nutmeg powder along with required sugar.
3.Using a hand blender blend well until smooth and creamy. Finally garnish with chopped pistachios and enjoy!
Serve chilled!
Expert Tips
Use thick curd - I always use thick and fresh curd for this drink. Watery curd makes the Piyush thin and it lose the creamy taste.
Soak the saffron - I soak saffron strands in two spoons of warm milk for 10 minutes. This gives better colour and the aroma spread well in the drink.
Blend till smooth - I use a hand blender and blend until there are no lumps. Shrikhand is thick, so it needs some time to mix well.
Add sugar slowly - I taste the Piyush once before adding any sugar. Store bought shrikhand is already sweet, so most of the time extra sugar is not needed.
Chill well - I keep the Piyush in the refrigerator for at least 1 hour before serving. Cold Piyush taste much better and feels more refreshing.
Nutmeg quantity - I add only a tiny pinch of nutmeg powder. If you add more, the flavour becomes too strong and cover the saffron flavour.
Serving and Storage
Serve this chilled with chopped pistachios and a few saffron strands on top. It tastes best when served fresh after blending. Store the leftovers in a closed bottle in the refrigerator and finish within one day.
FAQS
1. Can I skip shrikhand?
Yes you can make it with curd and milk, but the taste will be slightly different.
2. Can I use homemade shrikhand?
Yes you can use homemade shrikhand, it will taste even better. Just make sure it is smooth and not very sour.
3. Can I skip saffron?
Yes you can skip saffron if it is not available. The drink will taste good, but the colour and aroma will be less.
4. Can I use a mixer jar instead of hand blender?
Yes you can use a mixer jar and blend for few seconds. Do not blend for long time as the drink will become thin.
5. How thick should Piyush be?
It should be thick like a lassi and easy to pour. Add little cold milk if it feels too thick.
If you have any more questions about this Piyush Recipe do mail me at sharmispassions@gmail.com. In addition, follow me on Instagram, Facebook, Pinterest, Youtube and Twitter .
Tried this PiyushRecipe ? Do let me know how you liked it. Also tag us on Instagram @sharmispassions and hash tag it on #sharmispassions.
Piyush is a natural, yummy drink made by blending curd, milk, flavours, shrikand & sugar and served chilled. Piyush is flavourful, soothing delight for the summer and a rich choice for welcome drink, parties& family time. Piyush is a must try at home for the joy of tasting!
Apple Cinnamon Popsicles are creamy, delicious dessert bars made by freezing a blend of apple juice, milk and cinnamon flavours in moulds. Apple Cinnamon Popsicles is a treat for kids in summer holidays and a healthy resort to manage the heat of the summer.
You just need to blend few ingredients and let the freezer do the work. Kids love these more than regular ice cream. This is a great option when you want something cool and healthy for the family. Apple Cinnamon Popsicles takes time to freeze but the making part is quick and easy.
[feast_advanced_jump_to]
About Apple Cinnamon Popsicles
Apple Cinnamon Popsicle is made using fresh apples, milk, sugar and cinnamon powder. These ingredients come together to make something really nice and creamy. Apple gives natural sweetness and nutrition. The cinnamon adds warmth and nice flavour that makes it taste special.
Fresh apples gives this popsicle its real taste and you puree it with milk it becomes smooth and creamy without any lumps. The apple flavour stays strong and tastes really nice when it freezes. It is a perfect treat that kids love and it is good for their health too.
Cinnamon powder brings warmth to the popsicles. It is not overpowering but you can taste it in every bite. The combination of apple and cinnamon is really nice and feels homemade. Milk makes it creamy and smooth texture that melts in your mouth.
I make apple cinnamon popsicles during summer because my kids ask for them every day. They are healthy and tastes good so I don't feel guilty giving them. I feel proud making something cool and refreshing at home.
Fresh apple - I used one small apple and removed the skin. Fresh apples gives natural sweetness and nutrition to the popsicles.
Milk - I use boiled and cooled milk. Boiling makes it safe to use and it blends nicely with apple puree.
Cane sugar - I add sugar for sweetness. My apple is already sweet so I used less sugar and adjusted based on preference.
Cinnamon powder - I add cinnamon for warmth and flavour. It gives nice taste and makes popsicles taste really special.
How to make Apple Cinnamon Popsicles Step by Step
1.Take boiled and cooled milk add sugar to it. Mix well and set aside
2.Strain to remove impurities if any. Take a small apple remove the skin and chop into small cubes. Transfer to a mixer jar.
3.Add half of milk to it, puree it smooth then add remaining milk.
4.Add half of milk to it, puree it smooth then add remaining milk.
5.Mix well.Take your favourite popsicle mould. Fill it with apple milk mixture.
6.Close with lid.Freeze for 6 to 8 hours. I freezed it overnight, next day show the moulds under running tap water, gently pull out the popsicles and serve immediately.
Serve chilled!
Expert Tips
Boil milk first - I boil milk and let it cool completely before using. This makes it safe and helps it blend better with apple puree.
Puree smoothly - I blend apple with half of milk first then add remaining milk. This helps it blend smooth without any lumps or chunks.
Remove impurities - I strain the mixture before filling moulds. This makes sure no small pieces or impurities stay in the popsicles.
Mix cinnamon well - I add cinnamon powder and mix it really well. This distributes the flavour evenly throughout the mixture.
Fill carefully - I pour the mixture slowly into popsicle moulds. Don't overfill or the mixture spill out when it freeze.
Freeze long enough - I freeze for 6 to 8 hours or overnight. Overnight freeze works best because it freezes completely and solid from all sides.
Serving and Storage
Serve apple cinnamon popsicles straight from freezer when they are cold and solid. Run warm water on the outside of mould when removing popsicles. They taste best when served immediately after removing from mould. Store in freezer and they stay good for 2 weeks if covered.
FAQS
1. Can I use apple juice?
You can use apple juice but fresh apple tastes better. Fresh apple gives more natural flavour and better texture.
2. How sweet should it be?
Make it less sweet because apple is already sweet. Add sugar based on how sweet you like and adjust accordingly.
3. Can I use other fruits?
Yes you can use other fruits like mango or banana. The method stays same just replace apple with your fruit choice.
4. Can I skip cinnamon?
You can skip it but cinnamon give nice flavour. It makes the popsicles taste really special and different.
5. How long do they stay frozen?
They stay frozen for 2 weeks in freezer if covered. After that they start to get ice crystals and texture change.
If you have any more questions about this Apple Cinnamon PopsiclesRecipe do mail me at sharmispassions@gmail.com. In addition, follow me on Instagram, Facebook, Pinterest, Youtube and Twitter .
Tried this Apple Cinnamon PopsiclesRecipe ? Do let me know how you liked it. Also tag us on Instagram @sharmispassions and hash tag it on #sharmispassions.
Apple Cinnamon Popsicles are creamy, delicious dessert bars made by freezing a blend of apple juice, milk and cinnamon flavours in moulds. Apple Cinnamon Popsicles is a treat for kids in summer holidays and a healthy resort to manage the heat of the summer.
Rose Mousse is a soothing yummy dessert made by simmering milk and blending it with cream, rose essence and chilling it. Rose Mousse is a tasty delight for the family after weekend lunch and special occasions.
This is a great option when you want something elegant but simple to make. Rose Mousse fills the heart, eyes and tummy. It is quite easy to make. You feel proud serving something that looks fancy but it's really easy. It also feels light and fluffy because of the whipped cream.
[feast_advanced_jump_to]
About Rose Mousse
Rose Mousse is made using milk, fresh cream, white chocolate chips and rose syrup. These ingredients come together to make something nice and delicate. The rose flavour and white chocolate gives it sweetness without being too heavy.
Fresh cream gives this mousse its texture. When you whip it to soft peaks it becomes light and airy. This makes the mousse fluffy and nice to eat and you need to be careful not to whip it too much or it turns into butter and spoils texture and taste.
The white chocolate dissolves into the boiled milk and makes it creamy. The rose syrup gives it beautiful colour and nice flavour. When you layer it first at the bottom it give nice touch and make it look pretty. The combination of rose and white chocolate is really special.
I make rose mousse for special occasions because my family loves it. It looks impressive when you serve it in cups with the rose syrup layer. My kids like it more than heavy cakes and pastries.
Milk - I use milk and boil it for few minutes. This helps remove any bacteria and makes it safe to use with fresh cream.
Fresh cream - I use fresh cream that I whip until soft peaks form. Don't whip too much or it will ruin the mousse.
White chocolate chips - I add white chocolate to the boiled milk. It dissolves nicely and give sweetness and richness to the mousse.
Rose syrup - I use rose syrup to add flavour and colour. I use homemade beets rose milk syrup but store bought works too.
How to make Rose Mousse Step by Step
1.Take milk in a sauce pan, boil for 3-5 minutes. Set aside to cool down completely.
2.Take fresh cream in a bowl and start whipping with hand mixer. Whip till soft peaks form as shown. This is the right stage, don't whip it more, then it will end up in butter.
3.To boiled milk add white chocolate chips and let it boil until it dissolves completely. Cool down completely then add this mixture to whipped cream.
4.Add rose syrup to it.
5.Mix well. Take your serving cups. First pour rose syrup as first layer.
6.Spoon the fresh cream mixture and fill it up till ¾th of the serving cup. Refrigerate until serving time.
Serve chilled!
Expert Tips
Boil milk properly - I boil milk for 3 to 5 minutes to make it safe. Cool it completely before using or it curdles the cream.
Whip cream carefully - I whip fresh cream with hand mixer until soft peaks form. That is the right stage. If you whip more it turn into butter so watch carefully.
Don't skip cooling - I let the chocolate milk mixture cool completely before adding it to whipped cream. Hot mixture will collapse the whipped cream and ruin texture.
Layer nicely - I pour rose syrup first at the bottom of cup. This makes it look pretty and gives nice flavour in every spoonful.
Fill properly - I fill the cup till ¾ with the mousse mixture. Don't overfill or it looks messy and hard to handle.
Chill well - I refrigerate until serving time. This helps the mousse set properly and taste really nice when cold.
Serving and Storage
Serve rose mousse cold straight from the fridge. It taste best when chilled and the texture nice and fluffy. You can add few rose petals on top for decoration if you like. Store in refrigerator and it stay good for 2 to 3 days. Don't keep it too long or the cream separate and texture change.
FAQS
1. Can I use regular cream instead of fresh cream?
You can but fresh cream work better for whipping. It whips nicely and give better texture to mousse.
2. What if I don't have white chocolate?
You can skip it as milk chocolate changes the flavour a bit.
3. Can I use store bought rose syrup?
Yes store bought rose syrup work fine. Make sure it is good quality and has nice flavour.
4. How do I know cream is whipped properly?
When you lift the whisk, the cream should form soft peaks that fall back. That is the right stage to stop.
5. Can I make it ahead for parties?
Yes you can make it few hours before. Keep in fridge and serve cold when guests arrive.
If you have any more questions about this Rose MousseRecipe do mail me at sharmispassions@gmail.com. In addition, follow me on Instagram, Facebook, Pinterest, Youtube and Twitter .
Tried this Rose MousseRecipe ? Do let me know how you liked it. Also tag us on Instagram @sharmispassions and hash tag it on #sharmispassions.
Rose Mousse is a soothing yummy dessert made by simmering milk and blending it with cream, rose essence and chilling it. Rose Mousse is a tasty delight for the family after weekend lunch and special occasions.
Take milk in a sauce pan, boil for 3-5 mins. Set aside to cool down completely.
Take fresh cream in a bowl and start whipping with hand mixer. Whip till soft peaks form. This is the right stage, don't whip it more, then it will end up in butter.
To boiled milk add white chocolate chips and let it boil until it dissolves completely. Cool down completely then add this mixture to whipped cream.
Add rose syrup to it. I used homemade beets rose milk syrup. Mix well.
Take your serving cups. First pour rose syrup as first layer.
Spoon the fresh cream mixture and fill it up till ¾th of the serving cup. Refrigerate until serving time. Enjoy Rose Mousse!
Notes
Boil milk properly - I boil milk for 3 to 5 minutes to make it safe. Cool it completely before using or it curdles the cream.
Whip cream carefully - I whip fresh cream with hand mixer until soft peaks form. That is the right stage. If you whip more it turn into butter so watch carefully.
Don't skip cooling - I let the chocolate milk mixture cool completely before adding it to whipped cream. Hot mixture will collapse the whipped cream and ruin texture.
Layer nicely - I pour rose syrup first at the bottom of cup. This makes it look pretty and gives nice flavour in every spoonful.
Fill properly - I fill the cup till ¾ with the mousse mixture. Don't overfill or it looks messy and hard to handle.
Chill well - I refrigerate until serving time. This helps the mousse set properly and taste really nice when cold.
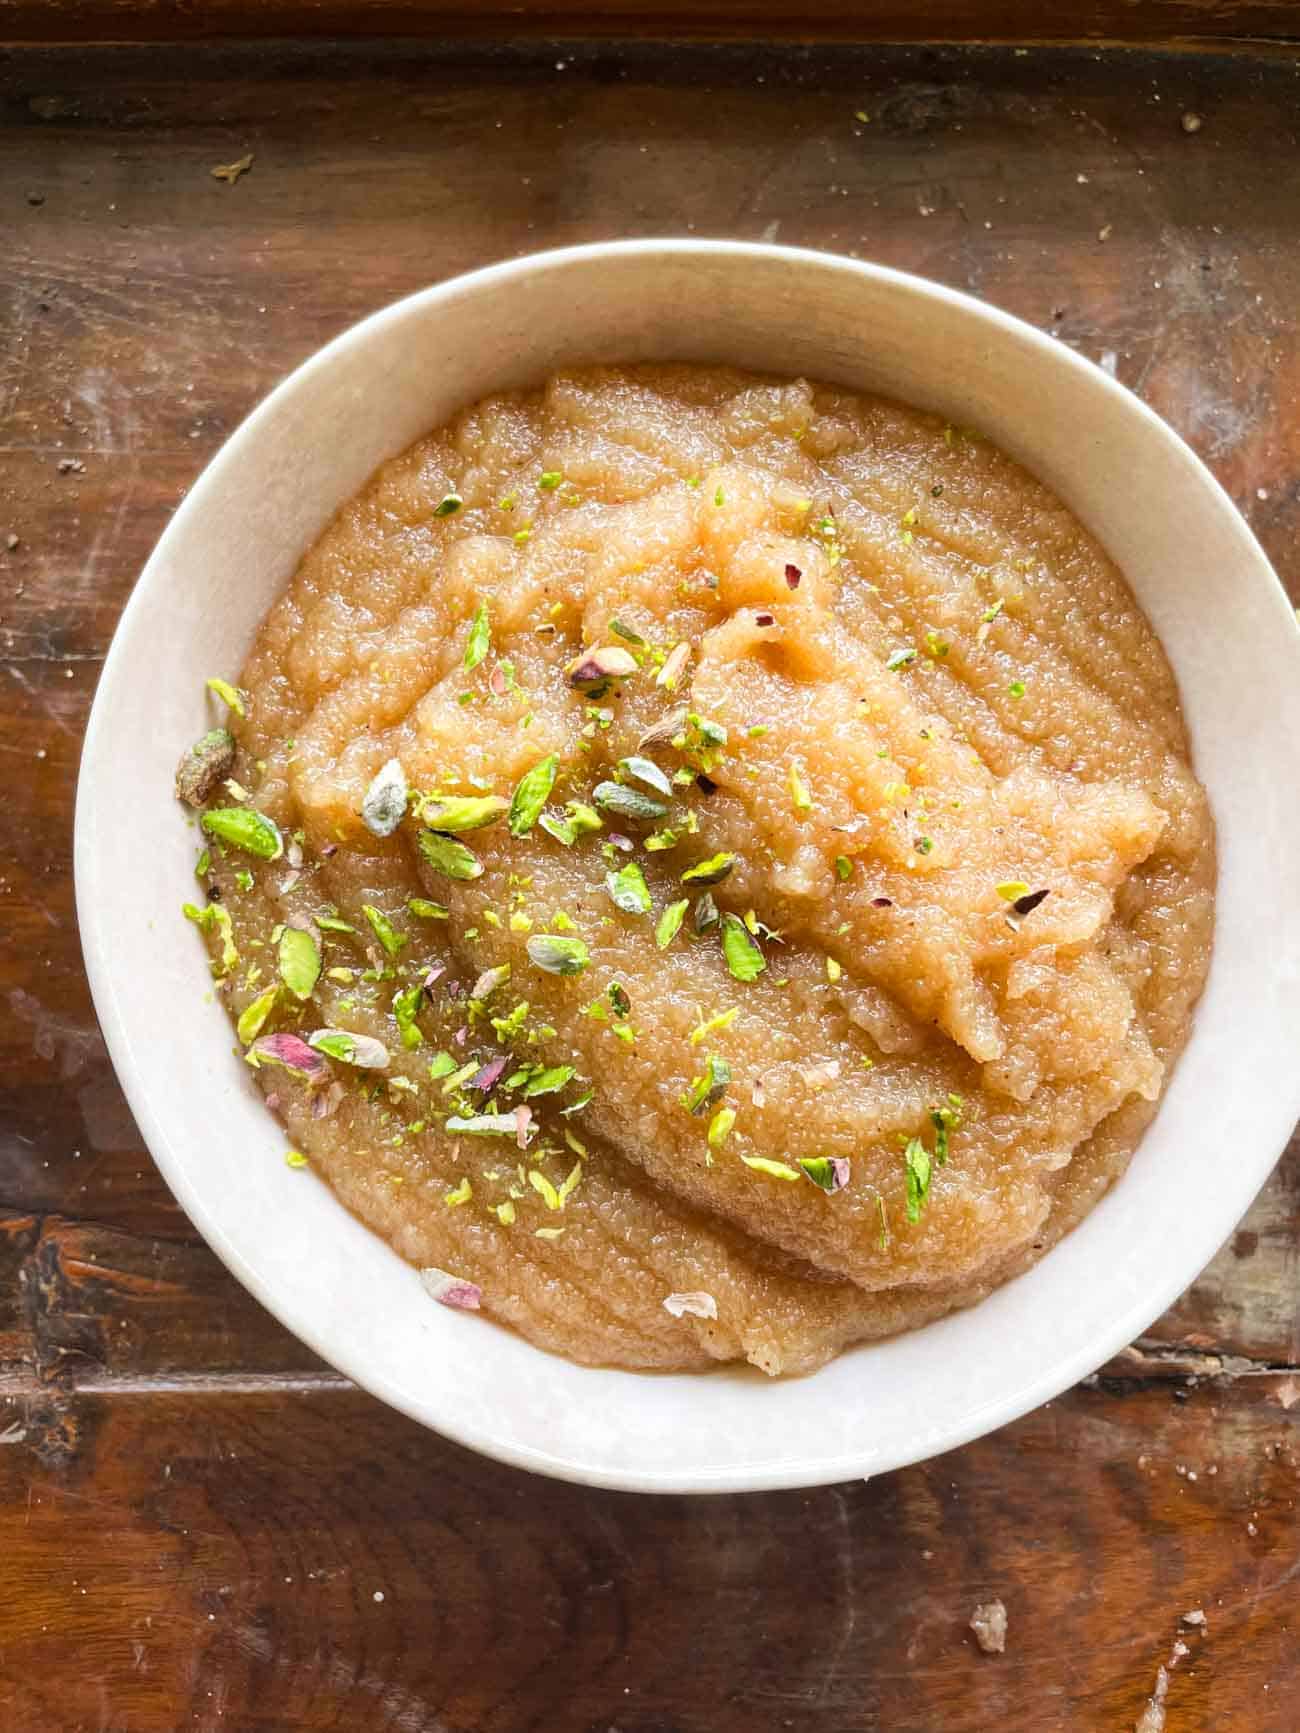
My mum’s sooji halwa is special because it’s got this gorgeous caramel-y nuttiness that comes from roasting the semolina (sooji) in ghee. You’ll never make it any other way!
There is nothing that screams Indian festivities quite like sooji halwa does (okay, and maybe also Malpua, Rabdi and Kheer!). However, I think this recipe is particularly special. What makes it stand out is the gorgeous, caramel-like glaze that coats every little bit of sooji. It’s my mum’s trick, and honestly, it’s the only way I like to make it now!
The magic, though, lies in patiently roasting the sooji in ghee for 20–25 minutes, until its colour changes from white to a deep brown. As a result, you get that deep, toasty flavour paired with a smooth, melt-in-your-mouth texture that makes this halwa an instant family favourite. And the best part? Whether you’re making it for a festival, a puja, or simply to satisfy a sweet craving on a weeknight, this halwa is just the thing to whip up because it always hits the spot!
Sooji (Semolina/Rava): The star ingredient; use fine sooji for a smooth texture and rich flavour. Bombay sooji works best here because the grains are neither too big nor too small. Bansi rawa will also work.
Besan (Gram Flour): Adds depth and enhances the nutty aroma.
Ghee: The key to flavour and richness. Please use the best quality ghee you can find for best results.
Sugar – Balances the nutty flavour with sweetness.
Water – Helps cook the semolina into a soft, smooth halwa.
Nuts (Almonds/Pistachios) – For crunch and garnish.
How to make sooji halwa
1. In a pan, roast the sooji and besan together over low flame, stirring continuously for 5-6 minutes. Add the ghee and continue cooking on low flame.
2. Stir constantly until the mixture changes to a light chocolate brown colour and becomes fragrant.
3. Continue roasting until the brown becomes a little deeper and darker.
4. Add the sugar and mix it in.
5. Slowly pour in the water while stirring continuously. Increase the flame. Be cautious as the mixture may bubble and splutter.
6. Keep stirring until the halwa thickens, and you see ghee starting to ooze out from the sides. Garnish with slivered pistachios or almonds.
Frequently Asked Questions
Which is the best type of sooji to make halwa?
For a smooth, melt-in-the-mouth halwa, use Bombay sooji (fine semolina). For a nuttier, coarser texture with more bite, use Bansi rava. Both work, it just depends on the texture you prefer!
Can I replace sugar with jaggery for this recipe?
Yes! Jaggery gives the halwa a deep, earthy sweetness and a slightly different colour. Just make sure to melt and strain the jaggery first (to remove impurities) before adding it in.
Why is my sooji halwa lumpy?
This happens if water is added too quickly. Always add water slowly while stirring continuously to prevent lumps.
Can I make this halwa without ghee?
You can use butter or oil, but I’d really suggest you don’t! The ghee is what makes this Sooji Halwa!
Is Sooji Halwa the same as Sheera or Rava Kesari?
They’re variations of the same dish. Rava Kesari includes saffron or food color, while sheera may include milk instead of water.
Can I make sooji halwa ahead of time?
Yes! Store in the fridge for up to 2–3 days. Reheat with a splash of water or milk to soften.
Can I reduce the sugar?
Absolutely, feel free to adjust to taste. Just remember that less sugar means less stickiness in texture.
Richa’s Top Tips
Don’t skimp on the ghee. That’s where the flavor and that glistening texture come from.
Always roast sooji onmedium heat. Too high and it will burn, too low and it won’t develop flavour.
Bombay sooji works best here. The grains are neither too big nor too small. But you can also use bansi rawa if that’s what you have available.
Be patient and pay attention. Be prepared to spend half an hour in the kitchen. Sooji can burn pretty quickly or brown unevenly if not stirred often. So keep stirring every minute or so for the best, even results.
The halwa willthicken as it cools. So take it off the heat slightly before your desired consistency.
Add the sugar before the water. Or the sugar will caramelize and harden when it hits the water.
The consistency should be thick but runny. If its too thick, it’ll start to become gloopy.
Fridge: Store in an airtight container and refrigerate for up to 2-3 days. Reheat with a splash of water or milk to soften.
Freeze: Sooji halwa also freezes quite well. Portion into single servings and store in a freezer safe container or bag for up top 3 months.
Thaw: Allow it to thaw in the refrigerator overnight. Transfer it to a pan along with a splash of milk or water and then reheat gently until it reaches your desired consistency.
One bite of this Sooji Halwa and you’ll understand exactly why I can’t stop raving about it! It’s warm, rich, comforting – everything I’d want in a dessert (and honestly just the thing for this festive season!) I hope you give this one a try.
Make sure to send me your recreations over on my IG @my_foodstory, I loveee to see them!!
Also check out my Navratri recipes round up for all the inspo you need this festive season ❤️
Watch How To Make Sooji Halwa Video
LOVE THIS RECIPE? Subscribe to my newsletter and be the first to receive all new recipes!
In a pan, roast the sooji and besan together over low flame, stirring continuously for 5-6 minutes.
1 Cup Sooji or Semolina, 1 1/2 tablespoons Besan or Gram Flour
Add the ghee and continue cooking on low flame, stirring constantly until the mixture changes to a light chocolate brown color and becomes fragrant.
1/2 Cup plus 1 tablespoon Ghee or Clarified Butter
Add the sugar and mix it in. Slowly pour in the water while stirring continuously. Increase the flame. Be cautious as the mixture may bubble and splutter.
3/4 Cup Sugar, 3 Cups Water
Keep stirring until the halwa thickens, and you see ghee starting to ooze out from the sides.
Coconut barfi was my mom's signature dessert - she made it for every happy occasion, a recipe she learned from her own mother. It was one of the first sweets she ever taught me to make. Every year, I still make her signature thenga barfi for my husband's birthday, and he looks forward to it […]
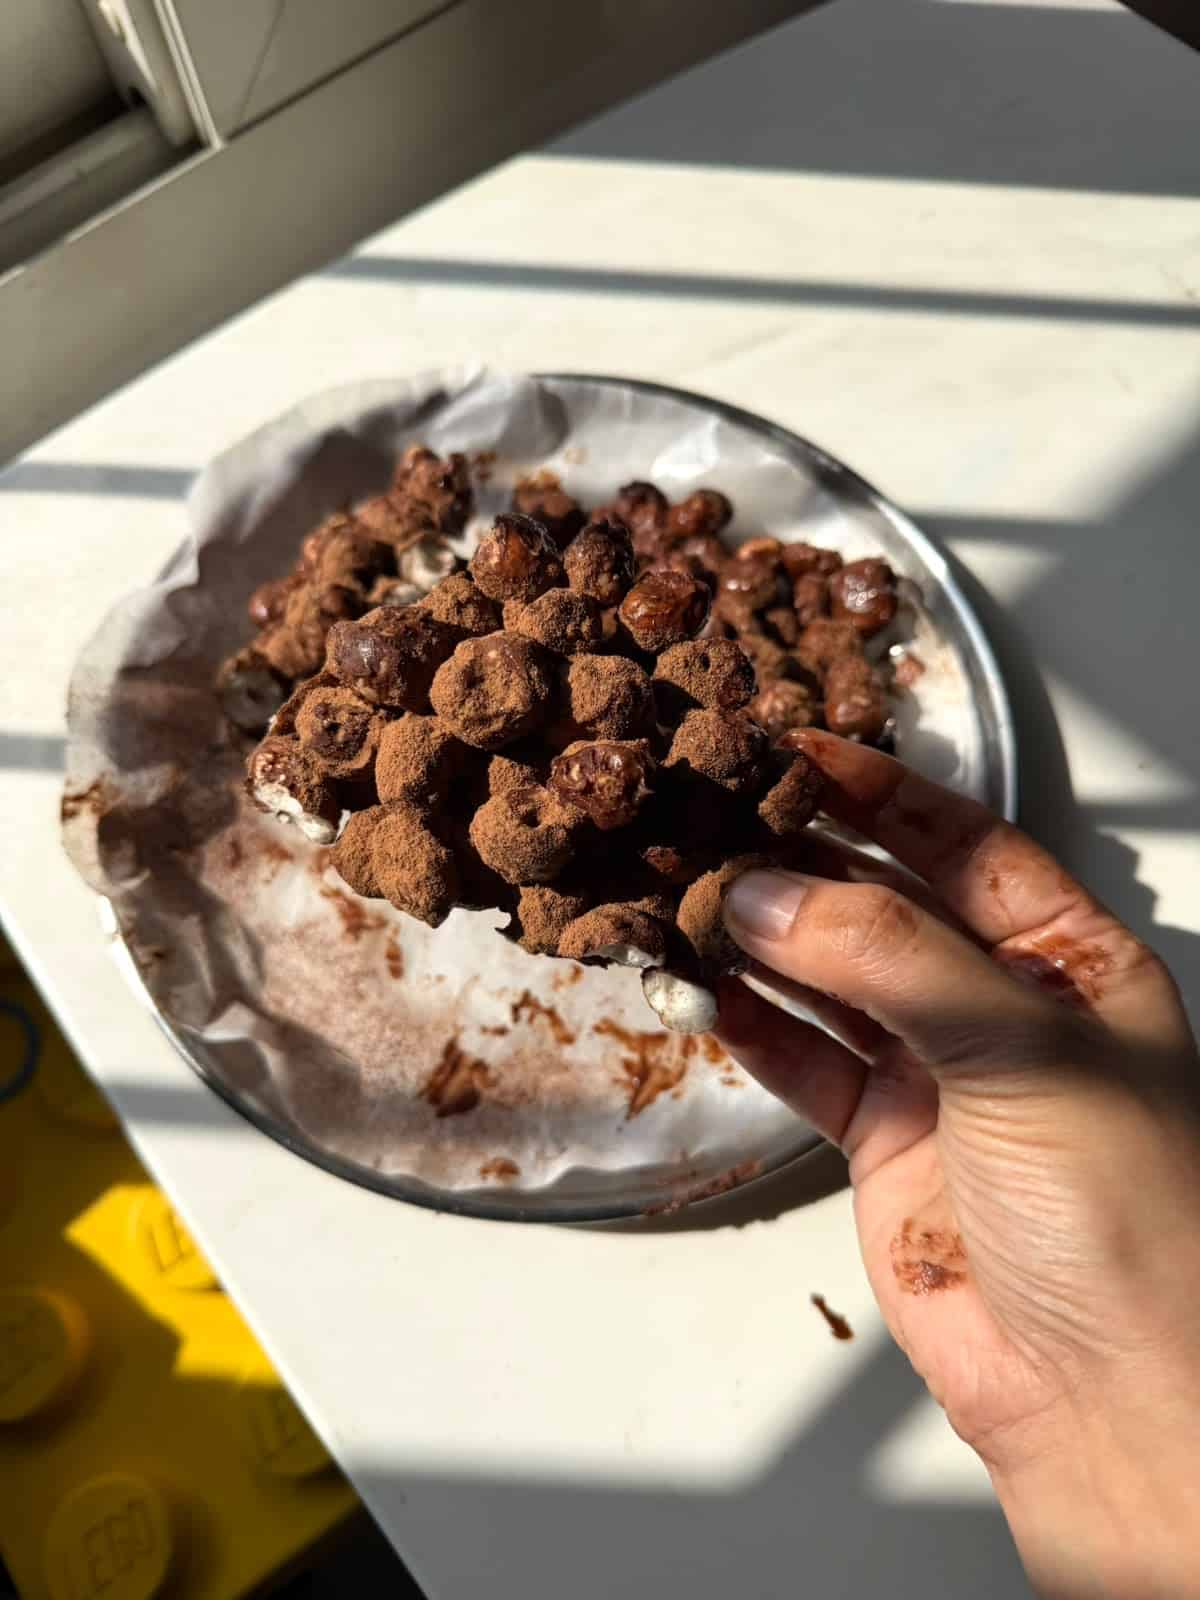
This makhana chocolate bark is for the times when the chocolate craving hits, but you don’t want to reach for a packet of biscuits.It takes about 20 minutes and uses just five ingredients.
My family loves makhana as a snack, but this makhana chocolate bark has taken it to a completely different level at home. The combination of crunchy roasted makhana with milk and dark chocolate is so good that we now keep a batch in the freezer at all times. It’s become our favourite thing to reach for when someone wants something sweet after dinner.
This makhana chocolate bark recipe uses just five ingredients, and the air fryer does most of the work, so it’s really not much effort at all. If you’ve tried our mocha lava cake or eggless chocolate brownies for dessert, this chocolate makhana bark is the no-bake, everyday alternative that satisfies the same craving with a fraction of the effort.
Makhana: AKA fox nut or popped lotus seed. If you’re outside India, you can easily find these in your local Indian grocery store.
Chocolate: A mix of milk and dark chocolate. The milk chocolate adds sweetness and the dark chocolate adds depth.
Butter: Just a teaspoon, tossed with the makhana before roasting.
Sugar: Half a tablespoon mixed in with the melted chocolate. You can skip it if your chocolate is sweet enough.
Cocoa Powder (Optional): Dusted on top before serving for a more intense chocolate flavour.
Oil: A little sunflower or neutral oil for greasing the parchment paper so the bark peels off cleanly.
Richa’s Top Tips
Don’t over-roast the makhana. Six minutes at 170°C is enough to get them light and crunchy. If they go too long, they’ll turn hard and bitter instead of crispy. But all air fryers are different. So you may need to experiment on yours to figure out the perfect timing.
Use a mix of milk and dark chocolate. All milk chocolate makes it too sweet, and all dark can be too bitter. The combination gives you the best flavour and the right amount of sweetness.
Mix the chocolate and makhana quickly once the chocolate melts. The chocolate starts setting fast, so you want every piece coated evenly before transferring to the parchment paper. Work quickly at this step.
Grease the parchment paper before spreading the mixture. If you skip this, the bark will stick to the paper and break unevenly when you try to peel it off.
Freeze for at least 2 hours before serving. The chocolate needs to set completely so the bark snaps cleanly into pieces. If you try to break it too early, it’ll be soft and messy.
Frequently Asked Questions
Can I make this chocolate makhana bark without an air fryer?
Yes. Roast the makhana in a pan on low heat with the butter for about 5-6 minutes until they’re crunchy. For the chocolate, melt it using a double boiler or in the microwave in 30-second intervals, stirring in between. Toss the roasted makhana in the melted chocolate, spread on parchment paper, and freeze as usual.
Can I use only dark or milk chocolate?
You can, but the balance won’t be the same. All dark chocolate will make the bark more bitter, and all milk chocolate will make it quite sweet. If using only one, dark chocolate with half tablespoon of sugar works better than milk chocolate on its own.
Can I make this recipe without sugar?
Yes. If your milk chocolate is already sweet enough, you can skip the sugar entirely. Taste the chocolate once it melts and decide. The sugar is really just there to round things out if needed.
Is chocolate makhana bark a healthy snack?
It’s definitely a better option than most packaged chocolate snacks. Makhana is naturally low in calories, high in fibre, and a good source of protein. The chocolate does add sugar and fat, but because the makhana is so light, you’re getting a lot of crunch and satisfaction without eating a heavy dessert.
Storage Tips
In the freezer: Store in an airtight container for up to two weeks. Place parchment paper between layers so the pieces don’t stick together.
In the fridge: It keeps well in the fridge for about a week, though the texture is slightly less snappy than when frozen. Still tastes great.
At room temperature: Not recommended. The chocolate will soften and melt, and the makhana will lose its crunch. Always keep this refrigerated or frozen.
Serving Ideas
This chocolate makhana bark works as a dessert, a snack, or even a homemade gift:
With Masala Chai: A few pieces of cold chocolate bark with a hot cup of chai is a really lovely afternoon combination.
With Tender Coconut Ice Cream: Crumble the bark over a scoop of ice cream for an easy, fancy-looking dessert.
As a gift: Break the bark into pieces, pack it into a nice box or jar, and you’ve got a really thoughtful homemade gift that takes almost no effort.
Customisation Ideas
Peppermint bark: Add a few drops of peppermint extract to the melted chocolate before mixing in the makhana. Crush some candy canes and sprinkle on top before freezing for a festive version.
Orange chocolate: Add a teaspoon of orange zest to the melted chocolate. It brings a really fresh, citrusy lift that pairs beautifully with the dark chocolate.
Nutty bark: Toss in a handful of roughly chopped almonds, pistachios, or cashews along with the makhana before spreading on the parchment paper. Adds extra crunch and makes it more filling.
White chocolate version: Swap the milk and dark chocolate for white chocolate and top with dried cranberries and crushed pistachios. Completely different flavour but just as easy.
Sea salt and caramel: Drizzle some caramel sauce over the bark before freezing and finish with a light sprinkle of flaky sea salt. The sweet-salty combination with the crunchy makhana is incredible.
Did You Know?
Makhana, also called fox nuts or lotus seeds, are harvested from the prickly water lily plant that grows in stagnant water bodies across Bihar. India produces over 90% of the world’s makhana, and almost all of it comes from the wetlands of Bihar’s Mithila region. The harvesting process is entirely manual. Workers wade chest-deep into muddy ponds to collect the seeds from the bottom, which is why makhana is more expensive than most dry snacks despite looking so simple. Once harvested, the seeds are sun-dried, roasted, and popped, which is what gives them that light, crunchy texture.
Fair warning, once you make this chocolate makhana bark, plain roasted makhana is going to feel a little boring. But that’s a good problem to have. We make a fresh batch almost every week now, and it’s become the thing everyone in the house reaches for after dinner. When you try it, share your pictures with me on Instagram @my_foodstory.
Take makhana in an airfryer safe container, add butter and mix well. Air fry at 170C for 6 minutes till it’s mildly roasted.
Cut out a parchment paper with diameter 10 inches and grease with oil on one of the sides.
Place chocolate on top of the roasted makhana and air fry at 170C for 2 minutes till the chocolate melts. Add sugar, mix well so the makhana is coated with chocolate & sugar.
Transfer the mix to the greased parchment paper and freeze for at least 2 hours.
Just before serving, peel off the parchment paper from the chocolate bark, transfer to a plate, dust with cocoa powder and serve.
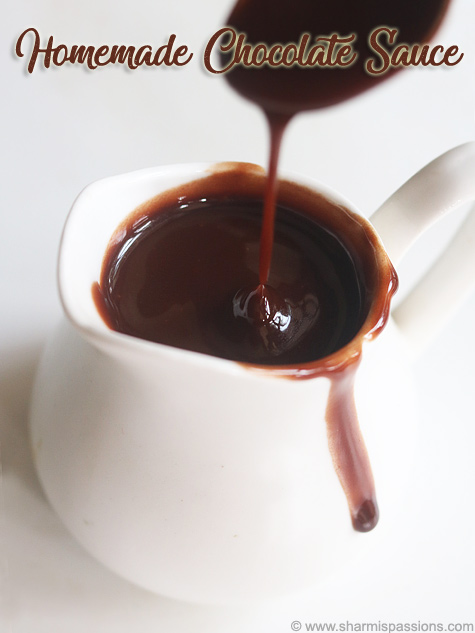
Chocolate Sauce is a yummy sauce made by simmering cocoa powder with water and powdered sugar. Chocolate Sauce is a great spread for bread, chapathi and used as a topping for desserts and snacks. It is different from thick chocolate spreads because it stays runny and smooth when stored.
This is just a handy sauce to make for breakfast, snacks and desserts at home. It does not need much effort and comes together in 15 minutes and it is also that you can use it with bread, toast, chapathi, ice cream, cakes and cookies.
[feast_advanced_jump_to]
About Chocolate Sauce
Chocolate Sauce is made using powdered sugar, water and cocoa powder. These 3 simple ingredients come together to make a smooth and delicious sauce. The cocoa powder gives rich chocolate flavour and deep brown colour. It is a simple recipe you can try at home easily.
This sauce has thin and pourable texture compared to thick chocolate spreads. It comes out smooth when mixed properly and has no lumps. The taste is rich and chocolatey but not too sweet and it stays smooth even after cooling and can be used warm or at room temperature.
You can make few variations to this recipe based on your liking, you can also add vanilla or a pinch of salt for a slight change in flavour. You can just adjust the sweetness. It works well with bread, toast and chapathi and also tastes good as topping for ice cream, cakes and cookies.
I usually make this when I need a quick chocolate sauce at home. It is easy to prepare and stays good in a jar for few days. My family loves it with hot toast in the morning. I prefer to make it fresh and use it whenever needed.
Powdered sugar - I used powdered sugar for sweetness. It dissolves easily in water to create smooth base.
Water - I added to make sauce thin and pourable. It helps dissolve sugar easily.
Cocoa powder - cocoa powder adds chocolaty flavour and it gives dark colour to the sauce and you can adjust based on how strong you want.
How to make Chocolate Sauce Step by Step
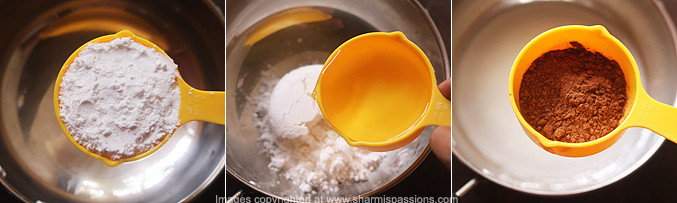
1.Measure and take powdered sugar, add water to it. Add cocoa powder to it.
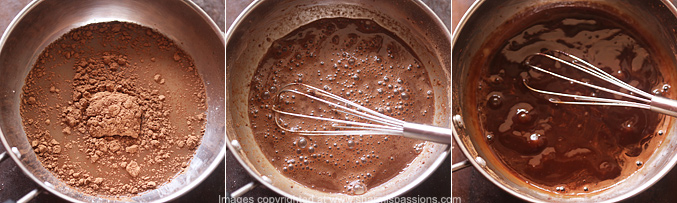
2.Whisk well so that there are no lumps, heat it up. Bring it to a boil and simmer for 2 minutes, Switch off.
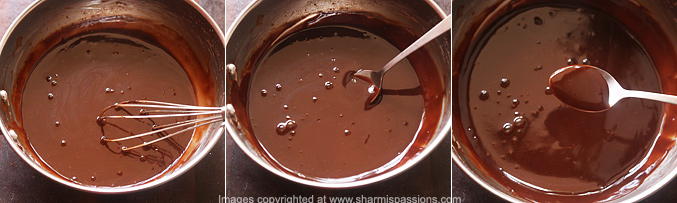
3.Look how the consistency is smooth and silky. Cool down then store in a clean jar.
Expert Tips
Whisking - I whisk really well after adding cocoa powder. This helps break up any lumps so sauce comes out smooth.
Heating - I heat on medium flame so it does not burn. Keep stirring gently while it heats up.
Boiling - I bring it to gentle boil then simmer for 2 minutes only. This helps flavours blend but keep sauce liquid.
Consistency check - Look at the sauce while it cools down. It should pour easy from spoon, not too thick.
Cooling - Let it cool completely before storing in jar.
Sifting - I sift cocoa powder before adding to water. This prevents lumps and makes mixing easier.
Serving and Storage
Serve this sauce with favourite desserts, it tastes great on hot bread and toast. Pour it over desserts, ice cream, or use as dip for cookies. It also works nice mixed into milk for chocolate drink. Store leftover in clean glass jar at room temperature. It stay good for 3 days like this.
FAQS
1. Can I use chocolate drink powder?
Yes you can use it if you prefer chocolate drink powder.
2. Can I make it less sweet?
Yes you can reduce the amount. Start with less and add more if needed to taste.
3. How do I make it thicker?
You can simmer it longer for thicker consistency. This helps water evaporate and make it thicker.
4. Can I add butter to it?
Yes you can add little butter for richness. It makes sauce more creamy and smooth.
5. Does it taste good cold?
Yes it taste good at room temperature and cold, some people like it warm, some like it cold.
If you have any more questions about this Chocolate Sauce Recipe do mail me at sharmispassions@gmail.com. In addition, follow me on Instagram, Facebook, Pinterest, Youtube and Twitter .
Tried this Chocolate Sauce Recipe? Do let me know how you liked it. Also tag us on Instagram @sharmispassions and hash tag it on #sharmispassions.
Chocolate Sauce is a yummy sauce made by simmering cocoa powder with water and powdered sugar. Chocolate Sauce is a great spread for bread, chapathi and used as a topping for desserts and snacks. It is different from thick chocolate spreads because it stays runny and smooth when stored.
Course Dessert
Prep Time 10 minutesminutes
Cook Time 5 minutesminutes
Total Time 15 minutesminutes
Servings 4
Calories 67kcal
Author Sharmilee J
Ingredients
½cuppowdered sugar
½cupwater
3tablespooncocoa powder
Instructions
Measure and take powdered sugar, add water to it.Add coco powder to it.
Whisk well so that there are no lumps, heat it up.Bring it to a boil and simmer for 2 minutes. Switch off.
Look how the consistency is smooth and silky. Cool down then store in a clean jar.
You can use it in room temperature for 3 days after that refrigerate it stays good for 10 days. This sauce doesn't get thick it stays the same.
Notes
Whisking - I whisk really well after adding cocoa powder. This helps break up any lumps so sauce comes out smooth.
Heating - I heat on medium flame so it does not burn. Keep stirring gently while it heats up.
Boiling - I bring it to gentle boil then simmer for 2 minutes only. This helps flavours blend but keep sauce liquid.
Consistency check - Look at the sauce while it cools down. It should pour easy from spoon, not too thick.
Cooling - Let it cool completely before storing in jar.
Sifting - I sift cocoa powder before adding to water. This prevents lumps and makes mixing easier.
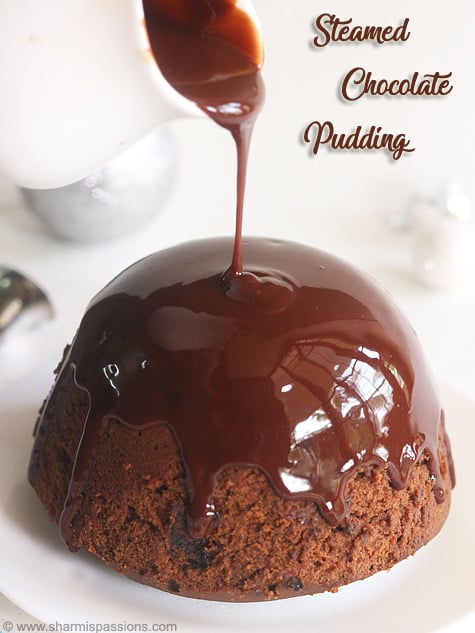
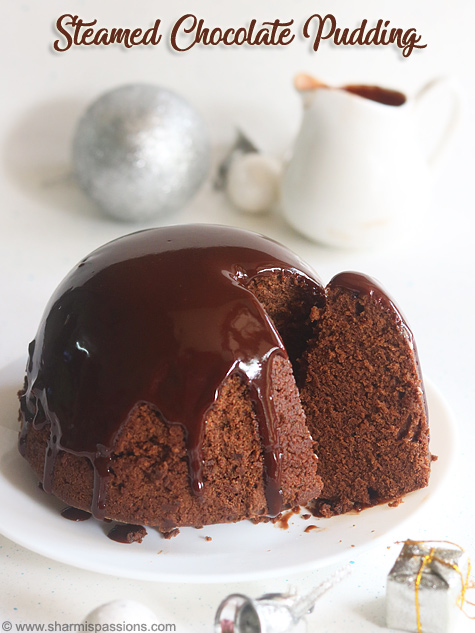
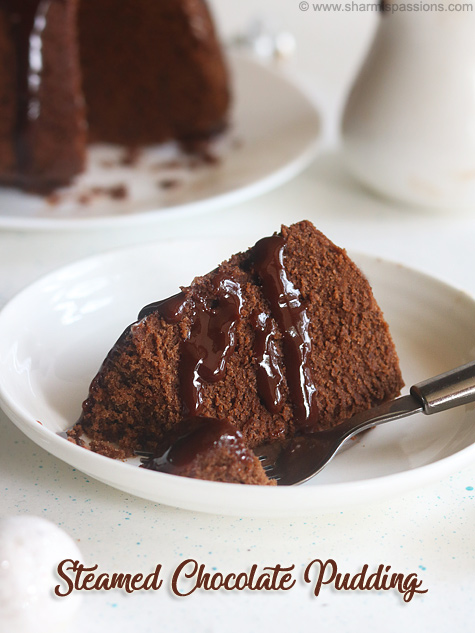
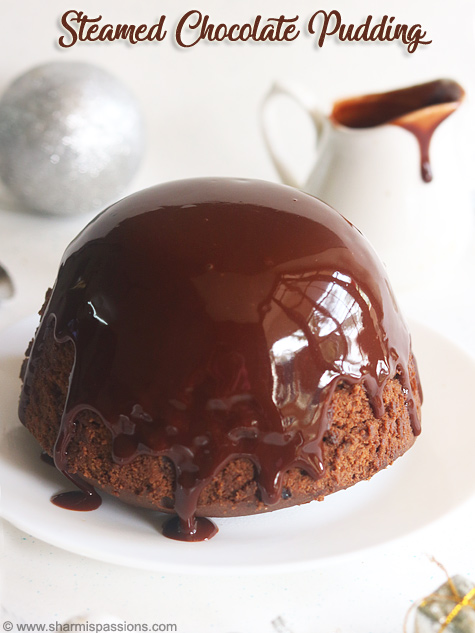
Steamed Chocolate Pudding is a rich and moist dessert made with flour, butter, eggs and melted chocolate. It has soft crumb texture that tastes really good with deep chocolate flavour and steamed pudding makes it soft, moist and not dry.
This pudding is perfect for Christmas or for special occasion. It takes about 2 hours from start to finish with steaming time. You can make this pudding because it feels homemade and indulgent but not too difficult to make. It doesn't feel heavy even though it has lot of butter.
[feast_advanced_jump_to]
About Steamed Chocolate Pudding
Steamed Chocolate Pudding is rich, chocolatey yummy traditional pudding made for Christmas. It is made by mixing butter and sugar until creamy then adding eggs and melted chocolate. The texture of this recipe is silky smooth and slightly firm, it should not be sticky when you touch it once it is steamed properly.
This recipe has smooth and slightly bouncy texture, not too hard if done right. Adding chocolate sauce on top makes it extra special but not necessary. You can cut into it for clean slices for serving.
After taking one bite I decided if someone asks me which is ur most favourite desert I would tell this as I loved the texture so much. Though this pudding looks cakeish it is in between pudding and cake and tastes so delicious. Though the time for steaming is more it is worth the time and effort.
There are few variations you can try in this recipe. You can add different dry fruits based on what you have and add nuts for extra crunch, you can adjust spice mix based on your taste. You can even try adding little coffee powder for taste.
I usually make this when I want something easy but still delicious. You can make this for parties also as a quick dessert.
Wheat flour - I used wheat flour for the base. It gives moist texture and keep pudding tender when steamed.
Butter - I used butter at room temperature. Butter abundant in pudding makes it rich and moist.
Brown sugar - I used light brown sugar for sweetness. It gives slight molasses flavour that works well with chocolate.
Eggs - I used two eggs to bind everything. It helps pudding come together and give structure.
Chocolate - I used choco chips to melt into batter. You can use cooking chocolate too. It gives deep chocolate flavour.
Coco powder - I added cocoa powder for extra chocolate flavour. It gives rich brown colour and deep taste.
Baking powder - I added little baking powder so that the pudding rises and stays light.
Vanilla essence - I added vanilla essence for flavour. It brings out chocolate taste.
Milk - I added milk to get right batter consistency. It helps batter smooth and not thick.
For chocolate sauce - I used powdered sugar, water and cocoa powder. Mix together to make smooth sauce.
How to make Steamed Chocolate Pudding Step by Step
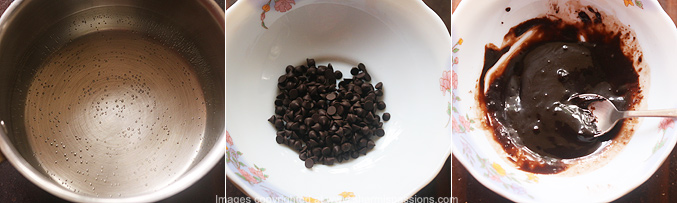
1.Boil water first, add choco chips in a heat resistant bowl, using double boiler method melt the chocolate. You can use cooking chocolate too, Set aside.
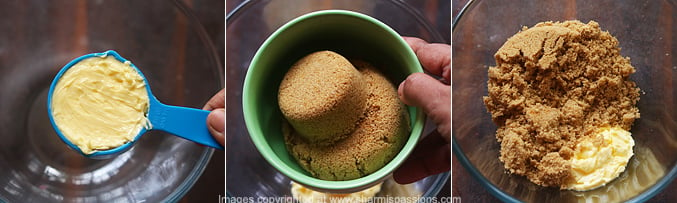
2.To a mixing bowl add butter, sugar.
3.Beat well until creamy. Crack open the eggs and add it.
4.Beat until smooth and creamy. Add vanilla essence, mix well
5.Now in another mixing bowl place a sieve, add wheat flour, cocoa powder, baking powder to it.
6.Add salt to it and sieve well.
7.Now add little of sieved flour to butter egg mixture, alternate with milk starting and ending with flour mixture.
8.Mix well to form a smooth lump free batter.
9.Add melted chocolate mix once. Grease a oven safe bowl with lots of butter. I placed a small circular butter paper at the bottom for easy demolding.
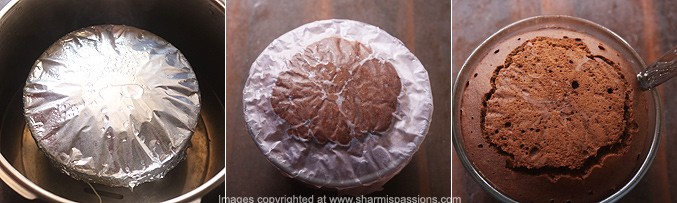
10.Transfer the prepared mixture to the bowl. The pudding rises well so choose a bowl accordingly. Grease a butter paper(I forgot but please do it), place over the bowl then wrap it with silver foil.
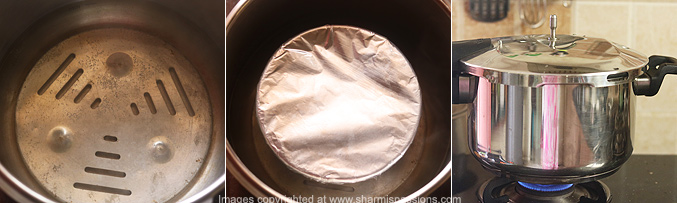
11.You can either use your steamer or pressure cooker. Put a plate inside the cooker, add water to it. Place the pudding bowl on the plate. Water should be touching ⅓ rd of the bowl. Close with lid, no whistle needed. Steam cook for 1 hour 30 minutes in low flame(sim). In between check the water level and add water accordingly. Check after 1 hour then proceed accordingly.Insert a toothpick in the centre of the pudding if it comes out clean then the pudding is done else steam cook for few more minutes.
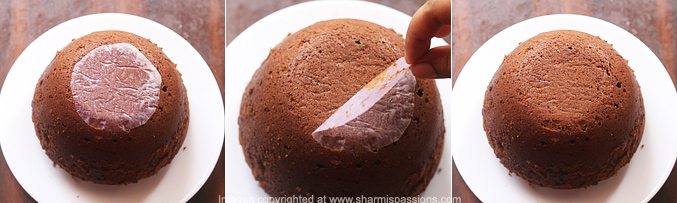
12.Mine got done in 1 hr 20 minutes. Remove from flame, set aside for 10 minutes. Gently remove the covers, Then slide a buttered knife at the edges.
13.Then invert, remove the butter paper. Cool down completely at least for 30 minutes(meanwhile you can make the chocolate sauce) then slice and serve.
14.Measure and take powdered sugar, add water to it. Add cocoa powder to it.
15.Whisk well so that there are no lumps, heat it up. Bring it to a boil and simmer for 2 minutes. Switch off.
16.Look how the consistency is smooth and silky. Cool down then store in a clean jar.
Yummy pudding and homemade chocolate sauce ready!
Expert Tips
Melting chocolate - I use double boiler method so it that it does not burn and stay smooth.
Soft butter - Always use butter at room temperature. It blends smoothly and makes pudding light.
Alternating - Add flour mixture and milk alternately to wet mixture. This prevents lumps in batter.
Greasing - Grease bowl and butter paper well. This make demoulding easy and pudding slides out smoothly.
Water level - Keep water at ⅓ rd of bowl height during steaming. This cooks pudding evenly.
Testing - Insert knife in centre after 1 hour. If it comes out clean pudding is done.
Cooling - Wait 10 minutes after steaming before you demould. This help pudding set properly.
Serving and Storage
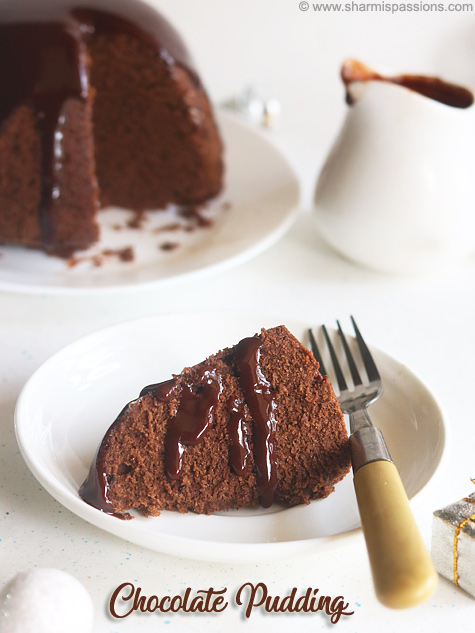
Serve this chilled, you can drizzle little chocolate sauce or add chopped fruits on top while serving. This goes well as after meal dessert. Store the leftover pudding in refrigerator in container. It stays good for about 2 days. Do not keep outside for long time especially in hot weather.
FAQS
1. Can I use white flour?
Yes you can use white flour. It gives pudding different texture but come out just as moist.
2. How do I know when pudding is done?
Insert knife in centre after 1 hour. If it comes out clean pudding is done.
3. Can I make pudding without sauce?
Yes pudding taste good on its own. Sauce just adds extra richness.
4. Can I use regular sugar?
Yes you can use white sugar but brown sugar gives caramel flavour and taste better in chocolate.
5. Can I make ahead for party?
Yes you can make pudding one day before and keep in fridge just add sprinkle on top when you serve so it look fresh.
If you have any more questions about this Steamed Chocolate Pudding Recipe do mail me at sharmispassions@gmail.com. In addition, follow me on Instagram, Facebook, Pinterest, Youtube and Twitter .
Tried this Steamed Chocolate PuddingRecipe ? Do let me know how you liked it. Also tag us on Instagram @sharmispassions and hash tag it on #sharmispassions.
Steamed Chocolate Pudding is a rich and moist dessert made with flour, butter, eggs and melted chocolate. It has soft crumb texture that tastes really good with deep chocolate flavour and steamed pudding makes it soft, moist and not dry.
Boil water first, add choco chips in a heat resistant bowl, using double boiler method melt the chocolate. You can use cooking chocolate too. Set aside.
To a mixing bowl add butter, sugar.
Beat well until creamy. Crack open the eggs and add it.
Beat until smooth and creamy. Add vanilla essence, mix well.
Now in another mixing bowl place a sieve, add wheat flour, coco powder, baking powder to it.
Add salt to it and sieve well.
Now add little of sieved flour to butter egg mixture, alternate with milk starting and ending with flour mixture.
Mix well to form a smooth lump free batter.
Add melted chocolate mix once. Grease a oven safe bowl with lots of butter. I placed a small circular butter paper at the bottom for easy demolding.
Transfer the prepared mixture to the bowl. The pudding rises well so choose a bowl accordingly. Grease a butter paper(I forgot but please do it), place over the bowl then wrap it with silver foil.
You can either use your steamer or pressure cooker. Put a plate inside the cooker, add water to it. Place the pudding bowl on the plate. Water should be touching ⅓ rd of the bowl. Close with lid, no whistle needed. Steam cook for 1 hour 30 mins. In between check the water level and add water accordingly. Check after 1 hr then proceed. Insert a knife in the centre of the pudding if it comes out clean then the pudding is done else steam cook for few more mins.
Mine got done in 1 hr 30 mins. Remove from flame, set aside for 10 mins. Gently remove the covers, Then slide a buttered knife at the edges.
Then invert, remove the butter paper. Cool down completely at least for 30 mins(meanwhile you can make the chocolate sauce) then slice and serve.
How to make homemade chocolate sauce recipe:
Measure and take powdered sugar, add water to it. Add coco powder to it.
Whisk well so that there are no lumps, heat it up. Bring it to a boil and simmer for 2 mins. Switch off.
Look how the consistency is. Smooth and silky. Cool down Steamed Chocolate Pudding and store in a clean jar.
Notes
Melting chocolate - I use double boiler method so it that it does not burn and stay smooth.
Soft butter - Always use butter at room temperature. It blends smoothly and makes pudding light.
Alternating - Add flour mixture and milk alternately to wet mixture. This prevents lumps in batter.
Greasing - Grease bowl and butter paper well. This make demoulding easy and pudding slides out smoothly.
Water level - Keep water at one third of bowl height during steaming. This cooks pudding evenly.
Testing - Insert knife in centre after 1 hour. If it comes out clean pudding is done.
Cooling - Wait 10 minutes after steaming before you demould. This help pudding set properly.
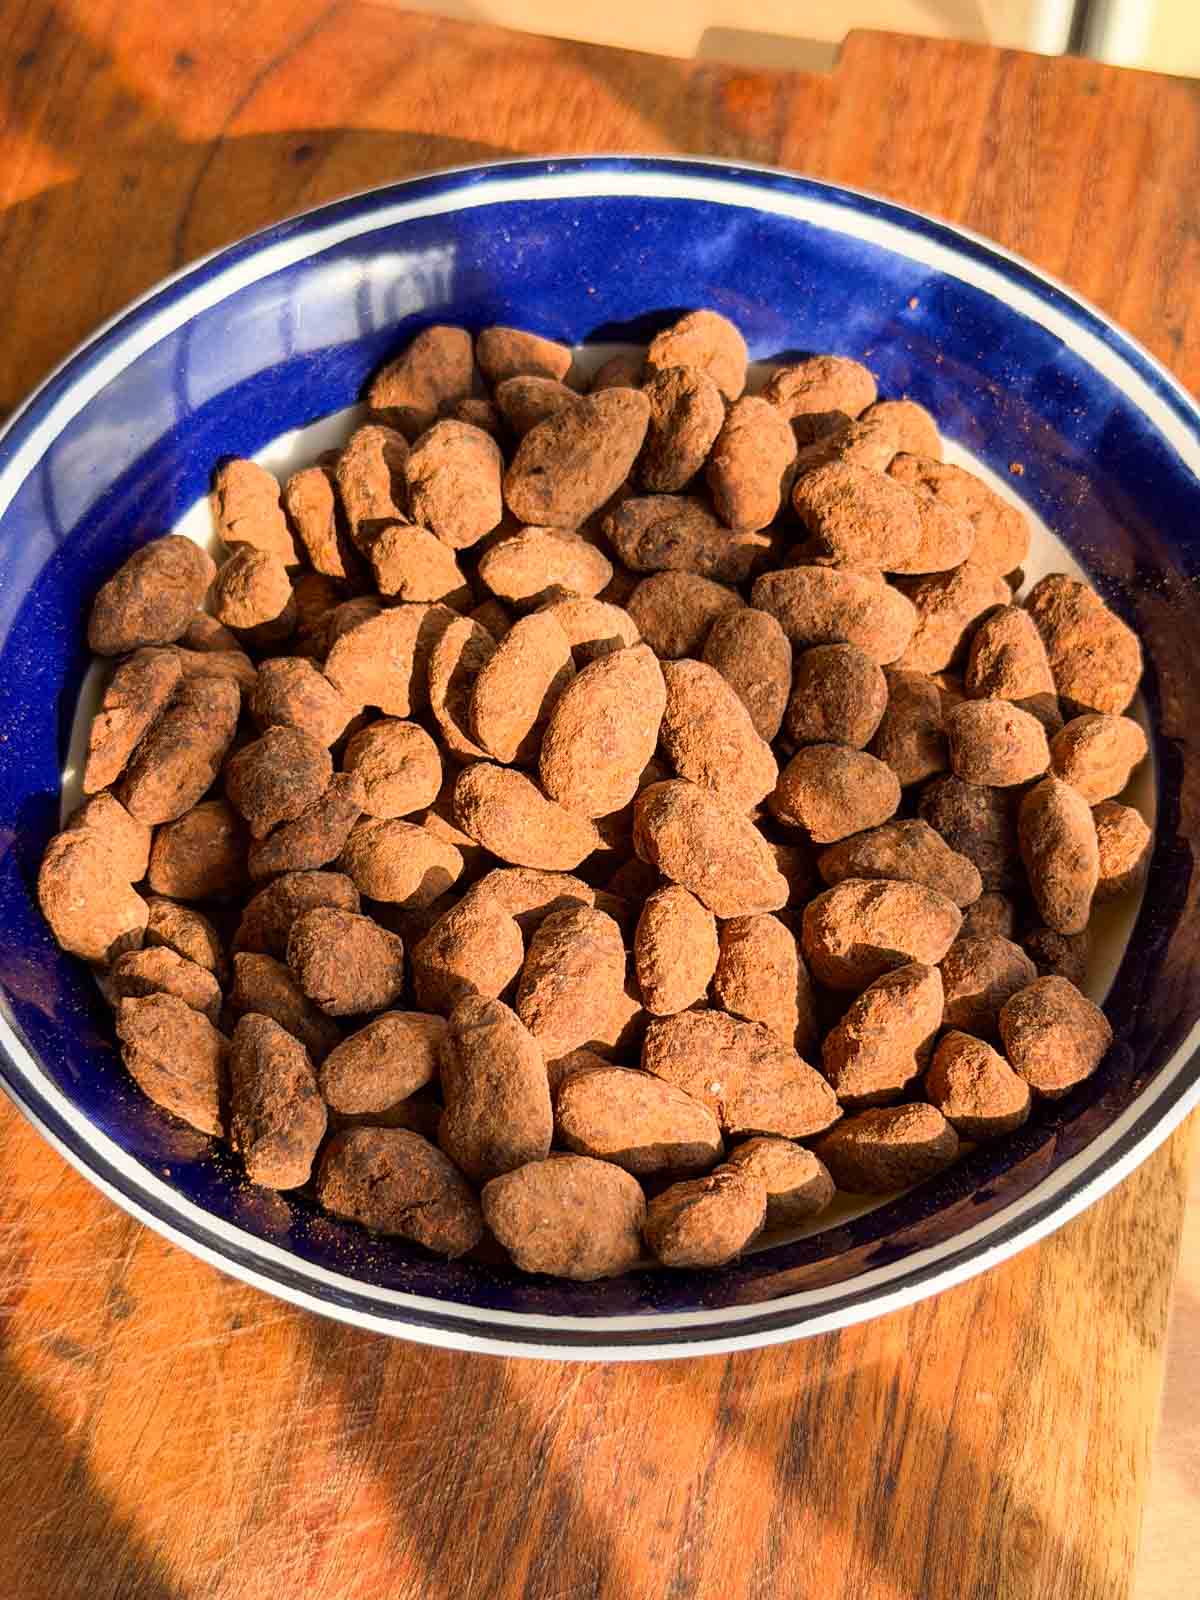
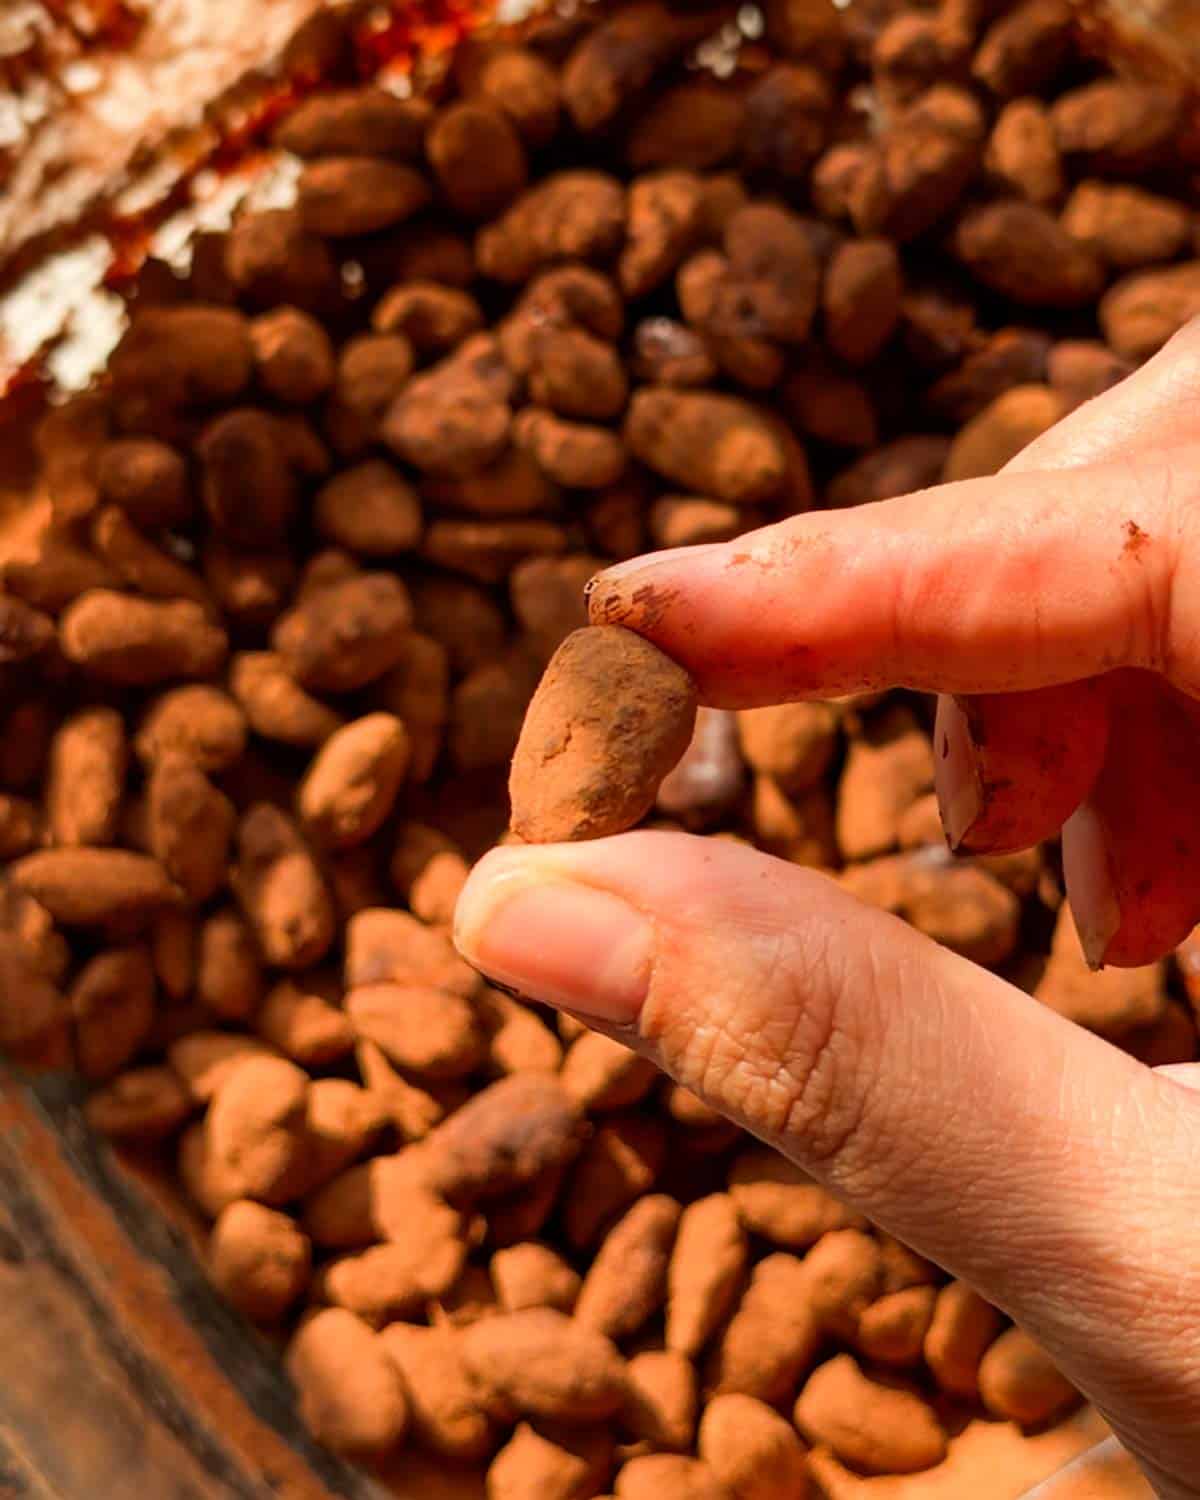
You won’t believe how easy and hassle-free it is to make Chocolate Covered Almonds in the air fryer. All it takes is 4 ingredients and 10 minutes to make the most addictive snack ever!
These chocolate covered almonds might look fancy and complicated, but trust me, they are a breeze to make. Especially if you have an air fryer. It calls for zero prep, only a couple of ingredients, just one container, and then the air fryer does most of the work for you. We roast the almonds in the air fryer, melt the chocolate in there, and then use the same container to coat them too. Sounds easy-peasy, right?
This recipe is super customisable too! You can use whatever chocolate and nuts you like and have or throw in some add-ins for a different flavor. Plus, you can make one big batch of these chocolate coated almonds and eat them for a long time, because they basically stay well forever! So let’s find out how to make them!
Chocolate bar: I have used half a bar of dark chocolate and half a bar of milk chocolate, but you can use full dark or milk based on how your preference
Nuts: I have used almonds for this recipe, but you can use any nut of your choice
Cocoa powder: I have used sugar-free cocoa powder for an intense chocolate flavor, but you can use whatever you have available.
Sugar: This is optional, but I would recommend using a little for balance, especially if you’re using only dark chocolate
Frequently Asked Questions
Can I use only milk chocolate for this recipe?
Yes, why not! Milk chocolate, white chocolate, dark chocolate, spiked chocolate, flavored chocolate, half and half like I have, or a mix of different chocolates, whatever you have and like works in this recipe.
Can I make these chocolate coated almonds without an air fryer?
Yes, you can make this recipe on the stove top as well, but it takes a little more effort. Start by dry roasting the almonds until slightly brown. Then melt the chocolate on a double boiler until it’s smooth and creamy. Follow the rest of the recipe as is for an easy chocolate covered almonds recipe on the stovetop.
Can I make this recipe using another type of nut?
Of course! You can use cashews, pecan nuts, peanuts, macadamia, walnuts, or a mix of all of them. This recipe is very customisable and forgiving. Use whatever you have and like, it all tastes amazing!!
Richa’s Top Tips
Melting chocolate: If your chocolate is not becoming very smooth when melting, stir in a drop or two of coconut oil to the melted chocolate.
Adjust the sugar: We prefer the slight bitterness of dark chocolate, but you can increase or reduce the quantity of sugar in your cocoa powder depending on how sweet you like your chocolate coated almonds.
Add cocoa powder in batches: Adding the entire quantity of cocoa powder at once leads to clamping and uneven coating. So add in a little at a time, shake, and repeat for the most evenly coated choco almonds.
Storage Tips
Countertop/Room temperature: These chocolate almonds keep well in an airtight container on the countertop (away from humidity, heat, and direct sunlight) for 2-3 days.
Fridge: If you are making a larger batch and won’t be able to finish quickly, store these chocolate covered almonds in the fridge for up to 2 weeks.
Freeze: These choco almonds are super freezer friendly and stay good for months.
Customisation Ideas
Add some spice: Mix some cayenne pepper or red chilli powder into the chocolate for hint of spicy, smoky flavor
Make it citrusy: Fold in a tablespoon of lemon or orange zest for a bright, citrusy flavor. A little goes a long way here
Sprinkle sea salt: For a sweet and salty flavor, sprinkle a pinch of sea salt before the chocolate covered almonds harden
Coffee flavored: Add a teaspoon or two of instant coffee powder mixed with hot water to deepen the flavor of chocolate.
This chocolate almond recipe in the air fryer is a fun, mess-free way to make an addictive snack in no time. It’s a clean, healthy snack (when eaten in moderation), and my kids absolutely love it!
If you make this chocolate covered almonds recipe, don’t forget to DM the pictures @my_foodstory. Happy cooking!
Making chocolate covered almonds in your air fryer is sooo easy and hassle-free! All it takes is 4 ingredients and 10 minutes to make the most addictive snack ever!
Take almonds in an air fryer safe container and air fry at 180C for 6 minutes till it’s mildly roasted. Use the container which has a lid.
Place chocolate on top of the roasted almonds and air fry at 150C for 3 minutes. Add sugar, mix the chocolate, sugar and almonds with a spatula till all the almonds are coated well with chocolate. Set aside to cool.
Once it’s completely cool, add ⅓ quantity (10 grams) of cocoa powder, cover the container with the lid and shake well to coat the almonds. Open the lid, add another ⅓ quantity (10 grams) of the cocoa powder and repeat the same process. Add the remaining ⅓ quantity (10 grams) of cocoa powder and shake well to coat all the almonds. cocoa powder is added in 3 parts to ensure even coating of the almonds, if you add the cocoa powder all at once, it tends to clump at some places and does not taste good.
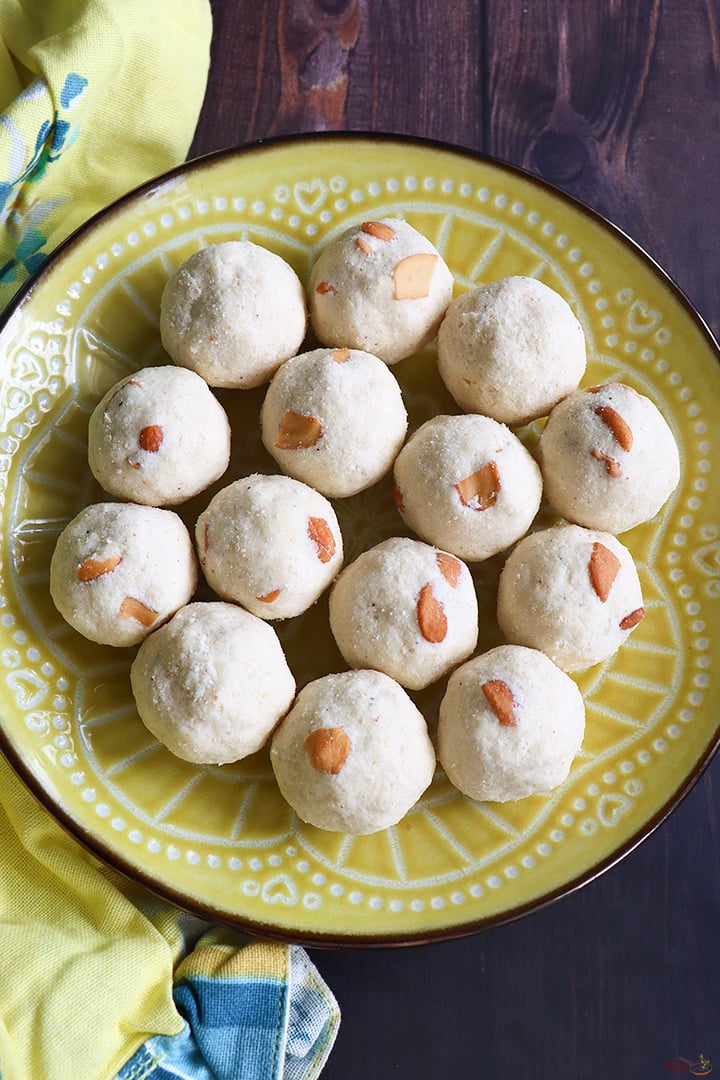
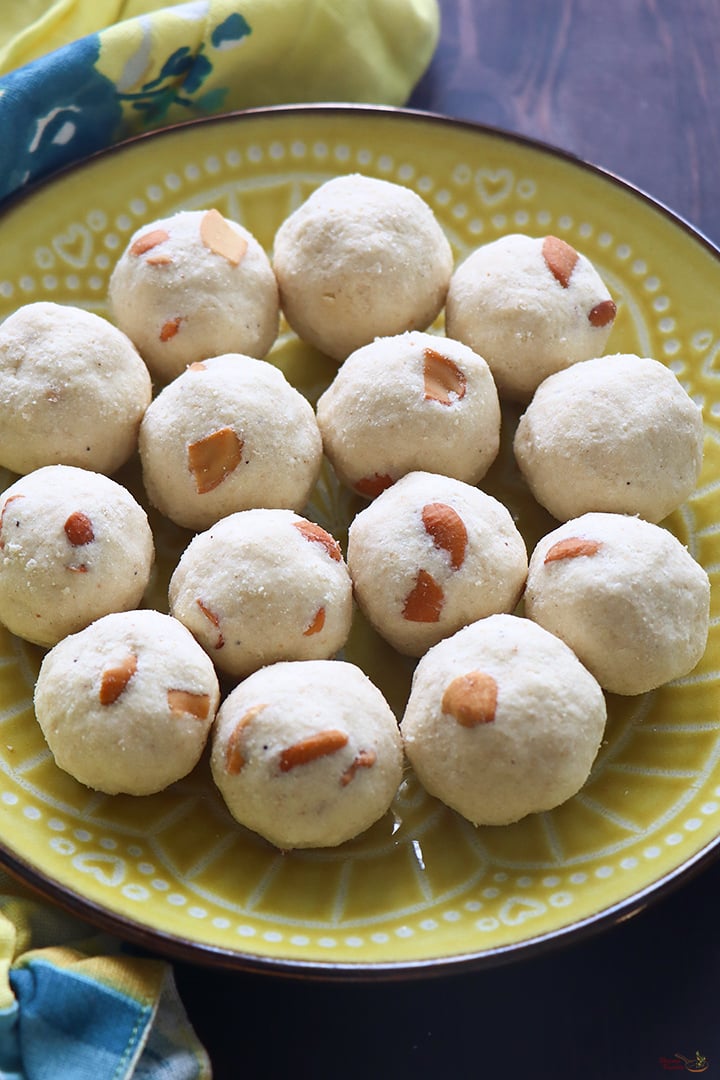
Rava Laddu is a popular Indian festive sweet made using rava, sugar, ghee, nuts and cardamom powder. Also popularly known as suji laddu, these are quick and easy to make perfect for even beginners to try. These rava laddus tastes so delicious, has a melt in the mouth texture with a slight crunch from rava and cashews.
Rava Laddu is one of the popular sweets that you can make for any festival. It is a quick and easy to make sweet and is one of the first few sweets I learned to prepare. I should admit it came out perfect in my first try itself so it is so special to me. Do try this easy Rava Laddu and enjoy!
[feast_advanced_jump_to]
About Rava Laddu
Rava Laddu is sweet semolina balls made using semolina or rava or sooji along with sugar, ghee, cardamom powder and nuts. Rava Laddu is also popularly known as Suji ke Laddu. Rava Laddu is one of the delicious laddu that you can make for any festival especially Gokulashtami or Krishna Jayanthi.
Rava Laddu is made using rava or sooji(cream of wheat), sugar, ghee, cashewnuts and flavored with cardamom. Basically Rava Laddu is nothing but sweet sooji balls with nuts and flavors.
"Krishnar Jayanthi / Gokulashtami" - The festival I look forward each year. The little footprints drawn gives the home a divine look. In hindu customs, it is believed that the footprints drawn brings little krishna home. Rava Laddu is made for Gokulashtami or any festive occasions like Diwali etc.
There are many variations to this easy Rava Laddu but I am sharing my family recipe which is easy, quick to make and tastes delicious. This Rava laddu can be tried even by beginners, its so easy and not that tricky too.
This recipe is from my mother who is making it for the past 30 years and it is a no fail recipe that any one can try. Beginners are always scared to try sweet recipes because of the consistency but this sweet is quick and easy to make with no consistency checks.
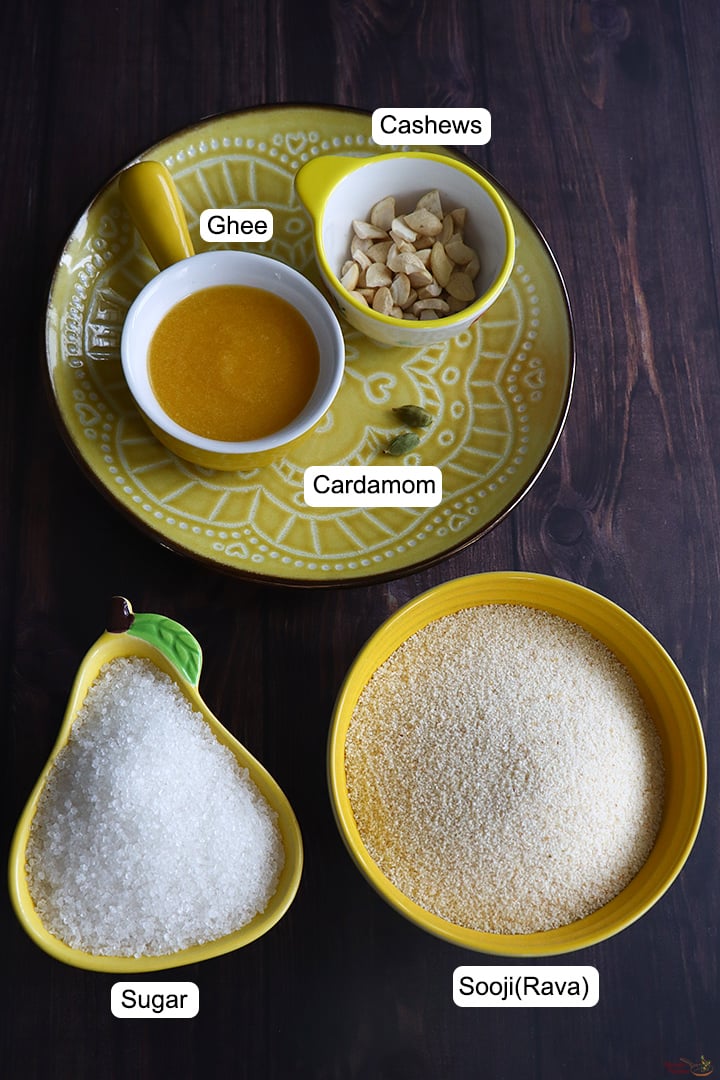
Rava / Sooji / Semolina - I have used store bought semi fine rava (upma rava) for this recipe.
Sugar - Traditionally white sugar is added for Rava Laddu. You can alternate sugar with jaggery powder, or brown sugar and make sure to increase the quantity accordingly.
Ghee - Use homemade ghee for best aroma and flavour. If using store bought ghee make sure it is fresh for best taste.
Nuts - I have used cashew nuts broken fried in ghee, you can add almonds, pistachios or even raisins based on your choice.
Cardamom - The best flavour for rava laddu is from cardamom so use freshly powdered cardamom powder.
How to make Rava Laddu Step by Step
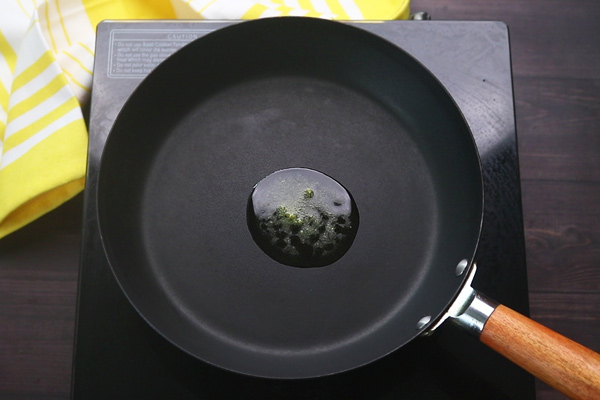
1.Heat 1 teaspoon ghee to a pan. We need ¼ cup ghee for this recipe so take 1 teaspoon ghee from it for roasting.
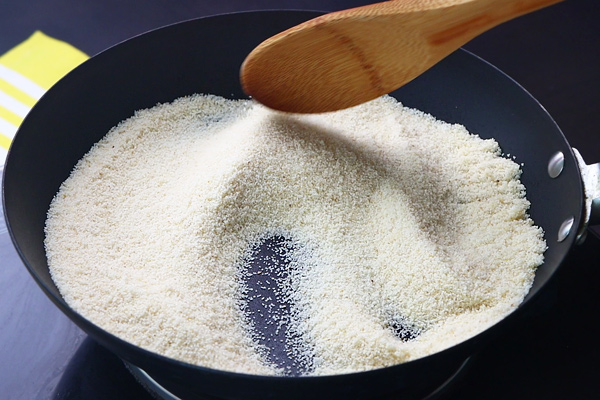
2.Add 1 cup rava to the pan and dry roast it until nice aroma comes and it turns slightly golden. You can feel the aroma in the kitchen and that is the sign that rava is roasted well.
3.Take care not to brown them, turn off heat, keep aside and allow it to cool. Immediately transfer it to a bowl to cool down.
4.To a mixer jar add ¾ cup sugar along with 2 cardamom. I peeled the skin and added, you can add it as such with skin too.
5.Powder the sugar very fine, set aside in a bowl.
6.Then transfer roasted rava to the same mixer jar.
7.Grind it to a semi coarse mixture.
8.Transfer powdered rava and sugar to a mixing bowl.
9.Mix until it is combined well.
10.Heat ¼ cup ghee in a tadka pan - add 2 tablespoon broken cashews.
11.Fry until golden. Switch off and remove from flame.
12.Then add fried cashews along with ghee to the mixing bowl.
13.Mix everything together, by this time it will look like bread crumbs. First mix with a spatula as it will be hot.
14.Then with your fingers mix it well, break lumps if any.
15.Shape them into rounds balls by pressing tight. Press it tight and form balls. Repeat to finish.
16. Rava Laddus are ready.
Store in an airtight container.
Expert Tips
Choosing Sooji / Rava - Choose fine variety of semolina or rava or sooji preferably.
Roasting Sooji - While roasting rava take care not to brown it, be very careful to turn over if not it might get browned at the bottom. Roast it well for 5-7 minutes stirring continuously. After roasting immediately transfer it to a bowl to cool down, do not let it in the pan itself as the heat of the pan might brown the rava.
Grinding Sooji - The texture of rava should be slightly coarse else while eating it will not have the crunch and will not taste good. Also take care not to grind the rava too coarse else shaping will be difficult.
Mixing - While mixing sooji and sugar, mix thoroughly so that the sugar is evenly distributed. Also add sugar only when rava is warm, if it is too hot then sugar will start melting making the mixture runny.
Adding ghee - Do not add more ghee, it will make the laddu look dull and alter the taste. Also use homemade or fresh ghee for best flavor.
Nuts- I have used chopped cashews, you can even use almonds, raisins too.
Sugar - Adding ¾ cup sugar will be just perfect, it will taste a bit over sweet when you taste it just after making but will be perfect after few hrs.
Variations
You can add half and half ghee and milk if you are looking for a low fat version. After the milk is added quickly form them into balls, don't let it dry. If its dried add few drops of ghee and form into balls.
The ghee version keeps well even for a week but for the milk version the shelf life is very less consume it within a day or two.
You can add 2 tablespoon desiccated coconut, saute in ghee for 2 minutes then add it. Add 1 tablespoon ghee extra if adding coconut.
Add ½ teaspoon rose essence and few drops pink food color to make rose rava laddu. Likewise you can try with other flavors of your choice too.
You can also add raisins fry and add it. You can add almonds along with cashews too.
Serving & Storage
Serve it as a snack along with tea or coffee. Store in an airtight container to retain freshness. Need not refrigerate. Rava Laddu keeps well for about 2-3 days in room temperature.
FAQS
1.Why is my laddu breaking while shaping?
If there is no enough moisture content then the laddu may break. So add little more ghee and start shaping. Warm ghee helps laddu to hold its shape well.
2.Can I made rava laddu using jaggery / cane sugar?
Yes you can make rava laddu with jaggery or cane sugar but make sure to use organic variety which is free from impurities as we have to add it as such.
3.What type of pan is best suited for making rava laddu?
You can use any heavy bottomed flat based pan or kadai to roast rava. But make sure not to burn it and stir at regular intervals.
If you have any more questions about this Rava Laddu Recipe do mail me at sharmispassions@gmail.com. In addition, follow me on Instagram, Facebook, Pinterest ,Youtube and Twitter .
Tried this Rava Laddu Recipe? Do let me know how you liked it. Also tag us on Instagram @sharmispassions and hash tag it on #sharmispassions
Rava Laddu is a popular Indian festive sweet made using rava, sugar, ghee, nuts and cardamom powder. Also popularly known as suji laddu, these are quick and easy to make perfect for even beginners to try. These rava laddus tastes so delicious, has a melt in the mouth texture with a slight crunch from rava and cashews.
Add rava to a kadai and dry roast it until nice aroma comes and it turns slightly golden. Take care not to brown them, turn off heat, keep aside and allow it to cool.
Add 1 cup rava to the pan and dry roast it until nice aroma comes and it turns slightly golden. You can feel the aroma in the kitchen and that is the sign that rava is roasted well.
Take care not to brown them, turn off heat, keep aside and allow it to cool. Immediately transfer it to a bowl to cool down.
Powder the sugar very fine, set aside in a bowl. Then transfer roasted rava to the same mixer jar.
Grind it to a semi coarse mixture. Transfer powdered rava and sugar to a mixing bowl and mix until it is combined well.
Then add the fried cashews, cardamom powder. Add ghee.
Mix everything together, by this time it will look like bread crumbs. With your hands form them into rounds balls by pressing tight.
Press it tight and form balls. set aside. Store in airtight container.
Enjoy Rava Laddu!
Video
Notes
Choosing Sooji / Rava - Choose fine variety of semolina or rava or sooji preferably.
Roasting Sooji - While roasting rava take care not to brown it, be very careful to turn over if not it might get browned at the bottom. Roast it well for 5-7 minutes stirring continuously. After roasting immediately transfer it to a bowl to cool down, do not let it in the pan itself as the heat of the pan might brown the rava.
Grinding Sooji - The texture of rava should be slightly coarse else while eating it will not have the crunch and will not taste good. Also take care not to grind the rava too coarse else shaping will be difficult.
Mixing - While mixing sooji and sugar, mix thoroughly so that the sugar is evenly distributed. Also add sugar only when rava is warm, if it is too hot then sugar will start melting making the mixture runny.
Adding ghee - Do not add more ghee, it will make the laddu look dull and alter the taste. Also use homemade or fresh ghee for best flavor.
Nuts- I have used chopped cashews, you can even use almonds, raisins too.
Sugar - Adding ¾ cup sugar will be just perfect, it will taste a bit over sweet when you taste it just after making but will be perfect after few hrs.
I made forty of these Gulab Jamun Cupcakes in a single day, and I still wasn't tired of them by the last batch - that's how I knew this Indian fusion dessert was the real deal. My first attempt skipped the custard powder, and while it tasted good, something was missing. Adding some custard powder […]
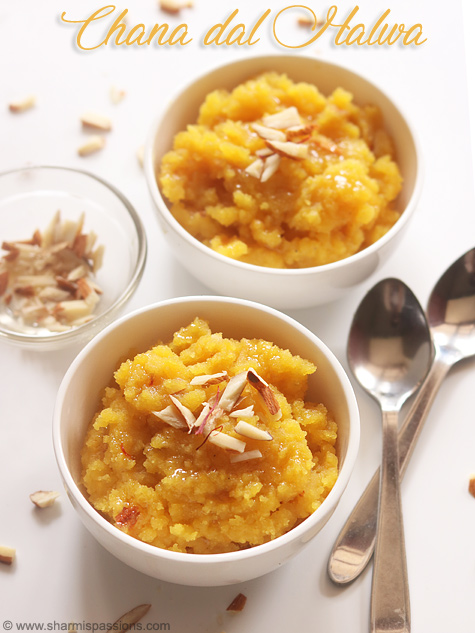
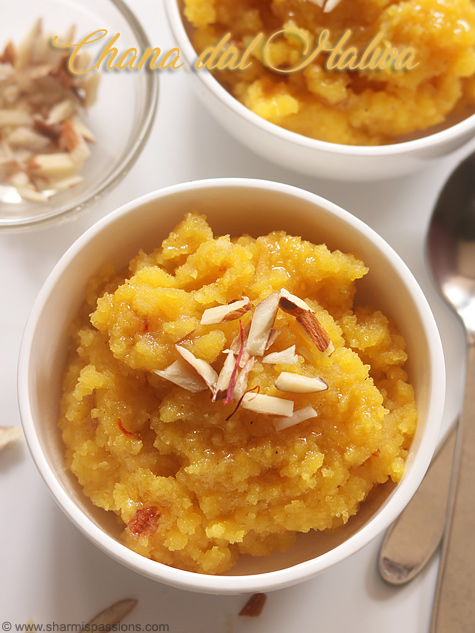
Chana Dal Halwa is a tasty, simple sweet made by simmering chana dal paste with ghee, sugar syrup and flavoured with cardamom powder. Chana Dal Halwa can be made quickly with the ingredients available at home for celebrating sudden moments.
Even though you are using very basic things like chana dal, ghee, sugar, and milk, the halwa tastes so rich and special. This halwa comes together in about an hour and a half, and it is not difficult at all. You can make this for sudden celebration or when guests arrive because it comes together so quickly, and everyone just love it.
[feast_advanced_jump_to]
About Chana Dal Halwa
Chana Dal Halwa is a traditional Indian sweet halwa that made by cooking ground chana dal paste with ghee until it turn golden and fragrant, then you combine with milk and sugar syrup. The halwa gets its name from chana dal, which is split chickpea dal that has this mild, slightly nutty flavour that makes it different from other halwa recipe.
The texture of this halwa is so wonderful. The cooked dal paste brings flavour and continuous stirring to make it smooth and creamy. The halwa is golden in colour from the saffron, and it also adds warm flavour and rich taste to the dish.
You can adjust this halwa based on your taste preference, you can make it sweeter by adding extra sugar or you can prefer it less sweet by using less sugar. The saffron is the key ingredient in this recipe and you really shouldn't skip it because it has special flavour that makes the whole halwa taste different.
I usually make this on festive occasions or when I want to try something different from the regular halwa that I make at home. My family love it because the texture is so soft and tasty, also feels something impressive but simple.
Chana Dal - I use chana dal for the base of this halwa because it has mild nutty flavour and become smooth when you cook it. You need to soak it for one hour first and then grind it coarsely to get the best texture.
Ghee - I use ghee for toasting the dal and making it golden and rich. Ghee really gives much better taste and texture to the halwa.
Sugar - I add sugar for sweetness and you can adjust it based on how sweet you like your halwa and your preference.
Milk - I add milk to make the halwa creamy and soft, it helps the dal cook completely and get that smooth texture you want.
Saffron - I use saffron soaked in warm milk for the beautiful golden colour and special flavour that makes it taste different and more special.
Cardamom Powder - I add cardamom powder for warm flavour that goes well with the saffron and ghee and make it taste richer.
Almonds - I added chopped almonds for crunch and garnish on the top of the halwa. You can also use cashew or pistachio if you prefer.
How to make Chana Dal Halwa RecipeStep by Step
1.Soak chana dal in water for 1 hour. Drain it and transfer to mixer jar.
2.Grind it to a slightly coarse paste, Set aside. Soak saffron in warm milk, mix well and set aside. To a kadai or pan add half of ghee to it add ground paste.
3.Keep cooking in low flame, first its lumpy slowly it will crumble like shown below, keep sauteing in low flame until golden and raw smell of chana dal leaves.
4.Add milk,saffron milk and water to it.
5.Mix well and cook covered for few minutes.
6.Cook until dal gets soft and fully cooked. Add sugar to it and mix well. The mixture will become goey.
7.Slow it will start to thicken, at this stage add remaining ghee. Keep stirring in low flame until it starts to leave the kadai and rolls like a ball.
8.Add cardamom powder and chopped almonds. Mix well and switch off.
Serve hot or warm with a generous sprinkle of chopped almonds. Delicious melt in the mouth chana dal halwa ready. Serve hot or warm!
Expert Tips
Heavy Kadai - Use a heavy bottomed pan or kadai for this halwa because it prevents the mixture from sticking and burning at the bottom.
Toast the Dal - Toast the grind chana dal paste in ghee on low flame until it turn golden for flavour.
Keep Stirring - Stir at intervals while cooking, regular stirring make sure the halwa cook evenly and the texture come out smooth.
Add Ghee Right - Add the remaining ghee when the mixture starts to thicken after you add sugar, this really helps to make it soft and creamy. The ghee brings everything together at this stage.
Cook Till Ball - Cook until the halwa starts to leave the side of the pan and roll like a ball when you stir it.
Serve Warm - Serve Chana Dal Halwa while warm because the texture is so soft and creamy at that temperature.
Serving and Storage
Serve this Halwa warm or hot with chopped almonds on top, It can be kept at room temperature for one day. You can refrigerate for three days and reheat before serving. When reheated, ghee will come out little which makes it soft again.
FAQS
1.Can I skip saffron in this?
You can skip it, but it really makes a big difference to the colour and flavour to the halwa.
2.Can I reduce ghee quantity?
You can reduce little but not too much. Ghee gives texture and shine to the halwa.
3.Why my halwa is sticky?
It may not be cooked fully. Keep cooking and stirring until it leaves sides of pan.
4.Can I skip cardamom?
Yes, cardamom is optional and you can skip it, but it does add warm flavour that go well with the saffron.
5.How long can I store this halwa?
You can simply keep it in an airtight container at room temperature and it stay fresh for like two to three days.
If you have any more questions about this Chana Dal Halwa Recipe do mail me at sharmispassions@gmail.com. In addition, follow me on Instagram, Facebook, Pinterest ,Youtube and Twitter .
Tried this Chana Dal Halwa Recipe ? Do let me know how you liked it. Also tag us on Instagram @sharmispassions and hash tag it on #sharmispassions.
Chana Dal Halwa is a tasty, simple sweet made by simmering chana dal paste with ghee, sugar syrup and flavoured with cardamom powder. Chana Dal Halwa can be made quickly with the ingredients available at home for celebrating sudden moments.
Course Dessert, sweet, sweets
Cuisine Indian
Keyword chana recipes, dal recipes, diwali dishes, diwali recipes, diwali sweets, diwali sweets recipes, halwa, sweet recipes, virtual diwali party
Soak chana dal in water for 1 hour. Drain it and transfer to mixer jar.
Grind it to a slightly coarse paste. Set aside.
Soak saffron in warm milk, mix well and set aside.
To a kadai or pan add half of ghee to it add ground paste.
Keep cooking in low flame, first its lumpy slowly it will crumble, keep sauteing in low flame until golden and raw smell of chana dal leaves.
Add milk, saffron milk and water to it. Mix well and cook covered for few mins.
Cook until dal gets soft and fully cooked. Add sugar to it and mix well. The mixture will become gooey.
Slowly it will start to thicken, at this stage add remaining ghee. Keep stirring in low flame until it starts to leave the kadai and rolls like a ball.
Add cardamom powder and chopped almonds. Mix well and switch off.
Serve Chana Dal Halwa hot or warm with a generous sprinkle of chopped almonds.
Video
Notes
Chana Dal - I use chana dal for the base of this halwa because it has mild nutty flavour and become smooth when you cook it. You need to soak it for one hour first and then grind it coarsely to get the best texture.
Ghee - I use ghee for toasting the dal and making it golden and rich. Ghee really gives much better taste and texture to the halwa.
Sugar - I add sugar for sweetness and you can adjust it based on how sweet you like your halwa and your preference.
Milk - I add milk to make the halwa creamy and soft, it helps the dal cook completely and get that smooth texture you want.
Saffron - I use saffron soaked in warm milk for the beautiful golden colour and special flavour that makes it taste different and more special.
Cardamom Powder - I add cardamom powder for warm flavour that goes well with the saffron and ghee and make it taste richer.
Almonds - I added chopped almonds for crunch and garnish on the top of the halwa. You can also use cashew or pistachio if you prefer.
Besan Barfi is a delicious melt in mouth sweet made by cooking besan flour with ghee, sugar syrup then cutting them into squares. The flavour comes from nutty besan flour, cardamom powder and garnish of nuts makes it look special and tastes even better.
This easy and quick sweet is perfect for special occasions when your busy schedule doesn't allow much time for cooking. The result is soft sweet that everyone loves as it melts in the mouth and doesn't feel heavy at all. Once cooled completely, it stores well for a couple of days.
[feast_advanced_jump_to]
About Besan Barfi
Besan Barfi is a traditional Indian sweet that people make for special occasions. This sweet is soft melts in your mouth without being heavy or sticky. The flavour is warm and rich because of cardamom powder mixed through it.
It has a golden brown colour from roasted besan, which gives it deeper, richer taste. Also the texture is tender and smooth, not grainy at all. It tastes smooth with ghee and sweetness from the sugar syrup.
You can adjust sweetness based on what you prefer, some people like it more sweet and some want less. This recipe works with white sugar or unrefined sugar, both give different taste but comes out good. Some add extra nuts on top and some skip it completely, it depends on your choice.
I usually make this barfi during festival season and it comes out perfect every time if you follow all the steps carefully. My family loves eating these because they tastes so good and not too sweet.
Besan Flour - I use one cup of besan flour as the base. Sieving avoid lump formation while roasting so flour stay smooth.
Ghee - I use ghee for roasting besan and more for greasing the pan. Ghee gives richness and helps barfi melt and enhances the taste.
Sugar - I use sugar for making syrup, you can use regular white sugar or unrefined sugar.
Water - I use water for making sugar syrup. Water helps sugar dissolve and reach the right consistency.
Cardamom Powder - I add cardamom powder for flavour and aroma. It blends beautifully with besan and makes barfi taste special.
Almonds - I chop almonds and sprinkle on top before it cool. Nuts add crunch and make barfi look nice.
How to make Besan Burfi Step by Step
1.Take besan flour and sieve it once. Set aside.
2.To a pan add ghee heat it, then add sieved besan flour.
3.Keep cooking in low flame for about 20 minutes. The color slightly changes and the raw smell will go off and a nice aroma of cooked besan will start coming.Switch off and set aside. This step is very important incase the besan flour is not roasted well, then the raw smell will be there in the burfi too so roast it patiently in low flame.
4.Grease the pan with ghee and set aside.In another pan add sugar and water.
5.Keep cooking until its thick and syrupy. Add cardamom powder to the syrup at this stage.
6.Keep checking and once it reaches one string consistency switch off. Take the pan with besan mixture and switch on. Add the syrup to it.
7.Once you add it do not delay mix it well. It will start to thicken.
8.Once it is mixed well transfer the mixture to the greased pan, sprinkle nuts on top. Press it slightly.
9.When it is still warm, mark pieces. After cooling down completely, cut over the marked line.cut into small squares. They are soft when warm, once it cools down it will be perfect to bite.
Enjoy!
Expert Tips
Sieve Besan - I sieve besan flour once before roasting because it avoids lump formation. Sieving makes flour light and smooth.
Roast Slowly - I roast besan flour in low flame till the raw smell goes.
Aroma - If the raw smell is there, besan is not roasted enough and it gives raw taste to burfi.
Check Sugar Syrup - I keep checking sugar syrup and once it reaches one string consistency I switch off, exact consistency is important.
Mix Quickly - Once you add sugar syrup to besan mixture, mix well immediately because the mixture thickens fast.
Press While Warm - I transfer mixture to greased pan and sprinkle nuts on top while still warm. Press it slightly so the nuts stick well.
Mark While Warm - Mark the pieces with knife while barfi is still warm, pieces come out clean.
Cool Completely - Barfi soft when warm but once it cools completely it hardens.
Serving and Storage
Serve Besan Barfi as sweet after meal or during tea time snack. It tastes best when it comes to room temperature because you get perfect texture and flavour. Store in airtight container and it stays fresh for three to four days in cool place. You can keep pieces separate with parchment paper in between so they don't stick together and stay nice.
FAQS
1.Can I use white sugar instead?
Yes you can use regular white sugar and it works fine. Unrefined sugar gives little different taste but both type work for this recipe.
2.Why my burfi comes out very hard?
Overcooking the sugar syrup make burfi very hard so switch off exactly after one string consistency. Do not overcook or it become difficult to bite.
3.How long they stay fresh?
Store in airtight container and they stay fresh for couple of days. Keep away from moisture because that make them soft and stick together.
4.Can I skip cardamom powder?
You can skip it but cardamom add nice flavour and aroma. Without it barfi tastes a bit plain so I recommend using it.
5.Why my barfi have wavy pattern on top?
This happens when you delay while handling and not mix quickly when syrup added. Mix well then switch off and pour immediately into greased pan for smooth top.
If you have any more questions about this Besan Barfi Recipe do mail me at sharmispassions@gmail.com. In addition, follow me on Instagram, Facebook, Pinterest, Youtube and Twitter .
Tried this Besan Barfi Recipe? Do let me know how you liked it. Also tag us on Instagram @sharmispassions and hash tag it on #sharmispassions.
Besan Barfi is a delicious melt in mouth sweet made by cooking besan flour with ghee, sugar syrup then cutting them into squares. The flavour comes from nutty besan flour, cardamom powder and garnish of nuts makes it look special and tastes even better.
To a pan add ghee heat it, then add sieved besan flour.
Keep cooking in low flame for about 20 mins. The color slightly changes and the raw smell will go off and a nice aroma of cooked besan will start coming. Switch off and set aside. This step is very important incase the besan flour is not roasted well, then the raw smell will be there in the burfi too so roast it patiently in low flame.
Grease the pan with ghee and set aside. In another pan add sugar and water.
Keep cooking until its thick and syrupy. Add cardamom powder to the syrup at this stage.
Keep checking and once it reaches one string consistency switch off. Take the pan with besan mixture and switch on. Add the syrup to it.
Once you add it do not delay mix it well. It will start to thicken.
Once it is mixed well transfer the mixture to the greased pan, sprinkle nuts on top. Press it slightly.
When it is still warm, mark pieces. After cooling down completely, cut over the marked line. Cut into small squares. They are soft when warm, once it cools down it will be perfect to bite. Enjoy Besan Barfi!
Notes
Sieve Besan - I sieve besan flour once before roasting because it avoids lump formation. Sieving makes flour light and smooth.
Roast Slowly - I roast besan flour in low flame till the raw smell goes.
Aroma - If the raw smell is there, besan is not roasted enough and it gives raw taste to burfi.
Check Sugar Syrup - I keep checking sugar syrup and once it reaches one string consistency I switch off, exact consistency is important.
Mix Quickly - Once you add sugar syrup to besan mixture, mix well immediately because the mixture thickens fast.
Press While Warm - I transfer mixture to greased pan and sprinkle nuts on top while still warm. Press it slightly so the nuts stick well.
Mark While Warm - Mark the pieces with knife while barfi is still warm, pieces come out clean.
Cool Completely - Barfi soft when warm but once it cools completely it hardens.
This is the lushest one-bowl chocolate cake recipe I’ve tested – it’s moist, rich and SO SO chocolatey. And it keeps for days (if you can stop yourself from finishing it right away)!
This chocolate cake recipe is hands down THE BEST!It’s one of those fab recipes that’s ridiculously simple because everything gets mixed together in one bowl. Yet it gives you a cake that stays super moist for up to FIVE DAYS! In fact, this simple chocolate cake tastes like it’s freshly baked even days later. Better still, you can make it in both the oven and the air fryer.
Whether you’re baking for a birthday party, packing a treat for the kids’ tiffins, satisfying a random chocolate craving, or just looking for something to enjoy with your evening chai, this cake always delivers. I’ve made it more times than I can count and it’s been a huge hit every single time, especially with that delicious buttercream frosting. So if you’re after an easy, reliable chocolate cake recipe, this is one you’ll definitely want to bookmark!
This is one of those recipes where I wouldn’t recommend any substitutes. It’s this proportion and combination of ingredients that create the moist texture that we want in a world-class chocolate cake.
All Purpose Flour (Maida) – the base of our cake. I don’t recommend subbing this for atta or gluten free flour since that will affect the texture. Maida keeps our cake light, bouncy, and moist.
Cocoa Powder – this is a chocolate cake, after all!
Sugar – I use granulated white sugar but you can also use caster sugar or brown sugar here
Oil –this ensures our cake stays moist for longer, any neutral flavored oil like canola, sunflower, rice bran works
Curd – my secret ingredient! I find that the combination of oil, curd, and egg in a cake batter results in an extra moist texture which is what we want.
Egg – for texture and binding.I don’t recommend subbing for a flax egg or making it eggless
Hot Black Coffee – an espresso shot or just brewed instant coffee works super well here. Coffee enhances the flavour of the cocoa powder and makes this cake super chocolatey and yum. Don’t add plain coffee powder as the liquid from the brewed coffee helps bring the batter together
Salt – just a pinch
Baking Powder + Soda – so our cake rises!
Note: the batter will be runny – that’s what we want! Don’t worry about this. Once baked, it’ll be just perfect.
How to make One-bowl chocolate cake:
Here’s a step-by-step guide on how to make the one-bowl chocolate cake:
1. Add all purpose flour, sugar, cocoa powder, baking soda, baking powder and salt to a bowl. Whisk together until combined.
2. Add vanilla extract, egg, oil and curd. Whisk well until combined, about 1-2 minutes. Scrape the sides of the bowl.
3. Pour in hot coffee.
4. Give it another mix till it’s a smooth, runny batter.
5. Pour the batter into lined and greased 6 inch cake mould.
6. Bake at 180C in a preheated oven for 30-40 minutes or till a skewer inserted into the centre comes out clean.
7. Allow it to cool for 15 minutes. Demould, remove the parchment paper and transfer to a wire rack.
8. Allow it to cool completely before serving or frosting.
I like serving mine with a quick chocolate buttercream frosting but this also works great on its own or with a layer of Nutella and chopped berries on top.
Frequently Asked Questions
1. Is there any difference in baking this cake in the air fryer vs the oven?
The oven will have a longer preheat time, although I recommend that you preheat your air fryer for a couple minutes as well. We want to bake our cake until a knife comes out clean. The overall baking time range is 30-40 mins.
2. Can I sub curd for Greek yogurt?
Yes, these can be substituted 1:1 easily. Just use non sweetened, non flavored greek yogurt.
Can I skip the coffee?
Yes. The coffee doesn’t make the cake taste like coffee. It simply enhances the chocolate flavour.
Can I make this cake without eggs?
This recipe has only been tested with an egg, so I can’t guarantee the same texture with an egg substitute.
Can I double this recipe?
Yes. You can double the recipe and bake it in a larger cake tin. Keep in mind that the baking time will increase, so start checking for doneness after about 40 minutes.
Richa’s Top Tips
Don’t overmix the batter. Once the wet and dry ingredients are combined, mix just until smooth. Overmixing can make the cake dense.
Scrape the bowl before adding the coffee. This ensures there aren’t any pockets of dry flour hiding at the bottom or sides.
Measure the flour correctly. Spoon the flour into your measuring cup and level it off instead of scooping directly from the container. Too much flour can make the cake dry.
Don’t worry about the thin batter. The batter will be quite runny after adding the coffee, and that’s exactly how it should be.
Cool the cake completely before frosting. Even if it feels only slightly warm, frosting can melt and slide off.
Storage Tips
At room temperature: Store the cake in an airtight container for up to 2 days.
In the refrigerator: Keep it in an airtight container for up to 5 days. And before serving, let it sit at room temperature for 20-30 minutes for the best texture.
To freeze: Wrap the completely cooled cake (whole or in slices) tightly in cling film followed by foil, or place it in a freezer-safe container. Freeze for up to 2 months. Thaw overnight in the refrigerator or at room temperature before serving.
If frosting the cake later: Wrap the cooled cake tightly and store it at room temperature or in the fridge until you’re ready to frost. This helps keep it moist and prevents it from drying out.
I think we all need our hands on a fool-proof simple chocolate cake recipe when those sweet tooth cravings come up. Trust me, this is THAT recipe! And if you want to an activity to do with the kiddos, baking this cake is also perfect for that.
1/2cupHot Black Coffee1 Teaspoon Coffee dissolved in 1/2 cup of hot water
Instructions
Line and grease a 6 inch tin with parchment paper. Preheat the oven to 180C
Add all purpose flour, sugar, cocoa powder, baking soda, baking powder and salt to a bowl. Whisk together until combined.
Add vanilla extract, egg, oil and curd. Whisk well until combined, about 1-2 minutes. Scrape the sides of the bowl.
Pour in hot coffee and give it another mix till it's a smooth, runny batter. Bake at 180C for 30-40 minutes or till a skewer inserted into the center comes out clean.
Allow it to cool for 15 minutes. Demould and transfer to a wire rack and allow it to cool completely before serving or frosting.
Strawberry Fool is a creamy delicious dessert that is made by layering fresh strawberries and whisked fresh cream. It is a special dessert and is a must try at home during strawberry season for its taste, also the dessert feels soft and creamy and is best served cold.
This is simple and doesn't need any cooking, each spoon has strawberry flavour and the soft cream gives it smooth texture, also the strawberry pieces add a bite and everything together feels fresh and satisfying. This comes together quickly without requiring much effort.
[feast_advanced_jump_to]
About Strawberry Fool
Strawberry Fool is a quick and easy to make dessert. You can enjoy fresh strawberries in a different form and this recipe is also easy to make and does not need much effort. It can be made ahead and kept in the fridge until serving time, the flavours blend together well and give a refreshing taste.
The texture is soft and creamy with little strawberry pieces throughout. Each spoon has a strawberry flavor and soft cream makes it smooth. Lemon juice if added gives a tangy taste that balances the sweetness. When you serve it cold everything comes together and tastes really good.
The recipe is flexible and depends on how sweet your strawberries are. Sugar can be adjusted based on your strawberries. Some people like more strawberries for stronger flavor while others prefer more cream. You can also skip lemon juice if you don't like the tangy taste.
I usually make this during strawberry season when berries are fresh and sweet. My family likes it really chilled. The creamy texture and fresh strawberry taste make it a favourite at home.
Strawberry Fool Ingredients
Strawberries - I have used fresh, ripe strawberries for the pudding and the garnish. Medium sized ones give you better flavour and soft texture.
Fresh Cream - I use fresh cream or whipped cream for making this rich and creamy. You can also use whipping cream if that is what you have.
Sugar - I added sugar for sweetness, you can just adjust as per taste depending on how sweet your strawberries are.
Lemon Juice - I used for tangy taste and it helps bring out fresh flavour. Adjust quantity based on how much tangy taste you like and it balances the sweetness.
1.Rinse it well, remove the leaf. Chop them roughly.
2.Take it in bowl, add sugar to it.
3.Mix well add lemon juice. Set aside for 10 minutes so that it becomes juicy.
4.To a mixing bowl add fresh cream, Whisk well until thick and peaks are soft. I used my hand mixer. I always take fresh cream from fridge just before whisking.
5.Add juicy strawberries reserving a tablespoon of it for topping.
6.Just give a quick mix, do not over mix. Take your serving glass. Spoon the mixture into it.
7.Fill the serving cup, spoon the juicy strawberries and add as topping. Chill until serving time.
Serve chilled!
Expert Tips
Picking Strawberries - I usually choose ones that are completely ripe and naturally sweet, makes the dessert taste better.
Whisking Cream - I whisk until soft peaks form and then stop. If you over whisk it, the texture becomes heavy and does not work as well.
Strawberry Mix - I prefer keeping strawberry mixture slightly pourable so it spreads easily when layering. You get a smoother finish this way and flavours blend well together.
Chilling Time - I always refrigerate the dessert before serving. It sets properly and tastes much better when cold. You can make it ahead and keep in fridge for few hours.
Toppings - You an also add few nuts on the top for garnish, it also add crunch texture.
Serving and Storage
Serve Strawberry Fool as after meal dessert or on afternoon to beat the summer heat. You can store this in fridge for upto one day, consume within for best flavour and taste.
FAQS
1.Can I make this ahead?
Yes you can make it before some time and serve. The flavours blend well and taste even better when it sit for some time.
2.Which strawberries are best?
I use ripe, sweet and fresh ones for best flavour and the right texture overall. Medium sized ones work well too.
3.Can I add vanilla essence?
Yes you can use it and it mix well into the cream giving extra flavour. Add only small quantity for best taste.
4.Can I skip lemon juice?
Yes skip if you don't like tangy taste. Lemon juice gives a bit of freshness and balance the sweetness but it is optional.
5.How long can I store it?
You can store this in the fridge for about one day only. It taste best when fresh and cold.
If you have any more questions about this How to season Iron Tawa do mail me at sharmispassions@gmail.com. In addition, follow me on Instagram, Facebook, Pinterest, Youtube and Twitter .
Tried this How to season Iron Tawa? Do let me know how you liked it. Also tag us on Instagram @sharmispassions and hash tag it on #sharmispassions.
Strawberry Fool is a creamy delicious dessert that is made by layering fresh strawberries and whisked fresh cream. It is a special dessert and is a must try at home during strawberry season for its taste, also the dessert feels soft and creamy and is best served cold.
Course Dessert
Cuisine Indian
Keyword 30 mins recipes, dessert recipes, fresh cream recipe, fruit recipes, lemon recipes, strawberry recipes
Prep Time 10 minutesminutes
Cook Time 10 minutesminutes
Chilling Time 15 minutesminutes
Total Time 35 minutesminutes
Servings 2glass
Calories 440kcal
Author Sharmilee J
Ingredients
1cupfresh cream / whipped cream
6medium sizedstrawberries
¾teaspoonlemon juice(optional)
1tablespoonsugar
Instructions
Rinse Strawberries well, remove the leaf. Chop them roughly.
Take it in bowl, add sugar to it. Mix well add lemon juice. Set aside for 10 mins so that it becomes juicy.
To a mixing bowl add fresh cream, Whisk well until thick and peaks are soft. I used my hand mixer. I always take fresh cream from fridge just before whisking.
Add juicy strawberries reserving a tablespoon of it for topping.
Just give a quick mix, do not over mix. Take your serving glass. Spoon the mixture into it.
Fill the serving cup, spoon the juicy strawberries and add as topping. Chill Strawberry Fool until serving time.
Enjoy Strawberry Fool chilled!
Notes
Picking Strawberries - I usually choose ones that are completely ripe and naturally sweet, makes the dessert taste better.
Whisking Cream - I whisk until soft peaks form and then stop. If you over whisk it, the texture becomes heavy and does not work as well.
Strawberry Mix - I prefer keeping strawberry mixture slightly pourable so it spreads easily when layering. You get a smoother finish this way and flavours blend well together.
Chilling Time - I always refrigerate the dessert before serving. It sets properly and tastes much better when cold. You can make it ahead and keep in fridge for few hours.
Toppings - You an also add few nuts on the top for garnish, it also add crunch texture.
Insanely delicious, rich, creamy & divine Gulab Jamun cheesecake… This is the second time I’ve made this cheesecake. The first time, a few years ago, I was completely blown away by how incredibly delicious it turned out. So this Eid, when I was deciding on a dessert, I couldn’t stop thinking about this gulab jamun …

 Login