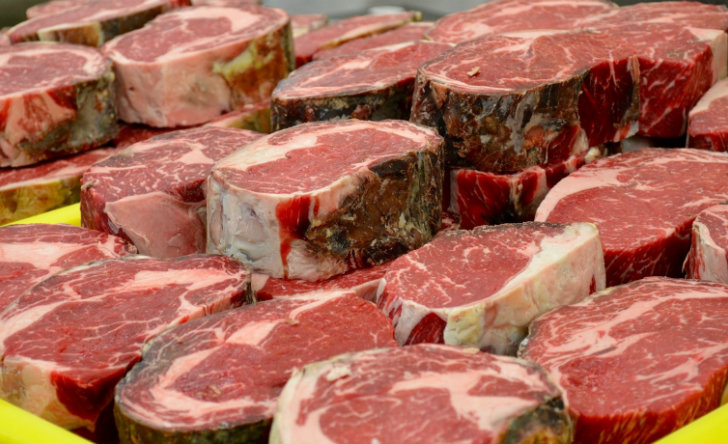
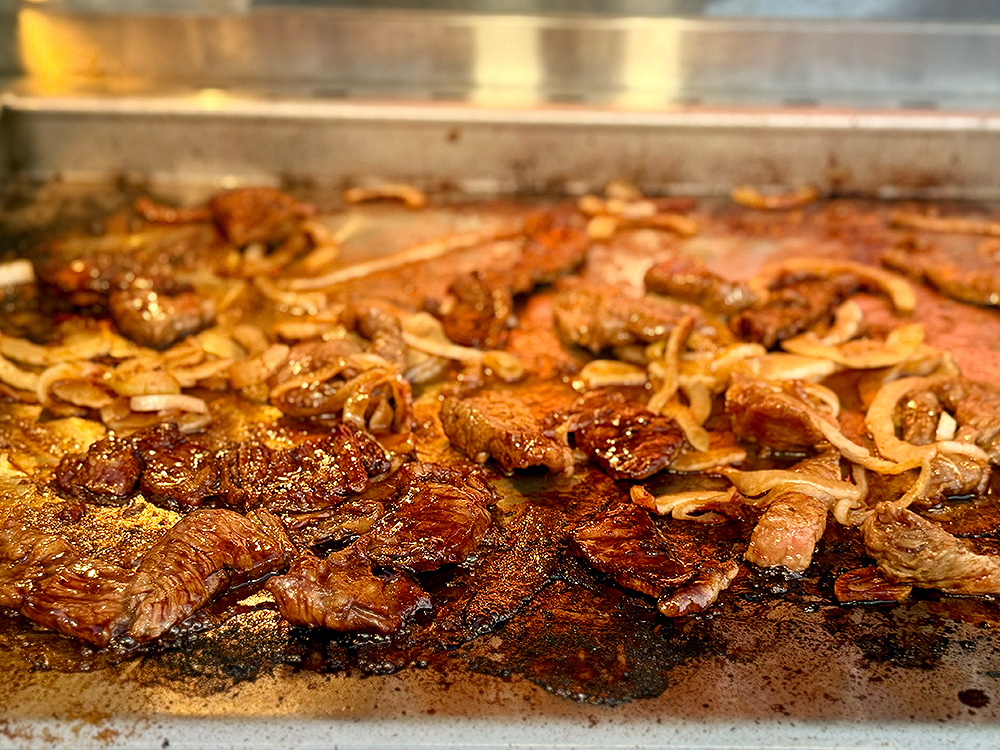
❌

Reading view

There are new articles available, click to refresh the page.

Big Beef Flavor, Little Buns: Smoked Chuck Roast Sliders

By Daniel Hale

Tailgating calls for food that’s easy to serve, easy to eat, and substantial enough to satisfy hungry sports fans. Here at BarbecueBible.com, we believe you can do better than the usual burgers and hotdogs. BBQ beef sliders check all three boxes, especially when the beef has been smoked low and slow over smoldering hardwood. Just one catch: You’ll want to smoke the beef the day before the game. Which, come to think of it, isn’t a catch at all, because by doing most of the prep ahead of time, you get to enjoy the game.

For this recipe, I went with chuck roast instead of brisket. It’s a smaller, more manageable cut of beef with plenty of marbling and rich flavor. It’s a lot more affordable (and these days, who isn’t worried about the grocery bill.). And when smoked properly, it makes a spectacular filling for BBQ sandwiches.

I used the Monument Denali 605Pro gas grill and Monument smoker box to smoke the chuck roast low and slow, developing a flavorful, smoky bark before chopping the beef for our sliders.

And yes, you can smoke beef on a gas grill. You just need the right setup, some wood chips, and patience.

Why Chuck Roast Works for BBQ Sliders

Chuck roast comes from the shoulder of the steer, an area that gets plenty of exercise. The meat contains loads of connective tissue and intramuscular fat, which make it particularly well-suited to low-and-slow smoking.

As the roast heats, the connective tissue gradually breaks down, helping transform a tough cut of beef into meat tender enough to cut with the side of a fork.

Chuck also has a practical advantage over brisket. You can purchase a roast weighing three to five pounds rather than committing to a 12 pound packer. For this smoke, I started with a boneless chuck roast weighing a little over 4 1/2 pounds.

If you have the time and patience, you can smoke a chuck roast until it’s tender enough to pull or shred with forks. I had neither, so I chopped the smoked chuck with a cleaver instead. It makes an excellent sandwich filling, especially when mixed with barbecue sauce.

How to Set Up the Monument Denali 605Pro for Smoking

A gas grill might not be the first thing that comes to mind when you think about smoking beef, but with indirect heat and a smoker box, it’s entirely possible.

I used the Monument Denali 605 gas grill, setting it up for indirect grilling with a target temperature of approximately 250°F.

The Monument smoker box holds wood chips, allowing them to smolder over an active burner and produce smoke inside the grill. The chuck roast sits away from the direct heat, where it can smoke slowly without scorching.
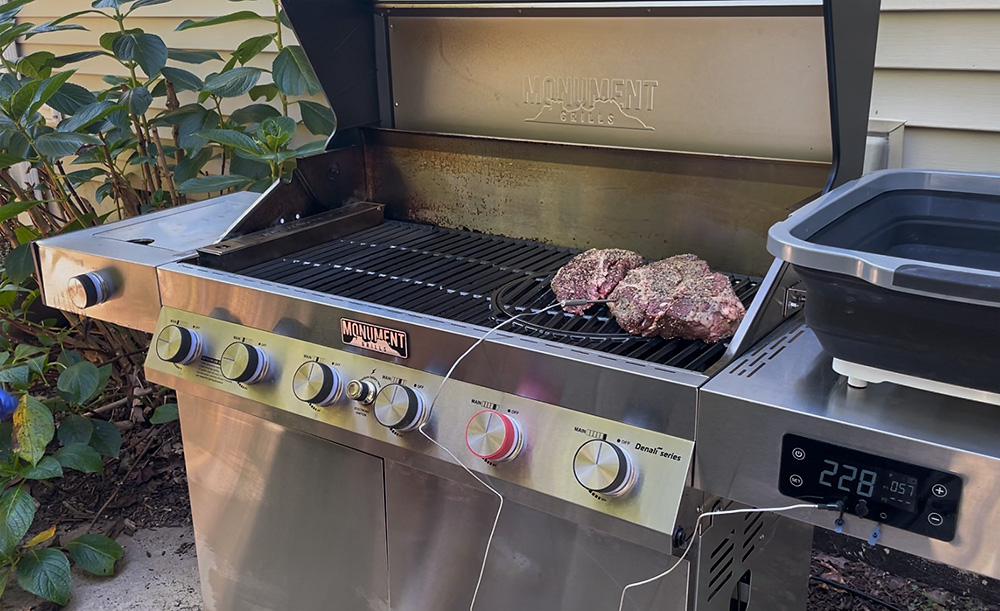
Chuck Roast on the Monument Denali 605

My target was 250°F, although the grill temperature fluctuated between approximately 230°F and 280°F throughout the smoke. Maintaining a steady low temperature can be tricky on a gas grill, even with the burners turned down.

Steven shared a little hack for managing the heat: Prop the grill lid open slightly with a small metal rod to allow some heat to escape. (I wish I’d known that one before I started!)

I added wood chips twice during the initial smoking stage. The goal was to develop a noticeable smoke flavor and a dark exterior bark, not to produce heavy smoke for the entire grilling session.

A few tips for smoking on a gas grill:

  • Use indirect heat so the roast isn’t sitting directly over an active burner.
  • Monitor the grill temperature and adjust the burners as necessary.
  • Replenish wood chips when needed, especially during the early stages of smoking.
  • Use a meat thermometer to follow the roast’s progress.

Smoking the Chuck Roast

I started by seasoning the chuck roast generously with Steven’s Texas Brisket Rub, covering all sides of the meat.

Once the Denali 605Pro was preheated and the smoker box was producing smoke, I placed the roast over indirect heat and closed the lid.
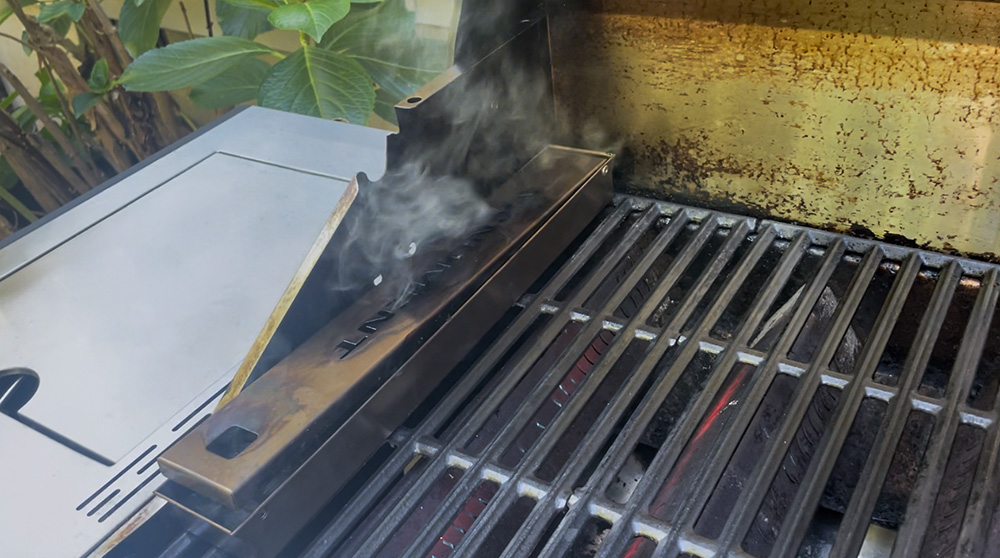
Monument Grills Smoker Box

After four hours, the internal temperature was approximately 142°F. An hour later, it had only climbed to 147°F.

That slow progression isn’t unusual with a large piece of beef. Evaporative cooling can slow the rise in internal temperature, a phenomenon barbecue enthusiasts know as the stall. And personally, it drove me crazy.

By this point, the chuck roast had spent around five hours in the smoke, developing its bark and smoke flavor.

Rather than continuing to smoke the beef uncovered, I moved to the next stage: a covered finish to help tenderize the meat.
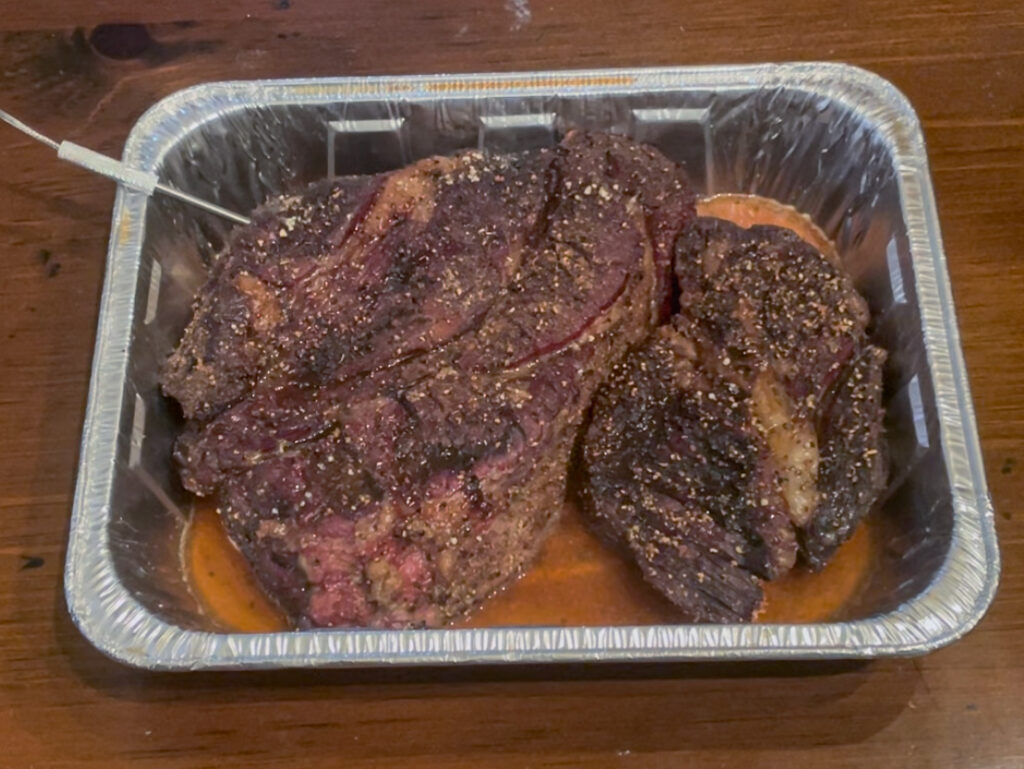
Chuck Roast in Pan

Finishing the Chuck Roast

Once the smoking stage was complete, I transferred the roast to a foil pan with beef broth, Worcestershire sauce, minced garlic, and onion powder.

I covered the pan tightly to retain moisture and moved it to the oven to finish. That’s a little tip I picked up from barbecuebible.com editor Nancy Loseke: Once the grill has done its job developing the smoke flavor and bark, there’s no need to keep burning propane—unless you want to. Your oven can take it from there.

The purpose of this stage is to help break down the connective tissue while keeping the meat moist. The liquid also collects beef juices that can be used later when preparing the sliders.

After more than eight hours of total grilling and finishing time, the chuck roast reached approximately 205°F internally.

Here’s something worth emphasizing: Internal temperature alone doesn’t guarantee tender beef.

Although the roast had reached the temperature normally associated with shreddable chuck, it wasn’t quite as tender as I had hoped. One section pulled apart relatively easily, while the larger portion still offered a little resistance.
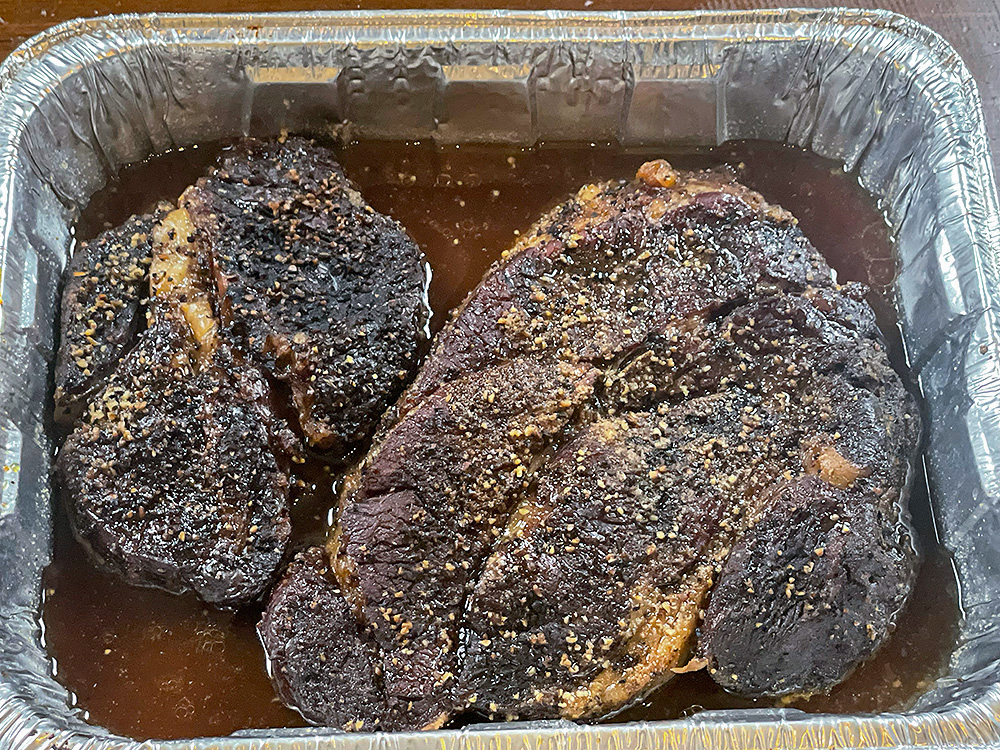
Chuck Roast

Since it was getting late, it was time for Plan B. I decided to chop the meat instead.

And that proved excellent for sliders.

If you’re aiming for fully shredded beef, you have to keep cooking until a temperature probe or skewer slides into the thickest part with very little resistance. That final tenderness test is more important than reaching a particular temperature on the thermometer.

Building the Smoked Chuck Roast BBQ Sliders

With the beef rested and chopped, it was time to assemble the sliders.

I mixed some of the chopped smoked chuck roast with barbecue sauce, using just enough to coat the beef without overpowering the smoke flavor. You can use any barbecue sauce you like, including Steven’s Chipotle Molasses Barbecue Sauce. Personally, I prefer a sauce with less sugar for health reasons. I’m partial to Stubb’s Simply Sweet Reduced Sugar BBQ Sauce.
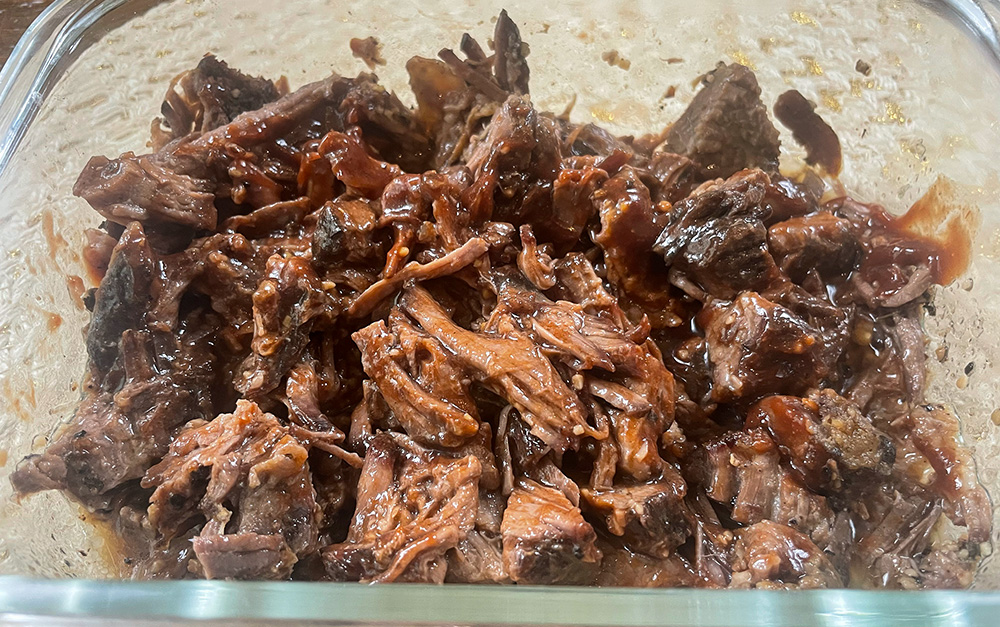
Chuck Roast Chopped with Barbecue Sauce

For the sandwiches, I kept it simple: Hawaiian slider rolls, smoked BBQ beef, and provolone cheese. The sweetness of the rolls worked nicely with the smoky beef and barbecue sauce.

These sliders are ideal for tailgating because you can prepare the beef the day before the game. Save some of the juices from the covered finishing stage to keep the meat moist when reheating.

On game day, simply reheat the beef until hot, toast the slider rolls, add the provolone, and assemble the sandwiches.

Smoked Chuck Roast BBQ Sliders for Game Day

The finished sliders were fantastic. The smoky beef, barbecue sauce, melted provolone, and sweetness of the Hawaiian rolls made a spectacular sandwich!

The Monument Denali 605Pro did a great job smoking the chuck roast. Paired with the Monument smoker box, it gave the beef plenty of smoke flavor and developed a nice bark, all on a gas grill.

Not bad for a tailgate sandwich!
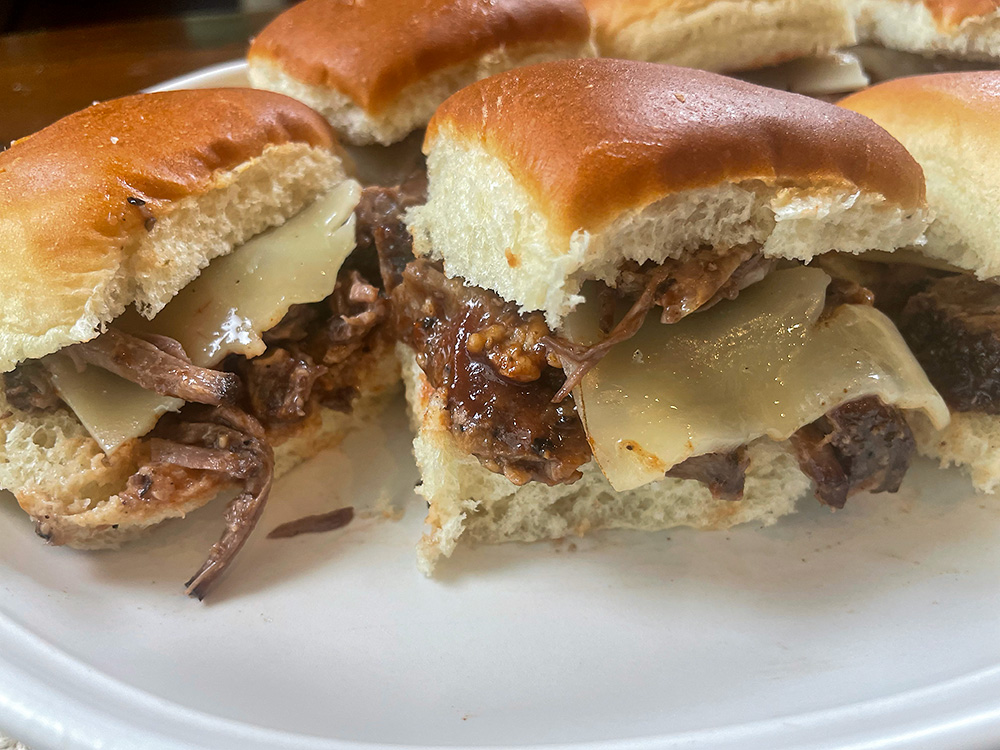
Chuck Roast Sliders

Recipe

Smoked Chuck Roast BBQ Sliders

Smoked chuck roast, chopped or shredded and tossed with barbecue sauce, served on Hawaiian slider rolls with melted provolone cheese.

Yield: Approximately 16–20 sliders (estimated)

Method: Indirect smoking

Equipment: Gas grill, smoker box, meat thermometer, disposable foil pan, aluminum foil

Ingredients

For the smoked chuck roast:

  • 1 boneless beef chuck roast (approximately 4 1/2 pounds)
  • Steven Raichlen’s Texas Brisket Rub (or your favorite barbecue rub), enough to generously season the roast
  • Wood chips, for smoking
  • 1 cup beef broth
  • 2 tablespoons Worcestershire sauce
  • 1 tablespoon jarred minced garlic
  • 1 teaspoon onion powder

For the sliders:

  • 16–20 Hawaiian slider rolls
  • Your favorite barbecue sauce, to taste
  • Sliced provolone cheese, enough for each slider

Instructions

  1. Season the beef: Generously season the chuck roast on all sides with Steven Raichlen’s Texas Brisket Rub.
  2. Set up the grill: Prepare the gas grill for indirect smoking at approximately 250°F. Fill the smoker box with wood chips and position it over an active burner according to the manufacturer’s instructions.
  3. Smoke the chuck roast: Place the roast over indirect heat and close the lid. Maintain a grill temperature near 250°F, replenishing the wood chips as needed. Smoke until the roast develops a dark bark and reaches an internal temperature of approximately 165°F.
  4. Cover the roast: Transfer the chuck roast to a disposable foil pan. Add the beef broth, Worcestershire sauce, minced garlic, and onion powder. Cover the pan tightly with aluminum foil.
  5. Finish the roast: Return the covered pan to the grill over indirect heat. Continue smoking at approximately 250°F. When the internal temperature reaches 205°F, begin checking for tenderness. The beef is ready when a temperature probe or skewer slides into the thickest part with very little resistance.
  6. Rest and chop: Remove the roast from the grill and let it rest for 20–30 minutes. Chop or shred the beef, reserving some of the pan juices.
  7. Add the barbecue sauce: Toss the beef with enough barbecue sauce to coat it. Add a little reserved pan liquid if needed to keep the meat moist.
  8. Prepare the slider rolls: Split the Hawaiian slider rolls and lightly toast them on the grill. Place a portion of BBQ beef on each bottom bun and top with provolone cheese. Warm briefly until the cheese melts.
  9. Assemble and serve: Replace the top buns and serve warm.

Make-Ahead Tailgating Tip

Prepare the smoked chuck roast the day before the game. Refrigerate the chopped or shredded beef with some of the reserved pan juices in a covered container. On game day, reheat the beef thoroughly to 165°F, adding reserved liquid as needed to keep it moist. Toss with barbecue sauce and assemble the sliders shortly before serving.

A big thank you to Monument Grills for sponsoring this post.

Plan your next cook with our full recipe collection—weeknight grills, weekend projects, and special-occasion feasts.

Get Steven’s weekly grilling tips, seasonal recipes, and live-fire ideas in your inbox. Join our Up in Smoke newsletter. Sign up and get a FREE PDF of Steven Raichlen's Best Ribs Recipes Ebook.

Preorder Man On Fire — A Steven Raichlen Memoir. And get some really cool rewards!

Looking to upgrade your tailgating setup? Check out our Tailgating Essentials.

The post Big Beef Flavor, Little Buns: <br />Smoked Chuck Roast Sliders appeared first on Barbecuebible.com.
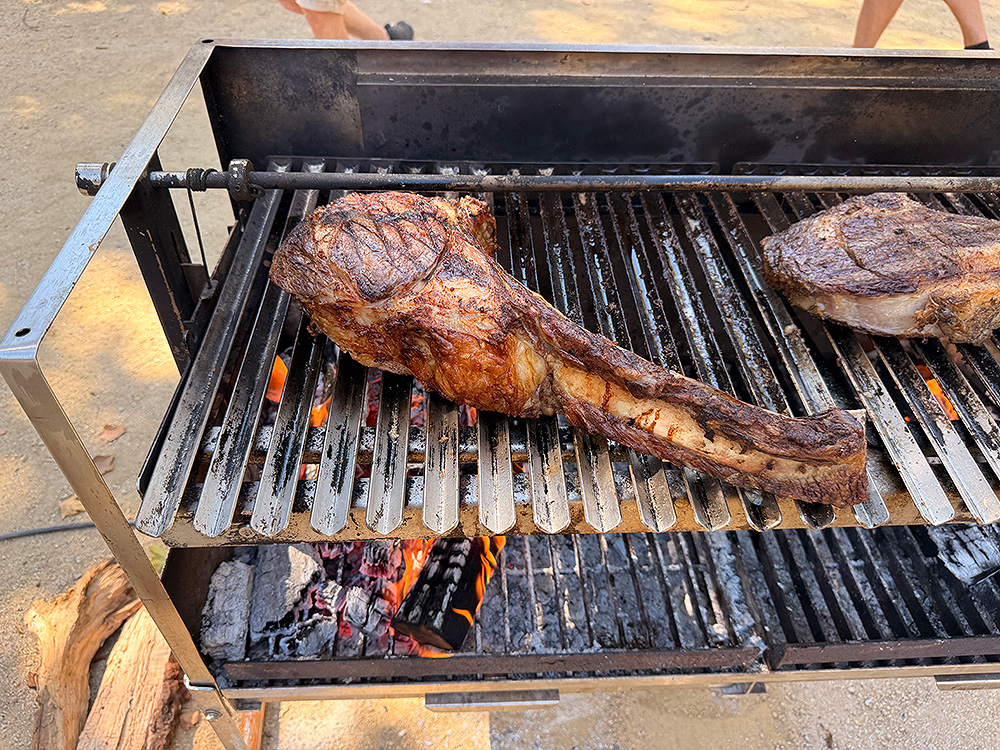
Beef Tomahawk 101

When I started writing about barbecue, a tomahawk was an Indian ax. No one had heard of beef tomahawks.

Today, you can’t go to a steakhouse—or even your local supermarket—without being tempted by this magisterial cut of beef. The beef tomahawk has become the new steak status symbol—one restaurant in Miami even serves it clad with gold leaf. (You don’t want to know the price.)

Given beef prices these days, a beef tomahawk is definitely a splurge, but for a special occasion, you may just want to sizzle one on your grill.

What Is a Beef Tomahawk?

So what is a beef tomahawk? In a nutshell, it’s a bone-in ribeye steak with the entire rib bone attached. (In butcher speak, it’s IMPS/NAMP Number: 1103B.). Often that rib bone is “frenched,” that is scraped clean of meat. Picture a monster steak, 2 to 3 inches thick, with a bone that extends 5 to 8 inches. For all you meat geeks out there, know that tomahawks are cut from ribs 6 through 12 on a steer’s ribcage.

A steak this size presents the griller with several challenges. Try direct grilling it, as you would a regular rib steak or rib-eye, and you wind up burning the exterior, while leaving the center cold and raw. Try smoking it, as you would a brisket, and you miss out on a sizzling seared crust.

No, a beef tomahawk requires a special technique for cooking it to perfection and that technique is, drumroll please, reverse searing.

How to Reverse Sear a Beef Tomahawk

In a nutshell, you start cooking the steak low and slow, as you would true barbecue, like Texas brisket. Once the center reaches an internal temperature of 100 degrees, you take the steak off and rest it on a wire rack over a sheet pan. Raise your grill heat to high to sear the steak on the outside and direct grill it to the desired doneness.

Beef Tomahawk on the Grill

Reverse-searing has several benefits: the meat cooks evenly from top to bottom (no more blood-red “bullseye” in the center, and the timing is a lot more forgiving because you can do most of the cooking ahead of time. Add wood chunks or chips to the fire to give your steak the smoky flavor of barbecue. That’s always a big win in my book.

Two Other Ways to Grill a Beef Tomahawk

Note: There are two other ways to grill a beef tomahawk. If you have a grill with a raisable and lowerable grate (like a Santa Maria-style grill or KUDU), position it high (18 inches) above the fire. Direct grill your steaks slowly, turning every few minutes. Lower the grate the last few minutes to lay on a crusty sear. The cooking time will be 20 to 30 minutes.

Alternatively, if you have a large grill, set it up for direct grilling, one side on medium-high and one side on low. Start the steak on high, then when the surface begins to sizzle and brown, slide it to the low zone. Keep sliding it back and forth between the hot zone and cool zone. The Kalamazoo Outdoor Gourmet company calls this the “sear and slide” method. The cooking time will be 20 to 30 minutes.

Recipe

The Raichlen Beef Tomahawk

By Steven Raichlen

Yield: Serves 2 to 3

Ingredients

  • 1 beef “tomahawk” (rib steak with long rib bone attached and dry-aged, if possible) or very thick ribeye, 24 to 30 ounces and 2-1/2 to 3 inches thick
  • Coarse salt (kosher or sea) and coarsely and freshly ground black pepper
  • Cowboy Butter or other compound butter

Cowboy Butter

  • 8 oz. (organic) butter, unsalted (2 sticks)
  • 1 tsp smoked sea salt
  • 2 tsp smoked paprika
  • 4 garlic cloves, minced
  • 1 shallot, small, minced
  • Zest from 1 lemon
  • Juice from 1 lemon
  • 2 tablespoons fresh parsley, chopped
  • 2 tablespoons fresh chives, finely chopped
  • 1 tablespoon thyme, stems removed
  • 1/4 teaspoon pepper

Instructions

  1. Very generously season the beef tomahawks on both sides with salt and pepper. Set up your grill for indirect grilling and heat to medium-low (250 degrees). Brush or scrape the grill grate clean and oil it well.
  2. Arrange the tomahawks on the grate away from the heat. Add wood chunks or chips to the fire. Smoke-roast the steak to an internal temperature of about 100 degrees. This will take 40 to 60 minutes.
  3. Transfer the steak to a wire rack over a rimmed sheet pan and let rest for 10 minutes. Meanwhile, set up your grill for direct grilling and heat to high.
  4. Arrange the tomahawk steak over the hottest part of the grill grate, running diagonal to the bars of the grate. Direct grill until both sides are sizzling, browned, and crusty, 2 to 4 minutes per side. You want a final internal temperature of 120 to 125 degrees for rare; 130 to 135 degrees for medium-rare; or 140 to 145 degrees for medium. If the exposed parts of the rib bone start to burn, slide a sheet of aluminum foil under it.
  5. Transfer the tomahawk to a cutting board or warm platter. Carve the beef off the bone and cut into 1/4-inch-thick slices for serving. Top with Cowboy Butter (if desired), following the recipe below.

Cowboy Butter Instructions

  1. Before grilling your steaks, let’s start by making the compound butter.
  2. Let butter come to room temperature. Combine all ingredients with a stick blender or a food processor. Roll butter onto a large piece of plastic wrap forming a log. Roll the plastic wrap up into a log and twist on the ends. Store in the refrigerator until it is time to use.

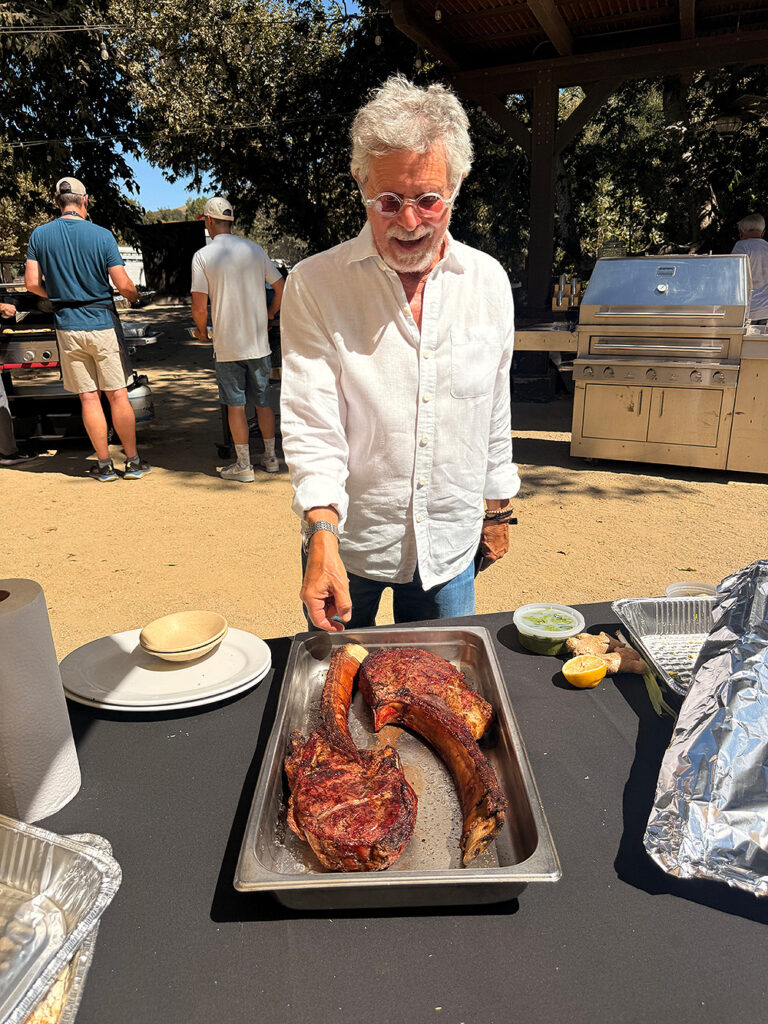
Steven Raichlen with a Beef Tomahawk

Looking for more recipes like this? Browse our Recipe Index for grilled, smoked, and live-fire favorites.

Get Steven’s weekly grilling tips, seasonal recipes, and live-fire ideas in your inbox. Join our Up in Smoke newsletter. Sign up and get a FREE PDF of Steven Raichlen's Best Ribs Recipes Ebook.

Preorder Man On Fire — A Steven Raichlen Memoir. And get some really cool rewards!

Looking to upgrade your tailgating setup? Check out our Tailgating Essentials.

The post Beef Tomahawk 101 appeared first on Barbecuebible.com.
How to Smoke Dino Ribs: Big, Bad Beef Plate Ribs

Because Sometimes Bigger Is Better

By Steven Raichlen

Greetings from Barbecue University®, my school at the Alisal Ranch in Solvang, California. We always start the first class with a bang. And bangs (or bones) don’t get bigger than dino bones, aka brontosaurus bones, aka beef plate ribs, aka big bad beef ribs!

The beef plate rib certainly lives up to its reputation as “brisket on the bone.” Imagine the fatty richness of a barbecued brisket point with the gnaw-a-bility of a meaty sparerib. Imagine a single rib that weighs upwards of 2 pounds and easily feeds 2. When you order it at a restaurant, you can pay up to $50—for a single rib! I’m going to show you how to barbecue this spectacular beef bone at home for a fraction of the price.

What Are Dino Bones?

First the rib. Beef plate ribs are cut from bones 6, 7, and 8 on a steer’s ribcage. (MPS/NAMP 123A in butcher speak.) They come in a slab that’s the size of a laptop computer, tipping the scale at 6 to 8 pounds.

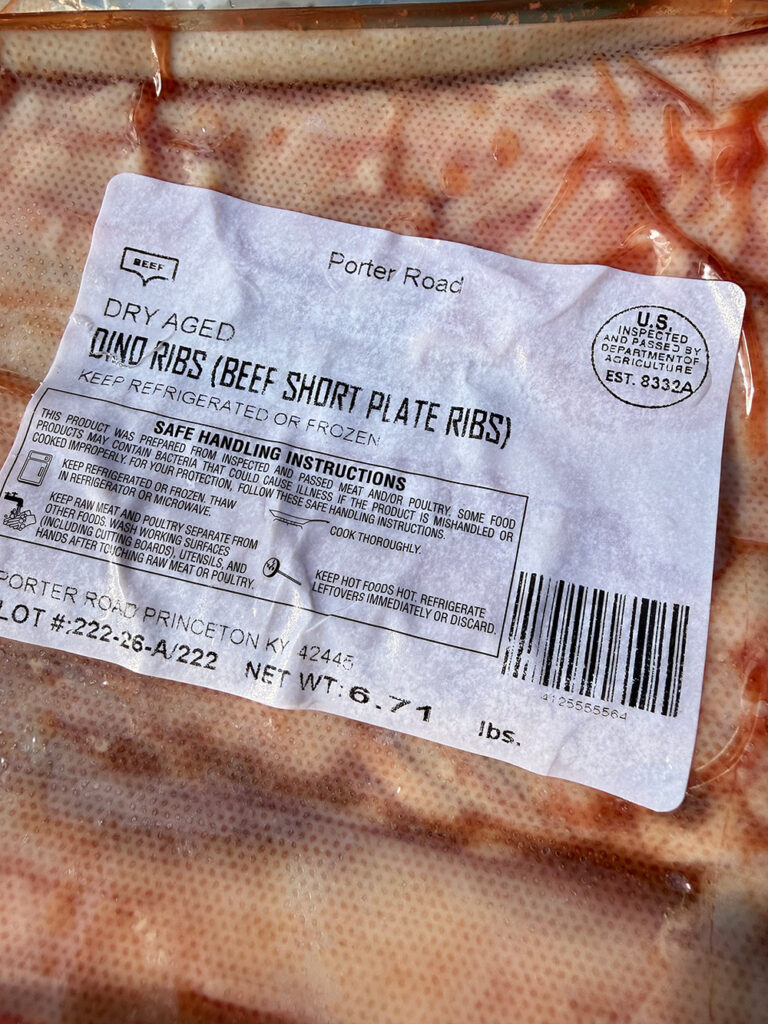
We source our beef ribs from the Nashville-based butcher shop and online meat purveyor, Porter Road. Founded by Chris Carter and James Peisker in 2010, Porter Road specializes in pasture-raised meats free of antibiotics and hormones, dry-aged and hand-cut. I order from them whenever I can: their meats are first rate. If you use code BarbecueBible you can get 15% off your first order.

Dino Bones from Porter Road

How to Smoke Dino Bones

Once you have your dino ribs, cut the rack into individual bones. Individual bones mean more spice, more bark, and more woodsmoke on each rib. I like to keep the seasoning simple: coarse salt and cracked black peppercorns. Maybe a whiff of garlic powder and dried oregano. Whoops—I just gave away the formula for my Planet Barbecue Brisket Rub, which goes great on dino bones.

You can cook your dino ribs on a smoker, kamado, pellet grill, or charcoal grill. (Sorry, folks. It’s hard to smoke meat on a gas grill.) Preheat it to 250 degrees and add the wood (chunks or chips) following the manufacturer’s instructions every hour.

The other ingredient you need is time—lots of it—because dino ribs take at least 8 to 10 hours to cook, plus 1 to 2 hours resting in an insulated cooler or barbecue blanket before serving.

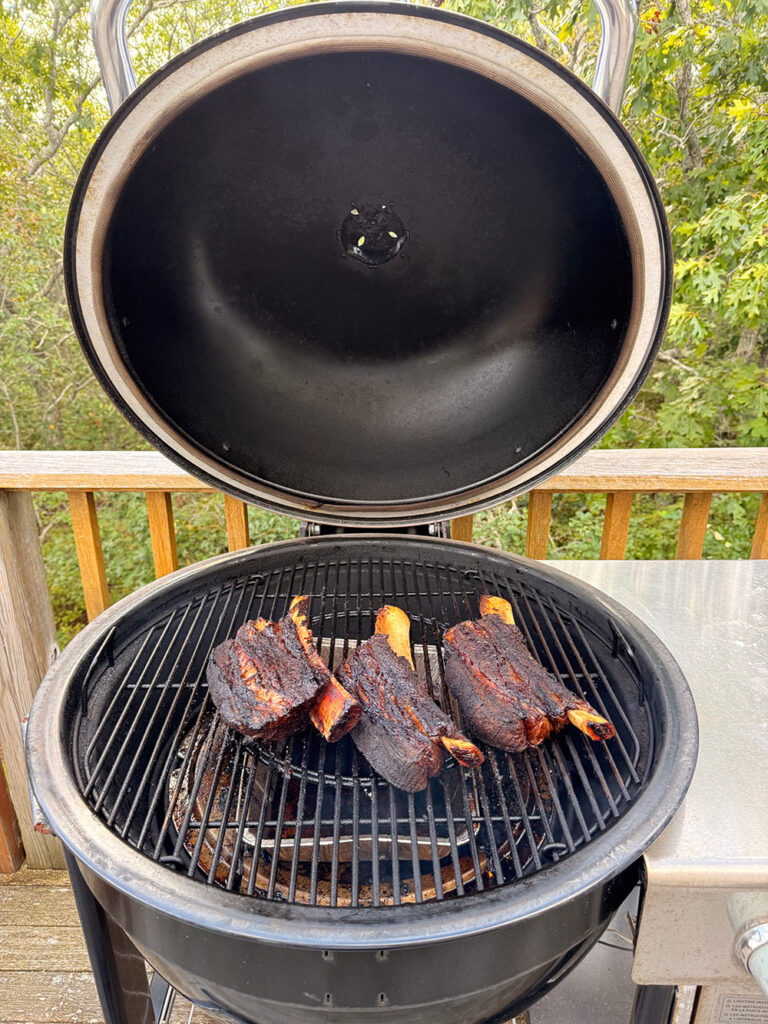
Dino Bones on the Grill

So how do you know when they’re done? The meat will have shrunk back from the ends of the bones by 2 inches or so and the meat will be soft and tender. The internal temperature on an instant-read thermometer should be around 200°F.

What to Serve with Dino Bones

And what do you serve with dino bones? If you’re me, nothing. I like to savor the rich beefy flavor, salt, pepper, and smoke all by themselves.

But Mrs. Raichlen likes my Chipotle Molasses Barbecue Sauce, so I wouldn’t say no to that.

Here, then, are Barbecued Dino Bones in all their beefy glory. Guaranteed to give brisket a run for its money!

Recipe

Dino Bones (Barbecued Beef Plate Ribs)

By Steven Raichlen

Big, meaty beef plate ribs seasoned with salt, cracked black pepper, and hot red pepper flakes, then smoked low and slow until tender.

Yield: 3 ribs, serving 3 hungry people
Method: Hot-smoking
Prep Time: 10 minutes
Smoking Time: 8 to 10 hours
Resting Time: 1 hour

Ingredients

  • 3 full beef plate short ribs (rack of 6 to 7 1/2 pounds)
  • 3 tablespoons coarse salt (sea or kosher), plus extra for serving
  • 3 tablespoons cracked black peppercorns
  • 2 tablespoons hot red pepper flakes
  • Beer (optional)
  • 1 cup beef stock (preferably homemade)

Equipment

  • Smoker
  • Oak, hickory, or mesquite wood, or a combination
  • Aluminum foil drip pan
  • Instant-read thermometer
  • Insulated cooler (optional)

Instructions

  1. Cut the rack lengthwise into individual bones and place them on a rimmed baking sheet.
  2. Place the salt, pepper, and hot red pepper flakes in a small bowl and mix well. Generously sprinkle the rub on the ribs on all sides, including the ends, rubbing it into the meat with your fingertips.
  3. Set up your smoker following the manufacturer’s instructions and preheat to 225° to 250°F. If your smoker has a water pan, fill it with water or beer to a depth of 3 inches. If it doesn’t have a water pan, fill a disposable aluminum foil pan with water or beer to a depth of 3 inches and place it below the rack on which you’ll be smoking the ribs. (Note: You don’t need to do this on a ceramic cooker.) Add wood as specified by the manufacturer.
  4. Place the ribs in the smoker fat side up, with at least 2 inches between ribs. Smoke the ribs until darkly browned on the outside and very tender inside, 8 to 10 hours. If working on a smoker with the firebox at one end, shuffle the ribs a couple times so they cook evenly. To test for doneness, insert a metal skewer in the largest rib (through one end and parallel to the bone); it should pierce the meat easily. Another test for doneness is to insert an instant-read thermometer parallel to but not touching the bone; it should read 200°F. (Check the ribs to make sure all are done.) When done, the meat will have shrunk back from the ends of the bones by 1 to 2 inches.
  5. Transfer the ribs to a large foil pan with the beef stock. Loosely cover the pan with aluminum foil and place it in an insulated cooler. Let the ribs rest for 1 hour before serving.
  6. Just before serving, season each rib with a light sprinkling of salt.

Plan your next cook with our full recipe collection—weeknight grills, weekend projects, and special-occasion feasts.

Get Steven’s weekly grilling tips, seasonal recipes, and live-fire ideas in your inbox. Join our Up in Smoke newsletter. Sign up and get a FREE PDF of Steven Raichlen's Best Ribs Recipes Ebook.

Preorder Man On Fire — A Steven Raichlen Memoir. And get some really cool rewards!

Looking to upgrade your tailgating setup? Check out our Tailgating Essentials.

The post How to Smoke Dino Ribs: Big, Bad Beef Plate Ribs appeared first on Barbecuebible.com.
Kick Off Tailgating Season with Rotisserie Tri-Tip

Photo Credit: Daniel Hale


By Daniel Hale

With football season fast approaching, it’s time to make my first tailgating meal. Being from California, I have to go with tri-tip!

A few years ago, I wrote about my first real attempt at grilling tri-tip. I cooked it indirectly on my Weber kettle, then finished it over direct heat for that amazing sear.

This time I wanted to take the same cut in a different direction. I decided to put a Santa Maria-style tri-tip on the rotisserie.

And what better grill to use than the Monument Eminence 605? This is a big grill. This isn’t something I’m throwing in the back of the car and hauling to a stadium parking lot. This was game-day cooking at home.

Rotisserie Tri-Tip on the Eminence 605

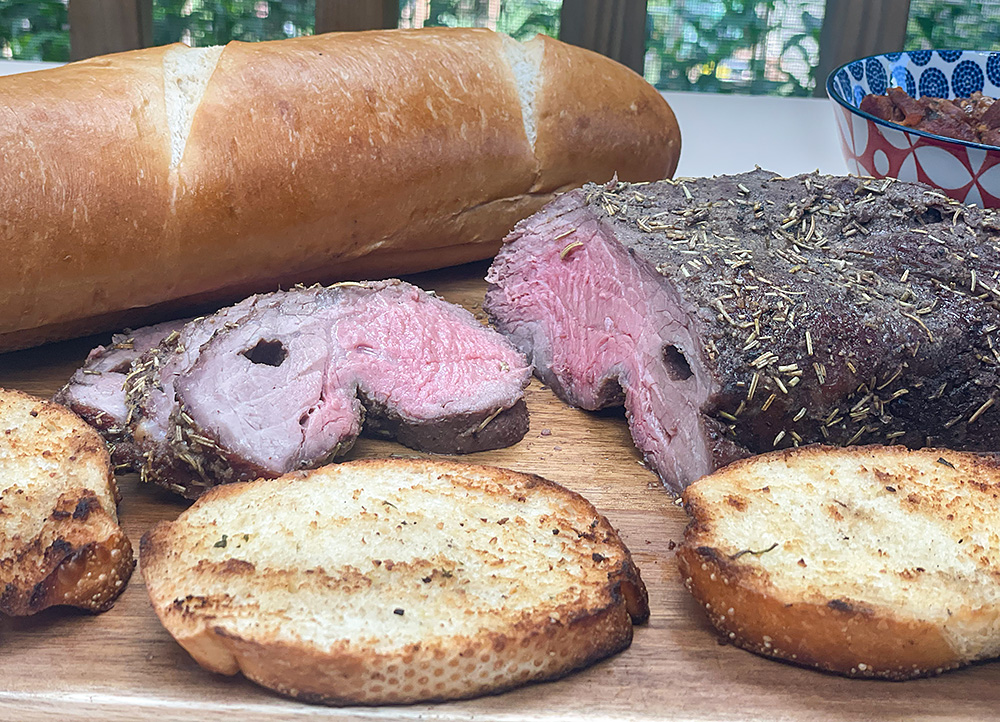
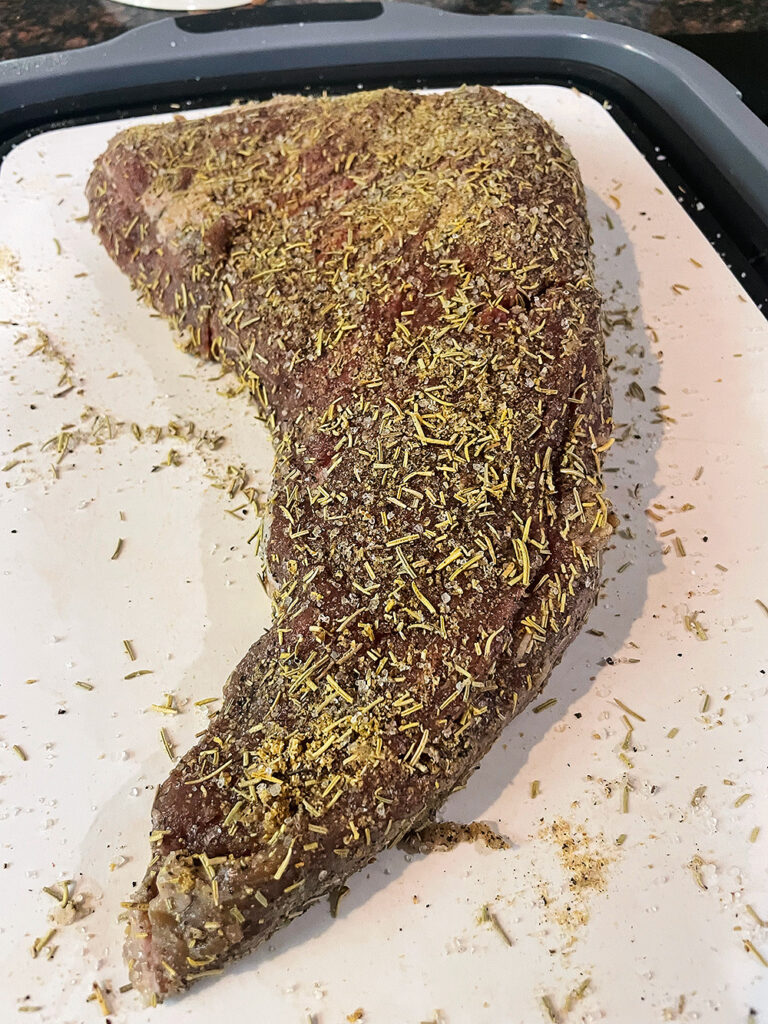
I started with Steven’s Santa Maria Tri-Tip recipe, seasoning the meat with coarse salt, black pepper, garlic powder, and dried rosemary. The tri-tip started at about 3 1/2 pounds before I trimmed a fair amount of exterior fat.

Tri-Tip with Santa Maria Rub

Photo Credit: Daniel Hale


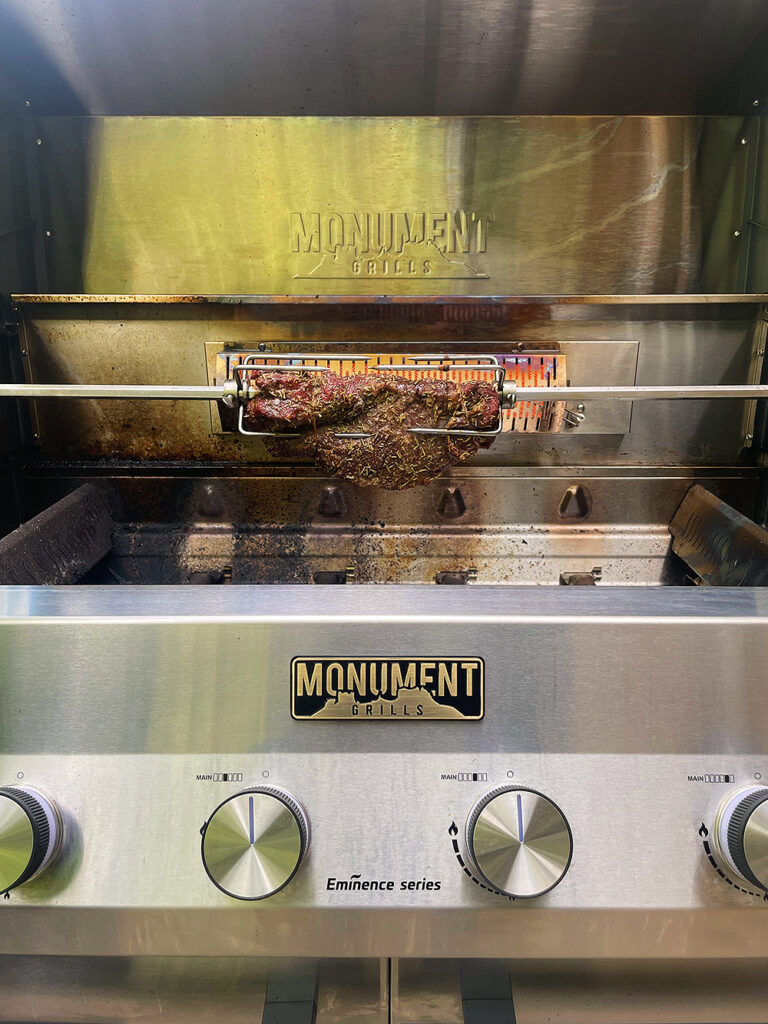
Once the meat was secured on the rotisserie spit, I set up the Eminence 605 for indirect cooking. I lit the burners on either side of the meat and left the burners directly below the tri-tip off. The grill settled in around 285 to 290°F.

The rotisserie kept the tri-tip turning steadily without any flipping or repositioning. After about 45 minutes, the deepest part of the roast had reached 117°F.

Finishing with the Infrared Rear Burner

The Monument Eminence 605 includes a rear infrared burner designed to work with the rotisserie. The rear burner is either on or off rather than adjustable like the main burners.

Rotisserie Tri-Tip on the Eminence 605

Photo Credit: Daniel Hale


I turned on the infrared rear burner and kept the rotisserie running. The added radiant heat browned the outside while I watched the internal temperature closely.

I wanted medium-rare, so I pulled the tri-tip when the deepest part reached 130°F and let it rest before slicing. The finished meat had a pink center and a browned, rosemary-flecked exterior.

Tri-tip has grain that changes direction, so I separated the roast as needed and sliced each section across the grain. The method was different from my previous tri-tip cook, but the temperature strategy was familiar: cook it gently first, then use higher heat to finish the exterior.

Santa Maria-Style Sides on the Grill

A Santa Maria-style tri-tip called for the traditional supporting cast, so I also made Steven’s Santa Maria Garlic Bread and Santa Maria Pinquito Beans.

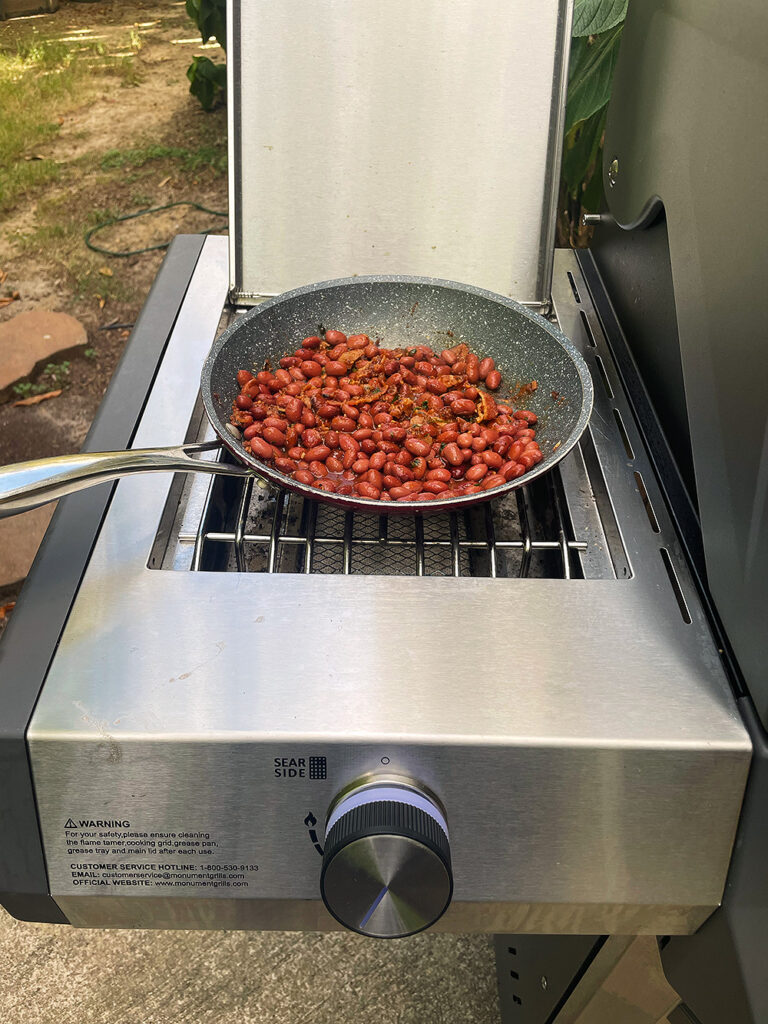
I made a couple of changes to the beans. Instead of pinquito beans, I used Frijoles Colorados Cortos (small red beans). I also substituted chipotle sauce for the red chile sauce. Other than that, I followed the recipe.

Santa Maria Style Beans on the Monument Eminence 605

Photo Credit: Daniel Hale


I cooked the beans in a saucepan on the Eminence 605’s side burner while the tri-tip was on the rotisserie. Bacon, ham, onion, garlic, tomato purée, chipotle sauce, and the seasonings all went into the pot with the beans.

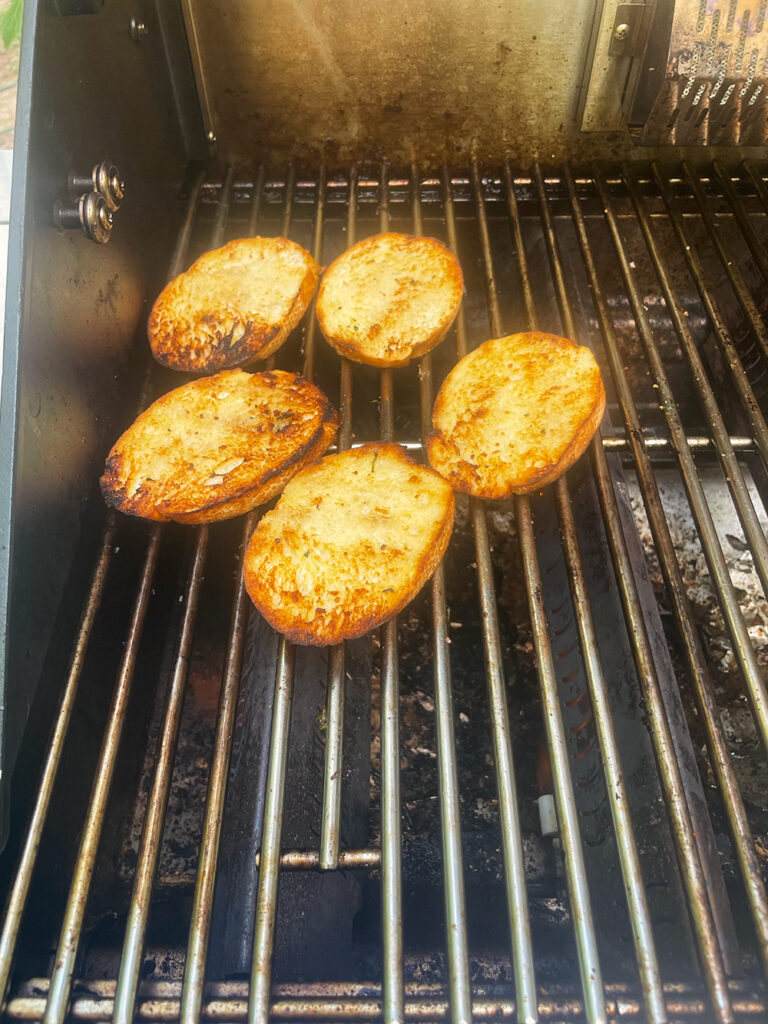
For the garlic bread, I followed the Santa Maria Garlic Bread recipe. I grilled the bread at the end of the cook while the rest of the meal was coming together.

Santa Maria Garlic Bread

Photo Credit: Daniel Hale


That gave me the full game-day menu: rotisserie tri-tip, Santa Maria-ish beans, and Santa Maria grilled garlic bread.

The Results

The tri-tip came out beautifully, with a pink center and a browned exterior from the infrared finish. The rosemary really came through in the Santa Maria seasoning and gave the beef a distinct herbal note without covering up the flavor of the meat. I especially liked what the chipotle sauce did for the beans, adding a deeper smoky flavor and a little heat. And the garlic bread may have been the surprise of the meal. Grilled until crisp around the edges and loaded with garlic butter, it was excellent alongside the tri-tip and beans.

Game Day at Home

I’ve now cooked tri-tip a few different ways, and the rotisserie gave me another one worth keeping. The Eminence 605 handled the slow roast, the infrared rear burner handled the finish, and the side burner gave me a place to cook the beans at the same time.

Rotisserie Tri-Tip

Photo Credit: Daniel Hale


For a tailgating-season meal at home, it made good use of the grill without turning dinner into a juggling act.

A big thank you to Monument Grills for sponsoring this cook.

Build your live-fire skills with our Back-to-Basics library—setups, temps, tools, and pro moves that make a difference.

Get Steven’s weekly grilling tips, seasonal recipes, and live-fire ideas in your inbox. Join our Up in Smoke newsletter. Sign up and get a FREE PDF of Steven Raichlen's Best Ribs Recipes Ebook.

Preorder Man On Fire — A Steven Raichlen Memoir. And get some really cool rewards!

Looking to upgrade your tailgating setup? Check out our Tailgating Essentials.

The post Kick Off Tailgating Season with Rotisserie Tri-Tip appeared first on Barbecuebible.com.
Hot or Hotter: Pepper Steak Two Ways

Photo by: Steve Nestor


September 9 is National Steak au Poivre Day. Here at BarbecueBible.com, we’re celebrating with one of the great French steak preparations: beef crusted with cracked black pepper and served with a Cognac cream sauce.

Traditionally, steak au poivre is made with filet mignon in a skillet on the stovetop. We’re taking it outside, using ribeye and a cast-iron skillet over a wood fire.

The idea for this version came from BarbecueBible Test-Kitchen Director Steve Nestor, who cooked a ribeye steak au poivre in cast iron over a wood fire in 2023. His original version inspired the approach here.

Why Ribeye for Steak au Poivre?

Ribeye brings considerably more marbling and beef flavor to the equation.

It also stands up well to the assertive flavors in this dish. There’s a lot going on between the cracked peppercorns, Dijon mustard, Cognac, and cream. Ribeye doesn’t disappear underneath the sauce.

Cast Iron Meets Wood Fire

Set up the grill for a two-zone wood fire, with a hot side and a cooler side. A chimney starter makes quick work of getting the fire going. The hot side will heat the skillet and cook the steak; the cooler side gives you a place to finish the sauce, especially once the Cognac comes out.

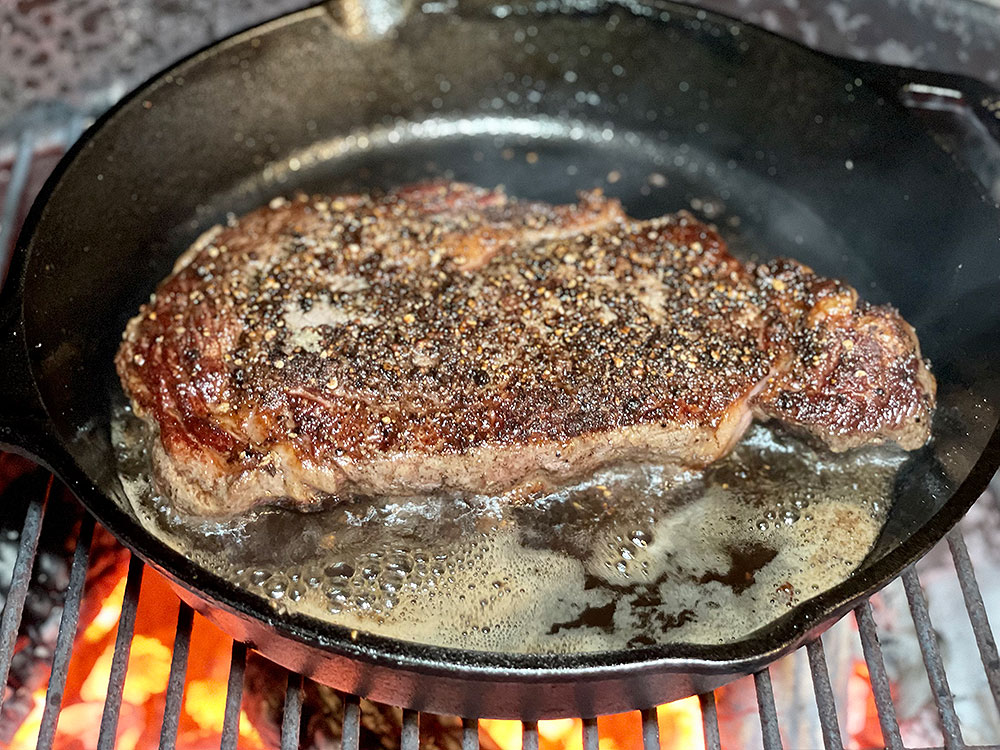
Lightly brush the ribeye with Dijon mustard, then coat it with freshly cracked black peppercorns. The mustard helps the pepper stick to the steak. And cracked is the operative word here. You want some texture from the peppercorns, not a coating of finely ground pepper.

Heat a 10-inch cast-iron skillet over the hot side of the fire. Add the butter, then the pepper-crusted ribeye.

Cooking the steak in cast iron rather than directly on the grill grate keeps the butter, rendered beef fat, and browned bits in the pan.

Ribeye Steak

Photo by: Steve Nestor


Transfer the ribeye to a wire rack set over a sheet pan and let it rest while you make the sauce. Don’t wipe out the skillet. The butter, beef drippings, and browned bits left behind are the starting point for the au poivre sauce.

Building the Au Poivre Sauce

With the steak resting, sauté the diced shallot directly in the skillet, then add the mushrooms you grilled earlier over the wood fire.

Move the skillet to the cooler side of the grill before adding the Cognac. Pour it into the skillet, then ignite it with a long match or butane lighter, keeping your face and hands back from the pan. Let the flames burn out on their own, then stir in the Dijon mustard and heavy cream. Cook until the sauce reduces and thickens.

Recipe

Wood-Fired Ribeye Steak au Poivre

A thick-cut ribeye is brushed with Dijon mustard, crusted with cracked black pepper, and cooked in cast iron over a wood fire. The steak drippings become the base for a Cognac cream sauce with shallots and grilled mushrooms.

Ingredients

  • 1 thick-cut ribeye steak, 16 to 20 ounces
  • 1 tablespoon Dijon mustard, for brushing the steak
  • 2 tablespoons coarsely cracked black peppercorns, plus more for the sauce
  • 2 tablespoons butter
  • 8 ounces mushrooms, sliced
  • 1 shallot, diced
  • Kosher salt
  • 3 tablespoons Cognac
  • 1 teaspoon Dijon mustard, for the sauce
  • 1 cup heavy cream

Instructions

  1. Set up the grill for a two-zone wood fire, with a hot side and a cooler side.
  2. Grill the sliced mushrooms over the wood fire until browned. Set aside.
  3. Lightly brush the ribeye with 1 tablespoon Dijon mustard, then coat it with the cracked black peppercorns.
  4. Place a 10-inch cast-iron skillet over the hot side of the fire. When the skillet is hot, add the butter. Once the butter melts, add the ribeye and cook for about 4 minutes. Flip the steak and cook for another 4 minutes, or until cooked to your desired doneness.
  5. Transfer the steak to a wire rack set over a sheet pan and let it rest while you make the sauce. Do not wipe out the skillet.
  6. Sauté the diced shallot in the remaining butter and steak juices. Add the grilled mushrooms and season with kosher salt and additional cracked black pepper.
  7. Move the skillet to the cooler side of the grill and add the Cognac. Ignite it with a long match or butane lighter, keeping your face and hands back from the pan. Let the flames burn out on their own.
  8. Stir in 1 teaspoon Dijon mustard and the heavy cream. Bring the sauce to a boil, then cook until it reduces and thickens.
  9. Slice the rested ribeye and spoon the au poivre sauce over the top. Serve immediately.

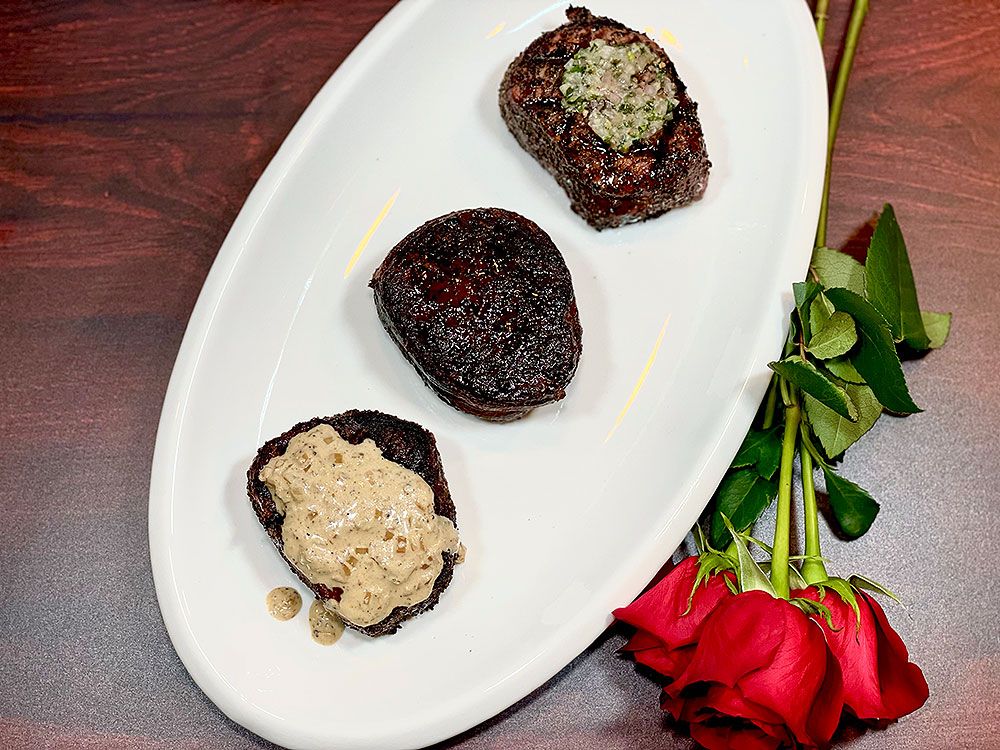
Au poivre isn’t limited to ribeye. The same peppercorn-and-Cognac treatment works with strip steak, sirloin, or the traditional filet mignon. You can also take the sauce beyond beef and serve it with pork chops, lamb, or venison.

The Finished Felet Mignon

Photo by: Steve Nestor


Not Hot Enough? Pepper Steak Barbecue University Style

This steak gets its smoky char flavor from a singular grilling method—cavemanning, aka grilling directly on the embers. I like to start with a nice thick T-bone for this recipe—1-1/2 inches thick. Season it super generously with coarse sea salt and cracked black pepper.

Build a charcoal fire and rake out the embers to an even layer. Fan the coals with a folded newspaper to dislodge any ash.

Then lay the T-bone directly on the coals. Grill until the bottom is charred and beads of blood start to pearl on the top, 3 minutes or so. Move the steak once or twice with tongs, so it grills evenly. Then, using long-handled tongs, invert it and grill the other side the same way. Transfer the steak to a wire rack over a sheet pan, shaking it to dislodge any embers.

And now the pepper sauce. Heat 1/4 cup extra virgin olive oil in a long-handled skillet directly on the embers. Add 4 thinly sliced jalapenos, 4 thinly sliced garlic cloves, and 1 cup chopped fresh cilantro. Cook the ingredients in the oil, stirring with tongs, until the jalapenos and garlic are sizzling and lightly browned. Pour the mixture over the steak and dig in.

Whichever version you choose, I’m sure you’ll agree that pepper(s) make a great steak taste even better!

Do you have a favorite steak au poivre? Share your photos on Steven’s social media: @stevenraichlen.

Want to go deeper on the craft? Explore our grilling techniques and how-to guides for ribs, steak, chicken, seafood, and more.

Get Steven’s weekly grilling tips, seasonal recipes, and live-fire ideas in your inbox. Join our Up in Smoke newsletter. Sign up and get a FREE PDF of Steven Raichlen's Best Ribs Recipes Ebook.

Preorder Man On Fire — A Steven Raichlen Memoir. And get some really cool rewards!

Looking for some fall grilling inspiration? Check out our Fall Grilling Guide.

The post Hot or Hotter: Pepper Steak Two Ways appeared first on Barbecuebible.com.
Fire-Roasted Hatch Chile Burgers: A Taste of New Mexico

Photo Credit: Daniel Hale


By Daniel Hale

There are burgers, and then there are burgers that make you rethink what a burger should be.

I came across these New Mexican Green Chile Burgers while paging through Steven Raichlen’s Raichlen’s Burgers.

This is the kind of burger I had never really considered. Sure, I’ve had plenty of chili cheeseburgers. But a green chile burger? That was something new for me.

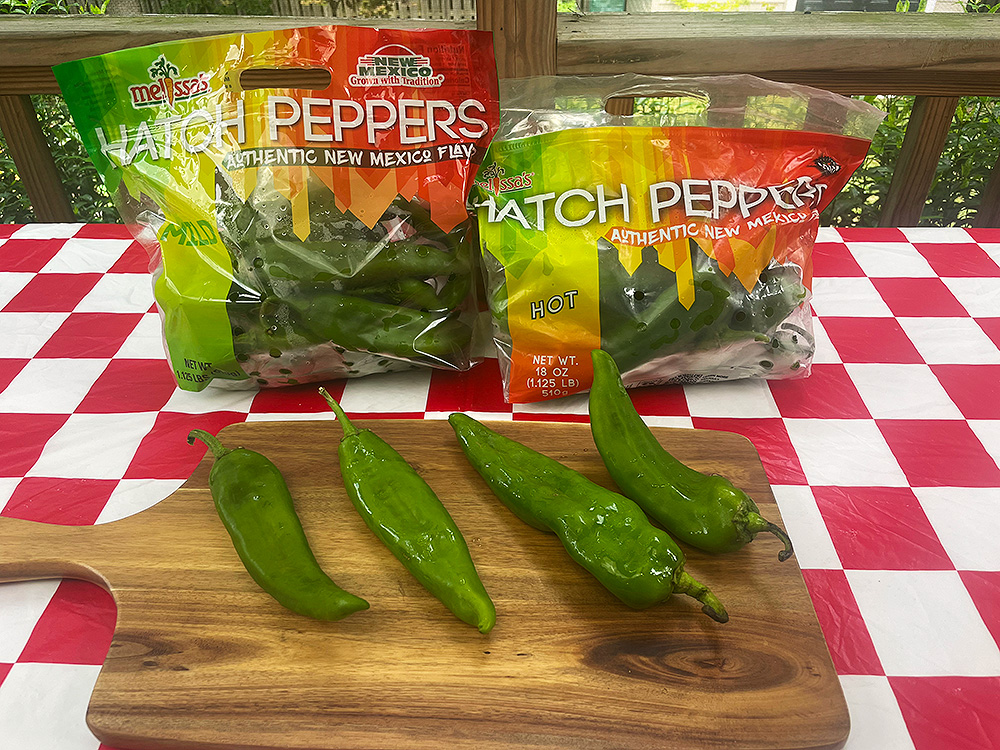
So when Melissa’s Produce sent me a box of fresh mild Hatch chiles in the middle of Hatch season, I knew exactly what I wanted to make.

I fired up the Monument Grills Eminence 605 and put Steven’s New Mexican burger to the test.

What Makes a Hatch Chile Different?

Hatch isn’t a particular variety of pepper. The name refers to chiles grown in and around New Mexico’s Hatch Valley.

They can range from mild to seriously hot, but what makes them special is their distinctive flavor—especially once they meet fire. Roasting softens the flesh, concentrates the flavor, and adds a smoky edge that makes green chile a natural partner for grilled beef.

Hatch Peppers

Photo Credit: Daniel Hale


Once roasted, the chiles are covered briefly to steam, then peeled, seeded, and cut into strips. Some go into the cheddar topping for the burgers, while the rest can be used to make Steven’s New Mexican Salsa Verde.

Making the Green Chile Burgers on the Monument Eminence 605

The first job for the Monument Grills Eminence 605 was roasting the Hatch chiles.

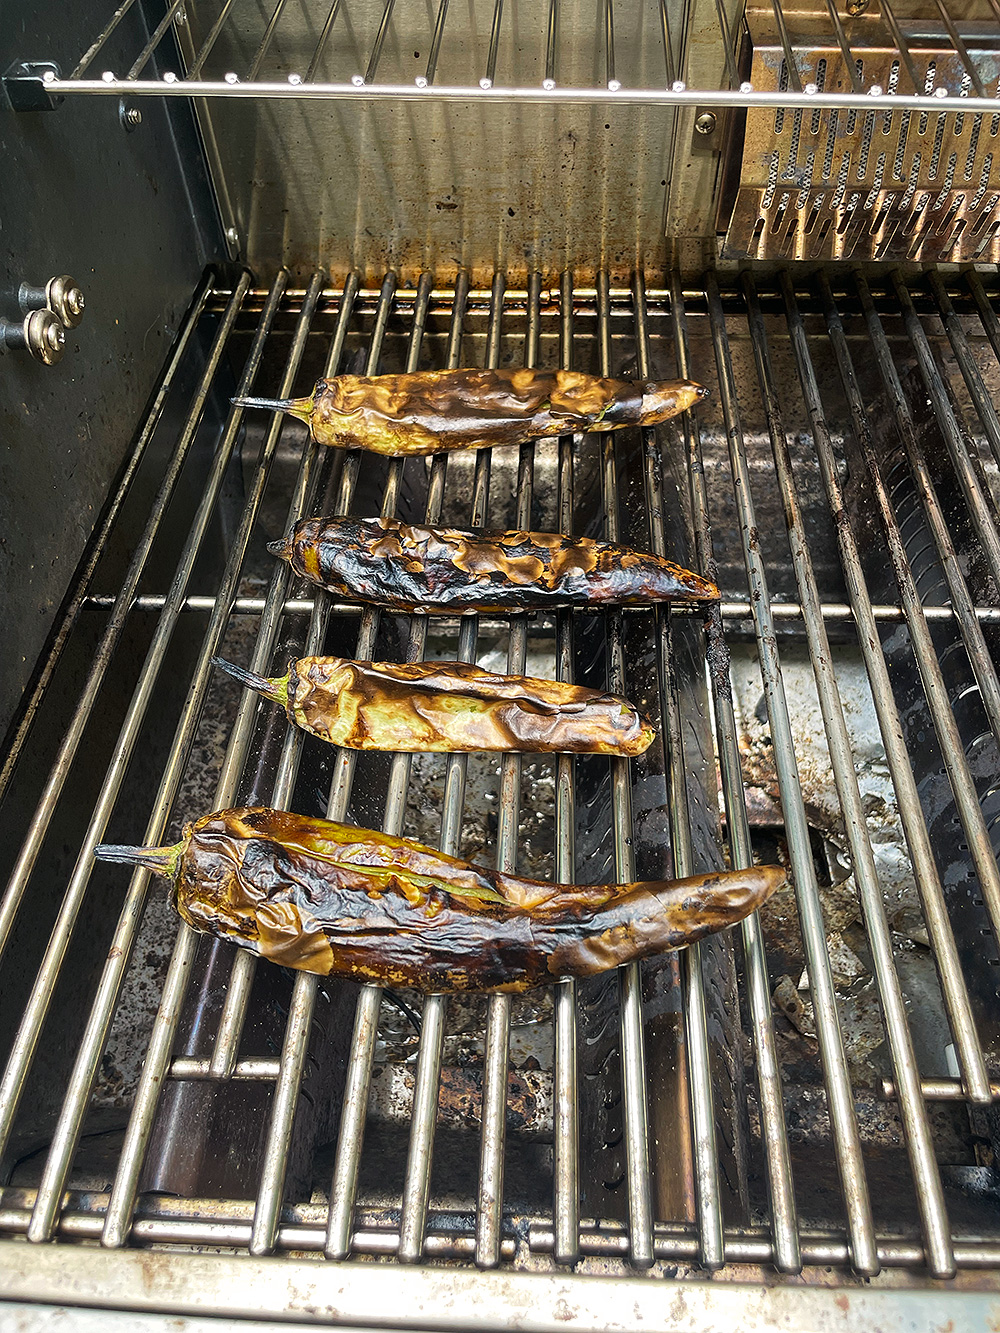
I fired up the grill and brought the temperature to around 550° to 600°F. That intense heat quickly blistered and blackened the skins while softening the flesh underneath.

Fire-roasted green chiles blistered on the grill

Photo Credit: Daniel Hale


The Eminence 605’s six main burners made it easy to generate the high heat I was looking for. I placed the chiles directly over the heat and turned them until the skins were blistered on all sides.

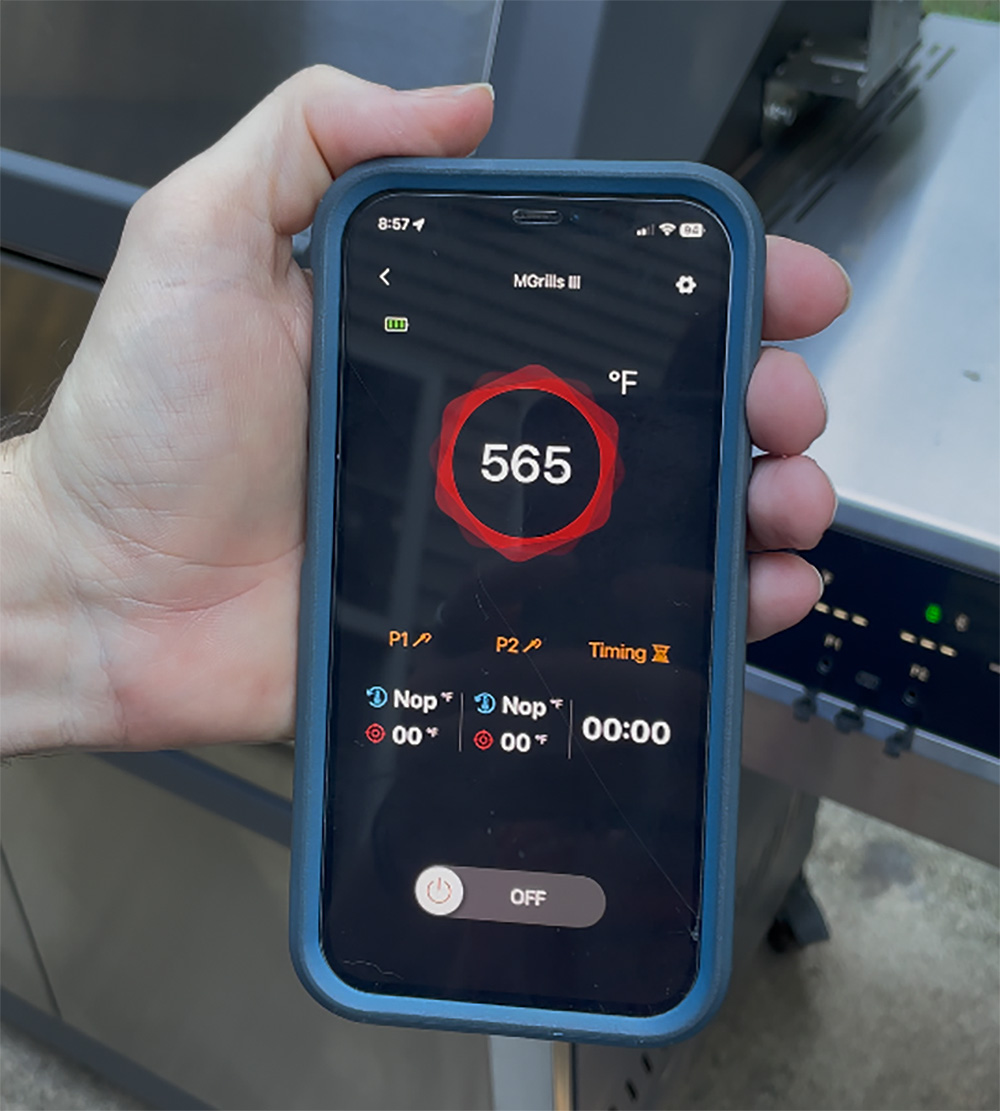
While they cooked, I kept an eye on the grill through the Monument Grills app. The Eminence 605 connects to the app via Bluetooth, allowing me to monitor the grill temperature from my phone without constantly lifting the lid.

Monument Grills App

Photo Credit: Daniel Hale


Once the chiles were roasted, peeled, and seeded, they became the ingredient that really sets Steven’s New Mexican Green Chile Burger apart.

The chile shows up twice. First, strips of fire-roasted Hatch chile are combined with grated white cheddar and piled onto the hot burger, where the cheese melts around the peppers.

Then comes the salsa verde. Made with roasted green chiles, garlic, cilantro, lime juice, cumin, and oregano, it adds another layer of chile flavor along with acidity and freshness.

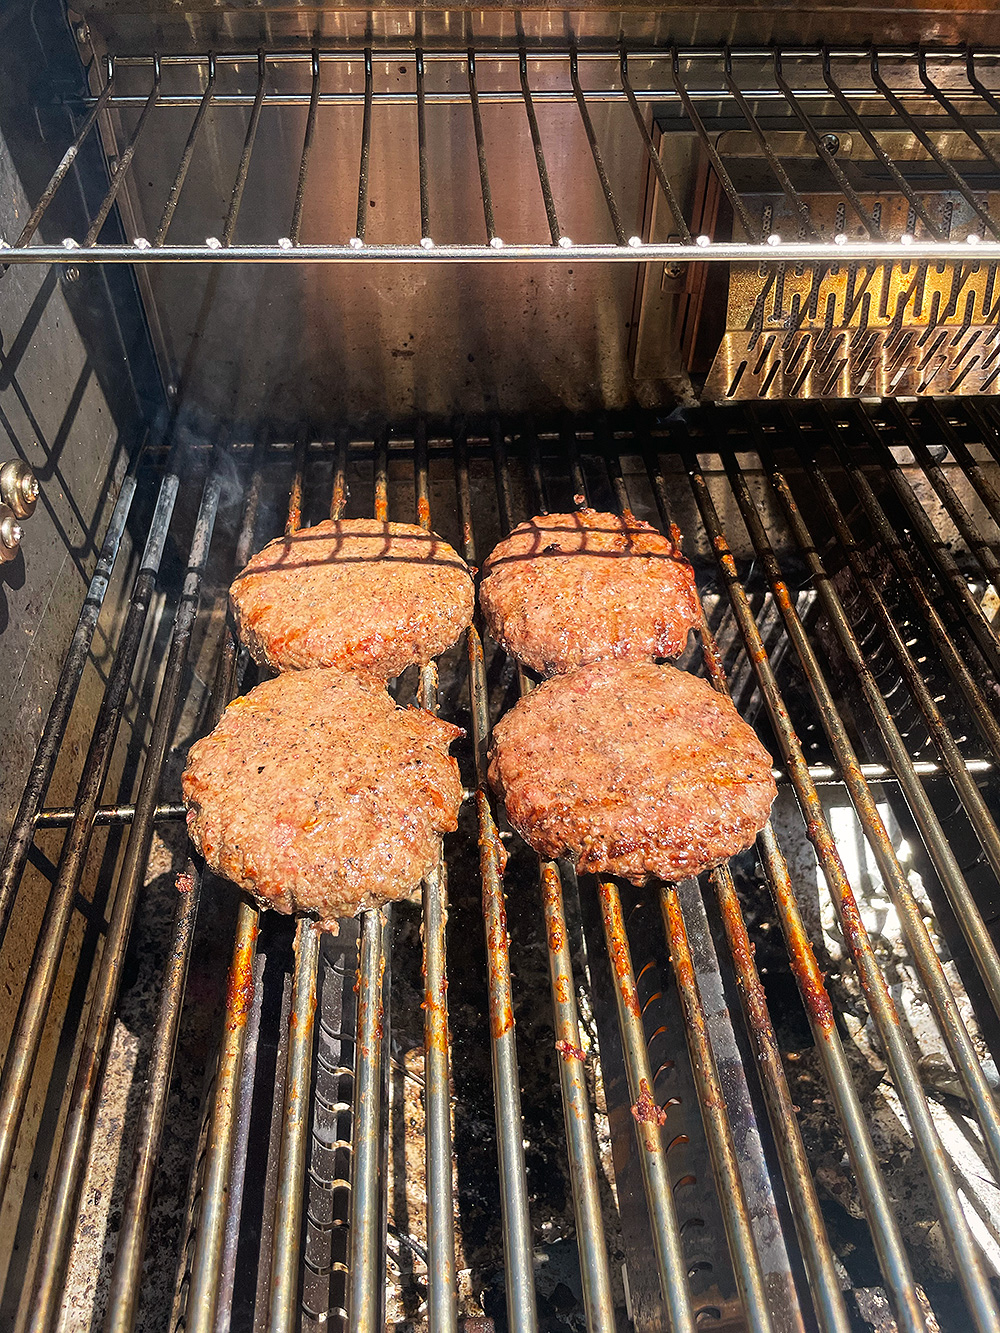
The burgers themselves are intentionally simple: ground chuck or sirloin seasoned generously with salt and pepper. After roasting the chiles, I used the Eminence 605 to grill the beef patties and toast the hamburger buns.

Burgers on the Monument Eminence 605 Grill

Photo Credit: Daniel Hale


Steven’s original recipe calls for New Mexican green chiles, Anaheim chiles, or poblanos. If you can get fresh Hatch chiles while they’re in season, use them.

Recipe

New Mexican Green Chile Burgers with Salsa Verde

Recipe by Steven Raichlen

These New Mexican green chile burgers get a double dose of chile flavor from fire-roasted peppers mixed with white cheddar and a fresh New Mexican salsa verde.

Method
Direct grilling
Serves
4

Ingredients

Instructions

  1. Place the chile strips in a serving bowl and stir in the Cheddar. Cover and refrigerate until ready to use.
  2. Wet your hands with cold water and divide the ground beef into 4 equal portions. Working quickly and with a light touch, pat each portion into a thick patty. Place the patties on a plate lined with plastic wrap and refrigerate, covered, until ready to grill.
  3. Generously, and I mean generously, season each patty on both sides with salt and black pepper. Grill the burgers until they are cooked through. Remove the burgers and cover to keep warm. Leave the grill on.
  4. Brush the cut sides of the hamburger buns with the olive oil. Place the buns on the hot grill, cut side down, and, lowering the temperature if necessary, grill until toasted, 1 to 2 minutes. You may need to work in batches.
  5. Place each of the burgers on the bottom half of a bun and top each with a quarter of the chile and cheese mixture. Spoon some salsa verde over each, top with the other half of the bun, and serve at once.

Fire Up a Different Kind of Burger

I have to say, this burger was fantastic.

You get great beefy flavor up front, followed by the roasted chile and just enough Hatch chile heat at the finish. The salsa verde adds brightness without overpowering the burger.

A great burger doesn’t always need bacon, a dozen toppings, or some complicated secret sauce. Sometimes all it takes is good beef, a hot grill, melted cheese, and one ingredient that changes the whole personality of the burger.

In New Mexico, that ingredient is green chile.

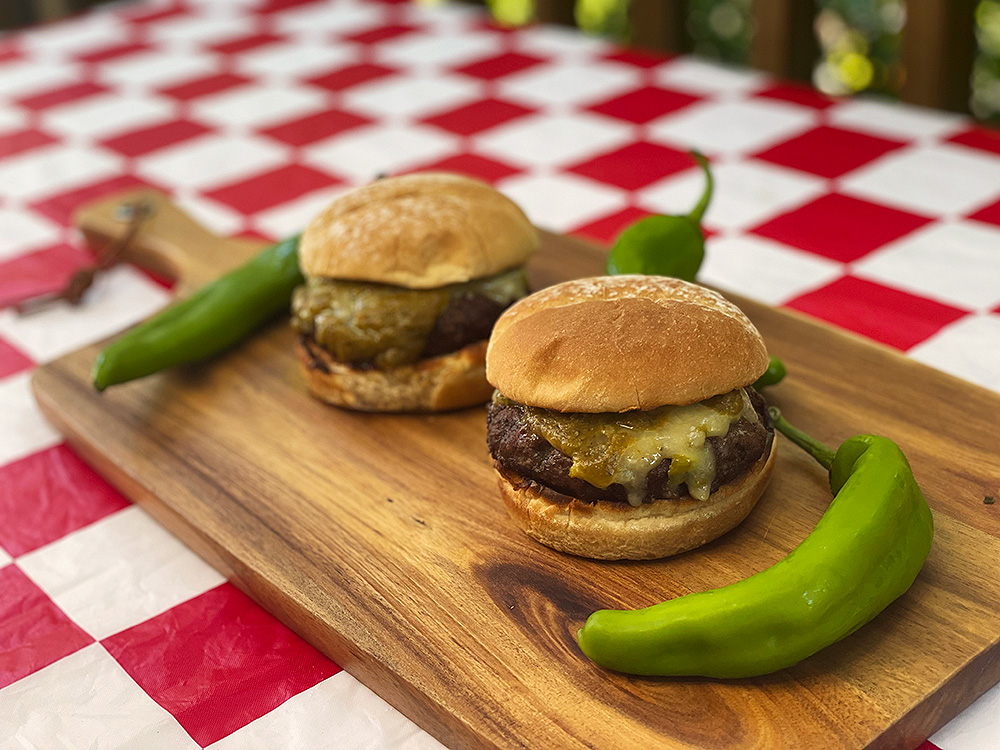
After trying one topped with fire-roasted Hatch chiles, the standard lettuce-and-tomato cheeseburger suddenly has some serious competition.

Fire-Roasted Hatch Chile Burgers

Photo Credit: Daniel Hale


A huge thanks to Monument Grills for sponsoring this post.

The post Fire-Roasted Hatch Chile Burgers:<br /> A Taste of New Mexico appeared first on Barbecuebible.com.
How to Grill the Perfect Steak: 7 Steps to Tender, Juicy, Smoky Beefy Nirvana

Steak! A five-letter word that spells a mountain of pleasure. For some of us, it’s the ultimate luxury; for others, a weeknight dinner. It’s so easy to grill, even a first-timer can earn bragging rights, yet you can spend a lifetime perfecting the fine points. Steak is the one dish everyone should know how to grill.

Too often, people make simple, avoidable mistakes: Undercooking. Overcooking. Flipping too seldom or too often. Leaving the beef out to warm to room temperature (especially dangerous in summertime heat). Serving it hot off the grill or resting it so long, the steak is cold by the time you cut into it.

Here’s the ultimate guide to achieving the perfect steak every time.

Steak Cooking at a Glance

  • Best Steaks: Ribeye, NY Strip, Porterhouse, Filet Mignon, Skirt, Flank, Hanger
  • Seasoning: Coarse salt and freshly cracked black pepper
  • Doneness (Med-Rare): 130°F to 135°∘F
  • Resting: 1 to 2 minutes on a wire rack
  • Best Method: Direct grilling for steaks up to 1-1/2 inches thick; reverse searing link for 3- to 4-inch thick monsters

Step 1: Start with the Right Steak

Five factors determine the excellence of your steak: cattle breed, feed, aging, grade, and cut.

  • Prime vs. Choice: The USDA grades beef on marbling (intramuscular fat). Only 2% of beef qualifies as Prime—highly flavorful, tender, and luscious. Choice is what you find at most supermarkets—less rich, but still very tasty.
  • Wagyu vs. Angus: Wagyu is renowned for its hyper-generous marbling; an A-5 Japanese Wagyu looks like white lace on red cloth. Angus delivers a bold, robust, classic beefy flavor enjoyed across North America.

    D'Artagnan American Wagyu beef

  • Grain-Fed vs. Grass-Fed: Corn-fed beef produces rich, buttery, meaty steaks. Grass-fed beef is leaner with a distinctive, almost herbaceous flavor. The ideal compromise is beef raised on grass, then finished with grain.
  • Dry-Aged vs. Wet: Dry-aged beef, hung unwrapped in climate-controlled rooms for 28 to 36 days, loses moisture, concentrating the beefy flavor and creating rich umami notes. Wet-aged beef matures in vacuum-sealed plastic; it is faster, cheaper, and tasty enough, but lacks the rich, concentrated flavor of dry-aged beef.

The Four Steak Categories

  1. The Noble Steaks: Upper steer cuts (filet mignon, ribeye, strip, porterhouse) that are intrinsically tender and rich.

    Grill Marks!

  2. The Belly Steaks: Undercarriage cuts (skirt, flank, hanger). Intensely flavorful but stringy; slice thinly against the grain to ensure tenderness.
  3. The Tough Steaks: Round and chuck. Slice paper-thin for cheesesteaks or chop fine for carne asada.

  4. The Cult Steaks: Unique cuts like tri-tip, picanha (featuring a luscious fat cap), and flatiron.

Step 2: Keep Seasoning Simple and Strategic

For premium beef, skip heavy, muddying marinades. Stick to coarse sea salt or kosher salt and freshly cracked black pepper. Season your steak early—about 45 to 60 minutes before grilling. This allows the salt to draw out moisture, dissolve, and reabsorb back into the fibers, seasoning the meat deeply. If you’re short on time, season immediately before the steak hits the grates.

Do not let steaks warm to room temperature beforehand. The difference in cooking time is negligible, and it is simply not worth the food safety risk. Keep them cold until they go on the grill.

Step 3: Set Up Your Grill for Two-Zone Cooking (Wood Smoke Optional, But Desired)

Arrange your coals or burners so you have a screaming-hot direct zone for searing and a cooler, zone for cooking. Control the cooking by moving the steak back and forth between the hot and less hot zone. Add wood chunks or chips (like oak, hickory, or pecan) directly to your coals or place in your gas grill’s smoker box. A quick blast of wood smoke during grilling makes a good steak great and a great steak unforgettable.

Step 4: Sear Hot and Flip Frequently

Forget the old myth of flipping your steak only once to get crosshatch grill marks. (Mea culpa—I used to recommend this in my earlier books.) I’ve come to see that flipping your steak often—every 20 to 30 seconds—cooks the meat more evenly and helps build a darker, richer crust. Focus on the crust and flip often.

Reverse searing steaks

Step 5: Master the Reverse Sear

  1. Place your seasoned steak on the cooler, indirect side of your grill (225°F to 250°F).
  2. Indirect grill (with grill lid down) to heat the meat to an internal temperature about 20°F below your target doneness (for example, to 110°F for a medium-rare steak)
  3. Move the steak directly over the high-heat, searing for 1 to 2 minutes per side to build a sizzling dark crust and internal temperature of 130°F.
The Steak Doneness Guide
Doneness Description Internal Temperature Poke Test Feel
Rare Warm red interior 120°F to 125°F Soft and squishy
Medium-Rare Hot red to dark pink interior 130°F to 135°F Yielding
Medium Pink interior 140°F to 145°F Gently yielding
Medium-Well Grayish pink interior 150°F to 155°F Firm
Well Done Gray interior 160°F+ Hard and springy

Note: Measure internal temperature using an instant-read thermometer inserted horizontally through the side of the steak. For the poke test, press the top of the steak with your forefinger. The amount of resistance will tell you the doneness. Use a thermometer for thicker steaks; the poke test for thin steaks like skirt.

Step 6: Give It a Rest

A steak served “hot off the grill” sounds romantic, but resting your steak on a wire rack over a sheet pan for a minute or two will give you a tenderer, juicier steak. (Resting relaxes the meat, allowing the juices to redistribute. The wire rack keep the bottom from getting soggy.) But over-resting results in a lukewarm or even cold steak, which does the meat an injustice.

Step 7: Carve It Right

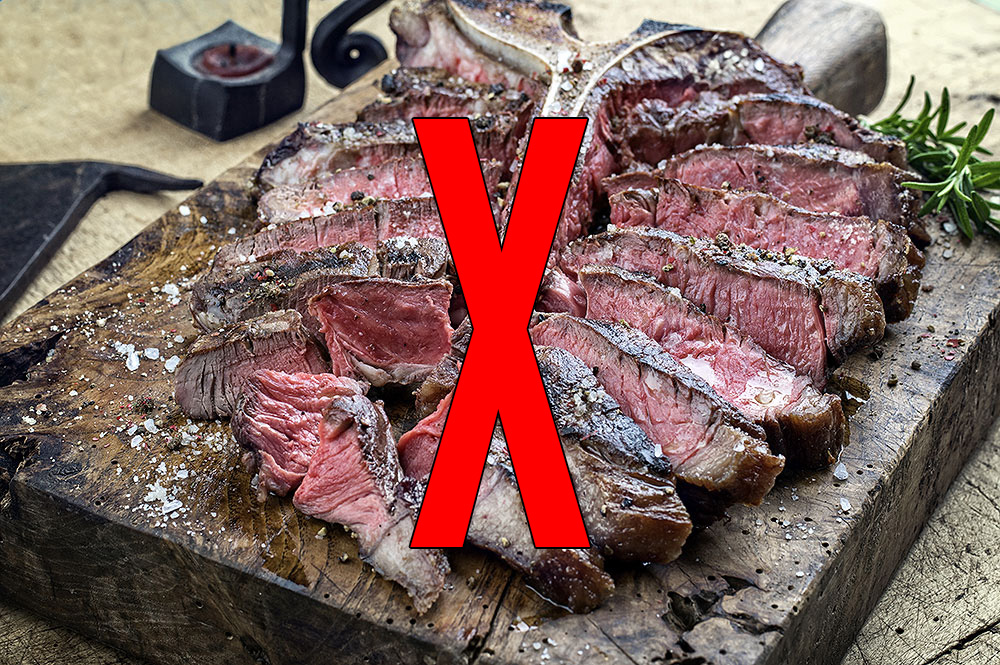
It has become fashionable, if not de rigueur, for steakhouses to pre-slice your steak before serving. Don’t. This may look dramatic, but a pre-sliced steak gets cold and dry very quickly. Serve your steak whole and let the diner slice it him- or herself.

Not like this!

Note: the one exception here are belly steaks, like skirt and flank, which should be thinly sliced across the grain to shorten the tough meat fibers.

Finally, don’t forget to anoint

A great steak needs little more than salt and pepper by way of a seasoning, but a pat of compound butter link or drizzle of melted butter or extra virgin olive oil makes a great steak even better

Great Steak Recipes to Try Next

More Steak Recipes »

Frequently Asked Questions

What is the best way to cook steak on the grill?

For thick cuts, use the reverse sear method. For thinner cuts, cook directly over high heat, flipping frequently.

How long should you grill steak?

Figure on 2 to 2-1/2 minutes per side for thin steaks, about 1/2 inch thick; 3 to 4 minutes per side for 1-inch steaks; and about 5 minutes per side for 1-1/2-inch steaks. When using the reverse sear method for a really thick steak, figure on 40 to 60 minutes for the low-heat indirect grilling, followed by 2 to 3 minutes per side for the high-heat sear.

What temperature should steak be cooked to?

Medium-rare, 130°F to 135°F, is ideal for many steaks. Use an instant-read thermometer inserted into the side of the steak to verify doneness. For thinner steaks, like skirt and flank, use the poke test: press the meat with your forefinger to feel the resistance. Pull the steak a few degrees early, as carryover cooking will raise the temperature during resting.

How do you make steak tender on the grill?

Select well-marbled cuts, season like you mean it, do not overcook, and rest the meat for a minute or two before serving.

Should you grill steak with the lid open or closed?

Keep the lid open when searing thin steaks over high heat. Keep the lid closed during indirect cooking or when finishing thick steaks.

Want to go deeper on the craft? Explore our grilling techniques and how-to guides for ribs, steak, chicken, seafood, and more.

Get Steven’s weekly grilling tips, seasonal recipes, and live-fire ideas in your inbox. Join our Up in Smoke newsletter. Sign up and get a FREE PDF of Steven Raichlen's Best Ribs Recipes Ebook.

Preorder Man On Fire — A Steven Raichlen Memoir. And get some really cool rewards!

Looking for more summer grilling inspiration? Check out our Summer Grilling Guide.

The post How to Grill the Perfect Steak: 7 Steps to Tender, Juicy, Smoky Beefy Nirvana appeared first on Barbecuebible.com.
Reverse Sear What Is It?

Reverse Sear what is it? After talking with a few folks there seem to be 2 schools of thought here. 1. Do a sear on your meat then smoke it. 2. Smoke your meat, and then do your sear. I got 1000’s of responses on both options so I thought I would do some research […]
❌