Reading view

There are new articles available, click to refresh the page.

Back to Basics: A Labor Day Feast Without the Labor!

By Steven Raichlen

Labor Day already? It seems like summer just began. I hope you’ve been grilling as much as I have this summer. For Labor Day this year, I propose something different.

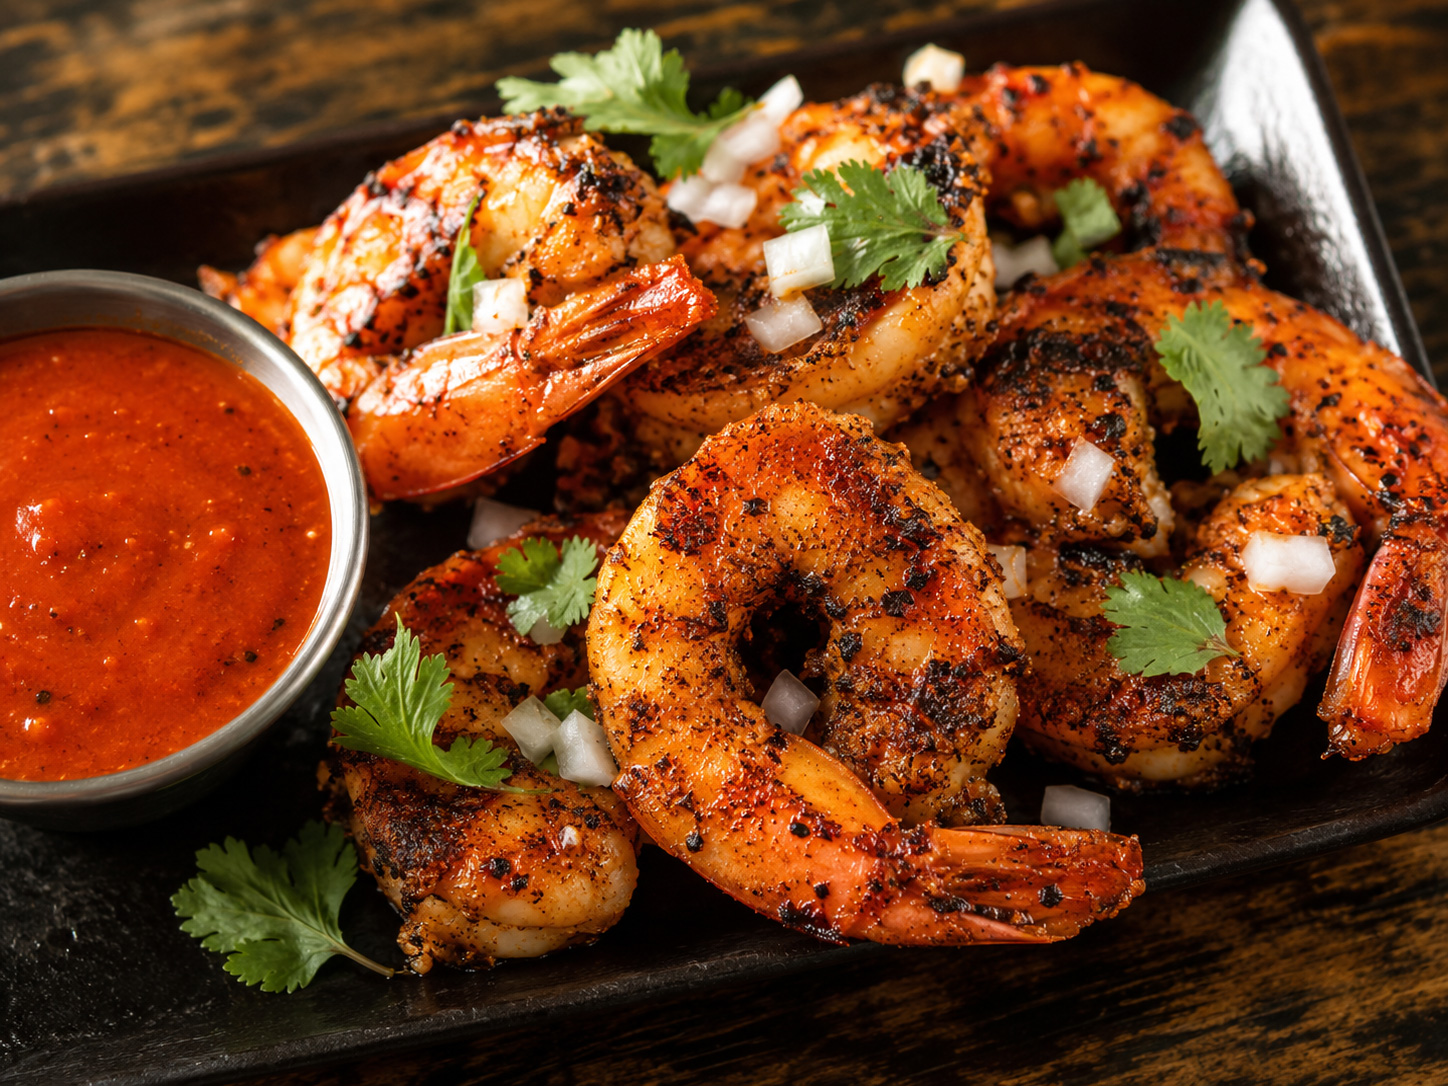
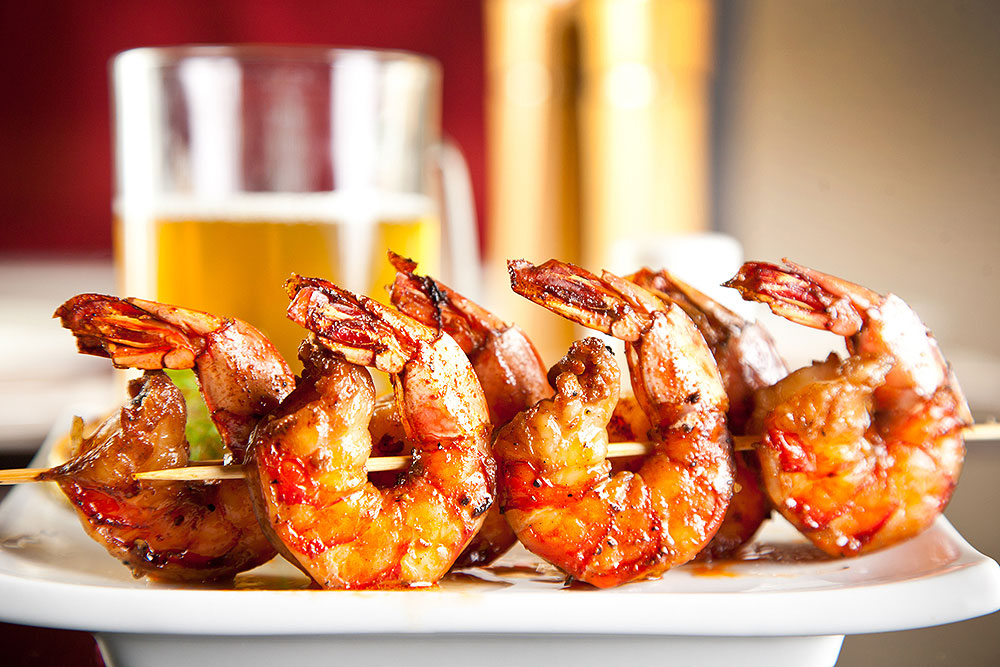
This Labor Day, we’re planning a feast that’s the opposite of labor intensive, and we’re firing up the griddle to cook it. We start with a Raichlen twist on classic shrimp cocktail—spice blackened shrimp with chipotle tequila cocktail sauce.

Wildfire Banner

For the main course, we’re taking a page from the Philadelphia playbook: cheesesteak. But not just any cheesesteak. No, we’re making this one with thinly sliced rib-eyes. (Of course, you can use the more traditional top or bottom round.) And to crank up the heat, we’ll use poblano chiles instead of bell peppers. For mushrooms, you can’t beat the elegance of shiitakes.

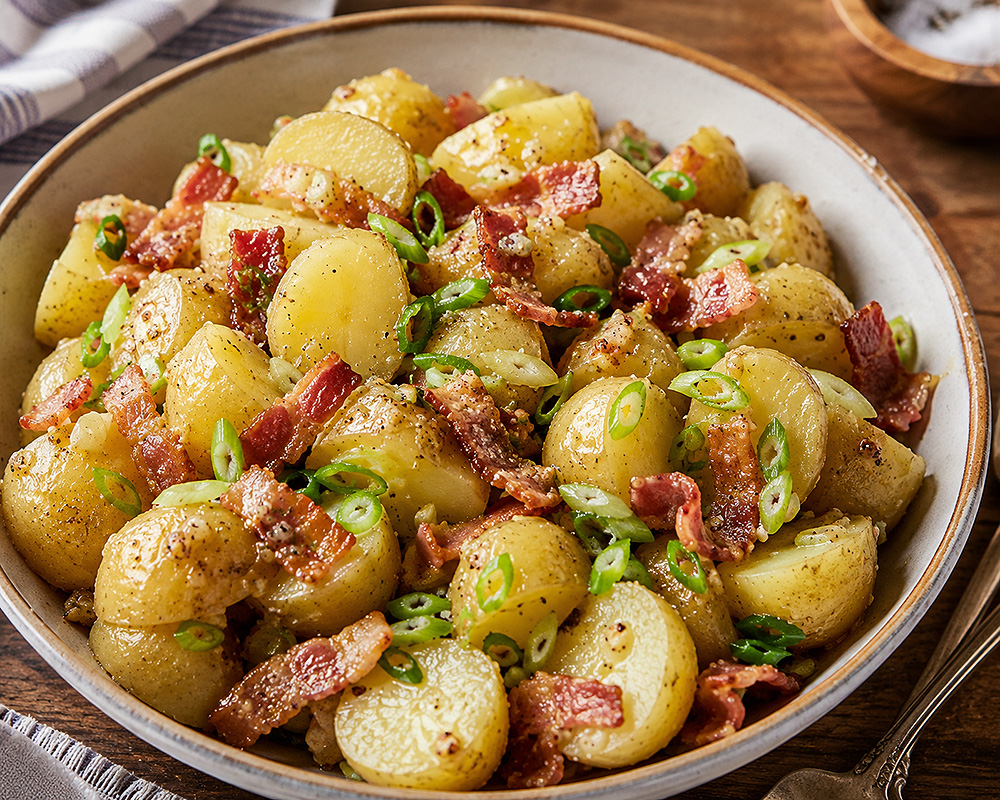
Our side dish is—you guessed it—potato salad, but, oh, what potato salad. German-style potato salad enhanced with griddled onion, capers, and bacon.

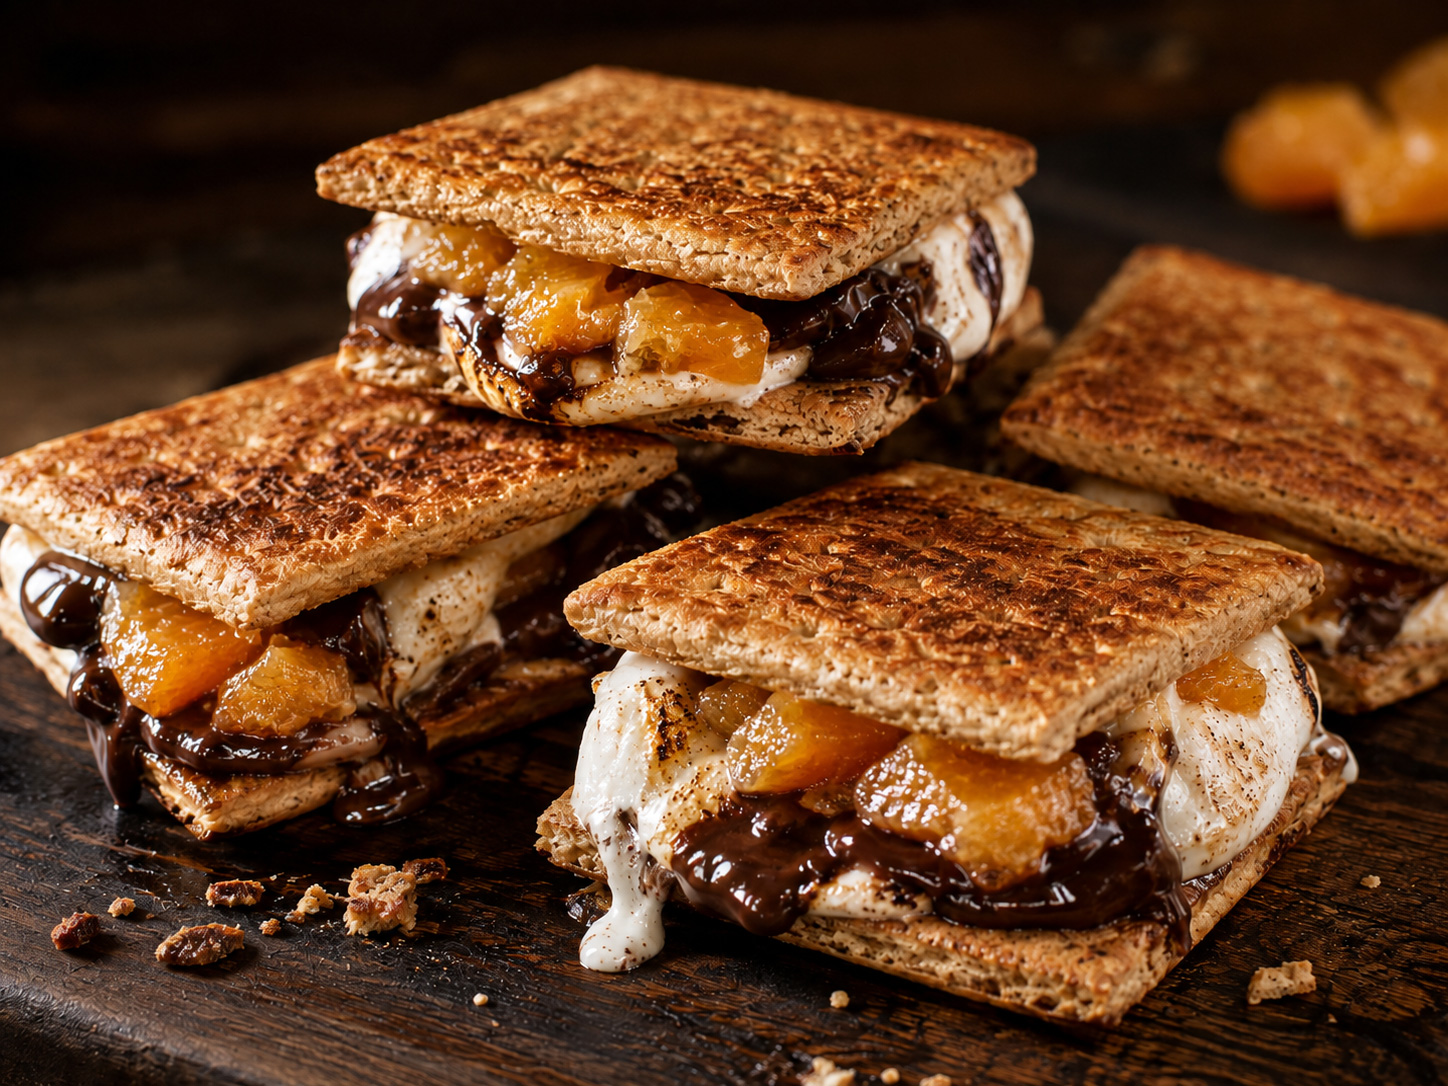
And for dessert? That campfire classic, s’mores, only for these, you don’t need a campfire. You don’t even need a grill. The secret, deconstruct and reconstruct the classic s’more into a sandwich: 2 graham crackers sandwiched with marshmallow and bittersweet chocolate. The Raichlen touch? A slice of candied orange. You’ll crisp the whole shebang on the griddle. Who says s’mores are only for kids?

Finally, to wash it all down? One of my favorite cocktails: the smoky mezcalini. Think margarita meets mojito and don’t think of Labor Day without it.

Happy Labor Day everyone! Don’t work too hard as you celebrate.

The BarbecueBible.com Labor Day Menu

Wildfire Outdoor Living is an Arizona-based company specializing in high-performance gas grills and premium outdoor kitchen solutions. Wildfire brings a commitment to cutting-edge technology and industry-leading innovation. Their 304 stainless steel design and illuminated LED knobs, cast stainless steel burners, and laser-cut stainless steel cooking grates create products that will provide peak performance. They also allow you to customize your outdoor kitchen with designer finish knobs and handles to meet the growing demand for designer outdoor kitchens.

Looking for more recipes like this? Browse our Recipe Index for grilled, smoked, and live-fire favorites.

Get Steven’s weekly grilling tips, seasonal recipes, and live-fire ideas in your inbox. Join our Up in Smoke newsletter. Sign up and get a FREE PDF of Steven Raichlen's Best Ribs Recipes Ebook.

Preorder Man On Fire — A Steven Raichlen Memoir. And get some really cool rewards!

Looking for some fall grilling inspiration? Check out our Fall Grilling Guide.

The post Back to Basics:<br /> A Labor Day Feast Without the Labor! appeared first on Barbecuebible.com.

Back to Basics—How to Grill the Perfect Roast Chicken

Steak may be the choice of champions, and no cookout would be complete without ribs. But when it comes to comfort food, nothing beats a roast chicken.

You know the bird I’m talking about. Skin bronzed and crisp, the meat tender and juicy, the aromas intense and mouthwatering. A properly roasted chicken is the very embodiment of lusciousness and well-being. Brisket may be a once-a-month luxury. A roast chicken you feast on once a week.

Roast Chicken

And the secret to achieving that great roast chicken? Fire up your grill.

So how do you grill the perfect roast chicken? Let me count the ways.

  • You indirect grill it, adding wood chunks to the coals to lay on a smoke flavor.
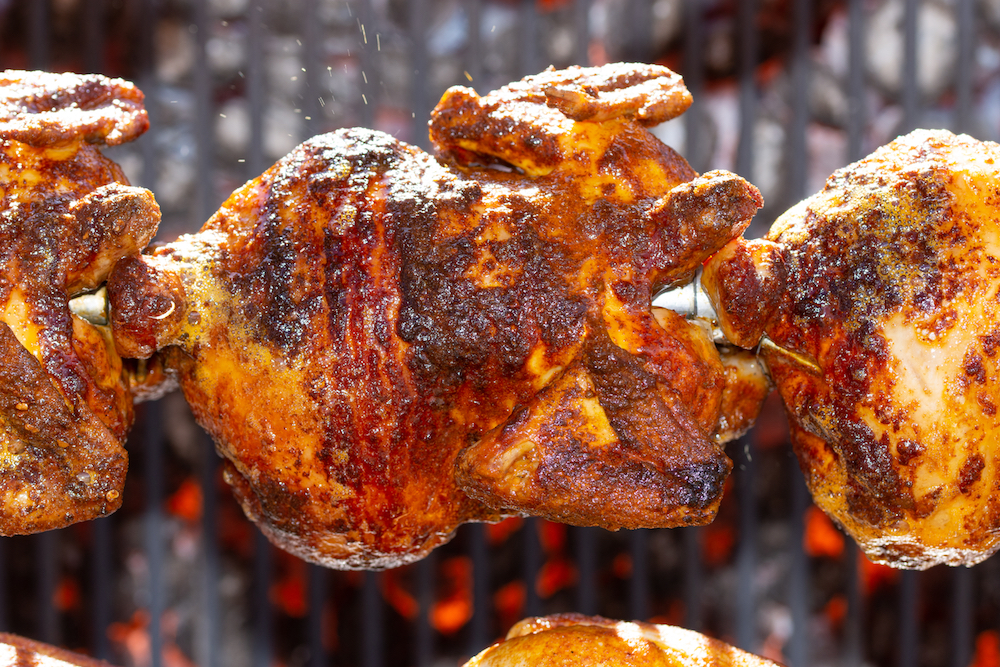
  • You spit-roast it on the rotisserie, using the gentle rotation to baste the meat with chicken juices as it cooks.
  • You prop it on a beer can (open, of course) and roast it upright to make the infamous beer can chicken.
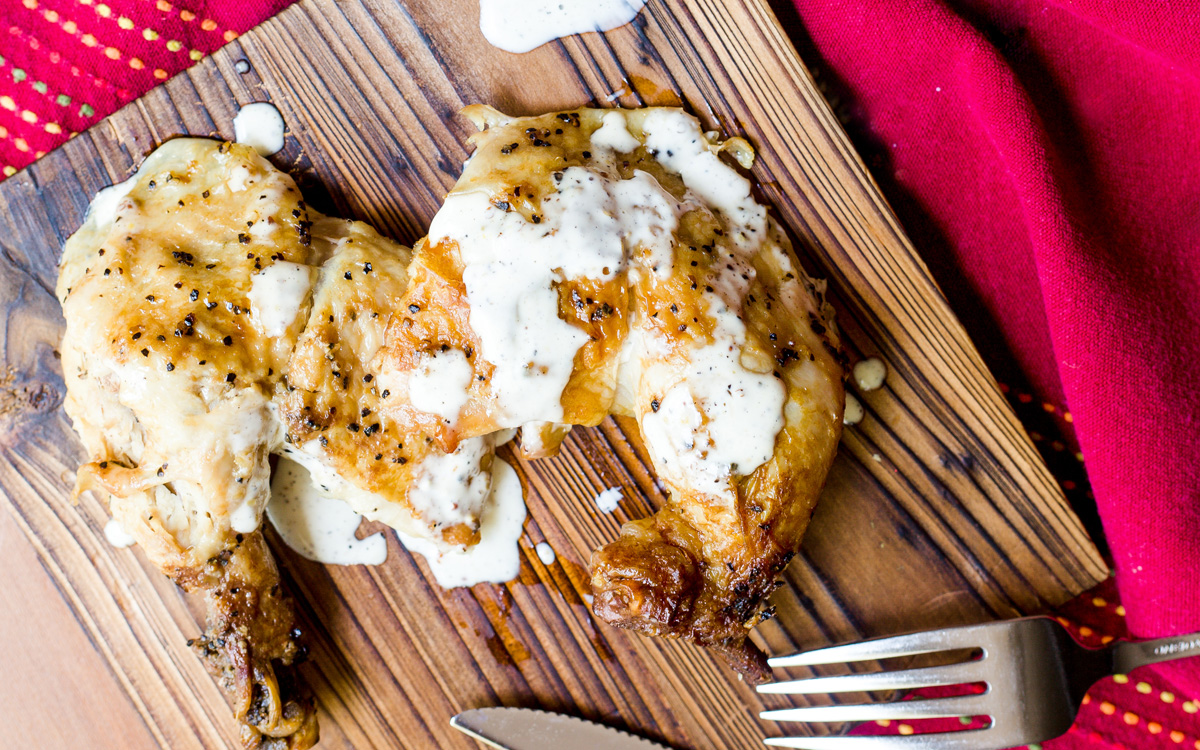
  • You smoke it low and slow (at a low heat for 3 to 4 hours) to make barbecued chicken, which you top with Alabama white sauce: 2 parts mayonnaise, 1 part cider vinegar, with as much black pepper as you can bear.

    White on White Barbecued Chicken

  • You can even direct grill a whole chicken by cutting out the backbone and opening the bird like a book—a process known as spatchcocking. When using this method, start the chicken bone side down and grill it over a moderate fire.

For indirect grilling or beer can chicken, set up the grill with the heat to the sides and a drip pan beneath the bird; medium heat, around 350°F, is a good starting point. For rotisserie roasting, position the coals or lit burners to either side of the spit and place a drip pan underneath. For low-and-slow smoking, maintain a temperature between 225° and 275°F and add wood chunks or wood chips for smoke. For spatchcocking, grill directly over a moderate fire, starting bone side down.

Six Essential Steps for an Even Better Roast Chicken

  1. Leave the bird uncovered in the refrigerator. Refrigerate it uncovered for 24 to 48 hours before roasting. This dries out the skin, making it extra crisp when you roast it.
  2. Remove the wishbone. Cut it out of the front cavity with a paring knife. This makes it easier to carve the breast meat.
  3. Add flavor inside and out. Rub the outside of the bird with a cut lemon and a cut head of garlic. Then place these ingredients in the cavity to perfume the chicken from the inside-out.

    BBQU

  4. To truss or not to truss. I always truss a chicken to give it a handsome ovoid shape—a holdover from my French cooking school days, when appearance was paramount. But if you roast the chicken untrussed, the smoke and fire flavor can penetrate the inside of the bird. Your choice.
  5. Cook the thigh to 175° to 180°F. Insert an instant-read thermometer into the thickest part of the thigh without touching the bone. Yeah, I know that’s higher than the USDA minimum of 165°F, but the dark meat will be more tender.
  6. Give it a short rest. Once cooked, rest your chicken on a wire rack over a sheet pan for 2 minutes before carving. This “relaxes” the meat, making it juicier. But don’t rest it too long or the skin will get soggy and the chicken will get cold.

However you choose to cook it, the grill gives roast chicken something the oven can’t: the flavor of smoke and fire. Get the skin crisp and the dark meat tender, and you may find that once-a-week roast chicken becoming a habit.

Whole Chicken Recipes to Try

For more ways to grill a whole chicken, try these BarbecueBible.com recipes:

Want to go deeper on the craft? Explore our grilling techniques and how-to guides for ribs, steak, chicken, seafood, and more.

Get Steven’s weekly grilling tips, seasonal recipes, and live-fire ideas in your inbox. Join our Up in Smoke newsletter. Sign up and get a FREE PDF of Steven Raichlen's Best Ribs Recipes Ebook.

Preorder Man On Fire — A Steven Raichlen Memoir. And get some really cool rewards!

Looking for some fall grilling inspiration? Check out our Fall Grilling Guide.

The post Back to Basics—How to Grill the Perfect Roast Chicken appeared first on Barbecuebible.com.

Back-To-Basics: Brown Sugar-Spiced Pineapple, Hot Off the Griddle

Photo Credit: Steve Nestor


By Steve Nestor

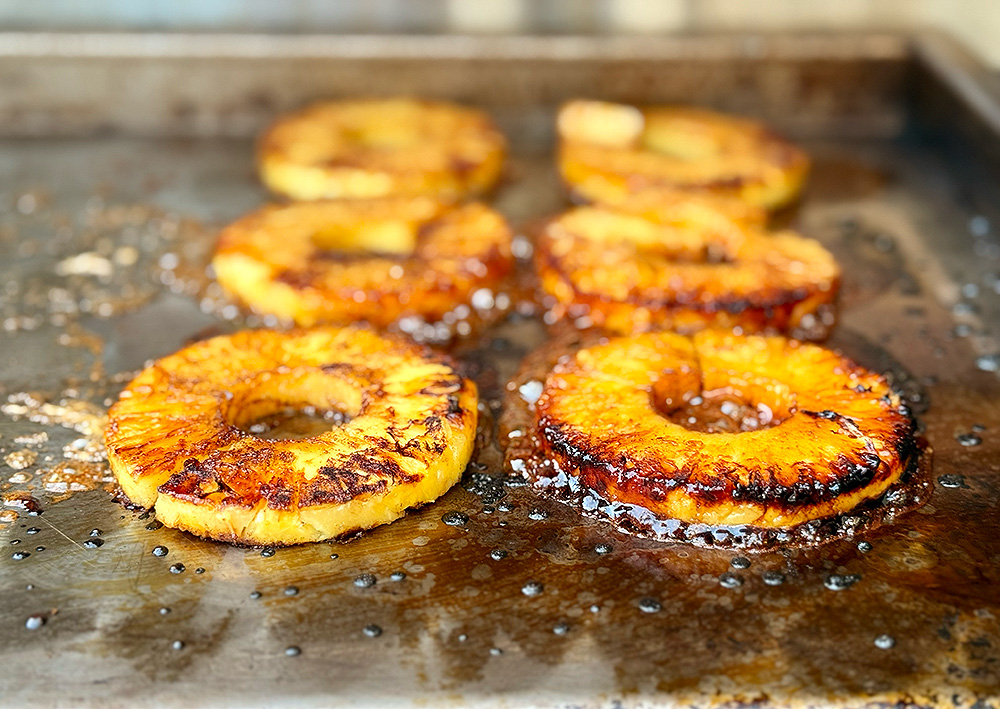
Do you ever grill dessert? I do it all the time, and one of my favorites is grilled pineapple. The outside of the pineapple becomes charred, and the edges get crusty while the inside remains cool and sweet. I thought using a griddle would create a better sear since the entire slice of pineapple is in contact with the griddle. I used the drop-in griddle for the Wildfire gas grill for this pineapple dessert.

Wildfire Banner

Why Pineapple Works So Well on the Griddle

Here is how it all came together. I placed the griddle in the Wildfire gas grill and heated it to high. I prepared all my ingredients while the griddle was heating up. I cored and sliced the pineapple. I sliced the outside of the pineapple into rings to use for serving.

Next, I placed two cinnamon sticks, allspice berries, and two cloves in a spice grinder and finely ground all the ingredients. Then I mixed the ground spices with freshly grated nutmeg and brown sugar. I placed the spice mixture in a baking dish. I brought all the ingredients to the grill.

Creating the Brown Sugar Spice Crust

Once I coated each pineapple slice in the brown sugar spice mixture, I put each one directly on the griddle. I do not recommend adding the brown sugar mixture to all the pineapple slices in the kitchen and then heading out to the griddle. The brown sugar mixture will start to mix with the juices of the pineapple and get watery, which will impede the searing of the pineapple.

The pineapple slices were placed on the griddle and seared for two minutes. I then flipped the pineapple slices, and they seared for another two minutes. Once the pineapple slices were seared on both sides, I placed them on a wire rack over a sheet pan.

brown sugar pineapple

Photo Credit: Steve Nestor


Serving the Griddled Pineapple

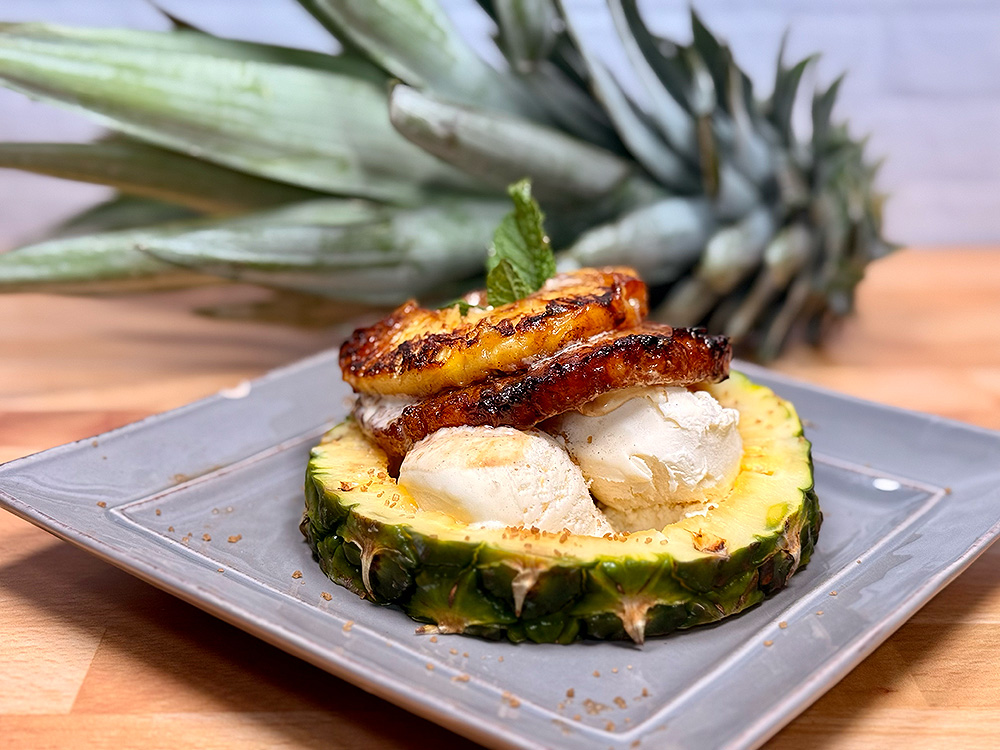
To serve the seared pineapple, I placed a pineapple ring on a plate and then scooped in vanilla ice cream. I sprinkled more of the spice rub over the ice cream. I then topped the ice cream with seared pineapple slices and garnished with fresh mint.

brown sugar pineapple

Photo Credit: Steve Nestor


The cold and smooth ice cream contrasts with the hot and crusty pineapple. The high heat of the Wildfire drop-in griddle and the brown sugar spice mixture created a flavorful crust on the pineapple. The mint provides freshness and relief from the sweetness of the ice cream and the pineapple.

Recipe

Brown Sugar Spice-Rubbed Griddled Pineapple

Fresh pineapple is coated with brown sugar and warm spices, then seared on a hot griddle until crusty and caramelized. Serve it warm with vanilla ice cream and fresh mint for a hot-and-cold dessert.

Ingredients

  • Pineapple, peeled, cored, and sliced
  • 2 cinnamon sticks
  • Allspice berries
  • 2 whole cloves
  • Freshly grated nutmeg
  • Brown sugar
  • Vanilla ice cream, for serving
  • Fresh mint, for garnish

Instructions

  1. Place the drop-in griddle in the gas grill and preheat it to high.
  2. Core and slice the pineapple. If desired, reserve rings from the outside of the pineapple for serving.
  3. Place the cinnamon sticks, allspice berries, and cloves in a spice grinder and grind finely. Combine the ground spices with freshly grated nutmeg and brown sugar in a baking dish.
  4. Bring the pineapple and spice mixture to the grill. Working one slice at a time, coat the pineapple in the brown sugar spice mixture immediately before placing it on the hot griddle. Do not coat all the slices ahead of time; the brown sugar will mix with the pineapple juices and become watery, which can interfere with searing.
  5. Griddle the pineapple for about 2 minutes. Flip and sear for another 2 minutes, or until both sides are browned and crusty.
  6. Transfer the pineapple to a wire rack set over a sheet pan.
  7. To serve, place a pineapple ring on each plate and add vanilla ice cream. Sprinkle with additional spice mixture, top with the warm griddled pineapple, and garnish with fresh mint. Serve immediately.

A big thank you to Wildfire Outdoor Living for sponsoring this cook.

Wildfire Outdoor Living is an Arizona-based company specializing in high-performance gas grills and premium outdoor kitchen solutions. Wildfire brings a commitment to cutting-edge technology and industry-leading innovation. Their 304 stainless steel design and illuminated LED knobs, cast stainless steel burners, and laser-cut stainless steel cooking grates create products that will provide peak performance. They also allow you to customize your outdoor kitchen with designer finish knobs and handles to meet the growing demand for designer outdoor kitchens.

The drop-in griddle will turn your Wildfire gas grill into a full-fledged kitchen for breakfast, lunch, and dinner. You can enjoy pancakes and bacon for breakfast, smash burgers for lunch, or stir-fry for dinner, all on the drop-in griddle.

Looking for more recipes like this? Browse our Recipe Index for grilled, smoked, and live-fire favorites.

Get Steven’s weekly grilling tips, seasonal recipes, and live-fire ideas in your inbox. Join our Up in Smoke newsletter. Sign up and get a FREE PDF of Steven Raichlen's Best Ribs Recipes Ebook.

Preorder Man On Fire — A Steven Raichlen Memoir. And get some really cool rewards!

Looking for some fall grilling inspiration? Check out our Fall Grilling Guide.

The post Back-To-Basics: Brown Sugar-Spiced Pineapple, Hot Off the Griddle appeared first on Barbecuebible.com.

Crispy, Juicy, and Flame-Kissed: The Secrets to Grilled Chicken Thighs

Chicken thighs haven’t always received the respect they deserve. For years, many of us reached for boneless, skinless breasts, treating dark meat as a second-class citizen. My, how times have changed!

Today, we Americans have caught on to what grill masters around the world have long known: chicken thighs deliver deeper flavor, stay juicy over the fire, and represent one of the few remaining bargains at the supermarket.

Talk about versatile! Chicken thighs turn up in everything from Jamaican-inspired dishes to Japanese yakitori. A boneless chicken thigh is great for stuffing with herbs, ham, cheese, sausage, and more.

Yakitori

Bone-in chicken thighs take longer to cook than boneless, skinless breasts. They’re also fattier, so you need to be mindful of flare-ups. Yes, you can direct-grill bone-in, skin-on thighs (work over moderate heat), but our preferred method is to indirect-grill them at a high enough temperature (that would be 400°F) to render the fat and crisp the skin.

Here’s how to grill bone-in, boneless, skin-on, and skinless chicken thighs, including the best cooking times and temperatures—and a few of our secrets for keeping the meat juicy and the skin crisp.

Choosing Your Chicken Thighs

Chicken thighs are sold bone-in or boneless and with or without the skin. For classic grilled chicken thighs, we prefer skin-on—preferably bone-in. Among bone-in chicken pieces, thighs give you a generous portion of meat for the money, while the skin turns crisp and flavorful when grilled properly.

Boneless, skinless thighs cook more quickly and are a good choice for satays, yakitori, kebabs or other preparations where the chicken will be cut into smaller pieces.

Sauce Goddess - Moroccan spice chicken

The important thing is to match the grilling method to the type of thigh. Cook bone-in, skin-on thighs with indirect heat. Smaller pieces of boneless, skinless thigh should be direct-grilled over a hot fire.

Preparing the Thighs and the Grill

Brining the chicken before grilling will make the thighs even more succulent. For a wet brine, combine 2 tablespoons of coarse salt with 1 cup of warm water, then add a tray of ice cubes. Once the brine is cold, submerge the thighs and refrigerate for 1 hour.

For skin-on thighs, we prefer a dry brine. Sprinkle the thighs on both sides with about 1 teaspoon of coarse salt per pound of chicken, then refrigerate them uncovered for at least 4 hours. This seasons the meat while helping the skin dry out for a crisper finish.

Before grilling, trim off any large pieces of loose skin or excess fat, but leave enough skin to cover and protect the meat. Pat the thighs thoroughly dry. If you haven’t brined the thighs, now’s the time to apply your favorite barbecue rub or seasonings. Of course, we’re partial to one of Steven Raichlen’s barbecue rubs or seasoning blends.

Set up the grill for indirect grilling and preheat it to 375° to 400°F. On a charcoal grill, arrange the coals on opposite sides of the firebox and leave the center free of direct heat. On a gas grill, light the outside burners and set them to medium, leaving the center burner off. Close the lid and adjust the burners as needed to maintain a temperature of 375° to 400°F. Clean and oil the grill grate before adding the chicken.

How to Grill Bone-In, Skin-On Chicken Thighs

Arrange the thighs skin side up in the center of the grill grate, away from the heat. Replace the lid and grill for about 45 minutes. There is no need to turn the thighs while they cook.

Begin checking for doneness after 35 minutes. Insert an instant-read thermometer into the thickest part of the thigh without touching the bone. Chicken is safe to eat at 165°F, but we prefer to cook thighs to 175° to 185°F. At this higher temperature, the connective tissue breaks down, and the dark meat becomes especially tender.

If the chicken is done but the skin needs additional crisping, move the thighs briefly over direct heat, skin side down. Watch them closely and return them to the indirect zone at the first sign of flare-ups.

Transfer the thighs to a platter and let them rest for about 5 minutes before serving.

How to Grill Boneless Chicken Thighs

Boneless, skinless thighs cook much faster than bone-in thighs. Open them flat and grill over medium-high direct heat for 5 to 7 minutes per side, until nicely browned and the internal temperature reaches at least 165°F. Because their thickness can vary, check each thigh individually with an instant-read thermometer.

Smaller pieces cook even faster. Steven’s Moroccan Chicken Kebabs, for example, use 1/2-inch cubes of boneless thigh grilled over high heat for about 3 minutes per side.

Stuffed or rolled boneless thighs are the exception. Their greater thickness makes them better suited to indirect grilling with the lid closed.

Chicken Thigh Grilling at a Glance

Preferred cut: Bone-in, skin-on thighs for moist meat and crisp, flavorful skin.
Grill setup: Two-zone fire for bone-in thighs; direct heat for boneless, skinless thighs.
Grill temperature: 375° to 400°F for bone-in, skin-on thighs.
Bone-in cooking time: About 45 minutes over indirect heat.
Boneless cooking time: About 5 to 7 minutes per side over medium-high direct heat.
Small thigh pieces: About 3 minutes per side over high direct heat.
Internal temperature: Chicken is safe at 165°F, but we prefer bone-in thighs cooked to 175° to 185°F for more tender dark meat.
Rest time: About 5 minutes before serving.

Saucing Chicken Thighs and Avoiding Common Mistakes

If you’re using a barbecue sauce—especially one containing sugar—brush it on during the final few minutes of grilling. Applying it too early can cause the sauce to burn before the chicken is cooked through. Brush the thighs lightly, give the sauce a minute or two to set, and serve additional sauce on the side.

A few other mistakes can stand between you and great grilled chicken thighs:

Starting with wet skin: Pat the thighs dry so the skin can brown and crisp.

Cooking skin-on thighs entirely over direct heat: Dripping fat can cause flare-ups and scorch the chicken before the inside is done.

Walking away during the final crisping: If you move the thighs over direct heat, stay close. The skin can go from crisp to burned quickly.

Relying on time or color alone: Grills and chicken thighs vary. Use an instant-read thermometer to determine when they’re done rather than cutting into the meat.

Chicken Thigh Recipes to Try

Smoky, Crispy Chicken Thighs with Alabama White Barbecue Sauce

These bone-in, skin-on thighs are smoke-griddled until crisp outside and moist and smoky inside. Serve them with Alabama’s tangy, peppery white barbecue sauce.
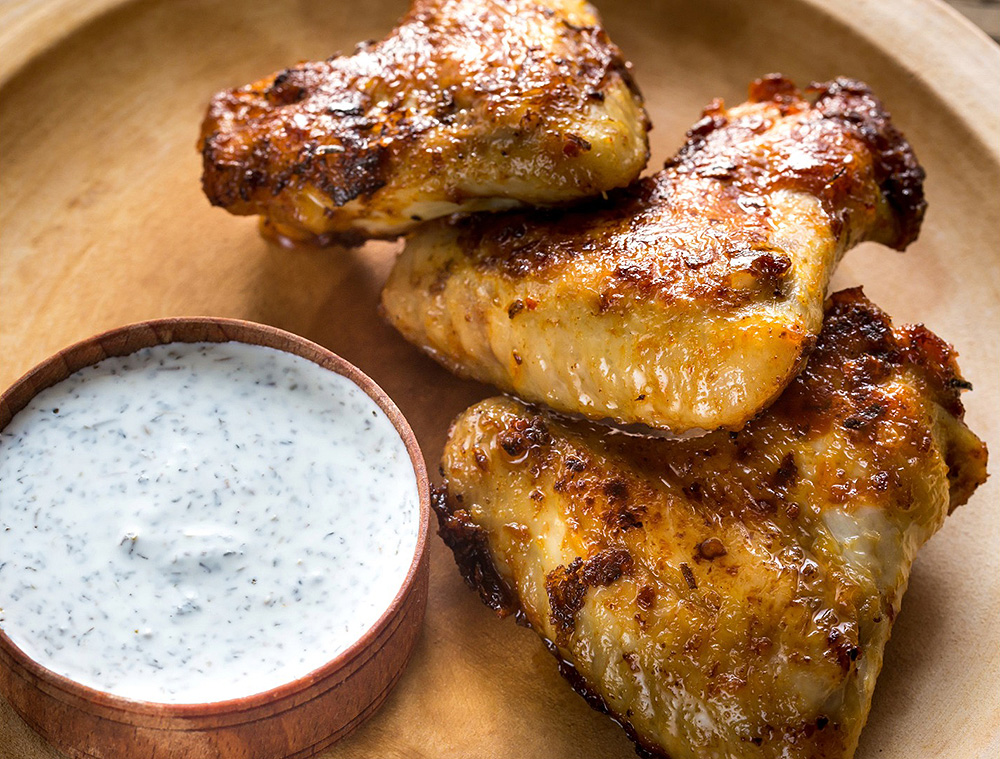
chicken thighs with alabama white barbecue sauce

Get The Recipe »

Char Siu Chicken Thighs with Beijing Barbecue Sauce

Inspired by Chinese char siu, these boneless thighs are stuffed with pepper Jack cheese, Chinese sausage, smoked ham, shiitake mushrooms, and scallions, then indirect-grilled with wood smoke.
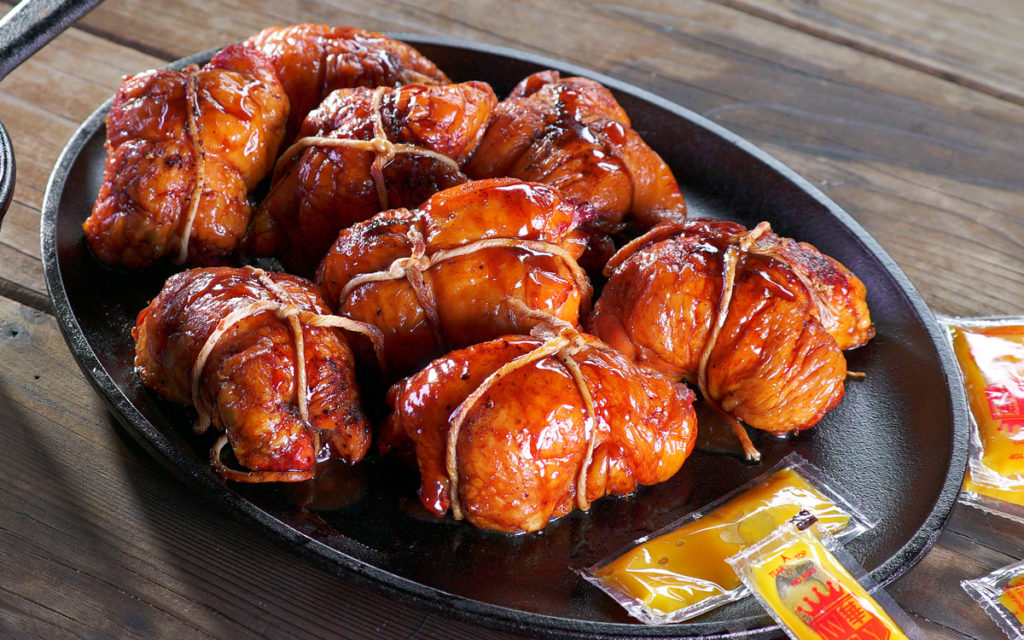
Char Siu Chicken Thighs with Beijing Barbecue Sauce

Get The Recipe »

Moroccan Chicken Kebabs

Boneless, skinless thighs are cut into bite-size pieces, skewered with onion, and grilled quickly over high heat. Charmoula does double duty as both the marinade and the base for a fresh tomato sauce.

Moroccan spiced chicken kebabs

Get The Recipe »

More Chicken Grilling Guides

Looking for more recipes like this? Browse our Recipe Index for grilled, smoked, and live-fire favorites.

Get Steven’s weekly grilling tips, seasonal recipes, and live-fire ideas in your inbox. Join our Up in Smoke newsletter. Sign up and get a FREE PDF of Steven Raichlen's Best Ribs Recipes Ebook.

Preorder Man On Fire — A Steven Raichlen Memoir. And get some really cool rewards!

Looking for some fall grilling inspiration? Check out our Fall Grilling Guide.

The post Crispy, Juicy, and Flame-Kissed: The Secrets to Grilled Chicken Thighs appeared first on Barbecuebible.com.

Back to Basics: How to Grill Shrimp and Lobster

By Steven Raichlen

It’s America’s favorite seafood. Despite its diminutive name and size, we consume more than 5 pounds per person—for every man, woman, and child—per year.

I’m talking, of course, about shrimp.

Shrimp is quick and easy to grill, delivering a satisfying taste in a matter of minutes. It’s pure protein and in this world of $50-a-pound strip steaks, it’s mercifully affordable. It absorbs virtually any spice, marinade, and smoke flavor you throw at it, without losing its own unique briny flavor. Not everyone eats oysters, clams, or sea urchins. Everyone loves shrimp.

Wildfire Banner

Withal, not all shrimp is created equal, nor do all varieties cook the same on the grill. Here’s what you need to know to grill the perfect shrimp every time. And while we’re at it, we’ll give you some pointers on grilling shrimp’s big brother: lobster.

What You Need to Know About Shrimp

What’s the Difference Between Shrimp and Prawns?

A simple question with a complicated answer. In the U.S. we tend to call these crustaceans “shrimp.” In the UK, people call the same shellfish “prawns.” (In Italy, prawns are called “scampi.”) There are also anatomical, zoomorphic, and biological differences too complicated to get into. Don’t let that interfere with the pleasure of grilling them.

Grilled Fireworks Shrimp

What Size Shrimp Is Best for Grilling?

Shrimp range in size from Quebec’s diminutive crevettes Nordiques (so tiny you can fit a dozen in a tablespoon) to Africa’s black tiger prawn, which can grow up to a foot in length. Shrimp in the U.S. are sold by the “U” size—for example, U-16 means fewer than 16 headless shrimp to a pound. That’s what I use when making shrimp kebabs. When grilling individual shrimp, I buy U-8s or U-10s—also sold as “colossal.”

East-West Shrimp Cocktail

Should You Grill Shrimp With the Heads On?

In much of the world, people grill shrimp with the heads on. There’s lots of flavor in the head (don’t be embarrassed to suck it out), and it looks cool as all get out. Never underestimate the power of looking cool at the grill.

Should You Grill Shrimp With the Shells On?

I like grilling shrimp in the shell. Fire-charred shells add flavor and keep the meat moist. I like grilling peeled shrimp because they’re quicker and easier to eat (and easier to marinate). There’s a place for both in my barbecue world.

Should You Leave the Tails On?

A lot of restaurants leave the tails on—to remind you that the creature you’re about to eat once swam in the ocean. Or maybe to give you a handle when eating shrimp with your fingers. The fire-charred tail adds a bit of flavor. But it also adds another step come time to eat the shrimp, so omit it if you prefer.

How to Devein Shrimp

A visible black vein in a cooked shrimp is off-tasting and unsightly. Here are three ways to remove it.

  1. Use a shrimp peeler and deveiner. Insert the deveiner in the fat end of the shrimp and push. The shell and vein will come off easily.
  2. Butterfly the shrimp—that is, make a V-shaped cut along the back of the shrimp to cut out the vein and the flesh immediately surrounding it. The advantage of this method: The shrimp curls into an attractive butterfly shape as it cooks.
  3. Insert the tine of a fork in the rounded part of the back under the vein and gently lift. Most of the time, the vein will pull right out.

How to Grill Shrimp

In a nutshell, directly over high heat. Grill small shrimp kebab-style (threaded on bamboo or metal skewers). The skewer should pass through the head end and tail end so each shrimp lies flat on the grate. It’s a lot easier to turn 4 kebabs than 20 individual shrimp.

Catalan Grilled Shrimp Kebabs

For the really big guys, like African black tiger prawns, cut them almost in half through the back (cut lengthwise), butterfly them open, and grill as you would a lobster tail. And don’t overlook smoking: Smoked shrimp make an awesome shrimp cocktail.

Figure on 1/2 pound of headless shrimp per person.

Which Shrimp Should You Grill?

Shrimp remain mercifully regional, and each variety has its own distinct texture and taste. If you live on the southeastern seaboard, you eat delicate Carolina shrimp. If you come from Down East, sweet white Maine shrimp are your ticket. Down my way, in south Florida, we grill succulent Key West pinks. Californians and Hawaiians savor spot prawns—so named for the black eye-like mark on the side of the shell. Wild-caught shrimp are my personal favorite—buy them whenever you can.

Otherwise, you’ll use farmed shrimp, which are mercifully affordable and available everywhere. If you’re worried about the provenance, look for the Marine Stewardship Council label on wild-caught shrimp. For farmed shrimp, look for certification from the Aquaculture Stewardship Council or Best Aquaculture Practices.

When buying shrimp, use the sniff test. They should smell briny and fresh, like the seashore, not a fish store. Avoid shrimp that smell ammoniated or like bleach.

A Word About Grilling Lobster

Here in North America, we have two basic varieties to choose from. Down my way, in Miami, we get spiny lobster, also known as Florida lobster (or langosta among our many Spanish speakers). Its lack of claws and wide meaty tail makes it ideal for grilling. Up in Martha’s Vineyard, where I spend my summers, we have Homarus americanus, Maine lobster, distinguished by its large front claws. Spiny is easier to split and grill (and it’s my wife’s favorite), so that’s the recipe featured here.

Grilled Lobster

Here are five of our favorite shrimp and lobster recipes, starting with a New Orleans classic: Emeril Lagasse’s Barbecued Shrimp.

Shrimp and Lobster Recipes to Try

Emeril Lagasse’s New Orleans-Style Barbecued Shrimp

Emeril Lagasse’s New Orleans classic starts with jumbo shrimp seasoned with Cajun spices. The shrimp are grilled over high heat and basted with a rich barbecue sauce made with onion, garlic, lemon, Worcestershire sauce, white wine, and cream.

Emeril Lagasse's New Orleans-Style Barbecued Shrimp

Get The Recipe »

Shrimp Spiedini with Salmoriglio

These colorful Sicilian-inspired kebabs alternate shrimp with sweet onion, bell peppers, padrón or shishito peppers, sage, and bay leaves. As they grill, the spiedini are basted with salmoriglio—a lively Italian sauce made with fresh herbs, capers, olives, lemon, and olive oil.

Shrimp Spiedini with Salmoriglio

Get The Recipe »

Greek Grilled Shrimp

This simple recipe proves that shrimp don’t need much embellishment. Greek-inspired herbs, extra-virgin olive oil, and fresh lemon give the shrimp plenty of flavor before they’re quickly grilled over medium-high heat.
Greek Grilled Shrimp

Get The Recipe »

Smoked Shrimp Cocktail with Chipotle Orange Sauce

This is shrimp cocktail reimagined for the smoker. Garlic, cilantro, chipotle, and lime season the shrimp, while the accompanying cocktail sauce combines citrus, Worcestershire sauce, and more chipotle for a smoky, spicy finish.

Smoked Shrimp Cocktail with Chipotle Orange Sauce

Get The Recipe »

Grilled Florida Lobster, Rum Butter Basted and Mango Salsa

Florida lobster gets the Miami treatment in this live-fire recipe. The split lobsters are grilled over high heat and repeatedly basted with dark rum butter flavored with scallions, smoked paprika, lime, and cilantro, then served with a fiery mango salsa.
Grilled Florida Lobster with Rum Butter and Mango Salsa

Get The Recipe »

Wildfire Outdoor Living is an Arizona-based company specializing in high-performance gas grills and premium outdoor kitchen solutions. Wildfire brings a commitment to cutting-edge technology and industry-leading innovation. Their 304 stainless steel design and illuminated LED knobs, cast stainless steel burners, and laser-cut stainless steel cooking grates create products that will provide peak performance. They also allow you to customize your outdoor kitchen with designer finish knobs and handles to meet the growing demand for designer outdoor kitchens.

Plan your next cook with our full recipe collection—weeknight grills, weekend projects, and special-occasion feasts.

Get Steven’s weekly grilling tips, seasonal recipes, and live-fire ideas in your inbox. Join our Up in Smoke newsletter. Sign up and get a FREE PDF of Steven Raichlen's Best Ribs Recipes Ebook.

Preorder Man On Fire — A Steven Raichlen Memoir. And get some really cool rewards!

Looking for some fall grilling inspiration? Check out our Fall Grilling Guide.

The post Back to Basics: How to Grill Shrimp and Lobster appeared first on Barbecuebible.com.

Peach Meets Grill: Cinnamon-Grilled Peaches with Bourbon Glaze

Photo Credit: Steven Raichlen


By Steven Raichlen

Some years ago, while researching Japanese barbecue, I found myself at a produce market in Tokyo. There, amid the Yubari king melons and giant Amaou strawberries, was a $70 peach.

Flabbergasted, I asked the vendor how a single peach could cost $70. He explained the philosophical differences between Japanese and American agriculture.

“An American farmer looks at a peach orchard and thinks about how many tons of peaches he will harvest,” the vendor said. “A Japanese farmer looks at his orchard and thinks that one tree will produce peaches far superior to all the rest. And on that tree, one branch will produce a peach so extraordinary, connoisseurs will line up to pay $70 for the privilege of buying it.” (Sadly, I was not among them.)

Wildfire Banner

Why Grill Peaches?

I’m not going to tell you about a $70 peach this week, but I will tell you about a peach dish that tastes like a million bucks. It involves a spice, an herb, and a piece of cooking equipment near and dear to our hearts. You guessed it: the grill.

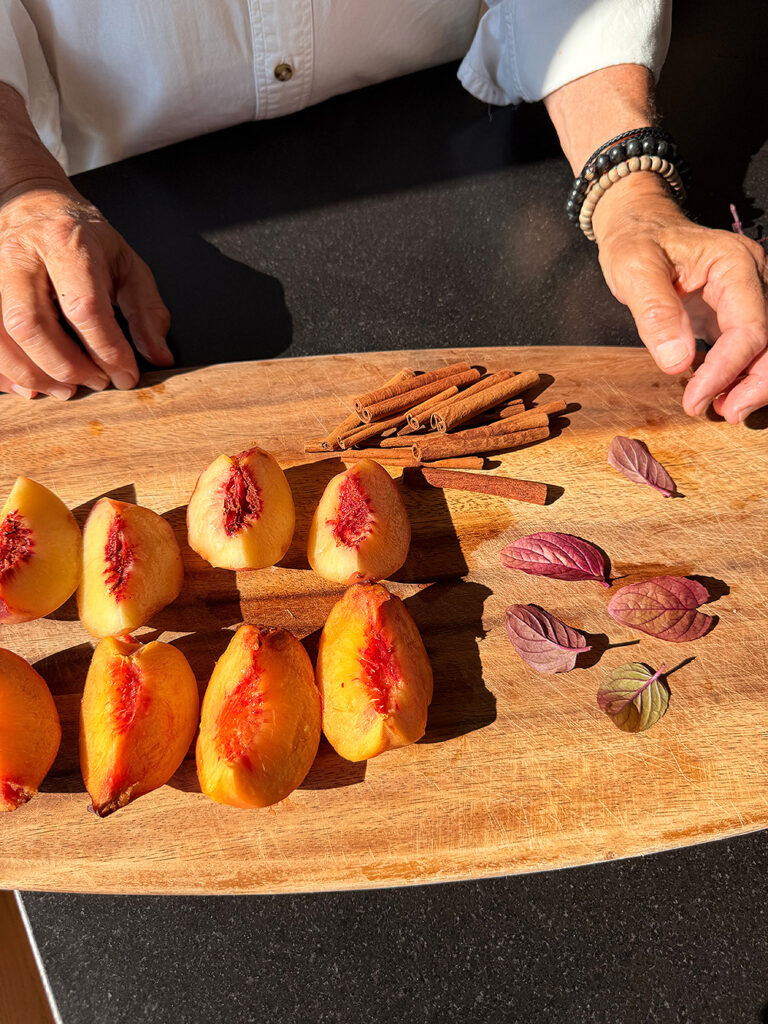
The spice in question is cinnamon—more precisely, the rolled bark of the tree that gives us ground cinnamon: the cinnamon stick.

cinnamon grilled peaches

Photo Credit: Steven Raichlen


The herb is celebrated across Planet Barbecue for its vibrant refreshing flavor: fresh mint.

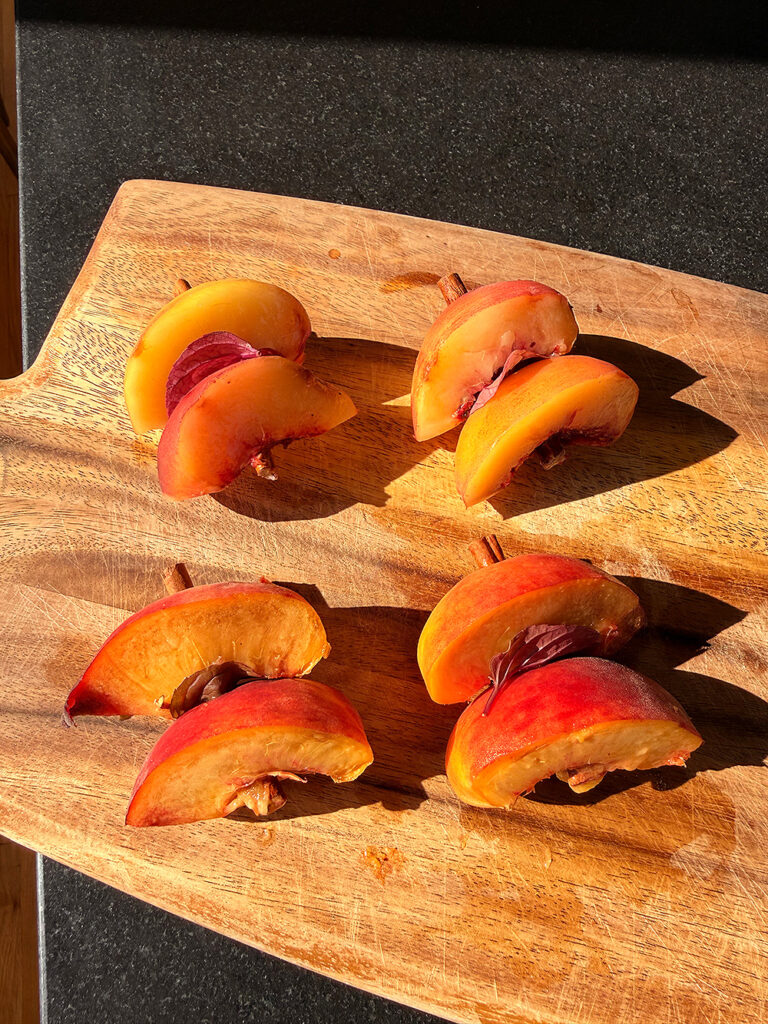
To put them together, you make mini kebabs with peach quarters and mint, using cinnamon sticks as skewers.

cinnamon grilled peaches

Photo Credit: Steven Raichlen


The Bourbon-Brown Sugar “B3” Glaze

Like all good barbecue, these grilled peach kebabs come with a sauce—in this case, my “B3” sauce. The three Bs are bourbon, brown sugar, and butter, with a whisper of heavy cream to hold them together.

Grill over a hot fire to caramelize the outside of the peaches, leaving the inside juicy and raw.

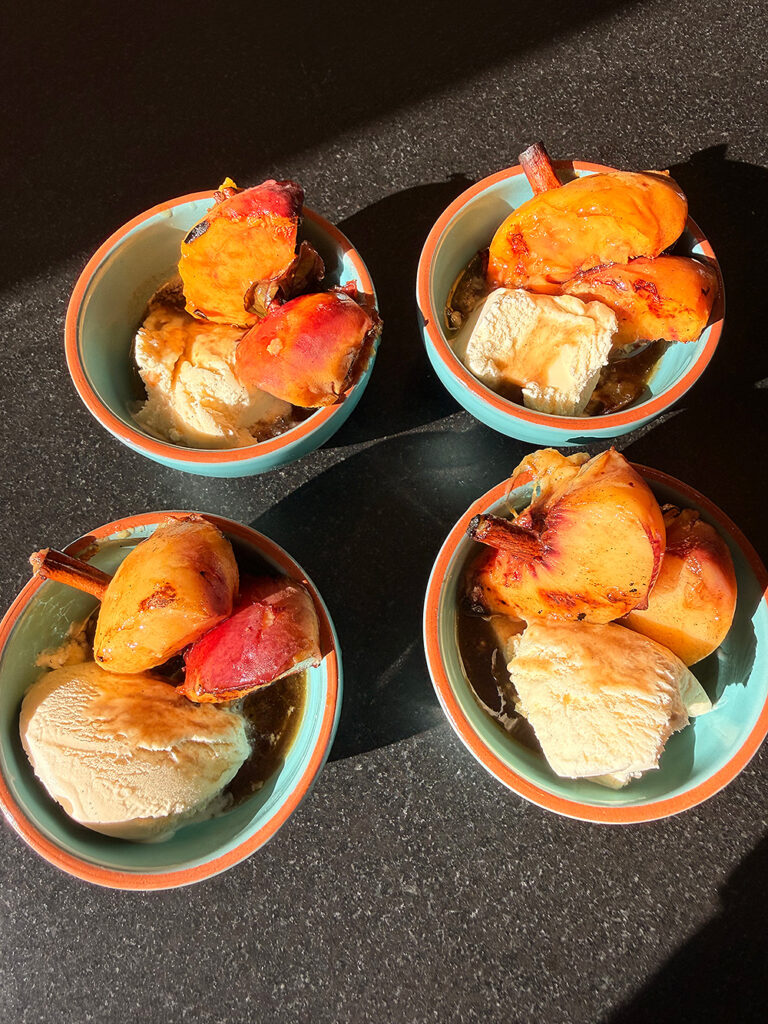
The crowning touch? Serve the grilled peaches over ice cream.

Summer never tasted so good!

Cinnamon-grilled peaches with bourbon glaze and vanilla ice cream

Photo Credit: Steven Raichlen


How to Make Cinnamon-Grilled Peaches

Recipe

Cinnamon-Grilled Peaches with Bourbon Glaze

Recipe by Steven Raichlen

These fresh peach kebabs use cinnamon sticks as skewers, with mint leaves tucked between the fruit. As the cinnamon sticks char, the heat releases their aromatic oils. The peaches are finished with a creamy bourbon, brown sugar, and butter glaze.

Method
Direct grilling
Serves
4

Ingredients

  • 4 large ripe freestone peaches
  • 1 bunch large fresh mint leaves
  • 8 cinnamon sticks

For the B3 Glaze

  • 1/4 cup bourbon
  • 1/4 cup brown sugar
  • 1/4 cup (4 tablespoons) unsalted butter
  • 2 tablespoons heavy cream
  • 1 pint vanilla ice cream, for serving

You’ll also need: Bamboo skewer and martini glasses

Instructions

  1. Cut each peach in half along the crease, running your knife in a circular motion around the peach and cutting to the pit. Twist the halves in opposite directions to separate them. Using a spoon, pry out and discard the pit. Cut each peach half in half.
  2. Using a bamboo skewer, poke a starter hole through the middle of each peach quarter. Skewer 2 quarters on each cinnamon stick, placing a fresh mint leaf between them.
  3. Make the B3 glaze: Combine the bourbon, brown sugar, butter, and heavy cream in a saucepan and bring to a boil over high heat. Let the glaze boil until thick and syrupy, about 3 minutes.
  4. Set up the grill for direct grilling and heat to high. Brush and oil the grill grate.
  5. Arrange the peaches on the hot grate and grill until nicely browned, 3 to 4 minutes per side, basting frequently with the bourbon glaze.
  6. Spoon the ice cream into martini glasses. Place 2 peach skewers in each glass and spoon the remaining bourbon glaze on top. Garnish each with a sprig of mint and serve at once.

Wildfire Outdoor Living is an Arizona-based company specializing in high-performance gas grills and premium outdoor kitchen solutions. Wildfire brings a commitment to cutting-edge technology and industry-leading innovation. Their 304 stainless steel design and illuminated LED knobs, cast stainless steel burners, and laser-cut stainless steel cooking grates create products that will provide peak performance. They also allow you to customize your outdoor kitchen with designer finish knobs and handles to meet the growing demand for designer outdoor kitchens.

Plan your next cook with our full recipe collection—weeknight grills, weekend projects, and special-occasion feasts.

Get Steven’s weekly grilling tips, seasonal recipes, and live-fire ideas in your inbox. Join our Up in Smoke newsletter. Sign up and get a FREE PDF of Steven Raichlen's Best Ribs Recipes Ebook.

Preorder Man On Fire — A Steven Raichlen Memoir. And get some really cool rewards!

Looking for more summer grilling inspiration? Check out our Summer Grilling Guide.

The post Peach Meets Grill: Cinnamon-Grilled Peaches with Bourbon Glaze appeared first on Barbecuebible.com.

How to Grill the Perfect Steak: 7 Steps to Tender, Juicy, Smoky Beefy Nirvana

Steak! A five-letter word that spells a mountain of pleasure. For some of us, it’s the ultimate luxury; for others, a weeknight dinner. It’s so easy to grill, even a first-timer can earn bragging rights, yet you can spend a lifetime perfecting the fine points. Steak is the one dish everyone should know how to grill.

Too often, people make simple, avoidable mistakes: Undercooking. Overcooking. Flipping too seldom or too often. Leaving the beef out to warm to room temperature (especially dangerous in summertime heat). Serving it hot off the grill or resting it so long, the steak is cold by the time you cut into it.

Here’s the ultimate guide to achieving the perfect steak every time.

Steak Cooking at a Glance

  • Best Steaks: Ribeye, NY Strip, Porterhouse, Filet Mignon, Skirt, Flank, Hanger
  • Seasoning: Coarse salt and freshly cracked black pepper
  • Doneness (Med-Rare): 130°F to 135°∘F
  • Resting: 1 to 2 minutes on a wire rack
  • Best Method: Direct grilling for steaks up to 1-1/2 inches thick; reverse searing link for 3- to 4-inch thick monsters

Step 1: Start with the Right Steak

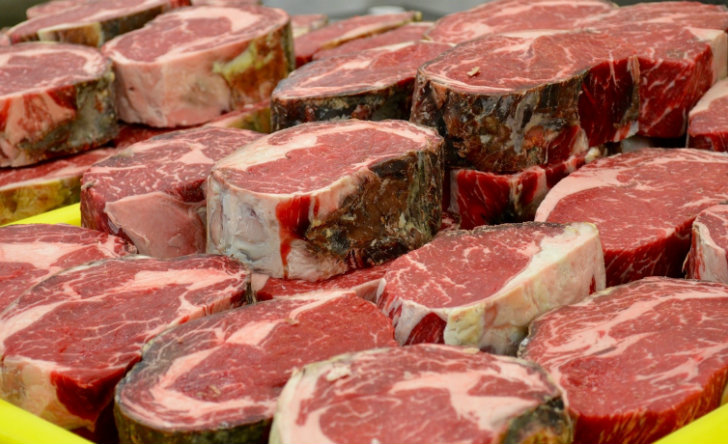
Five factors determine the excellence of your steak: cattle breed, feed, aging, grade, and cut.

  • Prime vs. Choice: The USDA grades beef on marbling (intramuscular fat). Only 2% of beef qualifies as Prime—highly flavorful, tender, and luscious. Choice is what you find at most supermarkets—less rich, but still very tasty.
  • Wagyu vs. Angus: Wagyu is renowned for its hyper-generous marbling; an A-5 Japanese Wagyu looks like white lace on red cloth. Angus delivers a bold, robust, classic beefy flavor enjoyed across North America.

    D'Artagnan American Wagyu beef

  • Grain-Fed vs. Grass-Fed: Corn-fed beef produces rich, buttery, meaty steaks. Grass-fed beef is leaner with a distinctive, almost herbaceous flavor. The ideal compromise is beef raised on grass, then finished with grain.
  • Dry-Aged vs. Wet: Dry-aged beef, hung unwrapped in climate-controlled rooms for 28 to 36 days, loses moisture, concentrating the beefy flavor and creating rich umami notes. Wet-aged beef matures in vacuum-sealed plastic; it is faster, cheaper, and tasty enough, but lacks the rich, concentrated flavor of dry-aged beef.

The Four Steak Categories

  1. The Noble Steaks: Upper steer cuts (filet mignon, ribeye, strip, porterhouse) that are intrinsically tender and rich.

    Grill Marks!

  2. The Belly Steaks: Undercarriage cuts (skirt, flank, hanger). Intensely flavorful but stringy; slice thinly against the grain to ensure tenderness.
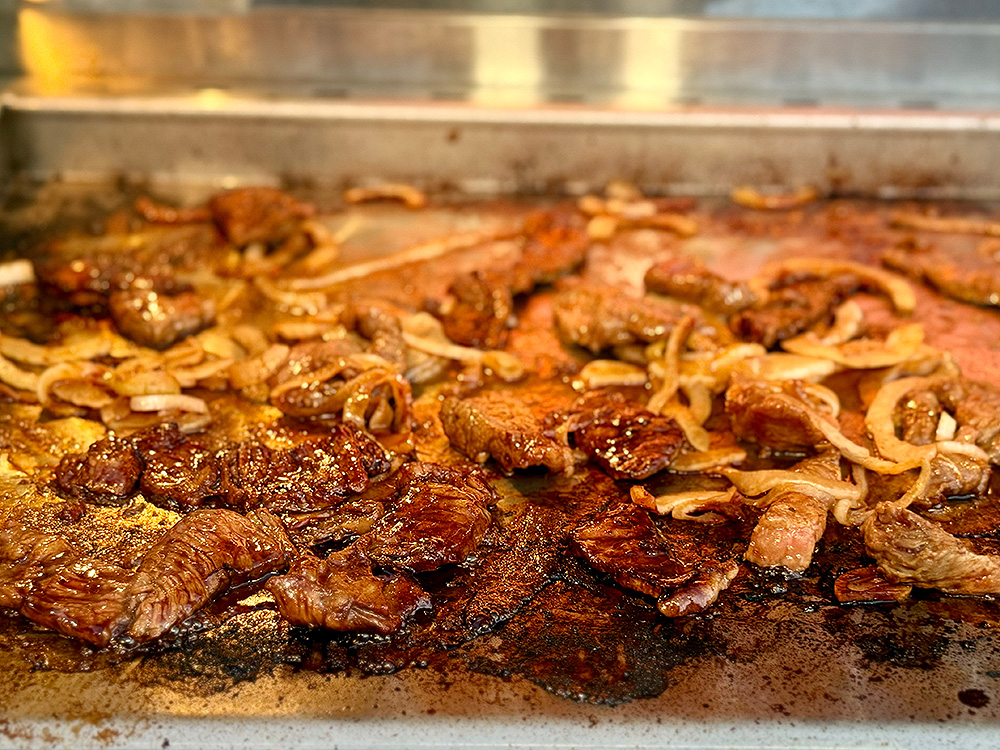
  3. The Tough Steaks: Round and chuck. Slice paper-thin for cheesesteaks or chop fine for carne asada.

  4. The Cult Steaks: Unique cuts like tri-tip, picanha (featuring a luscious fat cap), and flatiron.

Step 2: Keep Seasoning Simple and Strategic

For premium beef, skip heavy, muddying marinades. Stick to coarse sea salt or kosher salt and freshly cracked black pepper. Season your steak early—about 45 to 60 minutes before grilling. This allows the salt to draw out moisture, dissolve, and reabsorb back into the fibers, seasoning the meat deeply. If you’re short on time, season immediately before the steak hits the grates.

Do not let steaks warm to room temperature beforehand. The difference in cooking time is negligible, and it is simply not worth the food safety risk. Keep them cold until they go on the grill.

Step 3: Set Up Your Grill for Two-Zone Cooking (Wood Smoke Optional, But Desired)

Arrange your coals or burners so you have a screaming-hot direct zone for searing and a cooler, zone for cooking. Control the cooking by moving the steak back and forth between the hot and less hot zone. Add wood chunks or chips (like oak, hickory, or pecan) directly to your coals or place in your gas grill’s smoker box. A quick blast of wood smoke during grilling makes a good steak great and a great steak unforgettable.

Step 4: Sear Hot and Flip Frequently

Forget the old myth of flipping your steak only once to get crosshatch grill marks. (Mea culpa—I used to recommend this in my earlier books.) I’ve come to see that flipping your steak often—every 20 to 30 seconds—cooks the meat more evenly and helps build a darker, richer crust. Focus on the crust and flip often.

Reverse searing steaks

Step 5: Master the Reverse Sear

  1. Place your seasoned steak on the cooler, indirect side of your grill (225°F to 250°F).
  2. Indirect grill (with grill lid down) to heat the meat to an internal temperature about 20°F below your target doneness (for example, to 110°F for a medium-rare steak)
  3. Move the steak directly over the high-heat, searing for 1 to 2 minutes per side to build a sizzling dark crust and internal temperature of 130°F.
The Steak Doneness Guide
Doneness Description Internal Temperature Poke Test Feel
Rare Warm red interior 120°F to 125°F Soft and squishy
Medium-Rare Hot red to dark pink interior 130°F to 135°F Yielding
Medium Pink interior 140°F to 145°F Gently yielding
Medium-Well Grayish pink interior 150°F to 155°F Firm
Well Done Gray interior 160°F+ Hard and springy

Note: Measure internal temperature using an instant-read thermometer inserted horizontally through the side of the steak. For the poke test, press the top of the steak with your forefinger. The amount of resistance will tell you the doneness. Use a thermometer for thicker steaks; the poke test for thin steaks like skirt.

Step 6: Give It a Rest

A steak served “hot off the grill” sounds romantic, but resting your steak on a wire rack over a sheet pan for a minute or two will give you a tenderer, juicier steak. (Resting relaxes the meat, allowing the juices to redistribute. The wire rack keep the bottom from getting soggy.) But over-resting results in a lukewarm or even cold steak, which does the meat an injustice.

Step 7: Carve It Right

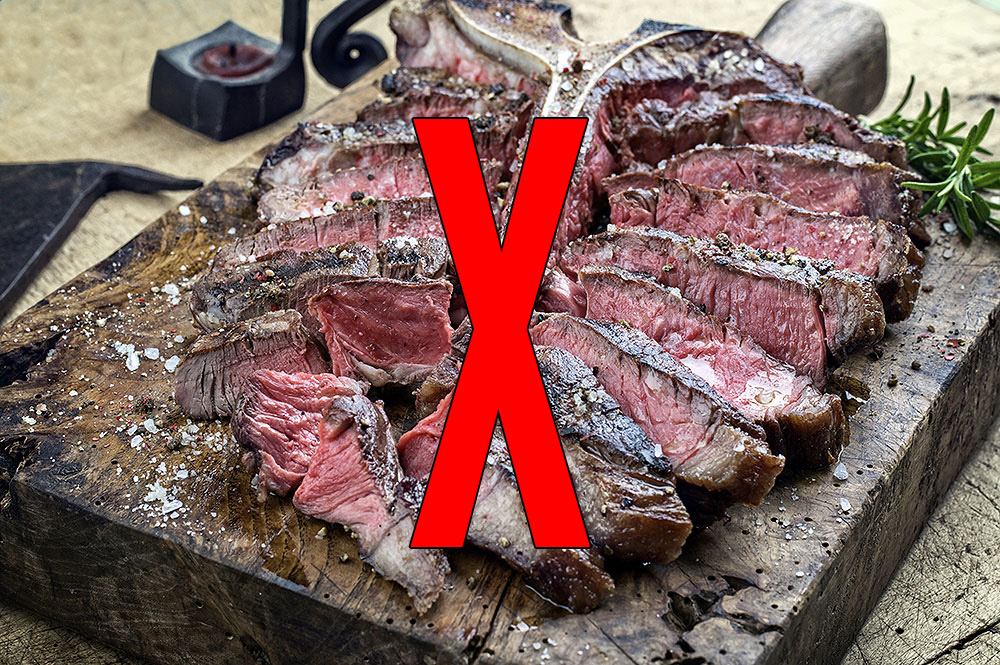
It has become fashionable, if not de rigueur, for steakhouses to pre-slice your steak before serving. Don’t. This may look dramatic, but a pre-sliced steak gets cold and dry very quickly. Serve your steak whole and let the diner slice it him- or herself.

Not like this!

Note: the one exception here are belly steaks, like skirt and flank, which should be thinly sliced across the grain to shorten the tough meat fibers.

Finally, don’t forget to anoint

A great steak needs little more than salt and pepper by way of a seasoning, but a pat of compound butter link or drizzle of melted butter or extra virgin olive oil makes a great steak even better

Great Steak Recipes to Try Next

More Steak Recipes »

Frequently Asked Questions

What is the best way to cook steak on the grill?

For thick cuts, use the reverse sear method. For thinner cuts, cook directly over high heat, flipping frequently.

How long should you grill steak?

Figure on 2 to 2-1/2 minutes per side for thin steaks, about 1/2 inch thick; 3 to 4 minutes per side for 1-inch steaks; and about 5 minutes per side for 1-1/2-inch steaks. When using the reverse sear method for a really thick steak, figure on 40 to 60 minutes for the low-heat indirect grilling, followed by 2 to 3 minutes per side for the high-heat sear.

What temperature should steak be cooked to?

Medium-rare, 130°F to 135°F, is ideal for many steaks. Use an instant-read thermometer inserted into the side of the steak to verify doneness. For thinner steaks, like skirt and flank, use the poke test: press the meat with your forefinger to feel the resistance. Pull the steak a few degrees early, as carryover cooking will raise the temperature during resting.

How do you make steak tender on the grill?

Select well-marbled cuts, season like you mean it, do not overcook, and rest the meat for a minute or two before serving.

Should you grill steak with the lid open or closed?

Keep the lid open when searing thin steaks over high heat. Keep the lid closed during indirect cooking or when finishing thick steaks.

Want to go deeper on the craft? Explore our grilling techniques and how-to guides for ribs, steak, chicken, seafood, and more.

Get Steven’s weekly grilling tips, seasonal recipes, and live-fire ideas in your inbox. Join our Up in Smoke newsletter. Sign up and get a FREE PDF of Steven Raichlen's Best Ribs Recipes Ebook.

Preorder Man On Fire — A Steven Raichlen Memoir. And get some really cool rewards!

Looking for more summer grilling inspiration? Check out our Summer Grilling Guide.

The post How to Grill the Perfect Steak: 7 Steps to Tender, Juicy, Smoky Beefy Nirvana appeared first on Barbecuebible.com.

Corn on the Grill: Three Ways to Do It Right

If you’re like us, we wait all year for summer corn. Wherever you live, summer means one thing: corn is at its peak, and there’s no better way to cook it than—you guessed it—on the grill. Live fire brings out corn’s sweetness, adding an inimitable smoky flavor. Grilling turns a simple ear into one of the great pleasures of the season.

Selecting Good Corn

Great grilled corn starts at the market. Look for ears with bright green husks that cling tightly to the cob and silk that feels slightly moist, not dry or brittle. The kernels should feel plump through the husk, and the ear should feel heavy for its size.

Firemen's Corn

And, of course, buy local. Here at barbecuebible.com, we’re incredibly lucky. Steven lives in Martha’s Vineyard; Daniel in North Carolina, John in New Jersey, Nancy in Iowa, and Jared in New York. All of us have fantastic local corn in July and August.

Avoid corn with dried-out husks, blackened silk, soft spots, or missing kernels near the tip. Corn starts losing sweetness soon after it’s picked, so buy it as fresh as you can and grill it the same day if possible.

Ways to Grill Corn

There are a few basic ways to grill corn, and each gives you a different result.

Corn Naked (without the husk and directly over a hot fire)

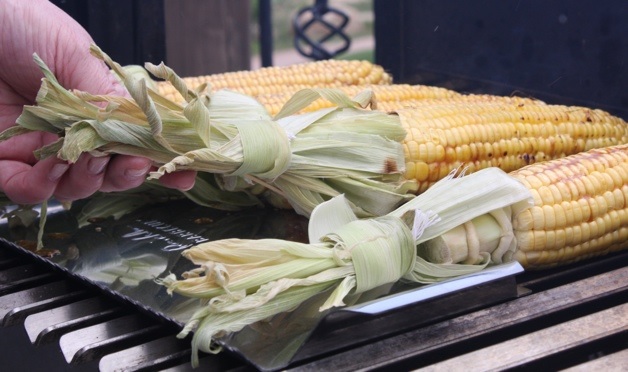
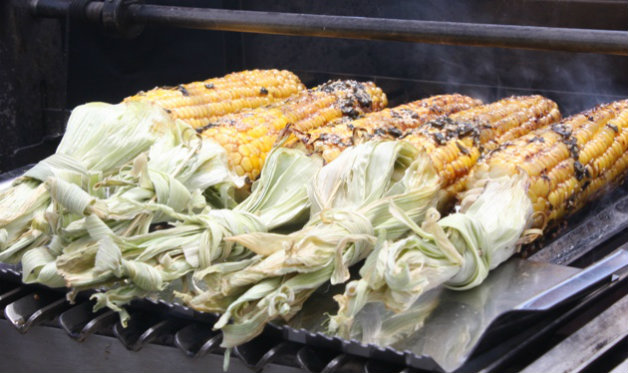
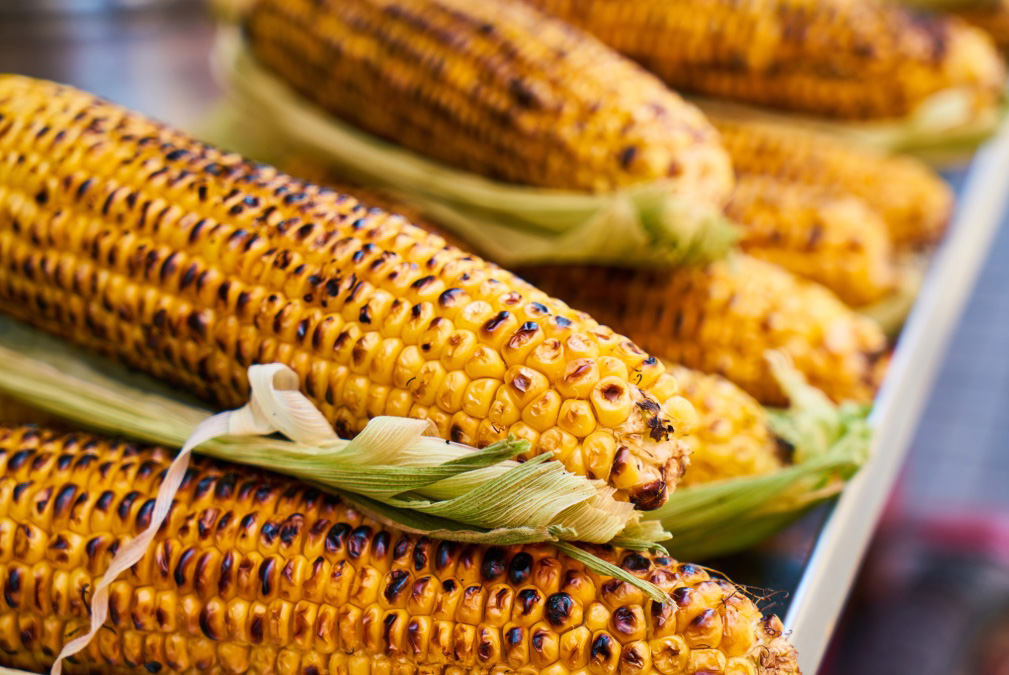
This is my favorite way to grill corn. You remove the husk (or fold it back over the stem to make a handle), brush the ears with melted butter or extra virgin olive oil, and season generously with salt and pepper. Then direct grill it over high heat until the kernels are nicely browned, basting with more melted butter as the corn cooks. The high dry heat caramelizes the natural plant sugars in the corn, making it all that much sweeter and smokier.

Corn Caveman Style

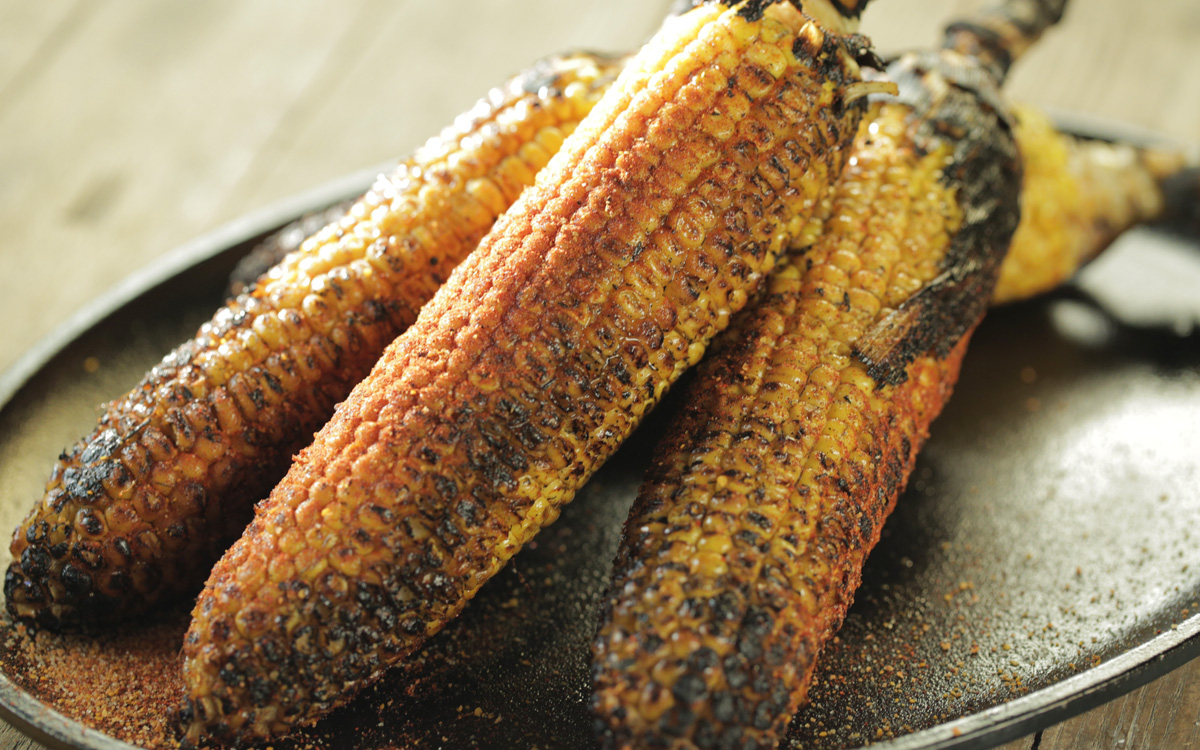
If you like your corn with even more smoke and char flavor, set up your grill (charcoal please) for caveman grilling—that is remove the grill grate ad rake out the embers in an even layer. Lay the corn in its husk directly on the coals. Grill until the husk burns off, turning with tongs, but not so long that the sweet kernels burn. Figure on 2 to 3 minutes per side, 8 to 12 minutes in all.

Corn in the husk

This method gives you juicy corn with a gentle roasted flavor. Pull back the husks without removing them, strip away the silk, brush the ears with melted butter and season with salt and pepper, then pull the husks back over the ears. Direct grill the corn over medium-high heat for 15 to 20 minutes, turning occasionally, until the husks are browned and the kernels are tender.

Corn in Foil

In a word, don’t. Foiled corn steams rather than grills. Use one of the methods above.

How to Know When Corn Is Done

Corn is done when the kernels are golden brown, hot, and tender. If you press a kernel lightly, it should give a little and release juice. Corn grilled directly on the grates should have browned or lightly charred spots, but the kernels should still look plump.

Flavor Ideas from Planet Barbecue

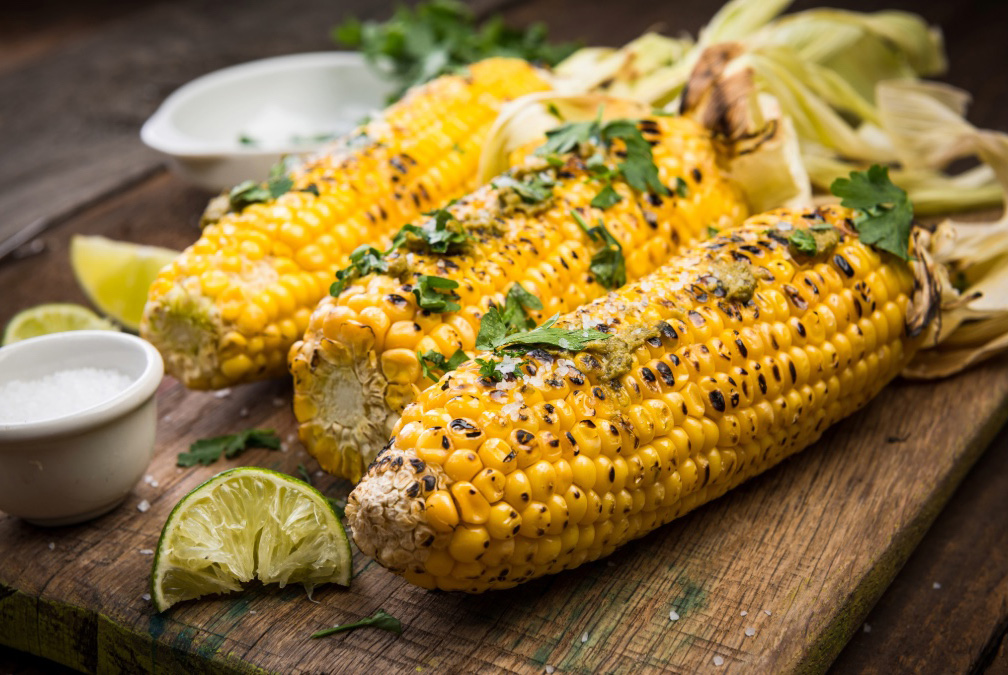
Once the corn comes off the grill, the fun starts. Butter, salt, and pepper are enough when the corn is fresh and sweet, but grilled corn also loves bold seasonings. In Mexico, it’s slathered with mayonnaise, sprinkled with grated Cotija cheese (parmigiano or romano also work well), and sparked with chile and lime. In India, it might be electrified with cayenne and lime. Steven loves Cambodian style grilled corn, brushed with coconut milk and curry paste and dusted with shredded coconut.

Here are some fantastic recipes to try to make the best grilled corn you’ve ever tasted!

Master Recipe For Grilling Corn

A great starting point for grilling corn simply and getting the basic technique right.

Corn on grill with shield

Get The Recipe »

Mexican Grilled Corn

A street-food favorite finished with mayonnaise, cheese, chile, and lime.

Windy City Mexican Grilled Corn

Get The Recipe »

Grilled Corn with Sesame-Soy Butter

A savory, Japanese-inspired butter gives grilled corn a rich, umami finish.

Grilled Corn

Get The Recipe »

Ember-Roasted Corn

A more primal live-fire method that roasts the corn directly in the embers.

Ember-Roasted Corn

Get The Recipe »

Firecracker Corn Grilled with Tabasco Butter

A spicy, buttery version for anyone who likes corn with a little heat.

Firecracker Corn

Get The Recipe »

The Best Way to Grill Corn

However you grill it, corn does not need much to be great. Start with fresh ears, choose the method that gives you the texture and char you want, and serve it hot. Husk, foil, or directly on the grates—when summer corn is at its peak, the grill is the best place for it.

Frequently Asked Questions

How long does corn take on the grill?

Naked corn, with the husk removed, usually takes 8 to 12 minutes over high heat. Turn the ears every 2 to 3 minutes so the kernels brown evenly without burning.

Is it better to grill corn in the husk, in foil, or directly on the grates?

It depends on the result you want. Corn grilled naked, meaning husked and cooked directly over the fire, gives you the most char and live-fire flavor. Corn grilled caveman style has the biggest wow factor because the ears cook directly on the embers. Corn grilled in the husk stays juicy and has a gentle roasted flavor.

Should you soak corn before grilling?

You can soak corn if you’re grilling it in the husk, but it is not mandatory. A 15- to 30-minute soak can help keep the husks from burning too quickly. You do not need to soak corn that is grilled directly on the grates or caveman style.

Why did my grilled corn dry out?

Corn can dry out if it cooks too long, if the heat is too high, or if it is grilled directly over the fire without enough turning. Pull the corn while the kernels are still plump and juicy, and baste often with melted butter or extra-virgin olive oil. Once the kernels start to shrivel, the corn is overcooked.

Can you put butter or olive oil on corn before grilling?

Yes, but it depends on the method. For corn grilled directly on the grates, use a light coating of oil before grilling, then add butter after the corn comes off the grill to avoid flare-ups.

Build your live-fire skills with our Back-to-Basics library—setups, temps, tools, and pro moves that make a difference.

Get Steven’s weekly grilling tips, seasonal recipes, and live-fire ideas in your inbox. Join our Up in Smoke newsletter. Sign up and get a FREE PDF of Steven Raichlen's Best Ribs Recipes Ebook.

Preorder Man On Fire — A Steven Raichlen Memoir. And get some really cool rewards!

Looking for more summer grilling inspiration? Check out our Summer Grilling Guide.

The post Corn on the Grill: Three Ways to Do It Right appeared first on Barbecuebible.com.

Chicken Under a Brick, Tuscan Style

Photo Credit: Daniel Hale


By Daniel Hale

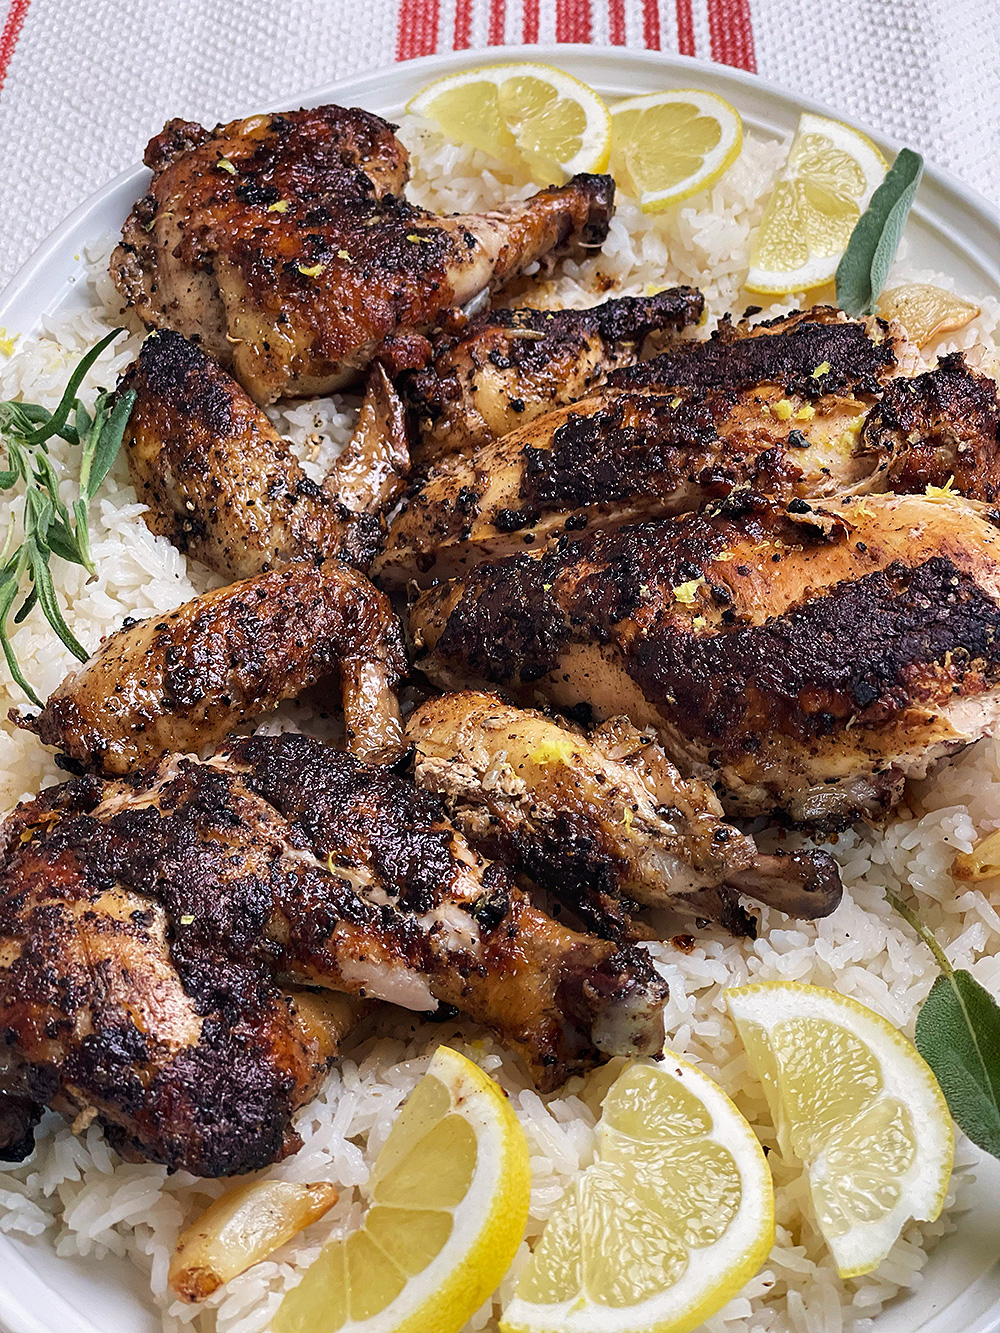
I first came across this Tuscan-style chicken under a brick recipe in Steven Raichlen’s Planet Barbecue. It is one of those old-school grilling techniques that looks unusual at first, but makes perfect sense once you try it. In Tuscany, pollo al mattone is traditionally cooked under the weight of a brick over wood embers or charcoal.

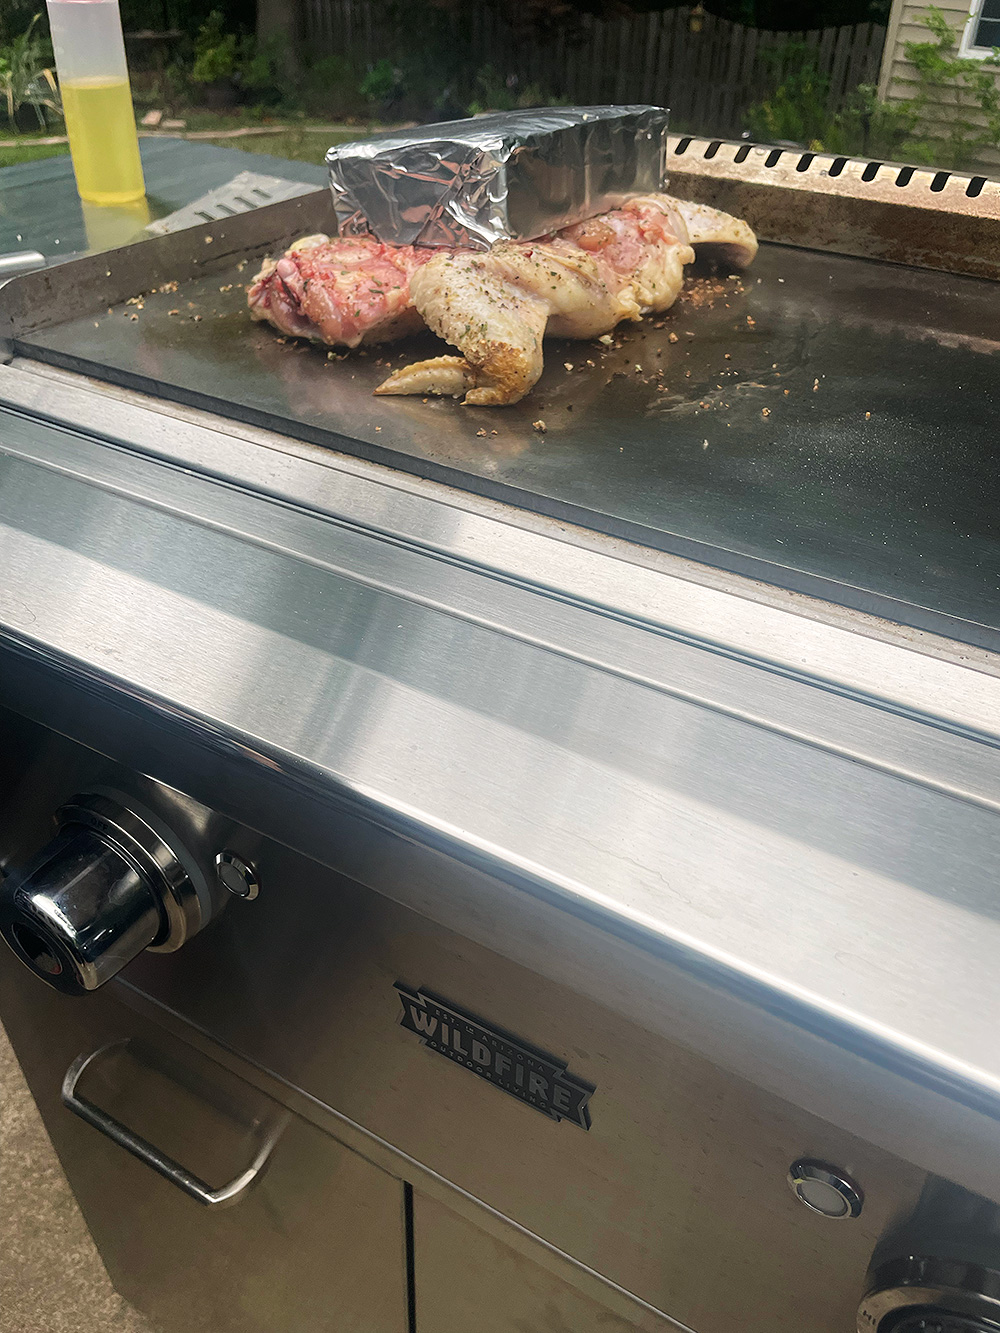
For this version, I adapted Steven’s recipe for the Wildfire Ranch Pro 30″ Griddle. The idea is simple: flatten the chicken, season it well, press it under a brick, and let the heat and pressure create crisp skin and juicy meat.

Wildfire Banner

Why I Used a Griddle

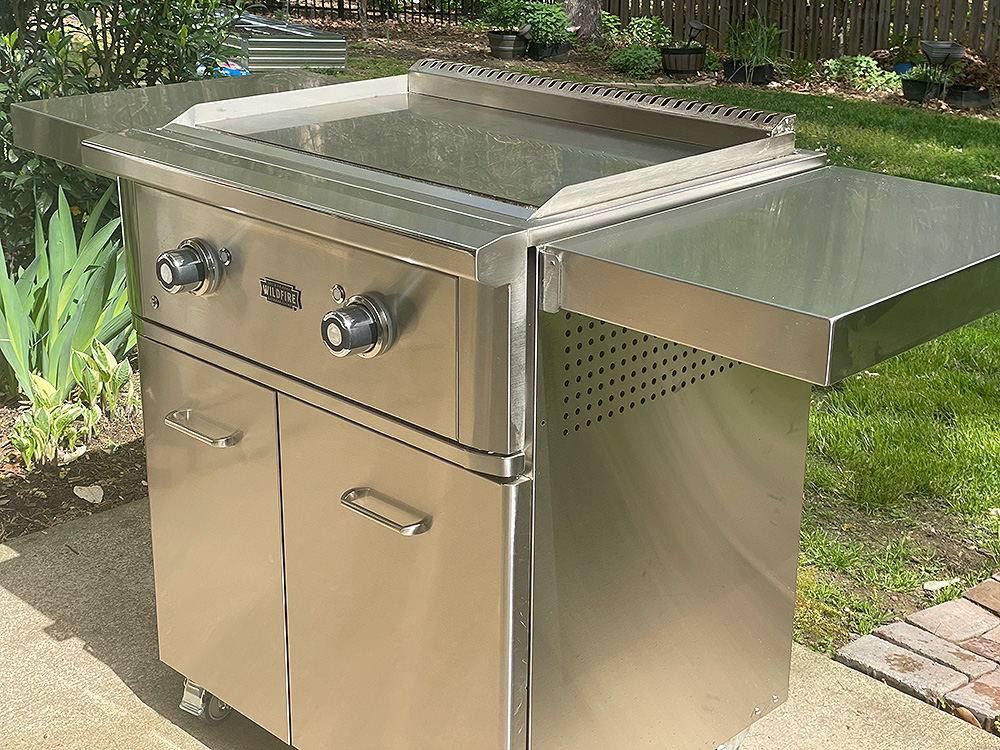
I chose the Wildfire 30” Ranch Pro griddle for this cook because chicken under a brick is all about contact. The weight of a brick presses the chicken down, and I liked the idea of putting that pressure against a flat, hot cooking surface instead of grill grates.

Wildfire Ranch 30” Griddle

Photo Credit: Daniel Hale


That direct contact helps the skin brown and crisp while the chicken cooks. The griddle also gave me enough room to work around the bird and manage the heat.

Prepping and Cooking

For pollo al mattone, the first step is spatchcocking the bird. This simply means removing the backbone so the chicken can be opened and pressed flat. You can do this with kitchen shears or a sharp knife. Once the backbone is removed, turn the chicken over and press firmly on the breastbone to flatten it.

Flattening the chicken is what makes this technique work. The bird cooks more evenly, and the skin has better contact with the hot griddle once the brick goes on top. Since I was using one whole chicken, I wanted it as flat as possible so the brick could press it evenly against the griddle surface.

Chicken Under a Brick

Photo Credit: Daniel Hale


The seasoning was simple: garlic, rosemary, sage, black pepper, and coarse salt. I seasoned the chicken on both sides with the Tuscan-style herbed salt, making sure to get some into the crevices.

Chicken Grilled Under Bricks

Chicken Under a Brick

Photo Credit: Daniel Hale


Get The Recipe »

Once the griddle was hot, I lightly oiled the surface and placed the chicken skin-side down. Then I set a foil-wrapped brick on top to press the bird against the griddle. Almost right away, you could hear the skin start to sizzle as it made contact with the hot surface. You could also use any type of grill press, but where is the fun in that?

While cooking, I kept an eye on the color, adjusted as needed, and flipped the chicken once the skin had browned. From there, I continued until the chicken reached the proper internal temperature.

Use an instant-read thermometer to check for doneness, especially with a whole chicken. The breast should reach 165°F, and the thighs can go a little higher and still stay juicy.

The Results

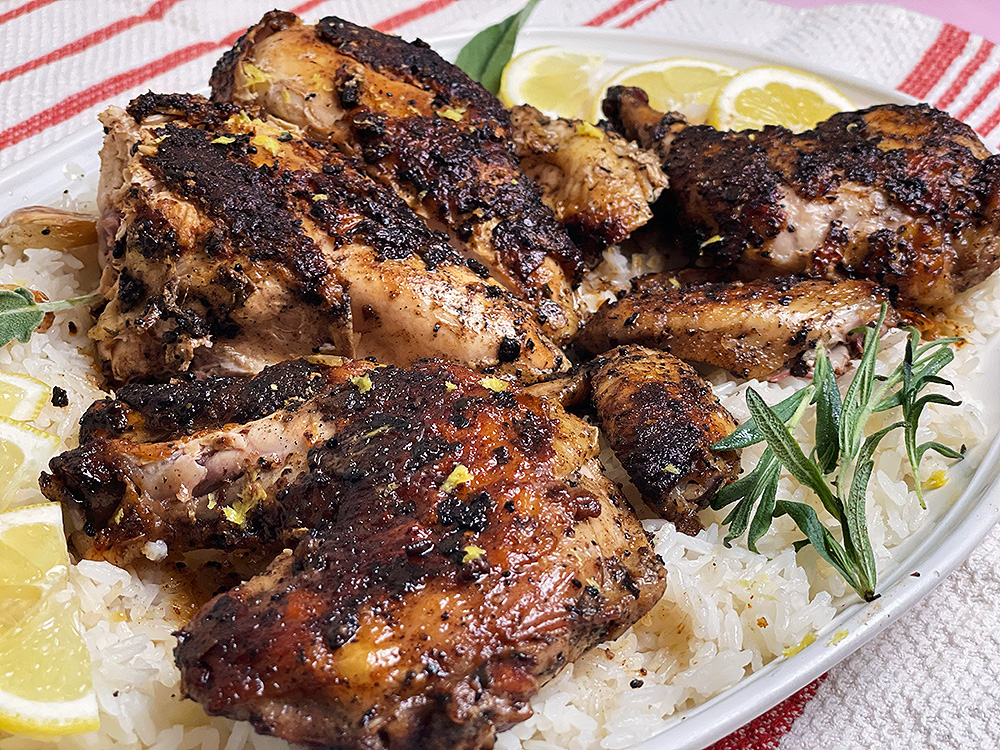
The chicken came off the griddle with crisp, browned skin and a lot of flavor from the garlic, rosemary, sage, and salt. The brick did exactly what it was supposed to do. It kept the chicken pressed against the hot surface, which helped build that color and texture while the meat stayed juicy.

Chicken Under a Brick

Photo Credit: Daniel Hale


I finished the chicken with a drizzle of extra-virgin olive oil and a squeeze of fresh lemon. That little bit of lemon really helped cut through the richness of the skin and brightened up the herbs.

This was a fun way to take a great recipe from Planet Barbecue and adapt it for the griddle.

What I liked most was how well the griddle handled the technique. Chicken under a brick can feel like an old-school charcoal recipe, but the griddle made it easy to manage the heat and get steady contact with the cooking surface.

A big thank you to Wildfire Outdoor Living for sponsoring this cook.

Wildfire Outdoor Living is an Arizona-based company specializing in high-performance gas grills and premium outdoor kitchen solutions. Wildfire brings a commitment to cutting-edge technology and industry-leading innovation. Their 304 stainless steel design and illuminated LED knobs, cast stainless steel burners, and laser-cut stainless steel cooking grates create products that will provide peak performance. They also allow you to customize your outdoor kitchen with designer finish knobs and handles to meet the growing demand for designer outdoor kitchens.

Frequently Asked Questions

What is chicken under a brick?

Chicken under a brick, or pollo al mattone, is a Tuscan-style cooking technique where a flattened chicken is pressed under a brick or grill press while it cooks. The weight helps the chicken make better contact with the hot surface, which helps crisp the skin and cook the bird more evenly.

Why do you spatchcock the chicken first?

Spatchcocking removes the backbone so the chicken can lay flat. This helps the bird cook more evenly and gives the skin better contact with the griddle once the brick goes on top.

Can you cook chicken under a brick on a griddle?

Yes. A griddle works well for chicken under a brick because the flat surface gives the chicken direct contact with the heat. In this version, the Wildfire Ranch Pro 30″ Griddle gave enough room to cook one whole chicken under a foil-wrapped brick.

What temperature should chicken under a brick reach?

Use an instant-read thermometer to check for doneness. The breast should reach 165°F, and the thighs can go a little higher while still staying juicy.

What do you serve with Tuscan-style chicken under a brick?

Keep it simple. Extra-virgin olive oil, fresh lemon, rosemary, and sage all work well with the garlic-herb seasoning. Grilled vegetables, roasted potatoes, or a simple salad would also fit nicely.

Build your live-fire skills with our Back-to-Basics library—setups, temps, tools, and pro moves that make a difference.

Get Steven’s weekly grilling tips, seasonal recipes, and live-fire ideas in your inbox. Join our Up in Smoke newsletter. Sign up and get a FREE PDF of Steven Raichlen's Best Ribs Recipes Ebook.

Preorder Man On Fire — A Steven Raichlen Memoir. And get some really cool rewards!

Looking for more summer grilling inspiration? Check out our Summer Grilling Guide.

The post Chicken Under a Brick, Tuscan Style appeared first on Barbecuebible.com.

❌