❌

Reading view

There are new articles available, click to refresh the page.

Rescuing a Rescue Device With a DIY Battery Pack
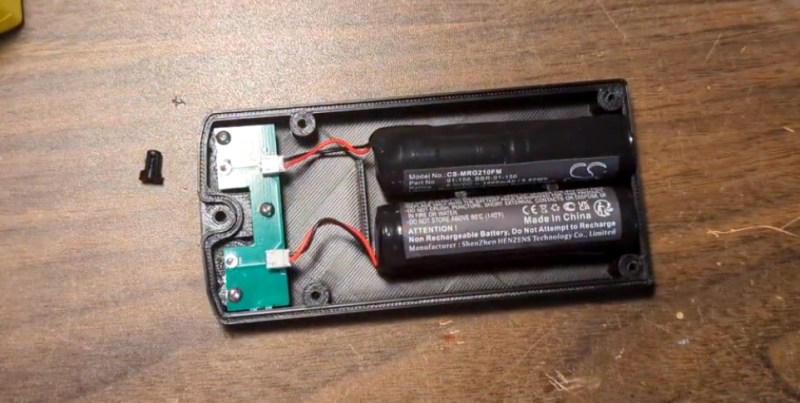
If you find yourself lost in the woods or adrift in the ocean, a GPS-enabled Personal Locator Beacon (PLB) is certainly a handy thing to have as it will pinpoint your location for rescuers. The one [Steve Jernigan] has is relatively affordable considering it might save your life one day, but it turns out that replacement batteries for the unit are extremely expensive and hard to come by because the manufacturer would rather you send the unit back to them for refurbishment. So naturally, he took it apart and figured out how to do it himself.
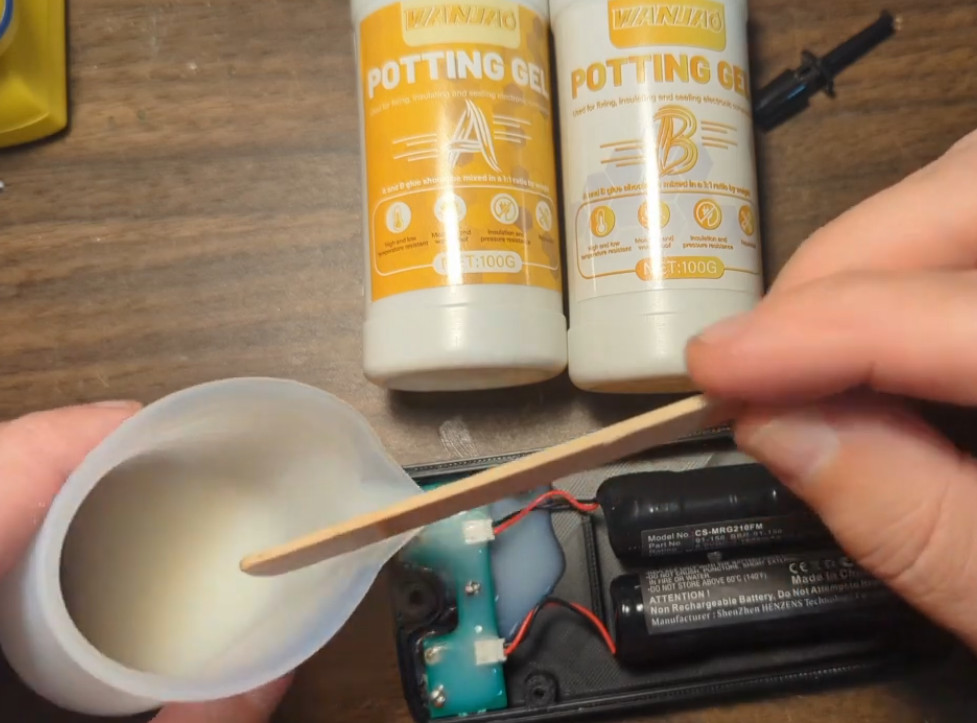
His DIY battery pack consists of a small custom PCB and pair of off-the-shelf 6 volt lithium manganese dioxide cells in a 3D printed enclosure that slots into the rear of the McMurdo PLB. In assembly video below, [Steve] shows how the pack goes together and demonstrates the use of a two-part potting compound in an effort to keep the elements at bay.

Before anyone says it β€” putting a homemade battery pack into a device which one day might be the only thing standing between you and death is probably not a great idea. [Steve] mentions in the description of this project that this is meant for backup purposes, and that you should really spring for a legitimate battery if there’s a chance you might actually need to be rescued at some point.

If you’re interested in battery pack hacking that doesn’t potentially risk life and limb, fixing the one that came with your cordless drill might be a better project to start with.

Mini Blinking Barrels Keep Desktop Traffic in Check

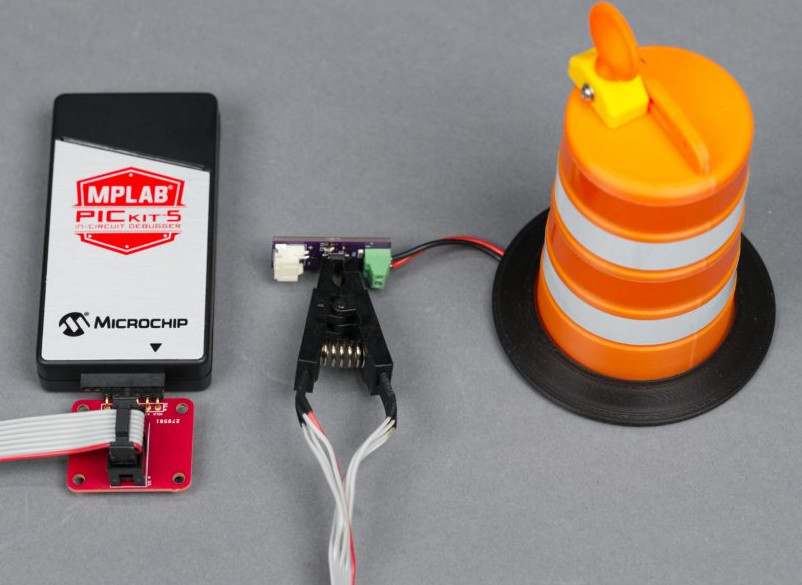
Your desk or bench is a work area, so why not make it look the part? That’s the idea behind the miniature blinking traffic barrels that [Glen Akins] recently put together. Of course, just a single blinking light doesn’t really sell the idea of a busy construction zone, so he spent a somewhat surprising amount of time and effort optimizing the design for small-scale production.

The end result is a fascinating write-up that dives into the design decisions [Glen] made. Every aspect of this project, from the overhang of the β€œhandle” on the 3D printed barrel to the number of passive components on the PCB was carefully considered. Critics may say [Glen] put too much thought into something that didn’t need to be so complex, but projects like these are an excellent way to keep your skills sharp β€” there’s no such thing as practicing too much.

Starting with the design of the barrel itself, we appreciate that [Glen] kept the capabilities of his desktop 3D printer in mind. By breaking the design up into multiple pieces and avoiding overly steep angles, he produced a design that prints cleanly without the need for support material. His step-by-step documentation and screenshots also serve as a great introduction to designing parts in Fusion if that’s something you’re interested in.

From there, things switch over to the electronics. Some in the audience will bemoan that he’s using a PIC12F1612 microcontroller to blink a single LED instead of a 555, but [Glen] brought the receipts on this one. Not only does the PIC offer more flexibility in terms of getting the blinking to look the way he wants, but it requires fewer passive components on the board and is considerably more energy efficient than the iconic timer IC. Even if you ignore all the other advantages, he calculates that going with a 555 would have cut the battery life of the finished product by approximately 15%.

This is one of those projects that’s difficult to summarize in such a terse format, as every time you think the write-up must be about over it takes a new turn on you. We were mildly bemused when the second iteration of the PCB popped up, but by the time he introduced the custom programming adapter board, we knew [Glen] wasn’t messing around.

Unsurprisingly, this isn’t the first time we’ve seen [Glen]’s handiwork. You may recall seeing his RP2040-powered sound board earlier this year, but his name has been popping up on these pages for more than a decade now.

PolyShot Camera Focuses On Nostalgia

An open-source, DIY, point-and-shoot digital camera.

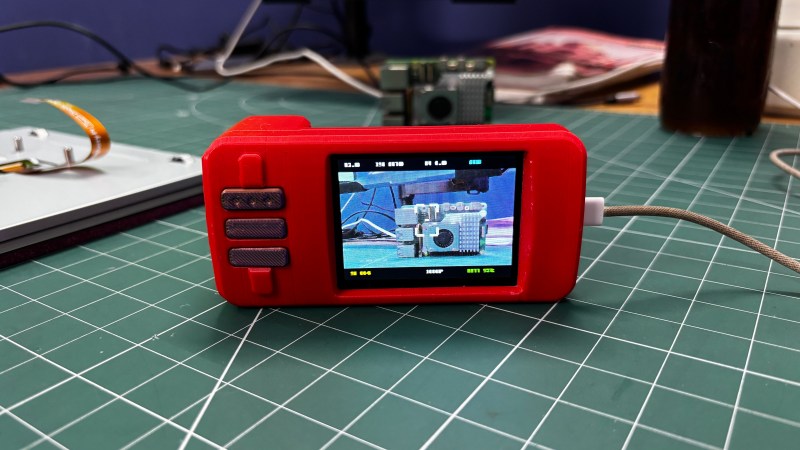
Although we personally have yet to see anyone brandishing an old digital point-and-shoot camera, we hear they’re back in vogue. Why, though? People are nostalgic for that image quality. While he certainly could have simply picked up a vintage model somewhere for a likely inflated price, [Arnov Sharma] decided to build his own version and call it the PolyShot.

The core of this project is the Unihiker K10 dev board, which uses an ESP32-S3, a whopping 2 megapixel camera, and a micro SD card to capture photos and display them back on the screen. The tricky part, if you can call it that, is the custom PCB. It’s a simple board with just three buttons: shutter, gallery, and next image. We do like that the position of the battery compartment creates a nice grip.

The biggest difference here is that there is a few-second delay between pressing the shutter button and actually capturing the image, which you can see in the short videos below. So if you’re trying to get a shot of a skink or something equally speedy, we wish you good luck.

In a future iteration, [Arnov] wants to address the issue of image quality, because this project ended up evolving into a more traditional digital camera. He would also improve the battery life, for which the current expectancy is around three hours on a charge. Ultimately, [Arnov] wants to ditch the Unihiker and design everything from the ground up, using an ESP32-S3 module.

Β 

❌