Reading view

There are new articles available, click to refresh the page.

Peach Meets Grill: Cinnamon-Grilled Peaches with Bourbon Glaze

Photo Credit: Steven Raichlen


By Steven Raichlen

Some years ago, while researching Japanese barbecue, I found myself at a produce market in Tokyo. There, amid the Yubari king melons and giant Amaou strawberries, was a $70 peach.

Flabbergasted, I asked the vendor how a single peach could cost $70. He explained the philosophical differences between Japanese and American agriculture.

“An American farmer looks at a peach orchard and thinks about how many tons of peaches he will harvest,” the vendor said. “A Japanese farmer looks at his orchard and thinks that one tree will produce peaches far superior to all the rest. And on that tree, one branch will produce a peach so extraordinary, connoisseurs will line up to pay $70 for the privilege of buying it.” (Sadly, I was not among them.)

Wildfire Banner

Why Grill Peaches?

I’m not going to tell you about a $70 peach this week, but I will tell you about a peach dish that tastes like a million bucks. It involves a spice, an herb, and a piece of cooking equipment near and dear to our hearts. You guessed it: the grill.

The spice in question is cinnamon—more precisely, the rolled bark of the tree that gives us ground cinnamon: the cinnamon stick.

cinnamon grilled peaches

Photo Credit: Steven Raichlen


The herb is celebrated across Planet Barbecue for its vibrant refreshing flavor: fresh mint.

To put them together, you make mini kebabs with peach quarters and mint, using cinnamon sticks as skewers.

cinnamon grilled peaches

Photo Credit: Steven Raichlen


The Bourbon-Brown Sugar “B3” Glaze

Like all good barbecue, these grilled peach kebabs come with a sauce—in this case, my “B3” sauce. The three Bs are bourbon, brown sugar, and butter, with a whisper of heavy cream to hold them together.

Grill over a hot fire to caramelize the outside of the peaches, leaving the inside juicy and raw.

The crowning touch? Serve the grilled peaches over ice cream.

Summer never tasted so good!

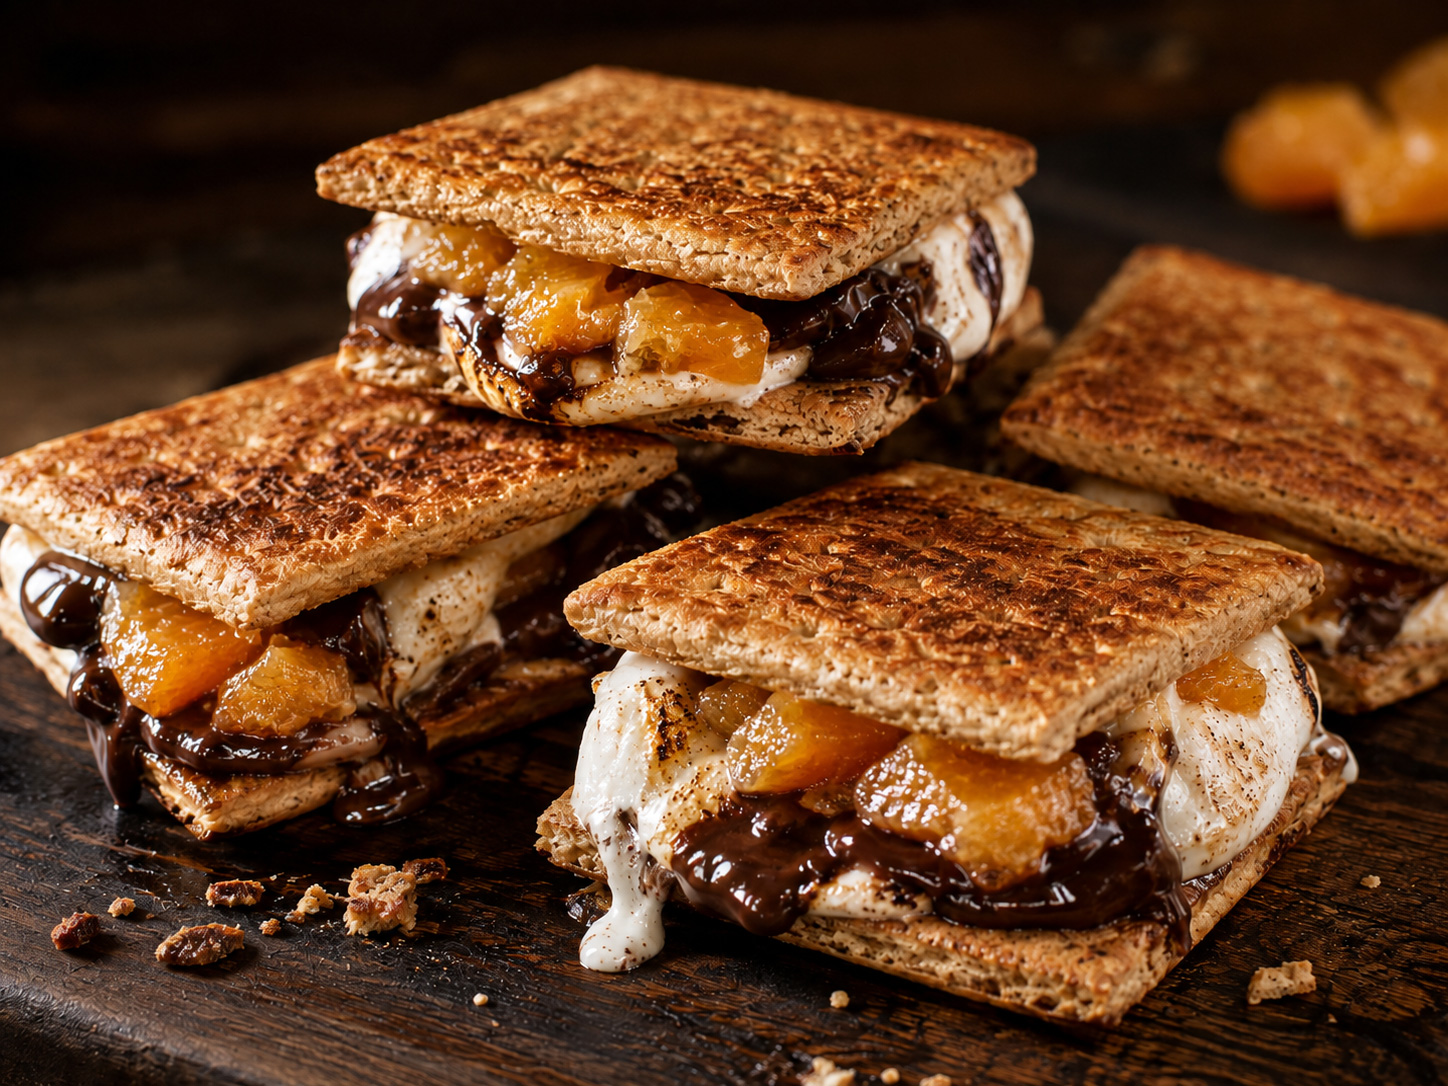
Cinnamon-grilled peaches with bourbon glaze and vanilla ice cream

Photo Credit: Steven Raichlen


How to Make Cinnamon-Grilled Peaches

Recipe

Cinnamon-Grilled Peaches with Bourbon Glaze

Recipe by Steven Raichlen

These fresh peach kebabs use cinnamon sticks as skewers, with mint
leaves tucked between the fruit. As the cinnamon sticks char, the
heat releases their aromatic oils. The peaches are finished with a
creamy bourbon, brown sugar, and butter glaze.

Method
Direct grilling
Serves
4

Ingredients

  • 4 large ripe freestone peaches
  • 1 bunch large fresh mint leaves
  • 8 cinnamon sticks

For the B3 Glaze

  • 1/4 cup bourbon
  • 1/4 cup brown sugar
  • 1/4 cup (4 tablespoons) unsalted butter
  • 2 tablespoons heavy cream
  • 1 pint vanilla ice cream, for serving

You’ll also need: Bamboo skewer and martini glasses

Instructions

  1. Cut each peach in half along the crease, running your knife in a
    circular motion around the peach and cutting to the pit. Twist the
    halves in opposite directions to separate them. Using a spoon, pry
    out and discard the pit. Cut each peach half in half.
  2. Using a bamboo skewer, poke a starter hole through the middle of
    each peach quarter. Skewer 2 quarters on each cinnamon stick,
    placing a fresh mint leaf between them.
  3. Make the B3 glaze: Combine the bourbon, brown sugar, butter, and
    heavy cream in a saucepan and bring to a boil over high heat. Let
    the glaze boil until thick and syrupy, about 3 minutes.
  4. Set up the grill for direct grilling and heat to high. Brush and
    oil the grill grate.
  5. Arrange the peaches on the hot grate and grill until nicely
    browned, 3 to 4 minutes per side, basting frequently with the
    bourbon glaze.
  6. Spoon the ice cream into martini glasses. Place 2 peach skewers in
    each glass and spoon the remaining bourbon glaze on top. Garnish
    each with a sprig of mint and serve at once.

Frequently Asked Questions

What kind of peaches are best for grilling?

Use large, ripe freestone peaches. Freestone peaches are easier to separate from the pit, making them simpler to quarter and thread onto the cinnamon sticks.

Do you need to peel peaches before grilling them?

No. Leave the skins on the peaches. The skins help the peach quarters hold their shape on the grill and make them easier to handle.

How long do peaches take to grill?

Grill the peach skewers over high direct heat for 3 to 4 minutes per side. The peaches should be lightly browned and caramelized on the outside while remaining juicy inside.

Wildfire Outdoor Living is an Arizona-based company specializing in high-performance gas grills and premium outdoor kitchen solutions. Wildfire brings a commitment to cutting-edge technology and industry-leading innovation. Their 304 stainless steel design and illuminated LED knobs, cast stainless steel burners, and laser-cut stainless steel cooking grates create products that will provide peak performance. They also allow you to customize your outdoor kitchen with designer finish knobs and handles to meet the growing demand for designer outdoor kitchens.

Plan your next cook with our full recipe collection—weeknight grills, weekend projects, and special-occasion feasts.

Get Steven’s weekly grilling tips, seasonal recipes, and live-fire ideas in your inbox. Join our Up in Smoke newsletter. Sign up and get a FREE PDF of Steven Raichlen's Best Ribs Recipes Ebook.

Preorder Man On Fire — A Steven Raichlen Memoir. And get some really cool rewards!

Looking for more summer grilling inspiration? Check out our Summer Grilling Guide.

The post Peach Meets Grill: Cinnamon-Grilled Peaches with Bourbon Glaze appeared first on Barbecuebible.com.
How to Grill the Perfect Steak: 7 Steps to Tender, Juicy, Smoky Beefy Nirvana

Steak! A five-letter word that spells a mountain of pleasure. For some of us, it’s the ultimate luxury; for others, a weeknight dinner. It’s so easy to grill, even a first-timer can earn bragging rights, yet you can spend a lifetime perfecting the fine points. Steak is the one dish everyone should know how to grill.

Too often, people make simple, avoidable mistakes: Undercooking. Overcooking. Flipping too seldom or too often. Leaving the beef out to warm to room temperature (especially dangerous in summertime heat). Serving it hot off the grill or resting it so long, the steak is cold by the time you cut into it.

Here’s the ultimate guide to achieving the perfect steak every time.

Steak Cooking at a Glance

  • Best Steaks: Ribeye, NY Strip, Porterhouse, Filet Mignon, Skirt, Flank, Hanger
  • Seasoning: Coarse salt and freshly cracked black pepper
  • Doneness (Med-Rare): 130°F to 135°∘F
  • Resting: 1 to 2 minutes on a wire rack
  • Best Method: Direct grilling for steaks up to 1-1/2 inches thick; reverse searing link for 3- to 4-inch thick monsters

Step 1: Start with the Right Steak

Five factors determine the excellence of your steak: cattle breed, feed, aging, grade, and cut.

  • Prime vs. Choice: The USDA grades beef on marbling (intramuscular fat). Only 2% of beef qualifies as Prime—highly flavorful, tender, and luscious. Choice is what you find at most supermarkets—less rich, but still very tasty.
  • Wagyu vs. Angus: Wagyu is renowned for its hyper-generous marbling; an A-5 Japanese Wagyu looks like white lace on red cloth. Angus delivers a bold, robust, classic beefy flavor enjoyed across North America.

    D'Artagnan American Wagyu beef

  • Grain-Fed vs. Grass-Fed: Corn-fed beef produces rich, buttery, meaty steaks. Grass-fed beef is leaner with a distinctive, almost herbaceous flavor. The ideal compromise is beef raised on grass, then finished with grain.
  • Dry-Aged vs. Wet: Dry-aged beef, hung unwrapped in climate-controlled rooms for 28 to 36 days, loses moisture, concentrating the beefy flavor and creating rich umami notes. Wet-aged beef matures in vacuum-sealed plastic; it is faster, cheaper, and tasty enough, but lacks the rich, concentrated flavor of dry-aged beef.

The Four Steak Categories

  1. The Noble Steaks: Upper steer cuts (filet mignon, ribeye, strip, porterhouse) that are intrinsically tender and rich.

    Grill Marks!

  2. The Belly Steaks: Undercarriage cuts (skirt, flank, hanger). Intensely flavorful but stringy; slice thinly against the grain to ensure tenderness.
  3. The Tough Steaks: Round and chuck. Slice paper-thin for cheesesteaks or chop fine for carne asada.

  4. The Cult Steaks: Unique cuts like tri-tip, picanha (featuring a luscious fat cap), and flatiron.

Step 2: Keep Seasoning Simple and Strategic

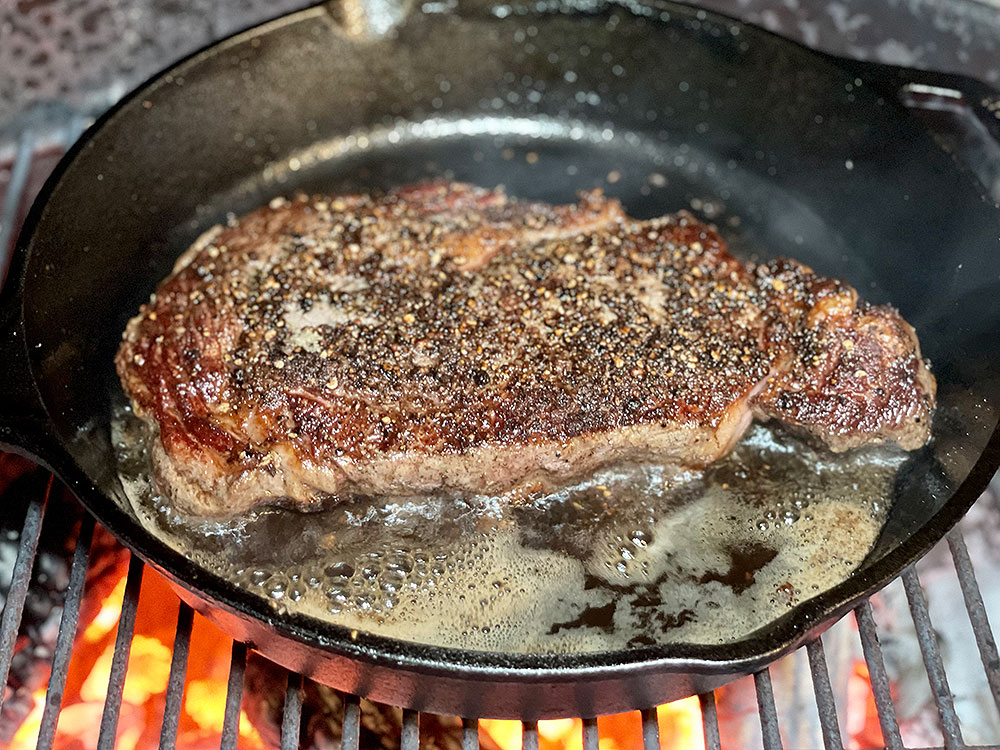
For premium beef, skip heavy, muddying marinades. Stick to coarse sea salt or kosher salt and freshly cracked black pepper. Season your steak early—about 45 to 60 minutes before grilling. This allows the salt to draw out moisture, dissolve, and reabsorb back into the fibers, seasoning the meat deeply. If you’re short on time, season immediately before the steak hits the grates.

Do not let steaks warm to room temperature beforehand. The difference in cooking time is negligible, and it is simply not worth the food safety risk. Keep them cold until they go on the grill.

Step 3: Set Up Your Grill for Two-Zone Cooking (Wood Smoke Optional, But Desired)

Arrange your coals or burners so you have a screaming-hot direct zone for searing and a cooler, zone for cooking. Control the cooking by moving the steak back and forth between the hot and less hot zone. Add wood chunks or chips (like oak, hickory, or pecan) directly to your coals or place in your gas grill’s smoker box. A quick blast of wood smoke during grilling makes a good steak great and a great steak unforgettable.

Step 4: Sear Hot and Flip Frequently

Forget the old myth of flipping your steak only once to get crosshatch grill marks. (Mea culpa—I used to recommend this in my earlier books.) I’ve come to see that flipping your steak often—every 20 to 30 seconds—cooks the meat more evenly and helps build a darker, richer crust. Focus on the crust and flip often.

Reverse searing steaks

Step 5: Master the Reverse Sear

  1. Place your seasoned steak on the cooler, indirect side of your grill (225°F to 250°F).
  2. Indirect grill (with grill lid down) to heat the meat to an internal temperature about 20°F below your target doneness (for example, to 110°F for a medium-rare steak)
  3. Move the steak directly over the high-heat, searing for 1 to 2 minutes per side to build a sizzling dark crust and internal temperature of 130°F.
The Steak Doneness Guide
Doneness Description Internal Temperature Poke Test Feel
Rare Warm red interior 120°F to 125°F Soft and squishy
Medium-Rare Hot red to dark pink interior 130°F to 135°F Yielding
Medium Pink interior 140°F to 145°F Gently yielding
Medium-Well Grayish pink interior 150°F to 155°F Firm
Well Done Gray interior 160°F+ Hard and springy

Note: Measure internal temperature using an instant-read thermometer inserted horizontally through the side of the steak. For the poke test, press the top of the steak with your forefinger. The amount of resistance will tell you the doneness. Use a thermometer for thicker steaks; the poke test for thin steaks like skirt.

Step 6: Give It a Rest

A steak served “hot off the grill” sounds romantic, but resting your steak on a wire rack over a sheet pan for a minute or two will give you a tenderer, juicier steak. (Resting relaxes the meat, allowing the juices to redistribute. The wire rack keep the bottom from getting soggy.) But over-resting results in a lukewarm or even cold steak, which does the meat an injustice.

Step 7: Carve It Right

It has become fashionable, if not de rigueur, for steakhouses to pre-slice your steak before serving. Don’t. This may look dramatic, but a pre-sliced steak gets cold and dry very quickly. Serve your steak whole and let the diner slice it him- or herself.

Not like this!

Note: the one exception here are belly steaks, like skirt and flank, which should be thinly sliced across the grain to shorten the tough meat fibers.

Finally, don’t forget to anoint

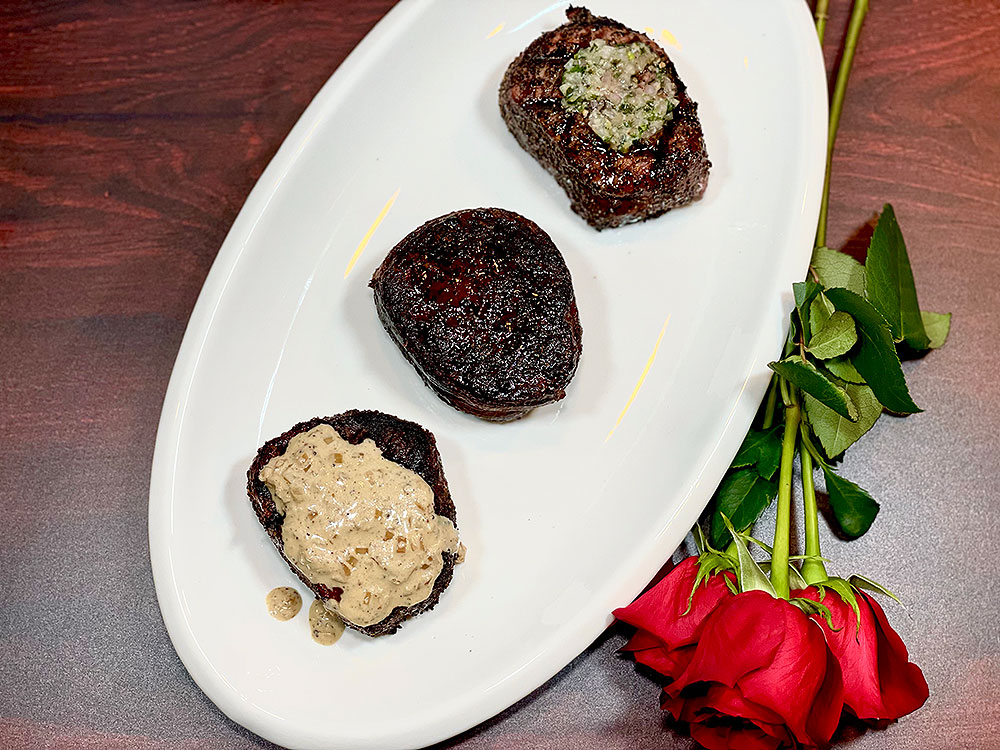
A great steak needs little more than salt and pepper by way of a seasoning, but a pat of compound butter link or drizzle of melted butter or extra virgin olive oil makes a great steak even better

Great Steak Recipes to Try Next

More Steak Recipes »

Frequently Asked Questions

What is the best way to cook steak on the grill?

For thick cuts, use the reverse sear method. For thinner cuts, cook directly over high heat, flipping frequently.

How long should you grill steak?

Figure on 2 to 2-1/2 minutes per side for thin steaks, about 1/2 inch thick; 3 to 4 minutes per side for 1-inch steaks; and about 5 minutes per side for 1-1/2-inch steaks. When using the reverse sear method for a really thick steak, figure on 40 to 60 minutes for the low-heat indirect grilling, followed by 2 to 3 minutes per side for the high-heat sear.

What temperature should steak be cooked to?

Medium-rare, 130°F to 135°F, is ideal for many steaks. Use an instant-read thermometer inserted into the side of the steak to verify doneness. For thinner steaks, like skirt and flank, use the poke test: press the meat with your forefinger to feel the resistance. Pull the steak a few degrees early, as carryover cooking will raise the temperature during resting.

How do you make steak tender on the grill?

Select well-marbled cuts, season like you mean it, do not overcook, and rest the meat for a minute or two before serving.

Should you grill steak with the lid open or closed?

Keep the lid open when searing thin steaks over high heat. Keep the lid closed during indirect cooking or when finishing thick steaks.

Want to go deeper on the craft? Explore our grilling techniques and how-to guides for ribs, steak, chicken, seafood, and more.

Get Steven’s weekly grilling tips, seasonal recipes, and live-fire ideas in your inbox. Join our Up in Smoke newsletter. Sign up and get a FREE PDF of Steven Raichlen's Best Ribs Recipes Ebook.

Preorder Man On Fire — A Steven Raichlen Memoir. And get some really cool rewards!

Looking for more summer grilling inspiration? Check out our Summer Grilling Guide.

The post How to Grill the Perfect Steak: 7 Steps to Tender, Juicy, Smoky Beefy Nirvana appeared first on Barbecuebible.com.
Corn on the Grill: Three Ways to Do It Right

If you’re like us, we wait all year for summer corn. Wherever you live, summer means one thing: corn is at its peak, and there’s no better way to cook it than—you guessed it—on the grill. Live fire brings out corn’s sweetness, adding an inimitable smoky flavor. Grilling turns a simple ear into one of the great pleasures of the season.

Selecting Good Corn

Great grilled corn starts at the market. Look for ears with bright green husks that cling tightly to the cob and silk that feels slightly moist, not dry or brittle. The kernels should feel plump through the husk, and the ear should feel heavy for its size.

Firemen's Corn

And, of course, buy local. Here at barbecuebible.com, we’re incredibly lucky. Steven lives in Martha’s Vineyard; Daniel in North Carolina, John in New Jersey, Nancy in Iowa, and Jared in New York. All of us have fantastic local corn in July and August.

Avoid corn with dried-out husks, blackened silk, soft spots, or missing kernels near the tip. Corn starts losing sweetness soon after it’s picked, so buy it as fresh as you can and grill it the same day if possible.

Ways to Grill Corn

There are a few basic ways to grill corn, and each gives you a different result.

Corn Naked (without the husk and directly over a hot fire)

This is my favorite way to grill corn. You remove the husk (or fold it back over the stem to make a handle), brush the ears with melted butter or extra virgin olive oil, and season generously with salt and pepper. Then direct grill it over high heat until the kernels are nicely browned, basting with more melted butter as the corn cooks. The high dry heat caramelizes the natural plant sugars in the corn, making it all that much sweeter and smokier.

Corn Caveman Style

If you like your corn with even more smoke and char flavor, set up your grill (charcoal please) for caveman grilling—that is remove the grill grate ad rake out the embers in an even layer. Lay the corn in its husk directly on the coals. Grill until the husk burns off, turning with tongs, but not so long that the sweet kernels burn. Figure on 2 to 3 minutes per side, 8 to 12 minutes in all.

Corn in the husk

This method gives you juicy corn with a gentle roasted flavor. Pull back the husks without removing them, strip away the silk, brush the ears with melted butter and season with salt and pepper, then pull the husks back over the ears. Direct grill the corn over medium-high heat for 15 to 20 minutes, turning occasionally, until the husks are browned and the kernels are tender.

Corn in Foil

In a word, don’t. Foiled corn steams rather than grills. Use one of the methods above.

How to Know When Corn Is Done

Corn is done when the kernels are golden brown, hot, and tender. If you press a kernel lightly, it should give a little and release juice. Corn grilled directly on the grates should have browned or lightly charred spots, but the kernels should still look plump.

Flavor Ideas from Planet Barbecue

Once the corn comes off the grill, the fun starts. Butter, salt, and pepper are enough when the corn is fresh and sweet, but grilled corn also loves bold seasonings. In Mexico, it’s slathered with mayonnaise, sprinkled with grated Cotija cheese (parmigiano or romano also work well), and sparked with chile and lime. In India, it might be electrified with cayenne and lime. Steven loves Cambodian style grilled corn, brushed with coconut milk and curry paste and dusted with shredded coconut.

Here are some fantastic recipes to try to make the best grilled corn you’ve ever tasted!

Master Recipe For Grilling Corn

A great starting point for grilling corn simply and getting the basic technique right.

Corn on grill with shield

Get The Recipe »

Mexican Grilled Corn

A street-food favorite finished with mayonnaise, cheese, chile, and lime.

Windy City Mexican Grilled Corn

Get The Recipe »

Grilled Corn with Sesame-Soy Butter

A savory, Japanese-inspired butter gives grilled corn a rich, umami finish.

Grilled Corn

Get The Recipe »

Ember-Roasted Corn

A more primal live-fire method that roasts the corn directly in the embers.

Ember-Roasted Corn

Get The Recipe »

Firecracker Corn Grilled with Tabasco Butter

A spicy, buttery version for anyone who likes corn with a little heat.

Firecracker Corn

Get The Recipe »

The Best Way to Grill Corn

However you grill it, corn does not need much to be great. Start with fresh ears, choose the method that gives you the texture and char you want, and serve it hot. Husk, foil, or directly on the grates—when summer corn is at its peak, the grill is the best place for it.

Frequently Asked Questions

How long does corn take on the grill?

Naked corn, with the husk removed, usually takes 8 to 12 minutes over high heat. Turn the ears every 2 to 3 minutes so the kernels brown evenly without burning.

Is it better to grill corn in the husk, in foil, or directly on the grates?

It depends on the result you want. Corn grilled naked, meaning husked and cooked directly over the fire, gives you the most char and live-fire flavor. Corn grilled caveman style has the biggest wow factor because the ears cook directly on the embers. Corn grilled in the husk stays juicy and has a gentle roasted flavor.

Should you soak corn before grilling?

You can soak corn if you’re grilling it in the husk, but it is not mandatory. A 15- to 30-minute soak can help keep the husks from burning too quickly. You do not need to soak corn that is grilled directly on the grates or caveman style.

Why did my grilled corn dry out?

Corn can dry out if it cooks too long, if the heat is too high, or if it is grilled directly over the fire without enough turning. Pull the corn while the kernels are still plump and juicy, and baste often with melted butter or extra-virgin olive oil. Once the kernels start to shrivel, the corn is overcooked.

Can you put butter or olive oil on corn before grilling?

Yes, but it depends on the method. For corn grilled directly on the grates, use a light coating of oil before grilling, then add butter after the corn comes off the grill to avoid flare-ups.

Build your live-fire skills with our Back-to-Basics library—setups, temps, tools, and pro moves that make a difference.

Get Steven’s weekly grilling tips, seasonal recipes, and live-fire ideas in your inbox. Join our Up in Smoke newsletter. Sign up and get a FREE PDF of Steven Raichlen's Best Ribs Recipes Ebook.

Preorder Man On Fire — A Steven Raichlen Memoir. And get some really cool rewards!

Looking for more summer grilling inspiration? Check out our Summer Grilling Guide.

The post Corn on the Grill: Three Ways to Do It Right appeared first on Barbecuebible.com.
❌