❌

Reading view

There are new articles available, click to refresh the page.

Running Generative AI on an RP2350

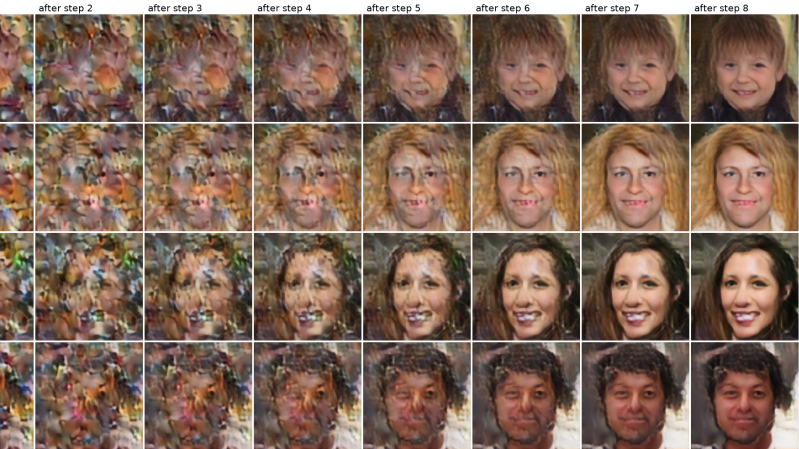
A grid of images shows pictures emerging from patches of random noise. To the left, images are more random, while to the right they become more recognizable.

Driven by a desire for privacy, customization, and lower costs, there’s growing interest in AI models which can be run on local hardware. Few of them go as far as [Tim], though, who built an image generation diffusion model which can run on an RP2350 microcontroller.

As might be expected, its capabilities are limited. The resolution is 128Γ—128, it only generates images of human faces, and it takes about twenty seconds per image – still impressive for such limited hardware. It runs on a Waveshare RP2350 development board, and it can output the generated image over USB or display it with the aid of a VGA adapter board.

The generative model doesn’t directly create an image. Rather, it generates a distribution in a latent space, which a variational auto-encoder’s decoder component translates into an image. The auto-encoder was trained in two parts: an encoder which transforms an image into a latent-space distribution, and a decoder to transform that distribution back to an image; once this was trained, only the decoder was used.

The generative portion of the model uses a latent flow diffusion transformer; this takes in noise to start with, then iteratively predicts changes which bring it toward the desired image. It can also take in a output class, which guides the generator’s direction (toward a smiling face, for example). [Tim] trained two models, one larger and one faster, and quantized the weights for both to 8-bit integers. Both models, along with the inference program, then fit into 4 MB of flash memory.

For such a small model, the results are remarkably good; they don’t look quite natural, but they’re quite recognizable. For more on how diffusion image generators work, check out our article on Stable Diffusion.
The Birds Outside, Drawn For You Automatically

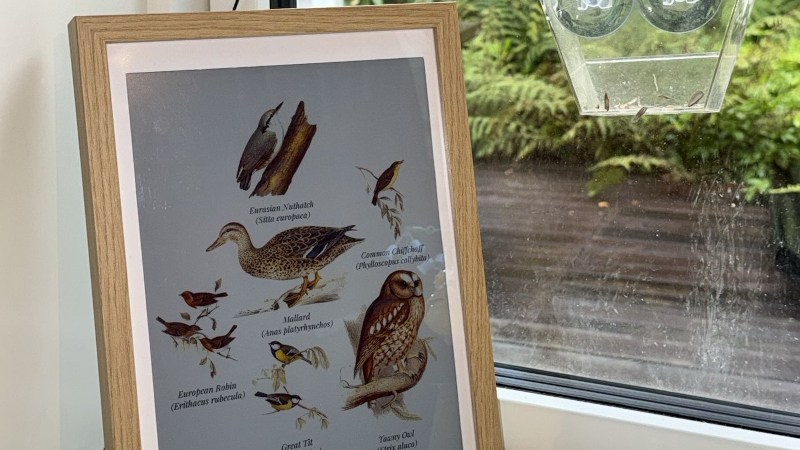
With artificial intelligence being the bΓͺte noir of the moment, there are some projects using it which maybe don’t bring much to the table. So it’s nice to see one that uses it in a creative way, and delivers something new. [arnegiacomo]’s e-paper screen is a great example, as it draws a picture in real time of whatever birds are outside.

Behind the quite large screen sits a Raspberry Pi 5, and on that is BirdNet-Go, an AI-powered birdsong classifier. A USB microphone catches the birdsong, and Birdnet comes up with the species. The birds on the display are then those species as pictures from 19th century bird spotters guides, assembled into a collage. You can even see what the current set of birds it hears are, live, and they are a representative cross section of the European birds you’d find in Norway where it’s located.

We like this project, both for the bird book vibe it gives, and the creative use of machine classification. Surprisingly this isn’t the first project in this field we have seen over the years.

Amiga-Inspired AROS Goes Bare Metal on Raspberry Pi

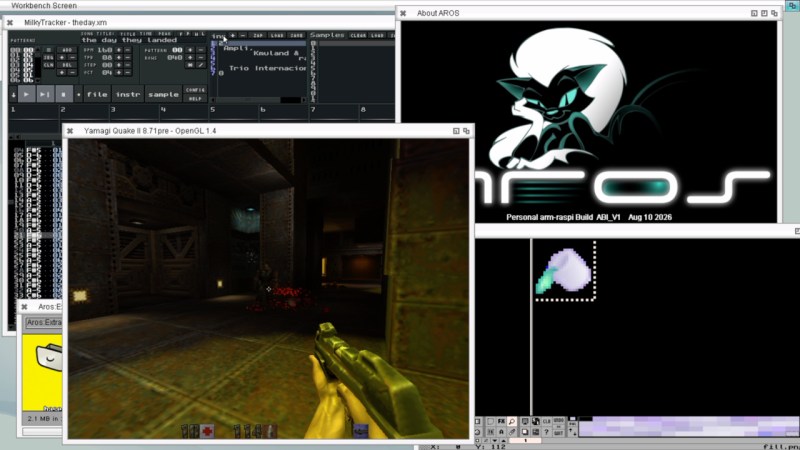
There’s no actual data, but if we had to guess the least-favourite Disney movie of former Amiga owners would have to be Frozen, because none of them will ever be able to β€œLet it Go”. The Amiga-derived AROS Research Operating System has just been ported to boot bare-metal on the Raspberry Pi, in both 32-bit and 64-bit versions. Yes, there’s a 64-bit Amiga-compatible OS that runs on ARM. It truly is a time of wonders.

AROS has already been ported to a number of platforms. Besides x86, there’s a PPC port that provided a lot of code to the MorphOS, which you can read about here, and a back-port that brings AROS back to original Amiga 68k hardware. There is even a build for RISC V.

AROS developers are making sure that Amiga legacy isn’t stuck on any given hardware, so they never have to let it go. So while not totally out of left field, this development is β€œpretty nifty” both in that it gives another ultralight operating system for the Pi, with boot times to rival RiscOS, and another platform for ex-Amiga users to play with that isn’t 40 years old. Previously if you wanted to run AROS on a Pi it was virtualized in Linux, making it similar to all other Amiga emulators.

While some software has been recompiled for ARM, the available software isn’t as full-featured as x86, but that’s almost certain to change as time goes on. It’s early days yet and this build is very much a work in progress. Likewise we expect support for other Pi boards to expand, as while right now the target is the Pi3, the forum threads include discussion of the Pi4 and even Zero2W.

You can check the port out in action in a video by [Dan Wood] embedded below, sent to us by tipster [Stephen Walters]. Thanks [Stephen]!

We have featured AROS once before, thought it’s been a while.

Teardown Shows Low-Fi Microphone is Surprisingly Sophisticated

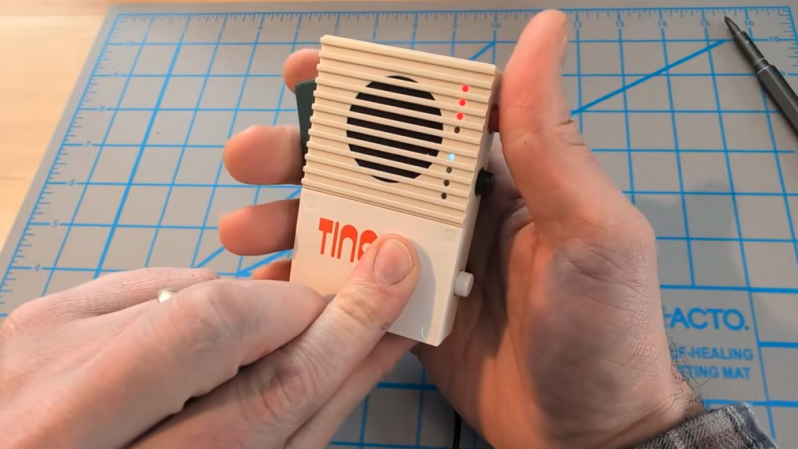
The Ting FX EP-2350 by Teenage Engineering is a standalone microphone with a few extras, including samples and built-in effect presets that can be modified by the user. It also has a distinctive design, and [Sam Holland] does an in-depth teardown that offers some insights that are worth keeping in one’s back pocket. The large, side-mounted lever in particular is an interesting bit, but more about that in a moment.

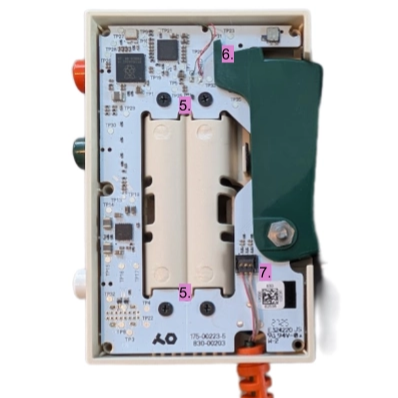
Inside the device is a single PCB, which has a cutout in the middle for a pair of AAA cells. A Raspberry Pi 2350 drives the device’s functions, supported by various components which [Sam] identifies, although he mostly looks at everything from the perspective of a mechanical engineer as he critiques the design. It’s a clean-looking, intentionally low-fi design thatΒ belies how complex the device really is.

The multi-function, chunky, spring-loaded side lever is of particular interest. It has three sensors: two switches and a potentiometer. One switch detects when the lever is at rest, or depressed by any amount at all. The potentiometer mates with the pivot point of the lever, allowing the device to directly sense how far the lever is pushed. The last switch triggers when the lever is pushed all the way in. Together, it forms an intuitive input that combines powering on (the device wakes up from sleep mode as soon as the lever is pressed) with the ability to adjust effects in proportion with how far the lever is pressed, while also bottoming out with a distinct clickΒ that itself acts as an input signal.

One other interesting bit is the light pipes that carry light from multiple indicator LEDs to the outside of the device. A textured surface acts as a diffuser and helps the lit surface look smooth, while a coating of silver paint prevents light bleed and (probably) maximizes light transmission through the plastic. Hot glue makes a pretty good light pipe material but if DIY light pipes end up in your next project, sanding the exit surface and giving the rest a coating of silver paint just might be worth a shot.

❌