Reading view

There are new articles available, click to refresh the page.

E-ink Writing Deck Rocks a Typewriter Aesthetic

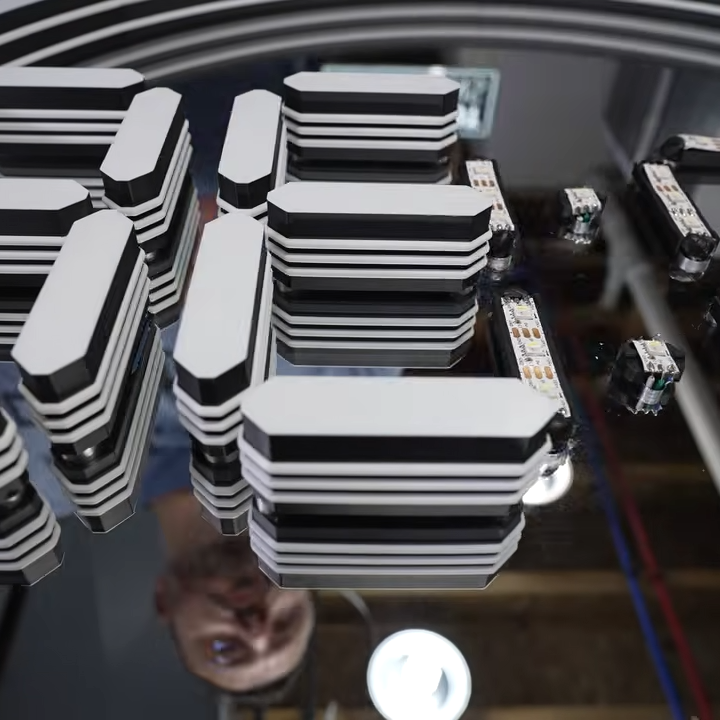
[Myth Made] has a goal to get into writing. However, she likes to do things the aesthetic way, rather than the easy way. Thus, she has eschewed simple word processing on a conventional computer, instead choosing to build a remarkably attractive writing deck styled after a classic typewriter.

The keycap marking technique is worth watching the video for on its own.

The build began with a mechanical keyboard with a compact layout. The square keycaps were swapped out for custom 3D printed versions that were rounded to suit the desired look. [Myth Made] used a neat technique where the caps were colored in with a paint marker and then ran through a laser engraver to bond the paint to the surface to make all the key markings.

With the input side sorted, the rest of the build could progress. The typewriter shell was printed in multiple parts, and then welded together with acetone. This was then covered with an ABS-acetone solution that helped remove some of the surface artifacts, before priming and paint. As for the electronics side, a Raspberry Pi Zero runs the show, hooked up to a Waveshare e-ink display which can be cranked up and down like a piece of paper coming out of a typewriter. There’s also a lovely 7-segment display which displays the current word count.

It’s a fun build that looks utterly joyous to use. Sometimes leaning into the aesthetic side of a project is what makes it so magical.

BASICally, Its Retro Machine Language

We enjoyed [Beej’s] trip down memory lane looking at a BASIC game, The Wizard’s Castle, written for the Exidy Sorcerer. It appeared in a 1980 magazine that included the title graphic above. It reminded us how, back in those days, we did things with BASIC that you shouldn’t be able to do and it often looks, today, rather cryptic.

In particular, even if you know modern BASIC, these few lines might give you a pause:

10 REM"_(C2SLFF4
40 POKE 260,218: POKE 261,1: T = USR(0): T = PEEK(-2049)
80 Q = RND(-(2*T+1))

Line 10 is a comment, but a strange one. Certainly that doesn’t matter, right? Actually, it is a key part of the action. On line 40, you can see some pokes to write directly to memory and a peek to read some memory value back. The USR function calls some machine language program. You may realize the whole thing is to get some value T to seed the random number generator in line 80.

This leads to a few obvious questions. First, how does USR know what to call? Second, where is the machine language program? The details varied by system, of course, but in this case, the program knows that location 259 has a jump instruction that USR called. So poking an address into 260 and 261 was telling USR where it should go.

But what’s at that address? Keep in mind that an old computer like the Sorcerer didn’t have megabytes of memory being swapped about by an operating system. That means that things tended to be in known places and that BASIC had to be judicious about storing source code.

As was common at the time, a line like “10 PRINT 1+1” would get tokenized. In this case, each line would get a pointer to the next line, a two-byte line number, a single-byte token for “PRINT” and then more bytes to represent the rest of the line. In the case of text in a string or a remark, the bytes were just the text with a zero to terminate the string.

The first line entered would always be at address 469. So? If you consider the format of the REM statement, there will be a pointer at 469 and 470, the line number at 471 and 472, and the REM token at 473. That means the other bytes just get poured into address 474 and beyond.

That might seem like an odd number until you look at the pokes in line 40. Keep in mind that POKE works on bytes, not words. So poking 1 into 261 gives you an address of 256 + whatever is in the low byte, in this case 218. Add 256 and 218, and you get… 474! So USR is going to call that odd string in line 10!

There is more to the detective story, but if you want to know exactly what the REM did, you can read the original post.

Hackaday Europe 2026: Half Quad, Half Blimp: Test. Fly. Survive.

A great many drones out there, whether homebuilt or store-bought, follow the same basic format. Four motors, some kind of controller, and a lithium-polymer battery supplying the juice to keep everything in the air. It’s a format that produces a remarkably capable air vehicle, suitable for everything from high-speed camera work to urban search and rescue.

With that said, the format does have its limitations. [Suryansh Sharma] has been working on alternative designs for fancy and interesting drones that are half quadcopter and half blimp, and he came to Hackaday Europe 2026 to tell us all about it.

Combining a multirotor design with a balloon for additional lift proved useful for certain applications. Despite the motors all being mounted in the horizontal plane, vertical translation is possible by firing the right combination of motors, due to convenient aerodynamic effects.  Credit: slides

[Suryansh]’s talk took in a number of drone projects which he has been involved with. The first was the creatively-named BEAVIS, or Balloon Enabled Aerial Vehicle for IoT and Sensing. This was a project that aimed to tackle one of the greatest limitations of the common multirotor drone. Namely, as [Suryansh] so elegantly puts it, they “suck when it comes to staying in the air.” This is for a very simple reason—much like the helicopter, a multirotor drone must expend energy continuously to generate lift by spinning its propellers. Conventional multirotors don’t have wings that generate lift from forward motion, and any sort of gliding or similar behavior is basically impossible. Continual energy expenditure is the only thing keeping a multirotor aloft.

The point of BEAVIS was to fix this by combining drone tech with a simple lighter-than-air balloon. It’s an interesting combination, because a multirotor drone has excellent maneuverability and agility, but terrible endurance. A lighter-than-air balloon is quite the opposite, which has excellent endurance while suffering in all other respects. The BEAVIS concept outfits a small balloon with four motors in a split-cross configuration, which allows for planar translation as well as the ability to control yaw of the craft. With all four motors mounted horizontally in the same plane, it may seem like vertical control is not possible. However, by turning on two opposing props, it’s possible to create a low-pressure region beneath the craft which tends to push it downwards. Meanwhile, if you turn all four props on in the right directions, you create a high pressure region underneath the balloon which pushes the craft up. With the balloon, it has the benefit of being able to just hang in the air without continually burning through battery power. Endurance times of well over an hour were possible with this build, compared to maybe less than ten minutes for a comparable pure multirotor.

BEAVIS was developed into JANUS, a drone with an actuator system that pivots the motors so that it can fly in a pure quadcopter mode in the event of balloon failure. Credit: slides

BEAVIS was eventually developed into Janus— described as a “morphing quadrotor blimp with balloon failure resilience.” The goal was to build a craft that was viable for deployment in the real world, and that could undertake mobile ecological sensing work. The main difference to the previous design was that it would no longer solely fly as a balloon with horizontally-mounted props. Instead, Janus would feature a mechanism to allow the rotors to be positioned in the vertical axis to allow for conventional multirotor flight. This was key to allowing the craft to fly both as a lighter-than-air craft, and to survive and keep flying in the event the balloon burst or was otherwise damaged. The build was eventually deployed in Kenya to aid in ecological data collection for conservation efforts.

The Avy emergency response drone uses a metal launchpad and pogo pins to provide electrical power to keep the batteries topped off at all times. Credit: slides

[Suryansh] has been involved in other drone-related projects, too. Open Gimbal was a particularly interesting effort, involving the construction of a bench-testing rig for developing small multirotor drone craft. The 3-DoF platform offered unrestricted rotational freedom, allowing for a craft to be put through its paces in a controlled way without requiring a large open  space for free flight. [Suryansh] also discusses his work with a company called Avy, which specializes in VTOL drones with a focus on emergency response roles. The company has deployed drones that use multirotor technology to launch vertically, while relying on fixed wing aerodynamic elements to extend range and improve efficiency for longer flight times. The drones feature a neat charging setup, wherein pogo pins on the fins pick up power from the metal launchpad to ensure that batteries are fully charged and the drone is ready to go at all times.

Ultimately, multirotor drones have taken on their basic form for good reason. With that said, as [Suryansh]’s talk explains, modifications to the form can have great utility when made to suit a particularly specific mission or application. If you’re developing a drone for a certain purpose, and you’re running into hard limitations, you might try thinking outside the box to make something more fitting for your goals.

Saving Some Coin With 3D Printed Stencils

One of the extra tools someone might need when working with surface-mount components is a solder paste stencil, which not only simplifies the application of solder paste to a PCB but increases accuracy. These metal stencils can cost an annoying amount of money and take time to get delivered, so this group has developed a method to 3D print them instead.

Starting with a PCB design in one’s tool of choice, the Gerber files can be sent to the online Stenchill tool to generate the stencil. Alternatively, a KiCad plugin exists as well. The tool will output files for a 3D printer from there. An FDM printer is required, with either PLA or PETG filament, and some configuration in the slicer is needed to get the accuracy required for a useful stencil. But once that’s all set up, the printer can output a perfectly usable stencil at a fraction of the cost, and without having to wait days for delivery through the mail.

It’s not all upside, though. Although it might be better than applying solder paste with a syringe on a massive board or doing more than one smaller board by hand, it may not be as good as a metal stencil for extremely small pads. But for those who often find themselves using metal stencils and dealing with the downsides that come with them, this could be a viable alternative, especially when prototyping.

If you have a laser cutter handy, that opens up some additional options for stencil production.

Industrial GPU Adapted for the Desktop

As technologies change and adapt, we’re often left with seemingly useless junk that has nowhere to go. Certainly anyone still sitting on a pile of floppy disks feels this way sometimes, but odds are anyone who owns a mining ASIC or an NFT can attest to that as well. The trillions of dollars flowing into GPU-based data centers will likely become the next victim of this trend, so if you want to capitalize on the losses of some venture capitalist you’ll want to figure out a way to get GPUs meant for a server into your desktop doing useful work.

Of course, calling these devices GPUs is a bit of a stretch compared to the Radeon and GeForce cards many of us are used to using for gaming. These don’t even have a PCIe slot or video output, after all. But, as [Oscar] notes, the VRAM and GPU cores are very real and can still do useful work. An adapter board is able to mate a Tesla V100 SXM2 16 GB GPU to a standard PCIe slot, which solves the first problem, but the major downside from there is that the cooling fan for this unit was literally deafeningly loud. At 82 dB it was about as loud as a lawnmower, which is fine in a server rack but not great in a bedroom. [Oscar] found a way to tamp down the fan speed, making it usable in a home.

Without video output, the utility of these cards mainly comes from adding VRAM and compute for tasks that benefit from parallel computing. Using tensor splitting, [Oscar] is running a local LLM with this card alongside his RTX 4080, providing 32 GB of VRAM on his NixOS system. With his benchmarking tests, the LLM sports impressive stats for a self-hosted model, ranking somewhere around Claude Sonnet 4.6. What’s even more impressive is that this is all done for around £200, and with the rate the various LLM companies are ratcheting up pricing could pay itself back very quickly. If trading off performance for cost is acceptable, though, it’s possible to run local models on much less powerful hardware as well.

Dress Up Your YubiKey With This Web-Based Tool

The combination of hardware required to make use of this project is specific enough that we imagine only a relatively limited number of readers will actually be able to try it out. But if you do happen to own a YubiKey and either a laser engraver capable of marking it or a fancy UV printer, [madeinoz67] has put together an awesome tool for adding some visual flair to your two-factor authentication device.

Running it is as simple as opening a web page, because that’s exactly how it’s implemented. You can either host it yourself or just launch it right from the GitHub repository. After opening the HTML file, you’re presented with a fairly intuitive user interface that lets you draw on top of a 2D outline of the YubiKey itself so you can get a better idea of what the final product will look like.

You can pick from an array of vector icons, upload your own images, and add custom text. There’s a pull-down at the top that lets you pick which specific YubiKey you want to work with, and there are different views depending on whether you plan on blasting your handiwork onto the device with a laser, doing a full-color UV print, or cutting it out of vinyl with something like a Cricut.

Even if you don’t have a YubiKey that’s begging for some custom artwork, we think there’s a lot to learn from this project. Obviously there are some very valid reasons to be concerned about how much of our modern software can only be accessed through a browser. If you’re going to use web technologies to create a piece of software, the least you could do is make it offline and self-contained like [madeinoz67] has.

Now if you’ll excuse us, we’ve got to go warm up the UV printer.

A Smarter DIY Air Filter

A vaguely perforated metal cylinder sits on a wooden box with a grey cylinder and LCD display atop it. There are holes in the top of the grey cylinder for air to flow through.

As predominantly indoor creatures, it’s important to maintain a healthy habitat for the hacker. [Kishan Pratap Singh] designed a clever solution in AirSense, an ESP32-powered air filter.

If you’re thinking of cleaning the air in your environment, you might also want to know some properties about the air coming out of the filter. AirSense measures PM2.5 dust concentration, Air Quality Index (AQI), temperature, humidity, and atmospheric pressure. The various sensors are mounted along the exhaust path of the filter, which lets your know what kind of air it’s pumping out.

The system drives a 150 mm exhaust fan mounted in a 3D printed cap that pulls air through a cylindrical Xiaomi HEPA filter inside a perforated metal trash can enclosure. The ESP32 and an LCD readout of the environmental data also live in the cap, giving the device a sleek look. While [Singh] chose to run the filter continuously, we wonder if it might be interesting to set it up to only filter the air if air quality drops below a certain level to conserve power, especially if you’re on a time-of-use power plan. That would require redesigning the sensor assembly (or running the unit in reverse), so maybe it’s over-complicating things?

We’ve seen the Xiaomi Air purifier filter mentioned before, but under the auspices of hacking it’s filter DRM, an open source air filter designed by [Naomi Wu], and even an ESP32 pressed into service to plug an air purifier into Home Assistant.

Open Source Vacuum Avoids Cloud

As more and more of the technology that we paid for turns becomes a subscription, there’s slowly been a momentum shift in the open source world of building replacements for these intrusive rent-seekers. We see this all of the time for self-hosted media and communications servers, but now we’re starting to see it in hardware as well. The OOMWOO robotic vacuum cleaner is completely open source, from hardware to software, and requires no cloud services whatsoever.

Although it’s open source, not every component is something one could buy off the shelf. It does require a 3D printer for most of the parts, but assuming that requirement is met most of the rest of the build comes together easily enough. For compute it relies on a Raspberry Pi running ROS 2 software and is set up to integrate easily with other existing open tools and projects such as Home Assistant. Like its proprietary cousins it can sense and map the rooms its placed in, but this platform uses an inexpensive 2D lidar system to keep costs down.

Right now the project is not quite complete, so we’ll all have to keep our eyes on this one as the team building it progresses. But they do have most of the software development done and the bill-of-materials is in progress. As an open project it’s being developed by many volunteers and there are a lot of areas available to contribute to as well, all currently set up on the project’s GitHub page. Right now many of those areas of effort are adapting the 3D printer files to off-the-shelf parts.

With the rocky status of the Roomba ecosystem, projects like this are more important than ever.

Neural Net Reads the Gas Meter

In an ideal world, the role of technology would be to make all of our lives easier. And although all the ads suddenly appearing in our smart TVs and gaming systems might make it seem otherwise, some technology can still improve our lives if we work hard at it. For [Cian], that meant training a neural network to read his gas meter so he wouldn’t have to do it himself.

The root issue here is twofold, first that [Cian]’s gas company hasn’t upgraded their own technology to modern, remote-readable meters, and second that the meter can’t be read by a gas employee because it’s hidden in the depths of [Cian]’s basement. This latter fact requires him to delve into Moria-like depths to get to the meter, so the solution here was to place a Raspberry Pi in this location instead. With a camera pointed at the meter, it’s not quite capable of discerning digits on its own so a neural network was trained in order to get accurate readings of the dial. And, finally, since the machine is networked already [Cian] set it up to automatically notify the gas company of its reading so he is now completely out of the loop.

For automating tedious tasks like these, the Raspberry Pi with something like OpenCV as a computer vision tool is a fairly mature platform for light machine learning duties like these. We’ve seen license plate readers as well as neighborhood traffic surveys built on these platforms to help automate human labor away, making our lives easier one single-board computer at a time.

Giving Resin 3D Printers Another Shot After Six Years

Art of 3D printer in the middle of printing a Hackaday Jolly Wrencher logo

My initial experience with a 3D printer came in 2020, when I got access to a buddy’s Creality LD-002R SLA printer. This was one of those awkward transition phases for SLA printers, where inefficient RGB LCDs finally got replaced by monochrome LCD panels, thus massively reducing the required exposure time and increasing the LCD panel’s lifespan.

The closely related Creality LD-002H is a monochrome SLA printer, but as this wasn’t the one that this friend opted for we had to learn the ropes on this more old-school printer. In terms of specifications this meant a build volume of 119 mm x 65 mm x 160 mm to play with and a claimed 26.1 µm resolution. Despite some struggles along the way, this machine churned out impressively high levels of detail with whatever cheap resin we threw at it, and even the post-printing processing became easy once we added a flex plate to the build plate and tweaked the cleaning and curing steps.

Despite all these positives, we both drifted away from resin printing, mostly due to the still messy and smelly printing process. FDM printers seemed like a better deal, especially after said buddy got his mittens on a used IDEX FDM printer. I would eventually go through a rather loathsome Creality Ender V2 experience before ending up with my current-day Elegoo Neptune 4, and resin printing seemed to be a thing of the past for me. Until recently, that is.

Things Have Changed

The Creality LD-002R MSLA 3D printer from 2020. (Credit: Creality)

Despite not having access to a resin printer any more, I still kept up to date on newly released hobbyist-level 3D printers of any type, as well as progress in technologies. Here I rather liked the digital light processing (DLP) types of resin printers, as they ditched the LCD and UV light source for a MEMS micro-mirror and laser setup for big power and weight savings. Unfortunately DLP resin printers appear to have fallen by the wayside again due to a variety of reasons, one of them apparently being scaling limitations with available DLP light engines and the manufacturers for the latter seemingly uninterested in this market.

Thus consumer SLA printing is still generally done with mono LCDs, which do not quite have the same efficiency and crisp edges for individual pixels as DLP, but which otherwise have come a long way, with better optics and light sources. A big push has also been towards larger build volumes, so despite new SLA printers tacking on more ‘K’s to their display resolution, the effective resolution isn’t that much better than a 2020 budget model. The real question is probably whether that’s even needed based on my own experiences printing fine details.

Perhaps the most exciting change is that with overall user-friendliness,  such as easier bed levelling, the preventing of resin smells wafting out of the printer into the room, heated resin vats for reliable print results and UV-blocking lids that you can flip open instead of having to gently lift off the printer with dirty gloves while you desperately try not to drop it whilst scrambling to find a free spot to put it safely down.

Although the Creality LD-002R lists air filtration with a carbon filter, this was more filtration of the homeopathic variety. Instead of filtering anything, the tiny, noisy fan effectively blasted unfiltered, resin-rich air into the room. Thus one of the first thing we did was disabling this ‘feature’ by turning off the fan and sealing the air hole. This immensely improved the printing experience even with less optimal airflow in the room.

Picking A Resin Printer

The Anycubic Photon D2, the largest Anycubic DLP printer. (Credit: Anycubic)

The selection of resin printers to pick from these past years has been nothing short of overwhelming, even if you ignore the veritable flood of slightly different variations from certain manufacturers. Here DLP printers seemed different enough even with their small build space, to the point that I almost got one. Of course the long-awaited successor DLP printers never appeared, and the small build space was somewhat rough and put me off from an impulse buy.

Thus getting an SLA printer as a friend for my FDM printer seemed like the only option, but lacking real project motivation that idea got put on the backburner. It’s really hard to justify a purchase if you cannot justify such a financial expense, after all.

That’s when I suddenly got motivation shoved into my face, in the form of Uniformation contacting me about giving their GK3 Ultra SLA printer a shot. This would be a no-strings-attached chance to have a poke at what looked to be a rather nice and capable printer, even if its price tag of around $1,300 makes it something for people who really know that this is the resin printer they want.

I had heard of this Uniformation company before, as a smaller company that scored a pretty big hit with the somewhat-troubled-but-very-interesting GKtwo SLA printer, which had also featured on my shortlist at one point. The GK3 successor to the GKtwo had been baking in the resin printing community for more than a year by the time I got contacted, with gradual improvements over that time based on community and reviewer feedback.

This is quite different from most 3D printer companies who generally push out a new model in a take-it-or-leave-it sense, so I took them up on their offer for this printer to either play with or use as a very fancy coffee table, whatever I wanted. Based on the sheer verbal abuse I have read aimed at Uniformation during the GK3 development phase on especially sub-reddits, it makes me fairly confident that all major issues were fixed, and that at the very least it’ll be a massive upgrade over the LD-002R that’s pretty much my reference point.

Setting Up

In the world of 3D printers, it would seem that the idea of a flatpack parcel with your new 3D printer – as with my Ender 3 v2 and Neptune 4 bed slingers – has come to an end. A modern CoreXY kinematics FDM printer arrives fully assembled with only few exceptions – like Prusa 3D’s DIY kit offerings – so you’re looking at a very big box that weighs a lot. The similarly priced Prusa CORE One+ for example comes in at a cool 22.5 kg without packaging.

Super easy to move, barely an inconvenience. (Credit: Maya Posch)

The GK3 Ultra ups that to 35 kg, so I had a rather unhappy delivery bloke lug the ~40 kg box up a few steps from his van to where I could use furniture rollers to walk it over to its new home, next to the FDM printer in a sturdy rack. Lifting the printer into the rack was consequently also a bit of a chore, though less due to the weight and more due to the lack of any good places to grip it. I had to put on some good gloves for extra grip and to prevent the aluminium case from cutting into my flesh.

With that chore done, I could finally admire the fine mess that I had gotten myself into. First of all, the build volume is pretty massive, at 300 x 160 x 300 mm, almost fully beating the Neptune 4’s 225 x 225 by 265 mm. The GK3 Ultra is notably quite deep, at about 40 cm before adding space for the power and Ethernet cables, not to mention the provided Wi-Fi dongle if that’s more your thing.

Much of this extra space is taken up by the resin dispenser system, which I’ll cover more later. Within the rack you’ll need at least 85 cm between the two shelves if you want to put a resin bottle into the slot that’s conveniently placed on the top. Fortunately you can also pour resin directly into the vat and even make the flippy lid removable, but it’s a pretty hefty unit either way.

After liberating a lot of foam and goodies from the inside of the printer, I was finally able to start commissioning it. This involved removing a lot of protective film, running the exposure test to verify that the LCD and UV light source are working, and best of all a quick confirmation that the pre-levelled build plate was still level. Compared to the faffing about with four bolts on the LD-002R’s build plate assembly and sheets of A4 paper that I was used to, this was a massive improvement.

Time To Print

The resin that got sent along with the printer uses a special bottle style, which fits in the GK3’s resin feeding system. You slot the entire bottle into the hole on the top of the printer, from where it should automatically slot into all the tubing and widgets that are supposed to handle the resin flow. My only misgivings with this design is that each of these special cartridge-like bottles are only rated for ten insertion/removal cycles, after which you have to buy a new one.

Bottom of the Uniformation resin bottle, with the ports visible. (Credit: Maya Posch)

If you use non-Uniformation resin and are pouring resin into a special bottle, then this can be a bit of a pain, if only to keep track of just how many times you have inserted said bottle before you suddenly have it start draining fully into the vat, or whatever the failure mode here is. Fortunately you can also disable this feature if you’d rather pour the resin directly into the vat, which is probably what I’ll end up doing with typical resin bottles rather than use the provided empty special bottle.

Since the only bottles of non-expired resin that I have lying around use this automatic resin feeding system, I’ll be be giving it a shot. A total of two resin types are available to me, one is the water-washable type that’s supposedly not as smelly as the standard resin that I have always used, and which can be cleaned with plain water instead of IPA.

The other type of resin is ABS-like, which as the name suggests is a ‘tough’ kind of resin, targeting similar use cases as ABS, ASA and kin. For the test I’ll print everything with both WW and ABS, as well as in PLA on the FDM printer, to test both overall workflow, printing of fine detail, water-tight parts, heat-resistance and durability.

Test Setup

For a first printing round, I have so far printed a range of parts on the Neptune 4 in white PLA, and for the GK3 Ultra I will initially just use the ABS-like (AL) clear-blue resin, to not have to switch resins just yet, which is another fun topic to cover. These prints include a range of items like bottles, a miniature figurine and a bunch of LEGO Technic-compatible parts. The latter two serve to give dimensional accuracy a good workout, along with basic durability testing.

The print results and my initial findings will be in the next article, as this one is getting on in words. I’m also more than happy to consider any requests for aspects to test and questions to answer here. Although I have so far printed FDM parts in PLA, I’ll probably also be printing some parts in PETG and conceivably also TPU. Since I only have an open style FDM printer, engineering-grade materials such as ABS, ASA, etc. are naturally not available to me, for both practical and health-related reasons.


20 FPS on E-Paper Display Without Help

If electronic paper displays have one downside, it’s generally refresh rate. Earlier versions of the tech might only have been able to do single-digit frames per second, while modern, mid-range devices can sometimes manage 10-20 FPS — and that’s not including the frames needed to blank the display. Getting up past that double-digit barrier typically requires higher-end displays, more powerful processors or FPGAs, and more money. On the other hand, [Tony] was recently able to get 20 FPS out of an ESP32-based device without using any extra processing power.

The key to improving e-paper performance is understanding how the display actually works. The “ink” consists of microscopic charged pigment particles that physically move in response to electric fields, making the display much slower than LCD or OLED panels. Rather than fully erasing and redrawing every frame, the software takes advantage of the particles’ existing state by generating optimized driving waveforms that only move the particles needed to produce the next image. On the software side, an MPEG-like encoding is used so only changes between frames are transmitted and converted into these waveforms, reducing unnecessary data transfers and allowing much higher frame rates.

Tony’s method is able to drive 960×540 panels, like those found in the Lilygo or M5PaperS3, to 20 FPS, and these platforms are based on nothing more than the capable but limited ESP32 chip. It’s an impressive push, and worth checking out the video in the linked project page. We assume you’d need a little more to drive something like the massive e-paper display found in this home automation setup, though.

Sail Virtually Aboard the “Itanic” with IA-64 Emulator

Intel’s Itanium architecture was an interesting experiment, but it has gone down in history as one of the chip giant’s bigger flops, so much so that it earned the name “Itanic” in the tech press. This is perhaps unfair, considering it did limp on until a quiet EOL in 2020. We didn’t know anyone missed it, but perhaps it was more the technical challenge than nostalgia for obsolete server hardware that led [Yufeng Gao] and [gdwnldsKSC] to spin up an instruction-set translator for the late, lamented, IA-64 architecture.

Note that it’s very much in alpha, version 0.1, so don’t expect all the things. Neither HP-UX and OpenVMS will boot, which is a pity since Itanium’s great success was arguably winning those OSes and thereby killing the bespoke architectures HP and DEC had at the time. Gentoo can get to a shell, as long as you use Kernel 6.6 or older, and Windows Server 2003 and XP-64 both apparently boot.

It’s not incredibly performant, with 486-level speeds when running on Ryzen 5000 series hardware, but then, it is a 64-bit hardware being emulated here, and pretty weird hardware at that. Itanium’s Very Long Word Instruction architecture was notoriously hard to program well. Specifically, it was hard to compile optimized programs for, so we expect optimizing an emulator is going to be similarly difficult. That’s why this is so impressive, even at this early stage.

The late, unlamented Itanium is probably one of the few systems not in the Virtual OS Museum, but perhaps eventually this project will change that.

via Raymii.org

Echolocation for Drones

A quadcopter with a clear, U-shaped shield up front and red propellers navigates between a close stand of moss-covered trees.

Bats are remarkable creatures, able to fly at night or inside the confines of caves without light to guide their way. A team of researchers at Worcester Polytechnic Institute (WPI) has determined how to use low power ultrasonic sensors to guide drones in obscured environments.

While radar, lidar, and GPS are all great for navigation and sensing, they can run into issues when light is obscured or can take too much power to be practical for the limited battery life of a drone. The researchers found that a dual sonar array could be used to implement a much lower power sensing system for a drone that performs well in environments that would stymie a computer vision system.

A shield placed behind the array cuts down on the sound of the propellers that would otherwise drown out the signal, and further signal analysis via a neural net separates the echoes of objects in front of the drone from the background. The prototype could navigate in various simulated environments like forests, smoke, and snow. It looks like it even got a chance to go for a flight in the actual woods. All the code and hardware designs are Open Source, so have at it!

We’ve covered mosquito-inspired drone sensors before, and if you want to get into echolocation yourself, apparently humans can learn to do it too.

via Entertainment Engineering.

A Feature-Rich Drum Machine

A little over a month ago, we featured a project from [Igor] who built 64 bits of DRAM from scratch using discrete components. Jokes about memory pricing aside, he did have a use case for such a small amount of memory — he is using it in a custom-built drum machine. But featuring the memory build and not the drum machine was perhaps putting the cart before the horse, so in this video, [Igor] shows off the construction of each part of his impressive 16- or 64-step sequence drum machine.

This isn’t Igor’s first drum machine, either, although his previous build was a bit more limited. It had fewer steps in the sequence and didn’t quite have the range of his newer model. The upgraded version can play more steps but also includes force-sensitive drum pads based on piezo sensors and more voices (drums) as well. Each voice is built electronically using various op-amps and passive components, and [Igor] has the schematics for each of them, as well as every other part of the drum machine, for those looking to recreate any part of this on their own. There’s a lot going on in this lengthy video as well, so for the musically inclined, it’s worth taking a look in full.

Now that our horse is in the correct position in front of the cart, it’s worth going back and looking at the memory build if you missed it when it first ran. A small amount of memory makes the machine programmable rather than just playable, and truly expands the capabilities of a machine like this in the recording studio.

Launching Rockets is Hard, Bring them Back is Harder

Since the first V2 rocket sailed above the Kármán line back in 1944 and right up until the modern era, the trajectory of most space-bound rockets was more or less the same: after expending their propellants they would either crash into some desolate steppe or plunge into the ocean. In either event, the rocket was disposable. The important bit up top might go on to explore the stars or send a human crew off on their mission, but the booster rocket that lifted the spacecraft out of the atmosphere was always going to be sacrificed for the cause.

But in the 1970s NASA had a wild idea: what if we didn’t smash a brand-new rocket valued at millions of dollars into the ocean every time we wanted to put something in orbit? Instead, they would build a hybrid space vehicle that blended the vertical takeoff and raw power of a rocket with the capabilities of an airplane, allowing it and whatever it was carrying to make a gentle runway landing at the end of its mission. As such, the Space Shuttle was born.

With the benefit of hindsight, we now know the Shuttle wasn’t quite the spaceflight revolution that NASA had hoped for. The age of reusable rockets didn’t truly begin until 2015, when SpaceX landed the first stage of their Falcon 9. To date they’ve repeated the feat nearly 600 times, all the while increasing the reliability and speed of their operations. Today the Falcon 9 is the most prolific launch vehicle in history, and nearly every other rocket in active development is being designed to include some element of reusability.

Most recently, China demonstrated that they could recover their Long March 10B rocket by gently bringing it down into what amounts to a giant butterfly net. While it might seem a bit quaint compared to rockets that land on their tails like something out of a 1950s sci-fi movie, the idea offers considerable promise.

There and Back Again

But why did it take 70+ years before we were able to regularly refly orbital-class rockets? It’s not that there’s anything inherently complex about reusing a spent rocket. Sure, there’s a case to be made that material science improvements have made the engines robust enough for repeated use. But even if you had to rebuild the engines after each flight it would still be better than slamming the whole vehicle into the ocean. Similarly, there’s nothing particularly unique about the structure of the Falcon 9 that enables it to fly multiple times — it’s a big metal tube with tanks inside of it, just like essentially every rocket that has flown before it.

The revolutionary technology demonstrated by SpaceX in 2015 didn’t have anything to do with making their rocket go up, it was that they were able to safely bring it back without damaging or physically altering it. The Falcon 9 first stage that came back to Earth was in the same condition it was when it left the launch pad eight minutes or so earlier, albeit with empty propellant tanks and a layer of soot on the outside.

As such, most of the variability we see when comparing the reuse of past, present, and future rockets comes not from how the vehicle ascends, but how it ultimately comes to rest back down on Earth.

Splashdown is Easy, But Rough

Without question, the easiest way to recover a rocket intact is to simply slow it down before it hits the surface of the ocean using parachutes This is how all American crewed capsules, and more applicably the Space Shuttle’s Solid Rocket Boosters (SRBs), have been recovered after their flights.

Once pumped out, the hollow SRBs could be towed to shore.

But even when descending under multiple huge parachutes, splashdown isn’t exactly a gentle event. It could probably best be described as “survivable”, in that the vehicle and crew will come through the experience in one piece, but neither is likely to be terribly happy about it.

The situation of course ends up being even worse for the rocket, as its structure is going to be subjected to the brunt of the impact force. Additionally, a complex aerospace vehicle getting partially submerged in salt water is a recipe for corrosion and electrical issues, to say nothing of the thermal shock the hot engines will experience when getting dunked.

One could argue that the only reason this method of recovery worked for the Shuttle SRBs is because of their relative simplicity when compared to a liquid-fueled rocket capable of independent flight. At the risk of oversimplifying the structure of the SRB, at splashdown it was effectively a hollow tube with minimal avionics and thrust vector control (TVC) hardware that could simply be replaced before the next flight.

Still, the NASA document Solid Rocket Booster (SRB) Refurbishment Practices goes over the considerable work required to bring each booster back to flight status after coming down in the ocean. Given the challenges of refurbishing the boosters, it’s perhaps unsurprising that NASA elected to forgo their reuse on the Space Launch System despite its SRBs being largely identical to their Shuttle predecessors.

Teaching Rockets New Tricks

In the very early days, while they were still trying to reach orbit with the Falcon 1, SpaceX had actually considered a Shuttle SRB-style recovery procedure. But in the end they decided to outfit the Falcon 9 with deployable landing legs and the rest, as they say, is history.

The DC-X demonstrated propulsive landing in 1993, but couldn’t reach orbit.

Landing legs allow a rocket to come down on effectively any flat surface, be it a concrete pad next to the launch facility or a floating platform. But there are some fairly serious drawbacks to this approach. For one thing, the requirement for precise terminal guidance means parachutes are out of the question. The rocket needs fins, attitude thrusters, or other control surfaces to come down on the center of the pad.

It also means the rocket needs to perform a propulsive landing. That is, use its own primary engines to bring its velocity on touchdown to as close to zero as possible. This in turn requires engines that can not only restart in flight — a capability that has not traditionally been required by first stage boosters — but are able to throttle down low enough to control the rocket’s descent without simply pushing it back upwards. It’s difficult to overstate how unnatural a state of operation this is for a rocket. Indeed, it’s the antithesis of how nearly every rocket has operated since the Song Dynasty started experimenting with gunpowder in the 10th century.

Even if you can accomplish all that, the true cost of landing a rocket is in the extra mass. Although the legs will be stowed away and unused for 99.8% of the rocket’s flight time, it still has to lug all that weight uphill. If that wasn’t bad enough, there’s also the extra weight of whatever control mechanism is in place to guide the rocket’s descent trajectory as well as the propellant that needs to be kept in reserve for the landing burn.

All told, landing a rocket on legs comes with a massive payload penalty. In the case of the Falcon 9, the rocket’s maximum capacity to Low Earth Orbit (LEO) in its expendable configuration is approximately 22,800 kg (50,300 lb). But when outfitted with the hardware necessary to land, that number is reduced by nearly 25% to 17,500 kg (38,600 lb).

Dropping the Dead Weight

There was a time, not so very long ago, when critics doubted the financial viability of recovering and reusing rockets like the Falcon 9. But today, reuse has gone from theoretical to standard operating procedure. Outside of a few Old Space holdouts, it’s top of mind for every launch provider and critical for remaining competitive in a fast-moving commercial market. In November, Blue Origin even managed to land their New Glenn heavy-lift rocket on only its second flight.

So at this point the question isn’t whether or not future rockets will be reusable, but rather, what is the most efficient way to achieve that reusability?

The first stage of Starship after being caught in mid-air.

With that in mind, it’s easy to see the appeal of China’s net recovery. While the rocket must still perform a propulsive descent — although in theory the necessary positional accuracy, and therefore the technical challenge, is somewhat reduced — it doesn’t need to have landing legs installed. This mass savings increases the vehicle’s useful payload capacity, which in turn makes it more profitable to operate. Achieving the same end goal while being easier and cheaper is an improvement in anyone’s book.

Admittedly, having the rocket come down in a huge net adds a certain amount of whimsy to the whole endeavor, but the overall logic is sound enough. It should also be said that SpaceX, for all the success they’ve had with landing their Falcon 9 on a set of deployable legs, are themselves planning on catching both the first and second stages of their next-generation Starship vehicle. Instead of a net, their goal is to pluck the rocket out of the air with a huge robotic pincer mechanism.

One is reminded of the old joke about how the Americans and Russians approached the problem of writing in space: NASA spent millions of dollars developing a pen that would work in microgravity, while their Russian counterparts simply used pencils. If China can demonstrate the ability to reuse a rocket they snagged in their net, the more elaborate methods of recovery employed by American rockets may one day look like a similarly overengineered solution.

Pong-like Cabinet for Classic Dinosaur Jumper

Back when Google ran a functional search engine, there used to be all kinds of quirky, fun antics hidden in their products. From Easter eggs in certain search results, to a flight simulator hidden in Google Maps, to funny, engaging April Fools jokes, it was a lighter, less corporate time. Now, though, to recreate any of that early Google magic, we have to do it on our own, and [Paul] has come up with an arcade cabinet for the classic Google Chrome dinosaur game that does just that.

Although the Dinosaur Game is still available in modern versions of Google Chrome, it lends itself almost perfectly to an arcade cabinet. Built from 18 mm plywood, the cabinet is standard DIY arcade fare with a built-in shelf to house the electronics and a 4:3 flatscreen monitor for a display. The Raspberry Pi 3B is also just enough to run the game, but the software running on it is unique. The Pi runs an operating system called FullPageOS, which automatically loads a modified version of the Dino jumper in full-screen mode. It’s been changed to look more like an arcade game than a browser Easter egg, with features like a leaderboard and an automatic-play screensaver mode, and the build is rounded out by a cactus-shaped scratching post to accompany the cabinet.

As for gameplay, we couldn’t ask for a simpler user interface. A single button is all that’s needed for this game, and it’s surprisingly engaging. It is a bit large for a single-button game, even with its reduced-width cabinet, so if you’re looking for something smaller, you could always base it on a tabletop arcade system instead.

A Pop-Up Truck Camper for Less

A black pickup sits in front of a snow-capped mountain range in the background. It has a white camper shell with a sci-fi looking "01" emblazoned on the side in black text. An orange, wedge-shaped tent pops up above the campershell and truck roof.

We live in a veritable Cambrian Explosion of camping options, ranging from a tarp on the ground to multi-million dollar RVs. Somewhere around the middle is the pop-up truck camper, but [Further Fabrication] wanted to build his own.

As is often the case, he saw the cool pop-up truck campers on the market, but balked at the cost. To make matters worse, the options out there weren’t really available in his country. After getting a solid set of measurements from the truck and some materials, he set to work.

The most interesting part of this build is probably the aluminum/plywood sandwich [Further Fabrication] chose for building the main structure of the camper shell. While many would’ve chosen a tubing space frame for the build, he decided to sandwich two layers of plywood around plywood beams and large rectangular aluminum tubing. These were affixed with a combination of construction adhesive and screws to create a lightweight yet sturdy enclosure.

The tent portion uses a 600-denier PVC-coated waterproof polyester fabric, sewn with nice YKK zippers, and features large windows with screens for excellent ventilation. The roof consists of two sections of aluminum composite sandwich, and the side panels were made from cutoffs of the roof material. Instead of the standard cam-lock used on most camper shells, [Further Fabrication] chose a solenoid-actuated system and more conventional grab handles.

We’ve covered campers several times, including a solar-powered RV, a truck camper that expands lengthwise rather than up, and several bike-based campers.

Open-Source Mid-Drive e-Bike Motor Has Lots of Promise, and Hyphens

[Pedro Neves] has a mid-drive e-bike, but he doesn’t own it — not truly, since he can’t repair the motor unit. For a hacker to be in that position, there are only two options: crack the old one and make it your own, or build your own from scratch. [Pedro] built his own and is open-sourcing it on his website for everyone to play with. Right now, that’s .step files and a BOM, so you’ll need to watch the design/build video on YouTube below to get the full picture.

His choice of a motor from an old battery-powered angle grinder is both thrifty and environmentally friendly, so we approve. His goal of 25 km/h seems like a reasonable speed limit, but may still be too fast for some countries’ regulations— so do check the local rules if you’re going to build this. Making the most of 3D-printed components is also a choice that makes the project more accessible, but don’t worry — the bearing surfaces are all metal. That includes the clutch bearing that will let you pedal home if the battery dies or the motor craps out. Well, unless the printed plastic axle gives up the ghost, but that got replaced with a CNC version, so it’s all good. Unless you’ve got legs like Hercules, it ought to hold.

If that’s not DIY enough, you could always build the motor yourself. This mid-drive is also part of a larger project [Pedro] is working on for a whole cargo bike, as he details in his video, which is a worthy project we’ve seen other examples of before.

Calculator UI Is More Complex Than You Might Think

Calculators are so ubiquitous and so familiar that they are easy to take for granted in many different ways. [lcamtuf] points out one that has probably never occurred to many of us: the user interface for a calculator is an unexpectedly complex thing.

The internal logic to support sequential inputs and multiple operators in a way that feels intuitive is a complex thing.

Resolving something like 1 + 2 = is pretty straightforward but complexity compounds rapidly after that, with numerous special cases. Let’s imagine one decides to program a simple calculator UI as a weekend project. The development process might look a little like this:

  1. User types in 1 + 2 = and the calculator displays 3. What happens if the user immediately presses -?
  2. No problem, just consider the result of the previous operation as an already-there input. So we’ll have 3 - for this next operation, and wait for more.
  3. Unless we should have treated that - as a negative sign for whatever number is coming next, making it a negative number? No, ignore that. Just treat whatever results from pressing equals as a pre-typed input.
  4. Unless the user hits a number. Because if they hit 2 (for example) then we’ll have a 32 and not a 2 which they probably, definitely don’t expect. So that’s a special case and we should insert a clear if that happens.
  5. Oh, better clear if the user enters a decimal, too.
  6. I’m going to need a coffee…

And that’s just the tip of the iceberg. Imagine trying to figure all this out for the very first time, without the benefits of habit and history to fall back on.

The fact is that supporting the apparently trivial behavior of a simple calculator requires an underlying complex state machine that deals with all kinds of special cases in order to make the UI feel intuitive. And that’s just for a basic four-function calculator; we haven’t even touched on how special keys like % should behave.

We know [lcamtuf] speaks from experience, not just because of their deep knowledge of calculator history but because they rolled their own calculator that uses voltmeters as digit displays and there’s nothing like actually implementing something to make one appreciate it.

Cross-Sectioning Crickets with a Femtosecond Laser

A scanning-electron micrograph is shown of a cricket's body, focusing on the head, which has been sliced off just above the eyes.

Unlike most cutting lasers, femtosecond lasers don’t vaporize materials; rather, they produce such short, intense bursts of light that the affected region is ablated without having the chance to heat its surroundings. This makes them good at cutting away material without damaging the surroundings, something [Ben Krasnow] exploited to cut cross-sections of samples while still in a scanning-electron microscope.

In this case, the samples were crickets, and before imaging they had to be prepared. First, the bodies were soaked in glutaraldehyde to cross-link the proteins and stabilize the structure. Next, a series of solvent exchanges replaced the water in the bodies with a low-surface-tension solvent; this meant that during the next step, drying, surface tension wouldn’t distort the crickets’ internal structure. Finally, the insect bodies were charred under argon, which made the bodies conductive and more absorptive to laser light.

The laser itself and the scanning galvo are mounted outside the microscope, and shine in through a transparent window. To protect the detector and electron optics from a spray of ablated carbon, a servo motor swings an aluminium shutter between these and the sample while the laser is active. This caused some mysterious problems during testing: after the first ablation run, the electron microscope’s image would contain so much noise as to be unusable, but it would improve over time. As it turned out, the shutter was painted, and the other side of the paint was getting coated with charged carbon particles. This created a small capacitor which disrupted the electron optics as it discharged. Eventually, after solving this and a few other strange problems, [Ben] was able to take several time-lapse videos of the laser gradually ablating a cricket, 30 microns at a time, revealing its inner structure.

Although scanning-electron microscopes are unfortunately shard to come by, it’s still possible to restore a secondhand microscope or, as [Ben] did, build your own. Femtosecond lasers are yet more inaccessible, though they can be used to replicate themselves.

❌