❌

Reading view

There are new articles available, click to refresh the page.

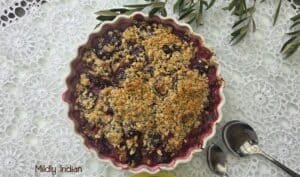
Sugar plum crumble

Sugar plum crumble
Put on your PJ’s,get your loved ones together, sink your spoon and scoop up some warm jammy plum with the cinnamon flavoured crunch top. You have got yourself the best version of aΒ  no added sugar dessert. Check out this sugar plum crumble and enjoy every bit of it.
Early this year my husband has decided to finally launch into following his diet plan. It is not a massive one, just one where we are going to watch how much we tuck in and see if we can occupy that with sensible options. Given that we are going to crave for something sweet to reward ourselves in this journey, i am planning to test out some options where we still feel dessert is taken care without the massive sugar loaded in . The first of this series probably is best served for Valentines day. This sugar plum crumble is a thoughtful one, save it.

Ingredients to make sugar plum crumble

This recipe has no added sugar or sugar substitutes. It entirely relies on the sugar plum to give it sweetness and flavour.
For the filling: the filling is just a whole tub of sugar plums. These sugar plums are smaller than the regular plums, slightly oblong and have a purple skin. The flesh is usually a pale yellow colour. The flesh is softer and juicer. We usually make jam with these plums as it takes no sugar or pectin to make them.
For the crumble topping: the topping used in this crumble is slightly different than the classic ones or the one we have used to make the mulberry crisp recipe. Here we have used an equal mix of flour and almond flour. To this mix we have added a bit of rolled oats, flax and chia seeds. This gives a bit of bite and crunch.
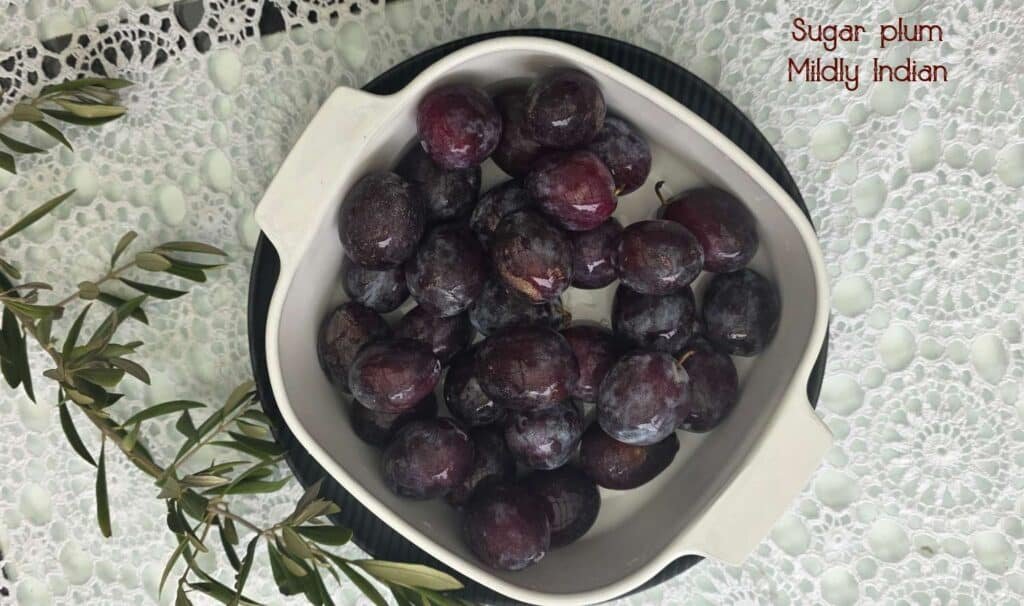
sugar plums

Gather the equipment and baking dish

As with any baked recipe a mixing bowl is so essential. Here ae the ones I recommend.
Measuring cups and mixing bowl ofcourse are needed to ensure the recipe is repeatably a success. Here are the ones I have here in Australia.
As for the baking dish,Β  I have used ( and in the photograph) this traditional flan style ceramic dish.
Another really important one to keep at hand is a fruit knife. You can have it as a block or an individual good one.

Lets make sugar plum crumble

This is fairly a beginner baking recipe and the steps are fairly lesser. Hope you like making it.
Prepping the sugar plums: the sugar plums unlike the regular plums are hard to get in two halves. Especially when they ripe as they are very soft. So i prefer slicing off the two cheeks and then the sides. You can cut the into wedges as well.Β 
Once sliced, layer the pieces on the baking dish.
Preparing the crumble topping
Baking the crumble
Serve the sugarplum crumble with some nectarine fizz or blackberry lemonade or peach iced tea.
Print

Sugar plum crumble

Put on your PJ's,get your loved ones together, sink your spoon and scoop up some warm jammy plum with the cinnamon flavoured crunch top. You have got yourself the best version of aΒ  no added sugar dessert. Check out this sugar plum crumble and enjoy every bit of it.
Course Desserts
Cuisine diabetic friendly
Keyword almond flour recipes, Baking bread, Winter warmers
Prep Time 20 minutes
Cook Time 25 minutes
Servings 6 people

Ingredients

For the filling

  • 450 grams sugar plum

for the filling

  • 1 cup almond flour.
  • 1/2 cup whole wheat flour
  • 1 tsp flax seeds
  • 1 tsp chia seeds
  • 1 tbsp oats rolled oats preffered

Instructions

  • Wash and pat dry the sugar plums.
  • Slice and remove the pit from the flesh.
  • Place the flesh in the baking dish.
  • Preheat the oven at 180 degree for 10 minutes
  • In separate bowl, mix the ingredients for crumble.
  • Sprinkle this filling on top of the filling.
  • Place the baking dish in the oven.
  • Depending on the quantity of juice in the fruit, it takes about 20 to 35 minutes.
  • When the crust is golden and the fruit juice all bubbled up on the sides, the crumble is ready to be taken out.
  • Remove the crumble from the oven.
  • Serve with cream or icecream if preferred

Meal prep and storage

I love to bake a crumble and pop it in the fridge after cooling to last the week. Mid week when workload gets heavy is when I actually love a scoop. You can leave it covered in the baking dish itself in the fridge. The corning ware bake and serve sets are really awesome for storing this. I love the chip resistant nature of the bake ware too.
I have not focussed on freezing it for longer, so if you have do share the knowledge.Β 

What if you need a regular sugar levels?

You can toss in a table spoon of sugar with the plum and an extra table spoon on the crumble topping and then bake if you need regular sugar levels.

Can I make this recipe vegan?

The main ingredient that is not vegan in this recipe is the butter. If you swap this for vegan butter or coconut oil, the recipe becomes vegan.

Why are sugar plums better in this recipe?

I prefer using sugar plums to make crumble especially when i am not adding sugar. This is because the natural sweetness of theirs is enough to have as a dessert when jammy. With the regular plums, you could do the same with black plums. However, I don’t really trust the red ones as they can be sour at times and then you need to add sugar which defeats the purpose of this recipe. Taste test the plum and chop in some dates for sweetness.

Recipes related to this recipe.
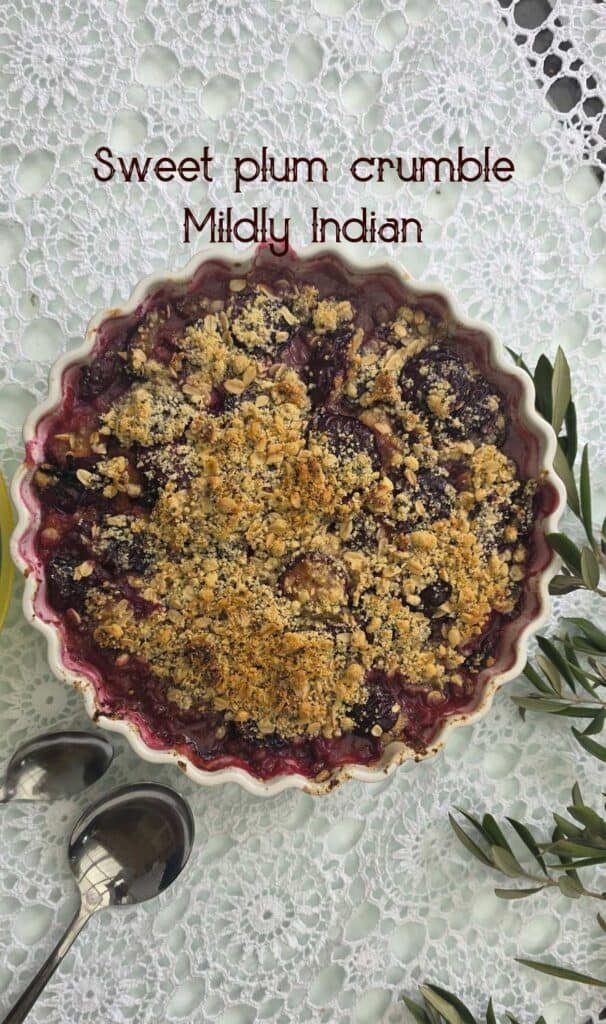
Sugar plum crumble

Stay connected

Hope you will benefit from this recipe too. When you do, leave us a comment on what worked for you and a rating for this recipe, please..
In this post, there are links to products that may benefit your recipe experience. These are affiliate links, that may pay me a small commission if you choose to click or buy them.
If you plan to save this recipe for later you can use the pin link below to do so.
For now stay subscribed
See you in the next post.
Pin this for later
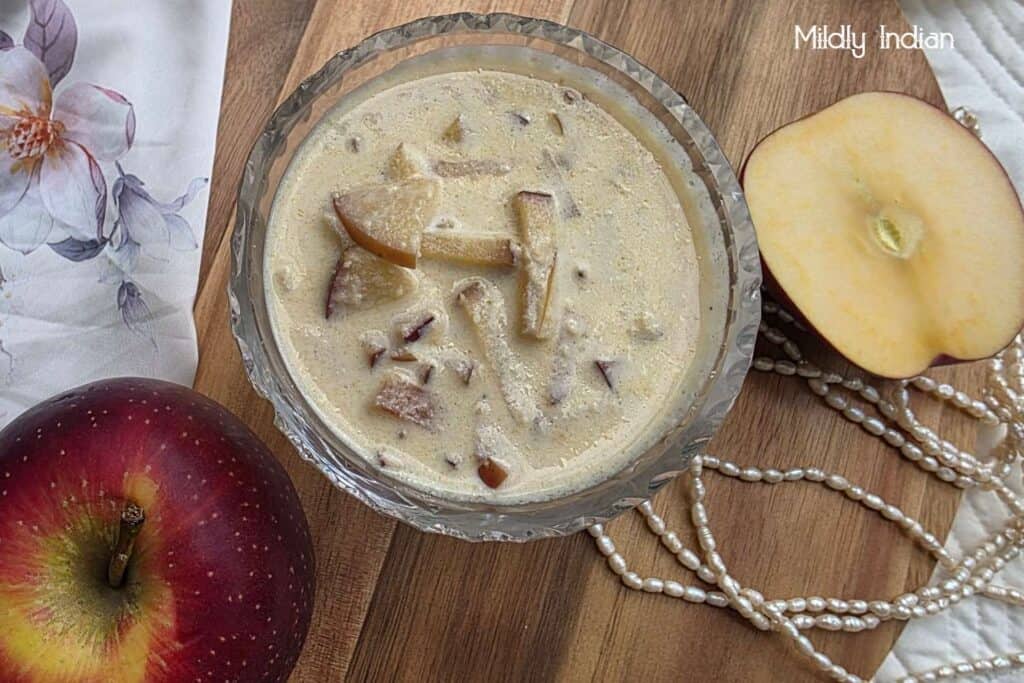
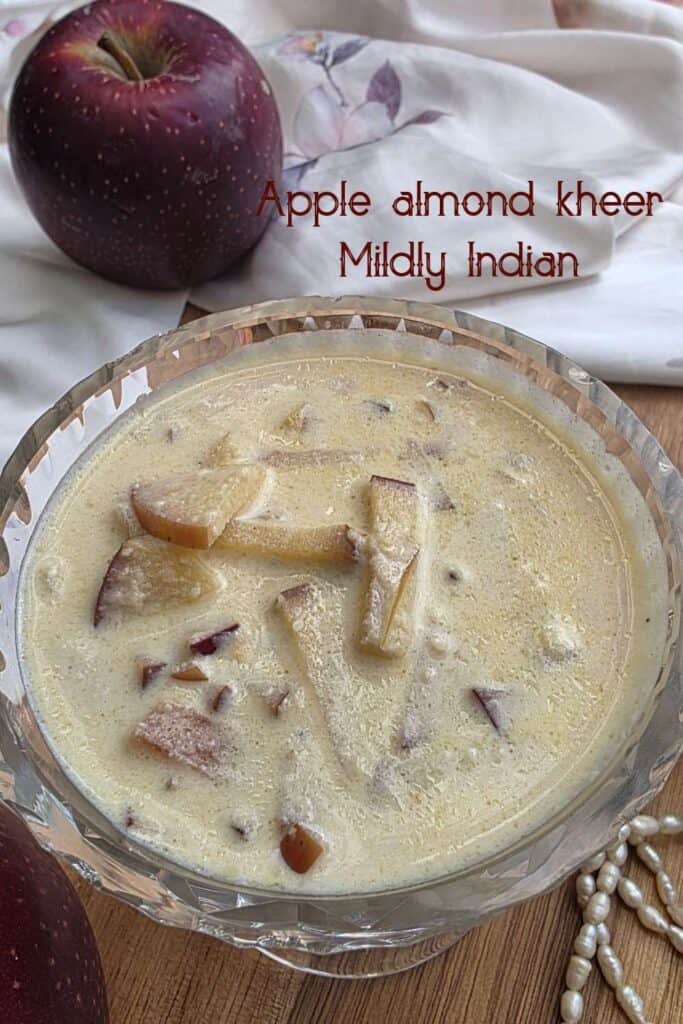
Apple almond kheer

apple almond kheer

Apple almond kheer is a delightful no sugar added Indian style dessert fit for any festival. Flavoured and thickened with almond flour it is a quick and easy recipe that is perfect for beginners.

I amΒ  not good when it comes to viral recipe trials. By the time I decide buy the ingredients and try it, the trend is over!
Clearly,it needs much more devotion and promptness. So that is an area we shall leave it to the enthusiastic experts. However there is one recipe I have been wanting to try and was waiting for the apple season to come. Enjoy my version of the apple kheer with no added sugar.Β 

What is apple kheer?

Made with full fat milk that’s slow cooks rice grits,Β  kheer is a must tryΒ  dessert. This is traditionally served in festivalsΒ  and grand IndianΒ  weddings. We have added a whole collection of kheer in our post- Payasam pathaman and kheer
Apple kheer a fusion dessertΒ  that embodies the idea of a kheer but has apples and almond flour to flavour and thicken. It is not a super sweet version , rather one to share at dinners or home gatherings.

Is this diabetic friendly apple kheer?

I make this with no added sugar or sweetener, just the sweetness from the apples making it a bit more on the diabetic friendly Indian dessert side. Please be aware that the apples are sweet enough, so moderate the portion size.

Ingredients to make almond apple kheer

Apple: crunchy sweet apples are the base flavour for this kheer. Personally, I like pink lady or red apples to make this kheer. I would avoid tart green apples as they can be too sour and may split the milk.

Butter or ghee:To kick off the caramelization and the colour on the apples, unsalted bautter or a small amount of ghee is helpful.You can use coconut oil if you are making it vegan.Β 

Almond flour: the almond flour gives a rabdi like feeling to the kheer. I use the blanched almond flour. If you don’t have these you can grind a few almonds or soak them and grind with the milk. Instead of almonds you can used any nuts of your preference like cashews, pistachios. Melon seeds or puffed makhana(lily seeds) powder also taste good and thicken the kheer easily.

Milk: full cream milk is best suited for this recipe. It has the right consistency and doesn’t easily split the milk when adding the sauteed apples. I would avoid almond milk to make this kheer among the plant based ones as it easily splits. You could use coconut or soy as well.

Sweetener: I have actually not added any in this recipe as the apples were super sweet and we like a mild sweetness for our kheer. You can add sugar as the milk boils. If adding jaggery syrup or maple syrup add it after you remove from heat. Alternatively date paste will be lovely in this kheer.

Spices: the common sweet spices used in Indian desserts are saffron and cardamom. I have used a few strands of saffron and powdered cardamom to finish the recipe.

almond apple kheer

Let’s make almond apple kheer

It does take a few steps to make this kheer, however, it is not a hard recipe to follow some absolutely recommend beginners to try it.

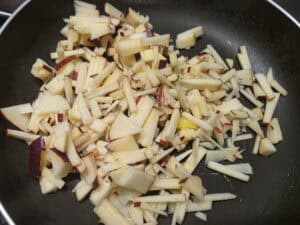
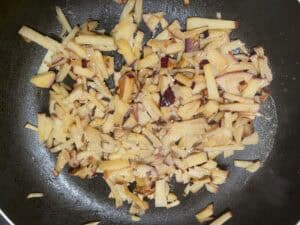
To prep the Apple: the Apple can be chopped like I have done or grated to have a smoother kheer. It is optional to peel the apple as this will be all about mouth feel. I leave the peels in as it gives a good bite.Β Once prepped add the apples to a pan with a touch of unsalted butter. On a low heat let this mix cook down and caramelize. Ensure that this is a low heat process. You can cover the apples for a minute if you feel they are dry. This captures the water from the juices allowing the apples to steam.

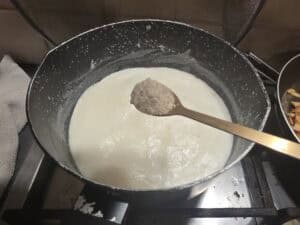
Boil the milk: in a separate sauce pan,Β  boil the milk. As it bubbles and boils, stir in the almond flour.
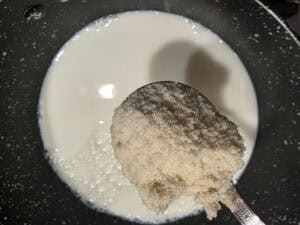
Thicken the milk the almond flour is the thickening agent. When the milk has started boiling and rising a bit, lower the heat to a simmer. Sprinkle the almond flour on the boiling milk. Stir well ensuring it is lump free. Let this cook down for about 5 to 6 minutes with stirring in between.

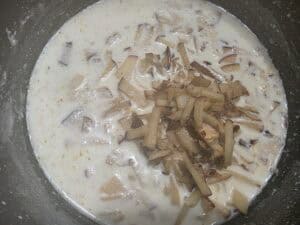
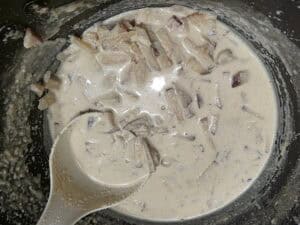
Add the apples: add the cooked apples into the mix and mix well. You can take off the heat at this point.

Flavouring the kheer: sprinkle cardamom powder and a few kesar strands and mix well.Β  At this stage my kheer is done. If you prefer to add sugar or jaggery syrup do so at this stage and mix well.

Print

Apple almond kheer

Apple almond kheer is a delightful no sugar added Indian style dessert fit for any festival. Flavoured and thickened with almond flour it is a quick and easy recipe that is perfect for beginners.
Course Desserts
Cuisine Indian
Keyword almond flour recipes, easy Indian sweets, festival offerings, Ganesh chaturthi recipes, Indian desserts
Prep Time 15 minutes
Cook Time 25 minutes
Servings 4 people

Equipment

Ingredients

to caramelize the apples

  • 2 medium apples sweet variety
  • 1 tsp ghee

to make the kheer

  • 3 cups milk
  • 2 tbsp almond flour.
  • 1 small green cardamom
  • 2-3 strands saffron

Instructions

  • Wash and chop the apples into small bits ( or grate them).
  • Add these into a frying pan along with a tsp of ghee.
  • Set this on a low heat and let this slowly cook and caramelize.
  • Saute this a few minutes once so it does not catch the bottom.
  • Into the saucepan add the milk and boil on a low heat.
  • Once it bubble up and boils stir in the almond flour with now lump and let this cook down on a simmer.
  • Add the cardamom and saffron at this stage.
  • When the almond flour swells and reaches a rabdi consistency, add the caramelized apples and remove from heat.
  • Mix well and let the kheer sit for 10 minutes.
  • You can serve the warm kheer at this point or cool and chill for later.

Is this a vegan kheer?

If you are using plant based milks the recipe can easily be turned vegan. Coconut milk or soy tastes good. For sauteeing and caramelizing the butter, coconut oil is best.Β 

Can we make this with other fruits?

Of courseΒ  you can change the fruits to make a variety of kheer. Mango ,jackfruit or plantain banana will be my first choice.
You can try dates and dried figs too. When using sweet dry fruits adjust the sugar accordingly.

Other quick try kheers

Sabudhana kheer
Sweet potato kheer
Mothichoor ladoo kheer
Rajgira kheer
Manipuri black rice kheer

Stay connected

When you try out this almond apple kheer, let us know in comments how much you liked it. Share it with family and friends.
Pin this link from here
See you in the next post

apple kheer

Sabudhana Kheer | Indian sago pearls dessert

Sabudhana kheer
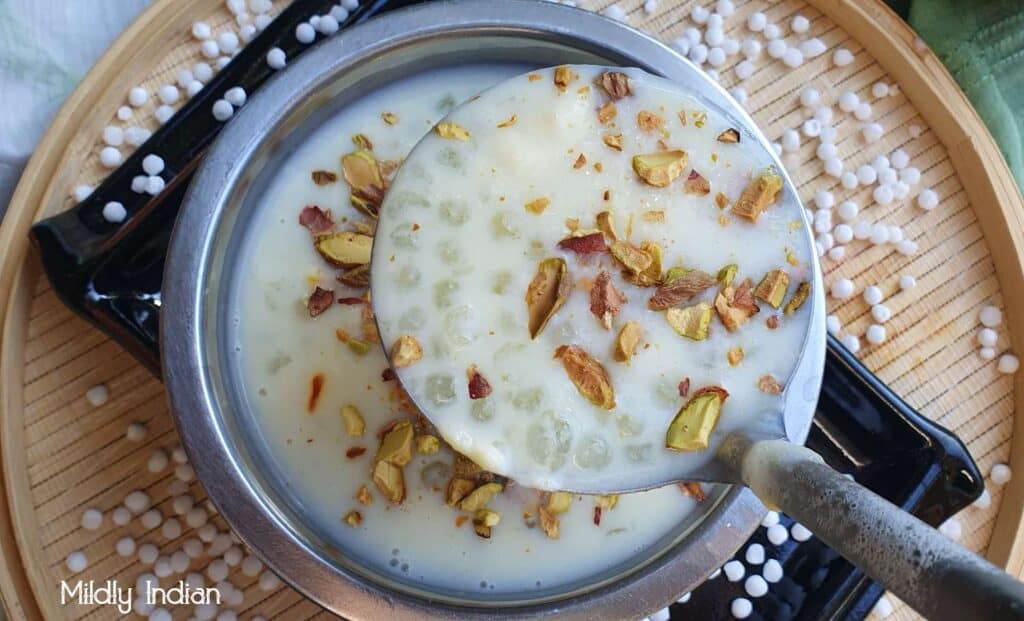
The sabudhana kheer is literally tapioca pearls boiled in milk. Yet, it tastes simply divine in some households and mediocre in othersΒ  if you are curious like I was here are the best collated ideas to make the best tasting sabudhana kheer.

What is sabhudhana kheer?

Sabudhana kheer is a creamy milk basedΒ  dessert popular in India and Pakistan. The recipe uses tapioca pearls cooked in milk and is flavoured with nuts, seeds and saffron. Made during festivals like Holi, Shivrathri, Diwali and Ramzan the dessert is either served warm or chilled.
In the south of India, the same is served slightly more liquid and warm. This is javarisi payasam or sago payasam.
As you travel towards Asian countries, you will find very similar dessert versions of this sago kheer like the Ginataang bayabas we made from Filipino cuisine.

Ingredients to make sabhdhana kheer

Sago pearls:medium sized tapioca pearls are the ones I use for making sago kheer. Choose the ones that have a milky centre. This cooks better than the glassy ones.
Milk: full cream milk is best for the recipe as it gives the desired creaminess to the kheer. Since you will be cooking to reduce a fair bit of this milk, you can use evaporated milk combined with the full cream milk too. Skim milk does make a fairly decent kheer, but it doesn’t have the full bodied flavour. Among plant based milks, I prefer coconut milk or cashew milk to make this recipe.
Sugar: Regular sugar is often preferred to make this kheer. Caramel syrup, dates syrup or stevia are excellent replacements.
Saffron:the fragrance of he saffron in this kheer is delightful, so don’t skip. It doesn’t matter if you choose the long stamens or the short. The saffron infused milk slightly turns the colour of the kheer toΒ  creamy colour then white.
Cardamom: The cardamom fragrance in any kheer is just divine. Use the seeds of green cardamom is what you use. You can powder this with some sugar and store to stir into the kheer.
Nuts and seeds: Pistachios, almonds, melon seeds and cashews are the best for this recipe. Crush the almonds and pistachios to add to the kheer.
sabudhana kheer
Let’s make sabhdhana kheer
Boil the milk:Β to get the best results, slow cook and reduce 4 cups of milk to half the volume. Use a thick bottomed vessel and constant stirring. This ensures that the kheer has a creamy consistency.
Soak the sago pearls: The sago pearls are a bit hard to start with. I prefer to soak them for 2 hours before cooking to reduce time on the stove. You can use hot water to soak them for half hour as well. The pearls when soaked will be soft and double in size.
Cool the pearls in milk: once soaked, cook on a slow heat. Once the water reduces, add the milk and slow cook till the tapioca pearls are cooked well. The center of the pearls will be glassy when cooked well.
Add the sugar: Once the sago is cooked in the milk remove from heat and add the sugar.
Add the aromatics and nuts: Stir in the cardamom powder and the crushed nuts. Mix well and the kheer is ready.

What are the best tips to make sabhdhana kheer better?

Sabudhana kheer is a very simple. However the most delicious sabudhana kheer recipes have a few little tweaks that elevate them.
  • Cooking down the milk: reducing the milk actually brings forth a creamy density. This flaours the tapicoa pearls really well.
  • Evaporated milk cuts down a fair bit of the cooking time. It also doesn’t take away from the flavour.
  • In certain recipes for the kheer you will find the addition of milk powder. This again increases the creaminess of the milk.
  • Soak the tapioca pearls: it is no fun to bite into a hard centered tapioca pearl. So ensure you wash and then soak the tapioca pearls for a couple of hours

Is jaggery suitable to be added to this kheer instead of sugar?

You can certainly use jaggery in the place of sugar to make this recipe. If using jaggery, do not add it like you do with sugar. Instead dissole the jaggery in a bit of warm water and make a syrup. oil the syrup and remove the impruitirs that skim on top. When the cooking process for the kheer is finished, add the jaggery syrup after you remove the kheer from the heat. This will ensure the kheer is not curdled.

Meal prep for this kheer

If serving chilled the kheer has a fantastic jelly like mouth feel. It stays God in the fridge for up to a week. If serving later,it is a good idea to make this kheer thinner as the tapioca pearls sit in the milk and swell a bit more.

Serving ideas for sabhudhana kheer

As said before, this kheer can be served warm or cold.
If serving warm: serving in small sized glasses topped with crushed nuts and a spoon to enjoy this dessert warm.
If serving cold: the traditional serving style is shallow bowls with a spoon. However you can make it into a parfait style using crushed nuts, chopped fruits, pieces of jelly etc layered with the chilled kheer. This is perfect for summer months. You can also add pieces of jilebi or jamun for the festive days to create fusion kheer dessert.

Can I make this kheer vegan?

If using coconut milk in place of regular milk you have made this kheer vegan easily. Since the coconut milk doesn’t curdle upon boiling it makes it easy to get this dessert creamy. You could try the same with oat milk too if you prefer.

Can I make this a sugar free dessert?

If you replace the sugar used in this recipe as stevia, monk fruit or aspartame, then you have a sugar free dessert. However, don’t add these to boil, rather make the kheer completely without sugar and then stir in the sugar free before serving. This ensure that the slight bitterness you feel with the sugar free is not accentuated.
Print

Sabudhana kheer

The sabudhana kheer is literally tapioca pearls boiled in milk. Yet, it tastes simply divine in some households and mediocre in othersΒ  if you are curious like I was here are the best collated ideas to make the best tasting sabudhana kheer.
Course Desserts
Cuisine gluten free, Indian
Keyword festival offerings, iftar recipes, Indian desserts, pot luck recipes
Prep Time 10 minutes
Cook Time 20 minutes
soaking time 2 hours
Total Time 2 hours 30 minutes
Servings 4 people

Equipment

Ingredients

  • 1/2 cup tapioca pearls
  • 1 cup water
  • 4 cups milk
  • 1/4 tsp green cardamom powder
  • 1/4 cup Assorted nuts crushed

Instructions

  • Wash and soak the sago (tapioca pearls).
  • Once it is swollen and has doubled in size it is ready to cook.
  • Boil the milk and reduce to half the volume. Ensure you are contantly stirring and scraping the solids that accumulate on the sides.
  • Add the soaked tapioca pearls and water to a deep pot and bring to a slow boil
  • Half way through add the milk and let the sago boil till the center turns glassy of each pearl.
  • Don't miss to keep stirring at this stage as it can catch the bottom easily.
  • Stir in the sugar, cardamom powder and mix well.
  • Remove from heat and stir in the crushed nuts .
  • Once he sugar is dissolved the kheer is ready to be served.
Stay connected
We make sabudhana kheer for any festivals and sometimes just on a whim. It is that easy and provides a comforting feeling always.Β 
Hope you like making this recipe.
Pin this kheer for later.
Stay subscribed and see you in the next post.
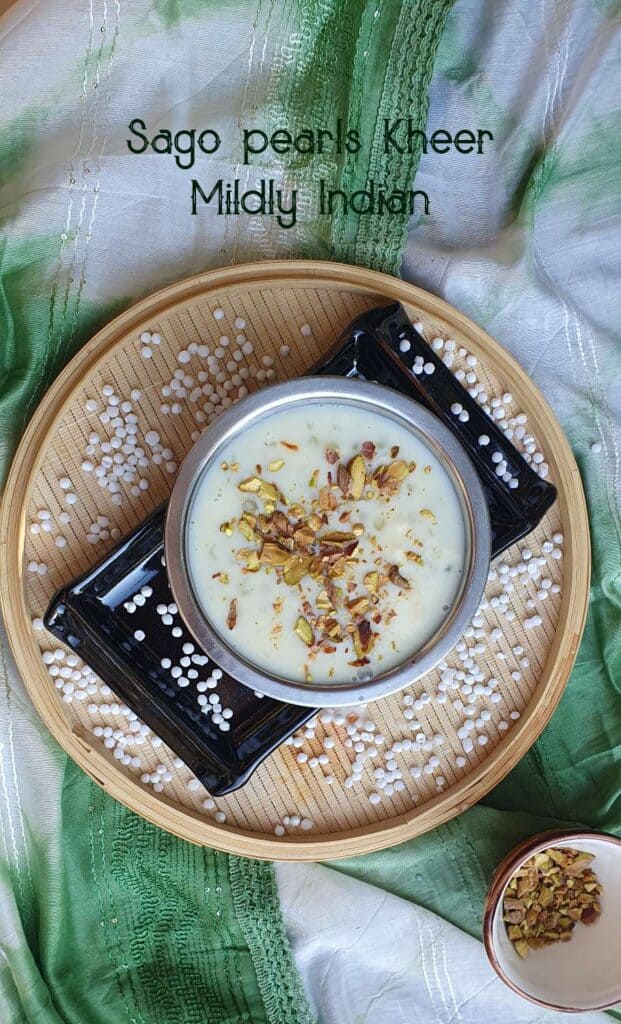
sago pearls kheer

Elaichi doodh | Cardamom milk

cardamom milk recipe

Milk is not one of my favorite drinks. I always disliked a cup of milk whether you add sweetness to it or not. So, when I was little my mum devised a few clever ways to make me have some. The one that I did not put up much of a fight with was for the warm cup of cardamom milk during the cooler months. As the slow autumn chill is coming through here currently, I had a sudden urge to try this elaichi doodh back again.

What is cardamom milk?

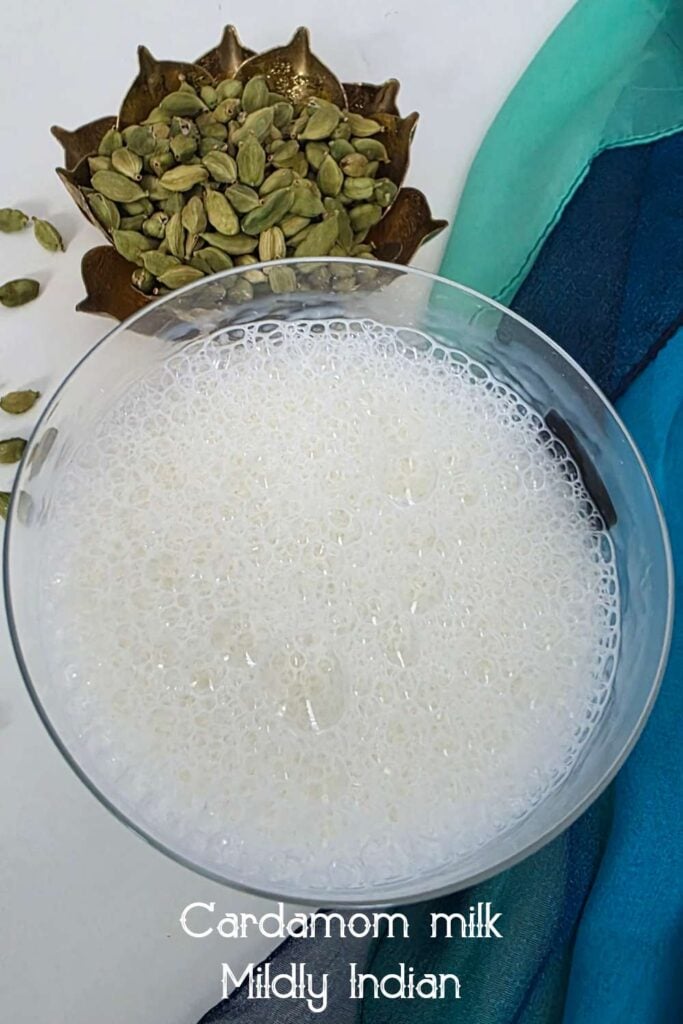
Cardamom milk is an excellent winter warm drink where steamed or boiled milk is infused with the aroma and flavour of cardamom. This elevates it from just being a drink to a copy dessert like feeling. It is also the same recipe called as cardamom moon milk.

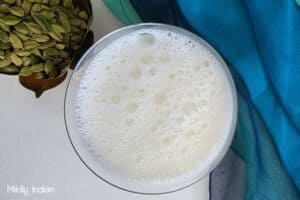
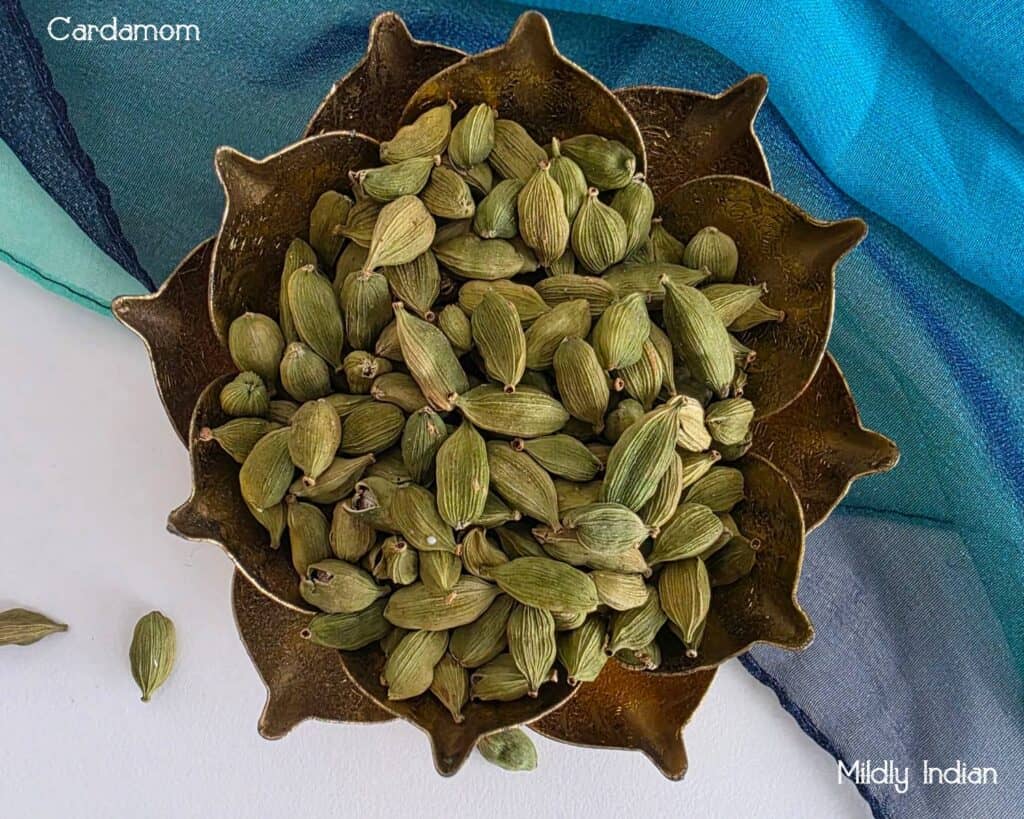
Cardamom pods

Ingredients to make elaichi doodh

Milk: classic elaichi doodh used full cream milk. However, it is up to you to use skim, lactose free or half and half milk or plant milk like soy or oat. Ensure you have a thick bottomed pan to boil it in.

Cardamom: green cardamom pods are the ones used in the recipe. When you buy them,ensure they look deep sage green or slate green and are so fragrant as soon as you open the pack. The skin is discarded (use in curries or to make tea) andΒ  the seeds are ground to add to the milk.

Sweetener: this can be entirely your choice. Honey, cane sugar, stevia, monk fruit or add none if you prefer it that way.

Let’s make cardamom milk

Making cardamom milk is as simple as slow boiling the milk and stirring in the cardamom powder and sweetener .

  • Remove the seeds from the cardamom pods.
  • Crush them well.
  • Slow boil the milk till it is bubbly and frothy.
  • Stir in the cardamom and remove from heat.
  • Stir in the sweetener. If using honey, wait till the milk cools down a bit.
  • Pour into cups and serve warm.

Will cardamom milk induce sleep?

Cardamom as a spiceΒ  is a soothing relaxant. Along with milk that is well known for inducing sleep the Cardamom milk combination makes it and excellent combination. It certainly is not a remedy for sleeplessness.Β 

Can elaichi milk be vegan?

If you are following this recipe with soy milk, oat milk etc,Β  the recipe naturally becomes vegan, however you don’t want honey in the recipe.

Can we serve this chillied?

Absolutely, pop them into small bottles and leave them in thr refrigerator. If using UHT milk, it will stay for almost a week with no issues.

Print

Cardamom milk

Enjoy the soothing warmth of cardamom milk as the winter chill slowly starts to show up.
Course Desserts, Drinks, Sweets and savories
Cuisine Indian, South indian
Keyword Indian drink recipes, Winter warmers
Prep Time 10 minutes
Cook Time 15 minutes
Servings 2 cups

Equipment

  • saucepan thick bottomed

Ingredients

  • 2 cups full cream milk
  • 2 green cardamom
  • 2 tbsp honey

Instructions

  • Peel the cardamom pod and extract the seeds.
  • Crush the seeds into a fine powder.
  • Bring the milk to slow boil,
  • Add the cardamom powder.
  • Once warm and bubbling, remove from heat and stir in the sweetener ( honey)
  • Pour into cups and serve.

Milk recipes from this blog

Kesar doodh – aromatic saffron milk

Mexican Atole | Hot corn drink

Ulundhu paal | blackgram drink

Jeera milagu Kashayam paal | spiced milk

Stay connected

Hope you are a better milk lover than I am and enjoy this recipe more often. Let us know if you have some soothing warm drink recipes like this that you absolutely love in the comments below.

Pin this for later

Stay subscribed and see you in the next post.Β 

Elaichi doodh

Payasam, pradhaman & kheer | Indian pudding recipe collection

kheer payasam prathaman

May it be any Indian festival, payasam, prathaman, pongal or kheer is the sweet ending. There is a certain bit of comfort we derive from hugging a bowl of this dessert. Resembling a pudding, the dessert is a combination ofΒ  a grain, fruits or seed cooked in milk and sweetened perfectly.Depending on the region where it is popular this dessert is slightly different and goes by the names payasam, payasa, payesh prathaman, pongal or kheer.

Why is this Indian pudding made?

Cleverly crafted the payasam or kheer is a age old tradition. The bowl of kheer symbolizes a celebration hence it is made for festivals, birthdays and any occasion to celebrate success. Combined with milkΒ  (plant milk) and sweetness it is a beloved navivedyum (bhog) which is a divine offering.Β  If you look at the varieties carefully, you will notice the regional and seasonal changes that made to the basic recipe, still holding on to the very essence of celebration and sharing with love.Β 
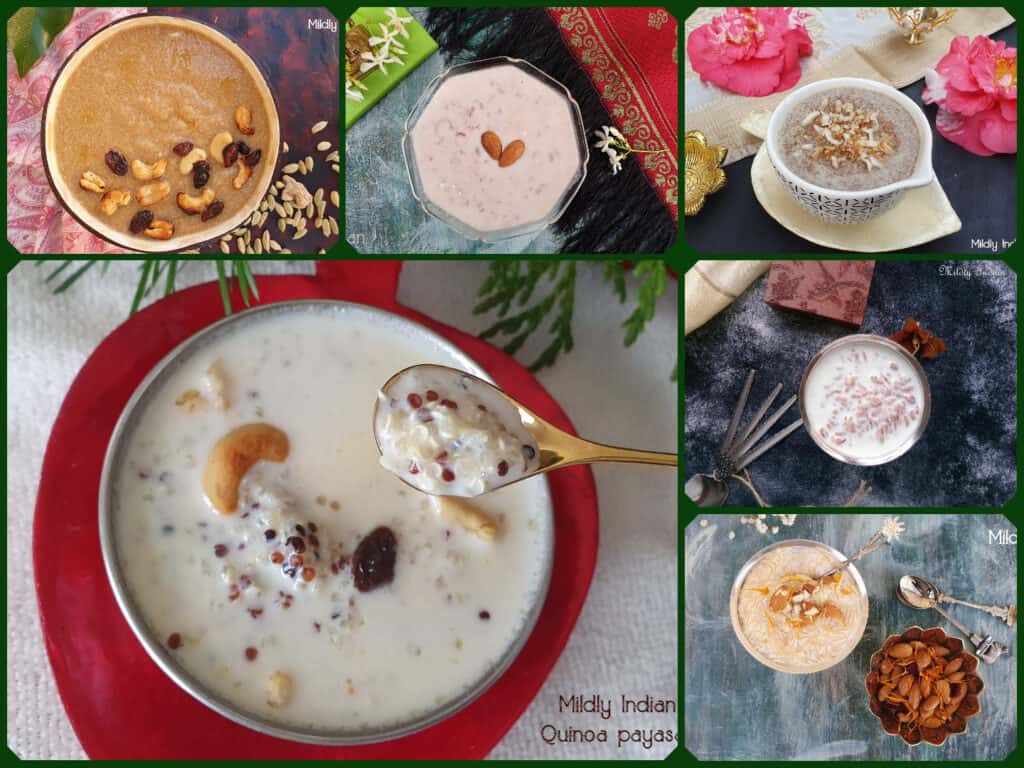
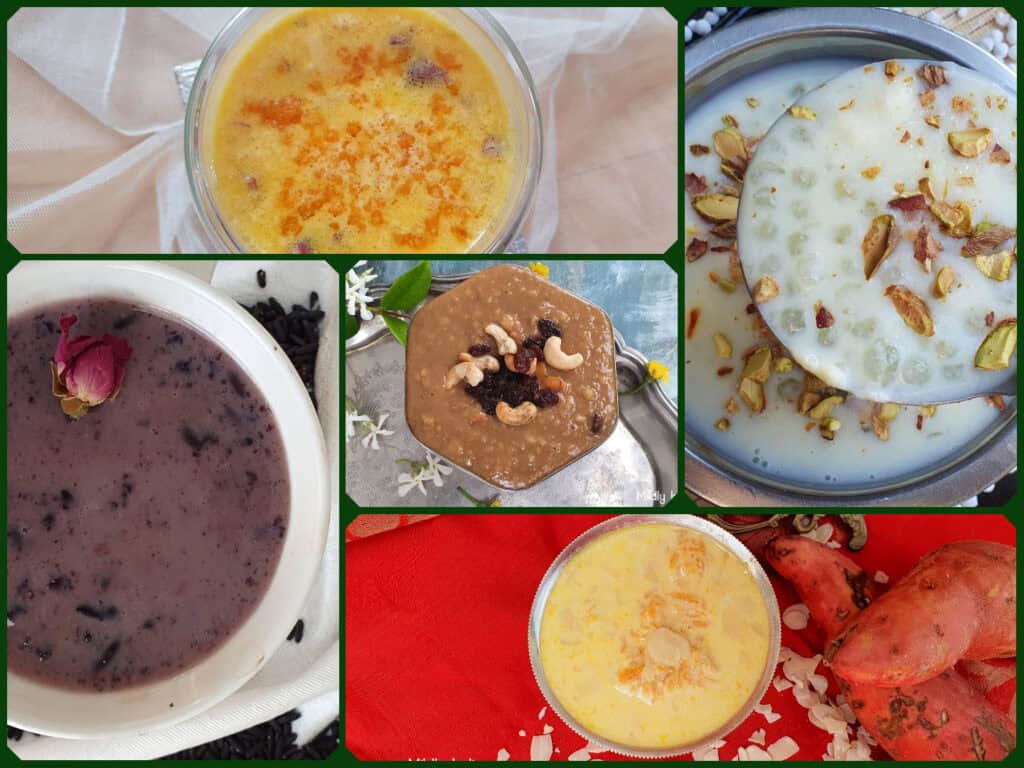
Here is a collection of 25 varieties of this dessert that you can trust for your festival offering. Each one of them is tried and tested multiple times, some classic and some fusion. Save it and enjoy.

Try these payasam recipes

Payasams come in many forms. Listed here are some of the most popular and some unique payasams you must try when trying the south Indian meal.

Pink paal payasam: Kerala style payasam made with raw red rice and milk is a comforting recipe made famous for it pale pink hue. Made during Krishnashtami, Onam and Vishu the payasam is one of Kerala’s favorite.

Semiya payasam:Β  the classic adaptation of the thin vermicelli cooked in milk is one of the best propagated fusion recipes that we have all loved. Make it for a birthday, a get together or any festival and make some memories.This is also called the vermicelli kheer or seviyyan kheer.

Chatha chathayam: An ancient rice and coconut milk based kheer, flavored with jaggery and banana. This is a niche recipe made during Shastapreethi. It is also a vegan payasam.

Teff payasam :a clever use of the Ethiopian seeds to form a creamy payasam laced with shredded coconut.

Mongil arisi payasam: is a slow cooked pudding with bamboo rice and milk. It is a rare payasam recipe popular among the forest region where bamboo rice is more available.

Kadala parippu payasam: uniquely satisfying chickpea payasam from Sizzling tastebuds is to be savoured atleast once. The chickpea dal is roasted to bring out the best of flavours in this recipe.

Rice rava payasam:Β  Quick and easy payasam made with crushed rice (rice rava) and jaggery. Best part is it is done under 20 minutes, hence a brilliant idea for festival days that fall on busy week days.

Carrot payasam: orange or purple carrots make the most delicious drinking style payasam. Very often we make this during Navrathri.

Aval payasam: instant payasam idea with flaked rice and coconut milk the rice is loved for its quick comfort that I learnt from my husband’s family.Β 

Badami payasa: Enjoy this Karnataka style payasa made with almonds, coconut and milk from Preethis cuisine. It is rich and perfect for small serves and for festivals like Ugadi

Varagu paal payasam: slow cooked millet in milk is one of our house favorite. It is perfect for vrat days or naivedyum.

Nuruku godhambu payasam : done in Kerala style this crushed wheat based payasam is made during home celebrations. This is again a vegan payasam.

Chaler payesh: classic rice payesh made in Bengali style is a recipe from Evergreen dishes. The unique feature about thie recipe is the subtle fragrance from the added bayleaf.

Payasam recipes collection.

What is the difference between payasam and prathaman?

For the love of Kerala, prathamans find thier way more often than payasams. Prathaman are a rustic style payasam made with coconut milk and jaggery. The slow cooked prathaman is often made with rice, fruits like plantain and jackfruit or dals. It is a bit thicker than payasam and best served on a banana leaf. This paysam stays good for a couple of days as well.These recipes are made for Onam, Vishu, Christmas and Easter.

Here is a collection of prathaman

Mango prathaman: Ripe mango and jaggery cooked in coconut milk is a seasonal prathaman recipe that is made often during Vishu.

Paalada prathaman : made using sundired rice flakes, milk and sugar the paalads prathaman is slightly different from the prathaman recipes that use jaggery and coconut milk.

Kadala parippu prathaman: made with Bengal gram the prathamn is a slightly ifferent version from the chickpea payasam.

Nendrapazham prathaman: made with ripe plantains nendrapazham prathaman is an unavoidable recipe for Onam once you have enjoyed it.

What is the difference between payasam and kheer?

Though cooked fairly similar, kheer is a smoother and thicker version of the Indian pudding compared to payasam. Compared to a payasam there is a lot of crushed nuts added to the kheers, where as in payasam it is a roasted bunch of nuts and raisins alonv with the ghee that is addded. Very often kheer can be seen served chilled where are payasams are preferably served warm. The differnece exists even in the way they are served. Payasams are served in a banana leaf or glasses with a spoon.however, kheer is usually served in small earthen bowls or any bowl as it is a bit thicker to have.

Kheer recipe collection

Must try kheer varities

Kheers as discussed re very similar to payasams. Here are some comforting and some special ones that you can use throughout the festival time

Rajgira Kheer: made popularly during navrathi season or vrat this is amde with popped amaranth seeds. gently and slowly cooked in milk it is an incredible mouth feel like little pops.

Sweet potato kheer:The most delicious creamy cooked sweet potato in milk an flavoured with jaggery or sugar and cardamom.

Chakhao ambui kheer: made with forbidden black rice it is a unique recipe that is fragrant and creamy and purple.

Kheer komola: this unique recipe with oranges in kheer is a seasonal speciality from The world through my eyes.

Mothichoor kheer: Fusion to the best,this kheer is made with crushed mothichoor ladoos and the warmth of milk.It is best served chilled.

Apple kheer: What is a better way to hve some apples than use them as a kheer. So fragrant this recipe from Mayuri’s jikoni will ensure your sweet tooth is well taken care of.

Bagarichi kheer: Bagar or millet based kheer is a delicate recipe made for Janmashtami, Check it out on The Madscientist Kitchen.

Paneer kheer; Is a royal creamy cottage cheese recipe, served chilled. This gluten free recipe is from Food trails.

Sago kheer: simple and easy yet comfortingly creamy kheer with tapioca pearls is one you should never miss. Make it with stands of saffron for that unique color and flavour.

Badam kheer: Soaked and ground almonds turned to the creamiest kheer. Try this from My cooking journey.

Phool Makahana kheer: Traditional kheer recipe made with foxnuts and nuts is a popular dessert for Holi, Navrathri or Diwali. Check it out from Cook with Renu.

Lauki kheer: Bottle gourd cleverly disguised as a dessert is an incredible idea for a kheer. Do try from Batter up with Sujata.

Stay connected

Hope you have a sweet tooth to hold on to this incredible collection of Indian dessert that is essential to celebrate every festival at its best. Share with us if you have any unique ones you make so we can add it to the collection
Pin this for use later.
Stay subscribed as we bring you some lovely idea collections like these.
See you in the next post.Β 

Elevated Peaches and cream

peaches and cream

Literally as simple as putting together peaches and cream this no-bake dessert is one that you will love for its simplicity. Enjoy this popular 90’s restaurant dessert, an under-10-minute dessert that can feed a crowd.

When it comes to any fruit, the simplest way appeals to the lazy me. Mostly it is cut and eaten. Otherwise, do something simple with it like add it to a salad. This is exactly what I plan with the first batch of peaches I have hauled. Once the first two or three peaches satisfy my appetite, I need to determine the future for the rest of them. The dessert that easily comes to my mind is peaches and cream.

Choosing the peaches

That perfectly ripened peach is an absolute must for this dessert as it relies on the lovely flavour of the peaches. Look for the round peaches as the tree-ripened ones tend to go round. Smell them! The aroma of that fruit permeates through the soft skin. Then, gently press them. If the fruit yields gently it is ready and juicy.
For this dessert, you can choose white or yellow peaches. yellow peaches give a classic look, that’s all. Flavour wise they are the same.

Yellow peaches.

How to remove the pit from a peach?

There is a line running along the side of the peach. Cut the peach along this line. Now you have a cut to separate them into two halves. Twist one-half and gently pull it away from the other. That one-half separate. Now, wiggle the seed to loosen it. Pull it away from the other half. Remember not to squeeze the flesh much as the fruit is easily bruised.

Ingredients to make this peach dessert

The basic recipe for peaches and cream needs only 2 ingredients. However, this doesn’t do justice to the popular 90’s restaurant dessert. Hence here is my version
Peaches – Once you have chosen and pitted the peaches, slice them or dice them.
Sugar- unrefined sugar works perfectly fine in this case. It is only to keep the pears juicy while you get on further and prevent excessive browning.
Lemon zest-Thi is a small twist that adds a lot of freshness to the dish. As the cream can be pretty heavy the lemon zest helps to lighten the flavour.
Cream- Pouring cream is ideal in this recipe. We are not looking for soft whipped peaks, so no whipping cream is needed. If you want to cut down a bit the calories, try light cream or low-fat cream.
Vanilla- Scrape out a few bits from a vanilla pod and add to the cream. Without te addition of any sugar this gives the simple dessert a fantastic fragrance.Β 

peaches cream recipe.

Print

Peaches and cream

Course Dessert, Sweets and savories, Traditional
Cuisine American, Fusion, International
Keyword no cook recipes,, stone fruit recipes, summer recipes
Prep Time 10 minutes
Servings 2 people

Equipment

  • mixing bowls and spoons.

Ingredients

  • 2 medium peaches
  • 1/4 tsp lemon zest
  • 1 tsp brown sugar
  • 1 cup heavy cream
  • few vanilla scrapings

Instructions

  • Wash and slice the peach into pieces.
  • Add it to your mixing bowl and sprinkle the sugar and lemon zest.
    sliced peaches.
  • Mix well and set it aside.
  • Mix the vanilla scrapings into the heavy cream and mix well.
    Vanilla cream.
  • Keep chilled.
  • Scoop the peaches into a glass and top with the cream.
  • Serve immedietly.
    peaches and cream

Making it healthier

Honestly, this dessert is not for you if you are looking for a healthy dessert. I would rather dunk the fruit in chocolate tofu dip to keep it cleaner and simpler.

Make ahead

This is certainly an easy dessert to put together for a crowd. However, you cannot prepare and assemble this dish much in advance. Here is what you can do the previous day.

Prep the glasses ahead.

Cut the peaches, and mix in the sugar and zest. Keep them covered in the fridge.

Whip the cream with vanilla, slightly so you have a pouring consistency. Keep this covered in the fridge.

Once these are set it is as simple as spooning the fruit and cream into the individual glasses.

What other fruit can I try with the cream?

Given an opportunity, I wouldn’t hesitate to make the cream combo with strawberries, mango, grapes, bananas, melons etc. You can also mix a combination of fruits in this vanilla cream.

Stay connected

Hope you have a collection of recipes like this that hardly takes a few minutes but satisfies a crowd really well. In our attempt, the fruit salad with honey dressing and the peaches with cream are my top picks to share on a barbeque day. Let us know in the comments how we are doing with this blog. As usual, leave us a rating on the start system with 5 stars if you like this recipe. Don’t forget to subscribe or connect with us through Instagram or Facebook.

For now, enjoy the sun and the sunny peach season.

peaches and cream dessert

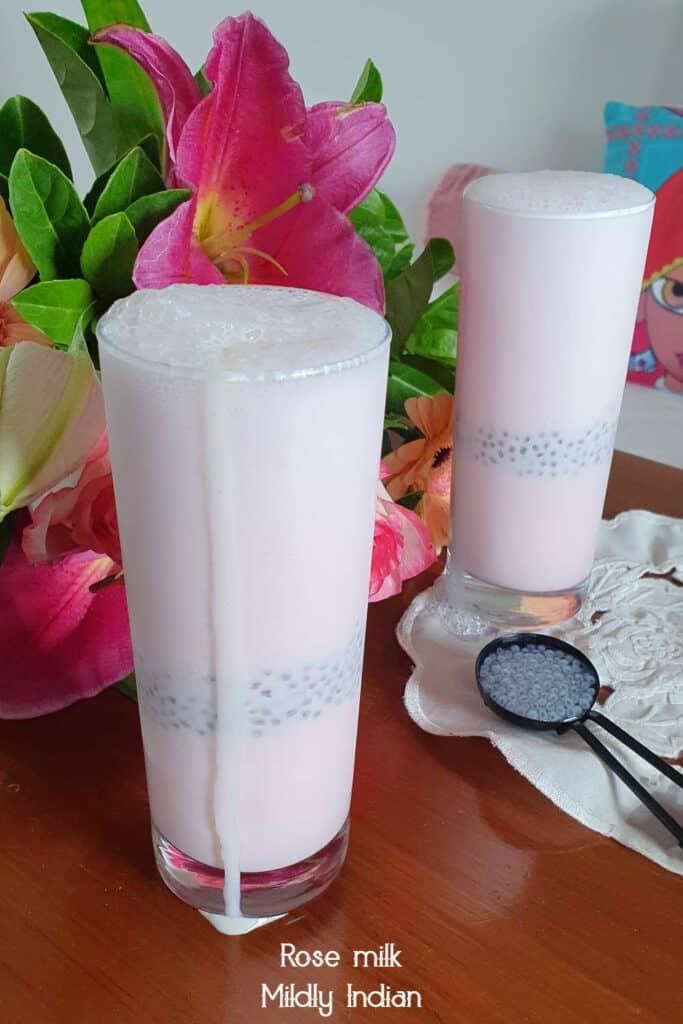
Rose milk ( no syrup used)

Rose milk

The recent India trip was fantastic. As much as we had fun, there are a couple of things that this India trip ruined for me. One was bread the other was rose milk. That was my simple pleasure which the milk booths used to keep in plenty. During this trip, I searched high a low for some but found none. As soon as we got back and the jet lag faded off,Β  I had to make some myself. Since it has become a kind of rarity, I guess it is best if it is on our blog too.

What is rose milk?

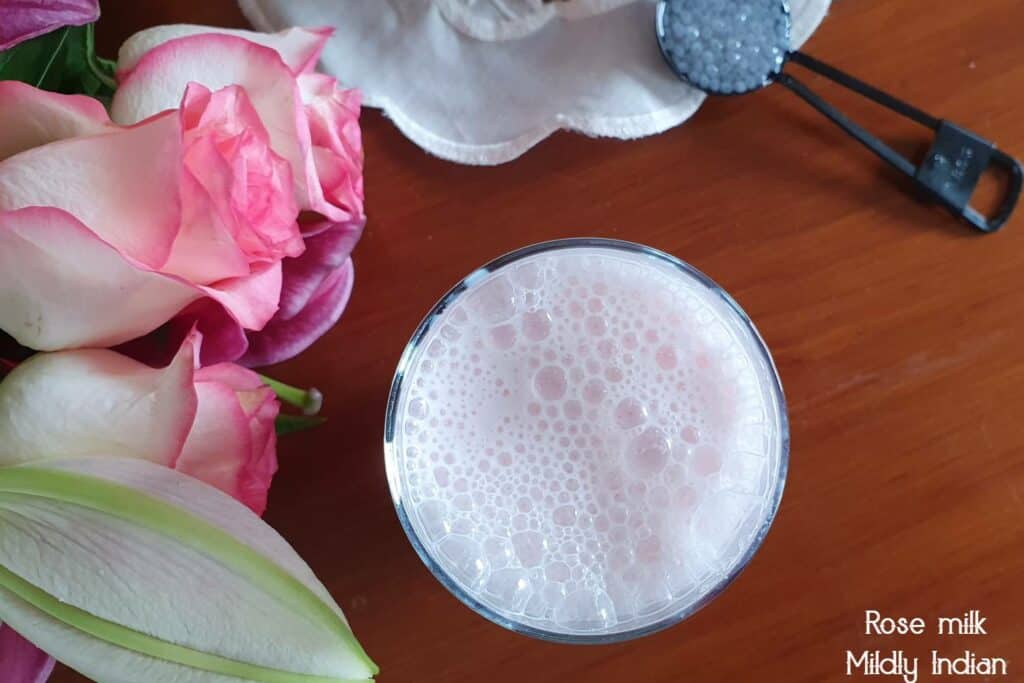
The gorgeous, pale pink, milk-based drink is a gentle lightly sweetened drink popular in summer. With the juicy crunchy basil seeds added, this summer drink is a popular one for the heat and humidity of the tropics. With flavours of extract of rose and the same as its fragrance, the cold, frothy milk drink is a relief from the heat. The drink Bandung in Malaysia and Thai Nom Yen are all versions of the same. However in this recipe today we have not used the rose syrup that gets utilized in most recipes, rather have gone in to create a natural alternate with fresh rose flower petals.Β 

Ingredients to make the rose milk

Milk : boiled and chilled milk is what we use traditionally for this recipe. However, over aΒ  period of time, I find Evaporated milk gives a full-bodied thick frothy milk moustache-making consistency. You can use half-and-half or low-fat milk too.
Rose petals: nothing beats that fresh rose petal that gets blended in. Use known sources of pesticides free fresh rose petals or edible grade dried ones. The actual variety that we look for with its fragrance is the panneer rose, the one from which rose water is extracted. Make sure your source is from the edible roses as there are plenty that is just ornamental.
Rose water: since the rose petals may not be fragrant enough, edible-grade rose water is required. If you have plenty of rose petals you can avoid using this.
Red food colour: the pink colour is characteristic of this drink. A small drop or two of natural red food colour will do the job. You can use natural dried beet powder in its place too.
Sweetener:Β  is totally optional. Use honey or sugar to flavour if needed. Since the milk in Australia is much sweeter, I have not used any here.
Sweet basil seeds: this is the exciting part of this drink. Basil seeds are small black seeds often sold in Indian spice aisles as Sabja. This when added to water swells into small jelly globes. They add a lovely touch to the drink and also promote gut health. These are not chia seeds, however, if you cannot get there you can use some chia here.

How to make this drink?

Soak the basil seeds in about 3 times water. Once you gather the ingredients it is as simple as blending them together all except the basil seeds. Once frothy pour into tall glasses and top with the bloomed basil seeds. Check the recipe card below for detailed instructions and exact measurements. YOu can pin the same from th recipe card on to your board if saving for later.

Rose milk recipe

Print

Natural Rose milk

With the juicy crunchy basil seeds added, this summer drink is a popular one for the heat and humidity of the tropics. With flavours of extract of rose and the same as its fragrance, the cold, frothy milk drink is a relief from the heat.
Course Dessert, Drinks
Cuisine Baby toddler food, gluten free, Indian, Kids choice, Medicinal, Summer
Keyword Lunch recipes, no cook recipes,, summer recipes
Prep Time 10 minutes
Servings 2 people

Equipment

  • blender
  • measuring cups and spoons
  • Glasses tll slender ones

Ingredients

  • 2 cups milk chilled
  • 10-15 Rose petals
  • 1 pinch Red food coulor or dried beet powder
  • 1 tsp Rose essence
  • sweetener optional

for the topping

  • 1 tbsp sweet basil seeds
  • 1/4 cup drinking water

Instructions

  • Soak the basil seeds to bloom.
  • Set this aside while you prepare for the rose shake.
  • Into the blender add all the other ingredients and sweetenerif required.
  • Blend smooth for 2 minutes till it is frothy.
  • Pour this into tall glasses.
  • Top with the bloomed sweet basil (sabja) seeds
    Rose milk

Notes

The basil seeds when added initially will sink to the bottom. Then they will slowly rise up to the top for a few hours.Β 

Can this be a vegan drink?

It is a milk-based drink, however, using soy or almond milk gives a delicious vegan pink milk without a huge change in flavour. In fact, I love to use soy milk as my choice for the vegan version. The rest of the ingredients are the same.

Make ahead and storage

The freshly blended rose milk is certainly frothy. However, it is an easy drink to make and store in the refrigerator. It stays good for upto 3 days with regular milk and about 7 days with Evaporated milk. Keep it in a sealed bottle or a small covered pitcher to have on hot days. You can mix in the basil seeds too. They stay at the bottom, so stir well before pouring out the drink for yourself.

Easy summer thirst quenchers on this blog

Apple celery green juice
Nectarine fizz
Fresh fig milkshake
Strawberry lassi
Cherry watermelon smoothie

Stay connected

If you have spent your childhood in the tropics, I am sure you would have also had a version of this. Pink milk as it is fondly called us now revived for me. Try out this caffeine-free, afternoon pick-up and rate us using the star system below. Share in the comments your childhood experiences with the easy thirst quencher. Subscribe to us for new recipes or visit us often.
Enjoy your glass while I get some more.Β 

Pink milk | rose milk

Ellu bella for Sankranthi

Ellu bella for sankranthi

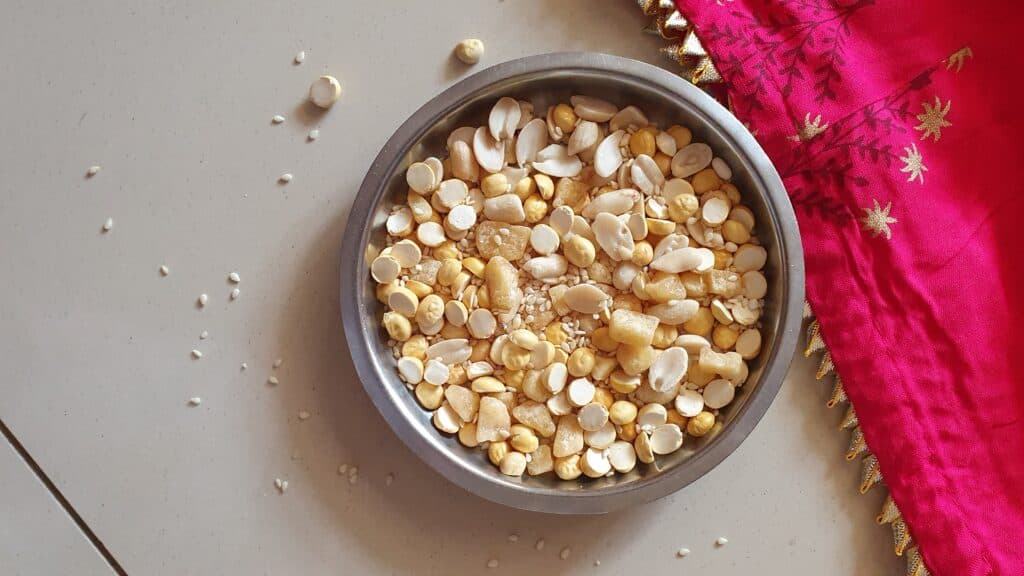
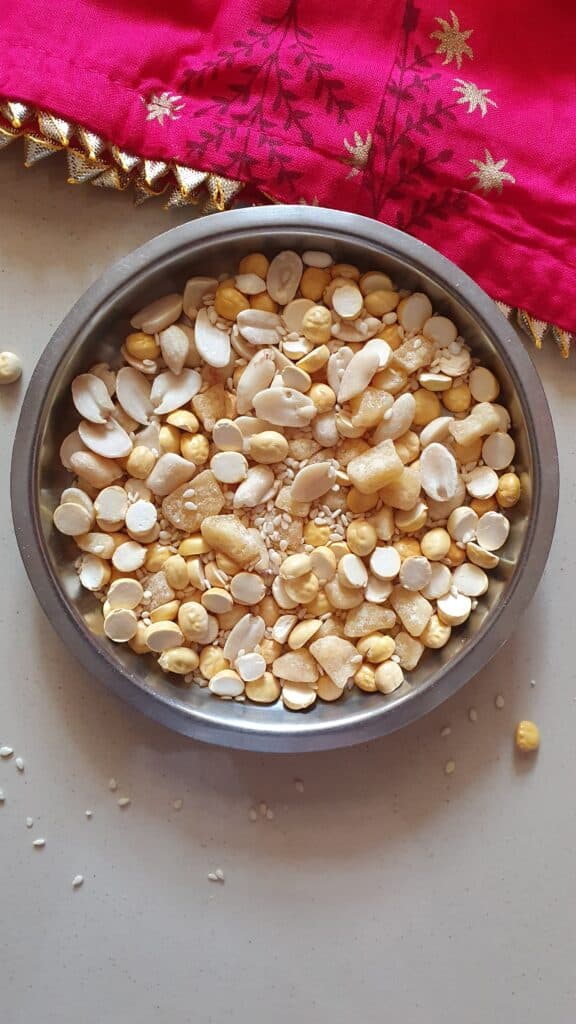
Ellu bella sweet trail mix made during the Makar Sankranthi festival. Shared with friends and family, this easy gluten-free dry mix provides a good form of jar snack.

Walking through the now back to bustling markets of Bengaluru there is sugarcane, ellu bella packs, achu sharkare etc lining the shelves. It is nearing Makar Sankarnthi. The ellu bella packs attracted my attention. This trail mix is one I am particularly fond of and loved munching on. Here is the recipe to make this simple ellu bella and a bit about it.

What is makar sankrathi?

The transition into the Zodiac of capricon is Makar Sankranthi. It marks the beginning of summer and teh end of winter. During this time the winter harvest is plenty and is a celbartion for the farming communities, thanking the natural forces for the abundance. Across indian states, these three days are celebrated as Pongal ( Read more here), Sankranthi, Magi, Makara villaku or Sokran. Each regions celebarates the local produce which is showcased in the festival foods. In Karnataka, this celebartion time is all about bonding, sharing and happiness. Kite flying, decorated animals and carts are a common site during thsi time. The family is in their best attire (new ones ofcourse) and visiting friends and fanily with ellu bella and a sankranthi thali.

Why is ellu bella shared?

β€œEllu bella thindu olle maathadi”.
The Kannada saying above translates to eat ellu bella and speak no evil. It is one of the recipes (not much if it) meant purely for sharing. The actual highlight of the day is the sharing of the ellu bella with neighbours and friends. This is an excitement for the kids who are entrusted with the job. The idea of sharing this winter trail mix is to enhance the bonding between the families.

Ingredients for ellu bella

Ellu bella is not a huge deal of a recipe, but rather a simple mix of ingredients that make it a perfect winter munch. Here is what goes into making ellu bella.

Roasted groundnut: as a locally grown crop, grounds form a huge part of Karnataka cuisine. Roasted to perfection, peeled and split the groundnut anyway form the favourite munch. Added the trail mix it offers a delicious nutty feel.
Sesame seeds: the toasted white sesame seeds are used to make this recipe. The nutty flavour with a faint after-taste along with the jaggery tastes fantastic.
Roasted chickpea dal: huri kadle or roasted gram is added to the mix. This gives a powdery mouthful when bitten into.
Jaggery: traditionally jaggery or bella is the sweetness factor in this dry mix. If not sugar or rock sugar pieces will work in their place.
Dry coconut: Kobri is mature coconut that has its kernel completely dried. This is either grated or cut into small cubes. It has a slightly sweet flavour with abundant coconut oil and fibre.

Utensils for the Ellu bella

The roasting of the ingredients is done on a cast iron wok called banali. This thick-bottomed wok is perfect for roasting nuts and seeds without getting them burnt. Usually, this is a hand-me-down. I got mine from my mother.
The Kobra or dry coconut is cut into squares using a nutcracker or an arumamanai. The arumamanai is a small wooden stool or plank fitted with a bent sharp blade. Sitting on the plank placed on the floor, the kobri (even vegetables) are diced into pieces. This is actually an art in itself. Sitting on that plank needs practice.

How long to keep ellu bella?

Ellu bella is a dry mix. If kept in airtight containers it stays good for up to 3 months on the shelf. However, a handful of the mix is actually a wonderful snack, so it never lasts so long in my house.

Print

Ellu bella

Ellu bella sweet trail mix made during the Makar Sankranthi festival. Shared with friends and family, this easy gluten-free dry mix provides a good form of jar snack.
Course Dessert, Snack
Cuisine gluten free, Indian, Karnataka, One pot, South indian
Keyword beans and legumes, festival offerings, Karnataka recipes, vegan
Prep Time 30 minutes
Servings 20 people

Equipment

  • Kadai
  • Cutting board
  • Knife

Ingredients

  • 1 cup roasted chickpea porikadale, hurikadale
  • 1 cup peanuts peeled and split
  • 1 cup dry coconut kobri
  • 1 cup jaggery cubed
  • 1/2 cup sesame seeds

Instructions

  • Cut the kobri into 1/2 cm cubes. If preferred can remove the outer brown cover using a peeler.
  • Cut the jaggery ball into small pieces to add to the mix.
  • Set these two aside till needed.
  • Set the kadai (banali) on medium heat.
  • Roast the peanut with constant stirring.
  • Once the peanut is slightly golden and crunchy, Add to a mixing bowl.
  • Next, into the kadai add the dry coconut pieces and roast them.
  • Remove this also into the mixing bowl.
  • Add the sesame seeds and let them pop.
  • As they crackle and pop, add this to the mixing bowl.
  • Remove the kadai from heat and add the roasted chickpeas just to warm up by the heat of the vessel.
  • Into the mixing bowl add the jaggery pieces and the roasted gram.
  • Give the trail mix a good stir.
  • Now the ellu bella is ready.

Setting up the sankranthi thali.

The Sankranthi thali is one of the simplest to set up. It is all about the seasonal local produce. This is an easy idea to set it up. Here are some things you want to gather
Ellu bella
Sugarcane
Mango leaves or betel leaves
Achhu sharkare (candy sugar figurines)
Banana
Ber or indian jujubes
Flowers
Additional adds
Steamed groundnut
Steamed sweet potatoes
A steel or metal platter is preferred to set this mix. Wash clean and dry the leaves. On the platter plate the leaves and arrange the other elements around them. You can keep the ellu bella in a bowl or add it directly onto the plate. Add the sugar candy last and decorate with flowers. This is your sankranthi thali.

Food served for Sankrathi

Since it is a seasonal abundance, newly harvested rice, yams, sweet potatoes,hyacinth beans, groundnuts, sugarcane etc are the main produce you see during this time. Commonly, Sweet pongal, steamed groundnuts, payasa, lemon rice, avrekalu uppitu,steamed sweet potato, ellu unde are made during this time.

If you are looking for a naivedyam thali, try this -click here for the link.

Stay connected

Learning about traditional cuisine takes time and guidance. Simple recipes like these are more fun to put together and bring about the festival spirit. So dress up and celebrate. Tell us about your way of celebrating with ellu bella or how you celebrate makar Sankranthi in the comments. If you are making ellu bella at home, share with us the little twists and turns. Don’t miss to subscribe and keep connected.
Happy Sankranthi!

Ellu bella

Β 

❌