❌

Reading view

There are new articles available, click to refresh the page.

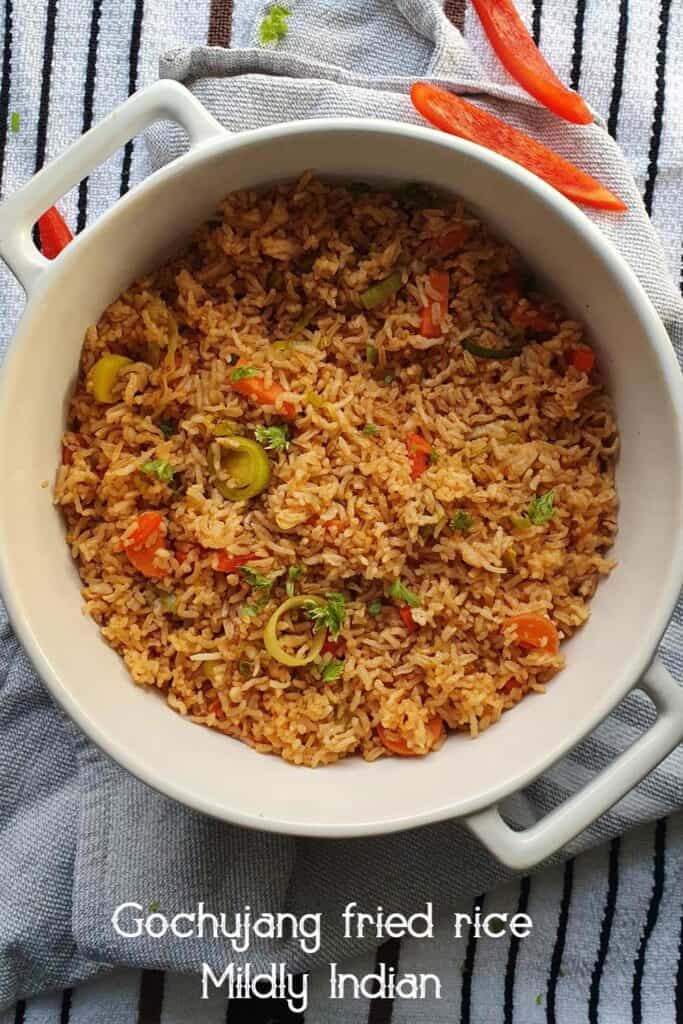
Gochujang fried rice

Gochujang fried rice

Dipping your feet into Korean food? Here’s gochujang fried rice that you must not miss. quick and easy, this brown rice fry is gluten-free,Β  vegan and above all delicious.

The current bonding with my teens is learning the ropes of Korean pop. As I am getting educated on the song list, moves, selfie trends etc my brain runs fueled by flavours. Here is the first and easiest, gochujang fried rice. Hopefully, this imperfect gochujang fried rice version will be accepted by my teens.Β 

What is gochujang?

I am sure you all are familiar with fried rice. Gochujang takes fried rice to a whole new level, the one that you don’t want to put your fork down.Β  Gochujang is a unique fermented chilli paste made from taeyancho Chili peppers. It is not a ground chilli paste like gochugaru, rather has fermented soy paste, glutinous rice etc, that contributes to the umami flavour it develops. Gochujang does not have the fiery flavour of the chillies. Yes, there is the spiciness,Β  yet a bit of sweet mellowness comes from the fermentation. Gochujang is used in combination with gochugaru for heat in many recipes. In this fried rice, we have only used the gochujang to create the flavour.

What rice is best for gochujang fried rice?

Medium to long-grain rice is what is best for making gochujang fried rice. The key idea is that the rice is nonsticky, not a glutinous variety. Today I have used brown basmati to make this recipe. The brown basmati has a bite when cooked and fluffs ups perfectly making it easy to stirfry.

Prepping the rice for the perfect texture

Ideally, soak the rice after washing it for 10 minutes. Depending on the method you choose to cook the rice you will need 1l to 2 times of the water to get fluffy rice. Either cook and drain the excess liquid or use the absorption method. Once the rice is cooked, use a fork to fluff it so the rice grains separate better. To be fair, the best-fried rice makes use of leftover rice as it has dried out a little bit keeping the grains separate, yet soft.
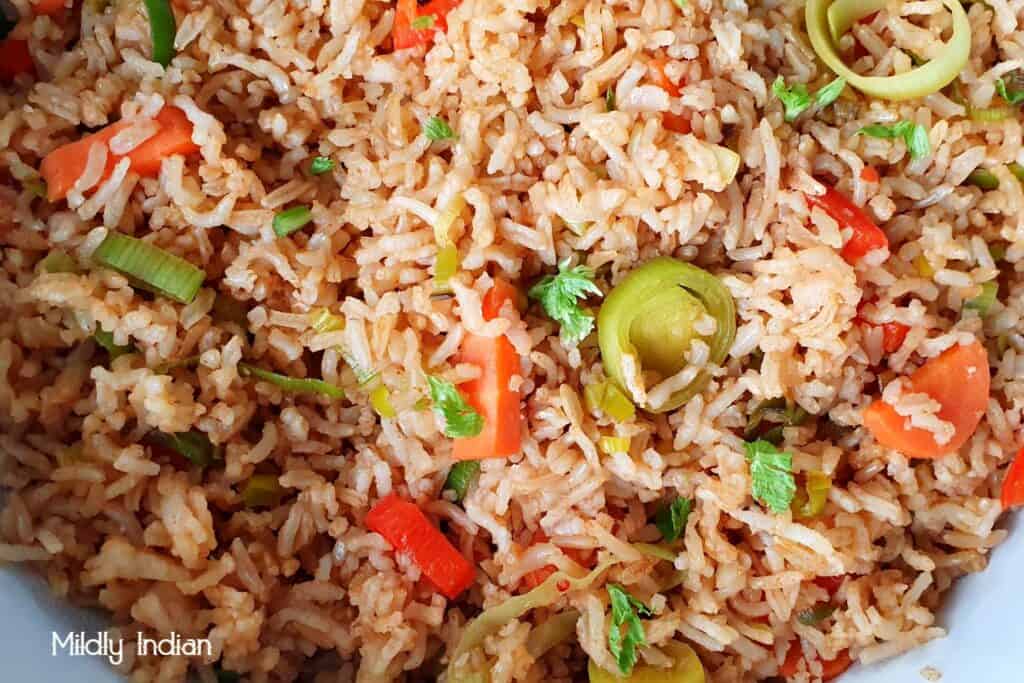
korean fried rice made with Gochujang paste.

Let’s get cooking

Once you have the rice ready, the gochujang fried rice comes together quickly.
Chop up some veggies you have like onions, capsicum, peas, cabbage, carrots etc. I have used sliced leeks, chopped carrots and capsicum to make it. This keeps changing based on what I have at hand.
Next comes the sauce. So, into the bowl goes gochujang paste, soy sauce andΒ  2 tablespoons of hot water. Whisk this to get a smooth sauce.
I guess you are in ready-set-go mode. Fire up that wok and grease it well with oil. Fry the veggies and add the fluffed rice.Β  Pour the sauce and quickly start mixing. Use two turners to achieve this. So, it is dug and tossed, not stirred. In this way, the sauce and the veggies get evenly mixed without the rice turning mushy. Once all is mixed, the fried rice is ready to be served.

Print

Gochujang fried rice

Dipping your feet into Korean food? Here's gochujang fried rice that you must not miss. quick and easy, this brown rice fry is gluten-free,Β  vegan and above all delicious.
Course Main Course
Cuisine Fusion, gluten free, Korean, One pot
Keyword leftover recipes, Lunch recipes, rice salad recipes, Tofu recipes
Prep Time 15 minutes
Cook Time 20 minutes
Servings 4 people

Equipment

  • wok
  • ladle

Ingredients

  • 2 tbsp oil
  • 1 tbsp garlic minced
  • 1 tsp fresh ginger root chopped
  • 1/2 cup leeks sliced
  • 1/2 cup carrots chopped
  • 1/2 cup capsicumΒ  chopped
  • 1/2 cup tofu crumpled
  • 3 cups brown rice cooked and fluffed
  • 2 tbsp gochujang
  • 1 tbsp dark soy sauce
  • 1 tsp Toasted sesame seeds

Instructions

  • Stir together the soy sauce and gochujang paste with a bit of water to form sauce. Set this aside till needed.
    sauce for gochujang fried rice.
  • Chop the carrots, capsicum and leeks. Set it aside.
  • Fluff the cooked brown rice and keep it ready.
    cooked brown rice for the fried rice.
  • Into the wok add the oil and let it heat up.
  • Once heated, add the garlic and ginger and stirfry to flavour the oil.
  • Add the tofu and stir fry for minute.
  • Now stir fry the veggies.
    veggies
  • Once the veggies are crisp but sauteed, add the rice.
    brown rice
  • Add the sauce and toss and fry on high heat.
    gochujang sauce.
  • Once the rice is well coated and heated up, sprinkle the sesame seeds and mix well.
    gochujang fried rice.
  • Taste test and adjust seasoning or salt if needed.
  • Remove from heat and the rice is ready to be served.
    gochujang fried rice.
Serving suggestions for gochujang fried rice

The best dishes to serve with this gochujang fried rice are roasted tofu, some spicy cucumber salad. Pair with chilled baesook and the meal is complete.Β 

Stay connected

Gochujang fried rice is not an authentic Korean recipe. It is more so a fusion idea that we tried as a stepping stone into the cuisine. It is a very flavourful recipe that we have decided to bond upon. We will welcome your suggestions to try out vegetarian Korean dishes. Leave them in your comments and rate the recipe when you make this fried rice.Β 

Korean Gochujang fried rice.
Elevated Peaches and cream

peaches and cream

Literally as simple as putting together peaches and cream this no-bake dessert is one that you will love for its simplicity. Enjoy this popular 90’s restaurant dessert, an under-10-minute dessert that can feed a crowd.

When it comes to any fruit, the simplest way appeals to the lazy me. Mostly it is cut and eaten. Otherwise, do something simple with it like add it to a salad. This is exactly what I plan with the first batch of peaches I have hauled. Once the first two or three peaches satisfy my appetite, I need to determine the future for the rest of them. The dessert that easily comes to my mind is peaches and cream.

Choosing the peaches

That perfectly ripened peach is an absolute must for this dessert as it relies on the lovely flavour of the peaches. Look for the round peaches as the tree-ripened ones tend to go round. Smell them! The aroma of that fruit permeates through the soft skin. Then, gently press them. If the fruit yields gently it is ready and juicy.
For this dessert, you can choose white or yellow peaches. yellow peaches give a classic look, that’s all. Flavour wise they are the same.

Yellow peaches.

How to remove the pit from a peach?

There is a line running along the side of the peach. Cut the peach along this line. Now you have a cut to separate them into two halves. Twist one-half and gently pull it away from the other. That one-half separate. Now, wiggle the seed to loosen it. Pull it away from the other half. Remember not to squeeze the flesh much as the fruit is easily bruised.

Ingredients to make this peach dessert

The basic recipe for peaches and cream needs only 2 ingredients. However, this doesn’t do justice to the popular 90’s restaurant dessert. Hence here is my version
Peaches – Once you have chosen and pitted the peaches, slice them or dice them.
Sugar- unrefined sugar works perfectly fine in this case. It is only to keep the pears juicy while you get on further and prevent excessive browning.
Lemon zest-Thi is a small twist that adds a lot of freshness to the dish. As the cream can be pretty heavy the lemon zest helps to lighten the flavour.
Cream- Pouring cream is ideal in this recipe. We are not looking for soft whipped peaks, so no whipping cream is needed. If you want to cut down a bit the calories, try light cream or low-fat cream.
Vanilla- Scrape out a few bits from a vanilla pod and add to the cream. Without te addition of any sugar this gives the simple dessert a fantastic fragrance.Β 

peaches cream recipe.

Print

Peaches and cream

Course Dessert, Sweets and savories, Traditional
Cuisine American, Fusion, International
Keyword no cook recipes,, stone fruit recipes, summer recipes
Prep Time 10 minutes
Servings 2 people

Equipment

  • mixing bowls and spoons.

Ingredients

  • 2 medium peaches
  • 1/4 tsp lemon zest
  • 1 tsp brown sugar
  • 1 cup heavy cream
  • few vanilla scrapings

Instructions

  • Wash and slice the peach into pieces.
  • Add it to your mixing bowl and sprinkle the sugar and lemon zest.
    sliced peaches.
  • Mix well and set it aside.
  • Mix the vanilla scrapings into the heavy cream and mix well.
    Vanilla cream.
  • Keep chilled.
  • Scoop the peaches into a glass and top with the cream.
  • Serve immedietly.
    peaches and cream

Making it healthier

Honestly, this dessert is not for you if you are looking for a healthy dessert. I would rather dunk the fruit in chocolate tofu dip to keep it cleaner and simpler.

Make ahead

This is certainly an easy dessert to put together for a crowd. However, you cannot prepare and assemble this dish much in advance. Here is what you can do the previous day.

Prep the glasses ahead.

Cut the peaches, and mix in the sugar and zest. Keep them covered in the fridge.

Whip the cream with vanilla, slightly so you have a pouring consistency. Keep this covered in the fridge.

Once these are set it is as simple as spooning the fruit and cream into the individual glasses.

What other fruit can I try with the cream?

Given an opportunity, I wouldn’t hesitate to make the cream combo with strawberries, mango, grapes, bananas, melons etc. You can also mix a combination of fruits in this vanilla cream.

Stay connected

Hope you have a collection of recipes like this that hardly takes a few minutes but satisfies a crowd really well. In our attempt, the fruit salad with honey dressing and the peaches with cream are my top picks to share on a barbeque day. Let us know in the comments how we are doing with this blog. As usual, leave us a rating on the start system with 5 stars if you like this recipe. Don’t forget to subscribe or connect with us through Instagram or Facebook.

For now, enjoy the sun and the sunny peach season.

peaches and cream dessert

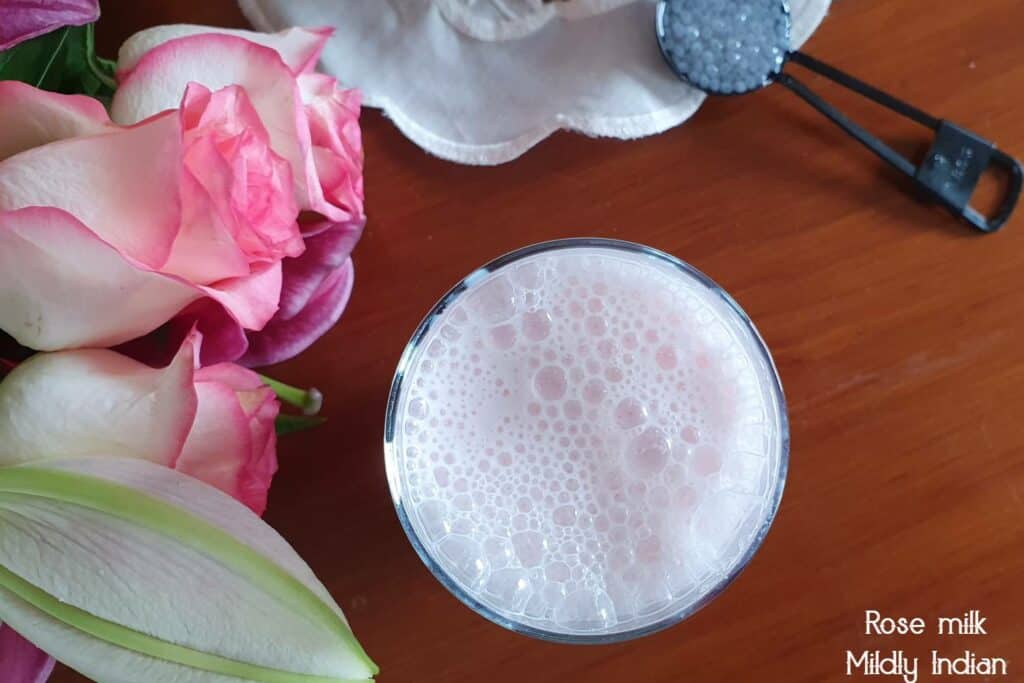
Rose milk ( no syrup used)

Rose milk

The recent India trip was fantastic. As much as we had fun, there are a couple of things that this India trip ruined for me. One was bread the other was rose milk. That was my simple pleasure which the milk booths used to keep in plenty. During this trip, I searched high a low for some but found none. As soon as we got back and the jet lag faded off,Β  I had to make some myself. Since it has become a kind of rarity, I guess it is best if it is on our blog too.

What is rose milk?

The gorgeous, pale pink, milk-based drink is a gentle lightly sweetened drink popular in summer. With the juicy crunchy basil seeds added, this summer drink is a popular one for the heat and humidity of the tropics. With flavours of extract of rose and the same as its fragrance, the cold, frothy milk drink is a relief from the heat. The drink Bandung in Malaysia and Thai Nom Yen are all versions of the same. However in this recipe today we have not used the rose syrup that gets utilized in most recipes, rather have gone in to create a natural alternate with fresh rose flower petals.Β 

Ingredients to make the rose milk

Milk : boiled and chilled milk is what we use traditionally for this recipe. However, over aΒ  period of time, I find Evaporated milk gives a full-bodied thick frothy milk moustache-making consistency. You can use half-and-half or low-fat milk too.
Rose petals: nothing beats that fresh rose petal that gets blended in. Use known sources of pesticides free fresh rose petals or edible grade dried ones. The actual variety that we look for with its fragrance is the panneer rose, the one from which rose water is extracted. Make sure your source is from the edible roses as there are plenty that is just ornamental.
Rose water: since the rose petals may not be fragrant enough, edible-grade rose water is required. If you have plenty of rose petals you can avoid using this.
Red food colour: the pink colour is characteristic of this drink. A small drop or two of natural red food colour will do the job. You can use natural dried beet powder in its place too.
Sweetener:Β  is totally optional. Use honey or sugar to flavour if needed. Since the milk in Australia is much sweeter, I have not used any here.
Sweet basil seeds: this is the exciting part of this drink. Basil seeds are small black seeds often sold in Indian spice aisles as Sabja. This when added to water swells into small jelly globes. They add a lovely touch to the drink and also promote gut health. These are not chia seeds, however, if you cannot get there you can use some chia here.

How to make this drink?

Soak the basil seeds in about 3 times water. Once you gather the ingredients it is as simple as blending them together all except the basil seeds. Once frothy pour into tall glasses and top with the bloomed basil seeds. Check the recipe card below for detailed instructions and exact measurements. YOu can pin the same from th recipe card on to your board if saving for later.

Rose milk recipe

Print

Natural Rose milk

With the juicy crunchy basil seeds added, this summer drink is a popular one for the heat and humidity of the tropics. With flavours of extract of rose and the same as its fragrance, the cold, frothy milk drink is a relief from the heat.
Course Dessert, Drinks
Cuisine Baby toddler food, gluten free, Indian, Kids choice, Medicinal, Summer
Keyword Lunch recipes, no cook recipes,, summer recipes
Prep Time 10 minutes
Servings 2 people

Equipment

  • blender
  • measuring cups and spoons
  • Glasses tll slender ones

Ingredients

  • 2 cups milk chilled
  • 10-15 Rose petals
  • 1 pinch Red food coulor or dried beet powder
  • 1 tsp Rose essence
  • sweetener optional

for the topping

  • 1 tbsp sweet basil seeds
  • 1/4 cup drinking water

Instructions

  • Soak the basil seeds to bloom.
  • Set this aside while you prepare for the rose shake.
  • Into the blender add all the other ingredients and sweetenerif required.
  • Blend smooth for 2 minutes till it is frothy.
  • Pour this into tall glasses.
  • Top with the bloomed sweet basil (sabja) seeds
    Rose milk

Notes

The basil seeds when added initially will sink to the bottom. Then they will slowly rise up to the top for a few hours.Β 

Can this be a vegan drink?

It is a milk-based drink, however, using soy or almond milk gives a delicious vegan pink milk without a huge change in flavour. In fact, I love to use soy milk as my choice for the vegan version. The rest of the ingredients are the same.

Make ahead and storage

The freshly blended rose milk is certainly frothy. However, it is an easy drink to make and store in the refrigerator. It stays good for upto 3 days with regular milk and about 7 days with Evaporated milk. Keep it in a sealed bottle or a small covered pitcher to have on hot days. You can mix in the basil seeds too. They stay at the bottom, so stir well before pouring out the drink for yourself.

Easy summer thirst quenchers on this blog

Apple celery green juice
Nectarine fizz
Fresh fig milkshake
Strawberry lassi
Cherry watermelon smoothie

Stay connected

If you have spent your childhood in the tropics, I am sure you would have also had a version of this. Pink milk as it is fondly called us now revived for me. Try out this caffeine-free, afternoon pick-up and rate us using the star system below. Share in the comments your childhood experiences with the easy thirst quencher. Subscribe to us for new recipes or visit us often.
Enjoy your glass while I get some more.Β 

Pink milk | rose milk

Spicy Moringa bilimbi salad

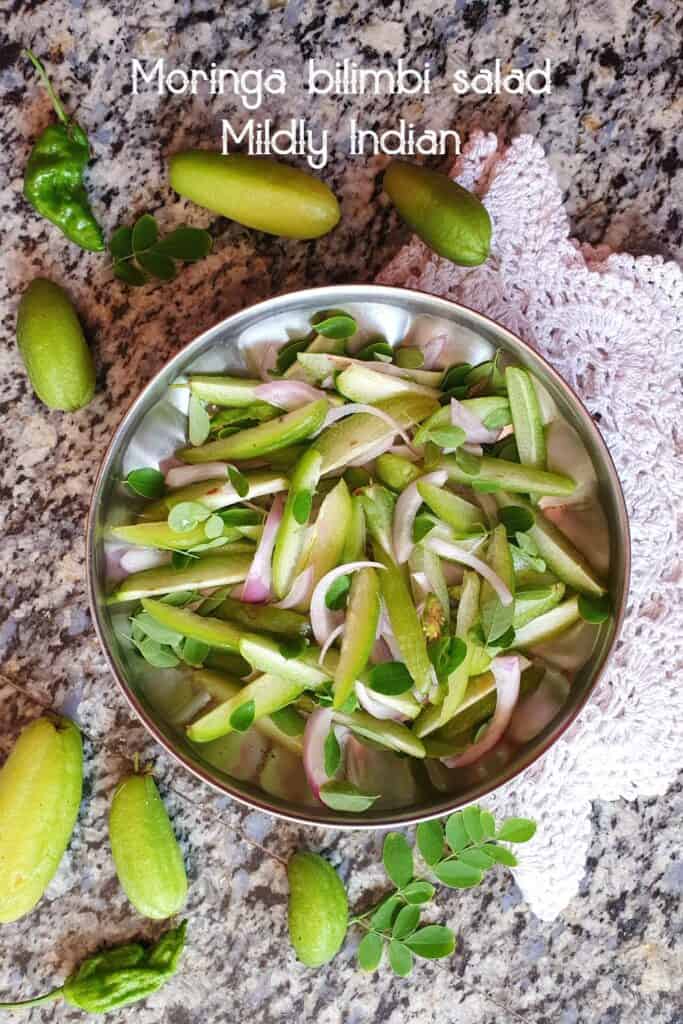
The India trip is exciting in many ways. Not only do I love being with my parents,Β  the travel but also the foods that I hardly get to see in my daily run in Sydney. However, it was getting to a point where the cooked foods were constant and I missed the simplicity of forking some salad for lunch. Invading into the kitchen garden, the bilimbi tree was almost as if it was waiting for me. This was the first time my daughter saw me climb a tree. She really did not believe I had the monkey in me. Anyway, now that’s proven!Β  we made a sour spicy salad to accompany the meals (just because amma won’t allow the bilimbi salad as a meal).

What is bilimbi?

A close relative of the carambola tree the bilimbi, Averrhoa bilimbi is a small tree that grows well in the tropics and a native of South East Asia.Β  Flowering as deep red inflorescence these turn into soft-skinned green fruit. This is bilimbi fruit that has a lot of culinary interest. The whole fruit is edible. The fruit grows in clusters from the stem. The fruit in local Indian names is irumban puli(malayalam) bimbuli (kannada), kamias(Tagalog). (Share with us more regional names if you have any for this fruit please).

bilimbi tree
What does bilimbi taste like?

The crunchy and firm fruit is actually extremely juicy to bite into. The fruit is highly sour and acidic with a slight metallic after-taste. Unlike carambola, the fruit does not turn sweet upon ripening. If eaten raw, best tasted with a pinch of salt mixed with cayenne. Choose the younger fruit if you like a bit lesser intensity for the sourness, especially for salads. For curries, the ripe fleshy ones are more suited.

Ingredients for the salad

Apart from young bilimbi, you will need other ingredients. A small red onion that is finely sliced and a green chilli to add spiciness. You can either pound the chilli with salt to mix it in the salad or chop it in.Β  I have added a handful of fresh moringa leaves as the mesclun. If you don’t have access to them, use arugula or spinach in their place. Use fine salt to the season only at the end as it draws out a lot of juice from the bilimbi making the salad soggy.

The recipe card below gives the proportion of the ingredients. From this recipe card, you can directly save onto your pin board if you need to find some of the fruit too.

Print

Moringa Bilimbi Salad

Course Appetizer, Salad
Cuisine Fusion, gluten free, Indian
Keyword moringa recipes, Tree sorrel recipes
Prep Time 10 minutes
Servings 2 people

Equipment

  • mixing bowls and spoons.

Ingredients

  • 10 medium Tree sorrel fruit Adjust based on your sourness tolerance.
  • 1 small red onion hinly sliced
  • 1/2 cup moringa leaves cleaned and separated
  • 1 green chilli
  • salt to taste

Instructions

  • Wash and clean all the vegetables for the salad.
  • Cut the tree sorrel fruit into wedges or thinner slices.
  • Slice the onion and set it aside.
  • Thinly slice the chilli remove seeds and central core if you need lesser heat.
  • Clean the moringa leaves, remove small stalk bits and wash throughly. Drain and set it aside.
  • Into the mixing bowl add the prepared ingredients and mix well. Sprinkle salt and let it sit for 5 minutes.
  • Mix again and the salad is ready to be served.

Notes

It will be lovely to top this salad with a seed mix of sunflower seeds, pumpkin seeds and flax seeds. Since we paired it with a south Indian thali meal, we did not use any.Β 

Pairing the moringa bilimbi salad.

Since the salad is sour and spicy, it will be a fabulous side to protein-rich preparations. Ideally, it will taste awesome with sheek kebabs, rajma cutlets,cheela or cutlets. If you chop the bilimbi fruit smaller, you can mix it with a basic bhel mix to make a tasty snack. We did not wait for all that but had it just as such with a classic South Indian thali.

Stay connected

We love to bring you new ideas and recipes as we explore them. Hopefully, we will have more tree sorrel recipes I hope you like them too, rate us and leave a comment on your experience of our website. Check out our YouTube, Instagram and Facebook pages too.

moringa Bilimbi Salad

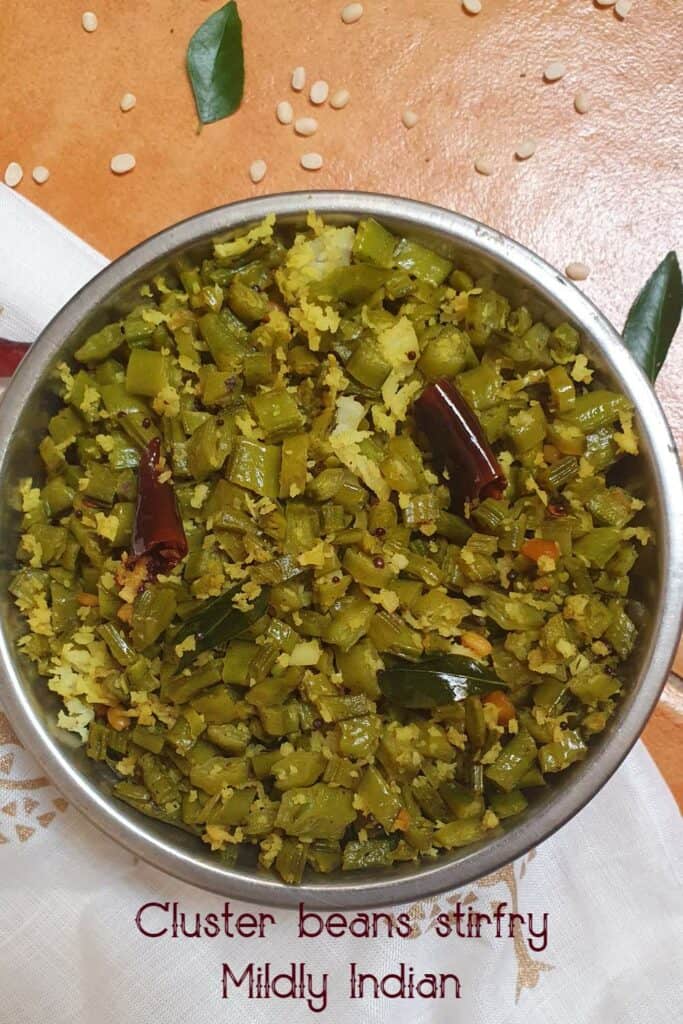
Kothavarakkai poriyal | Cluster beans stirfry

Kothavarakkai poriyal | cluster beans stir fry

Kothavarakkai poriyal is a basic stir fry made with cluster beans. Valued for its medicinal properties this cluster beans stirfry is a gluten-free, vegan addition to your everyday Indian meals.

The visit to Bengaluru this time has seen so many changes. My mother-in-law is finally hooked on blogger world. She is now curious about the new idea. She was talking about bloggers, YouTubers and plenty more who have daily appearances on her devices. So, the suggestion to be videoed while she was making the daily food was welcomed instantly. So as a start, we have kothavarakkai poriyal from her kitchen.

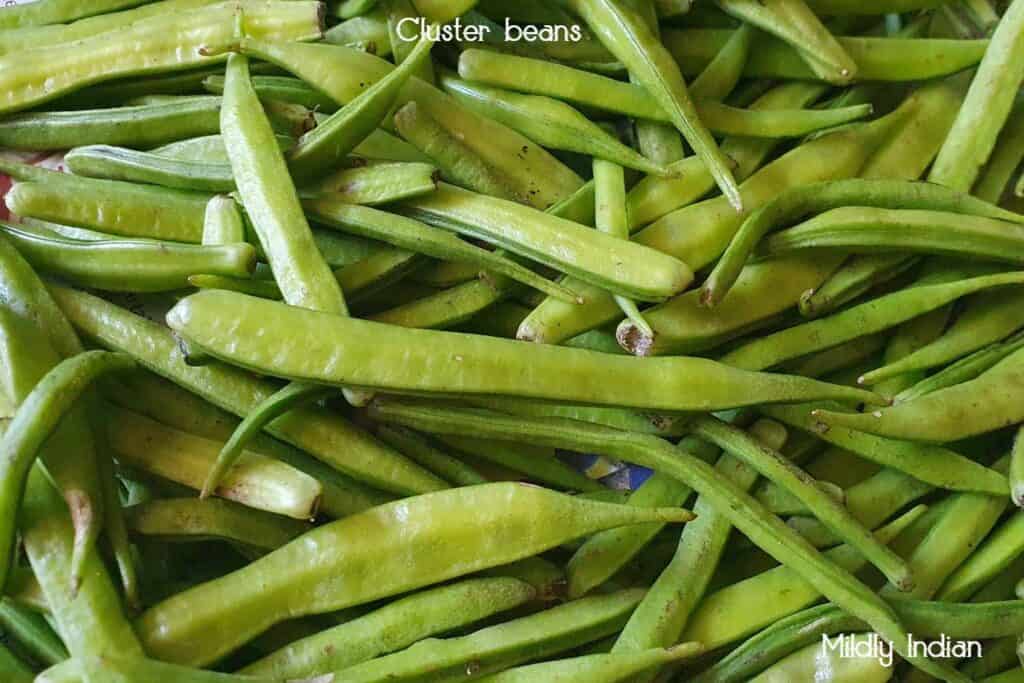
Cluster beans

What is kothavarakkai?

The tender pods of Cyamopsis tetragonoloba are used as a vegetable known in regional languages as guar, gawarfali, the green seed pods that grow in clusters are the product of interest. Grown in crop rotation the guar plant notably provides the legume but also improves the soil by nitrogen fixation. The low-calorie pods are a good source of fibre and potassium.

Did you know?

The much-valued commercial flour improver guar gum is extracted from the endosperm of the mature dry seeds of this plant. This is used in breadmaking, the cheese industry and ice cream manufacture.

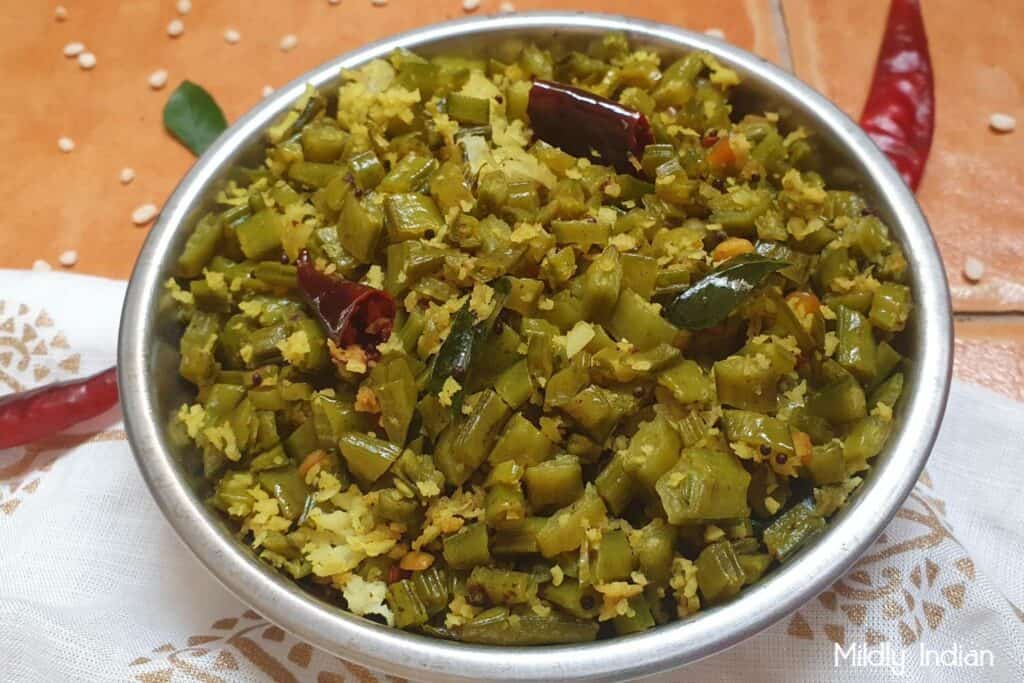
Cluster beans stirfry

Ingredients for this kothavarakkai poriyal

This kothavarakka proiyal is made by my mother-in-law. It is one of the simplest stirfries yet very very tasty. Here is the list of ingredients you need to prepare this
Cluster beans or kothavarakkai is the main ingredient in this recipe. Wash and clean the beans. Remove the beans from the thick stalk. Pinch off the tail as it tends to be a bit chewy. Now slice the beans as thin as you like.
Tempering: the classic south Indian tempering is of mustard seeds that crackle to flavour the coconut oil, a touch of dals (split lentils ) for the crunch, followed by curry leaves and red chillies that further flavour the oil.
Seasoning: the recipe is usually just seasoned with salt. However, if you like it spicy use about half teaspoon of cayenne pepper powder can be added.
Garnishes: the final addition of the freshly grated coconut adds a lot of difference to the dish. Honestly, it doesn’t feel the same with the desiccated coconut. However, grated frozen coconut still manages a good bit of flavour.
Additional adds:
Shallots: sliced shallots can be added along with the curry leaves. This gives a wonderful aroma to the poriyal. However, this is not common in Tambaram kitchens so my mother-in-law doesn’t use it.
Cumin: if you don’t have mustard seeds, use cumin. The cumin (jeera) gives a different flavour to the oil.

How to make the poriyal?

As a part of this new journey, we have made a short mature video of how the poriyal is prepared. My mother-in-law is the one who is making this so the measurements in the video are approximate. However, you can follow the recipe card below to get the exact measurements and step-by-step instructions. Hope you will like and share this video too.Β 

Print

Kothavarakkai poriyal

Course Side Dish, Traditional
Cuisine gluten free, South indian
Keyword bean salad, Indian vegetarian dinner, Lunch recipes, warm salad
Prep Time 20 minutes
Cook Time 20 minutes
Servings 4 peopl

Equipment

  • chopping board
  • Knife
  • Kadai
  • ladle

Ingredients

  • 2 cups cluster beans chopped

For tempering

  • 1 tbsp coconut oil
  • 1/2 tsp mustard seeds
  • 1/2 tsp urad dal
  • 1/2 tsp Channa Dal
  • 1 small dry red chilli
  • curry leaves we did not have any.

seasonings

  • 1 pinch turmeric powder
  • salt to taste

To cook

  • 1/4 cup drinking water

Garnish

  • 1/4 cup grated coconut

Instructions

  • Wash and trim the cluster beans.
  • Chop the cluster beans into small bits. Set it aside till needed.
  • Into the khadai add coconut oil and set on medium high heat.
  • As the oil heats up add the mustard seeds, urad dal, channa dal and red chillies. Add curry laves and stir fry till mustard seeds splutter.
  • Add the chopped cluster beans and stir fry for a minute.
  • Now add the turmeric powder, salt and mix well.
  • Add 1/4 cup of water and cover and cook for 5-7 minutes.
  • Once cooked, add the grated coconut and stir fry for another minute or two till water is completely absorbed.
  • The kothavarakkai poriyal is now ready.
    Cluster beans stirfry

Serving suggestions

Kothavarakkai poriyal paired with steamed rice, quinoa or millets with a classic gravy like sundakkai thengaarachukozhambu or podipotta sambhar is a perfect South Indian meal.
To make an easy wrap use a spinach phulka as the base and fill up with this poriyal. If you have cooked potatoes mash add it up to give aΒ  filling wrap.

Meal prep and storage

The poriyal can be made and saved for about 3 days if refrigerated. If storing for a week, I avoid adding the coconut. Since the coconut added is fresh add it after thawing. The cluster beans stirfry is not the best to be frozen. It turns a bit rubbery if texture.

Stay connected

As we are exploring new ideas this year, hope you stay with us by subscribing to our newsletter. When you try this recipe don’t forget to let us know in the comments how you like it and rate the recipe with a 5-star rating. We will love to stay connected with you. Follow us on Instagram or Facebook to receive updates more often.

Cluster beans poriyal

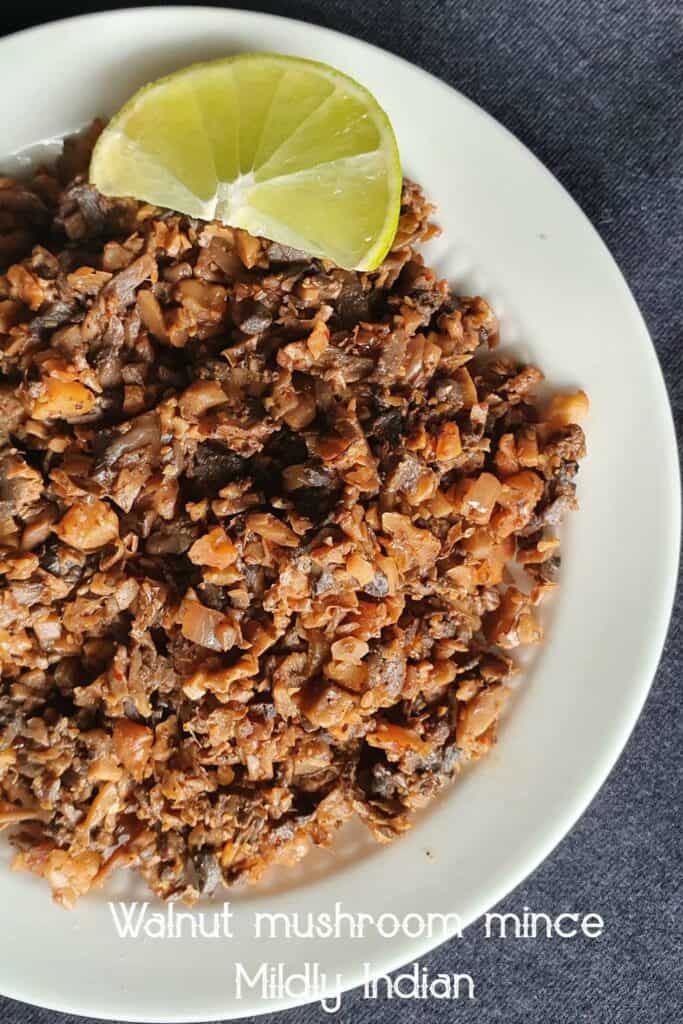
Vegan walnut mushroom mince

walnut mushroom mince

A fantastic vegan alternative, walnut mushroom mince is a filling textually satisfying alternative to faux meat. Try out this simple gluten-free, low-oil recipe that is keto-friendly.

Walnut mushroom mince is one of my favourite fillers for tacos and to add to pasta or fill up a sandwich. The idea was developed as just veggies as filling in a taco was never filling, nor gave depth to that dish. When the recipe was meal prep friendly it was one that my friends loved too. Usually, this mushroom mince is what I go for if there is an omni potluck in which I participate. Throw in some store-bought tacos, a simple pico de Gallo and some shredded vegan cheese, and the plan sounds easy and achievable, doesn’t it?

What mushroom is best for this mince?

There are two mushrooms that work well with the mushroom mince. Portebella and the cremini. If you like a meatier version go with portabello. The cremini gives a nicer mouth feel with the walnuts. You can have a mix of mushrooms too. Baby Bella is not too bad, but it makes the mince much softer. Shimenji and enoki are not suitable for this recipe. I have not tried oyster mushrooms for this vegan mince. If it works for you, leave us a comment so we can try it.

Why walnuts?

Walnuts in this vegan mince provide that oily, crumbly texture. Plus it is a good bit of protein with crushed walnuts. The slightly bitter flavour of the walnuts complements the earthiness of the mushrooms. While mincing the walnuts make sure they are not overprocessed. The powdery walnuts leave the texture too soft.

Ingredients for walnut mushroom mince

This recipe is for a basic vegan mince. The flavour profile you want to develop depends on what you want to use it for. The recipe card below gives the measurements and step-by-step instructions to follow.Β 
Walnuts
Mushroom
Cumin
Oregano
Cayenne

Salt

Flavour variations
The walnut mince I make is predominantly used for taco filling and nachos, hence I have added flavours that taste towards it in my basic vegan mince. However, the mince base takes up flavours based on how you prefer to spice it up. You can add while cooking rosemary, oregano and thyme if you are just planning to be used in pasta or pasta salad. If making an Indian-based curry add to the mince some grated garlic, garam masala powder, some turmeric, cumin and coriander powders and chopped cilantro before cooking and then cook them. So it is up to your tastebuds how you like this walnut mince flavoured.

Print

Walnut mushroom mince

Course Side Dish
Cuisine diabetic friendly, Fusion, gluten free, One pot, Vegetarian
Keyword Lunch recipes, mushroom dishes, vegan
Prep Time 15 minutes
Cook Time 20 minutes
Servings 4 people

Equipment

  • chopping board
  • Knife
  • mixing bowls and spoons.
  • frying pan

Ingredients

to prep the walnuts

  • 1 cup walnuts
  • 2 cups drinking water luke warm

to prep the muhroom base

  • 2 tbsp olive oil
  • 1/4 cup red onion chopped or minced
  • 2.5 cup mushroom minced

Seasonings

  • salt to taste
  • 1/4 tsp cumin
  • 1/4 tsp crushed black pepper
  • 1/4 tsp red chilli powder

To add fresh after cooking

  • fresh herbs use thyme and oregano
  • Lemon juice as required

Instructions

  • Soak the walnuts in luke warm water for about 15 minutes.
    walnuts soked.
  • mince the mushrooms and onion and set it aside till needed.
    mushroom and onions for the mince.
  • Once soaked chop the walnuts and set it aside.
  • Into the frying pan, add the oil followed by the onion.
    frying onions
  • Once the onion is golden, add the minced mushrooms and saute.
    mushroom mince.
  • The mushrooms will release the water and slowly cook.
  • When the water from the mushrooms is nearly over, add the walnuts and saute further.
    dding walnuts to the mince.
  • Add the salt, chilli powder, cumin and pepper and mix well.
    making mushroom mince.
  • Saute and cook till the walnut and mushrooms are well seasoned and cooked.
    walnut mushroom mince.
  • Remove off the heat, add lemon juice and fresh herbs and mix well.
  • The walnut mushroom mince is now ready to be served.
    walnut mushroom mince

Serving the mince

Just as discussed above in this post this is a fantastic recipe to share with any of your vegan friends.
Taco platter: Put up a build-your-own taco with pico de Gallo, cheese, lemon and some soft wraps.Β  In addition, you can add it to salads or top up your nachos platter with it.
Make a sandwich: onto your slice of bread add some creamy Mayo (vegan-friendly ones are so tasty) a whole heap of the walnut mushroom mince, and some cheese and press it down with another slice of bread. Grill it or use a sandwich press and it is a filling sandwich on the go.
Build a burger: if you have leftover mince, mix it with breadcrumbs and some mashed potatoes so they hold shape. Now make them like a patty and this is your quick and easy mushroom burger patty.
Add some to your pasta: I would totally fork this on pasta to make this a wholesome meal. Mix it into the ragu or add it on top of your prepared pasta it tastes really good.
Make a good Indian curry: if you have some mince, thaw a small batch of buna masala and add the mince to it. Now Cook them together with a bit of water to bring them together. Adjust salt if needed. Garnish with julienne ginger, lemon juice and lots more coriander leaves. Keep the naan ready to mop up the curry.

Meal prep and storage for the mince

The mushroom walnut mince stays good on the fridge for a week. So if it is a busy week the mince will hold up your need for something filling and quick. Keep in an airtight box and use as needed. The mince can be frozen and thawed as needed, however, once you do that the texture changes slightly as the mushrooms are now a bit fibrous.

Stay connected

shh cooking secretly

The walnut mushroom mince takes a bit of effort to make, yet is one of the handiest meal preps I have ever done. When Shh cooking secretly group placed the theme for vegan dishes this time, this mince is the one I wanted to share. Working with Anu Kollon as my partner, who was so easy to convince to do this, the recipe is now yours too. Let us know in the comments and by star rating how we are doing with our recipe. If you have not subscribed to our content yet, don’t miss out. Follow the arrow below to keep new ideas coming your way.
Stay safe, meal prep and have a lovely week.Β 

vegan mince

Maanga vattal | Sundried mango

Sundired mango | maanga vattal

The sun-dried mango is a unique traditional preserve that is utilized as a pickle or as a component of curries and rasam. It is a summer tradition to make these maanga vattal. Try out this as my mother teaches me to make them.

One of the first things I ask for as soon as I drop my bags at Mum is for maanga vattal. This time was no different. With mango trees surrounding the house, these sundried mango pieces are a spicy quick treat that amma keeps with her hundred-odd varieties of pickles. When she said she had none in stock at this time I was a bit disappointed. I am sure she spotted it too. The next day there was a small basket of raw mangoes ready. So here we are capturing how the dried mango vattal is made. Win-win, I get the vattal and the learning of making it. Sharing the recipe here for you too to save and use when green mango is in season for you.Β 

Ingredients for the maanga vattal

Raw mangoes- Sour green mangoes are specifically chosen to make sundried mangoes. the variety we have here is called β€œpulian” which is a local favourite for its extreme sourness. these are picked fresh from the tree using net baskets to prevent them from falling down and damaging.Β 
Salt – Amma will not agree if it is not crystalline salt. She disapproves of the refined table salt as it has no flavour!! I agree, the minerals make the flavour better.Β 
Chillies the chilli used in this recipe is for the pickle flavour. You can make salted pieces too. The heat is usually from dried and powdered Serrano peppers. If not use cayenne powder.

The step-by-step process for making dried mango

Prepping the mangoes

Once the mangoes are chosen break off the stem and wash off the stain that drains. Take care to protect your face as the stain causes burns. Slice off the flesh from either side of the mango seed. You can cut this into halves or quarters. The seed can be preserved as such or the side flesh can be cut away and dried.Β 
Seasoning the mango pieces since it is a preserved form of mango, salt is the main preservative. Along with this chilli powder is added to provide spiciness and feel like a pickle. Once the salt and chilli are rubbed on the pieces. Leave this in the mixing bowl for a couple of hours so that the water from the mango is extracted with the salt.

Drying stages

3 to 5 days in the hot tropical sun is what makes the maanga vattal so perfect. The brined and seasoned mango pieces are arranged on a plate or clean cloth under the sun in a single layer. Try doing this early morning to avoid the sun glare. This will start drying and within a day the edges will curl up. Flip it over and dry it the next day. The pieces will shrink and roll as drying continues. After couple more days in the sun test if the centre is dry. When warm from the sun, the pieces will snap this is the best test for the drying process completed.

Mango vattal recipe

Print

Sundried mango vattal.

Course Pickles, Preserves, Traditional
Cuisine diabetic friendly, gluten free, South indian, Summer
Keyword mango recipes, summer recipes, sun dried recipe
Prep Time 20 minutes
drying time 5 days
Total Time 5 days 20 minutes

Equipment

  • Knife
  • mixing bowls and spoons.
  • plate to dry the mangoes

Ingredients

  • 5 raw mango green , sour ones.
  • 2 teaspoon cystalline salt
  • 1 teaspoon red chilli powder

Instructions

  • Wash and slice off the flesh from the mango.
  • cut them in half or quarters.
    cut raw mango pieces
  • Add this to the mixing bowl.
  • Sprinkle with salt and chilli powder and toss well.
  • Leave this covered for 2 hours.
  • The salt will draw out the water from the mangoes and coats the dry rub on the mango pieces.
  • Mix well and spread this on a plate in a single layer.
  • Place this in the sun for a day.
    day i drying.
  • Turn them over and dry the next day.
    Day 2 drying
  • Repeat the process till the centre is dried well and the flavour is concentrated.
  • Once completely dry, Store them in an air tight container.
    Mango vattal recipe

Storing the mango pieces

Once dried the maanga vattal shrinks to very small pieces. These can easily be stored in an airtight bottle in your pantry for up to a year. If the weather is a bit humid,Β  make sure you redry it in the hot sun say once in three months.
To use remove the necessary pieces with a dry spoon and seal the bottle back againΒ 

How to use maanga vattal?

The dried raw mango pieces are a fantastic side to give a spicy sour bite to simple meals, kanjis or koozhu. If you soak the pieces in a tbsp or two of warm water they soften to form a pickle.
Amma makes a fabulous vattalkozhambu curry with maanga vattal that we had blogged about a long while ago – Click here for the link.
I use the manga vattal she gives to make a quick rasam by boiling the same with excess water, crushed garlic, rasam powder,Β  a shallot, curry leaves etc and seasoning to adjust. This is a thin rasam that is more like a soup broth than one to have with rice.

Stay connectedΒ 

Try out making these maanga vattals in summer this year. there are a few other vattals and vadams w keep stock. the Sago papad, avalakki sandige, kumbalanga kondattam, thamarakizhangu vattal are some we have in stock. However, I am learning new ones this year from my mother. Will share them with you as I get them right. Try out this manga vattal if you get fresh raw mangoes and then try out the vattal kozhambu with it. Share us a review when you make these and rate the recipe with 5 stars. Subscribe so we can bring you the latest content or connect with us via Facebook, Twitter and Instagram.

Stay on to explore more posts as I go back to help my mother.

Sundried mangoes | maanga vattal

Β 

Ellu podi | dry til chutney

ellu podi | til chutney

Dry til chutney or ellu podi is a common accompaniment on the side of a home-style thali. This dry condiment is a melange of lentils and sesame seeds with spices. Make some of this vegan, gluten-free ellu podi to complement your meals.

Molagapodi or the dry chutney that is used with dosa or idly comes in many flavours like garlic chutney podi and dhaniya podi. This adds a lot of variety to the same breakfasts that we make day after day or the simple home-style lunch. Also, it is one with a fantastic shelf life, thereby a boon to providing some relief to busy mornings. Here is another one that is handy, ellu podi.

Black and white sesame seeds

Sesame seeds are one of the tiniest ingredients that are common in the Indian kitchen. In fact, it is one of the hardest to harvest due to its size too. In the Asian markets, both black and white seeds are available. Both varieties of oil-rich seeds are rich in iron and calcium. Black sesame seeds are explored for their ability to reduce oxidative stress.

Hulled and unhulled sesame seeds

The polishing process at times removes the edible outer coating of the sesame seeds. This is the Hulled sesame seeds. If the outer coat is intact, it is unhulled. Nutritionally they are not very different. In addition, both hulled and unhulled seeds are equally edible roasted or raw. The hulled ones are brighter white and the unhulled white sesame seeds are slightly browned.

Ingredients for this til chutney

Sesame seeds- for this recipe I have used unhulled white sesame seeds. You can use black ones too and the podi looks much darker in colour. Upon roasting the sesame seeds have pop slightly and release the oils. upon grinding if the til chutney looks too oily roast some more of the lentils and adjust to form a dry powder.

Black gram dal- Urad dal or ulundu parippu is the base of most molagapodis. The skinned version is roasted and powdered. If using black sesame seeds, you can use the skinned black ones too. Roast well till they turn golden or aromatic.

Chickpea Dal-Bengal gram or kadala parippu is roasted separately and powdered with the urad dal. These two form the lentil base for most molagapodis. Roasted till slightly deeper brown the dal is crunchy and easy to powder.

Curry leaves- you can’t miss out on the karivepelai to give the classic ellu podi aroma. Add a handful if you have one. Dried ones will work well too, slightly roast before powdering.

Red chillies: depending on the spice levels you prefer can use a couple of different varieties here. The bydige or Kashmir red chilli adds a deep red colour without adding all that heat. Whereas the Guntur varieties give lighter red colour with a lot more pungent heat packed in. The ellu podi in the picture has bydige as I am not a huge fan of the heat.

Salt: Seasoning with salt is an absolute must to flavour and keep a good shelf life for the powder.

Hot tip:

On the first day, the salt doesn’t flavour well as the fresh ground chillies take over the flavour. However, taste test the next day to adjust the salt levels as by now the lentils will start absorbing the flavours and the pungent heat is slightly toned down.

Steps to make the dry til chutney

Roasting: dry and slow roasting of each ingredient ensures that the lentils are cooked and also that they can be powdered well. The sesame seeds crackle when roasted releasing the oil needed to bring the powder together. Each ingredient has a different time to roast, so have to be done separately.
Grinding: A spice mill or a coffee grinder can powder the spice mix. Powder the lentils and seasoning separately and then mix them well together. At times the sesame seeds will become mushy upon grinding as they release a lot of oil. Add a tablespoon or two of the lentil mix and grind further to reduce the stickiness.

Print

Ellu podi

Ellu podi or dry til chutney is a useful condiment that you can keep in the pantry. Use it with breakfast, add it to your wraps and sandwiches, the recipe is a handy one.
Course Preserves
Cuisine gluten free, Indian, South indian, Vegan, Vegetarian
Keyword chutneys and podi, Indian vegetarian dinner, Roasted recipes, vegan, Winter warmers
Prep Time 10 minutes
Cook Time 25 minutes
cool and powder 20 minutes
Servings 1 small bottle

Equipment

  • Kadai
  • spatula
  • measuring cups and spoons

Ingredients

  • 1/2 cup Urad Dal
  • 1/4 cup Channa Dal
  • 1/2 cup sesame seeds
  • 20 curry leaves
  • 10 dry red chillies
  • salt to taste

Instructions

  • Set the kadai on low heat and let it come to warmth.
  • Now add the sesame seeds and let it roast gently.
  • When the seeds start popping and turn golden brown, remove from heat and set it aside to cool.
  • The kadai now has an oil coating which can be used to roast the urad dal .
  • When the dal is golden brown remove and add to the plate to cool.
  • Roast the channa dal the same way.
  • Now add red chillies and curry leaves to roast and till the curry leaves are crispy.
  • Remove and let it cool a bit,
  • Powder each ingredient and add into a mixing bowl.
  • Mix all the ingredients together and add salt to taste.
  • Once the mix is cool, taste test and store in airtight bottles.
  • The ellu podi is now ready to use.
    ellu podi | til chutney

Storing the ellu molagapodi

The til chutney will become rancid if exposed to air much faster. If you are making a batch store it in an airtight bottle on the countertop for about 15 days.Β  Use a dry spoon to serve it. If keeping for a bigger batch keep it in the fridge to slow down the loss of flavour.

Serving ideas for the til chutney

With lunch thali- The dry til chutney can replace the thogayal in the classic south Indian thali meal. It provides a lovely pickle kind of side to add flavour to the dishes.
With idly and dosa- Just like using molagapodi, Ellu podi can be used to dip the idlis and dosas to have. You can add a touch of oil to make a paste that can be smeared on the idlies.
Make a thogayal- Add two or three tbsp of warm water to about the same quantity of til chutney powder and let it sit for 5 to 10 minutes. This will form a thick soft chutney. Further you can dilute it with water if needed.
In variety rice- Just like we make pickle masala rice, sprinkle the chutney podi on the stirfrying leftover rice and make a delightful ellu rice. You can add a tempering of mustard seeds and garnish with coriander leaves to make it more flavourful.
In parathas- Add a tablespoon of til chutney to the atta before kneading it and mix well. This gives a unique flavour to the paratha when cooked, yet cannot be seen much.
Add to sandwiches and wraps– Use the til chutney in your rolls, wraps and sandwiches as this dry spice mix will add flavour without going soggy. Add cooked and drained beans, herbs, or a basic salad to the wrap to make it filling. Smear a bit of the paste-like ellu podi on the slices of bread and make a basic tomato-cucumber sandwich, it tastes amazing.

Collaborations

Recipe challenge

The dry til chutney recipe is added to the A_Z collection of recipes for the Alphabet T. Sesame seeds are Til in Hindi and this long-stay chutney is what I chose to showcase.

Stay connected

When you make this ellu podi, tag us or share with us how you like it. Leave us a comment with a 5-star rating to tell us how it is, we would love to hear from you. Stay subscribed as this year we will try our best to bring you a lot more recipes. Stay connected and see you again soon.

Til chutney Ellu podi

Ellu bella for Sankranthi

Ellu bella for sankranthi

Ellu bella sweet trail mix made during the Makar Sankranthi festival. Shared with friends and family, this easy gluten-free dry mix provides a good form of jar snack.

Walking through the now back to bustling markets of Bengaluru there is sugarcane, ellu bella packs, achu sharkare etc lining the shelves. It is nearing Makar Sankarnthi. The ellu bella packs attracted my attention. This trail mix is one I am particularly fond of and loved munching on. Here is the recipe to make this simple ellu bella and a bit about it.

What is makar sankrathi?

The transition into the Zodiac of capricon is Makar Sankranthi. It marks the beginning of summer and teh end of winter. During this time the winter harvest is plenty and is a celbartion for the farming communities, thanking the natural forces for the abundance. Across indian states, these three days are celebrated as Pongal ( Read more here), Sankranthi, Magi, Makara villaku or Sokran. Each regions celebarates the local produce which is showcased in the festival foods. In Karnataka, this celebartion time is all about bonding, sharing and happiness. Kite flying, decorated animals and carts are a common site during thsi time. The family is in their best attire (new ones ofcourse) and visiting friends and fanily with ellu bella and a sankranthi thali.

Why is ellu bella shared?

β€œEllu bella thindu olle maathadi”.
The Kannada saying above translates to eat ellu bella and speak no evil. It is one of the recipes (not much if it) meant purely for sharing. The actual highlight of the day is the sharing of the ellu bella with neighbours and friends. This is an excitement for the kids who are entrusted with the job. The idea of sharing this winter trail mix is to enhance the bonding between the families.

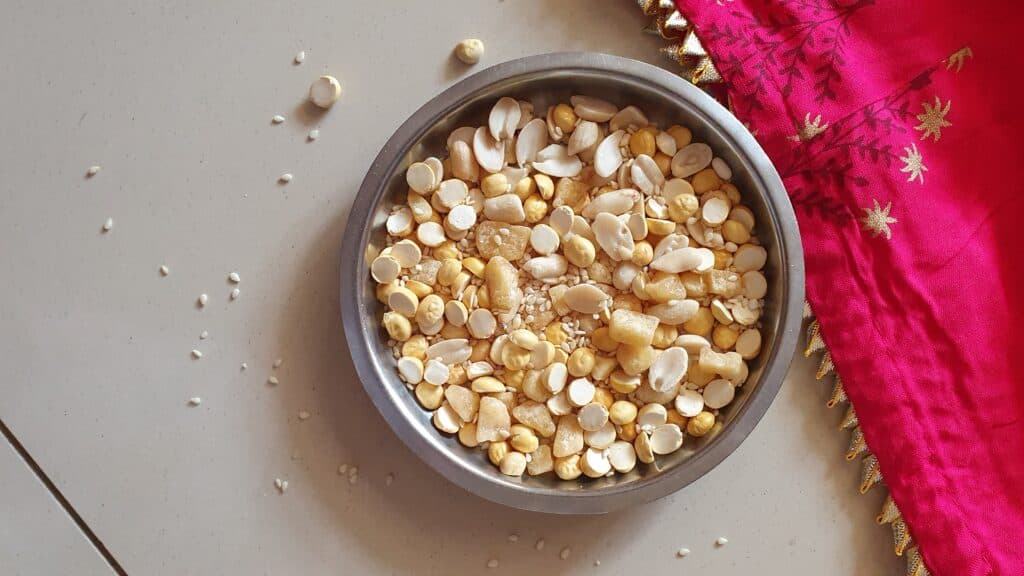
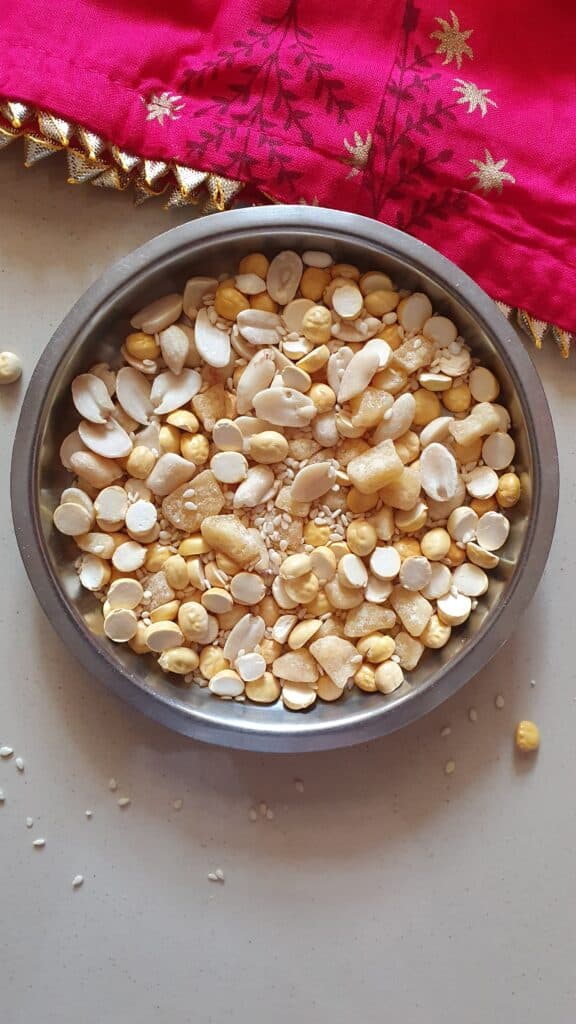
Ingredients for ellu bella

Ellu bella is not a huge deal of a recipe, but rather a simple mix of ingredients that make it a perfect winter munch. Here is what goes into making ellu bella.

Roasted groundnut: as a locally grown crop, grounds form a huge part of Karnataka cuisine. Roasted to perfection, peeled and split the groundnut anyway form the favourite munch. Added the trail mix it offers a delicious nutty feel.
Sesame seeds: the toasted white sesame seeds are used to make this recipe. The nutty flavour with a faint after-taste along with the jaggery tastes fantastic.
Roasted chickpea dal: huri kadle or roasted gram is added to the mix. This gives a powdery mouthful when bitten into.
Jaggery: traditionally jaggery or bella is the sweetness factor in this dry mix. If not sugar or rock sugar pieces will work in their place.
Dry coconut: Kobri is mature coconut that has its kernel completely dried. This is either grated or cut into small cubes. It has a slightly sweet flavour with abundant coconut oil and fibre.

Utensils for the Ellu bella

The roasting of the ingredients is done on a cast iron wok called banali. This thick-bottomed wok is perfect for roasting nuts and seeds without getting them burnt. Usually, this is a hand-me-down. I got mine from my mother.
The Kobra or dry coconut is cut into squares using a nutcracker or an arumamanai. The arumamanai is a small wooden stool or plank fitted with a bent sharp blade. Sitting on the plank placed on the floor, the kobri (even vegetables) are diced into pieces. This is actually an art in itself. Sitting on that plank needs practice.

How long to keep ellu bella?

Ellu bella is a dry mix. If kept in airtight containers it stays good for up to 3 months on the shelf. However, a handful of the mix is actually a wonderful snack, so it never lasts so long in my house.

Print

Ellu bella

Ellu bella sweet trail mix made during the Makar Sankranthi festival. Shared with friends and family, this easy gluten-free dry mix provides a good form of jar snack.
Course Dessert, Snack
Cuisine gluten free, Indian, Karnataka, One pot, South indian
Keyword beans and legumes, festival offerings, Karnataka recipes, vegan
Prep Time 30 minutes
Servings 20 people

Equipment

  • Kadai
  • Cutting board
  • Knife

Ingredients

  • 1 cup roasted chickpea porikadale, hurikadale
  • 1 cup peanuts peeled and split
  • 1 cup dry coconut kobri
  • 1 cup jaggery cubed
  • 1/2 cup sesame seeds

Instructions

  • Cut the kobri into 1/2 cm cubes. If preferred can remove the outer brown cover using a peeler.
  • Cut the jaggery ball into small pieces to add to the mix.
  • Set these two aside till needed.
  • Set the kadai (banali) on medium heat.
  • Roast the peanut with constant stirring.
  • Once the peanut is slightly golden and crunchy, Add to a mixing bowl.
  • Next, into the kadai add the dry coconut pieces and roast them.
  • Remove this also into the mixing bowl.
  • Add the sesame seeds and let them pop.
  • As they crackle and pop, add this to the mixing bowl.
  • Remove the kadai from heat and add the roasted chickpeas just to warm up by the heat of the vessel.
  • Into the mixing bowl add the jaggery pieces and the roasted gram.
  • Give the trail mix a good stir.
  • Now the ellu bella is ready.

Setting up the sankranthi thali.

The Sankranthi thali is one of the simplest to set up. It is all about the seasonal local produce. This is an easy idea to set it up. Here are some things you want to gather

Ellu bella
Sugarcane
Mango leaves or betel leaves
Achhu sharkare (candy sugar figurines)
Banana
Ber or indian jujubes
Flowers
Additional adds
Steamed groundnut
Steamed sweet potatoes
A steel or metal platter is preferred to set this mix. Wash clean and dry the leaves. On the platter plate the leaves and arrange the other elements around them. You can keep the ellu bella in a bowl or add it directly onto the plate. Add the sugar candy last and decorate with flowers. This is your sankranthi thali.

Food served for Sankrathi

Since it is a seasonal abundance, newly harvested rice, yams, sweet potatoes,hyacinth beans, groundnuts, sugarcane etc are the main produce you see during this time. Commonly, Sweet pongal, steamed groundnuts, payasa, lemon rice, avrekalu uppitu,steamed sweet potato, ellu unde are made during this time.

If you are looking for a naivedyam thali, try this -click here for the link.

Stay connected

Learning about traditional cuisine takes time and guidance. Simple recipes like these are more fun to put together and bring about the festival spirit. So dress up and celebrate. Tell us about your way of celebrating with ellu bella or how you celebrate makar Sankranthi in the comments. If you are making ellu bella at home, share with us the little twists and turns. Don’t miss to subscribe and keep connected.
Happy Sankranthi!

Ellu bella

Β 

Puli mullangi | Radish in tamarind sauce

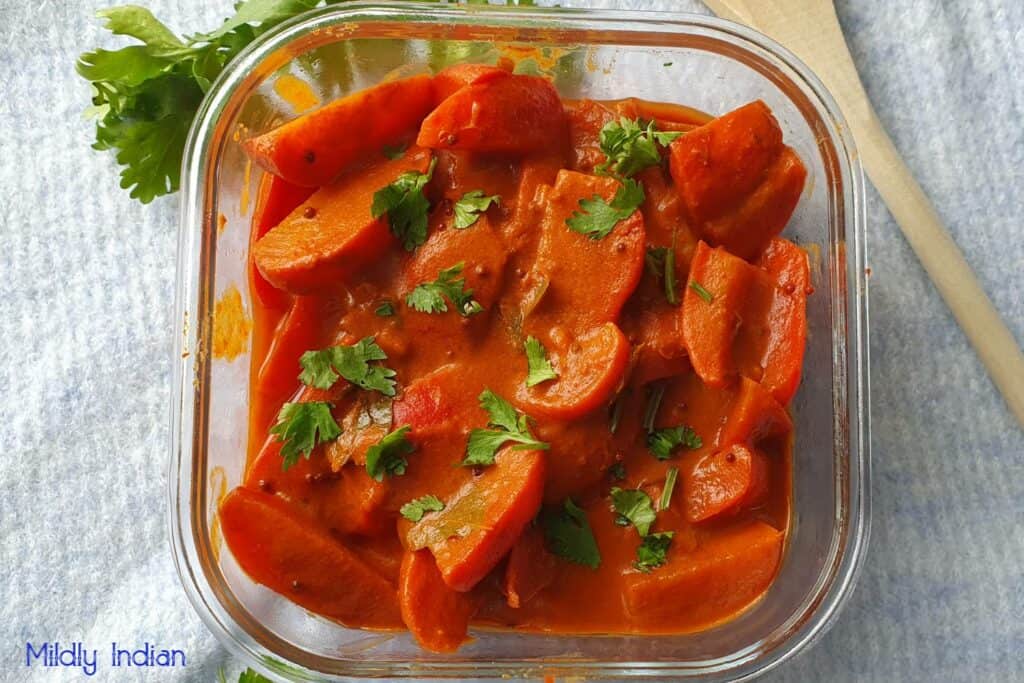
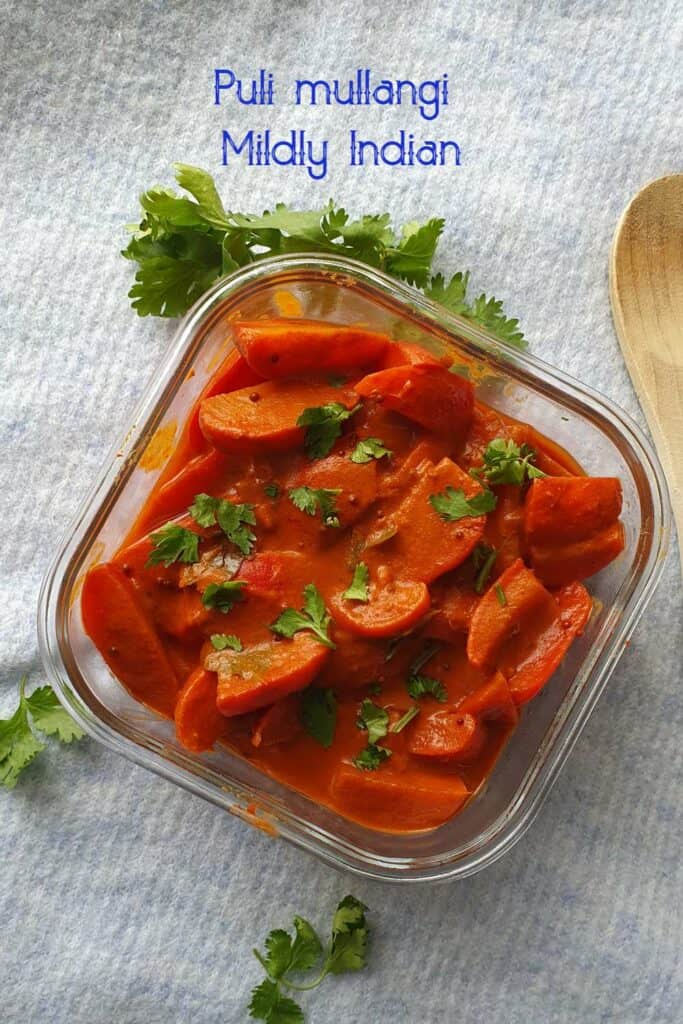
puli mullangi | radish in tamarind sauce

I was recently watching the Megan and Harry series on Netflix. There was one particular part I actually liked. The friends’ idea for the new year is to set a word. My instant reaction to that was wow,Β  that’s profound.Β  Rather than having a resolution that you drop off after a few days,Β  finding a word that is adding meaning to you in multiple ways sounded far better.
Guess what word I am choosing…after a bit of thought! Imperfect that is my word. As we evolve this year I will share with you how we are taking it forward. For now,Β  we are starting with imperfect produce. We have imperfect radishes that we are using to make this lesser-known South Indian style preparation.

Prepping the radishes

Radishes or Raphanus sativus, come in long cylinder ones or small round varieties. They have red or white skin. Inside they can be white, variegated or watermelon colour. I choose the small round red varieties to make this dish. The skin is red here and the flesh white. To prep, these, wash them thoroughly especially if they are not in perfect shape. I use a toothbrush to get rid of the mud in the folds. remove the leaves (don’t discard make mullangi keerai poriyal) and trim the root. Now slice the radishes into wedges. Save a few radishes to make our much-loved Radish pear salad with tahini dresssing.

Ingredients to make puli mullangi

Red radishes: prep the radishes as per the notes above. These radishes are crunchy and have a slightly stronger peppery flavour than daikon. Thus goes nicely with the spices added. If you are looking for a low food map option make it with daikon as this has been tested.

Sambhar powder: the archetypal curry powder for anything South Indian is the Sambhar podi. It works for this one too imparting the classic mix of heat from the chillies,Β  smokiness from the coriander seeds and complexity from the fenugreek.

Tamarind extract:Β  a thick extract of tamarind is the souring agent in this puli mullangi. This along with the salt and the sambhar podi forms that thick sauce that coats the red radish wedges.

Tempering: spices most South Indian dishes start or layer on with a spice-infused oil. This is created by crackling mustard seeds, fenugreek seeds, curry leaves and red chillies in sesame seed oil.
Seasoning: to balance the flavours salt is needed. My mum swears by crystalline salt in anything she wants to keep for a while. This is not the pink rock salt but clusters of sea salt that are not powdered. The flavour this imparts minutely changes depending on the other minerals in it. For acutely trained tastebuds like hers, these are important.

mullangi curry sauce.

Print

Puli mullangi

Puli mullangi is a lesser-known classic South Indian dish that pairs well with steamed rice meals.
Course Pickles, Side Dish
Cuisine gluten free, Indian, One pot, South indian
Keyword curry recipes, Indian vegetarian dinner, Pickle recipes
Prep Time 15 minutes
Cook Time 25 minutes
Servings 4 people
Author mildlyindian

Equipment

  • Kadai
  • Cutting board
  • Knife
  • measuring cups and spoons

Ingredients

  • 10 -15 medium radishes red salad variety
  • 1/2 cup tamarind extract
  • 2-3 tbsp Sambhar powder
  • salt to taste

For tempering

  • 2 tbsp Sesame oil
  • 1 tsp mustard seeds
  • 1/4 tsp fenugreek seeds
  • 1-2 dry red chillies
  • 10 curry leaves

Instructions

  • Wash and clean the radishes.
  • Slice them into wedges, Set them aside till needed.
  • Into the kadai or deep wok add the oil and mustard seeds.
  • Set on medium heat and as the mustard crackers add the fenugreek seeds.
  • When it turns aromatic add the red chillies ( break it in half for the heat) along with curry leaves and saute for a minute.
  • To this add the radishes and saute them for about 5-6 minutes.
  • Now add the thick tamarind extract, sambhar powder, salt and turmeric powder and mix it all well.
  • Cover and cook for 7-10 minutes, till the radishes release water and are fork tender.
  • Open the lid and mix to coat the gravy on the wedges.
  • Once the gravy thickens and coats the radishes well, the puli mullangi is ready.
  • Taste test and adjust salt.
  • Garnish with coriander leaves if using immediately.
    mullangi curry sauce.

Serving ideas for the radish in tamarind sauce

The puli mullangi is kind of a spicy side dish. You could pair it with a South Indian thali meal. For a simpler platter, I would choose keerai molagutal and puli mullangi with cooked millet.
Fill up a wrap with some cooked beans, stir-fried kalonji rice and pieces for puli mullangi spicy filling wrapped burrito lunch on the go.

Meal prep and saving for later.

The puli mullangi will stay well in the refrigerator for up to a week. In freezer-safe containers, they stay well for up to 3 months. The radishes do go a bit limp but taste fantastic even upon thawing. Save in smaller portions so you thaw only what is needed.

Stay connected

This new year share with us what you think you will be doing. Stay subscribed to see how we are going with our word. Connect with us (instagram or facebook) as we plan to travel a bit more and share new locations and experiences with you.

radish curry

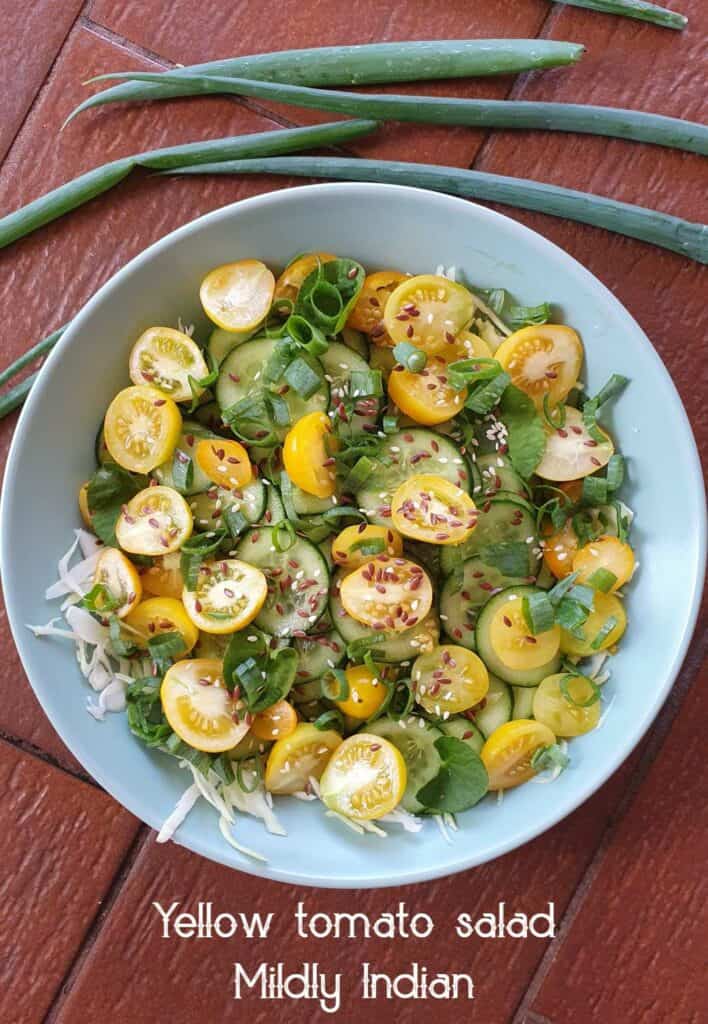
Yellow tomato salad with cabbage and cucumbers

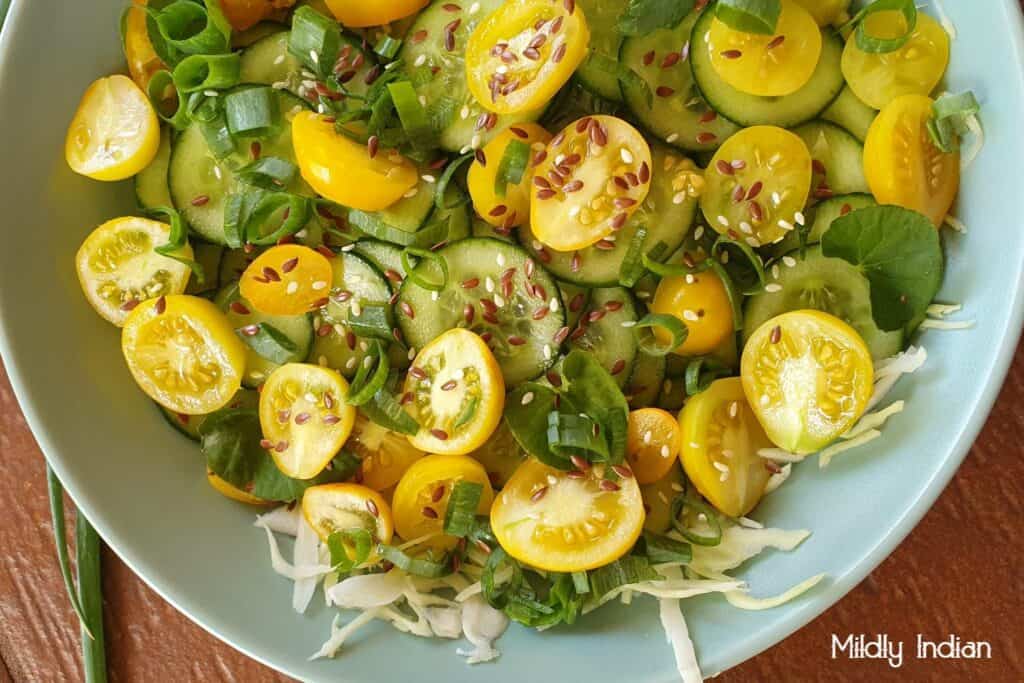
yellow tomato salad

Enjoy a delightful yellow tomato salad bursting with summer flavour. Make it a celebration of your homegrown produce with this salad with the best citrus dressing. Make some, share some and enjoy the sun.
It certainly feels so special when your garden provides you with a few good summer produce. Since it is a rainy summer this year, we have planted a few tomatoes. One of the varieties we have is the yellow pear tomato instead of the cherry tomato. These are smaller and sweeter and sunshine yellow in colour. To our surprise, this started fruiting as most as soon as the first rains started. So here are showcasing this beautiful produce with summer fresh cabbages and cucumbers.

Ingredients for the easy summer salad

Yellow tomatoes: these are a variety of cherry tomatoes. They are sweet with a burst of that tomato flavour. You really don’t have to go looking for these, cherry tomatoes or grape tomatoes will also do the job. If you have extra squishy ones, try our cherry tomato soup recipe.
Cabbage:Β  sweet and crunch cabbage forms the leafy base for this salad. It doesn’t matter if it is the red cabbage or the sweet white one. You can swap this for lettuce, arugula or mesclun.
Cucumber: Lebanese cucumbers are the plain complement to yellow tomatoes. Since they are water laden, there are lovely to have during summer, especially in a salad.
Seeds: mix the crunch part is the one that makes the salads more appetising. My go-to mix is flax, chia, sesame seeds and hemp. Depending on what you have at hand, just go with the flow. Popped quinoa tastes brilliant in this salad.

Herbs: Herbs add a good freshness to any salad. Since we are picking up some from the garden we have spring onions, gotugola ( Brahmi) and mint from the garden. So today’s batch pick-up goes right into the salad. You can add what you have at hand to brighten up the flavours.Β 

For the citrus vinaigrette.

Summer certainly is for those strong citrus flavours. This basic citrus vinaigrette has lemon zest, lemon juice, whole grain mustard, grated garlic and grated ginger along with salt. It has no oil added, you can add a teaspoon of olive oil if you like. Do you really need a dressing for this salad, maybe just lemon and salt will do, but it is far nicer with this basic lemon vinaigrette. Since we are using sweet tomatoes,Β  I have not added sugar or date syrup to them. If you are using this dressing for, say, coleslaw or basic garden salad mix, add a tsp of date syrup.

Putting together a meal

Option 1: The salad is actually a fantastic idea to serve at a BBQ or lunch. Make some crusty toast, and creamy cheese to add to a platter. Don’t forget to keep some chocolate crackles for desserts
Option 2: Pop some vegetable sheek kebabs on the barbecue. Toast up some flatbreads. Whip up some cacik sauce and roll up a kind of Greek gyros.
Option 3: Keep light to follow up with a cold drink, like berry kombucha and then serve some chocolate dessert brownies to make it up.

The recipe card below carries step-by-step guidance to make this easy summer salad. You can directly pin this onto your board to make during the tomato season. Share with us how you feel making this recipe in the comments below with a rating of upto 5 stars

yellow tomato salad.

Print

Yellow tomato salad

Enjoy a delightful yellow tomato salad bursting with summer flavour. Make it a celebration of your homegrown produce with this salad with the best citrus dressing. Make some, share some and enjoy the sun.
Course Salad
Cuisine gluten free, International, One pot, Vegan, Vegetarian
Keyword Lunch recipes, no cook recipes,, vegan
Prep Time 15 minutes
Servings 2 people

Equipment

  • Cutting board
  • Knife
  • mandolin slicer
  • mixing bowls and spoons.

Ingredients

  • 15 small cherry tomatoes yellow or red.
  • 1 cup cabbage shredded
  • 2 mdium cucumber sliced
  • 2-3 spring onions
  • 10 leaves indian pennywort brahmi ( optional)
  • 10 leaves mint leaves (optional)

seed mix

  • 1 tbsp flax seeds
  • 1 tsp Toasted sesame seeds
  • 1 tsp Hemp seeds

salad dressing

  • 2 tbsp citrus dressing

Instructions

  • Wash and slice the tomatoes.
  • Add it to the mixing bowl with shredded cabbage.
  • Slice the cucumber and add to the bowl.
  • Chop the herbs and add to the mixing bowl.
  • Add the citrus dressing and toss well.
  • Transfer to a serving dish and sprinkle the seed mix.
  • The salad is now ready to be served.
    yellow tomato salad.

Stay connected

As a home gardener, I get very excited when I see produce come up and the garden active with bees and butterflies. These have an emotional connection to the fruits kind of a sense of joy in their own way. Try your green thumb, you didn’t always have to get it right, but don’t give up.
When you make this yellow tomato salad, whatever type of tomato hope you enjoy the experience. Let us know in the comments how you feel about it and rate the recipe. Don’t forget the citrus dressing is perfect for kidney bean salad or edamame salad.
Stay with us for more, enjoy reading the blog and stay subscribed.Β 

Yellow tomato salad

Β 

❌