Reading view

There are new articles available, click to refresh the page.

Masala Carrot Fries

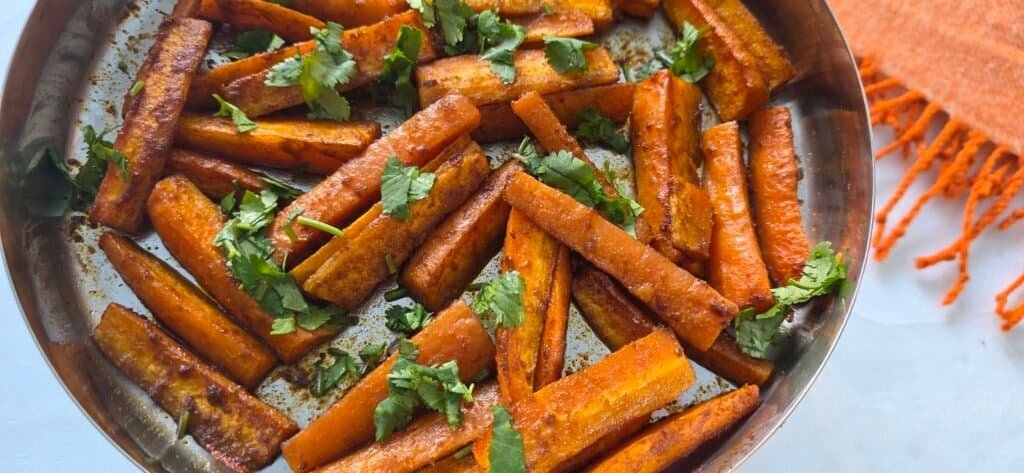
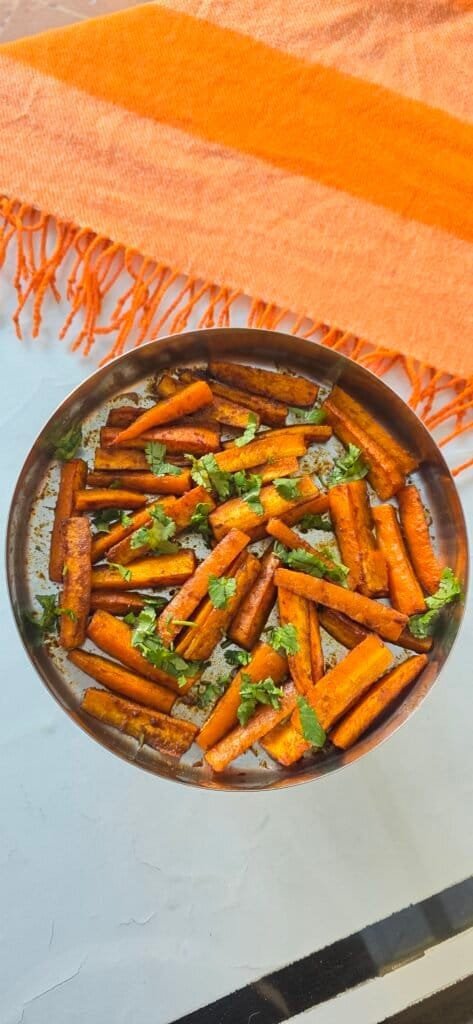
Masala carrot fries
Fries will always dominate my comfort food world. It can be potato, sweet potato, zucchini, rutabaga, parsnips, you name it  I will eat them. The one I really crave for in winter is the masala carrot fries.
Carrots have this incredible natural sweetness that caramelises beautifully when you hit them with high heat. By tossing them mix of  spices you transform this bright orange root vegetable into a highly addictive snack. This dish is naturally gluten-free, vegan-friendly, and packed with fibre and whatever carrots can offer.  It strikes that perfect, magical balance between sweet, smoky, savory, and tangy. I bet you cant keep your hands off them.

Ingredients for carrot fries

Carrots: The colour of the carrots chosen to make this masala fries does not matter. you can have purple, yellow or orange carrots though orange is the most popular colour available. Choose firm and thick carrots which are fairly straight. This makes it easy to cut even batons.  
Oil: though we are not deep frying the oil helps to coat and create the crispy roasted top for the carrot fries. Any neutral oil is good enough like sunflower oil, vegetable oil or avocado oil. If using coconut oil or sesame oil, it will add the fragrance to the fries. 
Spices and seasoning: Salt and pepper remains the key seasoning for these fries. The spices that upgrade it to masala fries is cumin powder, chaat masala and the kashmiri chilli powder. Cumin powder adds a smoky flavour, the chaat masala a zing and peppiness and the kashmiri chilli powder a mild spice level. Kashmiri chilli powder is similar to paprika with a tiny bit more spiciness. If you prefer a bit more spice you can use chilli or cayanne powder. 

Lets make carrot fries

Preheat your oven to 180°C.
Prep the carrots : wash and pat dried the carrots Peel your carrots and trim the tops. Cut 1cm-thick sticks. Try to keep them all roughly the same size so they cook at the exact same rate.
Pat your carrot sticks thoroughly dry with a paper towel after cutting add them into a large mixing bowl.
Spicing the carrots: sprinkle a mix of salt, cumin, paprika and chaat masala on the carrots sticks  Drizzle with oil and give them a good toss.
Spread Out and Bake:  Spread the carrots out onto your prepared baking tray. Leave a bit of breathing room between each stick. If they are piled on top of each other, they will steam instead of roast. Bake for 25 to 30 minutes, giving them a good flip halfway through the cooking time to ensure they get evenly golden and crisp on all sides. Be gentle with them at this point.
Once done the carrots turn crisp and glossy.
Remove on to a serving dish and enjoy with a dip.
Can carrot fries get crispy like potatoes ?
If you’ve ever tried baking carrots before, you know they tend to go a bit soft and limp. That is because carrots are packed with water and lack the natural starch of a potato. To beat the sogginess in the oven, use these two methods as nonnegotiable
The Paper Towel Pat-Down: Getting the carrot sticks completely dry before adding oil stops them from steaming in their own juices.
The Starch Dusting: A tiny sprinkle of cornflour  or rice flour acts like an invisible shield. It absorbs moisture and creates a crisp, micro-textured crust as it bakes. Ensure that you toss the spices in with the cornflour before dusting so it coats evenly.

Can carrot fries be made in the airfryer?

Oh yes, follow the steps of prepping and spicing. Then spread the carrots with enough gaps between them. These fries turn out more crispy. 
Spiced carrot fries
Print

Masala carrot fries

Course Appetizer, Snacks
Cuisine American, Baking, Continental, diabetic friendly, Fusion, gluten free, International, Kids choice, Vegan, Vegetarian, Winter
Keyword carrot, Indian vegetarian dinner, Lunch recipes, vegetarian barbecue
Prep Time 15 minutes
Cook Time 30 minutes
Total Time 30 minutes

Ingredients

for the fries

  • 300 gram carrots
  • 2 tbsp olive oil
  • salt to taste
  • 1/4 tsp Kashmiri chilli powder
  • 1/4 tsp roasted cumin powder
  • 1/4 tsp chaat masala

to finish

  • 1 tbsp coriander leaves

Instructions

For the baked fries

  • Preheat the oven at 180 degrees for 10 minutes
  • Wash and pat dry the carrots.
  • Cut them into two to three inch long and further into fingers
  • Toss in the olive oil, salt and spices
  • Bake at 180 degrees for 10 minutes
  • Remove and flip the fingers over and re bake for another 5 minutes.

Stay Connected

The carrot fries are undoubtedly one of our favorite fries. We love this with a cooling dip like Cacik, hope you do too. 

These masala carrot fries have been on our blog from Oct 2018. Funnily enough I hardly looked back at it till recently when it popped up on my socials as a memory. Coincidentally it was carrots special on Sunday Funday, so both together, It was time for this update. Hope you like it and please leave your comments below of how it turned out for you.

Here are some of the other carrot recipes from fellow bloggers.

We have added a few links to our blogs and afiiliates in this post. Hope you will like some of our suggestions. When you click on these links and use it to but these it will generate us a small commission revenue. This keeps our blog going, hope you can support that.

See you in the next post

Pin this for later

carrot fries recipe


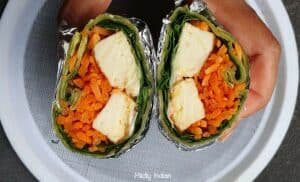
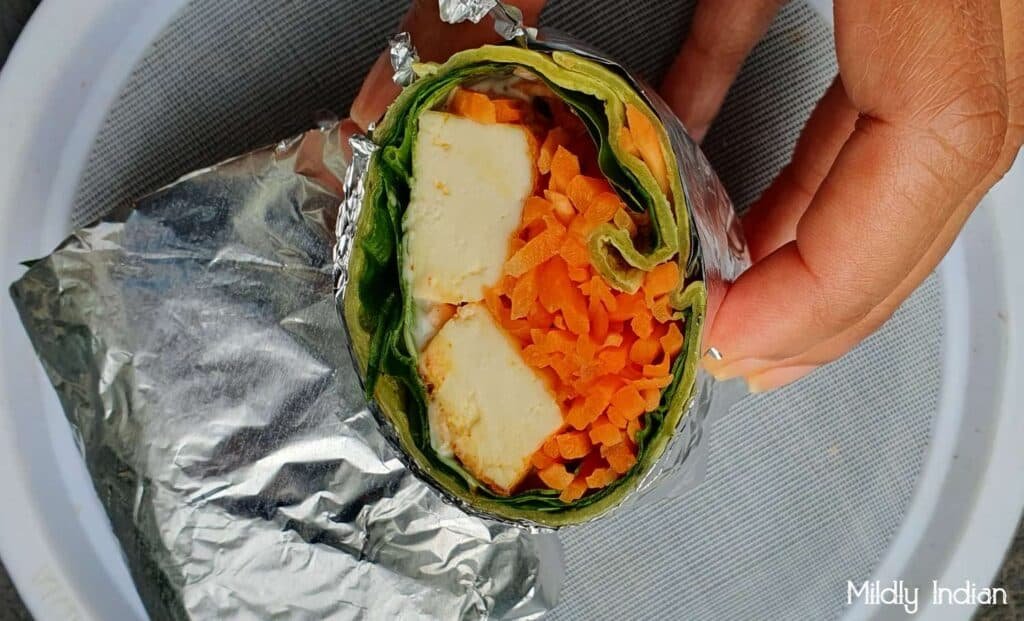
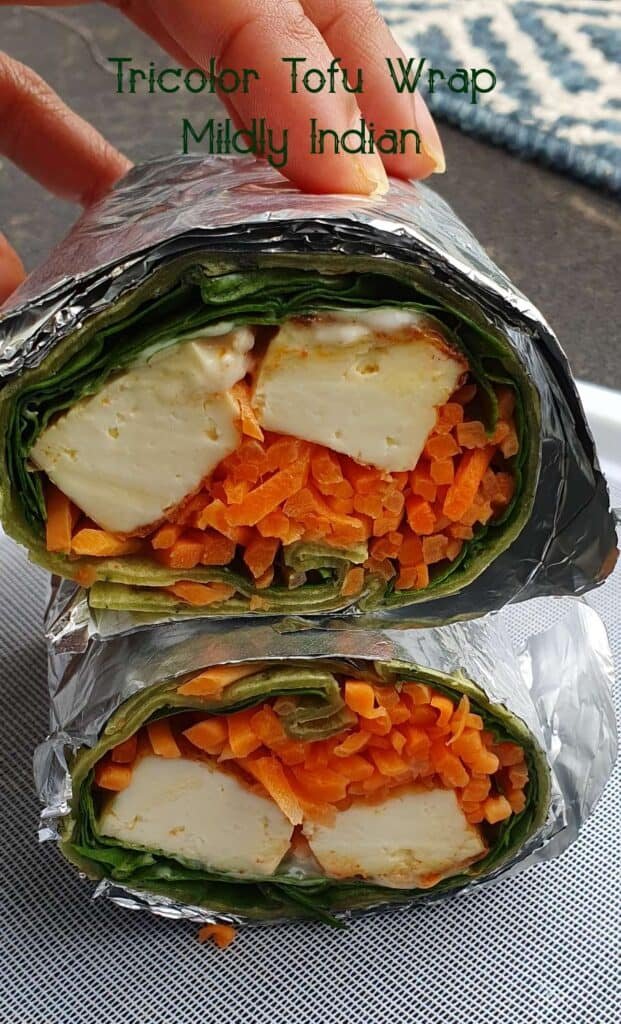
Tricolour crispy tofu wrap

If you are a tofu lover or a beginner, you will actually start liking these wraps for a couple of reasons

  • They dont feel so tofuy so its fairly easy for you to adapt into them.
  • These wraps come together in under 20 minutes and don’t need any marination.
  • They pack in a good balance of protein, carbohydrates and veggies.

If these sound good to you, lets get you started.

With the approach of autumn,  the sunrise is slowly getting later and later, we have started to slowly wake up late. This means it is then a mad scramble to get things done and all of us out of the door on a weekday. So having something that will roll quickly into a nutritious meal is welcomed. There are a couple of wraps that I know my kids will surely grab as they run out of the door. These are also the ones that my teens never had a reason for missing out on the eating. These are

the Paneer khati rolls,

Black bean and salsa wrap

Pumpkin wraps

and this tricolour tofu wrap

There is another reason why these are sure to be taken without the excuse of “Oh ! I forgot my lunchbox”. These are so much smaller when packed, so bags are less clumsy. Whatever the reason, these do get taken, eaten and are a fully balanced meal. So what is here not to love it.

Here are the details.

Ingredients to make this tricolour wrap

Before you start making wraps, you need to keep in mind that wraps are only as interesting as the flavor of the filling. So lets keep this one interesting.

Wrap:Based on the time you have you can make a roti like flat bread or use a store bought wrap. I use Helgas or Mission wraps as these are the closest to me. 

Tofu: You need firm tofu or extra firm tofu for this recipe. This ensure it will crisp up well and hold shape. If you have firm tofu and are planning your meal ahead, use a tofu press to ensure you get a perfect tofu. once this is sliced, salted and roasted these stay good for lunch. To make the tofu crispy, you need  few ingredients cornflour, breadcrumbs and salt. These three ingrdients coat the tofu to make it crunchy.

Veggie: I have used shredded carrots and baby spinach to make this recipe as this is what I often have at hand ready to go. If you prefer, you can add shredded cabbage, colored capsicum, cherry tomato, celery or avocado. You can use a bagged salad or a coleslaw mix as well to make the wrap. This is a pretty good shredder to use for carrots and cabbage.

Sauce: This is probably the simplest sauce you would have made without any compromise on flavors. It takes only two ingredients – a good quality chilli oil and thickened cream. Once you adjust the salt levels, I will put this on anything from toast to pasta. The sauce is useful as it will not run by afternoon and not make your wrap go limp. 

Equipment to make wraps

Honestly, if you have a great frying pan, you are set to make this recipe. I have this frying pan and love it to fry tofu, it does not stick much as well. I use these pre-cut parchment to wrap the rolls for lunch.

Flour wrap| crispy tofy| salad veggies

Lets make lunch perfect tofu wrap 

Print

Tricolour crispy tofu wrap

If you are a tofu lover or a beginner, you will actually start liking these wraps for a couple of reasons If these sound good to you, lets get you started.They dont feel so tofuy so its fairly easy for you to adapt into them.These wraps come together in under 20 minutes and don't need any marination.They pack in a good balance of protein, carbohydrates and veggies.
Course Main Course
Cuisine International
Keyword camp recipes, Lunch recipes, Tofu recipes
Prep Time 20 minutes
Cook Time 15 minutes
Servings 4 people

Equipment

Ingredients

  • 4 medium wholewheat wraps

for the salad

  • 200 grams carrots shredded
  • 200 gram Spinach

for the tofu

  • 250 gram firm tofu
  • 1 tbsp Corn Flour
  • 1/2 cup breadcrumbs
  • salt to taste

for the dressing

  • 1/4 cup thickened cream
  • 1 tbsp chilli oil

Instructions

  • Remove the tofu from the packaging.
  • Wash and pat dry and slice the tofu into thick long chunks.
  • Make a slurry with cornflour and salt.
  • Set your pan on medium heat, spary a bit of oil on it.
  • Dip each tofu block in the cornflour slurry, then roll in bread crumbs.
  • Place the tofu on the medium warm pan.
  • Don't move it much till the side is crisped and the tofu piece moves easily.
  • Then flip and cook another side.
  • Once all sides are crisped, tofu is ready, remoe and set aside.
  • Warm up the wrap on a flat pan.
  • Place the spinach and top it with shredded carrot.
  • Place a couple of pieces of the crispy tofu on it.
  • Whisk together cream and chilli oil.
  • Drizzle the dressing on the tofu.
  • Fold the sides of the wrap and roll tight.
  • Wrap is ready.

Stay connected

Hope you will like to make this wrap and the crispy tofu. We love taking this on our lunch, surprisingly this makes it to our camps too. When you make this recipe do share your thoughts and what you liked about it.This recipe was posted as a part of Sunday Funday’s theme cottage cheese, tofu and paneer hosted by Mayuri. Here are the other entries, each delightful in its own manner so don’t miss to check them out 

Corn Paneer Parathas from Mayuri’s Jikoni

Cottage Cheese Muffins from A Day in the Life on the Farm

Cottage Cheese Wraps from Making Miracles

Cheese Paneer Tikka Open Sandwich in Air Fryer on Sourdough from Cook with Renu

Firecracker Tofu Broccolini Stir-Fry from Food Lust People Love

Homemade Paneer Recipe Ideas from Sid’s Sea Palm Cooking

Paneer Tomato Rice With Leftover Rice For One from Sneha’s Recipe

Pasta with Green Beans and Ricotta from Karen’s Kitchen Stories

Potato, Cottage Cheese, & Caramelized Onion Pierogi from Amy’s Cooking Adventures

Retro Cottage Cheese Jello Salad from A Messy Kitchen

We have added some links that we think will come useful for you. These are highlighted in blue. Please use your choice to click on these links as the lead to external sites.

Dont skip lunch, and always éat for your body. Stay connected

Pin this for later


tricolour tofu wrap


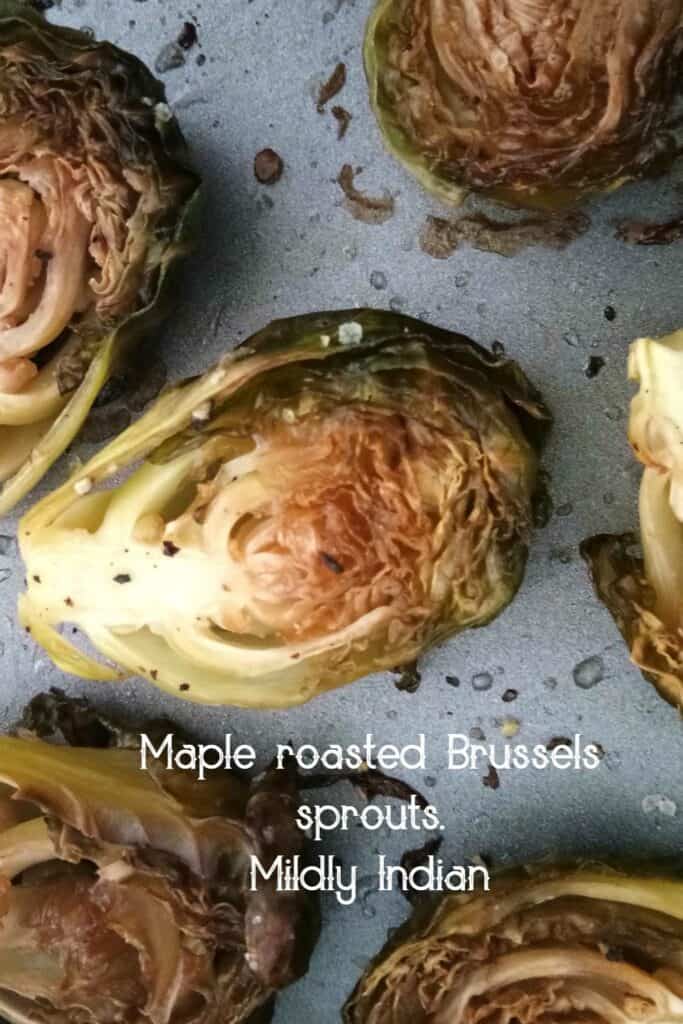
Vegan maple roasted Brussels sprout

Maple roasted Brussels sprout
Shed your dislike for Brussels sprouts and try this baked version with sweet maple syrup to take over your tastebuds. This roasted Brussels sprouts ensures that this underrated vegetable reaches your plate easily.
Once winter sets in roasted or baked vegetables are such a delightful addition to the meals. Lots of veggies, warmth from the oven and the kind of attention the kitchen gets and it feels like home. I guess this is the whole reason why these are the top-rated recipes for the holiday season and thanksgiving. Being on the opposite hemisphere, ( Australia), Brussels sprouts become more of a Christmas in July recipe than for Thanksgiving.
Lets explore this recipe today and get your oven going based on the season you like to make this for.  
Brussels sprouts

Fresh Brussels sprout from the farmers market

Brussels sprouts| what are they?

The edible buds of the Gemmifera cultivar belonging to the cabbage family are Brussels sprouts. The slightly green tight leafy buds, about the size of pingpong balls are  obviously,  the name gives away where it was popularly grown.The look like mini cabbages when sliced and peel like the cabbage leaves in miniature sizes. It comes on a long stalk, but at the supermarket, you may just get the buds. ( source)
Towards late autumn, these buds are harvested in larger numbers and hence was introduced as a thanksgiving essential.They are served often as salads, pan roasted with balsamic, baked or boiled. We have added them to a baked pasta recipe with a creamy sauce
Being a part of the cabbage family, they are rich in sulphur compounds and therefore, carry a bad reputation for being bitter and unpleasant. Predominantly,  this comes from over boiling them or over cooking them, which releases the sulphurous compounds and the resultant unpleasant taste. 

How to prep some Brussels sprouts?

  • The loose outer leaves and excess stem are clipped away and these easily burn while roasted leaving an unpleasant taste.
  • Soak the sprouts in water for about 5 minutes, wash them and set them to drain.
  • Pat dry and the sprouts are ready for use.

How do these roasted Brussels sprout taste?

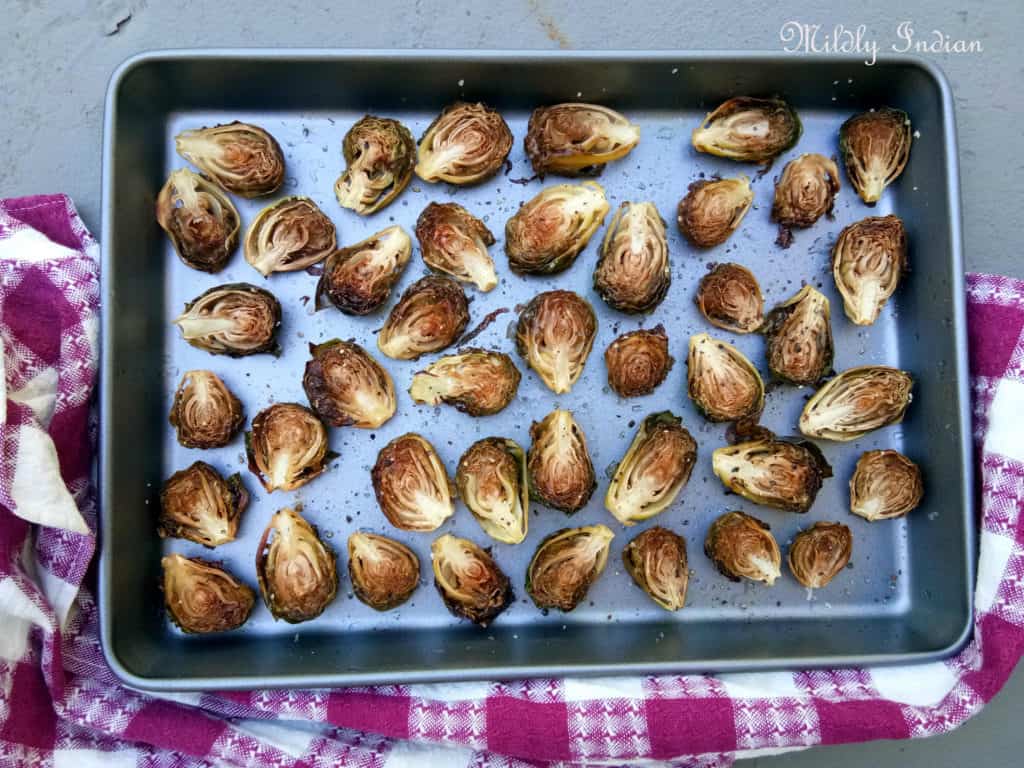
Brussels sprouts tend to become soft in the centre when roasted, yet the outer leaves are crisp. This combines with the sweetness from the maple and a few spicy hints from paprika take off any bitterness that you may expect from this vegetable. The end result is slightly smokey, slightly sweet complexity of flavour. If you are still on the fence, try it and don’t be scared of this lovely vegetable. 

Ingredients for this maple roasted Brussels sprout.

Brussels sprouts: Once the sprouts have been cleaned and prepped, it is just slicing them in half.if you havent read above, the cleaning tips are outlined.
Oil: Good quality neutral oi. I use olive oil or rice bran oil. However this need not be very specific. You can choose vegetable oil, coconut oil or any other that you are used to. 
Sea salt: I like flaky sea salt for this recipe as it has a depth of mineral content than table salt.
Maple syrup: The maple syrup fragrance while baking will remove any unpleasant odours while the sprouts cook. It will also take away the slight bitterness that these sprouts may have.
Spices: to spice it all up the faint hint of paprika that last hits the mouth make all the difference in flavour.
Print

Maple roasted Brussels sprout

A delightful roasted sprout recipe for the cooler weather days. Enjoy this vegan gluten-free recipe for maple roasted brussels sprout.
Course Appetizer, sidedish, Soups and salad
Cuisine Baking, Continental, Fusion, gluten free, International, One pot, Vegan, Vegetarian, Winter
Keyword Roasted recipes, warm salad
Prep Time 15 minutes
Cook Time 20 minutes
Total Time 35 minutes
Servings 4 people
Calories 71kcal

Equipment

Ingredients

For roasting

  • 250 g Brussels sprouts
  • 1 tbsp coconut oil
  • Sea salt

For flavour

  • 1 tbsp maple syrup
  • 1/2 tsp paprika
  • 1 tsp Lemon juice

Instructions

  • Preheat the oven at 180 for 10 minutes
  • Cut off the knobby ends of the Brussels sprouts and remove any discoloured leaves.
    Brussels sprouts
  • Wash pat dry and slice them in half.
  • Add the sliced sprouts into a mixing bowl and add oil and salt and gently rub till the sporuts are evenly coated.
  • Arrange this on the baking tray.
  • Mix together the maple syrup, lemon juice and paprika.
  • Remove the half roasted Brussels sprouts from the oven.
  • Brush the maple mix on the sprouts and place them back to bake.
  • Bake till the centre becomes a bit soft at 180 degrees for about 10 minutes.
  • Remove the baking tray and scoop into a serving dish.
  • Enjoy the sprouts warm.

Nutrition

Serving: 50g | Calories: 71kcal | Carbohydrates: 9g | Protein: 2g | Fat: 4g | Saturated Fat: 3g | Polyunsaturated Fat: 1g | Monounsaturated Fat: 1g | Sodium: 16mg | Potassium: 257mg | Fiber: 2g | Sugar: 4g | Vitamin A: 491IU | Vitamin C: 55mg | Calcium: 32mg | Iron: 1mg

What more to add to these maple roasted Brussels sprout?

Nuts – walnuts or pecans chopped or broken bits of nuts after roasting the Brussels sprouts add so much crunch and nutrition. The subtle sweetness of maple works with the nuts really well.
Sweet potato – The soft roasted sweet potato is by far the best add on roots vegetable to this roast. I love the colours of the two together as it just screams autumn for me.

Furthermore, you can add carrots, parsnips, cauliflower too to make this a huge bowl of roast. If you pass the bowl to me, I will still pick out all the brussels sprouts before I choose the others.

Stay connected

We hope you will love to share with us your thoughts about our Brussels sprouts recipes and post. Do leave your comments for us to improve and also notes on the ones you love.  Take a moment to visit our youtube channel. Leaving you with our Facebook page  (click here) and Instagram (click here ) so you can take a peek. Don’t forget to follow us as we update these to the best of our efforts. Subscribe, share, like and evermore come back.

Collaborations

 Being a unique ingredient Brussels sprouts seemed the best fit to bring to my audience and I am re introducing it theough the Sunday funday group.. Though not so common in India, I am sure my global friends will like to try this recipe.

Stay safe and see you at the next post.

Maple roasted brussels sprouts

10+ Ultimate cabbage recipes you cannot afford to miss.

Learn 10 easy ways to feature the cabbage head in your home menu more widely  more often. These easy to achieve recipes will help you elevate the cabbage from just the basic coleslaw.  

The underrated cabbage seems to have shot into limelight. This probably is triggered by the article in Vogue promoting it to be the vegetable for 2026 and it is high time these leafy vegetables get some real use. It certainly is versatile and incredibly easy to use in most cuisines.

Familiarize yourself with the Cabbage varieties

The big head of cabbage does actually comes in a few different types, providing a bit of textural and pigment variation.

The common white cabbage: this is the most versatile of all cabbages. They are perfect for all sorts of recipes, mellow and crispy and sit well in salads too. Put these on the grill or tandoor to chargrill.

The red (or purple) cabbage: these are very similar to the white cabbage. It is the colour that attracts the eye. The red cabbage is usually seen in salads and as pickles. However they are equally good when stirfried or braised too.

Savoy (crinkled) cabbage: what is interesting about this variety is the crinkly texture of the leaves. These are great to filled and rolled to make skinny enchiladas!

Wombok: This slightly sweet Chinese cabbage or Wombok is perfect for Asian dressings and stirfries. They are super tasty as kimchi and pickled cabbages. For Indian recipes, I love using wombok for poriyal and kootus as it curls up well, providing a good textural feel.

Bokchoy:Though not typically considered a part of cabbage bokchoy falls under the cabbage family.Most Asian recipes do call for he green leafy bokchoy. They are more green and tender. The flavour is brilliant in Asian style soups and stirfry.

The love-hate relationship with cabbage

You certainly would have come across a bit of a love-hate relationship with cabbage.Some people love it and some are averse. Knowing the science behind it will ensure you know the reason for your dislike.

Cabbages are a part of the cruciferous vegetable family. They are naturally rich in sulfur compounds like glucosinolates.
When cabbages are cut or cooked they release these compounds as volatile sulfur gases. This is the weird fishy smell you may encounter. This may be the reason some people dislike the cabbage. 
There are ways of mitigating this as well when you are cooking. Scroll down to ensure you see the tips to ensure your cabbage experience is better.

Reasons to love the cabbage

Though there is dislike for cabbages among some, there are several more wonderful (and delicious) reasons to love it!

  • Cabbages are low calorie vegetable. It is also nutrient dense. That makes it perfect to add volume to your meals.
  • It carries high levels of fibre that ensure fullness and avoids constipation.
  • Cabbages are good source of vitamins C and K . Both fresh and cooked cabbage are rich in them!
  • Cabbages are diabetic-friendly as they are leafy vegetable, meaning they are low in sugar content.
  • It has a good amount of folate as well.
  • As for taste, they have a mild sweetness and are crisp to bite when fresh. When sauteed or grilled , they retain the sweetness.

Tips to cook the cabbage right

The sulfur smell that comes from cabbages can be reduced by following these.

  • Use lemon juice: when you add lemon or vinegar to the shredded cabbage it greatly reduces the smell that develops. You can also add an acidic agent to the cooking water instead.
  • Using an open pan: To saute or stirfry use an open pan and dong cover, and cook. This ensure the volatile compounds can escape.
  • Quick cooking: Instead of slow boiling, always resort to quick boiling methods when using in soups. Slow cooking any of the cruciferous vegetables releases the sulfur compound, causing the smell.

Lets get some cabbage on the fork!
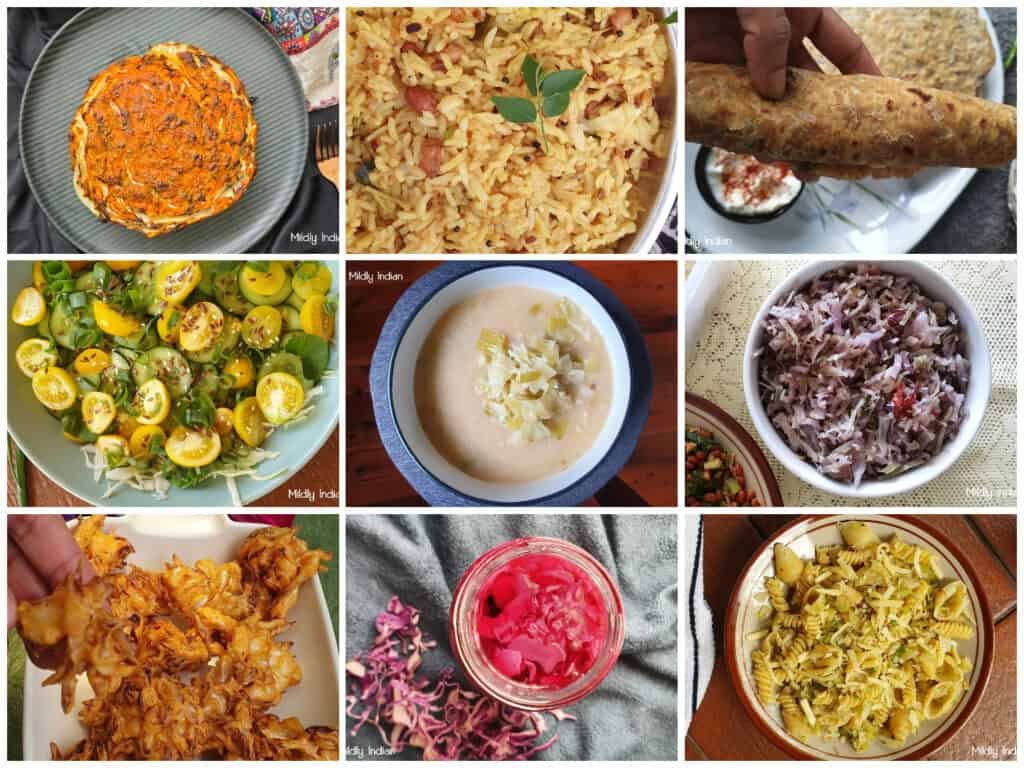
 

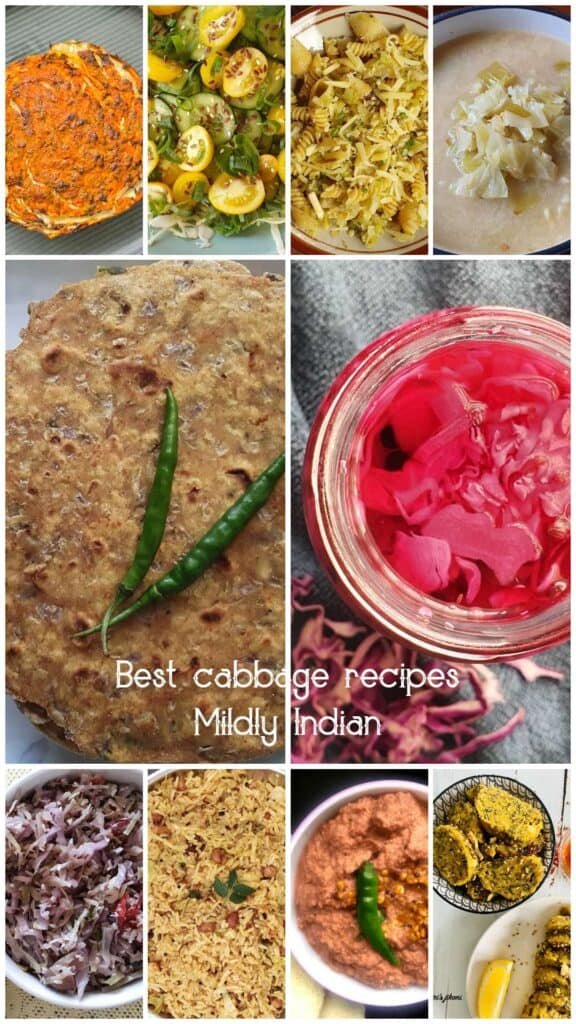
cabbage recipe collection

Cabbage recipe range from appetizers to mains. Apart from ease of cooking, cabbages are super versatile in absorbing the flavour and blending in with the flavours of the recipe. Here are some fabulous ones you should absolutely try.
Each of the recipe links are highlighted in blue. Clicking on them will lead you to the exact recipe. Lets start with some appetizers and dips

Cabbage pakoda: You cannot miss the crunch of this appetizer style recipe, perfect for entertaining. You can shred it or cut into cubes to make the pakoda. The chickpea batter with the spices makes it a delicious appetizer.

Tomato and cabbage salad: Now if you are on a summer plan or eating a bit healthier today, you have got to try this lean, fibre-rich recipe. The crunch of this salad with the acidity from tomatoes makes it a fantastic summer lunch.

Pickled red cabbage:This instant tangy pickled cabbage is a great addtion to home made burger, rolls or crunch wraps. We love to add a small bol of this to a meditteranean inspired grazing board as it pairs really well with the dips.

Now lets incorporate these into some mains that you can use much easier. 

Coconut cabbage soup: Carry the cabbage into winter with a comforting bowl of creamy coconut milk cabbage soup. This is a light soup that can be enriched by adding grains or cooked beans.

Paratha with cabbage: Bring in the comfort of cabbage in the form of a stuffed paratha. Made with maize flour, this is a brilliant flat bread recipe to serve with a simple dip or some Indian pickle.

Red cabbage pachadi: This low calorie red cabbage chutney pairs well with rice,flat breads and as a spread for a sandwich. 

Tandoori cabbage: This unique variation helps to ensure a good amount of flavour in the cabbage. It will definitely change any cabbage hater’s mind.

Shredded cabbage pasta: Ensure you have a hearty pasta with cabbage that lends itself well to Italian flavours. This shortcut pasta recipe does not use tomatoes.

Cabbage and spinach muthiyas: Muthiyas are steamed and stir fried snack from the Gujarathi cuisine. This variation ensures it is easy to adapt new variations.

Cabbage puli sadam: Put a twist on the classic puli saadam by adding shredded cabbage while stirfrying, giving it plenty of filling volume and fibre. Since cabbage takes up the spices and flavours well, this South Indian twist is a well-loved recipe.
Cabbage thoran: While going through cabbage recipes, you cannot ignore the  sadhya style cabbage thoran! This Kerala classic stirfry is one of the best warm salads.

Though you have a predominately Indian recipe collection here with cabbages, there is so much more you can do with these cabbages. You can make cabbage rolls,  add them to your momo filling, make coleslaw, chargrill them and so forth.

Stay connected

There are a couple of different bloggers who have  put forth their best cabbage recipes for you to try, so do checkout the links and their blogs through the links above.
We have used affiliate links to help your cooking successful on this blog. This in turn helps us earn a small income to keep this blog going. Hope you will find these link useful, but use them at your discretion. While you are here, here re two products that I find very useful.

Hair growth serum

In shower moisturizer

Dream lengths hair mask

When you try out these recipe please do let us know which one you liked the best in the discussion below.
Pin this for later
Stay subscribed and see you in the next post. 

cabbage recipe collection

Okoy | Filipino mixed vegetable fritters and sweet vinegar dipping sauce

Mixed veg fritter
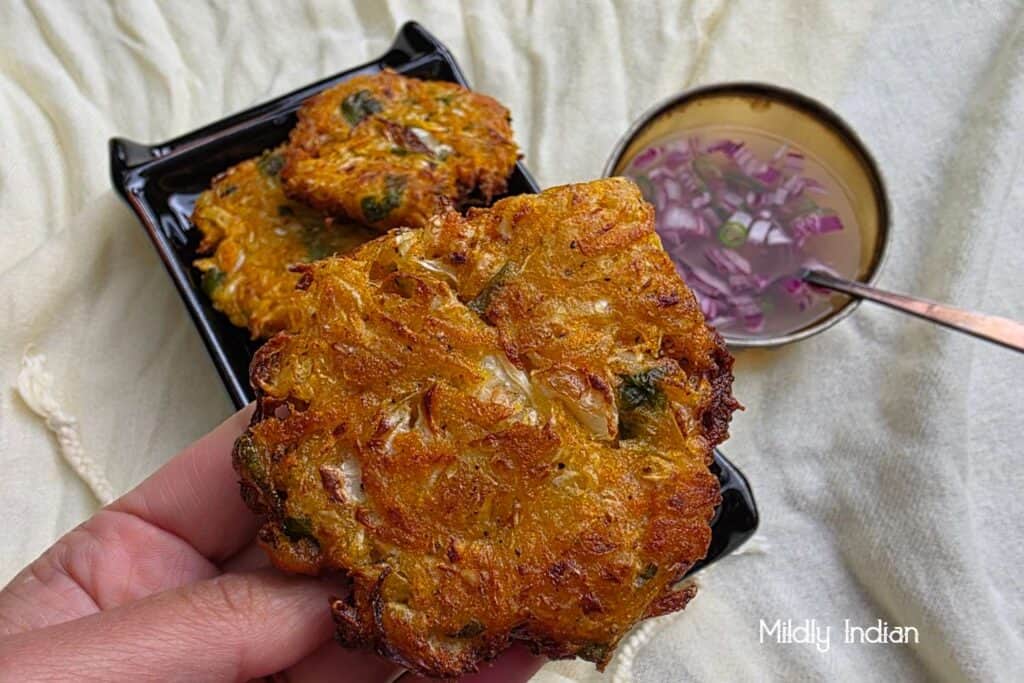
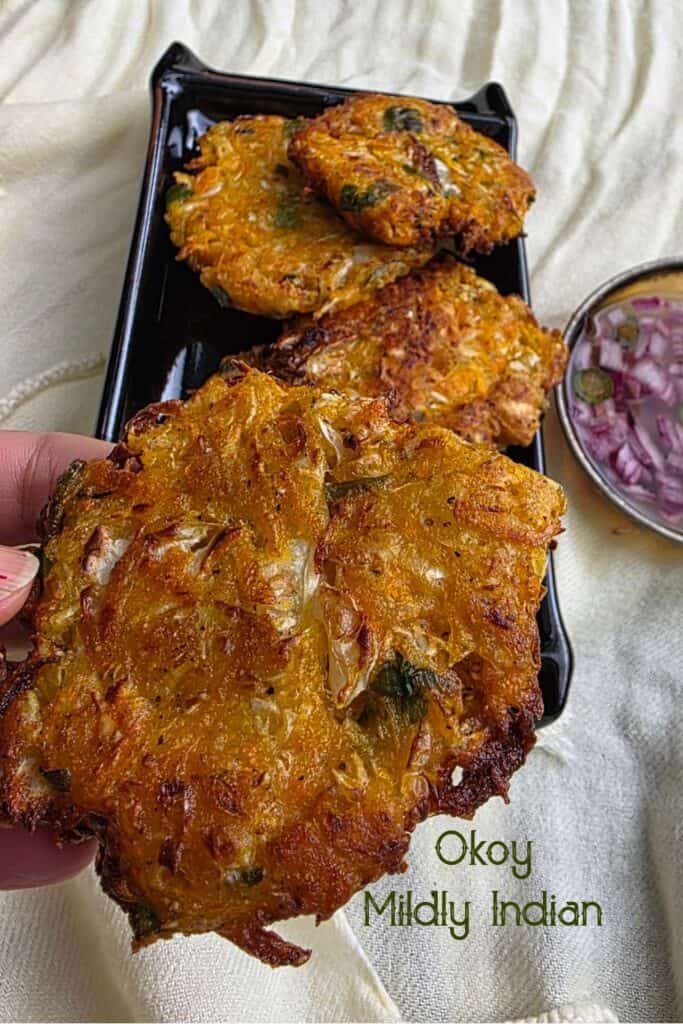
Turn your ordinary fritters into something amazing the way the Filipinos make it. Try this okoy recipe loaded with veggies and the sweet vinegar dipping sauce ( pink vinegar sauce) to go with it.
When we were living in the Philippines, my son went to a kindy and learnt a children’s song.
The “” Bahay kobo song” that every kid knows in Tagalog. It is a song about a village house surrounded by vegetables and fruits.  The song was more beneficial for me than to him as I could navigate the veggie open market, on my own, with this song and knowing a few numbers to calculate the prices. I felt less alien and more like I belong. Little did people near me know that i was humming this song on repeat so I knew what to ask for.
Following learning this song, i learnt to make the street food okoy from the kindy mums.  Filled with a lot of vegetables the fritter is crisp flat and always hits the right notes.  The song always felt right with the okoy always and is a lovely memory of the kids growing up.

What is okoy?

The veggie loaded Filipino style fritters is called okoy or ukoy. Classic okoy is made with shrimps, however the pumpkin or vegetable version is equally popular. Made with rice flour the street style snack is gluten free, vegan and nut free.  It can hide a lot of finely shredded vegetables and hence is a perfect recipe for hidden veggies fritter. It is usually served with a sweet pink vinegar based dipping sauce that balances out the deep fried effect. 

Ingredients to make Filipino fritters

The filipino  fritter doesn’t look like it hides a lot, but the flavour is partly from this deception. the Main flavour come from the vegetable mix you choose.
Vegetable mix:this is where you literally get to play god. As long as you have some starchy veggies to hold everything together, you can literally add any vegetable to this mix. I like cabbage, pumpkin,carrot, shallots in this recipe. You can add sweet potato, capsicum, potato, beans, corn, kohlrabi and any Asian greens you like.  So feel free to vary based on what you have. Here is what I will avoid in this mix cucumbers, tomato,  bottle gourd and winter melons are not suitable as they make the batter too runny.
Glutinous rice flour: also known as sticky rice flour or sweet rice flour, is a high starch content flour used in Asian cooking.  i use the flour to vegetable mix ratio as 1: 1. For every cup of grated vegetable use 1 cup of glutinous rice flour. You can use all-purpose flour instead of rice flour. A table spoon of cornflour  with the all purpose flour makes the fritters crisp. Otherwise the fritter goes limp pretty fast.
Seasoning:not much of spices are added to this recipe. It is usually just salt and pepper that is added.
Oil: peanut oil or vegetable oil id used for frying the fritters this is just based on your preferences. For the authentic flavors peanut oil is the best.

Ingredients the make pink vinegar dipping sauce

Vinegar: the dipping sauce with plain cooking vinegar cuts through the deep fried fritter and make the dipping sauce an excellent combo. You can make it with cooking white vinegar or apple cider vinegar.
Onion: the red onion when soaked in the vinegar provides a pink hue to the dipping sauce. This is why the red one is preferred. If you don’t have  it  yellow brown onion will do just fine.
Sugar: the dipping sauce is made sweeter than usual by stirring in some sugar. Though it feels odd the combination tastes good with the fried fritter.
Salt: salt balances the sauce flavours. General table salt will provide the necessary flavour.
okoy fritter
Lets make sweet dipping vinegar
  • The pink colour takes a few minutes to seep in so I prefer making the dipping sauce first.
  • The pink dipping sauce is so easy to make.
  • Finely chop the red onion and add it to a bowl, add the vinegar, salt and sugar.
  • Stir well and set it aside for 10 minutes.
Now, let’s make the okoy fritters
  • I have used cabbage, pumpkin, carrots, a small capsicum that grew in the garden to make this recipe.
  • Grate these so that they make a  easy mix and cook evenly.
  • Add these into the mixing bowl. Use 1:1 ratio of glutinous flour to vegetable grated.
  • Add the flour, salt and crushed black pepper.
  • Mix this well and set aside for 10 minutes. do not add any water as the vegetables will provide enough moisture.
  • Heat oil in a pan . Once oil is hot, lower the heat to medium.
  • Scoop and shape the batter in to flat  and as far as round you can. Then gently place in the oil. Let this cook on on side and gently flip to the other side.
  • Once both sides are golden and crispy, remove and drain from oil.
  • The okoy is ready to have.

Meal prep the okoy

Okoy is a favorite in the lunch boxes and as after school snacks. So,  yes we meal prep them. Once you make them cool them well and store in tight lidded boxes. This will ensure they don’t go soggy. Store them in the refrigerator for up to a week. To reheat  them I prefer a flat pan or the toaster. This keeps them crisp and not go soft.
Print

Okoy

Course Appetizer, Snack
Cuisine Filipino
Keyword fritters, Lunch recipes, pot luck recipes
Prep Time 30 minutes
Cook Time 20 minutes
Servings 4 people

Ingredients

for the batter

  • 4 cups mixed vegetable grated ( I have used carrot, cabbage, pumpkin and sweet potato)
  • 1 cup glutinous rice flour
  • 2 tbsp scallions chopped
  • salt to taste
  • 1/2 tsp crushed black pepper

for frying

  • 1 cup cooking oil

for the sweet vinegar dipping sauce

  • 1/2 cup vinegar distilled
  • 1 small red onion
  • 1 medium green chilli
  • 2 tbsp sugar
  • salt to taste use a little at a time

Instructions

For the sweet vinegar dipping sauce

  • Peel, wash an finely chop the onion and chillies.
  • Add this into a mixing bowl, with vinegar, salt, sugar and the chillies.
  • Set this aside for the pink colour of the onions to infuse.
  • If keeping for longer, store in the fridge in a tight jar.

For the filipino fritter dough

  • Peel and grate carrots, pumpkin and sweet potato.
  • Grate the cabbages and add to the mixing bowl.
  • Chop the scallions and add to the mix.
  • Add the rice flour, salt and pepper to this mix.
  • Mix well and set it aside.

For frying the okoy

  • Heat oil in a frying pan on medium heat.
  • Scoop a bit of the batter and place in the warm oil.
  • Gently flatten the surface.
  • Once the sizzling slows down, flip over and cook the other side as well.
  • Once it crisps up, remove from oil.
  • Serve warm with dipping sauce.

Other recipes from the Filipino cuisine

We have not written about a lot of recipes from the Philippines. Here is a couple we have posted.
Pancit bihon
Ampalaya salad

Stay connected

Hope you enjoy making this comforting but unique street style Filipino recipe. Initially it is hard to understand how the vinegar is the best combo till you actually try it. The veggie loaded bite is perfectly balanced by the acidic sweetness of the dipping sauce. 
We enjoy having these a lot and take some in a lunch boxes. 
Share with us in the comments if you enjoyed making okoy in the comments below.
Pin this for later
Stay subscribed and see you in the next post.

Hidden veggies sandwich

cream cheese veggie sandwich
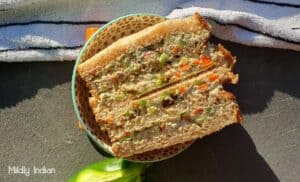
Past couple of weeks has been so busy that I now look back and think how did we pull it off. Those frozen meals that we keep a stach of was super helpful and depleted pretty fast. Hence emerged easy ideas like this hidden veggies sandwich. Fairly easy to make this sandwich came together in under 15 minutes (use the mincer) and did not fall apart by lunch time. Here is the recipe for you to try

Ingredients to make hidden veggies sandwich.

Cream cheese: the soft cheese that is made with milk and cream is cream cheese. It is spreadable and mixes well with the vegetables to form a good spread. Most cream cheeses have added salt in them. You can us any rand available or home made ones.
Vegetables: my go to mix for this filling is  basically firm salad veggies. carrots, bell pepper (capsicum) and zucchini form a good combination. You can add scallions and radishes too, if you like. The veggies I avoid are tomatoes, cucumber as they leach a lot of water making the filling soggy.
Herbs and black pepper: A good mix of fresh herbs like basil, thyme, oregano are lovely in this combination. You can use fresh or dried versions. Crushed black pepper adds a heat kick to the recipe. You can add pickled ginger or pickled peppercorns too. Red chilli flakes are optional.
Bread: choose one that you like to have. It can be sourdough, panini, foccacia or basic sandwich bread. We have used a multi grain sliced bread to make this batch. You can use wraps or soulaki too.
vegetable and cheese sandwich

Let’s make this cream cheese sandwich

Keep the cheese our of the fridge: the cheese when in fridge firms up a bit. If we bring it to room temperature it is easy to mix the vegetables and to spread the mix. You don’t have to leave it out for long, just enough toll it feels soft.
Prep the vegetables: the veggies that go in the mix have to be finely chopped so they mix well with the cheese. This makes them overall spreadable. I use a manual mincer or hand chop them to make them small.
Prepare the cheese filling into the mixing bowl add the chopped vegetables, herbs and cheese.sprinkle black pepper powder and give it a good mix till they arr evenly mixed.
Make the sandwiches: lay out the bread and top it with the cheese filling. Spread it evenly.the thickness of the filling is up to you.  Slice it into halves or triangles and the sandwich is ready.
ingredients for hidden veggie sandwich cheese spread for sandwich filling on bread

Can we make wraps with this filling?

The filling is the most flavorful part of this recipe. So it is entirely up to you if you want to make it a wrap, a sandwich or a pin wheel sandwich. Depending on what you want to make choose an appropriate bread.

Can the sandwich be made vegan?

Creamcheese will be the part that needs a change to make it vegan. Dairy free cream cheese or cashew cheese will help you achieve this. I have not personally tried it out yet. When you do, let us know how it matched you taste test.

Meal prep the cream sandwich

Ideally, I will not keep the sandwich for more than a day in the refrigerator. However,the filling stays good for almost a week. So week the filling ready to slather on the bread as we need.

Lunchbox idea with sandwich

On a busy at work day these sandwich  ideas are welcome lunch boxes. I do top up our boxes with some fresh fruit or a handful of nuts etc. While making this sandwich, I added a handful of steamed edamame and some crackers to the lunchbox.
Print

Hidden veggie sandwich

Sandwich with cream cheese and veggie filling for an easy ;lunchbox idea.
Course Appetizer, Main Course
Cuisine International, Summer
Keyword camp recipes, Cheese recipes, Lunch recipes, no cook recipes,
Prep Time 15 minutes
Servings 2 people

Equipment

  • mixing bowls and spoons.

Ingredients

For the filling

  • 1/4 cup zucchini minced or grated
  • 1/4 cup carrot minced or grated
  • 1/4 cup capsicum  any colour, minced.
  • 1/2 cup cream cheese
  • 1/4 tsp crushed black pepper
  • 1 tsp mixed herbs chopped fine

Instructions

  • Thaw the cream cheese.
  • Mince or grate the vegetables and set it aside.
  • Into the mixing bowl add the cream cheese, prepared vegetables, herbs and black pepper.
  • Mix well till they are uniformly combined.
  • Place two slices of bread on a clean surface.
  • Spread a thick layer of the filling on one side of the bread.
  • Close the sandwich and cut into halves or triangles.
  • The sandwich is now ready to have.

Other useful sandwich ideas for lunch boxes

Guacamole sandwich

Loaded vegemite sandwich

Paneer pesto sandwich

Kale sandwich

Stay connected

This cream cheese sandwich has kept us going for a couple of times this week. It is quite filling and since the vegetables are added in make a light lunch option. The recipe is a good one to take to picnics, brunch or high tea. Hope you like this recipe and will let us know how yours turned out.
See you in the next post.
Hidden veggie sandwich

Ellu bella for Sankranthi

Ellu bella for sankranthi

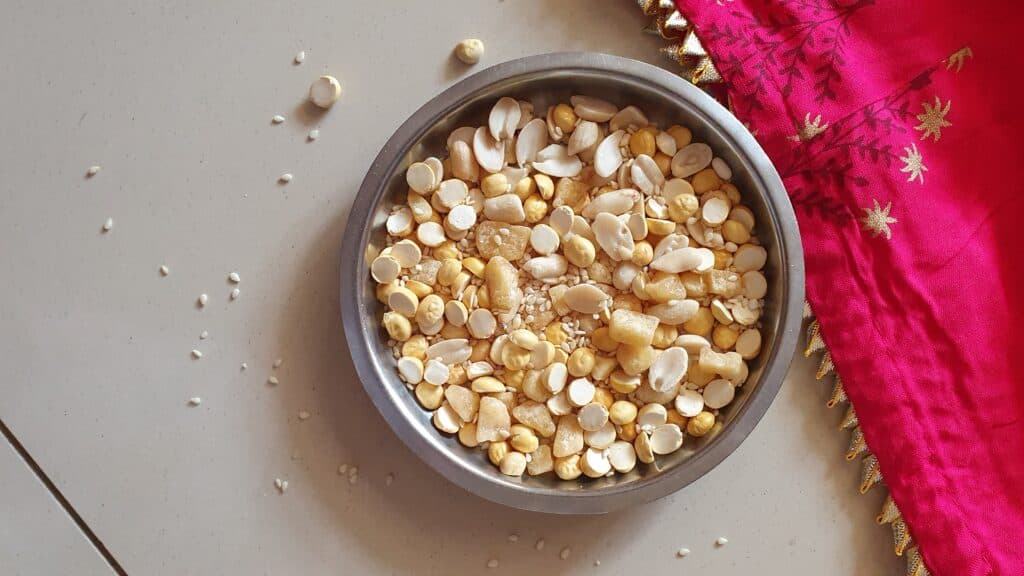
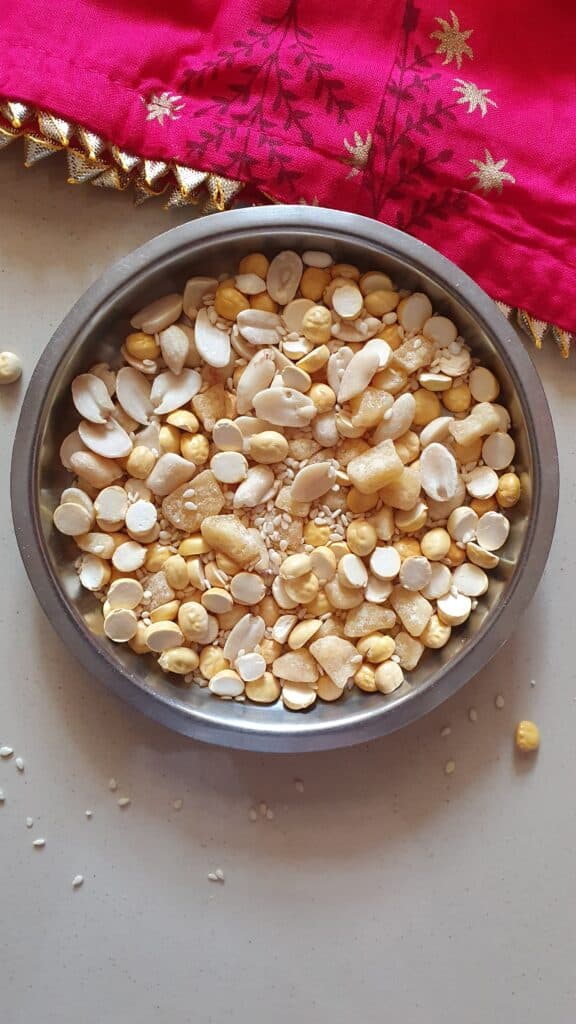
Ellu bella sweet trail mix made during the Makar Sankranthi festival. Shared with friends and family, this easy gluten-free dry mix provides a good form of jar snack.

Walking through the now back to bustling markets of Bengaluru there is sugarcane, ellu bella packs, achu sharkare etc lining the shelves. It is nearing Makar Sankarnthi. The ellu bella packs attracted my attention. This trail mix is one I am particularly fond of and loved munching on. Here is the recipe to make this simple ellu bella and a bit about it.

What is makar sankrathi?

The transition into the Zodiac of capricon is Makar Sankranthi. It marks the beginning of summer and teh end of winter. During this time the winter harvest is plenty and is a celbartion for the farming communities, thanking the natural forces for the abundance. Across indian states, these three days are celebrated as Pongal ( Read more here), Sankranthi, Magi, Makara villaku or Sokran. Each regions celebarates the local produce which is showcased in the festival foods. In Karnataka, this celebartion time is all about bonding, sharing and happiness. Kite flying, decorated animals and carts are a common site during thsi time. The family is in their best attire (new ones ofcourse) and visiting friends and fanily with ellu bella and a sankranthi thali.

Why is ellu bella shared?

“Ellu bella thindu olle maathadi”.
The Kannada saying above translates to eat ellu bella and speak no evil. It is one of the recipes (not much if it) meant purely for sharing. The actual highlight of the day is the sharing of the ellu bella with neighbours and friends. This is an excitement for the kids who are entrusted with the job. The idea of sharing this winter trail mix is to enhance the bonding between the families.

Ingredients for ellu bella

Ellu bella is not a huge deal of a recipe, but rather a simple mix of ingredients that make it a perfect winter munch. Here is what goes into making ellu bella.

Roasted groundnut: as a locally grown crop, grounds form a huge part of Karnataka cuisine. Roasted to perfection, peeled and split the groundnut anyway form the favourite munch. Added the trail mix it offers a delicious nutty feel.
Sesame seeds: the toasted white sesame seeds are used to make this recipe. The nutty flavour with a faint after-taste along with the jaggery tastes fantastic.
Roasted chickpea dal: huri kadle or roasted gram is added to the mix. This gives a powdery mouthful when bitten into.
Jaggery: traditionally jaggery or bella is the sweetness factor in this dry mix. If not sugar or rock sugar pieces will work in their place.
Dry coconut: Kobri is mature coconut that has its kernel completely dried. This is either grated or cut into small cubes. It has a slightly sweet flavour with abundant coconut oil and fibre.

Utensils for the Ellu bella

The roasting of the ingredients is done on a cast iron wok called banali. This thick-bottomed wok is perfect for roasting nuts and seeds without getting them burnt. Usually, this is a hand-me-down. I got mine from my mother.
The Kobra or dry coconut is cut into squares using a nutcracker or an arumamanai. The arumamanai is a small wooden stool or plank fitted with a bent sharp blade. Sitting on the plank placed on the floor, the kobri (even vegetables) are diced into pieces. This is actually an art in itself. Sitting on that plank needs practice.

How long to keep ellu bella?

Ellu bella is a dry mix. If kept in airtight containers it stays good for up to 3 months on the shelf. However, a handful of the mix is actually a wonderful snack, so it never lasts so long in my house.

Print

Ellu bella

Ellu bella sweet trail mix made during the Makar Sankranthi festival. Shared with friends and family, this easy gluten-free dry mix provides a good form of jar snack.
Course Dessert, Snack
Cuisine gluten free, Indian, Karnataka, One pot, South indian
Keyword beans and legumes, festival offerings, Karnataka recipes, vegan
Prep Time 30 minutes
Servings 20 people

Equipment

  • Kadai
  • Cutting board
  • Knife

Ingredients

  • 1 cup roasted chickpea porikadale, hurikadale
  • 1 cup peanuts peeled and split
  • 1 cup dry coconut kobri
  • 1 cup jaggery cubed
  • 1/2 cup sesame seeds

Instructions

  • Cut the kobri into 1/2 cm cubes. If preferred can remove the outer brown cover using a peeler.
  • Cut the jaggery ball into small pieces to add to the mix.
  • Set these two aside till needed.
  • Set the kadai (banali) on medium heat.
  • Roast the peanut with constant stirring.
  • Once the peanut is slightly golden and crunchy, Add to a mixing bowl.
  • Next, into the kadai add the dry coconut pieces and roast them.
  • Remove this also into the mixing bowl.
  • Add the sesame seeds and let them pop.
  • As they crackle and pop, add this to the mixing bowl.
  • Remove the kadai from heat and add the roasted chickpeas just to warm up by the heat of the vessel.
  • Into the mixing bowl add the jaggery pieces and the roasted gram.
  • Give the trail mix a good stir.
  • Now the ellu bella is ready.

Setting up the sankranthi thali.

The Sankranthi thali is one of the simplest to set up. It is all about the seasonal local produce. This is an easy idea to set it up. Here are some things you want to gather
Ellu bella
Sugarcane
Mango leaves or betel leaves
Achhu sharkare (candy sugar figurines)
Banana
Ber or indian jujubes
Flowers
Additional adds
Steamed groundnut
Steamed sweet potatoes
A steel or metal platter is preferred to set this mix. Wash clean and dry the leaves. On the platter plate the leaves and arrange the other elements around them. You can keep the ellu bella in a bowl or add it directly onto the plate. Add the sugar candy last and decorate with flowers. This is your sankranthi thali.

Food served for Sankrathi

Since it is a seasonal abundance, newly harvested rice, yams, sweet potatoes,hyacinth beans, groundnuts, sugarcane etc are the main produce you see during this time. Commonly, Sweet pongal, steamed groundnuts, payasa, lemon rice, avrekalu uppitu,steamed sweet potato, ellu unde are made during this time.

If you are looking for a naivedyam thali, try this -click here for the link.

Stay connected

Learning about traditional cuisine takes time and guidance. Simple recipes like these are more fun to put together and bring about the festival spirit. So dress up and celebrate. Tell us about your way of celebrating with ellu bella or how you celebrate makar Sankranthi in the comments. If you are making ellu bella at home, share with us the little twists and turns. Don’t miss to subscribe and keep connected.
Happy Sankranthi!

Ellu bella


❌