❌

Reading view

There are new articles available, click to refresh the page.

Instant Ragi Dosa | Crispy and Lacy Finger Millet Dosa

Crispy, nutritious and such an easy breakfast – Instant Ragi Dosa is best enjoyed with coconut chutney and podi. One of my favourite millet recipes and a really easy way to incorporate them in your diet.
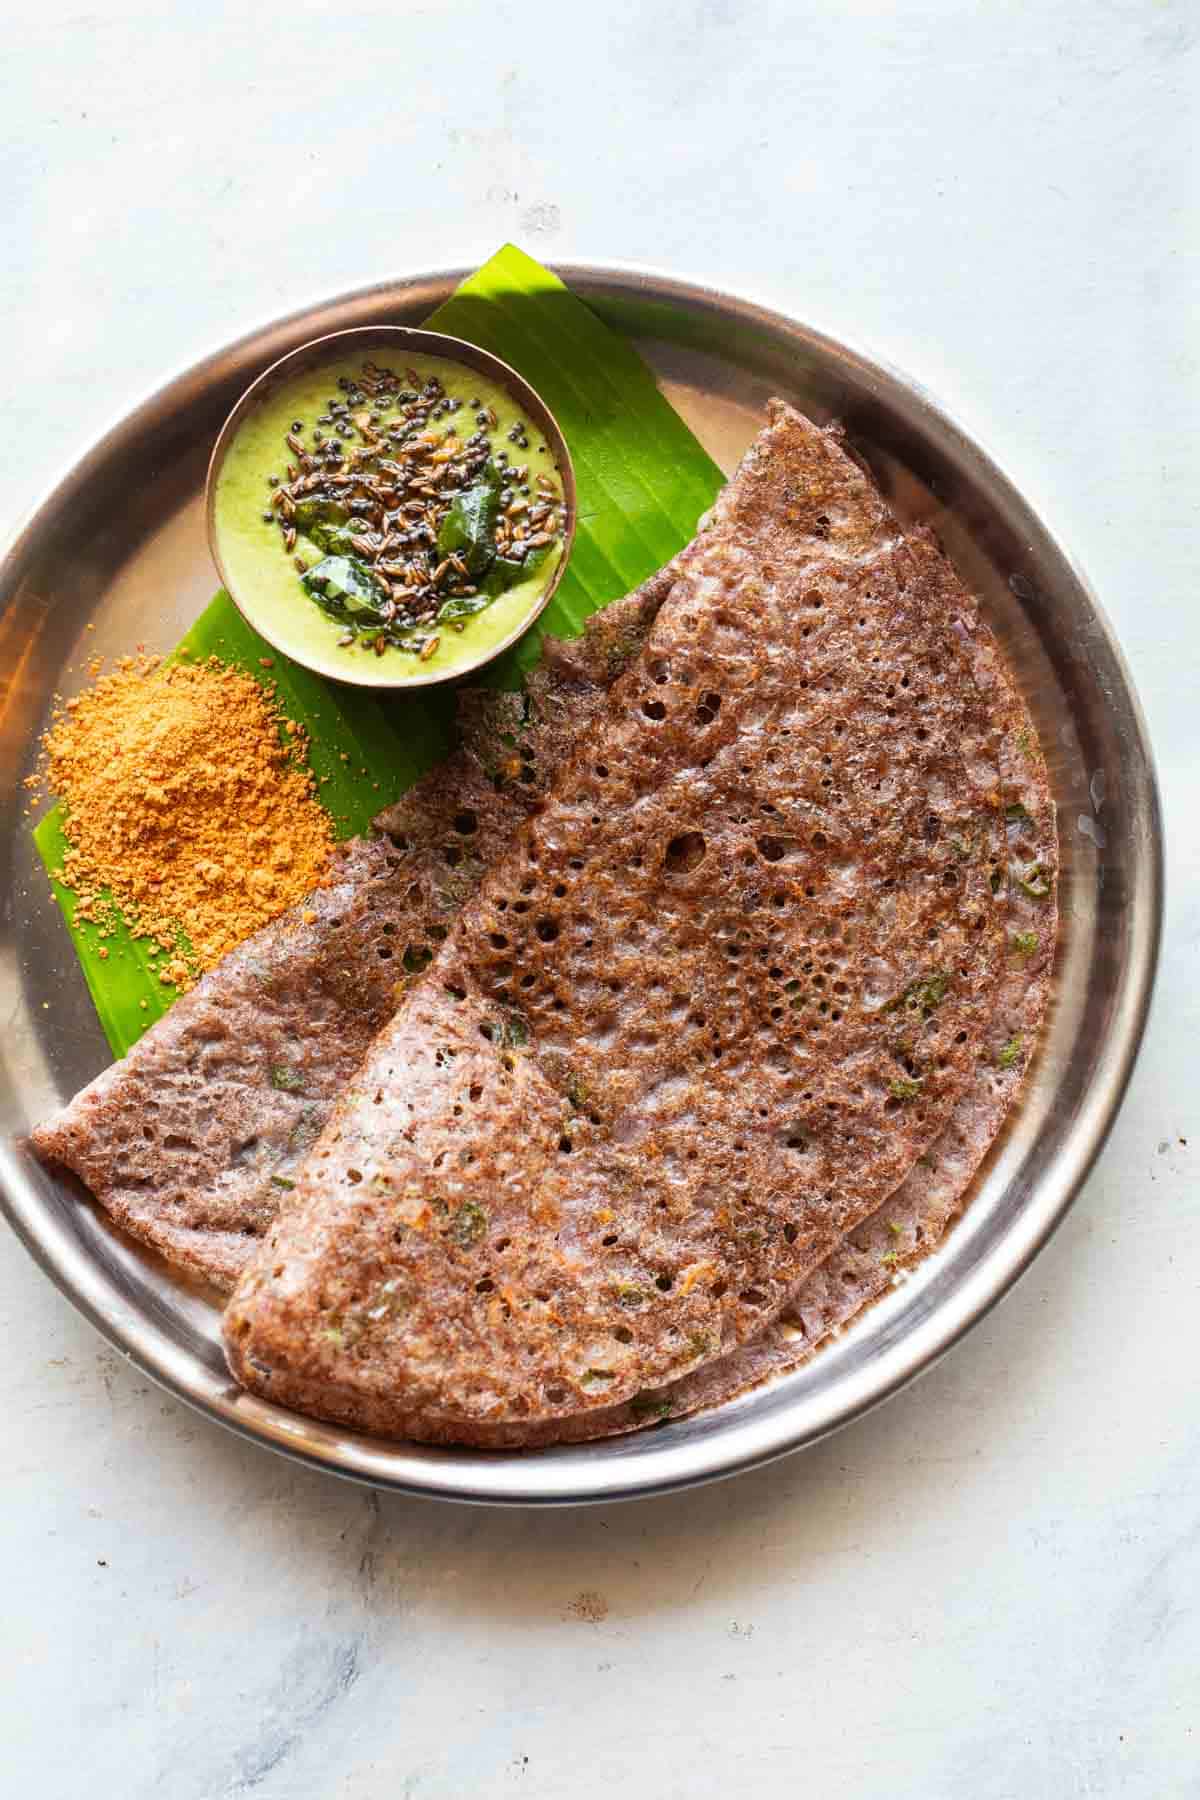
Ragi dosa served in a steel plate on a banana leaf with coconut chutney and podi

We’ve spoken about how I’m trying to incorporate more millets in my diet and this by far is my favourite recipe. In fact now that I think about it, Ragi or Finger Millet is my most used millet. Because its so easy to incorporate – I use it to make ragi crepes, pancakes, cake and even ragi soup.

And today I have this delicious Instant Ragi Dosa for you – a super healthy, hearty breakfast that takes minutes to put together. Dosa is our go-to breakfast on my days and we do a lot of different kinds – regular dosa, oats dosa, banana dosa, millet dosa with a fermented batter, neer dosa, banana dosa and chilla. This Ragi Dosa is a current favourite because its more filling than regular dosa, doesn’t need fermentation and is a great way to incorporate ragi into the diet.

If you want to learn more about millets, including the types, how to cook them, ideas to include them in your diet and a lot more, make sure to check out myΒ Millets 101Β article.

Ingredients for Ragi Dosa

Here’s a quick picture of all the ingredients you’ll need for ragi dosa. Ragi flour or Finger Millet Flour is easily available at most places these days.
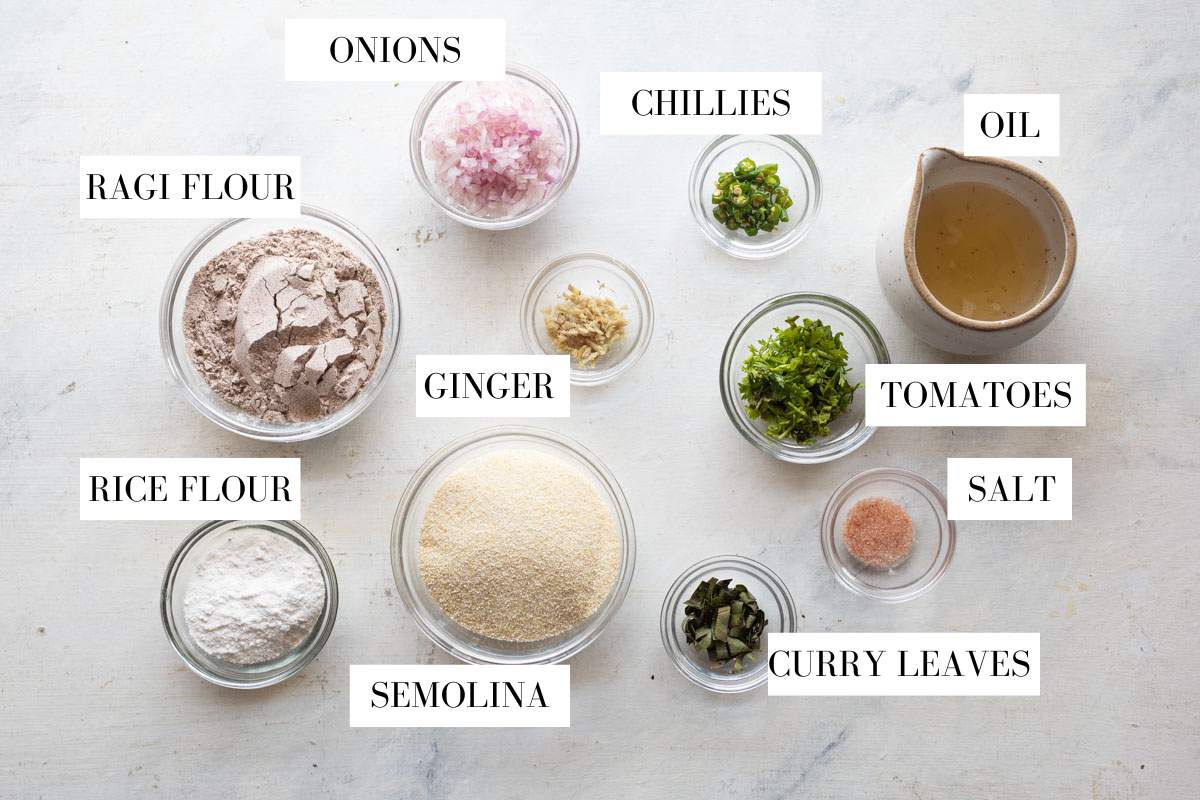
Picture of all the ingredients required for ragi dosa with text overlay to identify them

Ragi flour: Aka finger millet flour. It’s easily available in most stores both online and offline in India. If you’re outside India, you should be able to find it in any Indian supermarket near you

Semolina: Rava or semolina helps achieve that lacy, crispy texture of dosa. It also gives the dosa batter more body and prevents the dosa from falling apart

Rice flour: Helps make the batter light and airy and the dosa crispy

Onions: For texture and flavor in ever bite

Greens: Chopped coriander leaves and curry leaves add a lovely earthy flavor and freshness

Ginger: Finely chopped for flavor and aroma

Green chillies: Finely chopped for a kick of heat

Salt: For seasoning

Oil: Any neutral-flavored oil helps to prevent the dosa from sticking and makes it crispy. You can also use butter or ghee instead

Benefits of Finger Millet

  • Rich in calcium: Finger millet, also known as ragi, is naturally high in calcium, which supports strong bones and teeth.
  • Good source of fibre: Its fibre content can help support digestion and keep you feeling fuller for longer.
  • Naturally gluten-free: Ragi is a great grain option for people looking to include more gluten-free foods in their diet.
  • Provides plant-based iron: It contains iron, which plays an important role in supporting healthy red blood cell production.
  • Contains essential nutrients: Ragi provides nutrients such as magnesium, phosphorus and potassium, making it a wholesome addition to everyday meals.
  • Steady source of energy: Its combination of complex carbohydrates and fibre makes it a nourishing choice for breakfast, snacks or meals.

Frequently Asked Questions

Is ragi dosa healthier?

Yes, ragi dosa is much healthier than regular dosa thanks to its higher fiber content, and more nutrients such as calcium and iron.

Why is my ragi dosa sticking to the pan?

If your ragi dosa is sticking to the pan, the pan may not be at the right temperature or the batter may be too thick. Make sure the pan is well heated, use a thin, pourable batter, and avoid flipping the dosa until the edges are crisp and naturally start to release. If you’re using cast iron, a well-seasoned pan also makes a big difference.

Can I make instant ragi dosa without rava or semolina?

Yes, you can make instant ragi dosa without rava or semolina, but the dosa may be slightly less crispy and can be more delicate. Rava adds structure and helps create crisp edges, so if you leave it out, make sure the batter is thin and cook the dosa a little longer until it releases easily from the pan.

Richa’s Top Tips

  • Add water little by little. While making the batter, start by mixing all the dry flours with a little water to make a thick, lump free paste. Then add the other ingredients and water to make a thin, flowing batter
  • Rest the batter for at least 30 minutes. This helps the semolina to swell up. The batter is best consumed on the same day, but can also be made the previous night and kept
  • Give the batter a stir before each dosa. This helps mix any flour thats settled at the bottom
  • Always pour the batter, not spread. Unlike regular dosas, the batter doesn’t have to be spread. It should be poured and swirled around on a hot pan. As it hits the pan, it’ll set into a lacy pattern. If you see any large unfilled pockets, pour a little batter to fill them (watch the video to see how this is done)
  • Cook the dosas on a low flame. This ensures they cook well and become crispy
  • The consistency of the batter should be like milk. The batter can thicken so you might have to add a little more water to the batter mid way to adjust the consistency.

Storage Instructions

  • Dosa batter: Store leftover batter in an airtight container in the refrigerator for up to 1 day. The rava will continue to absorb liquid, so add a splash of water and whisk well before making the dosas.
  • Cooked dosa: Ragi dosa is best eaten fresh as it tends to lose its crispiness as it sits. If you do have leftovers, refrigerate them in an airtight container for up to 1 day.
  • Reheating: Reheat leftover dosas on a hot tawa for a couple of minutes on each side to bring back some of the crispness. Avoid microwaving as it can make them soft and chewy.

Serving Ideas

Instant ragi dosa tastes best hot and crisp, straight off the pan. Here are a few things you can serve it with:

  • Coconut chutney: A classic pairing that works beautifully with the nutty flavour of ragi.
  • Tomato or onion chutney: Great if you like a little extra tang and spice.
  • Sambar: Serve with a bowl of hot sambar for a more filling breakfast or meal.
  • Potato masala: Add a spoonful of South Indian-style potato masala and fold the dosa for a delicious ragi masala dosa.
  • Curd or yoghurt: A simple option that works especially well with a spicy chutney on the side.
  • Chutney powder: Sprinkle some podi over the dosa and drizzle with a little ghee for an easy, flavourful option.
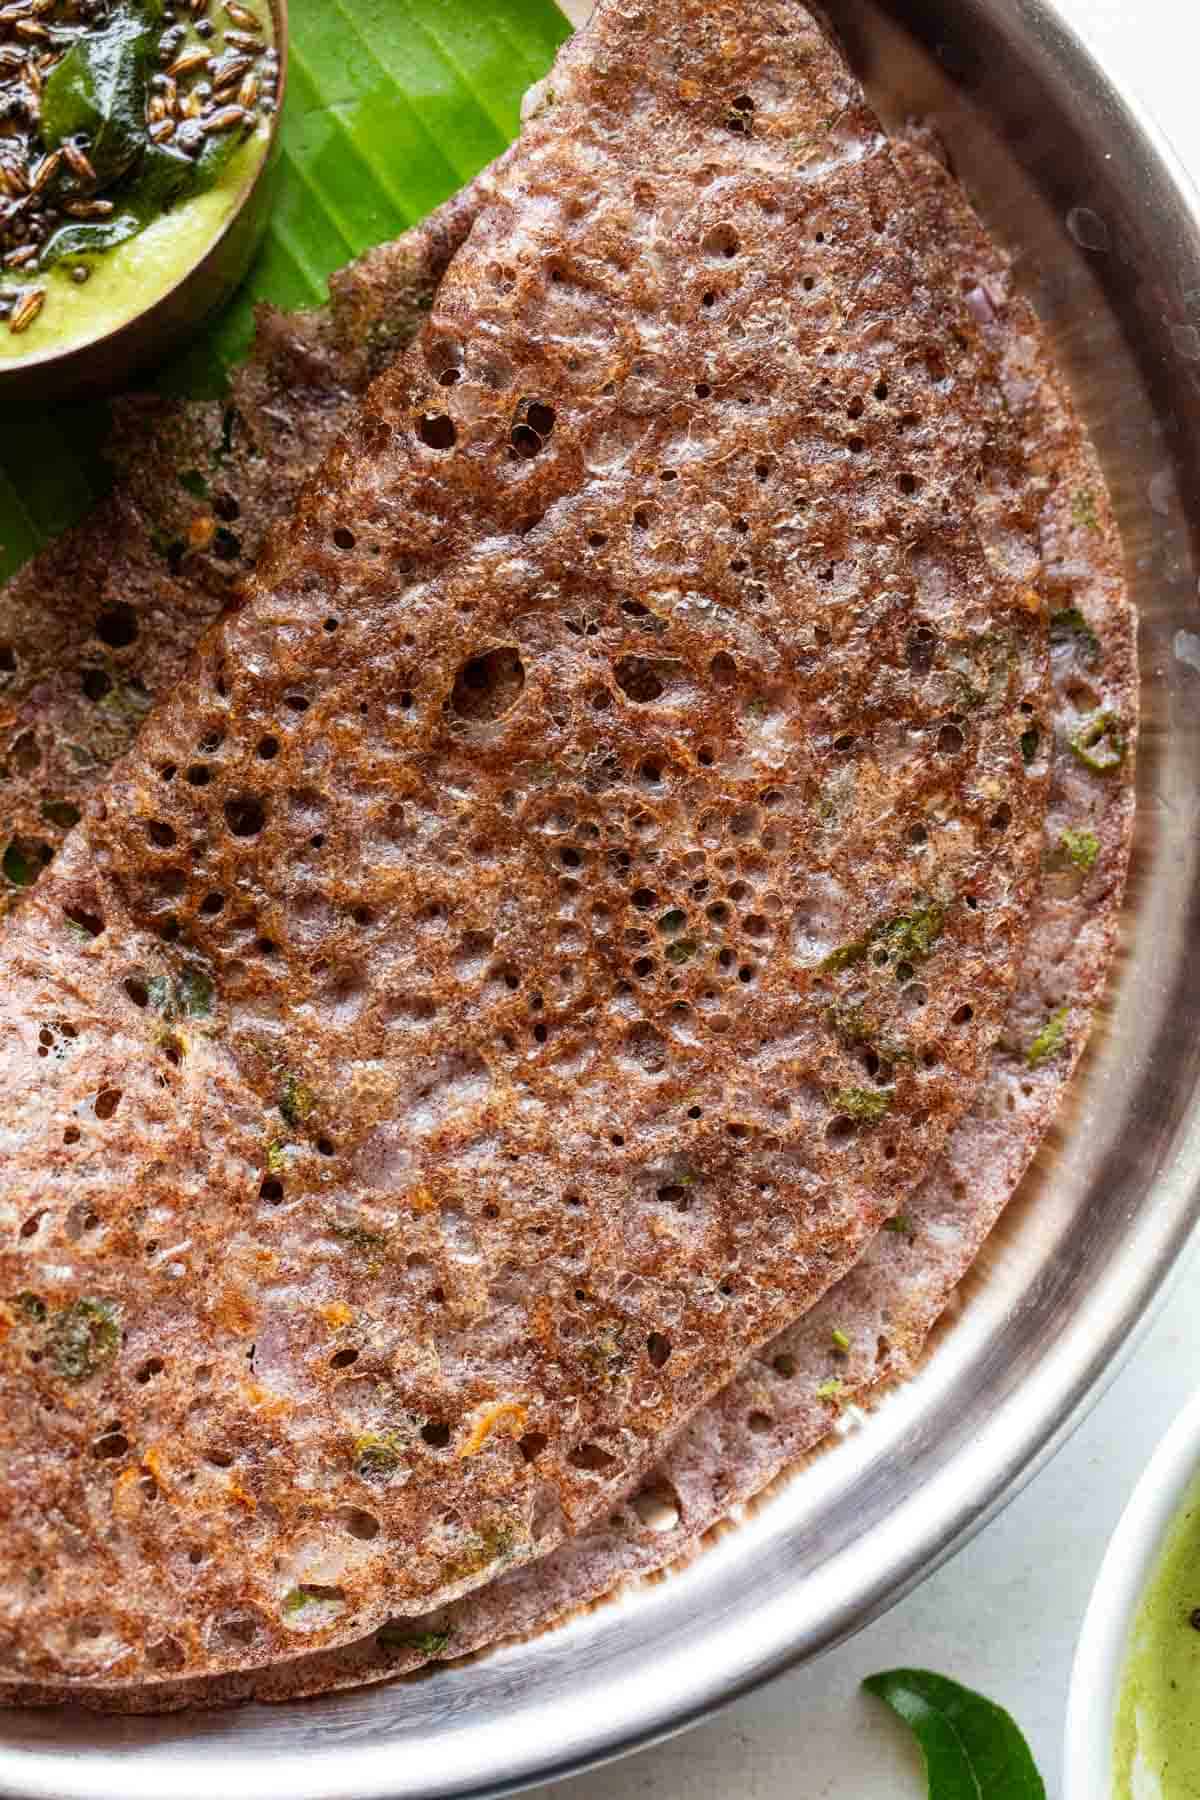
Close up of ragi dosa to show the lacy, crispy texture

This dosa is really versatile. You can also add some grated carrots or thinly sliced cabbage to the batter. Another great addition is to stuff the dosa with grated paneer, or crack an egg on it while its cooking. Choose from my trio of chutney recipes for a super delicious breakfast.

Watch Instant Ragi Dosa Recipe Video
Ragi dosa served in a steel plate on a banana leaf with coconut chutney and podi
Print

Instant Ragi Dosa

Ragi dosa is an instant dosa recipe that’s also a great way to include millets in your diet. It doesn’t need any grinding or fermenting. Rich in iron and fibre, these dosas are healthy, hearty & nutritious. The trick is to make sure the batter is the consistency of milk.
Course Breakfast
Cuisine South Indian
Diet Diabetic, Low Calorie, Vegan, Vegetarian
Prep Time 10 minutes
Cook Time 15 minutes
Total Time 25 minutes
Servings 15 dosas
Calories 58kcal
Author Richa

Ingredients

  • Β½ cup Ragi Flour finger millet/nachni/kezhvaragu/mandua
  • Β½ cup Rice Flour
  • 2 tablespoons Sooji Rava/Semolina
  • Β½ teaspoon salt
  • 1 medium Onion, finely chopped approx 1/3 cup
  • 2 Green Chillies finely chopped
  • 1 teaspoon grated Ginger
  • 12 Curry Leaves finely chopped
  • 2 tablespoons finely chopped Coriander Leaves
  • 1 1/2 to 2 cups Water

Instructions

Mixing Batter:

  • Add Ragi Flour, Rice Flour, Semolina and salt to a large mixing bowl. Add half the water and mix well to form a lump free batter. Add all the other ingredients and the remaining water to the bowl. The consistency of the batter should be like milk.
  • Rest the batter for 30 minutes.

Making the Dosa:

  • Heat a non-stick tawa or a seasoned cast iron tawa on medium heat.
  • Once hot, take a ladle full of batter and pour from about a 1-2 inch height in a circular motion starting from the edge to the center. Don't try to spread the batter, always pour it around the pan.
  • As the batter hits the hot pan, you’ll see the dosa setting with small holes. These holes allow the steam to escape and help make the dosa crispy. If there are any big holes, you can fill them up with a little batter. Turn the flame to low, drizzle Β½ teaspoon oil and let it cook for a couple of minutes or till it turns golden.
  • The dosas take 4-5 minutes to cook on a low flame. Flip the dosa and cook for another minute or two.
  • Serve hot with coconut chutney or any other chutney of your choice.

Video

Notes

  • For Gluten Free ragi dosa, skip sooji rava or semolina. Dosas will taste as good, but will be a little thinner.
  • You may also add grated veggies like carrots, cabbage, beetroot etc to the batter if you like.
  • Leftover batter can be refrigerated and will stay fresh for up to 3 days.
  • You can use any Dosa Tawa, but I personally like using a Nonstick Tawa as the dosa doesn’t stick to the tawa and is easier to flip.
  • Feel free to use oil or ghee to cook the dosa
  • Give the batter a stir before each dosa. This helps mix any flour thats settled at the bottom
  • Cook the dosas on a low flame so that they cook well and become crispy
  • You might have to add a little more water to the batter mid way in case the batter becomes too thick. It should be the consistency of milk.
  • Unlike regular dosas, the batter doesn’t have to be spread. It should be poured and swirled around on a hot pan. As it hits the pan, it’ll set into a lacy pattern. If you see any large unfilled pockets, pour a little batter to fill them (watch the video to see how this is done).

Nutrition

Calories: 58kcal | Carbohydrates: 13g | Protein: 1g | Fat: 0.2g | Saturated Fat: 0.1g | Polyunsaturated Fat: 0.1g | Monounsaturated Fat: 0.1g | Sodium: 100mg | Potassium: 51mg | Fiber: 1g | Sugar: 1g | Vitamin A: 34IU | Vitamin C: 17mg | Calcium: 34mg | Iron: 0.4mg

This article was researched and written by Urvi Dalal.

The post Instant Ragi Dosa | Crispy and Lacy Finger Millet Dosa appeared first on My Food Story.
Easy Kung Pao Chicken Recipe

This Kung Pao Chicken is spicy, sour, sweet and salty and everything we love about Indo-Chinese food! It’s easy, comes together quickly, has the same takeout style flavor, and makes for the best weeknight meal.

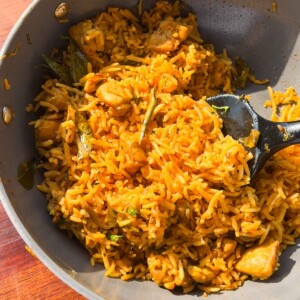
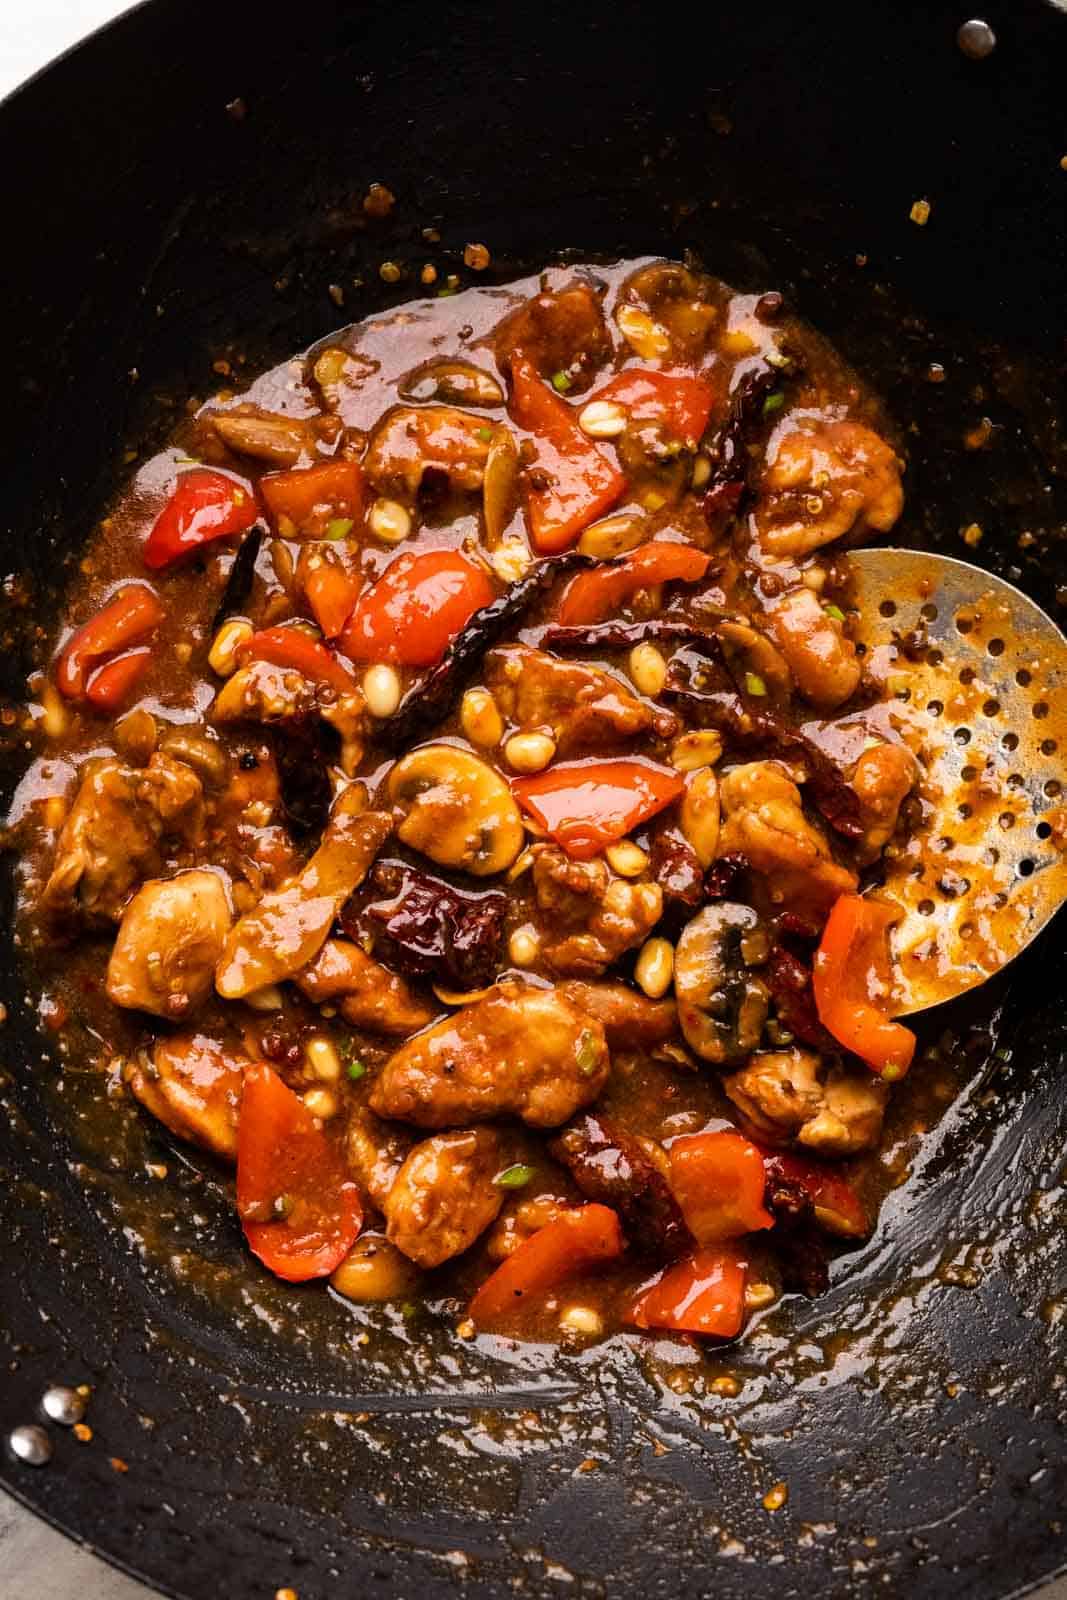
Kung Pao chicken pictures in the wok that it was cooked in with a skimmer

If there’s one takeaway dish I never get tired of, it’s Kung Pao Chicken. I love how it comes together in under an hour with simple pantry ingredients, yet tastes like something you’d order from your favourite Chinese restaurant. It’s saucy, packed with flavour, and one of those recipes that disappears from the dinner table every single time. We are talking BIG flavours here!

In the authentic Chinese version, Kung Pao or Kung Bo is usually a dry stir fry served as an appetiser or accompaniment.Β  But we made an Indianised version, so it’s got more sauce, mushrooms and peanuts. I promise, it’s just as good!

Kung Pao Chicken Ingredients

  • Red Chilli Paste: Dry red chilli paste is just what this kung pao stir fry needs for a hit of spice. It’s a simple blend of soaked dry red chillies and water. I’ve used the seeds of the chillies in the sauce for extra heat. If you want to reduce the heat level, just remove the seeds of the chillies before blending.
  • Kung Pao Sauce: This Chinese spicy chicken has a spicy sweet salty gravy which is dangerously addictive. The sauce is a perfect balance of soy sauce, vinegar, hot sauce, ketchup, sesame oil and lemon juice.
  • Dried Red Chillies – For an extra spicy, smoky hit.
  • Sichuan Peppercorns: These keep you coming back for more!
  • Chicken: Boneless thigh pieces stay juicy and tender through the high cooking temperatures of Indo-Chinese cooking.
  • Corn flour: Used in the marinade as well as the sauce. It helps to make crisp up the chicken pieces as well thicken the sauce and lend a glossy sheen.
  • Veggies: Mushrooms and onions for texture and flavor
  • Aromatics: Finely chopped ginger and garlic
  • Peanuts: Roasted for extra texture and a lovely nutty flavor. You can replace peanuts with cashews for a slightly different flavor.
  • Spring onion greens: Used as garnish for freshness

Frequently Asked Questions

What does kung pao chicken taste like?

Kung pao chicken is mildly sweet, sour, savory, and has a signature spicy kick from Sichuan peppercorns. Basically, it’s like a party in your mouth and totally addictive!

Can I use chicken breast instead of chicken thighs?

Yes. Chicken breast works well, but it cooks faster and can dry out more easily. Keep an eye on the cooking time and avoid overcooking.

Why is baking soda added to the marinade?

A small amount of baking soda helps tenderise the chicken, giving it the soft, velvety texture that’s common in restaurant-style stir-fries.

Can I add other vegetables?

Yes. Bell peppers, broccoli, baby corn, zucchini and snap peas all work well. Stir-fry them on high heat so they stay crisp.

Richa’s Top Tips

  • Adjust the spice to suit your tolerance. I’ve made this kung pow chicken extra spicy coz that’s how I roll, but you can adjust spice levels according to your preference!
  • Don’t skip the marinade. Even 30 minutes makes a noticeable difference. The baking soda helps tenderise the chicken, while the cornflour creates a light coating that gives the sauce something to cling to.
  • Cut the chicken into evenly sized pieces. This ensures everything cooks at the same rate, which is very important for the quick cook times of Indo-Chinese cuisine.
  • Fry the chicken in batches. If you’re making a large batch, then it’s best to cook the chicken in smaller batches. Overcrowding the wok lowers the oil temperature, causing the chicken to steam instead of turning golden.
  • Keep the heat high while stir-frying. High heat cooks the vegetables quickly so they stay crisp and helps the sauce reduce into a glossy coating instead of becoming watery.
  • Have everything prepped before you start. Everything moves really quickly once you start cooking. So keeping everything ready before you start ensures a smoother cooking process.
  • Make it vegetarian or vegan by swapping chicken with paneer or tofu respectively. You can check out my kung pao tofu recipe here.

Storage Tips

  • Refrigerate: Store leftovers in an airtight container in the refrigerator for up to 3 days.
  • Reheat: Warm in a hot pan for a few minutes until heated through. Add a splash of water if the sauce has thickened too much. You can also microwave it in short bursts, stirring halfway through.
  • Freeze: Freeze for up to 2 months. Thaw overnight in the refrigerator before reheating. The mushrooms will soften slightly after freezing, but the flavour will still be great.
  • Make ahead: You can marinate the chicken and prepare the sauce a day in advance. Store both separately in the refrigerator and stir-fry just before serving.

Serving Ideas for Kung Pao Chicken

  • Steamed jasmine rice: The classic pairing. The fluffy rice soaks up all the delicious sauce and balances the bold flavours of the stir-fry. You can also serve with plain steamed rice for an equally delicious meal.
  • Fried rice or noodles: Egg fried rice, hakka noodles, chilli garlic noodles, basil fried rice are some classic Indo-Chinese sides that really complement the sweet, savory spicy notes of kung pao chicken.
  • Stir-fried greens: Serve alongside bok choy, Chinese greens, broccoli or green beans for an easy way to add more vegetables to the meal.
  • Asian-inspired sides: Pair it with spring rolls, momos, bao, or a light cucumber salad for a complete takeout-style spread.
  • Lettuce wraps: Spoon the chicken into crisp iceberg or butter lettuce leaves for a lighter meal or appetiser.

Garnish Kung Pao Chicken with chopped spring onions and serve with steamed rice or noodles!

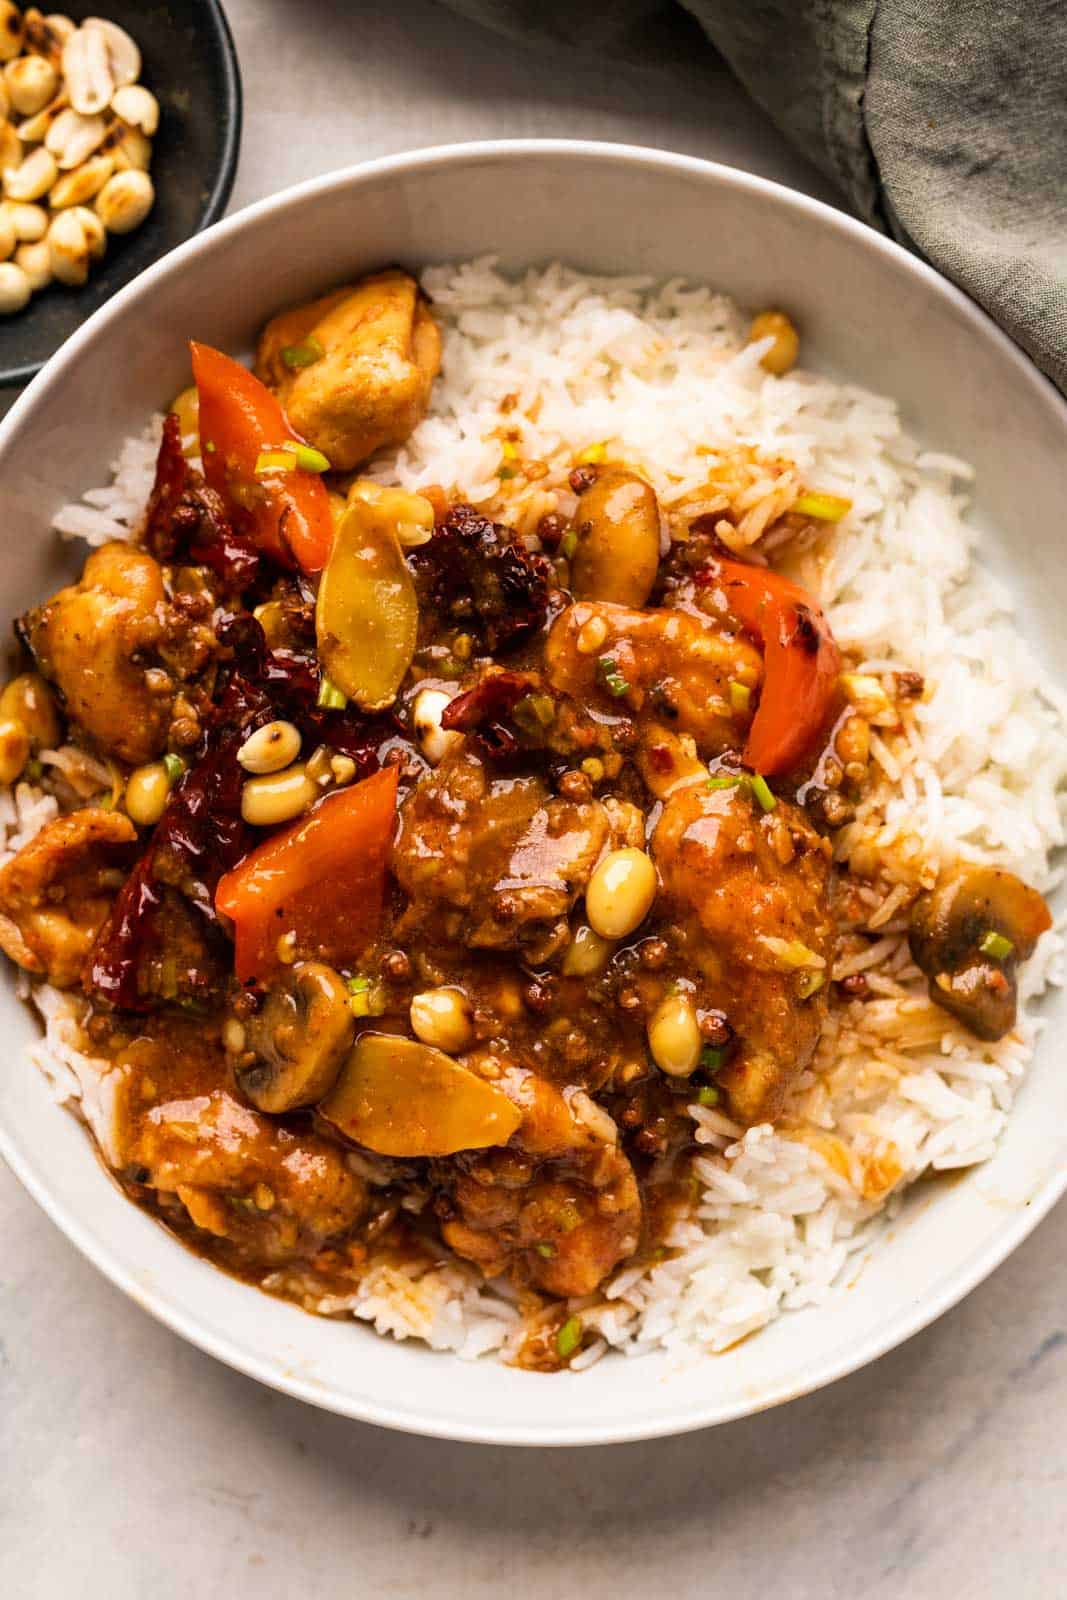
Kung Pao Chicken served over rice in a bowl with peanuts on the side

This kung pao chicken recipe is so easy, delicious, and addictive that I’ll be you won’t be able to stop making it. We make it nearly every other week, and we’re still not bored. It’s quick, flavour-packed, and one of the BEST Indo-Chinese dishes you can make at home.

If you try this recipe, DM me pictures over on my IG or tag me in your stories at @my_foodstory.

Watch Kung Pao Chicken Recipe Video

Kung Pao Chicken served over rice in a bowl with peanuts on the side
Print

Saucy Kung Pao Chicken

This Kung Pao Chicken recipe has big, bold flavours from chillies added three ways. There's lots of sauce so that the rice can soak up some of that spice and this can turn into a main dish.
Course Main Course
Cuisine Indian Chinese
Diet Halal
Prep Time 10 minutes
Cook Time 25 minutes
Total Time 35 minutes
Servings 4 people
Calories 390kcal
Author Richa

Ingredients

For marinade

  • 500 gms boneless chicken thighs cut into Β½ inch pieces
  • Β½ teaspoon salt
  • Β½ teaspoon sugar
  • ΒΌ teaspoon baking soda
  • 3 tablespoons cornflour cornstarch
  • 3-4 tablespoons water
  • 1 tablespoon soy sauce
  • Β½ teaspoon crushed pepper

For sauce

  • 1 Β½ tablespoons vinegar
  • 1 tablespoon sugar
  • 2 tablespoons light soy sauce
  • 1 Β½ tablespoons dark soy sauce
  • 2 tablespoons oyster sauce
  • 1 Β½ teaspoons cornflour
  • ΒΎ + β…› cup water

For stir-fry

  • 3 tablespoons sunflower oil or any neutral flavoured oil divided
  • 10 dried red chillies whole
  • 1 large onion cut into petals, approx. 1 cup
  • 2 tablespoons finely chopped garlic
  • 2 teaspoons finely chopped ginger
  • 10 mushrooms halved
  • ΒΌ cup roasted peanuts
  • ΒΎ teaspoon white pepper powder
  • ΒΌ cup cut spring onion greens 1 inch pieces

Instructions

  • In a large bowl add all the ingredients listed under marinade, mix well to combine all the ingredients. Set aside for 30 minutes to an hour.
    500 gms boneless chicken thighs, Β½ teaspoon salt, Β½ teaspoon sugar, ΒΌ teaspoon baking soda, 3 tablespoons cornflour, 3-4 tablespoons water, 1 tablespoon soy sauce, Β½ teaspoon crushed pepper
  • Whisk together all the ingredients for the sauce and set aside.
    1 Β½ tablespoons vinegar, 1 tablespoon sugar, 2 tablespoons light soy sauce, 1 Β½ tablespoons dark soy sauce, 2 tablespoons oyster sauce, 1 Β½ teaspoons cornflour, ΒΎ + β…› cup water
  • Heat oil in a wok or kadai. Once the oil is hot, add chicken pieces and fry for 3 – 4 minutes, turning once or twice till golden brown. Do not over crowd the wok as the chicken pieces tend to stick together. Fry them in batches and set aside.
    3 tablespoons sunflower oil or any neutral flavoured oil
  • To the same wok, add onion petals, red chillies and saute on high for a few seconds till fragrant. Add garlic, ginger and saute on high for a few seconds, add mushrooms and stir fry on high heat for 1-2 minutes and add the fried chicken. Toss for 2 minutes till the chicken absorbs the flavours. Add the sauce, white pepper and toss well on high heat till the sauce coats the chicken. Stir fry for a minute or two and take off the heat. Top with spring onions and serve.
    10 dried red chillies, 1 large onion, 2 tablespoons finely chopped garlic, 2 teaspoons finely chopped ginger, 10 mushrooms, ΒΌ cup roasted peanuts, ΒΎ teaspoon white pepper powder, ΒΌ cup cut spring onion greens

Video

Notes

  1. Keep all ingredients chopped and ready before starting the stir fry process as it has to happen quickly and on high heat.
  2. To make onion petals cut onions into 3/4 inch wide slices, separate each layer of onion to form petals.
  3. Boneless chicken thighs are used in the recipe as they are juicy and tender

Nutrition

Calories: 390kcal | Carbohydrates: 21g | Protein: 31g | Fat: 21g | Saturated Fat: 3g | Polyunsaturated Fat: 3g | Monounsaturated Fat: 13g | Trans Fat: 0.02g | Cholesterol: 119mg | Sodium: 1788mg | Potassium: 690mg | Fiber: 3g | Sugar: 7g | Vitamin A: 424IU | Vitamin C: 6mg | Calcium: 51mg | Iron: 2mg

This article was researched and written by Urvi Dalal.

The post Easy Kung Pao Chicken Recipe appeared first on My Food Story.
One-Bowl Chocolate Cake (Simple Chocolate Cake Recipe)

This is the lushest one-bowl chocolate cake recipe I’ve tested – it’s moist, rich and SO SO chocolatey. And it keeps for days (if you can stop yourself from finishing it right away)!

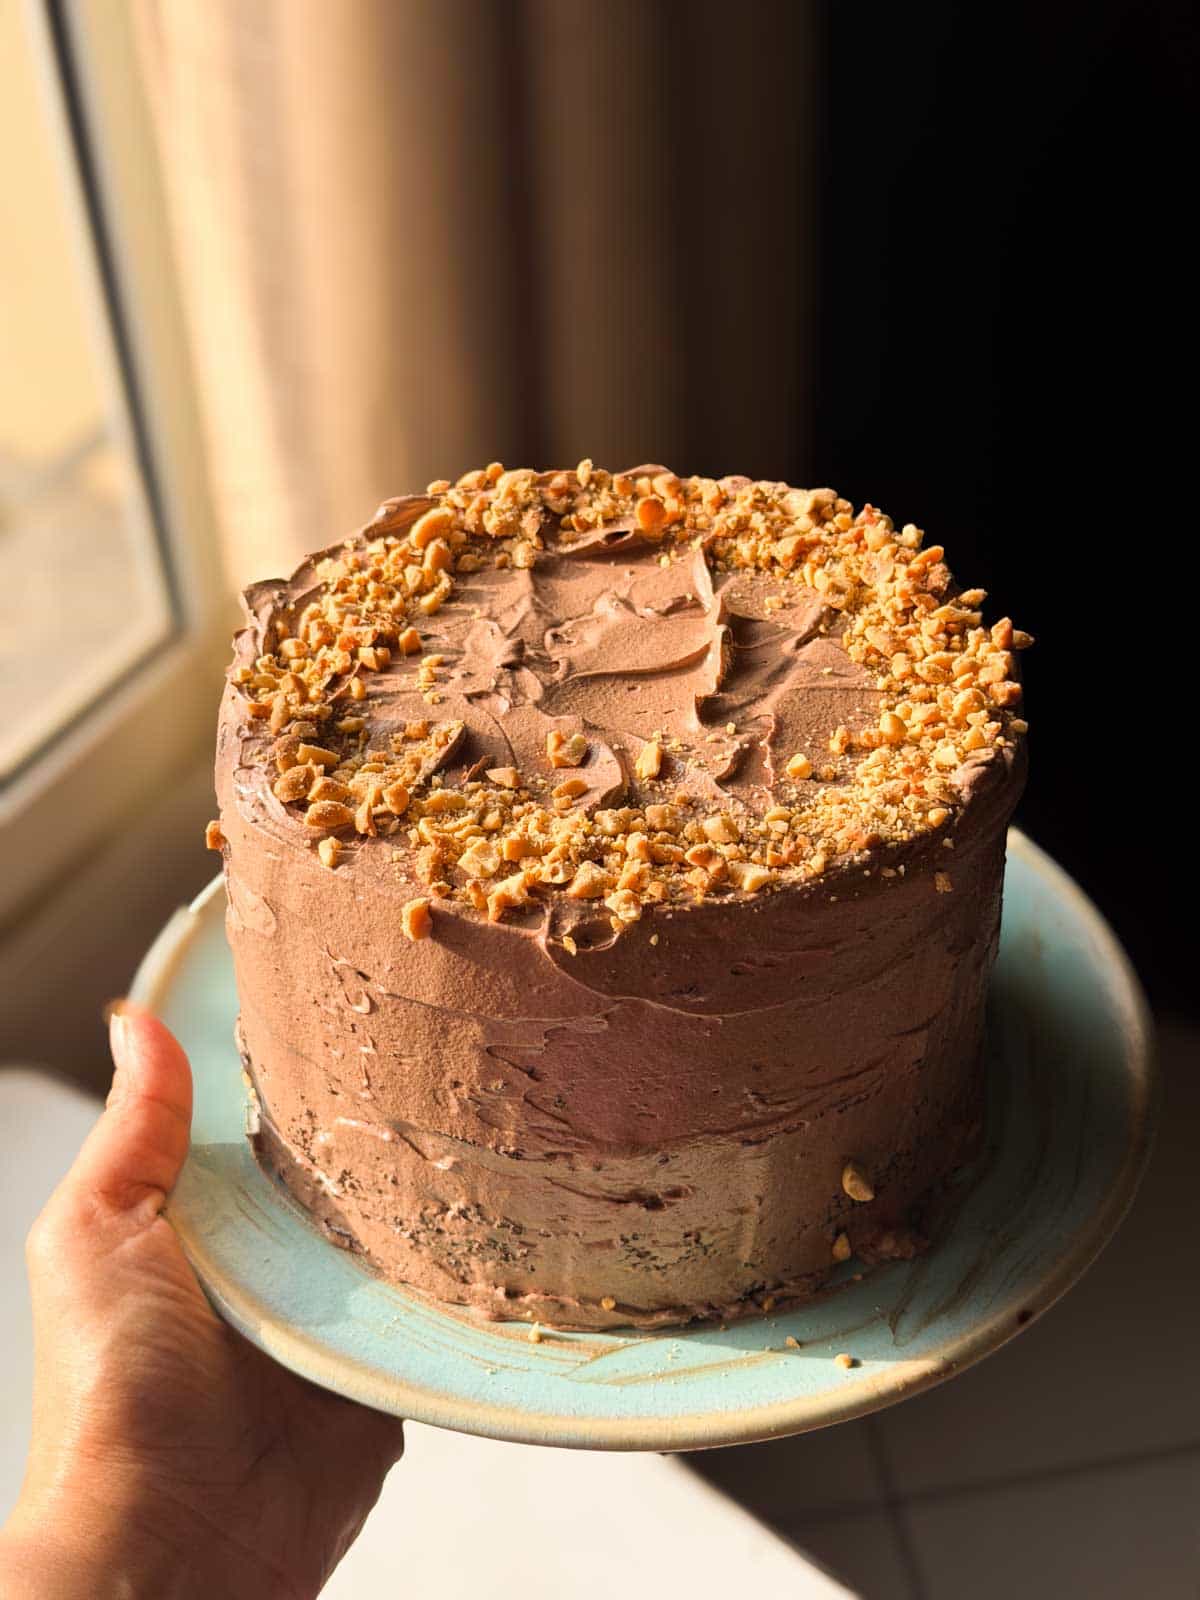
an image of the whole chocolate cake decorated with frosting and crushed nuts

This chocolate cake recipe is hands down THE BEST!It’s one of those fab recipes that’s ridiculously simple because everything gets mixed together in one bowl. Yet it gives you a cake that stays super moist for up to FIVE DAYS! In fact, this simple chocolate cake tastes like it’s freshly baked even days later. Better still, you can make it in both the oven and the air fryer.

Whether you’re baking for a birthday party, packing a treat for the kids’ tiffins, satisfying a random chocolate craving, or just looking for something to enjoy with your evening chai, this cake always delivers. I’ve made it more times than I can count and it’s been a huge hit every single time, especially with that delicious buttercream frosting. So if you’re after an easy, reliable chocolate cake recipe, this is one you’ll definitely want to bookmark!

Chocolate Cake Ingredients

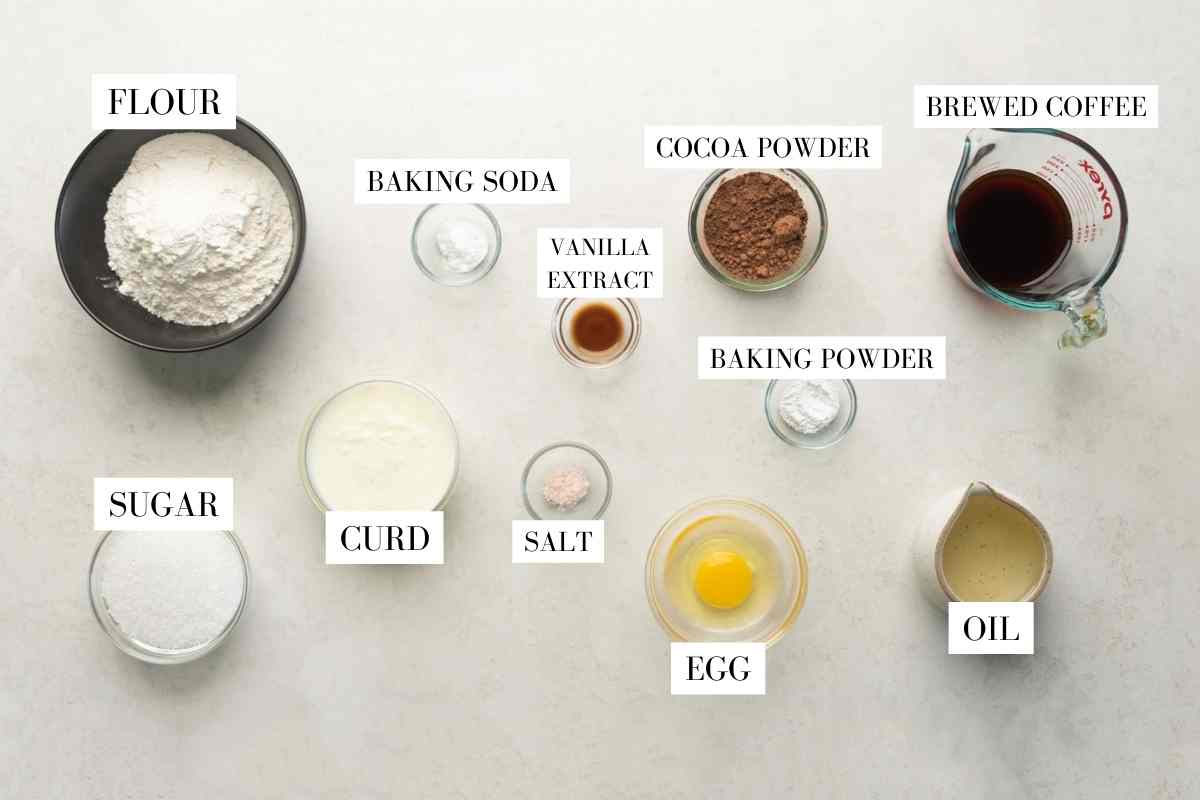
ingredient shot for one bowl chocolate cake

This is one of those recipes where I wouldn’t recommend any substitutes. It’s this proportion and combination of ingredients that create the moist texture that we want in a world-class chocolate cake.

  • All Purpose Flour (Maida) – the base of our cake. I don’t recommend subbing this for atta or gluten free flour since that will affect the texture. Maida keeps our cake light, bouncy, and moist.
  • Cocoa Powder – this is a chocolate cake, after all!
  • Sugar – I use granulated white sugar but you can also use caster sugar or brown sugar here
  • Oil – this ensures our cake stays moist for longer, any neutral flavored oil like canola, sunflower, rice bran works
  • Curd – my secret ingredient! I find that the combination of oil, curd, and egg in a cake batter results in an extra moist texture which is what we want.
  • Egg – for texture and binding. I don’t recommend subbing for a flax egg or making it eggless
  • Hot Black Coffee – an espresso shot or just brewed instant coffee works super well here. Coffee enhances the flavour of the cocoa powder and makes this cake super chocolatey and yum. Don’t add plain coffee powder as the liquid from the brewed coffee helps bring the batter together
  • Salt – just a pinch
  • Baking Powder + Soda – so our cake rises!

Note: the batter will be runny – that’s what we want! Don’t worry about this. Once baked, it’ll be just perfect.

How to make One-bowl chocolate cake:

Here’s a step-by-step guide on how to make the one-bowl chocolate cake:

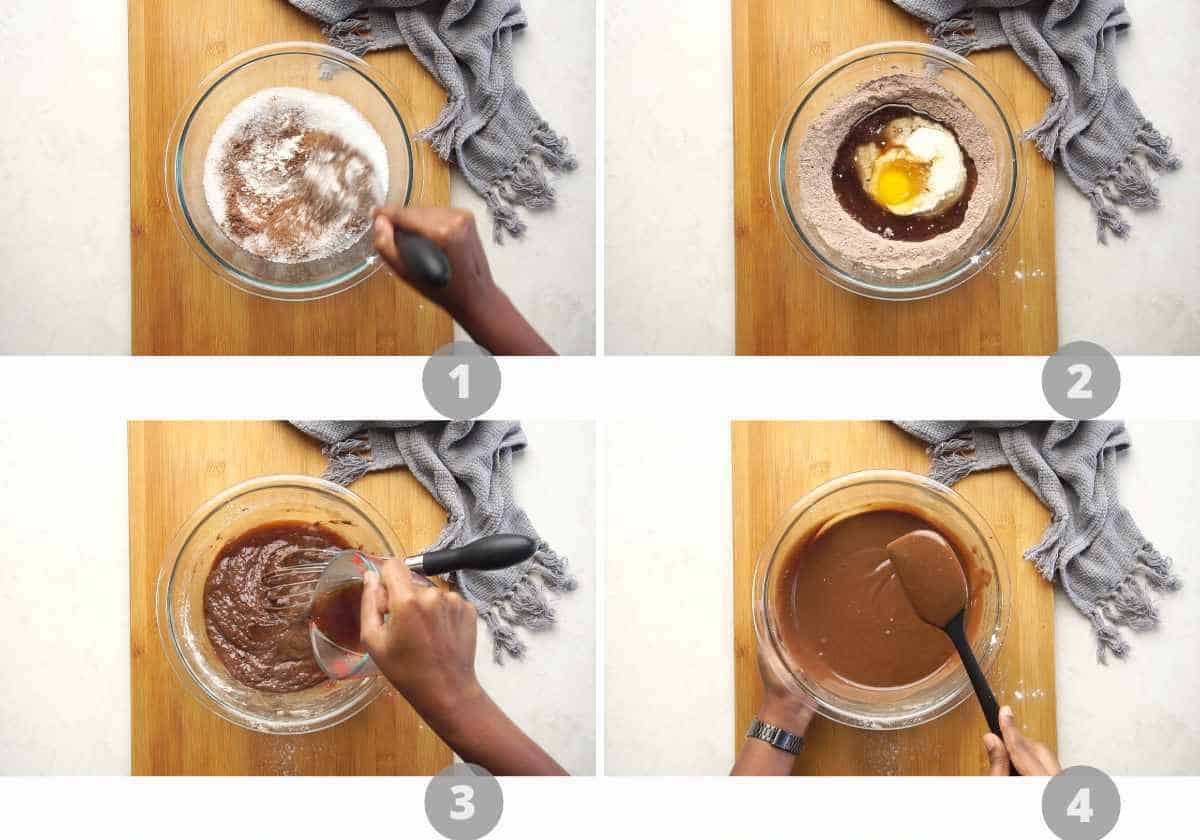
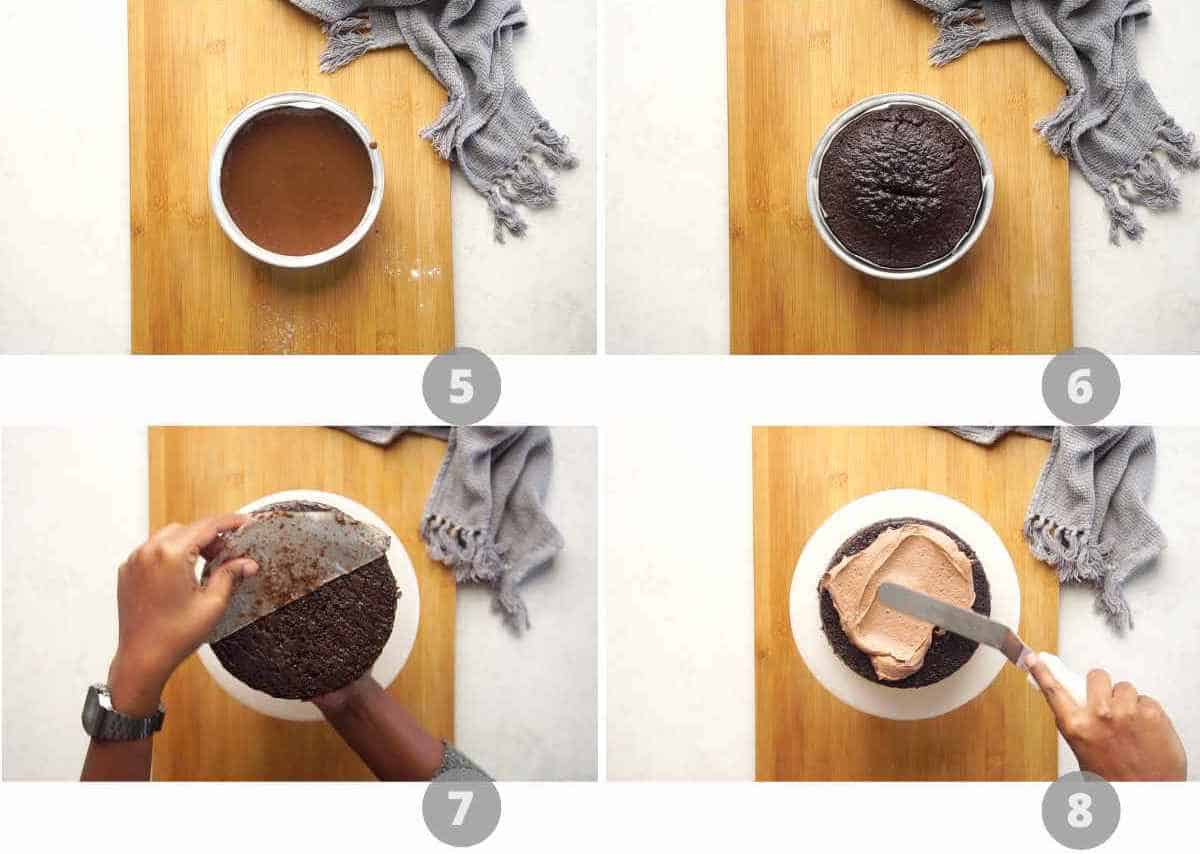
Step by step picture collage showing how to make chocolate cake

1. Add all purpose flour, sugar, cocoa powder, baking soda, baking powder and salt to a bowl. Whisk together until combined.

2. Add vanilla extract, egg, oil and curd. Whisk well until combined, about 1-2 minutes. Scrape the sides of the bowl.

3. Pour in hot coffee.

4. Give it another mix till it’s a smooth, runny batter.

Step by step picture collage showing how to make chocolate cake

5. Pour the batter into lined and greased 6 inch cake mould.

6. Bake at 180C in a preheated oven for 30-40 minutes or till a skewer inserted into the centre comes out clean.

7. Allow it to cool for 15 minutes. Demould, remove the parchment paper and transfer to a wire rack.

8. Allow it to cool completely before serving or frosting.

I like serving mine with a quick chocolate buttercream frosting but this also works great on its own or with a layer of Nutella and chopped berries on top.Β 

Frequently Asked Questions

1. Is there any difference in baking this cake in the air fryer vs the oven?

The oven will have a longer preheat time, although I recommend that you preheat your air fryer for a couple minutes as well. We want to bake our cake until a knife comes out clean. The overall baking time range is 30-40 mins.Β 

2. Can I sub curd for Greek yogurt?

Yes, these can be substituted 1:1 easily. Just use non sweetened, non flavored greek yogurt.Β 

Can I skip the coffee?

Yes. The coffee doesn’t make the cake taste like coffee. It simply enhances the chocolate flavour.

Can I make this cake without eggs?

This recipe has only been tested with an egg, so I can’t guarantee the same texture with an egg substitute.

Can I double this recipe?

Yes. You can double the recipe and bake it in a larger cake tin. Keep in mind that the baking time will increase, so start checking for doneness after about 40 minutes.

Richa’s Top Tips

  • Don’t overmix the batter. Once the wet and dry ingredients are combined, mix just until smooth. Overmixing can make the cake dense.
  • Scrape the bowl before adding the coffee. This ensures there aren’t any pockets of dry flour hiding at the bottom or sides.
  • Measure the flour correctly. Spoon the flour into your measuring cup and level it off instead of scooping directly from the container. Too much flour can make the cake dry.
  • Don’t worry about the thin batter. The batter will be quite runny after adding the coffee, and that’s exactly how it should be.
  • Cool the cake completely before frosting. Even if it feels only slightly warm, frosting can melt and slide off.

Storage Tips

  • At room temperature: Store the cake in an airtight container for up to 2 days.
  • In the refrigerator: Keep it in an airtight container for up to 5 days. And before serving, let it sit at room temperature for 20-30 minutes for the best texture.
  • To freeze: Wrap the completely cooled cake (whole or in slices) tightly in cling film followed by foil, or place it in a freezer-safe container. Freeze for up to 2 months. Thaw overnight in the refrigerator or at room temperature before serving.
  • If frosting the cake later: Wrap the cooled cake tightly and store it at room temperature or in the fridge until you’re ready to frost. This helps keep it moist and prevents it from drying out.
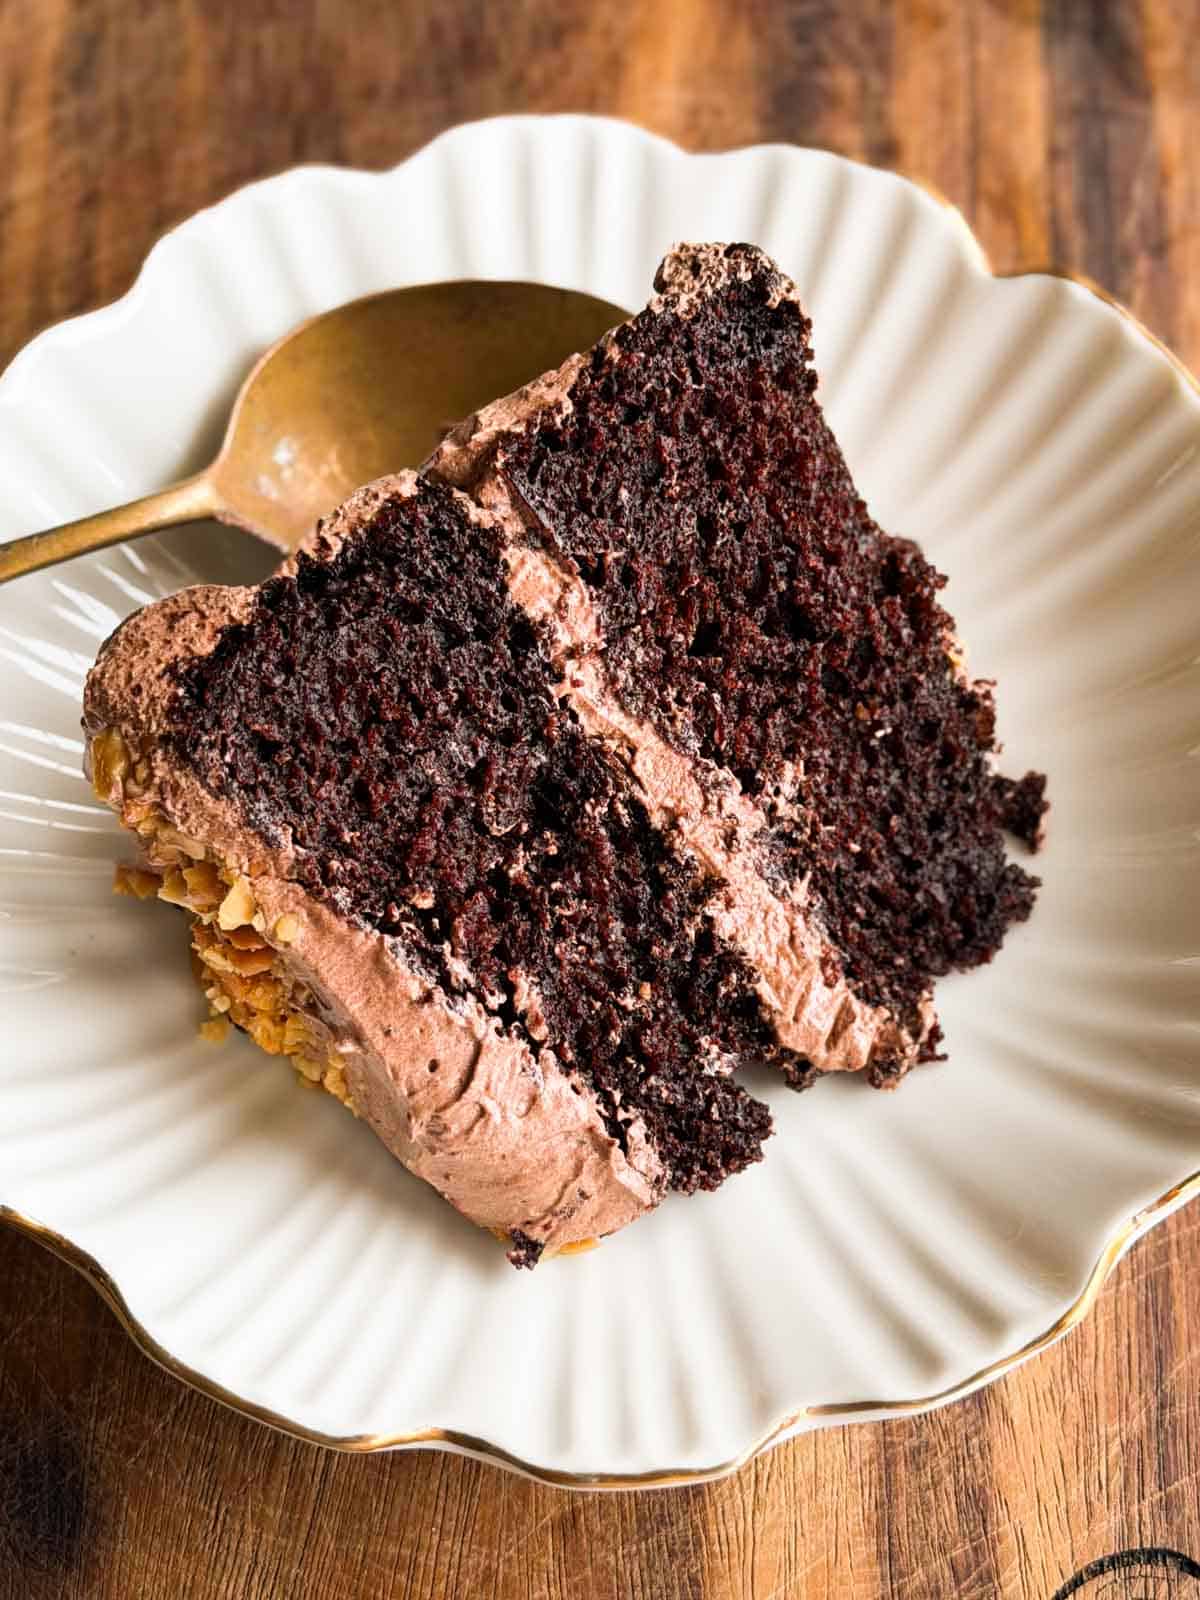
a slice of the one bowl chocolate cake served on a white dish with a spoon

I think we all need our hands on a fool-proof simple chocolate cake recipe when those sweet tooth cravings come up. Trust me, this is THAT recipe! And if you want to an activity to do with the kiddos, baking this cake is also perfect for that.

Watch This Simple Chocolate Cake Recipe Video

a slice of the one bowl chocolate cake served on a white dish with a spoon
Print

One-Bowl Chocolate Cake

This one-bowl chocolate cake uses everyday ingredients and stays moist for days!
Course Desserts
Cuisine American, Continental
Prep Time 10 minutes
Cook Time 40 minutes
Resting Time 30 minutes
Total Time 1 hour 20 minutes
Servings 6 people
Calories 370kcal
Author Richa

Ingredients

  • 1 cup All Purpose Flour 125 grams
  • 3/4 cup Sugar 150 grams
  • 1/4 cup Cocoa Powder 32 grams
  • 1 tsp Baking Soda
  • 1/2 tsp Baking Powder
  • 1/4 tsp Salt
  • 1 tsp Vanilla Extract
  • 1 Egg
  • 1/2 cup Oil 125 millilitres
  • 1/2 cup Curd or Yogurt 130 millilitres
  • 1/2 cup Hot Black Coffee 1 Teaspoon Coffee dissolved in 1/2 cup of hot water

Instructions

  • Line and grease a 6 inch tin with parchment paper. Preheat the oven to 180C
  • Add all purpose flour, sugar, cocoa powder, baking soda, baking powder and salt to a bowl. Whisk together until combined.
  • Add vanilla extract, egg, oil and curd. Whisk well until combined, about 1-2 minutes. Scrape the sides of the bowl.
  • Pour in hot coffee and give it another mix till it's a smooth, runny batter. Bake at 180C for 30-40 minutes or till a skewer inserted into the center comes out clean.
  • Allow it to cool for 15 minutes. Demould and transfer to a wire rack and allow it to cool completely before serving or frosting.

Video

Nutrition

Calories: 370kcal | Carbohydrates: 44g | Protein: 5g | Fat: 21g | Saturated Fat: 2g | Polyunsaturated Fat: 6g | Monounsaturated Fat: 12g | Trans Fat: 0.1g | Cholesterol: 30mg | Sodium: 336mg | Potassium: 130mg | Fiber: 2g | Sugar: 26g | Vitamin A: 60IU | Vitamin C: 0.1mg | Calcium: 57mg | Iron: 2mg

This article was researched and written by Urvi Dalal.

The post One-Bowl Chocolate Cake (Simple Chocolate Cake Recipe) appeared first on My Food Story.
48+ amazing Rice Recipes for every mood

Everyone loves rice, and these rice recipes range from quick everyday meals to show-stopping dishes. Whether you’re looking for a side or a main, there’s something here for every occasion.

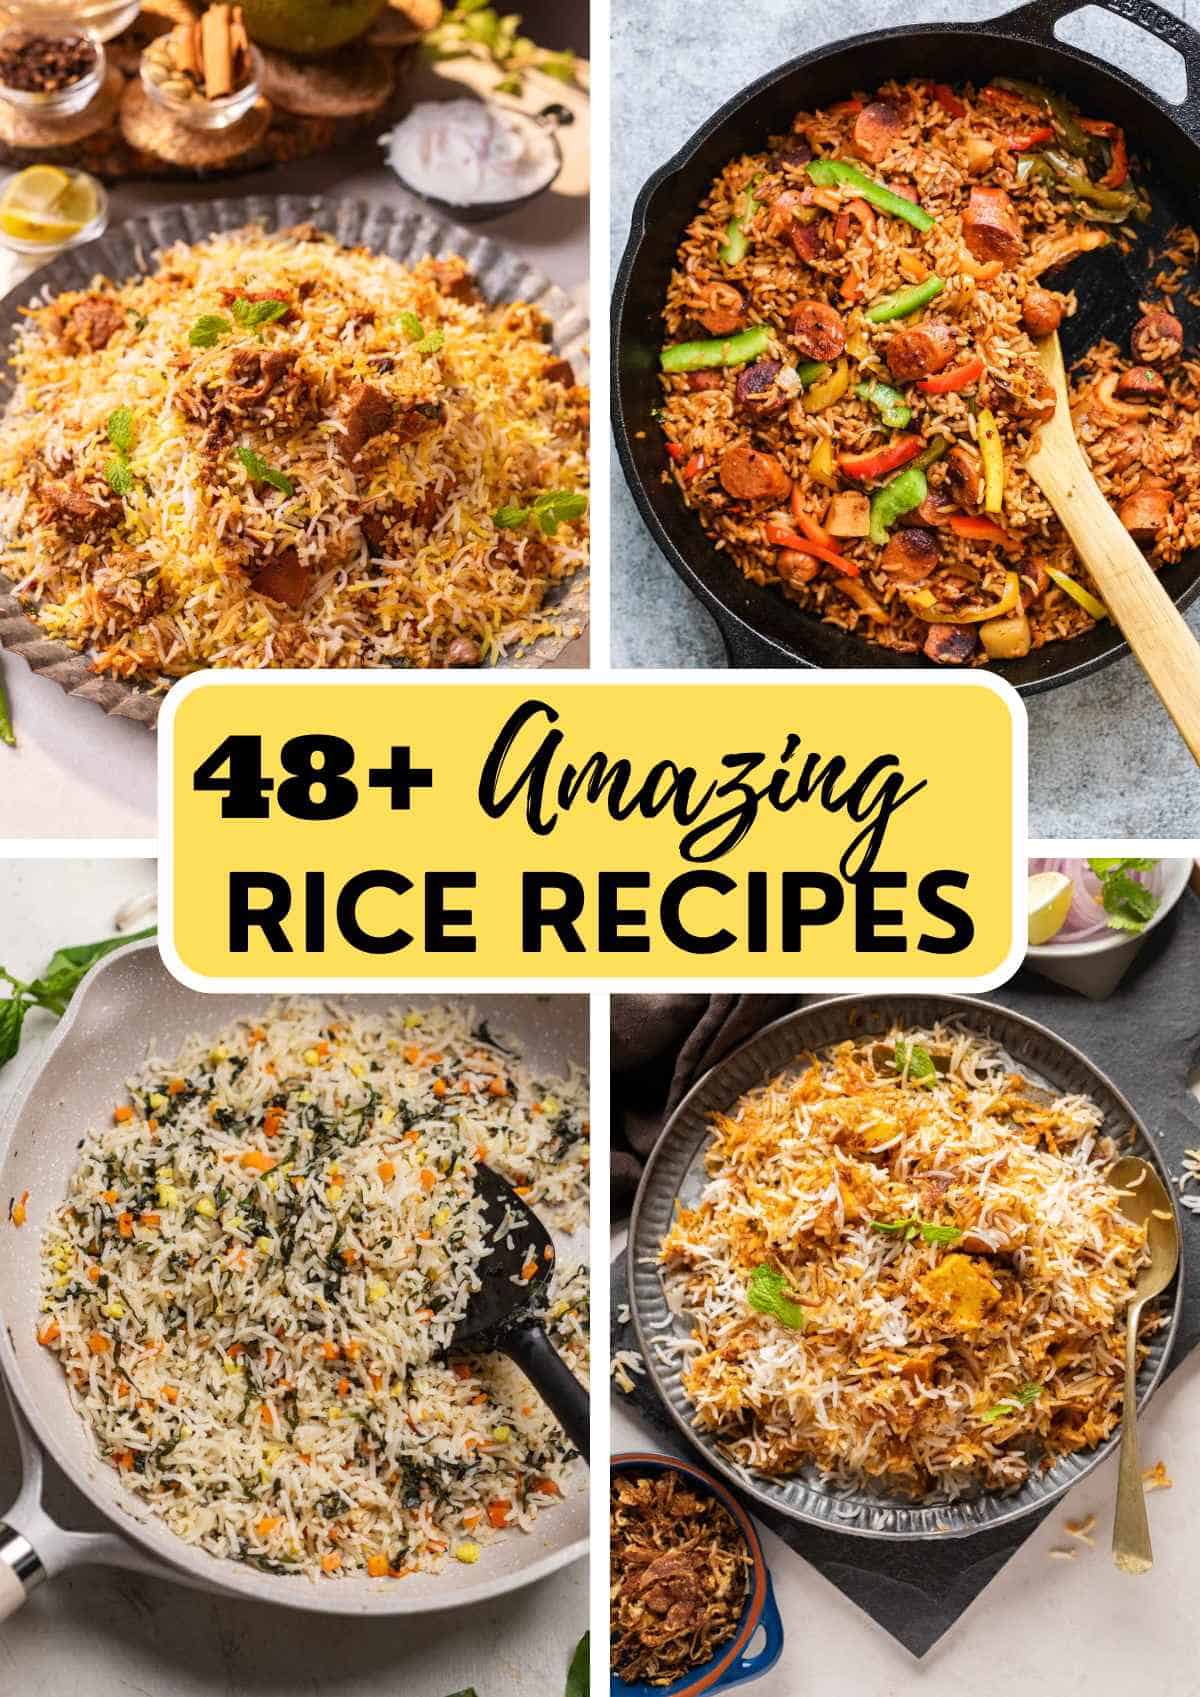
a collage of 4 rice recipes with text overlay

Rice has the ability to become an instant comfort food or a fragrant bowl of something that you just want to inhale. No matter what the occasion or the amount of effort you want to put in, I’ve got something on this list for everyone. From main rice dishes to fried rice, biryanis, pulaos, and even desserts, these are the only rice recipes you will ever need.

The thing with rice dishes is how easy they’re to serve. So, you can eat them with delicious sides such as curries, raitas or dals for meals that the entire family will love!

This round up also contains plenty of rice meal ideas and one-pot rice dishes for lazy days or pack a punch without putting in too much effort. Plus, the best the thing about making rice is that you can easily double or trip the quantity

Biryani Recipes

Non-veg biryanis

boneless chicken biryani served in a copper handi style bowl
4.84 from 6 votes

Boneless Chicken Biryani | Meghana Style

If you love biryani and fried chicken, this Boneless Chicken Biryani from the famous Meghana's In Bangalore will blow your mind! Super flavorful and layered to perfection, this biryani will become a Sunday ritual!
View Recipe
a close up image of dindigul mutton biryani to show it's texture

Dindigul Style Mutton Biryani

Aromatic and flavor, this dindigul mutton biryani with it's freshly made masala and jeera samba rice makes for a hearty Sunday lunch!
View Recipe
shot of a spoon full of chicken biryani in the instant pot
4.80 from 5 votes

Instant Pot Chicken Biryani

A simple one-pot chicken biryani that doesn't need you to cook the rice and chicken separately! This method is simple and will give you a quick biryani without compromising on the flavour.
View Recipe
Egg Biryani served on a white platter with onion raita on the side

Kerala Style Egg Biryani

This Kerala Style egg biryani or mutta biryani has a slightly different flavour profile than most biryani recipes because of the spices used in the recipe. It's really easy to make, and a fantastic way to feed a big family or a crowd. Also eggs work so well in a biryani that you really won't miss the meat.
View Recipe
Mutton biryani served on a platter with sliced onions, raita and mirchi salan
5 from 16 votes

Mutton Biryani

My Mutton Biryani recipe will give you fantastic results every single time. It needs a little time and effort but you'll be rewarded with juicy, flavourful, tender pieces of meat and really fragrant rice.
View Recipe
Chicken Biryani served on a platter with crispy fried onions and onion raita.
4.90 from 154 votes

The Best Chicken Biryani (Step by step video recipe)

Watch Recipe Video ABOVE for step by step directions. This homemade chicken biryani recipe is easier than you think. I have broken down the entire recipe into a step by step process so that you can make this at your own pace. This biryani recipe is closest to Hyderabadi Biryani where chicken and rice are layered to make the most fragrant, and well spiced biryani.
View Recipe

Vegetarian biryanis

Closeup of veg biryani in the pot after a few spoonfuls have been served
4.86 from 14 votes

Restaurant Style Veg Biryani

Insanely delicious veg biryani is a great alternative for vegetarians. This recipe is so good that even meat lovers will be impressed! It's the perfect family style meal. My tips and tricks will make sure you have the perfect vegetarian biryani every single time.
View Recipe
Paneer Biryani served on a grey plate with fried onions on the side
5 from 3 votes

Paneer Makhani Biryani

This Paneer Biryani with Makhani gravy is a unique twist on a vegetarian biryani that combines my love for paneer makhani and biryani! It's got layers of paneer makhani, fragrant basmati rice, mint, coriander and fried onions and every bite is super tasty.
View Recipe
A plateful of mushroom biryani with a spoon on the side and a bowl of raita

Mushroom Biryani

Aromatic, spicy, and just as flavorful as it's non-veg counterparts, this mushroom biryani is a quick and easy vegetarian biryani you won't be able to have enough of!
View Recipe
close up image of veg steamed potli biryani ready to be served

Veg Potli Biryani | Veg Potlam Biryani

Wrapped in a banana leaf and steamed until done, this veg potli biryani is the vegetarian version of parda biryani. It's layered, flavorful, and one of the best veg biryani recipes ever!
View Recipe

Lal Paneer Biryani

This lal paneer biryani is one of the BEST vegetarian biryanis out there! It’s spicy, garlick-y, rich, and creamy, and just absolutely delicious ❀️‍πŸ”₯
View Recipe
gobi 65 biryani served on a plate

Gobi 65 biryani

For this recipe, we have recreated Bangalore's famous gobi 65 in a veg biryani format. It's crispy, spicy, and full of texture!
View Recipe
Veg soya keema biryani served in a brown bowl

Veg Soya Keema Biryani

This Veg Soya Keema Biryani is a rich, layered, packed with flavor, high-protein veg biryani that's 100% vegetarian! Serve with raita and laccha onions for the perfect Sunday meal!
View Recipe
a close up image of jackfruit biryani garnished with mint leaves to show it's fluffy texture
5 from 2 votes

Jackfruit Biryani | Kathal Biryani

This jackfruit biryani packs a punch with juicy jackfruit and big, comforting flavors – mimicking the texture and flavors of meat, but in a 100% vegetarian biryani.
View Recipe

Fried Rice Recipes

Vegetarian recipes

thecha paneer fried rice served in a steel plate

Thecha Paneer Fried Rice

View Recipe
close up of basil fried rice in a pan to show it's fluffy texture

Basil Fried Rice

Super quick and easy, this basil fried rice recipe is a refreshing, herby, garlicky dish that makes for the fastest dinner ever!
View Recipe
Picture of chilli garlic fried rice served on a white and blue plate
5 from 3 votes

Chilli Garlic Fried Rice

The best way to turn leftover rice into something special. Key is the chilli garlic paste that's made from scratch – very low effort but it really adds smokiness and that distinct spicy, chilli flavour to the fried rice.
View Recipe
Picture of fried rice in a white bowl with a spoon
4 from 1 vote

Veg Fried Rice

This 10-minute veg fried rice recipe is a lifesaver when you have only bits and bobs in the fridge. It's a fantastic fridge cleaning meal and a great way to use leftover rice too. Add a fried egg and you've got yourself a fast, easy-winner dinner!
View Recipe
Thai Pineapple fried rice served in pineapple boats
5 from 6 votes

Thai Pineapple Fried Rice

Thai Pineapple Fried Rice is a super quick recipe that's delicious because of all the sweet and spicy flavours. Pair it with a spicy stir fry for a fantastic weekday meal.
View Recipe
burnt garlic mushroom fried rice ready in the wok
4.75 from 4 votes

Burnt Garlic Mushroom Fried Rice

True mushroom lover food – this burnt garlic mushroom fried rice is ready in 15 minutes and packed with flavour!
View Recipe
Picture of chilli garlic fried rice served on a white and blue plate
5 from 3 votes

Chilli Garlic Fried Rice

The best way to turn leftover rice into something special. Key is the chilli garlic paste that's made from scratch – very low effort but it really adds smokiness and that distinct spicy, chilli flavour to the fried rice.
View Recipe
Schezwan Fried Rice from leftover rice served in a white bowl.
5 from 2 votes

Schezwan Fried Rice from Leftover Rice

This is the best chinese schezwan fried rice you’ll make – loaded with vegetables, spicy and super easy! Made with sichuan sauce, it’s the best way to use leftover rice.
View Recipe
colourful rainbow rice in a white pan with a black rubber spatula
5 from 1 vote

Rainbow Rice

This kid-friendly recipe is simple stir-fry rice that has light flavours making it an amazing addition to your child's lunch box!
View Recipe

Non-veg fried rice

Egg Fried rice served in a bowl with a spoon
5 from 6 votes

Egg Fried Rice – Same restaurant style taste!

A few simple tricks and easily available ingredients are all you need to make restaurant style egg fried rice at home!
View Recipe

Side Rice Recipes

a close up image of jeera rice to show it's fluffy texture
4.85 from 52 votes

Perfect Jeera Rice (Indian Cumin Rice)

This recipe for jeera rice (Indian steamed cumin rice) will never fail you! You don’t need a rice cooker or fancy equipment to make this. Just a few ingredients and a pot and you’ll have fluffy, flavorful jeera rice ready in under 10 minutes.
View Recipe
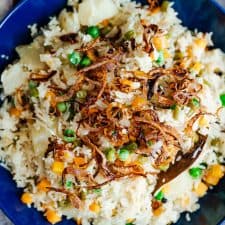
Ghee Rice pictured in the pot that it was made in topped with fried onions and fried cashews
4.75 from 4 votes

How to make Ghee Rice

Ghee Rice is a simple recipe that takes less than twenty minutes to make. Its flavorful, aromatic and a great way to elevate steamed rice if you want something extra on the table!
View Recipe
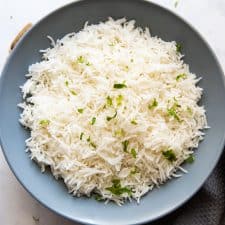
How to cook basmati rice thats served in a bowl in the picture
4.94 from 15 votes

How to cook Basmati Rice 3 ways

Learn how to cook Basmati Rice with my tried and tested methods. This is more like a guide to basmati rice where you can choose from three methods – stovetop, instant pot and traditional pressure cooker.
View Recipe
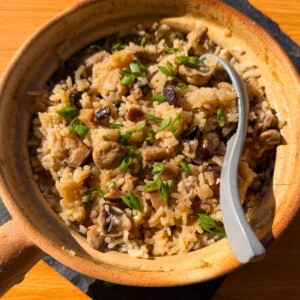
Coconut rice served in a kadhai topped with roasted cashews and curry leaves
4.50 from 2 votes

Coconut Rice

Watch the Recipe Video above. This easy coconut rice is a fantastic side to curries, roasted veggies and meats. In India, it’s even had for breakfast because it really fuels you up. Also a great way to use leftover rice! Its naturally vegan, gluten free and vegetarian.
View Recipe
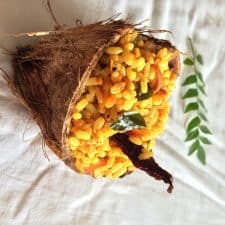
mango rice served in a coconut shell

Mango Rice

Tangy, spicy, vegan one pot mango recipe, made healthier. Great as an accompaniment to curries or stews or can be had just by itself.
View Recipe
Raw mango rice in a kadai with a ladle
5 from 1 vote

Raw Mango Rice

Make the most of mango season with raw mango and turmeric rice. Use brown rice for a healthier alternative to Maavinakayi Chitranna/ Mangai sadham as it is locally called.
View Recipe
Curd rice served on a plate with pickle and fryums
5 from 4 votes

Curd Rice – Summer Special

This curd rice recipe is a must make during hot summer months. Creamy, tangy and so refreshing, curd rice will make summer lunches infinitely better. Easy, comfort food.
View Recipe

Pulao Recipes

Veg Pulao Recipes

Kabuli Chana Pulao served in a bowl with onions and a salad
5 from 1 vote

Kabuli Chana Pulao

Kabuli Chana Pulao is a one pot recipe where spices, chickpeas and rice are cooked together till the rice is fluffy. It’s a delicious weeknight dinner that doesn’t take long to cook and tastes best when paired with raita.
View Recipe
This pressure cooker veg pulao recipe is fragrant, fluffy and perfect every single time! Making this in an instant pot or any other pressure cooker ensures that everything cooks fast. Cooked with whole spices and lots of vegetables, this is the perfect side dish.
5 from 5 votes

Pressure Cooker Veg Pulao (Rice Pilaf)

This pressure cooker veg pulao recipe is fragrant, fluffy and perfect every single time! Making this in an instant pot or any other pressure cooker ensures that everything cooks fast. Cooked with whole spices and lots of vegetables, this is the perfect side dish. Watch Video ABOVE.
View Recipe

Non-veg pulao recipes

chicken pulao in the cooking pan with a ladle

Chicken Pulao with Leftover Rice

This chicken pulao recipe is quick, easy, customisable, and very family-friendly. Eat it with curd or a side of sauteed veggies for a comforting and wholesome meal.
View Recipe
Chicken Pulao served on a grey plate with raita
4.77 from 13 votes

Easy Chicken Pulao

Inspired by the Donne Biryani and made with green masala, this Chicken Pulao Recipe will become a favourite! Spicy, aromatic, this is no regular pulao.
View Recipe

Rice Meals

Veg rice meals

Rice bath served in a grey plate with fryums, poppdum and onions on the side
5 from 2 votes

Kavitha Aunty’s Rice Bath

Rice bath is a typical Karnataka rice dish that has south Indian flavours and the rice is cooked in a green masala with veggies. This is a one pot meal thats easy to put together and is bursting with flavours. Perfect for weeknight dinners!
View Recipe
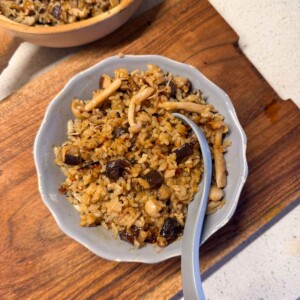
claypot mushroom rice served in a bowl with spoon

Claypot Rice with Mushroom

This claypot mushroom rice is my idea of a perfect weeknight dinner. Everything cooks in one pot, the flavour is incredible, and it takes about 25 minutes from start to finish.
View Recipe
Khichdi served on a black plate with papad, tomato chutney and aloo fry
4.77 from 13 votes

The Khichdi Recipe that’s actually tasty!

Khichdi or khichri is an Indian one pot lentil and rice dish that's vegetarian, easy to digest and wholesome. Done right, it can be incredibly tasty and may become your favourite comfort food. This version can be made in a traditional pressure cooker or an Instant Pot and I have instructions below for both.
View Recipe
Instant Pot mexican rice served in a bowl with letttuce, corn, salsa, jalapenos and lime wedges on the side.
4.67 from 3 votes

Instant Pot Mexican Rice with Corn and Bell Peppers

This Instant Pot Mexican Rice is incredibly flavorful, spicy and super versatile. It can be used as a filling for quesadillas, tacos, burritos, enchiladas or as a side dish with grilled chicken or veggies. We added some corn and bell peppers to make this recipe more hearty!
View Recipe
5 from 1 vote

Patra Rice

Patra rice is an aromatic spiced rice along with a tangy masala enclosed in a banana leaf and cooked to perfection!
View Recipe
picture of tahari rice in a white plate with a steel spoon
5 from 2 votes

Tahari

Tahari, a beloved rice dish in Uttar Pradesh, is a go-to for vegetarians. This one-pot wonder combines rice with winter veggies like potatoes, green peas, and cauliflower. It's a delightful, comforting dish, ideal for those days when you crave something easy yet satisfying!
View Recipe
Healthy Cauliflower Rice Broccoli served piping hot!
4.75 from 8 votes

Healthy Cauliflower Rice Broccoli Casserole

Healthy Cauliflower Rice Broccoli Casserole is a baked casserole dish that is gluten free, keto friendly and has loads of flavor. It’s super cheesy and perfect when you want a complete meal for dinner. This can double up as a side dish or a main dish.
View Recipe
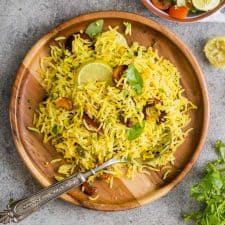
Flavorful lemon rice served on a wooden plate with a spoon.
5 from 2 votes

Easy Lemon Rice (Yellow Rice)

A really simple lemon rice recipe – it’s flavored with lime juice and zest so that the rice really packs a punch and is full of flavor. Made all in one pot from start to finish, this yellow rice is easy to put together and is excellent with raita on the side.
View Recipe
one pot sambar rice scooped up in a ladle from the cooking pot

One-Pot Sambar Rice | Sambar Sadam

One Pot Sambar Rice is a quick and easy rice, lentil and veggie dish from South India. It's spicy, tangy, nutritious, and absolutely yummy and comforting.
View Recipe

Non-veg rice meals

claypot chicken rice with mushroom in the cooking pot with spoon
5 from 1 vote

Claypot Chicken & Rice with Mushrooms (Asian Style)

Hot and comforting, this One Pot Chicken & Rice with Mushrooms has all the umami, savory, and aromatic goodness of Asian cooking. Plus, it's one of the easiest recipes ever!
View Recipe
One Pot Mexican Rice and Sausages served in a cast iron pan
5 from 6 votes

One Pot Mexican Rice and Sausages

One Pot Mexican Rice and Sausages makes for a quick meal which is full of smokey and mexican flavors. You can substitute the sausages with tofu/paneer and add in as many veggies as you want!
View Recipe

Rice Desserts

Festive Chocolate Rice Kheer served in aesthetically pleasing glasses by Chumbak.

Festive Chocolate Rice Kheer (Pudding)

Super easy recipe for a festive chocolate rice kheer pudding made without condensed milk but still really creamy. Perfect for your Diwali dessert table or any other Indian festival. Actually you won’t need a reason to make this one!
View Recipe
A picture of Mum's Gulab Phirni Recipe / Rose flavored Rice Pudding.

Gulab Phirni Recipe / Rose flavored Rice Pudding

Rich rice pudding or phirni flavored with rose petals for that perfect make ahead dessert to wow your guests with.
View Recipe
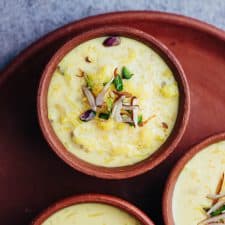
Overhead shot of rice kheer in mud pots
5 from 4 votes

Rice Kheer

This easy rice kheer or chawal ki kheer is probably the most popular Indian dessert there is. Made with long grained basmati rice and sweetened with condensed milk, it’s simple enough that you can make it often, and elegant enough to serve to guests!
View Recipe

The post 48+ amazing Rice Recipes for every mood appeared first on My Food Story.
❌