Reading view

There are new articles available, click to refresh the page.

Mexican Oatmeal Bowl | Savory Oatmeal Recipe

This Mexican oatmeal bowl recipe is savoury, spiced, and loaded with toppings that make it feel more like a taco bowl than a bowl of oats. 
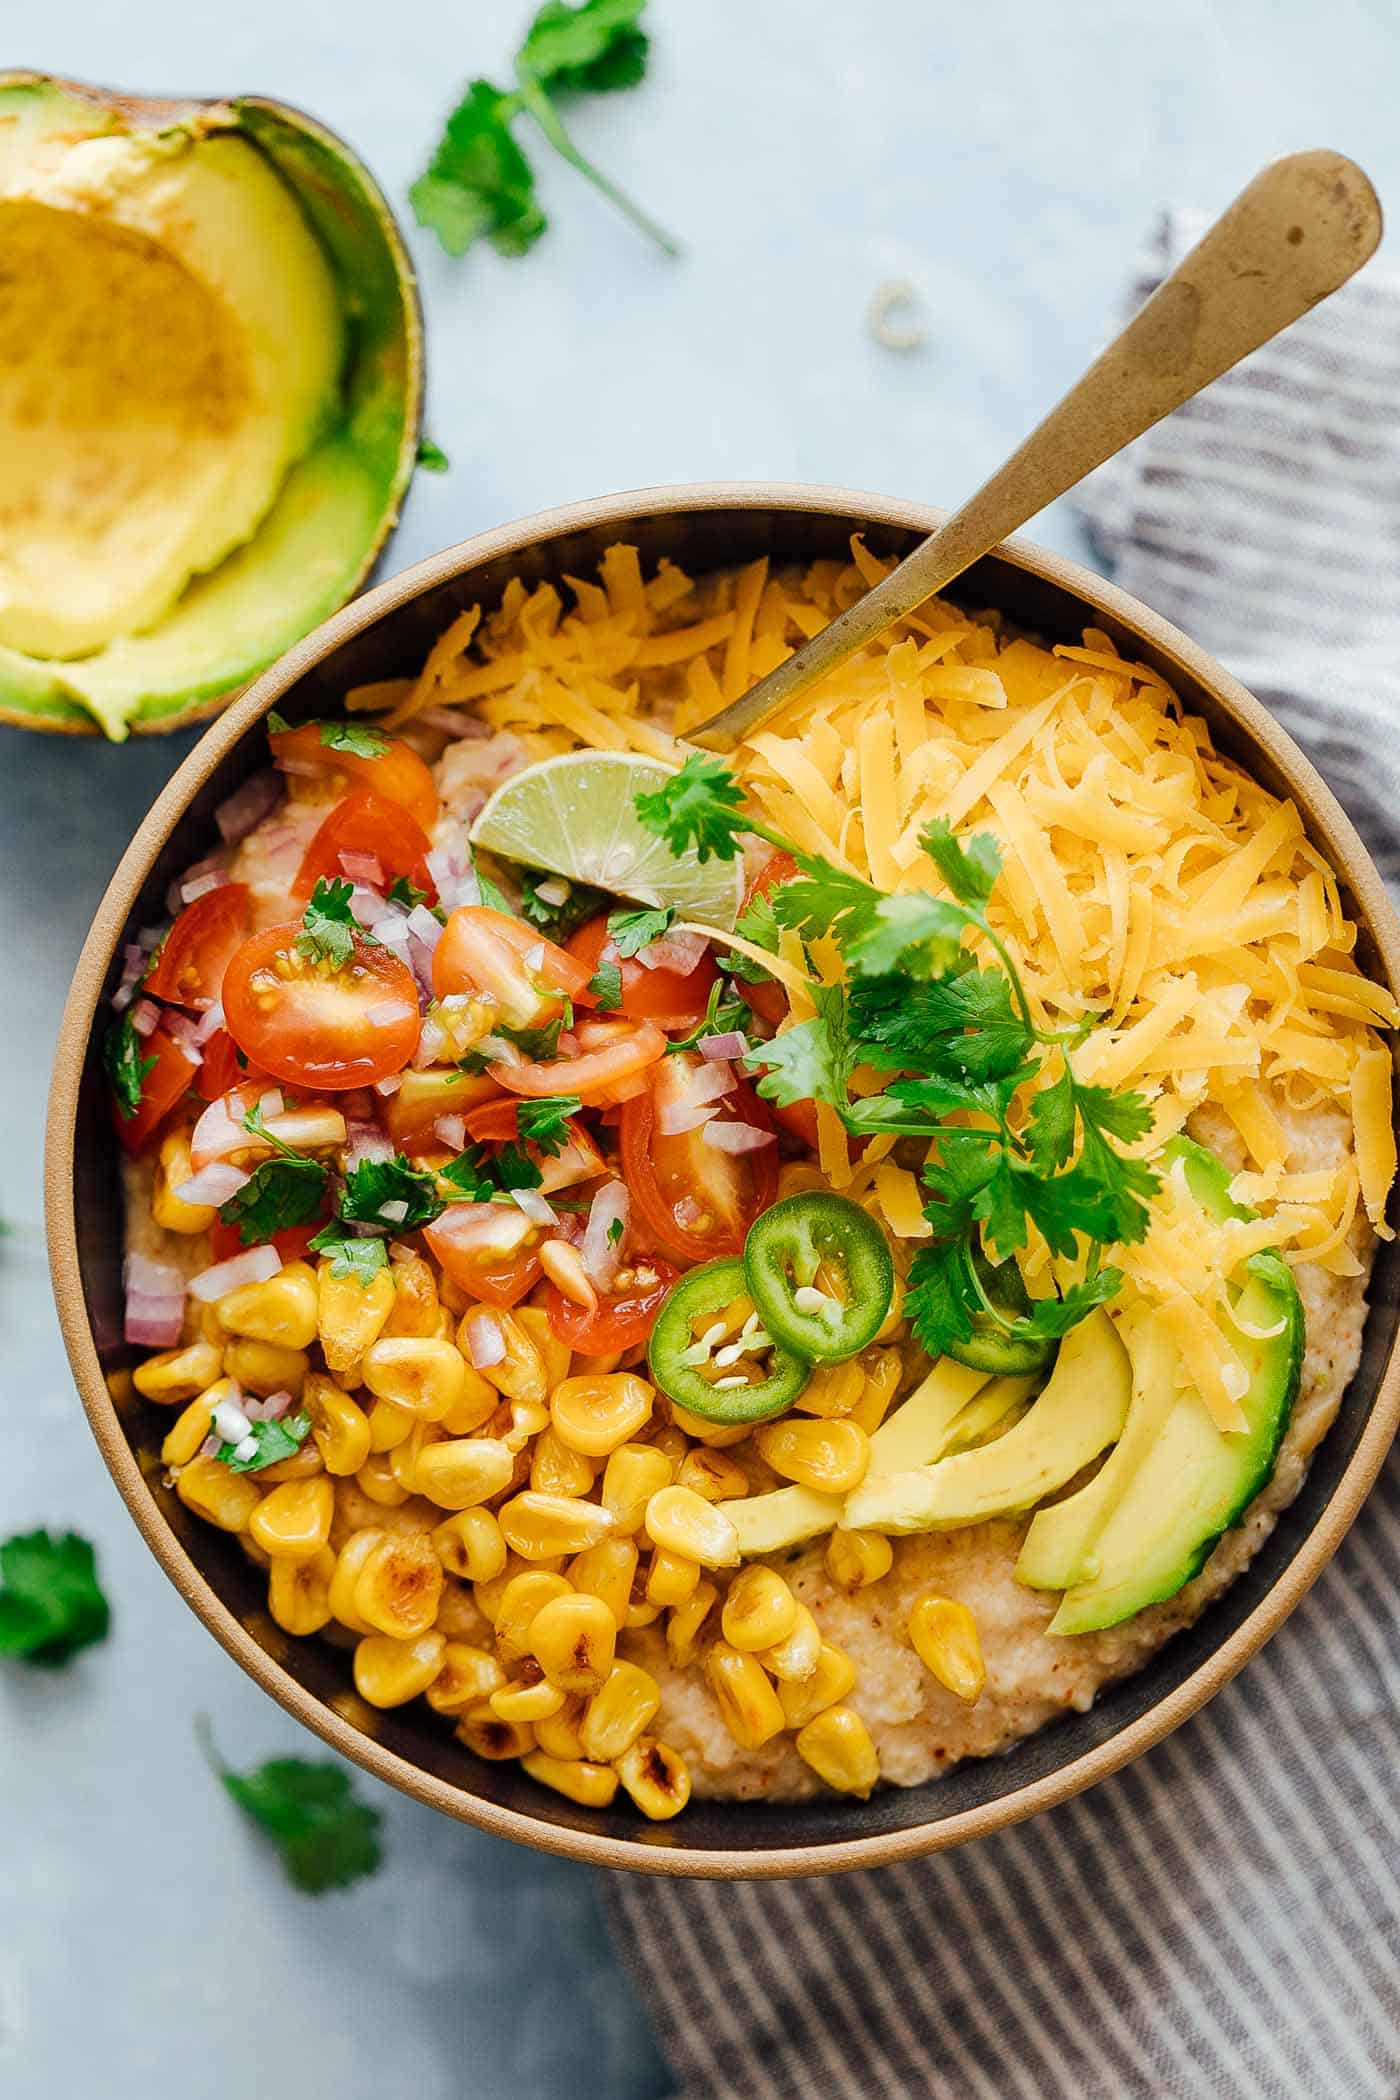
a bowl of mexican oats ready to be served

Oats for breakfast don’t have to mean the same old sweet porridge every morning. This Mexican oatmeal bowl is a really fun way to eat oats if you’ve never tried them savoury before. The oats in the recipe are cooked with garlic, taco seasoning, paprika, and a squeeze of lime, and then topped with things like corn salsa, avocado, cheddar, and jalapenos. It takes about 15 minutes and feels a lot more like brunch than a regular bowl of porridge.

The recipe is completely customisable, so you can top it with whatever you enjoy. If your family already loves our high protein dosa or moong dal chilla for breakfast, this oatmeal bowl makes a really nice change on mornings when you want something quick and different.

Ingredients for Mexican Oatmeal Bowl

Oats: I have used rolled oats which I have pressure cooked to help them cook fast and come to the perfect consistency.

Garlic: Minced and sautéed before the oats go in. 

Seasoning: Taco seasoning, paprika powder, lime juice, and salt. These give the oats their Mexican flavour.

Toppings: Corn salsa, grated cheddar, avocado, and jalapenos. 

Oil: For sautéing the garlic.

Richa’s Top Tips

  • Don’t overcook the oats. They only need 3-4 minutes of simmering after the water comes to a boil. Any longer and they turn gluggy and lose their texture. You want them cooked but still with a little body to them.
  • Adjust the water to get the consistency you like. Some people prefer their oats thick and porridge-like, others like them a little looser. Start with the 2 cups and add more if needed.
  • Make this fresh and eat it immediately. Oatmeal dries out and turns stodgy really fast once it cools. This isn’t a recipe you want to make ahead or save for later. It’s best eaten straight from the pot.
  • Go heavy on the toppings. The toppings are what make this bowl exciting. Don’t hold back on the salsa, avocado, and cheddar. They add freshness, creaminess, and flavour that the oats need.

Frequently Asked Questions

Is this recipe spicy?

It has a mild warmth from the taco seasoning and paprika, but nothing overpowering. If you want more heat, add extra jalapenos on top or a dash of hot sauce. If you’re making this for kids or someone who doesn’t like spice, reduce the taco seasoning slightly and skip the jalapenos.

Do I need to soak my oats before making this recipe?

No. Quick cooking oats don’t need soaking. They cook in just 3-4 minutes once the water comes to a boil. That’s what makes this recipe so quick.

Can I use instant oats or steel cut oats instead?

Steel cut oats need significantly more time and water, so the recipe would need to be adjusted quite a bit. You can use instant oats for the recipe though.

Can I make this vegan?

Yes. Just skip the cheddar or use a plant-based cheese, and make sure your taco seasoning doesn’t contain any dairy. Everything else in the recipe is already vegan.

Storage Tips

  • Best eaten fresh. This is one of those recipes that doesn’t store well. Oatmeal dries out and becomes thick and gluggy as it cools, so make only as much as you plan to eat right away.
  • Freezing: Not recommended for the same reason. The texture won’t come back after freezing and thawing.
  • Prep ahead tip: If you want to speed up your mornings, you can pre-mix the dry seasoning (taco seasoning, paprika, salt) and keep it in a small jar. When you’re ready, just sauté the garlic, add oats, water, the seasoning mix, and you’ll have breakfast ready even faster.

Serving Ideas

These Mexican oats are a complete breakfast on their own, but here are a few ways to make the morning even better:

  • With a Watermelon Lime Smoothie: A cold, refreshing smoothie alongside a warm, savory oatmeal bowl is a really good morning combination.
  • With a cup of Masala Chai: If you want to keep it simple, a hot chai alongside this bowl is all you need.
  • With Air Fryer Poached Eggs on top: A poached egg with a runny yolk over the savoury oats adds protein and makes the bowl even more filling.

Customisation Ideas

  • Add protein: A fried egg, grilled chicken strips, sautéed prawns, or even some black beans on top turn this from a light breakfast into a really filling meal.
  • Swap the toppings: Guacamole instead of plain avocado, pico de gallo instead of corn salsa, or sour cream and pickled onions for a completely different flavour profile. Use whatever you enjoy on your tacos.
  • Make it Indian style: Skip the taco seasoning and add cumin powder, turmeric, and a pinch of chaat masala instead. Top with chopped onions, tomatoes, green chutney, and sev for a desi savoury oats bowl.

Did You Know?

Oats are one of the few grains that actually lower cholesterol. They contain a soluble fibre called beta-glucan that forms a gel-like substance in your gut, which binds to cholesterol and prevents it from being absorbed into the bloodstream. Studies have shown that eating just 3 grams of beta-glucan a day, roughly one bowl of oats, can reduce LDL cholesterol by 5-10%. 

a bowl of mexican oats ready to be served

If you’ve been eating oats the same sweet way every morning, give this savoury breakfast oatmeal bowl a try and see how you feel about savoury oats. I think one bowl is all it’ll take to convert you. Share your bowls with me on Instagram @my_foodstory when you make it.

Watch Mexican Oatmeal Bowl Recipe Video

This Mexican oatmeal bowl is the healthier version of a Mexican breakfast bowl. The oatmeal is seasoned with all the spices that go into your favorite taco, and then topped with salsa, corn, avocado, jalapenos and cheddar. Super simple to make but you’ll feel like a king when you dig into this!
Print

Mexican Oatmeal Bowl

A power packed healthy oatmeal bowl upgraded with Mexican flavours. Added flavours from garlic, lemon and paprika make this meal truly scrumptious.
Course Breakfast
Cuisine Mexican
Prep Time 5 minutes
Cook Time 10 minutes
Total Time 15 minutes
Servings 1 portions
Calories 263kcal
Author Richa

Equipment

Ingredients

  • 1 teaspoon Oil
  • 2 Garlic Cloves minced
  • ¾ cup Quick cooking Oats
  • ½ teaspoon Taco Seasoning refer to Notes
  • ¼ teaspoon Paprika Powder
  • ½ teaspoon Lime Juice
  • 2 cups Water
  • Salt to taste
  • Corn Salsa for topping
  • grated Cheddar for topping
  • Avocado for topping
  • Jalapeno for topping

Instructions

  • Pressure cook oats along with garlic, salt, and water for about 2 whistles on high heat. Turn off the flame allow the pressure to release naturally.
  • Transfer to a bowl and taco seasoning, paprika powder, and lime juice.
  • Top with corn, salsa, grated cheddar, avocado and jalapeno. Serve hot.

Video

Notes

  1. You can substitute Taco seasoning with any Mexican flavoured seasoning readily available at supermarkets.
  2. I have topped my meal with my favourites like corn salsa and avocado. You can top it with any condiments like salsa verde, proteins like – grilled chicken or prawns, chipotle dressing, guacamole etc.,
  3. This is a very quick recipe. Do not prepare it and store it for later as oatmeal can very easily become dry and gluggy

Nutrition

Calories: 263kcal | Carbohydrates: 42g | Protein: 8g | Fat: 8g | Saturated Fat: 1g | Sodium: 30mg | Potassium: 215mg | Fiber: 6g | Sugar: 1g | Vitamin A: 246IU | Calcium: 42mg | Iron: 3mg

This article was researched and written by Harita Odedra.

The post Mexican Oatmeal Bowl | Savory Oatmeal Recipe appeared first on My Food Story.
High-Protein Veg Mayonnaise | Eggless Mayonnaise

If you’ve ever wanted a homemade eggless mayonnaise recipe that uses whole ingredients, zero oil, is high-protein, and actually tastes good, this veg mayonnaise is what you’ve been looking for.

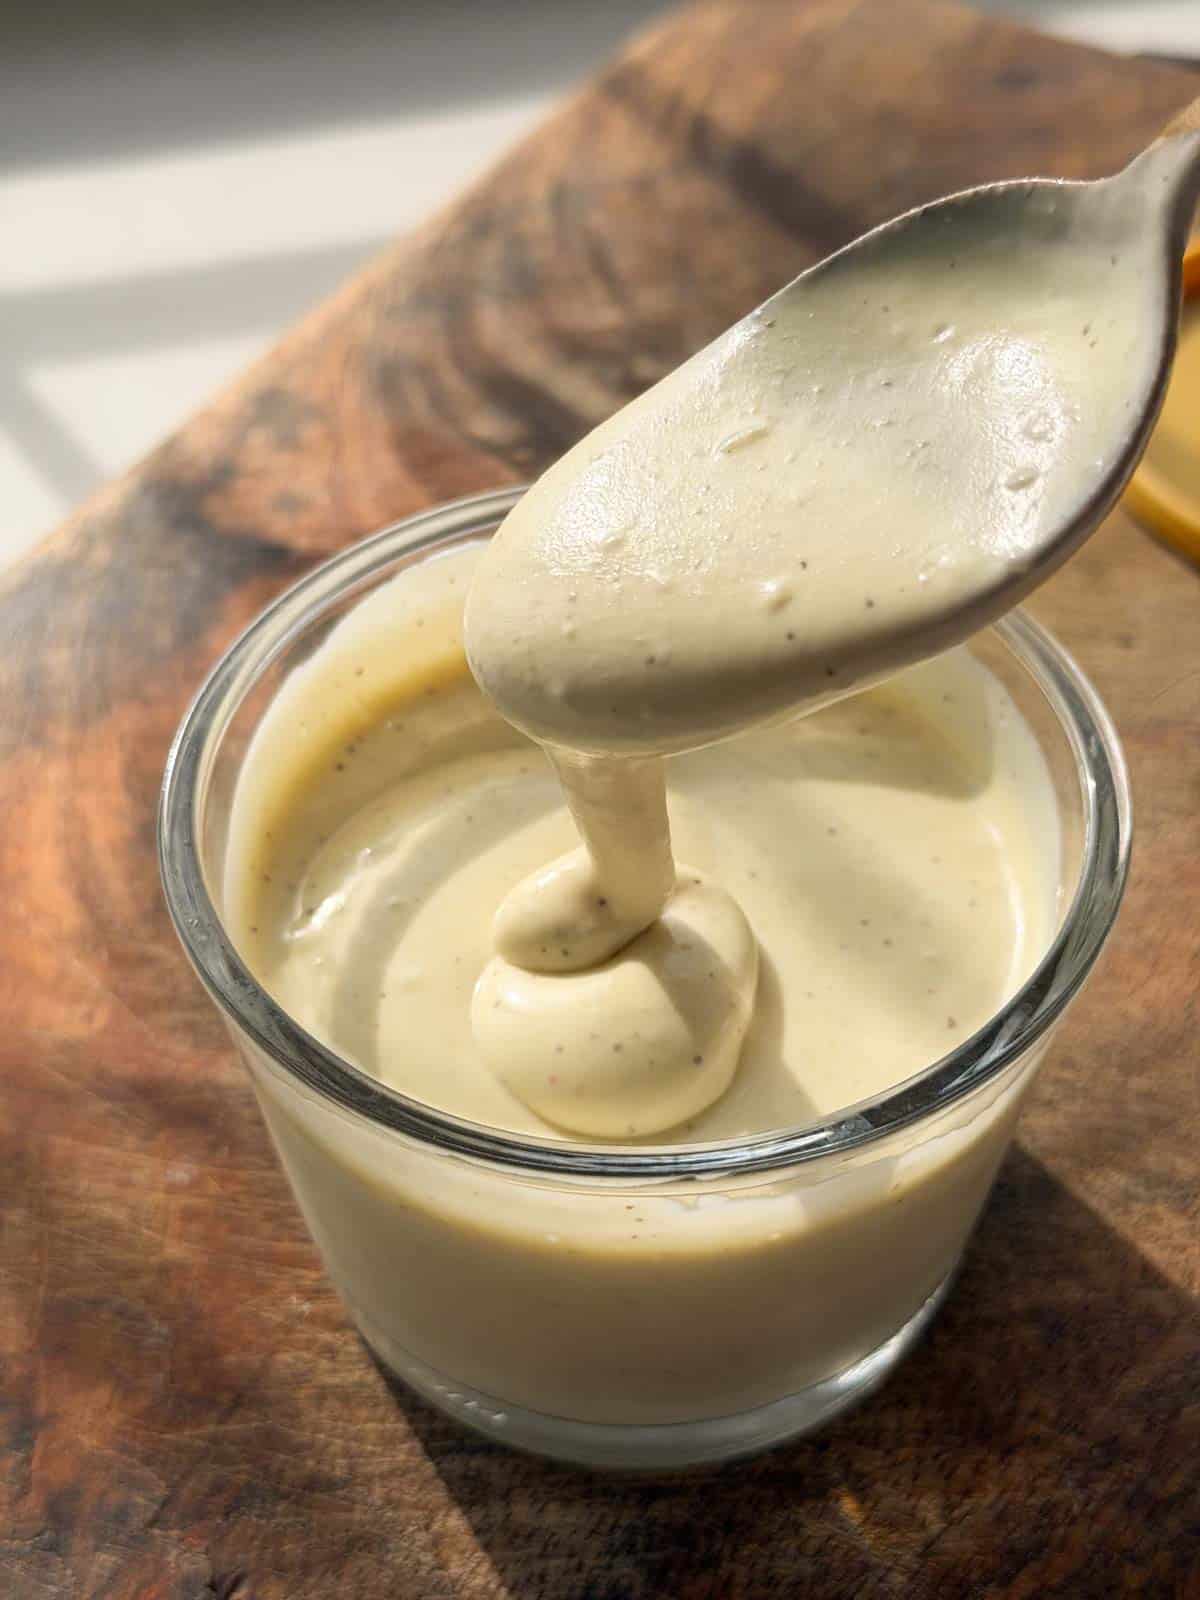
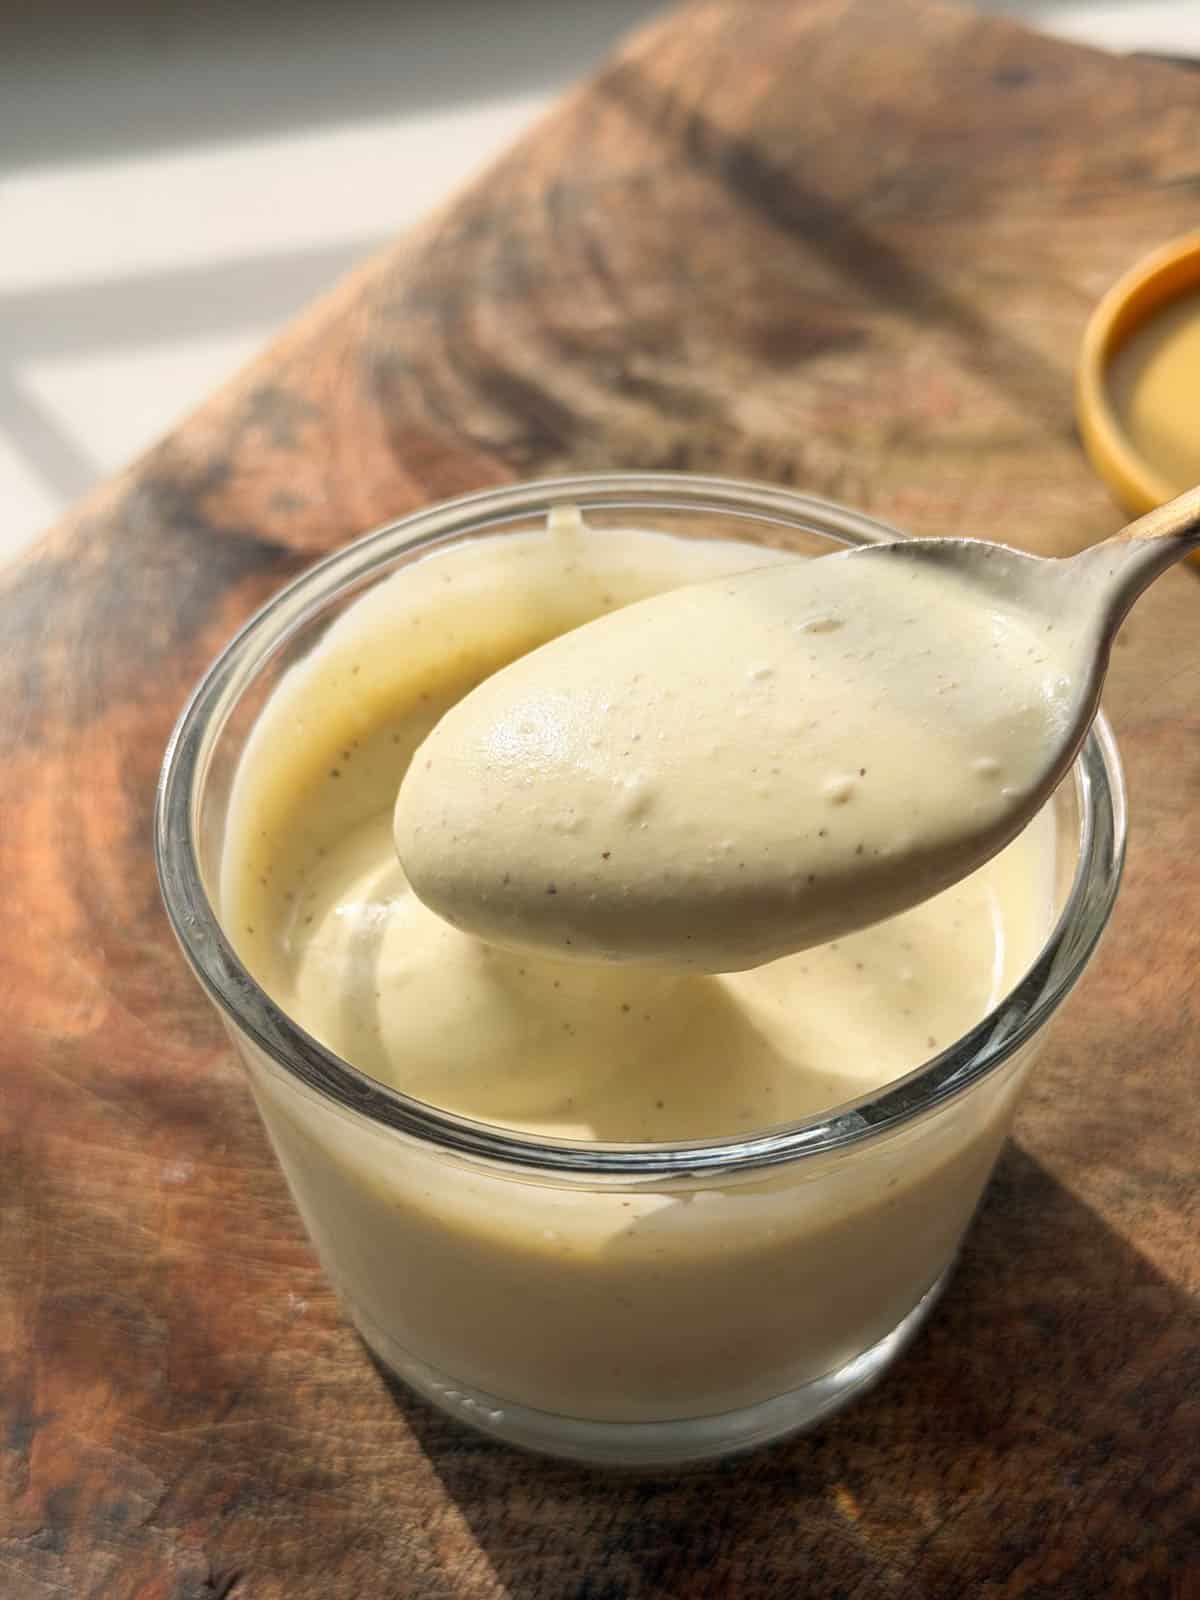
smooth and creamy veg mayo scooped up in a spoon

This veg mayonnaise recipe uses paneer and cashews, and it tastes so close to regular mayo that I can bet you won’t be able to tell the difference. The cashews give it a super creamy and smooth body; the paneer adds richness without making it too heavy. There’s some mustard, garlic, a touch of honey, and black salt, which brings that signature eggy flavour that most eggless mayos are missing.

If you’ve tried our boiled egg mayonnaise, then this eggless mayonnaise is the perfect replacement for your friends and family who don’t eat eggs. It works as a dip, a sandwich spread, a salad dressing, pretty much anywhere you’d use regular mayo. We keep a batch in the fridge at all times now because once you start making mayo at home, the store-bought stuff just doesn’t feel the same anymore.

Ingredients for Veg Mayonnaise

Paneer: Cut into small cubes to add richness and body to the mayo.

Cashews: Soaked in hot water for 10-15 minutes. These are what give the mayo its smooth, creamy texture.

Apple Cider Vinegar: For that tangy kick that every good mayo needs.

Mustard Sauce / Kasundi: Adds sharpness and depth to the flavour.

Garlic: Whole cloves blended in for a mild, savoury note.

Black Salt (Kala Namak): This is the secret ingredient. It gives the veg homemade mayo that subtle eggy flavour that most eggless versions are missing.

Honey: A tablespoon to balance the tang from the vinegar and mustard.

Salt: Just a pinch alongside the black salt.

Frequently Asked Questions

Can I use tofu instead of paneer?

Yes, firm tofu works as a substitute. The texture will be slightly lighter and less rich than the paneer version, but it blends just as smoothly. Make sure to drain the tofu well before using so the mayo doesn’t turn watery.

Why is my mayo runny?

Most likely the cashews weren’t soaked long enough and didn’t blend into a smooth paste, or too much water was added. Start with the 3 tablespoons of water mentioned in the recipe and only add more if it’s too thick. You can also try adding a few more soaked cashews and blending again to thicken it up.

I don’t have black salt. Can I skip it?

You can, but the mayo will taste different. Black salt is what gives this veg mayo that subtle eggy flavour that makes it taste like traditional mayonnaise. Without it, you’ll have a delicious creamy spread, but it won’t have that classic mayo character. Regular salt alone won’t replicate it.

Richa’s Top Tips

  • Soak the cashews properly. 10-15 minutes in hot water is the minimum. If they’re not soft enough, the mayo will be grainy instead of smooth. If you have time, soaking for longer gives an even silkier result.
  • Don’t skip the black salt. Regular salt and black salt do completely different things here. The black salt has a natural sulphuric quality that mimics the taste of eggs. Without it, the mayo will taste fine but won’t have that familiar eggy flavour that makes it feel like real mayo.
  • Blend until completely smooth. Keep the mixer running until there are absolutely no lumps or graininess left. This takes a little longer than you’d expect, but the texture of the finished mayo depends entirely on this step.
  • Use it at room temperature or chilled, not heated. This veg mayo recipe isn’t meant for cooking. Heat will cause it to split and change texture. Use it as a dip, spread, or dressing.
  • Adjust the consistency with water. If the mayo comes out too thick, add a tablespoon of water at a time and blend again until you get the consistency you like.
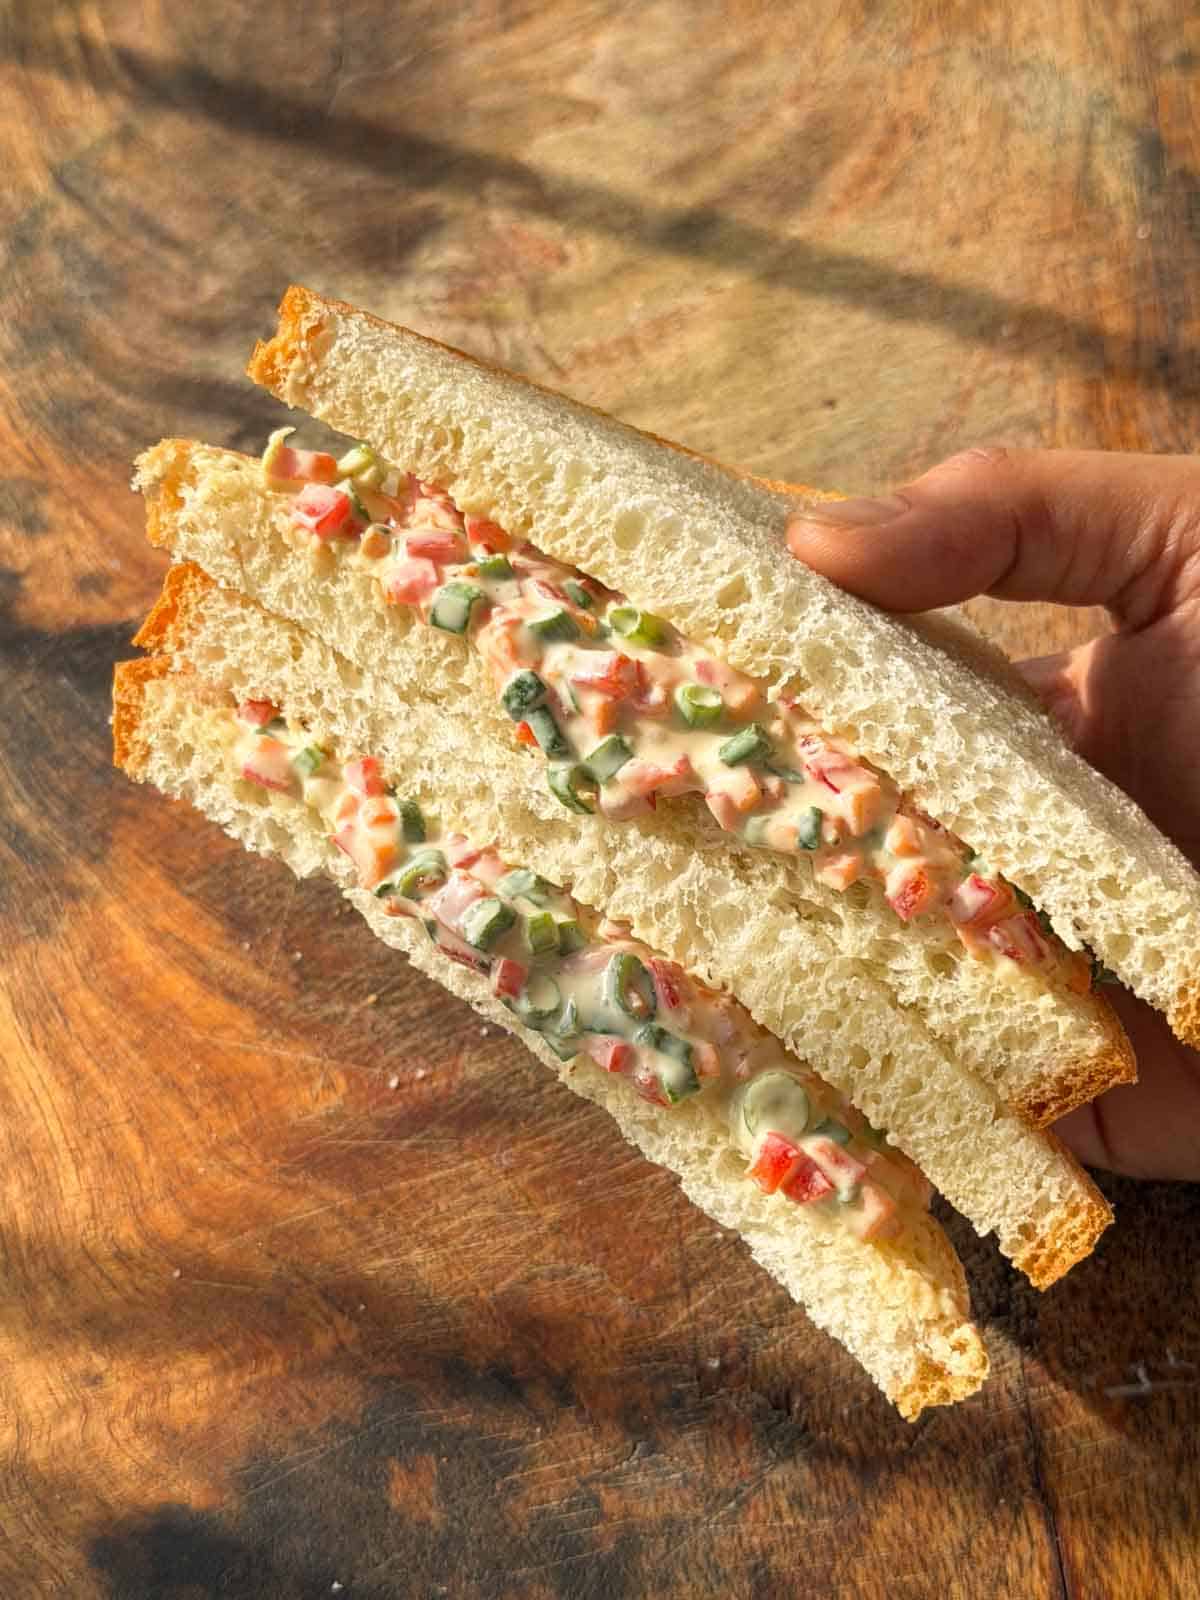
a veg sandwich made using the homemade veg mayonnaise

Storage Tips

  • In the fridge: Store in a clean, airtight glass jar for up to a week. It thickens slightly as it chills, so give it a good stir before each use.
  • Freezing: Not recommended. The paneer and cashew base separates once frozen and thawed, and the texture won’t come back even after blending again.
  • Freshness tip: Always use a clean, dry spoon when scooping out the mayo. Any moisture or food residue getting into the jar can cause it to spoil faster.

Serving Ideas

This veg mayo is incredibly versatile. Here are some of our favourite ways to use it:

  • As a dip with Air Fryer Sweet Potato Fries: Crispy fries with a bowl of fresh homemade mayo is the most classic pairing and always a hit.
  • As a dip with Chilli Lime Sweet Potato Wedges: The tangy, spicy wedges with this creamy mayo on the side are a really good combination.
  • As a sandwich spread: Mix in some finely chopped bell peppers, carrots, and spring onions and spread it between two slices of bread for a quick, filling sandwich.
  • With Chicken Shawarma: Use it as the sauce in your shawarma wrap instead of store-bought mayo. The garlic and mustard in it work perfectly. 

Customisation Ideas

  • Garlic mayo: Double the garlic cloves in the recipe for a more intense garlic mayo that works really well as a burger spread or a dip for fries.
  • Spicy mayo: Add a teaspoon of sriracha or homemade chilli oil to the blended mayo for a spicy version that goes perfectly with wraps and sandwiches.
  • Herb mayo: Blend in a handful of fresh coriander or dill along with the other ingredients for a green, herby mayo that pairs beautifully with grilled chicken or fish.
  • Tandoori mayo: Add a teaspoon of Kashmiri chilli powder and half a teaspoon of roasted cumin powder to the blend for a smoky, spiced mayo that’s amazing with tikkas and kebabs.

Did You Know?

Cashews are one of the most popular dairy substitutes in plant-based cooking, and there’s a scientific reason for it. When soaked and blended, cashews break down into an incredibly smooth paste because of their high fat content, about 44% by weight. This fat is mostly oleic acid, the same type of fat found in olive oil, which is why cashew-based sauces and spreads feel rich and creamy on the palate without any dairy. No other nut blends as smoothly or mimics dairy as closely, which is why cashews show up in everything from vegan cheese to ice cream. 

smooth and creamy veg mayo scooped up in a spoon

Once you see how easy this veg mayonnaise is to make and how good it tastes, I don’t think you’ll go back to the packaged stuff. It takes about 20 minutes, uses simple veg mayonnaise ingredients, and works with pretty much everything. Tag me on Instagram @my_foodstory when you make it, I’d love to see what you use it with.

Watch Veg Mayonnaise Recipe Video

smooth and creamy veg mayo scooped up in a spoon
Print

Veg Mayonnaise | Eggless Mayonnaise

Creamy, high-protein, and made with whole ingredients, this Veg Mayonnaise recipe is a complete game-changer. Use it in salads, dips, wraps, and sandwiches and you will never go back to buying it from a store!
Course Dips, Dressings & Sauces
Cuisine international
Diet Vegetarian
Prep Time 10 minutes
Total Time 25 minutes
Servings 4 servings
Calories 184kcal
Author Richa

Ingredients

  • 100 grams paneer cut into ¼ inch cubes
  • ½ cup broken cashews
  • ½ cup hot water
  • 1 tablespoon apple cider vinegar
  • 2 teaspoons mustard sauce / kasundi
  • 4-6 cloves garlic whole
  • teaspoon salt
  • teaspoon black salt / kala namak
  • 1 tablespoon honey
  • 3 tablespoons water

Instructions

  • Soak cashews in hot water for 10-15 minutes. Drain and discard the water it was soaked in.
    ½ cup broken cashews, ½ cup hot water
  • Add drained cashews and rest of all the ingredients listed to a mixer and grind until smooth. You will get a semi-thick mayonnaise, ready to use.
    100 grams paneer, 1 tablespoon apple cider vinegar, 2 teaspoons mustard sauce / kasundi, 4-6 cloves garlic, ⅛ teaspoon salt, ⅛ teaspoon black salt / kala namak, 1 tablespoon honey, 3 tablespoons water
  • Veg mayonnaise may be used as a dip for Fries, Potato Wedges, Chips, Crackers etc.
  • 2-3 tablespoons of veg mayonnaise mixed with finely chopped red bell peppers, carrots, broccoli & spring onion greens can be used as a sandwich spread on bread slices.

Video

Nutrition

Calories: 184kcal | Carbohydrates: 11g | Protein: 7g | Fat: 13g | Saturated Fat: 5g | Polyunsaturated Fat: 1g | Monounsaturated Fat: 4g | Cholesterol: 17mg | Sodium: 184mg | Potassium: 128mg | Fiber: 1g | Sugar: 5g | Vitamin A: 2IU | Vitamin C: 1mg | Calcium: 135mg | Iron: 1mg

This article was researched and written by Harita Odedra.

The post High-Protein Veg Mayonnaise | Eggless Mayonnaise appeared first on My Food Story.
Masala Potato Wedges in Air Fryer

Making potato wedges in air fryer is easy-peasy! This is a quick and mess-free masala potato wedges recipe that cooks that delivers perfect results each time. 

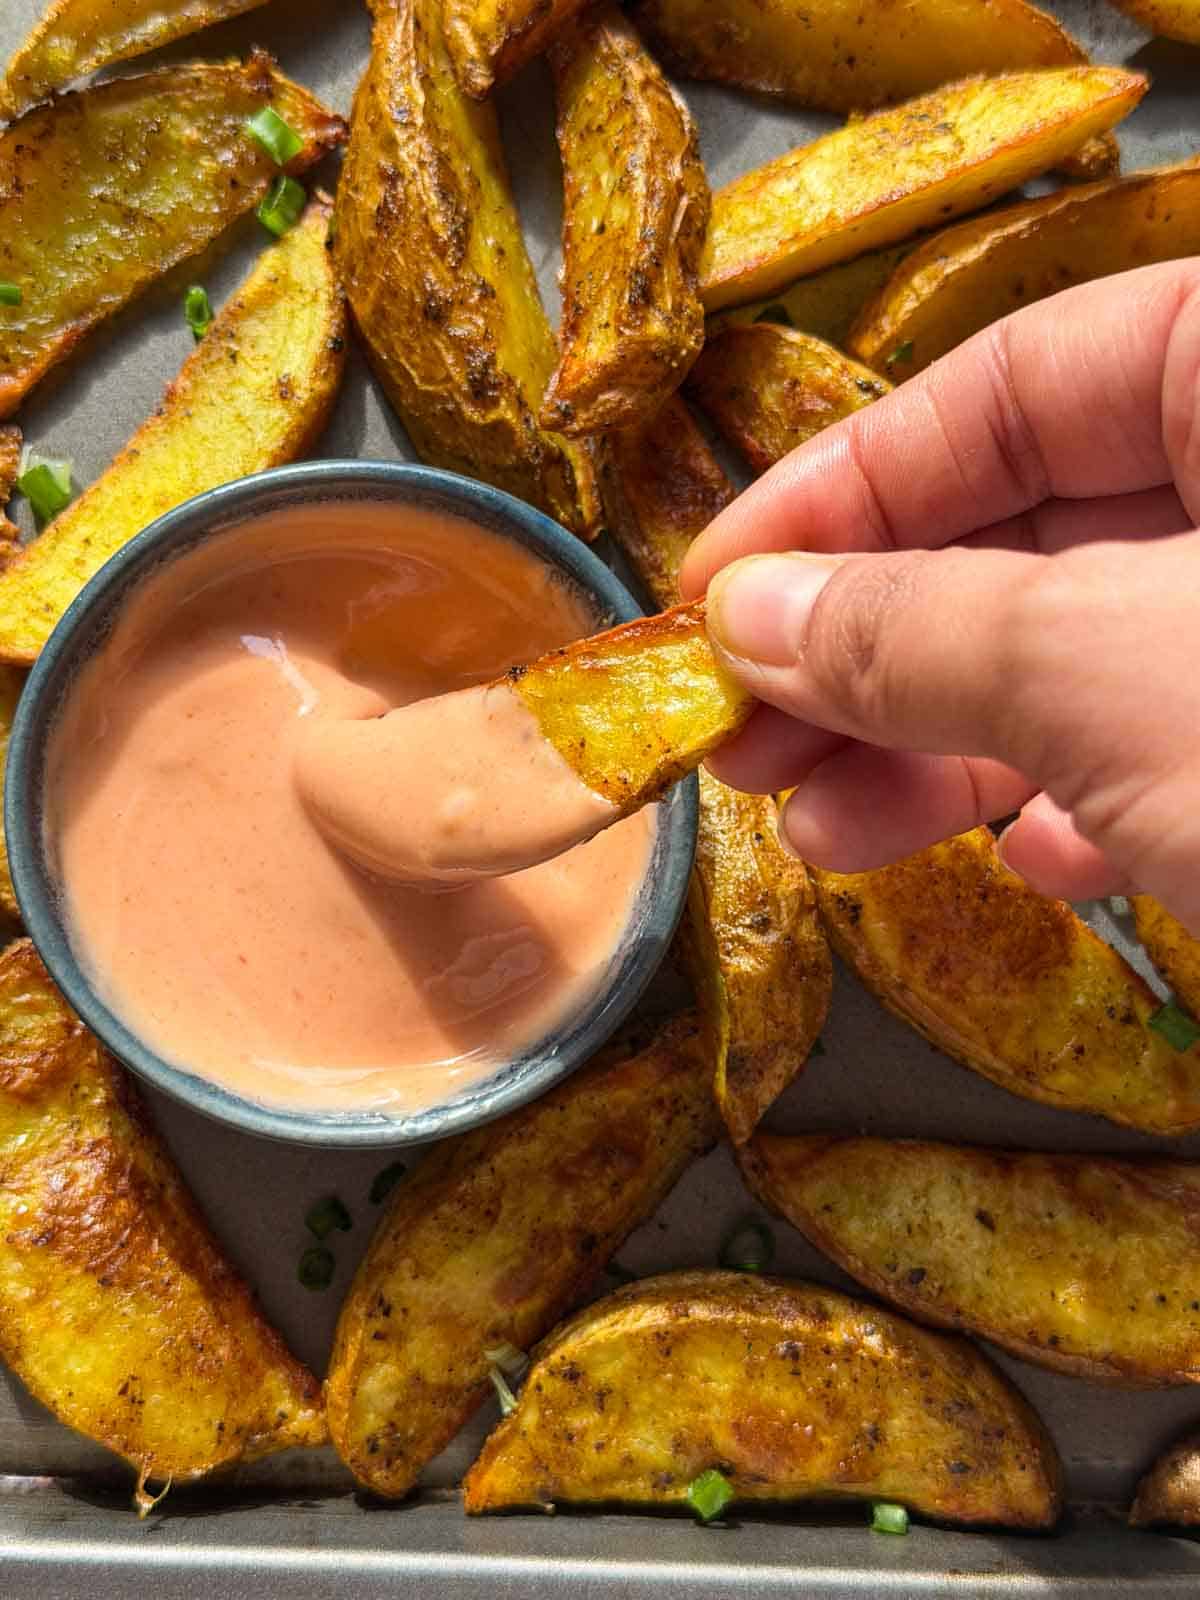
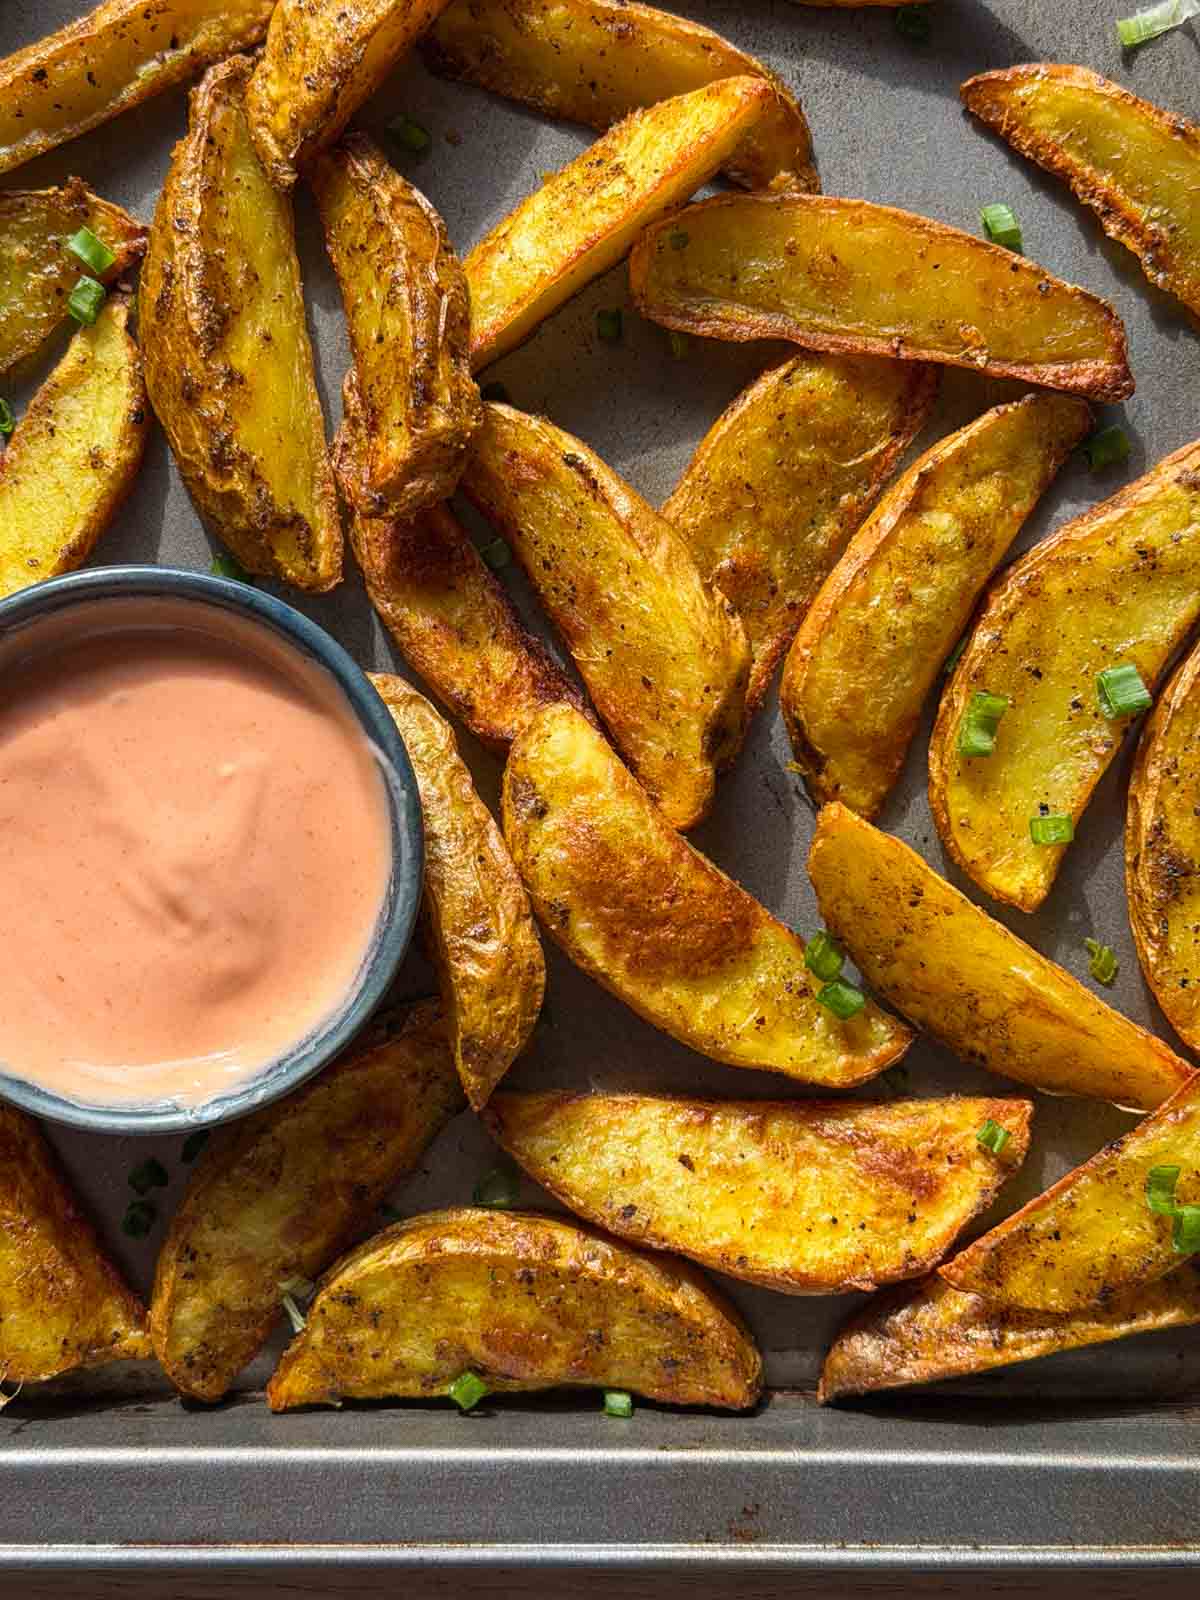
air fryer potato wedges with an accompanying dip

There is nothing more delicious than a plate of hot potato wedges and a couple of dip options. It’s nostalgic, comfort food that always works right from being a kiddie snack to beers and conversations with friends.   

This masala potato wedges come together in the air fryer, which means no deep frying, no excess oil, and no guilt. And the result is the same delicious golden-brown, crispy outside and creamy, fluffy insides that are so hard to resist. I love eating these on their own, but they taste so good with roast chicken, burgers and sandwiches, and salads among other things., You need to try this air fryer potato wedges recipe today! 

Masala Potato Wedges Ingredients 

  • Potato: Cut into wedges with the skin on. I have used an older crop of regular Indian potatoes, but Russet potatoes or Yukon Gold work really well if you’re outside India 
  • Ginger garlic paste: Adds a lovely flavor and aroma 
  • Spices: Turmeric powder, cumin powder, and crushed pepper add for flavor and color
  • Salt: To season
  • Corn flour: Helps the masala coat the potatoes evenly and makes the wedges light and crispy 
  • Oil: I have used sunflower oil, but any neutral-flavored oil with a high-smoke point will work for this recipe 

Frequently Asked Questions 

Why are my potato wedges not crispy?

This happens for a number of reasons like excess moisture in potatoes, an overcrowded air fryer basket, too much oil, and not enough cooking time. But to troubleshoot, make sure to soak and wipe the potatoes thoroughly, sprinkle a little extra cornflour, and try air frying them for a minute or two. 

Do I need to peel the potatoes?

Nope! Potato wedges actually taste better with skin on. The skin adds extra texture and crisps up beautifully in the air fryer. Just give the potatoes a good scrub before cutting them into wedges.

Can I use sweet potatoes instead?

Yes, but sweet potato wedges cook a little differently. They won’t become quite as crispy as regular potatoes because they contain more moisture and natural sugars. Reduce the cooking time slightly and avoid overcrowding the basket. I would recommend trying out my air fryer sweet potato fries recipe instead. 

Richa’s Top Tips

  • Cut the wedges into the same size to help them cook evenly. 
  • If making a large batch, cook in batches: Make sure to line the potato wedges in a single layer with space in the between. An overcrowded basket can steam the potatoes instead of crisping and browning them. 
  • Soak the potatoes well: Soaking the potatoes is an important step to strip away excess starch, prevent steaming, and have crispy wedges. Please don’t skip this step. 

Storage Tips

  • Refrigerate: Even though these are best served fresh, you can store any leftovers in the fridge for up to 3 days in an airtight container.  
  • Freezer: Cool down the fries completely and line them on a tray. Stick it into the freezer overnight and then transfer to a freezer-safe bag and store for up to 3 months. 
  • Reheat: You can easily reheat these in the air fryer at 180℃ for about 5 minutes if refrigerated and about 8 to 10 minutes if frozen. 

Serving Ideas

These air fryer potato wedges taste incredible with any dip. Here are some of my favorites! 

Potato Wedges Seasoning Ideas 

When it comes to potato wedges seasoning, the world is your oyster! Once you’ve got the basic method down, you can play around with different spice blends depending on what you’re craving.

  • Classic Garlic Herb: Garlic powder, onion powder, dried oregano, dried parsley and black pepper.
  • Peri Peri: Peri peri seasoning, smoked paprika and a pinch of garlic powder for spicy, smoky wedges.
  • Cheesy Parmesan: Toss the hot wedges with grated parmesan, garlic powder and chopped parsley just before serving.
  • Indian Masala: Chaat masala, roasted cumin powder, Kashmiri chilli powder and a squeeze of fresh lemon juice.
  • Cajun: Cajun seasoning with a pinch of smoked paprika for bold, smoky flavour.
  • Lemon Pepper: Lemon pepper seasoning with a little garlic powder for bright, zesty wedges.
  • Italian Herb: Italian seasoning, garlic powder and a sprinkle of parmesan for wedges that pair beautifully with pasta.
  • Spicy BBQ: Smoked paprika, garlic powder, onion powder, chilli powder and a pinch of brown sugar for a sweet and smoky finish.
  • Tandoori: Tandoori masala with a little Kashmiri chilli powder and dried fenugreek leaves (kasuri methi) for an Indian-inspired twist.

Tip: If you’re adding parmesan, fresh herbs or lemon juice, do it after the wedges come out of the air fryer. This keeps the cheese from burning and the herbs tasting fresh.

air fryer potato wedges with an accompanying dip

Whether you’re serving them as a snack, a side or loading them up with your favourite toppings, these air fryer potato wedges are always a hit. They’re crispy on the outside, fluffy on the inside, and so easy to customise with different seasonings. Once you try them, you’ll wonder why you ever bought frozen wedges!

If you make this recipe, DM me your pictures or tag me in stories over on my IG @my_foodstory ❤️   

Watch Air Fryer Potato Wedges Recipe Video

air fryer potato wedges with an accompanying dip
Print

Masala Potato Wedges in Air Fryer

Making potato wedges in air fryer is easy-peasy! This is a quick and mess-free masala potato wedges recipe that cooks that delivers perfect results each time.
Course Snacks & Appetizers
Cuisine international
Diet Vegan, Vegetarian
Prep Time 10 minutes
Cook Time 10 minutes
Total Time 20 minutes
Servings 6 servings
Calories 148kcal
Author Richa

Equipment

Ingredients

  • 4 potatoes approx. 400 gms
  • 1 teaspoon ginger garlic paste
  • 1 teaspoon salt
  • 1 teaspoon crushed pepper
  • A pinch ‘turmeric powder
  • ¼ teaspoon cumin powder
  • 2 teaspoons corn flour
  • 1 ½ tablespoons sunflower or any neutral flavored cooking oil divided

Instructions

  • Wash and cut the potatoes into wedges with skin-on. keep them soaked in water till using as they turn brown if exposed to air.
    4 potatoes
  • Drain the potato wedges and pat dry with a kitchen towel. Add to a bowl.
  • Add ginger garlic paste, salt, crushed pepper, turmeric powder, cumin powder, cornflour, ½ tablespoon sunflower oil and combine it all to ensure the wedges are coated well.
    1 teaspoon ginger garlic paste, 1 teaspoon salt, 1 teaspoon crushed pepper, A pinch ‘turmeric powder, ¼ teaspoon cumin powder, 2 teaspoons corn flour
  • Pre-heat air fryer at 200C and brush the basket with oil.
  • Place the potato wedges on the air fryer basket with some gap between each. Brush with a few drops of oil and air fry at 200C for 5 minutes. Brush with oil, flip and air fry at 200C for 5 minutes or until they are golden & crisp.
    1 ½ tablespoons sunflower or any neutral flavored cooking oil

Video

Nutrition

Calories: 148kcal | Carbohydrates: 26g | Protein: 3g | Fat: 4g | Saturated Fat: 1g | Polyunsaturated Fat: 0.2g | Monounsaturated Fat: 3g | Sodium: 397mg | Potassium: 599mg | Fiber: 3g | Sugar: 2g | Vitamin A: 4IU | Vitamin C: 28mg | Calcium: 19mg | Iron: 1mg

The post Masala Potato Wedges in Air Fryer appeared first on My Food Story.

One-Bowl Chocolate Cake (Simple Chocolate Cake Recipe)

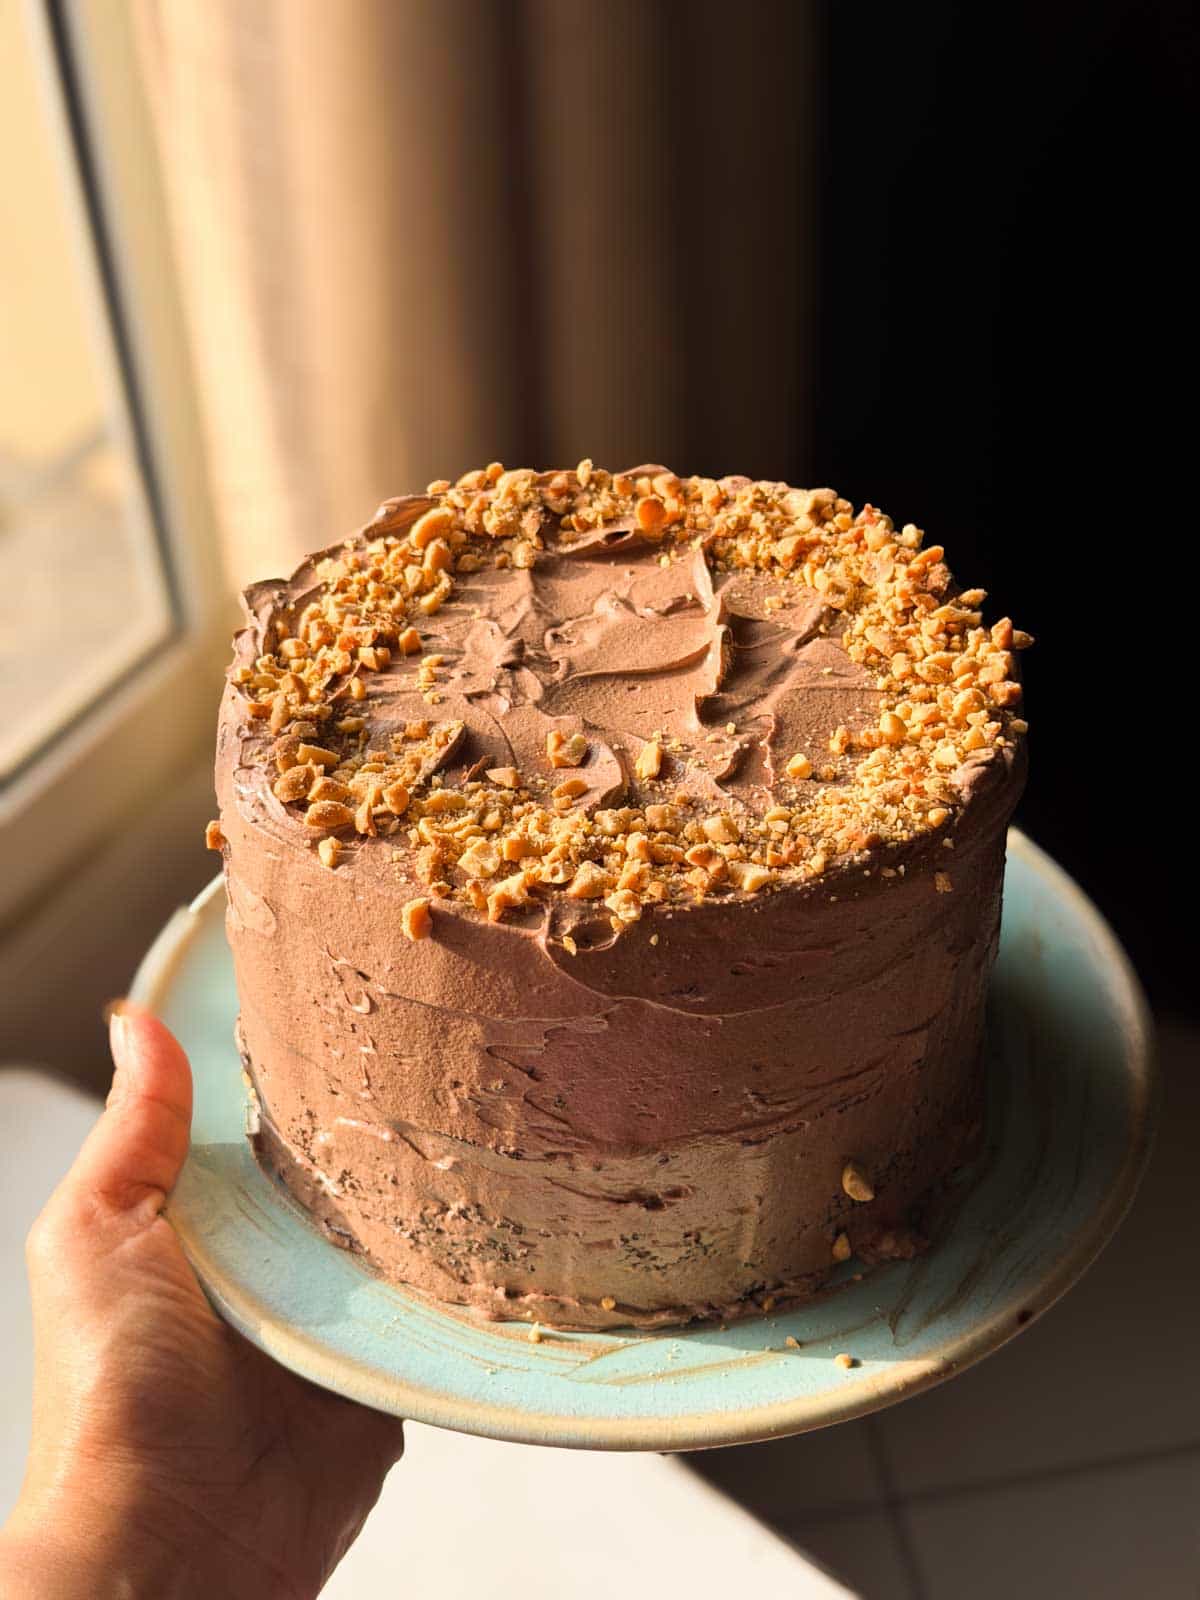
This is the lushest one-bowl chocolate cake recipe I’ve tested – it’s moist, rich and SO SO chocolatey. And it keeps for days (if you can stop yourself from finishing it right away)!

an image of the whole chocolate cake decorated with frosting and crushed nuts

This chocolate cake recipe is hands down THE BEST!It’s one of those fab recipes that’s ridiculously simple because everything gets mixed together in one bowl. Yet it gives you a cake that stays super moist for up to FIVE DAYS! In fact, this simple chocolate cake tastes like it’s freshly baked even days later. Better still, you can make it in both the oven and the air fryer.

Whether you’re baking for a birthday party, packing a treat for the kids’ tiffins, satisfying a random chocolate craving, or just looking for something to enjoy with your evening chai, this cake always delivers. I’ve made it more times than I can count and it’s been a huge hit every single time, especially with that delicious buttercream frosting. So if you’re after an easy, reliable chocolate cake recipe, this is one you’ll definitely want to bookmark!

Chocolate Cake Ingredients

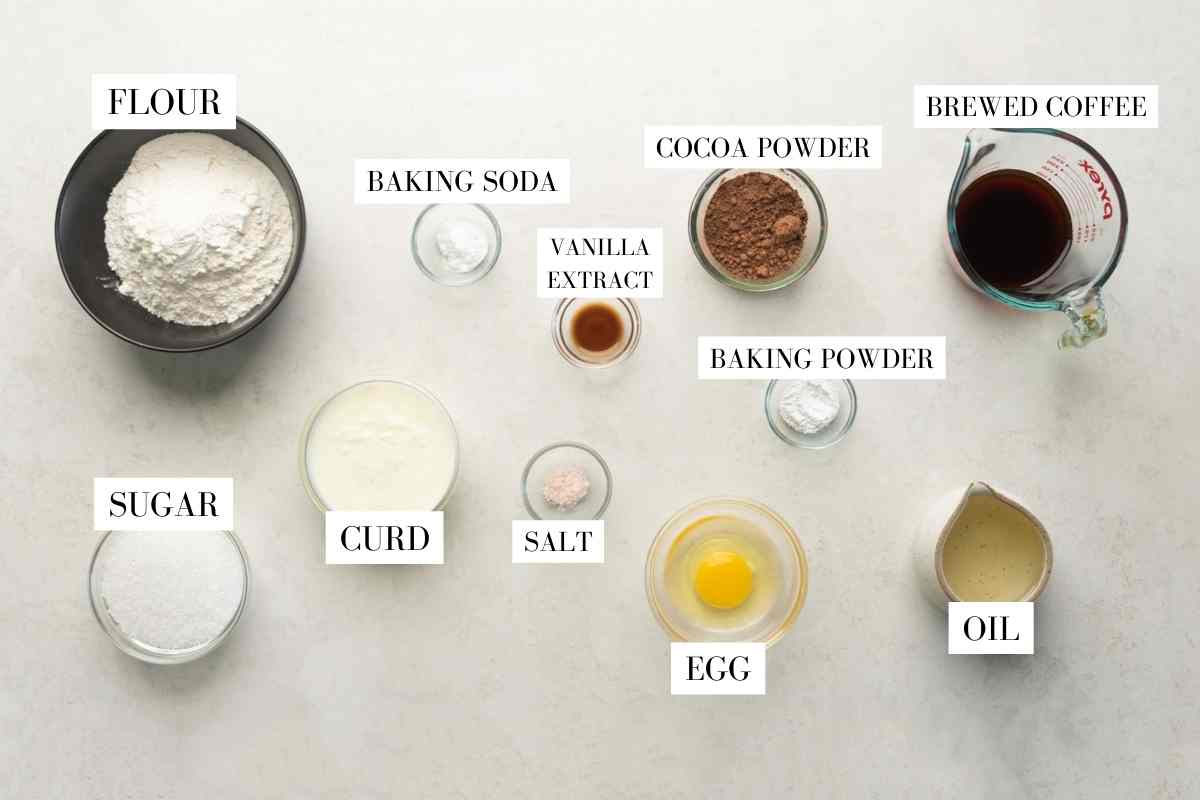
ingredient shot for one bowl chocolate cake

This is one of those recipes where I wouldn’t recommend any substitutes. It’s this proportion and combination of ingredients that create the moist texture that we want in a world-class chocolate cake.

  • All Purpose Flour (Maida) – the base of our cake. I don’t recommend subbing this for atta or gluten free flour since that will affect the texture. Maida keeps our cake light, bouncy, and moist.
  • Cocoa Powder – this is a chocolate cake, after all!
  • Sugar – I use granulated white sugar but you can also use caster sugar or brown sugar here
  • Oil this ensures our cake stays moist for longer, any neutral flavored oil like canola, sunflower, rice bran works
  • Curd – my secret ingredient! I find that the combination of oil, curd, and egg in a cake batter results in an extra moist texture which is what we want.
  • Egg – for texture and binding. I don’t recommend subbing for a flax egg or making it eggless
  • Hot Black Coffee – an espresso shot or just brewed instant coffee works super well here. Coffee enhances the flavour of the cocoa powder and makes this cake super chocolatey and yum. Don’t add plain coffee powder as the liquid from the brewed coffee helps bring the batter together
  • Salt – just a pinch
  • Baking Powder + Soda – so our cake rises!

Note: the batter will be runny – that’s what we want! Don’t worry about this. Once baked, it’ll be just perfect.

How to make One-bowl chocolate cake:

Here’s a step-by-step guide on how to make the one-bowl chocolate cake:

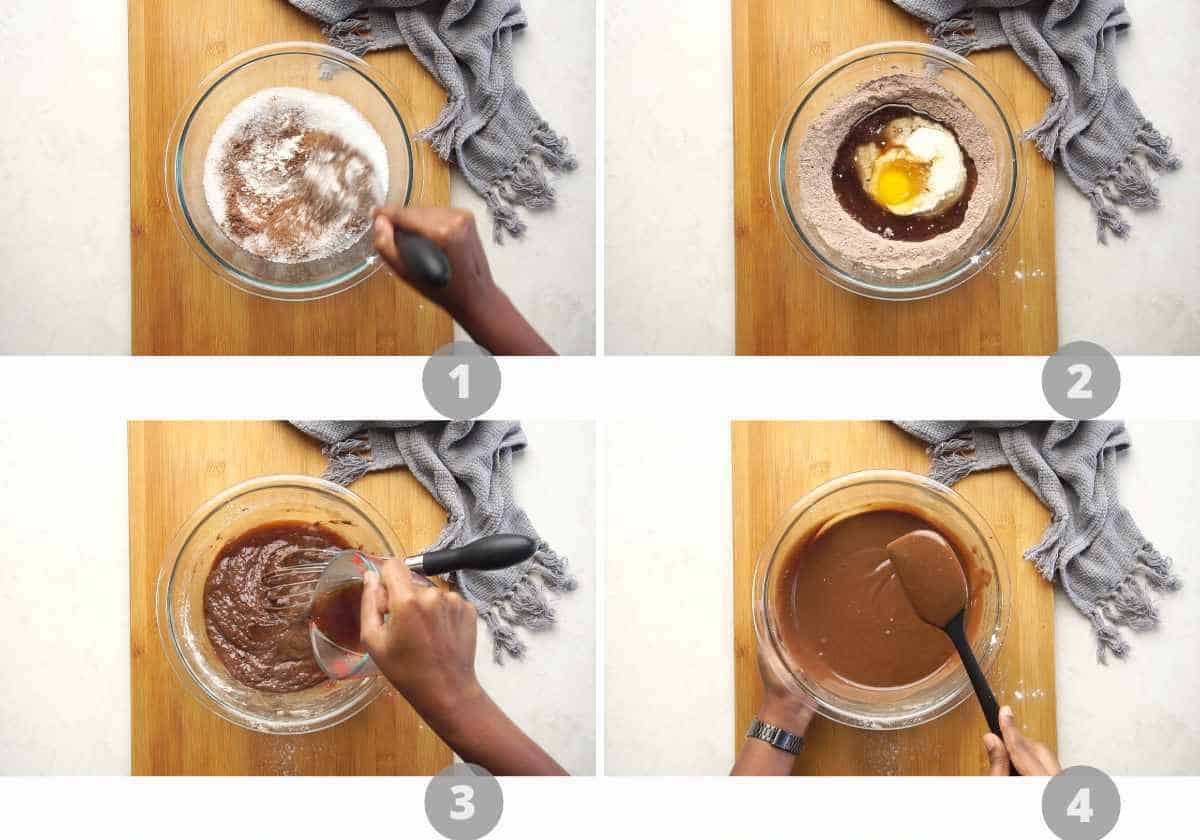
Step by step picture collage showing how to make chocolate cake

1. Add all purpose flour, sugar, cocoa powder, baking soda, baking powder and salt to a bowl. Whisk together until combined.

2. Add vanilla extract, egg, oil and curd. Whisk well until combined, about 1-2 minutes. Scrape the sides of the bowl.

3. Pour in hot coffee.

4. Give it another mix till it’s a smooth, runny batter.

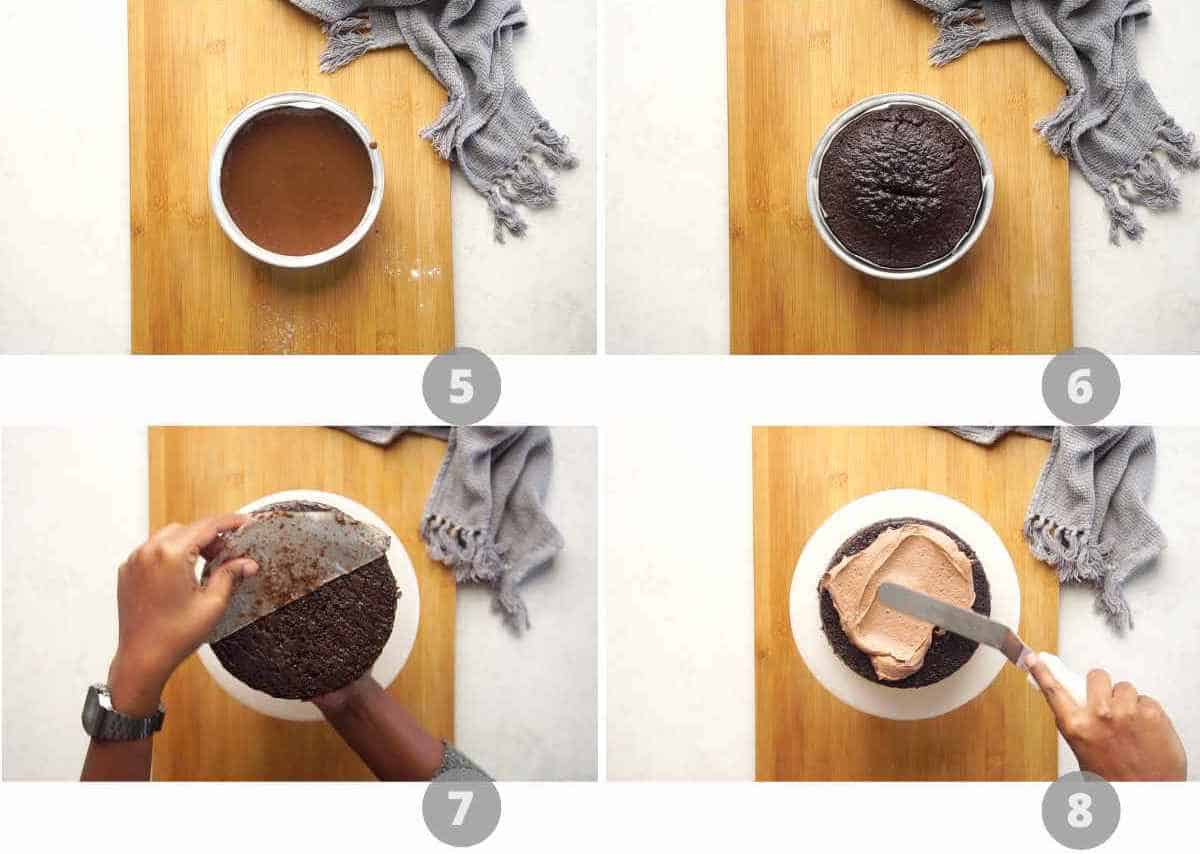
Step by step picture collage showing how to make chocolate cake

5. Pour the batter into lined and greased 6 inch cake mould.

6. Bake at 180C in a preheated oven for 30-40 minutes or till a skewer inserted into the centre comes out clean.

7. Allow it to cool for 15 minutes. Demould, remove the parchment paper and transfer to a wire rack.

8. Allow it to cool completely before serving or frosting.

I like serving mine with a quick chocolate buttercream frosting but this also works great on its own or with a layer of Nutella and chopped berries on top. 

Frequently Asked Questions

1. Is there any difference in baking this cake in the air fryer vs the oven?

The oven will have a longer preheat time, although I recommend that you preheat your air fryer for a couple minutes as well. We want to bake our cake until a knife comes out clean. The overall baking time range is 30-40 mins. 

2. Can I sub curd for Greek yogurt?

Yes, these can be substituted 1:1 easily. Just use non sweetened, non flavored greek yogurt. 

Can I skip the coffee?

Yes. The coffee doesn’t make the cake taste like coffee. It simply enhances the chocolate flavour.

Can I make this cake without eggs?

This recipe has only been tested with an egg, so I can’t guarantee the same texture with an egg substitute.

Can I double this recipe?

Yes. You can double the recipe and bake it in a larger cake tin. Keep in mind that the baking time will increase, so start checking for doneness after about 40 minutes.

Richa’s Top Tips

  • Don’t overmix the batter. Once the wet and dry ingredients are combined, mix just until smooth. Overmixing can make the cake dense.
  • Scrape the bowl before adding the coffee. This ensures there aren’t any pockets of dry flour hiding at the bottom or sides.
  • Measure the flour correctly. Spoon the flour into your measuring cup and level it off instead of scooping directly from the container. Too much flour can make the cake dry.
  • Don’t worry about the thin batter. The batter will be quite runny after adding the coffee, and that’s exactly how it should be.
  • Cool the cake completely before frosting. Even if it feels only slightly warm, frosting can melt and slide off.

Storage Tips

  • At room temperature: Store the cake in an airtight container for up to 2 days.
  • In the refrigerator: Keep it in an airtight container for up to 5 days. And before serving, let it sit at room temperature for 20-30 minutes for the best texture.
  • To freeze: Wrap the completely cooled cake (whole or in slices) tightly in cling film followed by foil, or place it in a freezer-safe container. Freeze for up to 2 months. Thaw overnight in the refrigerator or at room temperature before serving.
  • If frosting the cake later: Wrap the cooled cake tightly and store it at room temperature or in the fridge until you’re ready to frost. This helps keep it moist and prevents it from drying out.
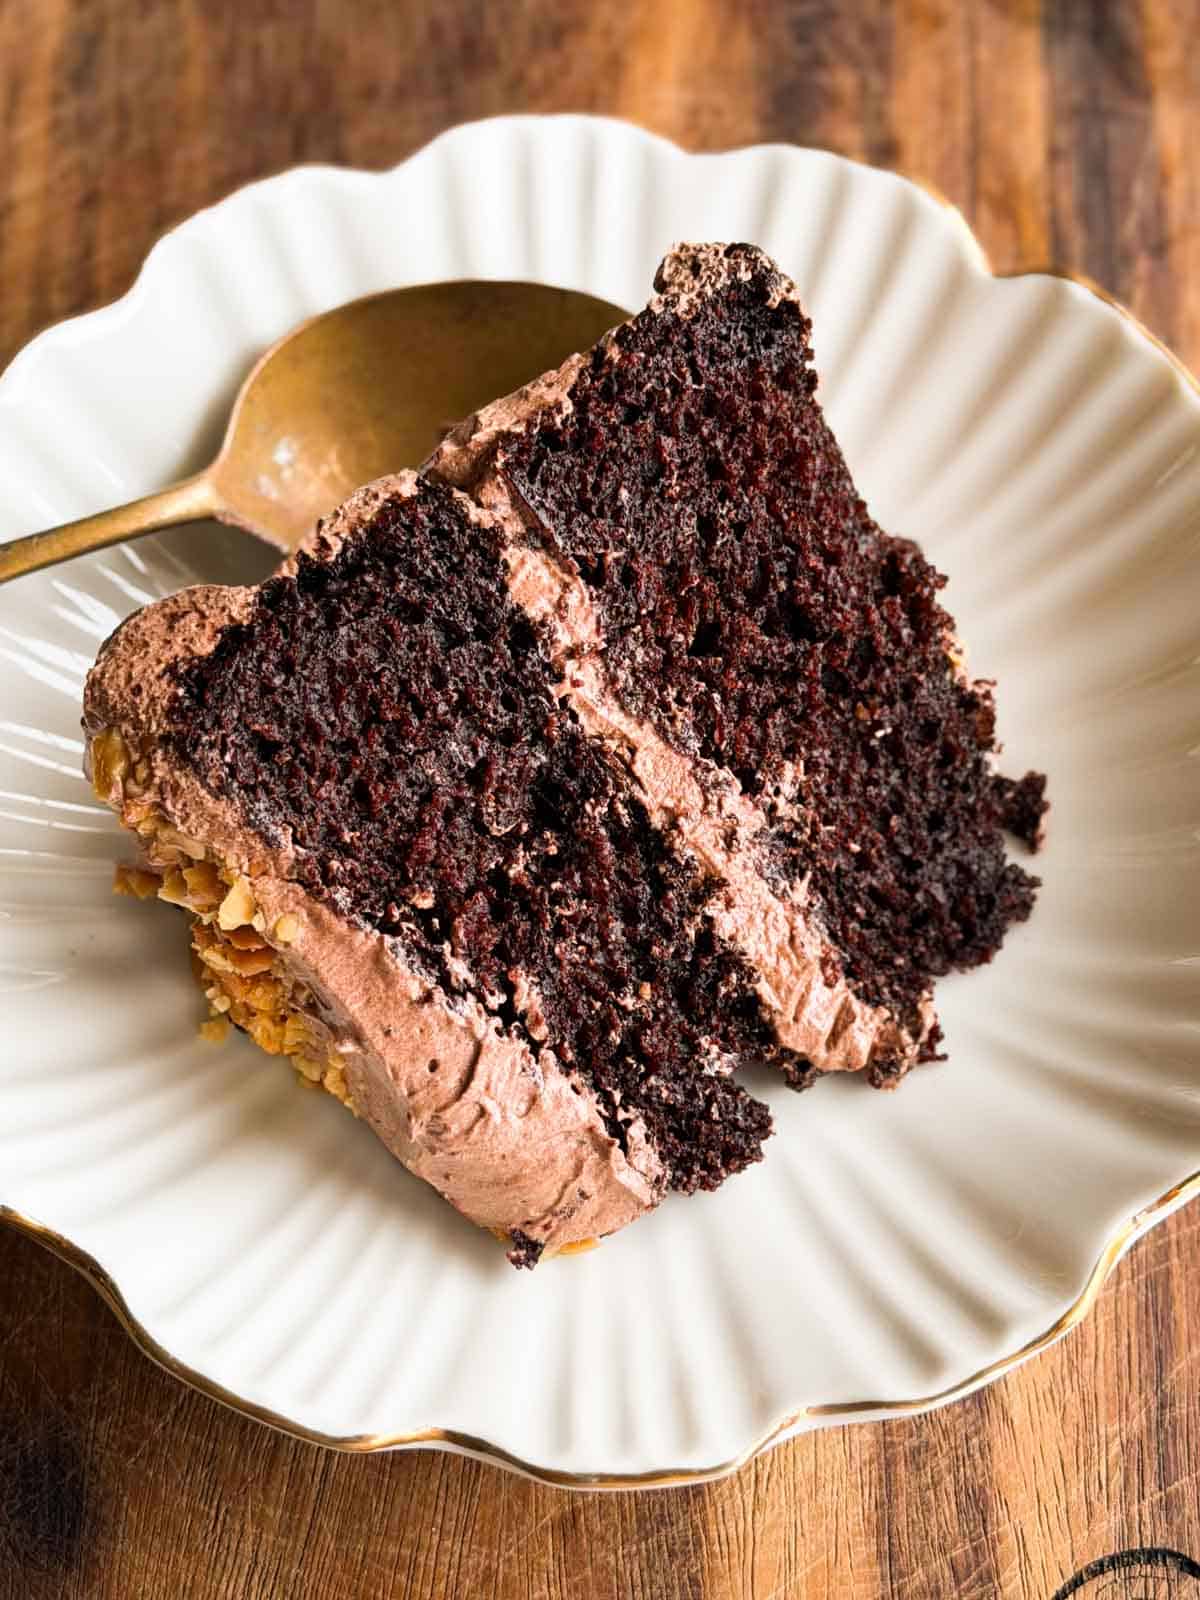
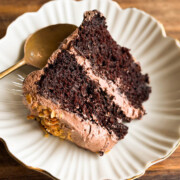
a slice of the one bowl chocolate cake served on a white dish with a spoon

I think we all need our hands on a fool-proof simple chocolate cake recipe when those sweet tooth cravings come up. Trust me, this is THAT recipe! And if you want to an activity to do with the kiddos, baking this cake is also perfect for that.

Watch This Simple Chocolate Cake Recipe Video

a slice of the one bowl chocolate cake served on a white dish with a spoon
Print

One-Bowl Chocolate Cake

This one-bowl chocolate cake uses everyday ingredients and stays moist for days!
Course Desserts
Cuisine American, Continental
Prep Time 10 minutes
Cook Time 40 minutes
Resting Time 30 minutes
Total Time 1 hour 20 minutes
Servings 6 people
Calories 370kcal
Author Richa

Ingredients

  • 1 cup All Purpose Flour 125 grams
  • 3/4 cup Sugar 150 grams
  • 1/4 cup Cocoa Powder 32 grams
  • 1 tsp Baking Soda
  • 1/2 tsp Baking Powder
  • 1/4 tsp Salt
  • 1 tsp Vanilla Extract
  • 1 Egg
  • 1/2 cup Oil 125 millilitres
  • 1/2 cup Curd or Yogurt 130 millilitres
  • 1/2 cup Hot Black Coffee 1 Teaspoon Coffee dissolved in 1/2 cup of hot water

Instructions

  • Line and grease a 6 inch tin with parchment paper. Preheat the oven to 180C
  • Add all purpose flour, sugar, cocoa powder, baking soda, baking powder and salt to a bowl. Whisk together until combined.
  • Add vanilla extract, egg, oil and curd. Whisk well until combined, about 1-2 minutes. Scrape the sides of the bowl.
  • Pour in hot coffee and give it another mix till it's a smooth, runny batter. Bake at 180C for 30-40 minutes or till a skewer inserted into the center comes out clean.
  • Allow it to cool for 15 minutes. Demould and transfer to a wire rack and allow it to cool completely before serving or frosting.

Video

Nutrition

Calories: 370kcal | Carbohydrates: 44g | Protein: 5g | Fat: 21g | Saturated Fat: 2g | Polyunsaturated Fat: 6g | Monounsaturated Fat: 12g | Trans Fat: 0.1g | Cholesterol: 30mg | Sodium: 336mg | Potassium: 130mg | Fiber: 2g | Sugar: 26g | Vitamin A: 60IU | Vitamin C: 0.1mg | Calcium: 57mg | Iron: 2mg

This article was researched and written by Urvi Dalal.

The post One-Bowl Chocolate Cake (Simple Chocolate Cake Recipe) appeared first on My Food Story.
❌