Reading view

There are new articles available, click to refresh the page.

Easy Kimchi

Kimchi is a fermented salty, mildly sweet, sour and spicy Korean condiment. The most common kind of Kimchi is made with salted Chinese cabbage, white radish, carrot, spring onion greens and a variety of seasonings. This condiment can be made with other vegetables too. While Kimchi tends to have non-vegetarian ingredients traditionally, it can be made vegetarian too. Today I’m sharing my recipe for a vegetarian/ vegan Easy Kimchi. Since it is fermented, it is a gut healthy food.
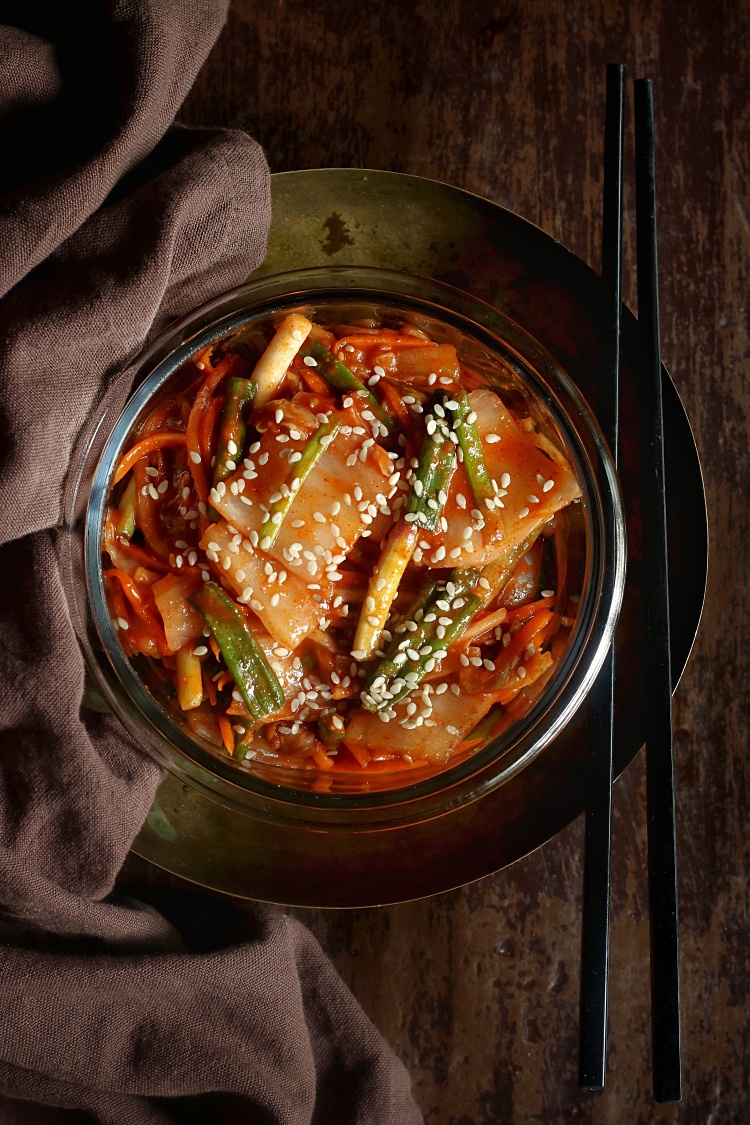
Kimchi is believed to have originated in Korea over 3000 years ago as a way to preserve summer produce for the extremely cold winters. Originally Kimchi was made only with radish. Increased trade with other countries during the Goryeo period meant other vegetables were grown and used in Kimchi. There also very many different ways of making and seasoning Kimchi. I believe Koreans make about 200 different kinds of Kimchi!

I discovered Kimchi thanks to Korean dramas! Sometime towards the end of the pandemic, I discovered the world of Korean drama thanks to my daughter. It showed me a people and culture I found interesting. While television drama isn’t the best source of authentic information, it can be an introduction to many things. So I learnt that Koreans seem to love alcohol (beer and soju especially), pork any which way, Korean beef, takeaway food, tteokbokki, rameyon, kimbap, kimchi, and rice among other things.

Korean meals typically are centred on cooked rice or rice porridge, and a broth/ soup or stew or both. You may also find noodles and/ or dumplings. These come with a variety of “banchan” or side dishes, one of which Kimchi is generally a given. These vegetable, seafood and meat side dishes will vary in number and help balance out the meal nutritionally.

My Easy Kimchi is not made the traditional way, so it isn’t authentic in that sense. I have made adjustments based on ingredient availability and personal taste preferences. Let’s start with the ingredients for Kimchi. While Kimchi is not really difficult to make, it does involve a number of ingredients.
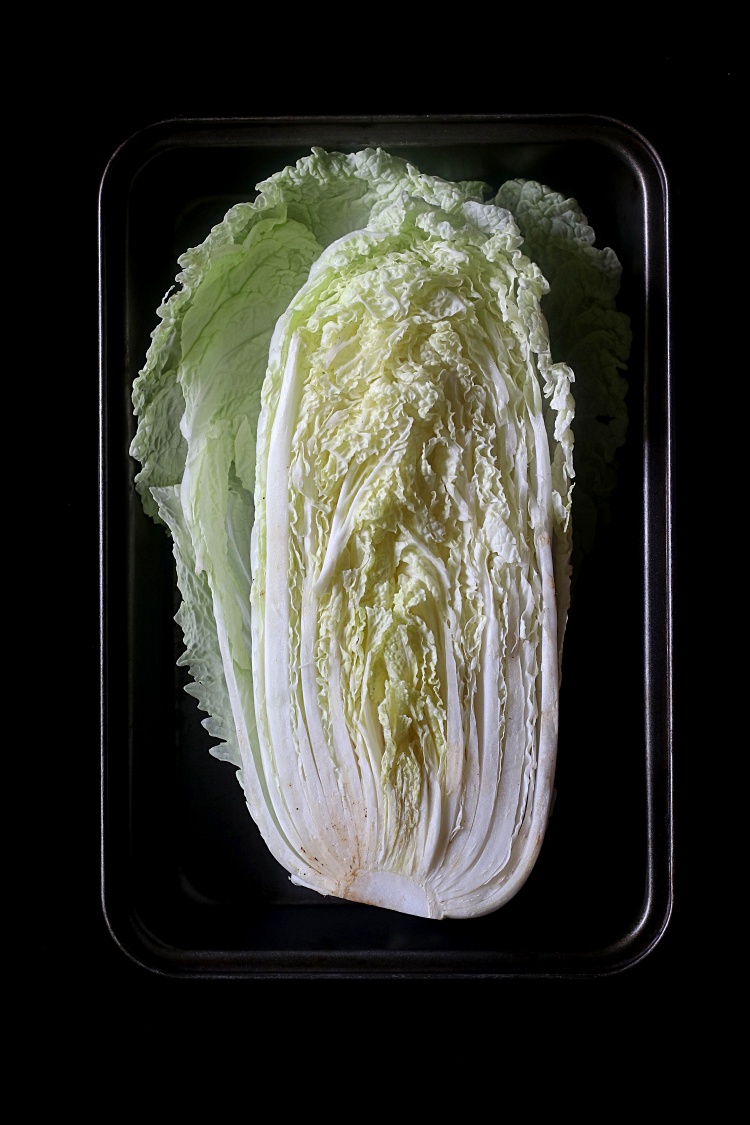
Chinese cabbage, Napa or Savoy cabbage is the best cabbage to use for Kimchi. The Koreans use a different variety of radish in Kimchi, but regular white (Indian mooli) or Daikon radish works well. You can make Kimchi without it too. Other vegetables in Kimchi include carrot, spring onion greens and chives. These have to be cut wuite thin and long about the length of matchsticks. The spiralizing blade on my peeler does a perfect job of this.

The first step to making this dish is to clean and salt the Chinese cabbage. In my shorter Kimchi recipe, the salted cabbage is allowed to sit for a couple of hours. The slat draws out the water in cabbage. The cabbage is then rinsed well with water before proceeding further. Cabbage is not cut but brined and salted leaf by leaf for traditional Kimchi. My easy version calls for cutting the cabbage into chunks and tossing in salt.

The next important step is make the cooked Kimchi paste. For this a little bit of rice flour is cooked into a slurry with stock or water. I prefer to use brown rice flour and water. Vegetable stock will give a more umami flavor. This slurry is blended into a smooth paste with ginger, garlic, onion, sugar (I prefer jaggery), soy sauce, and soaked red chillies/ red chilli powder or Gochu-jang paste. Gochu-jang is a Korean fermented spicy red chilli paste. You can buy it or make your own using one of the many recipes on the net.

Koreans generally love spicy food. The fire and deep red colour in this Korean condiment comes from Gochu-garu (Korean red chilli flakes/ powder) or Gochu-jang (red chilli paste). I used ready made Gochu-jang. Dried red Byadgi chillis work well too. Soak them in a little water and add while grinding the Kimchi paste.

Sugar is added to sweeten the cooked paste that makes this condiment, but I have come to prefer powdered jaggery. That’s not traditional at all but I like it like that. The sour taste or tang in Kimchi comes from fermentation. I like a slight tang in my Kimchi, but do not like it very fermented. I have worked around this by adding a little tamarind pulp to the Kimchi paste. This gives this condiment a slight tang without the fermentation normally needed to produce it. You can leave it out if you prefer.

What can you do with Kimchi? Eat it as a side dish with rice, noodles, dumplings, rice porridge/ kanji or even with bread. It’s a really good ingredient to use in a sandwich. So here is my version of Kimchi. Please feel free to adjust quantities of the ingredients to suit your taste.

Print

Easy Kimchi

An easy vegetarian Kimchi, a Korean fermented spicy side dish and condiment made of Chinese cabbage, white radish, carrots and spices.
Course condiments
Cuisine Korean
Prep Time 2 hours 45 minutes
Cook Time 15 minutes
Total Time 3 hours
Servings 2 medium jars

Ingredients

  • 1/2 kg Chinese cabbage
  • 2 tbsp salt
  • 1 1/2 tbsp brown or white rice flour
  • 3/4 cup water
  • 1 tbsp tamarind extract
  • 2 tbsp powdered jaggery or sugar
  • 1 tsp minced garlic or garlic paste
  • 1 1/2 tsp minced ginger or ginger paste
  • 1 tsp dark soy sauce
  • 1 medium onion chopped
  • 1/4 cup Gochujang or Korean red chilli paste
  • 1/2 cup thinly slivered white radish
  • 3/4 cup diagonally sliced spring onion greens
  • 2/3 cup thinly slivered carrot
  • 2 to 3 tbsp toasted sesame seeds optional

Instructions

Salt the Cabbage:

  • Chop off the bottom of the cabbage and discard. Wash the cabbage well, then halve the cabbage lengthwise and then chop into about 1 1/2 –inch bite sized pieces. Transfer to a large bowl and add the salt. Toss to mix well with the salt. Cover and let it stand for about an hour to an hour and a half. Toss the cabbage pieces every half hour.

Make the Kimchi Paste:

  • Combine the Mix together the rice flour and water in a small saucepan and cook over medium heat, stirring constantly. Once the mixture starts bubbling and thickening, stir in the powdered jaggery/ sugar and the tamarind pulp. Remove from the heat and let cool thoroughly.
  • Blend the cooled rice flour paste, garlic, ginger, soy sauce and onion to a smooth paste. If using soaked red chillies, add them as well while blending. Add a little salt as well. Be careful while doing this as the cabbage will be salty too. Taste and adjust according to preference. This paste should be slightly salty and sweet, tangy and spicy if adding red chillies. Keep aside.

Make the Kimchi:

  • Now rinse the salted cabbage with water 3 times, discarding the water each time. After the final rinse, squeeze out remaining moisture from the cabbage and put it in a large bowl.
  • Add the radish, carrots and spring onion greens to the cabbage. Add the blended paste and the Gochujang if using this instead of red chillies. Mix well with gloved hands or using a spoon, till well mixed.
  • Transfer the Kimchi to airtight glass containers or jars. Press down the on the kimchi so it’s well packed, then put the lid on. This is important so very little air can get inside.
  • If you like freshly made Kimchi, sprinkle with toasted sesame seeds and serve right away. Leave it at room temperature for a couple of days and then refrigerate it for about a week or two for fermentation, depending on how sour you like it.
  • I like my Kimchi less fermented and not too sour. I love freshly made Kimchi with hot rice. I typically leave it at room temperature on my kitchen counter for a day, then refrigerate it. I tend to make smaller batches that will last me a couple of months.

The post Easy Kimchi appeared first on My Diverse Kitchen - A Vegetarian Blog.

Coconut or Narkel Sandesh

It’s Navarathri season once again. Navratri, the Festival of Nine Nights is here again (“Nav” meaning nine and “Ratri” meaning night). This festival lasts ten days and reveres and celebrates the nine forms of the Hindu Godess Durga or Shakti (energy of the universe). The festival is celebrated according to the traditional Lunar calendar and starts on the new moon day falling between September 15thand October 15th every year. Special food for Neivedhyam or ritual offering is cooked for each day. Apart from the usual festive fare, this time I decided to make Coconut or Narkel Sandesh as well. Sandesh made with coconut and moulded in half moon shapes is called Chandrapuli.


Sandesh, pronounced Shondesh, is a milk based sweet from the eastern Indian regions of Bengal and Orissa. It is also made in parts of Bangladesh. Full fat cow’s milk is curdled and drained to make a soft cheese called Chenna. This is kneaded further till soft and cooked with sugar or palm jaggery. The resulting dough is shaped in clay or wooden moulds.

Medieval Bengali literature mentions a sweet called Sandesh though the ingredients aren’t known. The modern Channa/ Chenna based Sandesh is thought have origins in the 17th century when the first Portuguese settlers in Calcutta brought cheese making techniques with them. Before this curding milk wasn’t done and even considered inauspicious. Bengali sweet makers quickly adopted the cheese making techniques, and became inventive in using cheese in sweets. Thus they say, Sandesh was also born.

The word Sandesh, in Hindi at least, means message. With some stretch of imagination, people tend to liken the confectionery to a sweet and happy message. Which isn’t all that far from the truth, I guess. Sandesh is mildly sweet and is definitely about happiness.

At its simplest is Kanchagolla, a very soft and moist Sandesh rolled into laddoo like balls. Then there’s the beautifully moulded Sandesh that we’re all more familiar with. Sandesh can be creamy or coarse in texture, soft or firmer depending on what variety it is. It can be sweetened with sugar or “nolen gur” or “patali gur”, the famed Bengali date palm jaggery. Sandesh can also be flavoured  according to preference. There is also Jol Bhara Sandesh, a type of moulded Sandesh with a sweet liquid filling. So Sandesh is a sweet that lends itself creative variations.

Kerala is the land of coconuts among other stuff, so I chose to make Coconut or Narkel Sandesh. My friend Sayantani sent me a beautiful set of clay and wooden Sandesh moulds and Navarathri seemed as good a time as any to try them out. It’s just the beginning of palm jaggery season in West Bengal, so I used locally sourced jaggery.

Sandesh is not very difficult to make, though it can take a little time and planning. You have to start with making the Channa/ Chenna. This is done by curdling full fat cow milk with an acidic agent, usually lime juice or yogurt. It is important that the curdling process forms a very soft cheese, softer than for paneer. Cow milk is good for this, as is the amount of lime juice or yogurt used for curdling it. Once the milk cheese has been drained, it must be kneaded well using the heel of the palm. This ensures soft and creamy Channa/ Chenna.

Once the milk cheese is soft and smooth enough it is mixed with sugar or jaggery. Here I’ve also added mawa/ khoya for a more milky taste and fresh coconut. Running the fresh grated coconut in the blender a couple of times produces a smoother mouth feel. This mixture is then cooked over low to medium heat, with frequent stirring until, it becomes less moist and dough like.

The cooked dough is shaped by pressing it into Sandesh moulds. If you don’t have Sandesh moulds, you can roll the dough mixture into small 1 inch balls. You can also decorate them using cookie press moulds.

Print

Coconut or Narkel Sandesh

A festive moulded coconut and milk cheese sweet from Bengal made for the nine day Hindu festival of Navrathri.
Course Dessert, Festive Fare, Neivedhyam
Cuisine Indian
Prep Time 55 minutes
Cook Time 20 minutes
Resting Time 30 minutes
Total Time 1 hour 45 minutes
Servings 1 batch

Ingredients

For the Channa/ Chenna :

  • 2 litres full fat cow milk
  • 4 to 5 tbsp yogurt or 2 to 3 tbsp lime juice diluted with water to 5 tbsp

For the Sandesh :

  • 1 1/2 cups chenna
  • 3/4 cup mawa/ khoya
  • 1/3 cup fresh grated coconut
  • 1/3 cup powered jaggery or to taste
  • 4 to 5 pods cardamom powdered

Instructions

First we make Channa/ Chenna, the soft milk cheese.

  • Bring milk to a boil in a thick walled pot. Turn down the heat and stir in the acidic curdling agent – yogurt or diluted lime juice, a little at a time.
  • The milk should curdle to form soft clumps. Keep stirring and then turn off the heat. Leave it for about 10 to 15 minutes. Line a mesh strainer with muslin cloth and strain the soft milk cheese or Channa/ Chenna.
  • Pull up the edges of the muslin cloth to cover the cheese. Place any small and somewhat heavy object on this o aid pressing and draining of excess liquid. Leave for about half an hour. Then unwrap and you should have still moist and somewhat firm cheese. You can use the strained liquid for kneading chappathi dough.

Making the Sandesh.

  • Place this Channa/ Chenna on a largish thali or shallow edged plate or dish. Working on a small portion at a time, use the heel of your palm, press down and rub the cheese into the plate, from one edge to the other. This makes the cheese smooth, soft and creamier. See the video in post above to understand this process better.
  • Run the fresh grated coconut in the blender a couple of times. Mix well this coconut, crumbled mawa/ khoya and the powdered jaggery with the Channa/ Chenna.
  • Put this mixture into a thick walled pan and cook it on low to medium heat, stirrig constantly. The mixture will soften as the jaggery melts. It should lose moisture, thicken to a dough like consistency aas it cooks and start leaving the sides of the pan.
  • Do not dry out the mixture. It should firm enough to shape and mould but melt in the mouth. Mix in the cardamom and take it off the heat. Let the mixture cool down.
  • Knead it again so it is smooth. Pinch off small balls of the dough mixture and press into greased moulds. Carefully loosen from the moulds with your fingers and transfer to a plate.
  • If you don’t have Sandesh moulds, you can roll the dough mixture into small 1 inch balls. You can also decorate them using cookie press moulds.
  • Serve the same day. Sandesh does refrigerate well for a couple ofdays at the most but is best eaten fresh.

The post Coconut or Narkel Sandesh appeared first on My Diverse Kitchen - A Vegetarian Blog.

Saffron Pistachio Modak

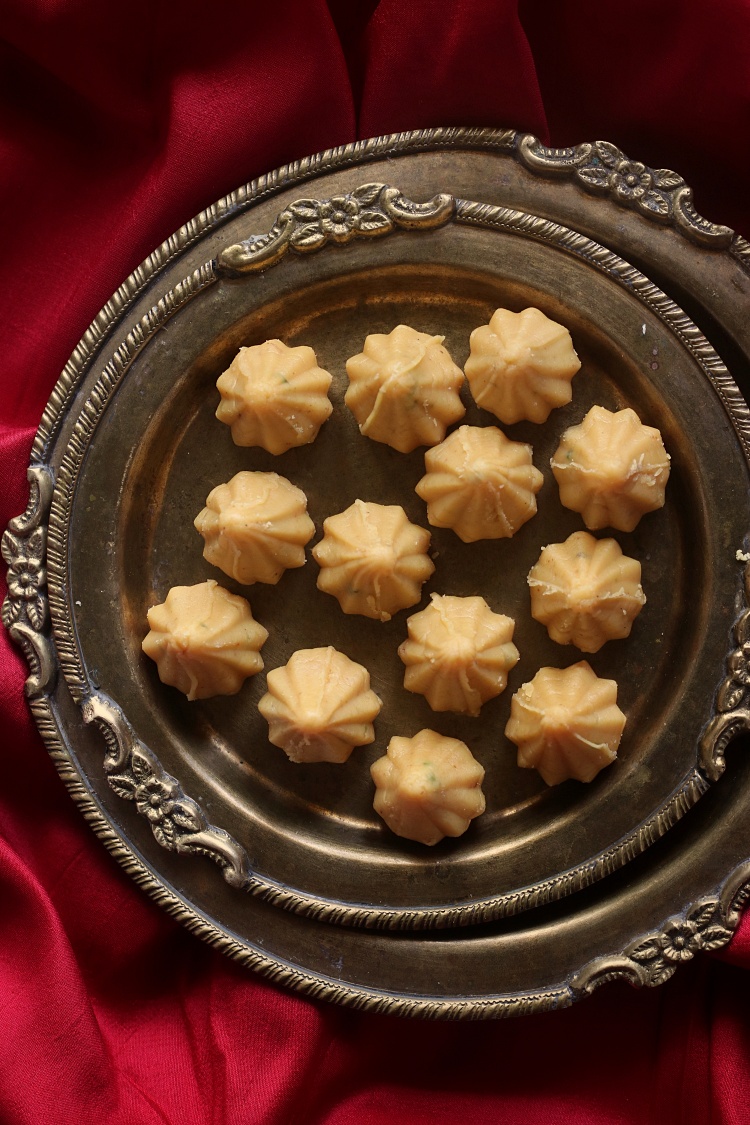
Once again, it’s that time of the year when we celebrate Ganesh Chathurthi. This means that a variety of Modaks will be made. This year I’m sharing a recipe for easy to make Saffron Pistachio Modak.

Ganesh Chathurthi, also known as Vinayaka or Pillayar Chathurthi celebrates the birth of Lord Ganesha. Lord Ganesha, the elephant headed Hindu God is worshipped and his blessings are always invoked for auspicious beginnings. He is also very well known for his love of good food especially sweets. Depictions of him always show him carrying a Modak (sweet) in one palm.

Modak or Modakam/ Kozhukattai as refer to them, are made and offered during Ganesh Chathurthi celebrations. They’re round in shape o the bottom with a pointy top where the dumpling wrapper is gathered and sealed. This festival and offerings are different across India though the Modak is a constant.  We offer Modakam or Kozhukattai that are steam cooked rice dumplings with sweet or savoury fillings.

Deep fried Modaks made with wheat flour wrappers are made in other parts of the country. These have a longer shelf life, whereas the steamed kind must be eaten the same day they’re made. In the Northern parts of India Modak also refers to milk sweets which are shaped the same way and offered during Ganesh Chathurthi. Today’s Saffron Pistachio Modak is this type of milk based sweet.

This is an easy recipe to make provided you have two things on hand – mawa/ khoya and the mould for shaping Modak. Mawa/ khoya are thick unsweetened milk solids. It is made by slow cooking and reducing full fat milk till it all the water in milk evaporates. Mawa/ khoya can be bought from local diaries or shops in most parts of India. If you choose to make it, do it ahead, as it is a lengthy process.

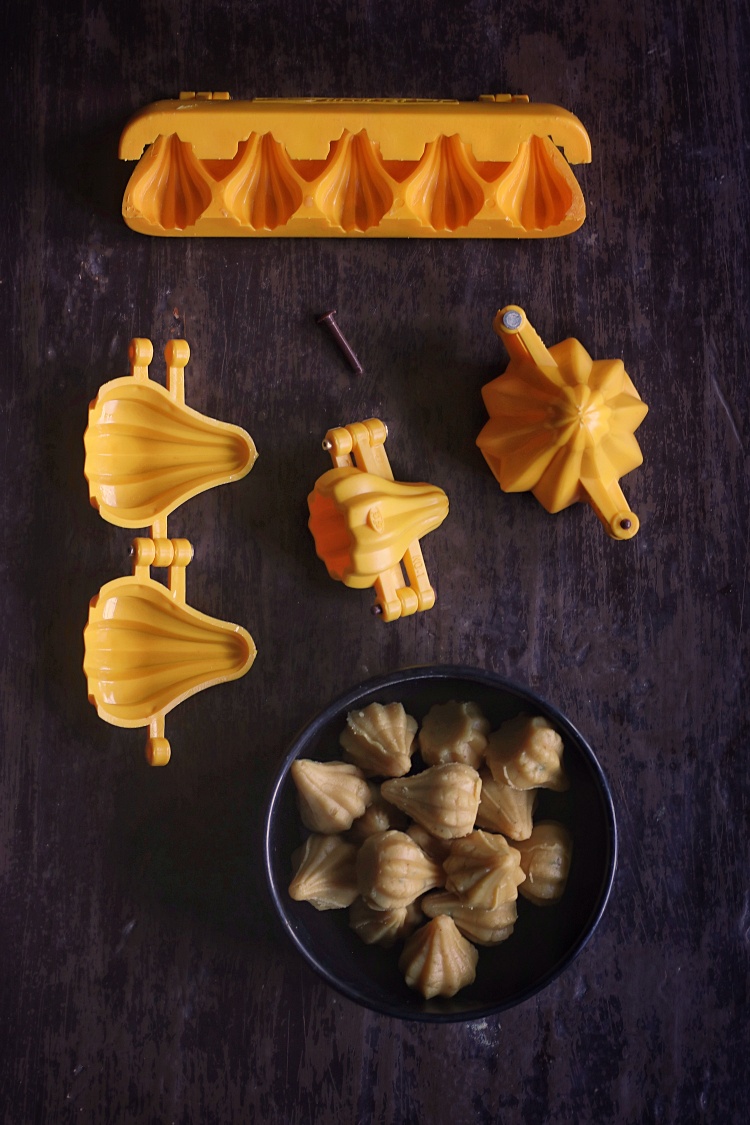
The moulds are available in stores or online. They’re available in plastic, metal or wood, if you’re lucky to find them. Use the smaller moulds to make them, as these Modak are rich and should be bite-sized. If you don’t have the moulds, you can still make these. Just shape them in peds or flattish discs.

Otherwise, all you need beyond mawa/ khoya and the moulds are sugar, cardamom, saffron, a little milk to dissolve it in and pistachios. Everything goes into a thick walled pan and is cooked till it comes together as a thick dough like paste. You can adjust the consistency of the mixture with a little milk (if very crumbly) or a little bit of full fat milk powder (if not thick enough) as you cook it. This paste is then shaped while warm using the moulds. Allow them to sit, covered, overnight at room temperature to set and they’re done.

Print

Saffron Pistachio Modak

Saffron Pistachio Modak - Easy recipe for Indian sweet made for Ganesh Chathurthi from mawa/ khoya, sugar, cardamom, saffron and pistachios.
Course Dessert, Festive Fare
Cuisine Indian
Prep Time 15 minutes
Cook Time 20 minutes
Shaping/ Moulding Time 20 minutes
Total Time 55 minutes
Servings 25 small modak

Ingredients

  • 1 tbsp warm milk
  • 1 large pinch saffron strands
  • 250 gm mawa/ khoya crumbled
  • 1/2 cup sugar
  • 1 tbsp ghee
  • 3 to 4 pods cardamom crushed fine
  • 2 tbsp finely chopped pistachios

Instructions

  • For the saffron infusion, in a small mortar, crush the saffron into the warm milk. Alternatively, let the saffron sit in the warm milk for about 15 minutes.
  • Put the well crumbled mawa/ khoya in a thick walled pan or wok with the sugar. Cook over medium heat, stirring frequently, till it becomes a thick paste. Stir in the saffron-milk mixture and keep cooking and stirring until it becomes thick like a dough.
  • The mixture will begin to leave the sides of the pan/ wok. This should take about 5 to 10 minutes at the most. Mix in the ghee, cardamom and pistachios at this point. Take it off the heat and turn the mixture out onto a plate. Otherwise it will continue to cook in the pan/ wok and could start browning.
  • Let it cool a bit until you can handle the heat comfortably. Grease your Modak mould with a little ghee. Close the mould and tightly pack a little bit of the cooked mixture into the moulds. Gently open the mould and unmould the Modak to a plate. Working quickly repeat with remaining mixture.
  • Cover and let it sit at room temperature overnight to set. The next day the Modak should be firm to touch but soft to eat. This will keep at room temperature for a couple of days. This recipe makes a small batch of about 20 to 25 small Modak.

The post Saffron Pistachio Modak appeared first on My Diverse Kitchen - A Vegetarian Blog.

❌