❌

Reading view

There are new articles available, click to refresh the page.

Aam ka Panna (Raw Mango Drink)

Aam ka Panna (Raw Mango Drink)
Print

Aam Ka Panna (Raw Green Mango Drink)

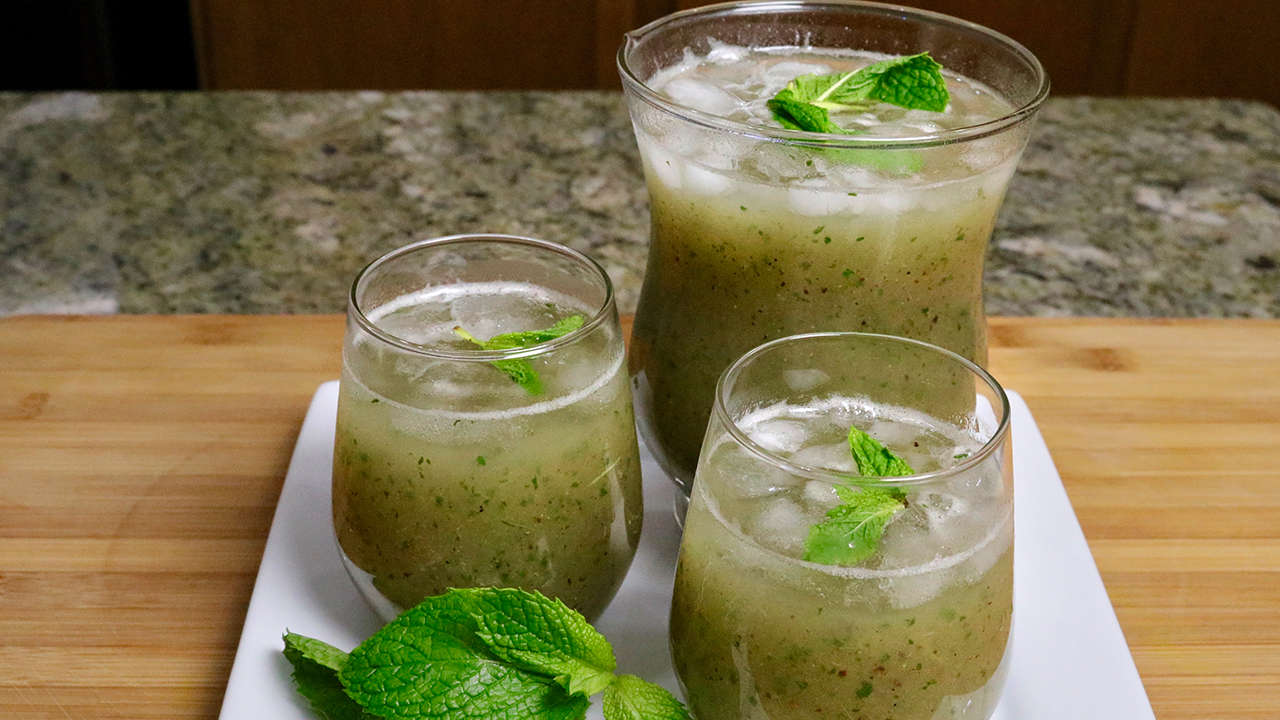
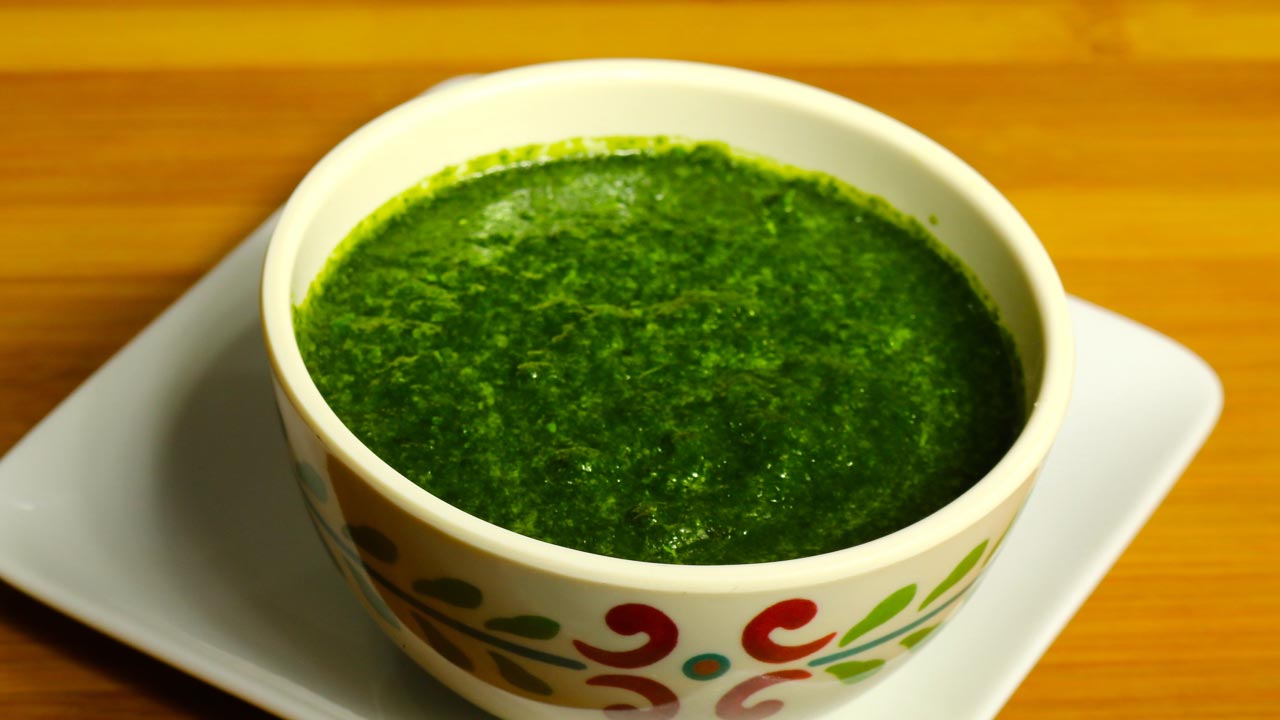
Aam ka Panna (Raw Green Mango Drink) is a refreshing mango drink that is made from raw green mangoes and some mild spices. This chilled drink is great for hot summer days as it has a very nice cooling effect.
Course Drinks
Cuisine Indian
Keyword Aamras, Amchora, Kairi Panna, Raw Mango Drink, Raw Mango Juice, Refreshing, Summer Drink
Prep Time 10 minutes
Cook Time 15 minutes
Total Time 25 minutes
Servings 4 people

Ingredients

  • 2 cup raw cooking mango peeled and cubed,
  • 3/4 cup sugar adjust as needed
  • 1/2 tsp salt
  • 1/2 tsp black salt
  • 1 tsp dry roasted cumin seed powder
  • 1/4 tsp black pepper
  • 1/4 cup mint leaves

For Serving

  • Few fresh mint leaves for garnishing
  • 2 cup crushed ice

Instructions

  • Peel the mango, slice it into large pieces and remove the seed.
  • Boil the mango slices in about 2 cups of water until the mango slices are well cooked. It should take about 10 minutes.
  • After the mango cools off, blend the mango with all the ingredients except use Β½ cup of sugar we will add the sugar as needed.
  • Add about 2 cups of water, taste the panna and adjust the salt and sugar. Panna should have the consistency of orange juice.Β 
  • Serve over ice and use fresh mint leaves as a garnish.

Originally posted 2018-07-08 22:28:27.

The post Aam ka Panna (Raw Mango Drink) appeared first on Manjula's Kitchen.
Khatta Meetha Chivda

Khatta Meetha Chivda
Print

khatta Meetha chivda

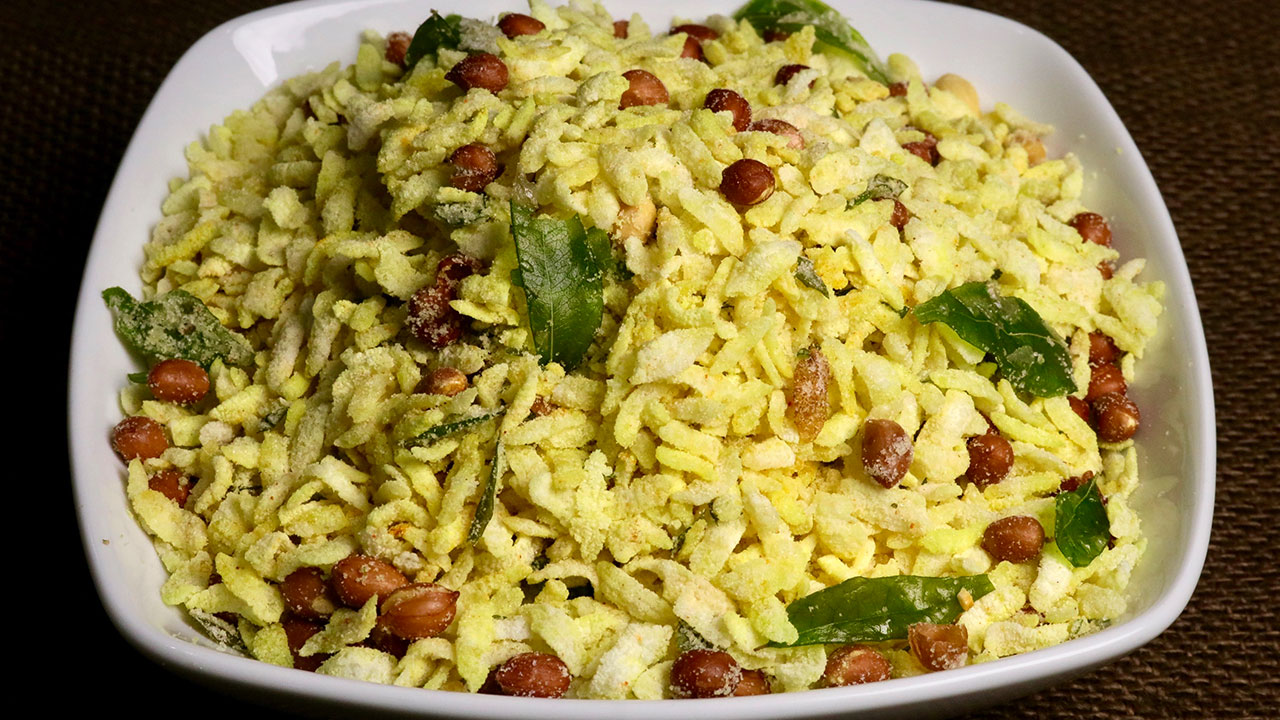
Khatta Meetha chivda is a popular tea time snack. This delicious sweet and salty snack can be enjoyed by all ages. Chivda is a flat rice, also known as poha.
Course Snack
Cuisine Indian
Prep Time 5 minutes
Cook Time 20 minutes
Total Time 40 minutes
Servings 8 people

Ingredients

  • 2 cup chivda or poha available in different thickness, thick, medium, thin or nylon poha, I am using medium
  • 1/2 cup peanuts
  • 1/2 cup sugar
  • 1/4 tsp turmeric
  • 1/2 tsp salt
  • 1/8 tsp citric acid
  • 1/4 tsp red chili powder
  • About 18 curry leaves
  • Also need oil to fry

Instructions

  • Grind sugar, salt, citric acid and red chili powder together making sugar in to powder. And all the ingredients will be mixed evenly. Set aside.
  • Wash and pet dry curry leaves and let it air dry for at least 10 minutes or more.
  • In a frying pan take about 1” of oil and heat on medium heat. Oil should be moderately hot. Put about 1/4 cup of chivda in an oil, chivda should come up right away, (otherwise oil is not hot enough) as soon chivda comes up over oil, lower the heat to low and stir fry chivda till it doubles in size but remains white in color. Take out fried chivda in a strainer to drain out excess oil. Repeat the process and fry the remaining chivda.
  • In the same oil fry peanuts over low heat till they are light brown.
  • Fry the curry leaves until they are crisp.
  • Take another frying pan large enough to hold all the ingredients, put I teaspoon of oil in the pan over low heat. put turmeric stir and put chivda, keep mixing till it is mixed well and chivda will be light yellow turn off the heat and let the chivda come to room temperature.
  • Add peanuts, sugar mix, and crush the curry leaves over. Mix it gently until all the ingredients are incorporated well.

Notes

You can store the Khatta Meetha Chivda, in a air tight container for a month. Store it in an air-tight container and enjoy this scrumptious snack for up to 2 months...!!

Originally posted 2017-12-05 01:48:04.

The post Khatta Meetha Chivda appeared first on Manjula's Kitchen.

Vegetable Cheela Rolls, vegetable Wrap

Vegetable Cheela Rolls recipe by Manjula
Print

Vegetable Cheela Rolls

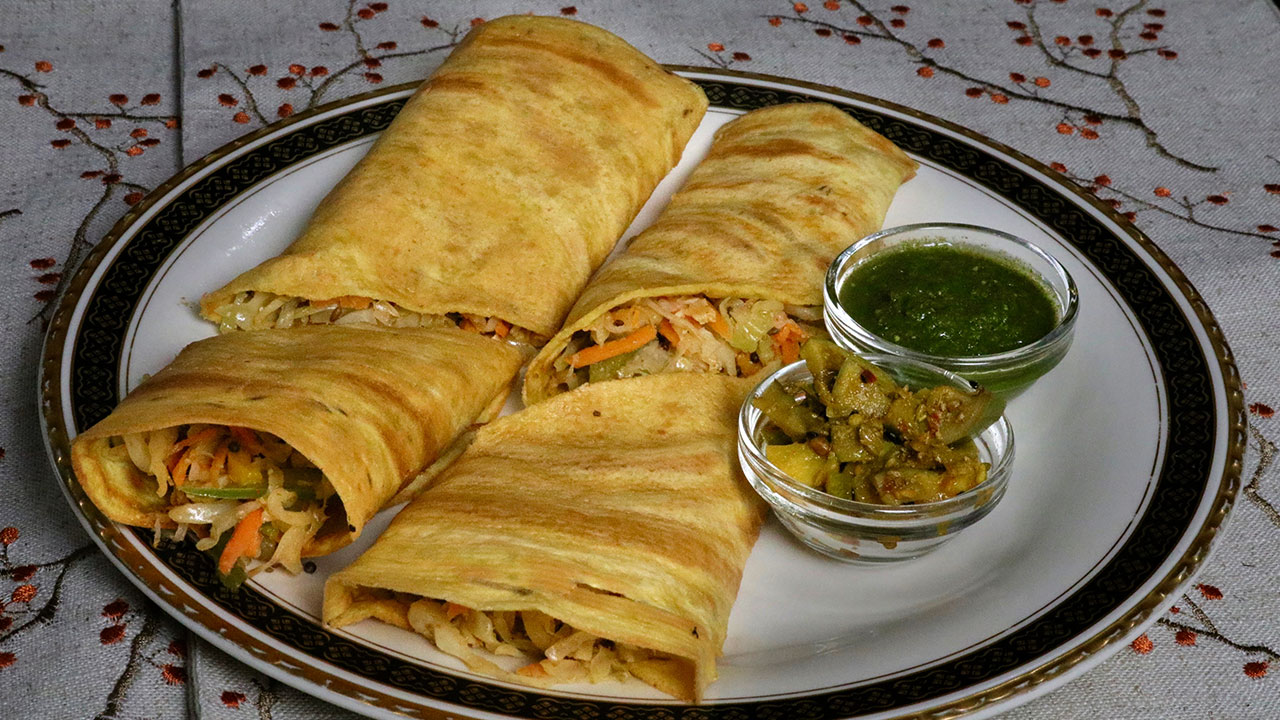
Vegetable Cheela Rolls is a healthy and delicious any-time meal. Cheela Rolls is a treat for people who are vegan and gluten free. Cheela is like a besan dosa, and can be used as a wrap and this cheela wrap with vegetables makes a wholesome meal. Cheela Rolls can be used as a snack and also for good a lunch box meal.
Course Appetizer, Snack
Cuisine Indian
Prep Time 10 minutes
Cook Time 20 minutes
Total Time 30 minutes
Servings 2 people

Ingredients

For Cheela

  • 1 cup besan Gram flour
  • 2 Tbsp rice flour
  • 1 tsp salt
  • 1/2 tsp cumin seeds jeera
  • 3/4 cup water to make batter
  • 4 tsp oil

For Filling

  • 3 cup cabbage thinly sliced
  • 1/2 cup carrots shredded
  • 1/2 cup bell pepper thinly sliced
  • 2 tsp oil Canola or vegetable oil
  • 1/2 tsp cumin seeds jeera
  • 1/2 tsp mustard seeds rai
  • 2 tsp coriander powder dhania
  • 1/4 tsp chili powder
  • 1/2 tsp salt
  • 1/2 tsp sugar
  • 1 tsp lemon juice

Instructions

  • Mix all the dry ingredients together, besan, rice flour, cumin seeds, and salt. Add the water slowly to make a smooth batter, consistency of Dosa batter. Set aside.
  • To make the filling: Heat the oil in frying pan over medium high heat. Oil should be moderately hot, add cumin seeds and mustard seeds, as the seeds crack. Add cabbage, carrots, and bell pepper. Stir-fry for about one minutes add all the other ingredients, coriander powder, chili powder, salt, sugar and lemon juice. Stir- fry for about three to four minutes, vegetables should be still crisp. Turn off the heat.
  • To make the Cheele: Use a heavy skillet and place on medium-high heat. Test by sprinkling a few drops of water on it. Water should sizzle right away.
  • Pour about 1/4 cup of the batter into the skillet and spread evenly with a back of spoon. Starting from the center, spiral the batter outward evenly to form a circle.
  • When batter starts to dry, gently spread one teaspoon of oil over it. Wait about 30 seconds; flip the cheela using a flat spatula.
  • Press the cheela lightly all around with the spatula to make cheela cook evenly. Turn the cheela and in the center of the cheele put about Β½ cup of stir-fry diagonally and roll it.
  • Vegetable Cheela Roll is ready to serve. I like to serve this with Mango Pickle or Cilantro Chutney.
  • Enjoy!

Notes

In the ingredients, we need about 4 cups total of sliced vegetable (this includes the cabbage, bell pepper, and carrots)
Suggestions
Use or preferred vegetables and also works good with any leftover vegetables.

Originally posted 2017-08-21 23:32:15.

The post Vegetable Cheela Rolls, vegetable Wrap appeared first on Manjula's Kitchen.

Masala Arbi (SautΓ©ed Taro Root)

Masala Arbi (SautΓ©ed Taro Root)
Print

Masala Arbi - SautΓ©ed Taro Root

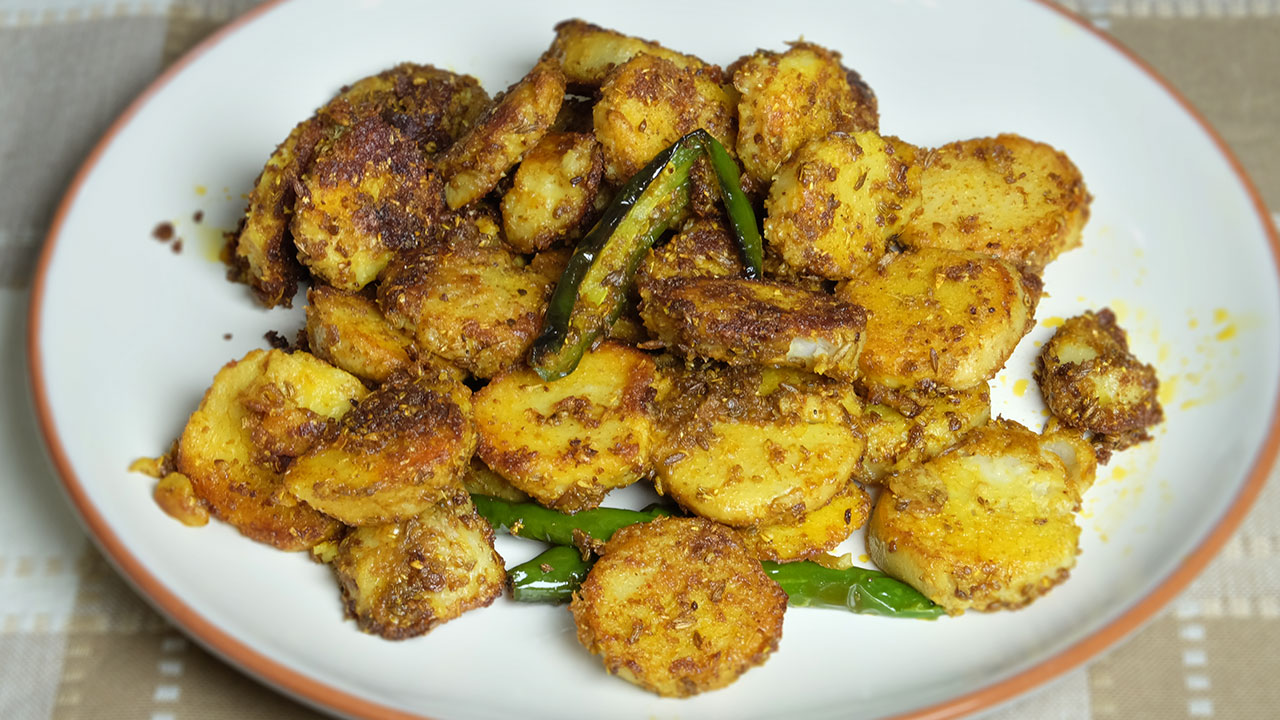
Arbi is also known as Taro root. Masala Arbi with a great blend of spices makes a very enjoyable side dish. This can complement any meal. Masala Arbi can be served with roti, paratha or puri.
Course Side Dish
Cuisine Indian
Prep Time 5 minutes
Cook Time 15 minutes
Total Time 20 minutes
Servings 4 People

Ingredients

  • 7-8 medium sized taro root boiled, arbi
  • 3 Tbsp oil
  • 1/2 tsp carom seeds ajwain
  • 1/4 tsp cumin seeds jeera
  • 1/8 tsp asafetida hing
  • 1 Tbsp coriander powder dhania
  • 1/4 tsp turmeric haldi
  • 1/2 tsp red chilli powder
  • 2 green chilies sliced
  • 1 tsp salt
  • 1/2 tsp mango powder amchoor

Instructions

  • Wash arbi before boiling and do not over boil the arbi as they become very slimy. I prefer to boil arbi in a pot so that it is easy to check if they are cooked. Arbi should be firm, and knife should go through effortless.
  • Peel the skin and slice them into about 1/8” thick rounds. Set aside.
  • In a small bowl mix turmeric, coriander powder, and red chili powder with 1/4 cup of water to make a paste. Set aside.
  • Heat the oil in wide pan over medium heat, oil should be moderately hot, (when you add the cumin seed to oil it should crack right away).
  • Add carom seeds, and cumin seeds as cumin seeds crack add asafetida,
  • Stir and add spice paste stir for about 30 seconds till oil start separating from oil.
  • Add green chili stir for few seconds.
  • Add arbi spreading over the pan, sprinkle the salt, and mango powder gently fold the arbi with spice mix, all the arbies should be coated well with spices. Making sure arbies are not sticking to each other.
  • SautΓ©e them over medium heat till they are lightly brown both sides. Turning them occasionally gently. This should take about 8-10 minutes.

Originally posted 2016-12-07 00:29:48.

The post Masala Arbi (SautΓ©ed Taro Root) appeared first on Manjula's Kitchen.
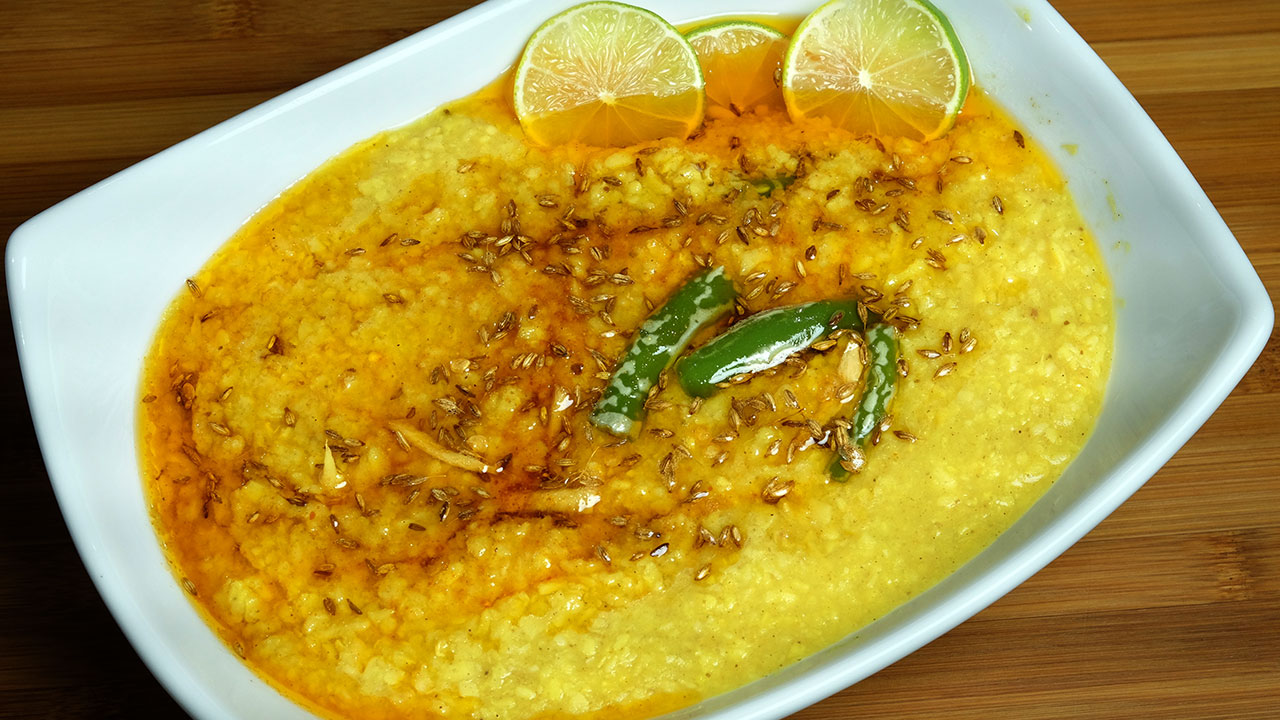
Urad Dal Tadka

Urad Dal Tadka
Print

Tadka Urad Dal

Tadka Urad Dal was a favored lentil dish in my family while I was growing up. Dal is a staple dish in Indian meals and, for most Indian vegetarians, a frequent source of protein. This delicious, nourishing dish can accompany any number of different meals.
Course Main Course
Cuisine Indian
Prep Time 10 minutes
Cook Time 15 minutes
Total Time 45 minutes
Servings 4 people

Ingredients

  • 1 cup urad dal washed
  • 1 tsp salt
  • 1/4 tsp turmeric
  • 1 Tbsp ginger finely chopped
  • 2 cups water
  • 1/4 tsp garam masala
  • 1/2 tsp mango powder amchoor

Seasoning

  • 3 Tbsp ghee clarified butter
  • 1/2 tsp cumin seeds jeera
  • 1/8 tsp asafetida hing
  • 1 green chili sliced
  • 1 Tbsp ginger thinly sliced
  • 1/2 tsp red pepper adjust to taste
  • 4 pieces lemon for garnishing

Instructions

  • Wash and soak urad dal for at least 20 minutes. Dal will be double in volume after soaking. Drain the water.
  • Put dal with 2 cups water into a pressure cooker and add salt, turmeric, and ginger. Close the cover and cook on medium high heat.
  • When the pressure cooker starts to steam, turn the heat down to low and cook for five minutes.
  • Turn off the heat and wait until all the steam has escaped before opening the pressure cooker. Dal should be soft. If needed add more water, dal should be not very mushy you should be able to see the grains. You should be able to scoop the dal with roti. Dal will thicken as it sits after cooking. So leave it more liquid than you want it to be.
  • Add garam masala, and mango powder mix it well.

Seasoning

  • Heat ghee in a small saucepan. Test the heat by adding one cumin seed to the ghee; if it cracks immediately, the oil is ready. Add the cumin seeds. When they begin to crack, add the asafetida, ginger, and green chilies. Stir for a few seconds. Add red chili powder and 1 tablespoon of water to prevent the spices from burning. Pour spiced chaunk over hot dal, before serving.

Notes

Tadka urad dal is ready serve with roti or paratha, or with plain rice.

Originally posted 2016-07-07 23:21:08.

The post Urad Dal Tadka appeared first on Manjula's Kitchen.
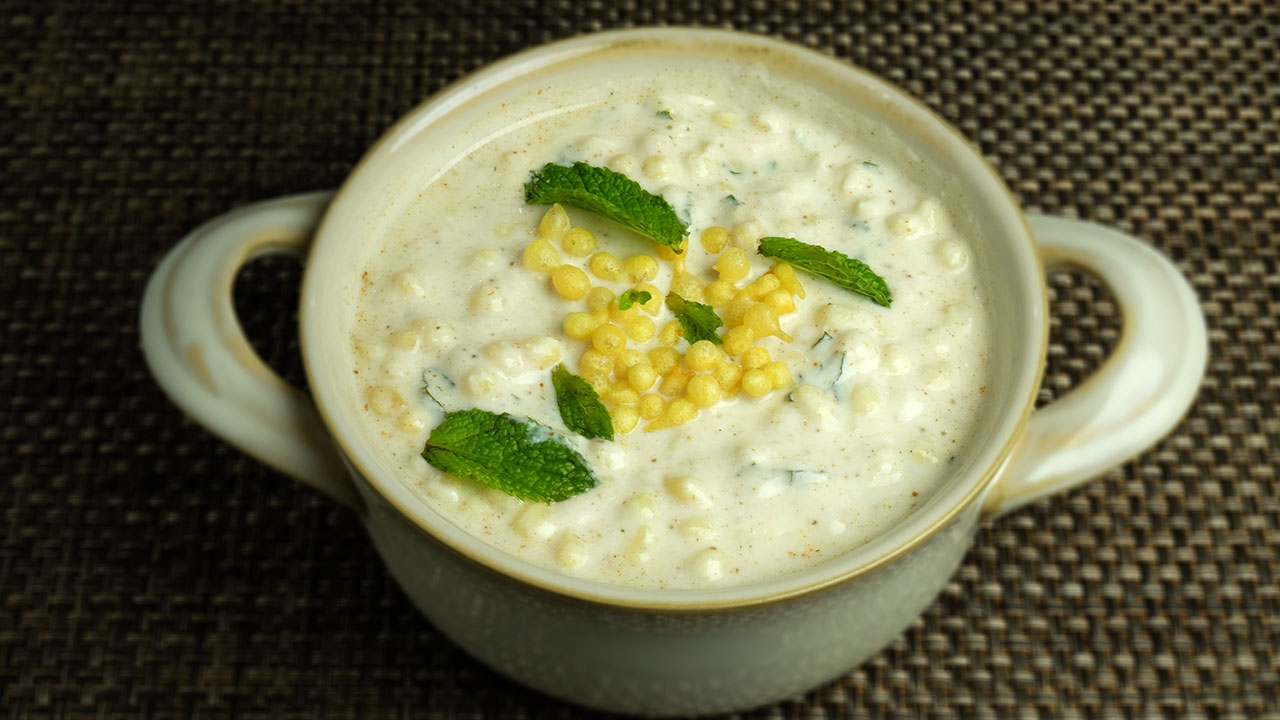
Boondi Ka Raita

Boondi Ka Raita is a delicious and easy to make side dish which compliments any meal. Boondi ka raita is a yogurt based Indian condiment. Raita is an integral part of Indian cuisine.

This recipe will serve 4.

Prep Time: 5 minutes

Cook time: 5 minutes

Boondi Ka Raita Recipe by ManjulaIngredients:

  • 1 cup boondi, boondies you can buy in indian grocery stores or use the recipe I have for sweet boondi just do not soak them in syrup.
  • 1-1/2 cups yogurt
  • 1/2 teaspoon Salt
  • 1/2 teaspoon Black salt
  • 1/2 teaspoon roasted cumin seed powder
  • 1/4 teaspoon red chili powder
  • About 1 table spoon mint leaves chopped
  • Few mint leaves to garnish

Method

  1. Soak boondi in the warm water for about 10 minutes.
  2. Lightly squeeze the boondies in your palms, don’t mash them.
  3. whisk the yogurt in a bowl. If yogurt if too thick add water as needed. Yogurt should be the consistency of pancake or dosa batter.
  4. Add all the spices salt, black salt cumin seed powder, chili powder, and chopped mint leaves mix it well.
  5. Add the boondi and mix.
  6. Garnish boondi raita with mint leaves.

Boondi raita can be served cold or at room temperature. I especially like boondi rita with aloo Β paratha or with Urad Dal Puri.

Originally posted 2016-06-22 20:47:19.

The post Boondi Ka Raita appeared first on Manjula's Kitchen.
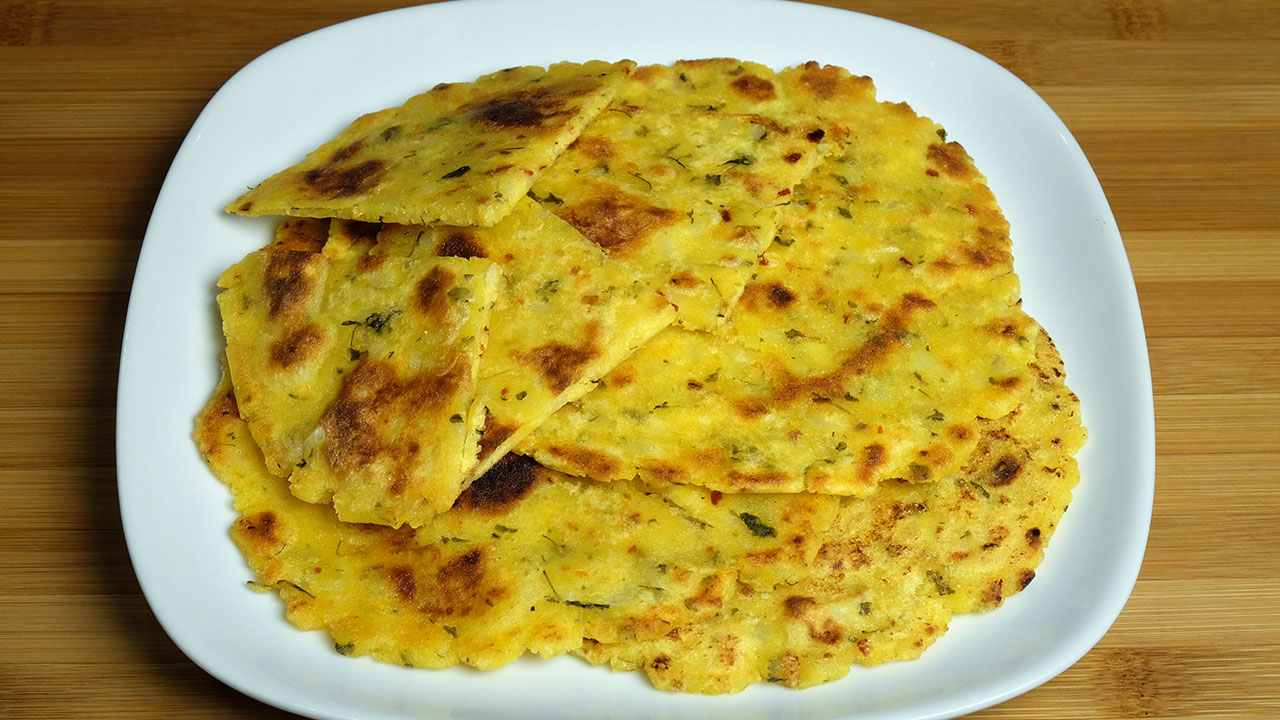
Makki Ki Roti – Paratha

Makki Ki Roti is a popular Punjabi bread made with corn flour and served with Sarson Ka Saag. Maki ki roti is also a Gluten Free flat bread.

This recipe will make 6 rotis, and will serve 3.

Makki Ki Roti Recipe by ManjulaIngredients:

  • 2 cups makki ka atta, corn flour
  • 1 cup potato, boiled peeled and grated
  • 1 teaspoon salt
  • 1 teaspoon chili flakes
  • 2 tablespoons dry fenugreek leaves, kasuri mathi
  • 1/8 teaspoon asafetida, hing
  • ΒΎ cup warm water
  • 3 tablespoons of ghee or clarified butter for cooking roties

We also need a plastic sheet about 8” x 12” to roll the roties I am using a zip lock bag.

Method

  1. Combine all the dry ingredients in a bowl, corn flour, salt chili flakes, fenugreek leaves, and asafetida mix it well. Add potato to the mixture and mix. This will become very crumbly. Add water as needed to make the firm dough. Knead the dough for a minute. For makki ki roti make the dough when ready to make roti.
  2. Note: Makki ki roti is little hard to roll that is the reason I decided to use potatoes. Potatoes help to binding the dough.
  3. Divide the dough in 6 equal parts. Make them in smooth balls.
  4. Take one ball press it between the plastic sheet plastic sheet help rolling the roti, roll the roti into about 6-inch circle. Note: may be the edges will not be as clean like other roties.
  5. Heat the skillet over medium heat. Skillet should not be very hot. Otherwise roties will not cook through.
  6. Place the roti in the skillet. As it cooks, the dough will change color and have a dryer look. Turn the roti over using a spatula. You should see golden-brown spots on the semi-cooked side.
  7. After few seconds, spread 1 teaspoon ghee onto the roti using a spatula. Turn the roti over. Using your spatula, lightly press the entire surface of the roti to help it cook all the way through. Put the ghee on both sides of the roti while cooking. Grill the roti from both sides making sure it is golden-brown on both sides.Β  Remove from heat.
  8. Repeat with the remaining dough, until they are all done.

Serve them hot. Makki ki roti traditionally served with sarson ka saag or dal makhani. If you are vegan use the oil for cooking the roties.

Originally posted 2016-06-16 23:30:35.

The post Makki Ki Roti – Paratha appeared first on Manjula's Kitchen.
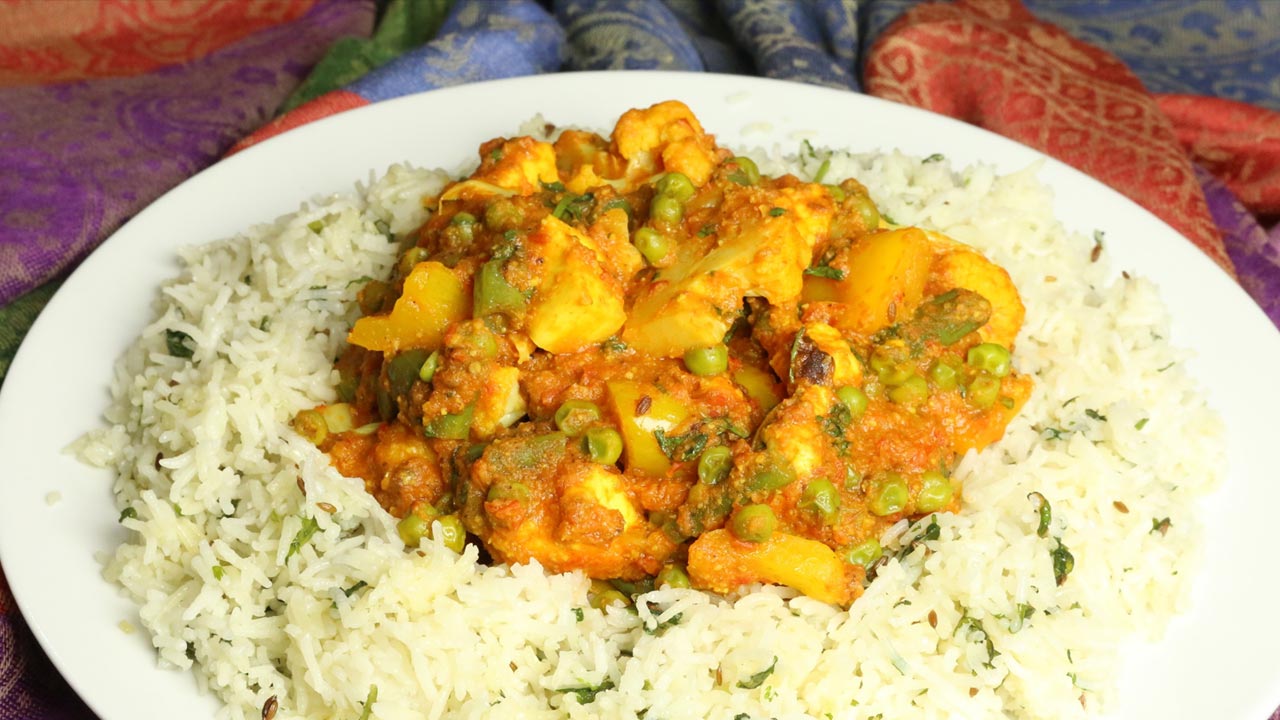
Shahi Pulao (Vegetable Pulao)

Shahi Pulao or Vegetable Pulao is an exotic rice dish that combines spicy and aromatic vegetables served over rice. Rich with flavor, this is an extraordinary dish. You may also call this Biryani. This dish is made in two parts. First I prepare the rice with cumin seeds and cilantro. Then the vegetables are cooked separately with tomatoes, cashews, beans, green peas, cauliflower, and paneer. Top these vegetables over the rice and you have a mouth-watering dish!

Recipe will serve 4.

Ingredients: Hyderabadi Biryani (Vegetable Pulao) Recipe by Manjula

For rice

  • 1 cup rice preferred basmati rice available in Indian grocery stores
  • 2 tablespoons clarified butter or ghee
  • 1/2 teaspoon cumin seeds (jeera)
  • About 1 inch piece cinnamon stick (dal chini)
  • 1/2 teaspoon salt
  • About 1/4 cup cilantro finely chopped (hara dhania)
  • 2 cups water

For vegetables

  • About 3 cups mix vegetables I am using cauliflower cut into small floret, green beans cut into small pieces, bell pepper cut into cubes, and frozen green peas,
  • 1/2 cup paneer cut into about 1/2 inch cubes
  • 4 cups tomatoes chopped
  • 1 green chili cut into pieces
  • About 2 tablespoons ginger cut into small pieces
  • 3 tablespoons oil
  • 1 teaspoon cumin seeds (jeera)
  • 1/8 teaspoon asafetida (hing)
  • 2 tablespoons coriander powder (dhania)
  • 1/2 teaspoon turmeric
  • 1/2 teaspoon red chili powder
  • 1-1/2 teaspoon salt
  • 1 teaspoon sugar
  • 1/4 cup cashew powder
  • 1/4 cup cilantro chopped
  • 1/4 teaspoon garam masala

Method

Rice:

  1. Wash rice gently changing water several times until the water appears clear.
  2. For fluffier rice, the rice should be soaked for at least 15 minutes prior to cooking.
  3. Heat the oil in a saucepan. Oil is the right temperature when one cumin seed dropped into the oil cracks immediately.
  4. Add the cumin seeds. When they crack, add the cinnamon stick and stir for a few seconds. Add the rice, cilantro, and salt. Stir-fry one minute.
  5. Add the water and bring to a boil, turn the heat to low. Cover the pan, and Cook 15 minutes, or until the rice is tender and the water has evaporated. Turn off the heat and fluff the rice with a fork.

Vegetables

  1. Blend tomatoes, green chilies and ginger to make a puree. If you prefer mild take the seeds out of green chili before blending.
  2. Heat the oil in a saucepan. Over medium high heat oil should be moderately hot, add the cumin seeds, and asafetida, as seeds crack add tomato puree, coriander, turmeric, sugar and salt.
  3. Lower the heat to medium, stir the spice paste occasionally when it start thickening add cashew powder and cook until paste become the thick and start leaving the oil from side.
  4. Add all the vegetables and 1/4 cup of water, mix it well. Cover the pan and let it cook for about 5-6 minutes over medium heat stir few times in between. Add paneer mix and cover the pan, cook for another 3-4 minutes. Vegetables should be tender not mushy.
  5. Turn off the heat add garam masala and cilantro, stir and cover the pan for few minutes before serving.
  6. Serve the vegetable over hot rice.

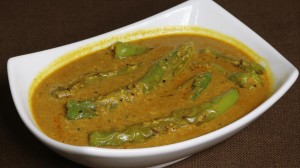
Hyderbadi mirchi ka salan goes well with this Shahi Pulao
Hyderabadi Mirchi Ka Salan (Spicy Pepper Curry)

Hyderabadi Mirchi Ka Salan (Spicy Pepper Curry)

Originally posted 2015-09-01 23:02:51.

The post Shahi Pulao (Vegetable Pulao) appeared first on Manjula's Kitchen.
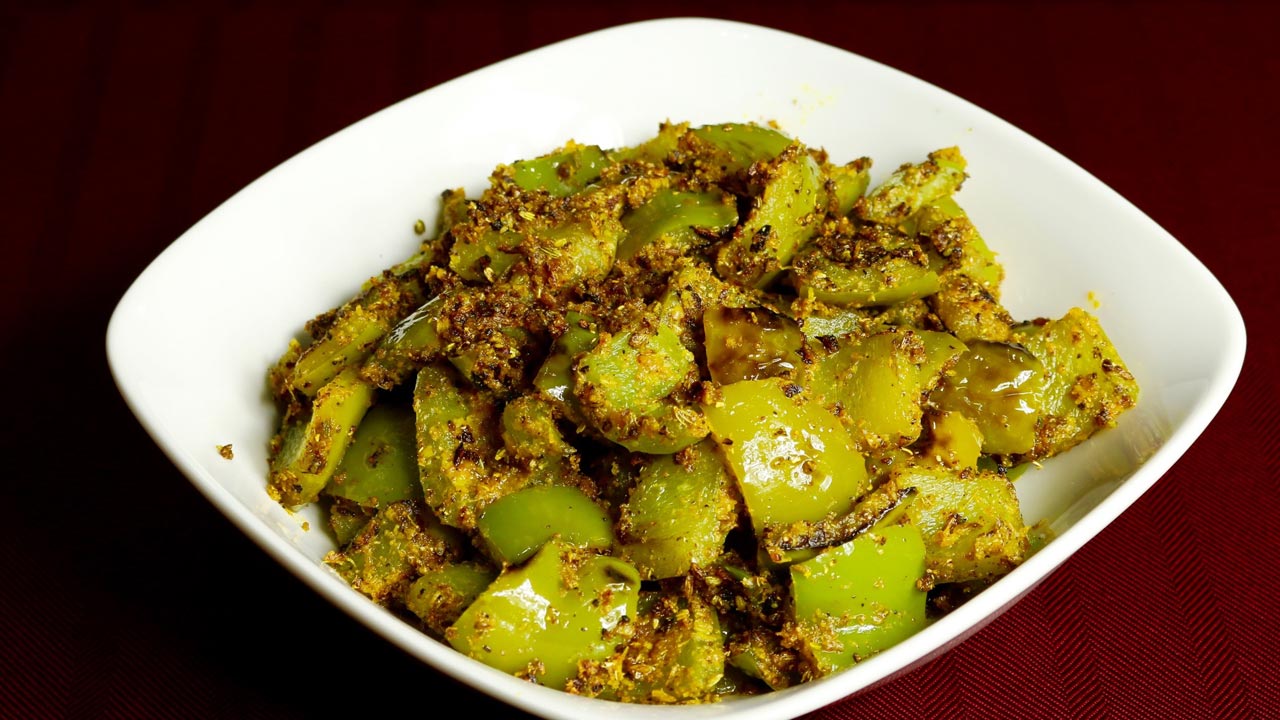
Masala Bell Pepper (Capsicum)

Bell pepper is also known as capsicum or shimla mirch. Masala bell pepper with great blend of spices, makes a very enjoyable side dish. This can complement any meal. Masala bell pepper can be served with roti, paratha or puries. I enjoy this with side of dal fry and plain rice.

This recipe will serve 4.

Masala Bell Pepper (Capsicum) Recipe by ManjulaIngredients:

  • 3 medium Green bell pepper seeded and cubed in 1/2” pieces this will make about 3 cup cubed bell pepper (capsicum, shimla mirch)
  • 2 tablespoons oil
  • 1/2 teaspoon cumin seeds (jeera)
  • 1/8 teaspoon asafetida (hing)
  • 1-1/2 tablespoon coconut powder (gola)
  • 1-1/2 tablespoon sesame Seed powder (til)
  • 2 teaspoons coriander powder (dhania)
  • 2 teaspoon fennel seeds powder (saunf)
  • 1/2 teaspoon Red Chili Powder (lal mirch)
  • 1/4 teaspoon Turmeric Powder (haldi)
  • 3/4 teaspoon salt
  • 1 teaspoon sugar
  • 1/2 teaspoon mango powder (amchoor)
  • 1 teaspoon Lemon Juice

Method

  1. In a small bowl mix most of the spices, coconut powder, sesame powder, coriander powder, fennel seeds powder, red chili, turmeric, salt, and sugar. Set aside.
  2. In a wide frying pan heat the oil moderately over medium high heat, add cumin seeds as seeds crack add asafetida. Add bell pepper mix well lower the heat to low medium. Cover the pan and let it cook for about 3 minutes.
  3. Sprinkle the spice mix. Mix it well coating all the bell pepper. Let it cook about 3-4 minutes covered, do stir in between. Cook the bell peppers until they are tender but still little crisp.
  4. Turn off the heat, add the mango powder and lemon juice mix well.
  5. Masala bell pepper is ready.
  6. Enjoy!

Β 

Β 

Originally posted 2015-05-26 01:30:07.

The post Masala Bell Pepper (Capsicum) appeared first on Manjula's Kitchen.
Fruit Smoothie

This Fruit smoothie is a delicious and healthy drink, and also quick and easy to make. Fruit smoothie is one of my favorite summer drinks. This great smoothie consists of cantaloupes, strawberries, and yogurt with a touch of ginger giving a nice and tangy taste. Try this recipe for the perfect almost-summer drink.

This recipe will serve 3.

Preparation time: 5 minutes

Cooking time: 5 minutes

Fruit Smoothie Recipe by ManjulaIngredients:

  • 2 cups cantaloupe cut into small pieces (kharbooja)
  • 3-4 strawberries cut into small pieces
  • 1/3 cup yogurt (curd, dahai)
  • 2 tablespoons sugar, adjust
  • 2 teaspoons ginger juice, freshly squeezed
  • 1/4 cup orange juice freshly squeeze
  • 1 cup crushed ice

Method

  1. Put the cantaloupes and strawberries in a blender and process on high speed until smooth, add yogurt, orange juice, ginger juice and sugar blend until everything mixed well. Add ice blend on high speed until there is no ice and smoothie is little frothy. Pour into glasses and serve.

Notes

Fruits should be ripe but do not use overripe fruits. Sugar needs to be adjusted depending on the fruits.

You will also like to try Arugula and Melon Salad and Chilled Melon Soup

Originally posted 2015-05-07 00:37:15.

The post Fruit Smoothie appeared first on Manjula's Kitchen.
Falooda Kulfi (Indian Ice Cream)

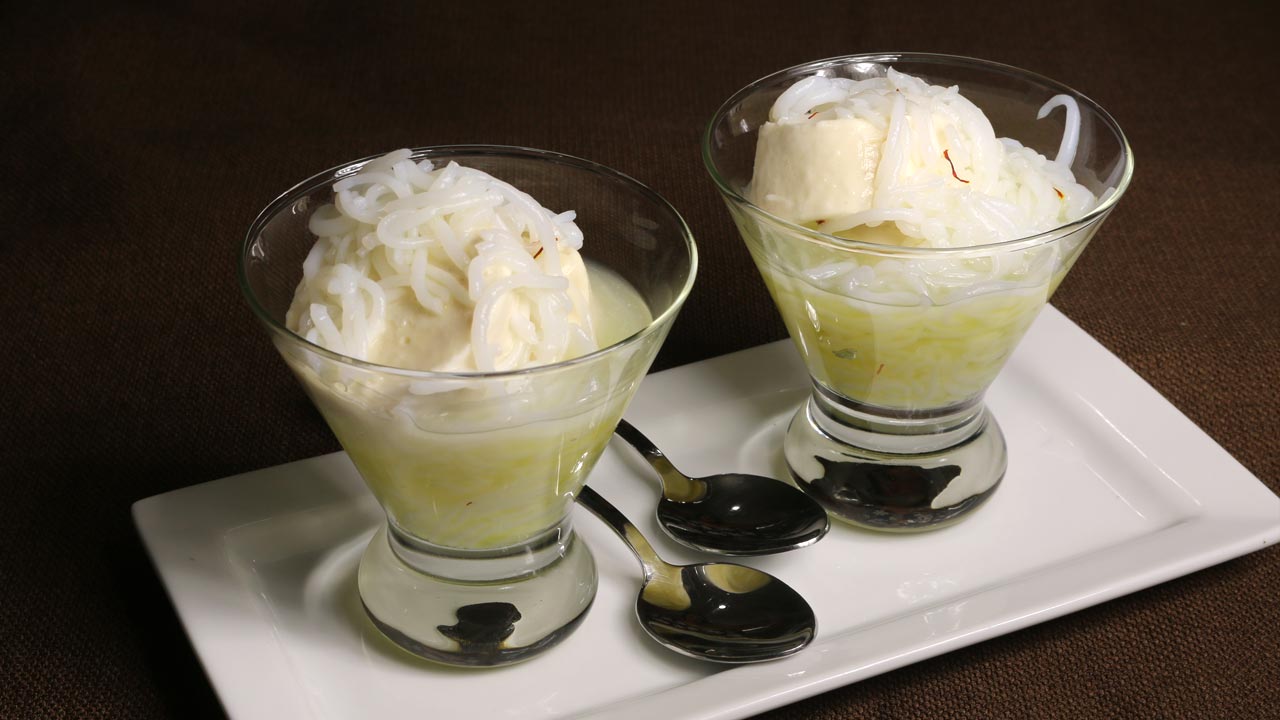
Falooda Kulfi is a refreshing dessert. β€œFalooda” looks like rice noodles and they are made with cornstarch or arrowroot.Β  β€œKulfi” is an Indian ice cream. This is a delicacy with street vendors all over India. One has to experience this delightful dessert to appreciate it.Β  You can also serve Falooda with any ice cream of your choice. Try this recipe to enjoy as one of my favorite summertime treats!

Recipe will serve 6.

Falooda Kulfi (Indian Ice Cream Recipe) by ManjulaIngredients:

  • 1/2 cup corn starch or arrowroot
  • 2 cup water
  • 1/2 cup sugar
  • 1/4 cup water
  • 12 strings of saffron
  • 1/2 cup kulfi for each serving, check my web site for kulfi recipe
  • Wide bowl of ice cold water with some ice

Also need sev maker

Method

  1. For syrup boil sugar, water and saffron together, as it comes to boil turn of the heat and stir the syrup making sure sugar has dissolved. Syrup needs to be chilled before serving, keep it in refrigerator.
  2. Add water to corn starch slowly making sure there is no lumps, batter will look like consistency of milk.
  3. Over low medium heat in a frying pan add the batter and cook stirring continuously till corn starch become translution and consistency of thick batter or soft lumpy dough. This will take about 10-12 minutes. Turn off the heat and remove from stove.
  4. Let the mix cool off little bit and pour the hot mixture into sev maker using fine sev attachment. Press the sev maker over ice cold water, and let the sev string drop into the bowl.
  5. Leave the falooda in ice cold water at least for 2 hours before using.
  6. Falooda will stay good for about a week in refrigerator, but make sure falooda stays in chilled water.

Serving the Falooda Kulfi

Use individual serving bowl, first layer the bowel with falooda, drizzle about 1 tablespoon of syrup. Put the kulfi then over the kulfi put some more faluda and finish off drizzling 1 tablespoon of syrup. Falooda kulfi is ready to serve! This just taste great.

Originally posted 2015-04-29 07:52:06.

The post Falooda Kulfi (Indian Ice Cream) appeared first on Manjula's Kitchen.
Tomato Chutney (Pickle)

Tomato Chutney (Tomato Pickle) Recipe by Manjula
Print

Tomato Chutney (Pickle)

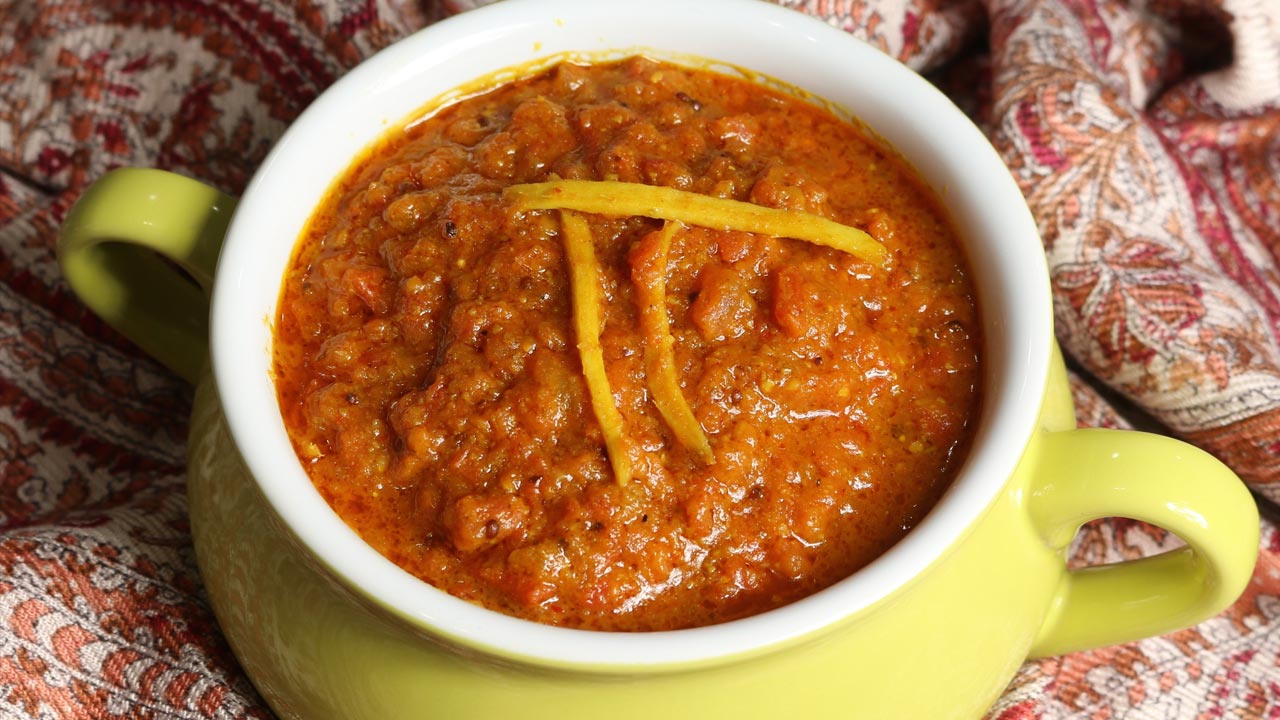
Tomato Chutney is tangy and spicy. I was inspired to make this particular tomato chutney from the south Indian cuisine. Chutneys and pickles are a common component of Indian meals. This unique blend of spices gives an amazing unforgettable flavor to chutney. It goes well with breads and rice or can be used as a spread for sandwiches. Tomato chutney is very easy to make and can be refrigerated for up to a month.
Course Side Dish
Cuisine Indian
Prep Time 10 minutes
Cook Time 30 minutes
Total Time 40 minutes
Servings 10 people

Ingredients

  • 4 cups tomatoes cubed in small pieces
  • 3 tbsp tamarind paste
  • 1/4 cup oil
  • 1 tsp mustard seeds rai
  • 1 tsp asafetide hing
  • 1/4 tsp turmeric haldi
  • 2 tbsp sesame seeds til
  • 2 tbsp coriander seed
  • 1 tsp fenugreek seeds
  • 10 whole dry red chilies
  • 1/4 cup sliced ginger optional
  • 1 tsp salt
  • 2 tsp sugar

Instructions

  • In a small frying pan dry roast red chilies, over low medium heat, stirring continuously to cook evenly till they are darker in color, this should take about 2 minutes. Remove from the frying pan.
  • In the same pan, dry roast sesame seeds, coriander seeds, and fenugreek seeds over low medium heat individually stirring continuously to cook evenly for about less than a minutes. Don’t over roast.
  • In a same pan add 2 teaspoons of oil when oil is moderately hot add ginger and stir-fry on low medium heat for about 3 minutes until ginger start catching the light brown color from the sides. Set aside.
  • After spices cool of grind them into the powder. Set aside.
  • In a blender crush the tomatoes do not make a paste. Set aside.
  • In a pan heat remaining oil over medium high heat, oil should be moderately hot add mustard seeds, after they crack add asafetida. Now add tomatoes, and tamarind paste. Stir and cook for about 10 minutes semi covered (after tomato comes to boil start splattering) or until oil start separating.
  • Add the roasted spice powder, ginger, turmeric, salt and sugar, reduce the heat to low medium and cook for about another 8 minutes or until chutney is thick and oil is separated.

Notes

I like to serve tomato chutney with rava dosa, vada or spread on sandwich.

Originally posted 2015-04-08 22:32:07.

The post Tomato Chutney (Pickle) appeared first on Manjula's Kitchen.

Dal Fry (Dal Tadka)

Dal Fry is a popular Indian lentil recipe. This recipe uses Toor dal, which is also known as Arhar or Toovar dal. The dal is seasoned with variety of spices and it tastes delicious. This is something you often find served at Indian restaurants.

Preparation time 10 minutes

Cooking time 15 minutes

Serve 4.

Dal Fry (Dal Tadka) Recipe by ManjulaIngredients:

  • 1 cup toor dal, arahar dal
  • 2-1/2 cups water
  • 1 teaspoon salt
  • 1/4 teaspoon turmeric

Seasoning Β 

  • 3 tablespoons clarified butter or ghee
  • 1 cup tomatoes chopped I used 3 medium size tomatoes
  • 1/2 teaspoon cumin seeds (jeera)
  • 1/2 teaspoon mustard seeds (rai)
  • 1/8 teaspoon asafetida (hing)
  • 2 whole dry red chili
  • 2 bay leaf
  • 1 tablespoon green chili finely chopped adjust to taste
  • 2 teaspoons ginger finely shredded
  • 2 tablespoons cilantro finely chopped (hara dhania)
  • 1/2 teaspoon red pepper adjust to taste
  • 1/2 teaspoon salt
  • 1 teaspoon sugar
  • 1/2 teaspoon mango powder (amchoor)
  • 1/4 teaspoon garam masala

Method

  1. Wash and soak toor dal in approx. 3 cups of water, for at least one hours. Dal will be double in volume after soaking. Drain the water.
  2. Put dal with 2-1/2 cups water into a pressure cooker and add salt, turmeric, Cook on medium high heat.
  3. When the pressure cooker starts to steam, turn the heat down to medium and cook for five minutes.
  4. Turn off the heat and wait until all the steam has escaped before opening the pressure cooker. Dal should be soft. If needed add more water, dal should be consistency of thick soup.

Seasoning

  1. Heat the ghee in a saucepan. Test the heat by adding one cumin seed to the oil; if it cracks right away, ghee is ready. Add cumin seeds, and mustard seeds, asafetida, whole red chili. After the seeds crack, add bay leaves, green chili, ginger and chili powder. Stir for a few seconds.
  2. Add tomatoes, salt and sugar stir and cook until tomatoes are tender and mushy.
  3. Add cilantro, mango powder, and garam masala cook for about one minute.
  4. Pour the seasoning over Β dal mix it well and cook for another minute.
  5. Dal fry is ready, serve this as a main dish with Indian flat bread or I prefer with plain rice.

Enjoy!

Originally posted 2015-01-14 18:11:46.

The post Dal Fry (Dal Tadka) appeared first on Manjula's Kitchen.

Mint Chutney – Indian Condiment

Mint chutney is a delicious condiment, blend of mint and cilantro combined with spices. Most Indian snacks are incomplete without chutney. Chutney also tastes great with a main meal. Try using mint chutney as a spread for your sandwiches – it tastes great!

Recipe will serve 6.

Preparation time 15 minutes

Cooking time 10 minutes

Mint Chutney Recipe by ManjulaIngredients:

  • 1 cup packed mint (podina) leaves all the stems removed
  • 1 cup packed Cilantro (hara dhania)roughly chopped
  • 2 tablespoons green chilies chopped (adjust to taste)
  • 2 tablespoons lemon juice (adjust to taste)
  • 1/2Β inch ginger chopped
  • 1 teaspoons salt (adjust to taste)
  • 2 tablespoons sugar
  • Pinch of asafetida (hing)
  • Approx. 3 tablespoons water use as needed

Method

  1. Blend all ingredients, except the mint and cilantro, into a paste. AddΒ mint and cilantro, a little at a time, and blend until smooth. Add water as needed.
  2. Taste and adjustΒ salt, green chilies, or lemon juice as desire.
  3. Taste great with samosa, vegetable pakoras….

Suggestions

You can make mint chutney in large quantity in advance and freeze it in ice cube trays. Store the frozen cubes in a zip-lock plastic bag. When ready to serve, defrost as many cubes of mint chutneyΒ as needed.Β Β 

Originally posted 2014-12-03 11:14:23.

The post Mint Chutney – Indian Condiment appeared first on Manjula's Kitchen.

❌