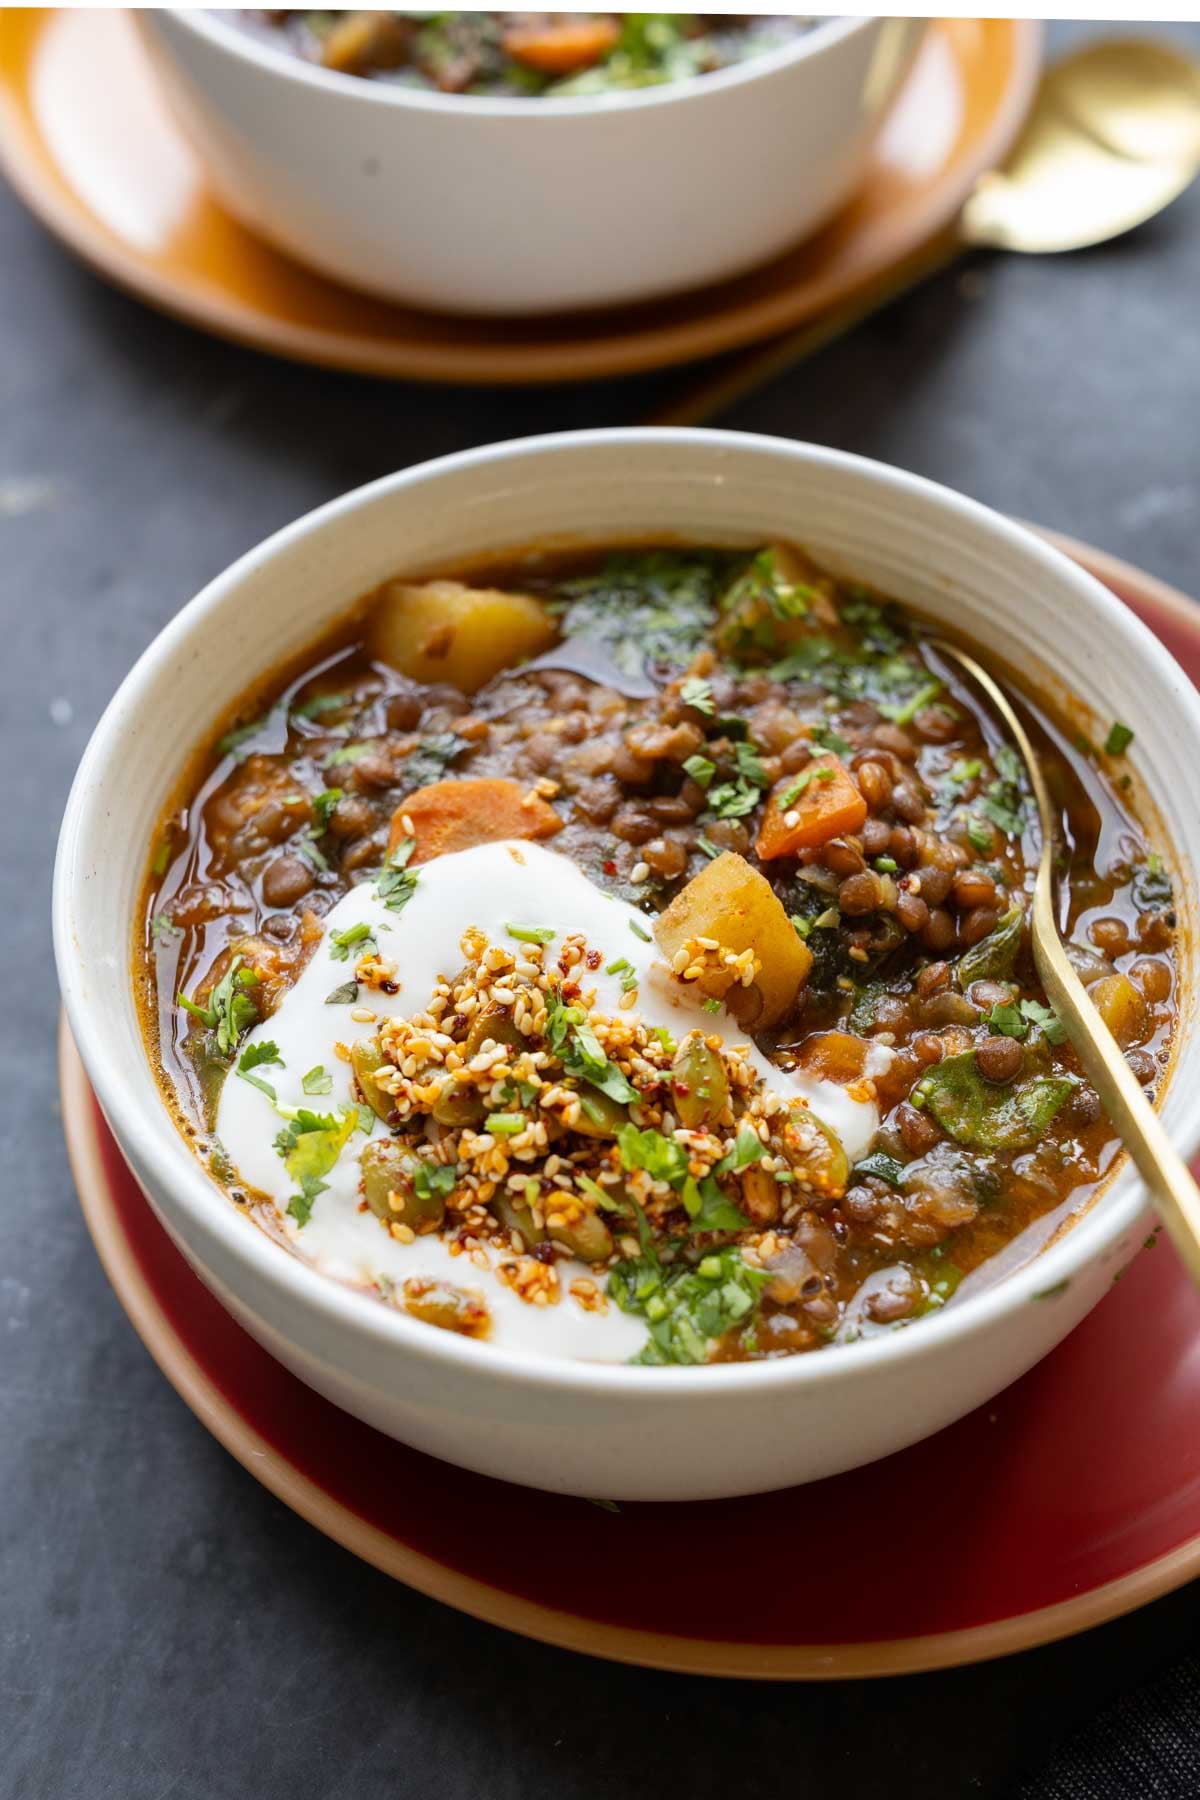
I’ve made plenty of lentil soups, but this lentil potato soup is the one I keep coming back to. It always wins on flavor and nutrition, and I’ll tell you the simple techniques that make it unbelievably flavorful every time. Each serve packs 20g Protein 14g Fiber (gluten-free, soy-free, nut-free)
This pot of lentil potato soup, including the toasted seed topping, has 75+ grams of protein, 56 grams of fiber, 24 milligrams of iron, about 700 milligrams of magnesium, 12 milligrams of zinc, plenty of omega fats, and lots of vitamins A and C, along with calcium.
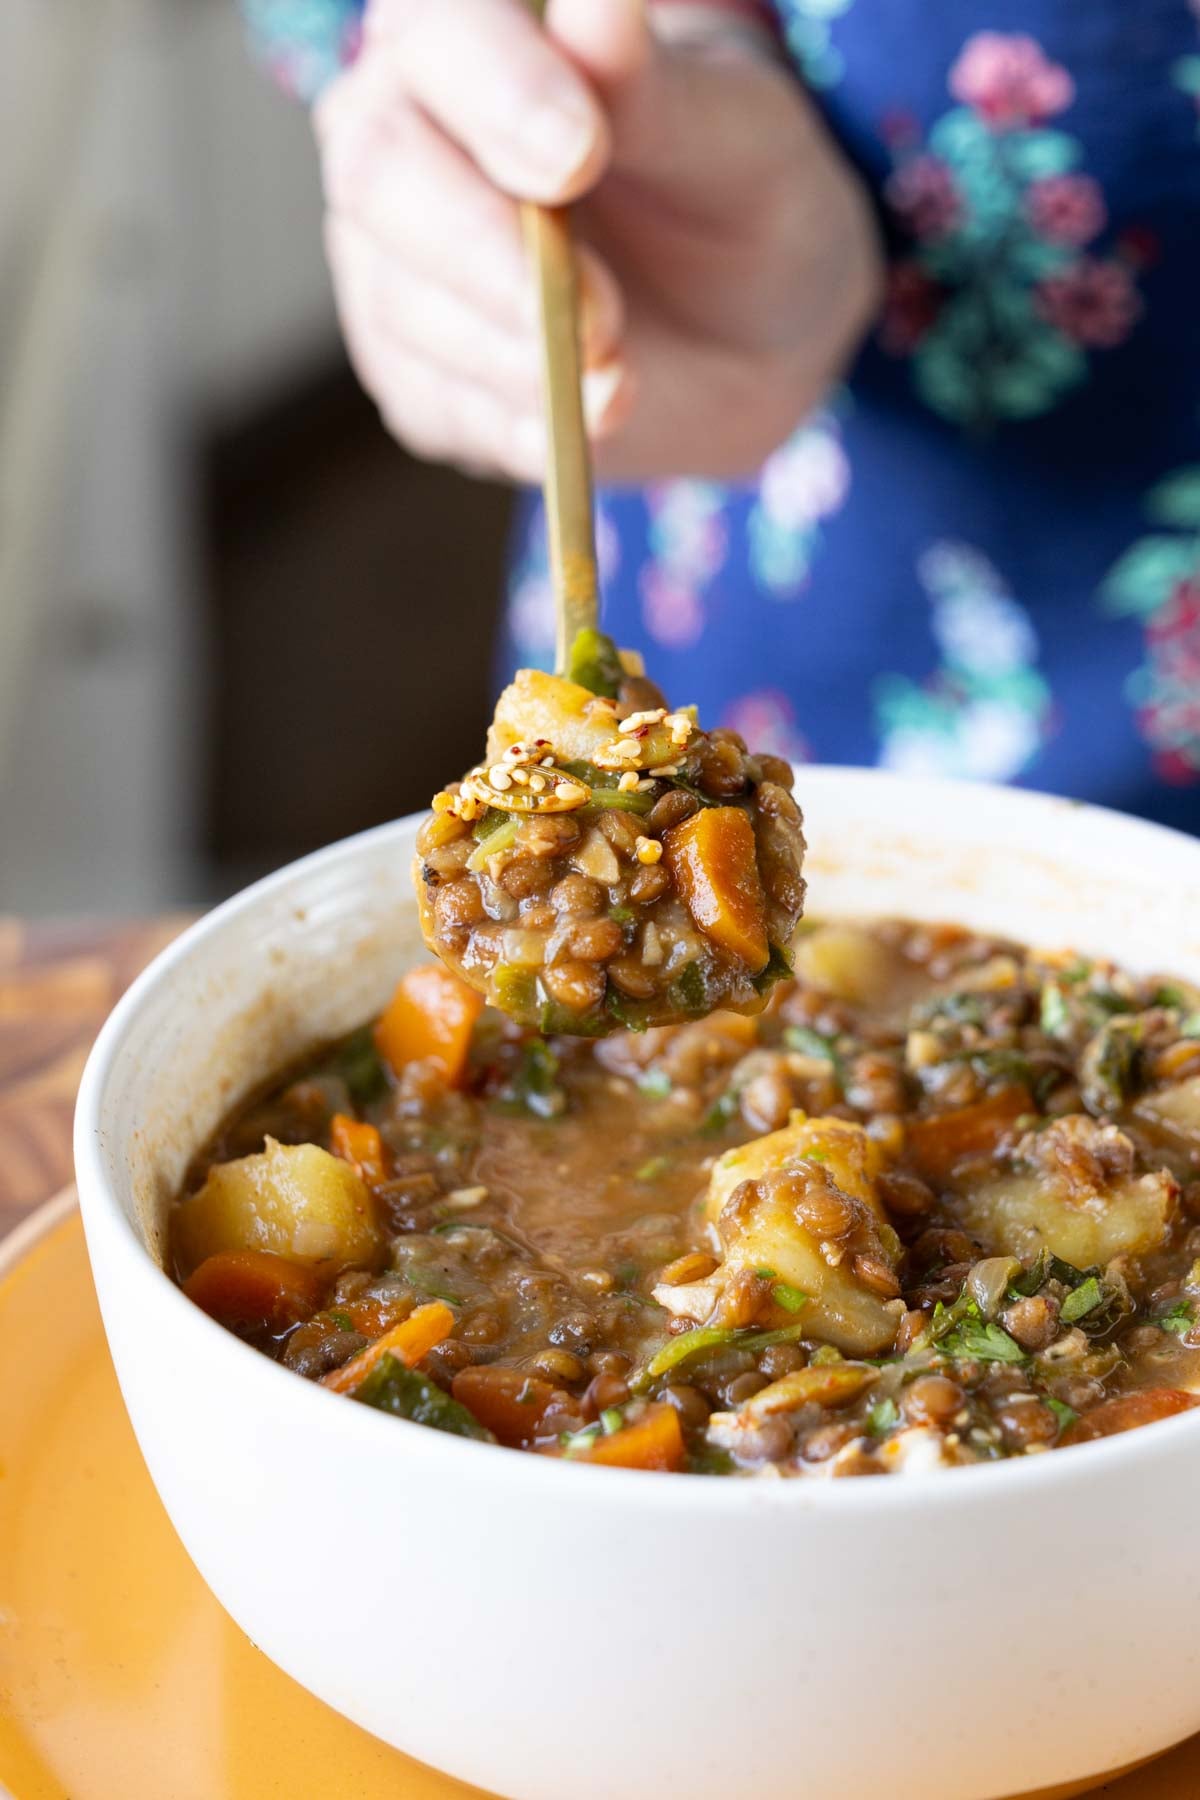
This lentil soup has so much flavor from the way we build up the flavor profile and spices. It is hearty with plenty of veggies and kale, and then we level it up with a toasty seed topping that not only adds amazing texture but also boosts the nutrient profile of the soup.
The lentils bring protein, fiber, iron, and folate. Kale adds vitamins K, C, and A, along with calcium. Pumpkin seeds, hemp seeds, and sesame seeds bring magnesium, zinc, calcium, omegas, and even more protein. The potatoes add vitamin B6 and potassium, while the carrots contribute beta-carotene. This lentil soup is truly a powerhouse of nutrients.
To level up this lentil potato soup, we first toast the garlic in the oil. Toasting the garlic releases its flavor into the oil, and then we add the onion. The onion stops the garlic from continuing to cook, so you get perfectly golden garlic without burning it. Next, we toast the tomato paste with the onion. This caramelizes the tomato paste and builds even more umami into the soup.
After that, we build layers of flavor with herbs and spices. I use oregano, but basil or thyme work just as well.
Then, I make a quick harissa-style spice blend with ground coriander, cumin, onion powder, and smoked paprika. You can also use a prepared harissa blend, sumac, shawarma spice blend, baharat, curry powder, or Cajun seasoning. All of these work wonderfully here. I also add black pepper to deepen the flavor and add a gentle heat.
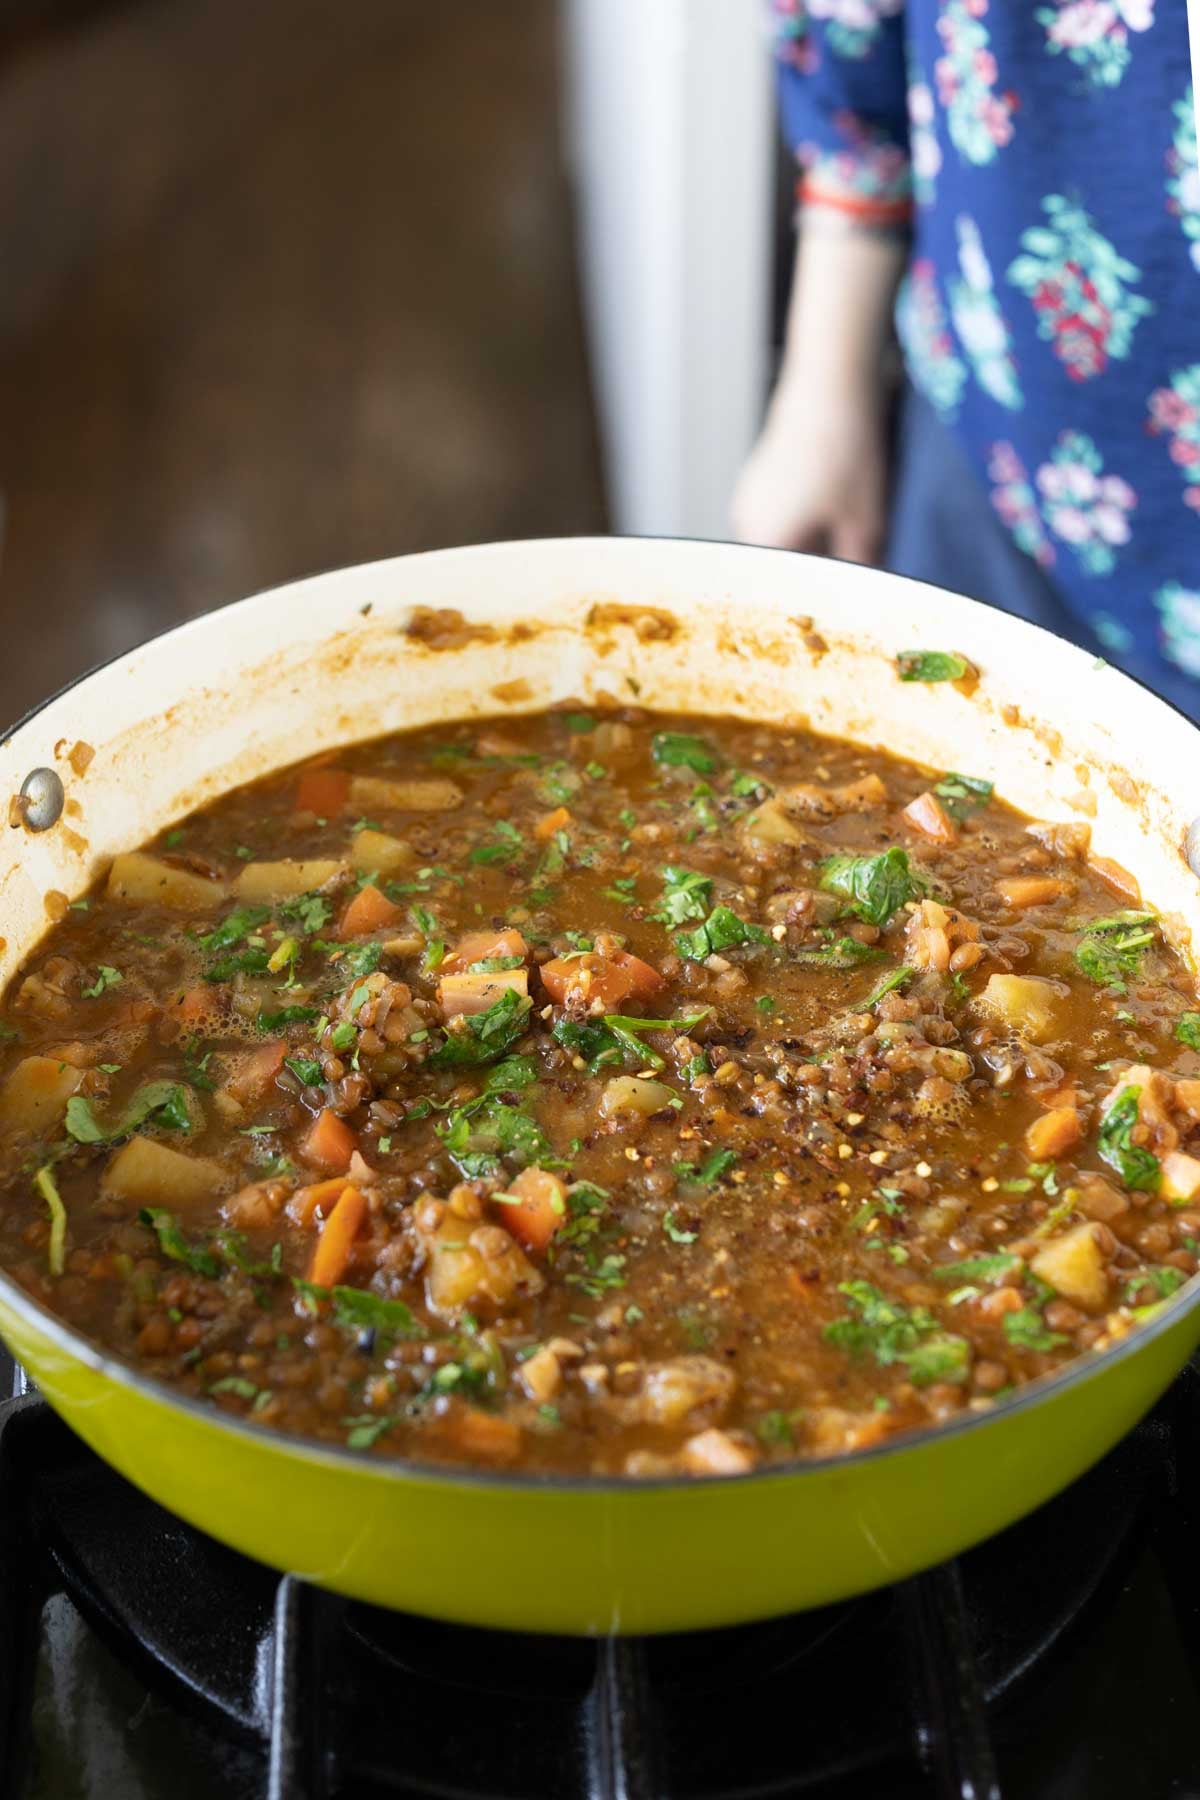
These layers of herbs and spices create an incredibly flavorful broth for the lentils and potatoes to cook in.
The potatoes are added midway through cooking, so they become perfectly tender while still holding their shape. They soak up all of the delicious broth without falling apart. If you prefer a thicker soup, you can add the potatoes at the beginning, so they break down into the broth.
Toward the end of cooking, we stir in plenty of kale to make the soup even more nutrient-dense.
Finally, we make a quick toasted seed topping with pumpkin seeds, hemp seeds, and sesame seeds. The seeds are toasted with lemon zest, which adds a bright, zesty flavor that pairs beautifully with their nutty richness. We finish the topping with Aleppo pepper flakes for a smoky, gentle heat. If you don’t have all three kinds of seeds, use one or two instead, but definitely make the topping. It adds incredible texture and flavor to every bowl of this lentil potato soup!
Why You’ll Love Lentil Potato Soup
nutrient-packed pot of soup with tons of amazing flavor
easy to make with simple ingredients
versatile! Use different spice blends and additions to change the flavor profile to preference.
crunchy seed topping adds even more flavor, an incredible texture and nutrient boost
This edamame garlic rice turns leftover rice into a garlicky, protein-rich meal that takes about 20 minutes from start to finish. That’s because leftover rice deserves better than being microwaved and eaten plain.
This edamame garlic rice has become our favourite way to use up leftover rice at home. There’s almost always some sitting in the fridge from the night before, and this recipe makes sure it never goes to waste. I often add it to my kids’ lunch boxes and it comes back clean every single time. If you’re a parent, you know that’s a feat!
The garlic and sesame oil give it so much flavour, and the edamame adds a really good amount of plant-based protein that makes every bowl feel like a proper, filling meal.It comes together in about 20 minutes with barely any prep, and everything goes into one wok. You can have it on it’s own, but throw in some aloo or chicken curry and you’ve got yourself a delicious, homemade meal in no time!
Edamame Pods: Fresh or frozen both work well. They need to be steamed, cooled in ice water, and then shelled before going into the rice.
Leftover Rice: Day-old or cold rice works best. Fresh hot rice tends to turn mushy when tossed in the wok.
Aromatics: Finely chopped garlic and spring onion whites, sautéed quickly on high heat.
Toasted Sesame Oil: I’ve used sesame oil for its nutty aroma, but any neutral oil works if you don’t have it.
Seasoning: Salt, white pepper, sugar, and light soy sauce.
Chilli Oil (Optional): Drizzled on top before serving for some extra heat.
Spring Onion Greens: For garnish.
Frequently Asked Questions
What is edamame?
Edamame are young soybeans that are harvested before they fully mature. They come in green pods and are commonly found in the frozen section of most supermarkets. They’re naturally high in protein, fibre, and iron, which is why they’re so popular in plant-based cooking. In this recipe, the pods are steamed and then shelled to get the beans inside.
Can I add a non-veg protein to this recipe?
Yes. Shredded chicken, prawns, or even a fried egg on top all work really well. If adding chicken or prawns, cook them separately first and toss them in with the rice at the end so they don’t overcook.
Can I add veggies to this edamame garlic rice?
Absolutely. Broccoli, corn, bell peppers, and mushrooms are all great additions. Just make sure to chop them small and sauté them before the rice goes in so they cook through properly.
Can I use frozen shelled edamame instead of pods?
Yes, and it saves you the shelling step entirely. Just steam them for about 8-10 minutes instead of 15 since they’re already out of the pod. Cool in ice water the same way.
Richa’s Top Tips
Use cold or day-old rice. Freshly cooked rice has too much moisture and will turn mushy and sticky the moment it hits the wok. Cold, lLeftover rice that’s been in the fridge overnight has driesd out just enough to stay separate and hold its shape when tossed.
Steam the edamame properly before shelling. Edamame requires about 15 minutes in the steamer to help them cook fully and become soft. Under-steamed edamame will be tough and chewy in the final dish.
Plunge the steamed pods in ice water immediately. This stops the cooking and keeps the beans bright green. If you skip this, they’ll continue cooking from the residual heat and lose their colour and bite.
Toss gently after adding the rice. The grains break easily if you stir too aggressively. Use a light tossing motion so the rice stays intact and doesn’t turn into a sticky mess.
Keep the heat high when sautéing the garlic and spring onions. You want them fragrant and slightly golden in a matter of seconds. Low heat will make them sweat instead of sizzle, and you’ll lose that punchy garlic flavour.
Storage Tips
In the fridge: Store in an airtight container for up to 2 days. The flavours hold up well and it actually tastes great cold the next day as a rice salad.
Freezing: Not recommended. The rice changes texture once frozen and the edamame can turn mushy after thawing.
Reheating tip: Toss it back into a hot wok with a few drops of sesame oil and soy sauce. A minute or two on high heat brings it back to life much better than the microwave.
Serving Ideas
This edamame garlic rice works as a quick meal on its own, but it also makes a great side. Here are a few pairings from the blog:
With Teriyaki Chicken Stir Fry: The garlicky rice with sweet, sticky teriyaki chicken on top makes for a really satisfying dinner bowl.
With Teriyaki Shrimp Broccoli Stir Fry: If you want a seafood option, the teriyaki shrimp alongside this rice is a combination we come back to often.
With Crispy Tofu Broccoli Stir Fry: For a fully plant-based meal, crispy tofu over the edamame rice gives you protein from two sources and tastes incredible together.
With Asian Veg Stir Fry: A big pile of crunchy stir fried vegetables on top of this rice keeps things light and balanced.
Customisation Ideas
Add an egg: Crack an egg into the wok before the rice goes in, scramble it quickly, and then toss the rice through it. Adds protein and gives it an egg fried rice feel.
Add chicken or prawns: Cook them separately in the same wok first, set aside, and then toss them back in with the rice at the end.
Swap the edamame for peas: If you can’t find edamame, green peas work as a substitute. They won’t have the same bite but will still add colour and freshness.
Make it more Asian: Add a teaspoon of oyster sauce and a splash of rice vinegar along with the soy sauce for a deeper, more complex flavour.
Did You Know?
Edamame and mature soybeans are the exact same plant, just harvested at different stages. Edamame are picked when the beans are still young, green, and soft, usually about 80% of the way to full maturity. If left on the plant for a few more weeks, those same beans would dry out, turn yellow, and become the hard soybeans used to make tofu, soy milk, and soy sauce. So in a way, eating edamame is eating tofu before it becomes tofu.
This edamame rice recipe proves the best meals don’t always need a lot of ingredients or time. Just some leftover rice, a handful of edamame, and a hot wok. If you make it, share your bowls with me on Instagram @my_foodstory, I’d love to see how yours turns out.
1tablespoontoasted sesame oil or any neutral flavoured oil
1tablespoonfinely chopped garlic
1tablespoonfinely chopped spring onion whites
2cupscooked and cooled or leftover rice
½teaspoonsalt
¼teaspoonwhite pepper powder
½teaspoonsugar
2teaspoonslight soy sauce
3tablespoonsfinely chopped spring onion greens
2-3teaspoonschilli oiloptional
Instructions
Heat a steamer with water and when it starts boiling, add edamame pods to the steamer plate and place it inside the steamer. Cover the lid and steam on high for 15 minutes till they are soft and cooked well.
Take a bowl with 3 cups of water and 10-15 ice cubes. Plunge the steamed edamame pods and refresh in cold water for 2-3 minutes, so the beans do not overcook and stay green in color. Drain the pods and discard the water.
De-shell the pods to take out edamame beans. This should yield about 105 grams / approx. ¾ cup of beans.
Heat oil in a wok or kadai, add garlic, spring onion whites and saute on high for a few seconds until fragrant. Add edamame beans and saute for a few seconds. Add rice, salt, pepper, sugar, soy sauce and toss gently till all the ingredients are mixed well.
Garnish with spring onion greens and serve. Optionally, you may also top with chilli oil.
Video
Notes
Fresh or frozen edamame pods may be used in the recipe. I have used frozen ones.
Leftover rice or one day old rice works best in the recipe.
Toss gently after adding rice so the rice does not break and turn mushy.
Seer fish fry, also known as vanjaram meen varuval, is one of the popular South Indian fish recipes made with seer fish (vanjaram), basic spices, lemon juice, curry leaves and coconut oil. The fish is marinated with the spices and fried until golden crispy with the outside nicely charred, while the inside stays soft and...
Are you someone who loves dunking a crispy rusk into a hot cup of tea? Then this Homemade Tea Rusk is the Answer. There is something satisfying about that dunk where the crunchy rusk soaks up the tea and becomes slightly soft is one of my favorite tea-time moments. Homemade Rusk If you have some...
Korean Corn Cheese Recipe is also known cheesy corn which is a very popular Korean snack which is served in Korean bar along with drinks. Corn cheese is made with onions, sweet corn, salt, pepper, sugar, cheese and mayonnaise. Bake corn cheese taste amazing when served piping hot. Korean Corn Cheese Recipe I have been...
Chocolate Strawberry is a London's viral recipe which got so popular in social media. Juicy fresh strawberries in a glass with melted milk chocolate no wonder this got so viral in the streets of London. This is so simple and easy to make yet tastes so delicious, so do recreate the magic and enjoy!
This chocolate strawberry is a match made as it tastes so delicious. If you like strawberries then this is a must try. I am not a big fan of berries still I loved it. I made it for my kids as they both love strawberries, and they absolutely loved it.
[feast_advanced_jump_to]
About London's Viral Chocolate Strawberry
Chocolate Strawberries needs just 2 ingredients fresh, juicy sweet strawberries and good quality milk chocolate. I wanted to try it ever since I saw in instagram as this recipe went so viral. I was waiting to try it with the best strawberries and finally I did, and these chocolate strawberries tastes so delicious.
I love cooking any dish with strawberries as it gives a bright vibrant colour to the dish and of course makes the dish look so tempting and beautiful. And needless to say about the taste, if you are a strawberry lover then you will know it.
I love recreating such trending recipes in my kitchen and this is one worth a try viral recipe. Use strawberries when they are peak in season and use good quality milk chocolate and you are in for the best treat.
I loved making and shooting these as much as as I enjoyed eating them. Strawberries are so photogenic and this dish with chocolate made it look even more appealing.
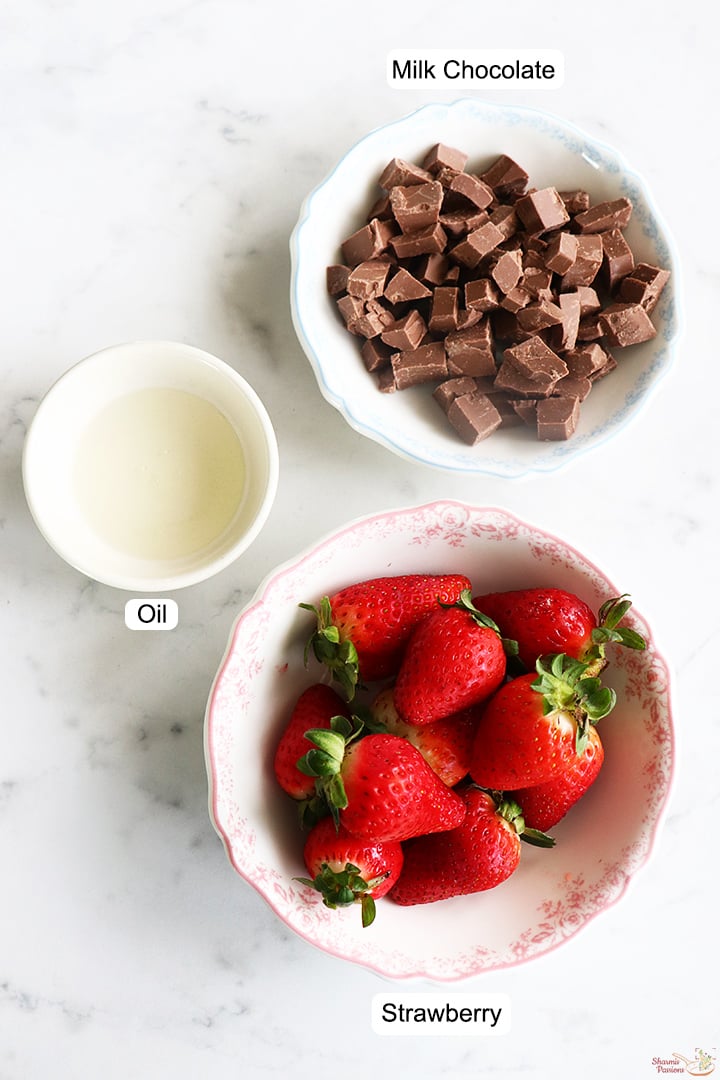
Strawberries - Choose the best juicy, ripe and sweet strawberries as it is the star ingredient of this recipe.
Chocolate - Use good quality milk chocolate for best taste. You can use chocolate compound or chocolate chips.
Oil - I used coconut oil, you can use any flavourless oil.
How to make Chocolate Strawberries Step by Step
Preparing strawberries
1.Take around 10 big strawberries, remove the green leaf stalk part and discard them.
2.All removed and ready.
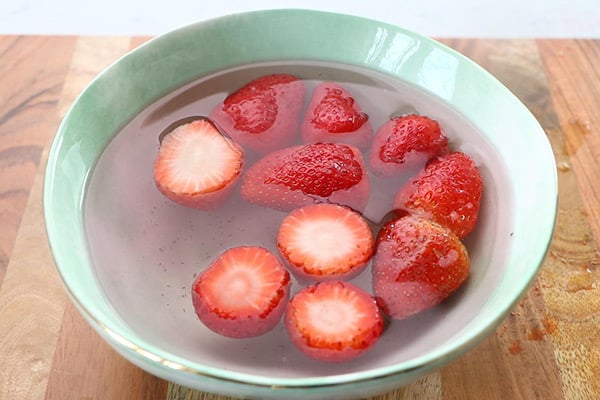
3.Add it to water and let it rest for few minutes.
4.Remove the strawberries and pat dry them and set aside.
Melting chocolate
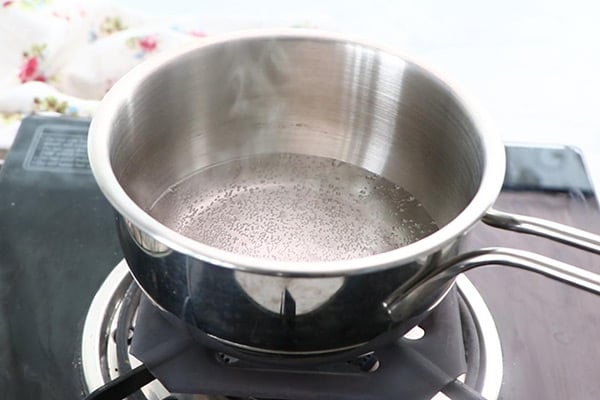
5.To a sauce pan add little water. Let it start boiling.
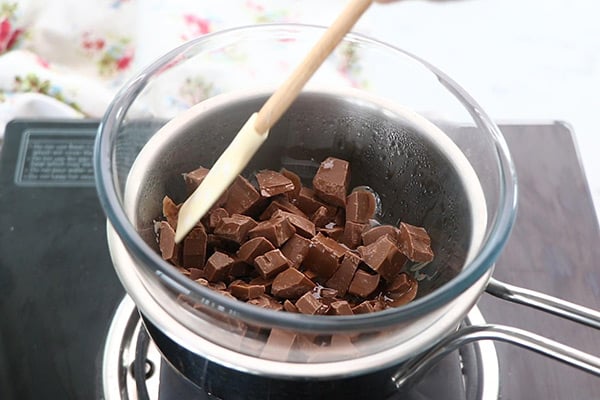
6.Keep a heat proof bowl, add ½ cup milk chocolate and 1 tablespoon coconut oil to it. Make sure the bottom of the bowl does not touch water inside the sauce pan.
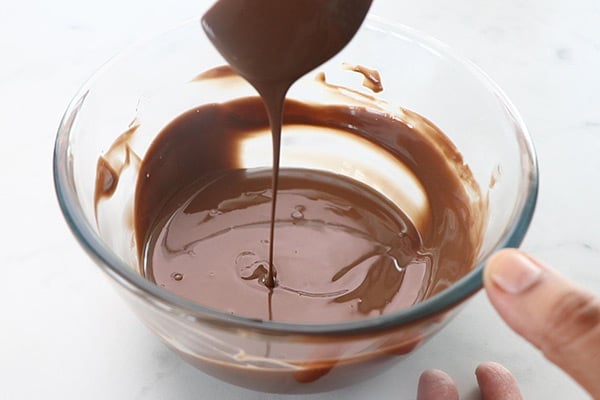
7.Mix well until the chocolate melts completely. Switch off and remove from flame.
8.The consistency should be pourable.
9.Transfer this to a spouted creamer. If you don't have one such creamer then use a ladle to pour.
10.Arrange the strawberries in a glass.
11.Pour melted chocolate over it.
Serve immediately and enjoy!
Expert Tips
Choosing strawberries - Choose ripe, sweet, fresh and juicy strawberries. Add it as such as cutting them may release water.
Chocolate - Milk chocolate is best for this recipe. However you can choose to use half and half of milk chocolate with dark chocolate. Couverture chocolate is best too.
Oil - Though adding oil is optional I would recommend adding it as it makes the consistency just perfect to pour. Coconut oil is best recommended as it goes well with chocolate. Make sure to use neutral tasting oil.
Glass - Choose a glass that is medium tall.
Pouring - You can arrange half of the strawberries then pour melted chocolate first then arrange the rest and pour the remaining chocolate.
Serving and Storage
This is best when served fresh so I would not recommend storing. You can prepare the strawberries ahead and while serving melt the chocolate and pour over and serve it immediately.
FAQS
1. What chocolate is best for chocolate strawberries?
Use good-quality compound chocolate or couverture chocolate. Milk is best preferred for this recipe however, dark and white chocolate can also be used if you prefer.
2.Should I wash the strawberries before dipping them in chocolate?
Yes rinse well to make sure strawberries are clean, but make sure they are completely dry before adding it to glass. Any water can prevent the chocolate from sticking properly.
3.What toppings can I use?
You can use chopped nuts like pistachios, almonds, hazelnuts or sprinkles, chocolate chips etc.
If you have any more questions about this London's Viral Chocolate Strawberry Recipe do mail me at sharmispassions@gmail.com. In addition, follow me on Instagram, Facebook, Pinterest, Youtube and Twitter .
Tried this London's Viral Chocolate Strawberry Recipe? Do let me know how you liked it. Also tag us on Instagram @sharmispassions and hash tag it on #sharmispassions.
Chocolate Strawberry is a London's viral recipe which got so popular in social media. Juicy fresh strawberries in a glass with melted milk chocolate no wonder this got so viral in the streets of London. This is so simple and easy to make yet tastes so delicious, so do recreate the magic and enjoy!
Course Dessert
Cuisine American
Keyword 15 mins recipes
Servings 2
Calories 299kcal
Author Sharmilee J
Ingredients
10strawberries
½cupmilk chocolate
1tablespooncoconut oil
Instructions
Take around 10 big strawberries, remove the green leaf stalk part and discard them.
All removed and ready.
Add it to water and let it rest for few minutes.
Remove the strawberries and pat dry them and set aside.
To a sauce pan add little water. Let it start boiling.
Keep a heat proof bowl, add ½ cup milk chocolate and 1 tablespoon coconut oil to it. Make sure the bottom of the bowl does not touch water inside the sauce pan.
Mix well until the chocolate melts completely. Switch off and remove from flame.
The consistency should be pourable.
Transfer this to a spouted creamer. If you don't have one such creamer then use a ladle to pour.
Arrange the strawberries in a glass.
Pour melted chocolate over it.
Serve immediately and enjoy!
Video
Notes
Choosing strawberries - Choose ripe, sweet, fresh and juicy strawberries. Add it as such as cutting them may release water.
Chocolate - Milk chocolate is best for this recipe. However you can choose to use half and half of milk chocolate with dark chocolate. Couverture chocolate is best too.
Oil - Though adding oil is optional I would recommend adding it as it makes the consistency just perfect to pour. Coconut oil is best recommended as it goes well with chocolate. Make sure to use neutral tasting oil.
Glass - Choose a glass that is medium tall.
Pouring - You can arrange half of the strawberries then pour melted chocolate first then arrange the rest and pour the remaining chocolate.
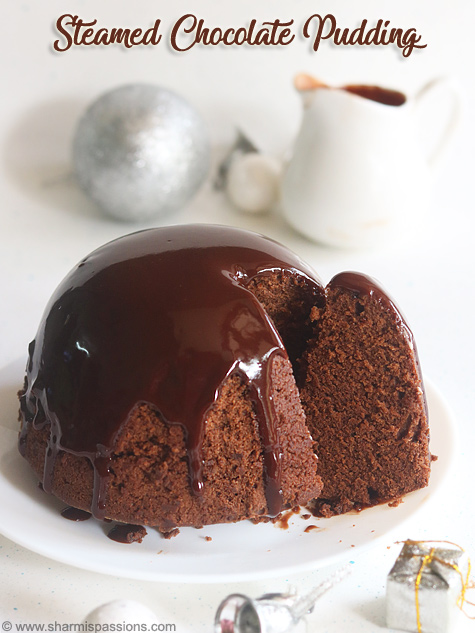
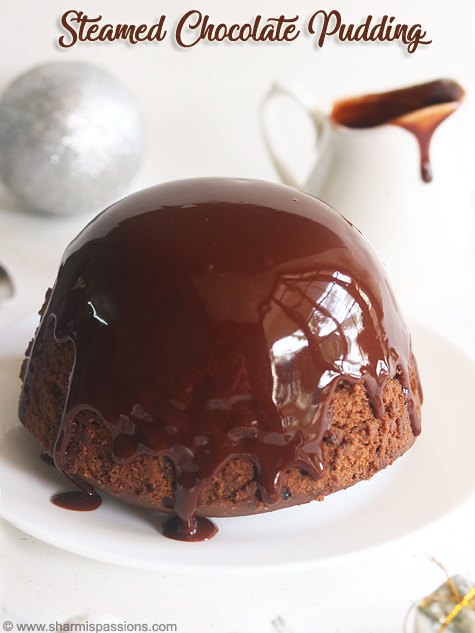
Steamed Chocolate Pudding is a rich and moist dessert made with flour, butter, eggs and melted chocolate. It has soft crumb texture that tastes really good with deep chocolate flavour and steamed pudding makes it soft, moist and not dry.
This pudding is perfect for Christmas or for special occasion. It takes about 2 hours from start to finish with steaming time. You can make this pudding because it feels homemade and indulgent but not too difficult to make. It doesn't feel heavy even though it has lot of butter.
[feast_advanced_jump_to]
About Steamed Chocolate Pudding
Steamed Chocolate Pudding is rich, chocolatey yummy traditional pudding made for Christmas. It is made by mixing butter and sugar until creamy then adding eggs and melted chocolate. The texture of this recipe is silky smooth and slightly firm, it should not be sticky when you touch it once it is steamed properly.
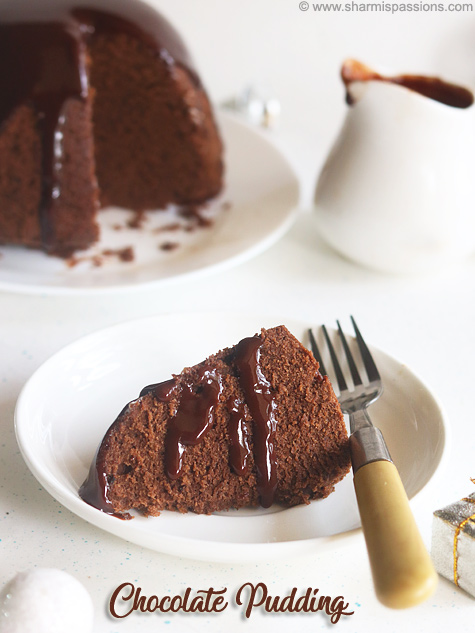
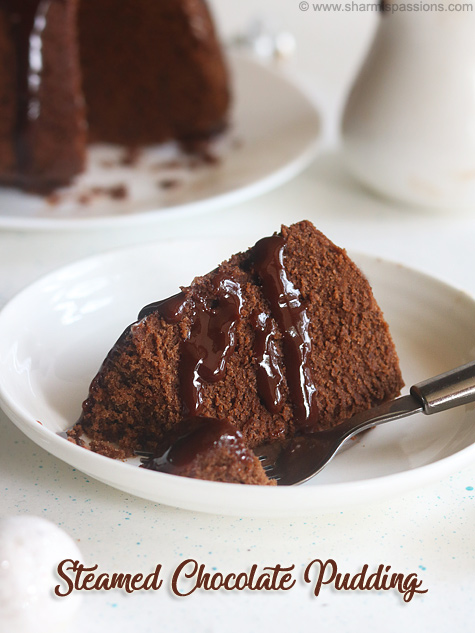
This recipe has smooth and slightly bouncy texture, not too hard if done right. Adding chocolate sauce on top makes it extra special but not necessary. You can cut into it for clean slices for serving.
After taking one bite I decided if someone asks me which is ur most favourite desert I would tell this as I loved the texture so much. Though this pudding looks cakeish it is in between pudding and cake and tastes so delicious. Though the time for steaming is more it is worth the time and effort.
There are few variations you can try in this recipe. You can add different dry fruits based on what you have and add nuts for extra crunch, you can adjust spice mix based on your taste. You can even try adding little coffee powder for taste.
I usually make this when I want something easy but still delicious. You can make this for parties also as a quick dessert.
Wheat flour - I used wheat flour for the base. It gives moist texture and keep pudding tender when steamed.
Butter - I used butter at room temperature. Butter abundant in pudding makes it rich and moist.
Brown sugar - I used light brown sugar for sweetness. It gives slight molasses flavour that works well with chocolate.
Eggs - I used two eggs to bind everything. It helps pudding come together and give structure.
Chocolate - I used choco chips to melt into batter. You can use cooking chocolate too. It gives deep chocolate flavour.
Coco powder - I added cocoa powder for extra chocolate flavour. It gives rich brown colour and deep taste.
Baking powder - I added little baking powder so that the pudding rises and stays light.
Vanilla essence - I added vanilla essence for flavour. It brings out chocolate taste.
Milk - I added milk to get right batter consistency. It helps batter smooth and not thick.
For chocolate sauce - I used powdered sugar, water and cocoa powder. Mix together to make smooth sauce.
How to make Steamed Chocolate Pudding Step by Step
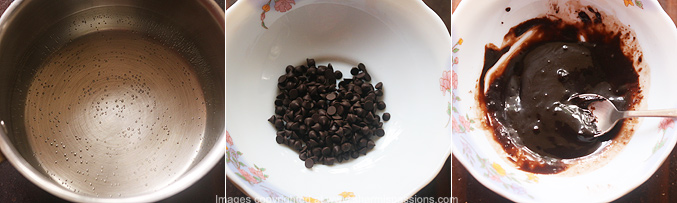
1.Boil water first, add choco chips in a heat resistant bowl, using double boiler method melt the chocolate. You can use cooking chocolate too, Set aside.
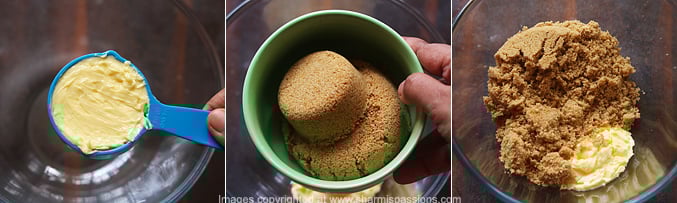
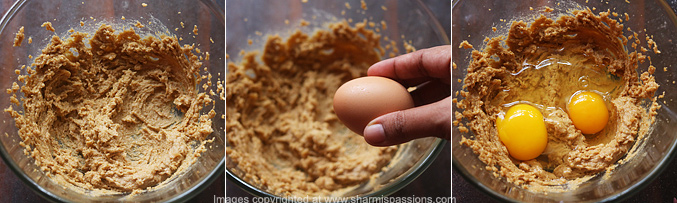
2.To a mixing bowl add butter, sugar.
3.Beat well until creamy. Crack open the eggs and add it.
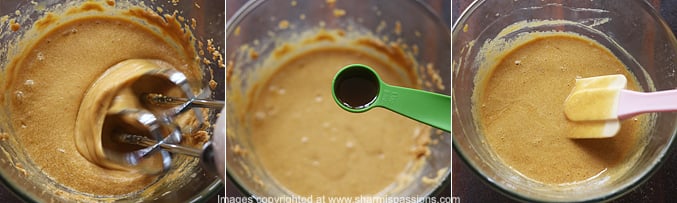
4.Beat until smooth and creamy. Add vanilla essence, mix well
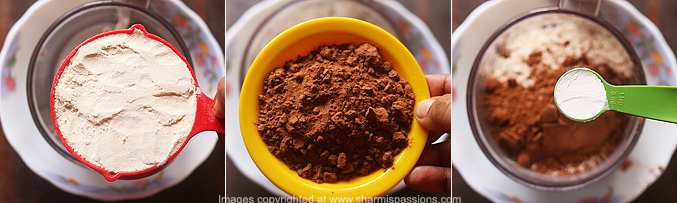
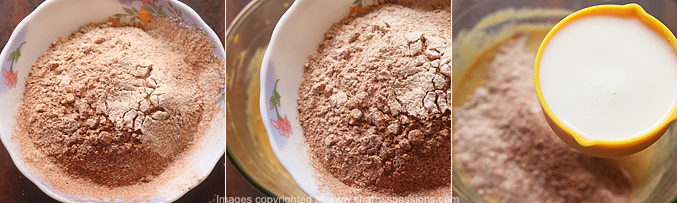
5.Now in another mixing bowl place a sieve, add wheat flour, cocoa powder, baking powder to it.
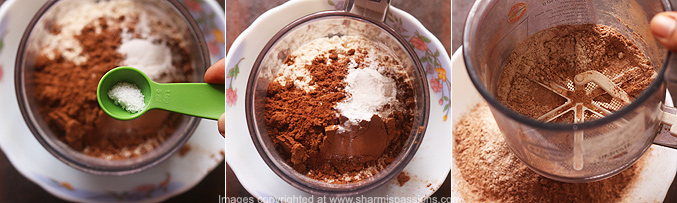
6.Add salt to it and sieve well.
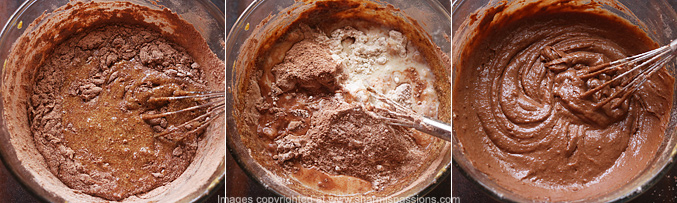
7.Now add little of sieved flour to butter egg mixture, alternate with milk starting and ending with flour mixture.
8.Mix well to form a smooth lump free batter.
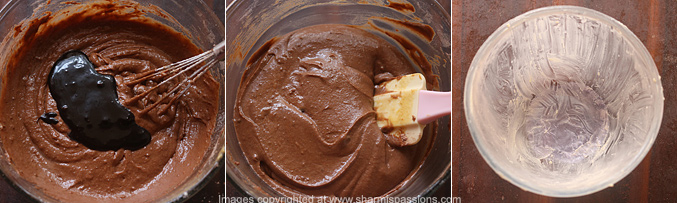
9.Add melted chocolate mix once. Grease a oven safe bowl with lots of butter. I placed a small circular butter paper at the bottom for easy demolding.
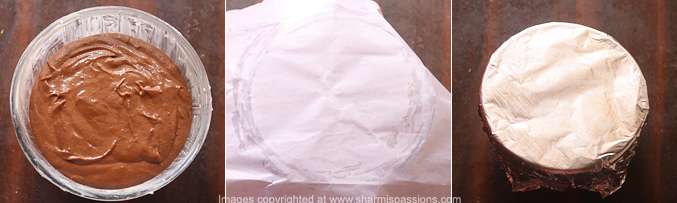
10.Transfer the prepared mixture to the bowl. The pudding rises well so choose a bowl accordingly. Grease a butter paper(I forgot but please do it), place over the bowl then wrap it with silver foil.
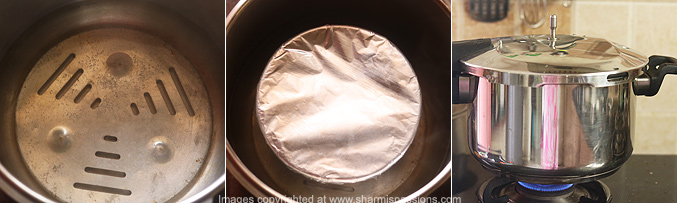
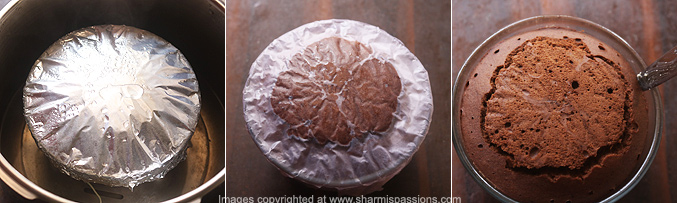
11.You can either use your steamer or pressure cooker. Put a plate inside the cooker, add water to it. Place the pudding bowl on the plate. Water should be touching ⅓ rd of the bowl. Close with lid, no whistle needed. Steam cook for 1 hour 30 minutes in low flame(sim). In between check the water level and add water accordingly. Check after 1 hour then proceed accordingly.Insert a toothpick in the centre of the pudding if it comes out clean then the pudding is done else steam cook for few more minutes.
12.Mine got done in 1 hr 20 minutes. Remove from flame, set aside for 10 minutes. Gently remove the covers, Then slide a buttered knife at the edges.
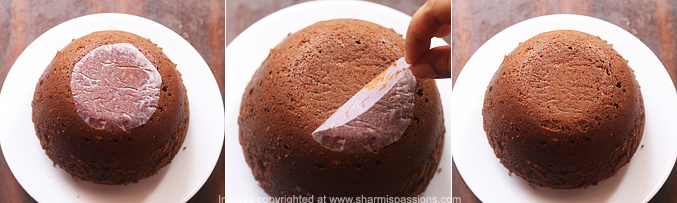
13.Then invert, remove the butter paper. Cool down completely at least for 30 minutes(meanwhile you can make the chocolate sauce) then slice and serve.
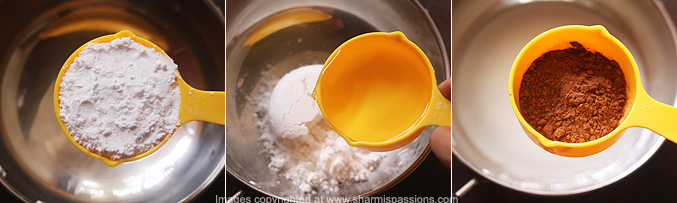
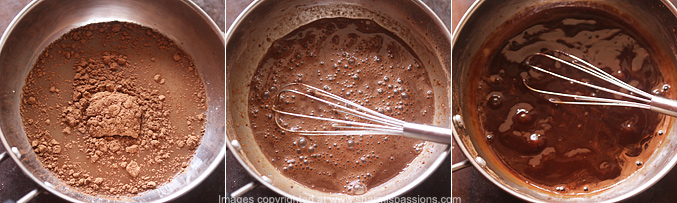
14.Measure and take powdered sugar, add water to it. Add cocoa powder to it.
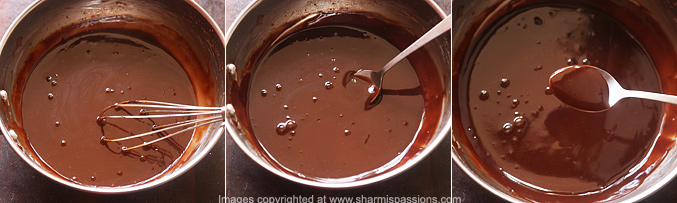
15.Whisk well so that there are no lumps, heat it up. Bring it to a boil and simmer for 2 minutes. Switch off.
16.Look how the consistency is smooth and silky. Cool down then store in a clean jar.
Yummy pudding and homemade chocolate sauce ready!
Expert Tips
Melting chocolate - I use double boiler method so it that it does not burn and stay smooth.
Soft butter - Always use butter at room temperature. It blends smoothly and makes pudding light.
Alternating - Add flour mixture and milk alternately to wet mixture. This prevents lumps in batter.
Greasing - Grease bowl and butter paper well. This make demoulding easy and pudding slides out smoothly.
Water level - Keep water at ⅓ rd of bowl height during steaming. This cooks pudding evenly.
Testing - Insert knife in centre after 1 hour. If it comes out clean pudding is done.
Cooling - Wait 10 minutes after steaming before you demould. This help pudding set properly.
Serving and Storage
Serve this chilled, you can drizzle little chocolate sauce or add chopped fruits on top while serving. This goes well as after meal dessert. Store the leftover pudding in refrigerator in container. It stays good for about 2 days. Do not keep outside for long time especially in hot weather.
FAQS
1. Can I use white flour?
Yes you can use white flour. It gives pudding different texture but come out just as moist.
2. How do I know when pudding is done?
Insert knife in centre after 1 hour. If it comes out clean pudding is done.
3. Can I make pudding without sauce?
Yes pudding taste good on its own. Sauce just adds extra richness.
4. Can I use regular sugar?
Yes you can use white sugar but brown sugar gives caramel flavour and taste better in chocolate.
5. Can I make ahead for party?
Yes you can make pudding one day before and keep in fridge just add sprinkle on top when you serve so it look fresh.
If you have any more questions about this Steamed Chocolate Pudding Recipe do mail me at sharmispassions@gmail.com. In addition, follow me on Instagram, Facebook, Pinterest, Youtube and Twitter .
Tried this Steamed Chocolate PuddingRecipe ? Do let me know how you liked it. Also tag us on Instagram @sharmispassions and hash tag it on #sharmispassions.
Steamed Chocolate Pudding is a rich and moist dessert made with flour, butter, eggs and melted chocolate. It has soft crumb texture that tastes really good with deep chocolate flavour and steamed pudding makes it soft, moist and not dry.
Boil water first, add choco chips in a heat resistant bowl, using double boiler method melt the chocolate. You can use cooking chocolate too. Set aside.
To a mixing bowl add butter, sugar.
Beat well until creamy. Crack open the eggs and add it.
Beat until smooth and creamy. Add vanilla essence, mix well.
Now in another mixing bowl place a sieve, add wheat flour, coco powder, baking powder to it.
Add salt to it and sieve well.
Now add little of sieved flour to butter egg mixture, alternate with milk starting and ending with flour mixture.
Mix well to form a smooth lump free batter.
Add melted chocolate mix once. Grease a oven safe bowl with lots of butter. I placed a small circular butter paper at the bottom for easy demolding.
Transfer the prepared mixture to the bowl. The pudding rises well so choose a bowl accordingly. Grease a butter paper(I forgot but please do it), place over the bowl then wrap it with silver foil.
You can either use your steamer or pressure cooker. Put a plate inside the cooker, add water to it. Place the pudding bowl on the plate. Water should be touching ⅓ rd of the bowl. Close with lid, no whistle needed. Steam cook for 1 hour 30 mins. In between check the water level and add water accordingly. Check after 1 hr then proceed. Insert a knife in the centre of the pudding if it comes out clean then the pudding is done else steam cook for few more mins.
Mine got done in 1 hr 30 mins. Remove from flame, set aside for 10 mins. Gently remove the covers, Then slide a buttered knife at the edges.
Then invert, remove the butter paper. Cool down completely at least for 30 mins(meanwhile you can make the chocolate sauce) then slice and serve.
How to make homemade chocolate sauce recipe:
Measure and take powdered sugar, add water to it. Add coco powder to it.
Whisk well so that there are no lumps, heat it up. Bring it to a boil and simmer for 2 mins. Switch off.
Look how the consistency is. Smooth and silky. Cool down Steamed Chocolate Pudding and store in a clean jar.
Notes
Melting chocolate - I use double boiler method so it that it does not burn and stay smooth.
Soft butter - Always use butter at room temperature. It blends smoothly and makes pudding light.
Alternating - Add flour mixture and milk alternately to wet mixture. This prevents lumps in batter.
Greasing - Grease bowl and butter paper well. This make demoulding easy and pudding slides out smoothly.
Water level - Keep water at one third of bowl height during steaming. This cooks pudding evenly.
Testing - Insert knife in centre after 1 hour. If it comes out clean pudding is done.
Cooling - Wait 10 minutes after steaming before you demould. This help pudding set properly.
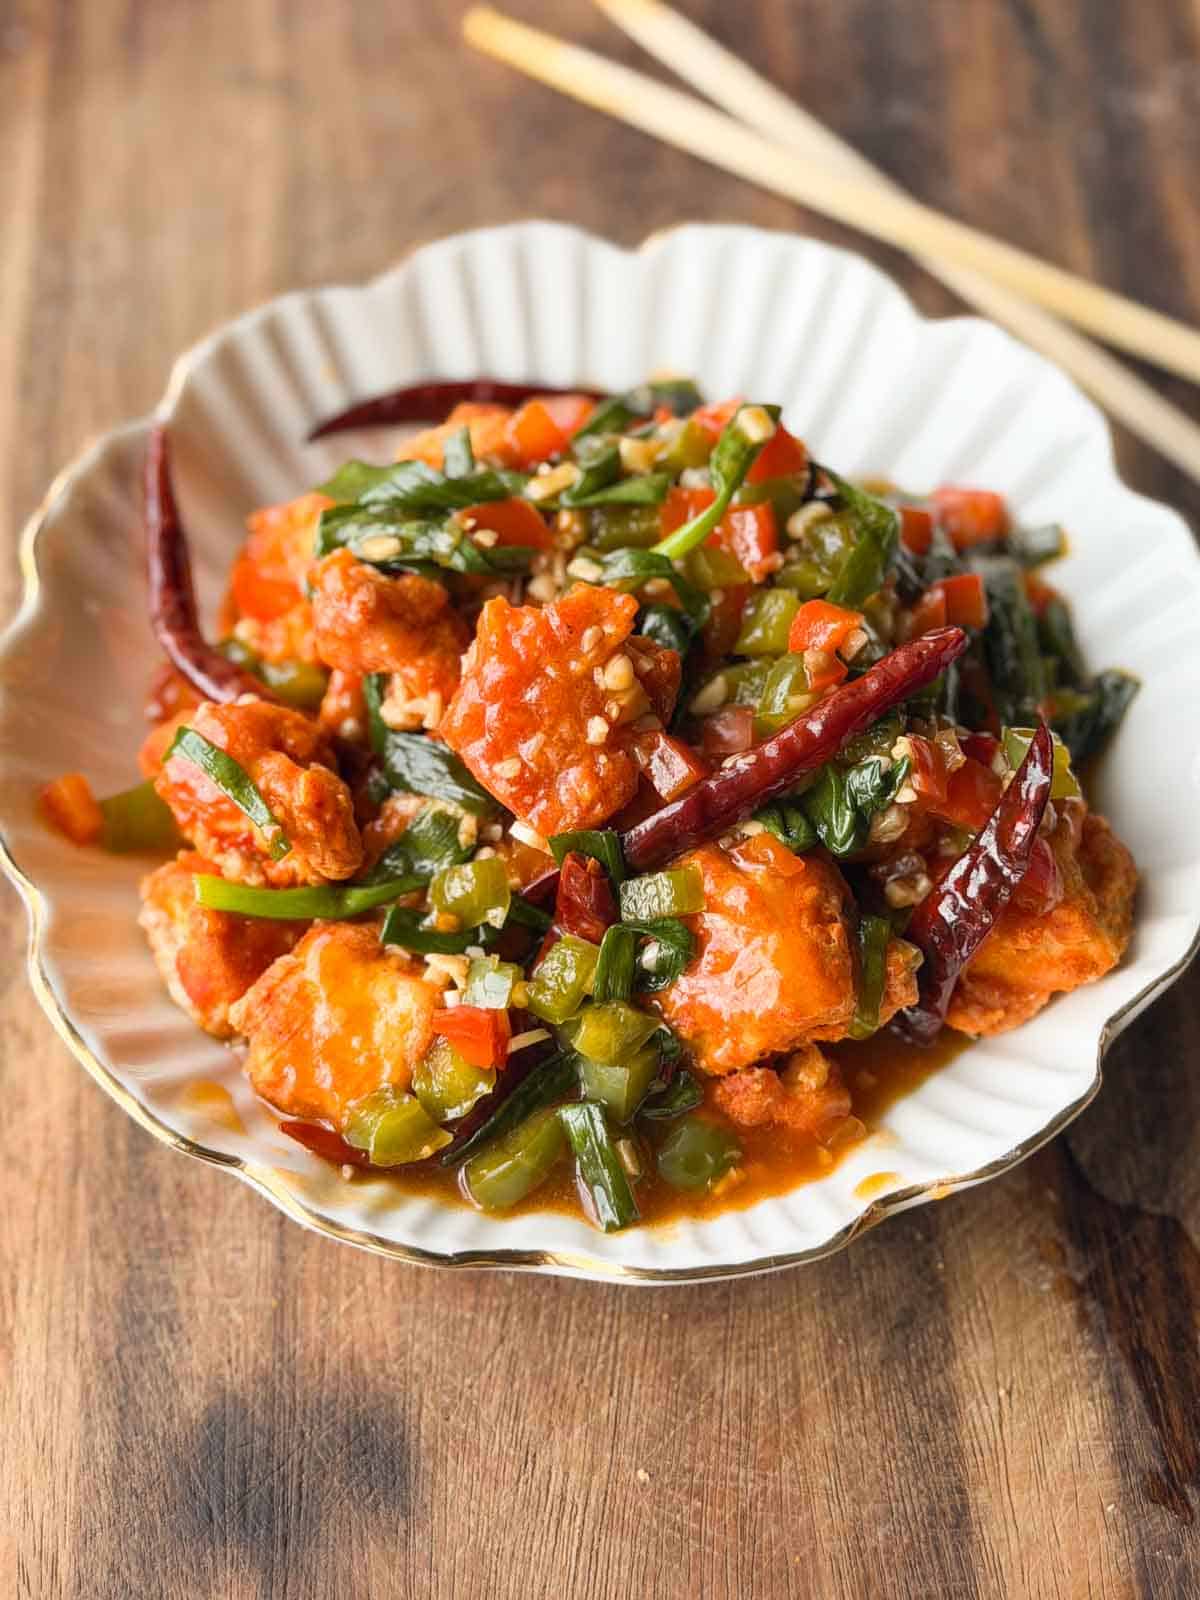
If you need a tofu recipe that’s easy and delicious, then this Crispy Chili Tofu is just what you need! It’s crispy, saucy, and has that addictive street-style Indo-Chinese flavor we all love so much!
If you haven’t yet found a tofu recipe you feel like eating on repeat or one you can add to your list of favorites, then I think Crispy Chili Tofu might just be the one. It’s got crispy pieces of tofu that we cook in the air fryer until they turn crisp and golden brown, and a glistening sauce that’s bursting with flavor that coats everything. The result is a dish that’s got the same savory flavor and texture of street-style Indo-Chinese, but made cleaner and healthier in your kitchen.
I made this chili tofu recipe as a replacement for my paneer chilli recipe for dinner one night, and my family just couldn’t have enough of it. We love eating this with veg fried rice for a classic easy weeknight dinner. But you can serve it with hakka noodles, plain rice, or even use it as a filling to make rice paper rolls; the possibilities are endless!
Tofu: I have used extra firm tofu as it retains its shape and doesn’t break apart during the cooking process. Extra firm tofu also gives the recipe a nice bite
Spices: White pepper powder, Kashmiri red chilli powder lend a spicy kick
Corn flour: Used as a coating for the tofu to make it light and crispy. We also mix it in water to make a slurry which helps to thicken the sauce
Oil: Sunflower or neutral-flavored oil with a high smoke point
Sauces: A mix ofschezwan sauce, light soy sauce, and oyster sauce for color, heat, and that authentic Indo-Chinese flavors
Veggies: Cubed bell peppers. (I have used red and green, but you can use whatever you have)
Garlic: Finely chopped for flavor and aroma
Chicken stock: To adjust the consistency of the sauce as well as add flavor. Feel free to swap with veggie stock or simply water for a vegan or veg version
Spring onion greens: Used as garnish for freshness and crunch
Salt and sugar: For seasoning and balance
Frequently Asked Questions
Can I use paneer instead of tofu?
Yes, absolutely! Paneer tastes great in this recipe. In fact, I have an awesome paneer chilli recipe on the blog for you to check out!
Can I make this recipe with a non-veg protein?
Definitely! Chilli chicken is a popular street-style Indo-Chinese dish and is the non-veg version of this crispy chili tofu recipe.
Can I make this chili tofu recipe without an air fryer?
Yes! You can shallow fry the coated tofu in a little oil over medium-high heat until golden and crispy on all sides. Drain on a wire rack or paper towel before adding it to the stir-fry.
Can I make this crispy chili tofu vegetarian?
Yes, simply swap the oyster sauce for vegetarian oyster sauce or mushroom stir-fry sauce and chicken stock or veggie stock or water. This keeps the same savoury, slightly sweet flavour while making the recipe vegetarian.
Richa’s Top Tips
Use firm tofu for this recipe. Firm or extra firm tofu works perfectly in this recipe as it retains the shape, doesn’t break apart, and has the perfect amount of texture and chew required for this Indo-Chinese dish.
Handle the tofu gently. The coating can peel off if you toss or flip the tofu too aggressively. Use a pair of tongs or a spatula to carefully turn the pieces.
Add the crispy tofu at the very end. Once the sauce has thickened, toss in the air-fried tofu and spring onion greens and mix just until coated. This keeps the tofu crisp instead of letting it sit in the sauce and turn soggy.
Have everything ready before you start the stir-fry. The sauce comes together quickly, so chop your vegetables and measure out the sauces beforehand.
Storage Tips
Fridge: Crispy chili tofu is best eaten immediately while the tofu is still crisp. However, leftovers can be stored in an airtight container in the refrigerator for up to 2 days.
For the best texture, store the crispy tofu and stir-fry sauce separately if you know you’ll have leftovers.
Reheat the tofu in an air fryer at 180°C for 3–5 minutes until hot and crisp, then warm the sauce separately and toss everything together just before serving.
If the tofu has already been mixed with the sauce, reheat it in the air fryer or oven rather than the microwave. The microwave will heat it through, but the tofu will lose most of its crispiness.
I wouldn’t recommend freezing this recipe because the texture of the tofu can become spongy after thawing.
Serving Ideas
Along with fried rice: Serve it alongside veg, chicken, or egg fried rice or for an easy restaurant-style meal at home. The crispy tofu and savoury rice make a really satisfying combination.
Pair with noodles: Pair it with Chilli Garlic Noodles or Hakka Noodles for a spicy, saucy Indo-Chinese dinner. I especially love noodles with this because you get a mix of crispy tofu, vegetables and chewy noodles in every bite.
Make it a rice bowl: Spoon the tofu over steamed basmati riceandstir fried veggiesand add some extra spring onions on top. It’s a simple option when you want something filling without making several dishes.
This crispy chili tofu recipe is the easiest way to make authentic, street-style Indo-Chinese dishes at home. It’s clean, healthier, and so, so delicious. Making this chili tofu recipe in the air fryer also means we don’t need any extra oil and the whole process is mess free!
If you make this air fryer tofu recipe, don’t forget to DM the pictures @my_foodstory. Until then, happy cooking!
If you need a tofu recipe that’s easy and delicious, then this Crispy Chili Tofu is just what you need! It’s crispy, saucy, and has that addictive street-style Indo-Chinese flavor we all love so much.
2tablespoonssunflower oil or any neutral cooking oil
1tablespoonfinely chopped garlic
5red chillieswhole
¼cupcubed red bell peppers
¼cupcubed green bell peppers
1tablespoonschezwan sauce
1tablespoonlight soy sauce
2teaspoonsoyster sauce
½teaspoonsugar
¾cupchicken stock
1teaspooncornflour
1 ½teaspoonswater
½cupspring onion greenscut into 2 inch long pieces
Instructions
Take tofu in a bowl, add all the ingredients for marination, toss gently so the tofu does not break. Set aside for 5-10 minutes to marinate.
Pre-heat airfryer at 200C.
Add the marinated tofu to the air fryer basket, brush with a teaspoon of oil and air fry for 10 minutes at 200C. Flip them gently and air fry at 200C for 2-3 minutes. Remove the fried tofu from the basket gently so that the coating does not peel off and transfer to a plate.
Heat 1 tablespoon sesame oil in a wok or pan, add garlic, red chillies and saute on medium for 1-2 minutes till fragrant, add red & green bell peppers and saute for high for a few seconds. Add schezwan sauce, soy sauce, sugar, stock and mix well.
Mix cornflour in 1 ½ teaspoons of water to make a slurry and add to the pan while stirring continuously so there are no lumps formed. Cook for 2-3 minutes while stirring till the gravy thickens.
Add fried tofu & toss gently for 1-2 minutes till they are coated with the gravy, garnish with spring onion greens and serve.
Baby corn manchurian is a delicious Indo-Chinese appetizer with a perfect mix of spicy, sweet and slight tangy flavours. It is a great snack to serve on its own or can be enjoyed along with veg fried rice, veg noodles or hakka noodles for a simple Indo-Chinese meal. Baby Corn Manchurian Recipe This is one...
Tamarind paste is a staple everyday basic ingredient that is used almost daily in South Indian cooking. Making Tamarind paste at home is now easy. It is more budget friendly, convenient to make tamarind paste or pulp at home in bulk and freeze. This makes your everyday cooking very easy. Tamarind Paste Recipe Some of...
Kerala squid curry, also called nadan koonthal or kanava curry, is a spicy, flavourful curry with roasted coconut paste. Tender squid is cooked with brinjal, roasted coconut, spices, shallots and curry leaves until everything comes together beautifully. This curry tastes amazing with Kerala red rice, appam, parotta or even dosa for a delicious meal. Nadan...
Papas Arrugadas are traditional Canary Island potato recipe called as wrinkled potatoes. It is made by cooking small potatoes in heavily salted water until potatoes are cooked through. These cooked potatoes are left to dry in the pan until the potato skins get wrinkly and the potatoes are lightly coated with salt. This wrinkled salt...
Nungu Paal Sarbath also known as nungu paal is a refreshing summer drink which is very popular across South India specially Kanyakumari, Kerala and Tamilnadu. This Refreshing palm fruit sarbath is made with ice apple (nungu | palmyra fruit), nannari sarbath, milk and sabja seeds. Nungu Paal Sarbath Recipe Summer is here, and our streets...
If you are looking for simple upma recipes for breakfast or dinner, then this rice flour upma is the answer. This arisi maavu upma is made with rice flour, simple tempering of mustard, urad dal, dry chillies, curry leaves and coconut. Easy to make rice upma with minimal steps. Rice flour upma Ever been in...
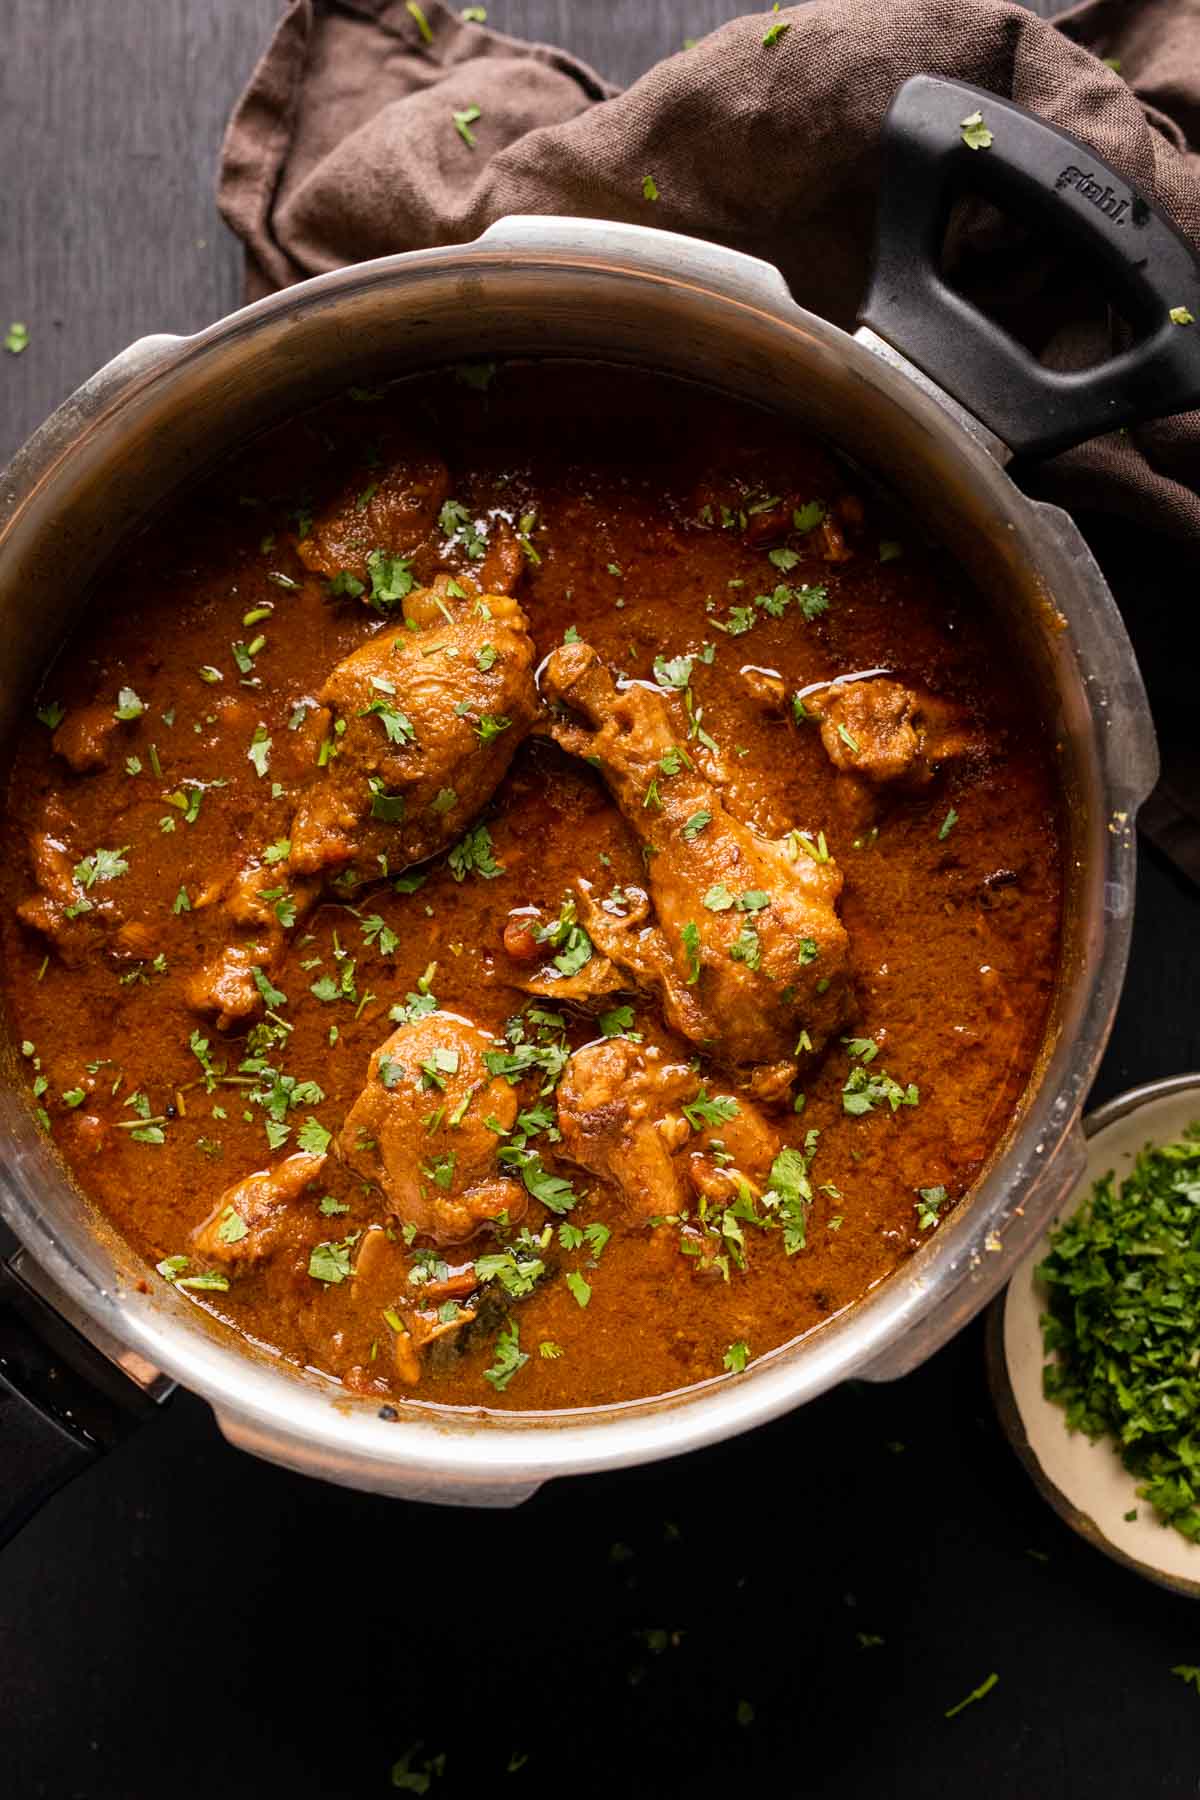
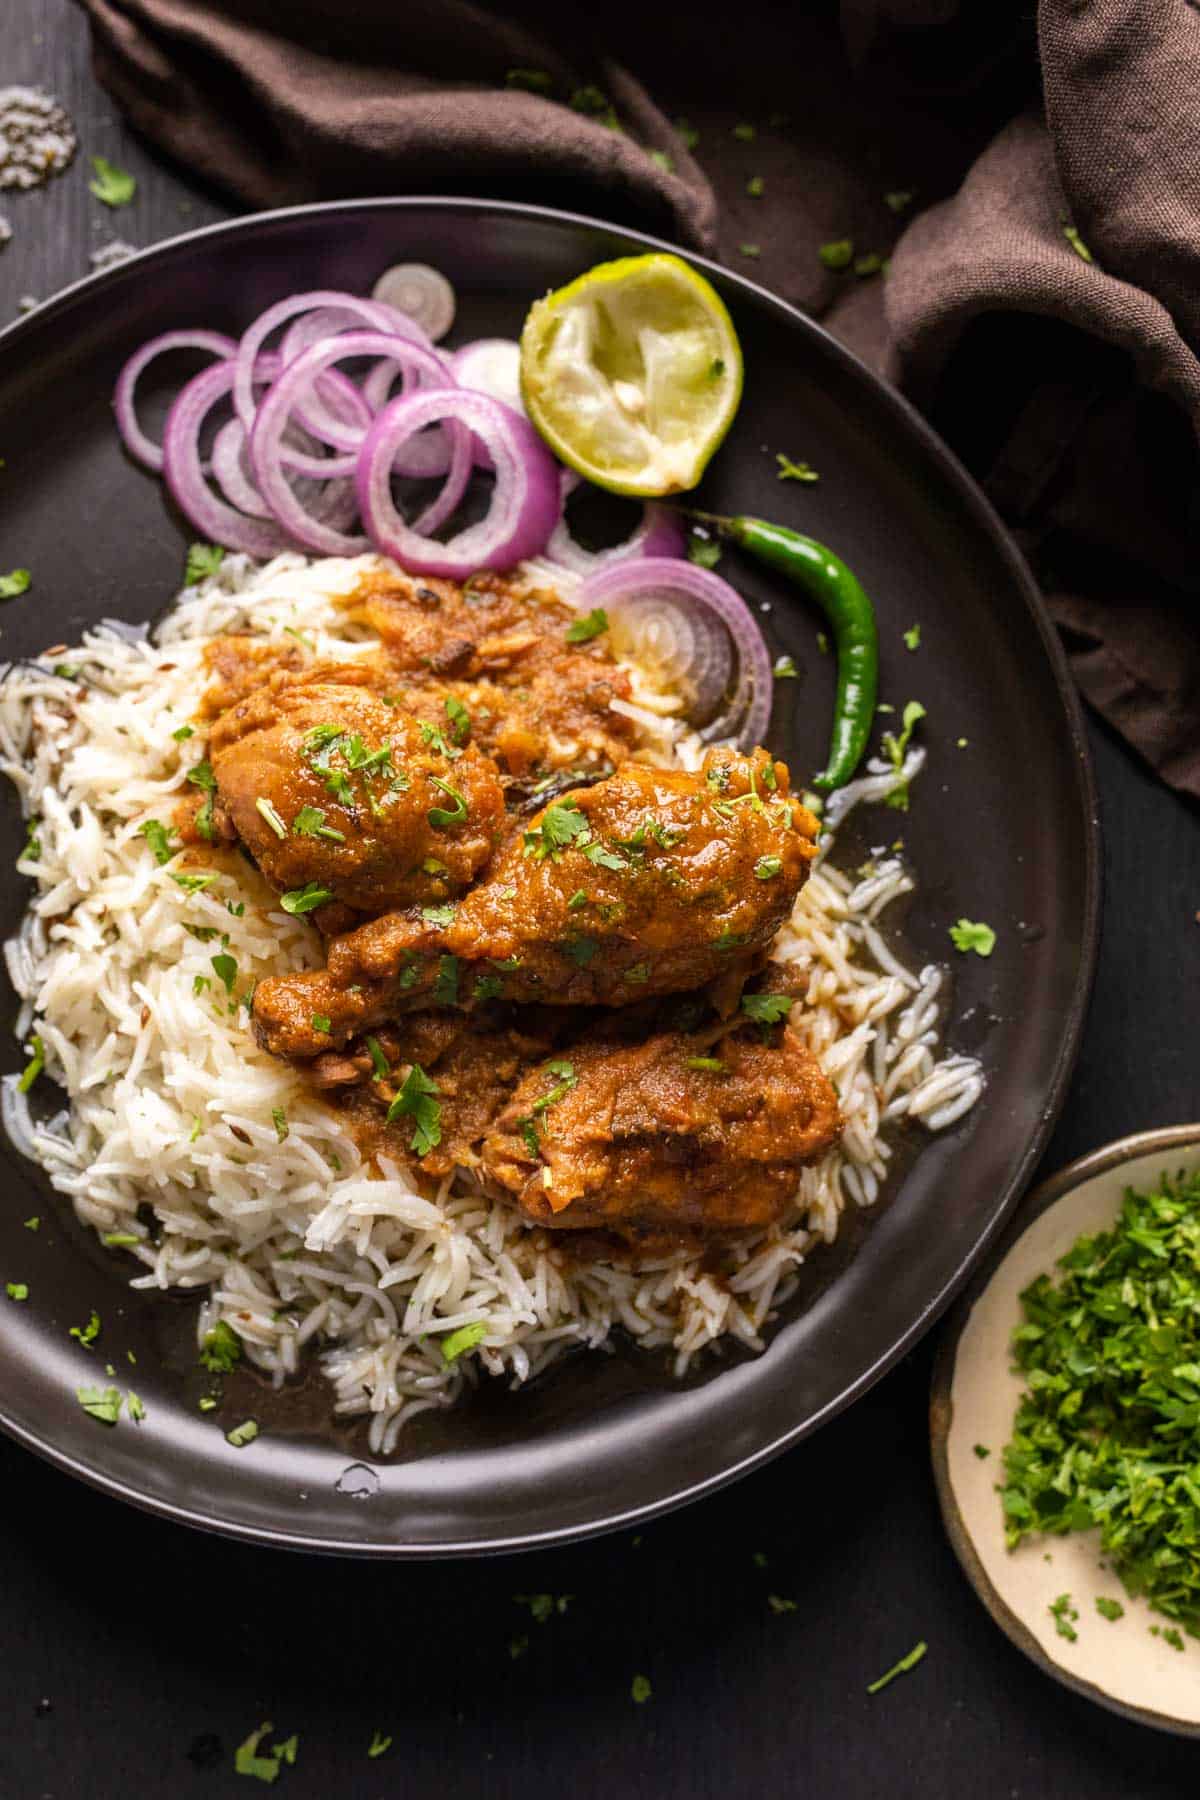
This Dhaba Style Chicken Curry stands for every road trip we’ve had with our families. Same bold flavours, hot, fragrant, and ready in under 45 minutes. Learn how to make it in a traditional pressure cooker, instant pot, and on the stovetop.
I think I’ve finally nailed it. This Dhaba Style Chicken Curry is SO good. Its legit, as close as it gets to eating it in a dhaba. Spicy, fragrant with spices, big, bold flavours and really juicy pieces of chicken.
Dhabas, for the uninitiated, are roadside restaurants that you’ll find along the highway. They’re road trip essentials and are scattered all over the country and really well-known for their bold, rustic flavors and ambience. Growing up, the highlight of any road trip was a stopover at a dhaba for steaming hot, spicy dhaba style chicken curry, dal fry or dal makhani and tandoori rotis fresh from the oven to mop it all up. These soul satisfying meals will always be etched on to my heart!
Unlike my other recipes, this one’s slightly time consuming because masala is ground and cooked till it’s color changes. This is characteristic of most Indian curries, and the slow cooking process or bhuno is what lends dishes a unique flavor.
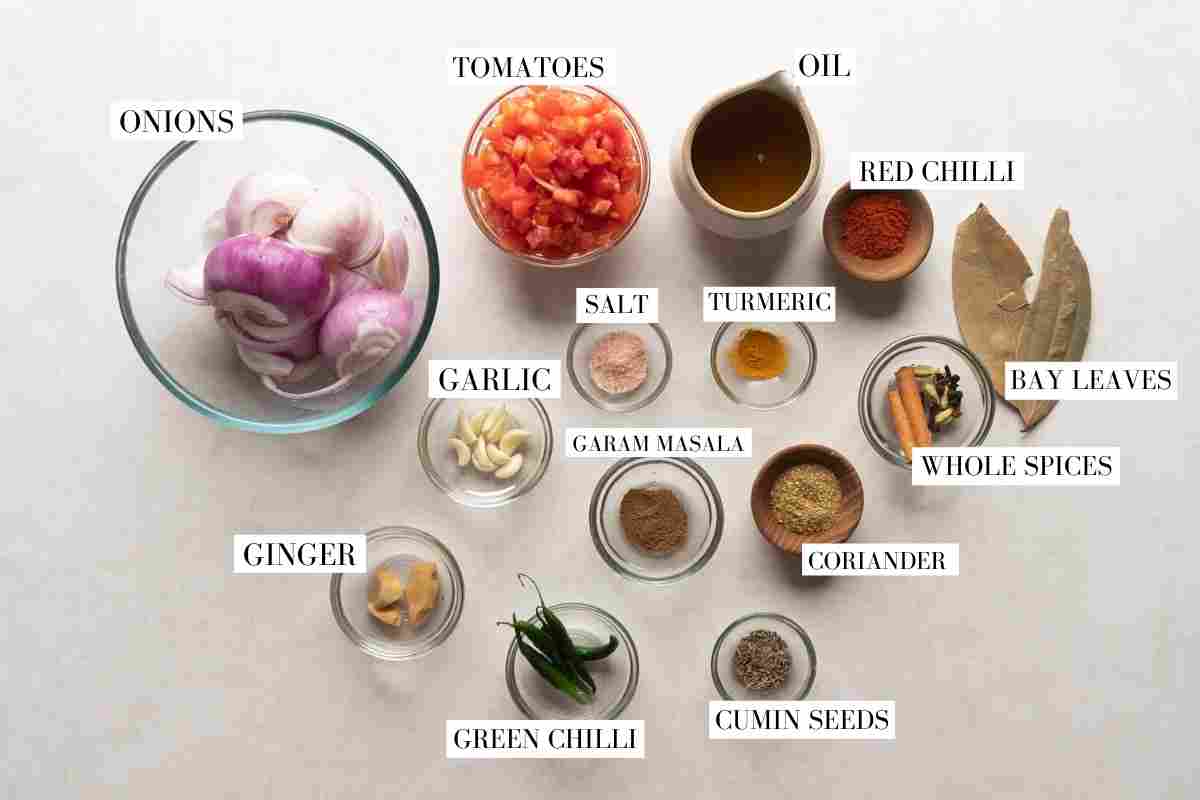
Here are the main ingredients you’ll need for this recipe:
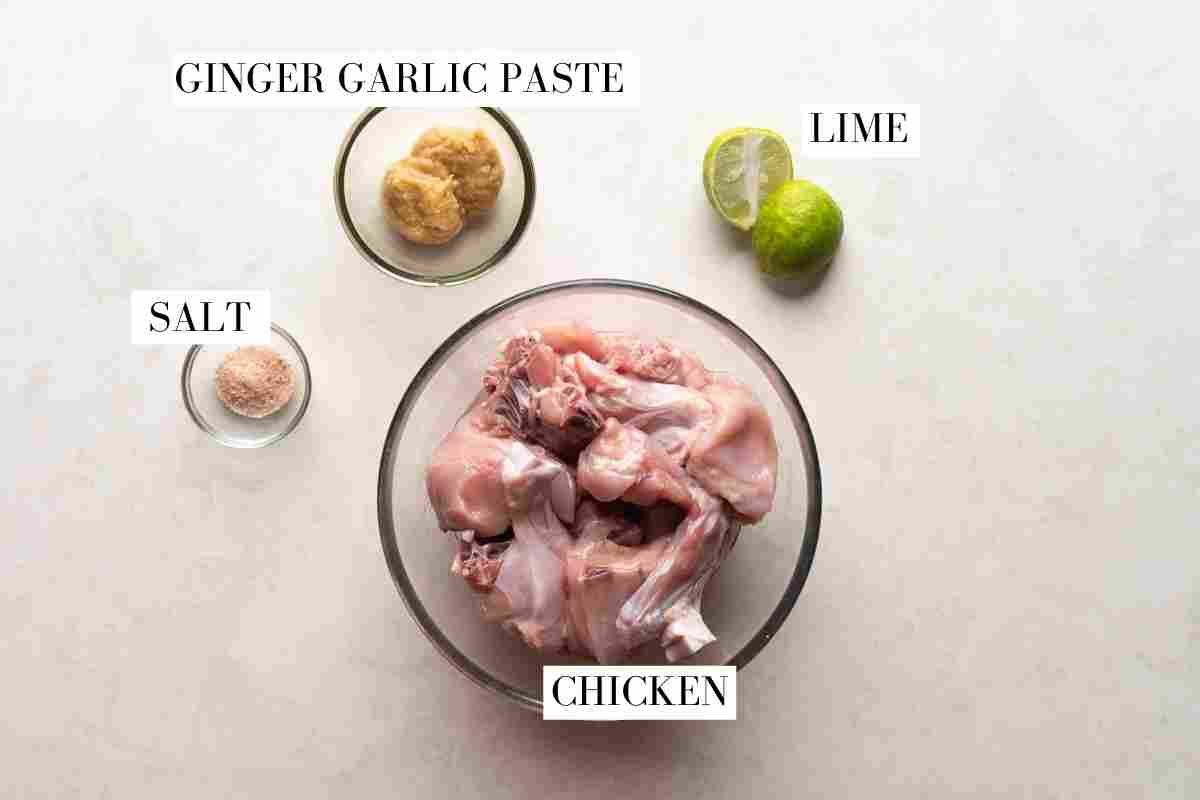
Chicken: Bone in chicken cut into 2 inch pieces. Most Indian curries use the entire bird (thighs, breast, drumsticks)
Ginger Garlic Paste: Fresh ginger and garlic in equal parts ground to a paste with a little water. Use store bought in a pinch but fresh adds more flavour
Lime Juice: Acid helps tenderise the meat
Mustard Oil: Key to getting that unique dhaba flavour. It’s more pungent and adds a smokiness
Whole Spices: Cumin, cloves, cardamom, cinnamon and bayleaf. Skip if you don’t have but I recommend using them for that burst of flavour
Ginger & Garlic: Ground with onions. You can substitute it with 1.5 tbsp store bought or homemade ginger garlic paste
Onions: Form the main base of the gravy and add flavour, density and thickness
Green Chillies: Add heat and flavour. Use serrano peppers if you don’t have Indian green chillies available
Ground Spices: Red Chilli Powder, Turmeric Powder, Coriander Powder and Garam Masala. I highly recommend using homemade garam masala. Add it towards the middle or end of the cooking process to retain its aroma and flavour
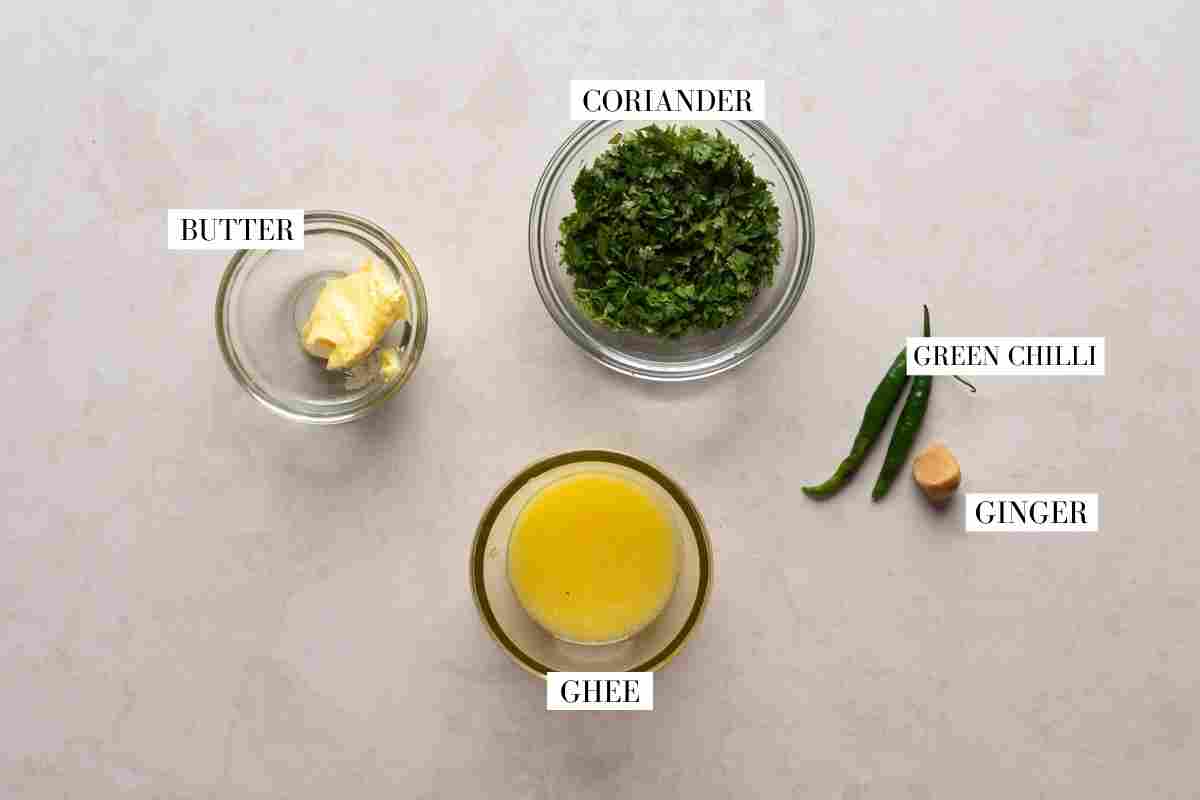
Tempering: We use ghee, ginger, and green chillies to add an additional layer of flavor to finish off the curry. Don’t skip this step!
Why is this Chicken Curry recipe so unique
We were asking this question ourselves while trying to replicate that dhaba like flavour – How is it that common dishes taste extra unique when they come from a dhaba?
Here’s what we found: Dhabas use more oil, ghee and butter to add richness and to cook the food faster, there’s a natural smoky flavour because all the cooking is done on a really high flame or using firewood. They liberally use freshly ground spices wherever possible and finally, they end the dish with a sizzling tadka/tempering!
We’ve taken all this information and compiled it into one beautiful chicken curry.
How to make Chicken Curry
Check out the simple steps that go into making this beautiful curry
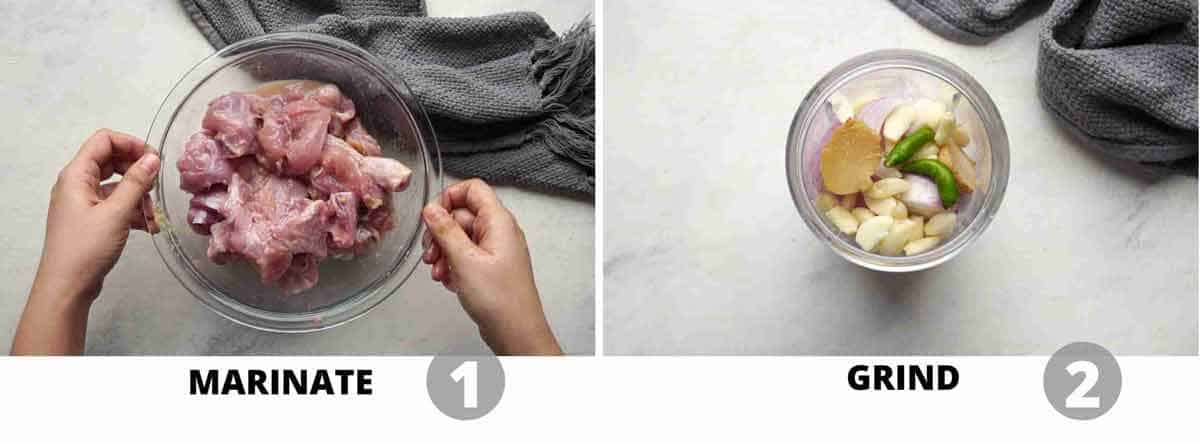
Marinate
1. Marinate the chicken in ginger garlic paste, lime juice and salt. This adds flavour from within and the acid helps tenderise the meat
2. Add onions, ginger, garlic and green chillies to a chopper and pulse to get a coarse mix.
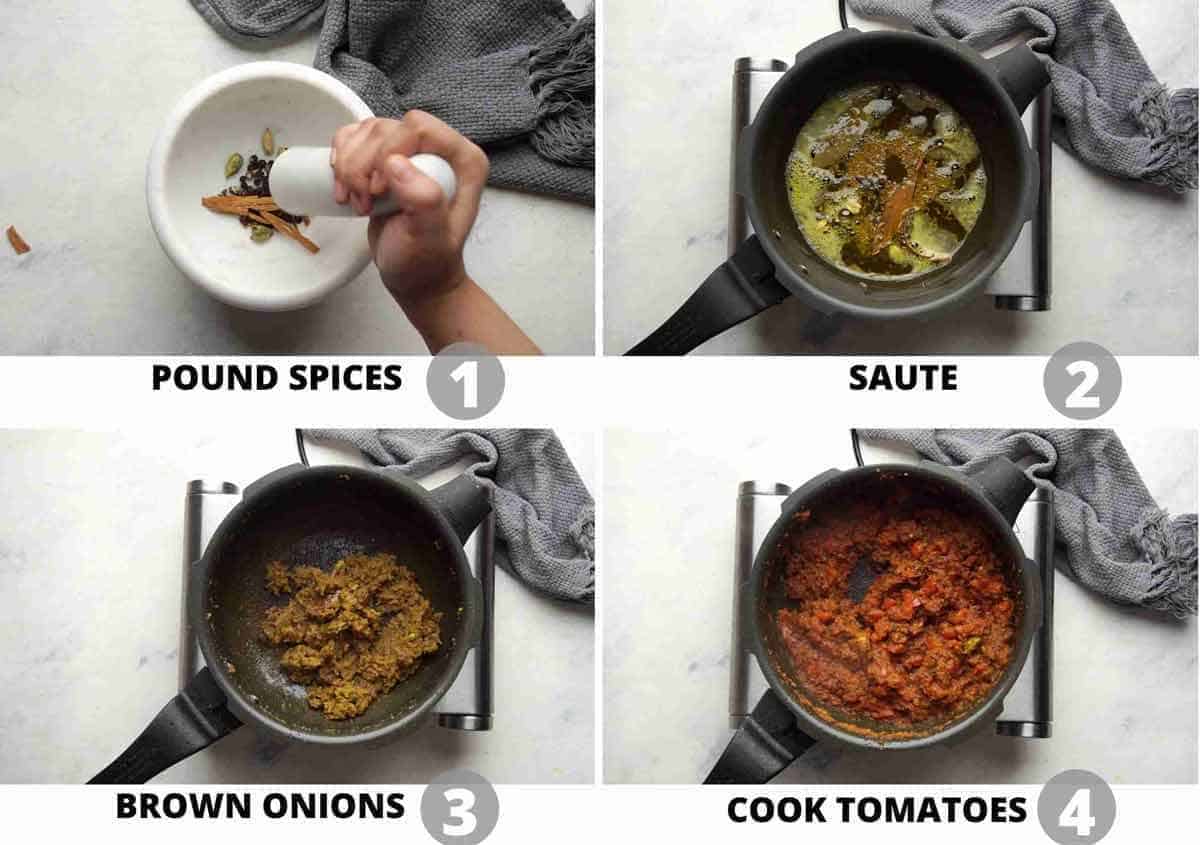
Curry
1. Pound spices roughly with a mortar pestle to break them down and release their flavour
2. Saute them in hot oil to temper them
3. Brown the onion paste in oil that’s tempered with whole spices. This is a slow cooking process where the onion paste is sauteed on a low flame till it changes colour and becomes a deep golden brown. You’ll see a thin layer of oil floating on the top and the sides – thats when you know its cooked through and isn’t raw anymore
4. Cooktomatoes and spices for a few minutes till the tomatoes become pulpy soft
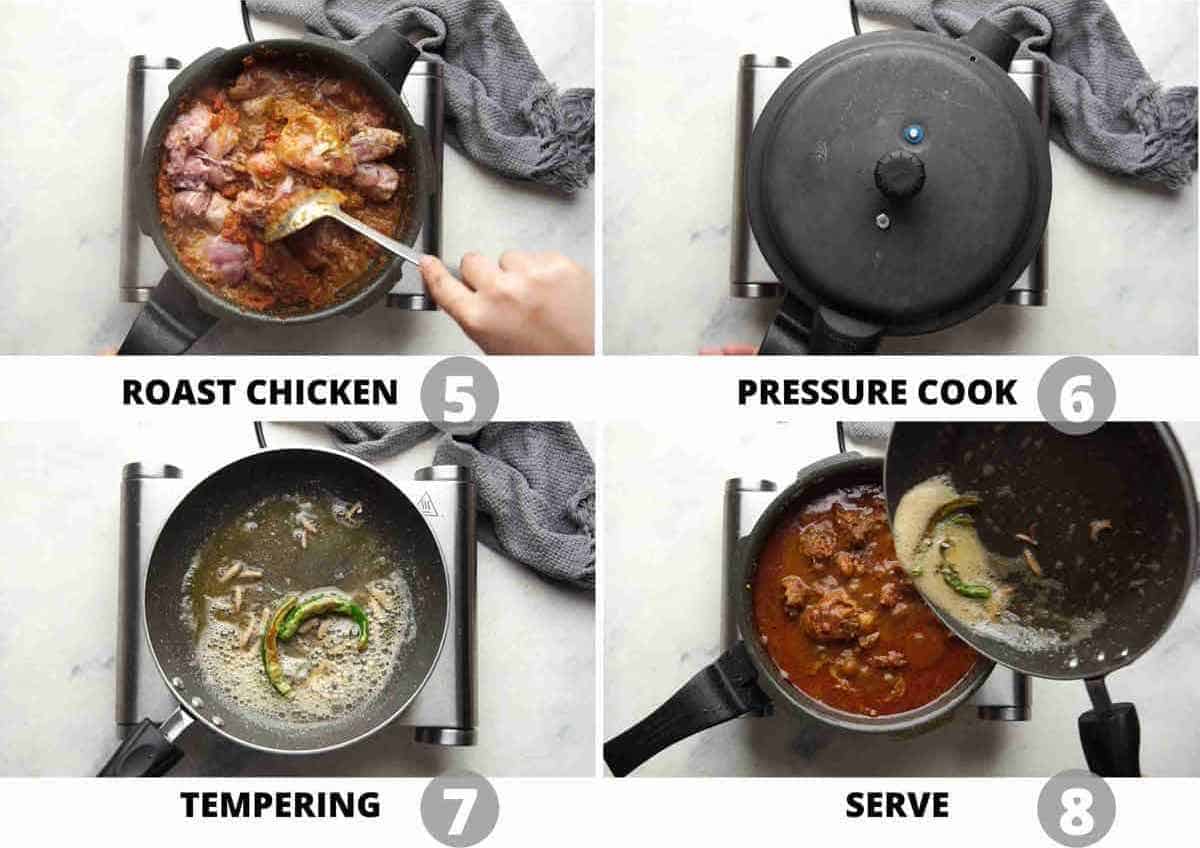
5. Roast the chicken along with garam masala in the onion tomato mixture, tossing it for a minute or two till the gravy coats all the pieces
6. Pressure Cook for 15 minutes. If using a traditional pressure cooker, start on high heat and after the first whistle, reduce the heat to low. Wait till you hear two more whistles and then turn off the flame. Let the pressure release naturally. To make instant pot chicken curry, pressure cook on high for 8 minutes
7. Temper julienned ginger and slit green chillies in butter and ghee.This adds an extra layer of flavour and gives it a nice hint of ginger
8. Serve chicken curry with tempering poured on top. Sprinkle some chopped coriander for freshness and flavour
Richa’s Top Tips
Always marinatethe chicken. The longer the better. This literally changes the game by adding flavour, seasoning, and tenderising.
Brown the onion paste. Don’t rush this process. Browning onions slowly gets rid of any raw smell and flavour. You’ll know its done when you see a little oil separating on the sides and the colour changes to a deep golden. This, in addition with the herbs, spices and tomatoes create the perfect balance.
Don’t skimp on oil. There is a fair amount of fat in this recipe in the form of oil, butter and ghee. I would not recommend skimping on oil as it will compromise the flavor.
Always use quality garam masala. I always recommend homemade garam masala. But even if using store bought, make sure its not more than a year old. Add it just before cooking the chicken so that it retains its freshness and aroma
Do not forget the tempering. It gives it that extra kick along with the richness from the ghee.
Storage Tips
If you have leftovers, let the chicken curry cool completely before transferring it to an airtight container. It will keep well in the refrigerator for 3–4 days.
If you’d like to store it for longer, you can freeze Dhaba Chicken Curry for up to 2–3 months. For convenience, portion it into freezer-safe containers so you can thaw only as much as you need.
When you’re ready to reheat, thaw the frozen curry in the refrigerator overnight and then warm it gently on the stovetop. The gravy tends to thicken as it sits, so add a splash of water while reheating if needed. Make sure the chicken is heated through before serving.
And the best part? The flavours have more time to come together as the curry sits, so leftovers can taste even better the next day. This also makes it a great make-ahead chicken curry for busy weeknights.
Serving Ideas
Wondering what to serve with Dhaba Chicken Curry? You really can’t go wrong with something that helps soak up all that delicious, spicy gravy!
If you’re craving a proper dhaba-style spread, go for tandoori roti or naan with a bowl of cool raita, sliced onions and lemon wedges on the side.
For a bigger Indian meal, add dal fryordal makhani and a simple vegetable sabzi. And don’t forget extra rotis or rice because you’ll want every last bit of that gravy!
I hope you guys enjoy this recipe as much as I do, it’s truly one of my favorites! And like all curries, this tastes even better the next day, so no need to worry about leftovers! If you love dhaba style food, check out my other favourite like Dhaba Dal Fry, Dhaba Dal Tadka, Matar Paneer, Karahi Chicken, Dal Makhani.
When you make this recipe, don’t forget to send me pictures over on my IG @my_foodstory. I love seeing your recreations!
The best dhaba style chicken curry recipe! Spicy, hot, fragrant curry made with ground spices, onions and tomatoes, and perfect for a family lunch or dinner.
Marinate the chicken pieces with ginger garlic paste, lime juice and salt. Cover and set aside while you prep everything else
Add onions, ginger, garlic and green chillies to a chopper and pulse to get a coarse mix.
Heat oil in a pressure cooker or a large heavy bottom pan. Add cumin seeds. Roughly pound all the whole spices (bay leaves, cinnamon, cardamom, peppercorns and cloves) and add to the oil.
once they start to splutter, add the onion mix. Cook the onion mix on a low flame, stirring occasionally till it is reduced to a golden brown mix and you see a thin layer of oil along the sides
Add tomatoes, salt, turmeric powder, red chili powder (if using) and coriander powder. Cook till the tomatoes start melting, and almost form a paste.
Add chicken and garam masala powder and roast for a minute or two till the chicken pieces turn pink and get coated with the masala. Add meat masala powder, 1 ¼ cups of water, mix well.
Pressure Cooker:
At this stage, if you are using a pressure cooker, place the lid and pressure cook on high till the first whistle goes off. Then reduce the flame to low and pressure cook for two more whistles and turn off the flame. If using a different kind of pressure cooker (without a whistle system), pressure cook on high for 15 minutes. Let the pressure release naturally.
Simmer for 5-10 mins on high flame, if required, to thicken the curry (chicken leaves a lot of water). I didn't need to do this.
Stovetop Method:
If you are using a heavy bottomed pan, bring the curry to a boil, reduce the heat, cover with a lid and let it cook on medium heat for 20-25 minutes. Uncover the pan, and cook for another 10-15 minutes till the curry starts to thicken. Once the curry is ready, switch off the flame.
Instant Pot Method:
If using an instant pot, place the lid and change the vent to sealing. Pressure cook on high for 8 minutes. Release pressure manually. Simmer the curry for a few minutes to achieve the desired thickness if there is too much water.
Tempering:
In another small pan, heat ghee and butter and add green chilies and ginger. Once they start to splutter, switch off the flame and mix the tadka (or tempering) into the curry. Top with coriander.
Let the curry sit for 10-15 minutes before serving. Tastes best with rotis or rice.
Some egg recipes are so simple, but still manage to feel a little special. These Italian baked eggs are one such recipe. Eggs are baked in a flavourful tomato sauce (marinara), topped with parmesan cheese and finished with some fresh herbs. It is simple, comforting and so delicious with some toasted bread. Baked Eggs Recipe...
Lemon ricotta cake is a soft, moist and delicious Italian cake made with ricotta cheese, lemon zest, butter, sugar, flour and eggs. The ricotta makes the cake really soft, tender, while the lemon zest gives it a lovely fresh flavour. Perfect cake to enjoy with a cup of tea or coffee. Lemon Ricotta Cake Recipe Lemon...
Crispy Corn is a popular Indian restaurant-style snack made by coating boiled sweet corn kernels with cornflour and rice flour, then deep-frying them. The fried kernels are tossed with chilli powder, chaat masala and other seasonings. The coating is crisp, while the corn remains tender and mildly sweet inside. Crispy corn is served hot as...
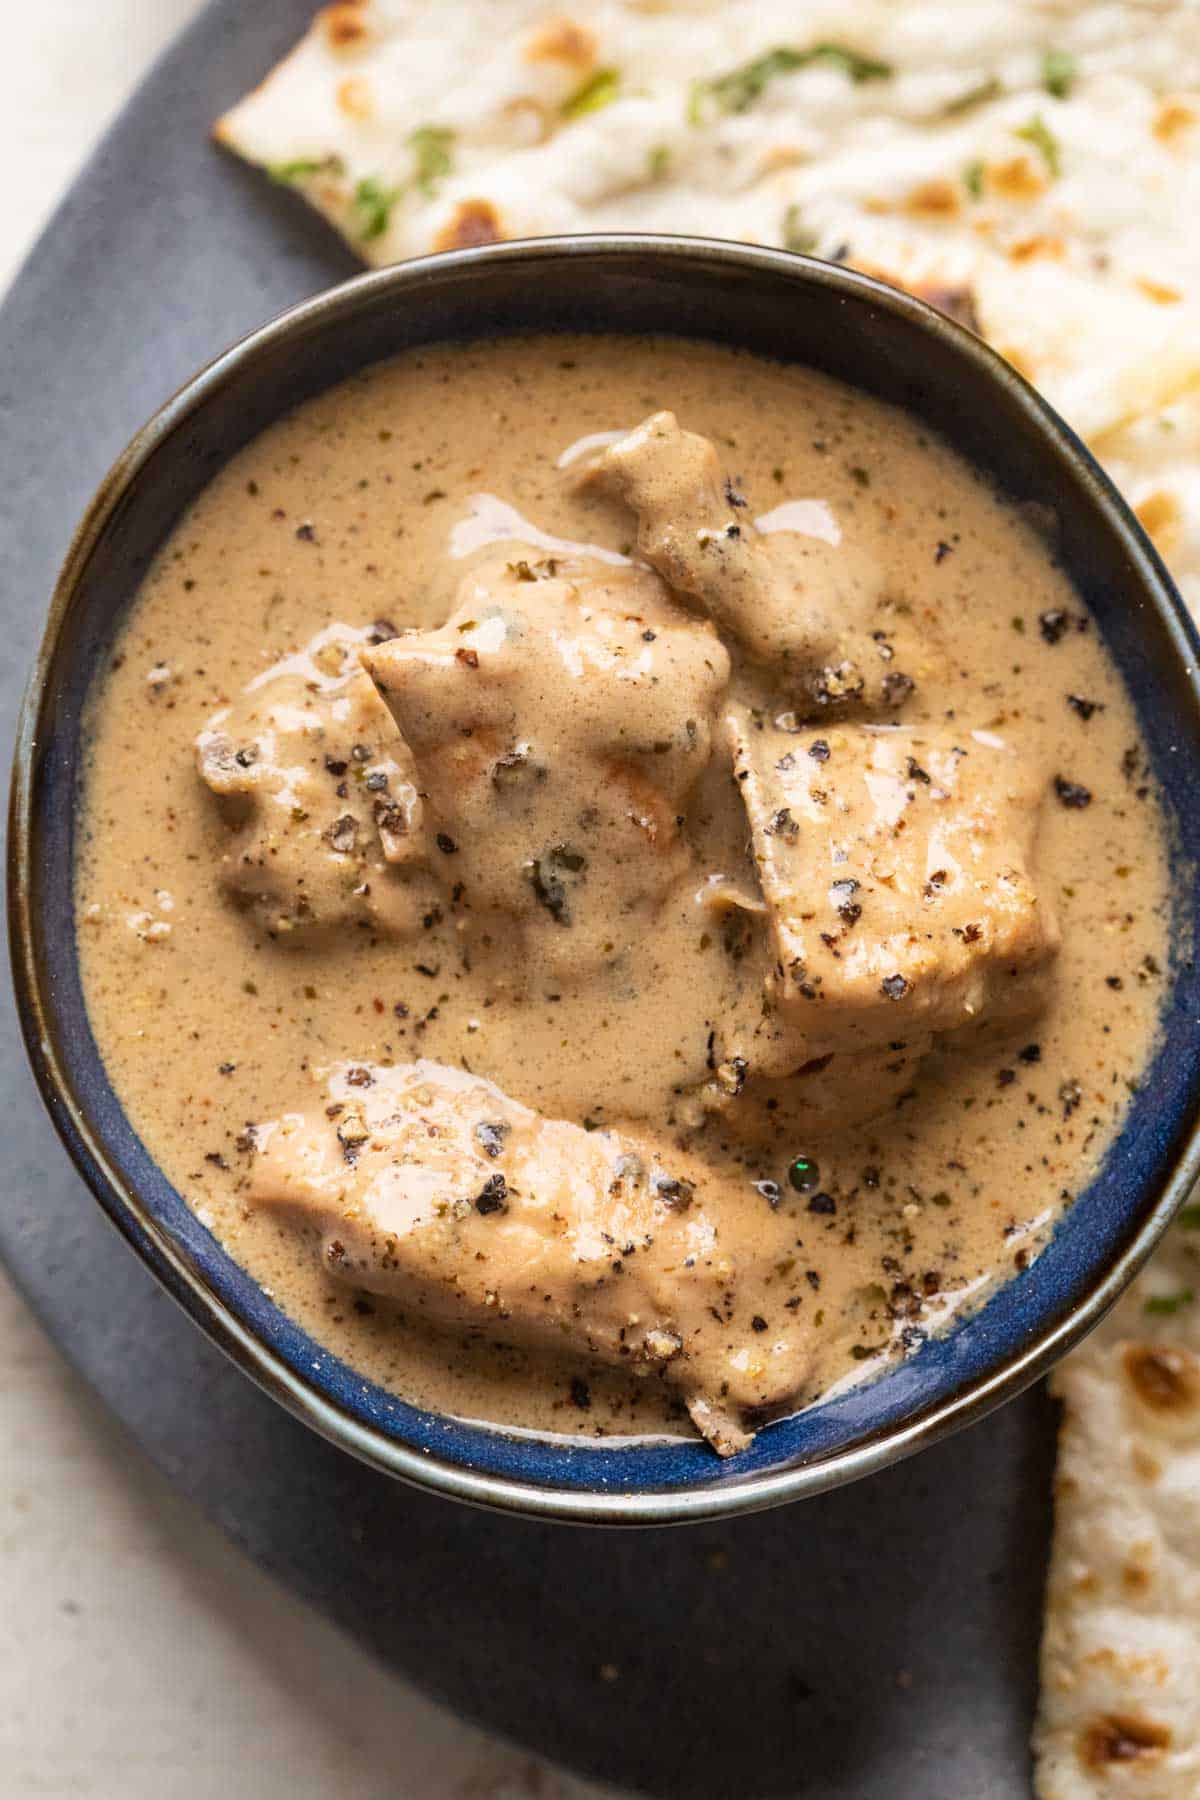
Chicken Kali Mirch in a rich white gravy is a stellar chicken recipe that’s comforting, satisfying and so tasty. This chicken curry is ready in under 45 minutes and can easily make a weeknight dinner feel special.
This chicken kali mirch has turned out to be one of my favourite chicken gravy recipes ever. This recipe ticks all the right boxes when it comes to comfort food. The gravy is smooth and luscious but not heavy; it’s warm, fragrant, gently spiced. The chicken pieces remain juicy and soak up all the black pepper flavour. The recipe is really simple and you don’t need fancy any
This chicken curry is also known as murgh kali mirch or black pepper chicken gravy/curry. Ans while it’s not a very popular restaurant dish, I guarantee is you it’s a hundred percent worth trying! And you’ll be titled the curry master every time you try it.
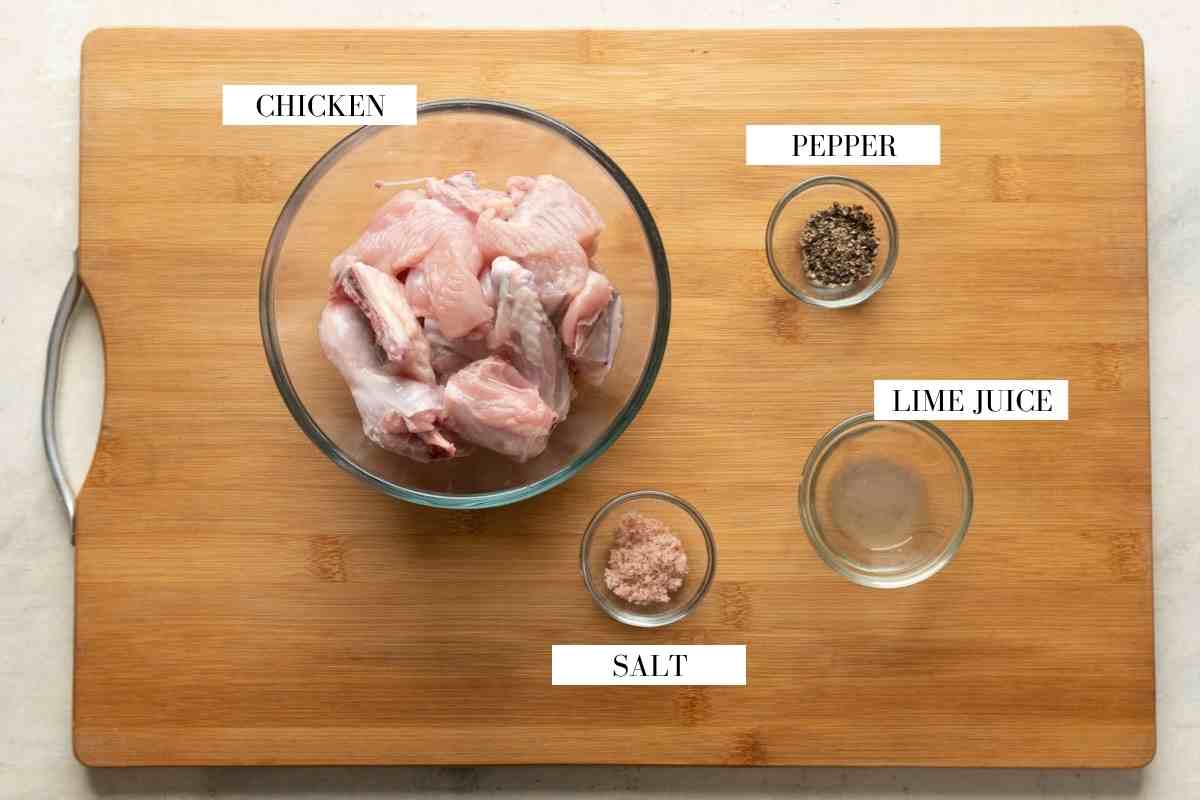
Here’s what you need for marinating the chicken, which is the first step in this recipe
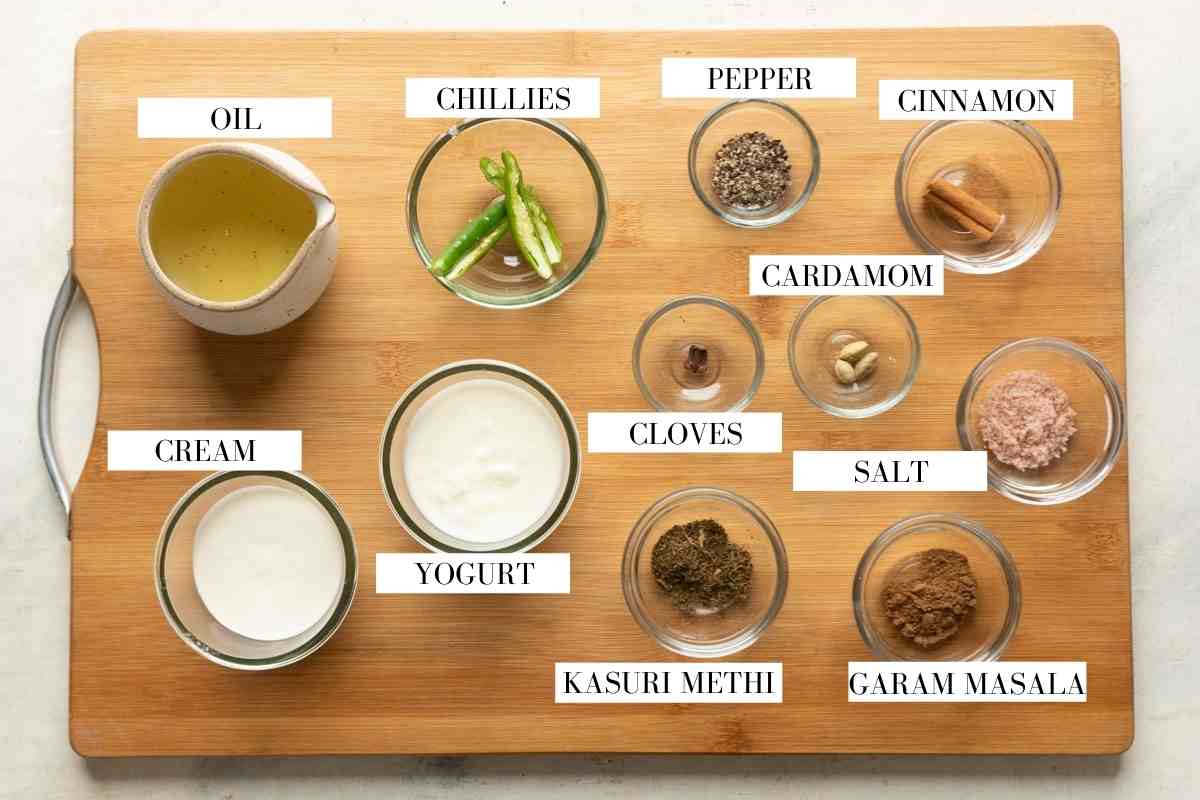
Chicken: I recommend bone in, skinless chicken pieces for this recipe, commonly known as ‘curry cut’ in India. If you don’t have this cut available where you are, use thighs and drumsticks instead.
The rest is a simple marinade of, pepper, lime juice and salt.
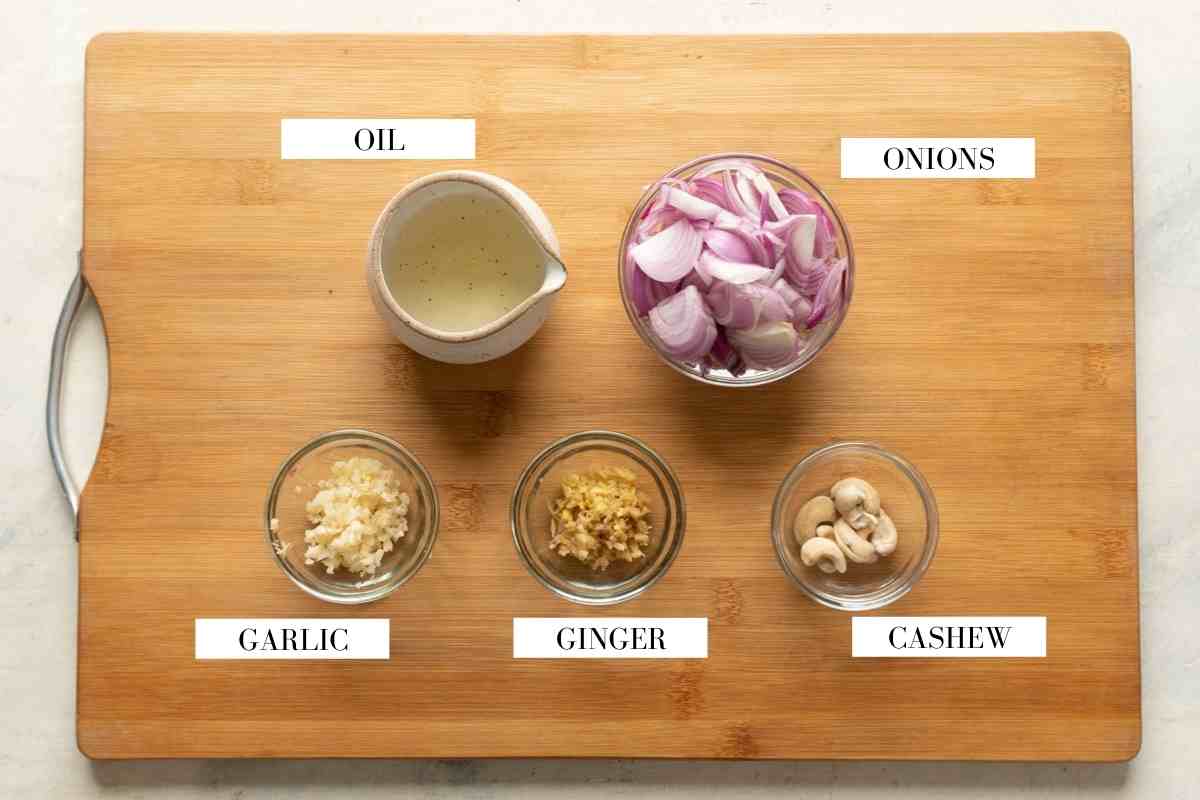
Onions: Preferably red or white for that sharp, pungent taste. You can roughly chop them as they will be blended later
Ginger and Garlic: For flavour, these are powerful aromats that form the base of the gravy
Cashews: For creaminess and richness. This recipe uses no cream, so cashews is what adds richness to the gravy
Whole Spices: Cinnamon, cardamom and cloves make this curry really fragrant
Black Pepper: Ground black pepper is used while marinating the chicken as well as in the gravy. It adds a nice spice and a gentle heat and flavour to the entire dish. Its the star ingredient of this recipe!
Kasuri Methi: This is a key ingredient that’s added towards the end to pull the whole dish together. I highly recommend trying to source it. Its an ingredient that I use frequently in Indian recipes so in my book, it’s a must have
Garam Masala: A little goes a long way with this powerful spice blend. Highly recommend making your own garam masala if you can
Yogurt: To add volume, tanginess and acidity
Cream: To add richness and make the overall curry really nice and creamy
Chicken Kali Mirch – Step by Step Recipe
Super simple – I’m breaking this down into 4 parts
1. Marinate
1-2Marinate the chicken pieces in lime juice, salt and pepper till the chicken is nicely coated. Set aside for 20 minutes while you make the onion paste
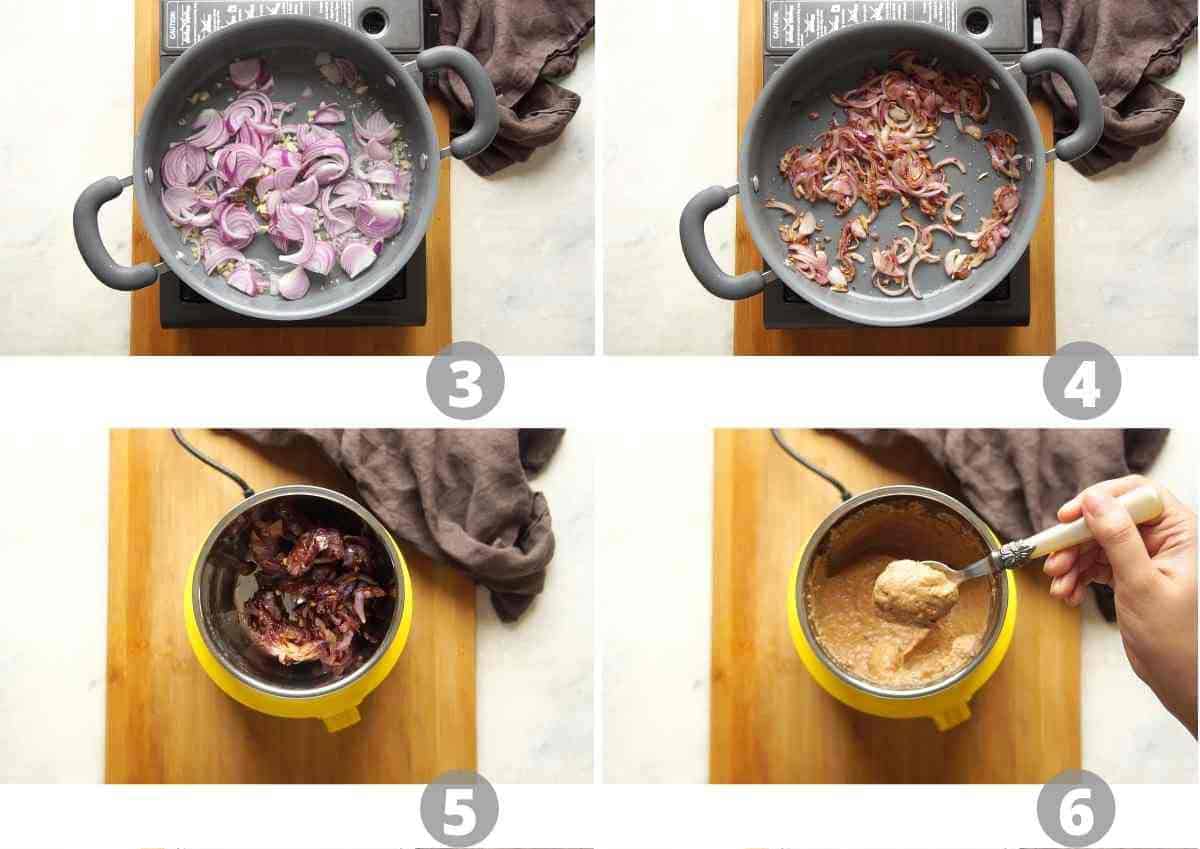
2. Onion Paste
3. Saute the onions, ginger and garlic in oil to soften and cook them
4. Look for a light golden brown colour. We don’t want to caramelise the onions too much or the colour of the gravy will change
5. Cool the onion mixture completely and then grind it in the smallest jar of the mixer grinder along with cashews and a dash of water
6. Blend to a smooth, creamy paste
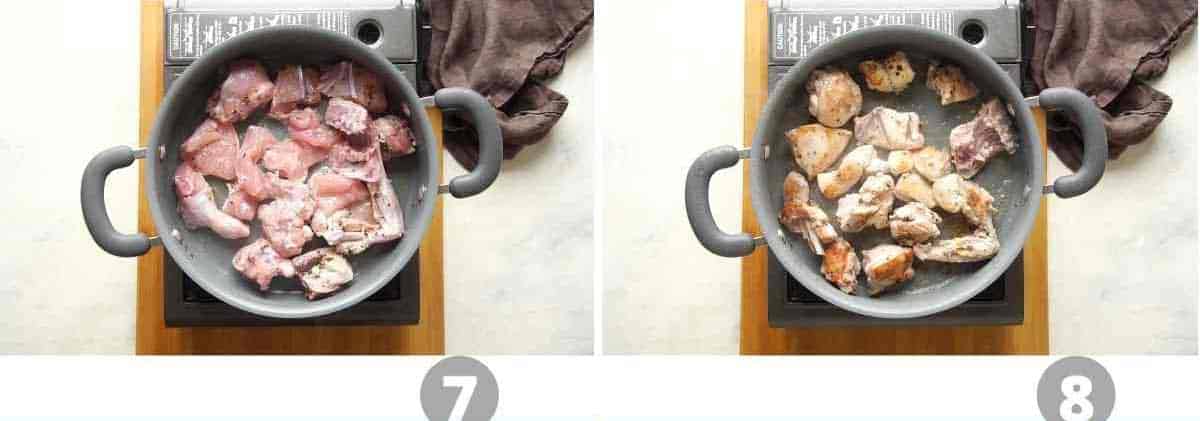
3. Sear Chicken
7. While the onion paste is cooling down, heat oil in a pan and add all the chicken pieces. Sear on high heat for 2-3 minutes on each side
8. Flip the chicken pieces and cook on the other side – we are looking for a nice golden sear to lock in the flavours
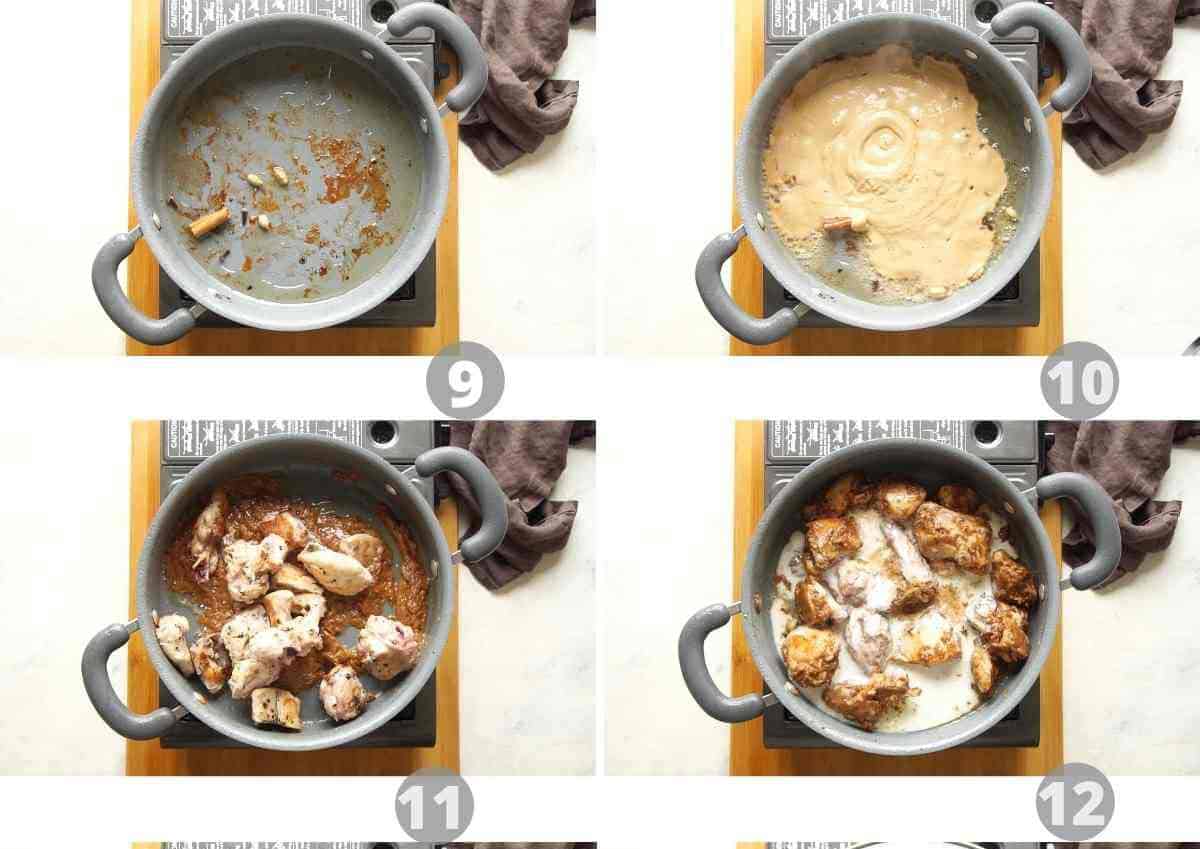
4. Kali Mirch Gravy
9. Remove the chicken pieces and in the same pan, heat more oil and add the whole spices. Saute for a minute
10 Add the onion paste and cook it for a few minutes till it reduces to half
11. Add the chicken pieces and coat them well with the onion mixture
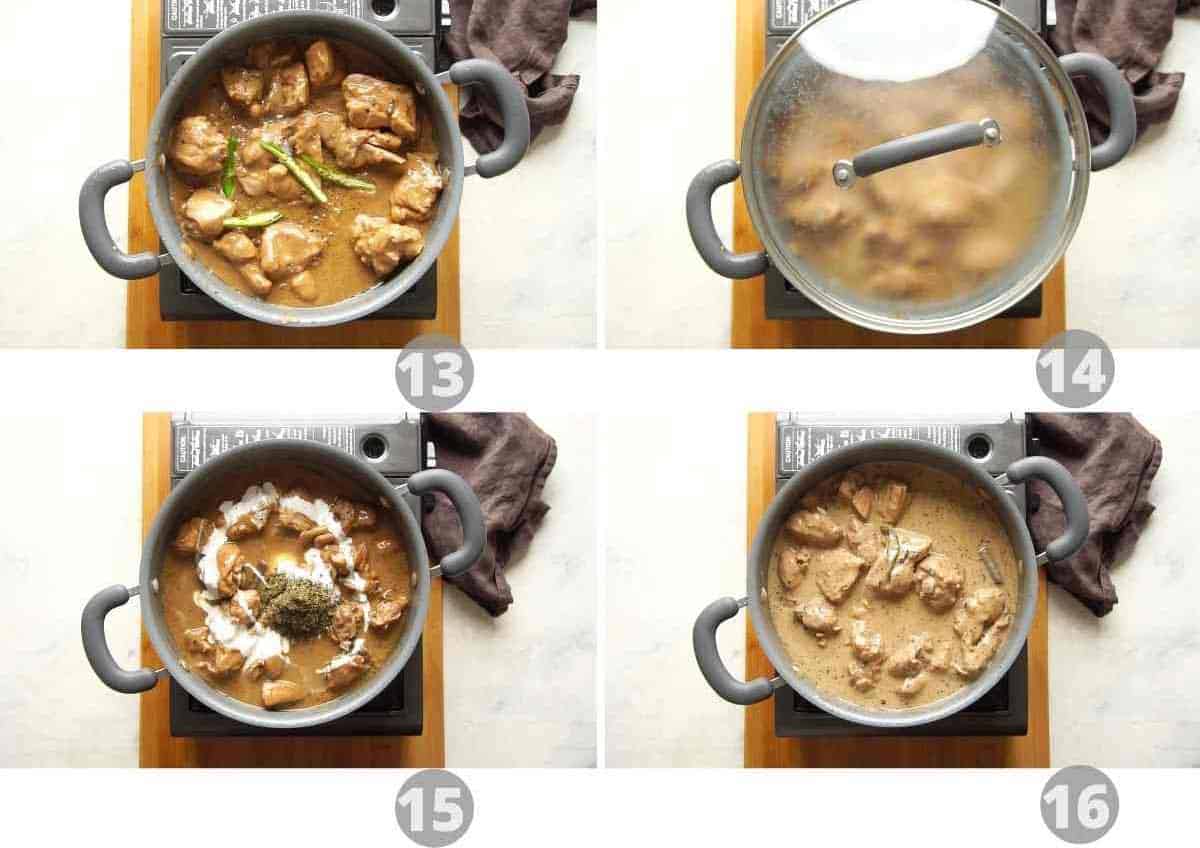
12. Reduce the heat, whisk the yogurt and add it to the pan along with garam masala. Quickly toss this around till the yogurt cooks a bit and you can see oil separating from the sides. If you don’t keep tossing it, the yogurt will split and can give the curry a grainy texture.
13. Add green chillies and water and mix well
14. Cover and cook the chicken for 15-20 minutes till its tender and cooked through
15. Add kasuri methi, ground black pepper and the cream
16. Give it another mix and turn off the flame. Chicken kali mirch is ready!
Richa’ Top Tips
Marinate the chicken for at least 15 minutes. This helps the pepper and lime juice work their magic and flavour the chicken from inside out. Longer is better!
Use the right cut of chicken: Bone-in, skinless chicken pieces are best for this recipe. The chicken pieces are cut into 1.5-2 inch in size. You can use boneless thigh pieces, but if you wish to use chicken breast, cook them in the gravy for only 7-8 minutes
Take your time browning onions. Brown the onions to a light golden. The more you brown them, the deeper the colour of the gravy will be. Which is not a bad thing, just different
Make sure to whisk the yogurt before adding it to the gravy. Add the yogurt on a low flame or turn off the flame. Once you add the yogurt, mix immediately and keep tossing it over low heat till the yogurt cooks
Don’t skimp on the pepper. If you want to reduce the heat, reduce the green chillies or skip them
Highly recommend using kasuri methi. Kasuri Methi really brings this dish together and helps add the finishing touch. A small amount goes a long way.
Make it vegetarian. Try my paneer kali mirch recipe for an easy vegetarian version. Believe me, it’s just as good!
Mumbai Pav or Dinner Rolls also work really well to soak up all that peppery, creamy flavour
Storage Tips
Fridge: Let the chicken kali mirch cool completely before storing. Then Transfer to an airtight container and refrigerate for up to 2–3 days. The flavours deepen over time, so it often tastes even better the next day.
Reheating: When reheating, add a splash of water to loosen the gravy and heat gently. Alternatively, you can reheat on the stovetop or in the microwave until warmed through
Freezer: For longer storage, freeze for up to 1 month Note: the sauce texture may change slightly after thawing
If you are looking for a mildly spiced, but super tasty gravy (I always hear a lot of our international readers saying its too spicy etc), then this is it! The combination of onions, black pepper, yogurt and cream make this gravy so lickable, you’ll be eating it off the stove. I know I do!
Watch Paneer Kali Mirch Recipe Video
LOVE THIS RECIPE? Subscribe to my newsletter and be the first to receive all new recipes!
Who would've imagined that flavours of black pepper could work so well in a chicken curry! This dish is warm, comforting and fragrant and is the best cozy, weeknight dinner. The chicken pieces remain juicy, the gravy is creamy and light and everything is mildly spiced but still very very tasty. This Chicken Kali Mirch is a fantastic weeknight dinner option!
½TeaspoonsKasuri MethiFenugreek Leaves, roasted and crushed
2TablespoonsCreamheavy or light cream
1/4TeaspoonSalt
Instructions
Marination
Add chicken, salt, pepper and lemon juice to a bowl and mix well. Set aside for 20-30 minutes and allow to marinate.
Onion Cashew Paste
Heat a tablespoon of oil in a pan and add the sliced onions. Fry on medium heat for 4 minutes till the onions are soft and translucent.
Add the chopped ginger and garlic and keep frying on medium heat for 1 minute.
Cook the onion mixture and then add it to a mixer grinder with cashew nuts. Grind to a smooth paste, use 2-3 tablespoons of water if required. Set aside.
Gravy
Heat 2 tablespoons of oil in a pan and place the marinated chicken pieces side by side. Cook on high heat for 2-3 minutes on each side. Remove from the pan and set aside.
In the same pan, add the remaining 2 tablespoons of oil and allow it to heat up on a medium flame. Add the whole spices and saute for 30 seconds to a minute.
Add the onion cashew paste that was ground earlier and cook for 5-6 minutes on medium heat till you see oil separating from the sides.
Add the fried chicken pieces and fry on medium heat for 2-3 minutes
Reduce the heat to low and add the whisked yogurt, garam masala and salt. Cook for 2-3 minutes, stirring continuously till oil separates.
Now add green chillies and ¾ cup of water. Mix well, cover & simmer on low heat for 15 minutes till chicken pieces are tender and cooked through.
Add pepper and kasuri methi, mix and simmer on low heat for 2-3 minutes. Serve hot.

 Login
Login