Reading view

There are new articles available, click to refresh the page.

Lemon Chicken Kabab Recipe | Juicy, Zesty & Easy Restaurant-Style Chicken

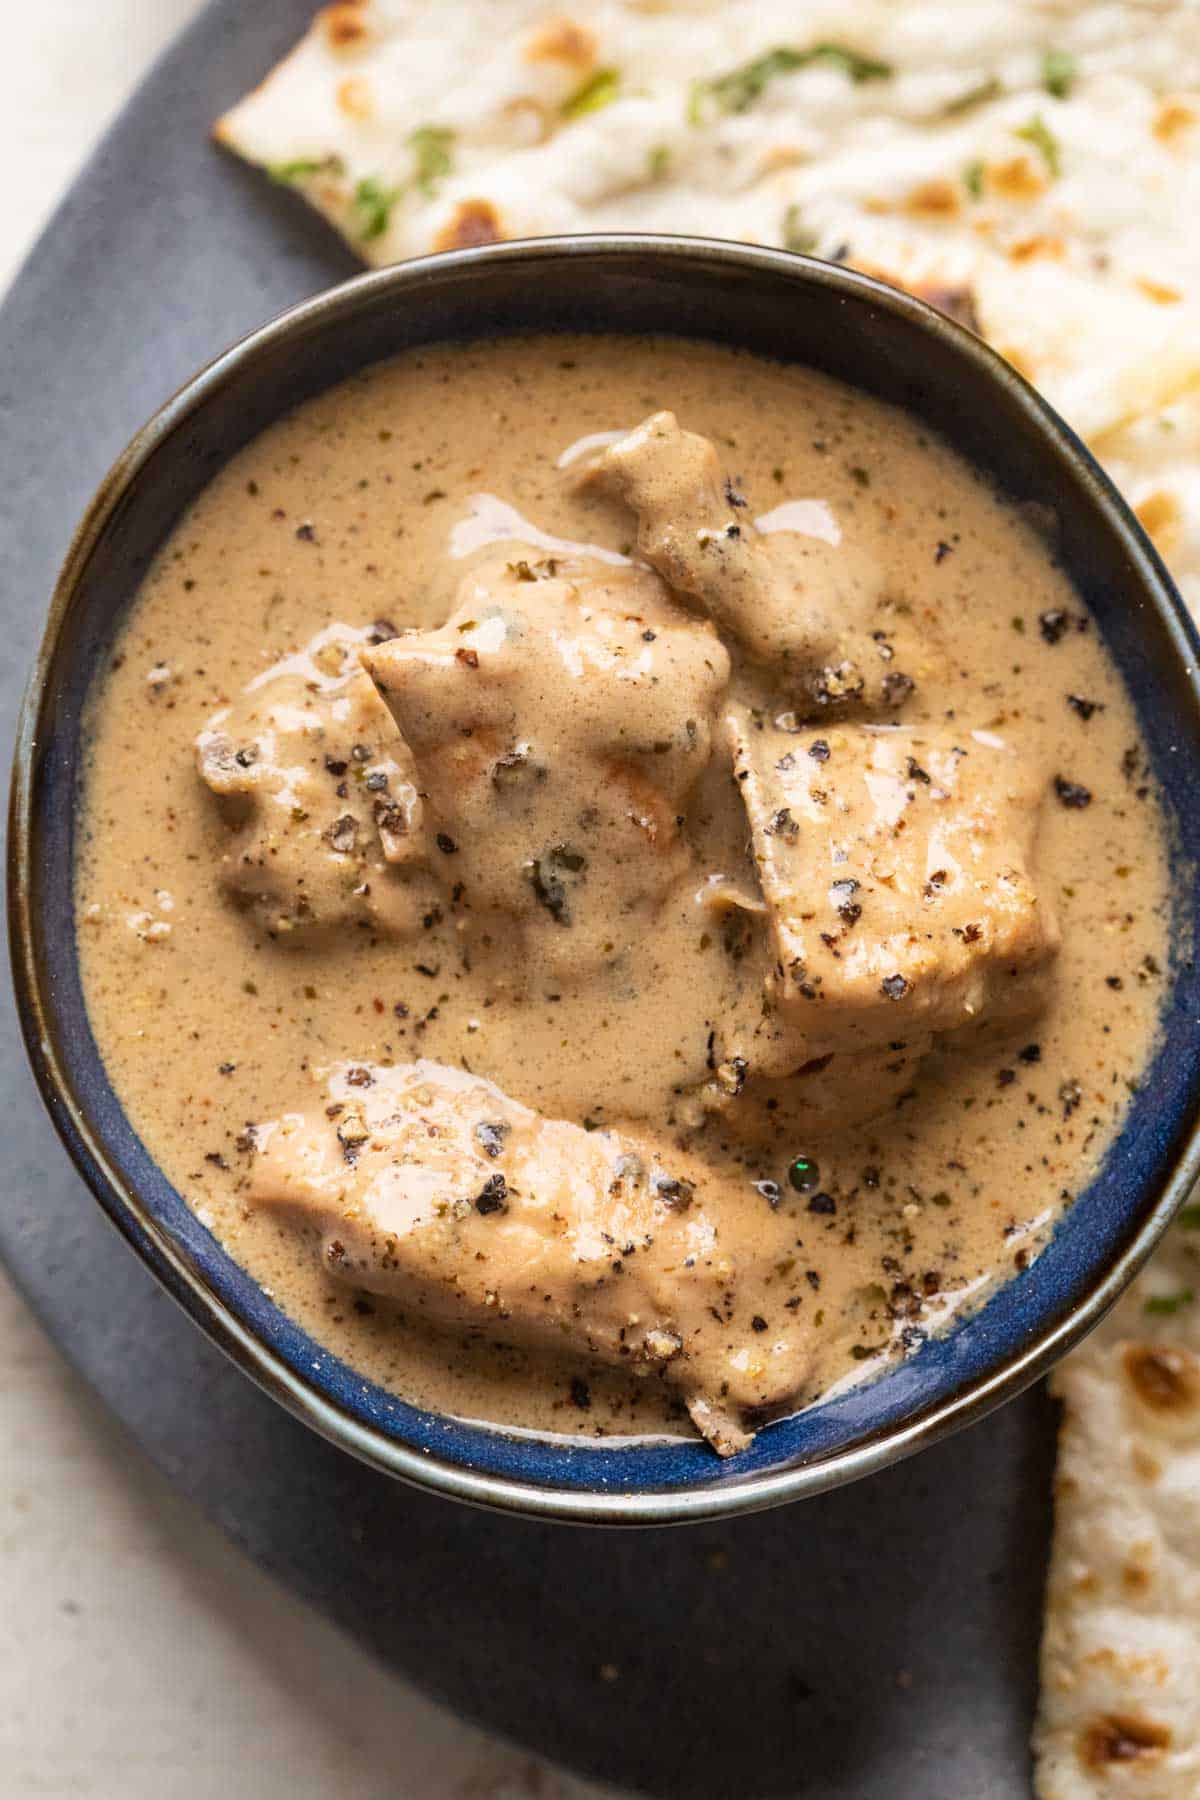
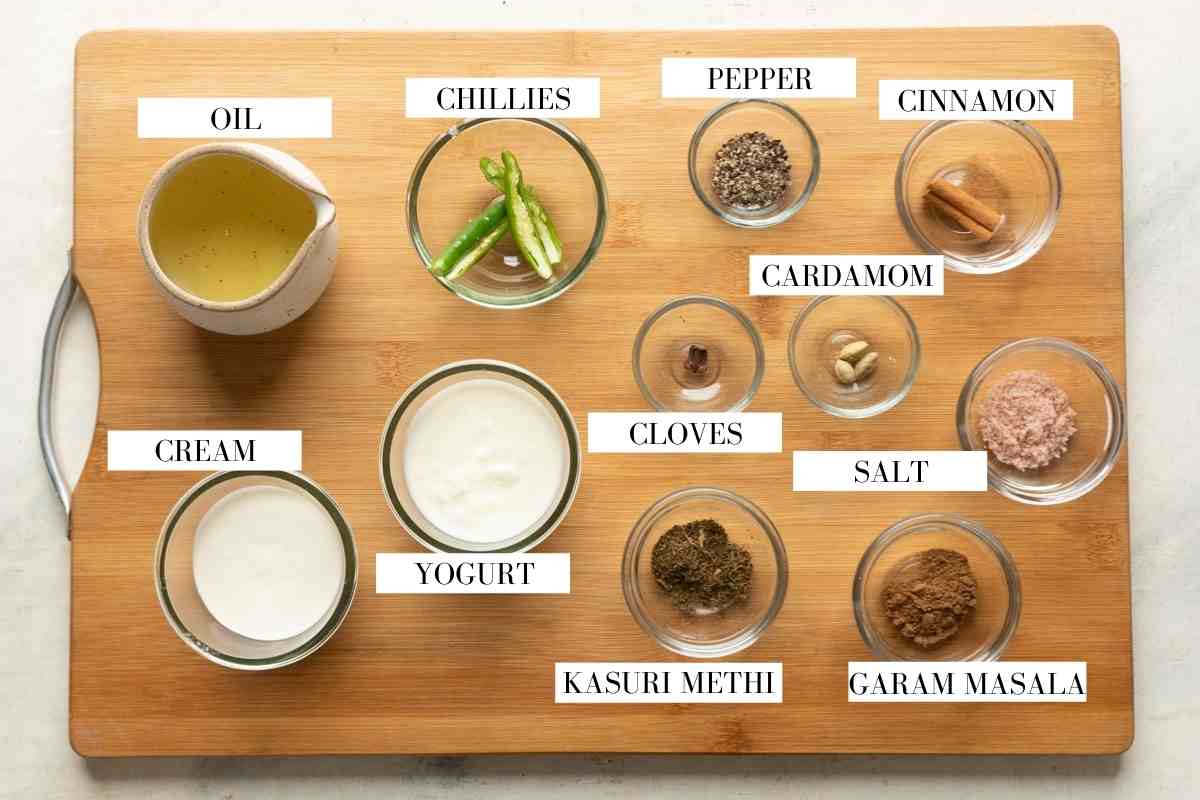
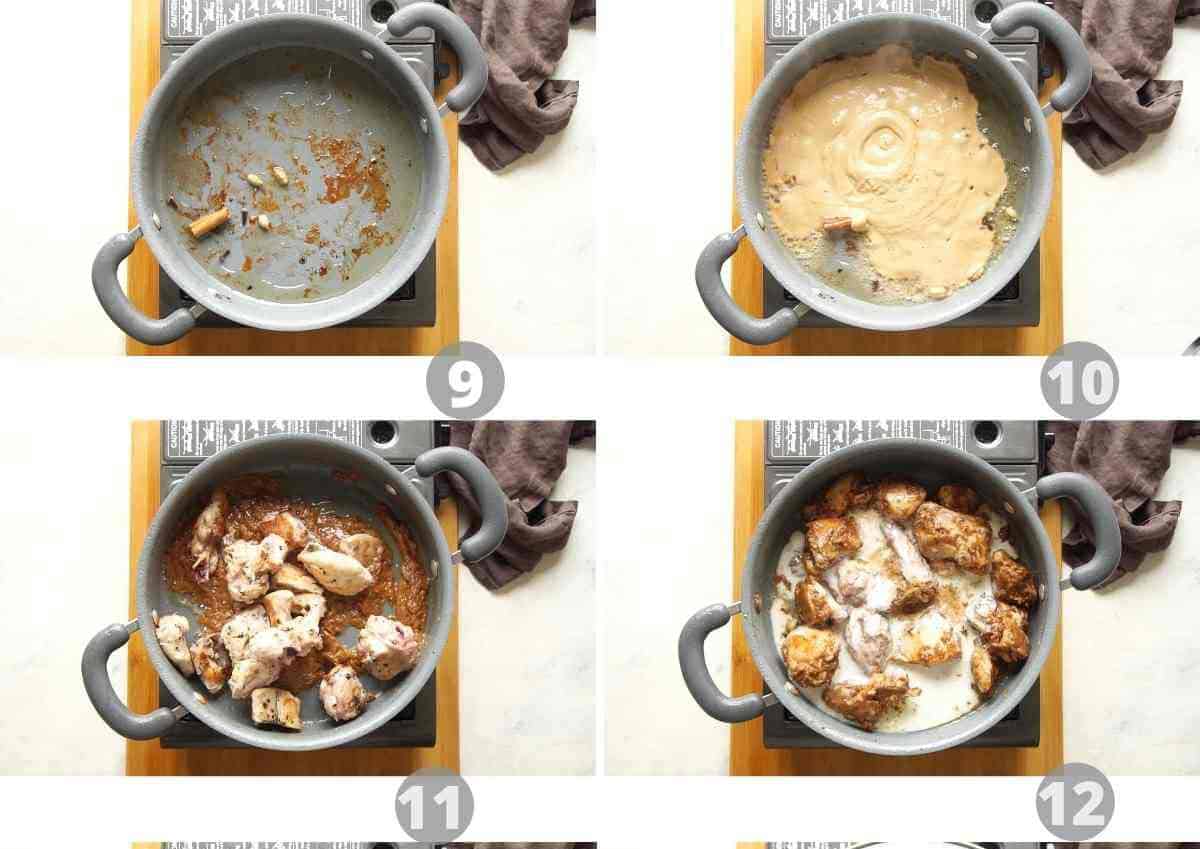
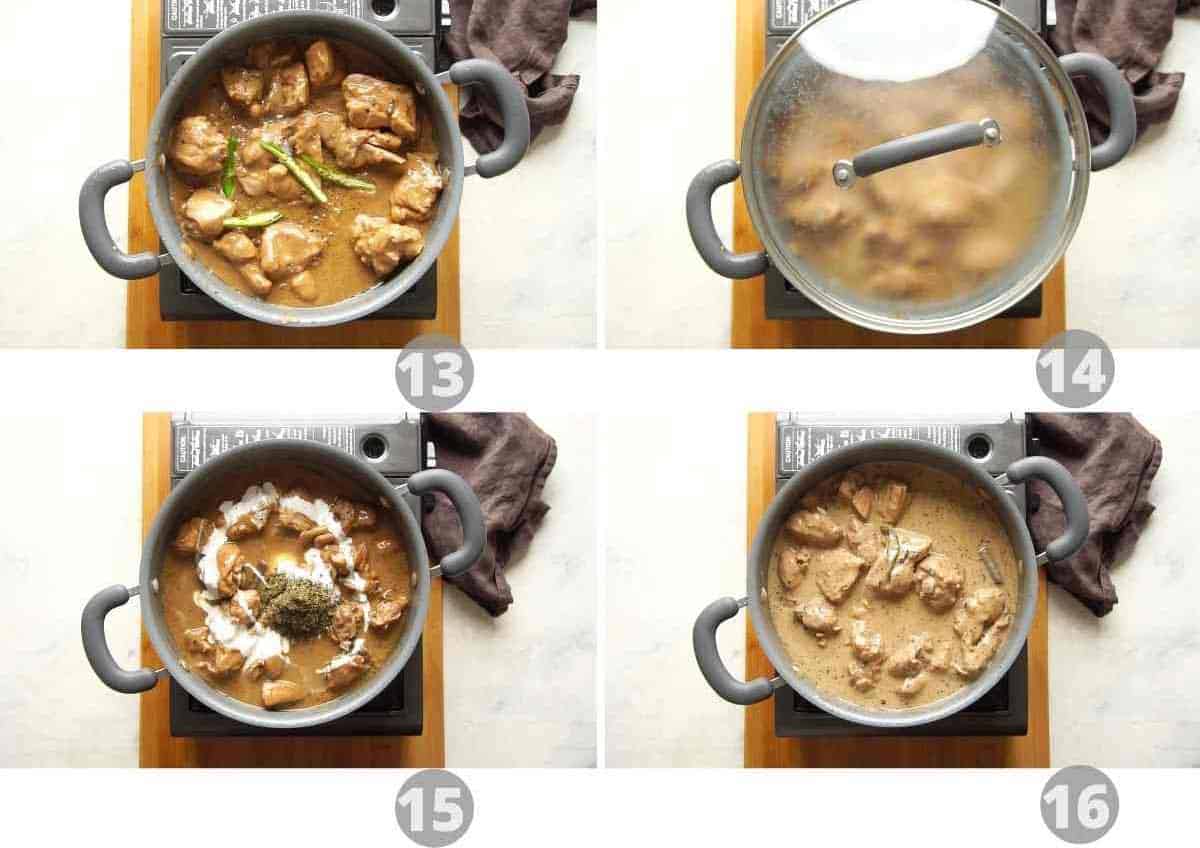
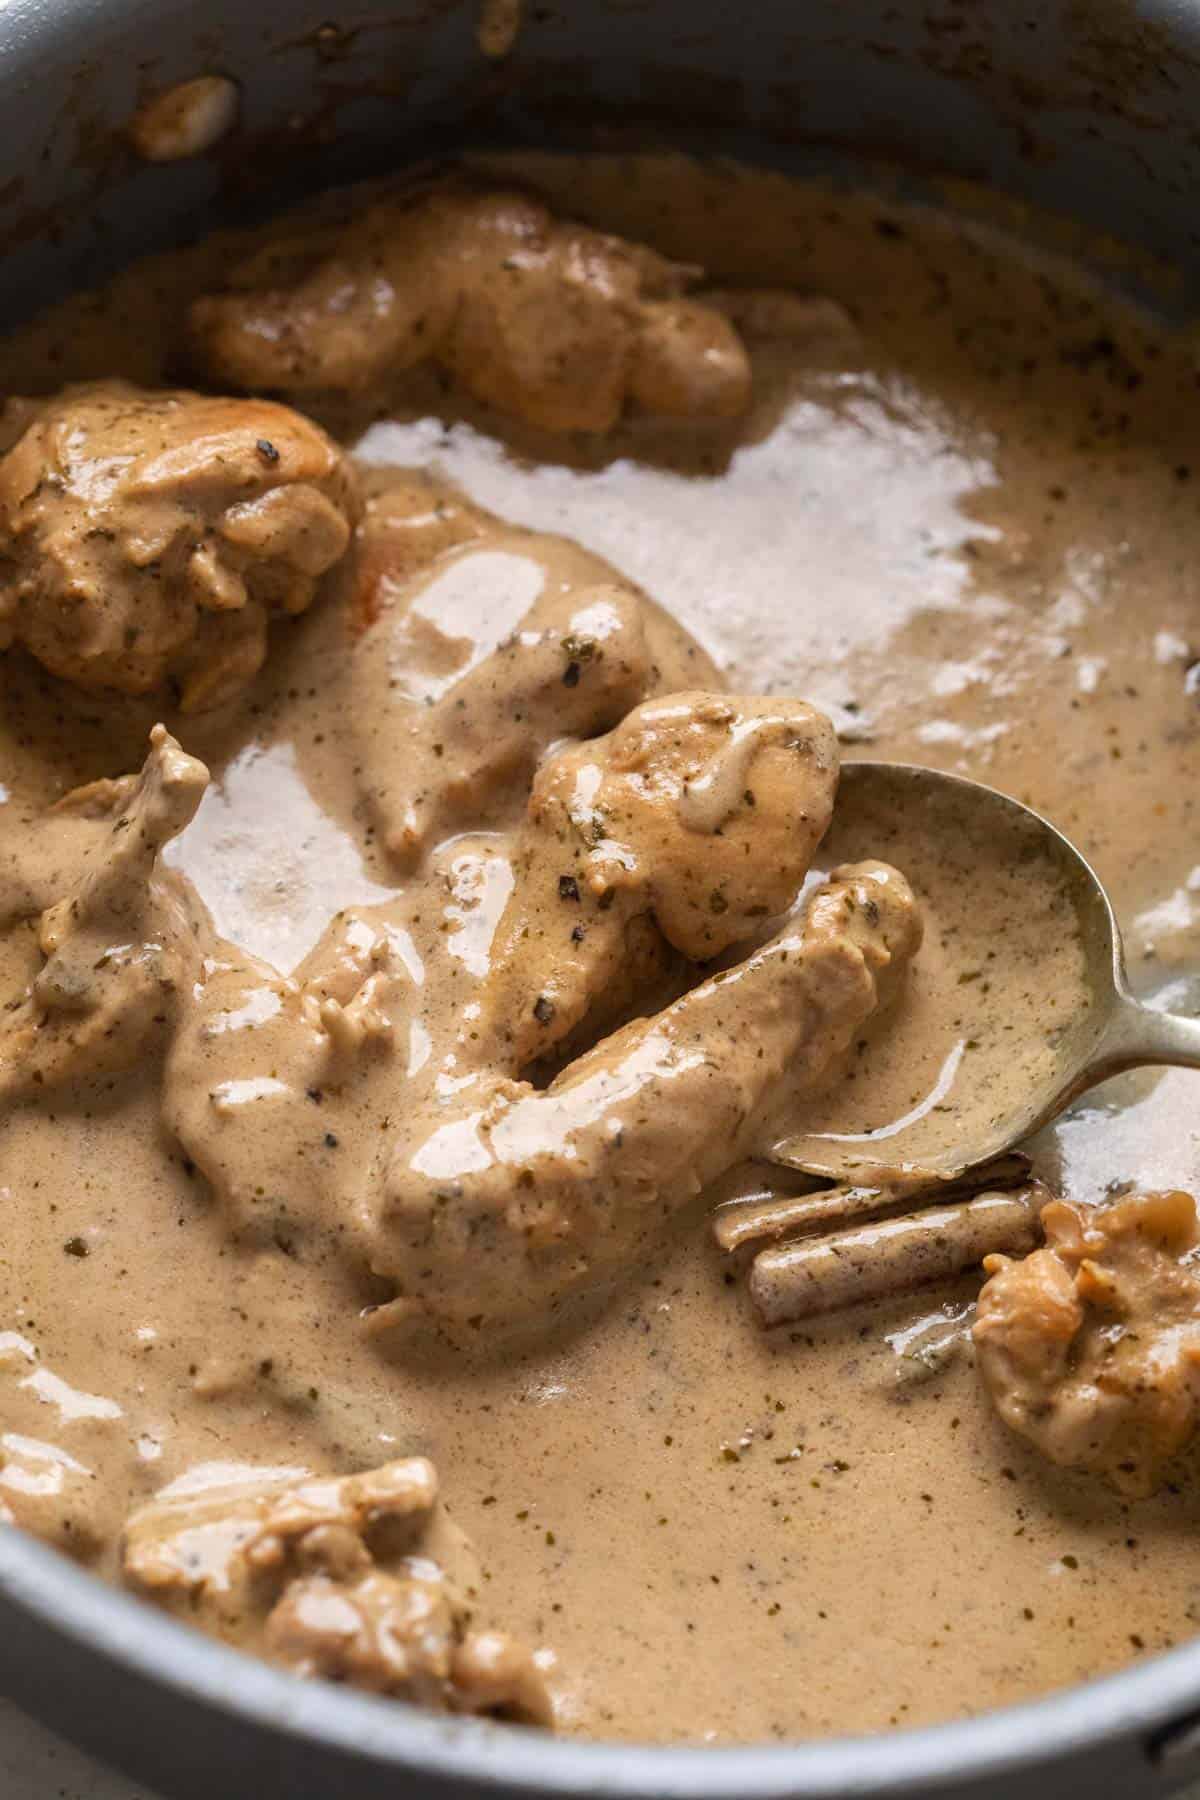
Fresh, zesty, juicy and packed with irresistible flavors, this lemon chicken kabab is proof that a handful of simple ingredients can create something truly extraordinary!

If you're looking for a chicken recipe that's bursting with fresh citrusy flavors while staying incredibly juicy and tender, this lemon chicken kabab is exactly what you need!

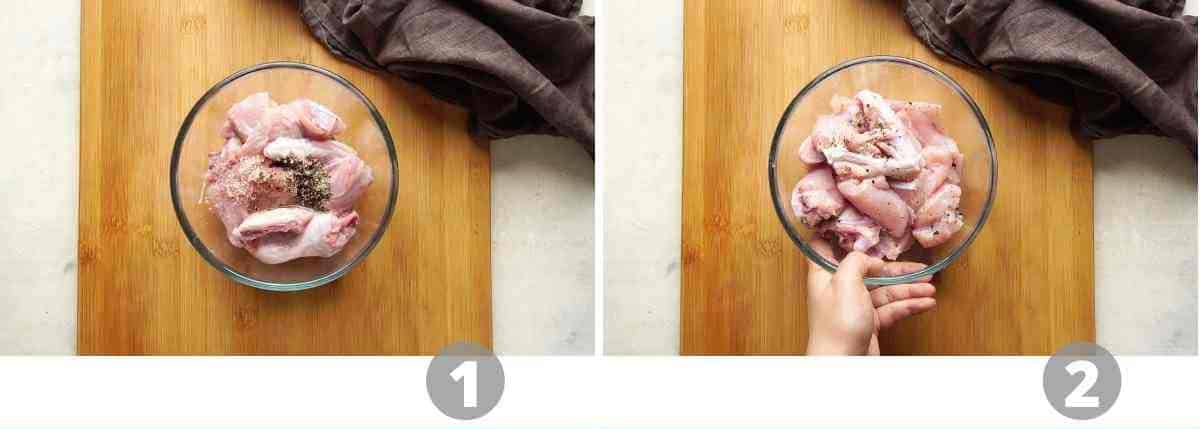
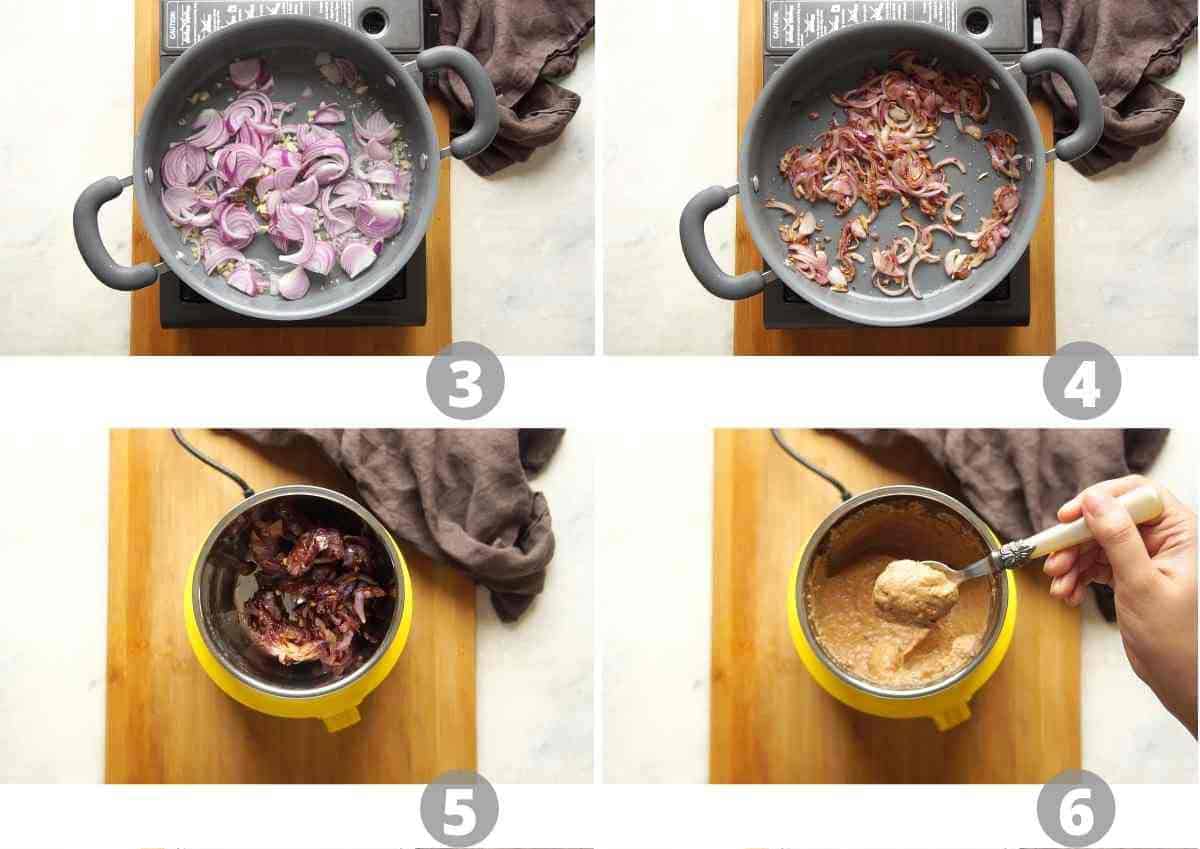
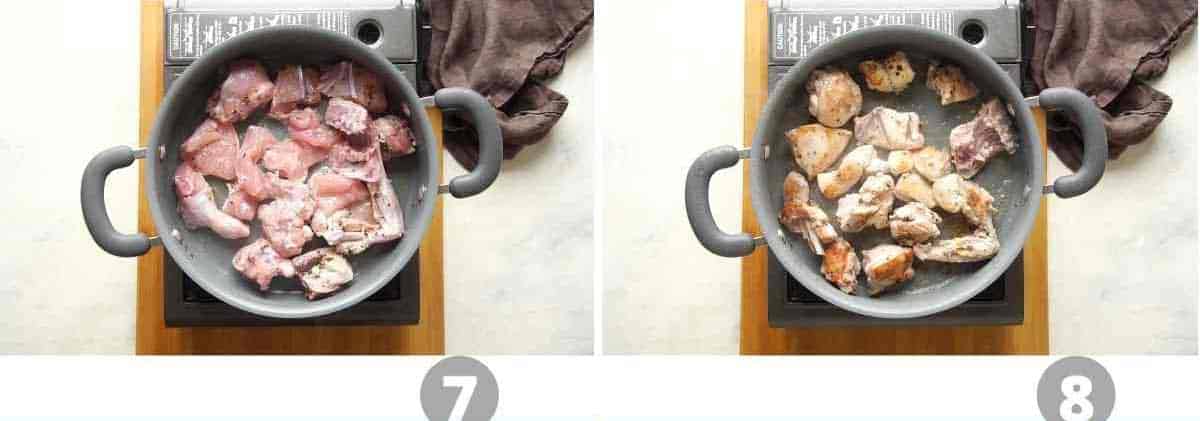
Marinated twice for maximum flavor, cooked with fragrant whole spices, and finished with plenty of lemon zest and juice, this kabab is light, aromatic and irresistibly delicious!

In addition to it, a freshly roasted blend of black peppercorns, cumin seeds, green cardamom, cloves and fenugreek seeds is sprinkled over the finished kabab for an extra layer of aroma and flavor.

This simple finishing spice mix elevates the dish from delicious to truly unforgettable making it perfect for everything from weeknight dinners to festive gatherings!

What is Lemon Chicken Kabab?

Lemon chicken kabab is a light, refreshing take on the classic Indian chicken kabab, where juicy pieces of chicken are infused with the bright, zesty flavors of fresh lemon instead of relying on heavy spices alone.

Unlike fiery red tandoori kababs, lemon chicken kabab is all about balance highlighting the bright zing of fresh lemon, complemented by creamy yogurt and aromatic whole spices for a beautiful allrounder flavor.

The citrusy freshness beautifully complements the savoury richness of the chicken, while whole spices and a sprinkle of freshly roasted masala add warmth and complexity without overwhelming the palate.

The result is a kabab that's juicy, fragrant and bursting with vibrant flavors in every bite. This lemon chicken kabab is a versatile dish that's elegant enough for entertaining yet simple enough for a weeknight dinner.

The post Lemon Chicken Kabab Recipe | Juicy, Zesty & Easy Restaurant-Style Chicken first appeared on Flavor Quotient.

Lemon-Chicken-Kebab-FQ-11-8275

Strawberry Fool Recipe

Strawberry Fool is a creamy delicious dessert that is made by layering fresh strawberries and whisked fresh cream. It is a special dessert and is a must try at home during strawberry season for its taste, also the dessert feels soft and creamy and is best served cold.

strawberry fool served in a glass

This is simple and doesn't need any cooking, each spoon has strawberry flavour and the soft cream gives it smooth texture, also the strawberry pieces add a bite and everything together feels fresh and satisfying. This comes together quickly without requiring much effort.

[feast_advanced_jump_to]

About Strawberry Fool

Strawberry Fool is a quick and easy to make dessert. You can enjoy fresh strawberries in a different form and this recipe is also easy to make and does not need much effort. It can be made ahead and kept in the fridge until serving time, the flavours blend together well and give a refreshing taste.

The texture is soft and creamy with little strawberry pieces throughout. Each spoon has a strawberry flavor and soft cream makes it smooth. Lemon juice if added gives a tangy taste that balances the sweetness. When you serve it cold everything comes together and tastes really good.

The recipe is flexible and depends on how sweet your strawberries are. Sugar can be adjusted based on your strawberries. Some people like more strawberries for stronger flavor while others prefer more cream. You can also skip lemon juice if you don't like the tangy taste.

I usually make this during strawberry season when berries are fresh and sweet. My family likes it really chilled. The creamy texture and fresh strawberry taste make it a favourite at home.

strawberry fool served in a glass

Strawberry Fool Ingredients

  • Strawberries - I have used fresh, ripe strawberries for the pudding and the garnish. Medium sized ones give you better flavour and soft texture.
  • Fresh Cream - I use fresh cream or whipped cream for making this rich and creamy. You can also use whipping cream if that is what you have.
  • Sugar - I added sugar for sweetness, you can just adjust as per taste depending on how sweet your strawberries are.
  • Lemon Juice - I used for tangy taste and it helps bring out fresh flavour. Adjust quantity based on how much tangy taste you like and it balances the sweetness.

Similar Recipes

How to make Strawberry Fool Step by Step

1.Rinse it well, remove the leaf. Chop them roughly.

how to make strawberry fool step1

2.Take it in bowl, add sugar to it.

how to make strawberry fool step2

3.Mix well add lemon juice. Set aside for 10 minutes so that it becomes juicy.

how to make strawberry fool step3

4.To a mixing bowl add fresh cream, Whisk well until thick and peaks are soft. I used my hand mixer. I always take fresh cream from fridge just before whisking.

how to make strawberry fool step4

5.Add juicy strawberries reserving a tablespoon of it for topping.

how to make strawberry fool step5

6.Just give a quick mix, do not over mix. Take your serving glass. Spoon the mixture into it.

how to make strawberry fool step6

7.Fill the serving cup, spoon the juicy strawberries and add as topping. Chill until serving time.

how to make strawberry fool step7

Serve chilled!

Expert Tips

  • Picking Strawberries - I usually choose ones that are completely ripe and naturally sweet, makes the dessert taste better. 
  • Whisking Cream - I whisk until soft peaks form and then stop. If you over whisk it, the texture becomes heavy and does not work as well. 
  • Strawberry Mix - I prefer keeping strawberry mixture slightly pourable so it spreads easily when layering. You get a smoother finish this way and flavours blend well together.
  • Chilling Time - I always refrigerate the dessert before serving. It sets properly and tastes much better when cold. You can make it ahead and keep in fridge for few hours.
  • Toppings - You an also add few nuts on the top for garnish, it also add crunch texture.

Serving and Storage

Serve Strawberry Fool as after meal dessert or on afternoon to beat the summer heat. You can store this in fridge for upto one day, consume within for best flavour and taste.

FAQS

1.Can I make this ahead?

Yes you can make it before some time and serve. The flavours blend well and taste even better when it sit for some time.

2.Which strawberries are best?

I use ripe, sweet and fresh ones for best flavour and the right texture overall. Medium sized ones work well too.

3.Can I add vanilla essence?

Yes you can use it and it mix well into the cream giving extra flavour. Add only small quantity for best taste.

4.Can I skip lemon juice?

Yes skip if you don't like tangy taste. Lemon juice gives a bit of freshness and balance the sweetness but it is optional.

5.How long can I store it?

You can store this in the fridge for about one day only. It taste best when fresh and cold.

strawberry fool served in a glass

If you have any more questions about this How to season Iron Tawa do mail me at sharmispassions@gmail.com. In addition, follow me on InstagramFacebook,  PinterestYoutube and Twitter .

Tried this How to season Iron Tawa? Do let me know how you liked it. Also tag us on Instagram @sharmispassions and hash tag it on #sharmispassions.

📖 Recipe Card

StrawberryFool2
Print

Strawberry Fool Recipe

Strawberry Fool is a creamy delicious dessert that is made by layering fresh strawberries and whisked fresh cream. It is a special dessert and is a must try at home during strawberry season for its taste, also the dessert feels soft and creamy and is best served cold.
Course Dessert
Cuisine Indian
Keyword 30 mins recipes, dessert recipes, fresh cream recipe, fruit recipes, lemon recipes, strawberry recipes
Prep Time 10 minutes
Cook Time 10 minutes
Chilling Time 15 minutes
Total Time 35 minutes
Servings 2 glass
Calories 440kcal
Author Sharmilee J

Ingredients

  • 1 cup fresh cream / whipped cream
  • 6 medium sized strawberries
  • ¾ teaspoon lemon juice (optional)
  • 1 tablespoon sugar

Instructions

  • Rinse Strawberries well, remove the leaf. Chop them roughly.
  • Take it in bowl, add sugar to it. Mix well add lemon juice. Set aside for 10 mins so that it becomes juicy.
  • To a mixing bowl add fresh cream, Whisk well until thick and peaks are soft. I used my hand mixer. I always take fresh cream from fridge just before whisking.
  • Add juicy strawberries reserving a tablespoon of it for topping.
  • Just give a quick mix, do not over mix. Take your serving glass. Spoon the mixture into it.
  • Fill the serving cup, spoon the juicy strawberries and add as topping. Chill Strawberry Fool until serving time.
  • Enjoy Strawberry Fool chilled!

Notes

  • Picking Strawberries - I usually choose ones that are completely ripe and naturally sweet, makes the dessert taste better. 
  • Whisking Cream - I whisk until soft peaks form and then stop. If you over whisk it, the texture becomes heavy and does not work as well. 
  • Strawberry Mix - I prefer keeping strawberry mixture slightly pourable so it spreads easily when layering. You get a smoother finish this way and flavours blend well together.
  • Chilling Time - I always refrigerate the dessert before serving. It sets properly and tastes much better when cold. You can make it ahead and keep in fridge for few hours.
  • Toppings - You an also add few nuts on the top for garnish, it also add crunch texture.

Nutrition

Serving: 100g | Calories: 440kcal | Carbohydrates: 12g | Protein: 4g | Fat: 43g | Saturated Fat: 27g | Polyunsaturated Fat: 2g | Monounsaturated Fat: 11g | Cholesterol: 134mg | Sodium: 33mg | Potassium: 170mg | Fiber: 1g | Sugar: 11g | Vitamin A: 1754IU | Vitamin C: 23mg | Calcium: 84mg | Iron: 0.3mg

The post Strawberry Fool Recipe appeared first on Sharmis Passions.

Podi Idli Recipe

Podi Idli is a great South Indian breakfast that cab be made quickly with leftover idlis or mini idlis. It is made by tossing steamed idlis over a basic tempering along with a spicy ground lentil condiment called podi. These serve as a great snack too, kids will love it.

mini podi idli served

Podi idli is so tasty and a comforting food made with leftover idlis or mini idlis. I have always wondered how our elders turn even the leftovers to such tasty snack and avoid food wastage. So I have also stuck to this rule of no food wastage  as far as I can.

[feast_advanced_jump_to]

About Podi Idli

Podi is a spicy condiment made using lentils. Idli is steamed rice cakes. So idlis tossed in podi is popularly known as Podi Idli. It is a quick South Indian breakfast made using left over idlis. Later hotels started to fancy it using mini idlis.

I started making podi ever since mittu started eating idli podi. I usually make a simple version in dosa tawa itself. But later when I tasted in restaurants and seeing kids enjoy it now this is the version I am making and everyone at home is a fan of it.

The key to a perfect tasting podi idli is idlis should be firm and podi should be slightly coarse. You can refrigerate the idlis for a while to make it a bit firm so that they don't crumble while tossing.

I always use homemade idli podi as it tastes great and is less spicy. I always have a batch of homemade idli podi as we aren't big fans of store bought ones. Once I see the bottle nearing to finish I make a fresh batch and store.

Over the years I have made so many versions of idli podi but the one posted here is our staple. For a change I try different varieties but finally come to our family staple recipe.

mini podi idli served

Podi Idli Video

Podi Idli Ingredients

  • Idli - You can use mini idli or big idlis cut into cubes. Make sure to refrigerate them for minimum 15 minutes before making podi idli.
  • Onion - Sliced onion adds a crunch and taste to this dish so do not miss it.
  • Oil - I always use gingelly oil for podi idli. But you can use any cooking oil too.
  • Ghee - Ghee is added for flavour. You can skip it if you do not prefer.
  • Mustard seeds - Mustard seeds is added to oil for tempering.
  • Curry leaves - is added for flavour.
  • Idli Podi - I always use homemade idli podi. But you can use store bought idli podi too make sure it is crunchy and slightly coarse.
  • Salt - to taste and balance the flavours.
ingredients needed to make mini podi idli

Similar Recipes

How to make Podi Idli Step by Step

1.To a pan add 1 tablespoon gingelly oil. Add ½ teaspoon mustard seeds, let it splutter.

temper mustard seeds

2.Add 1 small sprig curry leaves, let it splutter.

temper curry leaves

3.Add 1 medium sized onion sliced along with little salt. Idli podi already has salt so keep an eye while adding salt.

add onion, salt

4.Saute until it turns transparent. Do not let it soften it should be slightly crunchy.

saute until transparent

5.Add around 30 mini idlis along with 3 tablespoon idli podi. My homemade idli posi is not spicy so I added more. You can adjust according to the spice level of your idli podi.

add idli, podi

6.Add 1 ½ tablespoon ghee.

add ghee

7.Give a quick mix.Toss in high flame and switch off.

mix well

Serve podi idli hot!

mini podi idli served

Expert Tips

  • Adding idli podi - Our recipe of idli podi is less spicy so I usually add more. But if you are using store bought then use little less as it may be spicy, adjust accordingly.
  • Add ons - You can add vegetables like carrot, capsicum to make it whole some. You can even add corn, peas or any other veggie of your choice. You can even add peanuts or almonds replacing cashews.
  • Oil - Gingelly oil is good for health so be generous in adding. You can replace it with coconut oil.
  • Idlis - Make sure your idlis are slightly porous so that it absorbs the podi well. So use the first batch of idli batter for best results. If you don't have mini idli mould, you can even make regular idlis, cube them and use it.
  • Avoid crumbling - Refrigerate steamed idlis for a while to make it firm and avoid crumbling.

Serving and Storage

Serve podi idli hot or warm for the best taste. Enjoy it as a breakfast, snack, or light dinner. It also tastes delicious with a cup of filter coffee or masala chai. Garnish with fresh coriander leaves and a drizzle of ghee for extra flavour.

FAQS

1. Can I use leftover idlis?

Yes. Leftover or a day-old idlis works very well because they hold their shape and absorb the podi without becoming mushy.

2. Can I make podi idli for lunch boxes?

Yes. Podi idli is a great lunch box recipe because it stays great and flavorful even after cooling.

3. Why is my podi idli dry?

It means there wasn't enough oil or ghee, or too much podi was used. Add a little more sesame oil or ghee and toss again for a better coating and to avoid drying.

mini podi idli served

If you have any more questions about this How to season Iron Tawa do mail me at sharmispassions@gmail.com. In addition, follow me on InstagramFacebook,  PinterestYoutube and Twitter .

Tried this How to season Iron Tawa? Do let me know how you liked it. Also tag us on Instagram @sharmispassions and hash tag it on #sharmispassions.

📖 Recipe Card

Print

Podi Idli Recipe (Podi Mini Idli)

Podi Idli is a great South Indian breakfast that cab be made quickly with leftover idlis or mini idlis. It is made by tossing steamed idlis over a basic tempering along with a spicy ground lentil condiment called podi. These serve as a great snack too, kids will love it.
Course Breakfast, Snack
Cuisine Indian
Keyword chilli idli, chilli idly, easy idli for beginners, healthy idli, how to make chilli idli, how to make idli chaat, how to make idli fingers, how to make masala idli, how to make podi idli, idli milagai podi, idli podi recipe, Idli recipes, snack recipes
Prep Time 5 minutes
Cook Time 10 minutes
Total Time 15 minutes
Servings 2
Calories 206kcal
Author Sharmilee J

Ingredients

  • 30 mini idli
  • 1 medium sized onion
  • 1 tablespoon oil
  • 1 ½ tablespoon ghee
  • ½ teaspoon mustard seeds
  • 1 small sprig curry leaves
  • 2 tablespoon idli podi
  • salt to taste

Instructions

  • To a pan add 1 tablespoon gingelly oil. Add ½ teaspoon mustard seeds, let it splutter.
  • Add 1 small sprig curry leaves, let it splutter.
  • Add 1 medium sized onion sliced along with little salt. Idli podi already has salt so keep an eye while adding salt.
  • Saute until it turns transparent. Do not let it soften it should be slightly crunchy.
  • Add around 30 mini idlis along with 3 tablespoon idli podi. My homemade idli posi is not spicy so I added more. You can adjust according to the spice level of your idli podi.
  • Add 1 ½ tablespoon ghee.
  • Give a quick mix.Toss in high flame and switch off.
  • Serve podi idli hot!

Video

Notes

  • Adding idli podi - Our recipe of idli podi is less spicy so I usually add more. But if you are using store bought then use little less as it may be spicy, adjust accordingly.
  • Add ons - You can add vegetables like carrot, capsicum to make it whole some. You can even add corn, peas or any other veggie of your choice. You can even add peanuts or almonds replacing cashews.
  • Oil - Gingelly oil is good for health so be generous in adding. You can replace it with coconut oil.
  • Idlis - Make sure your idlis are slightly porous so that it absorbs the podi well. So use the first batch of idli batter for best results. If you don't have mini idli mould, you can even make regular idlis, cube them and use it.
  • Avoid crumbling - Refrigerate steamed idlis for a while to make it firm and avoid crumbling.

Nutrition

Serving: 150g | Calories: 206kcal | Carbohydrates: 8g | Protein: 2g | Fat: 19g | Saturated Fat: 8g | Polyunsaturated Fat: 2g | Monounsaturated Fat: 8g | Trans Fat: 0.03g | Cholesterol: 29mg | Sodium: 45mg | Potassium: 86mg | Fiber: 2g | Sugar: 2g | Vitamin A: 39IU | Vitamin C: 24mg | Calcium: 19mg | Iron: 0.2mg

The post Podi Idli Recipe appeared first on Sharmis Passions.

Easy Lentil Dip with Crispy Capers

Flavor-packed lentil dip comes together fast with serious protein and fiber punch! Lentils, roasted corn, veggies and crispy capers with herby pepper lime dressing is perfect for parties, potlucks, cookouts, and snacking! (gluten-free, soy-free, nut-free) High fiber, protein and iron!
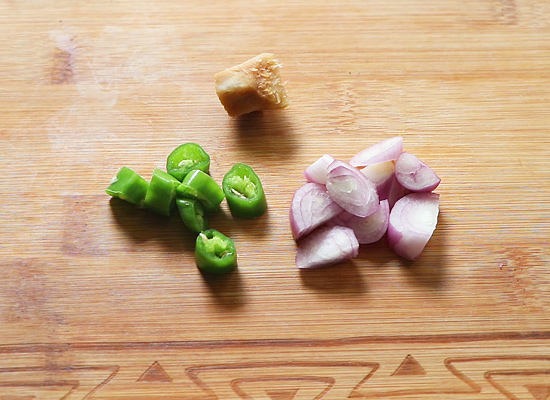
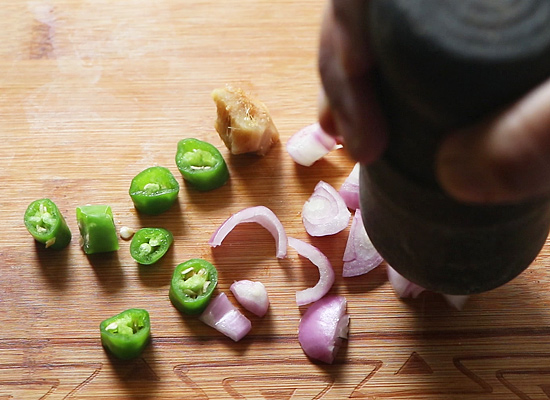
tossing lentil dip together in the bowl
This is the perfect lentil dip for summer. I was inspired by a lentil dip that went viral on TikTok, where you just take some lentils, add bruschetta and feta, Instead of those flavors, we’re adding a load of veggies and a fantastic dressing, and also crisp capers! All these flavors and textures have made this my fave this summer!
There’s also kale in the dip, hidden along with some herbs, so it’s a great way to sneak in kale. There’s just so much amazing flavor and texture overall in this lentil dip.

lentil dip ingredients in a bowl before adding the dressing

There’s the protein from the lentils. There are the fresh, crunchy veggies, jalapeño, and onion. There’s sweetness from the corn and the apple, the tart freshness from the cherry tomatoes, and refreshing vibrancy from the lime zest. 

The nutritional yeast adds a bit of cheesiness and protein, while the hemp seeds bump up the protein and texture even more. And all of that balances out with a hint of spice from the jalapeño and the pepper flakes and a savory burst of flavor from the crispy capers.

lentil dip after tossing together in the bowl

This lentil dip is a great source of protein, fiber, vitamin C, B vitamins, potassium, magnesium, and iron because of all the plant-based ingredients in it. You can use whichever veggies you have on hand. If you don’t like lentils, you can use chickpeas or white beans and add some more spices to the dressing. 

Make this dip and serve it with tortilla chips, crispy crackers, garlic bread or baguette slices. You can also use it to make wraps with pita bread or tortillas. It’s a versatile lentil dip that will disappear in no time. 

scooping up lentil dip on a tortilla chip

Why You’ll Love this Lentil Dip

  • protein- and veggie-packed dip with amazing flavors and textures
  • quick and easy herb-lime dressing comes together in 1 jar
  • crispy capers add a little crunch and a ton of umami
  • naturally gluten-free, soy-free, and nut-free
small bowl of lentil dip with a chip in it

Continue reading: Easy Lentil Dip with Crispy Capers

The post Easy Lentil Dip with Crispy Capers appeared first on Vegan Richa.

Paneer Fingers Recipe

Crispy paneer finger is a delicious and easy Indian snack made with paneer, which is coated in a batter, then rolled with breadcrumbs and fried until golden crispy. These paneer fingers make a perfect starter, evening snack and can be enjoyed with mint chutney, tomato ketchup, mayonnaise or any dip of your choice.  Paneer Fingers...

Read More

The post Paneer Fingers Recipe appeared first on Yummy Tummy.

Carrot Juice Recipe

Learn how to make fresh, tasty and healthy carrot juice at home using a blender, you don't need juicer or slow juicer to make this. This easy recipe comes together in just a few minutes with three simple ingredients like carrot, sugar and water. Homemade fresh carrot juice is a joy to make at home,...

Read More

The post Carrot Juice Recipe appeared first on Yummy Tummy.

Moru Curry Recipe

Moru Curry is a Kerala style yogurt based curry tempered with spices. Moru Curry is a popular buttermilk curry that can be made quickly to pair up with rice. It is one of the staple side dishes in Kerala, it is quick and easy to make. It is light, mildly spiced and served as a part of Sadya meal.

moru curry served

Moru Curry is a tasty side dish made by tempering spices in thick buttermilk. It is a popular Kerala style buttermilk curry that is served with rice. This buttermilk curry can be made with or without coconut. I have shared the simple and basic version of Moru Curry here.

[feast_advanced_jump_to]

About Moru Curry

'Moru' means buttermilk and 'Curry' is gravy based liquid side dish. Moru Curry is a very simple traditional Kerala style seasoned buttermilk which is an integral part of Onam Sadya. It is light and cooling for the stomach perfect balance for spicy and heavy meals served in Sadya.

Morru Curry has butter milk which helps in cooling the stomach making it ideal to be part of a heavy sadya meal. This Kerala style moru curry is popularly known as Moru Kachiyathu. This is one of Kerala's most refreshing side dishes and I love it so much.

Moru Curry is also called Nadan Moru Curry or Moru Kachiyathu or Kachiya Moru. I have shared the basic version of moru curry, there are a lot of variations to this simple curry, check out expert tips section.

Moru Curry can be prepared with just few ingredients that is easily available in your kitchen. If you are pressed for time then this moru curry is perfect to make in just few minutes of time.

moru curry served

Moru Curry Video

Moru Curry tastes great even with just rice and papadam. This Moru Curry can be made with coconut or without it but this version I am sharing is without coconut which is the basic version. Tempering in coconut oil gives a great flavor to the curry.

This is a very simple dish that you can make when you don't have vegetables in stock still can enjoy a good meal with papadam and a simple vegetable stir fry. Hubby appreciated this moru curry, so I am making it often.

Even though this moru curry is very simple to make there are still certain tricks to make this curry perfectly. Always switch off and add the prepared buttermilk else it will may curdle.

Similar Recipes

Moru Curry Ingredients

  • Curd - Use thick curd that is slightly sour which is best for this curry. Whisk it well and then add it.
  • Tempering - A simple tempering is made using coconut oil, mustard seeds, fenugreek seeds, curry leaves, red chili and hing. Adding hing is optional.
  • Turmeric powder - Turmeric powder is added for flavor and color.
  • Coconut oil - Coconut oil adds great flavor to the pachadi. However you can use regular cooking oil too.
  • Small onion - Small adds flavor to the curry and also crunch while eating.

How to make Moru Curry Step by Step

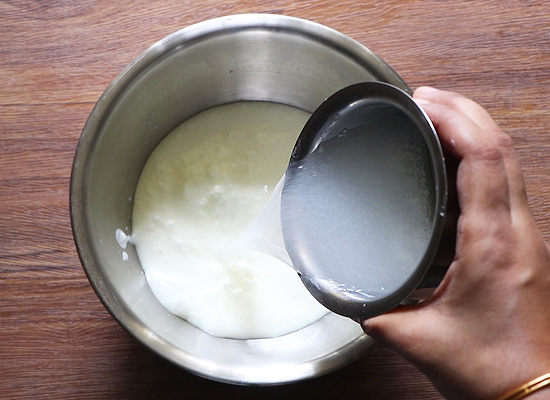
1.Take 1 cup thick curd in a bowl, add 1 cup water to it.

add water to curd

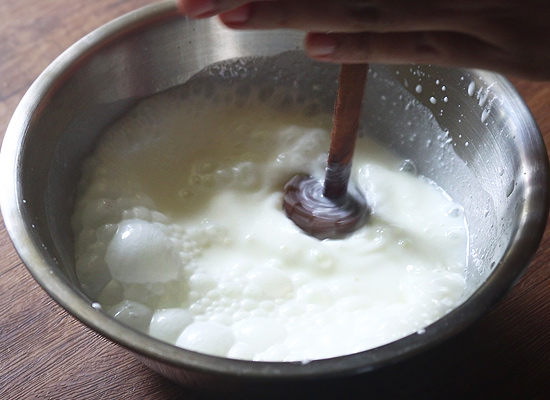
2.Whisk it well until smooth. You can even use a wired whisk to whisk well. Now buttermilk is ready. Set aside.

whisk it well

3.To a pan add 1 tablespoon coconut oil heat it. Now add

  • ½ teaspoon mustard seeds
  • ¼ teaspoon fenugreek seeds
  • 1 small green chili slit into 2
  • 2 nos red chilies
  • few nos curry leaves

Let it splutter, give a quick mix using a ladle.

prepare the tempering

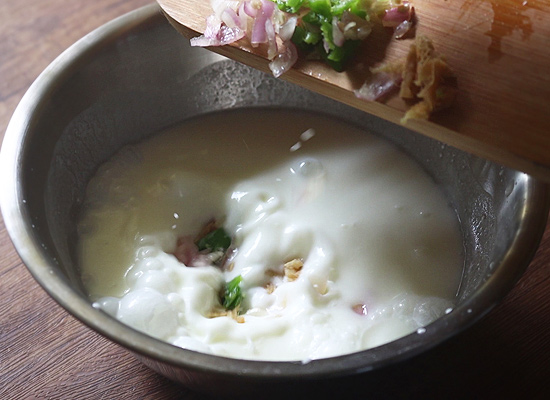
4.Add 5 small onion(sliced) along with required salt to taste and ¼ teaspoon turmeric powder.

add onion, turmeric powder, salt

5.Give a quick saute until it turns golden. Switch off.

saute until golden

6.Add prepared thick buttermilk to it.

add whisked curd

7.Make sure to add buttermilk only when the flame is off or low. I usually switch off and then add it to avoid curd from curdling.

butter is added

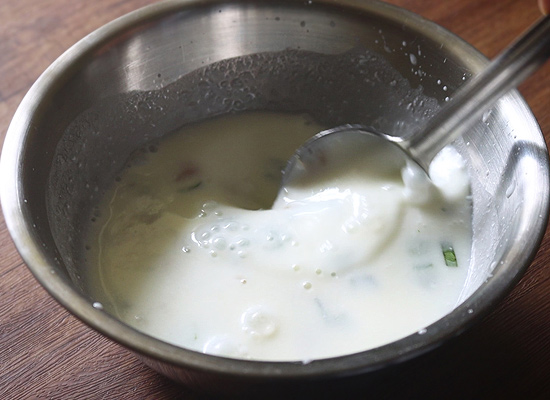
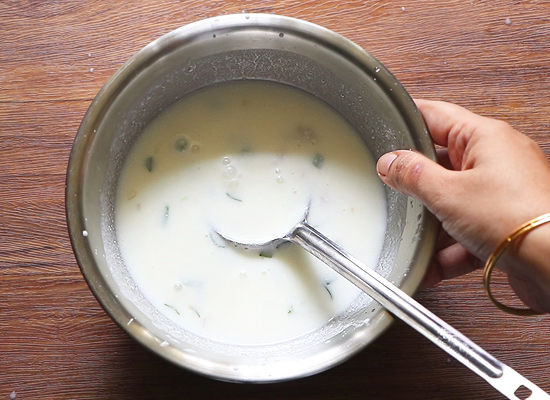
8.Mix well.

mix it well

Moru Curry is ready!

Expert Tips

  • Use thick and slightly sour curd for best taste.
  • Always switch off while adding buttermilk or keep in low flame and add it.
  • Do not cook after buttermilk is added as it might curdle.
  • Adjust water according to the thickness of curd. If curd itself is runny then add less water
  • This moru curry can be made with or without coconut.
  • Grind ¼ cup coconut, 1 green chili, ½ teaspoon cumin seeds to a paste and add it to the tempered items saute until raw smell leaves then add buttermilk.
  • You can add vegetables like vellarika(cucumber), kumbalanga(ash gourd), kaya(green raw plantain) etc.

Serving & Storage

Serve Moru Curry with rice and any vegetable stir fry or any spicy fry and papadam. This Moru Curry keeps well for 2 days in fridge.

FAQS

1.What vegetables can I add to moru curry?

You can cook and add ash gourd, yam, plantain, ladies finger, drumstick, cucumber etc.

2.Why did my moru curry curdle?

  • If buttermilk is not whisked well then it will curdle.
  • If the buttermilk is added to hot tempered items then it will curdle. So always turn off heat and add buttermilk or curd.

3.Is moru curry and moru kachiyathu the same?

Yes they are the same just the name differs.

4. Can I make moru curry with coconut?

Yes you can make moru curry with coconut also. But the traditional Kerala recipe is a simple buttermilk gravy with tempered spices.

5.Can I add vegetables to moru curry?

Yes you can add vegetables like cucumber, ash gourd, raw banana, yam etc.

moru curry served

If you have any more questions about this Moru Curry Recipe do mail me at sharmispassions@gmail.com. In addition, follow me on Instagram, FacebookPinterest, Youtube and Twitter .

Tried this  Moru Curry Recipe? Do let me know how you liked it. Also tag us on Instagram @sharmispassions and hash tag it on #sharmispassions.

📖 Recipe Card

Print

Moru Curry Recipe | Kerala Moru Kachiyathu

Moru Curry is a Kerala style yogurt based curry tempered with spices. Moru Curry is a popular buttermilk curry that can be made quickly to pair up with rice. Learn to make Moru Curry with step by step pictures and video.
Course Side Dish
Cuisine Indian
Keyword curd recipes, curry, curry recipes, Kerala Meal Sidedish, lunch recipes, meals, Side Dish, veg recipes
Prep Time 10 minutes
Cook Time 10 minutes
Total Time 20 minutes
Servings 2
Calories 147kcal
Author Sharmilee J

Ingredients

  • 1 cup curd thick & sour
  • 1 cup water
  • 5 nos small onion sliced thin
  • salt to taste

To temper:

  • 1 tablespoon coconut oil
  • ½ teaspoon mustard seeds
  • ¼ teaspoon fenugreek seeds
  • a pinch hing (optional)
  • 1 small green chili split into 2
  • 2 nos red chilies
  • few nos curry leaves
  • ¼ teaspoon turmeric powder

Instructions

  • Take 1 cup thick curd in a bowl, add 1 cup water to it.
  • Whisk it well until smooth. You can even use a wired whisk to whisk well. Now buttermilk is ready. Set aside.
  • To a pan add 1 tablespoon coconut oil heat it. Now add ½ teaspoon mustard seeds, ¼ teaspoon fenugreek seeds, 1 small green chili slit into 2, 2 nos red chilies, few nos curry leaves
  • Let it splutter, give a quick mix using a ladle.
  • Add 5 small onion(sliced) along with required salt to taste and ¼ teaspoon turmeric powder.
  • Give a quick saute until it turns golden. Switch off.
  • Add prepared thick buttermilk to it.
  • Make sure to add buttermilk only when the flame is off or low. I usually switch off and then add it to avoid curd from curdling.
  • Mix well.
  • Moru Curry is ready!

Video

Notes

  • Use thick and slightly sour curd for best taste.
  • Always switch off while adding buttermilk or keep in low flame and add it.
  • Do not cook after buttermilk is added as it might curdle.
  • Adjust water according to the thickness of curd. If curd itself is runny then add less water
  • This moru curry can be made with or without coconut.
  • Grind ¼ cup coconut, 1 green chili, ½ teaspoon cumin seeds to a paste and add it to the tempered items saute until raw smell leaves then add buttermilk.
  • You can add vegetables like vellarika(cucumber), kumbalanga(ashgourd), kaya(green raw plaintain) etc.

Nutrition

Serving: 75g | Calories: 147kcal | Carbohydrates: 8g | Protein: 5g | Fat: 11g | Saturated Fat: 8g | Polyunsaturated Fat: 0.3g | Monounsaturated Fat: 2g | Cholesterol: 16mg | Sodium: 138mg | Potassium: 212mg | Fiber: 1g | Sugar: 7g | Vitamin A: 131IU | Vitamin C: 5mg | Calcium: 156mg | Iron: 0.4mg

The post Moru Curry Recipe appeared first on Sharmis Passions.

How to season claypot for first use | How to maintain claypots

How to season clay pot is a simple guide that helps you use new clay pots the right way. A properly seasoned clay pot cooks food evenly and brings out amazing aroma while cooking. And the food tastes different and the aroma fills your kitchen. 

season claypots

The seasoning process takes a few days but it just makes the clay pot last much longer and cook better. Clay pots have been used in Indian homes for years and they continue to be favourite for making curries and everyday dishes. 

[feast_advanced_jump_to]

About Clay Pot

Clay pot or manchatty is a traditional cookware that is used for making curries, rice dishes and many everyday Indian foods. There are two types of clay pots, brown ones which are regular clay pots and black ones which are brown pots that are burnt for a few days. Both types work well but black clay pots are stronger and last longer because they are burnt and become more durable.

Cooking in clay pot is a bit different from metal cookware. The pot takes longer to heat up but once heated it cooks food evenly and keeps heat for long time. Even after switching off the stove the food continues to cook which is a specialty of clay pots. The food gets cooked slowly and evenly which brings out flavour and taste beautifully.

Clay pots have small pores in them which is why they need proper seasoning before first use. When you season the clay pot with starch water and oil it fills these pores and makes the cooking surface smooth. The seasoning process takes around five days but it is worth doing properly because it makes the pot last longer and cook better.

I usually buy clay pots from local shops and I ask shopkeeper for tips before bringing them home. I use clay pots for making fish curries, vegetable curries and rice dishes regularly.

season claypots

How to Season Clay Pot - Things needed

  • Water - Plain water is used for first soaking. Water helps pores in clay pot to open up gently before seasoning begins.
  • Starch Water - Rice cooked water or rice washed water is used for soaking clay pot for three days. It helps seal pores and prepare the surface for oil seasoning.
  • Ghee or Coconut Oil - I have used ghee or coconut oil for seasoning and spreading on both sides of pot. It fills pores and creates protective layer on cooking surface.
  • Grated Coconut - Used during final seasoning step with oil. Coconut helps spread oil evenly inside pot and season cooking surface well.
  • Turmeric Powder - Added to boiling water during last step of seasoning. Turmeric has natural properties that help complete seasoning process.
  • Coconut Scrubber - Used for scrubbing pot during washing and initial preparation. It removes any loose particles without damaging clay surface.
season claypots

Similar Recipes

How to season claypots Step by Step

1.These 2 are the new claypots I am going to season for first use. First rinse and wash it well. Use a coconut scrubber.

how to season claypots step1

2.Scrub it well, rinse and wash the claypots well.

how to season claypots step2

3.After washing soak the claypots in plain water for 1 day. After you soak you can hear a slight sizzle sound if you note it keenly there are small pores in the claypots so when waters enters first time you can hear that mild sound.

how to season claypots step3

4.Next day again scrub and wash it, soak in starch water(rice cooked water) or rice washed water for 3 days. Daily make it a point to change the starch water.

how to season claypots step4

5.Wash it again sun dry it. Now add ghee or coconut oil.

how to season claypots step5

6.Spread it well on both the sides back and top. Sun dry it for 2 -3 hrs until the oil is completely absorbed and is dry. Now add ghee or coconut oil, switch on the stove.

how to season claypots step6

7.Add 1-2 tablespoon grated coconut and saute it well so that the coconut and oil spreads all over the inside of the pan. Saute until golden.

how to season claypots step7

8.Do it for both the pans. Now remove the coconut add water along with turmeric powder let it come to a boil. Switch off and dry under the sun. Now your claypots are ready to use.

how to season claypots step8

How to maintain claypots

1.After use let the pots come to room temperature then soak in water for a while. Then using coconut scrapper scrap the extras. The black one I used for making paneer fried rice today morning for packing mittus lunchbox and the brown one for making ragi koozh.

how to maintain claypots step1

2.Scrub well and wash it in running water. Never use detergents or any soapy liquids. As there are small pores in the claypot there are chances for the soap to enter through the pores which in turn can mix in the food while getting cooked.So use rice flour or besan flour or chapathi flour to wash it. After washing in plain water then sprinkle rice flour.

how to maintain claypots step2

3.Scrub it well and  wash it

how to maintain claypots step3

4.Sun dry it then store.

how to maintain claypots step4

This is the way I seasoned my claypots and maintain it.Hope you find this post useful.

Expert Tips

  • Buying Clay Pots - Always pick pot that feels heavy and thick. Knock on back and listen for sharp loud sound, louder sound means good quality pot.
  • First Cooking - You should make curries first time not dry dishes. This is safer because clay pot stays moist and there is less chance of burning smell.
  • Heat Level - Always use low to medium flame while cooking in clay pot. High heat can cause cracks because clay gets too hot and expands.
  • Cooling Down - Never pour water into hot pot immediately after cooking. Wait for it to cool naturally for while then soak in water slowly.
  • Empty Pot Warning - Never heat clay pot when it is empty, this can damage it. Always have something cooking or liquid inside when heating.
  • Washing Method - Use only rice flour or besan flour for washing, never use soap. Soap can enter small pores and mix with food during cooking.
season claypots

Storage

After using a clay pot, let it cool down to room temperature before washing. Soak it in water for a while and then gently scrub it with coconut scrubber to remove stuck food. Wash it in running water using rice flour or besan flour, never use any soap or detergent as it can damage seasoning. Sun dry it completely before storing it in a dry place on your kitchen shelf.

FAQS

1.Can I use soap for washing?

No you should never use soap because it enters small pores in clay and can mix with food. Use rice flour or besan flour instead for washing.

2.When should I discard the clay pot?

If you see mild cracks forming at back of pot then stop using it for cooking. You can use it for soaking ragi or for gardening instead.

3.Which type is better, brown or black clay pot?

Black clay pots are stronger and last longer because they are burnt for few days. Brown ones are good too but black ones are more durable for regular cooking.

4.Can I use clay pot on induction?

No clay pots work only on gas stove, they will not work on induction cooktops. You need gas flame for clay pot to heat properly.

5.How long does seasoning process take?

Initial seasoning takes around five days with soaking and oil application. Real seasoning happens with regular cooking over first few weeks as you use it more.

season claypots

If you have any more questions about this How to season claypots do mail me at sharmispassions@gmail.com. In addition, follow me on InstagramFacebook,  PinterestYoutube and Twitter .

Tried this How to season claypots? Do let me know how you liked it. Also tag us on Instagram @sharmispassions and hash tag it on #sharmispassions.

📖 Recipe Card

Claypots3
Print

How to season claypot for first use | How to maintain claypots

How to season clay pot is a simple guide that helps you use new clay pots the right way. A properly seasoned clay pot cooks food evenly and brings out amazing aroma while cooking. And the food tastes different and the aroma fills your kitchen. 
Calories
Author Sharmilee J

Ingredients

  • Water
  • Starch Water
  • Ghee or Coconut Oil
  • Grated Coconut
  • Turmeric Powder
  • Coconut Scrubber

Instructions

How to season claypots for first use

  • These 2 are the new claypots I am going to season for first use.First rinse and wash it well.Use a coconut scrubber.
  • Scrub it well , rinse and wash the claypots well.
  • After washing soak the claypots in plain water for 1 day.After you soak you can hear a slight sizzle sound if you note it keenly there are small pores in the claypots so when waters enters first time you can hear that mild sound.
  • Next day again scrub and wash it, soak in starch water(rice cooked water) or rice washed water for 3 days.Daily make it a point to change the starch water.
  • Wash it again sun dry it.Now add ghee or coconut oil.
  • Spread it well on both the sides back and top.Sun dry it for 2 -3 hrs until the oil is completely absorbed and is dry.Now add ghee or coconut oil, Switch on the stove.
  • Add 1-2 tablespoon grated coconut and saute it well so that the coconut and oil spreads all over the inside of the pan. Saute until golden.
  • Do it for both the pans.Now remove the coconut add water along with turmeric powder let it come to a boil.Switch off and dry under the sun.Now your claypots are ready to use.

How to maintain claypots

  • After use let the pots come to room temperature then soak in water for a while.Then using coconut scrapper scrap the extras.The black one I used for making paneer fried rice today morning for packing mittus lunchbox and the brown one for making ragi koozh.
  • Scrub well and wash it in running water.Never use detergents or any soapy liquids.As there are small pores in the claypot there are chances for the soap to enter through the pores which in turn can mix in the food while getting cooked.So use rice flour or besan flour or chapathi flour to wash it.After washing in plain water then sprinkle rice flour.
  • Scrub it well and  wash it
  • Sun dry it then store.
  • This is the way I seasoned my claypots and maintain it.Hope you find this post useful.

Notes

  • Buying Clay Pots - Always pick pot that feels heavy and thick. Knock on back and listen for sharp loud sound, louder sound means good quality pot.
  • First Cooking - You should make curries first time not dry dishes. This is safer because clay pot stays moist and there is less chance of burning smell.
  • Heat Level - Always use low to medium flame while cooking in clay pot. High heat can cause cracks because clay gets too hot and expands.
  • Cooling Down - Never pour water into hot pot immediately after cooking. Wait for it to cool naturally for while then soak in water slowly.
  • Empty Pot Warning - Never heat clay pot when it is empty, this can damage it. Always have something cooking or liquid inside when heating.
  • Washing Method - Use only rice flour or besan flour for washing, never use soap. Soap can enter small pores and mix with food during cooking.

The post How to season claypot for first use | How to maintain claypots appeared first on Sharmis Passions.

Vegetarian Lasagna Recipe

Vegetarian Lasagna Recipe made with tons of vegetable but packed with flavours and nutrients. This vegetable lasagna recipe is easy to make with simple ingredients like tomatoes, mixed vegetables, lasagna pasta, bechamel sauce and cheese. Easy recipe to make for weeknight dinner. Vegetarian Lasagna Lasagna is one of the most requested recipe in yummy tummy....

Read More

The post Vegetarian Lasagna Recipe appeared first on Yummy Tummy.

Kuzhambu Recipes (South Indian Kulambu Recipes for Rice)

If you are looking for the best kuzhambu recipes for rice, you have come to the right place. Kuzhambu is one of the most loved comfort foods in every South Indian home. Whether it is a simple puli kuzhambu, mor kuzhambu, sambar, or spicy fish kuzhambu, there is always a kuzhambu that pairs perfectly with...

Read More

The post Kuzhambu Recipes (South Indian Kulambu Recipes for Rice) appeared first on Yummy Tummy.

Eggless Banana and Pineapple Cake Recipe

This easy eggless banana pineapple cake is a perfect way to use them. The combination of ripe bananas and pineapple makes a soft, moist and naturally sweet cake. This banana pineapple cake is perfect for birthdays, parties, family gatherings or as a simple dessert.  Eggless Banana and Pineapple Cake Many of my viewers asked me...

Read More

The post Eggless Banana and Pineapple Cake Recipe appeared first on Yummy Tummy.

Sweet Corn Croquettes Recipe

Easy Sweet Corn Croquettes Recipe also known as corn croquettes. These may be the easiest and tasty corn croquettes ever. Corn cheese croquettes is made with sweet corn, milk, flour, butter, spices and grated cheese. The creamy corn cheese filling is shaped into croquettes, which is coated with semolina and fried until golden and crunchy....

Read More

The post Sweet Corn Croquettes Recipe appeared first on Yummy Tummy.

Stuffed Braided Bread Recipe

Stuffed braided bread is a soft, and delicious homemade bread filled with a spicy and flavourful vegetable stuffing. It has a beautiful braided pattern and is perfect for breakfast, evening snacks, dinner or to serve at parties. You can enjoy it warm with mayonnaise, tomato ketchup. Stuffed Braided Bread I wanted to make a stuffed...

Read More

The post Stuffed Braided Bread Recipe appeared first on Yummy Tummy.

How to season new iron dosa tawa, Tips to maintain iron tawa

How to Season Iron Dosa Tawa is a simple guide that helps to use new iron tawa the first time. A properly seasoned tawa gives crisp dosas, prevents the batter from sticking and also protects the surface from rusting. With regular cooking the surface slowly becomes naturally nonstick, and the dosas get better in taste and texture.

iron dosa tawa with ladle

Iron dosa tawas have been used in many homes for years because they last long and cook evenly. Both cast iron and regular iron tawas work well when seasoned properly. A well maintained tawa can be used for many years without any problem.

[feast_advanced_jump_to]

About Iron Dosa Tawa

Iron dosa tawa is one of the most commonly used traditional cookware for making dosa, chapathi and many other everyday dishes. Cast iron and regular iron both work well, but they need proper seasoning before first use. This helps the surface become smooth and makes cooking much easier after few uses.

Seasoning is simply building a thin layer of oil over the iron surface. This layer protects the tawa from rust and also helps the batter spread easily without sticking. Many people even find that an old iron tawa works better than a new one.  

There are many ways to season an iron tawa, but this method is simple and works well for both new and old tawas. The same process can also be used for iron kadai, frying pan or any other unseasoned iron cookware. Once the seasoning is done well, maintaining the tawa becomes much easier with a little regular care.

I use my tawa for making dosas, chapatis, roasting vegetables, making dosa pizza. My family can taste the difference when something is made on iron versus other cookware. 

Cast iron dosa tawa which is 5 yrs old and I use it on a daily basis.I bought it from a local whole sale shop and it costed 300 Rs.

cast iron dosa tawa

How to Season Iron Dosa Tawa - Things needed

  • Oil - Used for seasoning the tawa and forming a protective layer on the surface. You can use coconut oil or any cooking oil you have at home.
  • Salt - Salt helps remove any dirt from the surface and works well along with oil while seasoning. Regular table salt is enough for this.
  • Starch Water - Starch water from cooked rice helps during the seasoning process. You can also use rice washed water if starch water is not available.
  • Mustard Seeds - Used during the final seasoning step. It gives a light tempering and helps spread the oil across the tawa.
  • Urad Dal - Urad dal is added along with mustard seeds for the tempering. It also helps while seasoning the cooking surface.
  • Onion - Onion is used for the final seasoning step. It helps condition the tawa and also improves the cooking surface after frying.
  • Dish Soap - Used only for the first wash to remove factory coating and dust from the new tawa. It should not be used for regular cleaning after seasoning.
  • Metal Scrubber - Used for scrubbing the new tawa well before seasoning. It helps remove dirt and loose particles from the surface.
  • Clean Cloth - A clean cloth is used for wiping the tawa dry after washing. It is also useful for applying a thin layer of oil before storing.

Similar Recipes

Chapathi Tawa I use regularly which is also almost 4 yrs old.I bought it from a local whole sale shop and it costed 100 Rs. I find online and even shops expensive so look out for local whole sale shops where it is damn cheap and no compromise in quality also.

chapathi tawa

From the days I started cooking I had no craze in buying nonstick pans even before I knew about its health hazards  as I didn't like the taste and texture of dosas / chapathis cooked in nonstick. The few ones I had were gifts / free items that came with my induction. But I am crazy about collecting traditional cookwares these days so more seasoning posts coming up soon.

Trust me, a well seasoned iron tawa works better than nonstick and the crispy texture it gives is worth all the effort we put in. I was searching for a flat dosa tawa and happy to find it in a local shop here in Coimbatore years back.

There are many different ways to season iron tawa. The tips and tricks I have given here can be used for any unseasoned iron utensils either kadai or pan or tawa.You can use these steps to re-season an old iron tawa too.

I have given both how to season iron dosa tawa for first time use and how to maintain it regularly.

dosa pizza

You might have seen these pics of my dosa and chapathi tawa in my earlier posts too.

dosa, chapathi, pizza made in iron tawa

How to season Iron Tawa Step by Step

1.First rinse the new dosa tawa with dishwasher soap or liquid and a metal scrubber. Scrub it well and wash it. Dry it completely.

how to season iron dosa tawa step1

2.Now add 2 teaspoon of oil and 2 teaspoon salt to the tawa. Adjust the quantity of oil and salt according to the size of the tawa.

how to season iron dosa tawa step2

3.Spread it with well so that the oil salt mixture is evenly spread over the entire dosa tawa completely. Leave it aside for 1 day.

how to season iron dosa tawa step3

4.Next day scrub again to remove any rust or dirt. Now we need starch water(rice cooked water) or you can used rice washed water too.

how to season iron dosa tawa step4

5.Soak in starch water or rice washed water.If you don't have enough mix starch water with water and add.Soak it for 2 days.Change the starch water the next day and then leave aside.Wash it again.Now heat it up. Add 2 teaspoon of oil.

how to season iron dosa tawa step5

6.Add ½ teaspoon of mustard seeds, ¼ teaspoon of urad dal and let it splutter.

how to season iron dosa tawa step6

7.Using a spatula spread the tempering all over the dosa tawa. Now add 1 -2 tablespoon chopped onion and fry until golden. Spread and saute to cover the entire dosa tawa.

how to season iron dosa tawa step7

8.Remove it and wipe off with a clean tissue or a cloth.Now your dosa tawa is ready to use. The first 2 dosas may slightly stick at the edges but after making 3-4 dosas it will work perfectly. These steps are needed only for new dosa tawa and can be used for re-seasoning tawas which you haven't used for a long time too.

how to season iron dosa tawa step8

How to maintain Iron Dosa Tawa

1.Sometimes we might overheat the dosa tawa which makes dosas stick or any other reasons which may cause the dosas to stick.In that case either do this step 1 or step 2 to avoid dosa sticking.Heat the dosa tawa keep in low flame, add oil and salt spread using a ladle, keep spreading and cooking for 2 minutes. Switch off, wipe it with a cloth then start using.

how to maintain iron dosa tawa step1

2.This is the recent method amma read in a book and it works like a charm.Heat dosa tawa in low flame, roughly tear 2 small red chillies and put it on the tawa, spread to cover the entire dosa tawa and saute for 2 minutes. Switch off, wipe it with a cloth then start using. Alternatively you can use half onion prick with a fork and use it on the pan to wipe it off.

how to maintain iron dosa tawa step2

See my paratha puffing up!

puffing paratha

Expert Tips

  • Heat Level - Always cook dosas on low medium flame. If the tawa gets too hot, sprinkle little water, wipe it and then start making dosas.
  • Before Making Dosa - Rinse the tawa once with water if oil was applied before storing. Wipe it dry well before heating.
  • Avoid Moisture - After washing, never leave the tawa wet for a long time. Dry it well before storing to avoid rust.
  • Cooking Eggs - If the tawa is used for eggs or non vegetarian dishes, wash it with soap before using it again for dosas.
  • Re-seasoning - If the tawa has not been used for many weeks, season it again before making dosas. It helps bring back the smooth cooking surface.
  • Storage - Keep the tawa in a dry place without stacking wet vessels on top. This helps the seasoning stay good for longer.
items made using iron tawa

FAQS

1.Can I use my new tawa immediately?

Yes you can but seasoning gets stronger with use. First few dosas might stick but this is normal. 

2.How long does seasoning take?

Initial process takes about three days with soaking. Real seasoning happens with regular use over first few weeks. More you use it, better it gets.

3.Do cast iron and regular iron season differently?

Seasoning process is the same for both. Cast iron is heavier so takes slightly longer to heat but steps are identical.

4.My dosas are sticking, what do I do?

The tawa should not be too hot. If not, use red chilli refresh method or onion method. These work quickly and tawa is back to normal.

5.Can I wash with soap everyday?

If used for non-veg sometimes, you can use soap occasionally but for regular dosa making, just water is enough. Just rinse with water and wipe dry. 

If you have any more questions about this How to season Iron Tawa do mail me at sharmispassions@gmail.com. In addition, follow me on InstagramFacebook,  PinterestYoutube and Twitter .

Tried this How to season Iron Tawa? Do let me know how you liked it. Also tag us on Instagram @sharmispassions and hash tag it on #sharmispassions.

📖 Recipe Card

IronDosaTawa1
Print

How to season new iron dosa tawa, Tips to maintain iron tawa

How to Season Iron Dosa Tawa is a simple guide that helps to use new iron tawa the first time. A properly seasoned tawa gives crisp dosas, prevents the batter from sticking and also protects the surface from rusting. With regular cooking the surface slowly becomes naturally nonstick, and the dosas get better in taste and texture.
Calories
Author Sharmilee J

Ingredients

  • Oil
  • Salt
  • Starch Water
  • Mustard Seeds
  • Urad dal
  • Onion
  • Dish Soap
  • Metal Scrubber
  • Clean Cloth

Instructions

How to season Iron Tawa Step by Step

  • First rinse the new dosa tawa with dishwasher soap or liquid and a metal scrubber. Scrub it well and wash it. Dry it completely.
  • Now add 2 teaspoon of oil and 2 teaspoon salt to the tawa. Adjust the quantity of oil and salt according to the size of the tawa.
  • Spread it with well so that the oil salt mixture is evenly spread over the entire dosa tawa completely. Leave it aside for 1 day.
  • Next day scrub again to remove any rust or dirt. Now we need starch water(rice cooked water) or you can used rice washed water too.
  • Soak in starch water or rice washed water.If you don't have enough mix starch water with water and add.Soak it for 2 days.Change the starch water the next day and then leave aside.Wash it again.Now heat it up. Add 2 teaspoon of oil.
  • Add ½ teaspoon of mustard seeds, ¼ teaspoon of urad dal and let it splutter.
  • Using a spatula spread the tempering all over the dosa tawa. Now add 1 -2 tablespoon chopped onion and fry until golden. Spread and saute to cover the entire dosa tawa.
  • Remove it and wipe off with a clean tissue or a cloth.Now your dosa tawa is ready to use. The first 2 dosas may slightly stick at the edges but after making 3-4 dosas it will work perfectly. These steps are needed only for new dosa tawa and can be used for re-seasoning tawas which you haven't used for a long time too.

How to maintain Iron Dosa Tawa

  • Sometimes we might overheat the dosa tawa which makes dosas stick or any other reasons which may cause the dosas to stick.In that case either do this step 1 or step 2 to avoid dosa sticking.Heat the dosa tawa keep in low flame, add oil and salt spread using a ladle, keep spreading and cooking for 2 minutes. Switch off, wipe it with a cloth then start using.
  • This is the recent method amma read in a book and it works like a charm.Heat dosa tawa in low flame, roughly tear 2 small red chillies and put it on the tawa, spread to cover the entire dosa tawa and saute for 2 minutes. Switch off, wipe it with a cloth then start using. Alternatively you can use half onion prick with a fork and use it on the pan to wipe it off.

Notes

Heat Level - Always cook dosas on low medium flame. If the tawa gets too hot, sprinkle little water, wipe it and then start making dosas.
Before Making Dosa - Rinse the tawa once with water if oil was applied before storing. Wipe it dry well before heating.
Avoid Moisture - After washing, never leave the tawa wet for a long time. Dry it well before storing to avoid rust.
Cooking Eggs - If the tawa is used for eggs or non vegetarian dishes, wash it with soap before using it again for dosas.
Re-seasoning - If the tawa has not been used for many weeks, season it again before making dosas. It helps bring back the smooth cooking surface.
Storage - Keep the tawa in a dry place without stacking wet vessels on top. This helps the seasoning stay good for longer.

The post How to season new iron dosa tawa, Tips to maintain iron tawa appeared first on Sharmis Passions.

The Truth About Tesla Copilot Screens and Airbags

Upgrading your Tesla with a 15.6-inch passenger entertainment screen (aka copilot screen) is a dream for road trips, allowing your co-pilot to enjoy movies, YouTube, or live sports without distracting you. Safety First: Airbag Compatibility A top concern for many owners is whether adding a large, fixed screen will impede the deployment of the passenger-side …

💾

💾

Restaurant-Style Paneer Do Pyaza made easily at home

Paneer Do Pyaza is an underrated classic that you’ll find at any North Indian restaurant. It heroes onions in three different ways to make a curry that’s spicy, mildly sweet, and filled with texture. 

Paneer do pyaza served in a white bowl with accompaniments

This Paneer Do Pyaza isn’t your average paneer curry. The star of this dish isn’t just paneer, but onions which are used in 2 different ways (hence the name, Do Pyaza). Making this restaurant-style paneer curry is easier than you’d think. Even though it has a slightly longer list of ingredients, most of them are Indian pantry staples. The result is a dish that is rich, spicy, mildly sweet and pairs perfectly with rice or roti.

If you are bored of the classic paneer recipes such as matar paneer or paneer lababdar, then this paneer do pyaza recipe is something you definitely need to try ASAP!

Paneer Do Pyaza Ingredients

Paneer: The star of the recipe. I have used homemade paneer for the best flavor, but store-bought works also.

Onions: We use onions two ways – once in the onion cashew paste to form the gravy and then as onion petals to add texture and bite to the dish

Spices: A mix of whole spices like cumin seesds, bay leaves, cardamom, and cloves along with powdered spices like turmeric, red chilli, Kashmiri red chilli, coriander, cumin, and garam masala, add lots of flavor, warmth, and color to the dish

Cashews: Helps add creaminess and richness to the gravy without the use of any cream. I have used broken cashews, but you can use whole cashews by simply reducing their quantity slightly

Tomatoes: Forms the base of the gravy along with onions and cashews. Adds a slight tanginess to the whole dish

Fat: We use three types of fats – oil, ghee, and butter at different stages of the cooking process to add richness and flavor to the dish in every bite

Ginger garlic paste: Adds aroma and flavor to the gravy

Tomato ketchup: Unexpected but adds a lovely tangy-sweet flavor the dish. I highly recommend adding it

Salt: for seasoning

Kasuri methi: Lightly roasted and crushed, and added right at the end for a subtle smokiness and that restuarant-style flavor

Coriander leaves: Used as a garnish for hint of hearty freshness and the perfect finishing touch

Frequently Asked Questions

Can I use chicken instead?

You could absolutely make a Chicken Do Pyaza but I’d recommend using a pressure cooker and noting that the cook time will increase – as for this recipe we are directly adding in the fried paneer pieces. You can also check out my Kadhai Chicken recipe! 

How is Paneer Do Pyaza different from Kadhai Paneer?

The key difference between the two is Paneer Do Pyaza’s heavy use of onions and Kadhai Paneer’s addition of capsicum and kadhai masala. Both are delicious North Indian restaurant-style curries!

Why is it called Paneer Do Pyaza?

“Do Pyaza” literally means “double onions.” The dish uses onions generously, both in the gravy and as larger onion petals that are cooked with the paneer.

Can I use frozen paneer?

Yes. Thaw it completely and soak it in hot water for 10-15 minutes before using. This helps restore its soft texture.

Richa’s Top Tips

  • Use homemade paneer: If you have 15 extra minutes, I highly recommend making paneer at home. It turns out incredibly soft and adds an unbeatable flavor and richness to the dish. It’s really easy to make but adds the most amazing flavor.
  • Make it vegan: You can easily make this recipe vegan by only using oil instead of ghee and butter and replacing paneer with either tofu or veggies of your choice.
  • Add veggies: You can add veggies like capsicum, bell peppers, babycorn, sweet corn, mushrooms, cauliflower and carrots for more texture and nutrition.

Serving Ideas

  • With bread: This paneer curry pairs beautifully with almost any Indian bread. Serve it with butter naan, garlic naan, tandoori roti, laccha paratha, or simple rotis for a comforting meal.
  • Rice: It also tastes great with steamed basmati rice, jeera rice, or peas pulao if you’re serving it as part of a larger spread.
  • Some accompaniments: Round out the meal with sliced onions, lemon wedges, papad, cucumber raita, or a simple salad for some freshness alongside the rich curry.

Storage Tips

Paneer Do Pyaza stores well, making it a great option for meal prep or leftovers.

  • Refrigerate: Allow the curry to cool completely before transferring it to an airtight container. It will keep well in the refrigerator for up to 2 days.
  • Reheat gently: Warm it over low heat on the stovetop or in the microwave until heated through. If the gravy has thickened in the fridge, add a splash of water to loosen it.
  • Freeze the gravy: If you’d like to freeze it, it’s best to freeze only the gravy for up to 2 months. Add freshly cooked paneer and onion petals after thawing for the best texture and flavor.
  • Avoid repeated reheating: Reheat only the portion you plan to eat, as repeatedly heating paneer can make it firm and rubbery.
Freshly made paneer do pyaza in a kadai

You’ll absolutely love this Paneer Do Pyaza! I love making this to elevate our weeknight dinners and I’m already adding it into this week’s meal plan. If you liked this recipe, I’ve got heaps of other paneer recipes up on the blog under Paneer Archives for you!

As always, be sure to send me your recreations over on my IG @my_foodstory. It’s always so good to hear from you guys!

Watch Paneer Do Pyaza Recipe Video

Paneer do pyaza served in a white bowl with accompaniments
Print

Paneer Do Pyaza

Rich, spicy, tangy, and loaded with texture, this paneer do pyaza is a classic restaurant style dish that tastes incredible with some naan!
Course Main Course
Cuisine Indian, North Indian
Diet Vegetarian
Prep Time 10 minutes
Cook Time 20 minutes
Total Time 30 minutes
Servings 4 persons
Calories 586kcal
Author Richa

Ingredients

For the onion-cashew-tomato paste

  • 2 tablespoons cooking oil
  • 1 cup sliced onions
  • 4 tablespoons broken or whole cashew nuts
  • 6 medium tomatoes roughly chopped approx. 2 ½ cups 210 grams
  • ¾ teaspoon salt

For do pyaza gravy

  • 400 grams paneer cut into 1 inch cubes
  • 2 tablespoons ghee see note 3
  • 1 teaspoon cumin seeds
  • 2 bay leaves
  • 2 black cardamoms
  • 8 cloves
  • ½ cup finely chopped onions
  • 2 teaspoons ginger garlic paste
  • 1 teaspoon red chilli powder
  • 2 teaspoons kashmiri red chilli powder
  • 2 teaspoons coriander powder
  • 1 teaspoon cumin powder
  • ½ teaspoon salt
  • 2 cups onions cut into petals see note 4
  • 2 tablespoons tomato ketchup
  • 2 cups + 2 tablespoons water divided
  • 1 teaspoon kasuri methi roasted & crushed
  • ½ teaspoon garam masala powder
  • 3 tablespoons chopped coriander leaves

Instructions

Making onion-cashew-tomato paste

  • Heat 1 tablespoon of oil in the same pan or kadai & fry sliced onions till they turn translucent. Add soaked cashews & saute for a minute. Add tomatoes, salt and cook covered for 4-5 minutes on low till they turn mushy.
    2 tablespoons cooking oil, 1 cup sliced onions, 4 tablespoons broken or whole cashew nuts, 6 medium tomatoes roughly chopped approx. 2 ½ cups, ¾ teaspoon salt
  • Set aside to cool down, grind it to a smooth paste (you may add 2 tablespoons of water for ease of grinding, if needed)

Making do pyaza gravy

  • Heat ghee in a pan or kadai, add cumin seeds, bay leaf, black cardamom & cloves & saute. Add finely chopped onions & fry till they turn golden brown.
    2 tablespoons ghee, 1 teaspoon cumin seeds, 2 bay leaves, 2 black cardamoms, 8 cloves, ½ cup finely chopped onions
  • Add ginger garlic paste and fry for a minute.
    2 teaspoons ginger garlic paste
  • Add all spice powders and fry for about 30 secs.
    1 teaspoon red chilli powder, 2 teaspoons kashmiri red chilli powder, 2 teaspoons coriander powder, 1 teaspoon cumin powder, ½ teaspoon salt
  • Add the onion petals and fry on high for 30 secs. Add 2 tablespoons of water to mix everything & cook for only a minute. Do not over cook.
    2 cups onions cut into petals, 2 cups + 2 tablespoons water
  • Add the onion-cashew-tomato paste and boil on low for 3-4 minutes.
  • Add tomato ketchup and mix well.
    2 tablespoons tomato ketchup
  • Add the remaining 2 cups of water & bring to a boil.
  • Add paneer cubes along with kasuri methi, garam masala powder, boil for a minute or two, garnish with chopped coriander leaves and serve.
    1 teaspoon kasuri methi, ½ teaspoon garam masala powder, 3 tablespoons chopped coriander leaves

Video

Notes

 
  1. Any cooking oil may be used in the recipe.
  2. Ghee is used for the authentic taste of the gravy which may be replaced with oil, if you prefer.
  3. To make onion petals: cut onions into 1 inch cubes, separate each layer of onion to form the petals.
  4. Leftovers will stay good for 3 days when refrigerated in an airtight container.

Nutrition

Calories: 586kcal | Carbohydrates: 30g | Protein: 20g | Fat: 45g | Saturated Fat: 21g | Polyunsaturated Fat: 3g | Monounsaturated Fat: 9g | Trans Fat: 0.03g | Cholesterol: 85mg | Sodium: 871mg | Potassium: 807mg | Fiber: 7g | Sugar: 13g | Vitamin A: 2060IU | Vitamin C: 37mg | Calcium: 570mg | Iron: 3mg

This article was researched and written by Urvi Dalal.

The post Restaurant-Style Paneer Do Pyaza made easily at home appeared first on My Food Story.

Homemade Oat Milk Recipe

Homemade oat milk is a healthy, dairy free milk made from oats and water. It is a great alternative for people who are following a vegan diet. All you need is two ingredients, oats and water, just blend, strain and enjoy. You don't need any special methods or fancy tools. This homemade oat milk is...

Read More

The post Homemade Oat Milk Recipe appeared first on Yummy Tummy.

❌