❌

Reading view

There are new articles available, click to refresh the page.

Reviving a Retro Mouse with BlueTooth low Energy support
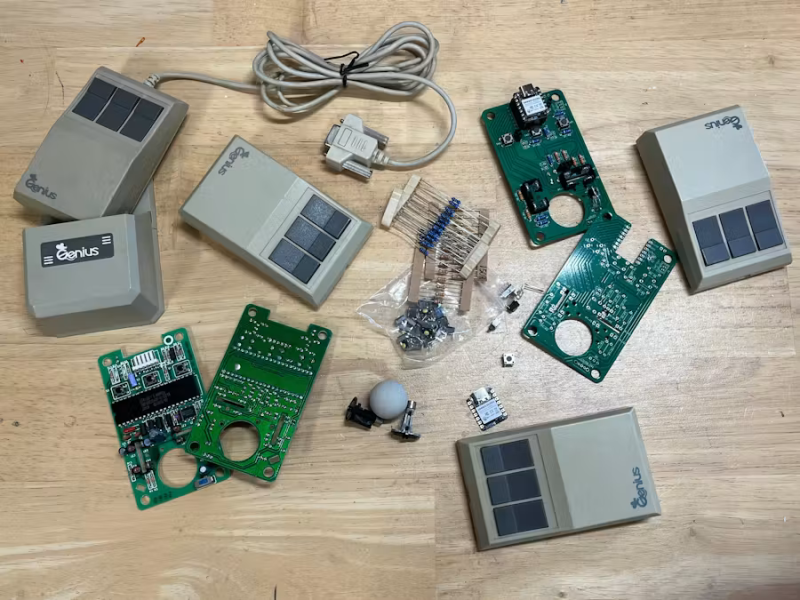
Several mice and their internal electronics

One of the disadvantages to collecting retro peripherals is that they’re not necessarily easy to use anymore. [eSPee77] changes that by retrofitting a Genius GM-6000 mouse with modern hardware, all while preserving the feel.

To make this mouse without compromising on the feel of the original, means replacing the PCB with a new one while retaining the same buttons and encoders. So [eSPee77] did exactly that. At the heart of the conversion lies an nRF52840 on a custom PCB. It uses new optical sensors to read the existing quadrature encoders, and uses the same type of switch for the mouse buttons as the original.

But from there, it diverges because–powered by the BLE capabilities of the nRF–this is actually a wireless mouse! And the modern features don’t end there, either. To support scrolling on a mouse which did not originally have it, you can press the middle mouse button while moving it forward/backward. Finally, as the cherry on the cake, it features an β€œair mouse” mode using an inertial measurement unit, handy for use in presentations.

M.A.S.K.-Inspired Cyberdeck for all your Portable Computing needs

There are infinite varieties of cyberdeck you could make, each with their own inspirations. Today, [RadioactiveArtist] shows us a M.A.S.K. lunchbox cyberdeck faithful to the 80s show.

To know why putting a cyberdeck in a lunchbox is exactly the kind of thing you would see in the show, [RadioactiveArtist] briefly explains what both are (but we’ll skip the former): M.A.S.K. is a cartoon running from ’85 to ’86 where ordinary objects transform to reveal a hidden purpose–and this cyberdeck does just that by hiding in M.A.S.K. merchandise: the lunch box.

Like any cyberdeck build, it starts as a pile of components on a desk. It’s made from a Raspberry Pi 5, a cute little 75% keyboard, stereo speakers, a card reader with some USB 3 ports and of course a battery made with four 18650 cells. After testing the electronics on the bench, [RadioactiveArtist] test-fits them in the lunch box before revealing the plan: keyboard and speakers on the bottom, thinner half, the rest on top, and the screen on a second hinge so it can flip up when opened.

The construction itself doesn’t harm the lunch box, because it shouldn’t be obvious that this isn’t just lunch. (Bonus points because the box itself is vintage.) Everything that was screwed into, was sacrificial material like plastic, which was then placed into the lunch box. The keyboard and speakers are fully enclosed on the bottom, which looks very sleek, but the top is exposed–both because it’s easier to access and fix, and because it looks cool.

[RadioactiveArtist] goes over all this and more, in the video below:

Ever Seen Claude Use Fusion 360?

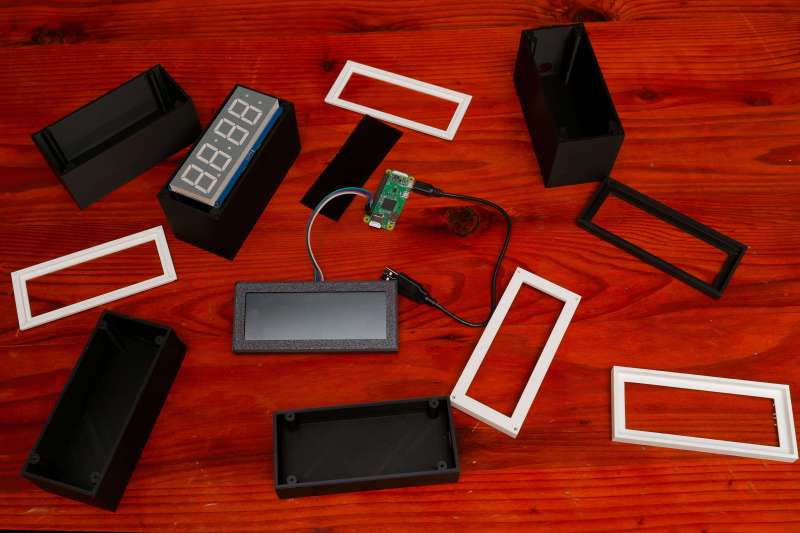
All the parts of a digital clock. Photo by Lee Hutchinson.

We’ve all done it before: a simple project that escalated to the point of extreme overengineering.
But what’s less common is [Lee Hutchinson]’s digital clock, whose case is (somewhat-successfully) designed by LLMs!

A clock needs time synchronization, and a digital one needs some code to drive the display. An avid systemd user, [Lee] had no trouble at all setting up all the users and services needed to keep the time synchronized. Some rusty Python skills with some aid of the dreaded Claude Code later, [Lee] had a script to actually show the time too.

But now comes the interesting part: the case. Now, [Lee] isn’t really a mechanical engineer, and he doesn’t really like Autodesk Fusion’s UX. Most projects would see their creators just grit their teeth and get on with it. But here, in an experiment we haven’t often seen before, [Lee] connects LLMs to Fusion’s new MCP server feature! Did it work? Surprisingly enough, yes. Kind of. The local Qwen model got most of the way there on one request, but still made mistakes for the other. However, another pass with the more powerful Claude models got the job done.

But there’s much more to the story; [Lee] goes into more detail, and talks about the assembly process, over at Ars Technica.

New Method Accelerates Color 3D Printing

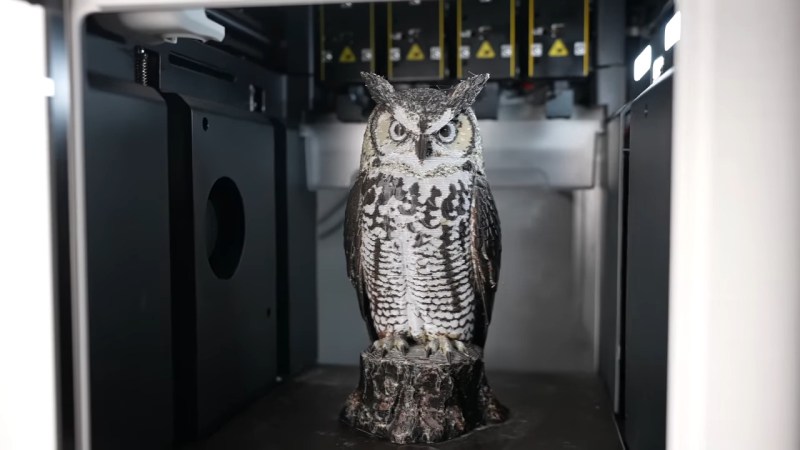
An owl printed with detailed color patterns

Multi-color 3D printing is notorious for being difficult to get right. Even with modern printers, you often end up much using more filament (and tool changes) than you would for a single-color print. [YKG3D] shows us a new method of color printing that needs far fewer tool changes.

Based on 2018 research, the new slicer rotates through its palette of colors each layer. Then, either by adjusting the amount of filament dispensed or by displacing the edges, the prominence of each color is adjusted. The result is smoother gradients and better color blending β€” and it prints faster too!

Of course, nothing is perfect: the more base colors you add, the thicker your apparent layer lines will be. For example, a 3-color print with 0.2 mm layer height will appear as having 0.6 mm layer height. A different issue happens when the walls get too steep; the color blending illusion starts to break down.

Voice Control Toolkit Comes to a Pico Near You

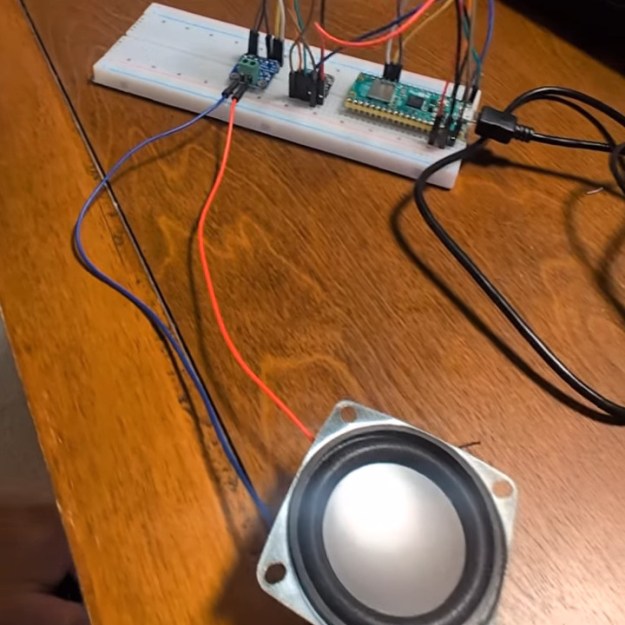
A Raspberry Pi Pico 2 W connected to a speaker

Voice-controlled appliances are nothing new. What might be new, however, is [Moonshine AI] running it all locally on a Raspberry Pi Pico 2 W!

The voice interface is roughly divided into three parts: voice activity detection, SpellingCNN speech-to-text and a neural text to speech. The speech to text supports up to 50 tokens, and can be re-trained to support any specific words you want. It runs a simple loop: detect voice activity, listen for (command) tokens, process them in C++, use the TTS to reply, and repeat.

Now, to be fair, it is a bit of a squeeze: 3.6 MiB of the available 4 MiB FLASH and 468 KiB SRAM on a stock Pi Pico 2 board. It leaves you with just about enough space to write a small amount of extra software, but it’ll be a challenge to fit anything substantial. Still, fitting three different types of AI model needed to make this possible in such a space is quite impressive.

Old TV Vacuum Tube Turned DIY X-Ray Machine

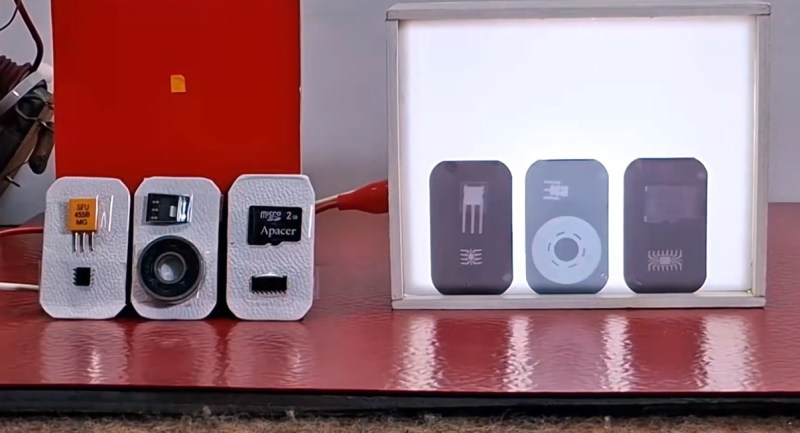
Just because you probably shouldn’t make a DIY X-ray machine, doesn’t mean nobody would. [mircemk] shows off his DIY unit, how it works, how to use it safely and of course, some pretty X-ray photos of household objects.

The machine repurposes a DY86 vacuum tube from old CRT TVs to emit X-ray radiation. To drive the tube without blowing it up, a rather specialized series of power supplies is needed; a low-voltage DC power supply powers a high-voltage AC inverter, which is then sent through first a transformer, and then a Crockfort-Walton voltage multiplier, to reach the incredibly high voltages needed for such a vacuum tube’s radiation emission to reach X-rays. Naturally, this didn’t go to plan first try, leading to the unfortunate demise of three vacuum tubes (as well as another three which had already lost their vacuums).

Now how do you capture an image with X-rays for a light source? With dental X-ray photo films of course! The dental film is placed behind the object to be scanned, the transmitted X-rays making up the resulting image. After going through the standard process of developing for about 30s, washing, fixing for about half an hour, and washing again, the photos become clearly visible. The best results were obtained at a distance of 10-15 cm an an exposure time varying from 15 minutes to an hour depending on material hardness.

❌