
❌

Reading view

There are new articles available, click to refresh the page.

Taking Tri-Camera True-Color Infrared Videos

An image of skyscrapers over a bay is shown, with some foliage along the bank. The sky and water are a pale blue-grey, while the foliage is pink.

Silicon-based CMOS camera sensors are cheap and plentiful, but they’re rarely used to their full potential: they can detect a greater range of wavelengths in the infrared spectrum than they can in the visible spectrum, but in most cameras this is blocked by an IR-cut filter. [Project 326]’s infrared camera system reverses this: it records infrared images in color while blocking out visible light.

The system uses three USB webcams, each with its IR cut filter removed and replaced with a different dichroic IR band-pass filter. One filter is centered at 750 nm, one at 850 nm, and one at 940 nm. There is no band overlap; in testing, each camera only detected an infrared flashlight tuned to its own filter wavelength. The original cameras didn’t hold the sensors in a consistent position, so [Project 326] designed new housings. Using three lenses, each with distinct aberrations, introduced some difficulties in alignment. [Project 326] originally intended to use a pair of beam-splitting prisms with only one lens, but this proved too difficult to align using 3D-printed frames.

A Raspberry Pi records a separate monochromatic stream from each camera, which can then be processed into a composite color video. The first frames need to be manually aligned, but afterwards a script can apply the alignment to the rest of the video. Finally, the channels are mapped to colors, with the precise mapping being freely changeable. There were some few unexpected issues: each camera has its own, not terribly precise, local oscillator, and they drifted apart by about one or two frames per minute. Parallax error, on the other hand, was less severe than might be expected: at close range it’s noticeable, but by a distance of 35 meters, it represents less than one pixel of distortion.

The resulting images look great, and it’s easy to forget that they’re being captured without the use of any visible light. We’ve seen a similar technique (though extending into the visible range) used to recreate the surreal effect of Aerochrome film.
Repairing a RED Cinema Camera On The Cheap

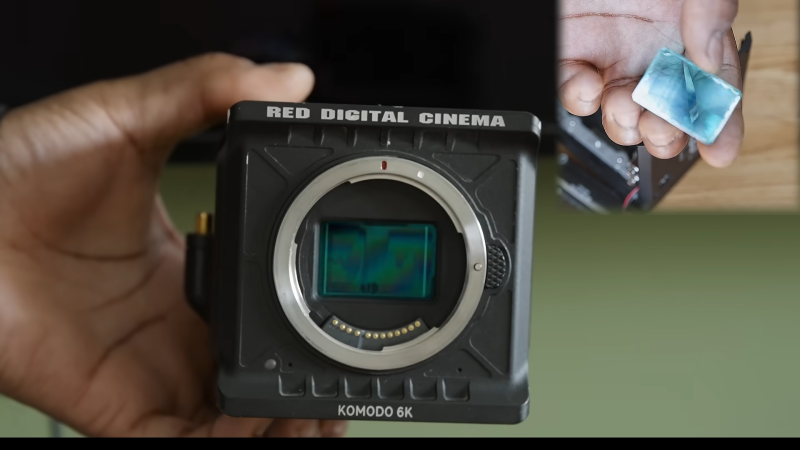
[ALT CINE] took a punt recently when purchasing a damaged RED Komodo camera online. In functional form, the 6K-capable camera sells for several thousand pounds (or dollars, or euros), whether used or brand new. However, [ALT CINE] was able to score the damaged unit for just Β£700. The question wasβ€”could it be repaired and turned back into a functional camera?

Things looked promising from the drop. The camera had just 3 hours of usage recorded in the firmware, and the casing seemed to suggest it had little use. However, the problem was soon revealed to be serious as the image sensor itself appeared to be damaged. Some research provided hope thoughβ€”that the damage could be limited to a glass layer in front of the sensor itself that had delaminated.

Thankfully, disassembling the camera was easy enough thanks to its modular design, and [ALT CINE] soon had the sensor block on the bench for further examination. The cause of the issue was apparentβ€”overzealous cleaning leading to fluid getting stuck to the rear of the filter in front of the sensor. Simply popping off the filter, cleaning and drying it properly, and reassembling, was enough to get the camera back to fully operational status.

RED’s repair service quoted $695 for a glass filter swap and $1,395 for a full sensor change. In contrast, [ALT CINE] was able to demonstrate that this repair was something easily within the realm of an intermediate camera tinkerer and it cost almost nothing to achieve. The video also covers an alternative potential repair route, wherein a DSMC2 filter can be subbed into a Komodo camera if the damage to the filter glass is otherwise unrecoverable.

It’s rare to get this lucky when it comes to repairing big-dollar cinema cameras like this one. We’ve featured some other great deep-dive camera repairs before, too.

Overpowered RC car + Gimbal Cam = The Greatest Chase Vehicle We’ve Ever Seen

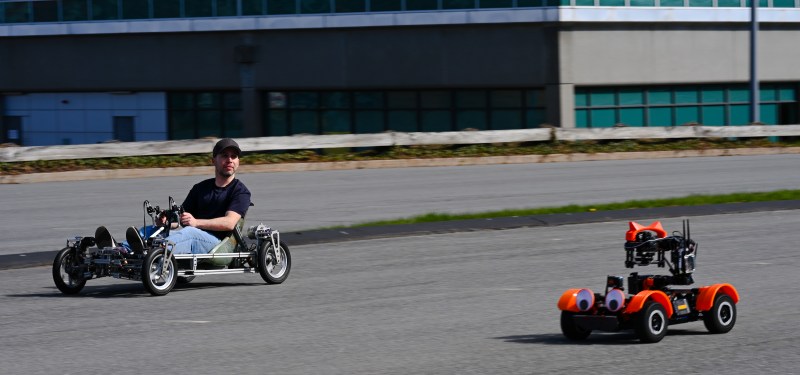
Modern cinema relies very heavily on quadrotor drones, because they make for very smooth, very easy to position platforms. From slow pans to chase shots, drones are great– if your shots can be taken at a high enough altitude. Close to the ground, things get a bit dodgier. That’s where [Transistor Man]’s camera chase vehicle comes inβ€” it’s a rover, so it excels close to the ground. In fact, it can’t go anywhere else, except perhaps if provided with a jump. It’s got a hefty gimbal to hold the camera steady on any terrain, a decade-old surplus radio to provide full HD FPV to the remote driver, and a powerful 1/5th scale radio control rally chassis to make it all go. Plus googly eyes, because everything is better with googly eyes.

It looks like an enormous amount of fun to drive, but more importantly it provides smooth, cinematic shots from the professional Sony camera held in the gimbal. One big takeaway is that when 3D printing something that will bounce around this much, you can’t rely on pure strength– flexible filaments are your friend. Just about everything printed ended up remade in TPU if it didn’t start that way. The other takeaway is that we’ve reached enough of a technological plateau that if you scrounge around, you can build something to take a top-of-the-line footage with decade-old castoffs, like the gimbal and radio used in this project, which is a great thing for hobbyists and small studios.

If you can’t find surplus, you could always DIY a gimbal. We’re not filmmakers, but we find ourselves wondering how shots made with this rover would compare to a camera slider.

❌