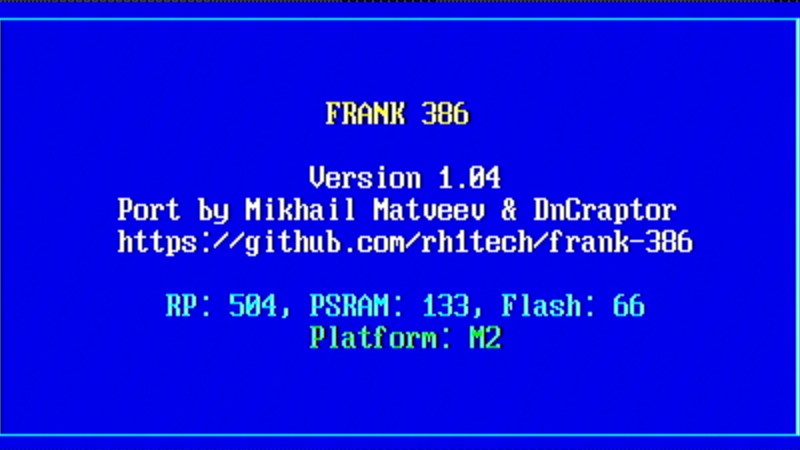
We’re at a fortunate moment: microcontrollers available at modest prices are edging into the capability level previously reserved for full-fat systems and can, through emulation, run software beyond classic 8-bit home computers, consoles, or old arcade games. A project we’ve been watching for a while is tiny386, an emulator for ESP32 boards that provides a 386 PC with just enough 486 and 586 instructions enabled to run a modern Linux kernel. Now we’re pleased to note that this platform is making it to the RP2350, with ports for both the FRANK emulation platform and the Waveshare Pi Zero boards. You can now have a 32-bit PC with all the peripherals, including VGA and DVI/HDMI, for the cost of an inexpensive development board.
Having seen tiny386 run on its minimum-spec ESP32 platform, we’ll concede that while it’s usable, it’s not the fastest experience, but the RP2350 port promises better performance. It’s not for a modern full-fat Linux distro, but should work well for running older operating systems such as DOS, or Windows 3.1 and 95, or even a lean Linux setup. This has fascinating potential: while these systems are old, they still have an enormous software library. The idea of useful general-purpose computing, 1990s style, in the palm of the hand, is interesting.
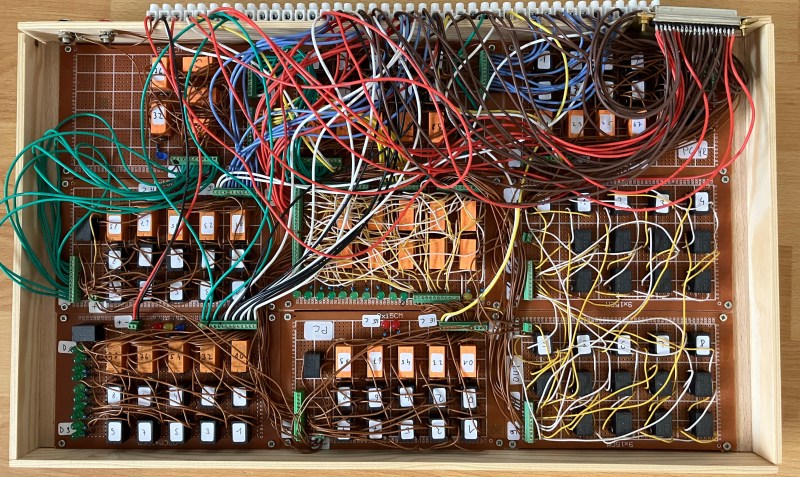
You want Retro? We did, when we started our retrocomputing challenge. [Peter] decided that transistors weren’t retro enough, and sent us this lovely homebrew relay computer, complete with 16- bit CPU, which is rather more bits than one normally associates with clicky clacky contacts.
The architecture is very simple– it just uses an accumulator register, ACCU, and goes from there. All mathematics and save/load operations go through ACCU. There whole instruction set is only 19 commands, and he’s used that set to program such lovely things as calculating 3 digits of Pi– which only took 8 minutes of glorious clicking. There’s a demo video of that embedded below. [Peter] has even implemented a display by hooking his computer to a 32×32 LED matrix, but don’t expect it to relay updates really quickly.
If this computer looks familiar, it’s because its earlier incarnation was one of the more “extra” entries in last year’s one-hertz challenge, where it was used to blink an indicator lamp. Yes, even relay computers apparently get started with the “blinky” sketch.
If you want in on the fun, our retrocomputer challenge runs until October 27th, so there’s lots of time left to turn back the clock.
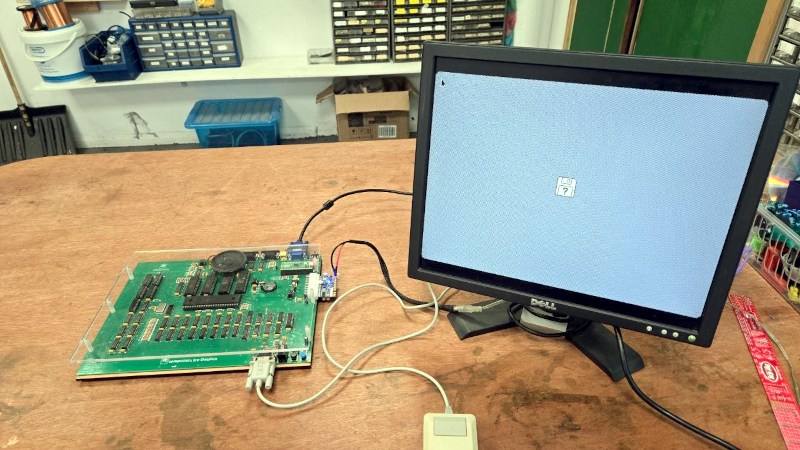
Apple hardware has always been proprietary, sometimes to an extreme. But that’s not to say that it’s impossible to make something that does the same job, which is what [DosFox1] appears to have done with the OSHintosh. It’s an open source PCB that implements a Mac 512k. Is it a 68k Hackintosh? You decide.
While it boots into a classic Mac OS image, it’s not quite a Mac. For a start, there are no disks, and no SCSI. Instead it boots from a disk held in ROM, which we guess will be a lot faster than the floppy from back in the day. They’ve even managed to do it on a 2-layer board, which means that despite its size, it shouldn’t be too expensive to have made.
We’re not sure quite what the legality of dumping a Mac ROM image to the ROM on this board would be, but assume for a moment that you own a copy in a defunct original Mac. This board can’t yet replace the original due to the disk issue, but given that original Macs are now long in the tooth, a modern replacement for those who must have hardware rather than an emulator sounds like a good idea. Perhaps for some people it will join the FPGA Amiga.
Although hard disks weren’t a common feature yet in many home computers in the 1980s, they were becoming increasingly more affordable. For relative meanings of the word ‘affordable’, naturally. This is illustrated by the 12 MB HDD for the Radio Shack TRS-80 that [Clint] over at LGR recently took a peek at.
Costing a cool $3,495 in 1983 – or $11,932 in 2026 USD – this 12 MB storage wonder used a Tandon TM-603 full-height 5.25″ HDD inside. Lacking a working TRS-80 to try it out with, the video is limited to just a basic powering up and opening up of the unit, but [Clint] will be donating it to a computer museum who can hopefully put it to use again.
The connection to the TRS-80 computer is handled by a ribbon cable, while the HDD has its own built-in power supply, rated at 60 Watt.
On the main board for the external HDD controller there is a Signetics 8X300 microprocessor that forms the brains of what makes it into an external drive for the TRS-80. Despite its age, it still looks brand new inside, so despite the Rifa capacitors in the PSU, [Clint] decided to power it on. This resulted in an auditory experience that’s probably best compared to a very rusty jet engine spinning up after languishing for a decade prior to spooling up for take-off.
Hopefully we’ll find out whether this particular unit and its HDD are still working in 2026.
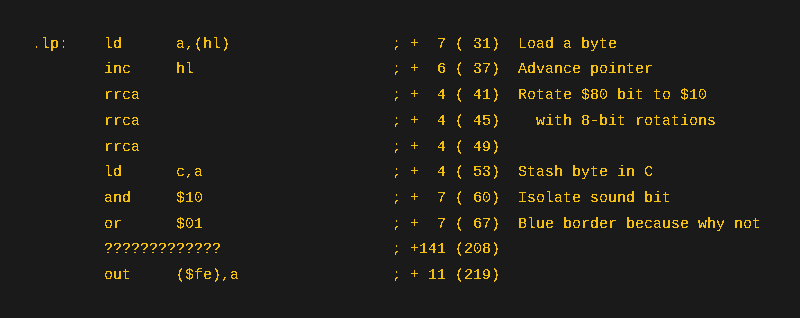
[Michael] has a thing for playing audio over beepers using a single bit. He’s done it with the Apple ][ and the IBM PC. This time he turns to the ZX Spectrum. He didn’t get quite as good a result — at least not yet — but he did manage to get some things working. He documents everything, so even though this wasn’t a successful week, there’s sometimes more to learn from reasonable failures than from unreasonable successes.
Of course, the whole thing relies on pulse code or pulse width modulation. Of the two techniques, PWM should produce better results. However, he wasn’t able to get PWM working yet. Some other target computers drive the buzzer through a dedicated hardware timer. However, with the Spectrum, it is all software.
Getting multichannel music was another algorithm, and that makes for an interesting read, too. We are sure next week there will be more, and if you are interested in this sort of thing, going back to some previous weeks will show you a lot more, too.
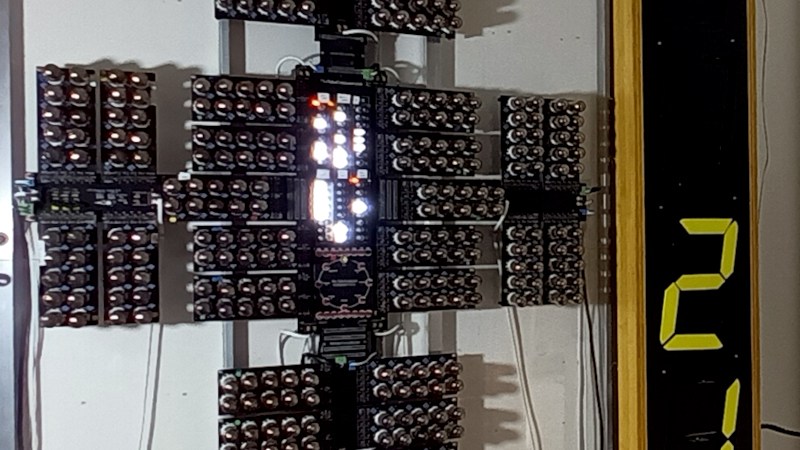
The earliest all-electronic computers used vacuum tubes, and most of us will know about machines such as ENIAC or Colossus. Vast machines that required the budget of a country at war to build, andfill very large rooms. It’s very pleasing then to see that a useful vacuum tube computer can be made which has neither of these requirements, as with this example from [Mike] that uses former eastern bloc double-triodes.
It’s an 8-bit design following a von Neumann architecture with 16 instructions, whose operational block diagram would be instantly recognisable to anyone used to working with a 1970s-era 8-bit microcomputer. It follows a NOR-based design in the same manner as the famous NASA machines from the Apollo programme, and as we understand from the description it uses more modern parts for its I/O circuitry. Physically it’s a surprisingly compact wall-mounted unit, and it has an accompanying ex-British Rail flip-digit display as well as a control panel for a simple airship simulator game. There’s a website with full details, if you are interested.
We like this machine, a lot. It may not be the largest computer we’ve seen and it certainly isn’t the first one with vacuum tubes, but it’s a very impressive achievement to have created it. If tubes in computing interest you meanwhile, we took a trip to see the daddy of them all.
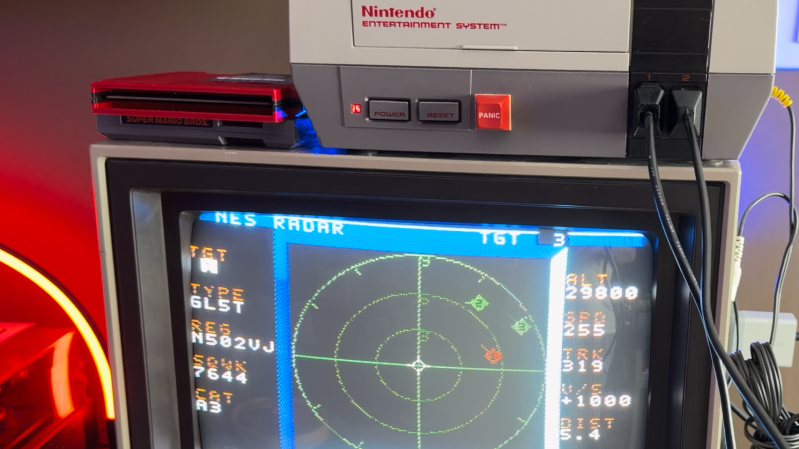
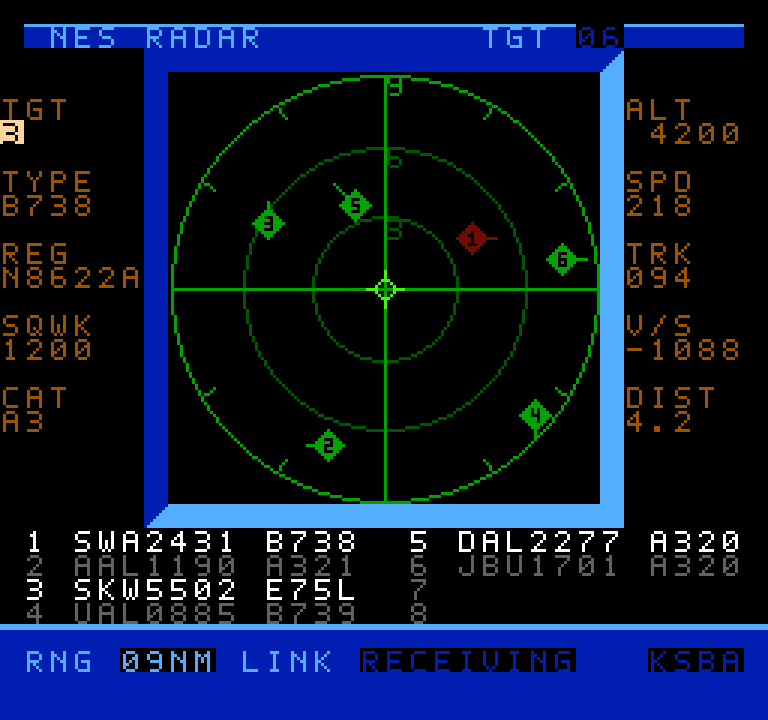
Air traffic visualizers seem to be having a bit of a moment right now, and now that moment has come to the venerable NES thanks to [k6lcm]’s NES Radar project, which is open-source under the GPL on GitHub. In spite of the name, there’s no Radio Direction or Range-Finding involved in this project– no radio at all, in fact, which makes this a bit interesting. It’s just an NES cartridge and a carefully constructed cable.
It looks like a period game, but it’s current-day air traffic.
The cartridge is a standard ROM cart that holds the software — no hidden ESP32 or PicoW here, which is what we initially suspected the project would be. So how is it that when you start up the NES with the cartridge inside, you can input an International Civil Aviation Organization (ICAO) code, like, say, KATL, and get a visualization of the traffic? Well, okay, if you put in KATL, you won’t get all the traffic, since the software is limited to 8 sprites, and that’s the world’s busiest airport. Still, how does it know where those airplanes are?
The secret is in the carefully constructed cable mentioned above: this project is using the second controller port on the NES as a serial port, and getting the data that way. A handy Python script on a nearby computer is what actually fetches aircraft positions. It’s based on c64u-radar, also by [k6lcm], which does the same Python server trick but relies on the Commodore 64 Ultimate’s LAN port to get data rather than using serial. The NES has no such ports available, though, so the controller port it was. We saw a similar trick used for satellite tracking on the NES some years ago.
If you like the idea of tracking flights, perhaps you’d like to see it done on a real radar CRT, or projected directly onto the ceiling. Thanks to ADS-B and free APIs, it seems airplane trackers are everywhere; if an interesting one has come onto your radar, please send us a tip.
Speaking of tips, thanks to [Levi] for putting this one on our scopes!
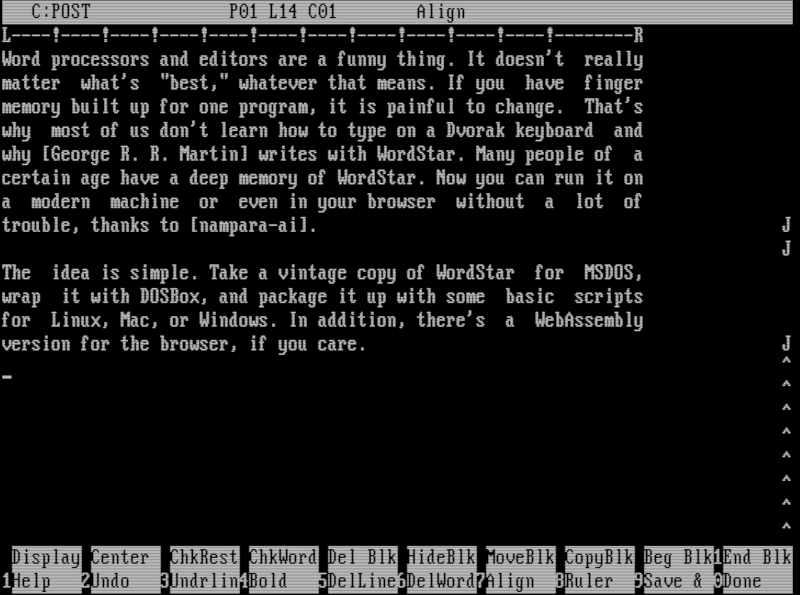
Word processors and editors are a funny thing. It doesn’t really matter what’s “best,” whatever that means. If you have finger memory built up for one program, it’s painful to change. That’s why most of us don’t learn how to type on a Dvorak keyboard and why [George R. R. Martin] writes with WordStar. Many people of a certain age have a deep memory of WordStar. Now you can run it on a modern machine or even in your browser without a lot of trouble, thanks to [nampara-ai].
The idea is simple. Take a vintage copy of WordStar for MSDOS, wrap it with DOSBox, and package it up with some basic scripts for Linux, Mac, or Windows. In addition, there’s a WebAssembly version for the browser if you’re into that sort of thing.
On Linux, the wordstar.sh file grabs the current directory and sends it to launch.sh. This script makes sure everything is ready, builds a DOSBox config file from a template, and launches everything. The only problem is that it doesn’t correctly resolve symlinks if you want a link on your path. Luckily, that’s easy to fix:
#!/usr/bin/env bash
 # Run me to launch WordStar 4.0 on Linux:  ./wordstar.sh
DIR="$(realpath "$0")"
DIR="$(dirname $DIR)"
cd "$DIR"
DIR="$(pwd)"

#DIR="$(cd "$(realpath "$(dirname "$0"))" && pwd)"
"$DIR/native/lib/launch.sh"
Practical? No. Irreplaceable? Not really. You could run WordStar under RunCPM or set up DOSBox yourself. You can even find a sort of modern version to run, if you prefer. But for just a quick way to get it running easily, it is hard to beat. If you want to play with the web version, it is easy to navigate to the web subdirectory and run Python:
python3 -m http.server 5309
Then you can point your browser to http://localhost:5309, and you are in business. Or, get a flavor for it from [TigerClawTV]’s walk-through video below.
The computer business in 1984 was a bizarre mix of hobby-level companies, a few small companies that had made it big, and a lot of big companies starting to take notice of personal computers. Plenty of money followed, which led to strange products and even stranger ads. [Such Bad Tech Ads] reveals a very bad ad from that time for a product we have barely heard of: the Spartan. The Spartan’s job was to convert your Commodore 64 so it could run Apple ][ software. The ad campaign had, inexplicably, a mime. We think. Or maybe a clown. Hard to say.
On the face of it, the Spartan might not be a bad idea. In 1984, there was plenty of Apple software. Well, relatively, anyway. But a Commodore computer was far cheaper. Other conversion kits like the Intel Inboard/386 managed to find some success in the market later. The problem, outside of strange ads, was one of timing.
If the product was available in 1984, it might have worked out better for the Canadian company, Mimic, behind it. Instead, it was about two years before an actual piece of hardware would show up in anyone’s hands. By that time, there was a ton of software for the Commodore 64. Not to mention that even when Mimic announced the Spartan, Apple had discontinued the Apple ][+ computer.
Why use a mime to promote a product that turns your Commodore 64 into a keyboard and monitor? We have no idea. But he was in all the ads and even on the product box. Strange.
We’ve seen the Spartan before, naturally. Being late usually has bad consequences. Ask FedEx.
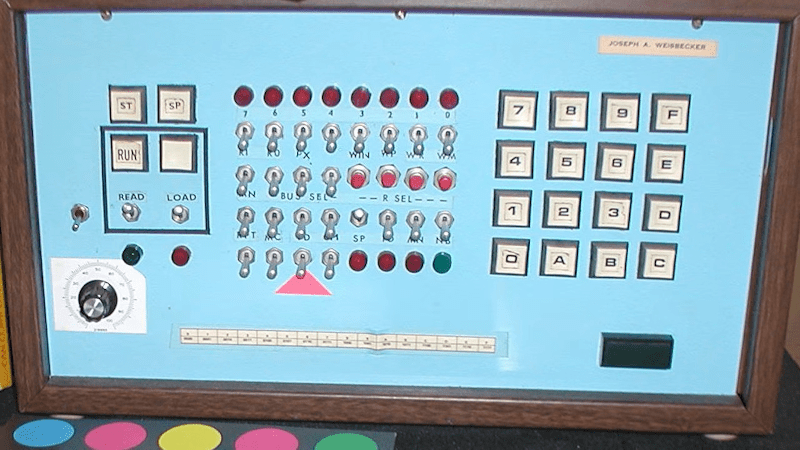
If you were interested in computers in the early 1970s, you struggled to get time on real computers since owning your own was all but impossible. In the middle of the decade, though, you could get a few computers: the Mark VIII, the Altair, the Apple I, and several others. Those were still pretty expensive, though. But in late 1976, an article in Popular Electronics said you could build a “powerful, expandable” computer for $80. The article in question was by [Joseph Weisbecker], who, unknown to most of us at the time, was actually the RCA employee behind the CPU — an RCA 1802. [Tech Time Traveler] takes a close look at the spunky little computer’s history in the video you can see below.
The 1802 was actually the second generation of the CPU, but the first that was all-in-one chip. [Weisbecker] started building the CPU as a personal project. He’d been a hacker even in high school, building relay-based tic-tac-toe games, among other things.
The first incarnation in his lab was “Fred,” with 100 TTL chips, and his idea was to have the computer be at least partially used as a video game — an interesting point, with Pong being very popular at the time.
The video covers a lot of history, but from a hacker’s point of view, the CPU was both amazing and limited. In a day when the 8080 and Z80 were kings, the 1802 had built-in DMA. This allowed a cheap companion video display that simply read bytes from memory and pushed them out to a TV.
Another neat feature was that the device had 16-bit registers and, even more interesting, 16 of them. On the one hand, any register could be, for example, the program counter or a memory index register. But on the other hand, there was no direct stack for doing calls and returns. The idea was that you’d use different registers for different subroutines, which was fine and efficient for very simple programs but not for the general case. One thing all 1802 programmers knew about was SCRT, the “standard call return technique” routines in the 1802 manual. But, as you might expect, this made calls and returns expensive.
There’s more that you’ll see in the video. People still build 1802-based computers and, of course, there are plenty of simulators, including ours. One thing you’ll notice is that the instruction set is very regular. Even if you didn’t know, you might guess that one guy designed the architecture.
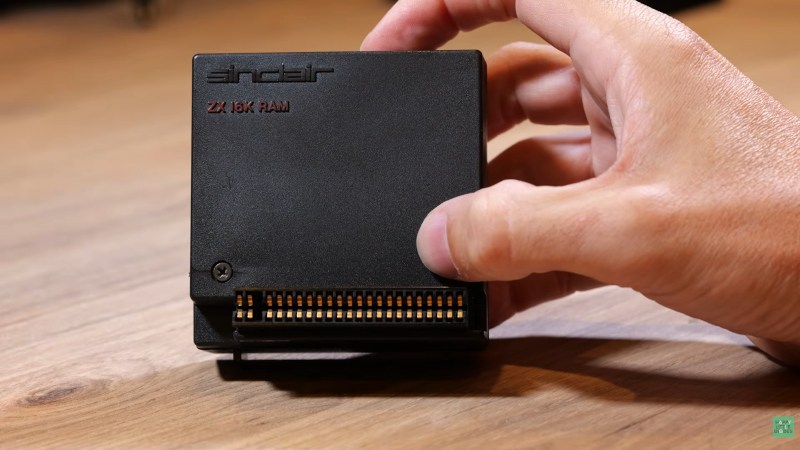
Sir Clive Sinclair and his company were notorious for pushing the limits of electronic parts in search of a low price, and his ZX series 8-bit computers were fine examples of this art. The ZX81 came with a meagre 1K of memory, and a popular upgrade was a 16K RAM pack. [Happy Little Diodes] has opened one up, and to his surprise, found many more parts than expected.
Inside the box is a pair of PCBs connected by ribbon cables, one of which has a selection of 74 chips and the other the 4116 RAM chips and a discrete component power circuit. This complexity comes from that cheapness, the 4116 is an inexpensive DRAM chip and requires an eclectic set of power supplies.
The functions of address selection are straightforward enough, as is the DRAM refresh circuitry. The power supply is clever in that it’s a self-oscillating switcher that provides +12 and -5 volts with a single transistor. We particularly like the quench diode in the 12 V Zener diode regulator circuit.
The ZX81 gave a huge number of British kids their first taste of computing, and learning to use a limited memory space is something that stays with you for life. The film doesn’t mention the most notorious feature of the 16K pack though, that it had been developed with a machine clamped to the desk. Using one in a real-life location was an exercise in not jogging your machine, because the slightest disturbance would trigger a reset.
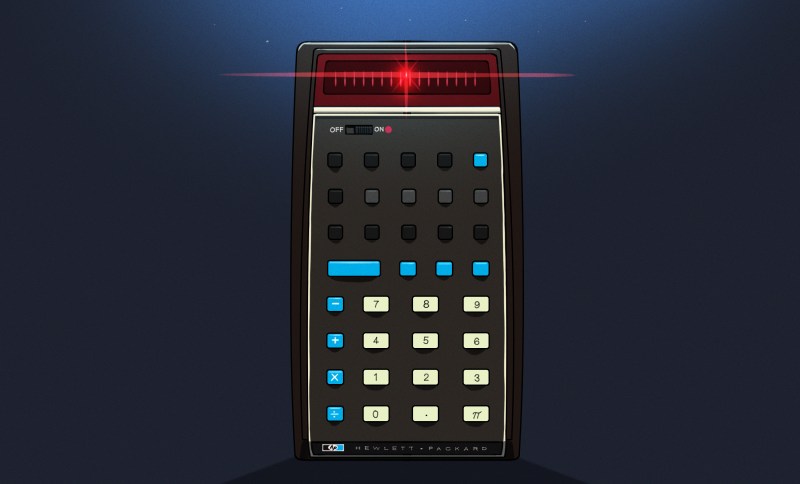
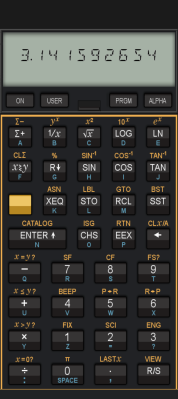
If you used a scientific calculator in the 1970s or 1980s, there was a fair chance that it worked differently from almost every calculator you see today. Instead of typing:
2 + 3 =
you entered:
2 ENTER 3 +
There wasn’t even an equals key. Hewlett-Packard made this system — Reverse Polish Notation, or RPN — practically synonymous with serious scientific calculators until other players like TI and Casio got serious. Once you got used to it, ordinary algebraic calculators could feel annoyingly clumsy.
Today, RPN calculators look like a nearly extinct species. HP left the calculator market, licensing the HP calculator line to Moravia Consulting. Old HP-15Cs, 16Cs, 32Ss, 42Ss, and 48s have become collectibles. But RPN isn’t dead. You can still buy new hardware, build your own, or turn almost any computer or phone into a very capable RPN machine. There are reasons some of us still want to.
But Why Polish?
The name goes back to Polish logician [Jan Łukasiewicz], who devised a notation in which operators precede their operands. Instead of writing:
A + B
you can write:
+ A B
The big advantage is that parentheses aren’t required. The structure of the expression tells you exactly what operates on what. Reverse Polish notation simply puts the operator at the other end:
A B +
[Łukasiewicz] wasn’t designing calculators, of course, but the same idea turned out to be extremely convenient for computers and calculators. Your software doesn’t have to remember what operation is in progress. Each operator is ready to go and can simply work on the operands that you’ve already read.
RPN isn’t exactly the way people calculate with pencil and paper, and it certainly wasn’t derived from the slide rule, but there is a similarity in the way you work. With a slide rule, you generally establish some value, operate on it, and continue from the result. When doing a long-hand calculation, you often calculate a subexpression, write down the answer, and use that answer in the next step. You will probably start with the inner parenthesis and work outward, just like someone with an RPN calculator does. RPN formalizes that process with a stack.
Suppose you want:
(3 + 4) × (5 + 6)
On a conventional calculator, you either need parentheses, or you have to calculate one result and remember it. On an RPN calculator:
3 ENTER

4 +

5 ENTER

6 +

×
The first + leaves 7 on the stack. The second leaves 11 above it. The multiply consumes both and leaves 77.
Notice what’s missing: parentheses, an equals key, and any need to tell the calculator about precedence. This isn’t much of a win for a five-key calculation. It becomes more apparent with something like computing the value of a bunch of parallel resistors:
R=1/(1/R1+1/R2+1/R3…)
An RPN user can calculate each reciprocal, add it to the running result on the stack, and finally take the reciprocal. Intermediate answers stay in the calculator naturally instead of being stuffed into memory registers or enclosed in increasingly impressive collections of parentheses.
Is RPN better? Calculator users have been arguing about that for half a century. But once RPN gets wired into your fingers, it can be surprisingly hard to give up.
RPN Before HP
Although RPN and HP are nearly inseparable in popular memory, HP didn’t invent the RPN calculator. That distinction generally goes to the Friden EC-130, introduced in 1964. It was a 44-pound transistorized desktop calculator costing $2,150, and its CRT actually displayed all four levels of its RPN stack at once. More than 18,000 were eventually made. You can even simulate it in Verilog, if you like.
HP entered the business in 1968 with the HP 9100A, a programmable desktop scientific calculator. It weighed about 40 pounds and sold for $4,900, but it provided logarithms, trigonometry, hyperbolic functions, coordinate conversion, programming, and RPN operation. HP famously called it a calculator rather than a computer partly because customers could often buy calculators without getting corporate computer departments involved.
Then came the machine that changed everything: 1972’s HP-35, the first HP pocket scientific calculator. From there, RPN became a defining characteristic of HP calculators for decades.
There were financial calculators, programmer’s calculators, scientific calculators, graphing calculators, and eventually the RPL machines such as the HP-28 and HP-48, which generalized the stack idea into an entire programming environment.
Eventually, though, algebraic entry won the mass market. Even HP began producing machines with algebraic modes, and some later calculators let you choose either system.
So did RPN die out? Are there any RPN machines left in 2026? Quite a few, as it turns out. The real question is do you want a calculator that pretends, in some way, to be your favorite old-fashioned RPN calculator, or do you want a more modern device that happens to use (or, at least, is able to use) RPN?
RPN You Can Still Hold In Your Hand
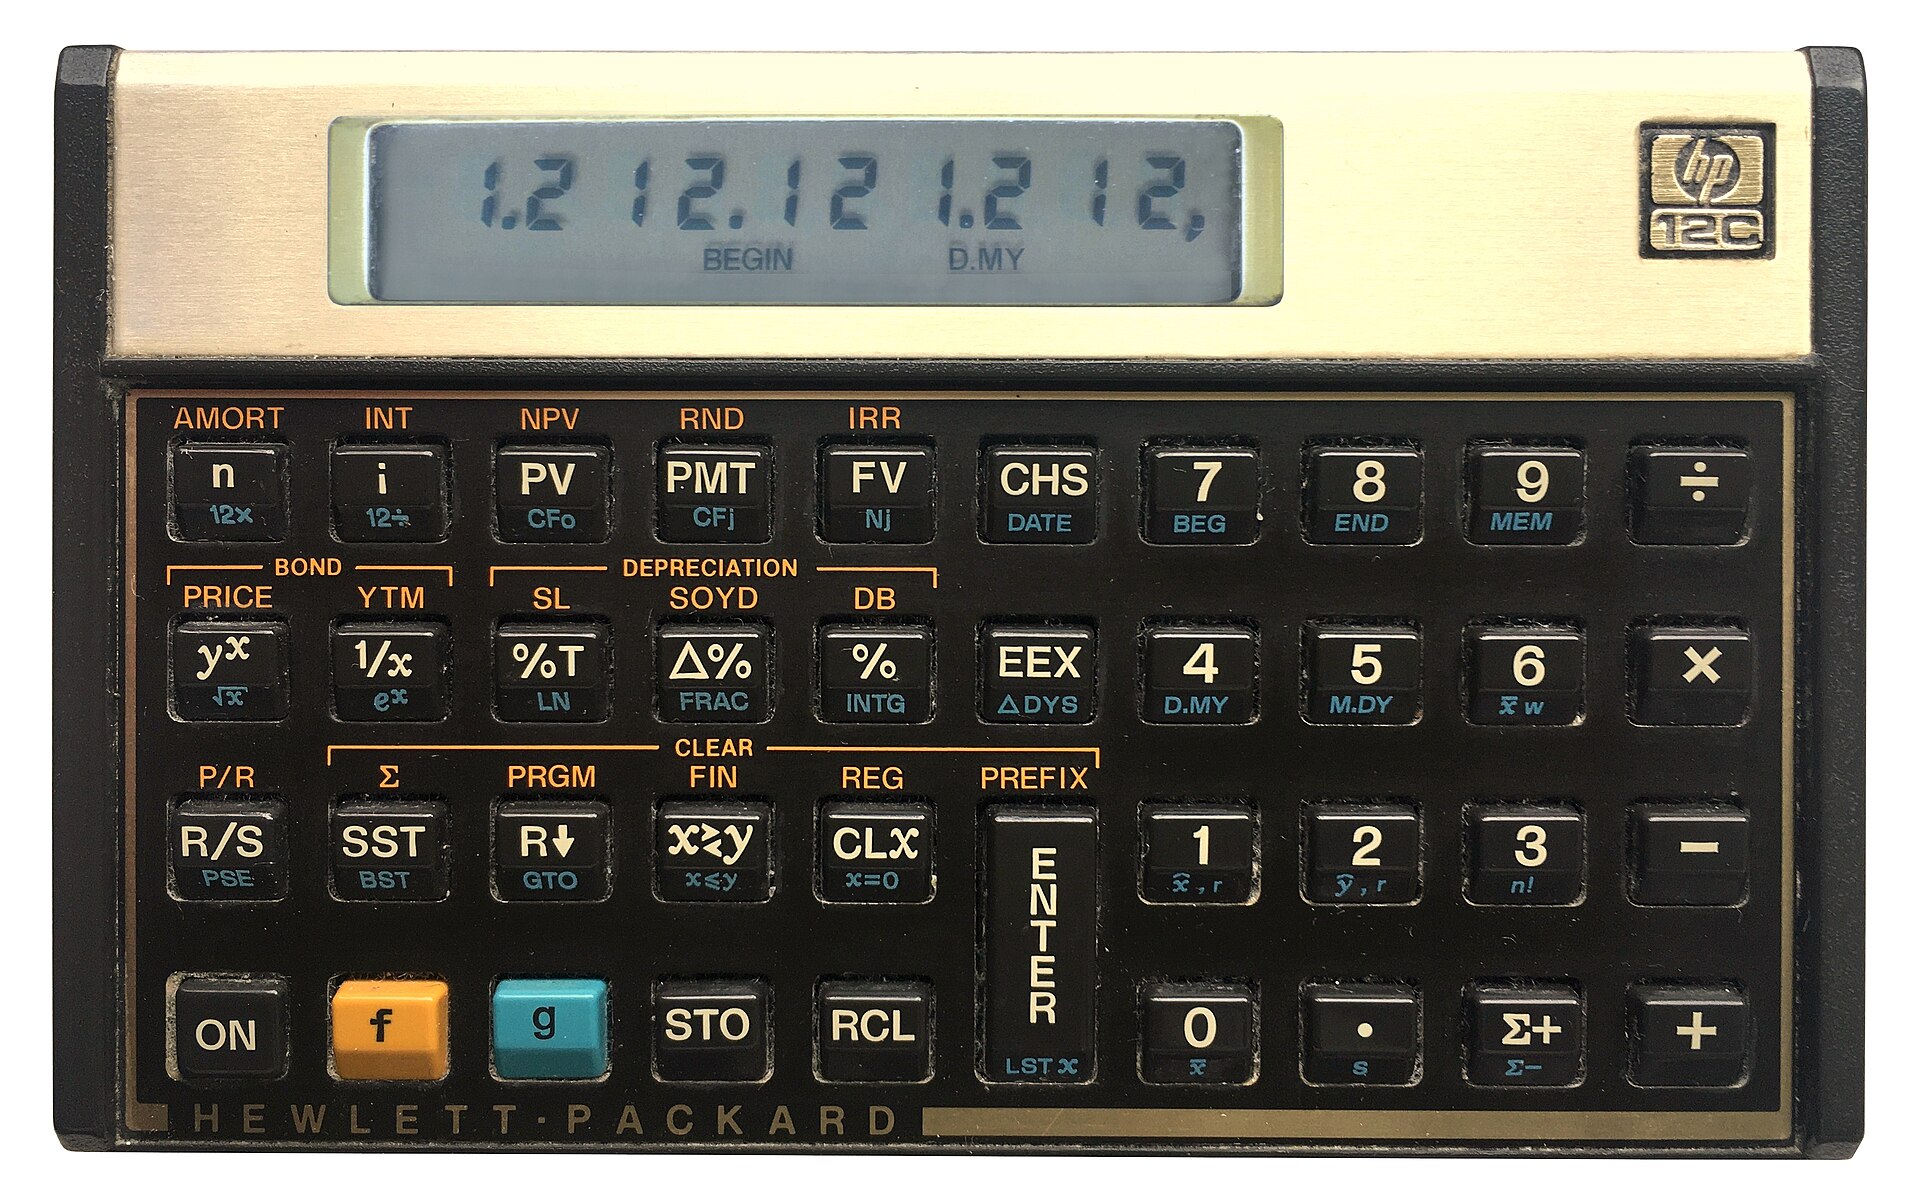
You can still get an HP12C (public domain).
The strange survivor is the HP-12C. Introduced in 1981 as a financial calculator, it remains available new more than four decades later. Depending on the retailer, expect something around $50 to $70. The 12C Platinum, which can operate in either RPN or algebraic mode, is also still available for roughly $80 to $110.
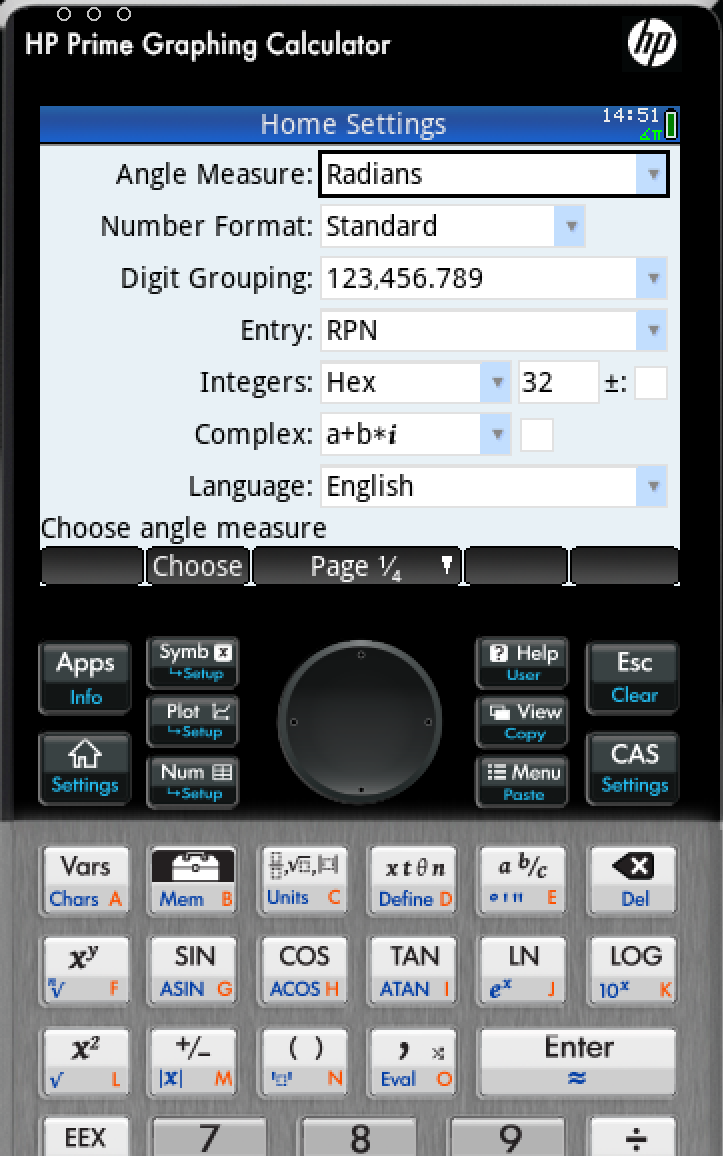
Then there is the HP Prime G2, generally around $150 to $170. The Prime is a graphing calculator with CAS, programming, symbolic mathematics, touch screen, and textbook-style input — but buried among all of that is an RPN entry mode. It isn’t an old-fashioned HP RPN calculator, but it certainly qualifies.
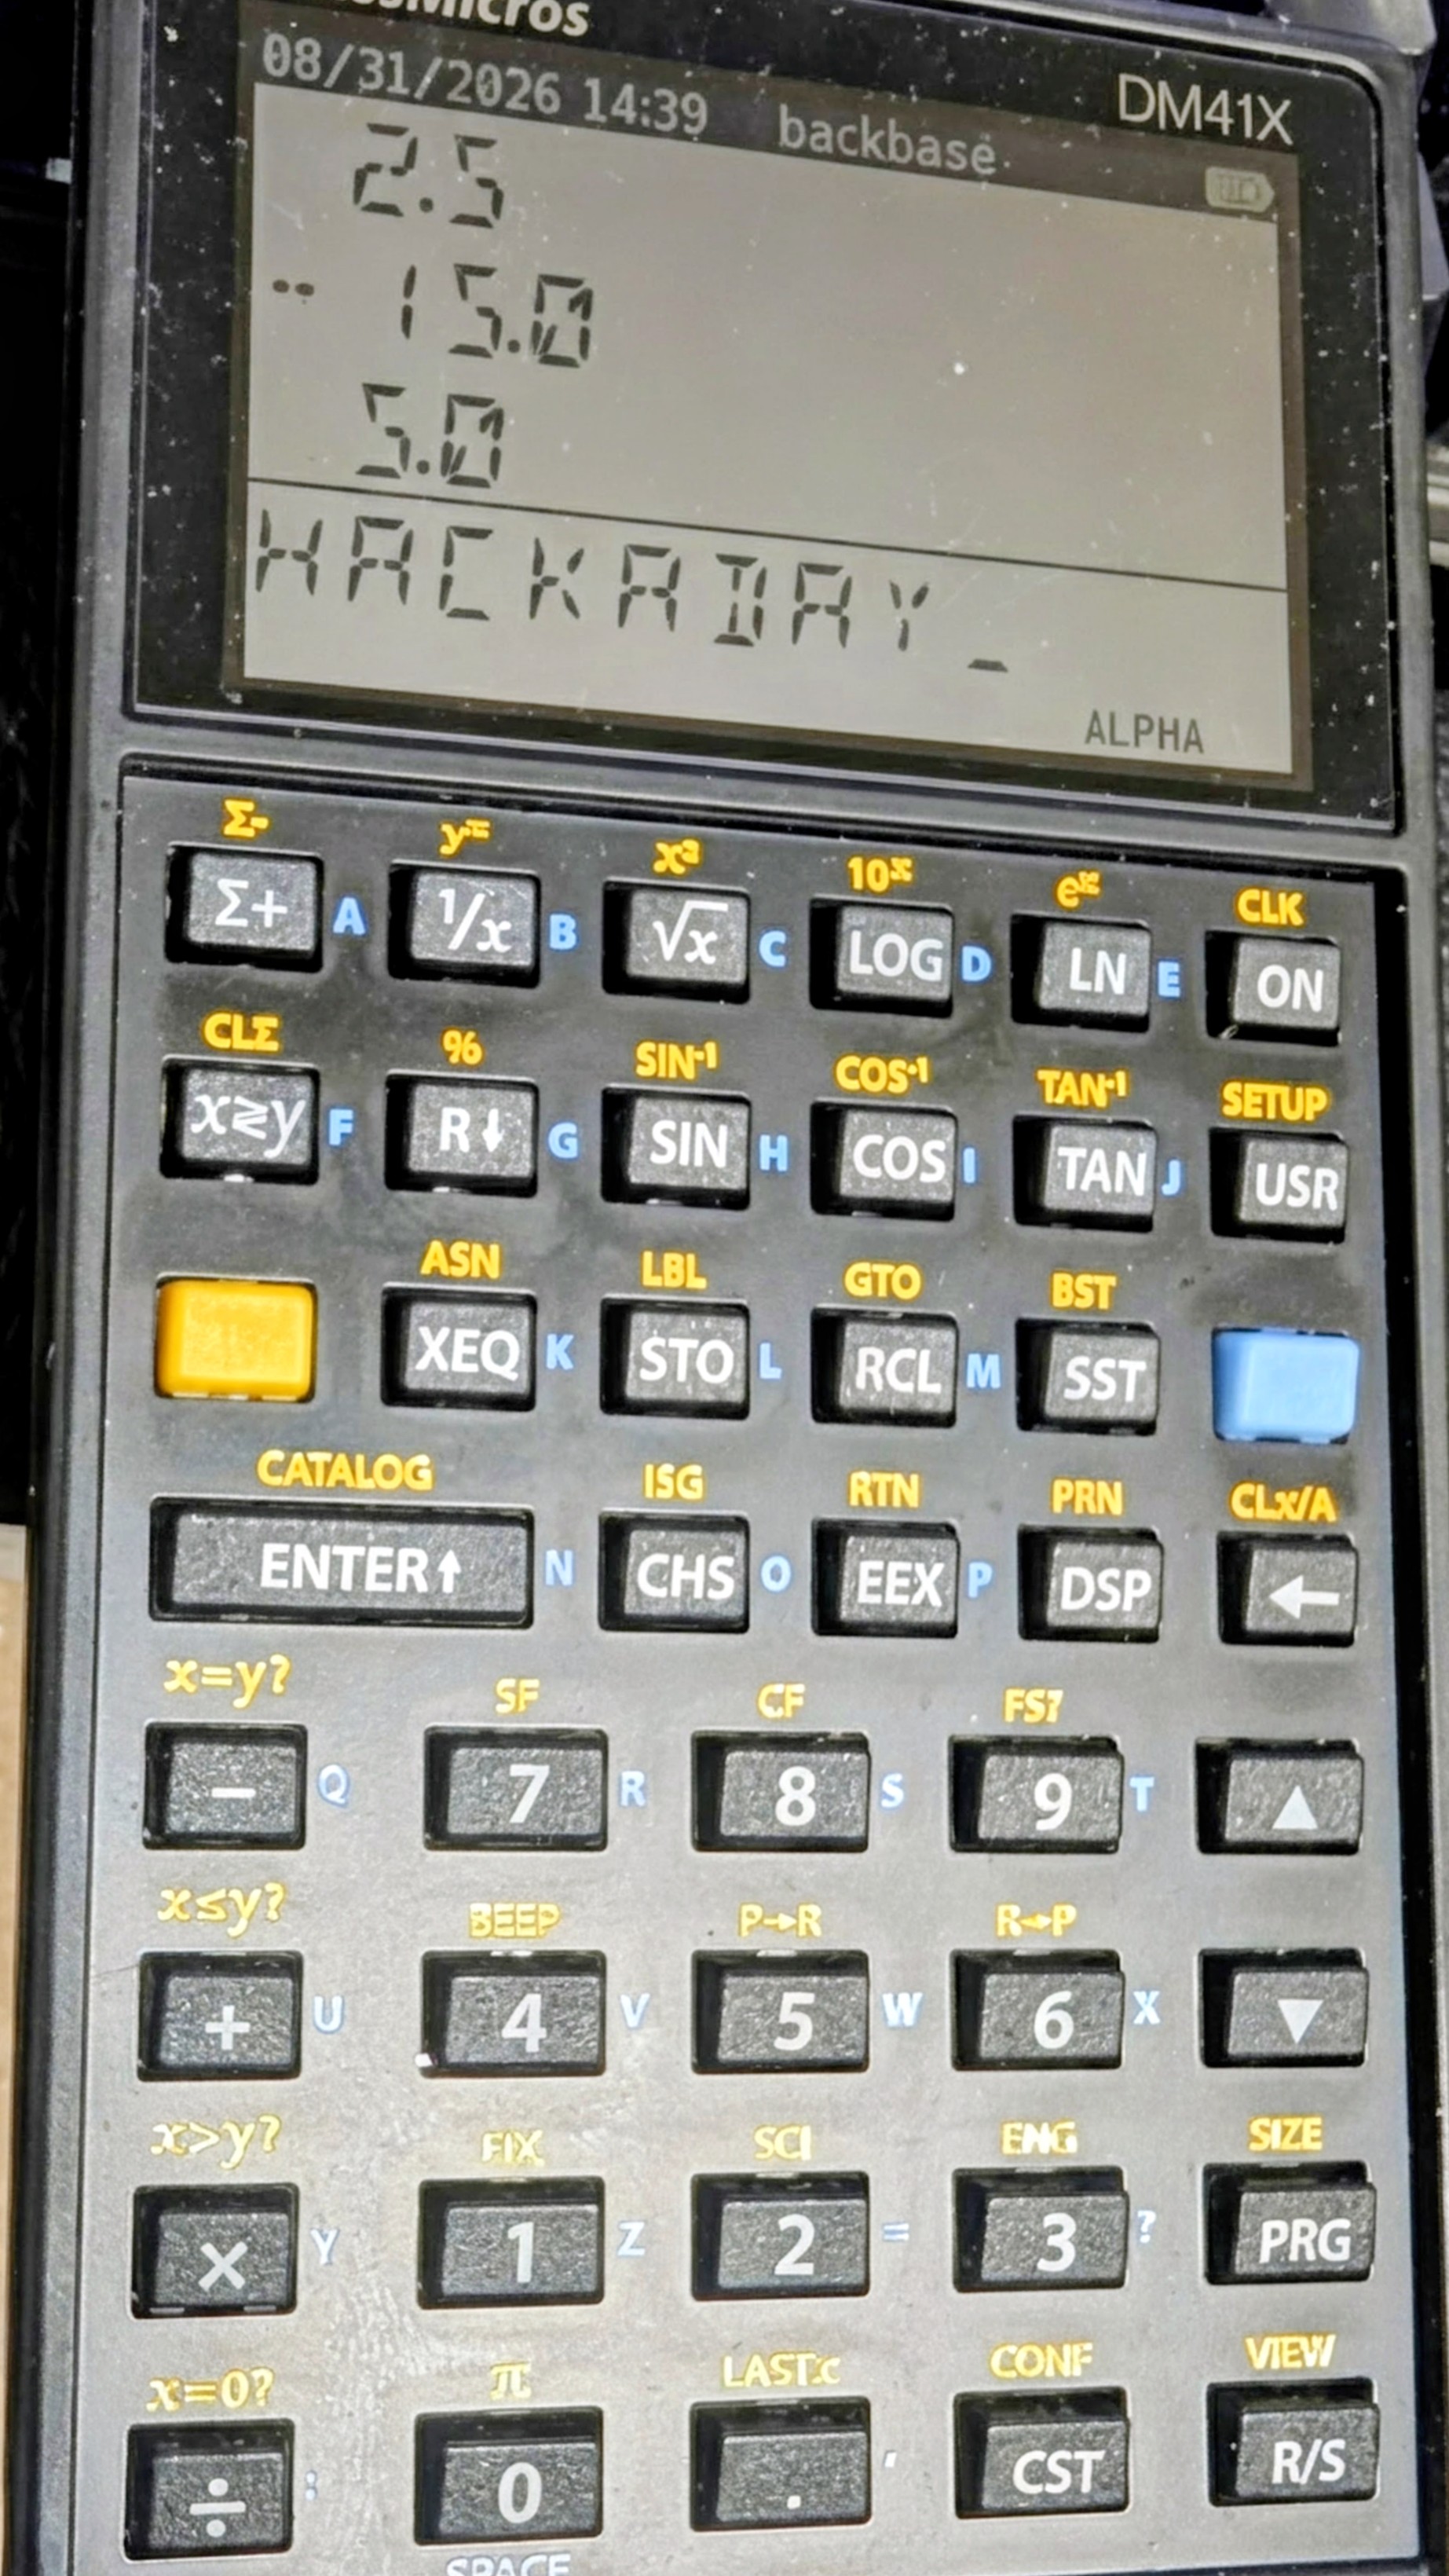
The real center of new RPN hardware today, however, is SwissMicros. SwissMicros started by producing modern implementations of classic HP designs and has since moved well beyond simple reproduction. Its current machines include the DM15L, modeled after the HP-15C; the DM16L programmer’s calculator; DM41L, DM41C, and DM41X machines inspired by the HP-41 family; and the DM32, which occupies roughly the territory once covered by the HP-32SII.
The SwissMicros answer to the HP41C (thanks [Julian]).At the high end is the DM42n, a modern descendant of the HP-42S idea. It has a 400×240 display, USB-C, programmable operation, matrices, complex numbers, equation solving, numerical integration, and 34-digit decimal arithmetic. It currently sells for a bit more than $300.
Perhaps more interesting is the R47, at about the same price. Instead of recreating a particular HP calculator, it grew out of the WP34S/WP43 community projects and attempts to be a modern enthusiast’s RPN calculator. It has an eight-level stack, matrices and vectors, complex arithmetic, base-N and bit operations, statistics, units, financial calculations, equation solving, integration, programming, and even built-in electrical engineering functions. Its firmware is still officially considered beta. This is probably the closest thing today to somebody asking, “What calculator would an obsessive HP engineer build if we started over?”
SwissMicros calculators aren’t cheap. Depending on the model, you’re generally looking at roughly $180 to more than $300 after currency conversion. But they are real, currently manufactured calculators rather than 40-year-old collectibles.
Heat Up The Soldering Iron
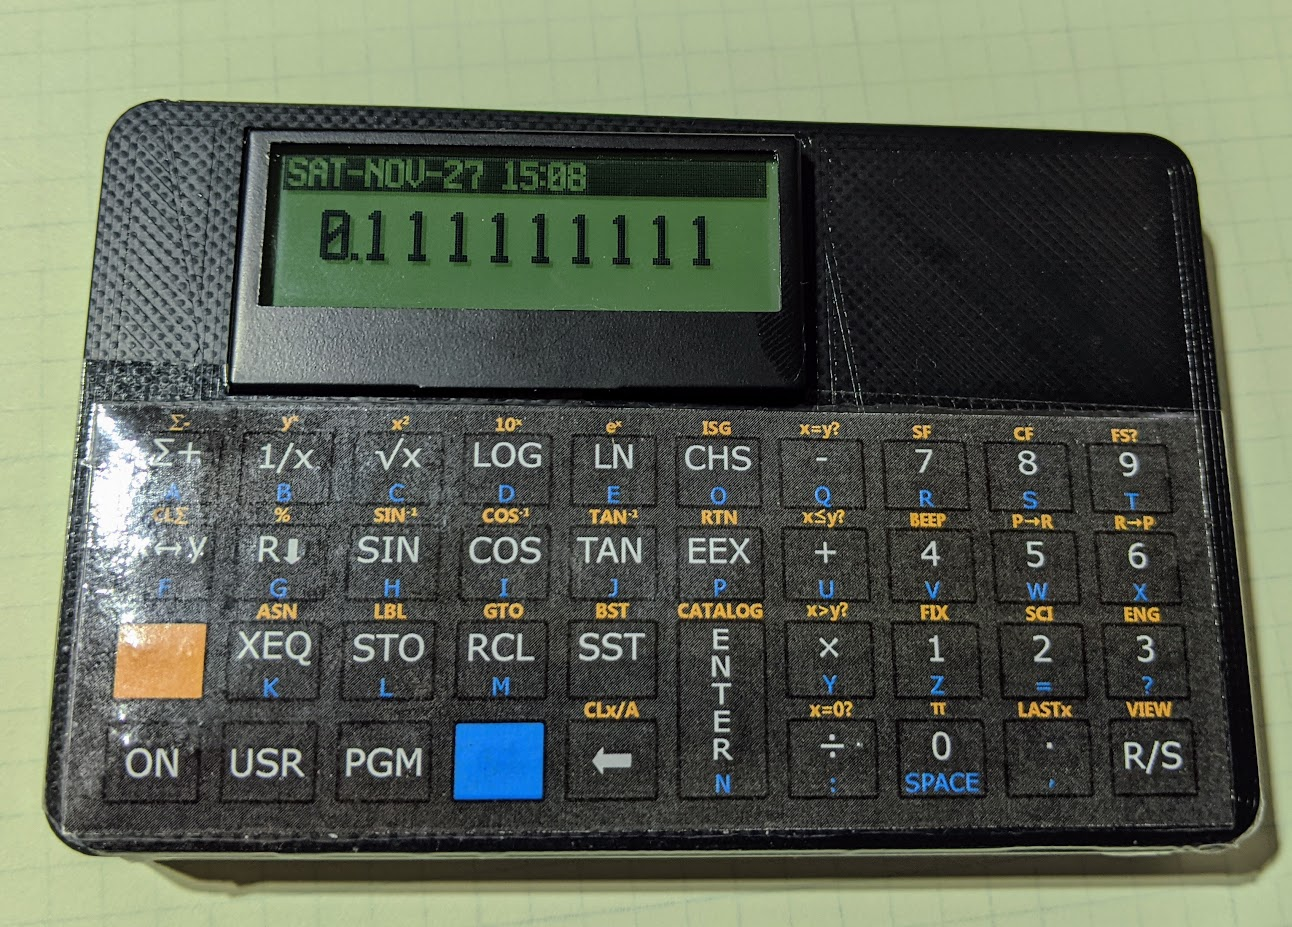
Sure, a real HP41C is in portrait mode, but otherwise, [Garza’s] is a pretty good clone.There is also a suitably hacker-friendly route. [Alex Garza’s] PAXER calculator projects reproduce machines such as the HP-15C, HP-16C, and HP-41C using an ATmega328. They’re available in kit form, use through-hole components, and aren’t just empty cases containing old calculator electronics.
The ATmega scans the keyboard, drives the display, and emulates the original machine. The design adds such modern amenities as continuous memory, an LCD backlight, real-time clock, and considerably higher execution speed than the originals. Kits and assembled versions are typically under $100.
There is also the 10LC (and related models), which approaches the problem from the other direction: take inexpensive ESP32-based M5Stack Cardputer hardware, add calculator firmware and key labels, and turn the whole thing into a pocket RPN calculator. Figure roughly $50-$60.
It isn’t going to make a calculator collector forget an HP-42S keyboard, but it does show how little hardware is actually required to build an extraordinarily capable calculator today.
There’s An App For That
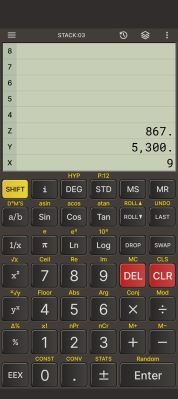
CalcTastic is a modern RPN phone app.If physical keys aren’t mandatory, RPN is actually thriving. You can get a host of RPN calculators on your Android or iPhone. There are many options for desktop computers, too. You can generally find these on your platform’s program repositories.
One of the best places to start is Free42, [Thomas Okken’s] free, clean-room implementation of the HP-42S. It runs on Android, iOS, Windows, macOS, and Linux. Plus42, from the same author, takes that foundation and expands it with equations, units, directories, plotting, financial functions, and other capabilities that the original HP-42S never had.
Android users also have CalcTastic, which can switch between algebraic and RPN modes and provides scientific calculation, complex numbers, fractions, statistics, conversions, and — in the paid version — programmer functions. The basic version is free, and the Plus version is only a few dollars.
For the HP-48 crowd, there is Droid48 on Android and several HP-48 implementations on iOS. If your idea of a calculator includes directories, symbolic objects, programs, lists, and an RPL command line, the phone in your pocket can impersonate a 48 far faster than the original hardware ever could. If you prefer the HP41C, go41C is the one I like.
Apple users have an especially large selection. i41CX recreates and extends the HP-41 environment. PCalc isn’t primarily an RPN calculator, but has long offered a very good RPN mode. There are also modern RPN calculators including MathU, RPN Calc, RPN Calculator 48, and a growing number of simulations of individual classic HP machines.
Real HP
Even HP’s current flagship environment is available in software. HP Prime Pro runs on Android and iOS and supports optional RPN input.
Desktop users aren’t left out either. HP provides a free HP Prime Virtual Calculator for Windows, and there has also been a macOS version. Most unusually, HP once produced an actual native Linux version. The Linux release was packaged as an AppImage and survives as a 2019 technical preview — build 2.1.14288 in the copy sitting on my Linux machine. It isn’t the Windows version hidden inside Wine; it’s a native HP build, and it still works remarkably well. Unfortunately, it predates one particularly interesting addition to the Prime: Python programming.
The HP Prime needs a setting to change to RPN mode.
There is a way to get that on Linux, although HP doesn’t make it easy. I found that the December 2024 Windows release of the Virtual Calculator, version 2.2.15212, runs under Wine using the Soda 9 runner in Bottles. That version includes the Prime’s Python app and reports MicroPython 1.9.4. The catch is that you don’t want to accept its offer to upgrade. Updating to the current Windows version causes the simulator to stop working under the same setup, and Soda 11 doesn’t appear to fare any better. So there is a slightly absurd sweet spot where an older Windows Prime under an older Wine runner provides a more up-to-date Prime on Linux than HP’s own native Linux build.
Between Free42, Plus42, Prime, HP-48 emulators and innumerable smaller projects, software may actually be the easiest way to use RPN today.
The Used Option
Of course, another source is available: millions of old calculators are already out there. If you’ve always wanted an HP-11C, 15C, 16C, 28S, 32SII, 41CX, 42S, or 48GX, auction sites and used-equipment dealers will happily provide one. Sometimes you can still find a bargain, especially if you’re willing to buy a cosmetically ugly machine or something outside the most desirable models. The problem is that the best old calculators aren’t merely used calculators anymore. They’re collectibles.
A calculator that originally lived in an engineer’s shirt pocket may now be a pristine example with its case, manuals, and box — and priced accordingly. Even fairly ordinary examples of desirable models can sell for enough money that carrying one around every day starts to feel irresponsible. My treasured HP41C, for example, works fine, but is already scuffed up enough that I rarely risk using it at my desk these days.
That creates a slightly absurd situation. A perfectly functional 35- or 40-year-old calculator may cost considerably more than an astonishingly capable modern computer because one is being priced as a collectible and the other as a tool.
On the other hand, battered calculators exist. If you don’t care about scratches, engraved names, missing battery doors, or someone’s old asset-control sticker, those are often exactly the machines to buy. You’re going to use it, after all.
ENTER Isn’t Dead
RPN plainly lost the calculator wars. Walk into an office supply store, and almost every calculator on the shelf expects conventional algebraic input. But it didn’t disappear.
You can still buy an HP-12C. You can buy sophisticated new RPN machines from SwissMicros. You can solder together your own HP-inspired calculator around an 8-bit AVR. You can turn an ESP32 gadget into one. Or you can install an app and have an HP-42S, HP-48, or modern RPN calculator in your pocket for anywhere from nothing to a few dollars.
That’s a surprising amount of life for an input system the mainstream calculator industry decided we didn’t want decades ago. Then again, people who like RPN tend to really like RPN.
If 2 ENTER 3 + looks more natural to you than 2 + 3 =, apparently somebody is still willing to sell you a calculator. If you want to see how easy it can be to parse RPN in a program, we’ve done that.
The concept behind the project is simple enough—grab the digital signals that feed the MC6847 IC responsible for generating the analog video output, and use them to create an all-digital video output over HDMI. [Scott] achieved this by using a Tang Nano board, which hosts a Gowin GW1N-1 FPGA. It’s able to snoop the signals heading to the MC6847 and, with some supporting components and level shifters, it can spit out video befitting modern screens. To make the system nicely complete, an analog-to-digital converter is also included to pick up the analog sound output from the TRS-80 and spit it out down the same HDMI cable. Such convenience!
There’s something strangely anachronistic about grabbing a TRS-80 off the shelf and hooking it up to a flatscreen with a single HDMI cable. Regardless, it’s a pretty great way to play with your old machine without having to futz with heavy old CRTs. We’ve featured plenty of similar projects before, too.
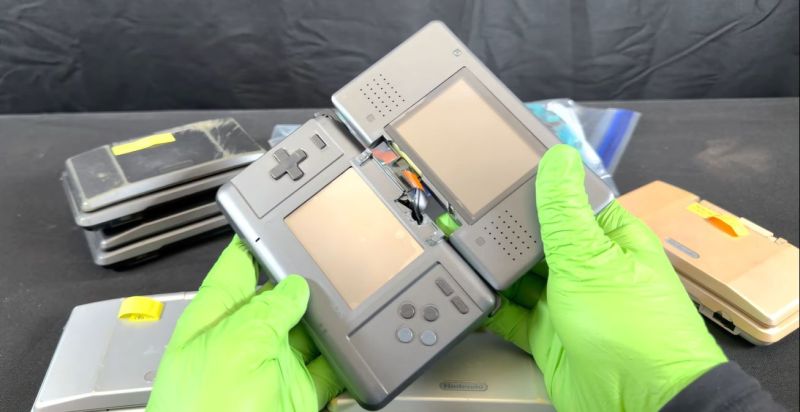
In a recent video [Sqwerks] does a deep-dive into the problem of disintegrating plastic enclosures of Nintendo DS consoles. These original NDS handheld consoles have a metallic-like coating that appears to interact with the ABS plastic, causing yellowing as well as extreme brittleness and correspondingly broken hinges. Unsurprisingly, this causes the shell to essentially disintegrate the moment you try to disassemble them for something like a screen replacement.
While somewhat the opposite of plasticizer migration into ABS from PVC insulation that we covered before, the underlying cause is probably similar, with the Transformers toy community having come to call it Gold Plastic Syndrome (GPS) based on the fact that it were mostly gold-colored parts on these plastic toys that seemed to be affected. Over time the additives used to add a cool metal sheen and swirls to the plastic appear to interact in a way that makes the ABS plastic very brittle.
Although the underlying cause of GPS doesn’t appear to be known yet, the Transformers community has documented this happening since the late 1980s and into the early 2000s, with even reports that some toys from the mid-2010s suffer from this. Whatever the underlying cause of GPS is, the result is always the same, with disintegrating brittle plastic and often a powdery residue.
In the case of NDS consoles, replacing the affected shell with a third-party replacement is still a viable option today, with [Sqwerks] recommending this solution. For other enclosures and toys where the plastic effectively is the toy, it might be that all we can do is watch them slowly disintegrate until we figure out how to revert GPS.
Anyone whose first computing experience came in the form of an 8-bit home computer will tell you about booting straight into a BASIC interpreter. The machine invited you to program it, and no doubt many of our middle aged readers are here today because they ran with that.
Modern computers with their fancy 64-bit multitasking supercomputer operating systems may have lost that experience, but now thanks to [Tarjan] you can bring it back. They’ve produced Thoreau BASIC, a bootable bare-metal BASIC interpreter for x86 machines with UEFI.
It’s largely GW-BASIC compatible, but with a few upgrades for the 21st century. The available memory is now whatever the system reports, so imagine a BASIC machine with gigabytes of the stuff. And while it has all the old-style BASIC you know and love, it also has high-res 24-bit graphics, and can load bitmaps. There can even be multiple text windows, it’s BASIC as you have never seen it before.
We are not sure how many will take this interpreter and run with it, after all maybe those modern 64-bit operating systems can be rather useful at times. But we’re guessing there will be plenty who’ll at least have a play with it for old time’s sake. Meanwhile, BASIC is not the only piece of UEFI goodness we’ve brought you.
All but a few of our very youngest readers are surely familiar with music formats that rely on optical disks. When we say [RobDevBuilds] made a MOD tracker that uses an optical disk, then, you might be forgiven for thinking he stuck a bunch of MOD files onto a CD– MOD files being a format of electronic music that was conceived of on the Commodore Amiga that is still used to this day. A dedicated MOD-CD player might be a fun project, but it’s not what [Rob] did; his project is far more impressive and impractical, as he’s come up with a way to encode the MOD files on paper for optical playback. This way the Amiga’s legacy can be preserved longer than the paltry thousand years promised by the optical M-disk format.
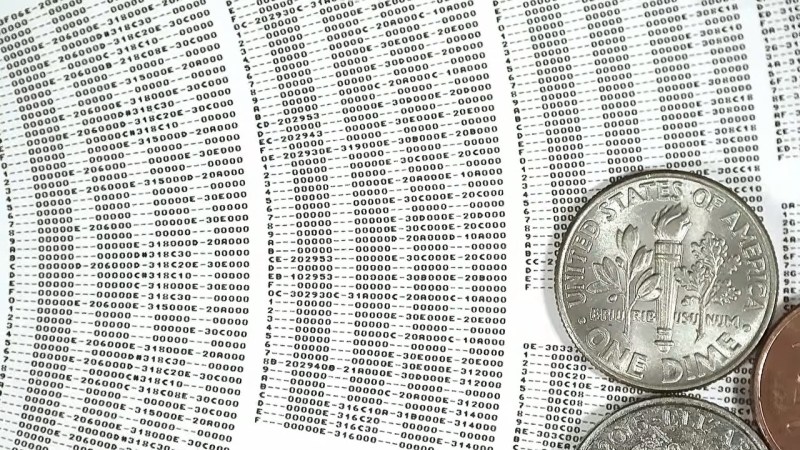
Zooming way, way in on the disk reveals that he’s actually printing the patterns of the MOD file row by row, just like you’d see playing it in a ‘tracker’ program. A MOD file, you see, does not encode music like a WAV or MP3; rather, like with MIDI, it lists the notes the software reading the file– traditionally called a tracker–is to recreate. Unlike a MIDI file, though, you don’t have to store the same notes more than once: repeating sections are stored in patterns. So most of the disk is just a long list of hexadecimal numbers: several columns worth, one for each ‘voice’ or instrument playing in the song. Another difference with MIDI is that MOD files are self-contained in that they are supposed to contain the samples, which isn’t in evidence until you flip over the disk.
There’s no B-side to [Rob]’s album; instead a QR-code like series of barcodes is used to encode the samples used in each track on the disk, as well as other information needed to recreate the MOD file, including metadata like title and artist, and the sequencing of the patterns on the front. Of course this means he needs two cameras on his physical mod player, one on each side, and steppers to slide them across the disk like a linear tracking turntable. The front is read via OCR of his modified Amiga “Topaz” font, while the rear holds the first 1084 bytes of the MOD file in a QR-inspired format [Rob] produced specifically for this project.
Unlike the last time we saw someone store music in QR codes, the more modest size requirements of modfiles– something that led to their use in keygens— means this player can store the music’s 8-bit sound samples without the OPUS compression [Rob] is using affecting fidelity. He’s working on another video to give the details of the player– as he works out the bugs, right now it can’t jump betwixt patterns on the disk as fast as some modfiles need–but we’re willing to hazard a guess he’s got a Raspberry Pi in there, and that it’s probably not running the Amiga-inspired AROS operating system.
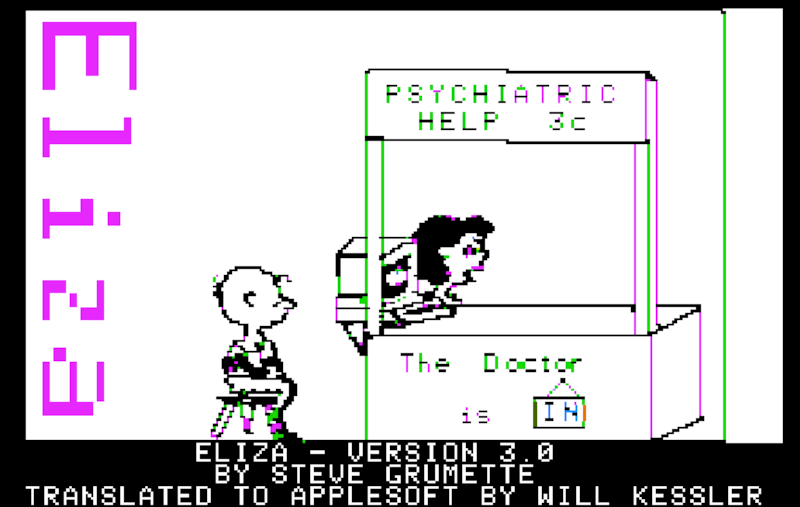
One day, people will look back at what we call Artificial Intelligence and laugh. We do the same thing today, as chat bots totally outstrip what the computer industry called AI up until pretty recently. This didn’t escape curators at the Internet Archive, apparently, and [Jason Scott] tells us about a recent collection, “Vintage Artificial Intelligence.”
These are old software titles that will run for you in emulated machines right in your browser, ranging from somewhere in the 1970s to the 1990s. There’s Eliza, of course. Actually, there are several copies of Eliza. Given how simple it was to write Eliza, it did a pretty good job. Then there are adventure games that are pretty conversational, Lisp, Prolog, which was going to spawn expert systems to replace us all, and Racter, which tried to write fiction.
There was even Alter Ego that was supposed to help you explore life decisions, maybe? There are a couple different versions of even a few versions of Conway’s Game of Life. We aren’t sure that’s ever really been AI, but perhaps it depends on your definition. We’re happy to see Sargon, the chess program, represented.
We didn’t see Hexapawn, which is a shame. We also didn’t see Parry (the paranoid counterpart to Eliza) or that elusive software we remember but can never find that built word chains from text called George.
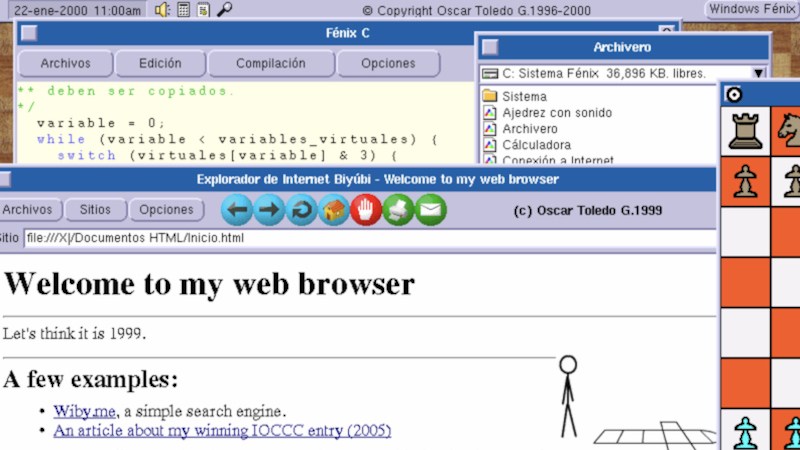
The AM29000 series of processors were AMD’s entry into the world of super-fast next-generation silicon of the late 1980s. It was a time when ARM was still a niche architecture in a British educational computer, the 68000 series was still a major player, and it was by no means certain that the x86 would maintain its position. It therefore wasn’t an unreasonable choice for someone building a high performance computer at the time, which is what [Oscar Toledo G.] and his father did. If that wasn’t enough, he went on to write an operating system for it in AM29000 assembly, complete with a GUI, a C compiler, and an up-to-date web browser for the late 1990s. The story makes for an engaging read.
It’s written across two parts, with the first looking at the computer and the early software development, and the second at the C compiler and web browser. It’s a tale of epic mastery of the machine, and something we remember ourselves, piecing together knowledge in a time before the Internet placed it all at our fingertips. Tales such as hand porting — we can’t really say compiling — C code into AM29000 machine code are completely next-level. You have to read these two write-ups, and there’s even an in-browser emulator should you want to try it.
Meanwhile, in case you think something is a little familiar here, he’s the same person who brought us a Transputer in the browser.
These days, modems are pretty fancy bits of kit, what with to keep up with the speeds of cable, VDSL, and fiber connections. At lower speeds, though, it’s entirely possible to build a modem out of simple discrete components. [sv3ora] did just that, building a simple modem for the CB2 Micro.
It’s a remarkably simple build.
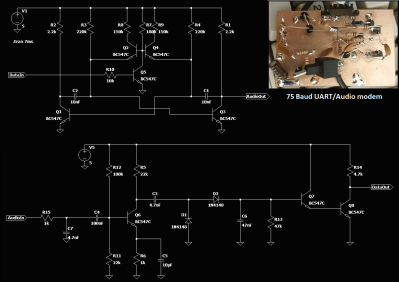
The project takes advantage of the fact that the V1.54 firmware for the CB2 Micro enabled 75 baud serial communication. Thus, it made sense for [sv3ora] to build a 75 baud modem to suit. As was the way in the days of dial-up internet, the modem modulates data into audio, demodulates audio back into data, allowing the CB2 Micro to send and receive data over telephone lines, ham radio links, or to store and retrieve data via mediums like cassette tape.
The device is built out of good old BC547 transistors. along with a smattering of diodes, resistors, and capacitors as supporting hardware. That’s all you need to turn slow serial into audio and back again. [sv3ora] does a great job of demoing the hardware, using it to store a program on tape and retrieve it again later.
Powered machinery started the industrial revolution, and it was automation that kicked it up another notch in the 20th century. The ability for machines to make things by themselves spurred increased output and in turn boosted economic growth. The concept became widely popular for manufacturers to implement, as any change with serious economic benefit tends to do. Fast forward to today, and advanced robots and fancy machine vision systems running on powerful computers are the norm in modern factories which create the many wonderful products that we all purchase, use, and enjoy.
Once upon a time, though, things weren’t so sophisticated. [Nicola Cimmino] came to Hackaday Europe 2026 to tell us all about a remarkably simple 1-bit CPU that used to run factories.
Logic, But Make It Cheap!
Nicola Cimmino used to frequent a facility that used to recycle electronic waste, which sold old bits and pieces of hardware by the kilo. Many times, Nicola would pick up odd boards with an eye to repurposing components for future projects. Eventually, one unremarkable looking chip caught his attention—the Motorola MC14500B. This chip was rather unique, being a rather simple processor with just 16 instructions and a 1-bit data bus.
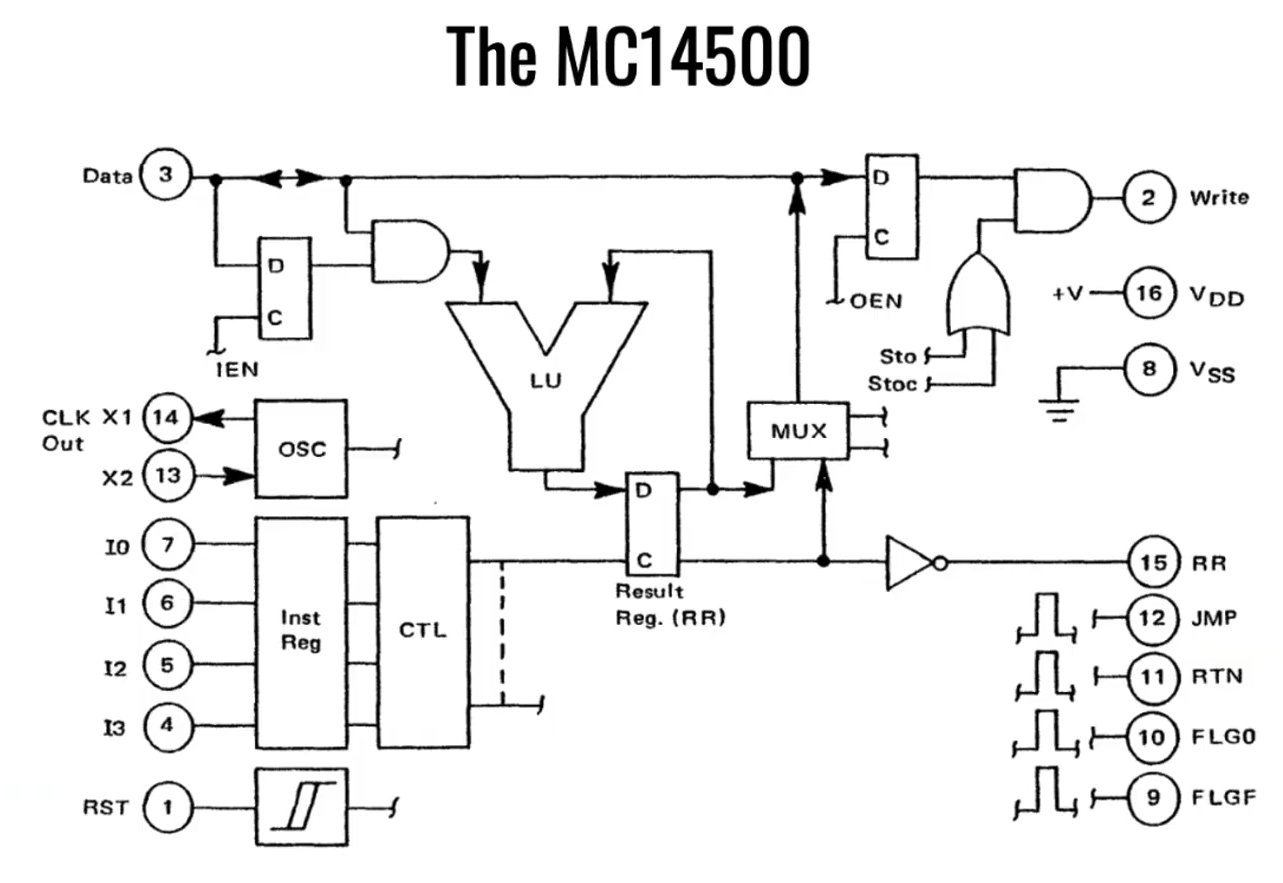
The simple architecture of Motorola’s basic 1-bit chip. Credit: talk slides
It’s worth examining the era in which this chip existed. Intel dropped the 4-bit 4004 in 1971, with the famous 8-bit 8080 landing in 1974. The Zilog Z80 came along in 1976, similarly an 8-bit design. And yet, when Motorola released the MC14500 in 1977, it landed with a rather slimline 1-bit design instead. Nicola notes that this likely came down to price, since populating a chip with more transistors cost more money quite significantly back in the 1970s. If the job could be done with less, it would make the part cheaper and thus more popular in the market. Bearing this out, Nicola explains that a 1976 Zilog Z80 used 8,500 transistors and cost around $200 USD, while an MC14500 used just 500 transistors and could be had in 1977 for the bargain price of just $5 USD.
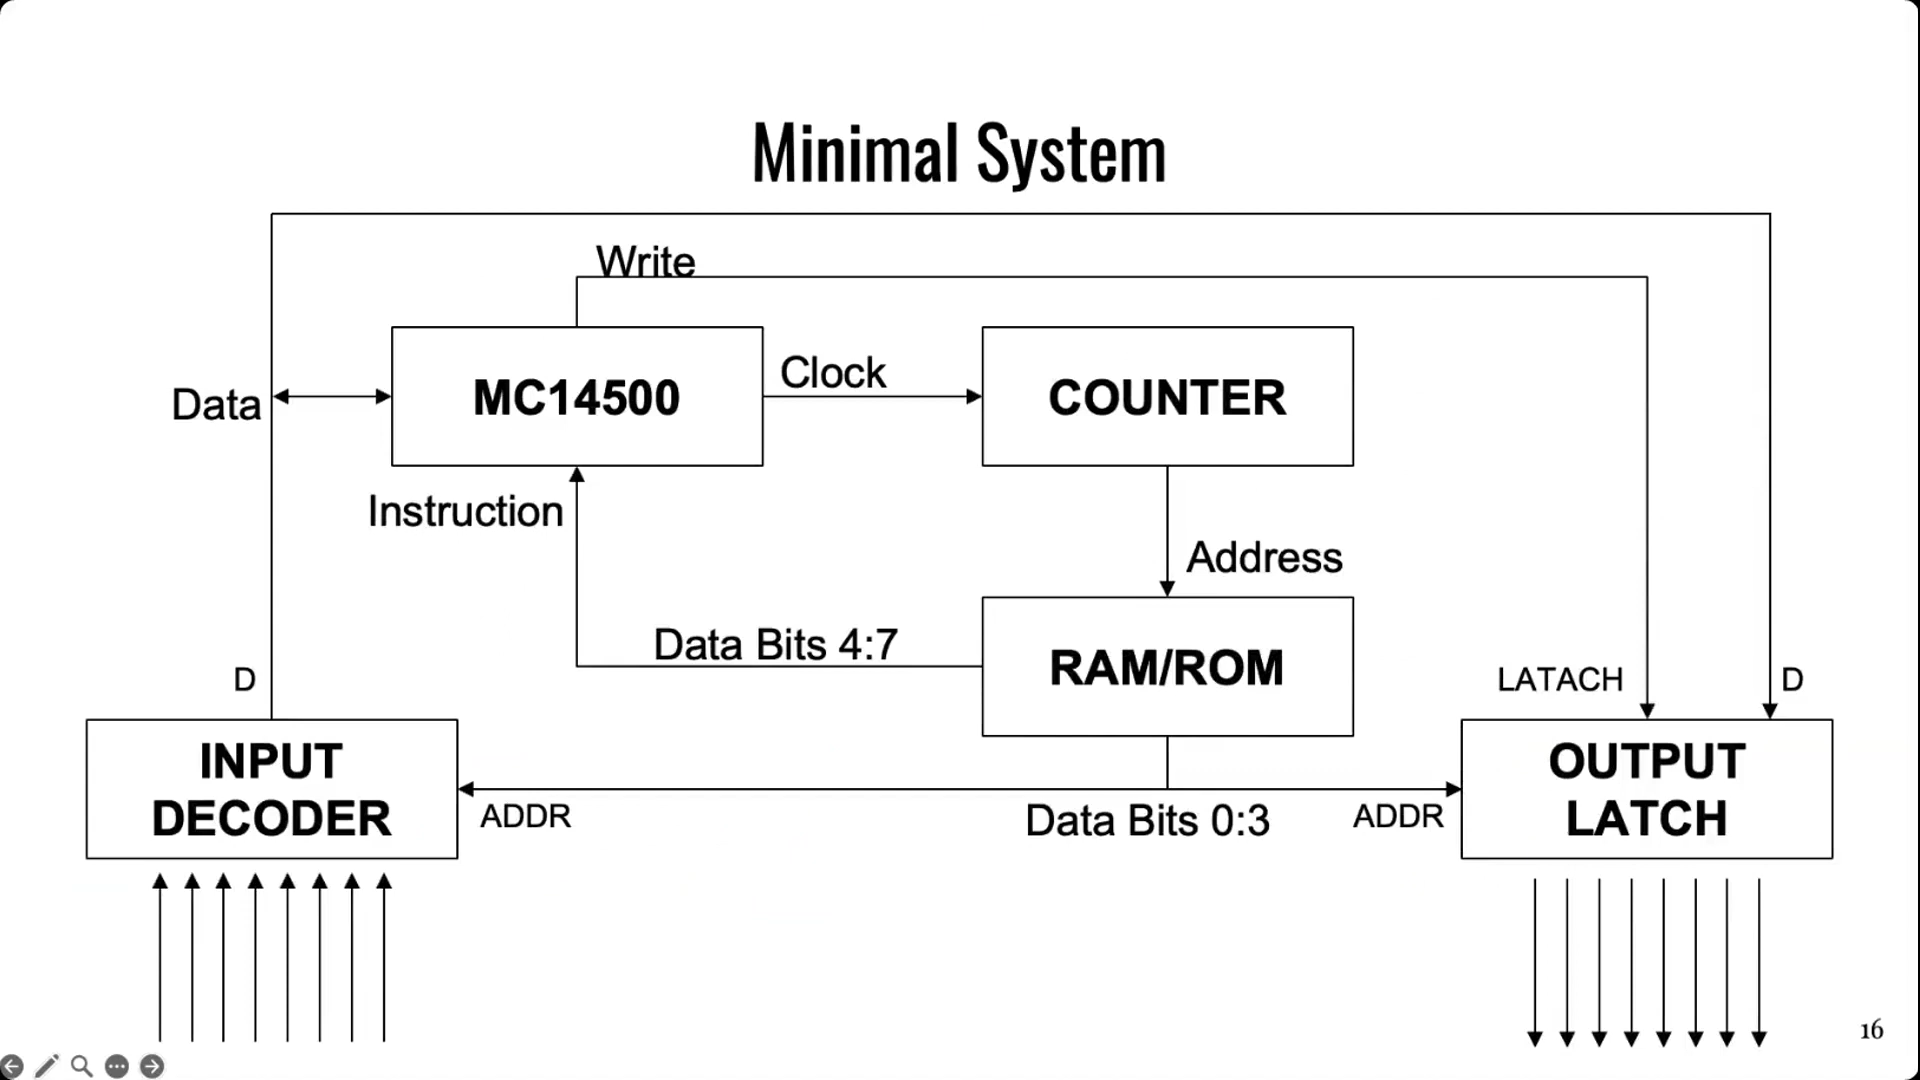
It doesn’t take much supporting hardware to get an MC14500 up and running. Notably, though, there is no memory or program counter on board, so those have to be added externally. Credit: talk slides
Back in the mid-1970s, automation in industry often consisted of simple logic that was handled by cabinets full of relays. This took plenty of bulk, required hard-wiring everything, and also involved plenty of electromechanical parts that could wear out. Changing logic required manually rewiring things which could be fussy and tedious at the best of times. In those days, the Programmable Logic Controller was just coming into use, developed to be a reprogrammable system for industrial automation tasks that was more flexible and reconfigurable just by reprogramming it.
The MC14500 sprung up as a useful tool at this time, powering a great many programable industrial systems. It was designed to offer the bare minimum requirements for its application, while leaving extraneous hardware for designers to implement if and when it was needed. The architecture is simple enough for Nicola to explain with a single slide. The chip came with a 1-bit logic unit, operating with a result register, a 1-bit accumulator and the data bus. A minimal system could be lashed up with the MC14500, a counter, some external RAM or ROM (since none was onboard), and an input decoder and output latch of 8 bits each. This setup would only allow for doing combinational logic, since there is nowhere to store the current state of the system. However, hooking some outputs back to the inputs could allow for sequential logic, since it would allow for storing the current state of the system via those outputs. Nicola then steps through various other configurational changes to addressing and system architecture that could be made to optimize the MC14500 for use in different ways.
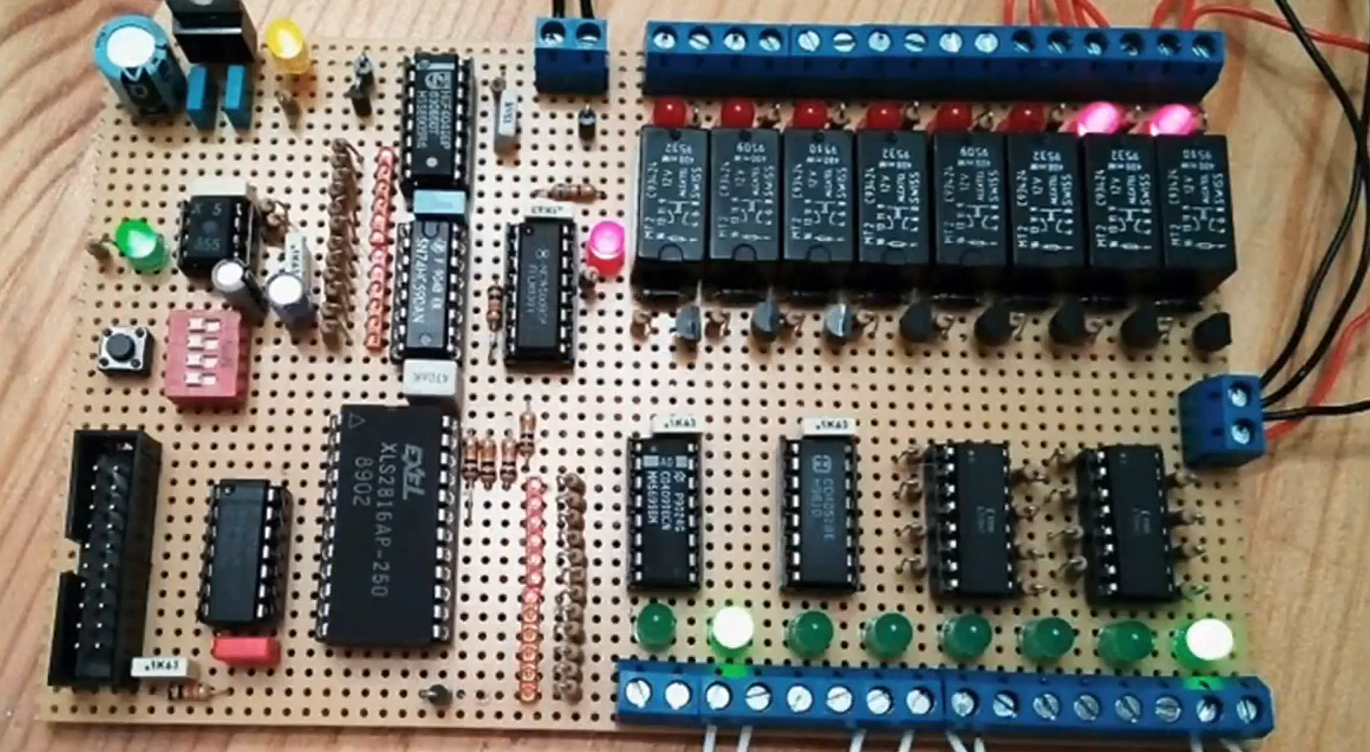
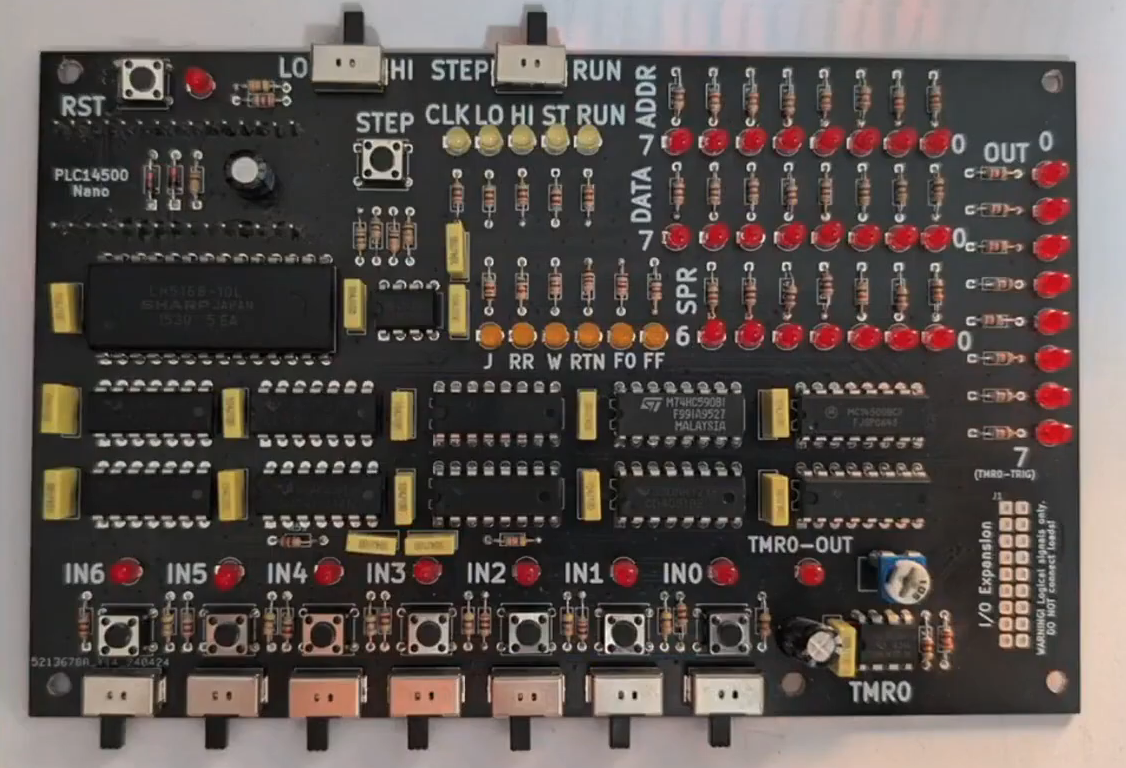
Nicola built a homebrew MC14500 system, allowing him to get to grips with the classic chip. Credit: talk slidesA more polished version came later, built on a custom PCB. Credit: talk slides
If you wanted to get to grips with using an MC14500 in industrial contexts, you would do well to pay attention to this talk, even if it came out some 40 years past the part’s heyday. Beyond the basic system architecture, Nicola explains how to use the limited instruction set, and how to get such a system executing simple programs in ladder logic, which remains somewhat of an industrial standard to this day. Beyond that, he steps up to more complex logic, like if/else conditionals and the use of some of the weirder instructions of the chip. He then shows off the hardware he built himself—both a breadboarded MC14500 setup built with wirewrap, and a more polished version on a custom PCB.
It’s not every day you get to learn about the nitty-gritty details of working with industrial hardware from the ground up. And yet, that’s exactly what Nicola brought to Hackaday Europe 2026. It’s an excellent primer on the topic, and also simply just good fun if you’re a fan of electronics and logic itself!

 Login
Login