Reading view

There are new articles available, click to refresh the page.

Hackaday Europe 2026: Bare Metal Made Easy
When we talk about programming in “bare metal,” it basically means writing software that runs right on the hardware with no operating system or abstraction layers in between. This gives the program the most direct possible access to peripherals and memory, with the tradeoff being that you don’t get the protection and ancillary features that come with an OS.

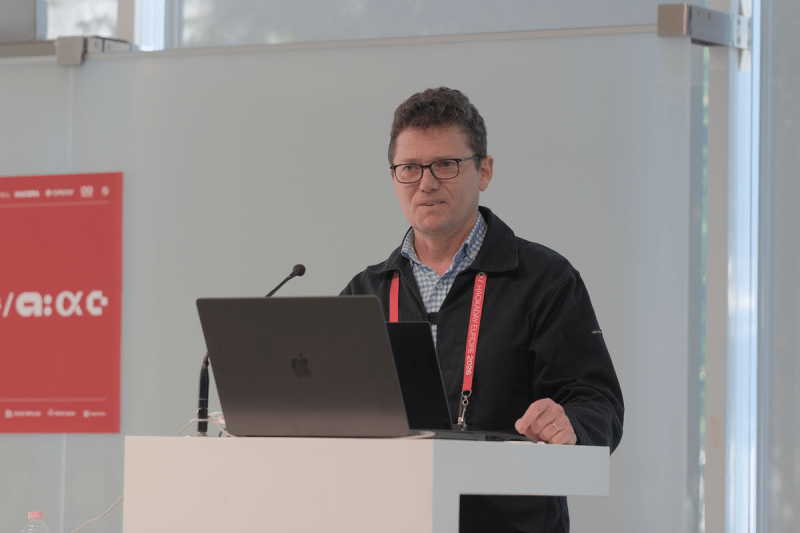
Sylvain Huet came down to Hackaday Europe 2026 to talk about making bare metal easy. Not just by ignoring operating systems and ever-bloating dependencies, but by rethinking the way we approach software development and by building a transparent platform from the ground up.

Down To Brass Tacks
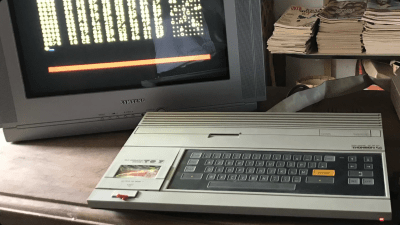
Sylvain’s computing journey began with the Thompson T07, in an era when the line between operating systems and bare metal was wafer thin. Since then, we’ve sheathed our CPUs in ever deeper layers of abstraction.  

Sylvain begins the talk with a look at where his own computing journey began. Back in 1982, he got his hands on a Thomson TO7, with just 8 kilobytes of user RAM and a 6809 CPU. The best way to have fun with the hardware was to work straight in assembly.  “It was easy to understand everything about your computer,” notes Sylvian of the simplicity of the platform. “There was almost no hidden side in this computer.” Of course, change was fast in that era, and a bit over a decade later, Sylvain was working on a Metaverse-like product called Second World, before moving on to work on Nabaztag in the early 2000s—a charming Wi-Fi enabled rabbit launched just as wireless networking was hitting the mainstream.

The through-line across all these projects was that much of the work was done at the bare metal level—often useful when it’s desirable to work as close as possible to the hardware peripherals or to maximise performance. Sylvain then contrasts this with how things are often done in this modern era. A poignant example was showing pictures from an airport during the CrowdStrike outage of 2024. Where once upon a time a flight schedule display might have been a purpose built device running on very simple hardware, these days it’s common to just kit out flat screen monitors with entire Windows computers behind them. It’s a convenient way to build, but as Sylvain explains, this complexity sometimes comes at a cost. He then shows that such a display can be very easily built with a Raspberry Pi running a bare-metal program with no operating system at all—with no automated security updates enforced by an outside OS provider, or any such heavy-handed management required. Since it’s coded to do one job from the ground up, it’s much less likely that the software falls apart due to some outside update or the collapse of some obscure dependency that nobody on the development team was even aware was included.
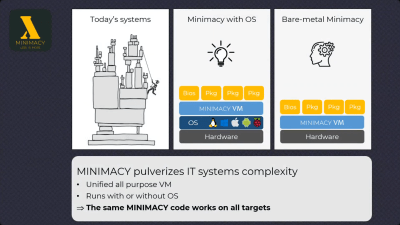
The modern operating system is perhaps the biggest black box of all; removing it provides a lot more transparency on what’s going on under the hood. Such is the goal of Sylvain’s overarching Minimacy project. 

Sylvain talks about a “new minimalism”—where “all you need to understand should fit in your single brain.” It’s not just about working at the bare metal level, but about creating systems where a single developer actually understands the project from top to bottom.  Of course, there are limits to the size of a project any one person can completely understand, but for some applications, this can be a useful guiding principle. The talk also explores how we use things like outside libraries. Sylvain calls this the “low-level paradox”— wherein the more sophisticated a task is, the more we rely on black boxes to do parts of the work for us. It’s a fast way to develop, but quickly adds thousands of lines of code to a project and enables us to avoid understanding some of what’s actually going on under the hood.
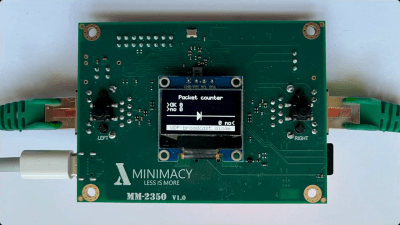
Sylvain’s Minimacy Machine is intended to be a platform with a focus on transparency—allowing the developer to know what’s going on at every level. It’s based on the Raspberry Pi RP2350. 

To this end, Sylvain has created the Minimacy language. It’s intended to enable development with fewer dependencies, black boxes, and operating systems, while maximising the capacity for understanding. It’s concise, linear, and safe, with strong static typechecking and type inference. You can work with it using the Minimacy virtual machine, which combines an instant compiler and a virtual processor that can run the code. It’s 100% open source, and is written in less than 900 kB of C—both which support the ideal of being within the realms of a developer’s ability to understand the whole stack. Indeed, Sylvain demonstrates just how light it is by running a Minimacy game off a floppy disk on a modern UEFI laptop. The idea is that a Minimacy VM could run on a variety of different hardware, allowing near-bare-metal access for Minimacy code while still maintaining some level of portability across systems.

Sylvain also demonstrates the Minimacy Machine. It’s powered by a Raspberry Pi RP2350, running at 150 MHz, with lots of useful peripherals, including Ethernet connectivity, an OLED display, an SD card reader, and a real time clock. Armed with all that, it’s a platform that can run Minimacy code and allow the development of devices that run without relying on lots of outside dependencies or a heavy OS built for more general purpose tasks. It exists as a transparent software and hardware stack for developers to build upon.

Overall, though, Sylvain’s talk isn’t just about Minimacy or programming in bare metal. It’s about finding simplicity where it makes sense. Working in bare metal isn’t for everything of course, and the vast majority of us will continue to use operating systems across all sorts of applications where they’re necessary and useful. However, in the advanced age we live in, it’s sometimes good to remember that stripping away unnecessary layers of abstraction often makes a lot of sense, because they can distract us from the simple tasks we’re trying to achieve in the first place.




Running Linux 6.11 on the ESP32-S3 with a Few Tweaks

With the Xtensa Lx7 twin CPU cores in the ESP32-S3 running at a relatively zippy 240 MHz and accompanying PSRAM of up to 16 MB, you might find yourself wondering whether it could run Linux. As [Paulneja] demonstrates with Linux kernel 6.11, the answer is a ‘yes’, though with the usual caveats.

What complicates matters with the ESP32-S3 is that it lacks certain amenities that spoiled OSes like Linux have come to take for granted, such as a Memory Management Unit (MMU). To deal with this, the NOMMU Linux configuration was used, along with a custom fork() implementation. Although the previous 0.7 version sort-of worked, the current 0.8 release is the first that manages to actually boot reliably and has a usable amount of RAM available after boot.

You can see the comparison between the two versions in the header image, with v0.8 having a blistering 3.7 MB available after booting and with overall resource usage and performance having improved massively. Note that only one core is available to Linux, with the other used by the typical FreeRTOS ESP-IDF stack to provide WiFi and Bluetooth.

This was all run on an ESP32-S3 with the N16R8 configuration, meaning 16 MB Flash that’s also used for writable storage and 8 MB of octal PSRAM. As for practical applications, it’s noted by [Paulneja] that this is a research project, though one could imagine this being an embedded Linux project along the lines of a network router running something like BusyBox.

Linux Fu: Speak Up!

Apparently, people hate typing. As every movie and TV show suggests, the future is talking to computers. There was a time when speech recognition was complex and not very good. But these days, even our lowly phones can do a pretty good job of speech recognition. Of course, one problem is that your phone probably isn’t actually doing the speech recognition. It sends it to the big business of your choice to interpret. I’ve been using Handy, a speech recognition system that works well for me. I’ve also looked at some that didn’t.

After all, it is sometimes nice to dictate to your computer, and it would be even nicer if you could keep your data local. On Windows, oddly enough, there is a well-developed speech feature that, as far as I can tell, almost no one talks about or uses. One video estimates that 99% of users don’t use it. Linux, of course, has many options, but historically, these have been difficult to set up or finicky.

Of course, the good news is that many of the Linux tools are open source and the models are quite good. That means other people have had the freedom to fork the tools and make them easier to use, at least in theory. The licensing of the models themselves may be different, but those will be hard to modify, anyway and they generally work well. The biggest problems on Linux isn’t the technology itself, but the tremendous variety of systems and setups.

Suppose you want to write a speech-to-text program. Will it work on ARM? What desktops will it integrate with? Can it use a GPU? What kind? What about specialized instructions in some CPUs? Then there’s the forced input situation; typing into arbitrary programs once you know what the user said. On X11, it is easy, but Wayland needs different handling.

A Shortcut

I’ve thought about using my phone with KDE Connect, which is an excellent program. It can let you use your phone as a keyboard and mouse for your Linux computer. Unfortunately, it is aimed at character-at-a-time input, and I’ve never found a way to make it work with voice.

Besides, the phone is beaming all the data to “the cloud.” You probably type things you’d rather not broadcast to the ether.

I had looked at Speech Note before, but it is sort of a speech recognition notepad. I didn’t find it seamless, and it didn’t work well on my system anyway. Vocalinux looks nice, but a quick test kept complaining that my Intel extensions were not available. Makes sense, since I have an AMD CPU. Even though the documentation said it should work, I was never able to get it to work.

The Easy Way

Turns out the application that worked readily on my machine was Handy. Keep in mind, Handy is just another tool that uses one of several models out there, along with other open-source tools. You might need to install some tools to deal with your system like xdotool or dotool, but they are probably already installed anyway. That isn’t to minimize the value of Handy. It is — well — Handy. You don’t have to load and configure models, set up a bunch of system-level hooks, or install a bunch of libraries. You install it, and it works.

You can configure it. The best model for you, for example, may depend on your machine and the languages you speak. You can configure the hotkeys and how the app types into your computer. But it does all the work of downloading and configuration.

No Cloud, Unless…

The models do run on your computer and you can make sure it takes advantage of your hardware. However, there is an optional alternate hotkey that takes your speech, processes it to text, and then sends it to your choice of AI engines to clean it up.

Of course, you could be running your own AI engine, but normally you’ll have it sent somewhere else with a prompt. You can tune the prompt or create your own, but the default one starts: “Clean this transcript: 1. Fix spelling, capitalization, and punctuation errors 2. Convert number words to digits (twenty-five → 25, ten percent → 10%, five dollars → $5) 3. Replace spoken punctuation with symbols (period → ., comma → ,, question mark → ?) 4. Remove filler words (um, uh, like as filler)…”

You do need an API key, but there are free options available. For experimenting purposes, I went to OpenRouter, generated a key, and attached it to one of several free models they have. The nice thing is that you can experiment with different models while keeping the same key.

If you search for free in the models box, you will find a few choices including openrouter/free which just picks a free model that isn’t too busy. That can be important because some of the models will introduce long wait times into your transcription.

On the other hand, you can make a new prompt, copy the original one in, delete the part about keeping the language the same, and add instructions to translate the output to French, and that will work, at least most of the time. So there are a lot of possibilities.

Rather than tell you all about it, we’d encourage you to install it and try it or watch the reveiw video below.

Special Mention

Although Handy is my first choice for day-to-day transcription use, there is another open source project that’s worth mentioning. Nerd Dictation is a very lightweight wrapper around the Vosk model. It does take a little bit to set up, and then it provides you with a command line tool that can start and stop dictation. Of course, you can assign those to macro keys. However, there is also a switch that allows you to simply output to stdout. That opens up a lot of possibilities for writing programs or even shell scripts that respond to voice.

To see what’s possible, run nerd-dictation begin --help. This will show you how to output to stdout, set a timeout, and handle other options.

Of course, the obvious project would be a voice typewriter. Many of the tools mentioned here either rely on or can use OpenWhisper and, of course, you can use it too, if you roll your own code.

Fixing a Ubiquiti 16-Port PoE Switch With an Extra Hole

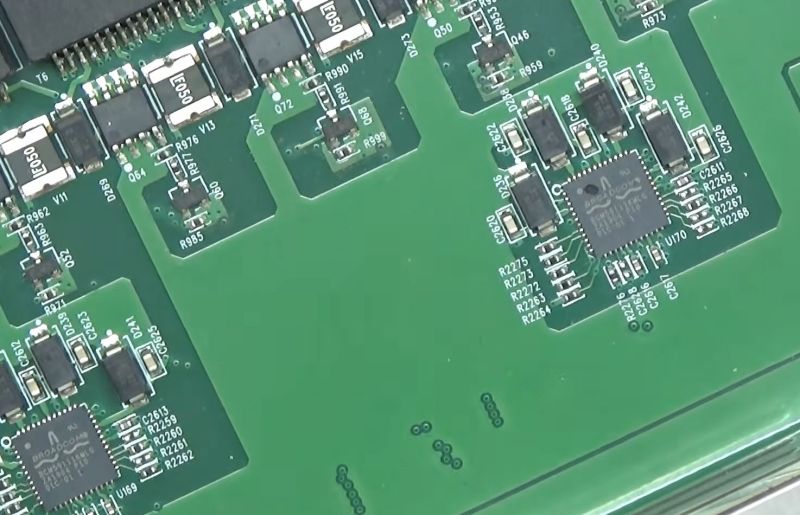
After saving a £300, 16-port Ubiquiti network switch from getting tossed into the trash, [Buy It Fix It] got the honor of trying to repair it. With four ports and their associated PoE function having some major issues it looked like it might take some debugging, but after taking the lid off, the cause seemed rather obvious.

One of the Broadcom BCM5911 controller chips had a rather suspicious chip of the plastic packaging missing, with additional probing of connected components showing that numerous MOSFETs and a diode having had their proverbial guts blown out and were shorted as well. Whatever happened to some connected Ethernet device would appear to have left a serious trail of damage that nearly wrecked the entire switch.

The biggest challenge here was probably to find a replacement for the Broadcom IC, as this isn’t an IC that stores like Digikey or Mouser stock any more. Fortunately it was still available for sale over at AliExpress for £1.84, with the usual caveat that it could be salvage, fake, a factory reject, etc. In this case it appears that it was a legit Broadcom IC, with the four affected ports springing back to life including powering a PoE camera.

With a total cost of about £5 plus the time invested it wasn’t a bad deal to save a pretty nice PoE switch with 16 Ethernet and 2 SFP ports.

An Open Heart Rate Monitor

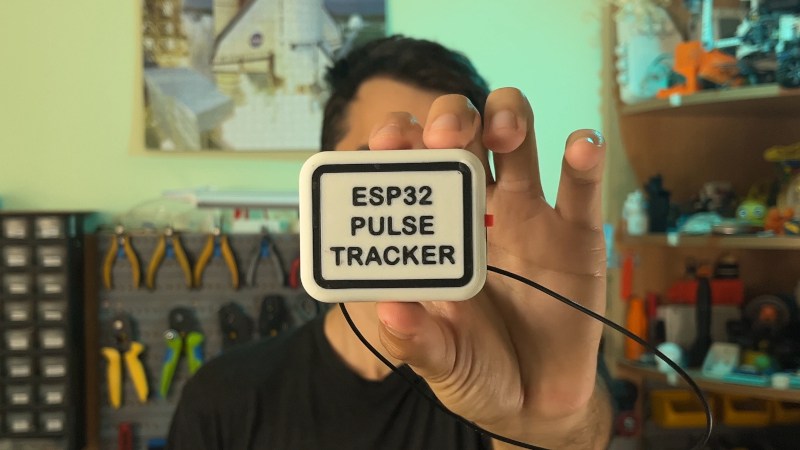
If you spend any time near a gym, you may be familiar with Bluetooth heart rate monitors — a small pack of electronics mounted on a strap round the chest which can relay heart rate data to an external logger or display. We’re pleased to see [Milos Rasic]’s project then, an open-source version of one of those monitors.

The heart rate capture is done by an AD8232, while the Bluetooth part is handled by a Seeed Studio XAIO ESP32 board. Power is provided by a single 3.7 V cell, with a boost converter to push that up to 5 V. The design omits a charge controller to keep things simple, so figuring out how to top off the cell is left as an exercise — no pun intended — for the user. Software is loaded through the Arduino IDE, which raises the possibility that other ESP32 CPUs could be supported with a bit of modification. All in all it’s a surprisingly simple project, and while the manufactured version is cheap enough it’s still very much worth having one that’s open source.

If you’d like to know more about his quest to develop open medical devices, check out the talk [Milos] gave on the intricacies of blood pressure monitoring earlier this year at Hackaday Europe.

Writing an ESP32 Bluetooth Printer Driver In Two Acts

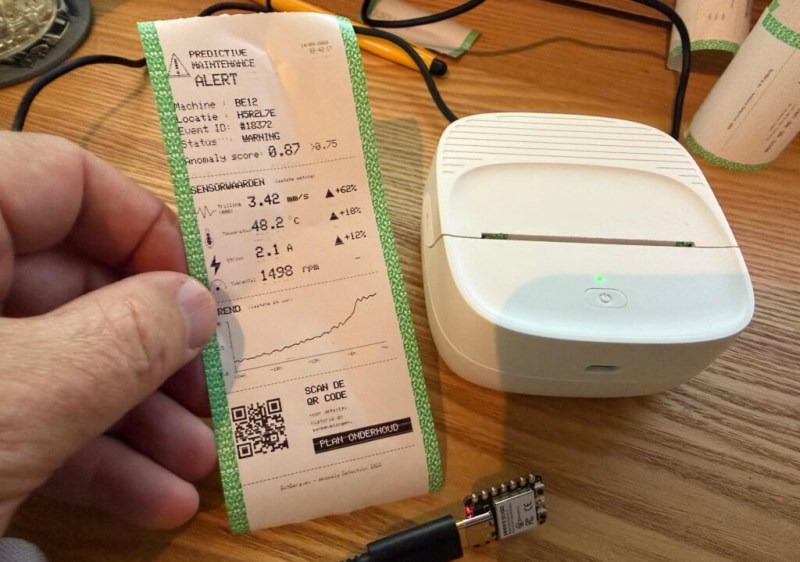
[Bas BotBerg] wanted to use a portable Bluetooth thermal printer to run off reports on sensor data collected by an ESP32-C3 microcontroller. But as is so often the case these days, the only official way to interface with the printer was through a proprietary smartphone application provided by the manufacturer. With no documentation on how the thing works, he set out to reverse engineer the printer’s communications protocol so he could control it from the MCU — but the route he took to get there was a bit different than what we usually see, and is an excellent case study for those who might have similar projects in mind.

The standard procedure for something like this, if it can be called that, is to use Android’s built-in debugging capability to log Bluetooth communications while running the manufacturer’s application. The resulting file can be fed into Wireshark, and with patience and some educated guesses, you can usually work out the various commands and values that get passed to the hardware.

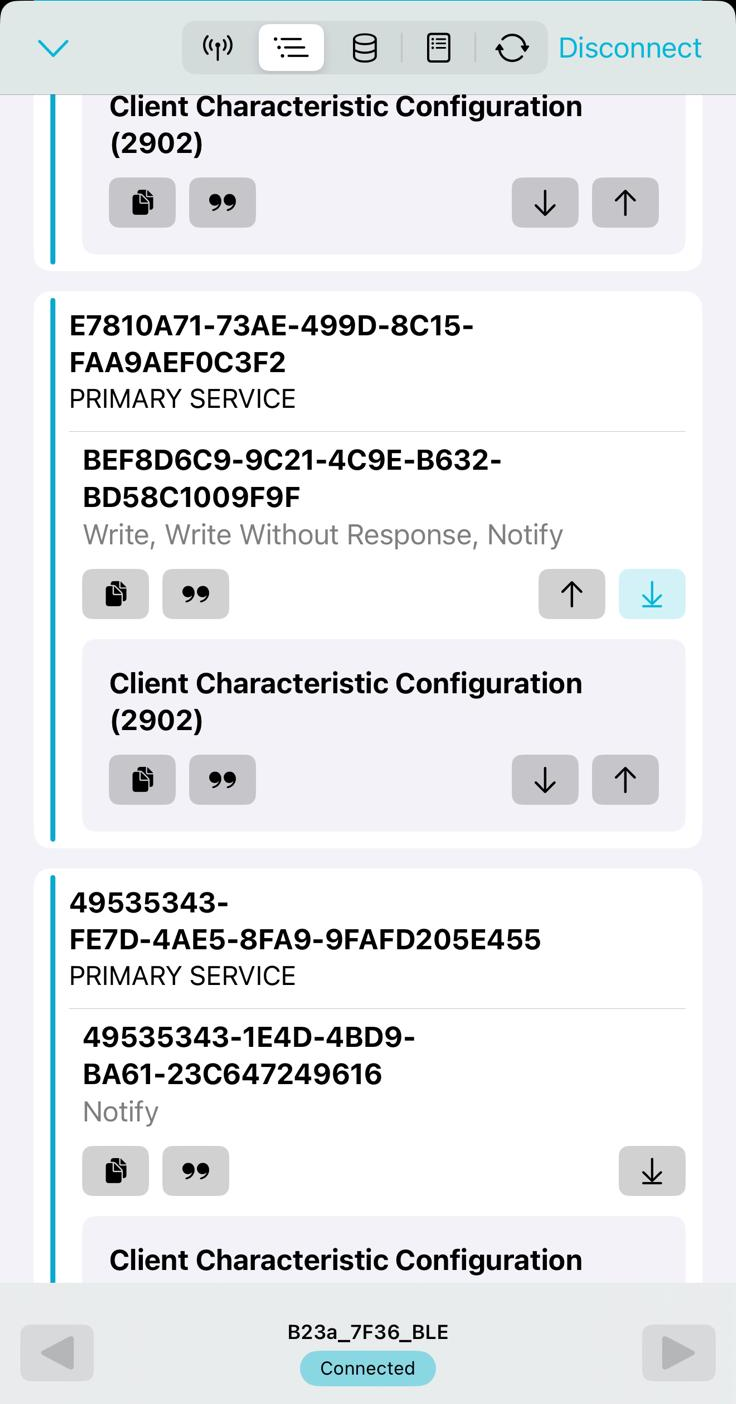
But in this case, [Bas BotBerg] ignored the manufacturer’s software and instead used an application that can query a device and list its Bluetooth Low Energy services and characteristics. Specifically, he looks for services that are marked as writable, and starts pushing data into them to see how the printer responds. For this he uses Python with the Bleak library, as it allows him to rapidly iterate and adapt his code. After a bit of poking and experimentation, he finds the proper incantation to get the printer’s motor to kick on an advance the paper — a critical first milestone that tells him he’s on the right path.

Once [Bas BotBerg] mapped out what data needed to be sent to what endpoints to operate the printer in Python, it was a relatively straightforward process to send those same payloads using C++ code on the ESP32. For extra style points he also brought in the Adafruit GFX library so he could produce icons and more easily format the output of the printer.

It doesn’t look like [Bas BotBerg] has released the code in this case (perhaps if we all ask nicely), but we’ve seen similar efforts to bring open source drivers to these cheap Bluetooth printers for the good of the community.

How High-Voltage Current Transformers Monitor the Grid

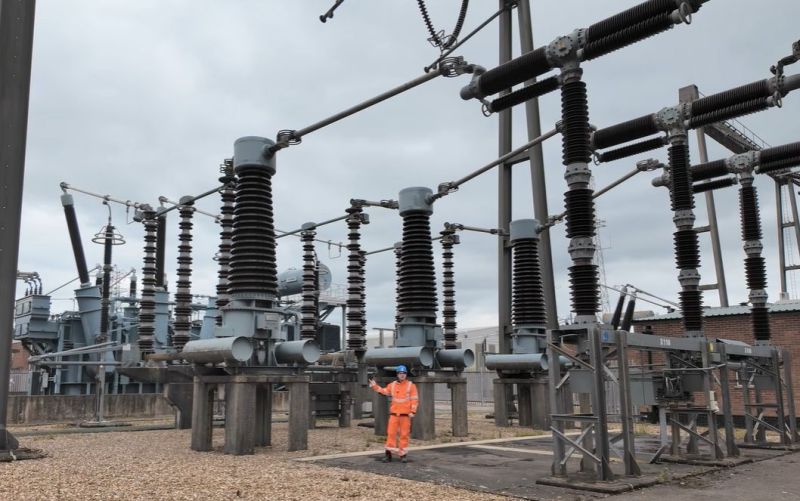
Being able to monitor voltages and currents is essential for many applications, with the national electrical grid being no exception. The obvious complication here is that the voltages and currents are massively higher than for those other applications, making safely monitoring these somewhat of an engineering challenge. The used systems for current monitoring are detailed by [Jordan Taylor], also known as [The Electric Brit], in an explainer of grid-level current transformers (CTs) and associated elements that help to provide galvanic isolation for safe current measurements.

Even if the basic principles remain the same, when you’re dealing with currents of 5 kA and more, the associated clearances and penalties for getting a detail wrong increasing correspondingly. The CTs help to implement over-current protection (OCP), over-voltage protection (OVP) as well as differential protection, which is useful to detect leakage and shorts, which could also happen inside the CT if the windings become damaged.

Any such failure condition can trigger a circuit breaker to be tripped, or other corrective measures to be taken. Incidentally this is also how it can be detected when someone is tapping off power in an illicit manner. As with all transformers they’re never perfect due to issues like core saturation, and thus performing accurate measurements and picking the right type of transformer is an art in itself, as explained in the video.

Ultimately CTs and the associated equipment are what makes an AC power grid responsive to any changes and with it into the reliable foundation of modern-day society.

CircuitPython Goes Turbo With Precompiled Functions

It would not be at all original to declare that Python is the new BASIC. Like BASIC, it has been the first programming language for a whole generation of coders, and its main advantage is that it’s quick and easy to write in. Like BASIC it is an interpreted language, and thus rather slow to execute.

Thus while CircuitPython can be very useful for beginners and quick projects, it hits the limitations of the hardware far sooner than it needs to — unless you can pre-compile critical parts of the code, which you now can, thanks to CircuitPython Turbo by [Mikey Sklar] with some help from Anthropic’s Claude LLM.

Now if that sounds a lot like MicroPython’s ‘Viper’ and machine-code compiler, that’s because it is. CircuitPython is a fork of MicroPython with some handy extras on Adafruit boards, but Viper wasn’t one of them until now. Before the Turbo version, CircuitPython only ran in interpreted mode.

Like MicroPython, using CircuitPython Turbo you can flag sections to run as ‘native’, where instructions are compiled but values stay as python objects, which gets you about a 3X speedup. A little more rewriting to declare your variables and pointers and you can use ‘viper’ mode, which can — depending on what you’re up to — result in a 20x to 70x speedup. In Adafruit’s documentation, they demonstrate a Metro RP2040 calculating the Mandelbrot set 3x faster in Native and 19.7 times faster with Viper than normal Python bytecode.

The one thing that we miss from BASIC that CircuitPython Turbo doesn’t give is inline assembly– though interestingly enough, that is in the upstream MicroPython implementation, so perhaps its day will come here too. Not every job is suited to the use of Python on microcontrollers, but we’ve seen it used for everything from e-bikes to a Winamp-inspired music player.

Dramatically Increasing Usable Closet Space

As any science YouTuber or first-year physics student is quick to point out, the universe is mostly empty space. Not just space itself, but the amount of “empty” space between nuclei and their electrons is also huge. Getting rid of this empty space results in all kinds of interesting phenomena like degenerate matter and black holes. But the concept can be extrapolated into our daily lives as well; many things are so filled with air that we can get a lot more usable storage space by compressing them down a little bit. [Super Valid Designs] took this concept to a coat closet, building one that can hold an impressive number of coats.

He started by looking at an existing closet, which could hold around 21 coats but only if someone used two hands to cram the coats into the space. After a trip to a store which sells rugs, he saw a much better design that lets all the rugs pivot like the pages on a book, and took this idea to his closet using a similar mechanism designed for storing large blueprints instead of rugs. The closet he built around this mechanism has two hinged doors which allow a person easy access to the coats, and when opened the blueprint hangers pivot out like a book, allowing the coats to not only be easily accessed without disrupting the other coats, but also allow them to be compressed down by the closet door for storage.

For comparison, the original closet could only hold 10 coats when restricted to single-hand operation and 21 when using both. The new closet design is smaller, and can hold 24 coats with a single hand and over 30 when using both, a dramatic improvement of closet efficiency. To top it off, a set of cupboards on top and bottom allow for storing shoes and hats as well, and there’s even a garage for a robotic vacuum cleaner. Surprisingly, we don’t see many closet optimization builds around here. The closest we can come is another traditionally small space, a college dorm.

Rusting an E-scooter (In a Good Way)

It is a classic Hackaday situation. You have an Egret GT E-scooter. It has a screen that shows the usual dash stats, but that led to an annoyance. You could accidentally enter firmware update mode and, from there, enter operational mode without the security PIN. [Ben] couldn’t let that stand, so he reverse-engineered the protocol and rewrote the firmware in Rust. As he put it, “… because I have to break… everything I own…” We get it.

The mobile app was useful for some basic info, since sniffing Bluetooth is fairly easy and analyzing mobile code is, more or less, straightforward. Analysis revealed some data that doesn’t show on the display and that several things are sent back to home base tagged with the scooter’s unique ID — another reason to gut the existing firmware.

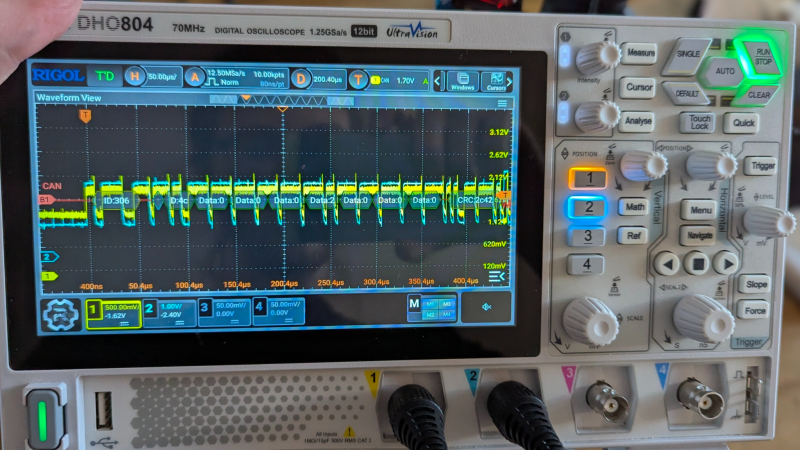
Internally, the scooter uses the CAN Bus, so out came the oscilloscope and a homebrew CAN decoder.  Surprisingly, the CAN bus is accessible on the USB-C port’s data pins. Officially, the port is only for charging phones, so you have to wonder what your phone makes of the alien signals on the data pins when it is charging.

Firmware updates actually come in at least three flavors: display, input panel, and main controller. Reverse engineering the firmware update process was crucial to installing the new firmware.

If you own a similar scooter, this post is a goldmine. If you don’t, it is still a very detailed breakdown of a reverse-engineering workflow, and you can apply many of the tools and techniques to your next project.

Of course, another option is to just keep the scooter and replace the brains. If you want to learn more about reverse engineering, there are literally dozens of Hackaday posts to help you get started.

Keeping Time on Tumbling Icosahedra

An angular, 3D-printed base holds two icosahedra with numerals on their faces. Each icosahedron has a zig-zagging path running through it, showing red gears inside.

Clocks are almost the ideal devices to inspire creativity in hackers — they have a simple, well-defined task, but there’s an almost unlimited number of ways to carry it out. [ekaggrat singh kalsi]’s OVODYO is a particularly intriguing approach, tumbling a pair of icosahedral counters to display the current time.

Each 3D-printed icosahedron has numerals sunk through each of its twelve sides, and is raised above the base of the clock on a brass support shaft. An inner drive shaft runs through the center of the support shaft and drives a set of beveled gears. These spin the outer shells around two axes, periodically cycling through all twelve faces. The pattern in which an icosahedron rotates means that only set of numerals appears upright at a time, making it easier to distinguish the time.

A split path around the icosahedra both lets them rotate around the support shaft and shows off the internal gearing. On the control side, an ATmega8 drives a pair of stepper motors with drv8833 motor drivers, using a hall effect sensor to detect each indicator’s position. Since the minutes dial only gives the time in five-minute intervals, it also drives an LED strip to indicate the exact minute.

[ekaggrat] has a long history of creative clock designs, from this dynamic chain-link sculpture to a hair-tie clock or a mechanical seven-segment display.

Whip-Cracking Machine Reliably Breaks the Sound Barrier

On the left side of the image, a mannequin holds a blade of grass in its mouth. A trail of dust follows a blurred green trail past the piece of grass. A man in the background is pointing a wooden device toward the mannequin.

We tend to think of breaking the sound barrier as a comparatively modern accomplishment, but on a smaller scale, cattle herders have been breaking it for centuries: the cracking sound of the tip of a bullwhip snapping comes from a small-scale sonic boom. Reliably getting a crack out of a whip takes skill and practice, though, which is why [Craig Turner] built a whip-cracking machine.

The first step was to build the whip itself, which was surprisingly complicated. Bullwhips taper down toward the end of the whip. As the whip uncurls during a crack, momentum passes down the whip; since the whip becomes continually narrower and lighter, conservation of momentum means that different stretches of the whip must move progressively faster. To get this effect, [Craig] joined together a series of increasingly thin and light ropes. The heavy end of the whip terminated in an eyelet connected to a length of elastic shock cord. Stretching the whip back on the shock cord and releasing it whipped it around, resulting in a fairly reliable crack.

For greater convenience, [Craig] built this into a launcher mechanism, with the elastic cord wrapped around the end of the launcher, an electrical-conduit guide for the whip, and a spring-loaded trigger mechanism to release it. This worked even better than expected, getting a reliable crack every time. The tip of the whip could slice leaves, tear open aluminium cans, put out candle flames, knock the cap off a bottle without tipping it over, and reliably hit small targets on the first shot.

As [Craig] mentioned, this setup would make it much easier to study the cracking effect with a schlieren imaging setup.

Spin FV-1 Emulator Simplifies Sound Pedal Development

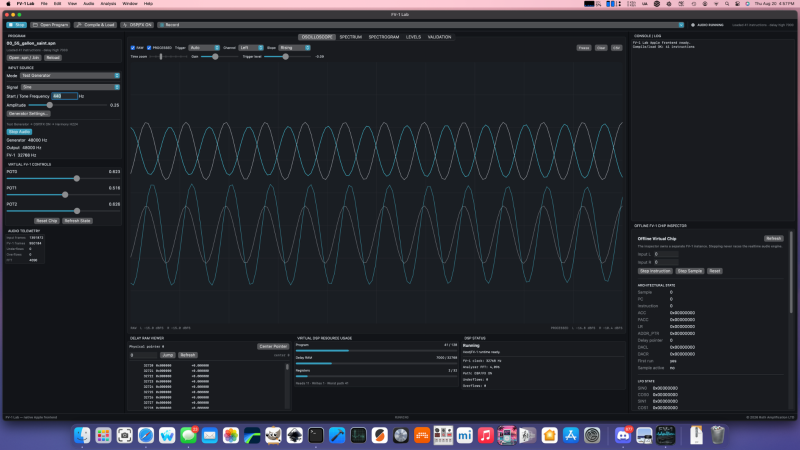
If you’ve never heard of the Spin Semiconductors FP-1 digital signal processor chip, don’t worry– that just means you haven’t been deep into guitar petals and audio effects hardware lately. [adamjvr], a.k.a. [avr] has, and he’s gone to the point of creating a PC-based emulator of this sound chip to simplify development.

If you don’t see the utility, stop and think about the development cycle without a simulation like this: you program, you flash to a board, and you test there. Not only does the ‘flash to the board’ step add time and friction, you do also have a limited number of flashes on the board’s memory. With an emulator on your PC, the workflow tightens to ‘code, test’ and you don’t flash the board until the simulated DSP is doing the sounds you want it to.

As for the FV-1 itself, it’s an interesting little chip in that it’s quite a full-featured DSP– rather, it’s small instruction set is focused entirely on audio effects. If you’re into that world– be it guitar pedals or otherwise– you may find this project very useful. There are releases for Linux, MacOS and Windows, and it’s all open-source on GitHub, under the Mozilla Public License. It’s not the most common choice, but we’re hardly going to complain about licenses to anyone willing to share their hard work.

If you like the idea of testing your work before you go to the bench, we’ve seen software that offer the same functionality for Arduino projects, as well as other AVR and PIC micros. It’s been a while since we featured a programmable guitar pedal, so we hope this tool enables others to rock out.

Making an Air-Powered Circular Saw with LEGO

The all-LEGO version barely cuts paper. (Credit: Jamie's Brick Jams, YouTube)
The all-LEGO version barely cuts paper. (Credit: Jamie’s Brick Jams, YouTube)

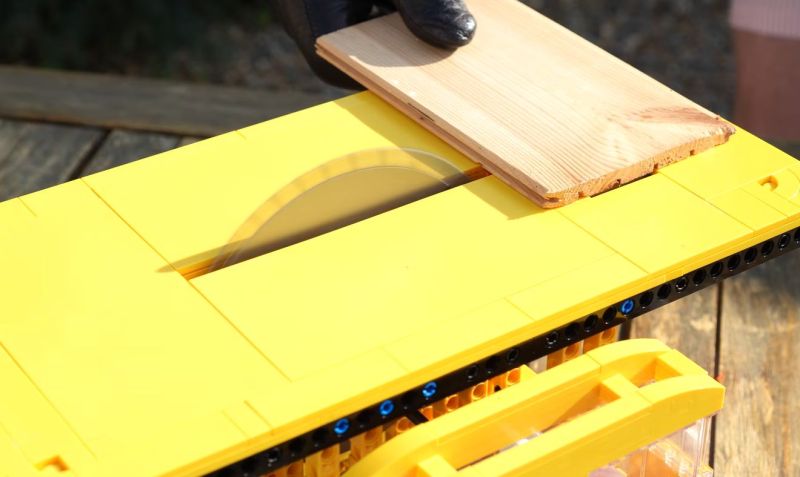
Although building a table saw out of LEGO is probably not the first thing that comes to mind when you look at those colorful bits of plastic, [Jamie] has been on a bit of a search for more applications of his LEGO-based air-powered motors. Naturally this led to the idea of doing something useful with it, like making a table saw you can actually use for real wood.

Starting off with a basic prototype using only regular LEGO pieces to get the mechanism figured out, [Jamie] then builds this up into said air-powered table saw featuring an actual metal blade. Suffice it to say that this isn’t something that you want your children to do with their LEGO while unsupervised.

The star of the show is of course the air-powered turbine that spins the blade. This is something that [Jamie] has been working on for a while, going through a number of prototypes to figure out a 3D printed geometry for the turbine blade that helps to convert as much of the high-pressure air into rotation.

Along the way it was also discovered that 3D printing saw blades is pretty hard, probably due to the lack of a sharp edge. This is definitely an area where it’s hard to beat a real table saw blade, with the added caveat that anything that’s good at cutting up boards of wood and sausages will just as happy slice through careless primate fingers.

In terms of safety features, the air supply is cut automatically with a sort of dead-man switch that requires you to keep one hand on it while using the final table saw design. There also an auto-feeding system added that tries to guide the board into the saw, but this turned out to be finicky. Suffice it to say that an air compressor and a handful of non-LEGO-approved components created a pretty convincing table saw.

Big Infinity Mirror Clock Invites You To Gaze Deeply

[Andy Huot] has a fantastic-looking infinity mirror digital clock that really raises the bar. It uses high quality components, smart use of RGB LED animations, and a clever “stacked diffuser” vertical design to the 7-segment display elements that really enhances the infinity mirror effect. It needs to be seen in action, so check it out.

The end result is expressly portal-like, with the smooth animations of the LEDs really playing into the effect. The size helps, too. It’s 24 inches in diameter, giving it considerable presence.

The stacked diffuser design for each display element really enhances the effect.

A basic infinity mirror design consists of lit elements sandwiched between a reflective back surface and a partially-reflective, partially-transmissive top cover. That same basic principle is used here, but with great care given to ensure nothing so much as a fingerprint spoils the illusion. For example, the top cover is a disk of acrylic with a 90% reflective film affixed to the inside surface. That’s easy enough to DIY with some car tint, but [Andy] found that for the very best results it was worth having high-quality film professionally applied.

We like the use of 3D-printed custom jigs for soldering the segments of RGB LED strips, and holding the pre-measured wires in place with some putty is a great way to keep them in place while working. In case you’re wondering, the mirrored acrylic making up the back wall has holes in it for mounting each segment’s LED strip in a holder, and running the wires to the rear.

The video (embedded below) documents every step of the assembly, and it’s a serious build. While the design files for the 3D-printed parts are not free, there’s certainly enough detail for an enterprising hacker to replicate the design in their own way.

This Mac Is Open Source Hardware

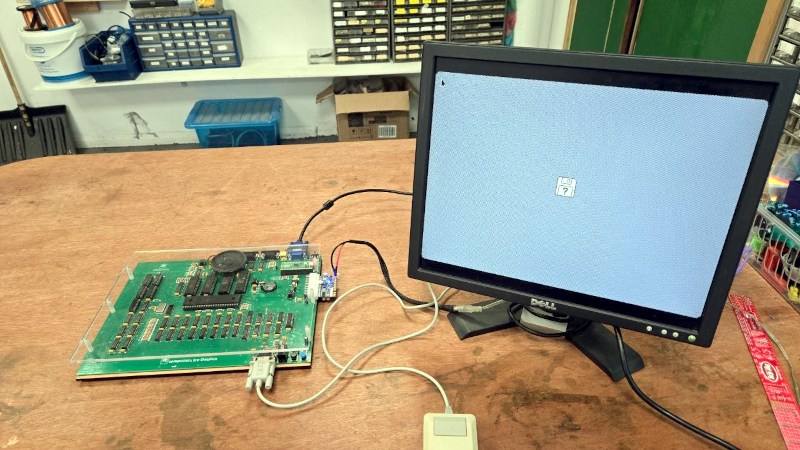
Apple hardware has always been proprietary, sometimes to an extreme. But that’s not to say that it’s impossible to make something that does the same job, which is what [DosFox1] appears to have done with the OSHintosh. It’s an open source PCB that implements a Mac 512k. Is it a 68k Hackintosh? You decide.

While it boots into a classic Mac OS image, it’s not quite a Mac. For a start, there are no disks, and no SCSI. Instead it boots from a disk held in ROM, which we guess will be a lot faster than the floppy from back in the day. They’ve even managed to do it on a 2-layer board, which means that despite its size, it shouldn’t be too expensive to have made.

We’re not sure quite what the legality of dumping a Mac ROM image to the ROM on this board would be, but assume for a moment that you own a copy in a defunct original Mac. This board can’t yet replace the original due to the disk issue, but given that original Macs are now long in the tooth, a modern replacement for those who must have hardware rather than an emulator sounds like a good idea. Perhaps for some people it will join the FPGA Amiga.

All The Best Computers Boot To… Python?

Among all the machines of the 8-bit home computer era which booted straight to a BASIC prompt, there were a very few that went their own way with another language. The Jupiter Ace springs immediately to mind, a diminutive Z80-based machine similar to Sinclair’s ZX81, which booted to FORTH.

The Ace wasn’t a commercial success, but what would have happened had it booted to a more accessible language? It’s a question [jordanhubbard] appears to be trying to answer, with an OS that boots to a Python interpreter.. The OS is Python, and everything on top of it uses the interpreter. Better still, it has a GUI mode.

The OS boots on an x86-64 platform or in QEMU, and appears to have been created using an LLM. There are two build options for the GUI version or the interpreter version. It provides a set of UNIX-like commands for interacting with the OS and disk, something which brings back memories of disk-based systems back in the BASIC days. We’re surprised to see no screenshots of the GUI in action though, an omission he’d do well to correct, we think.

It’s fair to say that in 2026 this is more a bit of fun than a serious OS contender, but maybe someone will run with it. It has competition too, not so long ago we featured a similar OS that runs a BASIC interpreter.

❌