Reading view

There are new articles available, click to refresh the page.

Smoked Turkey Breast on a Weber Kettle

Smoked Turkey Breast on a Weber Kettle with Pop Smoke

Introduction

Turkey isn't just for Thanksgiving. A smoked turkey breast is one of the easiest ways to feed your family a flavorful, juicy meal without committing to a full bird. Cooking it on a Weber Kettle using indirect heat gives you that classic wood-fired flavor while keeping the meat incredibly tender.

For this cook, I kept it simple. A generous coating of Burn Pit BBQ Pop Smoke adds the perfect balance of sweet, savory, and smoky flavor that complements turkey without overpowering it. Whether you're making sandwiches, meal prepping for the week, or serving a backyard dinner, this recipe is one you'll come back to all year long.


Smoked Turkey Breast on a Weber Kettle

Prep Time: 15 minutes
Cook Time: 2–3 hours
Smoker Temp: 250–275°F
Target Internal Temperature: 160°F (carryover cooking brings it to 165°F)
Servings: 6–8

Ingredients

  • 1 boneless turkey breast (3–5 pounds)
  • 2 tablespoons olive oil or melted butter
  • Burn Pit BBQ Pop Smoke seasoning
  • Apple or cherry wood chunks (optional but recommended)

Instructions

Step 1: Prepare the Turkey

Pat the turkey breast dry with paper towels.

Lightly coat with olive oil or melted butter to help the seasoning stick.

Generously season all sides with Burn Pit BBQ Pop Smoke. Let it sit while you prepare the grill (or refrigerate for a few hours if you have the time).


Step 2: Set Up the Weber Kettle

Arrange your charcoal for indirect cooking by placing the coals on one side of the grill.

Add one or two chunks of apple or cherry wood to the hot coals.

Stabilize your grill between 250–275°F.

Place a drip pan filled with a little water beneath where the turkey will cook.


Step 3: Smoke the Turkey

Place the turkey breast on the cool side of the grill directly over the drip pan.

Close the lid with the top vent positioned over the turkey.

Maintain your temperature between 250–275°F throughout the cook.

Cook until the thickest part of the breast reaches 160°F, approximately 2–3 hours, depending on size.


Step 4: Rest

Remove the turkey from the grill and loosely tent with foil.

Allow it to rest for 15–20 minutes before slicing.

Carryover cooking will finish bringing the turkey to the USDA-recommended 165°F while keeping the meat juicy.


Serving Ideas

This smoked turkey is incredibly versatile:

  • Slice for sandwiches
  • Serve with mashed potatoes and vegetables
  • Chop into salads
  • Dice for wraps
  • Add to soups or casseroles
  • Make incredible leftover turkey melts

Beginner FAQ

What temperature should I smoke turkey breast?

A grill temperature of 250–275°F gives you the best combination of smoke flavor, tender meat, and reasonable cook time.


What internal temperature is turkey done?

Remove the turkey breast at 160°F in the thickest part.

After resting, carryover cooking will bring it to the safe serving temperature of 165°F.


How long does it take to smoke a turkey breast?

Plan on approximately:

  • 3 lb turkey breast: 2 hours
  • 4 lb turkey breast: 2½ hours
  • 5 lb turkey breast: 3 hours

Always cook to internal temperature rather than time.


Do I need to brine it?

Not necessarily.

Many store-bought turkey breasts are already injected with a salt solution. If yours isn't, a simple overnight brine can add extra moisture, but this recipe produces excellent results without one.


What wood is best for turkey?

Turkey pairs wonderfully with mild smoking woods:

  • Apple
  • Cherry
  • Pecan
  • Maple

Avoid using too much mesquite or hickory, as they can overpower the delicate flavor of the meat.


Should I wrap the turkey?

No.

Unlike brisket or pork shoulder, turkey breast cooks relatively quickly and doesn't benefit from wrapping. Leaving it uncovered allows the smoke to build a beautiful color and flavorful bark.


Can I cook this on another grill?

Absolutely.

This recipe works on:

  • Pellet grills
  • Offset smokers
  • Kamado grills
  • Gas grills set up for indirect heat
  • Charcoal smokers

Simply maintain a cooking temperature between 250–275°F and cook until the internal temperature reaches 160°F.


Burn Pit BBQ Tip

Pop Smoke was made for more than pork. Its sweet, savory profile is outstanding on poultry, creating a beautifully seasoned turkey with just the right amount of smoke and flavor. If you've only used it on ribs or pork shoulder, give it a try on turkey—you might find your new favorite way to use it.


Final Thoughts

Turkey doesn't have to be reserved for the holidays. A Weber Kettle, a little charcoal, and a bottle of Burn Pit BBQ Pop Smoke are all you need to turn an ordinary turkey breast into a backyard barbecue favorite. Whether you're feeding the family on a Sunday afternoon or prepping lunches for the week, this recipe delivers juicy, smoky slices every time.

Fire up the grill, grab a bottle of Pop Smoke, and show everyone that turkey deserves a place in your barbecue rotation.

Citrus Shrimp with Coconut Rice

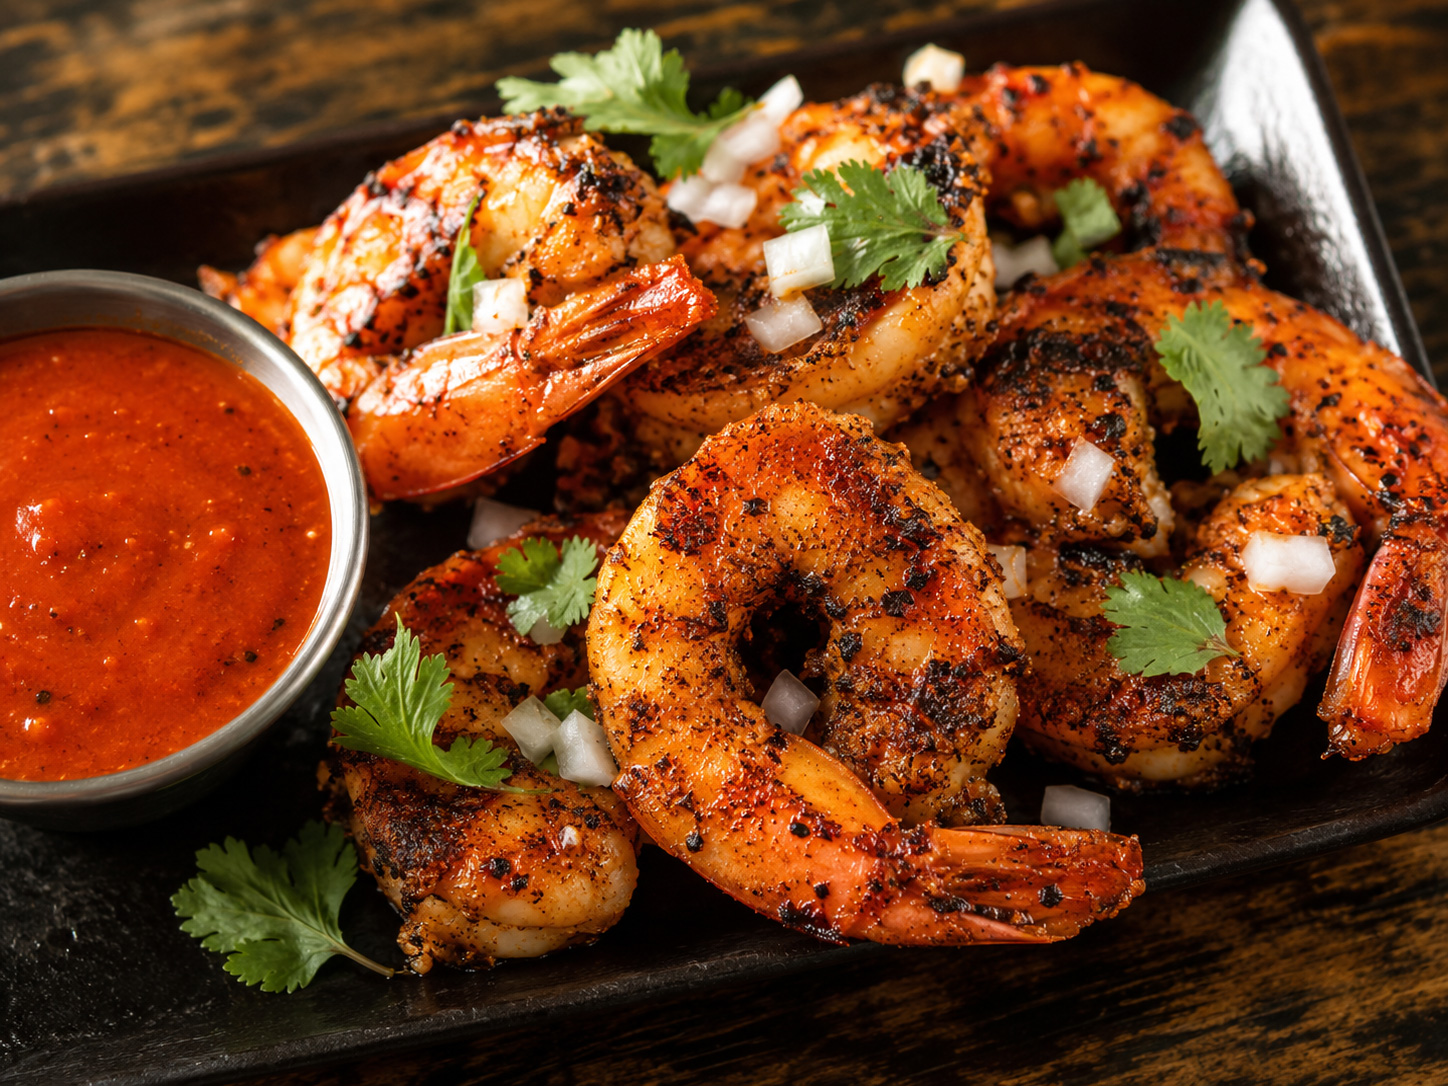
Bright citrus, buttery garlic, and tender grilled shrimp make this one seriously flavorful plate. Served over coconut rice, it’s an easy tropical-inspired dinner that brings a little sunshine to the table, no plane ticket required.

Peach Meets Grill: Cinnamon-Grilled Peaches with Bourbon Glaze

Photo Credit: Steven Raichlen


By Steven Raichlen

Some years ago, while researching Japanese barbecue, I found myself at a produce market in Tokyo. There, amid the Yubari king melons and giant Amaou strawberries, was a $70 peach.

Flabbergasted, I asked the vendor how a single peach could cost $70. He explained the philosophical differences between Japanese and American agriculture.

“An American farmer looks at a peach orchard and thinks about how many tons of peaches he will harvest,” the vendor said. “A Japanese farmer looks at his orchard and thinks that one tree will produce peaches far superior to all the rest. And on that tree, one branch will produce a peach so extraordinary, connoisseurs will line up to pay $70 for the privilege of buying it.” (Sadly, I was not among them.)

Wildfire Banner

Why Grill Peaches?

I’m not going to tell you about a $70 peach this week, but I will tell you about a peach dish that tastes like a million bucks. It involves a spice, an herb, and a piece of cooking equipment near and dear to our hearts. You guessed it: the grill.

The spice in question is cinnamon—more precisely, the rolled bark of the tree that gives us ground cinnamon: the cinnamon stick.

cinnamon grilled peaches

Photo Credit: Steven Raichlen


The herb is celebrated across Planet Barbecue for its vibrant refreshing flavor: fresh mint.

To put them together, you make mini kebabs with peach quarters and mint, using cinnamon sticks as skewers.

cinnamon grilled peaches

Photo Credit: Steven Raichlen


The Bourbon-Brown Sugar “B3” Glaze

Like all good barbecue, these grilled peach kebabs come with a sauce—in this case, my “B3” sauce. The three Bs are bourbon, brown sugar, and butter, with a whisper of heavy cream to hold them together.

Grill over a hot fire to caramelize the outside of the peaches, leaving the inside juicy and raw.

The crowning touch? Serve the grilled peaches over ice cream.

Summer never tasted so good!

Cinnamon-grilled peaches with bourbon glaze and vanilla ice cream

Photo Credit: Steven Raichlen


How to Make Cinnamon-Grilled Peaches

Recipe

Cinnamon-Grilled Peaches with Bourbon Glaze

Recipe by Steven Raichlen

These fresh peach kebabs use cinnamon sticks as skewers, with mint
leaves tucked between the fruit. As the cinnamon sticks char, the
heat releases their aromatic oils. The peaches are finished with a
creamy bourbon, brown sugar, and butter glaze.

Method
Direct grilling
Serves
4

Ingredients

  • 4 large ripe freestone peaches
  • 1 bunch large fresh mint leaves
  • 8 cinnamon sticks

For the B3 Glaze

  • 1/4 cup bourbon
  • 1/4 cup brown sugar
  • 1/4 cup (4 tablespoons) unsalted butter
  • 2 tablespoons heavy cream
  • 1 pint vanilla ice cream, for serving

You’ll also need: Bamboo skewer and martini glasses

Instructions

  1. Cut each peach in half along the crease, running your knife in a
    circular motion around the peach and cutting to the pit. Twist the
    halves in opposite directions to separate them. Using a spoon, pry
    out and discard the pit. Cut each peach half in half.
  2. Using a bamboo skewer, poke a starter hole through the middle of
    each peach quarter. Skewer 2 quarters on each cinnamon stick,
    placing a fresh mint leaf between them.
  3. Make the B3 glaze: Combine the bourbon, brown sugar, butter, and
    heavy cream in a saucepan and bring to a boil over high heat. Let
    the glaze boil until thick and syrupy, about 3 minutes.
  4. Set up the grill for direct grilling and heat to high. Brush and
    oil the grill grate.
  5. Arrange the peaches on the hot grate and grill until nicely
    browned, 3 to 4 minutes per side, basting frequently with the
    bourbon glaze.
  6. Spoon the ice cream into martini glasses. Place 2 peach skewers in
    each glass and spoon the remaining bourbon glaze on top. Garnish
    each with a sprig of mint and serve at once.

Frequently Asked Questions

What kind of peaches are best for grilling?

Use large, ripe freestone peaches. Freestone peaches are easier to separate from the pit, making them simpler to quarter and thread onto the cinnamon sticks.

Do you need to peel peaches before grilling them?

No. Leave the skins on the peaches. The skins help the peach quarters hold their shape on the grill and make them easier to handle.

How long do peaches take to grill?

Grill the peach skewers over high direct heat for 3 to 4 minutes per side. The peaches should be lightly browned and caramelized on the outside while remaining juicy inside.

Wildfire Outdoor Living is an Arizona-based company specializing in high-performance gas grills and premium outdoor kitchen solutions. Wildfire brings a commitment to cutting-edge technology and industry-leading innovation. Their 304 stainless steel design and illuminated LED knobs, cast stainless steel burners, and laser-cut stainless steel cooking grates create products that will provide peak performance. They also allow you to customize your outdoor kitchen with designer finish knobs and handles to meet the growing demand for designer outdoor kitchens.

Plan your next cook with our full recipe collection—weeknight grills, weekend projects, and special-occasion feasts.

Get Steven’s weekly grilling tips, seasonal recipes, and live-fire ideas in your inbox. Join our Up in Smoke newsletter. Sign up and get a FREE PDF of Steven Raichlen's Best Ribs Recipes Ebook.

Preorder Man On Fire — A Steven Raichlen Memoir. And get some really cool rewards!

Looking for more summer grilling inspiration? Check out our Summer Grilling Guide.

The post Peach Meets Grill: Cinnamon-Grilled Peaches with Bourbon Glaze appeared first on Barbecuebible.com.

31+ Traeger Thanksgiving Recipes

Putting the Traeger to work on Thanksgiving has become one of my favorite ways to do the holiday. The kitchen stays clean, you’re not hovering over the stove all day, and everything just tastes better with a little smoke. This round-up covers a full Thanksgiving spread — smoked turkey, glazed ham, sides like cornbread and […]

The post 31+ Traeger Thanksgiving Recipes appeared first on Simply Meat Smoking.

How to Grill the Perfect Steak: 7 Steps to Tender, Juicy, Smoky Beefy Nirvana

Steak! A five-letter word that spells a mountain of pleasure. For some of us, it’s the ultimate luxury; for others, a weeknight dinner. It’s so easy to grill, even a first-timer can earn bragging rights, yet you can spend a lifetime perfecting the fine points. Steak is the one dish everyone should know how to grill.

Too often, people make simple, avoidable mistakes: Undercooking. Overcooking. Flipping too seldom or too often. Leaving the beef out to warm to room temperature (especially dangerous in summertime heat). Serving it hot off the grill or resting it so long, the steak is cold by the time you cut into it.

Here’s the ultimate guide to achieving the perfect steak every time.

Steak Cooking at a Glance

  • Best Steaks: Ribeye, NY Strip, Porterhouse, Filet Mignon, Skirt, Flank, Hanger
  • Seasoning: Coarse salt and freshly cracked black pepper
  • Doneness (Med-Rare): 130°F to 135°∘F
  • Resting: 1 to 2 minutes on a wire rack
  • Best Method: Direct grilling for steaks up to 1-1/2 inches thick; reverse searing link for 3- to 4-inch thick monsters

Step 1: Start with the Right Steak

Five factors determine the excellence of your steak: cattle breed, feed, aging, grade, and cut.

  • Prime vs. Choice: The USDA grades beef on marbling (intramuscular fat). Only 2% of beef qualifies as Prime—highly flavorful, tender, and luscious. Choice is what you find at most supermarkets—less rich, but still very tasty.
  • Wagyu vs. Angus: Wagyu is renowned for its hyper-generous marbling; an A-5 Japanese Wagyu looks like white lace on red cloth. Angus delivers a bold, robust, classic beefy flavor enjoyed across North America.

    D'Artagnan American Wagyu beef

  • Grain-Fed vs. Grass-Fed: Corn-fed beef produces rich, buttery, meaty steaks. Grass-fed beef is leaner with a distinctive, almost herbaceous flavor. The ideal compromise is beef raised on grass, then finished with grain.
  • Dry-Aged vs. Wet: Dry-aged beef, hung unwrapped in climate-controlled rooms for 28 to 36 days, loses moisture, concentrating the beefy flavor and creating rich umami notes. Wet-aged beef matures in vacuum-sealed plastic; it is faster, cheaper, and tasty enough, but lacks the rich, concentrated flavor of dry-aged beef.

The Four Steak Categories

  1. The Noble Steaks: Upper steer cuts (filet mignon, ribeye, strip, porterhouse) that are intrinsically tender and rich.

    Grill Marks!

  2. The Belly Steaks: Undercarriage cuts (skirt, flank, hanger). Intensely flavorful but stringy; slice thinly against the grain to ensure tenderness.
  3. The Tough Steaks: Round and chuck. Slice paper-thin for cheesesteaks or chop fine for carne asada.

  4. The Cult Steaks: Unique cuts like tri-tip, picanha (featuring a luscious fat cap), and flatiron.

Step 2: Keep Seasoning Simple and Strategic

For premium beef, skip heavy, muddying marinades. Stick to coarse sea salt or kosher salt and freshly cracked black pepper. Season your steak early—about 45 to 60 minutes before grilling. This allows the salt to draw out moisture, dissolve, and reabsorb back into the fibers, seasoning the meat deeply. If you’re short on time, season immediately before the steak hits the grates.

Do not let steaks warm to room temperature beforehand. The difference in cooking time is negligible, and it is simply not worth the food safety risk. Keep them cold until they go on the grill.

Step 3: Set Up Your Grill for Two-Zone Cooking (Wood Smoke Optional, But Desired)

Arrange your coals or burners so you have a screaming-hot direct zone for searing and a cooler, zone for cooking. Control the cooking by moving the steak back and forth between the hot and less hot zone. Add wood chunks or chips (like oak, hickory, or pecan) directly to your coals or place in your gas grill’s smoker box. A quick blast of wood smoke during grilling makes a good steak great and a great steak unforgettable.

Step 4: Sear Hot and Flip Frequently

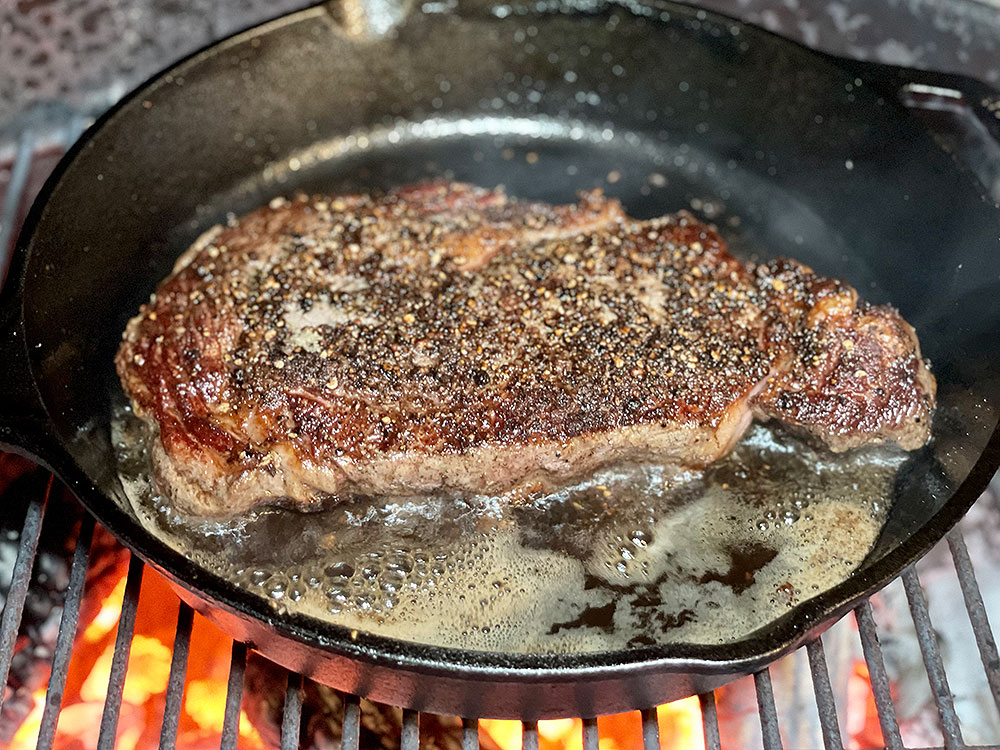
Forget the old myth of flipping your steak only once to get crosshatch grill marks. (Mea culpa—I used to recommend this in my earlier books.) I’ve come to see that flipping your steak often—every 20 to 30 seconds—cooks the meat more evenly and helps build a darker, richer crust. Focus on the crust and flip often.

Reverse searing steaks

Step 5: Master the Reverse Sear

  1. Place your seasoned steak on the cooler, indirect side of your grill (225°F to 250°F).
  2. Indirect grill (with grill lid down) to heat the meat to an internal temperature about 20°F below your target doneness (for example, to 110°F for a medium-rare steak)
  3. Move the steak directly over the high-heat, searing for 1 to 2 minutes per side to build a sizzling dark crust and internal temperature of 130°F.
The Steak Doneness Guide
Doneness Description Internal Temperature Poke Test Feel
Rare Warm red interior 120°F to 125°F Soft and squishy
Medium-Rare Hot red to dark pink interior 130°F to 135°F Yielding
Medium Pink interior 140°F to 145°F Gently yielding
Medium-Well Grayish pink interior 150°F to 155°F Firm
Well Done Gray interior 160°F+ Hard and springy

Note: Measure internal temperature using an instant-read thermometer inserted horizontally through the side of the steak. For the poke test, press the top of the steak with your forefinger. The amount of resistance will tell you the doneness. Use a thermometer for thicker steaks; the poke test for thin steaks like skirt.

Step 6: Give It a Rest

A steak served “hot off the grill” sounds romantic, but resting your steak on a wire rack over a sheet pan for a minute or two will give you a tenderer, juicier steak. (Resting relaxes the meat, allowing the juices to redistribute. The wire rack keep the bottom from getting soggy.) But over-resting results in a lukewarm or even cold steak, which does the meat an injustice.

Step 7: Carve It Right

It has become fashionable, if not de rigueur, for steakhouses to pre-slice your steak before serving. Don’t. This may look dramatic, but a pre-sliced steak gets cold and dry very quickly. Serve your steak whole and let the diner slice it him- or herself.

Not like this!

Note: the one exception here are belly steaks, like skirt and flank, which should be thinly sliced across the grain to shorten the tough meat fibers.

Finally, don’t forget to anoint

A great steak needs little more than salt and pepper by way of a seasoning, but a pat of compound butter link or drizzle of melted butter or extra virgin olive oil makes a great steak even better

Great Steak Recipes to Try Next

More Steak Recipes »

Frequently Asked Questions

What is the best way to cook steak on the grill?

For thick cuts, use the reverse sear method. For thinner cuts, cook directly over high heat, flipping frequently.

How long should you grill steak?

Figure on 2 to 2-1/2 minutes per side for thin steaks, about 1/2 inch thick; 3 to 4 minutes per side for 1-inch steaks; and about 5 minutes per side for 1-1/2-inch steaks. When using the reverse sear method for a really thick steak, figure on 40 to 60 minutes for the low-heat indirect grilling, followed by 2 to 3 minutes per side for the high-heat sear.

What temperature should steak be cooked to?

Medium-rare, 130°F to 135°F, is ideal for many steaks. Use an instant-read thermometer inserted into the side of the steak to verify doneness. For thinner steaks, like skirt and flank, use the poke test: press the meat with your forefinger to feel the resistance. Pull the steak a few degrees early, as carryover cooking will raise the temperature during resting.

How do you make steak tender on the grill?

Select well-marbled cuts, season like you mean it, do not overcook, and rest the meat for a minute or two before serving.

Should you grill steak with the lid open or closed?

Keep the lid open when searing thin steaks over high heat. Keep the lid closed during indirect cooking or when finishing thick steaks.

Want to go deeper on the craft? Explore our grilling techniques and how-to guides for ribs, steak, chicken, seafood, and more.

Get Steven’s weekly grilling tips, seasonal recipes, and live-fire ideas in your inbox. Join our Up in Smoke newsletter. Sign up and get a FREE PDF of Steven Raichlen's Best Ribs Recipes Ebook.

Preorder Man On Fire — A Steven Raichlen Memoir. And get some really cool rewards!

Looking for more summer grilling inspiration? Check out our Summer Grilling Guide.

The post How to Grill the Perfect Steak: 7 Steps to Tender, Juicy, Smoky Beefy Nirvana appeared first on Barbecuebible.com.

Why Patience Is the Secret Ingredient in Great BBQ

People often describe great BBQ by its smoky flavor, but taste is only part of what makes it memorable. The texture of slow-smoked meat plays an equally important role. A tender slice of brisket, perfectly pulled pork, or ribs with just the right amount of bite all require time, patience, and careful attention throughout the cooking process. Those details may not always be visible, but they’re what separate an ordinary meal from one that’s worth talking about long after the last bite.

Low and Slow Is More Than a Saying

The phrase “low and slow” isn’t just a barbecue tradition. It’s a cooking method that gives tougher cuts of meat the time they need to become tender. As the meat slowly cooks, connective tissues gradually break down, creating the juicy texture that barbecue is known for.

Trying to rush that process can leave meat dry or chewy, which is why patience remains one of the most important ingredients in authentic barbecue.

Every Cut Cooks a Little Differently

Not all smoked meats respond to heat in the same way. Brisket contains plenty of connective tissue that softens over several hours, while pork shoulder develops its signature pull-apart texture through a slightly different process. Ribs require their own balance, becoming tender without losing the structure that gives each bite its satisfying texture.

Understanding how each cut behaves during cooking allows pitmasters to bring out its best qualities instead of treating every piece of meat the same.

Resting Matters More Than Most People Realize

Once the meat comes off the smoker, the cooking process isn’t quite finished. Allowing it to rest gives the juices time to redistribute throughout the meat instead of running out with the first slice. That extra patience helps preserve moisture while creating a richer, more satisfying bite.

It’s one of those small steps that often makes a noticeable difference on the plate, especially when preparing exceptional BBQ.

The Details Make Every Meal Better

Great barbecue isn’t the result of a single technique. It comes from dozens of small decisions made throughout the cooking process, from selecting the right cut of meat to monitoring temperature, smoke, and timing. Those details may happen behind the scenes, but they’re what create the flavor and texture people remember.

Experience Barbecue Crafted With Care at Code 1 BBQ

Whether you’re stopping in for smoked brisket, ribs, pulled pork, or another favorite, Code 1 BBQ is passionate about serving authentic BBQ that’s prepared with patience and attention to detail. Check out our menu and visit us soon to enjoy a meal where every bite reflects the time and care that went into making it!


Follow us on Facebook for behind-the-scenes barbecue, featured menu items, and upcoming events you won’t want to miss!

The post Why Patience Is the Secret Ingredient in Great BBQ appeared first on Code 1 BBQ.

45 Easy Smoked Chicken Recipes

These smoked chicken recipes are packed with flavor and perfect for everything from easy weeknight dinners to weekend cookouts. You’ll find whole smoked chickens, juicy thighs, crispy wings, drumsticks, chicken quarters and stuffed chicken breasts, with options for pellet grills, Pit Boss and Traeger smokers. Smoked Beer Can Chicken A whole chicken cooked upright over […]

The post 45 Easy Smoked Chicken Recipes appeared first on Simply Meat Smoking.

Corn on the Grill: Three Ways to Do It Right

If you’re like us, we wait all year for summer corn. Wherever you live, summer means one thing: corn is at its peak, and there’s no better way to cook it than—you guessed it—on the grill. Live fire brings out corn’s sweetness, adding an inimitable smoky flavor. Grilling turns a simple ear into one of the great pleasures of the season.

Selecting Good Corn

Great grilled corn starts at the market. Look for ears with bright green husks that cling tightly to the cob and silk that feels slightly moist, not dry or brittle. The kernels should feel plump through the husk, and the ear should feel heavy for its size.

Firemen's Corn

And, of course, buy local. Here at barbecuebible.com, we’re incredibly lucky. Steven lives in Martha’s Vineyard; Daniel in North Carolina, John in New Jersey, Nancy in Iowa, and Jared in New York. All of us have fantastic local corn in July and August.

Avoid corn with dried-out husks, blackened silk, soft spots, or missing kernels near the tip. Corn starts losing sweetness soon after it’s picked, so buy it as fresh as you can and grill it the same day if possible.

Ways to Grill Corn

There are a few basic ways to grill corn, and each gives you a different result.

Corn Naked (without the husk and directly over a hot fire)

This is my favorite way to grill corn. You remove the husk (or fold it back over the stem to make a handle), brush the ears with melted butter or extra virgin olive oil, and season generously with salt and pepper. Then direct grill it over high heat until the kernels are nicely browned, basting with more melted butter as the corn cooks. The high dry heat caramelizes the natural plant sugars in the corn, making it all that much sweeter and smokier.

Corn Caveman Style

If you like your corn with even more smoke and char flavor, set up your grill (charcoal please) for caveman grilling—that is remove the grill grate ad rake out the embers in an even layer. Lay the corn in its husk directly on the coals. Grill until the husk burns off, turning with tongs, but not so long that the sweet kernels burn. Figure on 2 to 3 minutes per side, 8 to 12 minutes in all.

Corn in the husk

This method gives you juicy corn with a gentle roasted flavor. Pull back the husks without removing them, strip away the silk, brush the ears with melted butter and season with salt and pepper, then pull the husks back over the ears. Direct grill the corn over medium-high heat for 15 to 20 minutes, turning occasionally, until the husks are browned and the kernels are tender.

Corn in Foil

In a word, don’t. Foiled corn steams rather than grills. Use one of the methods above.

How to Know When Corn Is Done

Corn is done when the kernels are golden brown, hot, and tender. If you press a kernel lightly, it should give a little and release juice. Corn grilled directly on the grates should have browned or lightly charred spots, but the kernels should still look plump.

Flavor Ideas from Planet Barbecue

Once the corn comes off the grill, the fun starts. Butter, salt, and pepper are enough when the corn is fresh and sweet, but grilled corn also loves bold seasonings. In Mexico, it’s slathered with mayonnaise, sprinkled with grated Cotija cheese (parmigiano or romano also work well), and sparked with chile and lime. In India, it might be electrified with cayenne and lime. Steven loves Cambodian style grilled corn, brushed with coconut milk and curry paste and dusted with shredded coconut.

Here are some fantastic recipes to try to make the best grilled corn you’ve ever tasted!

Master Recipe For Grilling Corn

A great starting point for grilling corn simply and getting the basic technique right.

Corn on grill with shield

Get The Recipe »

Mexican Grilled Corn

A street-food favorite finished with mayonnaise, cheese, chile, and lime.

Windy City Mexican Grilled Corn

Get The Recipe »

Grilled Corn with Sesame-Soy Butter

A savory, Japanese-inspired butter gives grilled corn a rich, umami finish.

Grilled Corn

Get The Recipe »

Ember-Roasted Corn

A more primal live-fire method that roasts the corn directly in the embers.

Ember-Roasted Corn

Get The Recipe »

Firecracker Corn Grilled with Tabasco Butter

A spicy, buttery version for anyone who likes corn with a little heat.

Firecracker Corn

Get The Recipe »

The Best Way to Grill Corn

However you grill it, corn does not need much to be great. Start with fresh ears, choose the method that gives you the texture and char you want, and serve it hot. Husk, foil, or directly on the grates—when summer corn is at its peak, the grill is the best place for it.

Frequently Asked Questions

How long does corn take on the grill?

Naked corn, with the husk removed, usually takes 8 to 12 minutes over high heat. Turn the ears every 2 to 3 minutes so the kernels brown evenly without burning.

Is it better to grill corn in the husk, in foil, or directly on the grates?

It depends on the result you want. Corn grilled naked, meaning husked and cooked directly over the fire, gives you the most char and live-fire flavor. Corn grilled caveman style has the biggest wow factor because the ears cook directly on the embers. Corn grilled in the husk stays juicy and has a gentle roasted flavor.

Should you soak corn before grilling?

You can soak corn if you’re grilling it in the husk, but it is not mandatory. A 15- to 30-minute soak can help keep the husks from burning too quickly. You do not need to soak corn that is grilled directly on the grates or caveman style.

Why did my grilled corn dry out?

Corn can dry out if it cooks too long, if the heat is too high, or if it is grilled directly over the fire without enough turning. Pull the corn while the kernels are still plump and juicy, and baste often with melted butter or extra-virgin olive oil. Once the kernels start to shrivel, the corn is overcooked.

Can you put butter or olive oil on corn before grilling?

Yes, but it depends on the method. For corn grilled directly on the grates, use a light coating of oil before grilling, then add butter after the corn comes off the grill to avoid flare-ups.

Build your live-fire skills with our Back-to-Basics library—setups, temps, tools, and pro moves that make a difference.

Get Steven’s weekly grilling tips, seasonal recipes, and live-fire ideas in your inbox. Join our Up in Smoke newsletter. Sign up and get a FREE PDF of Steven Raichlen's Best Ribs Recipes Ebook.

Preorder Man On Fire — A Steven Raichlen Memoir. And get some really cool rewards!

Looking for more summer grilling inspiration? Check out our Summer Grilling Guide.

The post Corn on the Grill: Three Ways to Do It Right appeared first on Barbecuebible.com.

Smoked Sweet Corn on the Grill (The Easy Way That Never Dries Out)

Fresh Wisconsin sweet corn + a little patience = some of the best corn you'll ever eat.

If you've ever pulled corn off the grill only to find it dried out, burnt, or still crunchy inside, you're definitely not alone.

Grilled corn seems simple, but it's one of those foods that's surprisingly easy to mess up.

This is the method I've been using with fresh Wisconsin sweet corn, and it's become my favorite way to cook it. The secret isn't a fancy seasoning or expensive grill, it's simply soaking the corn first and letting the husks protect it while it slowly cooks.

Once it's tender, peel back the husks, let the kernels char over the fire, then finish with butter and our Ground Pounder Garlic Seasoning.

Simple. Smoky. Sweet. And about as good as summer gets.


Why Soak Corn Before Grilling?

One of the biggest mistakes people make is throwing fresh corn directly onto a hot grill.

The husks dry out almost immediately, burn away, and the kernels start losing moisture before they've had time to cook.

Soaking the entire ear of corn in water for several hours solves that problem.

The water trapped inside the husks creates steam while the corn cooks.

That steam:

  • Keeps the kernels juicy
  • Prevents the husks from burning too quickly
  • Helps the corn cook evenly
  • Adds another layer of smoky flavor

I simply filled a cooler with water, tossed the ears in, and let them soak for about 4 hours before firing up the smoker.

Soaked sweet corn in cooler

Ingredients

Serves 4–6


Equipment

  • Any smoker or grill
  • Charcoal, pellets, or wood
  • Tongs

This recipe works on virtually any grill or smoker. Whether you're cooking on a Weber kettle, pellet grill, gas grill, offset smoker, or ceramic cooker, the process stays the same.


Instructions

Step 1: Soak the Corn

Place the corn (husks on) into a cooler, sink, bucket, or large container.

Cover completely with water.

Let soak for about 4 hours.


Step 2: Fire Up Your Grill

Set your smoker or grill for indirect cooking.

Aim for:

225–250°F

This lower temperature lets the corn gently steam inside the husk while picking up light smoke flavor.


Step 3: Smoke the Corn

Place the soaked ears directly on the grate.

Cook for approximately:

60–90 minutes

The exact time depends on the size and freshness of the corn.

You'll know it's getting close when the husks begin drying and the kernels feel tender when gently pressed.

Corn on the cob in the husk on a weber grill

Step 4: Char the Corn

Carefully pull back the husks—but don't remove them completely.

Use them as a natural handle.

Place the exposed kernels directly over the heat for just a few minutes, rotating occasionally until they develop light char marks.

Don't overdo it.

You're looking for a little color and extra flavor—not burnt kernels.

Corn on the cob on the grill

Step 5: Finish with Butter

Brush the hot corn generously with butter.

Season with Ground Pounder Garlic Seasoning while the butter is still melted.

Serve immediately.

Buttered and Seasoned Corn

Tips for Perfect Grilled Corn

Don't skip the soak.

This is what keeps the corn juicy while preventing the husks from catching fire.

Leave the husks on while smoking.

They work like nature's foil, protecting the kernels and trapping moisture.

Char at the end.

Trying to char the corn first usually dries it out.

Cook first.

Color second.

Fresh corn matters.

Local sweet corn simply has more natural sugar, making it sweeter and more tender than corn that's been sitting in a warehouse for days.

If you're lucky enough to have a roadside stand nearby, this is the recipe for it.


Frequently Asked Questions

How long should I soak corn before grilling?

Two hours is the minimum, but 4 hours gives the husks plenty of time to absorb water and produce steam during cooking.


Do I have to soak the corn?

Technically, no.

But you'll lose moisture, increase the chance of burnt husks, and won't get nearly the same tender texture.


What temperature should I grill corn?

For this method:

225–250°F

If you're cooking over direct heat only, expect a much shorter cook time and rotate frequently.


How do I know when it's done?

The kernels should be bright yellow, juicy, and tender when pierced with a knife.

If they're still firm or crunchy, let them cook a little longer.


Can I make this on a gas grill?

Absolutely.

Set one side of the grill to medium heat and cook the corn over indirect heat until tender before finishing directly over the flame.


Can I season it before cooking?

You can, but I prefer seasoning after cooking.

Butter helps the seasoning stick, and the fresh garlic flavor from Ground Pounder really shines once the corn comes off the grill.


Final Thoughts

Sometimes the best recipes are the simplest ones.

Fresh local sweet corn doesn't need much—just a little smoke, a little butter, and the right seasoning.

If you've struggled with grilled corn before, give this soaking method a try. It keeps the corn tender, adds just enough smoke, and finishes with that backyard barbecue flavor everyone loves.

Whether you're cooking burgers, ribs, chicken, or brisket, this is one side dish that'll disappear just as fast as the main course.


Fire Up the Grill

If you make this recipe, let us know how it turned out! Share a photo on social media and tag Burn Pit BBQ so we can see what's cooking around your pit.

And if you haven't tried Ground Pounder Garlic Seasoning yet, this recipe might be the perfect place to start. It brings out the natural sweetness of fresh corn without overpowering it, making it one of our favorite summer combinations.

Grilling Across America: 6 Regional Hot Dogs I Love

Photo Credit: Daniel Hale


By Daniel Hale

All hail the hotdog! For some people, it’s an affordable staple. For others, it’s a rite of summer—along with baseball and backyard barbecues. For yet others, it’s the barbecue equivalent of a blank canvas—awaiting embellishments ranging from green pickle relish and chopped onions (Chicago) to beef chili (Detroit) to bacon and pinto beans (the Sonoran hotdog from Arizona).

Few foods are as regional as the humble hot dog. Nearly every part of the country has its version, and everyone has a favorite they’ll insist is the best.

Since July is National Hot Dog Month, I decided to make six different American hotdogs. Some are classics, some are personal favorites, and all of them prove there’s more than one way to build a great dog.

Setting Up the Grill

One of the things I wanted to take advantage of for this cook was the versatility of the Denali 605 Pro from Monument Grills. Besides its spacious cooking surface, the grill features a removable center cooking grate that can be swapped out for accessories. For this cook, I replaced it with Monument’s Round Cast Iron Cooking Plate.

Monument Grill Cast Iron Plate

Photo Credit: Daniel Hale


That gave me the best of both worlds. The hot dogs cooked over the main grill grates while the cast iron plate handled everything else. Onions and peppers caramelized, and the plancha was perfect for cooking the bacon-wrapped hot dogs without worrying about flare-ups. Having both cooking surfaces going at the same time made preparing six different hot dogs much easier than trying to juggle multiple pans indoors.

6 Regional American Hot Dogs

Frankie Frankk’s “Lou Dog”

This one is special for me because it’s local. If you live in the Raleigh area, there’s a good chance you’ve heard of Frankie Frankk’s, a popular hot dog cart that’s developed a loyal following over the years. One of their signature creations is the Lou Dog, and while this isn’t an exact copy, it’s definitely inspired by it.

Frankie Frankk's Lou Dog

Photo Credit: Daniel Hale


Chili, pimento cheese, and a drizzle of hot honey works surprisingly well. The rich chili and creamy pimento cheese create a classic Southern flavor, while the hot honey adds just enough sweetness and heat.

The Barbecue Dog

This one may not belong to any particular city, but it absolutely belongs on this list. I wrapped the hot dog in bacon, seasoned it with barbecue rub, and cooked it on the cast iron cooking plate until the bacon was crisp. After that came a brush of barbecue sauce and a handful of pickle chips.

The Barbecue Dog

Photo Credit: Daniel Hale


Smoky bacon, sweet and tangy barbecue sauce, a little extra seasoning, and crunchy pickles turn an ordinary hot dog into something that eats more like barbecue.

Kansas City Dog

The Kansas City Dog keeps things relatively simple, but sometimes simple is exactly what works. Melted Swiss cheese and tangy sauerkraut are served on a sesame seed bun, creating a balanced combination.

The Kansas City Dog

Photo Credit: Daniel Hale


The sauerkraut cuts through the richness of the hot dog while the Swiss adds a mild, nutty flavor. It’s one of those combinations you probably wouldn’t think to make, but after one bite you’ll understand why it’s become a regional favorite.

Coney Dog

No list of iconic American hot dogs would feel complete without a Coney Dog. Not to be confused with Coney Island in Brooklyn, the Coney Dog is most closely associated with Detroit. Piled high with chili, chopped raw onions, yellow mustard, and shredded cheddar cheese, it’s messy, hearty, and worth every napkin you’ll need afterward.

The Coney Dog

Photo Credit: Daniel Hale


LA Street Dog

Speaking of messy, this one might be my favorite simply because of the memories it brings back. I grew up in Los Angeles, and bacon-wrapped street dogs were everywhere after concerts, sporting events, and nights out. You could smell them cooking from half a block away.

The LA Street Dog

Photo Credit: Daniel Hale


Wrapped in bacon and topped with grilled onions, peppers, mayonnaise, ketchup, mustard, and a whole jalapeño, this is definitely the biggest hot dog of the bunch. Cooking it on the cast iron plate made it easy to crisp the bacon while caramelizing the vegetables right beside it. One bite immediately transported me back to SoCal.

Southern Slaw Dog

Sometimes less really is more. The Southern Slaw Dog skips all the extra toppings and lets creamy coleslaw do the work.

The Southern Slaw Dog

Photo Credit: Daniel Hale


Cool, crunchy slaw adds freshness and texture while complementing the smoky flavor of the grilled hot dog. Around the Carolinas, this combination has been a favorite for decades, and after one bite it’s easy to understand why.

Which One Will You Try First?

One of the best things about hot dogs is how personal they are. Every region has its own version, and every griller eventually finds a favorite combination. That’s what made this cook so much fun. It was simple, messy, and a good reminder that sometimes the best grilling ideas start with something as familiar as a hot dog.

Monument Grills - Hot Dogs

Photo Credit: Daniel Hale


The Denali 605 Pro made this cook especially enjoyable. I was able to grill the hot dogs on the main grates while cooking the vegetables and bacon-wrapped dogs on the Round Cast Iron Cooking Plate. It kept everything moving and made it easy to build six different hot dogs without juggling pans indoors. Thanks to Monument Grills for sponsoring this post.

Build your live-fire skills with our Back-to-Basics library—setups, temps, tools, and pro moves that make a difference.

Get Steven’s weekly grilling tips, seasonal recipes, and live-fire ideas in your inbox. Join our Up in Smoke newsletter. Sign up and get a FREE PDF of Steven Raichlen's Best Ribs Recipes Ebook.

Preorder Man On Fire — A Steven Raichlen Memoir. And get some really cool rewards!

Looking for more summer grilling inspiration? Check out our Summer Grilling Guide.

The post Grilling Across America: <br />6 Regional Hot Dogs I Love appeared first on Barbecuebible.com.

Buffalo Chicken Sliders

These buffalo chicken sliders are stuffed with shredded chicken tossed in buffalo sauce, plenty of melted cheese, and tucked between soft Hawaiian rolls brushed with garlic butter. They’re spicy, cheesy, and come together faster than you’d think. I make these whenever we’re hosting game day or need an easy appetizer that disappears fast. What I […]

The post Buffalo Chicken Sliders appeared first on Simply Meat Smoking.

Simple Smoked Brisket Recipe on the Weber Smokey Mountain

Smoked Brisket on the Weber Smokey Mountain (Simple, Classic, No Sauce Needed)

If you've ever been intimidated by smoking a brisket, don't be.

A good brisket doesn't need complicated injections, fancy wrapping techniques, or a dozen different seasonings. Sometimes the best barbecue comes from quality beef, a steady fire, and a little patience.

This week I smoked a 7-pound brisket from a locally butchered beef on my 18-inch Weber Smokey Mountain, and it turned out exactly how brisket should: tender, juicy, and packed with beefy flavor. It didn't need barbecue sauce—it stood on its own.

Here's exactly how I cooked it.

Works on Any Smoker: This recipe was made on an 18-inch Weber Smokey Mountain, but the same process works on pellet grills, kettle grills, offset smokers, ceramic cookers, and electric smokers. The key isn't the cooker—it's maintaining 225–250°F and cooking until the brisket is probe tender.

Sliced Brisket

Why I Love Smaller Briskets

Everyone talks about the massive 15-18 pound packer briskets you see in competitions.

The reality?

Most backyard cooks don't need that much meat.

A 6-8 pound brisket is much easier to manage, cooks faster, and is perfect for feeding family and friends without spending 14-16 hours tending a smoker.

This cook finished in about 7 hours, making it an ideal weekend project.


How to Trim a Brisket

One of the biggest mistakes people make is not trimming enough fat.

Fat adds flavor while it renders, but thick, hard fat won't melt during the cook. Instead, it blocks smoke and seasoning from reaching the meat.

Here's how I trim mine:

  • Remove any hard chunks of fat.
  • Trim the fat cap down to about ¼ inch thick.
  • Round off thin edges that may burn.
  • Remove loose pieces of meat or fat hanging from the brisket.

For this cook, I trimmed about one pound of fat from the brisket before seasoning.

Don't worry about making it competition-perfect. You're simply creating an even surface so the brisket cooks consistently.

Trimmed and Seasoned Brisket

The Seasoning

Sometimes simple wins.

I generously coated the brisket with Burn Pit BBQ Ground Pounder Garlic Seasoning, making sure every side was covered.

After seasoning, I wrapped the brisket tightly in plastic wrap and refrigerated it overnight.

Giving the seasoning time to work into the meat helps build flavor before the brisket ever hits the smoker.


Smoking on the Weber Smokey Mountain

For this cook I used my 18-inch Weber Smokey Mountain, one of my favorite smokers because it's reliable and easy to run.

Fire Setup

  • Minion Method - 

    The Minion Method is one of the easiest ways to maintain a long, steady fire in a charcoal smoker without constantly adding fuel.

    Instead of lighting an entire chimney of charcoal, you fill the charcoal ring with unlit briquettes, then pour a small amount of lit charcoal on top. As those hot coals burn, they slowly ignite the surrounding unlit charcoal, creating a controlled burn that can last for hours.

  • Charcoal briquettes
  • Hickory wood chips
  • Water pan filled with beer
  • Cooking temperature: 225–250°F

The Minion Method allows the fire to burn slowly and consistently for hours without constantly adding charcoal.

The beer in the water pan helps maintain moisture and stabilize temperatures throughout the cook.

Minion Method on weber smokey mountain grill

Cooking the Brisket

Place the brisket on the smoker once it's running steadily between 225-250°F.

From there, leave it alone.

Avoid opening the lid every 20 minutes. Every peek lets heat escape and adds unnecessary cooking time.

Instead, trust your smoker and let the brisket do its thing.

Rather than cooking to a specific internal temperature, cook until the probe slides into the meat with very little resistance, almost like inserting it into warm butter.

For this brisket, that happened at approximately 7 hours.

Every brisket is different, so tenderness, not temperature, is the finish line.

Brisket on the weber smokey mountain grill

Rest Before Slicing

Once the brisket is probe tender, remove it from the smoker and allow it to rest before slicing.

Resting gives the juices time to redistribute throughout the meat, making every slice more tender and flavorful.

Slice against the grain into pencil-thick slices and serve immediately.


The Best Part

The finished brisket was exactly what great barbecue should be.

Tender.

Juicy.

Rich beef flavor.

Just enough smoke.

And honestly...

No barbecue sauce needed.

When the meat is cooked right, the brisket speaks for itself.

sliced brisket

Smoked Brisket Recipe

Ingredients

Equipment

  • 18-inch Weber Smokey Mountain
  • Instant-read thermometer or temperature probe
  • Sharp slicing knife

Instructions

  1. Trim approximately 1 pound of fat from the brisket, leaving about ¼ inch of fat on the fat cap.
  2. Season generously with Burn Pit BBQ Ground Pounder Garlic Seasoning.
  3. Wrap tightly in plastic wrap and refrigerate overnight.
  4. Prepare the Weber Smokey Mountain using the Minion Method.
  5. Fill the water pan with beer.
  6. Add hickory wood chips to the charcoal.
  7. Stabilize the smoker between 225–250°F.
  8. Smoke the brisket until it is probe tender, approximately 7 hours.
  9. Remove from the smoker and allow it to rest.
  10. Slice against the grain and serve.

No sauce required.


Tips for Success

  • Trim hard fat—don't leave thick chunks that won't render.
  • Season the night before for deeper flavor.
  • Keep the smoker closed as much as possible.
  • Cook until probe tender, not to a specific time.
  • Let the brisket rest before slicing.
  • Slice against the grain for the most tender bite.

Smoked Brisket FAQ

What temperature should I smoke a brisket?

For this recipe, keep your smoker between 225°F and 250°F. This temperature range allows the fat and connective tissue to slowly render, creating a tender brisket without drying it out.

Don't chase every small temperature swing. A smoker naturally fluctuates, and being within this range is perfectly normal.


What internal temperature is brisket done?

Don't cook brisket to a specific temperature—cook it until it's probe tender.

Most briskets become tender somewhere between 195°F and 205°F, but every piece of meat is different.

The best test is inserting a temperature probe into the thickest part of the brisket. When it slides in with very little resistance, like pushing into room-temperature butter, it's ready to come off the smoker.


What is "the stall"?

The stall is the point during the cook when the brisket's internal temperature stops rising, usually between 150°F and 170°F.

This happens because moisture evaporating from the meat cools the surface at nearly the same rate the smoker is heating it—similar to how sweating cools your body.

The stall can last anywhere from 30 minutes to several hours, depending on the size of the brisket and your smoker.

Don't panic—it's completely normal.


Should I wrap my brisket?

You have two good options.

Leave it unwrapped

  • Better bark
  • Richer smoke flavor
  • Longer cook time

Wrap it

  • Speeds up the cook
  • Helps retain moisture
  • Softens the bark slightly

For this cook, I left the brisket unwrapped the entire time, and it turned out tender with a beautiful bark.

If you're short on time, wrap the brisket in butcher paper or aluminum foil once it reaches the stall (around 160°F).


Should I use butcher paper or foil?

Both work well, but they produce different results.

Pink butcher paper

  • Preserves the bark better
  • Allows some moisture to escape
  • Popular among Texas-style barbecue cooks

Aluminum foil

  • Cooks faster
  • Retains the most moisture
  • Produces a softer bark

If it's your first brisket, either option will work. The most important thing is cooking until the brisket is tender.


How long does it take to smoke a brisket?

Cooking time depends on the size of the brisket and your smoker.

As a general guide:

Brisket Size Approximate Cook Time at 225–250°F
5–6 pounds 5–6 hours
7–8 pounds 6–8 hours
10–12 pounds 9–12 hours
14–16 pounds 12–16 hours

Remember: cook to tenderness, not the clock.


Do I need to spritz the brisket?

No.

Many pitmasters spritz with water, apple juice, or beef broth, but it's not required.

Keeping the smoker closed allows it to maintain a stable cooking temperature. Opening the lid too often usually adds more cooking time than any benefit a spritz provides.


How long should I rest a brisket?

Rest the brisket for at least 30–60 minutes before slicing.

A longer rest (up to 2 hours in a cooler or insulated container) is even better for larger briskets.

Resting allows the juices to redistribute throughout the meat, giving you moister slices.


Do I slice with or against the grain?

Always slice against the grain.

Cutting across the muscle fibers shortens them, making each bite much more tender.

If you're unsure which direction the grain runs, take a look before seasoning and cooking—you can even make a small notch on one corner of the brisket as a reminder.


Can I freeze leftover brisket?

Absolutely.

Slice or portion the brisket, vacuum seal it (or wrap it tightly), and freeze for up to 3 months.

To reheat, thaw overnight in the refrigerator and warm gently in a covered pan or simmer the sealed bag in hot water. This helps keep the brisket moist without overcooking it.

Ready to Smoke Your First Brisket?

If this recipe gives you the confidence to fire up your smoker, we'd love to see how it turns out.

Tag @BurnPitBBQ on social media and show us your finished brisket—we regularly share cooks from our backyard barbecue community.

And if you're looking for more beginner-friendly recipes, grilling tips, and real-world barbecue advice, be sure to:

  • Subscribe to our weekly newsletter for new recipes delivered straight to your inbox.
  • Listen to the Grilling To Get Away podcast, where we talk barbecue, outdoor cooking, and the stories that happen around the grill.
  • Try our Ground Pounder Garlic Seasoning, the all-purpose blend we used on this brisket and one of our favorite seasonings for beef, chicken, pork, vegetables, and more.

Remember, great barbecue isn't about expensive equipment or complicated techniques—it's about gathering around the fire with family and friends, enjoying the process, and making memories one cook at a time.

We'll see you around the pit. 🔥

What to Grill in July

July is the heart of grilling season, the time of year when meals move outside and smoke, fire, and fresh summer flavors do most of the heavy lifting. This month’s recipe roundup is built for easygoing outdoor cooking, whether you’re planning a weeknight dinner, a weekend gathering, or something a little unexpected from the grill.

What to Grill in July

Mezcalini

Cross a margarita with a mojito and you get a Mezcalini. Add smoke and you achieve nirvana, not to mention notoriety—especially if you brandish the handheld smoker in front of your guests.

Mezcalini

Get The Recipe »

Griddled Bulgogi Steak Lettuce Wraps

Light eating for summer! These griddled bulgogi steak lettuce wraps are built for weeknight cooking: thin-sliced sirloin, a sweet-savory pineapple-soy marinade, quick cooking on a hot griddle, and crisp lettuce wraps finished with pickled cucumbers, green onion, and sesame seeds. The griddle gives the steak direct contact with high heat, helping the marinade caramelize while the meat stays tender.

griddled bulgogi steak

Get The Recipe »

A New Macaroni and Cheese (with Grilled Onions, Chilies, and Corn)

Mac ‘n’ cheese gets a well-deserved makeover. Presenting one of Steven’s most popular recipes—this cheesy dish also features grilled peppers (including a feisty poblano), bacon, and ham. Woodsmoke takes it over the top.

Grilled mac and cheese

Get The Recipe »

Coffee-Crusted Pork Tenderloins with Redeye Barbecue Sauce

Coffee is a traditional ingredient in at least one classic Southern pork dish: country ham with redeye gravy, a dish I last enjoyed in Louisville. Kentucky ham isn’t quite as well-known as that from Virginia, but it’s every bit as tasty and it gave me the idea for this coffee-crusted pork tenderloin served with a coffee barbecue sauce.

Coffee-Crusted Pork Tenderloins

Get The Recipe »

The Raichlen Pan Bagnat (Provencale Tuna Sandwich)

Sandwiches are a summertime staple, and few can hold a candle to this luxurious combination of grilled tuna, tender lettuce, black olives, a sun-ripened tomato, and basil. Accompany with a dry rosé or prosecco..

The Raichlen Pan Bagnat

Get The Recipe »

Carne Enchilada (pork taco)

Johnny Hernandez may be the busiest man in San Antonio. Chef, restaurateur, arts patron, and philanthropist, he presides over an empire that includes 11 restaurants, a stone-ground tortilla factory, and yes, a fleet of La Gloria Margarita trucks. His mission is simple–promote the authentic Mexican cuisine of his Nuevo Leon and Michuacan forebears. He has cooked for Barack Obama in the White House and created Day of the Dead River Parade and Festival that have become San Antonio institutions. Thanks to his tireless efforts, in 2017, UNESCO designated San Antonio a Creative City of Gastronomy. Like most Mexican-Americans, Johnny grew up eating carne asados at family Sunday cookouts. Pork marinated in adobo (dried chili paste), grilled over a hot fire, and served in tacos—it’s Mexican comfort food at its best.

Carne Enchilada

Get The Recipe »

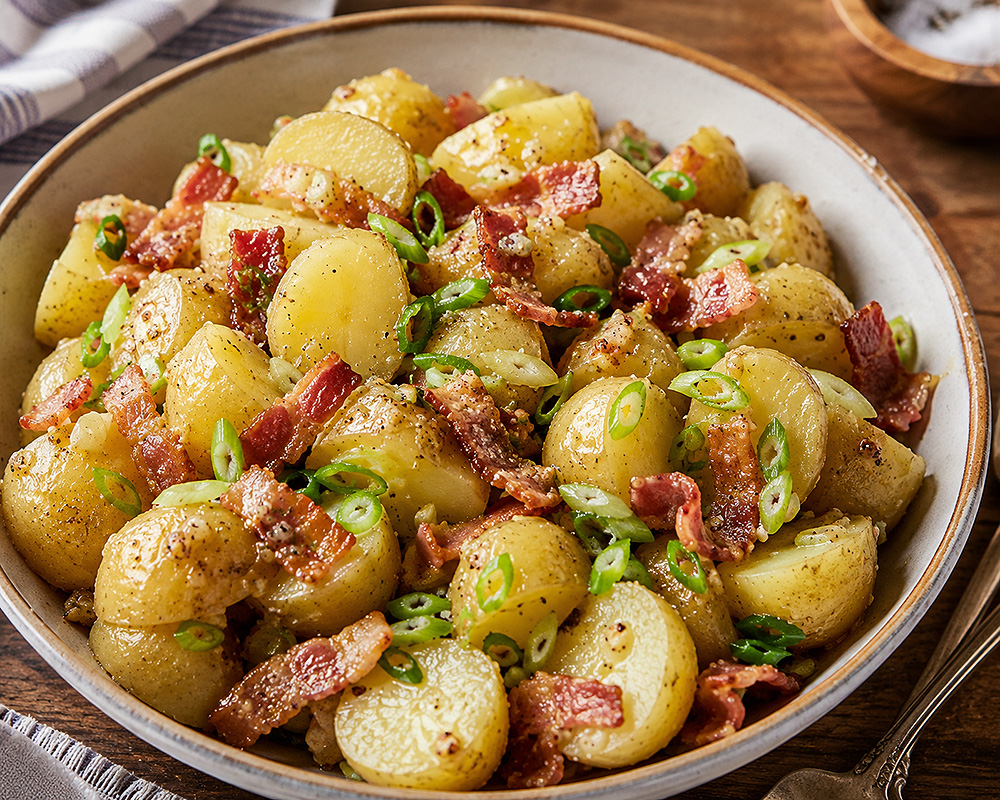
Smoked Potato Salad

No barbecue is complete without potato salad. Here’s my take on what may be the most soulful potato salad you’ve ever tasted.

Get The Recipe »

Double-Grilled Summer Vegetable Frittata

Grilling 24/7 is one of my bywords and that means firing up the grill for breakfast and brunch as well as for dinner. Which brings me to a dish that’s welcome pretty much anytime, day or night—double-grilled vegetable frittata. Frittata is a cross between an omelet and a quiche, of course, and the first grilling (direct) imparts a smoky char to the vegetables. The second grilling (indirect) cooks the frittata itself. The strategic addition of wood to the fire imparts a smoke favor that transports this Italian classic to the realm of barbecue. Note the use of a grilling grid, grill wok, or wiremesh grill basket to grill the vegetables.

Double Grilled Vegetable Frittata

Get The Recipe »

Spit-Roasted Pineapple

This cinnamon-grilled pineapple comes served on a spit, just like Brazilian rotisseried meats, and the waiter carves thin slices onto the plate, just as he would picanha or spit-roasted beef tenderloin. You can certainly serve the fruit with meat, but it also makes a stunningly original dessert.

Volcano Pineapple

Get The Recipe »

However you like to grill in July, keep it simple and make the most of the season. Pick a recipe, get outside, and enjoy the kind of easy summer meal that tastes better when it comes off the grill.

More Recipes for July

Looking for more recipes like this? Browse our Recipe Index for grilled, smoked, and live-fire favorites.

Get Steven’s weekly grilling tips, seasonal recipes, and live-fire ideas in your inbox. Join our Up in Smoke newsletter. Sign up and get a FREE PDF of Steven Raichlen's Best Ribs Recipes Ebook.

Preorder Man On Fire — A Steven Raichlen Memoir. And get some really cool rewards!

Looking for more summer grilling inspiration? Check out our Summer Grilling Guide.

The post What to Grill in July appeared first on Barbecuebible.com.

❌